FG Subwoofer enclosure
#1
 02-26-2007


Join Date: May 2006
Location: Tri-Cities
Posts: 201
Likes: 0
Received 0 Likes
on
0 Posts
FG Subwoofer enclosure
Well after finding that the sealed box that my P2 10" was in just wasn't cutting it , i decided to go ahead and build a new enclosure. I have recently been getting into fiberglass and thought that this would be a great project to try some new skills out on.
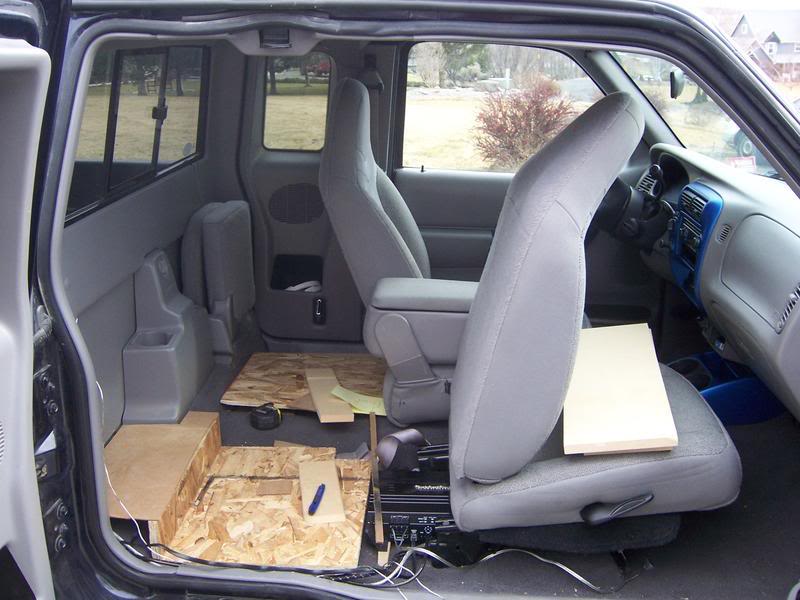
I began by pulling the pass. jumpseat. i had my old box back there and it was never used anyway so it wasn't a real loss.
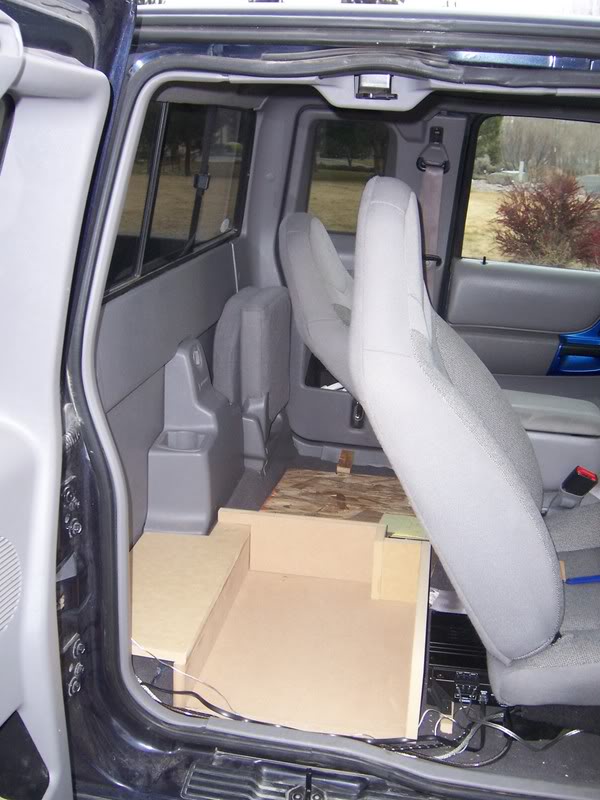
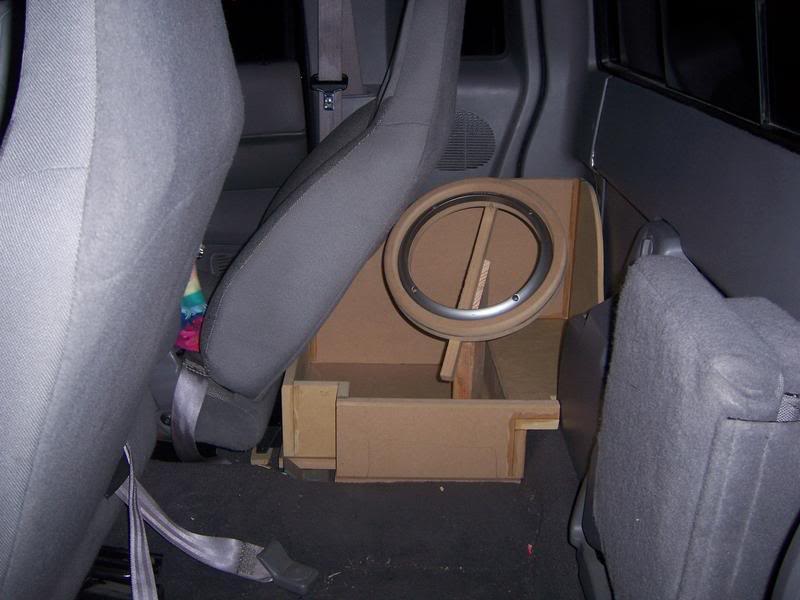
Next i started to lay out and mock up some of the panels for the bottom of the enclosure.
and finaly came up with this design:
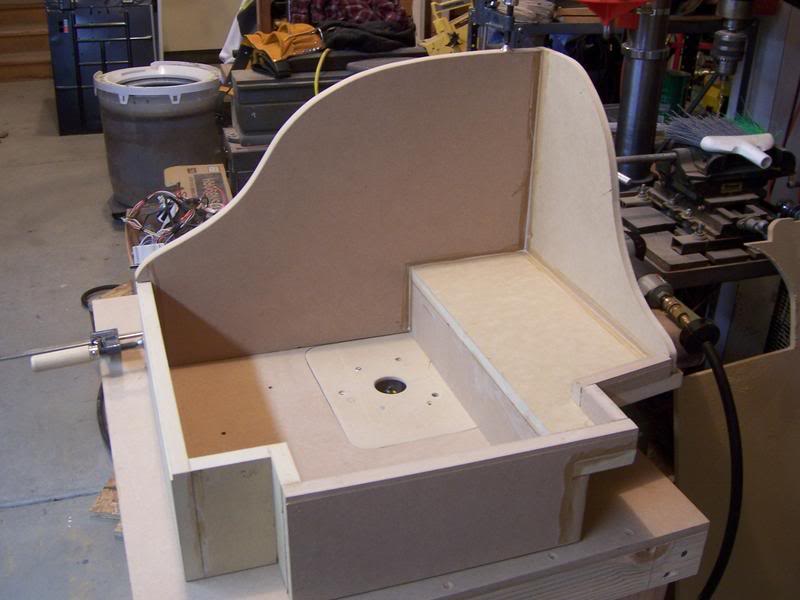
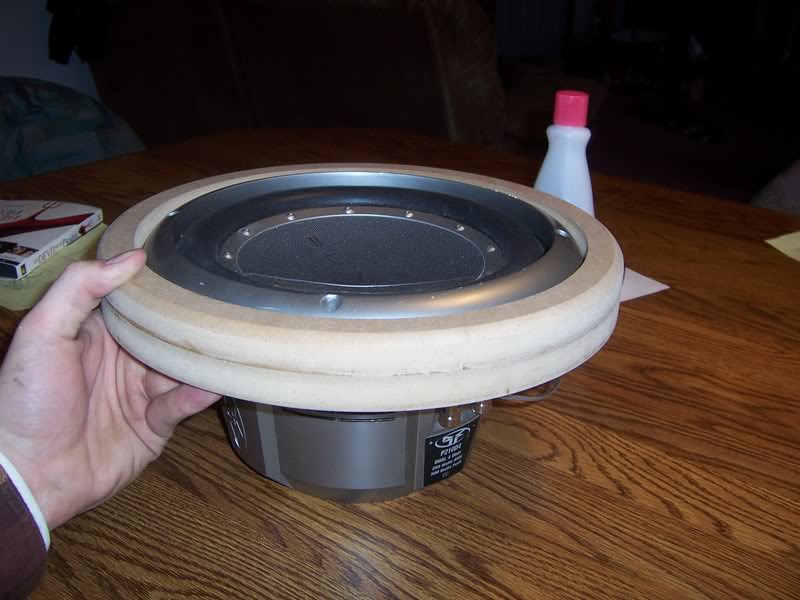
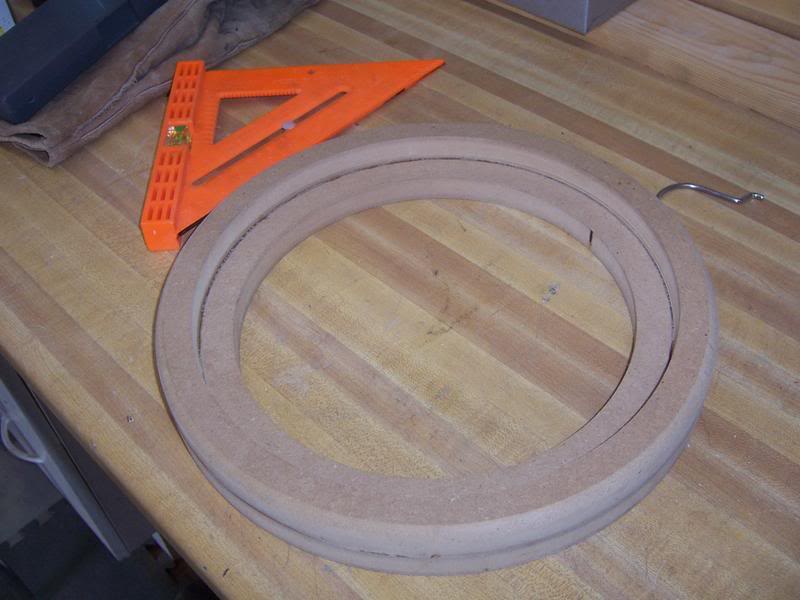
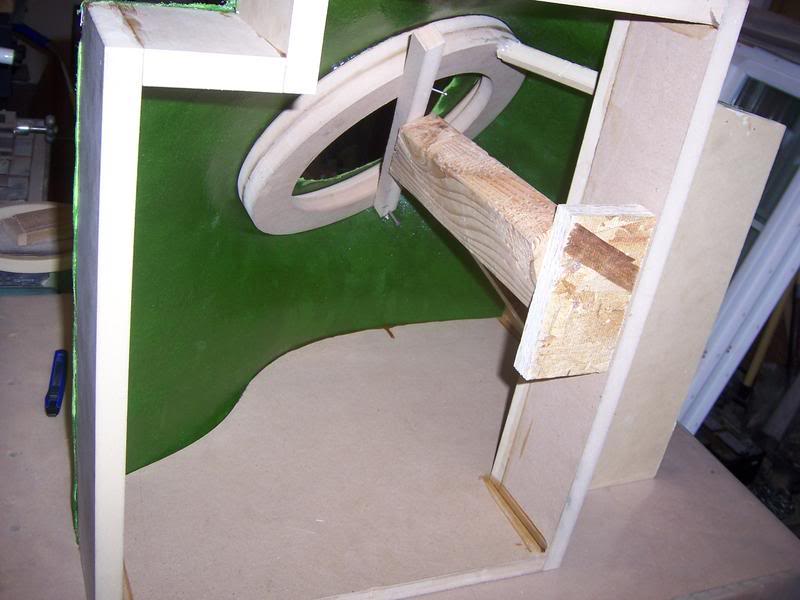
The next step was to cut out the ring for the sub to mount to. i made it a flushmount ring and used 3/4" MDF:
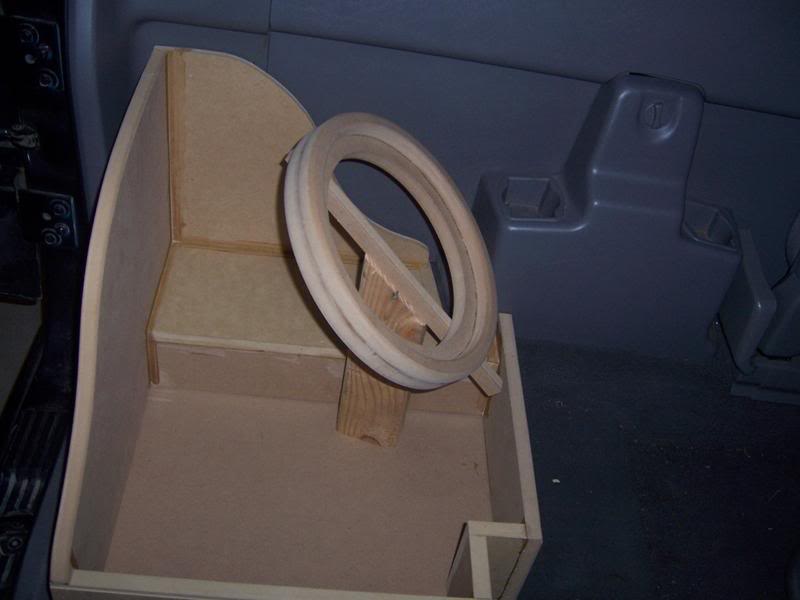
Now was the fun part getting to position the ring within the box to get the shape that i wanted. Eventually i came up with this:
Now came time to streach the fabric (i used a spandex like material that actually was made almost completely of cotton) and secure everything:
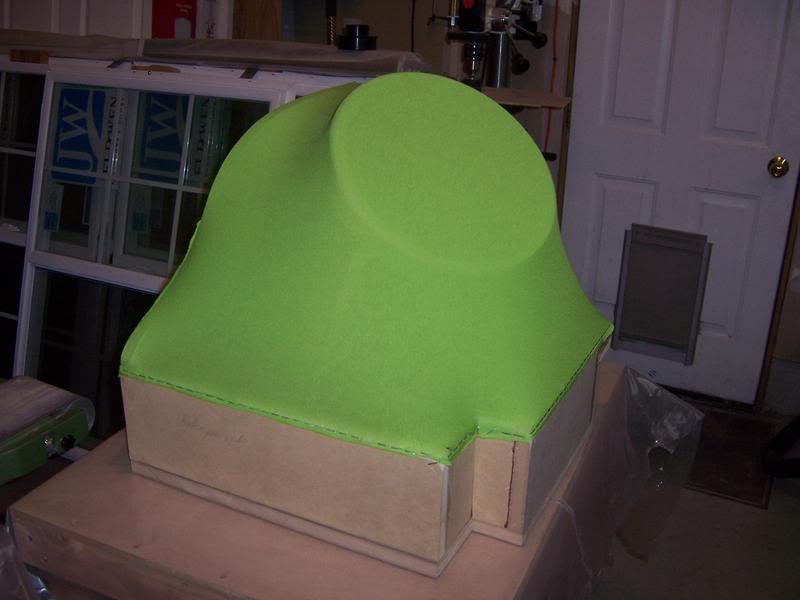
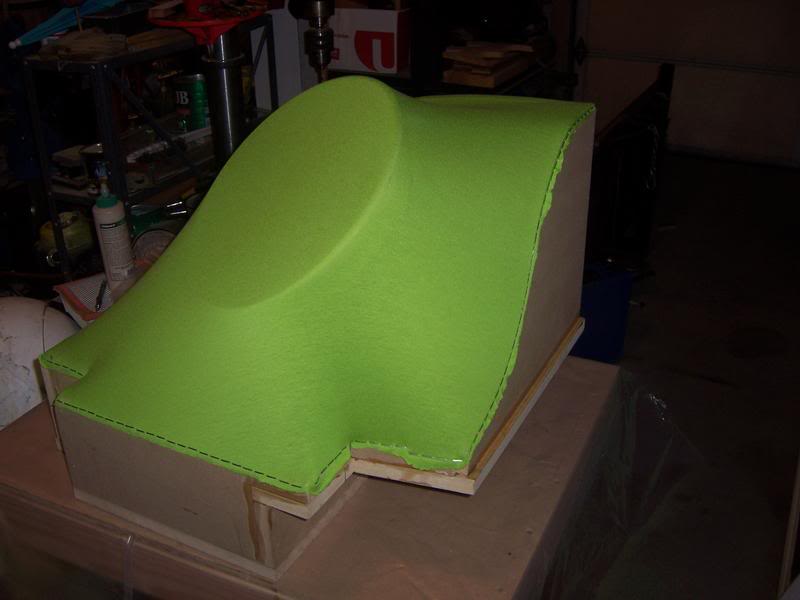
After getting the fabric just right i applied a layer of resin to create the thin brittle "shell" that i was to work off of:
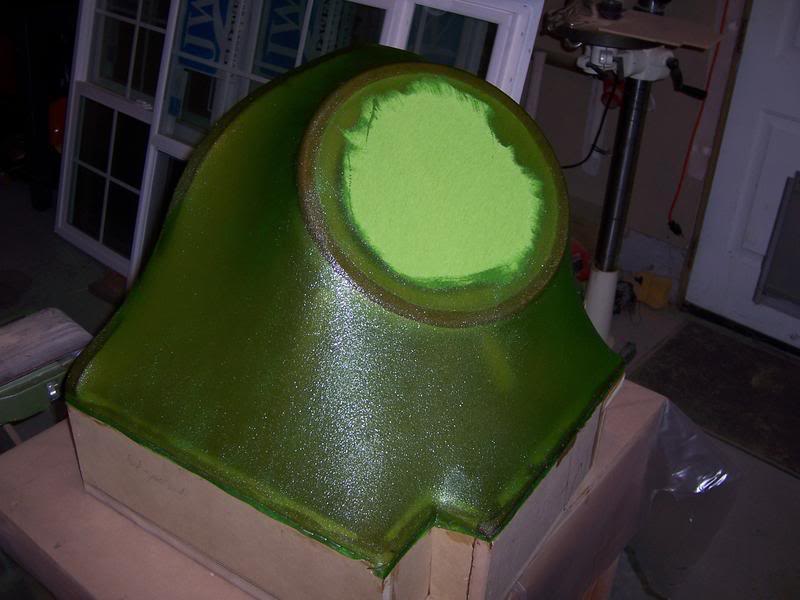
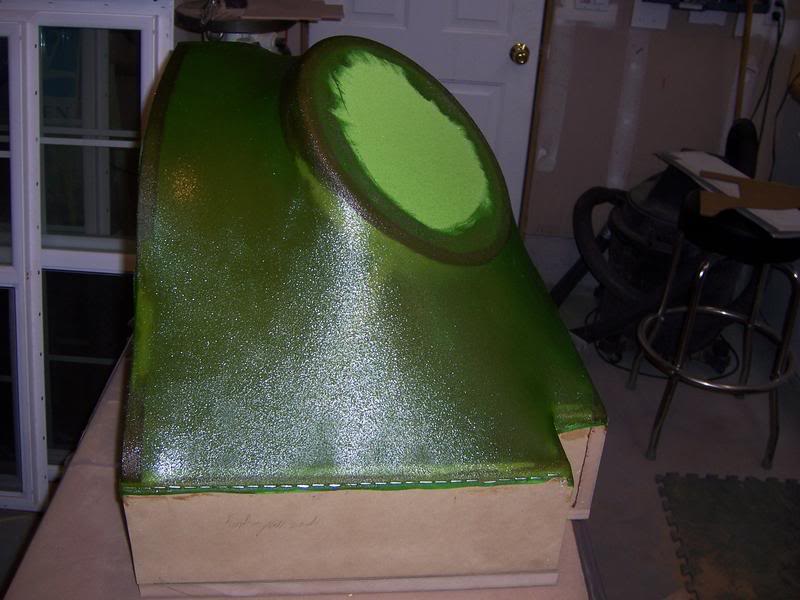
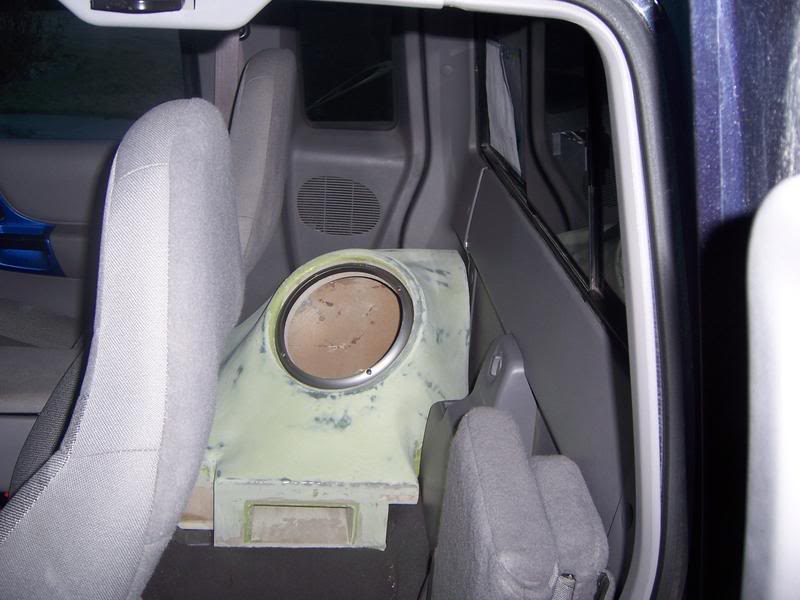
When that cured i began using Duraglaze to reinforce certain areas in the enclosure that needed it. Once that was done i was finally able to start laying glass
as of now there are only a couple of layers on the inside. I began working on the outside becase of difficulty of getting inside to glass the corners.:
so far this is all that i have gotten done. i plan on having the glass work dond by the end of the week and by then there should be time to work on the finishing of the surface. I'll try and keep things up to date as best as i can. well i gotta head off to the garage once again.
I began by pulling the pass. jumpseat. i had my old box back there and it was never used anyway so it wasn't a real loss.
Next i started to lay out and mock up some of the panels for the bottom of the enclosure.
and finaly came up with this design:
The next step was to cut out the ring for the sub to mount to. i made it a flushmount ring and used 3/4" MDF:
Now was the fun part getting to position the ring within the box to get the shape that i wanted. Eventually i came up with this:
Now came time to streach the fabric (i used a spandex like material that actually was made almost completely of cotton) and secure everything:
After getting the fabric just right i applied a layer of resin to create the thin brittle "shell" that i was to work off of:
When that cured i began using Duraglaze to reinforce certain areas in the enclosure that needed it. Once that was done i was finally able to start laying glass
as of now there are only a couple of layers on the inside. I began working on the outside becase of difficulty of getting inside to glass the corners.:
so far this is all that i have gotten done. i plan on having the glass work dond by the end of the week and by then there should be time to work on the finishing of the surface. I'll try and keep things up to date as best as i can. well i gotta head off to the garage once again.

#3
02-26-2007
Join Date: Nov 2005
Location: Royal Oak, Michigan
Posts: 1,022
Likes: 0
Received 0 Likes
on
0 Posts
#4
02-26-2007
Join Date: Jul 2005
Location: Fairbanks, AK
Posts: 3,256
Likes: 0
Received 0 Likes
on
0 Posts
#5
02-26-2007
Join Date: Nov 2004
Location: Richmond Hill, Georgia
Posts: 4,306
Likes: 0
Received 0 Likes
on
0 Posts
#6
02-27-2007
Join Date: May 2006
Location: Tri-Cities
Posts: 201
Likes: 0
Received 0 Likes
on
0 Posts
#8
02-27-2007

#9
02-27-2007


#11
02-27-2007
Join Date: Jul 2005
Location: Fairbanks, AK
Posts: 3,256
Likes: 0
Received 0 Likes
on
0 Posts
#12
02-28-2007
Join Date: Jan 2006
Location: Huntsville, Tx
Posts: 827
Likes: 0
Received 0 Likes
on
0 Posts
#13
03-03-2007
Join Date: May 2006
Location: Tri-Cities
Posts: 201
Likes: 0
Received 0 Likes
on
0 Posts
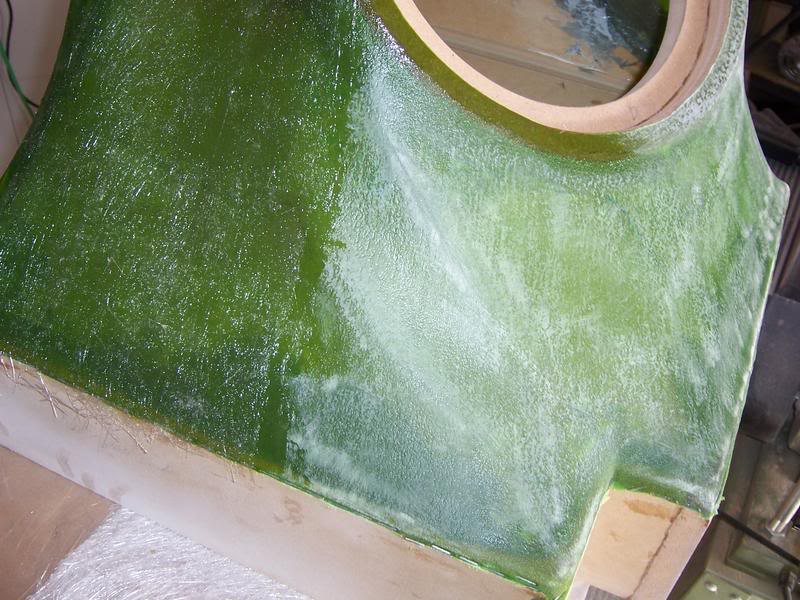
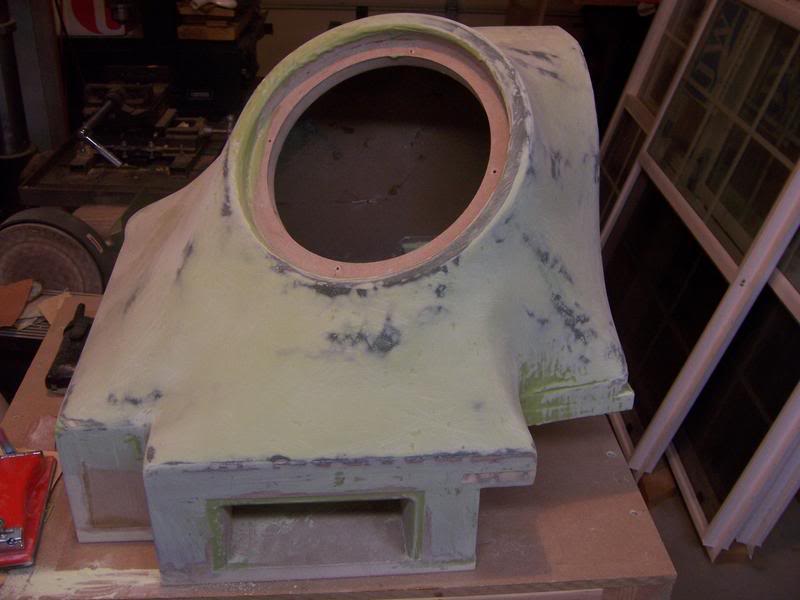
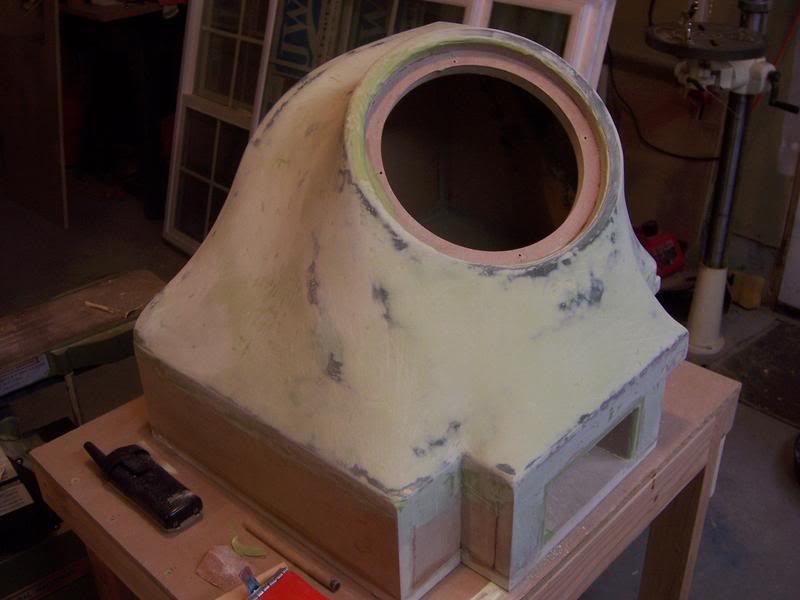
well ended up with four layers of FG, the port calculated and built, I am ready for final surface prep. i get to look forward to a couple of days of pure sanding joy! yeah right, well it'll be nice for this thing to finally be complete. All i can say is that i hope it ounds as good as it should. i ended up tuning it to around 38 hz. plan on dropping that RF P2 and steping up soon. well i'll try and get some pics when shes a little further along.
#14
03-03-2007
Join Date: Jul 2005
Location: Fairbanks, AK
Posts: 3,256
Likes: 0
Received 0 Likes
on
0 Posts
#15
03-03-2007
Join Date: May 2006
Location: Tri-Cities
Posts: 201
Likes: 0
Received 0 Likes
on
0 Posts
what brand of resin are you using? For this project ( my first FG experience) i used the bondo stuff. Not a good idea. i hate it. gloppy and doesn't wet out the mat very well. I recently ordered some off of UsComposites.com. Its the B-440 polyester resin. I've only heard good things about it.
Well i Got the thing together enough to get the sub in and take it for a test run. I love it! def goes lower then my old box and is cleaner. it fits nicely and is now ready for the finshing process.
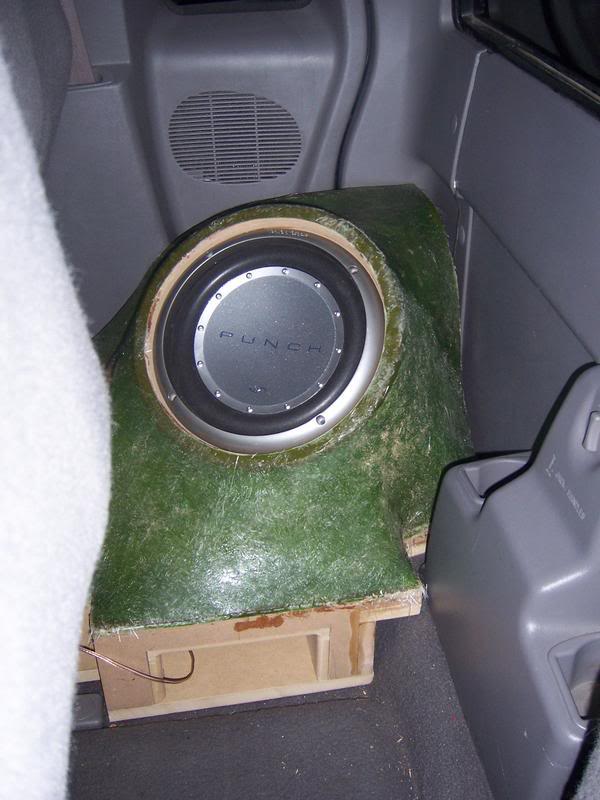
Well i Got the thing together enough to get the sub in and take it for a test run. I love it! def goes lower then my old box and is cleaner. it fits nicely and is now ready for the finshing process.
#17
03-03-2007
Join Date: May 2006
Location: Tri-Cities
Posts: 201
Likes: 0
Received 0 Likes
on
0 Posts

#18
03-03-2007
#19
03-04-2007
Join Date: May 2006
Location: Tri-Cities
Posts: 201
Likes: 0
Received 0 Likes
on
0 Posts
Originally Posted by lifted97ranger
looks good.....i need to know how to do fiberglass......so i can build me a new box...
www.fiberglassforums.com
#20
03-04-2007
Join Date: Jul 2005
Location: Fairbanks, AK
Posts: 3,256
Likes: 0
Received 0 Likes
on
0 Posts
I used some Elmer's stuff we sell at Lowe's and as far as I know its done fine... it was my error not mixing/applying at the right temp...
I've been all over us composite's site, but I didn't think I'd need something high-caliber like that... I'm trying to keep the costs low, since I'm using sub-par equipment anyway.
When I get a nicer amp/sub combo, I'll build a better box and I'll have a little more experience under my belt as well...
#21
03-06-2007
Join Date: May 2006
Location: Tri-Cities
Posts: 201
Likes: 0
Received 0 Likes
on
0 Posts
#23
03-06-2007
Join Date: Jul 2005
Location: Fairbanks, AK
Posts: 3,256
Likes: 0
Received 0 Likes
on
0 Posts
Ha, it's not hard... all you need to start is your truck, a sheet of MDF, and a couple power tools... Why does everyone think it's so "skill-requisite" ? Just do it!
Anyway, I pretty much finished up mine today, it's in the truck and I'm gonna take to to the local truck accessory place and get it sprayed with black bed liner. It'll be all sealed up and it'll reinforce/dampen the 'glassed part.
Yours definitely looks alot better than mine, good job!
Anyway, I pretty much finished up mine today, it's in the truck and I'm gonna take to to the local truck accessory place and get it sprayed with black bed liner. It'll be all sealed up and it'll reinforce/dampen the 'glassed part.
Yours definitely looks alot better than mine, good job!
#24
03-07-2007
Join Date: May 2006
Location: Tri-Cities
Posts: 201
Likes: 0
Received 0 Likes
on
0 Posts
Originally Posted by rolla_guy72
Ha, it's not hard... all you need to start is your truck, a sheet of MDF, and a couple power tools... Why does everyone think it's so "skill-requisite" ? Just do it!
Anyway, I pretty much finished up mine today, it's in the truck and I'm gonna take to to the local truck accessory place and get it sprayed with black bed liner. It'll be all sealed up and it'll reinforce/dampen the 'glassed part.
Yours definitely looks alot better than mine, good job!
Anyway, I pretty much finished up mine today, it's in the truck and I'm gonna take to to the local truck accessory place and get it sprayed with black bed liner. It'll be all sealed up and it'll reinforce/dampen the 'glassed part.
Yours definitely looks alot better than mine, good job!
I was thinking about that bedliner stuff or some other textured spray. you should post some pics of your box on here, i'd like to see your design and the final product.
yeah just jump in, start small if you don't like it then so be it, but if you do then you just opened yourself up a whole new set of oppertunities.
#25
03-07-2007
Join Date: Jul 2004
Location: Philadelphia, PA
Posts: 3,588
Likes: 0
Received 0 Likes
on
0 Posts


