2009 2 Door Ext Cab Stealth Install
#1
 06-11-2012


2009 2 Door Ext Cab Stealth Install
Intro: As this is a budget-minded "stealth" install, it probably won't be as exciting to look at as some of the more over-the-top mobile entertainment/concert-house-on-wheels featured in some of the other build logs. That aside, I think there are a lot of us out there that have tight budgets and even tighter spaces to work with. My goal with this vehicle was to create an enjoyable high quality (think SQ) sound system that;
1. Did not compromise any stock functionality
2. Did not sacrifice any seating and
3. Did not draw any extra (unwanted) attention
4. Most importantly, fit the budget
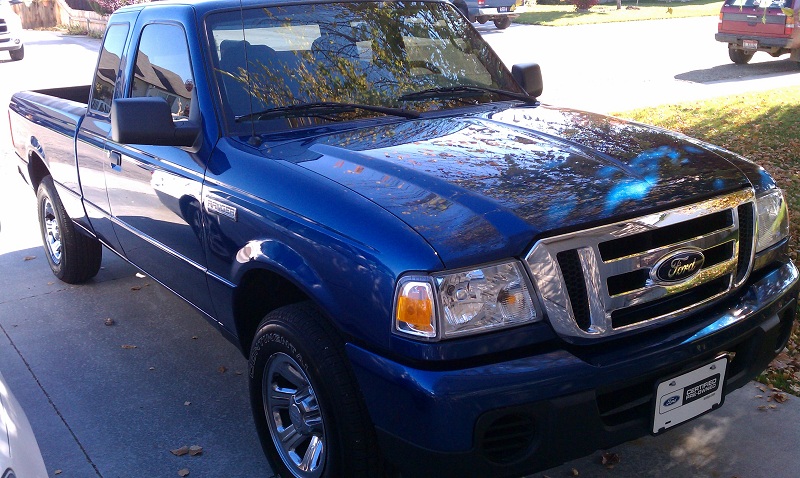
The vehicle: 2009 Ford Ranger XLT Super Cab 2-door. This is my daily driver purchased in late 2011, and after promising myself for 3 previous vehicles, I was finally going to install a decent sound system. Space was extremely tight. It took a lot of careful measuring, comparing, and research but eventually I had a plan....
The Plan: I decided to go with an aftermarket deck to add some extra functionality. From there I chose a 5-channel amp to power the two pairs of 5x7 speakers and the sub, all in a compact size. I used the stock speaker size and locations to preserve with the stealth/unmodified theme. The subs had to be small enough to hide under the rear side-facing jump seats; I chose a pair of 8" subs to get the job done.

The Source Unit: I got a fantastic Black Friday deal on this deck, Clarion CZ-501 and its pretty much loaded with all the features that I wanted: 4v pre-outs all around, Bluetooth hands-free and audio streaming, iPod/USB input, front Aux, XM, HD radio etc. It also looks good, in my opinion, a classic overall feel to it. Also, see the absolutely tiny USB thumb drive on the far right side? That�s a neat 16GB unit loaded with music!

Bass ****: Below the deck and A/C controls I mounted the Alpine RUX-**** to quickly control the sub level. I love bass *****!

4 gauge power cable. I spent a few extra minutes and made sure all the wiring looked as stock as possible.

I mounted the Alpine MRX-V60 amp behind the driver's side rear jump seat. It fits so well the seat can still fold up 100%. I normally leave the seat down to ensure the amp stays plenty cool. Which it usually does, it�s a very efficient amp.

You'll notice I had to trim the plastic up a little above the amp to fit it properly. This area is almost never seen, which is how I like it.

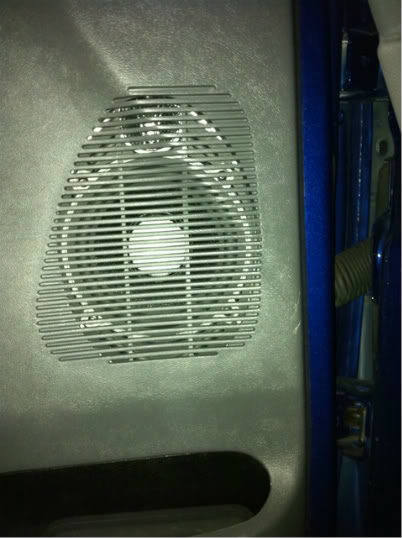
For the front stage I selected the JL Audio C2-570x, these fit perfectly into the stock location. I used some sound deadening close to the speakers and covered most of the large holes. (Also not pictured is the fact that I used the sound deadening material and constructed a weather shield above the speaker so any water drops will run down and around the speakers rather than dripping onto the speakers themselves) Then I re-attached the plastic moisture barrier for good measure.

The C2-570x noticeable behind the grill. These speakers have a pretty good offset on the silk dome tweeters, really helps the overall imaging without modifying the door panels.

Now the hard part...fit subs somewhere in the rear of the cab without sacrificing the rear jump seats or any room for that matter. Yes, in case you're wondering the jump seats do get used quite often. I have two kids that sit back there on a regular basis.

I decided the safest route was to down-fire a pair of JL Audio 8w1-4 subs. This shows the general idea, and just how little room I had to work with. The front seats are pulled all the way forward.

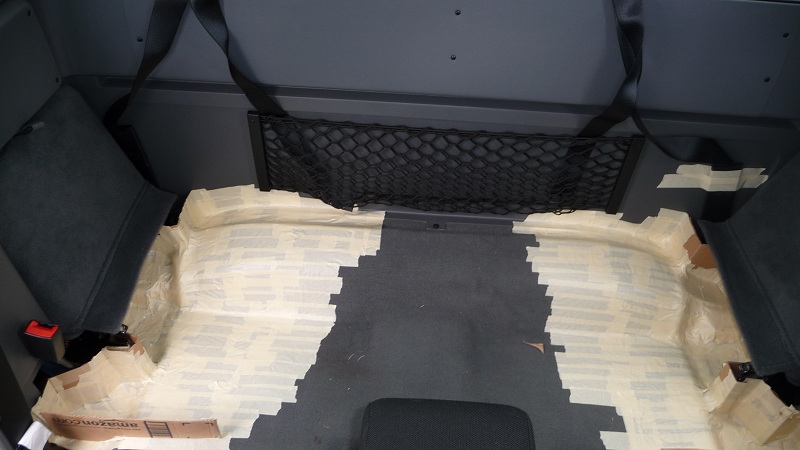
The only way to maximize every square (and cubic) inch was to build fiberglass enclosures. I have never worked with the stuff before, so I knew I was in for a ride. I first removed a small plastic panel under the rear jump seats that cover up their hinges and seat belts, and then proceeded to tape up the area. I used cardboard to define the area under the seats and around the hinges.
The first few layers. It took me a few layers of playing with fiberglass and resin before I figured out how to work with the stuff. I learned to dab rather than brush the resin into the fiberglass mat. Also, that stuff stinks something fierce!

Dry fitting the MDF portions. I placed 8 feet, in pairs, around the bottom baffle to keep the enclosures propped up. I added bracing for strength and to help keep the fleece from sagging later.

After adding a few more layers of fiberglass and building the mdf portion, I joined the two halves together in place using fleece and resin. I also used fleece and resin to round the curve in the front. I then sealed all the mdf with silicon.

After strengthening and sealing the joint between the two halves (using, fleece, fiberglass, resin, and Bondo) I then wrapped them in fleece and applied liberal amounts of resin.

16: I then added more fiberglass and Bondo both inside and out. These things became increasingly ugly and became affectionately known as "Mr. and Mrs. Frankenbox". They may be ugly but I made them air tight and tough enough that they should survive the impending zombie apocalypse.


A last clearance test before wrapping in carpet, wiring and mounting the subs.

A local shop had some carpet that was pretty darn close, so after dressing them up in carpet, I installed the subs and added a small amount of fiberfill and wired them up to the amp (2 Ohm load) Pictured with the jump seats up.

Final resting place with the seats down. This is how it looks most of the time.

The damage: I tried to keep a running total on my expenses. I literally started with nothing, I had to purchase every little thing along the way to completing the build. I feel I did a pretty good job until I got to the materials used for the sub boxes. (Due to trial and error I spent a little more cash than I wanted to on them, not to mention a lot more time to complete the project) But overall I'm very satisfied with the system. Total cost ~ $1000
Conclusion: The system sounds fantastic. For the money spent there is plenty of detail at all volume levels and it does very well with any type of music thrown at it. The subs are very musical and mix well into the overall system. They won�t satisfy a bass head (which I am at times, I'll admit it) but during day to day use they continue to perform very well indeed. The system doesn't attract any unwanted attention. Also having all the seats and stock functionality are a huge plus. Because of the way I installed it, if/when I sell the vehicle it should be relatively easy to roll back to stock. I hope you've enjoyed this little build and thanks for viewing.
1. Did not compromise any stock functionality
2. Did not sacrifice any seating and
3. Did not draw any extra (unwanted) attention
4. Most importantly, fit the budget
The vehicle: 2009 Ford Ranger XLT Super Cab 2-door. This is my daily driver purchased in late 2011, and after promising myself for 3 previous vehicles, I was finally going to install a decent sound system. Space was extremely tight. It took a lot of careful measuring, comparing, and research but eventually I had a plan....
The Plan: I decided to go with an aftermarket deck to add some extra functionality. From there I chose a 5-channel amp to power the two pairs of 5x7 speakers and the sub, all in a compact size. I used the stock speaker size and locations to preserve with the stealth/unmodified theme. The subs had to be small enough to hide under the rear side-facing jump seats; I chose a pair of 8" subs to get the job done.
The Source Unit: I got a fantastic Black Friday deal on this deck, Clarion CZ-501 and its pretty much loaded with all the features that I wanted: 4v pre-outs all around, Bluetooth hands-free and audio streaming, iPod/USB input, front Aux, XM, HD radio etc. It also looks good, in my opinion, a classic overall feel to it. Also, see the absolutely tiny USB thumb drive on the far right side? That�s a neat 16GB unit loaded with music!
Bass ****: Below the deck and A/C controls I mounted the Alpine RUX-**** to quickly control the sub level. I love bass *****!
4 gauge power cable. I spent a few extra minutes and made sure all the wiring looked as stock as possible.
I mounted the Alpine MRX-V60 amp behind the driver's side rear jump seat. It fits so well the seat can still fold up 100%. I normally leave the seat down to ensure the amp stays plenty cool. Which it usually does, it�s a very efficient amp.
You'll notice I had to trim the plastic up a little above the amp to fit it properly. This area is almost never seen, which is how I like it.
For the front stage I selected the JL Audio C2-570x, these fit perfectly into the stock location. I used some sound deadening close to the speakers and covered most of the large holes. (Also not pictured is the fact that I used the sound deadening material and constructed a weather shield above the speaker so any water drops will run down and around the speakers rather than dripping onto the speakers themselves) Then I re-attached the plastic moisture barrier for good measure.
The C2-570x noticeable behind the grill. These speakers have a pretty good offset on the silk dome tweeters, really helps the overall imaging without modifying the door panels.
Now the hard part...fit subs somewhere in the rear of the cab without sacrificing the rear jump seats or any room for that matter. Yes, in case you're wondering the jump seats do get used quite often. I have two kids that sit back there on a regular basis.
I decided the safest route was to down-fire a pair of JL Audio 8w1-4 subs. This shows the general idea, and just how little room I had to work with. The front seats are pulled all the way forward.
The only way to maximize every square (and cubic) inch was to build fiberglass enclosures. I have never worked with the stuff before, so I knew I was in for a ride. I first removed a small plastic panel under the rear jump seats that cover up their hinges and seat belts, and then proceeded to tape up the area. I used cardboard to define the area under the seats and around the hinges.
The first few layers. It took me a few layers of playing with fiberglass and resin before I figured out how to work with the stuff. I learned to dab rather than brush the resin into the fiberglass mat. Also, that stuff stinks something fierce!
Dry fitting the MDF portions. I placed 8 feet, in pairs, around the bottom baffle to keep the enclosures propped up. I added bracing for strength and to help keep the fleece from sagging later.
After adding a few more layers of fiberglass and building the mdf portion, I joined the two halves together in place using fleece and resin. I also used fleece and resin to round the curve in the front. I then sealed all the mdf with silicon.
After strengthening and sealing the joint between the two halves (using, fleece, fiberglass, resin, and Bondo) I then wrapped them in fleece and applied liberal amounts of resin.
16: I then added more fiberglass and Bondo both inside and out. These things became increasingly ugly and became affectionately known as "Mr. and Mrs. Frankenbox". They may be ugly but I made them air tight and tough enough that they should survive the impending zombie apocalypse.
A last clearance test before wrapping in carpet, wiring and mounting the subs.
A local shop had some carpet that was pretty darn close, so after dressing them up in carpet, I installed the subs and added a small amount of fiberfill and wired them up to the amp (2 Ohm load) Pictured with the jump seats up.
Final resting place with the seats down. This is how it looks most of the time.
The damage: I tried to keep a running total on my expenses. I literally started with nothing, I had to purchase every little thing along the way to completing the build. I feel I did a pretty good job until I got to the materials used for the sub boxes. (Due to trial and error I spent a little more cash than I wanted to on them, not to mention a lot more time to complete the project) But overall I'm very satisfied with the system. Total cost ~ $1000
Conclusion: The system sounds fantastic. For the money spent there is plenty of detail at all volume levels and it does very well with any type of music thrown at it. The subs are very musical and mix well into the overall system. They won�t satisfy a bass head (which I am at times, I'll admit it) but during day to day use they continue to perform very well indeed. The system doesn't attract any unwanted attention. Also having all the seats and stock functionality are a huge plus. Because of the way I installed it, if/when I sell the vehicle it should be relatively easy to roll back to stock. I hope you've enjoyed this little build and thanks for viewing.
The following users liked this post:
AR420 (07-24-2021)


#4
06-11-2012

Nice write up and set up!! More folks are choosing those 5-ch amps now a days. I'm still a little skeptical though about adjustability. How much fine tuning can you do with yours? Front/Rear separate adjusts? Sub on it's own?
I'm about to do a similar system redo. Except running my existing 12" Kicker CVR until I can swing a single 10 for it's tightness. What I'm planning is a good chunk of dough already. lol. Hertz 6.75" components in the front doors, drop-in's in the back, pondering a Kenwood XR-5S (80rms x 4+350rms x 1) powering everything.
I'm about to do a similar system redo. Except running my existing 12" Kicker CVR until I can swing a single 10 for it's tightness. What I'm planning is a good chunk of dough already. lol. Hertz 6.75" components in the front doors, drop-in's in the back, pondering a Kenwood XR-5S (80rms x 4+350rms x 1) powering everything.
#5
06-12-2012
Fx4wannabe01,
I had a lot of concerns about flexibility, power, cooling, cost, etc. as well. Here is my short list of small form factor 5-Channel amps when I was shopping around:
Kenwood XR-5S
Alpine PDX-5 (Replaced by: Alpine PDX-V9)
Alpine MRX-V60 (Replaced by: Alpine MRX-V70)
JL Audio XD700/5
JL Audio HD900/5
I wanted to keep the overall size to less than 12"x12", in fact 10"x10" is closer to what I was searching for.
I went with the Alpine MRX-V60, because it gave me a lot of features in roughly a 10"x10" form for the lowest price.
It's basically 3 amps in 1. The two 2-channel amps and a mono sub amp. Each "Amp" has its own Gain, Xover, etc. It's a very flexible amp, with a lot of different ways to set it up.
I am hoping one day to go with a much higher quality front stage (Hertz ?) and I'll bridge the 4 Channels down to 2, and run the rear fill speakers off my deck. (I have VERY little sound coming out of those as I have it faded nearly all the way to the front)
Here is a pic of all the controls:

The MRX-V60 proved to be a good choice for me, very clear, very cool running, and the Certification sheet rated the sub channel at 409w RMS @ 14.4v & 2-Ohms. So it powers the subs just fine, they are rated at 150RMS each. Most of the more pricey amps had about 25wRMS more into the 4-channels and about 100w-150w more into the sub channel. So after I chose the amp I chose the front and rear speakers to match and couldn't be happier.
I had a lot of concerns about flexibility, power, cooling, cost, etc. as well. Here is my short list of small form factor 5-Channel amps when I was shopping around:
Kenwood XR-5S
Alpine PDX-5 (Replaced by: Alpine PDX-V9)
Alpine MRX-V60 (Replaced by: Alpine MRX-V70)
JL Audio XD700/5
JL Audio HD900/5
I wanted to keep the overall size to less than 12"x12", in fact 10"x10" is closer to what I was searching for.
I went with the Alpine MRX-V60, because it gave me a lot of features in roughly a 10"x10" form for the lowest price.
It's basically 3 amps in 1. The two 2-channel amps and a mono sub amp. Each "Amp" has its own Gain, Xover, etc. It's a very flexible amp, with a lot of different ways to set it up.
I am hoping one day to go with a much higher quality front stage (Hertz ?) and I'll bridge the 4 Channels down to 2, and run the rear fill speakers off my deck. (I have VERY little sound coming out of those as I have it faded nearly all the way to the front)
Here is a pic of all the controls:
The MRX-V60 proved to be a good choice for me, very clear, very cool running, and the Certification sheet rated the sub channel at 409w RMS @ 14.4v & 2-Ohms. So it powers the subs just fine, they are rated at 150RMS each. Most of the more pricey amps had about 25wRMS more into the 4-channels and about 100w-150w more into the sub channel. So after I chose the amp I chose the front and rear speakers to match and couldn't be happier.
#7
06-12-2012
it's because it's a 2 door. the four doors have to attach the seats to the back wall. I think scott had a two door, they aren't as common.
#8
06-13-2012
Fx4wannabe01,
I had a lot of concerns about flexibility, power, cooling, cost, etc. as well. Here is my short list of small form factor 5-Channel amps when I was shopping around:
Kenwood XR-5S
Alpine PDX-5 (Replaced by: Alpine PDX-V9)
Alpine MRX-V60 (Replaced by: Alpine MRX-V70)
JL Audio XD700/5
JL Audio HD900/5
I wanted to keep the overall size to less than 12"x12", in fact 10"x10" is closer to what I was searching for.
I went with the Alpine MRX-V60, because it gave me a lot of features in roughly a 10"x10" form for the lowest price.
It's basically 3 amps in 1. The two 2-channel amps and a mono sub amp. Each "Amp" has its own Gain, Xover, etc. It's a very flexible amp, with a lot of different ways to set it up.
I am hoping one day to go with a much higher quality front stage (Hertz ?) and I'll bridge the 4 Channels down to 2, and run the rear fill speakers off my deck. (I have VERY little sound coming out of those as I have it faded nearly all the way to the front)
Here is a pic of all the controls:
The MRX-V60 proved to be a good choice for me, very clear, very cool running, and the Certification sheet rated the sub channel at 409w RMS @ 14.4v & 2-Ohms. So it powers the subs just fine, they are rated at 150RMS each. Most of the more pricey amps had about 25wRMS more into the 4-channels and about 100w-150w more into the sub channel. So after I chose the amp I chose the front and rear speakers to match and couldn't be happier.
I still need to make up my mind and allocate the funds(not quite allocate them, more like actually willing to drop the coin). We'll see what my hook-up cost is. I love having an employer that knows literally every small business owner in the area...including the local stereo shop. lol. I might be going a little overboard on my speaker choice (Hertz)...but I've heard 'em with 150 going to them and OMG.... it's like being there seeing Dave Mathews live!
#9
06-13-2012

Join Date: Aug 2010
Location: Welland, ON
Posts: 186
Likes: 0
Received 0 Likes
on
0 Posts
#10
06-13-2012


Very nice install. Your boxes are similar to the one I built for mine, except mine was all wood, and came out uglier than I had hoped because I made it with some crazy angles to maximize the space. I never carpeted or painted it it because I want to rebuild it, but it does the job. Fiberglass is definitely a must in this situation.
How do those JL Audio subs perform in that box? I used a Lanzer Max Pro 8, and I'm pretty happy with it, but I do want to add the second one.
How do those JL Audio subs perform in that box? I used a Lanzer Max Pro 8, and I'm pretty happy with it, but I do want to add the second one.
#11
06-13-2012
When I was shopping around, I found that the 2 door extended cab wasn't too rare (I saw a lot of 2007 & 2009 models), but a 2 door extended cab WITH the jump seats installed was a hard to find combination.
#12
06-13-2012
#13
06-13-2012
Very nice install. Your boxes are similar to the one I built for mine, except mine was all wood, and came out uglier than I had hoped because I made it with some crazy angles to maximize the space. I never carpeted or painted it it because I want to rebuild it, but it does the job. Fiberglass is definitely a must in this situation.
How do those JL Audio subs perform in that box? I used a Lanzer Max Pro 8, and I'm pretty happy with it, but I do want to add the second one.
How do those JL Audio subs perform in that box? I used a Lanzer Max Pro 8, and I'm pretty happy with it, but I do want to add the second one.
#14
06-14-2012
I'm always freaked out when someone has a modded to heck truck.......and finding out after 2 years his truck's a 2dr. lol. I'm so used to 4, I don't know what to do with myself in a 2dr. haha.
Last edited by Fx4wannabe01; 06-14-2012 at 09:32 PM.
#15
06-14-2012
wow you did an amazing job! our trucks are almost identical too!!
i got two amps behind my drivers side jumpseat. i did have to remove the rear back and foam of the jumpseat on that side but it still closes fully.

Rainbow Components
Both Amps behind drivers jumpseat
Zapco ST1 Amp for the 10" Kicker Sub
Kenwood X600F 4 ch amp for the rest...


i got two amps behind my drivers side jumpseat. i did have to remove the rear back and foam of the jumpseat on that side but it still closes fully.
Rainbow Components
Both Amps behind drivers jumpseat
Zapco ST1 Amp for the 10" Kicker Sub
Kenwood X600F 4 ch amp for the rest...
#16
06-14-2012
wow you did an amazing job! our trucks are almost identical too!!
i got two amps behind my drivers side jumpseat. i did have to remove the rear back and foam of the jumpseat on that side but it still closes fully.
Rainbow Components
Both Amps behind drivers jumpseat
Zapco ST1 Amp for the 10" Kicker Sub
Kenwood X600F 4 ch amp for the rest...
i got two amps behind my drivers side jumpseat. i did have to remove the rear back and foam of the jumpseat on that side but it still closes fully.
Rainbow Components
Both Amps behind drivers jumpseat
Zapco ST1 Amp for the 10" Kicker Sub
Kenwood X600F 4 ch amp for the rest...

How do you like that Zapco amp?
#17
06-14-2012
The zapco is great. Its tiny size makes it perfect to sandwich in there w the alpine. Pretty much the only one that would fit along with it. I like the MRX system you used, 5ch goodness and an even smaller footprint. The 8" subs must fill in great, bigger doesn't have to mean better. I used dual 8" Jehnert subs in my other car and they sounded better than my single ten in ranger :) Ur truck came out great!

Thread
Thread Starter
Forum
Replies
Last Post
freddie
Interior Semi-Tech
11
12-19-2008 08:37 AM
lifted97ranger
General Ford Ranger Discussion
9
11-23-2006 02:46 PM


