How To: Explorer Axle Swap
#1
 09-19-2005


How To: Explorer Axle Swap
Mod:Explorer Axle Swap
Difficulty: 5/10 (some mechanical knowledge required)
Time: [Approximate time needed]
Author: Scott Gabriel (Gay-briel)
Please direct all questions and comments to the author.
Tools/Equipment needed:
HOW-TO EXPLORER AXLE SWAP
This was done Danger94Ranger (from RPS) and myself.
Before shot with flip kit

First is first. Remove the bed by unbolting the 6 carriage bolts, also disconnect the tail light harness and unbolt the gas filler neck.
Bed Removed

Jack up frame and support with jack stands on either side near cab. Maybe sure you place blocks in front of the wheels or else the truck my move
Wheels off and on Stands

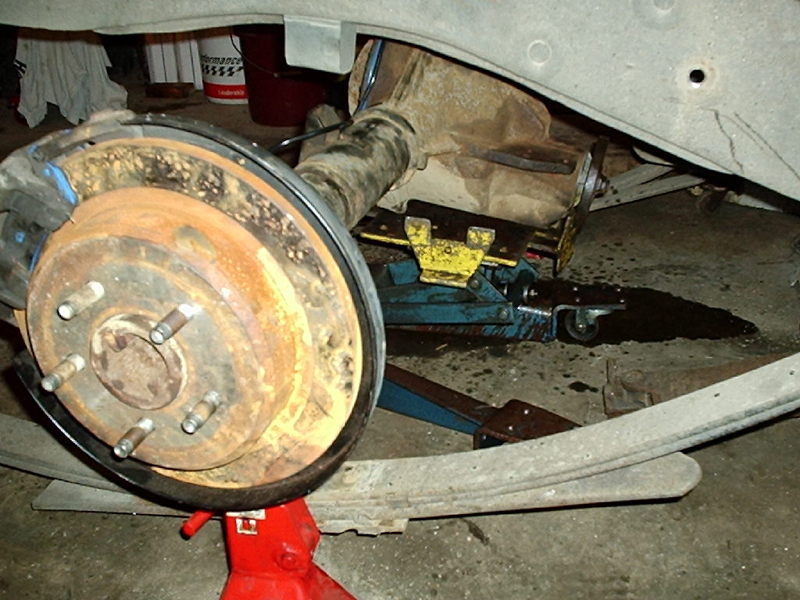
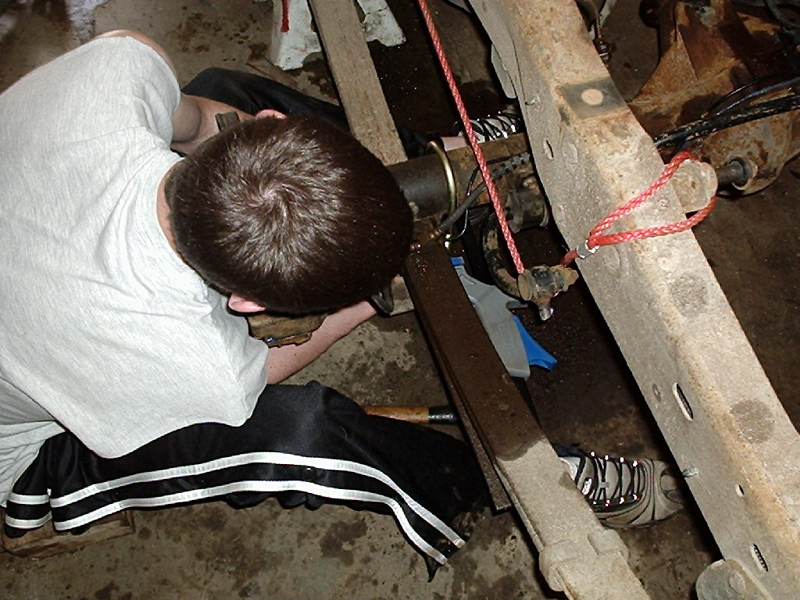
Use a jack to support the axle, and use a block of wood or something to hold up the drive shaft. You then need to unbolt the 4 U-Bolts holding the axle to the leaf, and the bolts holding the drive shaft to the yoke. Also remove the ABS sensor wire, brake lines, Parking brake lines, and breather tube
Undoing brake lines

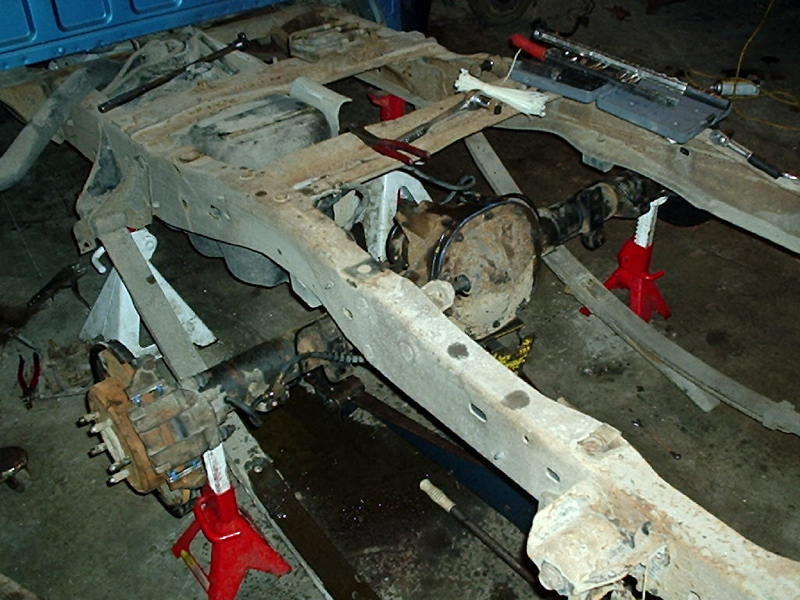
Then unbolt the rears of the leaf springs and pull the axle out.
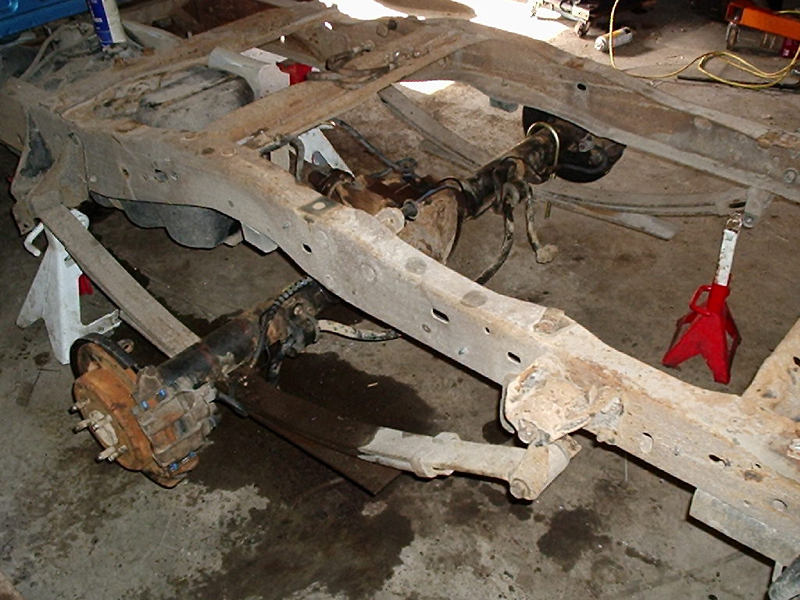
Removed axle

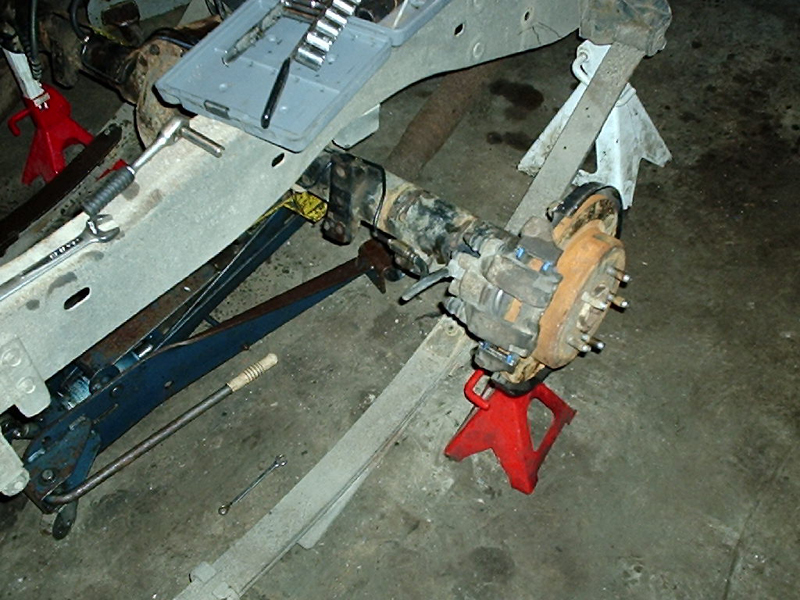
Then place Explorer axle on jack (transmission jacks work great) and place in the spot where the Ranger axle was removed
Explorer Axle in place
Line up axle on the leafs

Go ahead and bolt in the explorer axle to the drive shaft and reattach brake lines

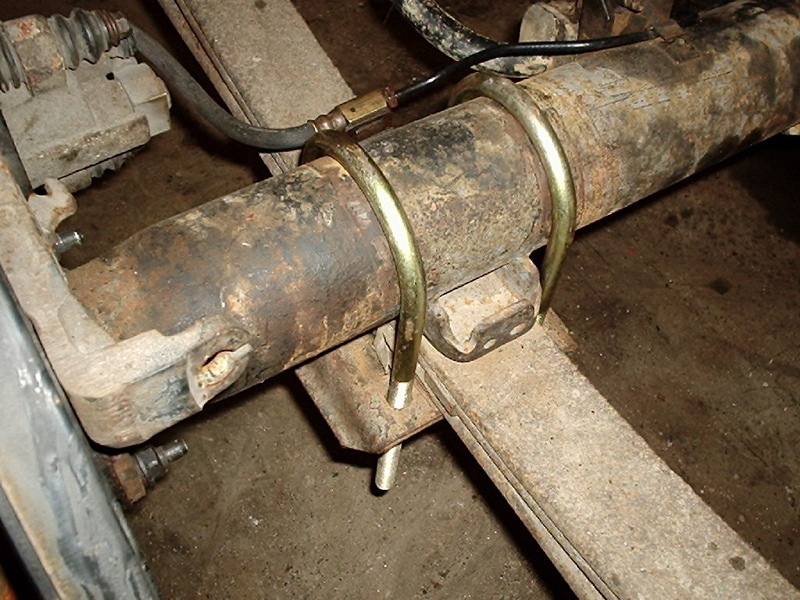
Now, install the U-Bolts to attach the axle to the leafs. The explorer 8.8 rear is actually thicker the then the ranger 7.5 and 8.8, so you might need aftermarket U-Bolts, or get OEM ones from the factory. We used U-Bolts from AutoZone and just had to clamp the ends together to get the spring plate on.
Ubolts on

Now make sure all brake lines are hooked up and that your brakes are blead. Then is time to put your rims back on.
We did not have all the proper pieces for the sway bar so we removed it. We also didn’t have the proper parking brake lines, so danger94ranger is running without parking brakes. Make sure when you get your explorer axle you get the parking brake lines that go with it.
Finished Pics


Mod Complete:

For more discussion of this Mod please view this thread.
https://www.ranger-forums.com/forum2...367#post172367
Edited by Jason Gonderman (rngprerunner) for grammar and format.
Difficulty: 5/10 (some mechanical knowledge required)
Time: [Approximate time needed]
Author: Scott Gabriel (Gay-briel)
Please direct all questions and comments to the author.
Tools/Equipment needed:
- Basic hand tools and a good mechanics wrench set.
HOW-TO EXPLORER AXLE SWAP
This was done Danger94Ranger (from RPS) and myself.
Before shot with flip kit
First is first. Remove the bed by unbolting the 6 carriage bolts, also disconnect the tail light harness and unbolt the gas filler neck.
Bed Removed
Jack up frame and support with jack stands on either side near cab. Maybe sure you place blocks in front of the wheels or else the truck my move
Wheels off and on Stands
Use a jack to support the axle, and use a block of wood or something to hold up the drive shaft. You then need to unbolt the 4 U-Bolts holding the axle to the leaf, and the bolts holding the drive shaft to the yoke. Also remove the ABS sensor wire, brake lines, Parking brake lines, and breather tube
Undoing brake lines
Then unbolt the rears of the leaf springs and pull the axle out.
Removed axle
Then place Explorer axle on jack (transmission jacks work great) and place in the spot where the Ranger axle was removed
Explorer Axle in place
Line up axle on the leafs
Go ahead and bolt in the explorer axle to the drive shaft and reattach brake lines
Now, install the U-Bolts to attach the axle to the leafs. The explorer 8.8 rear is actually thicker the then the ranger 7.5 and 8.8, so you might need aftermarket U-Bolts, or get OEM ones from the factory. We used U-Bolts from AutoZone and just had to clamp the ends together to get the spring plate on.
Ubolts on
Now make sure all brake lines are hooked up and that your brakes are blead. Then is time to put your rims back on.
We did not have all the proper pieces for the sway bar so we removed it. We also didn’t have the proper parking brake lines, so danger94ranger is running without parking brakes. Make sure when you get your explorer axle you get the parking brake lines that go with it.
Finished Pics
Mod Complete:
For more discussion of this Mod please view this thread.
https://www.ranger-forums.com/forum2...367#post172367
Edited by Jason Gonderman (rngprerunner) for grammar and format.
Last edited by 98liftedranger; 11-27-2011 at 11:39 PM.
#2
06-26-2012

#4
06-26-2012
Like I said, for a normal ranger. And you would still need a solution for the shock mounts and parking brake. All of that info was completely left out, and it makes this mod look much simpler than it is. Just FYI for the next shmuck like me.
#5
09-06-2013

Join Date: Jul 2012
Location: Ringgold, GA
Posts: 18
Likes: 0
Received 0 Likes
on
0 Posts
#6
07-09-2016


Join Date: Mar 2015
Location: Arnold
Posts: 6
Likes: 0
Received 0 Likes
on
0 Posts
Shock Mounts
I saw on this useful information on another more detailed thread.
"Explorer driver side U Bolt Plates/ Shock Mounts (2). This is the trick, and also a source of bad information on the internet. The Ranger has the passenger shock in front of the axle and the Explorer mounts them both behind the axle. The Explorer shock mount for the driver�s side works perfectly, and a second driver�s side mount rotated the opposite direction works perfectly for the Ranger�s passenger side. The Ubolt Plate/ Shock mount for the Explorer is a single part, and you need two of them, both from the driver�s side. I obtained one with my junkyard Explorer rear end, and bought the other at Ford, the cost was about $35. (Ford Part number F57Z-5798-AE)"
ALSO can you reuse the same brake lines from the Ranger axle on the Explorer axle?
#7
07-10-2016

Member
Join Date: May 2016
Location: Central Florida
Posts: 12
Likes: 0
Received 0 Likes
on
0 Posts
Parking brake cables from the Explorer worked just fine but the adapter that brings the 2 cables to 1 must be the one from the Ranger. Be prepared to pull hard from both ends to get the cables back together. There is ample slack in the auto adjust at the e-brake pedal but it is under spring pressure and would be much easier with a second set of hands (still doable solo).
For the rotors, calipers and pads (depending on year of donor) mine is a '97 and I ordered e-brake shoes and rotors for a 2001. Calipers and pads were purchased for a 2003 (a) calipers were aluminum (b) pads have twice the contact area. The original Ranger (fluid) brake lines attached to the rear diff do not work unless you plan on converting the disk brake rear back to drums.
Nothing in the OPs post is wrong, he was simply replacing a spring under setup with a spring under as stated.
#8
07-10-2016
Join Date: Mar 2015
Location: Arnold
Posts: 6
Likes: 0
Received 0 Likes
on
0 Posts
What do I need to get the disc brakes working? I dont think it was mentioned
I am going to go with the Explorer Driver's side U-bolt method for the drop and ease. As for the parking brake, one side was locked up on the Explorer i took the 8.8 off of due to it being exposed to the elements. Anyway, Ill only need one side to work, will I be able to get this done with Ranger cables? My automatic is pretty nice so im not worried that it'll fail, so I think one side is adequate.
I am going to go with the Explorer Driver's side U-bolt method for the drop and ease. As for the parking brake, one side was locked up on the Explorer i took the 8.8 off of due to it being exposed to the elements. Anyway, Ill only need one side to work, will I be able to get this done with Ranger cables? My automatic is pretty nice so im not worried that it'll fail, so I think one side is adequate.
Last edited by BlueNostromo; 07-10-2016 at 12:02 PM.
#9
07-10-2016

Get both sides working. Regardless if your auto is working reliably or not, if your braking system should fail, these parking brakes are your last resort to stopping the vehicle in a safe manner.
If only one side is working, then it will pull you to that side. This also means more heat will be generated, and that one working brake in this example will begin to fade. That's not something you want to happen.
If only one side is working, then it will pull you to that side. This also means more heat will be generated, and that one working brake in this example will begin to fade. That's not something you want to happen.
#10
07-10-2016
Join Date: Mar 2015
Location: Arnold
Posts: 6
Likes: 0
Received 0 Likes
on
0 Posts
Get both sides working. Regardless if your auto is working reliably or not, if your braking system should fail, these parking brakes are your last resort to stopping the vehicle in a safe manner.
If only one side is working, then it will pull you to that side. This also means more heat will be generated, and that one working brake in this example will begin to fade. That's not something you want to happen.
If only one side is working, then it will pull you to that side. This also means more heat will be generated, and that one working brake in this example will begin to fade. That's not something you want to happen.

Thread
Thread Starter
Forum
Replies
Last Post


