Off-Road Hard Sided Popup Trailer

#27
 05-11-2012


Join Date: Nov 2011
Location: Pittsburgh, Pa.
Posts: 23
Likes: 0
Received 0 Likes
on
0 Posts
#28
05-12-2012


#33
05-22-2012

Join Date: Jul 2008
Location: Temecula, CA
Posts: 115
Likes: 0
Received 0 Likes
on
0 Posts
I thought about building me one on the smaller scale. Its very expensive to build even on a small scale.
Thanks! I have a few of the finished trailer on a trail and with the top lifted. Those photos are coming.
#34
05-22-2012
Join Date: Jul 2008
Location: Temecula, CA
Posts: 115
Likes: 0
Received 0 Likes
on
0 Posts


#35
05-22-2012
Join Date: Jul 2008
Location: Temecula, CA
Posts: 115
Likes: 0
Received 0 Likes
on
0 Posts
On to the upper roof section. Following the same bending technique we form the outer roof supports and weld in place.

Supports and lower tubing welded on.
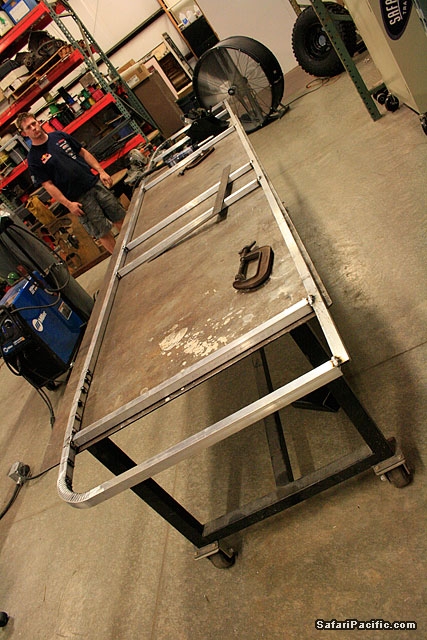
Cross bar and window tubing are welded on then set on the main body.

The other side is then built. Then both sides are connected together.

Supports and lower tubing welded on.
Cross bar and window tubing are welded on then set on the main body.
The other side is then built. Then both sides are connected together.
#36
05-22-2012
Join Date: Jul 2008
Location: Temecula, CA
Posts: 115
Likes: 0
Received 0 Likes
on
0 Posts


#37
05-22-2012
Join Date: Jul 2008
Location: Temecula, CA
Posts: 115
Likes: 0
Received 0 Likes
on
0 Posts
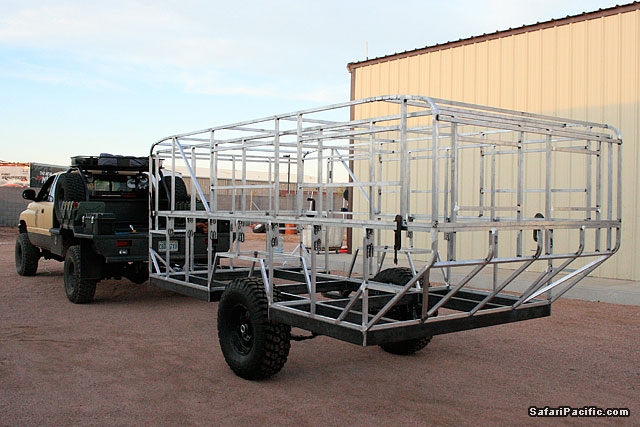
The upper roof section is pulled off and set on the floor. Its skinning time.

We start at the rear. The end sections have to be pre-bent by hand to fit the curve. We attached the skin with 3M's VHB tape. This was a very tedious process and no room for error. The VHB tape is super strong and once it touches, there's no pulling it off. The VHB tape was used in place of rivets. Rivets would take a long time to install, plus are another place to leak.


The rest of the sheets were laid over each other. This made all the seams face rearward. So during movement water and dust will roll over the seams and keep going.


We start at the rear. The end sections have to be pre-bent by hand to fit the curve. We attached the skin with 3M's VHB tape. This was a very tedious process and no room for error. The VHB tape is super strong and once it touches, there's no pulling it off. The VHB tape was used in place of rivets. Rivets would take a long time to install, plus are another place to leak.
The rest of the sheets were laid over each other. This made all the seams face rearward. So during movement water and dust will roll over the seams and keep going.
#38
05-22-2012
Join Date: Jul 2008
Location: Temecula, CA
Posts: 115
Likes: 0
Received 0 Likes
on
0 Posts


#42
05-22-2012
Join Date: Jul 2008
Location: Temecula, CA
Posts: 115
Likes: 0
Received 0 Likes
on
0 Posts
Before getting to far ahead, some steel work needs to be finished. The step is filled in with 3/16inch plate.
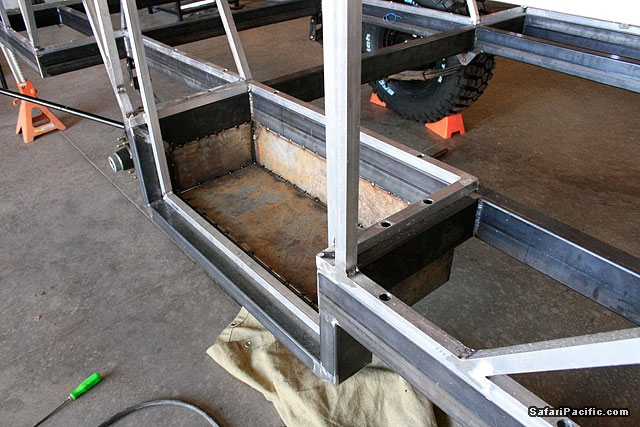
The front section is given a 3/16 inch gusset since the base step frame is only 1/8inch thick.

Corner marker lights are given 1/4 inch guards.

As well as the brake lights.

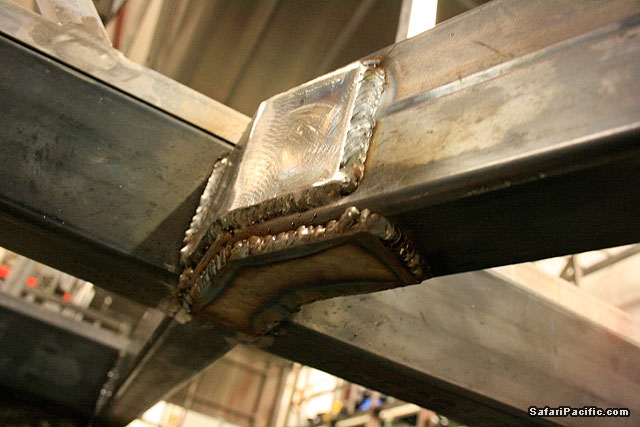
The tongue is given 1/4 inch plate reinforcements where the 2x4 tubing is welded together.
The front section is given a 3/16 inch gusset since the base step frame is only 1/8inch thick.
Corner marker lights are given 1/4 inch guards.
As well as the brake lights.
The tongue is given 1/4 inch plate reinforcements where the 2x4 tubing is welded together.
#43
05-22-2012
Join Date: Jul 2008
Location: Temecula, CA
Posts: 115
Likes: 0
Received 0 Likes
on
0 Posts
On to air bags. I spent a while to figure out the geometry in CAD for the suspension. I wanted to make sure the air bags didn't overextend, compress too much or tear from the axle swinging forward. Then I had a neighboring shop cut the parts out with their PlasmaCam. Upper and lower air bag plates are then fastened to the air bags.

Shock mount/reinforcing brackets are tacked on lower air bag plate.

A 2x4 section of chassis tubing is welded on to attach upper plate of air bag.

Upper shock tabs are welded on to chassis and gussets are welded on upper air bag plate.

After everything is tacked in place air bags and shocks are removed for final welding. The shock used is just temporary. The shocks ordered didn't arrive in time, so we used some cheap ones that were the same length.

Shock mount/reinforcing brackets are tacked on lower air bag plate.
A 2x4 section of chassis tubing is welded on to attach upper plate of air bag.
Upper shock tabs are welded on to chassis and gussets are welded on upper air bag plate.
After everything is tacked in place air bags and shocks are removed for final welding. The shock used is just temporary. The shocks ordered didn't arrive in time, so we used some cheap ones that were the same length.
#45
05-25-2012
Join Date: Jul 2008
Location: Temecula, CA
Posts: 115
Likes: 0
Received 0 Likes
on
0 Posts

#46
05-25-2012


