Off-Road Hard Sided Popup Trailer
#1
 05-07-2012


Join Date: Jul 2008
Location: Temecula, CA
Posts: 115
Likes: 0
Received 0 Likes
on
0 Posts
Off-Road Hard Sided Popup Trailer
Back in mid 2010 I was contacted by a customer to build him a custom hard sided popup camper to be mounted as a replacement for the bed of his truck. After designing the camper the customer realized he wanted more room, so I redid the design to a 14 foot tow-able trailer. I started the project at the end of September and finished it with the customer helping right up to the end of October. This is an old project, though I thought some of you guys on here would like the build.
The Concept

The Result

Details
Body size: 80" wide, 12' base length with a 2' kick up making 14' overall length, 80" inside height lifted and 56" inside height lowered.
Roof is controlled by electronic actuators rated for 200 lbs each with a 24" through.
Double door for access for roof in up or down position.
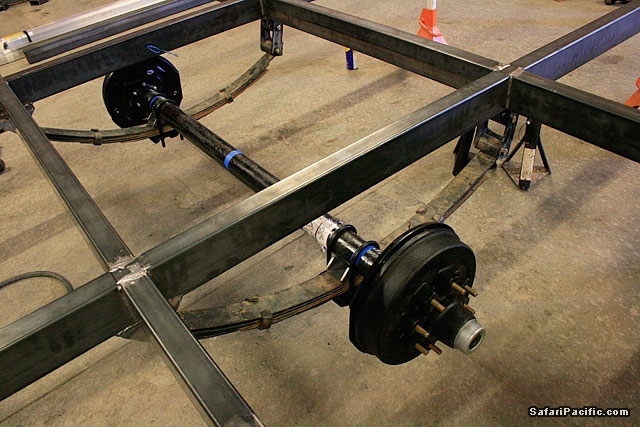
6000 lbs Solid Axle on leaf springs with air bags for weight control
Chassis is 2x4 .120 wall steel tubing.
Body structure is 1x1 .120 wall aluminum skeleton covered by .040 aluminum sheeting.
Weight once chassis and body complete was roughly 1600 lbs.
The Concept
The Result
Details
Body size: 80" wide, 12' base length with a 2' kick up making 14' overall length, 80" inside height lifted and 56" inside height lowered.
Roof is controlled by electronic actuators rated for 200 lbs each with a 24" through.
Double door for access for roof in up or down position.
6000 lbs Solid Axle on leaf springs with air bags for weight control
Chassis is 2x4 .120 wall steel tubing.
Body structure is 1x1 .120 wall aluminum skeleton covered by .040 aluminum sheeting.
Weight once chassis and body complete was roughly 1600 lbs.
Last edited by safaripacific; 05-07-2012 at 03:50 PM.
#2
05-07-2012
Join Date: Jul 2008
Location: Temecula, CA
Posts: 115
Likes: 0
Received 0 Likes
on
0 Posts


#3
05-07-2012
Join Date: Jul 2008
Location: Temecula, CA
Posts: 115
Likes: 0
Received 0 Likes
on
0 Posts


#4
05-07-2012
Join Date: Jul 2008
Location: Temecula, CA
Posts: 115
Likes: 0
Received 0 Likes
on
0 Posts


#5
05-07-2012
Join Date: Jul 2008
Location: Temecula, CA
Posts: 115
Likes: 0
Received 0 Likes
on
0 Posts

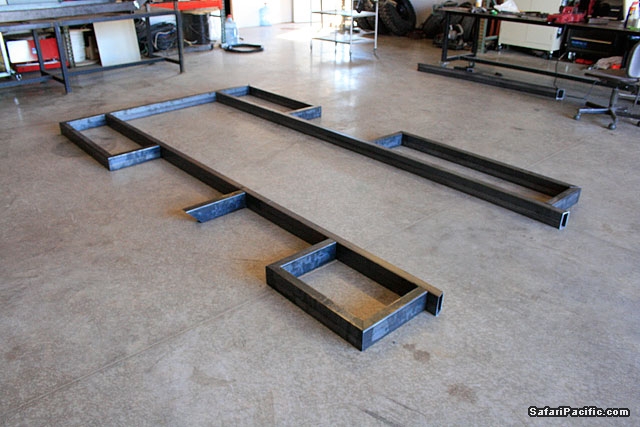
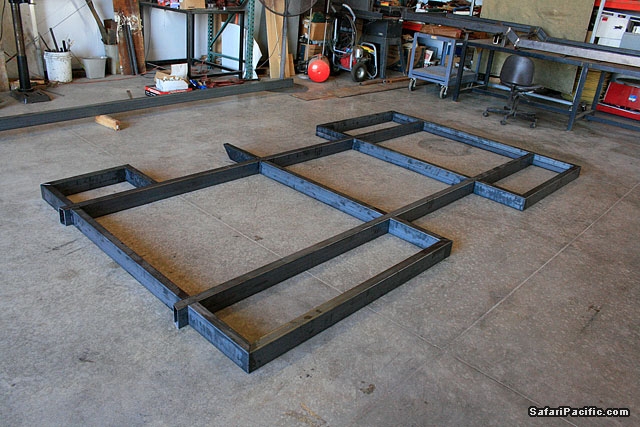
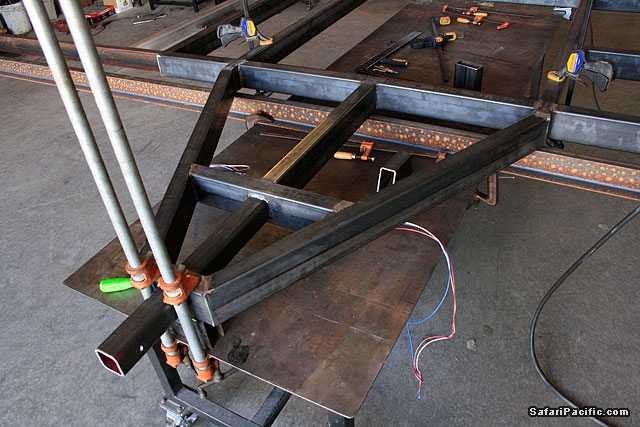
I clamp everything down after laying all the tubing in the correct places.

After tacking the tubing in place I start on the outside sections

When the outside sections are tacked in place I start working on the stairwell.

Then the whole chassis is flipped over to align the axle for mounts.

#6
05-07-2012
Join Date: Jul 2008
Location: Temecula, CA
Posts: 115
Likes: 0
Received 0 Likes
on
0 Posts


#8
05-07-2012
Join Date: Jul 2008
Location: Temecula, CA
Posts: 115
Likes: 0
Received 0 Likes
on
0 Posts
#9
05-07-2012
Join Date: Jul 2008
Location: Temecula, CA
Posts: 115
Likes: 0
Received 0 Likes
on
0 Posts
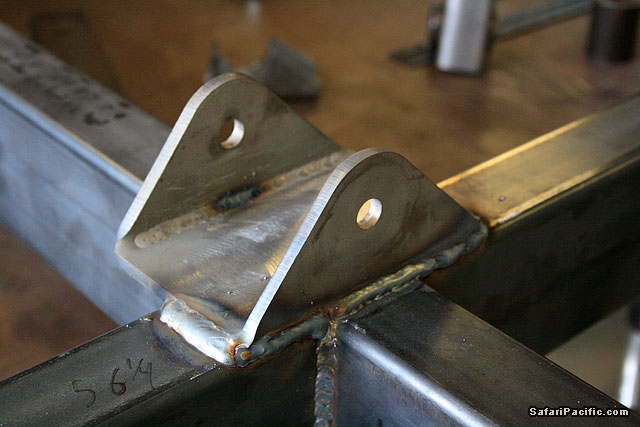
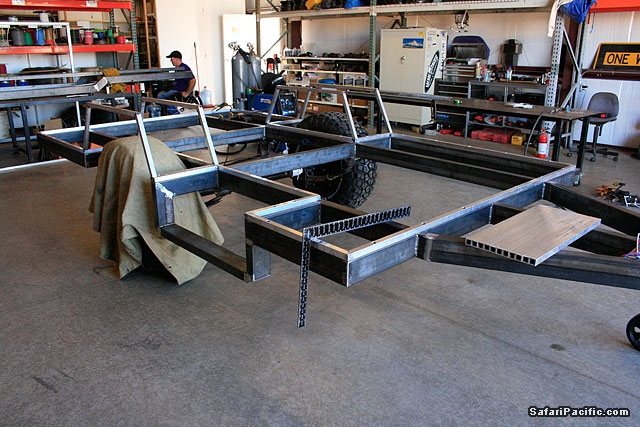
Next I square up the tongue.

Then weld the outside seams.

Receiver tubing is squared up and tacked in place.
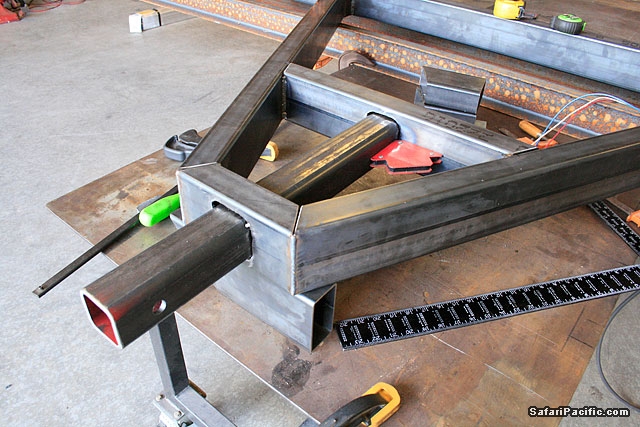
The backside of the back tongue tubing is cut out, so I can weld and tie the rear of the receiver tube to the outside.

Then I cut a 2x4 section to continue where the receiver tube ended.

Then weld the outside seams.
Receiver tubing is squared up and tacked in place.
The backside of the back tongue tubing is cut out, so I can weld and tie the rear of the receiver tube to the outside.
Then I cut a 2x4 section to continue where the receiver tube ended.
#10
05-07-2012
Join Date: Jul 2008
Location: Temecula, CA
Posts: 115
Likes: 0
Received 0 Likes
on
0 Posts


#13
05-07-2012

Join Date: Aug 2009
Location: Okeechobee,FL / Singapore
Posts: 563
Likes: 0
Received 0 Likes
on
0 Posts

#15
05-07-2012

Join Date: Nov 2011
Location: Pittsburgh, Pa.
Posts: 23
Likes: 0
Received 0 Likes
on
0 Posts

#17
05-11-2012
Join Date: Jul 2008
Location: Temecula, CA
Posts: 115
Likes: 0
Received 0 Likes
on
0 Posts
Thanks!
Thanks!
The guy I built this for is on the east coast. He was out by me for vacation then towed the trailer home when it was done. If your interested shoot me an email. travis at safaripacific.com Getting a trailer shipped is actually not too bad.
Thanks!
Thanks! Actually when it rolled out of the shop it only weight 1600 lbs (chassis and body only, no interior). Super light considering its size.
Thanks! Yeah I can do that. My brother has a shop here in Temecula. Most of my equipment is there right now.
Thanks!
Thanks!
Thanks! Actually when it rolled out of the shop it only weight 1600 lbs (chassis and body only, no interior). Super light considering its size.
Thanks! Yeah I can do that. My brother has a shop here in Temecula. Most of my equipment is there right now.
#18
05-11-2012
Join Date: Jul 2008
Location: Temecula, CA
Posts: 115
Likes: 0
Received 0 Likes
on
0 Posts


#20
05-11-2012
Join Date: Jul 2008
Location: Temecula, CA
Posts: 115
Likes: 0
Received 0 Likes
on
0 Posts
Now its onto the long process of building the body out of aluminum. The entire trailer was build by me in a CAD program. So from that I disassembled the parts of the trailer (tubing) and made cut lists. A friend of mine came to help start making all the cuts. Jim, the customer, arrived after the first couple weeks of building at took over cutting the material.
All the base tubing is clamped into the chassis.

The outside edges (corners) are welded together with my aluminum wire feed attachment to my welder.

Once welded all of the anchor holes are drilled. The top holes are larger to allow the bolt head and socket to clear.


I made a quick jig on my steel table and made the wheel wells. Then welded them on.

All the base tubing is clamped into the chassis.
The outside edges (corners) are welded together with my aluminum wire feed attachment to my welder.
Once welded all of the anchor holes are drilled. The top holes are larger to allow the bolt head and socket to clear.
I made a quick jig on my steel table and made the wheel wells. Then welded them on.
#21
05-11-2012
Join Date: Jul 2008
Location: Temecula, CA
Posts: 115
Likes: 0
Received 0 Likes
on
0 Posts
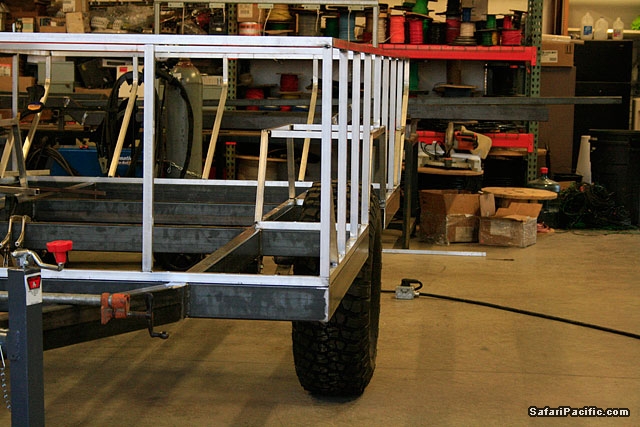
The body frame was secured to the chassis with self tapping bolts. Up rights for the lower walls are also cut and ready for welding on.(on tongue)
Next I start working on the rear kick up. Notches are made to create the correct bend. This was also designed in CAD. Makes production go much faster.
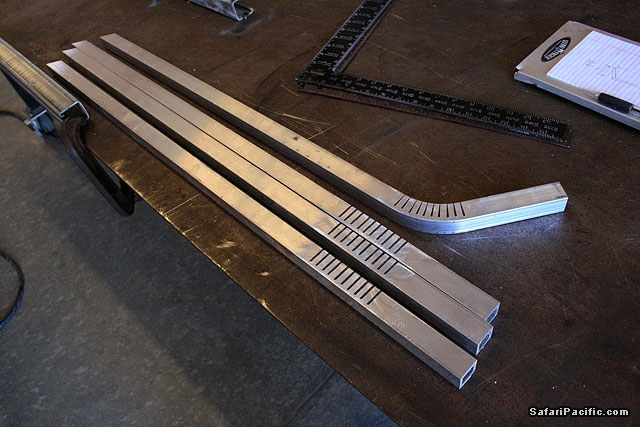
This is how the kick ups are to be placed.

Lower section of the wall welded and kick ups welded in place.


Next I start working on the rear kick up. Notches are made to create the correct bend. This was also designed in CAD. Makes production go much faster.
This is how the kick ups are to be placed.
Lower section of the wall welded and kick ups welded in place.
#22
05-11-2012
Join Date: Jul 2008
Location: Temecula, CA
Posts: 115
Likes: 0
Received 0 Likes
on
0 Posts


#24
05-11-2012
Join Date: Jul 2008
Location: Temecula, CA
Posts: 115
Likes: 0
Received 0 Likes
on
0 Posts
The middle wall on the back was tricky to keep square. I used a piece of steel tubing to help. This steel tube was also used on the lower walls.

Top bars on the middle wall set in place.

Upper perimeter completed. The customer Jim standing inside. He's over 6 foot tall by the way. Jim also put in a plywood floor. The original plan was to use a composite material for the floor, though in a time crunch we opted for plywood instead. The underside of the plywood was coated with bed liner material.

A crap ton of clamps were used to fasten the aluminum to the steel tubing, so everything stayed plum and square.

Next I work on the rear windows.

Top bars on the middle wall set in place.
Upper perimeter completed. The customer Jim standing inside. He's over 6 foot tall by the way. Jim also put in a plywood floor. The original plan was to use a composite material for the floor, though in a time crunch we opted for plywood instead. The underside of the plywood was coated with bed liner material.
A crap ton of clamps were used to fasten the aluminum to the steel tubing, so everything stayed plum and square.
Next I work on the rear windows.
#25
05-11-2012
Join Date: Jul 2008
Location: Temecula, CA
Posts: 115
Likes: 0
Received 0 Likes
on
0 Posts
He wanted the clearance to match his truck. The turnover angle from the front axle to rear axle on his truck is exactly the same as the rear axle to the trailer axle. So if the truck makes it the trailer will. The tires will also help while off-road on angles. Less likely to slide with km2 vs street tires. So it is an investment in keeping the trailer from being bashed up.


