off-road light wiring install, switch panel, before/after pics
#1
 02-11-2007


off-road light wiring install, switch panel, before/after pics
For those of you following my truck's progress, you might remember that I recently mounted (but didn't wire up) a set of $18 off-road lights:
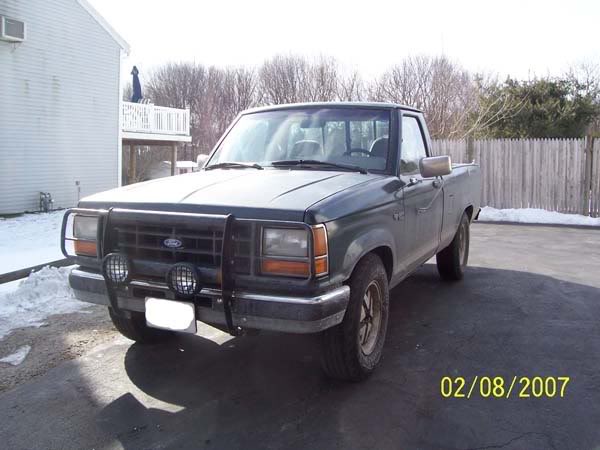
I wanted to wait until I had the time so I could do it right. Today, I finally took a few hours to:
-run proper wiring (through the firewall, zip-tied, and covered in loom)
-mount a switch
-install a relay
-aim the lights
The first thing I did was run the wires for the lights to the location of the relay. Fortunately for me, the brush guard had mounting tabs for the lights. Unfortunately, there is no guide or channel to hide or mount wiring in. So I chose to use split loom to, not only make the multi-color wires less visible, but also protect them against the harsh winter elements. The best route I could think of was straight back (across the bumper) and behind the grill.
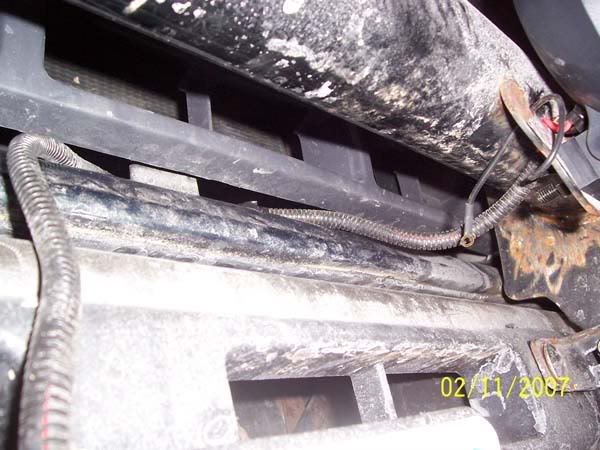
The other lights I installed had wiring that were just hanging. Those eventually got damaged from heat/moving parts, or just plain old ripped off. This time around I made sure the wires were run in a protected area, and secured w' zip-ties. If I installed these again, I'd buy black ones...

Bam. Now I can do donuts in the snow or hit some trails off-road...and in any case these wires aren't going ANYWHERE.
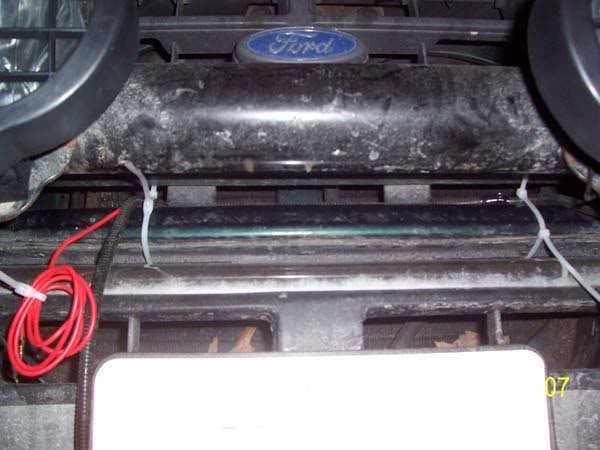
I wanted split loom to cover every part of the wire; especially where the electrical connection is being made at this junction. But unfortunately, 1/4" split loom isn't thick enough to cover all of it.
So I got the next size up (1/2") and pushed the smaller split loom inside to enclose the metal connectors:
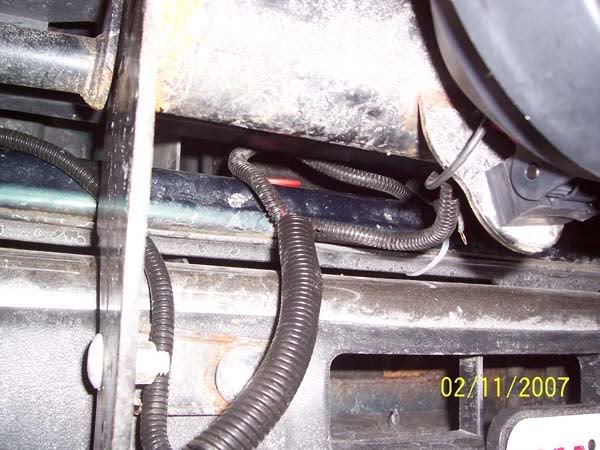
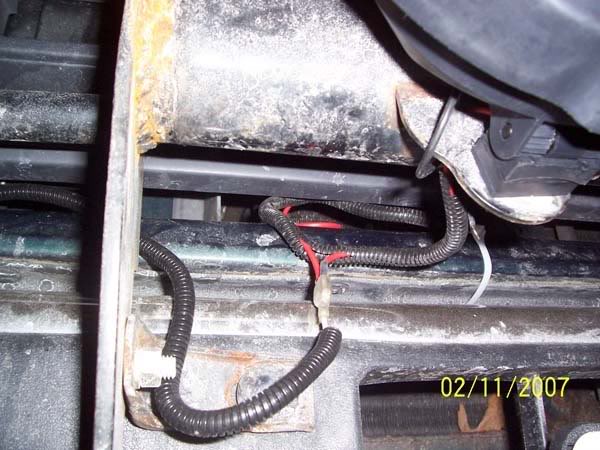
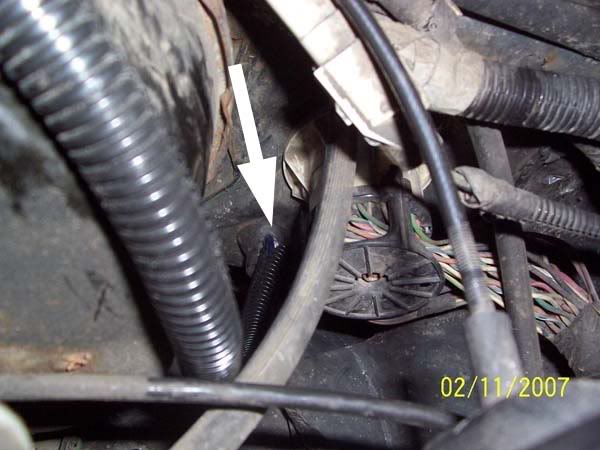
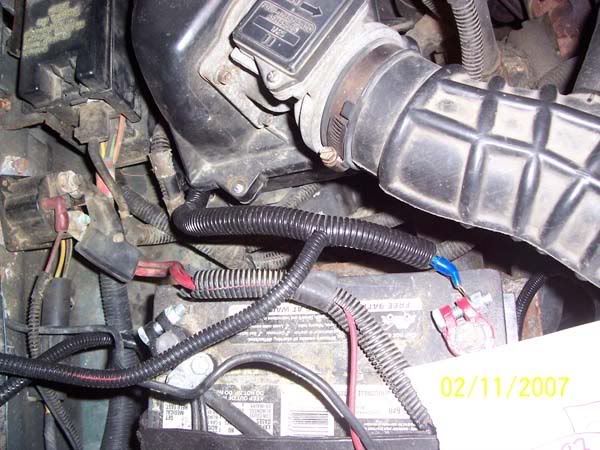
The wire then ran behind the grill, along the side of the radiator, and through this existing hole on the passenger side. Again, the split loom protects the wire from getting sliced.
I now have a +12 wire routed to the lights. The next part is a +12 fused wire going straight to the battery. Since the lights came with a wire that had a ring terminal on the end, I didn't bother making my own wire or doing anything fancy for the power tap. I just loosened the terminal, slid the ring terminal inside, and tightened it down next to the amp's power wire.

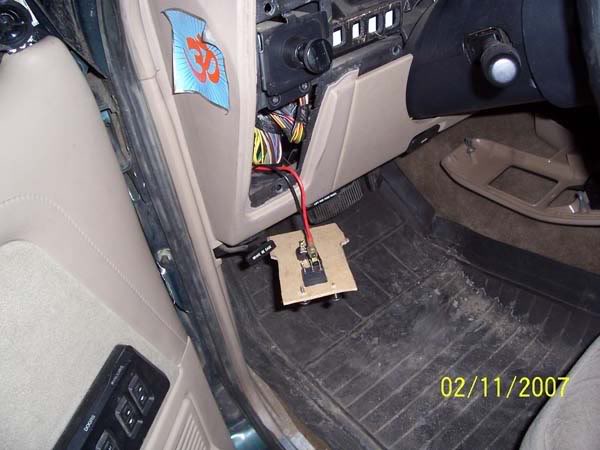
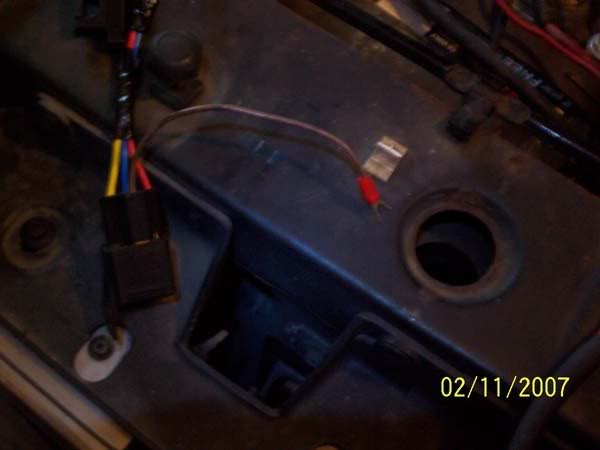
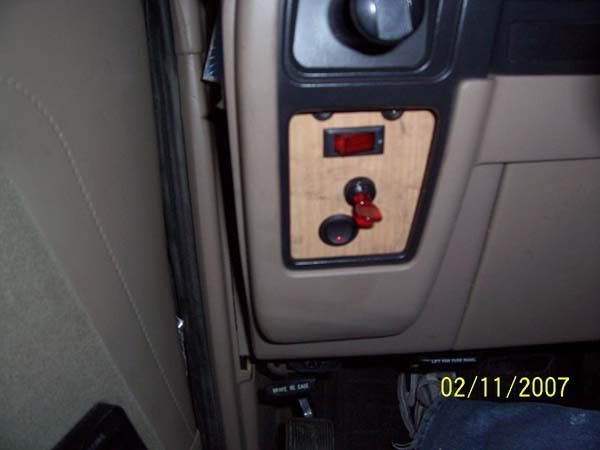
The next wire I needed was a +12 trigger coming from a switch on the inside of the truck so I can trip the relay. I wanted something out of the way that didn't mess up the factory dash, so I took out the panel underneath the headlight switch and mounted 3 switches on a temporary (cardboard) panel. It's mounted using the existing headlight switch screws. Again, the lights came w' a wire that had a spade terminal on it, so I just plugged that one into the switch instead of fabricating my own.
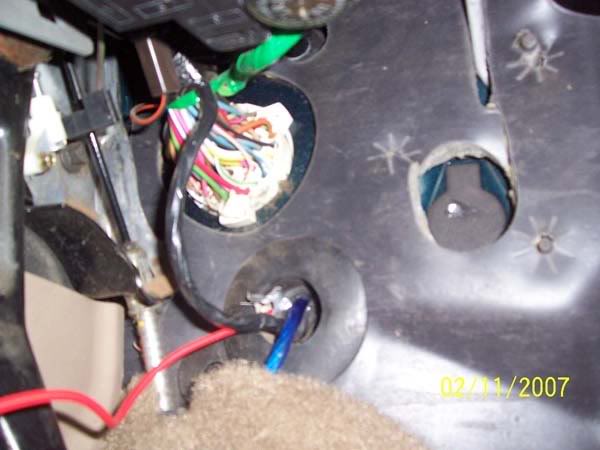
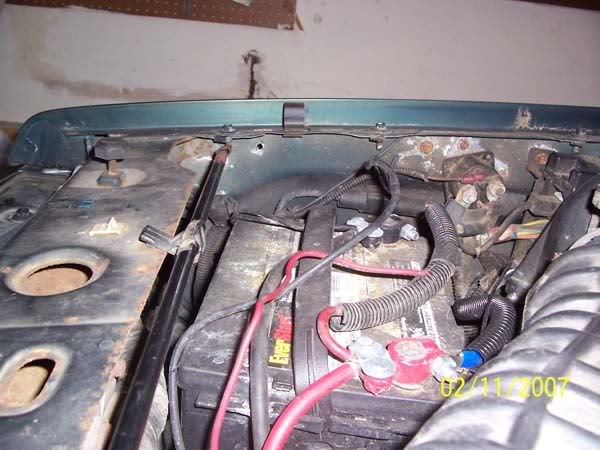
I didn't want a wire coming through the door, so it went through the hood-release grommet next to the amp's power wire:
Out the other side, and into split loom tubing:
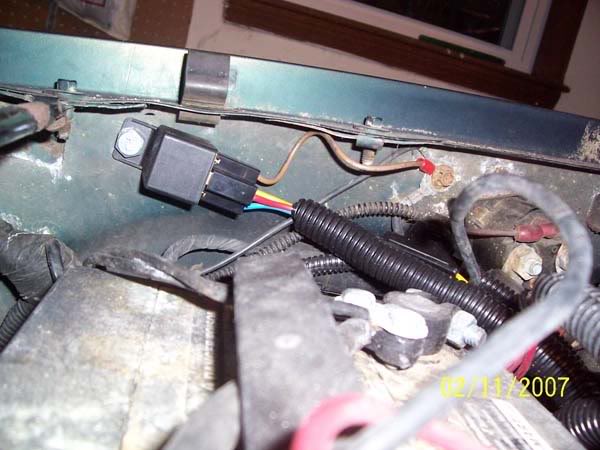
Now with a +12 wire for the lights, a +12 wire to the battery, and a +12 wire coming from the switch, I was ready to install the relay. My friend Mike prepped it by adding inline butt connectors (thanks man), so all I had to do was crimp the wires on. The only change I made was to remove the ground butt connector, hook up a spade terminal, and ground it close to where I mounted it:
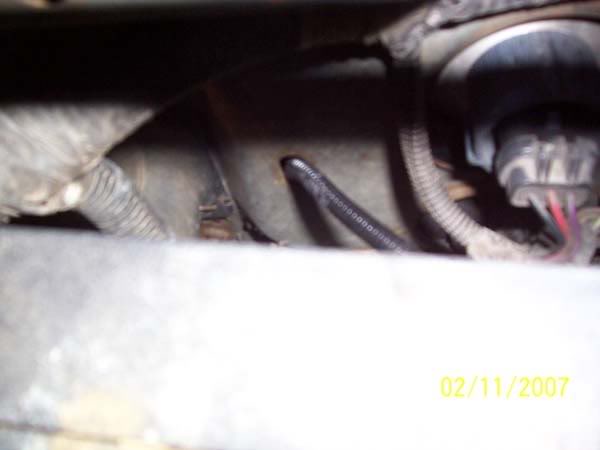
There was plenty of space to mount the relay, but I didn't feel like making new holes, so I poked around and found one on the side of the engine bay:
With the wires connected and covered up, I drilled out the relay's plastic, and mounted it with the ground wire going through it using a lag screw. It ended up looking great!

Unfortunately, my lag screw didn't thread close enough to its head to be tight. The ground wire kept falling out, so I mounted the ground wire to a factory location, and kept the relay on that hole. Now it looks much crappier. Boo hoo.
At the junction point between two split looms, I made small cutouts in the larger piece so that the smaller loom fit in nice and snug without opening up too much of a gap. It looks cleaner in person.
With the lights secure, the wiring complete, and the relay installed, I was ready to test them out.
Here's the temporary panel with the switch off:
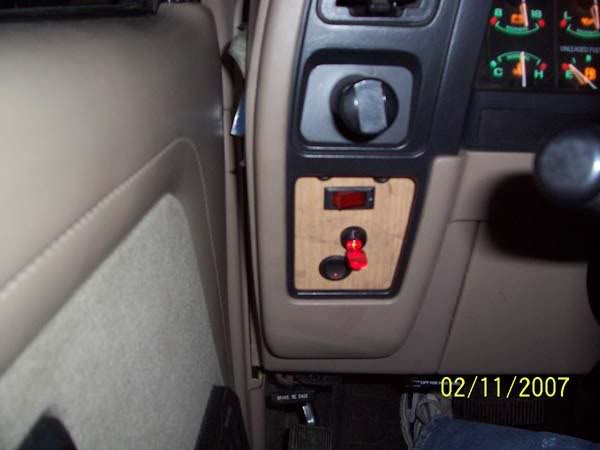
Switch on w' light:
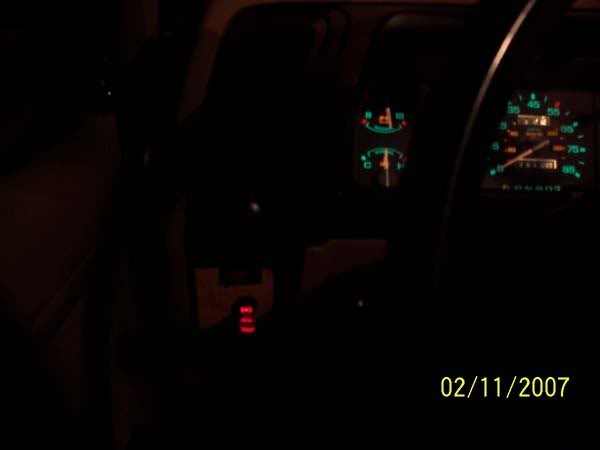
It took me a few tries using various settings, but here is what the illuminated switch looks like in the dark:
The camera doesn't nearly show how bright any of these lights actually are. They are all brighter in person, trust me. Just observe the amount of difference is between the beam patterns.
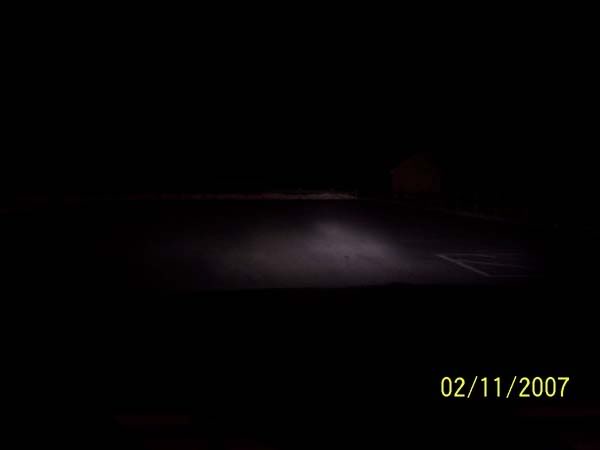
Low Beam:
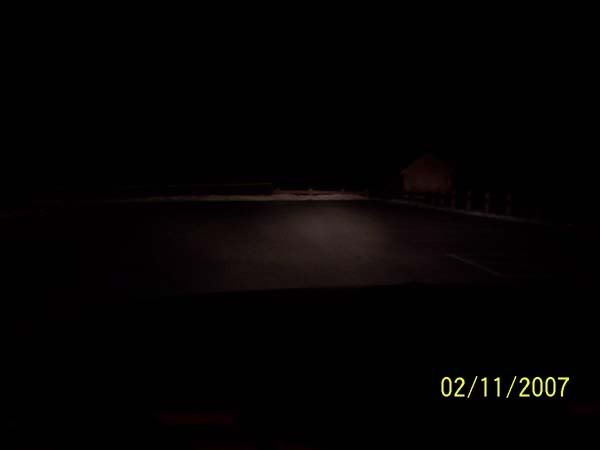
High Beam:
All of them WITH off-road lights:
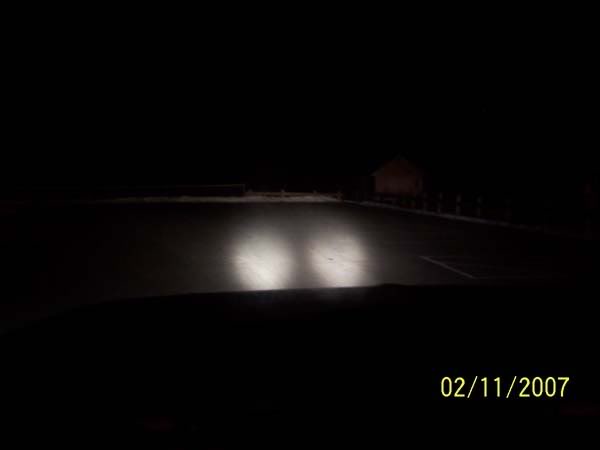
holy crap, wicked bright, eh? It's even better in person!
not bad for $18, 200W lights!
For someone like myself commuting everday at night, these are def. going to come in handy. Can we say increased visibility in rain and snow?
And the novel part about the relay is that even if I forget to turn the switch off myself, it will turn off automatically when I turn the truck off. And the 200W lights aren't going to melt any wires becuase they're powered w' thicker wires off the battery.
Let me know what you guys think...
I wanted to wait until I had the time so I could do it right. Today, I finally took a few hours to:
-run proper wiring (through the firewall, zip-tied, and covered in loom)
-mount a switch
-install a relay
-aim the lights
The first thing I did was run the wires for the lights to the location of the relay. Fortunately for me, the brush guard had mounting tabs for the lights. Unfortunately, there is no guide or channel to hide or mount wiring in. So I chose to use split loom to, not only make the multi-color wires less visible, but also protect them against the harsh winter elements. The best route I could think of was straight back (across the bumper) and behind the grill.
The other lights I installed had wiring that were just hanging. Those eventually got damaged from heat/moving parts, or just plain old ripped off. This time around I made sure the wires were run in a protected area, and secured w' zip-ties. If I installed these again, I'd buy black ones...
Bam. Now I can do donuts in the snow or hit some trails off-road...and in any case these wires aren't going ANYWHERE.
I wanted split loom to cover every part of the wire; especially where the electrical connection is being made at this junction. But unfortunately, 1/4" split loom isn't thick enough to cover all of it.
So I got the next size up (1/2") and pushed the smaller split loom inside to enclose the metal connectors:
The wire then ran behind the grill, along the side of the radiator, and through this existing hole on the passenger side. Again, the split loom protects the wire from getting sliced.
I now have a +12 wire routed to the lights. The next part is a +12 fused wire going straight to the battery. Since the lights came with a wire that had a ring terminal on the end, I didn't bother making my own wire or doing anything fancy for the power tap. I just loosened the terminal, slid the ring terminal inside, and tightened it down next to the amp's power wire.
The next wire I needed was a +12 trigger coming from a switch on the inside of the truck so I can trip the relay. I wanted something out of the way that didn't mess up the factory dash, so I took out the panel underneath the headlight switch and mounted 3 switches on a temporary (cardboard) panel. It's mounted using the existing headlight switch screws. Again, the lights came w' a wire that had a spade terminal on it, so I just plugged that one into the switch instead of fabricating my own.
I didn't want a wire coming through the door, so it went through the hood-release grommet next to the amp's power wire:
Out the other side, and into split loom tubing:
Now with a +12 wire for the lights, a +12 wire to the battery, and a +12 wire coming from the switch, I was ready to install the relay. My friend Mike prepped it by adding inline butt connectors (thanks man), so all I had to do was crimp the wires on. The only change I made was to remove the ground butt connector, hook up a spade terminal, and ground it close to where I mounted it:
There was plenty of space to mount the relay, but I didn't feel like making new holes, so I poked around and found one on the side of the engine bay:
With the wires connected and covered up, I drilled out the relay's plastic, and mounted it with the ground wire going through it using a lag screw. It ended up looking great!
Unfortunately, my lag screw didn't thread close enough to its head to be tight. The ground wire kept falling out, so I mounted the ground wire to a factory location, and kept the relay on that hole. Now it looks much crappier. Boo hoo.
At the junction point between two split looms, I made small cutouts in the larger piece so that the smaller loom fit in nice and snug without opening up too much of a gap. It looks cleaner in person.
With the lights secure, the wiring complete, and the relay installed, I was ready to test them out.
Here's the temporary panel with the switch off:
Switch on w' light:
It took me a few tries using various settings, but here is what the illuminated switch looks like in the dark:
The camera doesn't nearly show how bright any of these lights actually are. They are all brighter in person, trust me. Just observe the amount of difference is between the beam patterns.
Low Beam:
High Beam:
All of them WITH off-road lights:
holy crap, wicked bright, eh? It's even better in person!
not bad for $18, 200W lights!
For someone like myself commuting everday at night, these are def. going to come in handy. Can we say increased visibility in rain and snow?
And the novel part about the relay is that even if I forget to turn the switch off myself, it will turn off automatically when I turn the truck off. And the 200W lights aren't going to melt any wires becuase they're powered w' thicker wires off the battery.
Let me know what you guys think...
Last edited by Bhavesh; 02-11-2007 at 06:39 PM.

#4
02-11-2007
#5
02-11-2007

Join Date: Feb 2005
Location: Edmonton, Alberta
Posts: 1,027
Likes: 0
Received 0 Likes
on
0 Posts
wait a second..illegal whats your state say?
here if its under 3ft off the ground and under the headlights there fine..as long as there not blinding the hell out of on coming traffic..i run with my piaas on fog light mod all the time and i dont get flashed and the cops dont say anything..highbeam mode on the other hand..well them are for *** holes comin towards me with there highbeams on..
check your state laws on them you might be fine.

Thread
Thread Starter
Forum
Replies
Last Post
NinjaGinga1101
OLD - Interior, Exterior, Electrical, & Misc.
8
01-23-2015 07:59 PM
FMD
General Technical & Electrical
9
05-08-2008 07:54 PM
TheForce02
General Technical & Electrical
19
06-16-2006 04:14 PM


