
THE FIRST 2004+ LED CLUSTER IS HERE!!!! (pics galore)
#1
 08-17-2008

THE FIRST 2004+ LED CLUSTER IS HERE!!!! (pics galore)
So today I spent 8 hours making the first LED powered cluster on my 2004 ranger. We all know this has been done on the 2003 and older rangers but everyone who's tried to do it on a 2004 or newer has failed (as far as I know)
The problem lies in getting the needles off the damn arms. It has been a legend for years that they do not come off, but they indeed do, and this proves it.
Here is how she looks right now. There are still alot of parts to put back together but you get the idea. The one thing I learned is that I have to use smaller LED's because the ones I bought stick out a tad too far. I used all kinds of refletive tape on the inside to help project the light around but moving the LED's back will make it better. To get the needles back on in the correct position I used pictures before I took it apart. It seems very accurate so far but I will check with GPS and a scanner.
Here are some quick pictures, I'll update this thread as the project is really finished and no doubt it should be a sticky.


Thanks to Shane for recommending wet sanding.

The foil tape helps bounce the light around..

I used patches of tape to block some hotspots where the bulbs are.


The problem lies in getting the needles off the damn arms. It has been a legend for years that they do not come off, but they indeed do, and this proves it.
Here is how she looks right now. There are still alot of parts to put back together but you get the idea. The one thing I learned is that I have to use smaller LED's because the ones I bought stick out a tad too far. I used all kinds of refletive tape on the inside to help project the light around but moving the LED's back will make it better. To get the needles back on in the correct position I used pictures before I took it apart. It seems very accurate so far but I will check with GPS and a scanner.
Here are some quick pictures, I'll update this thread as the project is really finished and no doubt it should be a sticky.
Thanks to Shane for recommending wet sanding.
The foil tape helps bounce the light around..
I used patches of tape to block some hotspots where the bulbs are.

#3
08-17-2008
yeah they dim with the dimmer, but the picture is brighter than she is in real life. I'm going to buy some different LED's... Same color, but just ones that have different lighting "geometry". If anyone can recommend LED's i'm open minded.
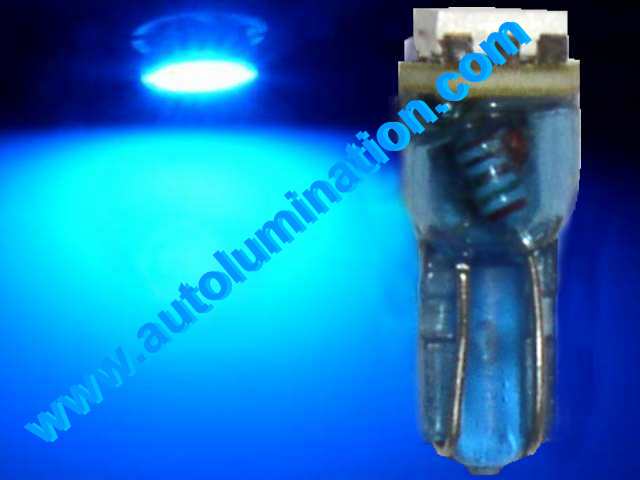
These are what I used, mainly because they worked so kick-a$$ in my HVAC controls.
they are too tall though, and they miss the clear "disperser" lense inside of the cluster.
I think I need to add foil tape to the back side of the gauge faces where it dosent need to shine through, I'm nervous that it might make the "sandwich too thick" though. I don't want the needles scraping the faces.
#4
08-17-2008


#6
08-17-2008
Needles seem to be working fine. I had a half tank before, and she fired up to a half tank after. When she warmed up it was at about 10:30 on the clock for temperature (about right) Tach seems dead on, and the speedo I only tested at about 5mph pulling into the garage. I have them on pretty loose so they will come back off with less effort than it took to get them off. I'll dial it all in later I just wanted to get everything rockin/rollin. I think the needles look dim because the led's are too tall and they are not really pressed all the way down. I'll fix all of this, but for now I know it works.
#7
08-17-2008

#10
08-17-2008
#11
08-17-2008
#13
08-17-2008
#15
08-17-2008
The messed up thing is, i did order a spare cluster, its just not here yet!
The damn ebay seller didnt ship right away, I'm thinking about leaving him a negative because its been sooooo long.
I did the HVAC last week
The fog switch the other day
Headlight switch is a piece of cake I'll do that this week.
I have alot of work to do putting things back together. - Then when all is done I'm going to do bright Red in the Evo cluster!
The cluster is coming back out, I'll take any more pics you guys want. Really the only difficult part is removing the needles. The 2003 and older method does not work.
#18
08-17-2008
Pictures can be deceiving when there is no flash.
It is brighter than stock, but the exposure amplified it in those pictures. Once I get the hot spots to fade down and the low spots brighter it will be perfect. I have some work to do, but the hard part is behind me.
#19
08-17-2008
The needles are molded with orange plastic.
They will look brighter when I finish. I may however switch to a different vehicles needles. I plan on putting blacklight LED's infront of the cluster so the white lights up UV-looking (My old car, my RX8 had that)
I'm also going to paint the black bezel body color (sonic blue)
Oh, and one other thing. The KPH speeds are in red, which is painted in FRONT of the cluster face (so you cant change that)
#20
08-17-2008
#22
08-17-2008
The strategy is the same for all 4.
The needles are pressed onto the shaft of the motor.
You can take your pinky finger and twist the needle back towards Zero, but it wants to stop right there.
This is the end of travel because the motor dosent want to spin anymore.
You have to continue to turn it and make the needle slip on the shaft.
After a few rotations, try and barely pull up as you do this
Round and round we go... Take your time. My Speedo, Fuel, and Temp came off easy.
The tach was a nightmare. The "miles reset" button is in the way, so you need to bend it each time you go past there. I rotated this for a full hour pulling up and she would not budge. I disassembled as much of the cluster as I could and then poped a flathead screwdriver between the needle base and the shaft. If you pull carefully you can open up the sandwich enough to get the edge of the screwdriver in and pop it free at the base. This sounds confusing and it is, I'll take a picture of what I mean. You have to be extremely careful because the odometer chip has pins that hold it to the base. Once you get the needles off you can slide these pins out and its a piece of cake.
#23
08-17-2008
Join Date: Jun 2008
Location: Suwanee,GA
Posts: 264
Likes: 0
Received 0 Likes
on
0 Posts
#24
08-18-2008
Join Date: Feb 2005
Location: SoCal
Posts: 4,428
Likes: 0
Received 0 Likes
on
0 Posts
#25
08-18-2008
One thing I learned is that the digital odometer is not back lit. It gets its light from the bulbs in the cluster. When I first plugged it in I had no way of knowing which way was right for the LED's (polarity wise) so I had no light from 3 of the 5 bulbs I LED'ed. Switching those backwards fixed this. The green paint behind the pin-odometer is still there, and the blue shines right through it and you can see the blue clearly. However I do think I understand how to scrape the green off the back side of the odometer so it is pure-pure blue. The green that is on there still just shades it a bit darker, it dosent really look greener at all.
The trick is that the odometer pin-board comes out. Once you get it all apart you can see from my pictures above (the ones where the clear plastic is alone). The odometer just connects to the main board by a bunch of little pins, like needles. These just thread thru holes on the main board. The odometer just clips in with 4 little clips and is easy to remove. I think we can just scrape off the paint on the back side of it.


