t-bar how to?
#1
 11-12-2009


#3
11-12-2009
#6
11-12-2009
Join Date: Jan 2005
Location: West Topsham, VT
Posts: 1,709
Likes: 0
Received 0 Likes
on
0 Posts
Be prepared if they are rusted in. My old ones were, BEAT the HELL out of them with no luck...PB, soakded literally in a bucket overnight, no luck.
What worked GREAT, was an oxyacetylene torch....heated for a few minutes, popped right out. (Heat the control arm or key, NOT the spring itself!)
What worked GREAT, was an oxyacetylene torch....heated for a few minutes, popped right out. (Heat the control arm or key, NOT the spring itself!)
#7
11-12-2009

You can do it a safer route too without special tools or the sketchyness of using a c-clamp or 2jaw puller.
unbolt upper shock mount
unbolt upper balljoint
unbolt sway bar link
possibly unbolt caliper
possibly loosen up the CV shaft
this will allow full droop of the LCA and inturn allow you to remove that 'block' that the adjustment bolt threads into, then remove the key with bar attached. done.
unbolt upper shock mount
unbolt upper balljoint
unbolt sway bar link
possibly unbolt caliper
possibly loosen up the CV shaft
this will allow full droop of the LCA and inturn allow you to remove that 'block' that the adjustment bolt threads into, then remove the key with bar attached. done.
#12
11-12-2009
Yah think? so why dont you help me understand a little.
From what i have read and gathered over the past few years is that the t-bar is held in a constant turned state. the adjuster bolt moves the key and turns the bar. if you tighten the bolt the bar is put under more pressure and if you loosen it then the presure is released. the amount of presure or turn on the bar is what hold the a arm up and gives it its spring like qualities.
what im not sure about is if once the bolt is completly taken out does the bar still have pressure on it if the truck is jacked up and the tires are off the ground. if any thing is incorrect please correct me or guide me to the answer.
#14
11-13-2009
Removal
Raise the vehicle.
Remove the torsion bar cover plate bolts.
Remove the torsion bar cover plate.
NOTE: Before relieving the torsion bar tension, measure and record the measurement of the torsion bar adjustment bolt. This measurement will be used as the preset depth for the new torsion bar adjustment bolt during installation.
Make preliminary adjustment references.
Measure and record the length where indicated.
Relieve the torsion bar tension.
Position the Torsion Bar Tool and adapters.
Tighten the Torsion Bar Tool until the torsion bar adjuster lifts off the adjustment bolt.
CAUTION: The torsion bar adjustment bolt is coated with dry adhesive and must be replaced if it is backed off or removed. Failure to do so can cause the adjustment bolt to loosen during operation and cause a loss of vehicle alignment.
Remove the torsion bar adjustment bolt.
Loosen the Torsion Bar Tool until the tension is removed from the torsion bar.
Remove the torsion bar.
Mark the torsion bar and the adjuster for proper installation.
Remove the torsion bar insulator.
Grasp the torsion bar and pull it free from the front suspension lower arm.
Installation
Position the torsion bar and the torsion bar adjuster.
Install the torsion bar adjuster.
Align the marks on the torsion bar and the torsion bar adjuster, then install the torsion bar adjuster.
Position the torsion bar insulator.
CAUTION: The torsion bar adjustment bolt is coated with dry adhesive and must be replaced if it is backed off or removed. Failure to do so can cause the adjustment bolt to loosen during operation and cause a loss of vehicle alignment.
Preload the torsion bar.
Install the Torsion Bar Tool and the adapters.
Tighten the Torsion Bar Tool until the new adjustment bolt can be installed.
Turn the adjustment bolt until the preliminary adjustment measurement (recorded length of the old adjustment bolt) is reached.
Remove the tool.
Install the torsion bar cover plate.
Position the torsion bar cover plate.
Install the torsion bar cover plate bolts.
Lower the vehicle.
#15
11-13-2009
Instead of using the torsion bar tool you can use a bottle jack. Just position the bottle jack at the same position as you would the torsion bar tool. Jack up the bottle jack to take the tension off and take out the adjustment bolt. The carefully lower the jack back down and remove the key, insulator, and torsion bar. Repeat for other side.
Just be sure to be very careful if you choose to use this method. Make sure that the tension is off of the key before you take out the adjustment bolt.
Just be sure to be very careful if you choose to use this method. Make sure that the tension is off of the key before you take out the adjustment bolt.
#16
11-13-2009
Hey check this link, its how i did it ( pre-key with #1 bars) it should be post #143
https://www.ranger-forums.com/forum2...eed-get-8.html
good luck
https://www.ranger-forums.com/forum2...eed-get-8.html
good luck
#18
11-13-2009
Just puting this here so it easier to find.
Ok sorry about the long wait. I just got dont getting everything together. I did it in photoshop on my camera phone so please excuse the pictures.....my camera is dead.
I wont type much but if you have any questions at the end please feel free to PM with them.
lets get started
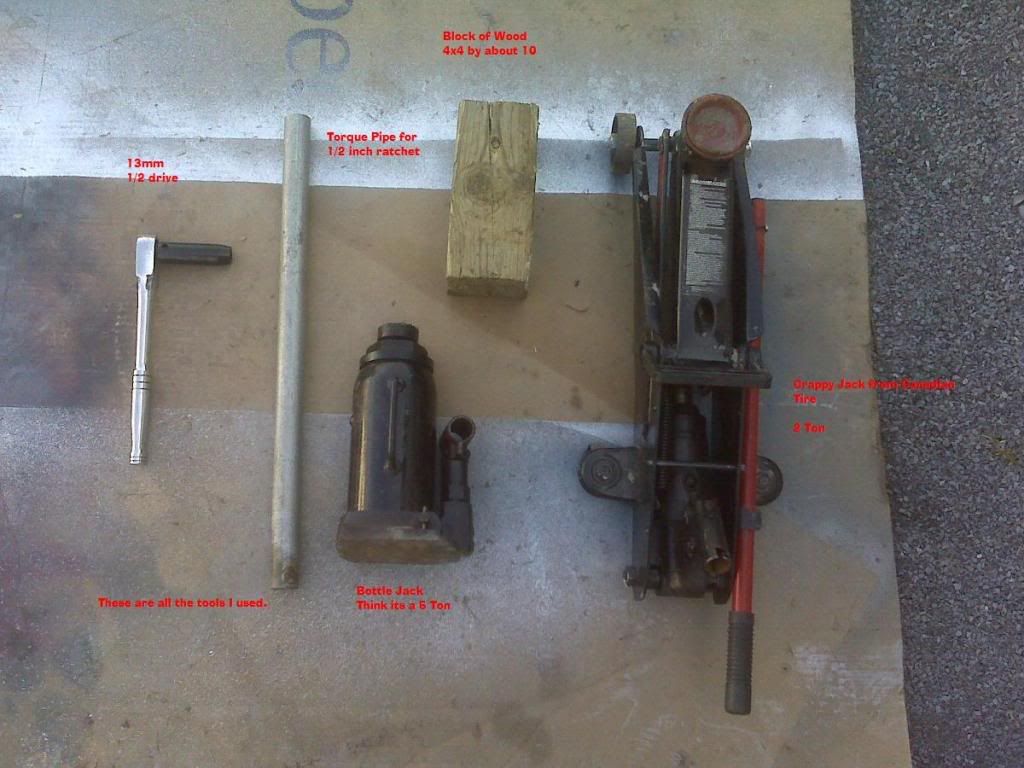
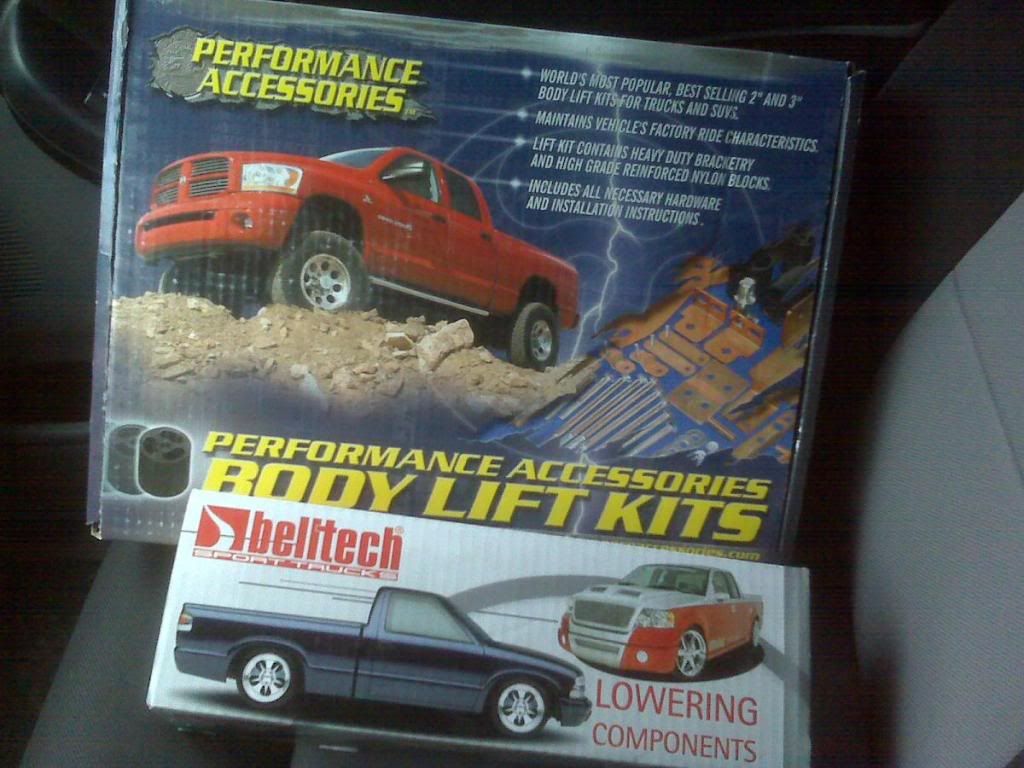
These are ALL the tools I used:
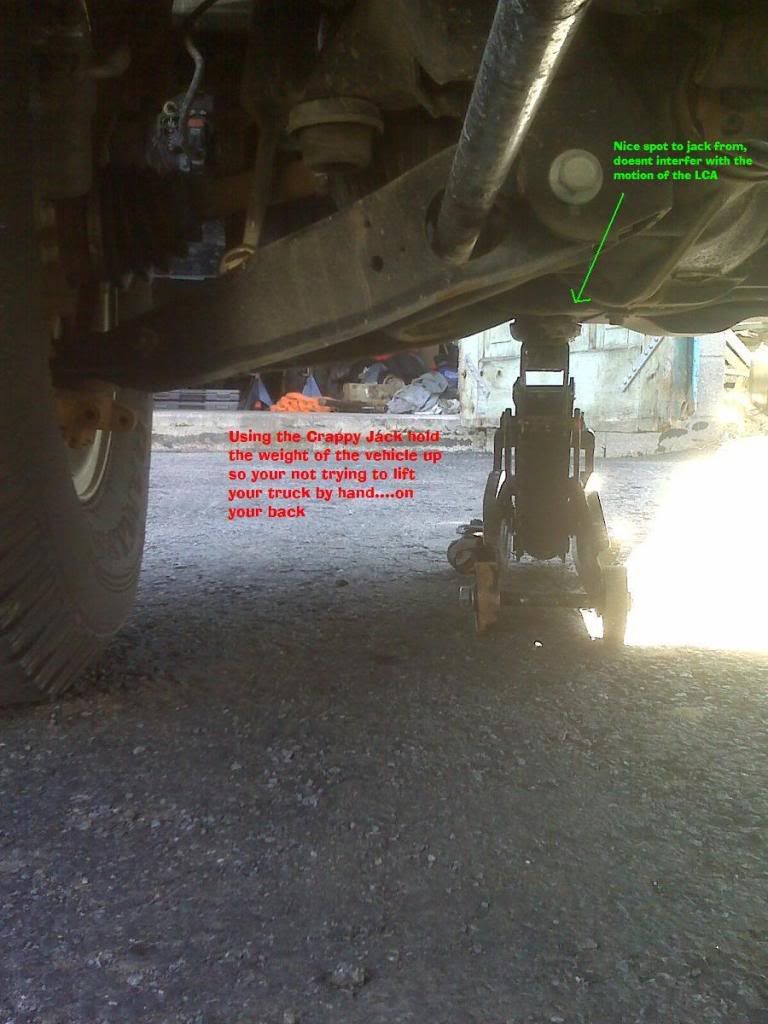
Take the weight off the front end:
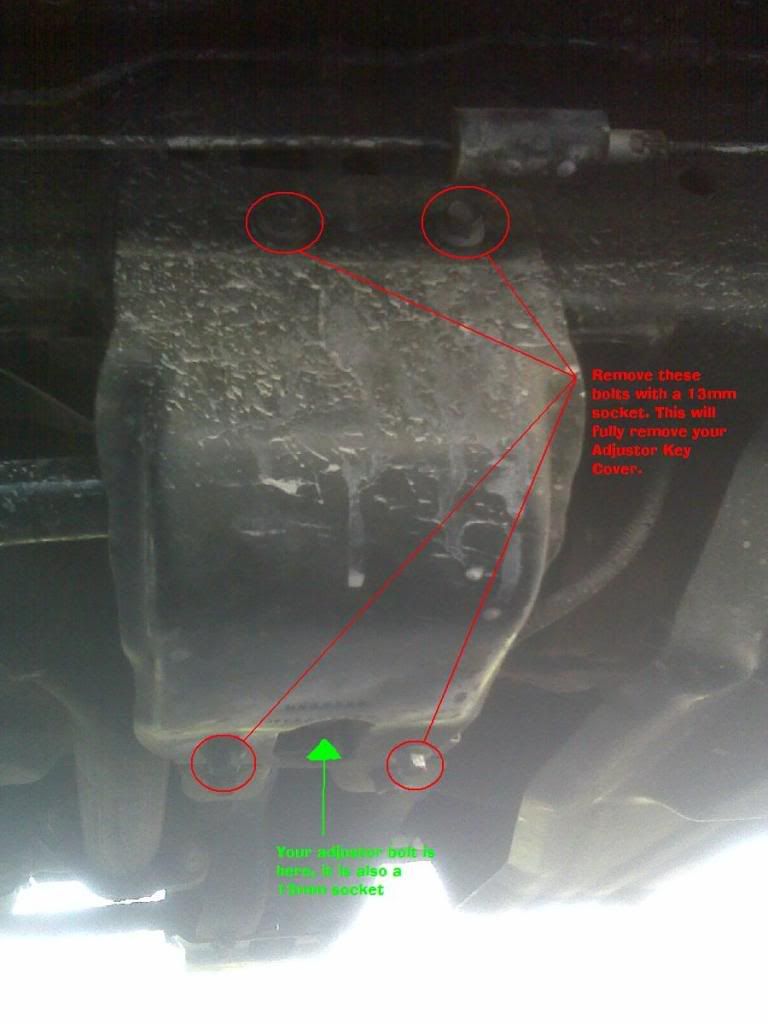
Take the Cover plate off to excess the key and bars:
Now what i did was use a bottle jack to hold tenson on the bars. First i removed my adjustor bolt all the way, then put the jack in there and raised it up till i could get my adjustor bolt plate out of the crossmember. Then take the old key and bar out. Reverse the steps to reinstall them.
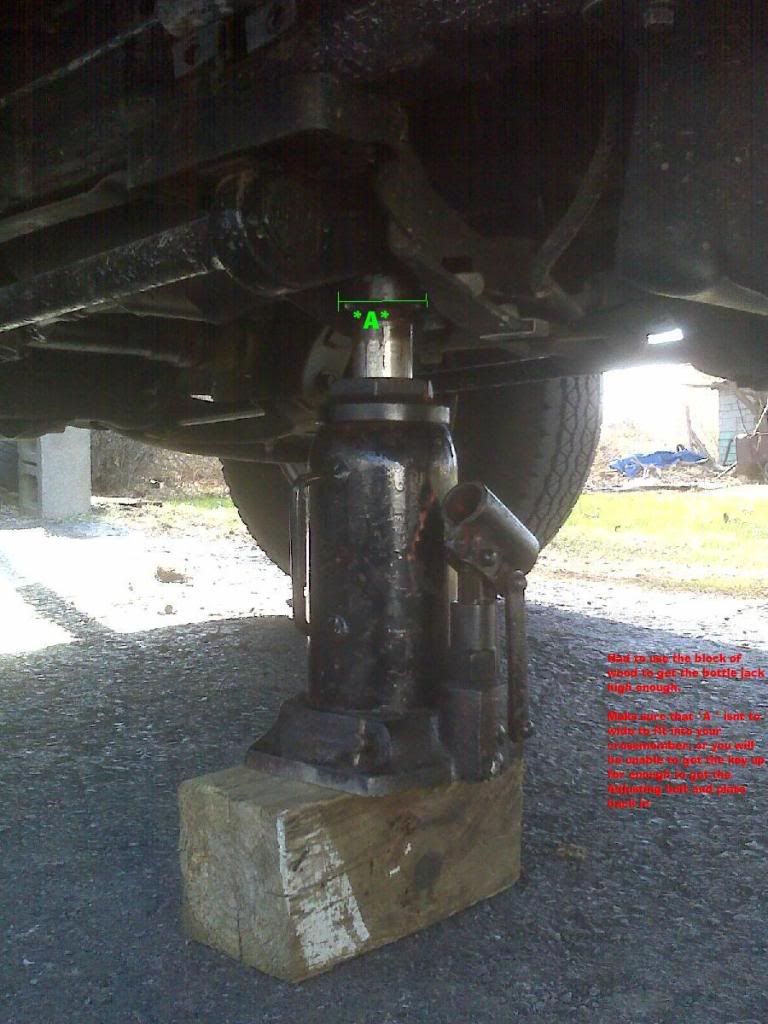
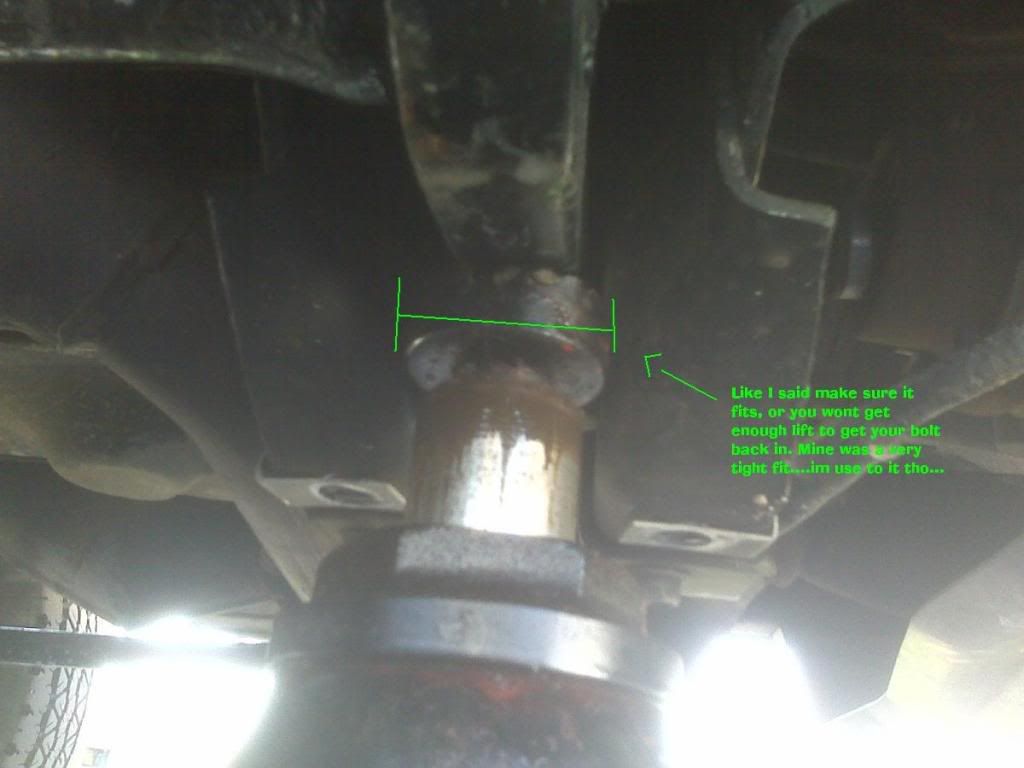

might have a bit of a time getting the plate back in place....or atleast i did
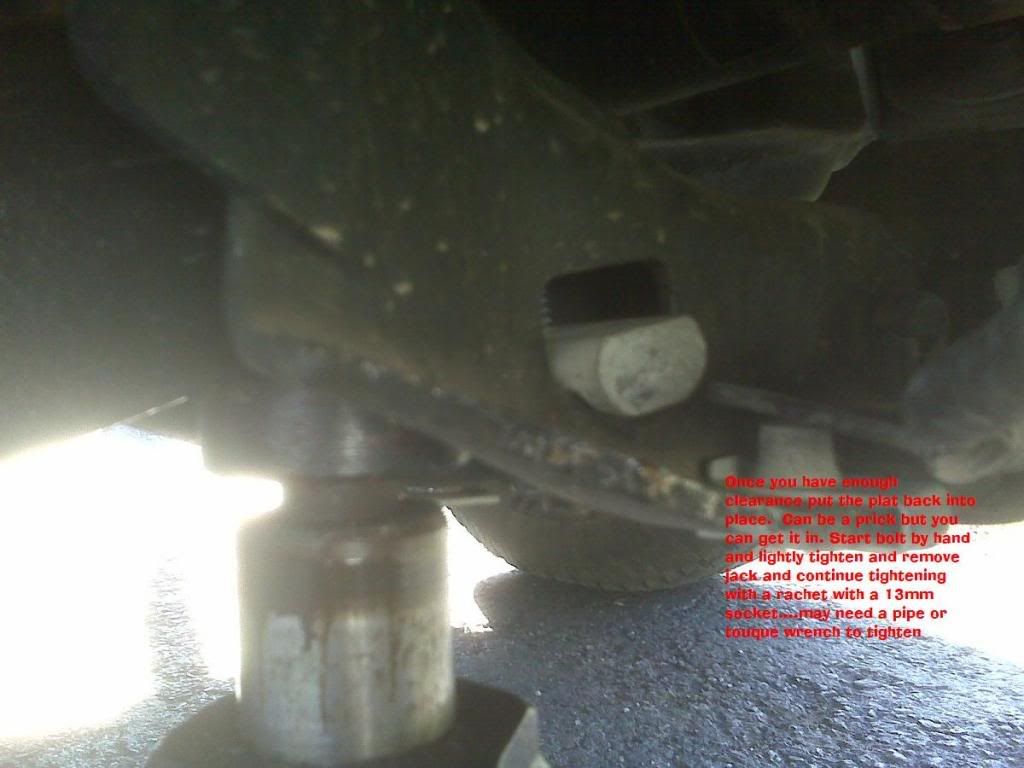
And then just repeat on other side.
I must say it wasnt that hard, basic tools in my driveway. And yes i did do it by myself, but having another person there wouldnt be a bad idea.
OH and i and my next trick?....Just fell in my truck one day.....uh
I wont type much but if you have any questions at the end please feel free to PM with them.
lets get started
These are ALL the tools I used:
Take the weight off the front end:
Take the Cover plate off to excess the key and bars:
Now what i did was use a bottle jack to hold tenson on the bars. First i removed my adjustor bolt all the way, then put the jack in there and raised it up till i could get my adjustor bolt plate out of the crossmember. Then take the old key and bar out. Reverse the steps to reinstall them.
might have a bit of a time getting the plate back in place....or atleast i did
And then just repeat on other side.
I must say it wasnt that hard, basic tools in my driveway. And yes i did do it by myself, but having another person there wouldnt be a bad idea.
OH and i and my next trick?....Just fell in my truck one day.....uh


Thread
Thread Starter
Forum
Replies
Last Post
tonkaranger04
General Ford Ranger Discussion
3
12-20-2005 06:40 PM


