BODY LIFT PREP & TIPS
#1
 04-27-2013


BODY LIFT PREP & TIPS
There are alot of threads about doing body lifts. Specially for 98+ Rangers with the torsion suspension, since a 3" body lift is the cheapest way to lift the truck up for larger tires.
So since there are so many threads, I thought I would create a list of PREP & TIPS for doing the lift. I have posted these tips up in a few threads, helping others that had questions about doing a body lift.
So here's my quick write up.
-----
DISCLAIMER: I nor Ranger-Forums.com will be held liable or responsible for damages or injuries. These tips are intended to help make the body lift process go easier.
----
BODY LIFT TIPS
This is not a full instruction list, just a quick list of tips and tools. Please read and follow the full instructions that came with your kit.
Required tools:
Propane or Map Gas torch
Dead blow hammer
Regular heavy hammer
Drill and drill bits, and drilling/tapping oil/lube
Jacks
Wood blocks
4x6 or 4x8 piece of lumber, about 6’ long.
PB Blaster or WD40 or Liquid Wrench
Flashlights or other moveable lights.
Hose Cutters
Screwdrivers
Impact Wrench, electric or air.
RATCHETS & SOCKETS
You will want the following ratchets and sockets.
� drive Ratchet and sockets, metric and SAE.
3/8 drive Ratchet and sockets, also metric and SAE.
You will also need various extensions for these ratchets, 1” to 3” long.
� or � drive Ratchet (long breaker bar) and metric and SAE sockets, preferably impact sockets.
You will also need some extensions for these as well. The front core supports, you will need 20” worth of extensions to get at. Either one long 20” or use a 10” and two 5”s.
TORX STAR DRIVES
Most stock bed bolts require a torx/star drive to remove, I believe it’s a T57… its best to have a variety and have them in socket form to put onto the breaker bar.
WRENCHES
SAE & Metric Wrench sets, preferably the ratcheting types.
PREPARATION
Don’t wait to tackle the body lift all at once, in one weekend. Prep early, start doing stuff 2-3 weeks in advance.
First, every day for two weeks, spray down all the bed and cab bolts, as well as all the bumper bolts with the PB Blaster or WD40.
After 2 weeks or so of spraying the bolts down, use your torch to heat up the bed bolts and break them free with your breaker bar. Go ahead and remove them one by one, clean the threads up with a wire brush and then put each back in and re-tighten. Then do the same for the 4 cab bolts. Don’t worry about the front two core ones up by the radiator, those will have to wait.
Now tackle the bumpers, and the tow hooks. The tow hooks are a major pain. It will take a lot of time to remove them. Once you get your tow hooks and front/rear bumpers off, you can put the front bumper back on, keep the tow hooks off.
Now the rear bumper, there are brackets and bolts on that to heat up and also remove. Go ahead and remove the bolts, and put it back together and back on the truck.
You are doing all this work so when the time comes to spend the day doing the actual lift, you won’t be spending all day fighting with these bolts, making things go a lot faster the day of the lift.
DAY OF THE LIFT
Start by measuring the gap between the bed and cab, write it down.
Remove the rear bumper.
Remove the fuel filler neck.
Now loosen up all the bolts, they should be easier to loosen. Remove the bolts from one side of the bed only.
Use a jack of a long piece of lumber to lift up the side and slide in the spacer blocks.
Put new bolts in, don’t tighten all the way, and then repeat for the other side.
Then snug everything down, not too tight, and check your measurement on your bed/cab gap.
Now remove the front bumper, it should be a lot easier to remove now.
Follow all the other instructions in the kit, unbolt the radiator, wire connectors, grounding straps, steering rod, manual shifter (if you have a manual) etc. and do one side of the cab at a time, like you did the bed.
Total time to complete stuff on the day of the lift, about 8-10 hours.
After a week of driving, double check and tighten all the bed and cab bolts.
It is highly recommended to use BLUE LOCTITE on the bolts.
REMEMBER THIS IS NOT A COMPLETE list of detailed instructions, this is just a quick list of tips and advice.
----------------------------
Next if you have a 98-00 Ranger with the stock fender flares/mudflaps, and you are wanting to go with some 33x12.5 tires, you will have to remove your stock mudflaps...specially the front ones...
the tires will rub in the back of the wheel well on tight turns and when on uneven ground... like turning into an incline etc...
You will also need to trim your front valance.
look at this pic
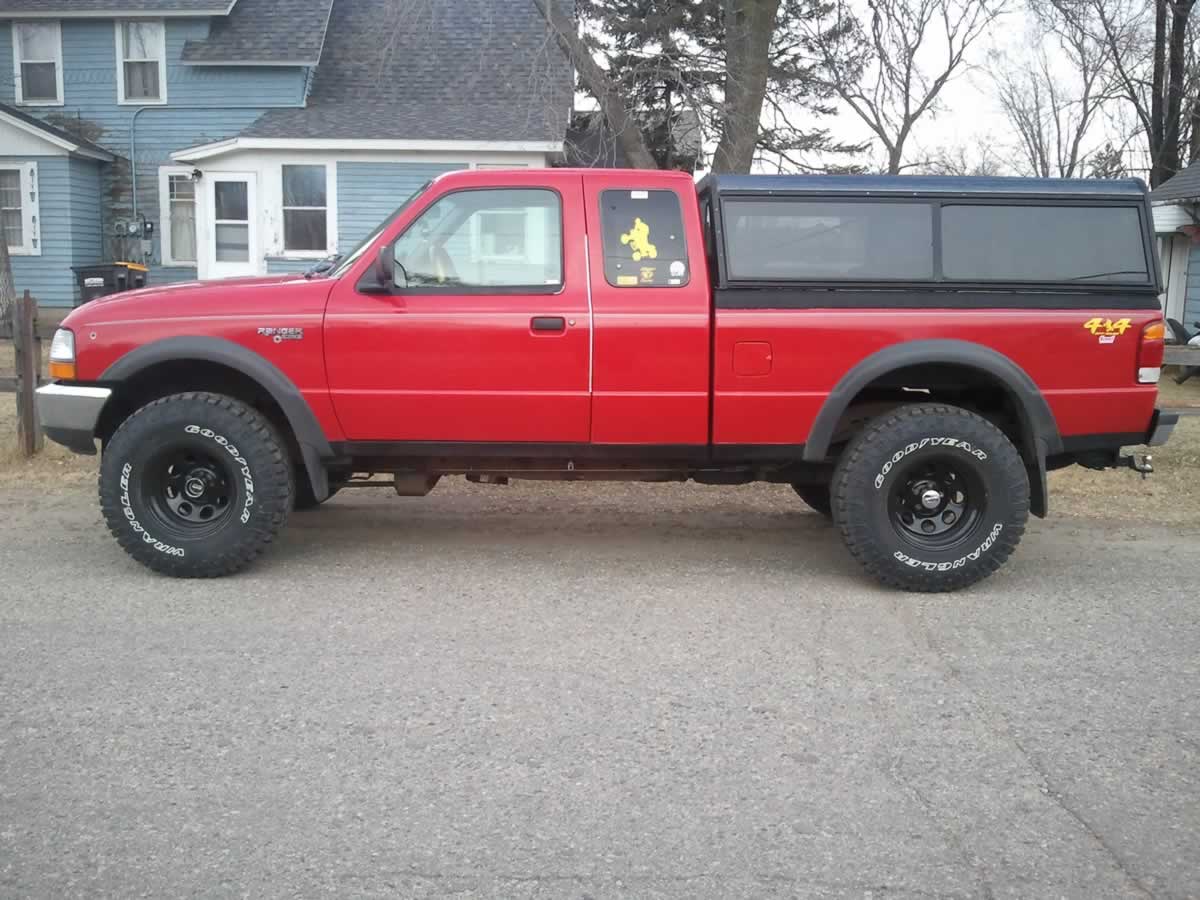
Diagram Pic

Look at the front tire areas around the stock mudflaps and upper front valence.... this is fine on even ground... but on bumpy ground flexing the suspension it rubs... and more with the wheels turned.
heres the best i have with a trimmed valence and removed the stock flares and flaps and put on bushwacker flares

ALSO take in mind if u go with a wider tire that sticks out past your fenders and/or flares, u will be getting rock chips in your paint!! Trust me! Get some wider flares!
After going thru all this... i wish i had went with 32s!!!! Nice big tires still and still more wheel well room for flex!!
---
Also compare these pics
Explorer rims with 31"BFGs, no body lift.

Explorer rims with 31"BFgs with 3"body lift.

New 33" tires and rims with 3"body lift, and my old black aluminum topper.
Also heres some close ups, this is with about 1.5"-2 Tbar crank:
Back of the front wheel well...

Front wheel well with the tip of the valence that needs trimming off.

Also, if you have stock flares, or no flares, the 33x12.5 tires will stick out past them, and in some states this is ILLEGAL. But the main issue with them sticking out past the fenders/flares is you will be getting rock chips in your paint, trust me, you will want to invest in wider aftermarket flares.
-----
Thank you for taking the time to read this, and I hope these tips and suggestions are helpful to people in the future.
If I missed anything, or if you would like me to add something, please feel free to chime in.
So since there are so many threads, I thought I would create a list of PREP & TIPS for doing the lift. I have posted these tips up in a few threads, helping others that had questions about doing a body lift.
So here's my quick write up.
-----
DISCLAIMER: I nor Ranger-Forums.com will be held liable or responsible for damages or injuries. These tips are intended to help make the body lift process go easier.
----
BODY LIFT TIPS
This is not a full instruction list, just a quick list of tips and tools. Please read and follow the full instructions that came with your kit.
Required tools:
Propane or Map Gas torch
Dead blow hammer
Regular heavy hammer
Drill and drill bits, and drilling/tapping oil/lube
Jacks
Wood blocks
4x6 or 4x8 piece of lumber, about 6’ long.
PB Blaster or WD40 or Liquid Wrench
Flashlights or other moveable lights.
Hose Cutters
Screwdrivers
Impact Wrench, electric or air.
RATCHETS & SOCKETS
You will want the following ratchets and sockets.
� drive Ratchet and sockets, metric and SAE.
3/8 drive Ratchet and sockets, also metric and SAE.
You will also need various extensions for these ratchets, 1” to 3” long.
� or � drive Ratchet (long breaker bar) and metric and SAE sockets, preferably impact sockets.
You will also need some extensions for these as well. The front core supports, you will need 20” worth of extensions to get at. Either one long 20” or use a 10” and two 5”s.
TORX STAR DRIVES
Most stock bed bolts require a torx/star drive to remove, I believe it’s a T57… its best to have a variety and have them in socket form to put onto the breaker bar.
WRENCHES
SAE & Metric Wrench sets, preferably the ratcheting types.
PREPARATION
Don’t wait to tackle the body lift all at once, in one weekend. Prep early, start doing stuff 2-3 weeks in advance.
First, every day for two weeks, spray down all the bed and cab bolts, as well as all the bumper bolts with the PB Blaster or WD40.
After 2 weeks or so of spraying the bolts down, use your torch to heat up the bed bolts and break them free with your breaker bar. Go ahead and remove them one by one, clean the threads up with a wire brush and then put each back in and re-tighten. Then do the same for the 4 cab bolts. Don’t worry about the front two core ones up by the radiator, those will have to wait.
Now tackle the bumpers, and the tow hooks. The tow hooks are a major pain. It will take a lot of time to remove them. Once you get your tow hooks and front/rear bumpers off, you can put the front bumper back on, keep the tow hooks off.
Now the rear bumper, there are brackets and bolts on that to heat up and also remove. Go ahead and remove the bolts, and put it back together and back on the truck.
You are doing all this work so when the time comes to spend the day doing the actual lift, you won’t be spending all day fighting with these bolts, making things go a lot faster the day of the lift.
DAY OF THE LIFT
Start by measuring the gap between the bed and cab, write it down.
Remove the rear bumper.
Remove the fuel filler neck.
Now loosen up all the bolts, they should be easier to loosen. Remove the bolts from one side of the bed only.
Use a jack of a long piece of lumber to lift up the side and slide in the spacer blocks.
Put new bolts in, don’t tighten all the way, and then repeat for the other side.
Then snug everything down, not too tight, and check your measurement on your bed/cab gap.
Now remove the front bumper, it should be a lot easier to remove now.
Follow all the other instructions in the kit, unbolt the radiator, wire connectors, grounding straps, steering rod, manual shifter (if you have a manual) etc. and do one side of the cab at a time, like you did the bed.
Total time to complete stuff on the day of the lift, about 8-10 hours.
After a week of driving, double check and tighten all the bed and cab bolts.
It is highly recommended to use BLUE LOCTITE on the bolts.
REMEMBER THIS IS NOT A COMPLETE list of detailed instructions, this is just a quick list of tips and advice.
----------------------------
Next if you have a 98-00 Ranger with the stock fender flares/mudflaps, and you are wanting to go with some 33x12.5 tires, you will have to remove your stock mudflaps...specially the front ones...
the tires will rub in the back of the wheel well on tight turns and when on uneven ground... like turning into an incline etc...
You will also need to trim your front valance.
look at this pic
Diagram Pic
Look at the front tire areas around the stock mudflaps and upper front valence.... this is fine on even ground... but on bumpy ground flexing the suspension it rubs... and more with the wheels turned.
heres the best i have with a trimmed valence and removed the stock flares and flaps and put on bushwacker flares
ALSO take in mind if u go with a wider tire that sticks out past your fenders and/or flares, u will be getting rock chips in your paint!! Trust me! Get some wider flares!
After going thru all this... i wish i had went with 32s!!!! Nice big tires still and still more wheel well room for flex!!
---
Also compare these pics
Explorer rims with 31"BFGs, no body lift.
Explorer rims with 31"BFgs with 3"body lift.
New 33" tires and rims with 3"body lift, and my old black aluminum topper.
Also heres some close ups, this is with about 1.5"-2 Tbar crank:
Back of the front wheel well...
Front wheel well with the tip of the valence that needs trimming off.
Also, if you have stock flares, or no flares, the 33x12.5 tires will stick out past them, and in some states this is ILLEGAL. But the main issue with them sticking out past the fenders/flares is you will be getting rock chips in your paint, trust me, you will want to invest in wider aftermarket flares.
-----
Thank you for taking the time to read this, and I hope these tips and suggestions are helpful to people in the future.
If I missed anything, or if you would like me to add something, please feel free to chime in.
#4
04-27-2013

-blue locktite? they send a tube of RED locktite with the kits for a reason.
-you don't need any type of hammer
-i don't have flares, I don't have any rock chips, and my tires poke out a lot. aftermarket flares are disgusting, i'd never buy them. keep a good coat of wax on the entire truck and you shouldn't have an issue.
-tow hooks aren't hard to remove unless you're a sissy
-you don't need any SAE sockets
-you shouldn't be using a ratchet as a breaker bar unless you like ruining your tools
-as mentioned above, the bed bolts are T55. 4 door extended cabs also require a T50 to remove the rear jump seats
-if you don't have air tools, find someone who does and make your life easier.
-if you overthink it, you're instantly going to have problems. it can be done alone in about 10 hours.
Last edited by 99offroadrngr; 04-27-2013 at 10:05 PM.
#5
04-27-2013
-blue locktite? they send a tube of RED locktite with the kits for a reason.
-i don't have flares, I don't have any rock chips, and my tires poke out a lot. aftermarket flares are disgusting, i'd never buy them. keep a good coat of wax on the entire truck and you shouldn't have an issue.
-tow hooks aren't hard to remove unless you're a sissy
-you don't need any SAE sockets
-you shouldn't be using a ratchet as a breaker bar unless you like ruining your tools
-as mentioned above, the bed bolts are T55. 4 door extended cabs also require a T50 to remove the rear jump seats
-if you don't have air tools, find someone who does and make your life easier.
As for the flares, like i said, if your tires stick out past the fenders, in some states that is illegal. And yeah a good coat of wax isnt going to protect your paint that much from big rocks and when off-roading....unless your lifted truck with big tires is just a mall-crawler. And if u think aftermarket flares are ugly, that's your opinion.....i did this write up and gave tips and my info...every truck owner can make his/her own personal decision if they like them or not.
The tow hooks on my 99 were a pain to get to...you cant remove the bumper until the hooks are removed and theres very little room to get a wrench into there..its not about being a sissy its about not being able to get to the bolt heads and trying to turn the 1/8 of a turn at a time.
My SnapOn ratchet has a long 2 foot handle...great to break the bolts loose, its not going to ruin it.. if it does, i get a new one free.
You may not need any SAE stuff, but its better to have them and not need them, than to need them and not have them.
Last edited by gcextreme; 04-27-2013 at 10:22 PM.
#6
04-27-2013

red locktite bolts CAN be removed easily using heat. you can take your bumper off without taking the tow hooks off on a 98-00. ive done it many times on both my 99 and my 98 that I've had. once the internals on your long ratchet break, you'll know why its called a ratchet and not a breaker bar.
#7
04-27-2013
my kit came with BLUE Loctite...ive had my BL on for over a year...no issues..
my ratchet i use every day on huge machinery....used it for 5 years, no issues...and its SNAPON, with a lifetime warranty...the snapon truck comes to my work every 2 weeks....i have over 10K invested in tools....
my ratchet i use every day on huge machinery....used it for 5 years, no issues...and its SNAPON, with a lifetime warranty...the snapon truck comes to my work every 2 weeks....i have over 10K invested in tools....
#9
04-27-2013
my kit came with BLUE Loctite...ive had my BL on for over a year...no issues..
my ratchet i use every day on huge machinery....used it for 5 years, no issues...and its SNAPON, with a lifetime warranty...the snapon truck comes to my work every 2 weeks....i have over 10K invested in tools....
my ratchet i use every day on huge machinery....used it for 5 years, no issues...and its SNAPON, with a lifetime warranty...the snapon truck comes to my work every 2 weeks....i have over 10K invested in tools....
#10
04-27-2013
And if you dont care, fine, then why tell me what tool i should use and not use?
i work on and build million dollar machinery every day...
thanks for the good info....im sure it will help out others doing a body lift.
Last edited by gcextreme; 04-27-2013 at 10:56 PM.

#12
04-29-2013
lmao at this thread. Good info, not many people think to start soaking their cab and bed bolts ahead of time. Thats a big time saver sometimes.
Also, Like the kewn said, Make friends with someone who has air tools, specifically a big *** impact. It will make your life 10x easier.
FWIW, My BL came with Red Loctite. Also, If you work on million dollar machinery, Where are your air tools? I've got a 3/8 Air Ratchet that takes those tow hooks off like a champ once you break them loose. My impact gun also makes the bed bolts come out in 10.2 seconds.
#13
04-29-2013
#14
04-29-2013
screw trying to do a body lift by hand. I hate doing stuff by hand if there is an Air Tool out there that can make quick work of it.
If all you own is a bag of tools that can be stored in someplace other than a garage, you shouldn't be attempting a body lift (not aiming that at any one person, just an overall statement here...)
#15
04-29-2013
It is included....read under required tools at the beginning......
The whole point of my write up was to provide a few simple tips and stuff to do for preping, not a full entire instruction list, as i sated several times in the write up.
Maybe i should also include "righty tighty, lefty loosey" for some idiots that dont know how to work bolts...
The whole point of my write up was to provide a few simple tips and stuff to do for preping, not a full entire instruction list, as i sated several times in the write up.
Maybe i should also include "righty tighty, lefty loosey" for some idiots that dont know how to work bolts...
#17
08-04-2013


Last edited by gcextreme; 08-04-2013 at 01:51 PM.
#18
08-04-2013

Thread
Thread Starter
Forum
Replies
Last Post
cummins ranger
1" & 3" Body Lifts
9
02-13-2019 11:43 AM


