How-To: Change HVAC Panel Light Color
#1
 01-26-2006


How-To: Change HVAC Panel Light Color
How-To: Change the color of your HVAC panel
If you’re considering doing a total LED conversion, you may want to START here. This will give you an idea of what is involved with the other process, and is MUCH EASIER than the instrumentation.
Tools Needed:
- 7mm socket and wrench, or a screwdriver with a socket adapter
- Flat head screw driver
Remove the two 7mm bolts above the A/C control *****. It is easier if you pull off the control ***** first, but is not necessary.
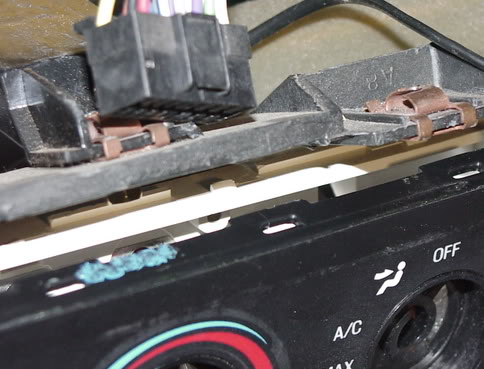
Remove the radio bezel by getting your fingers between it and the dash and pulling straight out. There are 2 clips on each side which hold the top portion on, so you may want to work from one direction to the other (bottom to top works well).
It is highly recommended you disconnect everything attached to this bezel and set it aside
The connections should consist of:
~Aux 12V power supply (two pull-off connections, one female spade and one rubber-type)
~Cigarette lighter (one pull-off polarized connection)
~Antenna (pull-out male connection)
~Radio harness (a flat head will help in removing this harness)
You may have more switches for fog lights or 4x4 switches, but since I don’t, I can’t describe the connection type. Someone please PM me the type of connection (pull-off harness, spade connectors, etc.)
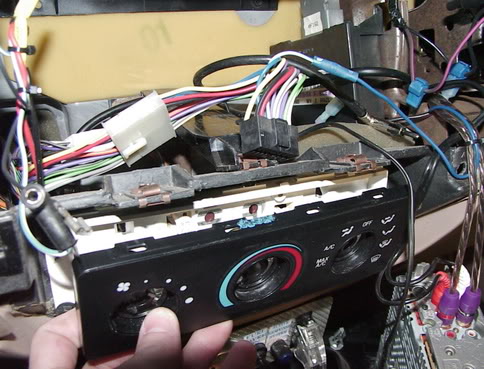
Now remove the four 7mm bolts around the outer edges of the A/C panel. This isn’t necessary and won’t allow you to pull it too far out from the dash because of the vacuum hoses connected to the back, but you’ll be able to accomplish the next task much easier.
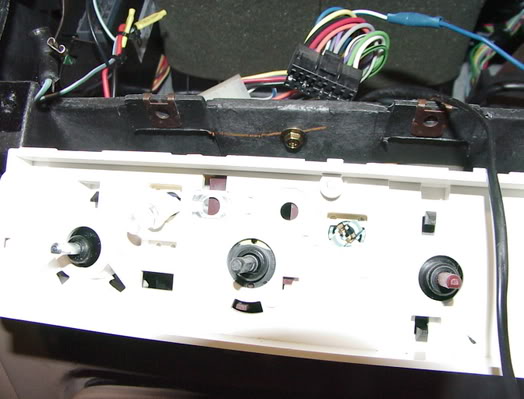
Using a flat-head screwdriver, pry up on the black plastic where it clips onto the white plastic:
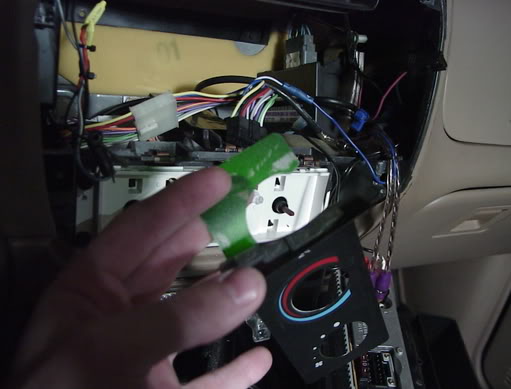
Now you’ll be able to remove the 161 bulbs and replace them with the LED’s. However, I was cheap and didn’t want to buy more LEDs so I removed the green plastic wedge-base adapter by twisting it out and bent the prongs of the 194 bulbs to contact the metal electrical-contacts on the reverse side of the white plastic panel.
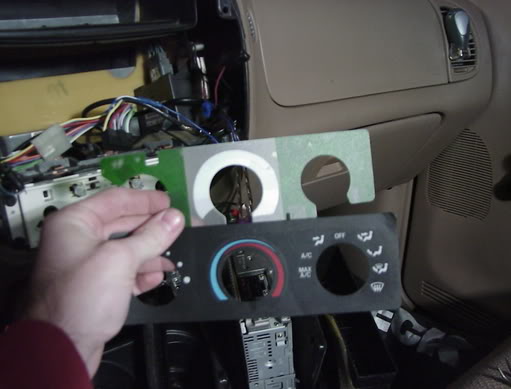
Before putting this all back together, you'll have to seperate the two layers of the HVAC panel face. It's glued on, but remains adhesive after you pull it off so you won't have to re-glue it:
In this last picture you can see the two sockets for the lights, one with a 194 LED and one with the green plastic wedge-base adapter. As mentioned, you can buy 161 LEDs that simply plug in to replace the stock bulb, but I'm cheap so I retrofitted and soldered. I can still de-solder it and replace the wedge adapters if I get some 161 LEDS too.
Reverse the steps to put it all back together and enjoy your cool new custom A/C controls.
#2
01-26-2006
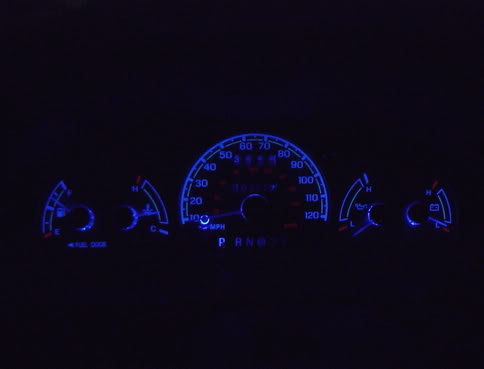
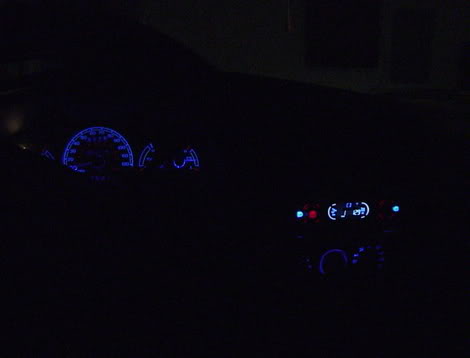
The results of my completly blue LED conversion:
Well I finished it tonight...a total LED conversion, from the gauges, to the HVAC, to the Headlight and accent lighting. Here's a few sneak peaks of the completed project, without the details.
So far I've done a reverse glow gauge overlay with the addition of LED backlighting to make the needles blue. I've also done the Healight switch mod to convert to a LED after the original bulb blew out 4 times in 4 months. Tonight I finished up my LED HVAC panel conversion. I've also got blue LED under-seat, under-dash, and on-dash accent lighting, on a switch that activates when the door opens or when I want them to. (Constant On, door-switchable-on, and off) Next is the Dome light conversion with blue LED accents.
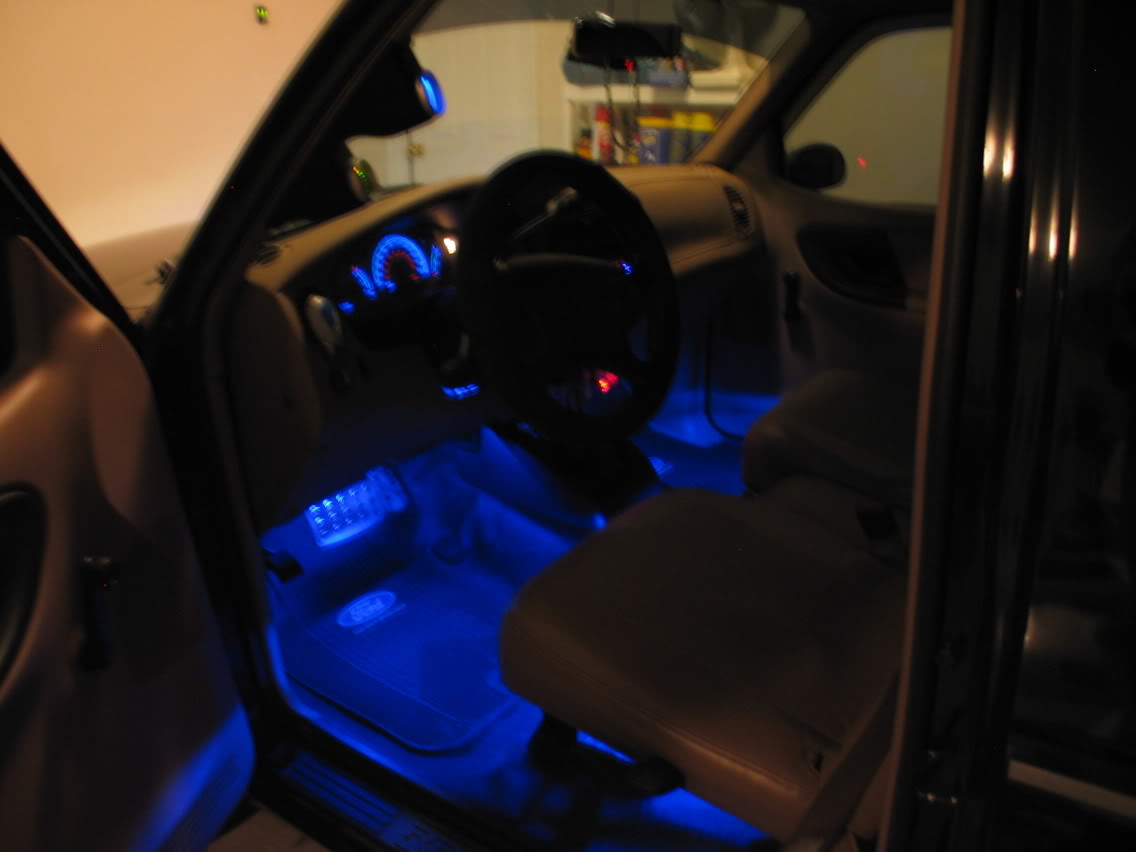
And a BEFORE LED Conversion Under-Seat lighting shot...
Well I finished it tonight...a total LED conversion, from the gauges, to the HVAC, to the Headlight and accent lighting. Here's a few sneak peaks of the completed project, without the details.
So far I've done a reverse glow gauge overlay with the addition of LED backlighting to make the needles blue. I've also done the Healight switch mod to convert to a LED after the original bulb blew out 4 times in 4 months. Tonight I finished up my LED HVAC panel conversion. I've also got blue LED under-seat, under-dash, and on-dash accent lighting, on a switch that activates when the door opens or when I want them to. (Constant On, door-switchable-on, and off) Next is the Dome light conversion with blue LED accents.
And a BEFORE LED Conversion Under-Seat lighting shot...
Last edited by KLC; 12-10-2011 at 06:23 PM.
#3
06-12-2006
Originally Posted by RangerEdge17
question is it the same process for most rnagers in that year, and what led bulbs would i need too do this cause im very intretsed in doin this on my ranger as well im soo sick of looking at green i want blue colors too stand out of the HVAC panel instead of that green and also did you use the same thing for your gauages and is it possible too doit too the 6cd changer?
2003 FORD Ranger
High & low beam headlamp
9007
Parking light
3457
Front turn signal
3457
Rear turn signal
3156
Tail light
3157
Stop light
3157
High mount stop light
912
Fog/Driving light
9145
License plate
194
Back up light
3156
Front sidemarker
194
Ash tray
161
Glove box
194
Map light
906
Dome light
912
Step/Courtesy light
212-2
Trunk/Cargo area
906
Under hood light
906
Instrument-general
161
1815
194
Hi-beam indicator
194
Brake warning
194
Automatic transmission indicator
194
Directional signal indicator
194
#4
03-20-2022


Join Date: Mar 2022
Location: Keithville,LA
Posts: 1
Likes: 0
Received 0 Likes
on
0 Posts
How did you make the numbers blue mine are still green
The results of my completly blue LED conversion:
Well I finished it tonight...a total LED conversion, from the gauges, to the HVAC, to the Headlight and accent lighting. Here's a few sneak peaks of the completed project, without the details.
So far I've done a reverse glow gauge overlay with the addition of LED backlighting to make the needles blue. I've also done the Healight switch mod to convert to a LED after the original bulb blew out 4 times in 4 months. Tonight I finished up my LED HVAC panel conversion. I've also got blue LED under-seat, under-dash, and on-dash accent lighting, on a switch that activates when the door opens or when I want them to. (Constant On, door-switchable-on, and off) Next is the Dome light conversion with blue LED accents.
Attachment 213192
Attachment 213193
And a BEFORE LED Conversion Under-Seat lighting shot...
Attachment 213194

I replaced my bulbs with blue LED’s but my numbers stayed green how do I make the numbers blue as well?
#5
04-26-2022
Member
You have to take the face off of the cluster and lightly sand the green off the back. I did it on my old ranger, looked amazing! Also had someone 3d print the inserts for the AC ***** and those looked great as well. No photos sadly.


Thread
Thread Starter
Forum
Replies
Last Post
HillPrideRanger
General Technical & Electrical
1
01-27-2010 03:22 PM
teambluemxer
General Technical & Electrical
4
10-23-2009 06:51 PM


