How To: Open And Paint Corner Lights
#1
 04-10-2010

How To: Open And Paint Corner Lights
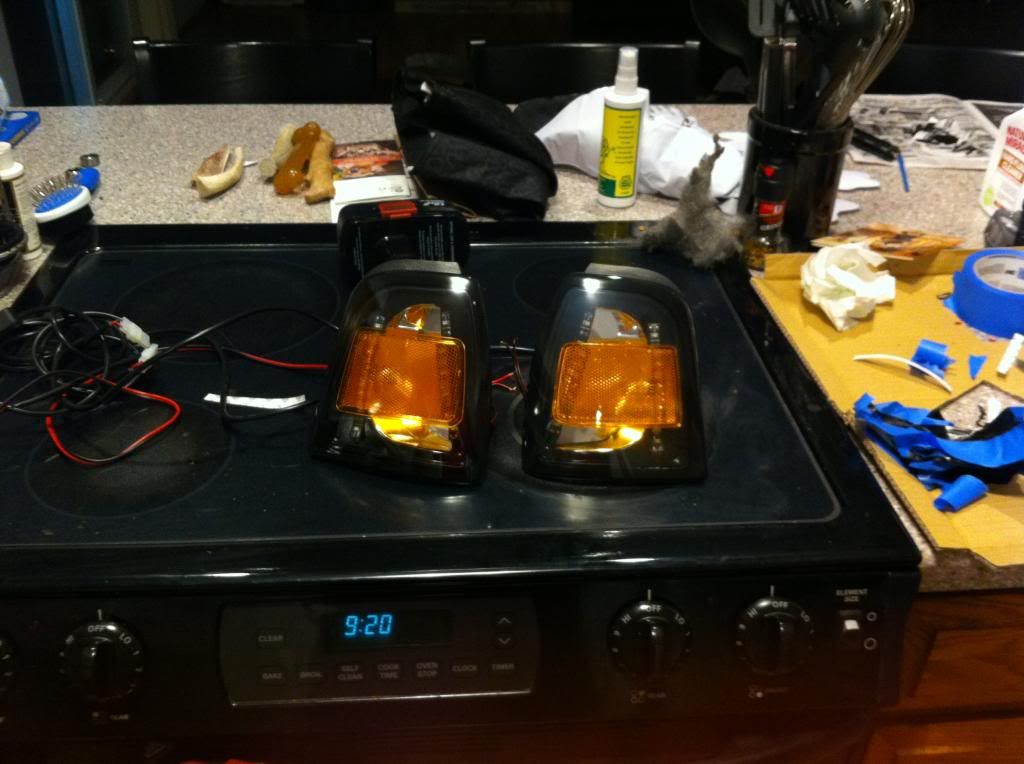
Well I took a crack at painting my clear corners today and figured I would post up my tips and some pictures.
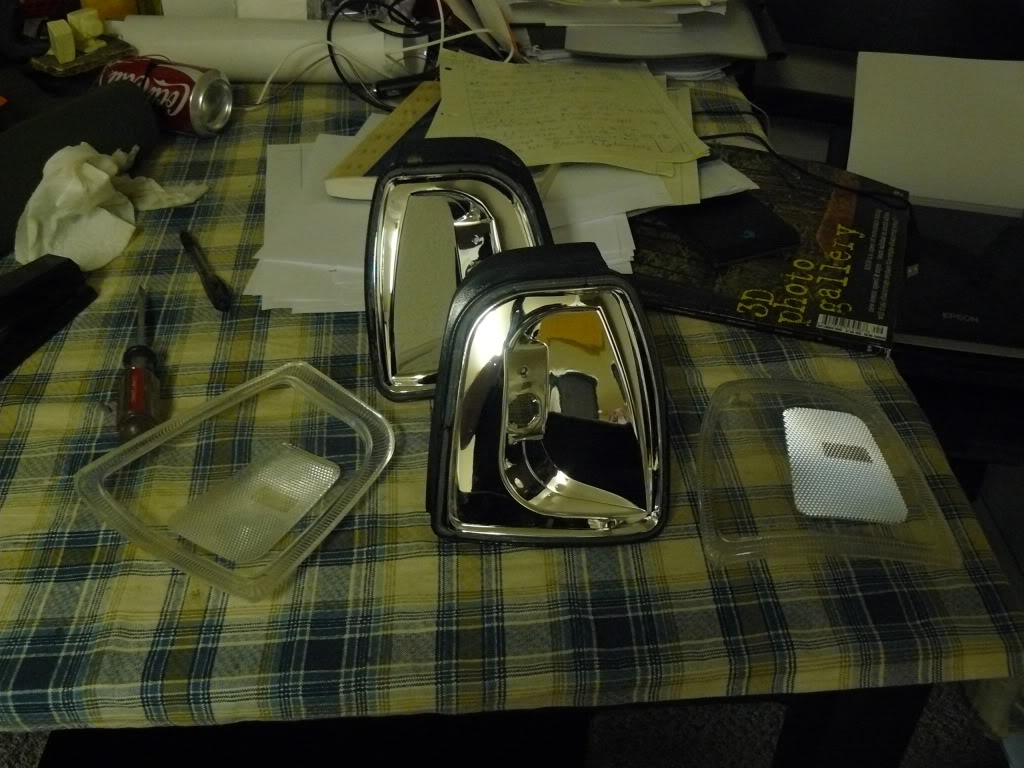
First of the tools and supplies you will need;
- oven
- flat head screw driver
- clear bathroom sealant
- paint of your choice
- blue painters tape
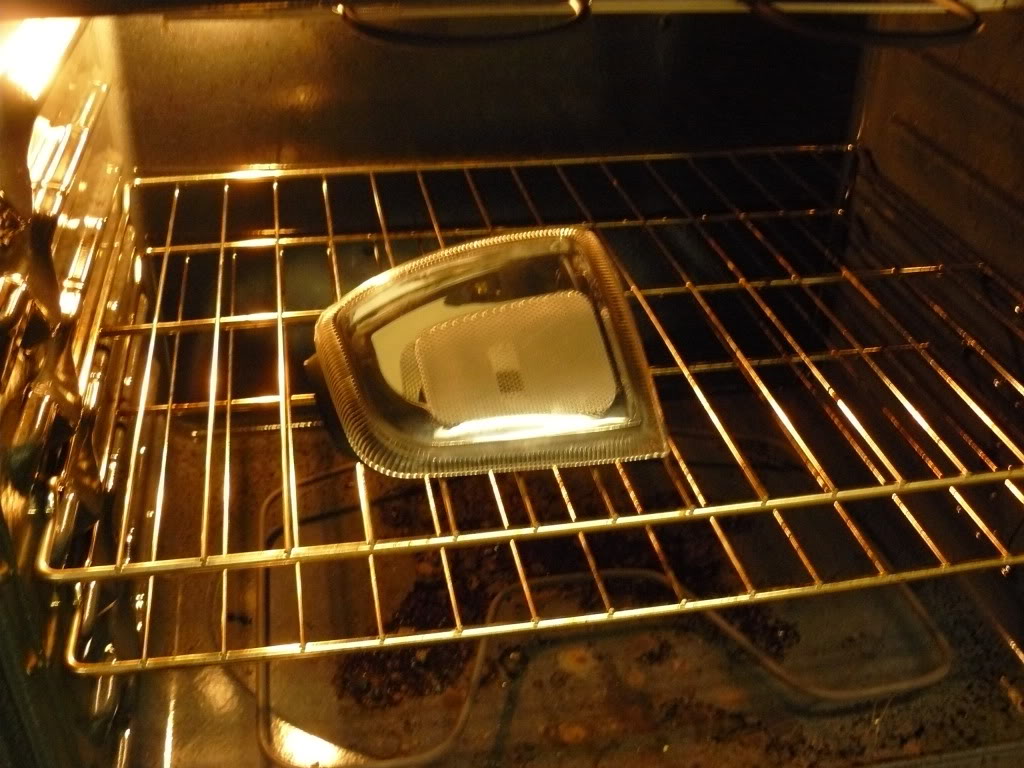
First clean your corners of any grime with soap and water and preheat your oven to ~ 190*.
Temperatures and times can vary but WATCH the corners constantly to avoid melting them.
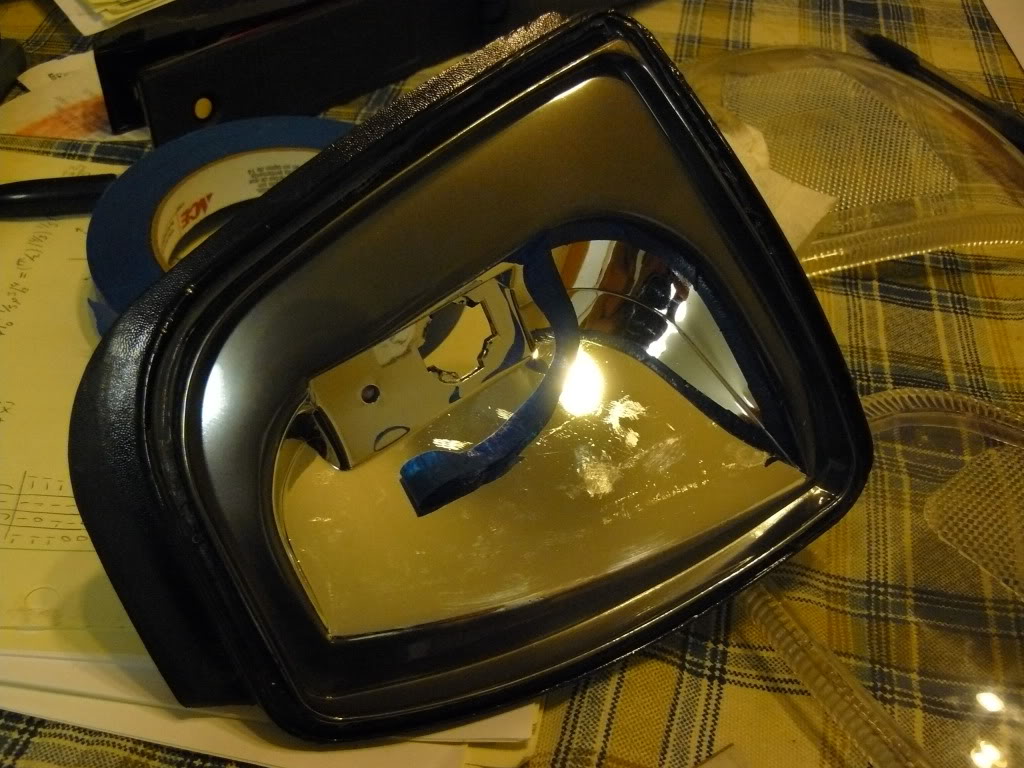
I started with the corners in for 4 minutes, then managed to break the seal and get most of the lens off then back in for another 2-3 and I was able to work the lens all the way off.
I started prying here, once the seal is broken work your way slowly around from your point of entry.
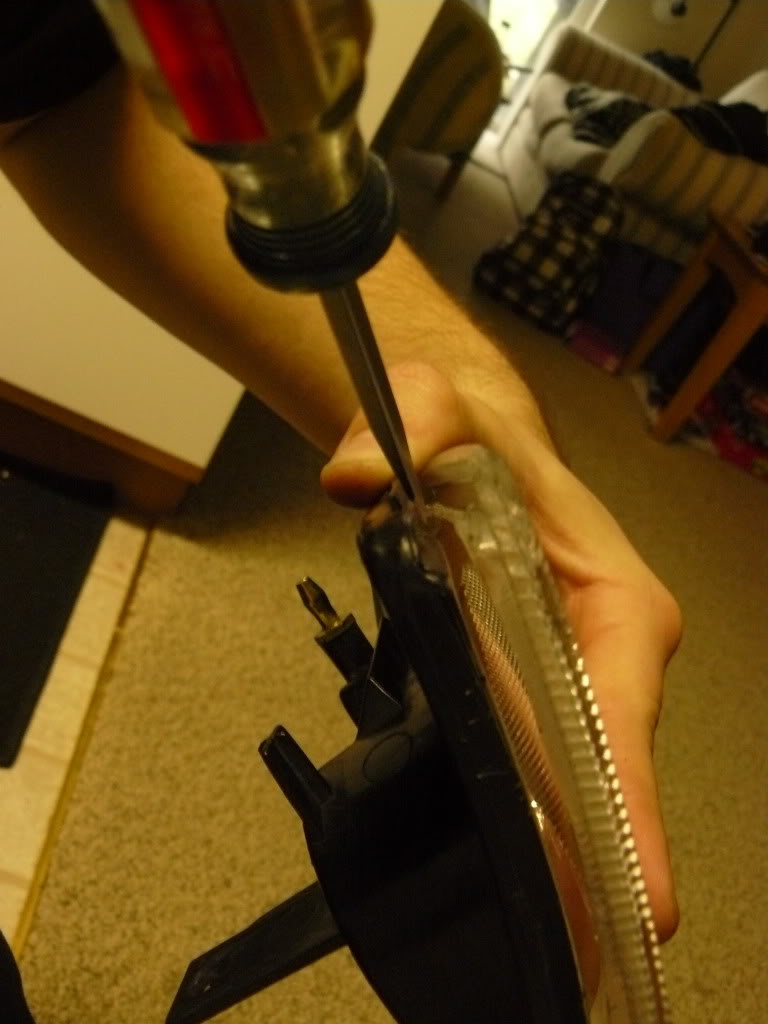
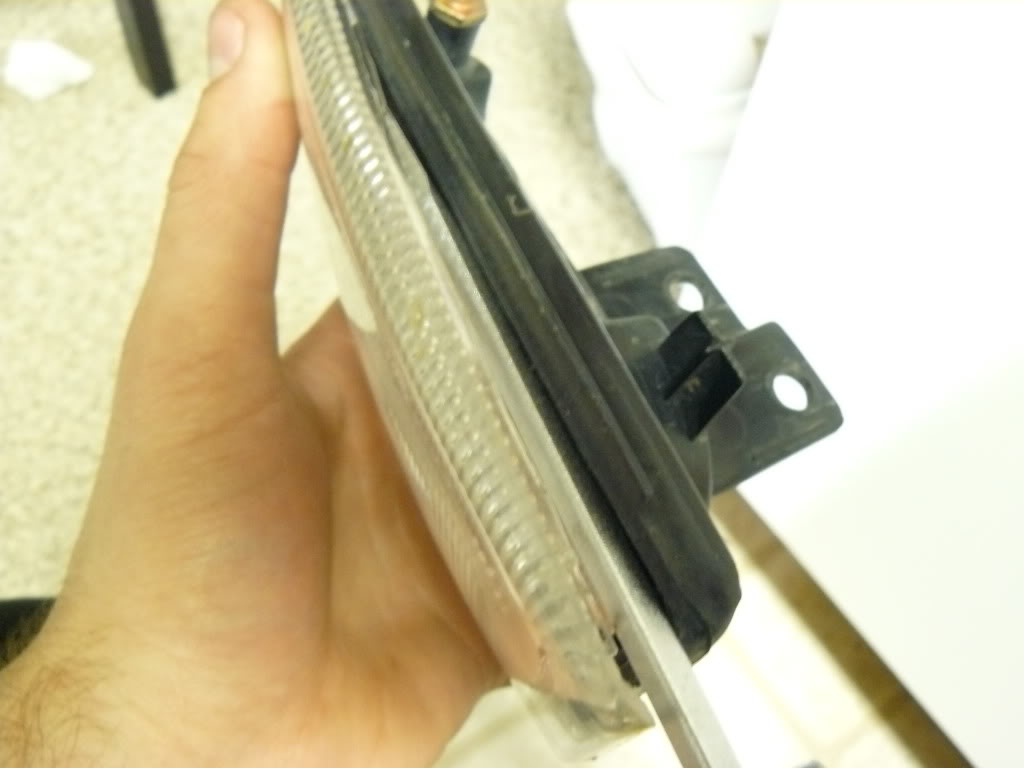
Once some of the lens is off I found the bast way to separate them was to run the blade of the screw driver up along the joint, this is also the place that has the most material so it can handle some extra force when needed.
Most of the way open, back into the oven.
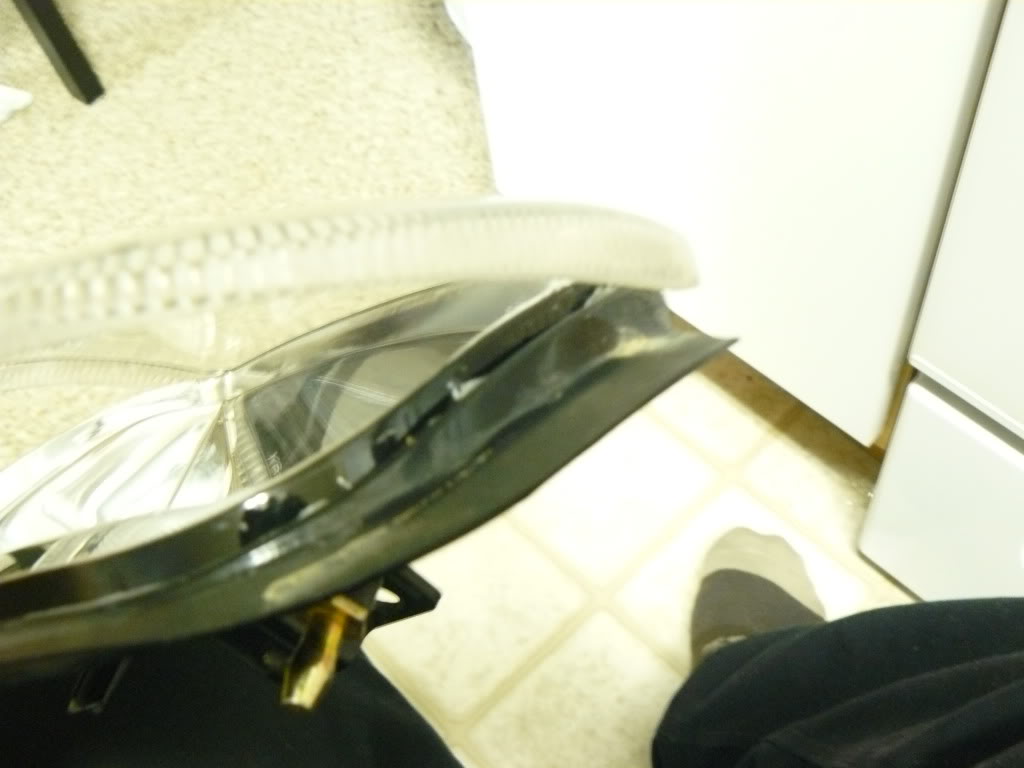
OPEN!
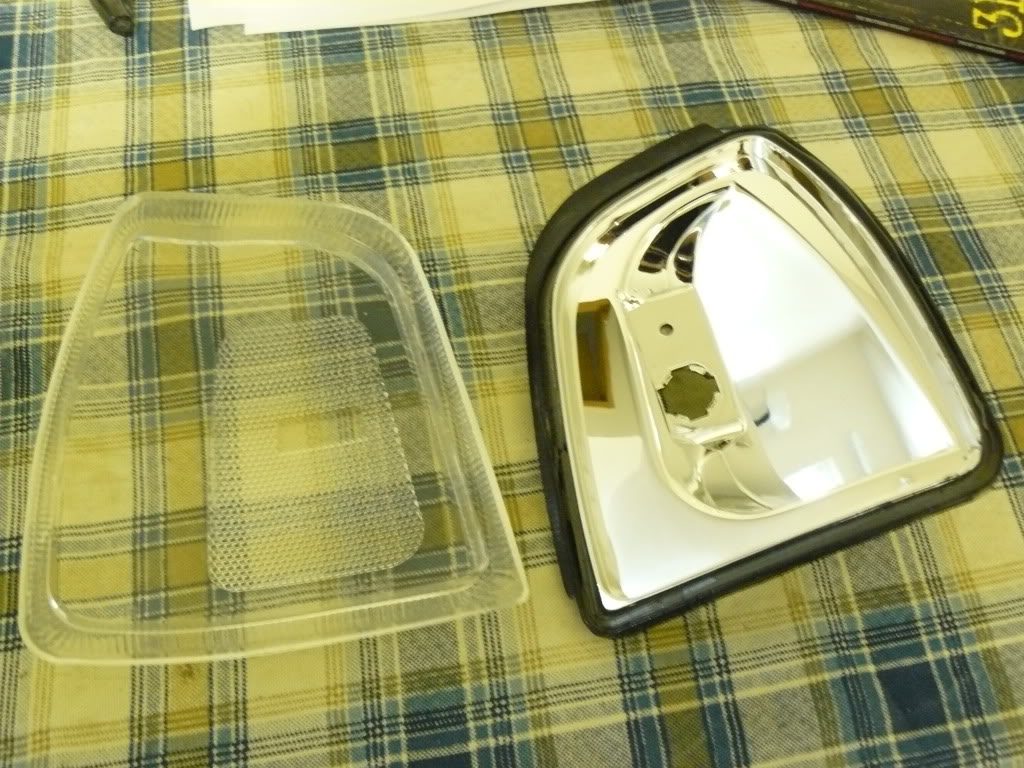
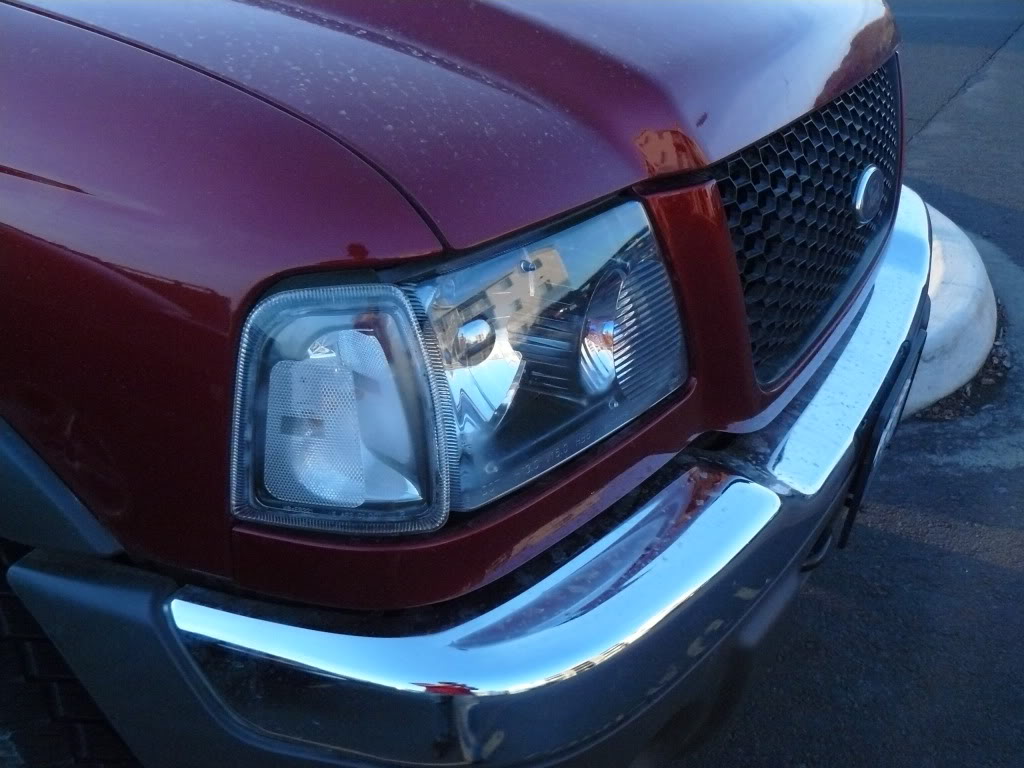
both done
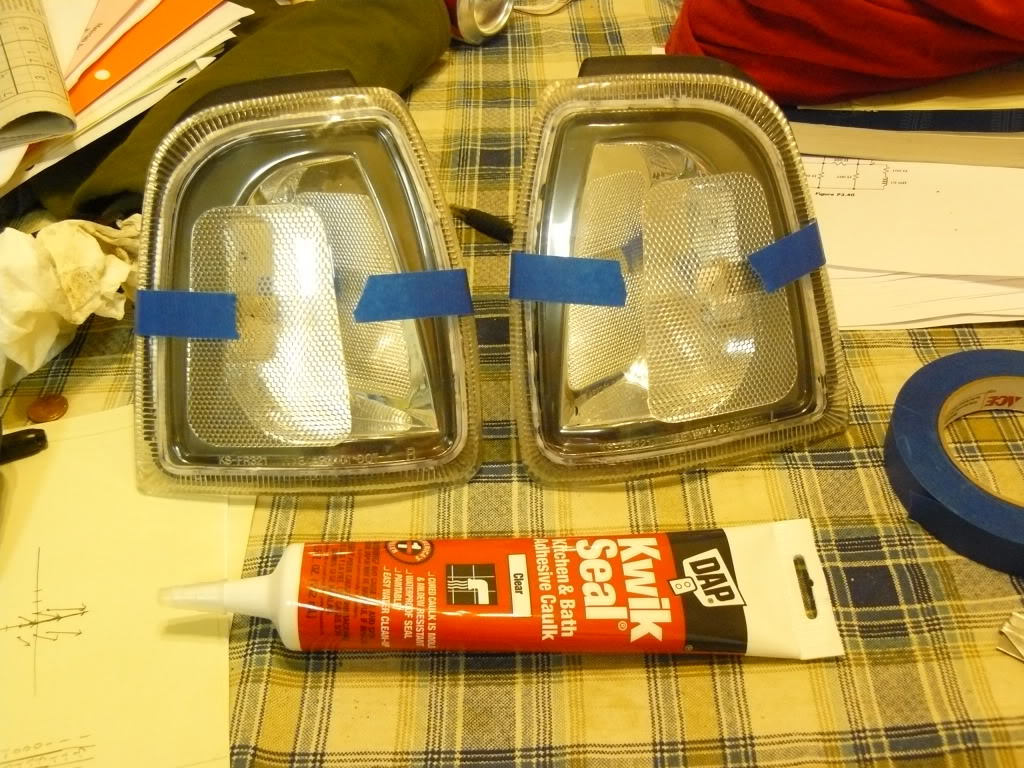
Then its time to tape, take your time to get smooth sharp lines, the better the tape job the better the corners will look.
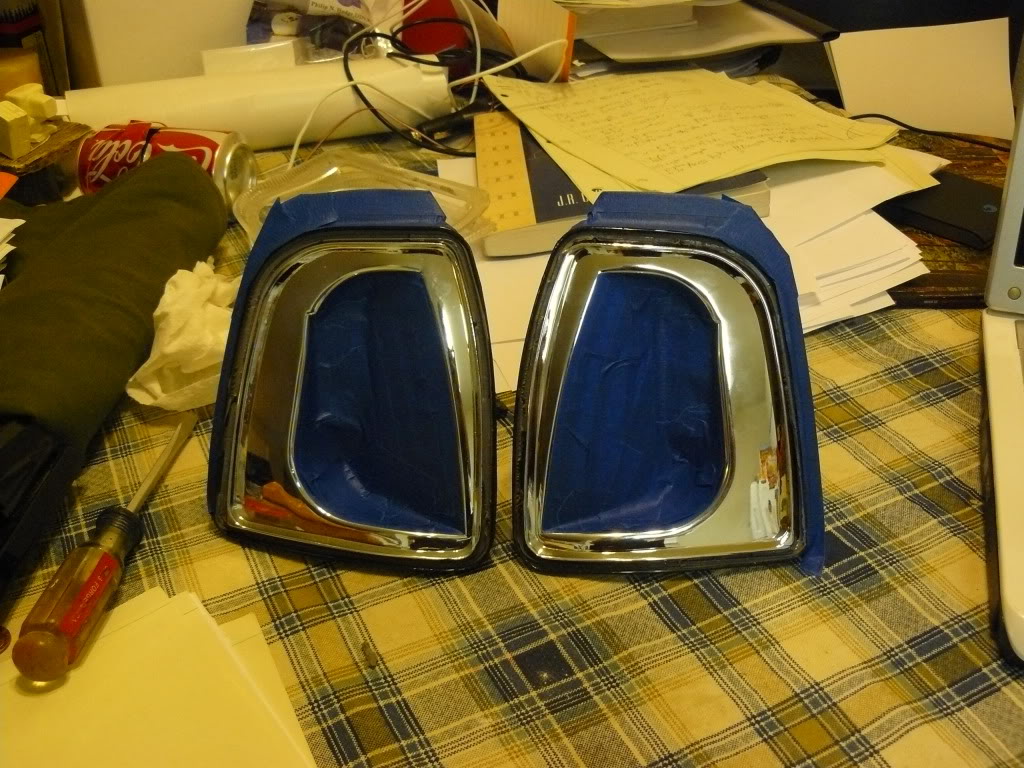
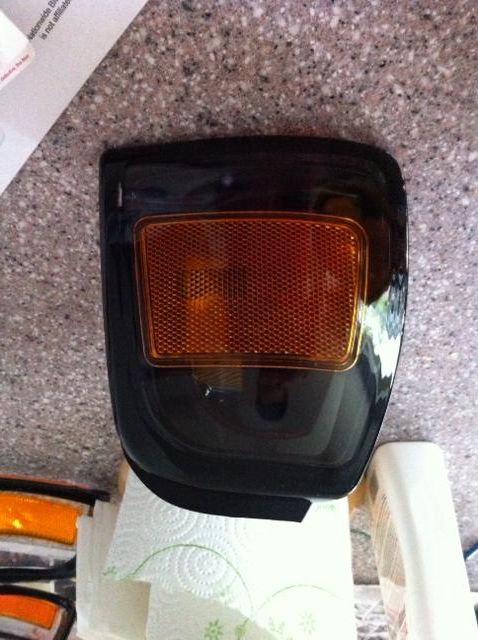
Paints I used - Duplicolor adhesion promoter and Metalcast Smoke.

Painting - remember light coats
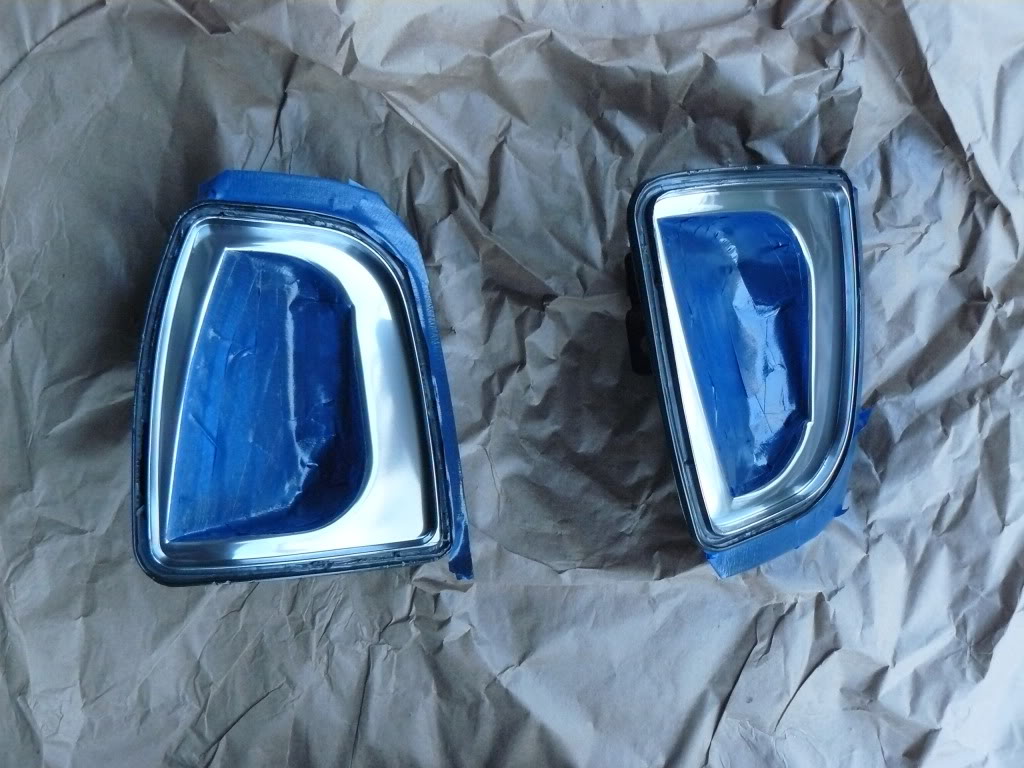
un-tape after the paint has tacked
then reseal with clear bathroom silicon
Hope this is some help for people looking to do their corners - Now Im off to do my headlights
First of the tools and supplies you will need;
- oven
- flat head screw driver
- clear bathroom sealant
- paint of your choice
- blue painters tape
First clean your corners of any grime with soap and water and preheat your oven to ~ 190*.
Temperatures and times can vary but WATCH the corners constantly to avoid melting them.
I started with the corners in for 4 minutes, then managed to break the seal and get most of the lens off then back in for another 2-3 and I was able to work the lens all the way off.
I started prying here, once the seal is broken work your way slowly around from your point of entry.
Once some of the lens is off I found the bast way to separate them was to run the blade of the screw driver up along the joint, this is also the place that has the most material so it can handle some extra force when needed.
Most of the way open, back into the oven.
OPEN!
both done
Then its time to tape, take your time to get smooth sharp lines, the better the tape job the better the corners will look.
Paints I used - Duplicolor adhesion promoter and Metalcast Smoke.
Painting - remember light coats
un-tape after the paint has tacked
then reseal with clear bathroom silicon
Hope this is some help for people looking to do their corners - Now Im off to do my headlights
Last edited by mikerider; 04-10-2010 at 08:04 PM.


#3
05-14-2012

Join Date: Dec 2009
Location: port crane, new york
Posts: 218
Likes: 0
Received 0 Likes
on
0 Posts
#5
08-02-2014
wanted to update this with some tricks I have learned working on other sets of corners.
First thing is an update to temp and time
265 for 7 min has worked the best for me. some lenses will start to get a little soft at this time so use caution.
Next is sealant
DO NOT USE bathroom silicone (not strong enough I lost a lense on a bumpy road and they fogged up
USE Adhesive RTV Silicone or Butyl Rubber
OCI Butyl Rubber Glue
Also make sure to scrape ALL of the old sealant out, it sucks but if you don't the lens will not sit back flush and you will not have enough sealant to keep them water tight.
Results
#6
09-09-2015

Hi Mike. I noticed that you posted two photos of the side markers. The first where you kept the entire bulb area unpainted, and the second where you went back and painted the majority of the side marker chrome around the bulb. What changed your mind? Aesthetics? Or did you power up the light and not like the result?
#7
09-10-2015
How To: Open And Paint Corner Lights
Originally Posted by msantram
Hi Mike. I noticed that you posted two photos of the side markers. The first where you kept the entire bulb area unpainted, and the second where you went back and painted the majority of the side marker chrome around the bulb. What changed your mind? Aesthetics? Or did you power up the light and not like the result?
Like the all black look some
Like the partially painted. Just depends on who the lights were for.
#9
09-10-2015


Thread
Thread Starter
Forum
Replies
Last Post
Rentz
OLD - Interior, Exterior, Electrical, & Misc.
4
04-28-2011 10:40 AM
vroomzoomboom
OLD - Interior, Exterior, Electrical, & Misc.
12
12-04-2010 05:46 AM
Want to Buy: 06+ corner light and tail lights
ranger024x4
OLD - Interior, Exterior, Electrical, & Misc.
0
09-30-2010 09:24 AM
For Sale: Euro Tails and Stock Corner Lights - GA
Dangerranger98
OLD - Interior, Exterior, Electrical, & Misc.
12
05-17-2010 08:50 AM
LowMaz
General Technical & Electrical
3
10-08-2007 07:15 PM


