How-To: Polish Your Oxidized Diamond-Plate Toolbox
#1
 08-23-2010


How-To: Polish Your Oxidized Diamond-Plate Toolbox
In this how-to I will be showing you one method on bringing back the shine of your faded, oxidized diamond-plate toolbox
Materials needed:
-Cordless or Corded Variable Speed Drill (Cordless preferrably as a corded is too strong, but will work)
-Mother's Powerball
-Aluminum Polish (I used Mother's Powermetal and Meguiar's Hot Rims)
-old Microfiber Cloth
-Waterhose
-wash bucket and mitt
Tips:
-Wear old cloths as the polish does sling somewhat
-wear eye prtection if needed
-If using a corded drill, go easy, as it is alot more powerful than a cordless drill
-after applying polish to powerball, go slow at first as not to sling the polish everywhere
-Make sure toolbox is clean before doing this
I found that the Hot Rims worked better as it was thicker and just seemed to polish better
Procedure:
First clean your toolbox, you dont want grit and stuff all over it.
The Tools:
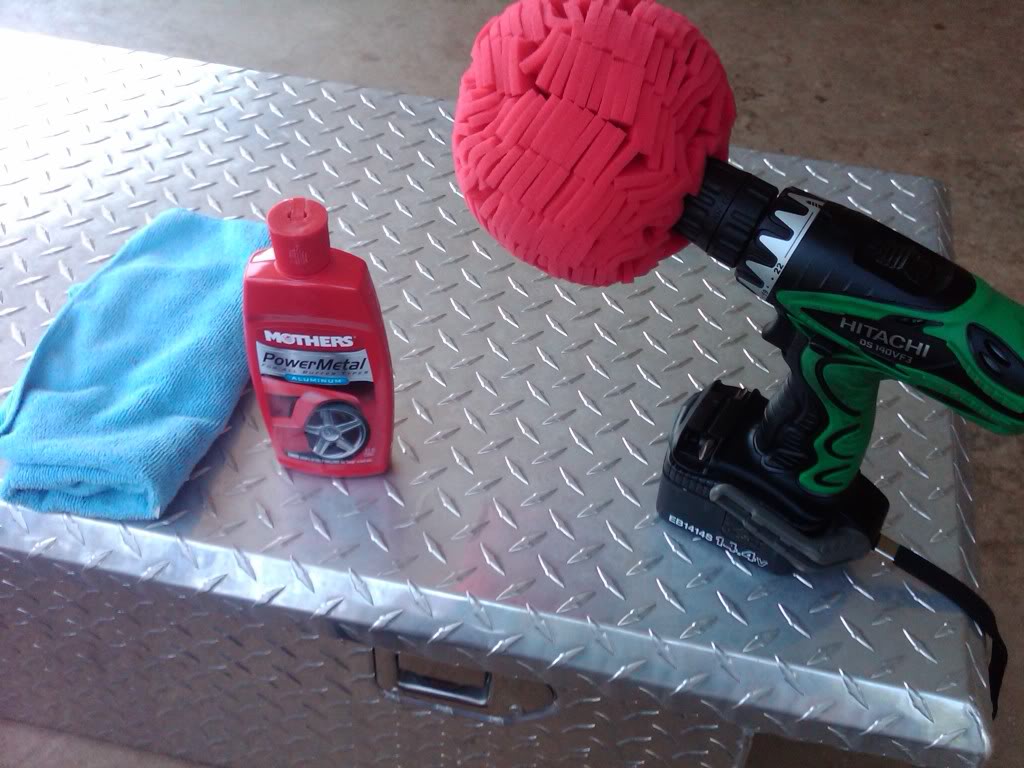
[/IMG]
(Thanks Stone for the pic)
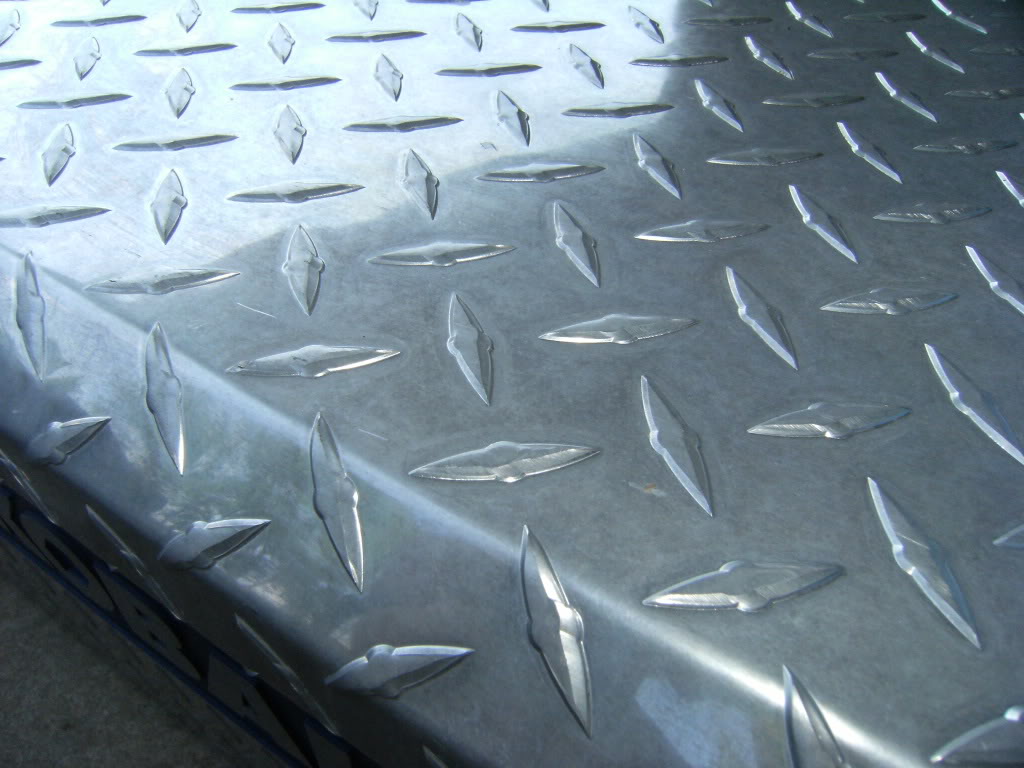
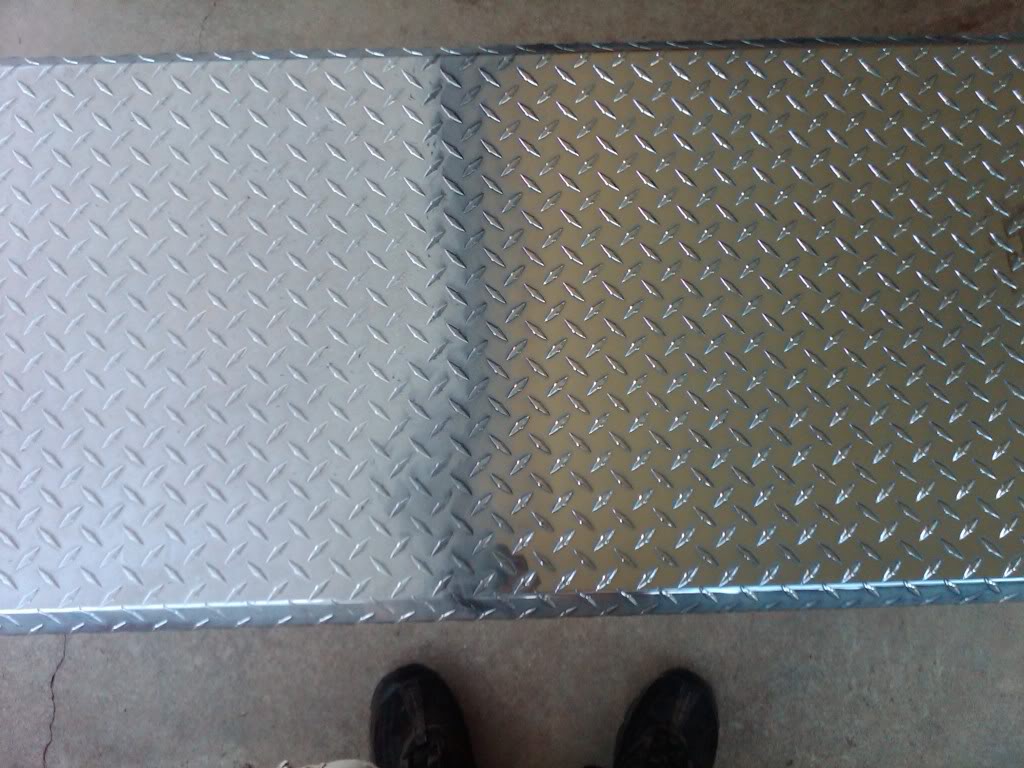
Now as you can see, the toolbox is pretty weathered:
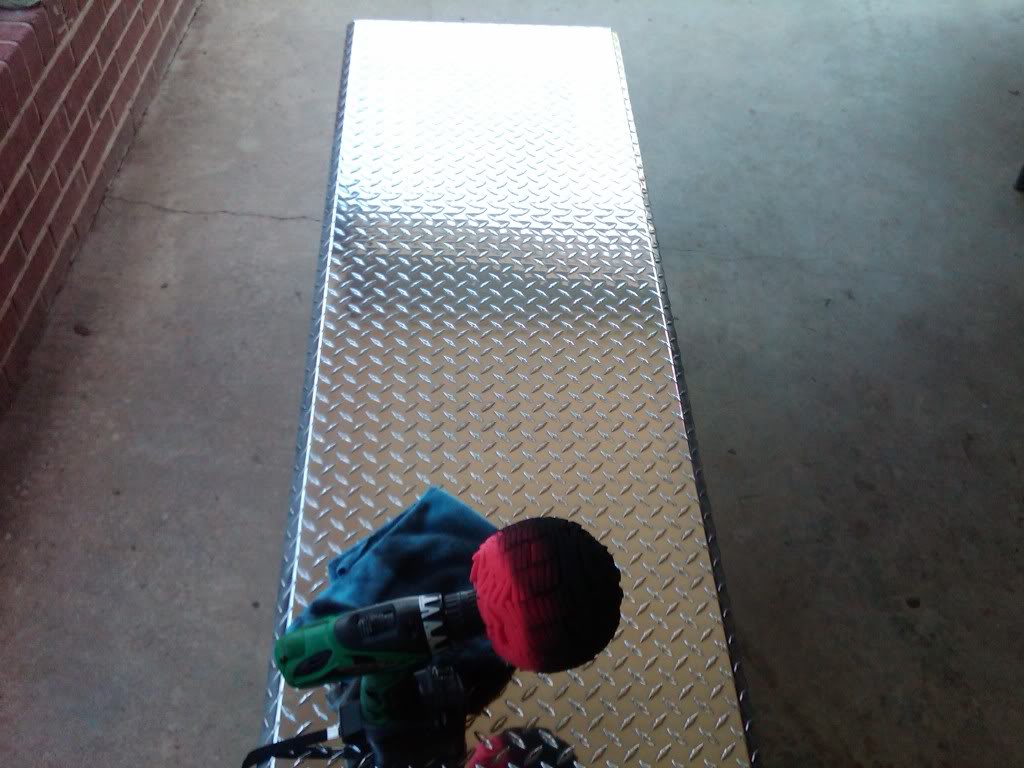
Now you can start anywhere on the toolbox that you want, I chose the top as it was easiest. Like mentioned above start slow or you will sling the polish everwhere. You can apply the polish to the ball or to the metal, it doesn't matter.
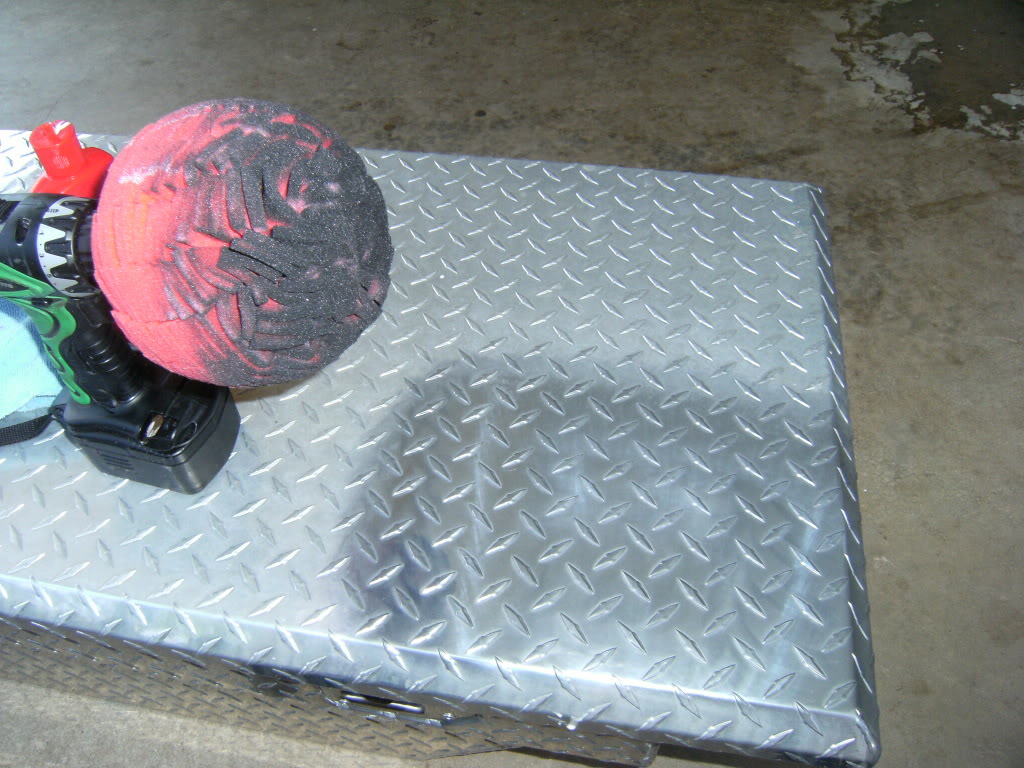
This is after a one pass over the surface and then wiping it down. You will want to polish until there is black residue all over the surface. Then wipe clean with microfiber towel to check for misses spots.

Here is after 3 passes and wipe downs. The more you polish, the shinier it gets
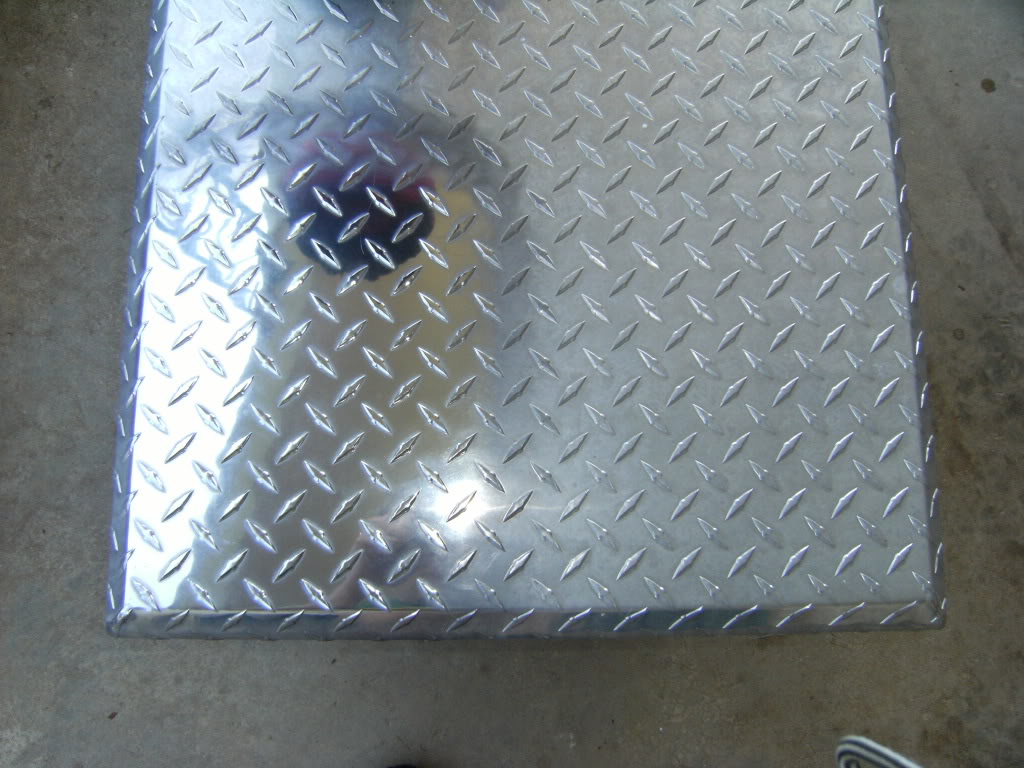
Ok, here I was about halfway done with the toolbox, its like a night and day difference:
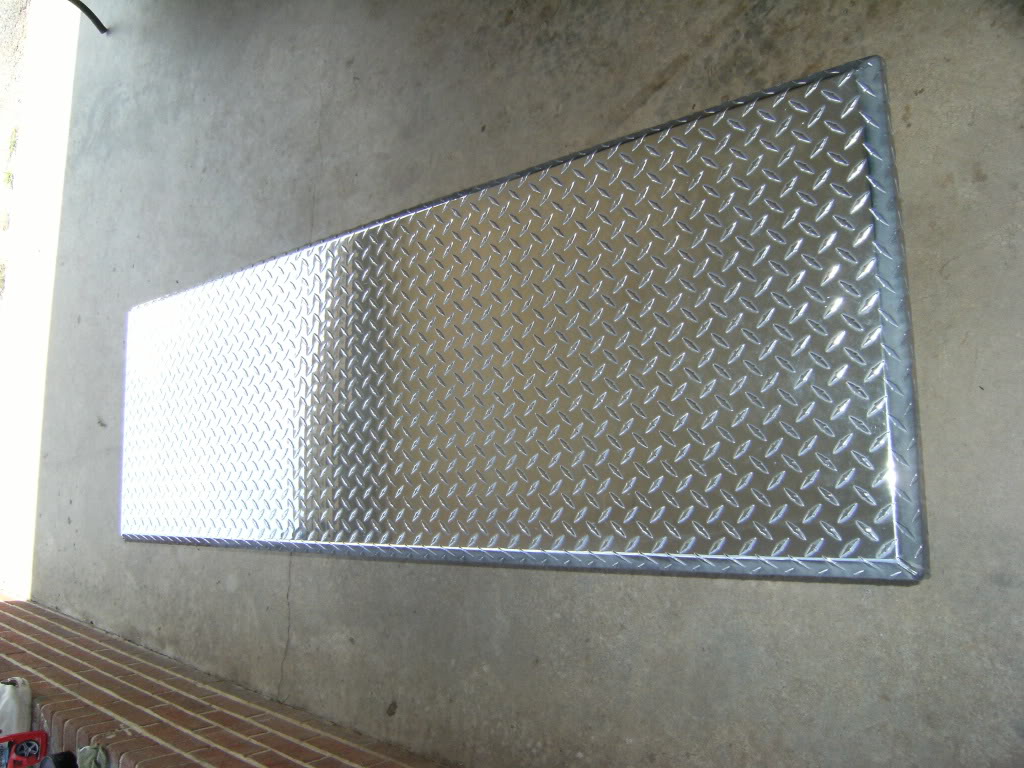
Here the top is done:
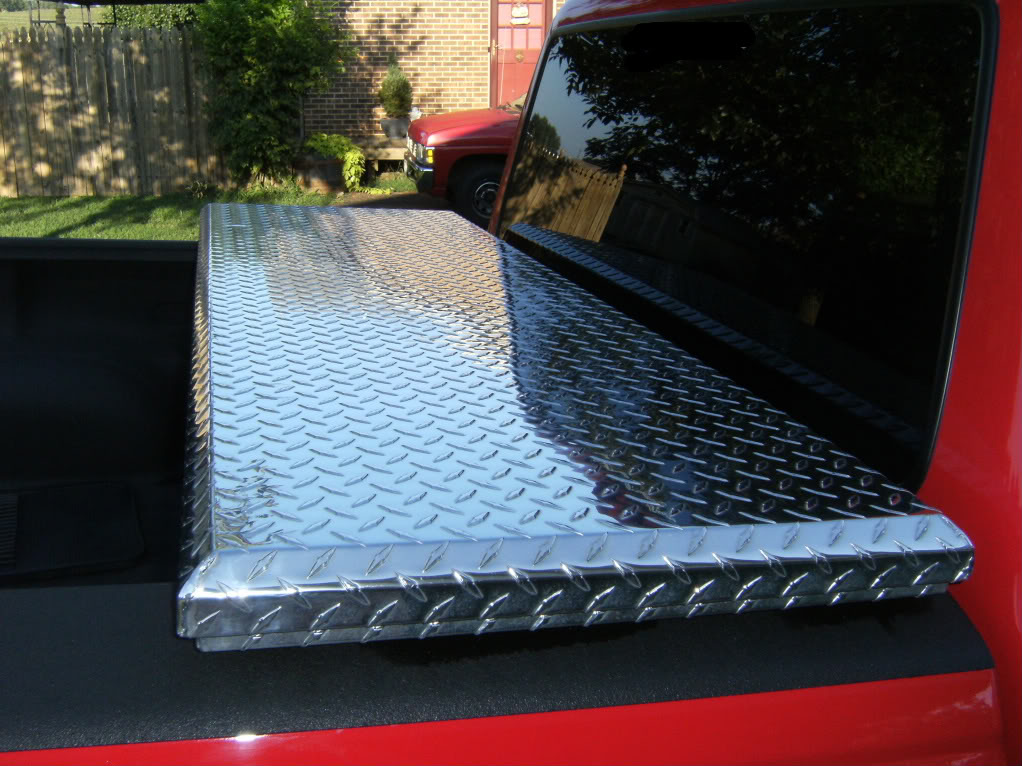
Just do the above procedures (Polish, wipe, polish wipe) to the whole toolbox until you are done. Once done, give the toolbox a good bath to get any missed residue off. Then mount on the truck again!

(For some Reason, the front would not polish up like the top, I polished it up like three times)
Materials needed:
-Cordless or Corded Variable Speed Drill (Cordless preferrably as a corded is too strong, but will work)
-Mother's Powerball
-Aluminum Polish (I used Mother's Powermetal and Meguiar's Hot Rims)
-old Microfiber Cloth
-Waterhose
-wash bucket and mitt
Tips:
-Wear old cloths as the polish does sling somewhat
-wear eye prtection if needed
-If using a corded drill, go easy, as it is alot more powerful than a cordless drill
-after applying polish to powerball, go slow at first as not to sling the polish everywhere
-Make sure toolbox is clean before doing this
I found that the Hot Rims worked better as it was thicker and just seemed to polish better
Procedure:
First clean your toolbox, you dont want grit and stuff all over it.
The Tools:
[/IMG](Thanks Stone for the pic)
Now as you can see, the toolbox is pretty weathered:
Now you can start anywhere on the toolbox that you want, I chose the top as it was easiest. Like mentioned above start slow or you will sling the polish everwhere. You can apply the polish to the ball or to the metal, it doesn't matter.
This is after a one pass over the surface and then wiping it down. You will want to polish until there is black residue all over the surface. Then wipe clean with microfiber towel to check for misses spots.
Here is after 3 passes and wipe downs. The more you polish, the shinier it gets
Ok, here I was about halfway done with the toolbox, its like a night and day difference:
Here the top is done:
Just do the above procedures (Polish, wipe, polish wipe) to the whole toolbox until you are done. Once done, give the toolbox a good bath to get any missed residue off. Then mount on the truck again!
(For some Reason, the front would not polish up like the top, I polished it up like three times)
Last edited by 98liftedranger; 11-29-2011 at 01:38 PM.

Thread
Thread Starter
Forum
Replies
Last Post
Redneckstone
Suspension, Tires, & Wheels
10
08-06-2016 02:10 AM
05RangerXLT
OLD - Interior, Exterior, Electrical, & Misc.
4
04-06-2009 09:06 PM


