How-To: 06+ Taillight Mod
#1
 01-26-2012


How-To: 06+ Taillight Mod
If you have no patience, hit the back button. If you've done the headlight mod, it helps. This was more difficult and more time consuming.
Purpose: replicate the taillights of 04-08 F150's with a Ranger housing.
You can mask your own lights however you want and use whatever color paint you want but I wanted mine to be as close to the F150's as possible.
What you need:
-Oven
-06+ taillight
-Painters tape (I used blue 3M)
-Exacto knife or similar (new one works best)
-Flathead screwdriver
-Krylon Fusion (satin black)
-Sealant of your choice
-Whatever you have to apply pressure to seal the light (bungees, clamps, small ratchet straps, etc)
-Nitrile gloves
Step 1: Pre-heat your oven to 200 degrees. Once pre-heated, place your taillight on a cookie sheet and put it on the middle rack.
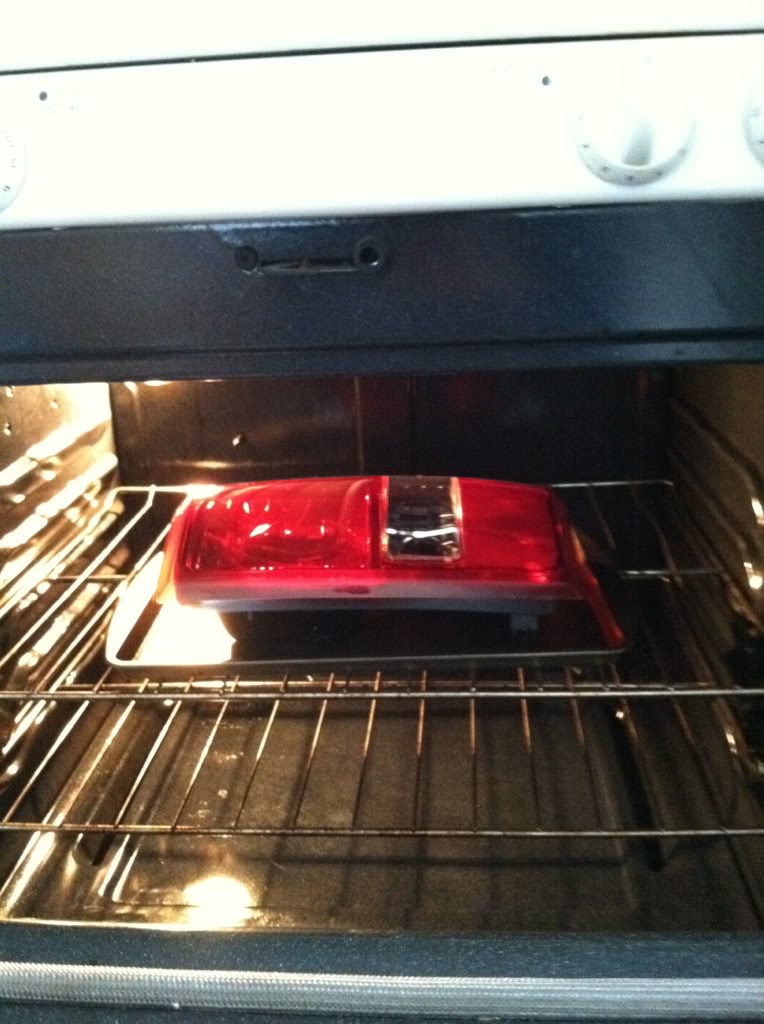
Step 2: Keep your eye on the time. I took my light out every 5 minutes and worked the lens all the way around with the flathead screwdriver and put it back in for another 5 minutes and so on until it came apart. Always start on the bottom corner of the side that meets the tailgate. DO NOT TWIST THE SCREWDRIVER, UP AND DOWN ONLY. (took about an hour total to get the lens off)
Step 3: Once the lens is about to come off, you'll notice that the parts where the holes are for the screws on the lens itself wont let go. I used my hands and just held the lens and the housing apart steadily and it slowly started to let go on its own. Be careful not to snap or crack the lens or the housing.
Step 4: Once you have separated the lens from the housing, quickly remove all the remaining glue off of the both parts. If it starts to harden up again, throw it back in the oven for 5 minutes and take it out and continue.

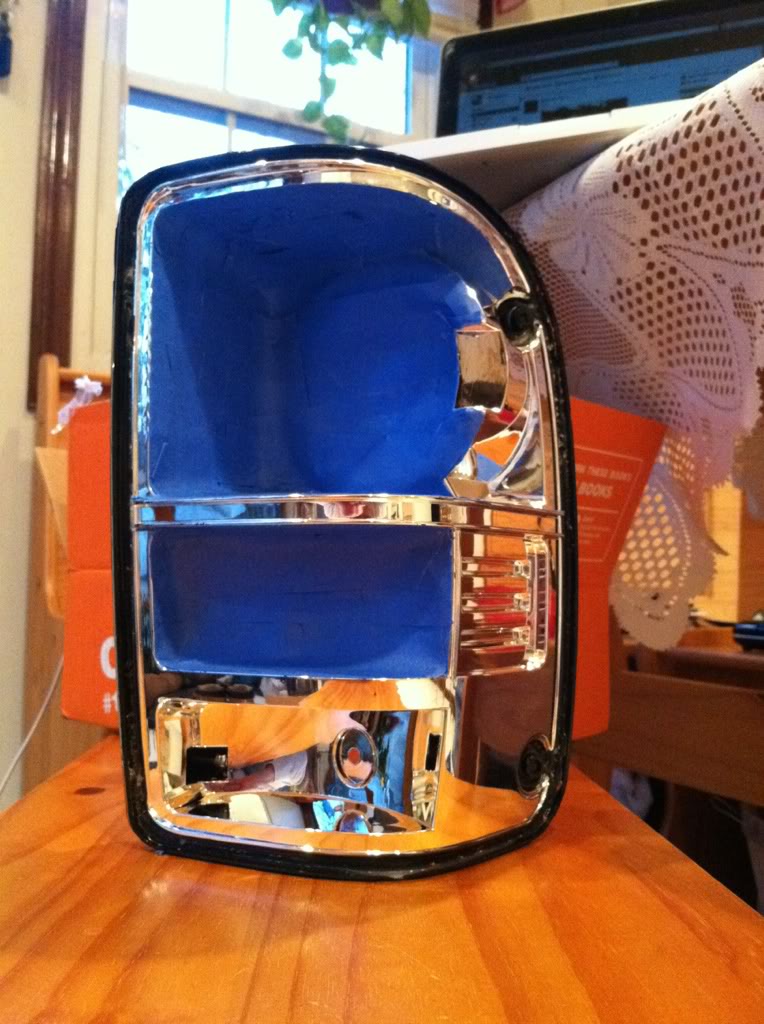
Step 5: Mask off what you don't want painted black. I was going for a replica of the Harley Davidson F150's so I masked it like below. Before you put a piece of tape onto the chrome, put the tape on your clothes somewhere a few times to take some of the stickiness off of it. If you don't, when you take the tape off you'll pull the chrome right off of the housing. Its really really delicate. Take your time masking it if you want it to come out good.
Step 6: Paint the housing with your Krylon Fusion satin black. I sprayed the first coat on, waited 15 minutes and went back and did another coat. (flip your taillight upside down to get the spots you miss and to ensure you covered everything). Let it dry for an hour.
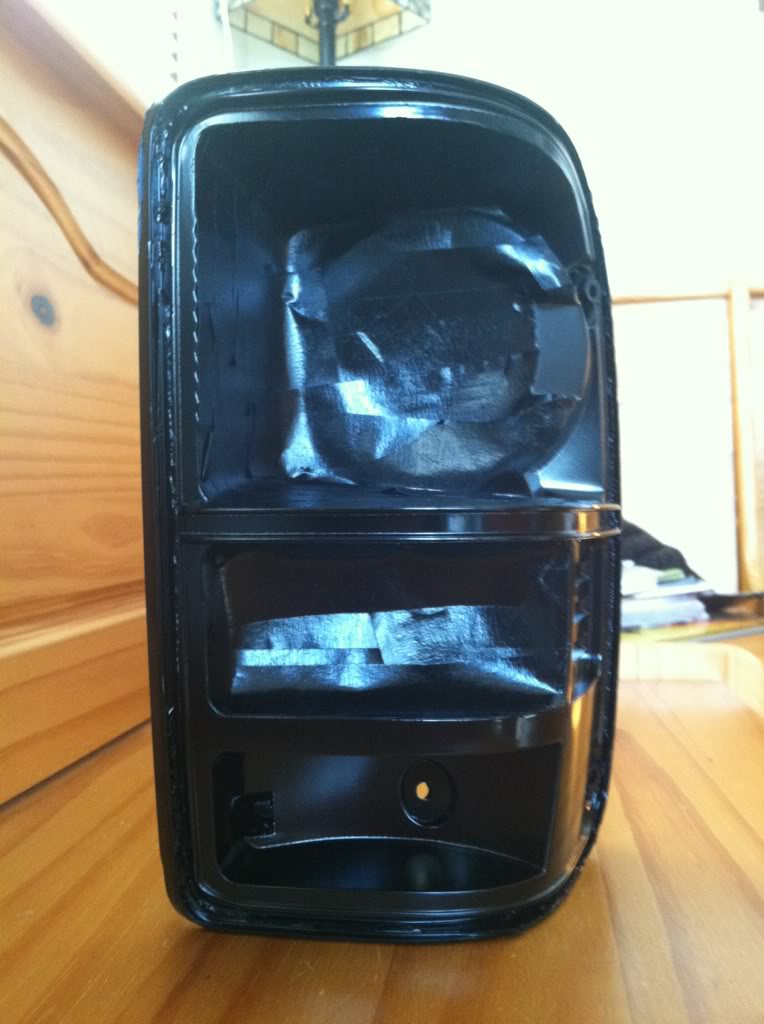
Step 7: After you've let the light dry for an hour, pull the tape off slowly and carefully. Use your exacto knife if you need to lift up on the corners.
Step 8: Put on a pair of nitrile gloves and apply your sealant to the groove where the lens mounted inside the housing. I used this stuff called Lexel which can be applied at any temperature from 0-120*F because I've had great success doing the headlight mod with it. Spread and lay a decently thick bead and be quick with it. This stuff starts to dry somewhat fast.
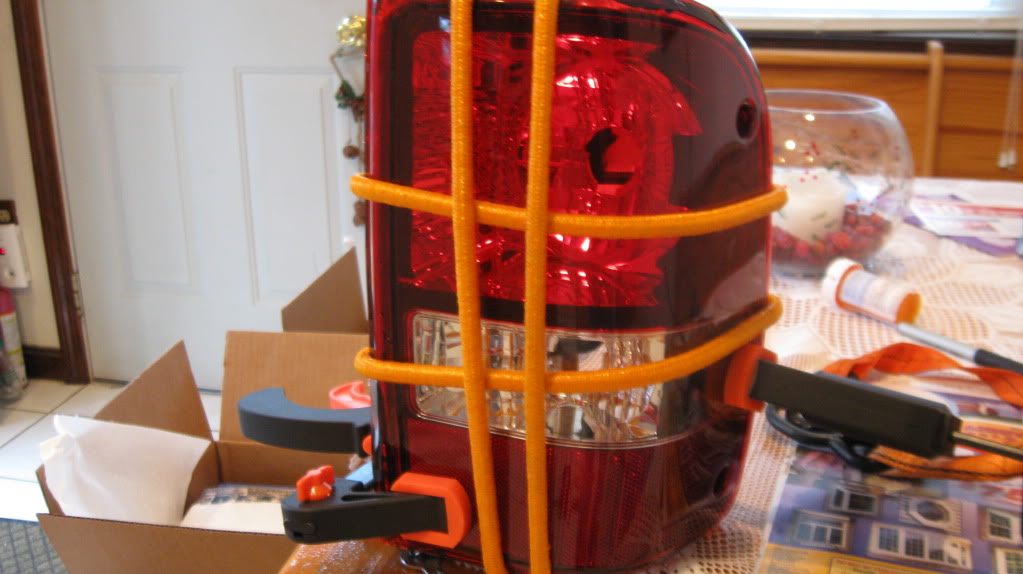
Step 9: Place the lens into the housing. It will be a pain in the *** putting the screw holes through the lens. Press hard and you'll hear them pop into place. To hold it, I used two clamps and 4 bungee cords. Let it sit for a few days before removing anything you use to hold it together.
Step 10: Repeat 1-9 for the other side
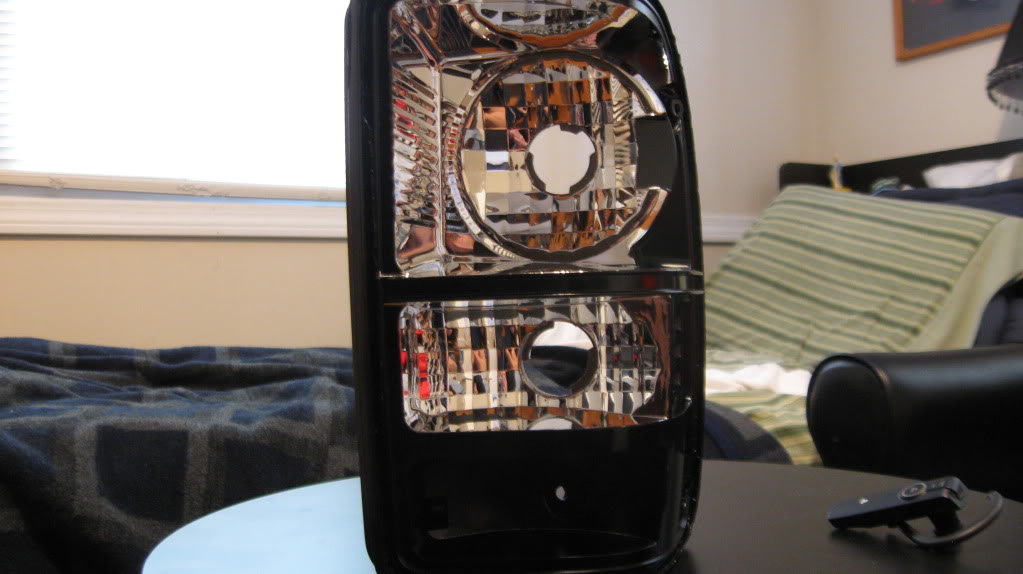
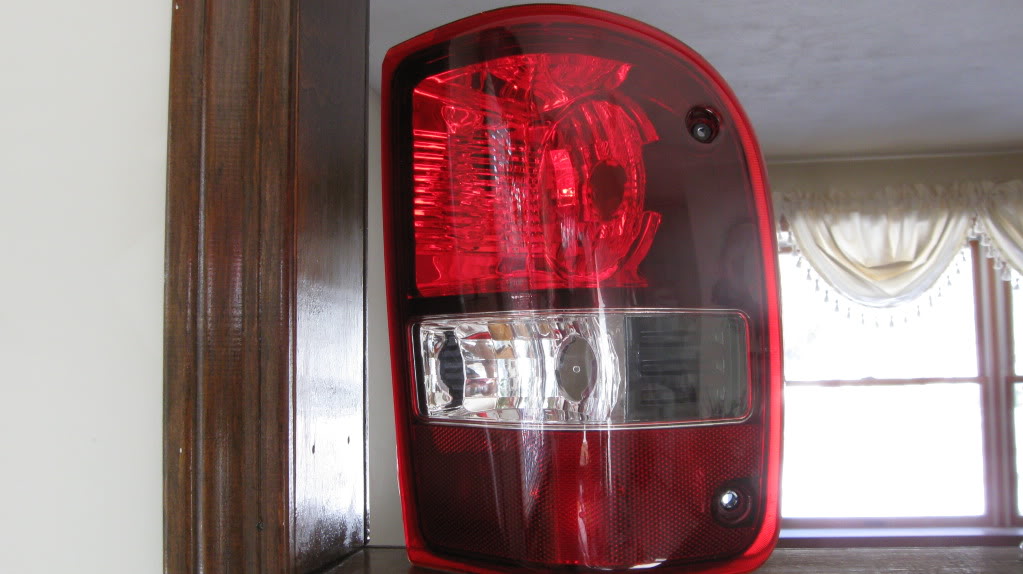
Finished
Purpose: replicate the taillights of 04-08 F150's with a Ranger housing.
You can mask your own lights however you want and use whatever color paint you want but I wanted mine to be as close to the F150's as possible.
What you need:
-Oven
-06+ taillight
-Painters tape (I used blue 3M)
-Exacto knife or similar (new one works best)
-Flathead screwdriver
-Krylon Fusion (satin black)
-Sealant of your choice
-Whatever you have to apply pressure to seal the light (bungees, clamps, small ratchet straps, etc)
-Nitrile gloves
Step 1: Pre-heat your oven to 200 degrees. Once pre-heated, place your taillight on a cookie sheet and put it on the middle rack.
Step 2: Keep your eye on the time. I took my light out every 5 minutes and worked the lens all the way around with the flathead screwdriver and put it back in for another 5 minutes and so on until it came apart. Always start on the bottom corner of the side that meets the tailgate. DO NOT TWIST THE SCREWDRIVER, UP AND DOWN ONLY. (took about an hour total to get the lens off)
Step 3: Once the lens is about to come off, you'll notice that the parts where the holes are for the screws on the lens itself wont let go. I used my hands and just held the lens and the housing apart steadily and it slowly started to let go on its own. Be careful not to snap or crack the lens or the housing.
Step 4: Once you have separated the lens from the housing, quickly remove all the remaining glue off of the both parts. If it starts to harden up again, throw it back in the oven for 5 minutes and take it out and continue.
Step 5: Mask off what you don't want painted black. I was going for a replica of the Harley Davidson F150's so I masked it like below. Before you put a piece of tape onto the chrome, put the tape on your clothes somewhere a few times to take some of the stickiness off of it. If you don't, when you take the tape off you'll pull the chrome right off of the housing. Its really really delicate. Take your time masking it if you want it to come out good.
Step 6: Paint the housing with your Krylon Fusion satin black. I sprayed the first coat on, waited 15 minutes and went back and did another coat. (flip your taillight upside down to get the spots you miss and to ensure you covered everything). Let it dry for an hour.
Step 7: After you've let the light dry for an hour, pull the tape off slowly and carefully. Use your exacto knife if you need to lift up on the corners.
Step 8: Put on a pair of nitrile gloves and apply your sealant to the groove where the lens mounted inside the housing. I used this stuff called Lexel which can be applied at any temperature from 0-120*F because I've had great success doing the headlight mod with it. Spread and lay a decently thick bead and be quick with it. This stuff starts to dry somewhat fast.
Step 9: Place the lens into the housing. It will be a pain in the *** putting the screw holes through the lens. Press hard and you'll hear them pop into place. To hold it, I used two clamps and 4 bungee cords. Let it sit for a few days before removing anything you use to hold it together.
Step 10: Repeat 1-9 for the other side
Finished

#3
01-26-2012
#5
01-26-2012
u could just do the tails. headlight mod is just good practice since its the same concept just easier in terms of splitting the lens from the housing. Headlights took me 15 minutes a piece to split. this single tail took me a hair over an hour using the same process lol
#6
01-26-2012

#7
01-26-2012
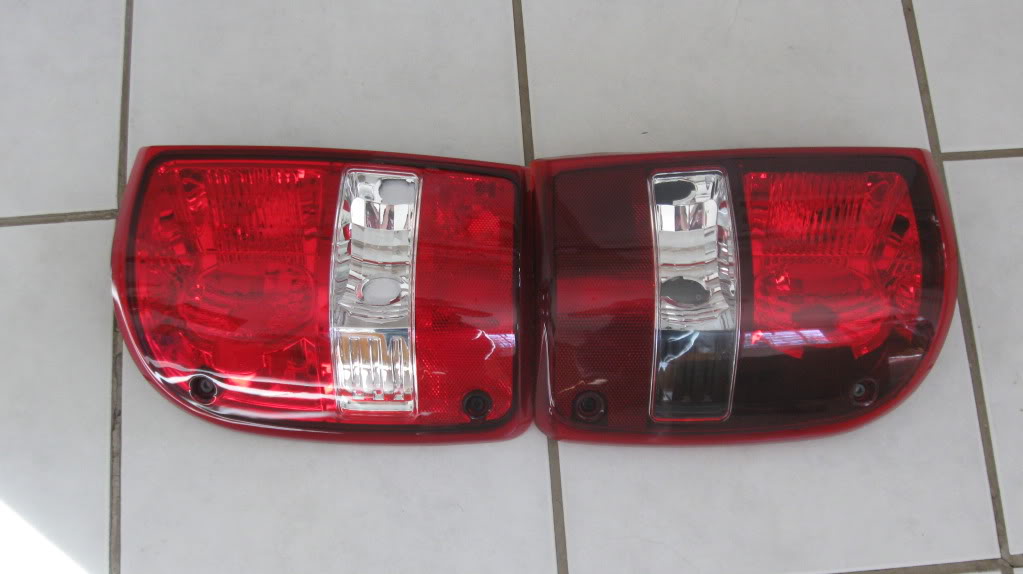
haha yeah that stuff is so delicate and its on the housing not the lens lol I messed up a headlight by not putting the tape on my clothes a few times to remove some of its adhesive strength. In person its more noticeable next to the stock tail
#8
01-26-2012
Like the reflective safety stuff that you can put on vests, and trailers and stuff like that.
lol.
#9
01-26-2012

#11
01-26-2012
#12
01-26-2012
thanks
Yeah i thought about it but just stuck with the f150 design. They have a curved top not a flat side on the inner part closest to the tailgate though. I could always do another set to see how it looks and have as a spare set.
Yeah i thought about it but just stuck with the f150 design. They have a curved top not a flat side on the inner part closest to the tailgate though. I could always do another set to see how it looks and have as a spare set.


#16
01-26-2012


