*TEASER* Explorer Power Seats & More...
#26
 05-18-2010

Small update
I'll be replacing the 12v outlets with some OEM style outlets when things settle down here. Will also add clear green LED indicators above the outlets when they've got power.
I raised the rear mounting bracket with about 1/2" of washers & longer bolts to each side. It seems to have taken some of the strain off of the console.
I've found that the gray auto carpet covering the console lid is quite comfortable & matches the interior pretty well, so it may stick around a while longer.
I had just began removing material from the rear control panel/cup holder. I'm going to open up the lower area (where the cup holder door is supposed to be) so I can store stuff under the armrest/CD storage area. There's quite a bit of room under there.
Will be installing new ABS textured panel for 12v outlets with indicator lights.


#28
06-16-2010
Back from the dead, I bring you a little something I've been working on....
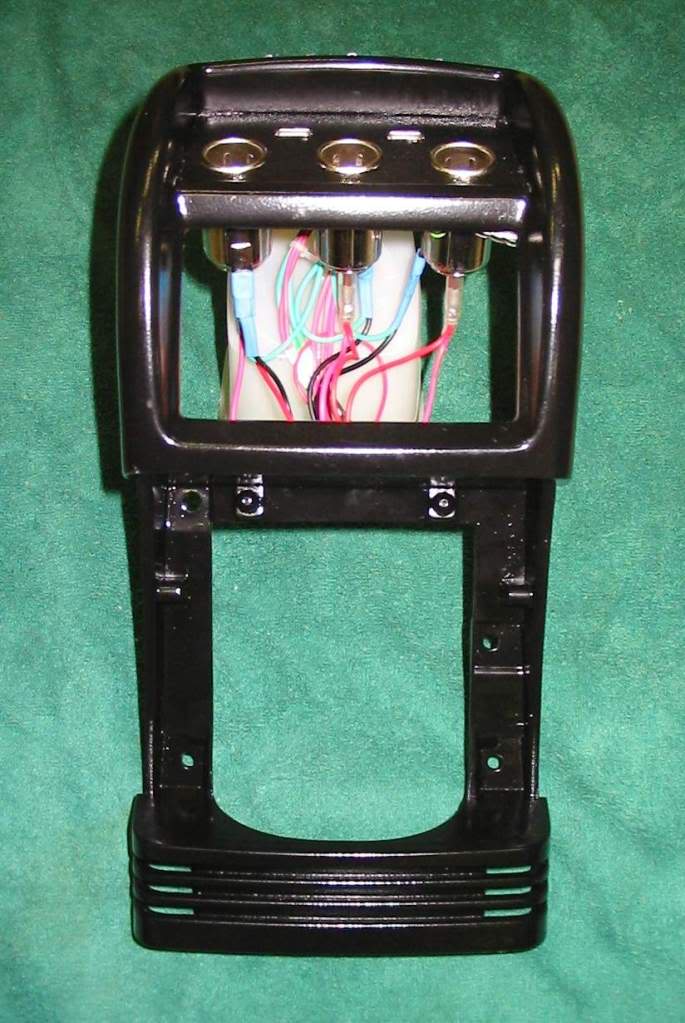
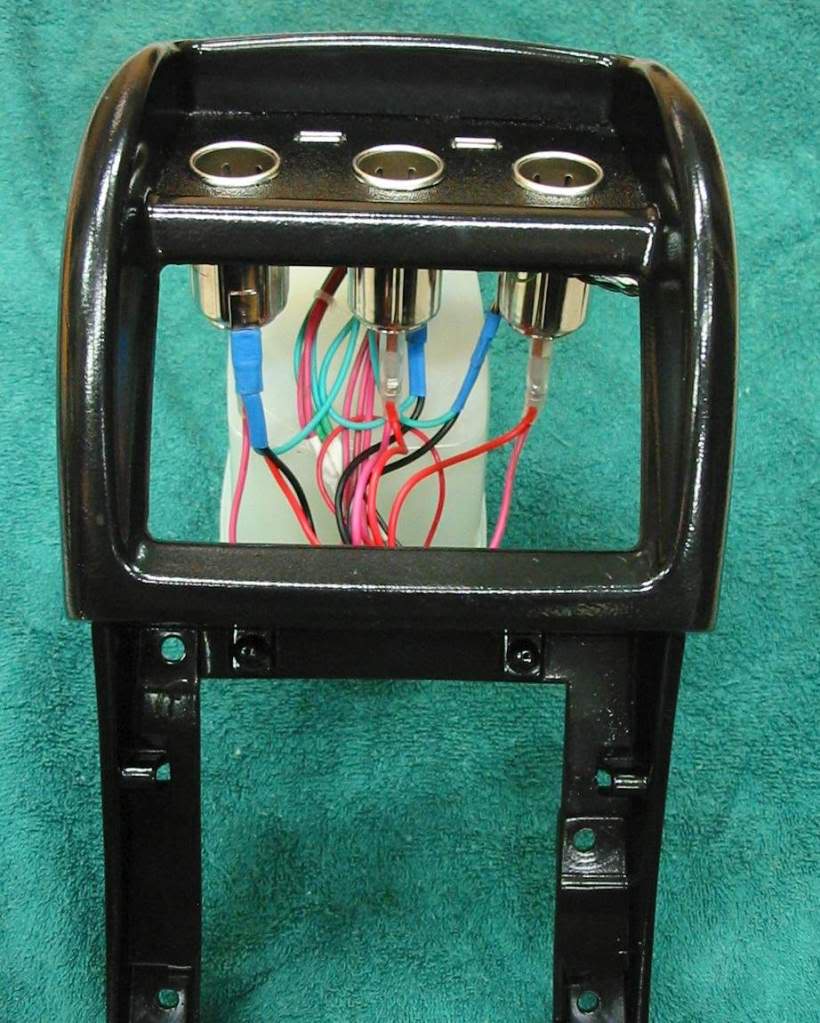

Finally got around to replacing the plate that holds the 12v outlets in the old rear vent location with some textured ABS.
I went with three 12v outlets, all wired together right now, but I can always run separate +12v & switches/fuses to each one if I decide to change my mind again.
Each 12v outlet has it's own 5mm clear/green LED mounted above to indicate which outlet has power (controlled by a single switch where the tissue holder opening used to be).
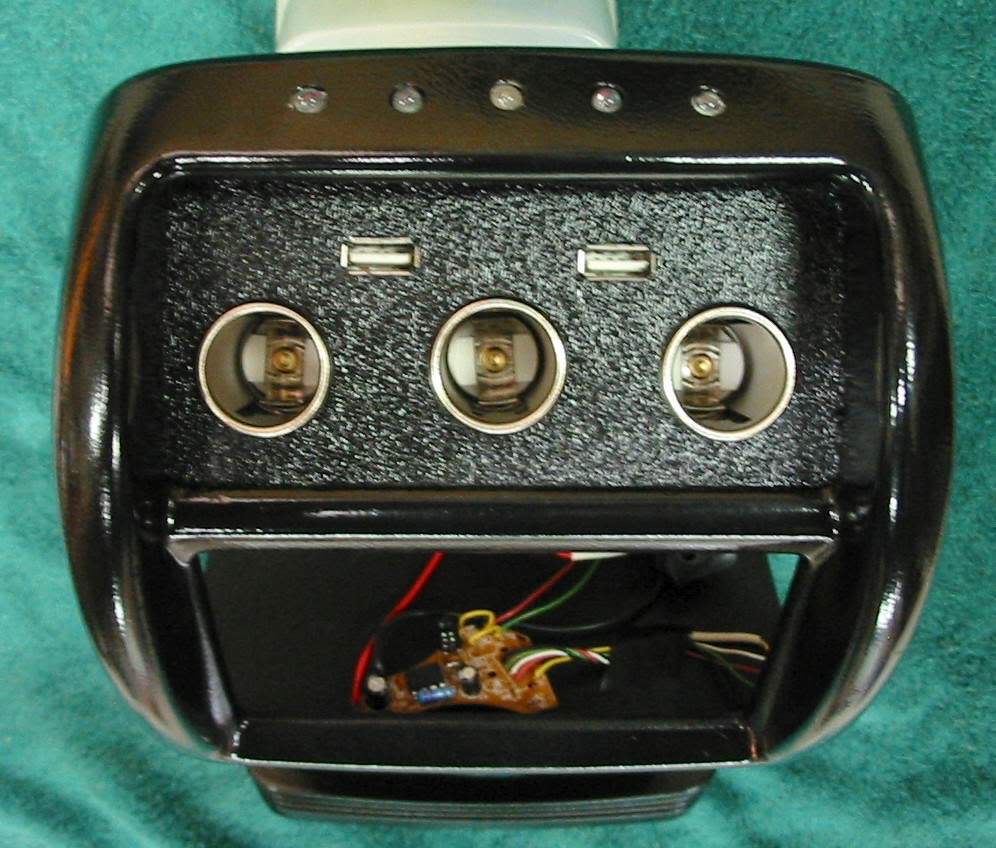
A few weeks ago, I ran into a deal online for one of those USB to 12v adapters that plugs into the cig lighter socket & it got me thinking.... why plug it in when I can install one permanent?!
Sooooo, I took the adapter apart, added some new wires to run to USB ports & changed the original resistors on the indicator LED's & BAM!
I had an old USB hub that didn't work so I took it apart & de-soldered the USB ports to use in my new power panel.
Soldered some cat5 wire to each lead, careful to keep the colors the same, and for good measure, I added a 2nd USB port too.
It was a trick getting the rectangles cut exactly for the USB ports, but after a few x-acto blades I got 'em in there.
Unfortunately, there was nothing to keep the USB ports from being pulled out when you remove whatever you have plugged into it, so I soldered a little blob on all 4 corners on the back side & added a little drop of Gorilla Glue to make sure the USB ports stay in place.
The adapter PCB had a LED indicator already, but when I connected my 2 new LED's to it, they had almost no output. After a little testing, I removed both original resistors from the board & soldered in some cat5 wire to bypass the resistors & just added my own resistors to each of my new LED's.
Each USB port has it's own clear/green indicator on the top side, just like the 12v ports.
One of my local Dollar Stores had these cool flexible LED USB powered book lights that I plan to plug into the USB ports for adjustable light behind the seats. (sorry, no pics of the USB flexy light, use your imagination)
If my indoor, daytime tests are any indication, the 5 green LED's are going to light up the entire headliner of the truck when everything is powered up.
I can't find Krylon Fusion in gray around here, so I just painted this back panel black. With the other black accents on the console, it looks fine... plus I doubt if anyone will ever notice it.
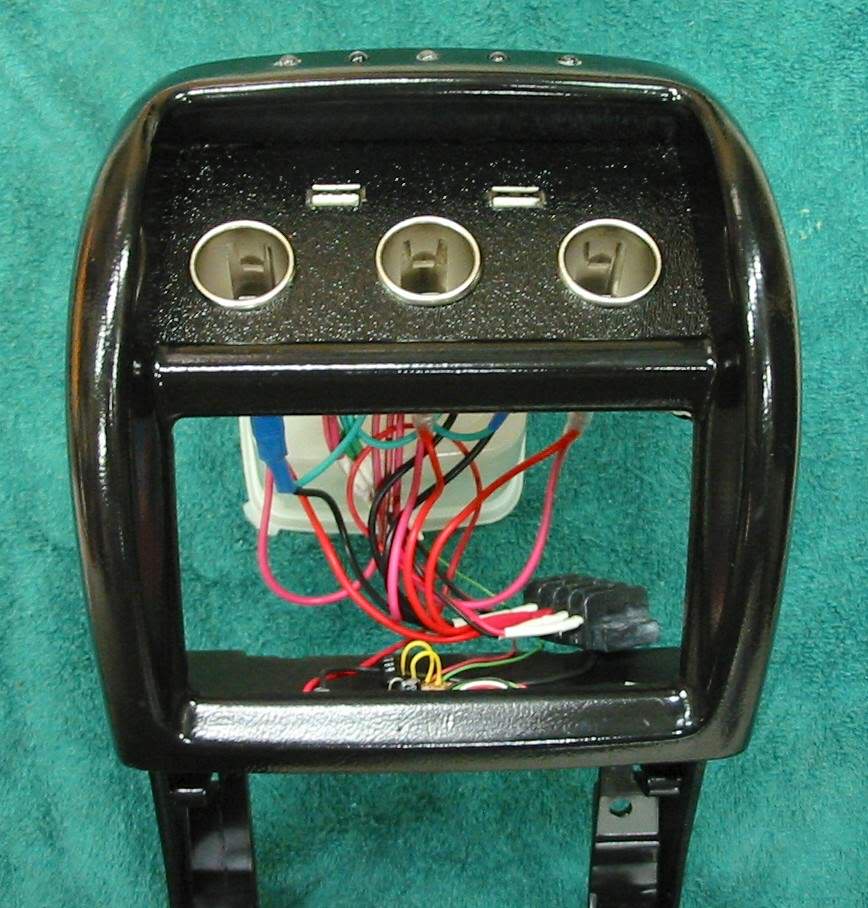
To make removing the panel easier, I added some ring terminals & barrier strips for the power & grounds.
Still don't have any idea what I'm going to do with the other rectangular opening or the lower opening. I did re-shape the bottom opening to make it easier to access under the console for storage.
That's it for now, more when I'm able
Finally got around to replacing the plate that holds the 12v outlets in the old rear vent location with some textured ABS.
I went with three 12v outlets, all wired together right now, but I can always run separate +12v & switches/fuses to each one if I decide to change my mind again.
Each 12v outlet has it's own 5mm clear/green LED mounted above to indicate which outlet has power (controlled by a single switch where the tissue holder opening used to be).
A few weeks ago, I ran into a deal online for one of those USB to 12v adapters that plugs into the cig lighter socket & it got me thinking.... why plug it in when I can install one permanent?!
Sooooo, I took the adapter apart, added some new wires to run to USB ports & changed the original resistors on the indicator LED's & BAM!
I had an old USB hub that didn't work so I took it apart & de-soldered the USB ports to use in my new power panel.
Soldered some cat5 wire to each lead, careful to keep the colors the same, and for good measure, I added a 2nd USB port too.
It was a trick getting the rectangles cut exactly for the USB ports, but after a few x-acto blades I got 'em in there.
Unfortunately, there was nothing to keep the USB ports from being pulled out when you remove whatever you have plugged into it, so I soldered a little blob on all 4 corners on the back side & added a little drop of Gorilla Glue to make sure the USB ports stay in place.
The adapter PCB had a LED indicator already, but when I connected my 2 new LED's to it, they had almost no output. After a little testing, I removed both original resistors from the board & soldered in some cat5 wire to bypass the resistors & just added my own resistors to each of my new LED's.
Each USB port has it's own clear/green indicator on the top side, just like the 12v ports.
One of my local Dollar Stores had these cool flexible LED USB powered book lights that I plan to plug into the USB ports for adjustable light behind the seats. (sorry, no pics of the USB flexy light, use your imagination)
If my indoor, daytime tests are any indication, the 5 green LED's are going to light up the entire headliner of the truck when everything is powered up.
I can't find Krylon Fusion in gray around here, so I just painted this back panel black. With the other black accents on the console, it looks fine... plus I doubt if anyone will ever notice it.
To make removing the panel easier, I added some ring terminals & barrier strips for the power & grounds.
Still don't have any idea what I'm going to do with the other rectangular opening or the lower opening. I did re-shape the bottom opening to make it easier to access under the console for storage.
That's it for now, more when I'm able
#29
06-16-2010


#30
06-16-2010


#32
06-17-2010
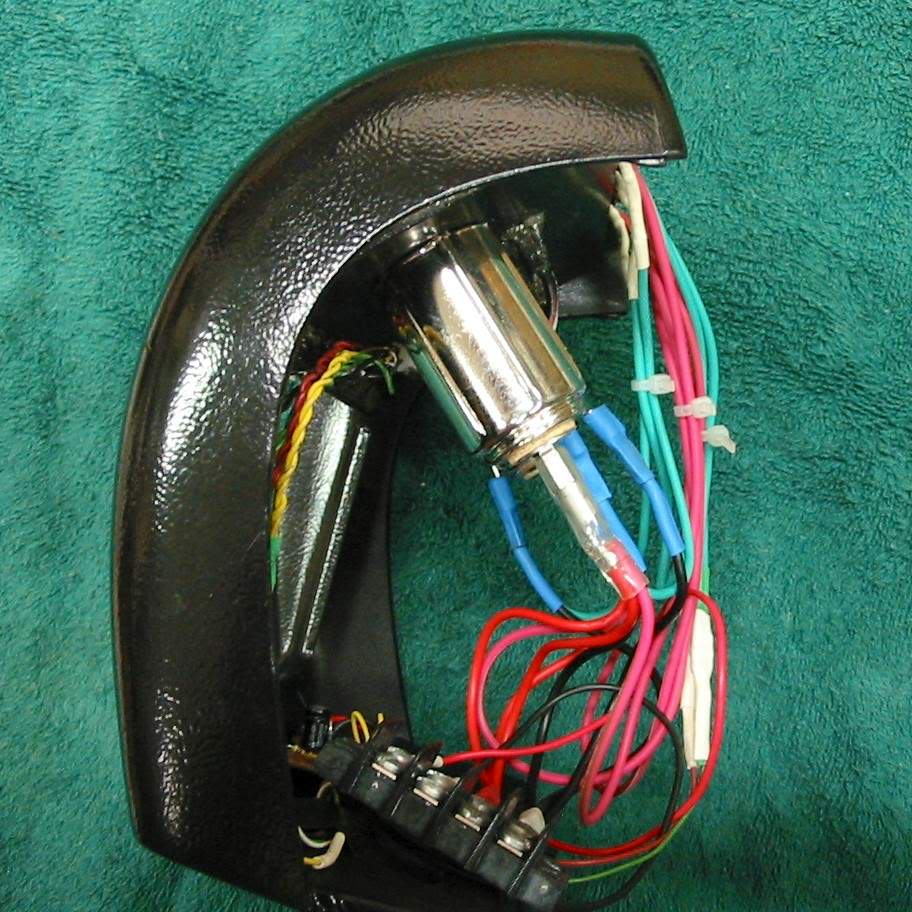
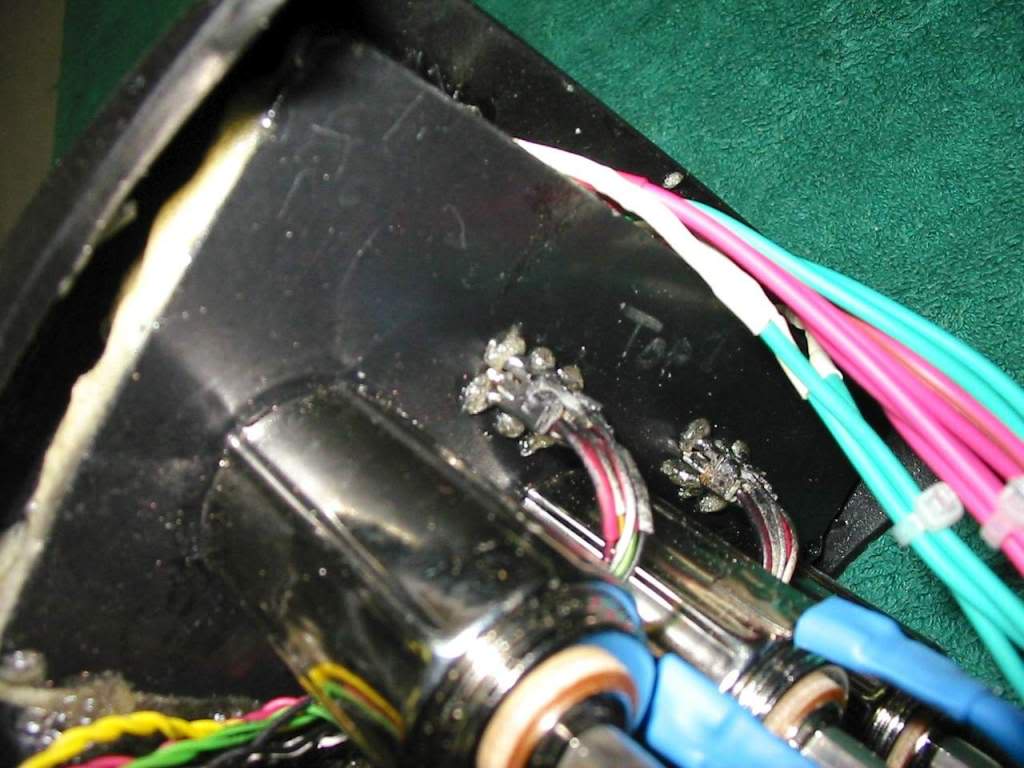
The OEM face for the airbag switch had a hole just large enough for the key to fit into which left a gap when I tried to use it on the console. My solution was to make the hole a bit larger than the entire circular area (where the key goes into). This let the entire switch ***'y set closer & almost flush with the outside of the console. I think the hole was just over 1".
The indicator was a different story. I had the right size hole, but lining it up was a pain...that's another reason I made the key hole area slightly larger, it gives some wiggle room.
I attached the indicator insert with some glue and the switch ***'y is held in place with a couple layers of thick emblem type double sided tape.
So far it's stayed in place & it's been 90*+ this week.
I'll try to get some close-up pics of the switch mounting next time I'm working on the console.

Thread
Thread Starter
Forum
Replies
Last Post
For Sale: Seats, seats, SEATS! NC
drppdyllwrngr
OLD - Interior, Exterior, Electrical, & Misc.
30
03-16-2010 07:38 PM
lifted97ranger
Interior Semi-Tech
18
12-17-2007 03:36 PM


