Started a Cup Holder Lighting Project
#1
 02-27-2013


#2
02-27-2013
I hope this works out well. I'll have to check it out whenever Taylor drives up and then tackle the project before the dunes.
#3
02-28-2013
Later today I will try sandblasting the top to see what effect it has on the light.
The company sells three single colors LEDs and a three-color setup depending on what you want your interior to look like.
Last edited by Scrambler82; 02-28-2013 at 06:04 AM.
#5
02-28-2013
#6
02-28-2013
Here is the first day of my quick mod…
Second Day
Cut a puck that fit the rear Cup Holder out of the �” Plexiglass.
Drilled a center counter bore, actually used a �” drill and only went in 3/16” so the hole is tapered from the drill point.
Placed the LED and the Puck in the Cup Holder and turned on the power supply, NICE !
The center was VERY brilliant, a little too brilliant but the best part is that the panel and especially the edge is glowing like a light pipe or fiber optics.
With a 1” round disc placed over the center position of the LED all there is a glow, a little bright yet but I will increase the center disc to 2” to see if I can reduce the total glow.
I didn’t get time to take pictures yet and I have only made the rear Cup Holder Light so I will get pictures tomorrow as I make and finish the front Cup Holder Lights, which is smaller.
Material:
1) Plexiglass, I used �” but ⅜” will do just not thinner than �”.
2) SMT LED Light Modules, set up for 12 volt already and they have a flat ribbon cable attached from the resistor to the LED allowing it to be placed under the plexiglass puck, sweet. (numbers tomorrow)
The only problem was actually cutting the pucks, one so far, the circle cutter with the arm was not stable enough for plexiglass since I had to remove the center bit but I had two hole saws, one 3 �” and one 2 �”, I removed the center bit and used a drill press and it went well enough.
The holes saws are a little over sized but after cutting the plexiglass the center of the hole was almost the correct size. Some sanding on the belt sander and the one I made fit.
Tomorrow pictures and the finished product.
#7
02-28-2013
Third Day
Here are a few photos of the Cup Holder Lighting.
Cutting out the pucks for the bottom of the cup holders.
The centering drill bit in the Hole Saw was removed for this step but you need a drill press to keep things from moving around.

The front (smaller) and rear pucks.

The center counter bore.
This was done with a 5/16” bit drilled in approximately 3/16” and then a �” drill bit to open up the tapered edges, again only 3/16” in, not even the bits tip.
The tapered edge was added to direct some of the light to the puck edges.
The LED, notice the flat ribbon cable used, made it easy to keep things low and tight.
Oznium.com… part number: 1-1659-481, Prewired Surface Mount LED in RED; you can chose your own color.

The Cup Holder Mod for the wiring.
This method will not be used on the finished product, plan is to drill the bottom center and then seal the puck with windshield sealer for waterproofing. I believe the center drilling on the puck may disappear depending on light direction without the center bore.
Notice the heat shrink covering the resistor.

First shot of LED in the dark, slight angle.

Top View.

Side View.

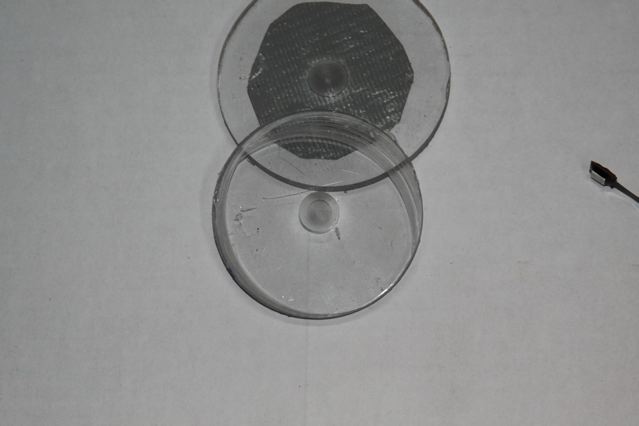
Top View but with a 2” piece of Duck Tape over one of the LED Position.
I think some black paint will be better and it will be tried tomorrow night along with froasting the top surface of the puck.

So far so good, the LED that was chosen for the Cup Holder is a little too bright for my taste but with a little black out I think it will work
I may contact Oznium to see if I can change the resistor, thinking a higher resistance setup will reduce the light.
Here are a few photos of the Cup Holder Lighting.
Cutting out the pucks for the bottom of the cup holders.
The centering drill bit in the Hole Saw was removed for this step but you need a drill press to keep things from moving around.
The front (smaller) and rear pucks.
The center counter bore.
This was done with a 5/16” bit drilled in approximately 3/16” and then a �” drill bit to open up the tapered edges, again only 3/16” in, not even the bits tip.
The tapered edge was added to direct some of the light to the puck edges.
The LED, notice the flat ribbon cable used, made it easy to keep things low and tight.
Oznium.com… part number: 1-1659-481, Prewired Surface Mount LED in RED; you can chose your own color.
The Cup Holder Mod for the wiring.
This method will not be used on the finished product, plan is to drill the bottom center and then seal the puck with windshield sealer for waterproofing. I believe the center drilling on the puck may disappear depending on light direction without the center bore.
Notice the heat shrink covering the resistor.
First shot of LED in the dark, slight angle.
Top View.
Side View.
Top View but with a 2” piece of Duck Tape over one of the LED Position.
I think some black paint will be better and it will be tried tomorrow night along with froasting the top surface of the puck.
So far so good, the LED that was chosen for the Cup Holder is a little too bright for my taste but with a little black out I think it will work
I may contact Oznium to see if I can change the resistor, thinking a higher resistance setup will reduce the light.
#9
02-28-2013
Blast it first then spray on the night shade.
I may have an extra set of pucks IF this is something you are interested in but you will have to get the LEDs.
#10
02-28-2013
I will take you up on that offer, i want to give this a shot. If you pick up the night shade, do really light coats, like a mist. it gets dark pretty quick.
#11
03-01-2013
It was suggested by Buggman to use a small regulator, I will need to look into that.
I will let you know P.C. when I get them made up.
Today I am sand blasting the first pucks to frost them.
Going to the Auto Store for some more parts, Night Shade Paint, Windshield Sealer and I should finish the first set today.
Snow is going away quick, so picture time again.
I will let you know P.C. when I get them made up.
Today I am sand blasting the first pucks to frost them.
Going to the Auto Store for some more parts, Night Shade Paint, Windshield Sealer and I should finish the first set today.
Snow is going away quick, so picture time again.
#12
03-02-2013


#13
03-02-2013

Join Date: Jan 2012
Location: Woodbridge, VA
Posts: 304
Likes: 0
Received 0 Likes
on
0 Posts
#15
03-02-2013
yeah he said he would sand blast it which is why i suggested the nite shade. It just runs off otherwise but it should have enough texture to stick if sandblasted lightly, i'd assume. idk
#16
03-03-2013
Me too on the sandblasting vs paint.
I cut out four puck today, two of each.
Tried painted the center and it works out ok cutting back on the direct lighting of the centered LED.
I didn't blast them yet but will do.
Small pucks are 2.56" OD and the larger (rear) puck measures 2.90" OD.
That's all for today.
I cut out four puck today, two of each.
Tried painted the center and it works out ok cutting back on the direct lighting of the centered LED.
I didn't blast them yet but will do.
Small pucks are 2.56" OD and the larger (rear) puck measures 2.90" OD.
That's all for today.

Thread
Thread Starter
Forum
Replies
Last Post


