Project B-FORD-K (VERY PIC HEAVY)
#51
 08-25-2013


Join Date: Mar 2011
Location: westminster,colorado
Posts: 54
Likes: 0
Received 0 Likes
on
0 Posts
1998 Mazda B-FORD-K: 4.0L | Auto | 4x4 | 235,000 miles
3" Body Lift | 33x12.50R15 Goodyear Duratracs | 31 Spline 8.8 Limited Slip | 4.10's
FX4 Lvl 2 Seats | Explorer OHC | Full Length Center Console
Alpine CDA-105 | JBL 4 Channel 600w amp | 4 JBL 6X9" 3 Way 300w | JBL Monoblock 700w Amp | 2 JBL 8" 800w Subs
C4x4 Front Bumper | 2010 Ranger Front Clip | 06+ Power Mirrors | 20% Tint Over Factory
Recon 10.5K Winch | Headache Rack | Cobra CB | TG Rock Sliders | 200 Amp Alt | Much More
fixed
#52
08-25-2013
Join Date: Mar 2011
Location: westminster,colorado
Posts: 54
Likes: 0
Received 0 Likes
on
0 Posts
#53
09-03-2013
Join Date: Jun 2011
Location: Burlington, MA
Posts: 382
Likes: 0
Received 0 Likes
on
0 Posts
#54
09-04-2013
You have to weld the support bars to the sliders. They sell them with them welded on already or without. I got them without so I can angle the sliders and put them on how I wanted them.
#55
09-04-2013
Join Date: Jun 2011
Location: Burlington, MA
Posts: 382
Likes: 0
Received 0 Likes
on
0 Posts
oh ok, so you just welded the bars on at a better angle so the gap doesn't look as bad and the fit is better? that seems to make more sense now.
did you do the welding or did you have a fab shop do it? i cant imagine it would even be that expensive to have done.
The reason I'm asking is bc i've been thinking about sliders for awhile and was concerned about their being a gap, and the welding since i don't own a welder.
did you do the welding or did you have a fab shop do it? i cant imagine it would even be that expensive to have done.
The reason I'm asking is bc i've been thinking about sliders for awhile and was concerned about their being a gap, and the welding since i don't own a welder.
#56
09-04-2013
oh ok, so you just welded the bars on at a better angle so the gap doesn't look as bad and the fit is better? that seems to make more sense now.
did you do the welding or did you have a fab shop do it? i cant imagine it would even be that expensive to have done.
The reason I'm asking is bc i've been thinking about sliders for awhile and was concerned about their being a gap, and the welding since i don't own a welder.
did you do the welding or did you have a fab shop do it? i cant imagine it would even be that expensive to have done.
The reason I'm asking is bc i've been thinking about sliders for awhile and was concerned about their being a gap, and the welding since i don't own a welder.
#57
09-14-2013
I've been really busy since my last update in this thread. I've installed explorer leaf springs with a 2 inch lift shackle and removed lift blocks, finally painted the hood to match the rest of the truck, installed 06 Ranger fender badges, black fx4 lvl 2 decals on the bed and installed a bug deflector.
Now I'm going to save up some money for a superlift. For those of you running the superlift, how are you lifting the rear of the truck. From what I've seen the superlift kit only comes with a 3" lift block for the rear, but I do not want to install a lift block back there. Would love to upgrade to coil overs while doing the lift but it'll depend on if I have the money at the time, if not I guess I'll just install the t-bar drop brackets for now.
Onto pictures.
Last edited by Chris98; 09-14-2013 at 08:55 PM.
#58
12-05-2013
Since my last update I have upgraded my amp for the subs and installed some new subs. I also upgraded the wiring for all the speakers.
I replaced the 4 channel Kenwood with a Monoblock Kenwood. It's rms power is 4 ohms: 500 watts x 1 chan, 2 ohms: 900 watts x 1 chan and 1 ohm: >900 watts x 1 chan. I currently have it wired at 2 ohms.
I replaced the old cheap speaker wire I had with some 12 gauge with 295x2 Strands and the subwoofer wiring with some 8 gauge with 735x2 strands. All new gold plated terminals and a grounding block.
I purchased 2 120mm pc fans to keep the box cool for the amplifiers and 2 relays to turn the fans on.
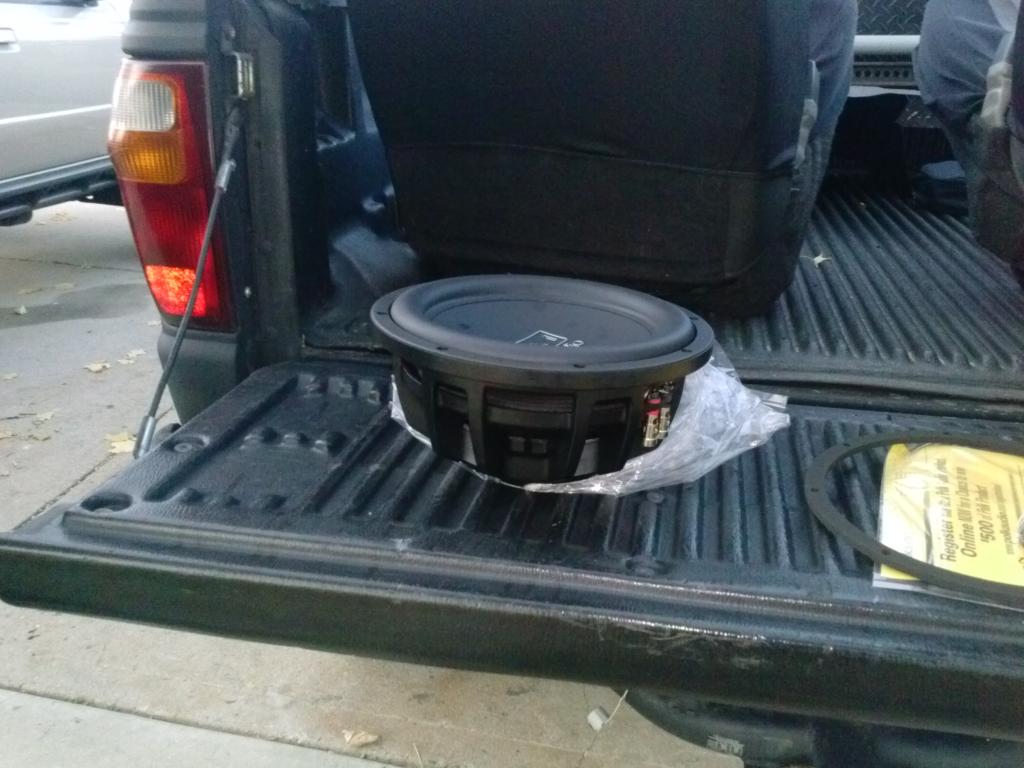
I replaced the 2 8" JBL subwoofers with 2 10" Polk Audio MM1040DVC.
Here's the specs on them.
Power Handling:
Peak: 700 watts
RMS: 350 watts
Impedance: Single 4 Ohm
Polymer woofer cone
Butyl rubber surround
Carbon Composite Basket is very lightweight and will not flex during use
Marine Certified
Heavy duty terminals can be used with speaker wire up to 8 gauge or two twisted pairs of 12 gauge
Klippel Distortion Analyzer results in the best possible performance at any listening level
2" High temperature copper voice coil
Frequency response: 24-200 Hz
Sensitivity: 91 dB
Onto Pictures.
New stuff :)

Interior out and old wiring mess laying on floor.

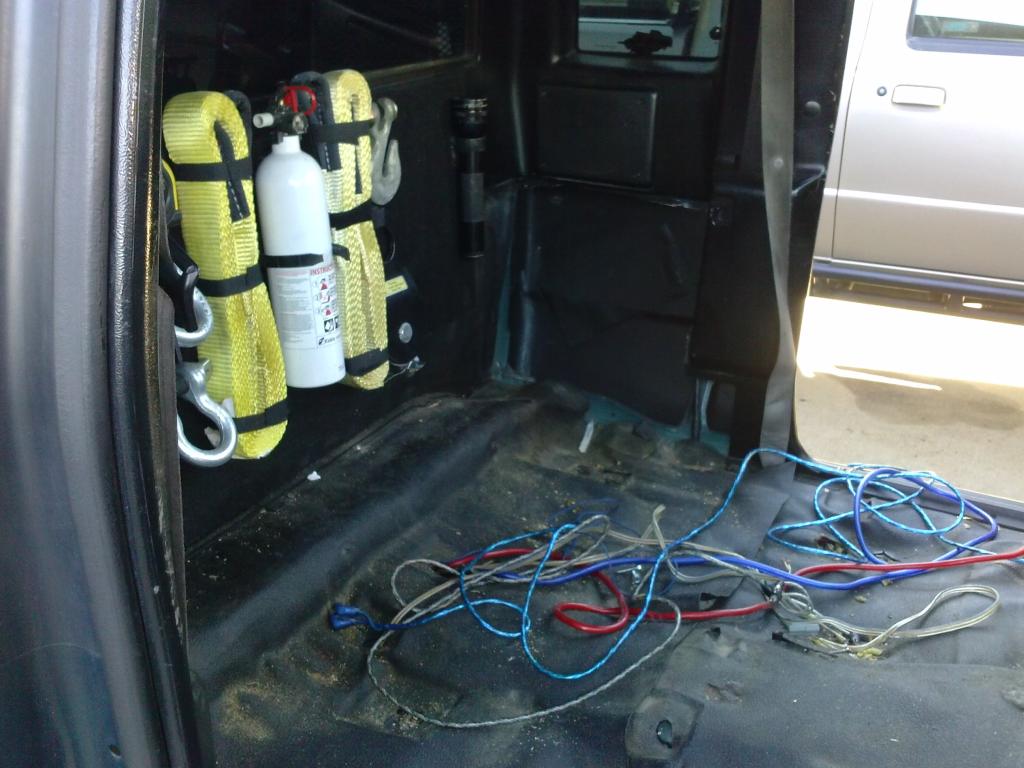
Everything laying in the bed of the truck.

Some of the old cheap wiring I ripped out of it.

Floors looking a little cleaner now
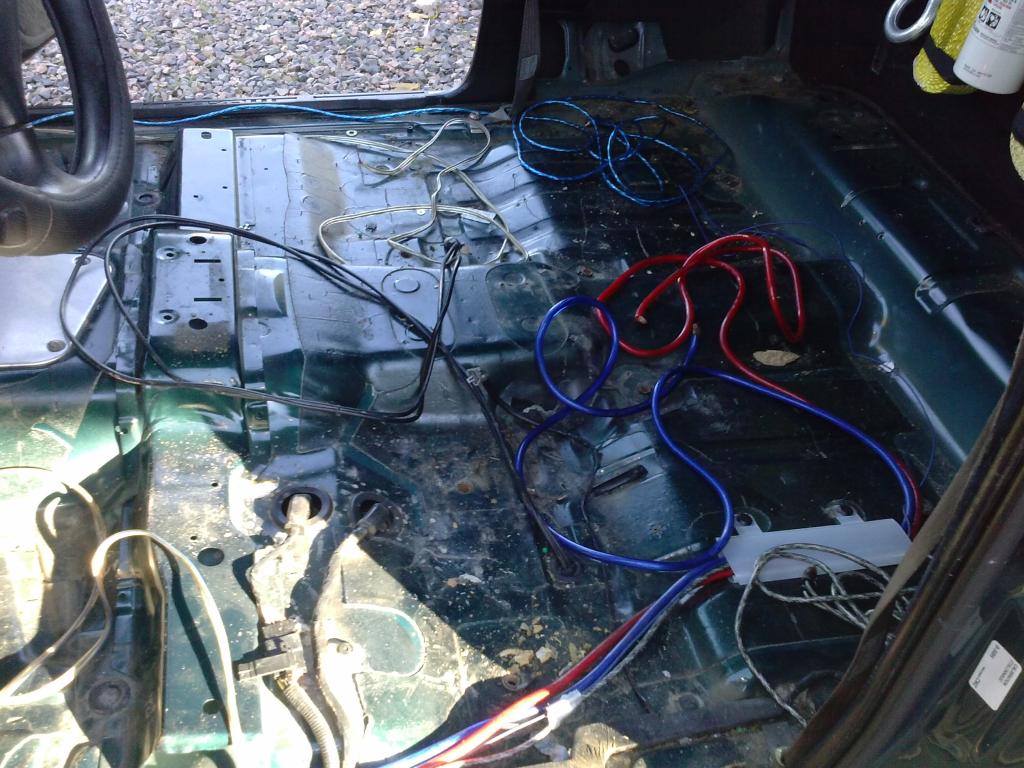
New wire pulled through door jam.

New wiring mess lol.


I installed some foam on the cab walls as the boxes would rattle against the wall every now and then and I was sick of it.

120mm PC Cooling fans installed inside box to help cool the amps off.

Amps Test Fitted Inside Box


New Subwoofer

Sorry I don't have any pics of the subwoofers installed in the truck.
Here's a video of them. Sound quality of the video sucks as it was filmed with my shitty dumbphone.
I replaced the 4 channel Kenwood with a Monoblock Kenwood. It's rms power is 4 ohms: 500 watts x 1 chan, 2 ohms: 900 watts x 1 chan and 1 ohm: >900 watts x 1 chan. I currently have it wired at 2 ohms.
I replaced the old cheap speaker wire I had with some 12 gauge with 295x2 Strands and the subwoofer wiring with some 8 gauge with 735x2 strands. All new gold plated terminals and a grounding block.
I purchased 2 120mm pc fans to keep the box cool for the amplifiers and 2 relays to turn the fans on.
I replaced the 2 8" JBL subwoofers with 2 10" Polk Audio MM1040DVC.
Here's the specs on them.
Power Handling:
Peak: 700 watts
RMS: 350 watts
Impedance: Single 4 Ohm
Polymer woofer cone
Butyl rubber surround
Carbon Composite Basket is very lightweight and will not flex during use
Marine Certified
Heavy duty terminals can be used with speaker wire up to 8 gauge or two twisted pairs of 12 gauge
Klippel Distortion Analyzer results in the best possible performance at any listening level
2" High temperature copper voice coil
Frequency response: 24-200 Hz
Sensitivity: 91 dB
Onto Pictures.
New stuff :)
Interior out and old wiring mess laying on floor.
Everything laying in the bed of the truck.
Some of the old cheap wiring I ripped out of it.
Floors looking a little cleaner now
New wire pulled through door jam.
New wiring mess lol.
I installed some foam on the cab walls as the boxes would rattle against the wall every now and then and I was sick of it.
120mm PC Cooling fans installed inside box to help cool the amps off.
Amps Test Fitted Inside Box
New Subwoofer
Sorry I don't have any pics of the subwoofers installed in the truck.
Here's a video of them. Sound quality of the video sucks as it was filmed with my shitty dumbphone.
#59
12-05-2013
Join Date: Jun 2011
Location: Burlington, MA
Posts: 382
Likes: 0
Received 0 Likes
on
0 Posts
#60
05-24-2014
So it's been a long time since my last update, but I haven't really done nothing to it and now it sits most of the time since I bought a new truck for a daily driver in February. I did rip out all of my audio equipment out of it to install in the new truck.
I took it on a trail today though. First time since doing all the rear end work and I am very happy with the results.
Onto the Pictures.
Not to bad of flex for just explorer springs and a 2" shackle.


Getting ready to leave the trail.


And of course the videos. Sorry for bad quality, I couldn't find the charger for my good camera so I had to use a ancient camera today. Thinking about buying a go pro and a mount and just mounting the go pro on the outside of the truck and film the entire trip.
Attacking some whoop de doos
Then we found a nice spot to do some jumps
My Attempt at a jump
I took it on a trail today though. First time since doing all the rear end work and I am very happy with the results.
Onto the Pictures.
Not to bad of flex for just explorer springs and a 2" shackle.
Getting ready to leave the trail.
And of course the videos. Sorry for bad quality, I couldn't find the charger for my good camera so I had to use a ancient camera today. Thinking about buying a go pro and a mount and just mounting the go pro on the outside of the truck and film the entire trip.
Attacking some whoop de doos
Then we found a nice spot to do some jumps
My Attempt at a jump
#61
05-25-2014
Join Date: Jun 2011
Location: Burlington, MA
Posts: 382
Likes: 0
Received 0 Likes
on
0 Posts
#62
05-26-2014
Not really. That was actually my second time jumping it. I guess my first time I got even more air and when I came down the grill flew 10 ft in front of the truck. Only damage was to the front bump stops, they're almost torn off now.
#63
05-31-2014
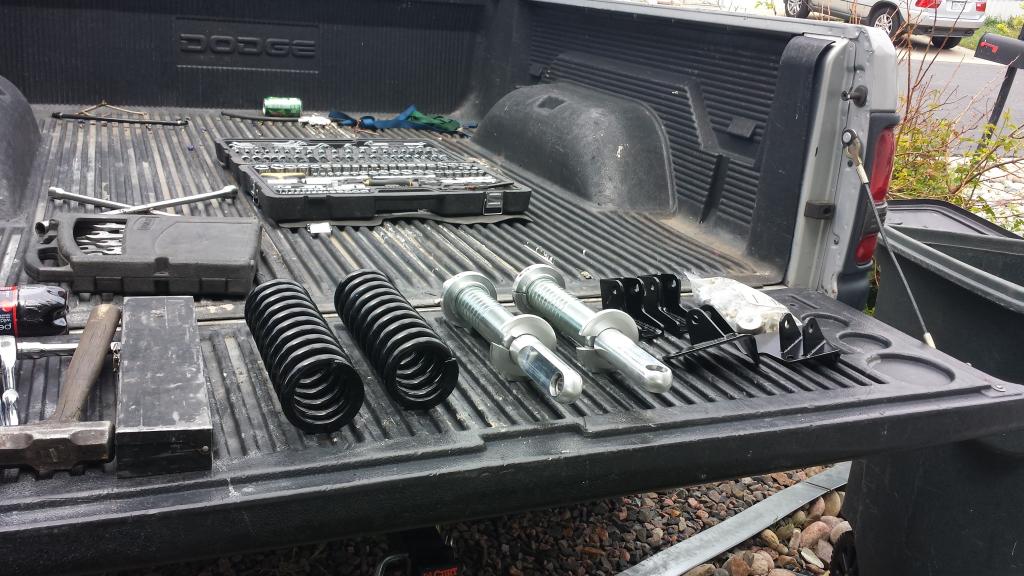
So a little teaser here. Purchased the coil overs from Mitchelltactical earlier this week. They're 6" FOA coilovers with 12" viper coilsprings and ME00Stepside bracket kit. Got them Friday morning and got a little excited and jumped the gun and started to install everything before the super lift arrived. So now I'm waiting for the super lift to arrive and then I can see how she handles.
Good bye torsion bars, which were slightly bent and the passenger adjuster bolt was also bent.


New parts.


Gussets welded in, they're not the prettiest welds but they're strong. And bumpstops are cut.


Brackets bolted in place.


Superlift Ordered.

Good bye torsion bars, which were slightly bent and the passenger adjuster bolt was also bent.
New parts.
Gussets welded in, they're not the prettiest welds but they're strong. And bumpstops are cut.
Brackets bolted in place.
Superlift Ordered.

#65
06-01-2014
#66
06-01-2014
#67
06-02-2014
Thanks guys, I've been wanting to coil overs and a superlift since I pretty much bought the truck. But after the last wheeling trip the t bars just weren't going to do it for me any more and that's what made me want to dump some money into her suspension.
That's good to know. I wasn't sure how much I was going to have to remove when I did cut them, then yesterday I was reading some topics on it and they were saying the same.
you will probaly need to trim some more of the bump stop brackets , all 4 of the truck I have done it has needed to be trimmed flush with the frame to clear the coils.
#68
06-03-2014
Join Date: Jun 2011
Location: Burlington, MA
Posts: 382
Likes: 0
Received 0 Likes
on
0 Posts
#70
06-13-2014

#72
06-13-2014


#74
06-14-2014


