Almost finished the Body Lift today...
#1
 03-16-2008


Join Date: Feb 2005
Location: USA
Posts: 2,667
Likes: 0
Received 0 Likes
on
0 Posts
Almost finished the Body Lift today...
Well thats right I finally did it! I got this thing rolling.. I did the body lift today and everything is done except for the bumpers. I was killed after all that so I just had to quit. Does anyone have any tips for getting the rear bumper lifted with the brackets and still using the hitch? And what all do I need to cut on the front one to make it work? I think my brain was fried when I was trying to look at the directions on it.
Other than that its great!! I couldnt believe how much it picked the truck up...wayy more than I expected!!
Other than that its great!! I couldnt believe how much it picked the truck up...wayy more than I expected!!
#2
03-16-2008

#3
03-16-2008
Join Date: Feb 2005
Location: USA
Posts: 2,667
Likes: 0
Received 0 Likes
on
0 Posts
#4
03-16-2008
Join Date: Jun 2007
Location: Phoenix, AZ
Posts: 1,462
Likes: 0
Received 0 Likes
on
0 Posts

#5
03-16-2008
Join Date: Jan 2007
Location: Columbus, Oh
Posts: 287
Likes: 0
Received 0 Likes
on
0 Posts

 :
:
#7
03-16-2008
Join Date: Mar 2005
Location: Brunswick, Ohio
Posts: 336
Likes: 0
Received 0 Likes
on
0 Posts
I've had my rear bumper in the stock location ever since i did mine 3 years ago. I prefer it that way, i use my truck as a truck. so having to step up into the bed is so much easier with the bumper lower. I worked with someone with b/l'ed ranger and he raised his rear bumper, and it was tough to step up to get into the bed.
#8
03-16-2008
Join Date: Jan 2008
Location: Bridgeton, N.J.
Posts: 383
Likes: 0
Received 0 Likes
on
0 Posts
#9
03-16-2008
Join Date: Feb 2005
Location: USA
Posts: 2,667
Likes: 0
Received 0 Likes
on
0 Posts
Alright alright alright even though I dont wanna do it Ill put some bumperless pictures up here...lol Ill have them up this evenin I gotta get that bumper raised in the back..it seems so much easier to just leave it but I dont wanna have that gap and everyone does the diamond plate thing..I just want it to look clean...I gotta fix the exhaust and hitch too..lol blah
#10
03-16-2008

#11
03-16-2008
x2 thats how I've always done em, I'm on like numero 7 or something like that (not counting mine goign up/down)
#12
03-16-2008
Join Date: Feb 2005
Location: USA
Posts: 2,667
Likes: 0
Received 0 Likes
on
0 Posts
Okay Ill def. do that for the front, how did ya'll do the back? Just have someone hold the bumper while you mark the places to drill on the frame and hitch? Thats the only way I can see to do it.
I hope I didnt forget anything that will be in a bind...for some reason Im really paranoid about it..
Radiators dropped
Filler neck done
Wires on motor dropped
Brake lines rebent
transfer case wiring rerouted
auto trans cable unclipped
I hope thats it..
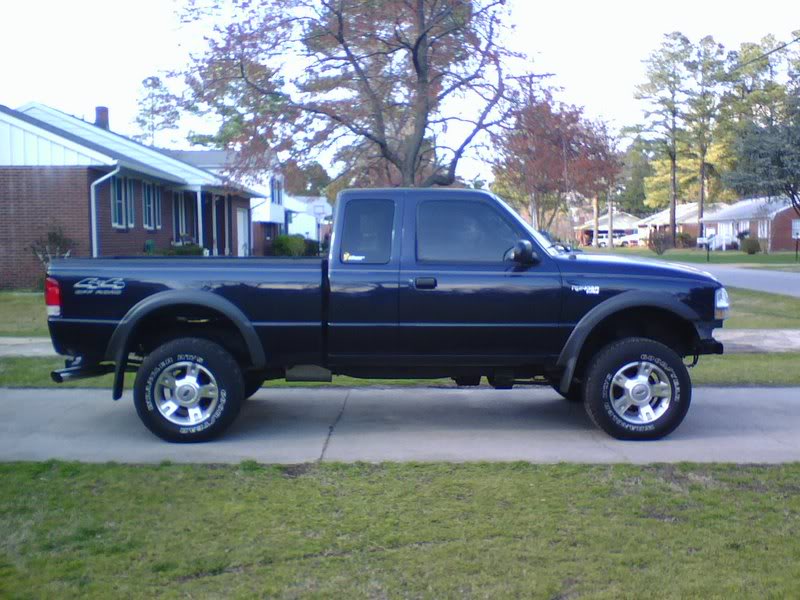
here are my pictures so far:
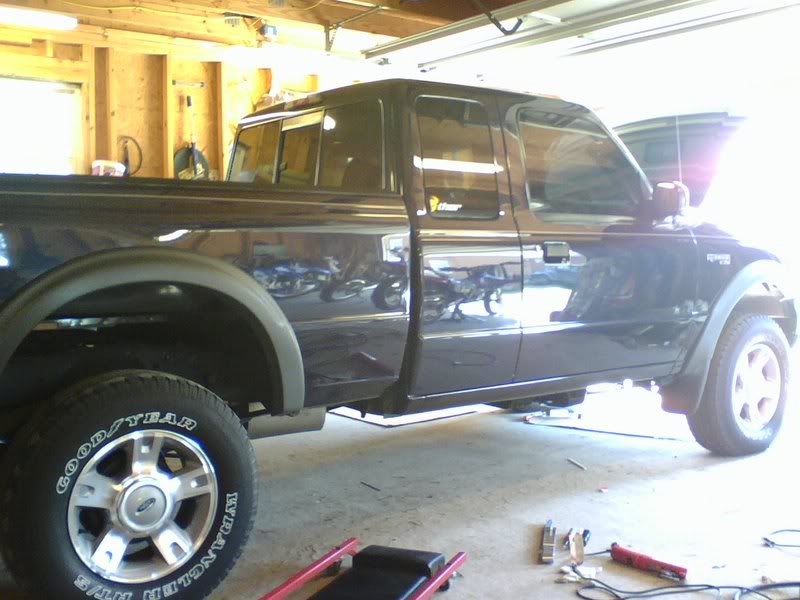
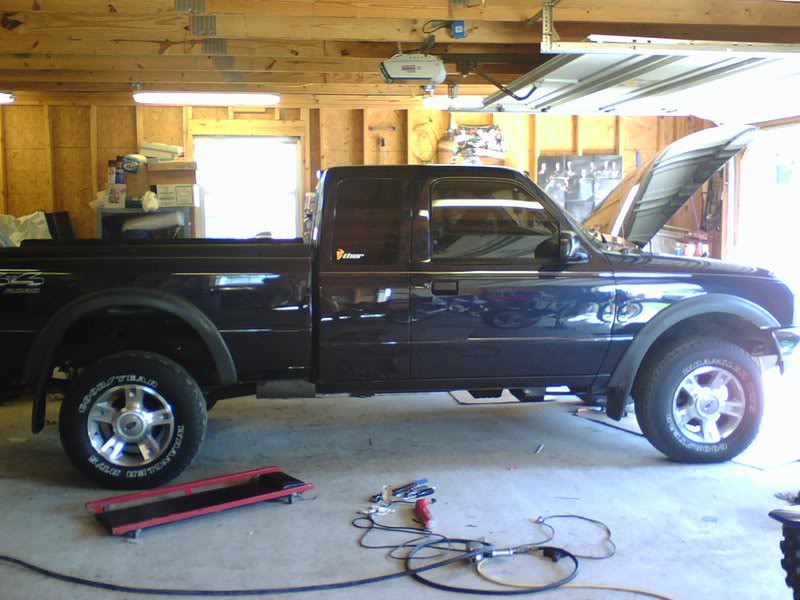
Hey I look like Brenton!!! hahaha
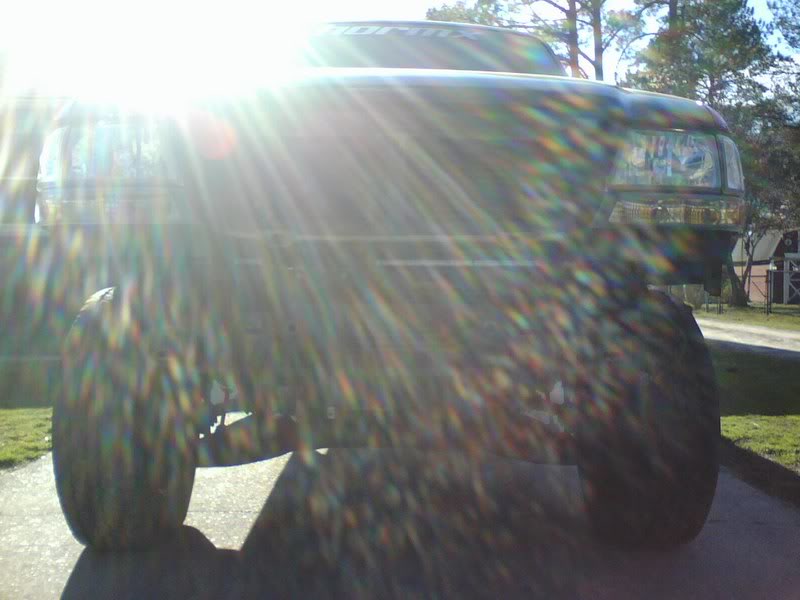
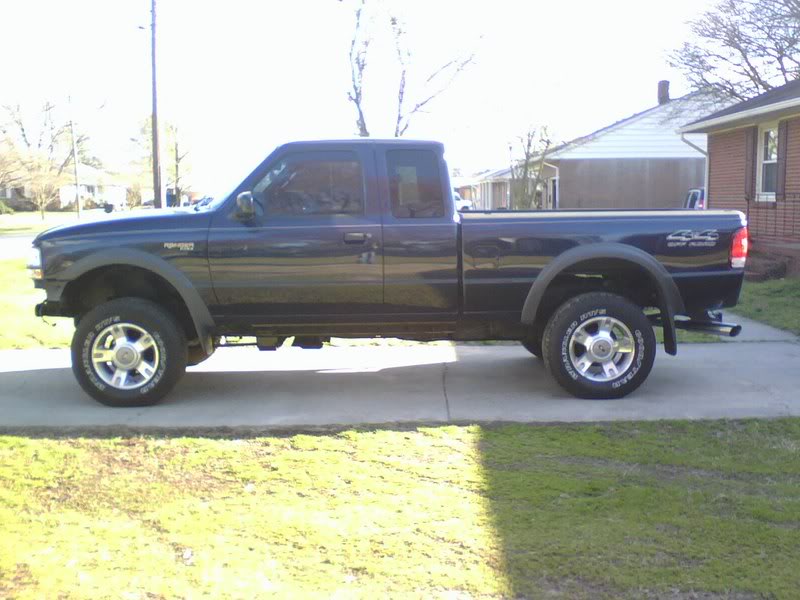
and a before and after:
Before:

After:
I hope I didnt forget anything that will be in a bind...for some reason Im really paranoid about it..
Radiators dropped
Filler neck done
Wires on motor dropped
Brake lines rebent
transfer case wiring rerouted
auto trans cable unclipped
I hope thats it..
here are my pictures so far:
Hey I look like Brenton!!! hahaha
and a before and after:
Before:
After:
#14
03-16-2008
Join Date: Feb 2005
Location: USA
Posts: 2,667
Likes: 0
Received 0 Likes
on
0 Posts
#15
03-16-2008
Join Date: Aug 2005
Location: southgate, mi
Posts: 1,989
Likes: 0
Received 0 Likes
on
0 Posts
#16
03-16-2008
Join Date: Feb 2005
Location: USA
Posts: 2,667
Likes: 0
Received 0 Likes
on
0 Posts
#19
03-17-2008
Join Date: Oct 2006
Location: Virginia Beach, VA
Posts: 193
Likes: 0
Received 0 Likes
on
0 Posts
#21
03-17-2008
Join Date: Nov 2004
Location: Richmond Hill, Georgia
Posts: 4,306
Likes: 0
Received 0 Likes
on
0 Posts
#22
03-17-2008
Join Date: Feb 2005
Location: USA
Posts: 2,667
Likes: 0
Received 0 Likes
on
0 Posts
haha thanks man...maybe one day!
Thanks everybody else for the compliments!
#23
03-17-2008
#24
03-17-2008
Join Date: Feb 2005
Location: USA
Posts: 2,667
Likes: 0
Received 0 Likes
on
0 Posts
#25
03-17-2008
Join Date: Feb 2005
Location: USA
Posts: 2,667
Likes: 0
Received 0 Likes
on
0 Posts
i do have one other question for ya'll when we were doing the cab, putting the blocks on the passenger side, we made a mistake. On the front mounts of course you have to drill those out, well we made the mistake thinking you drilled all of them out...however luckily I caught it only after we did one. We drilled out the passenger side rear body mount. Is it okay to get a long bolt and put a nut on the bottom of it? I was worried about compressing the bushing and flexing my body but maybe Im just being crazy. What should I do?


