Long Travel 302 swap


#127
 03-24-2016
#128
03-25-2016

In the stock 2002 Ranger, PATS disables the starter until the correct set of conditions is met. This is done via the 2002 PCM which controls ground to the starter relay located in the underhood box. If you have not already done so, you must ground that wire for the key to operate the starter using a 5.0 Ex PCM.
On my swap, I cut the orange/black wire from pin 19 of the 5.0 PCM connector, added a ring terminal to the engine harness side of the OR/BK and then grounded it to the firewall lug next to the PCM. Easy.
On my swap, I cut the orange/black wire from pin 19 of the 5.0 PCM connector, added a ring terminal to the engine harness side of the OR/BK and then grounded it to the firewall lug next to the PCM. Easy.
#129
03-30-2016
Thank you Bob!
I did all the wiring based on this guide from win:
Legend:
C110 = original Ranger 3.0 harness 42 pin connector
C115 = Explorer 5.0 42 pin connector
C1078 = A/C high pressure switch, C139 is C1078's path to ground (below brake master cylinder)
C1006 = A/C compressor relay
A/C Compressor control:
Loop C110 pin 37 to C110 Pin 35. Route C139 pin 5 or C1078 pin 1 to C115 pin 37 and to C1006 pin 6. Remove F1.25 10a fuse and then swap the relay pins from normally closed to normally open. It's probably easier to replace the A/C relay and "pig-tail" the new relay to both the C139 mod and the N0/NC swap.
Tachometer:
Move wire in slot 8 on the 10 wire plug to slot 16 on the 16 slot plug at back of instrument cluster
Starter:
Route C110 pin 28 to Ground, leave C115 pin 28 disconnected
Alternator (likely only 1 of three changes need to be made):
Route C110 Pin 41 to alternator excite terminal (only if C110 has the alternator wire)
Route C110 Pin 42 to alternator always on (only if C110 has the alternator wire)
Route C115 Pin 42 to ground -- gotta do this one regardless of the alternator wires)
VSS ground:
Route C115 pin 13 to ground
Leave C110 pin 13 open
I'll check the OR/BK again.
#130
03-30-2016
Second idea: IF your truck originally had a manual transmission, you would need to jump the clutch switch connector when converting to automatic. Automatic to automatic swap does not require this step.
#132
03-30-2016
#133
03-30-2016
#134
04-05-2016
Got the wiring all figured out. Thanks Bob and everyone else.
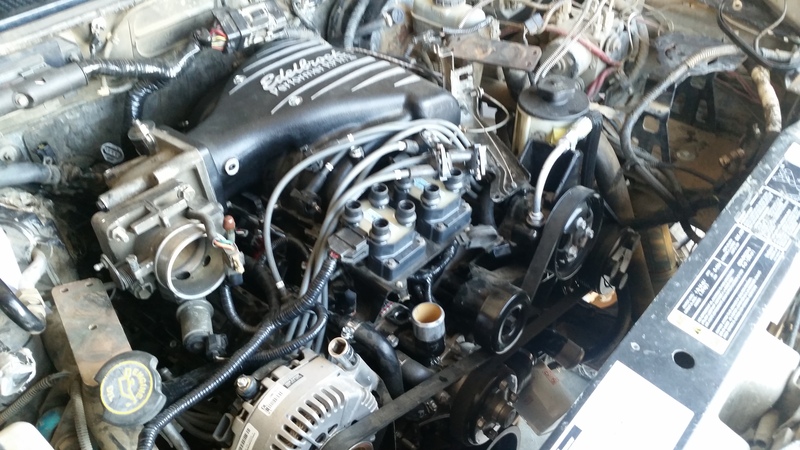
Next and last problem is timing. Can't seem to get TDC on the camshaft sync, won't fire up just massive backfires. I went and got the tool from autozone today so I don't have to guess. Hoping this work so I can post up the startup video.
Next and last problem is timing. Can't seem to get TDC on the camshaft sync, won't fire up just massive backfires. I went and got the tool from autozone today so I don't have to guess. Hoping this work so I can post up the startup video.

#136
04-05-2016
Got the wiring all figured out. Thanks Bob and everyone else.
Next and last problem is timing. Can't seem to get TDC on the camshaft sync, won't fire up just massive backfires. I went and got the tool from autozone today so I don't have to guess. Hoping this work so I can post up the startup video.
Next and last problem is timing. Can't seem to get TDC on the camshaft sync, won't fire up just massive backfires. I went and got the tool from autozone today so I don't have to guess. Hoping this work so I can post up the startup video.
#137
04-05-2016
#138
04-05-2016
Are you using the Explorer crank pulley/damper? IIRC, it should have a degree scale that you can read with the belt on. A little chalk or paint can help highlight the marks.
If not, you can check this thread or search the forum. Lots of good 5.0 info here.
Camshaft Position Sensor replacement--a bit of discussion - Ford Explorer and Ranger Forums "Serious Explorations"�
If not, you can check this thread or search the forum. Lots of good 5.0 info here.
Camshaft Position Sensor replacement--a bit of discussion - Ford Explorer and Ranger Forums "Serious Explorations"�
Last edited by V8 Level II; 04-05-2016 at 07:00 PM.
#139
04-06-2016
If you need it, here's a good graphic for the wire positions on the coil packs:
Ford Explorer and Ranger Forums "Serious Explorations"� - View Single Post - 5.0 V8 Firing Order Diagram [Inside]
Ford Explorer and Ranger Forums "Serious Explorations"� - View Single Post - 5.0 V8 Firing Order Diagram [Inside]
Last edited by V8 Level II; 04-06-2016 at 10:07 AM.
#140
04-06-2016
Thanks Bob, I got the wiring diagram from alldatadiy but I will compare it with your link as well.
I had to order a 28oz balancer from damper dudes because of the stroker kit I installed. It does have the marks on it I remember when I pulled it out of the box but I didn't highlight/chalk them up like I should have. Now that the belt is on I can't really see **** lol
I had to order a 28oz balancer from damper dudes because of the stroker kit I installed. It does have the marks on it I remember when I pulled it out of the box but I didn't highlight/chalk them up like I should have. Now that the belt is on I can't really see **** lol


