$8.00 gap guards...
#1
 10-13-2005


$8.00 gap guards...
Finally got around to MAKING my own gap guards.
When i read that they were $70 i said no way im buying them.
It was soo simple to make them i dont no why anyone wouldnt.....
I bought some rubber and made my own for just under $8.
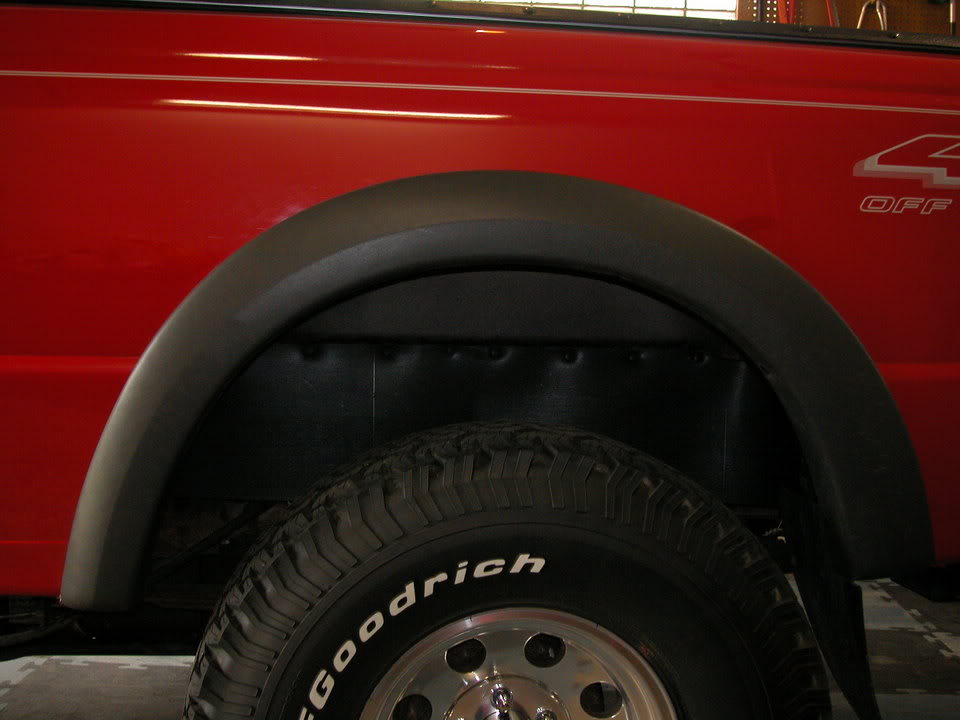
and i think they turned out very good.
what do you think?
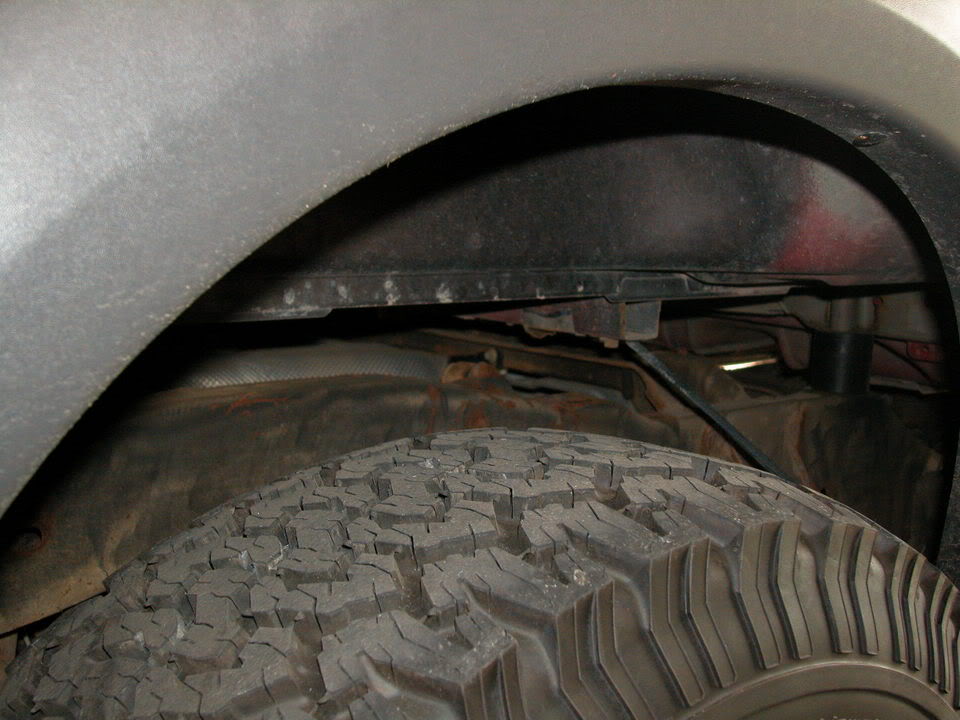
before
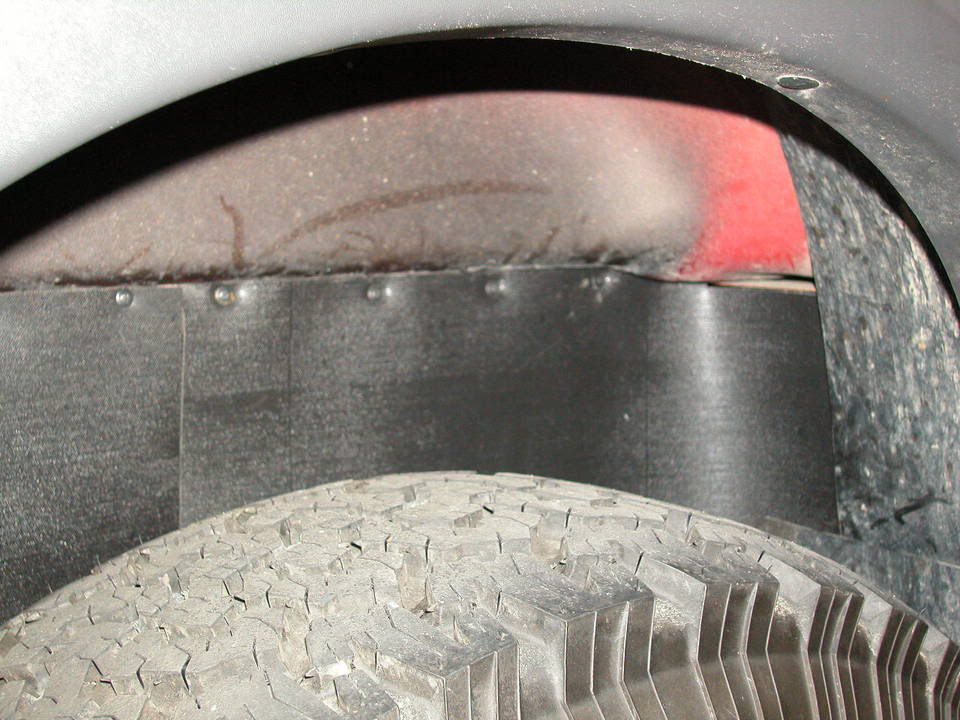
After
wraped around the back to stop mud
goes way up front to. ( the last screw was SOOO hard to put in. i couldnt see what i was doing)
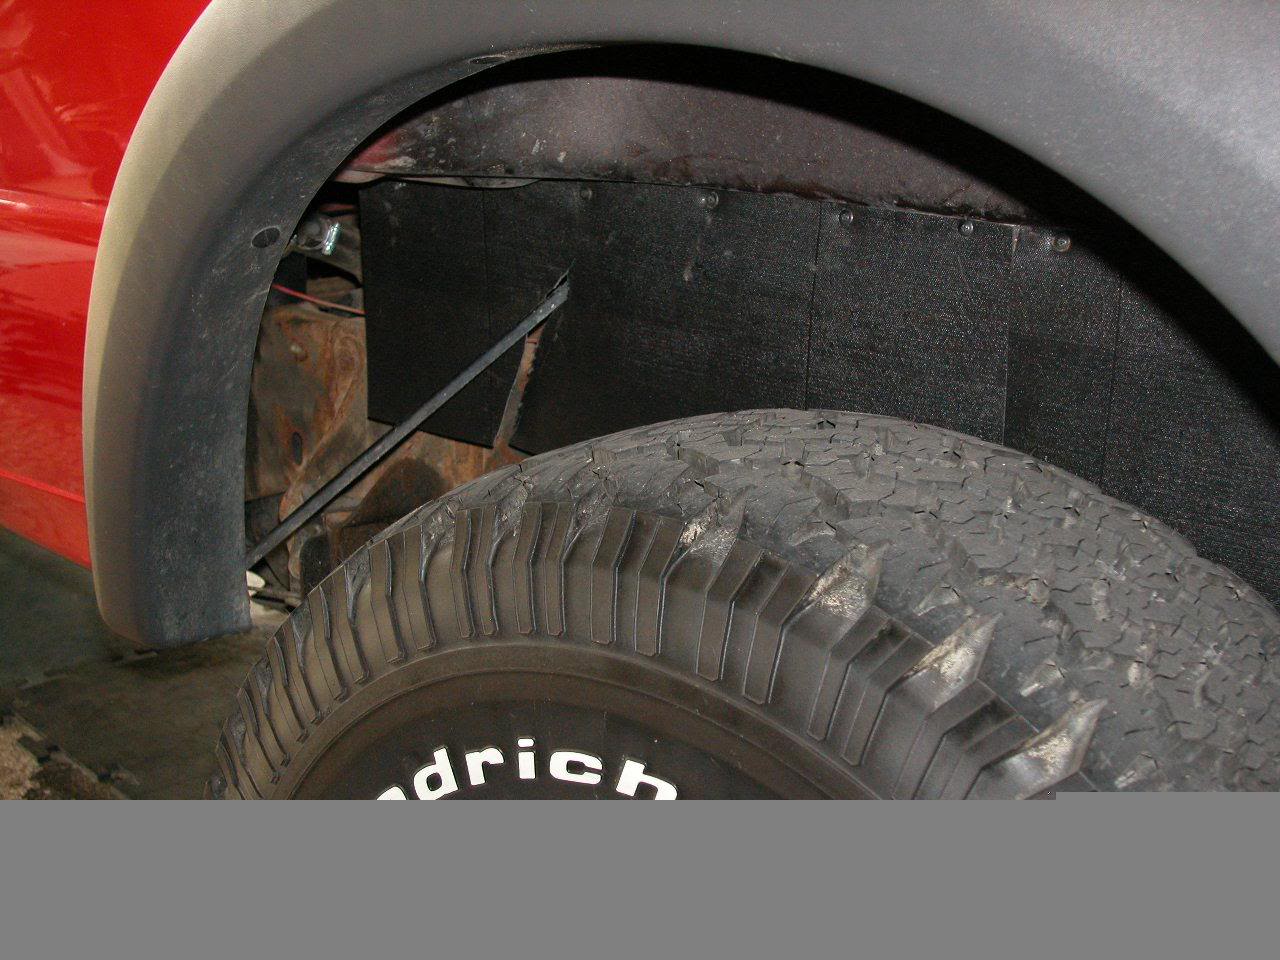
no mo gap!!
When i read that they were $70 i said no way im buying them.
It was soo simple to make them i dont no why anyone wouldnt.....
I bought some rubber and made my own for just under $8.
and i think they turned out very good.
what do you think?
before
After
wraped around the back to stop mud
goes way up front to. ( the last screw was SOOO hard to put in. i couldnt see what i was doing)
no mo gap!!


#4
10-13-2005

Join Date: Jun 2004
Location: Somewhere, XYZ
Posts: 4,351
Likes: 0
Received 0 Likes
on
0 Posts
#6
10-13-2005
#9
10-13-2005

#10
10-13-2005


#14
10-13-2005
Join Date: Mar 2005
Location: Brunswick, Ohio
Posts: 336
Likes: 0
Received 0 Likes
on
0 Posts
Looks good. Good thinking with the stair covers.
i just put mine on about two weeks ago. I came across a whole roll of that rubber that goes down the isle of a school bus, cut it in half[width wise] and drilled then put a bolt and a nut to keep them up there.
On the front, i ran mine like you did the back[as i did as well] I tucked it in the fender flare and re-used that plastic push pin. I could get the drill to stay in place to go forward you you did.
BTW what is that red wire going across by your fuel line? [3rd pic]
#16
10-13-2005
#17
10-13-2005
#18
10-14-2005
Join Date: Apr 2005
Location: Moncton
Posts: 447
Likes: 0
Received 0 Likes
on
0 Posts
#19
10-14-2005
Join Date: Apr 2005
Location: Moncton
Posts: 447
Likes: 0
Received 0 Likes
on
0 Posts

#21
12-11-2005
Join Date: Nov 2004
Location: FL
Posts: 234
Likes: 0
Received 0 Likes
on
0 Posts


