How To: Remove Fender Flares
#1
 04-30-2010


How To: Remove Fender Flares
Why risk getting overspray on your trucks paint if you're painting the flares? Its really easy to remove them.
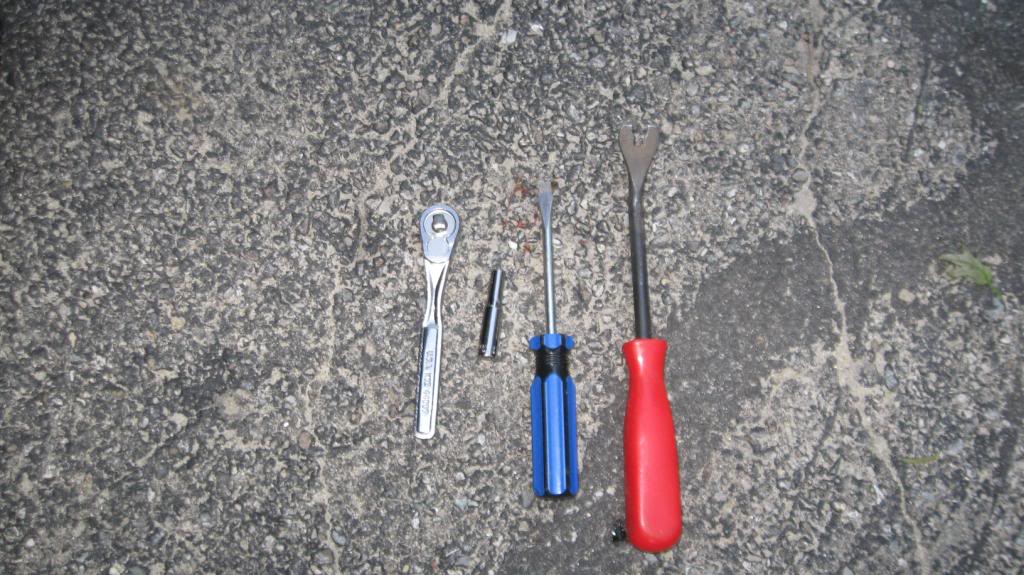
Materials Needed:
-1/4" Drive ratchet
-7/32" Socket
-Flathead Screwdriver
-Automotive Fastener Remover
Here's a picture of the stuff you'll need:
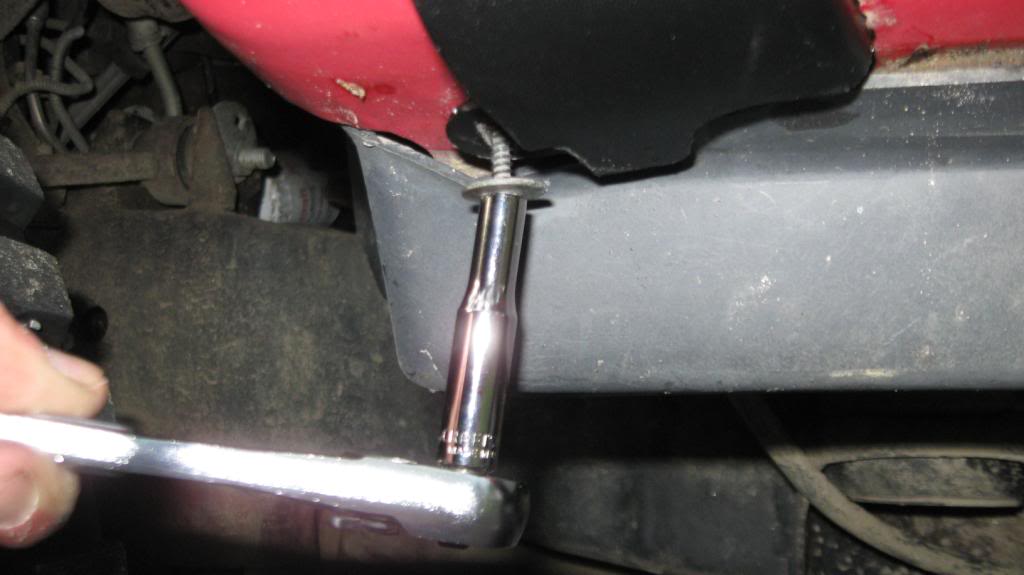
First, Remove the screw on the rear part of the flare closest to the cab on the front with the 7/32" socket. This was on my flares on my 99, may be different on other year trucks.
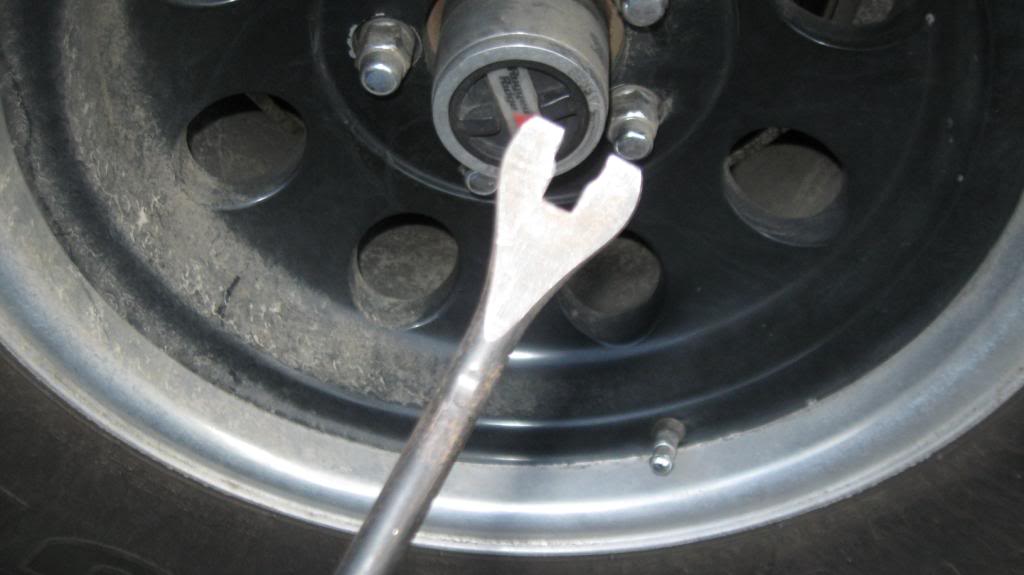
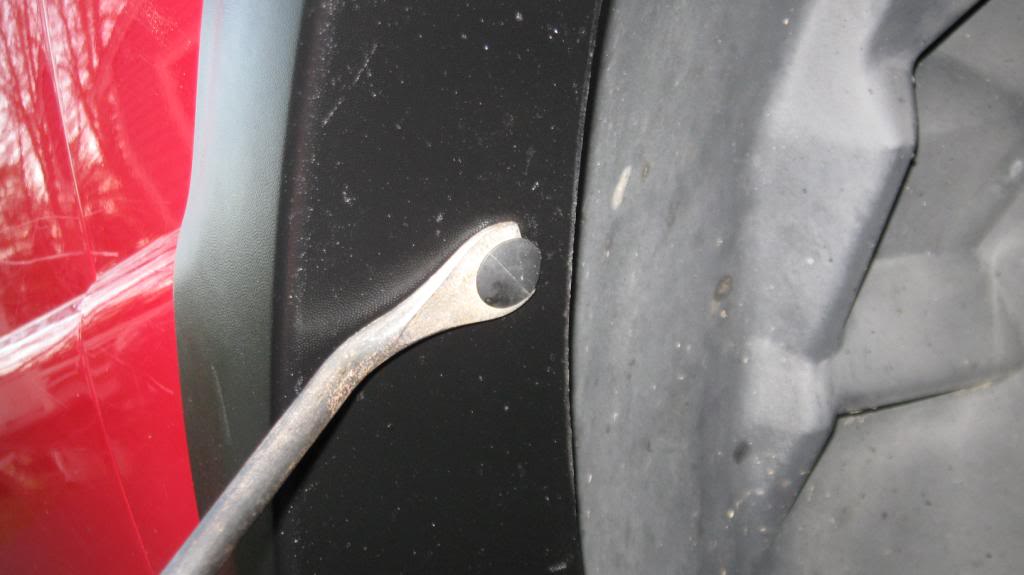
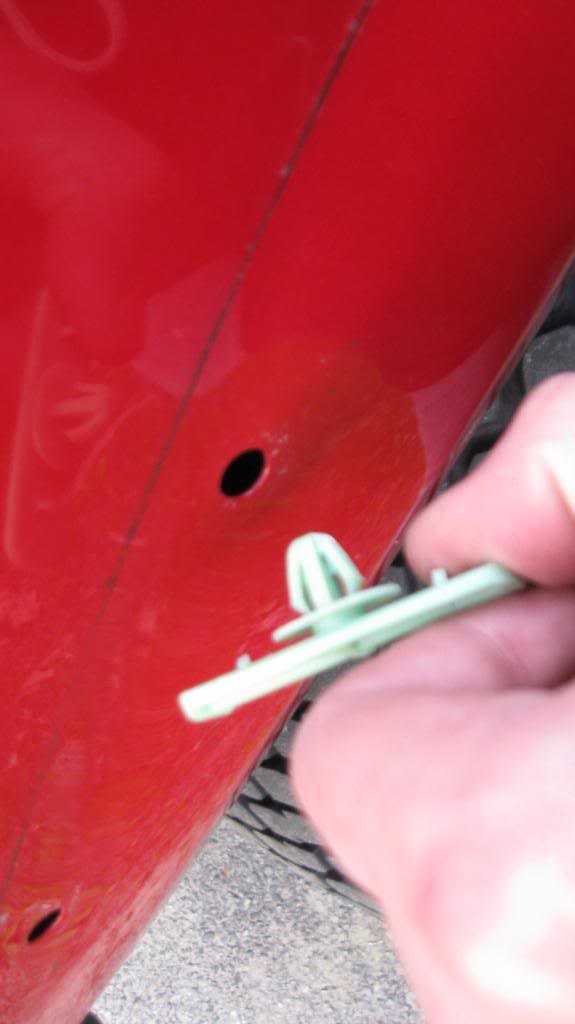
Now, use the automotive fastener remover, which can be found at any automotive parts store, and remove the 6 pins on the underside of the fender flares. Simply slide the tool between the pin and the flare and pry it out. Using pliers takes way too long and will ruin the head of the fastener, making them not reusable so thats why I purchased the tool, its very handy.
Once you remove those pins, simply pick an end to start on and pull towards you on the flare. There are little white pins attached to the flare and the fender itself. Don't be afraid, just pull on them til they pop out of the flare. They will say stuck in the fender but thats not a problem because you'll remove them later.
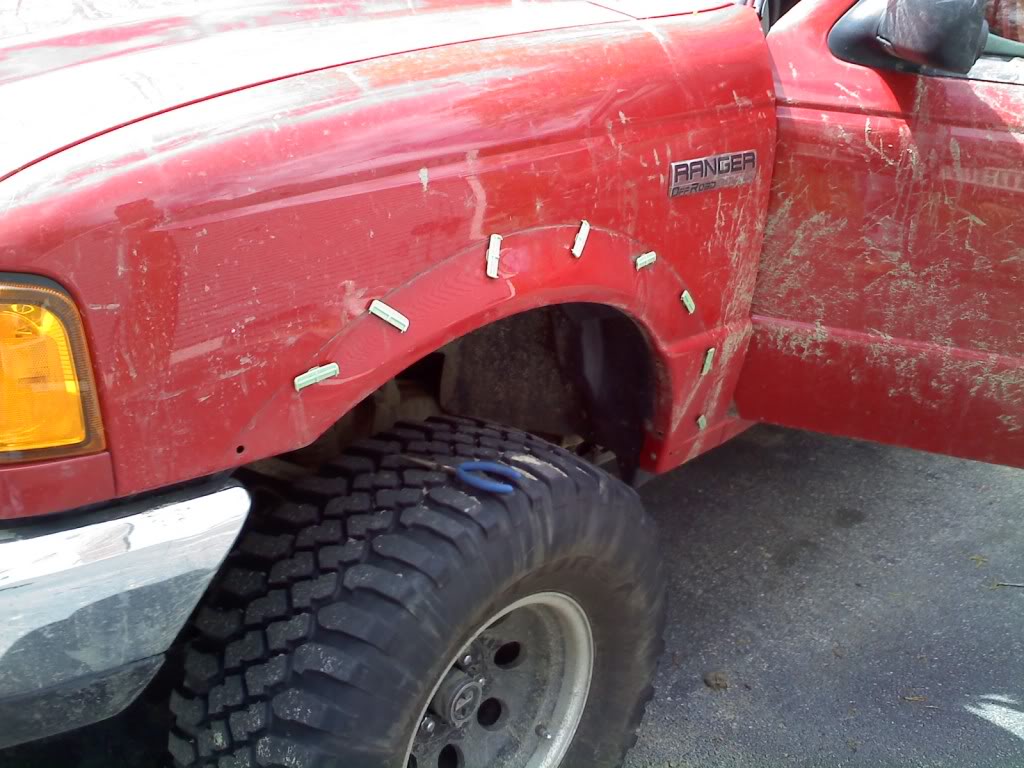
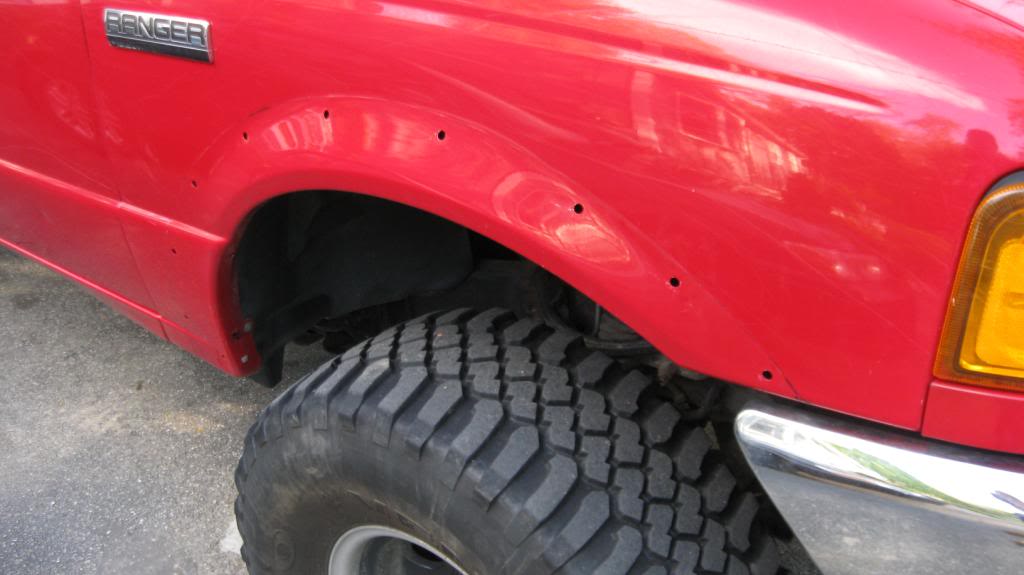
When you get the flare off, this is what you'll see. All these pins need to be removed in order to put the flare back in place after you paint them or simply after you clean behind them as some like to do.
To get those white pins out, simply pull on them gently. You will see a little flap on each side of them.
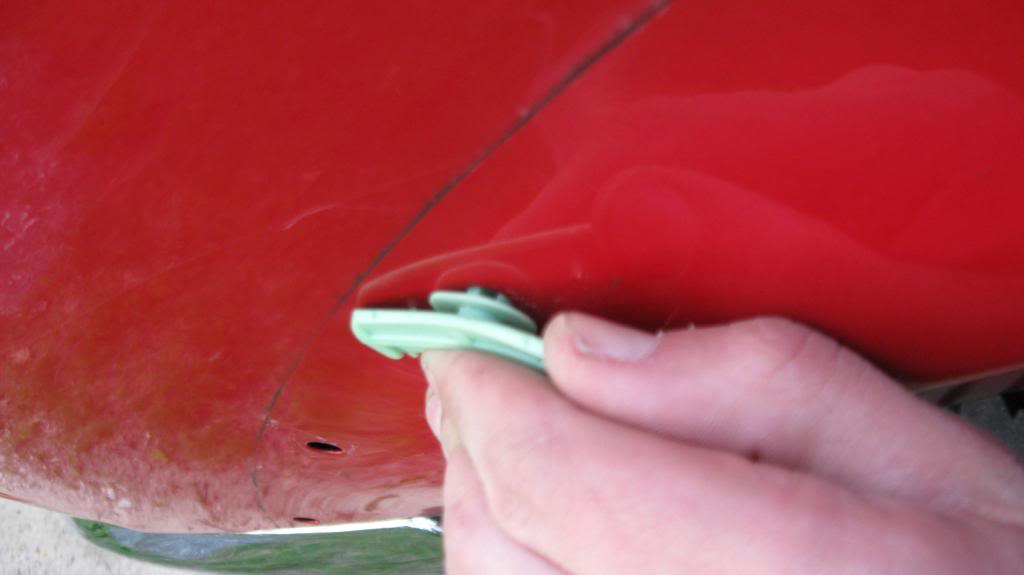
With the flathead screwdriver, push each of the flaps, one at a time, inward towards the center stud on the pin while pulling gently.
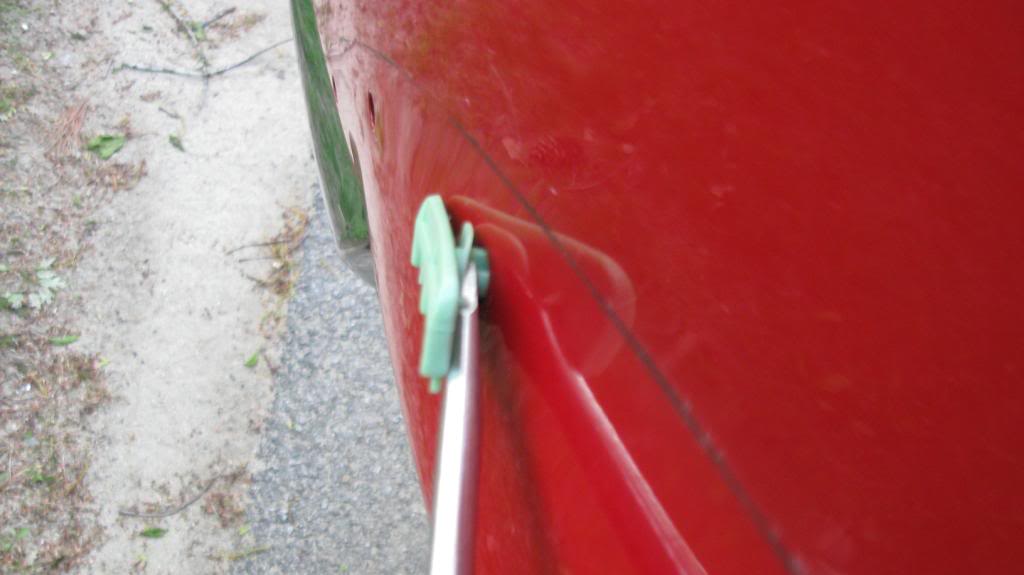
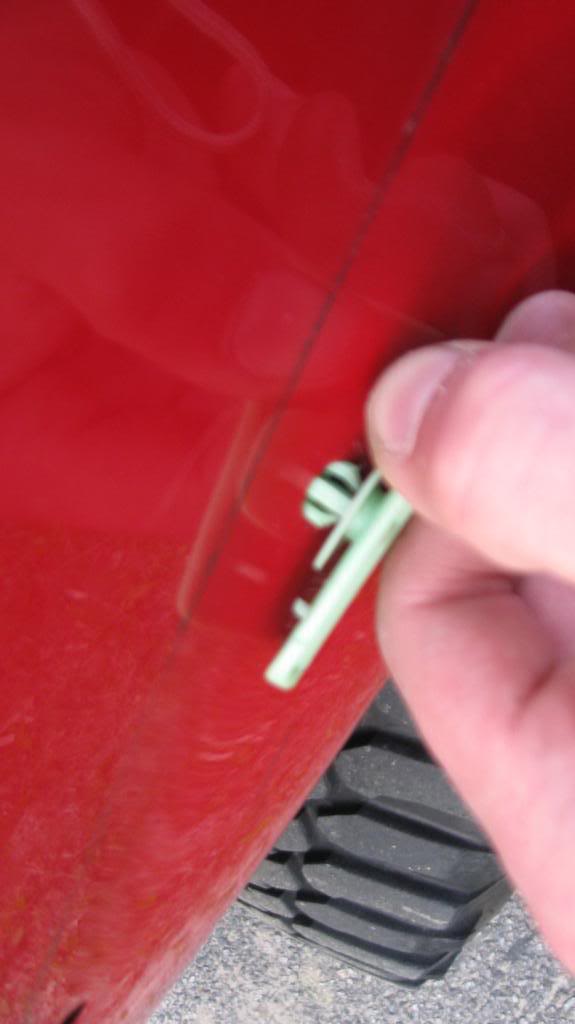
Once you have both flaps out, pull the pin out with your hand, it should come out easily.
Work your way around, and take them all off. This is what it will look like.
Once you paint the flares and clean behind where they were, simply put the white pins back onto the flare then push them on starting at one side working your way around the flare. Then, put the automotive fastener pins back on the under side of the flare and remember to screw that 7/32" bolt back into the backside of the flare, where the mudflap was.
Final product:
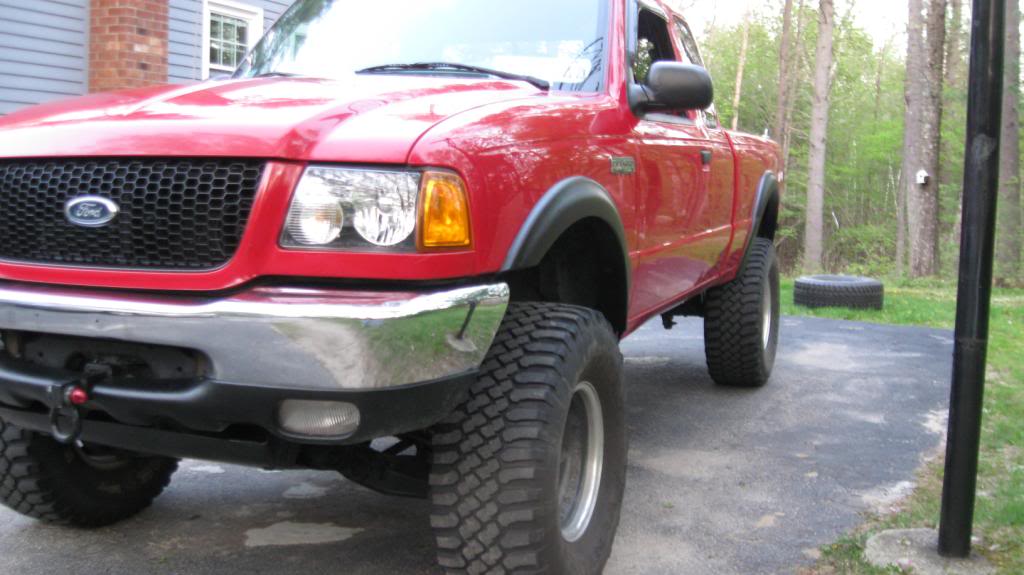
Truk lewkz gud!
Materials Needed:
-1/4" Drive ratchet
-7/32" Socket
-Flathead Screwdriver
-Automotive Fastener Remover
Here's a picture of the stuff you'll need:
First, Remove the screw on the rear part of the flare closest to the cab on the front with the 7/32" socket. This was on my flares on my 99, may be different on other year trucks.
Now, use the automotive fastener remover, which can be found at any automotive parts store, and remove the 6 pins on the underside of the fender flares. Simply slide the tool between the pin and the flare and pry it out. Using pliers takes way too long and will ruin the head of the fastener, making them not reusable so thats why I purchased the tool, its very handy.
Once you remove those pins, simply pick an end to start on and pull towards you on the flare. There are little white pins attached to the flare and the fender itself. Don't be afraid, just pull on them til they pop out of the flare. They will say stuck in the fender but thats not a problem because you'll remove them later.
When you get the flare off, this is what you'll see. All these pins need to be removed in order to put the flare back in place after you paint them or simply after you clean behind them as some like to do.
To get those white pins out, simply pull on them gently. You will see a little flap on each side of them.
With the flathead screwdriver, push each of the flaps, one at a time, inward towards the center stud on the pin while pulling gently.
Once you have both flaps out, pull the pin out with your hand, it should come out easily.
Work your way around, and take them all off. This is what it will look like.
Once you paint the flares and clean behind where they were, simply put the white pins back onto the flare then push them on starting at one side working your way around the flare. Then, put the automotive fastener pins back on the under side of the flare and remember to screw that 7/32" bolt back into the backside of the flare, where the mudflap was.
Final product:
Truk lewkz gud!

#3
04-30-2010
Note: If you just pull out on the flare, those clips that are left in the pics above, should all still be attached. I've never pulled flares off and those clips being left on the body. It may take a little persuasion with a knife on the 'ears' of the clips, but all should come off with the flare. I've ripped mine off so much that I had to replace many of those clips because they were so warn down and didn't clip too well to the fenders.
#4
04-30-2010
#5
04-30-2010
lol yeah...idk how shane gets the white pins out with the flare not a single one stayed attached to the flare it was easier just leaving them in the body and removing them afterwards
#6
04-30-2010

I removed the white clips with my flares also, just used needle nose pliers to squeeze the clip together from the back and they popped right out.

Thread
Thread Starter
Forum
Replies
Last Post
bmfmancini
General Ford Ranger Discussion
8
07-01-2023 10:47 AM
Want to Buy: 01-05 Fender FX 4 Fender Flares
dixie_boysles
OLD - Interior, Exterior, Electrical, & Misc.
2
11-09-2009 02:03 PM
RanJerEDGE
General Ford Ranger Discussion
19
03-03-2005 01:59 AM


