weekend bodywork
#1
 03-16-2009


weekend bodywork
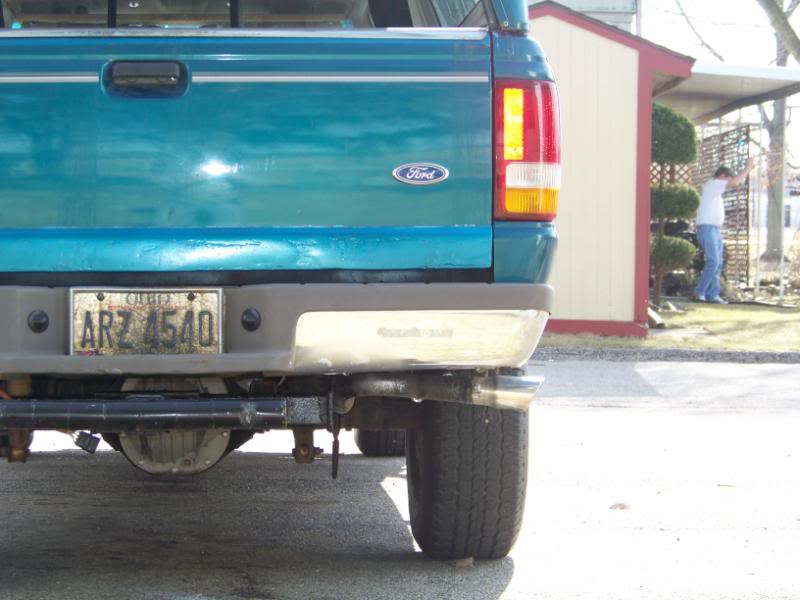
fixed my rust issues on the tailgate/rear bumper this weekend. its far from perfect but sure is better than that ugly rust hole it had. i hate how touch-up paint never matches the repair panel, thought about doing it in silver or black. i also pulled the top cap off the 'gate and cleaned things up under there, it had rust creeping out from under it as well. the bumper patch wont last as long as the tailgate fix im sure, but for now its a improvement. only way to really do it right is to replace the bumper, those hole were right by the mounting brackets. just used a little screen/bondo and shot it with chrome spray. it'll have to do for now. new bumpers are pricey! 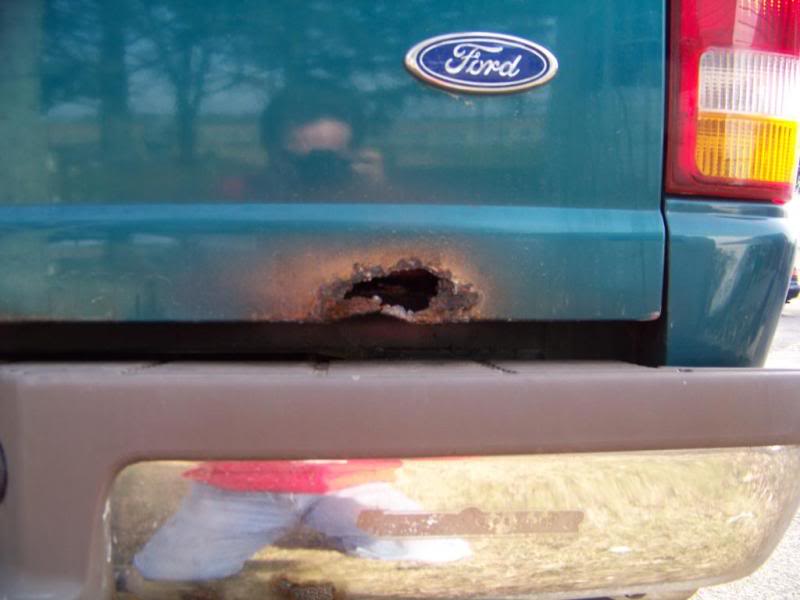

#3
03-16-2009

#4
03-16-2009
Join Date: Jan 2008
Location: Trexlertown,Pennslyvania
Posts: 1,293
Likes: 0
Received 0 Likes
on
0 Posts
#5
03-16-2009
if i had a mig welder and a plasma cutter, i would have done it the "right " way. the only welder i have access to is a old-school lincoln electrode arc welder, way too much for thin sheet metal. i could have sanded down further, but by leaving some thickness, hopefully it will help it last a while longer. i also poured a qt of fiberglass resin into the tailgate and coated the inside real good as well. wish i could have gotton fiberglass cloth into the bottom where problems occur. ive got a can of spray-on bedliner but im kind of saving it to coat my spring hanger brackets/shackles when they come in. my sander is a makita orbital. i got a patch that was basically a screen with a adhesive back that i formed to go over the hole. i had a strip of fiberglass cloth that goes the whole distance across the bottom of the tailgate. that stuff is kind of difficult to work with but if it stays with the sanded prepped metal as good as its still stuck to my fingertips, it could last awhile.
#6
03-16-2009
Join Date: Nov 2008
Location: san jose, Costa Rica
Posts: 1,319
Likes: 0
Received 0 Likes
on
0 Posts
#8
03-18-2009
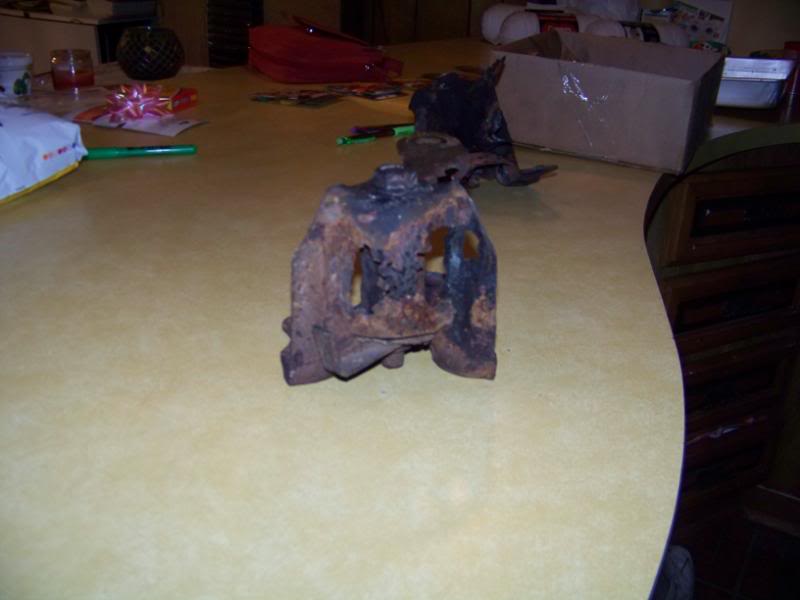
yep, got my rear spring angers to put on today. coated the new parts with a spray-on bedliner. the old ones hadnt failed yet, but there wasnt alot of life left in them either. pic--> http://i98.photobucket.com/albums/l2...nflie005-1.jpg
#9
03-18-2009
yep, got my rear spring angers to put on today. coated the new parts with a spray-on bedliner. the old ones hadnt failed yet, but there wasnt alot of life left in them either. pic--> http://i98.photobucket.com/albums/l2...nflie005-1.jpg
I would recommend taking the bed off, it makes it a whole lot easier. The bed only takes 20 minutes and 2 people to get off.
#10
03-19-2009
Join Date: Jun 2008
Location: newark, oh
Posts: 448
Likes: 0
Received 0 Likes
on
0 Posts
i lost the driver side leaf spring shackle mount on my '93 once. i was driven down the alley behind my buddies house and hit big *** hole in a puddle and heard it hit the bed. i replaced it with the mount from the dealer and universal shackles from auto zone, it all cost be about $50-60, and got lift out of it
good luck on getting the rivets out. i had to cut them off with the oxy/acet. and use a air hammer to pound it out. it was a PITA
good luck on getting the rivets out. i had to cut them off with the oxy/acet. and use a air hammer to pound it out. it was a PITA
#11
03-19-2009
i lost the driver side leaf spring shackle mount on my '93 once. i was driven down the alley behind my buddies house and hit big *** hole in a puddle and heard it hit the bed. i replaced it with the mount from the dealer and universal shackles from auto zone, it all cost be about $50-60, and got lift out of it
good luck on getting the rivets out. i had to cut them off with the oxy/acet. and use a air hammer to pound it out. it was a PITA
good luck on getting the rivets out. i had to cut them off with the oxy/acet. and use a air hammer to pound it out. it was a PITA
I just had to grind the heads off till the bracket fell off, the knock them out with a big centerpunch.
#12
03-19-2009
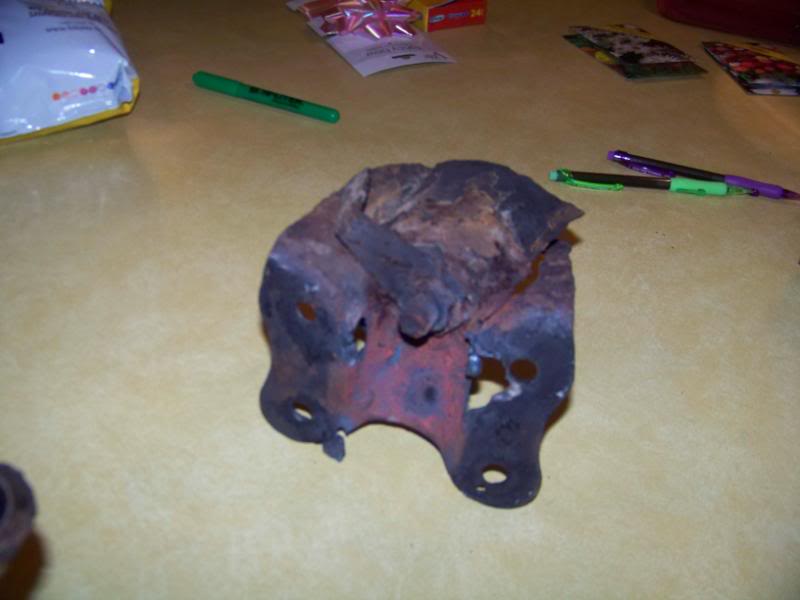
a torch is defintly helpful. while pulling the bed may help, i didnt want to go to that extreme, thats 4-6 more (major) fasteners, i had no help, and as badly rusted as things are under my rig, it would just be more time spent than i felt was worth. first thing i did was get the but up in the air, just as high as my jackstands would go. i pulled both rear tires and put the jack under the differential. unbolted the lower shock mounts, pulled the exhaust pipe out of the muffler. (i just put a new exhaust on it a few weeks back and used anti-seize on the joints, wasnt a problem) tried taking off the bolts holding the shackle to the spring, right side nut came off, left side just turned and collaped the rotting shackle. took the torch to the left side nut at the spring/shackle. torched off all the rivit heads. on the left side of my truck the back 2 (up and down) were bolts, torched them also. torched off the shackle where it meets the spring, lowered the rear axle with the floor jack as much as possible (rear brake line limits you here) took a hammer and chisel to the edge of the old brackets to seperate them from the frame. was able to knock rivits/bolts out o.k. on left side, right side only 1 would knock out, fired up the torch again and burnt them out. for removal of the spring bushings from the spring, i heated it up good with a torch, put the impact gun to the remaining bolt head and just kept at the trigger, it worked itself out, pried out the rubber from the spring eye with a screwdriver. putting the new bushings in was super easy. clean the spring eye, get some all-thread with nuts/washers.(you want it to just fit through the bushing) pass the all-thread thru the bushing & spring eye, put on bolts/washers, a little anti-seize for thread lubrication and i also lightly coated the bushing. the spring eyes were still warm from the torch, im sure this helped a bit. ratchet on one end of your all-thread, wrench on the other. and just "draw" it together. i cleaned the frame and sprayed on some areosol truck bed liner (i did my brackets and shackles the night before also) let it dry while i was putting the torch and air compressor away. put on the brackets, attached the spring to the shackle. hooked up my shocks and exhaust, tires back on, jackstands out, tightend wheels and hooked up diff vent tube (i had forgot about it when lowering the axle, it simply pulled out of the sot in the bed rib where it had been stuck) put tools away and headed home. (i did this at my folks farm, most of my tools are there, theres a nice slab of concrete to work on, and most of all dads torch! thres no room for a grinder) i didnt take the camera with me and its rather pointless to show you the new parts on. i did take pics of the old shackles after i removed them, they were much worse than i thought. the heating and banging really loosened more rust. got to do dads '94 3/4 ton next, the r.s. on it has seperated completely. one thing i found odd, on the 3/4 ton fords its basically the same bracketry (just bigger) but its installed upside down! (compared to how its on a ranger) heres the pics of the old junk once removed, 2 are of the left side and the last is of the right. wouldnt have made it another year! 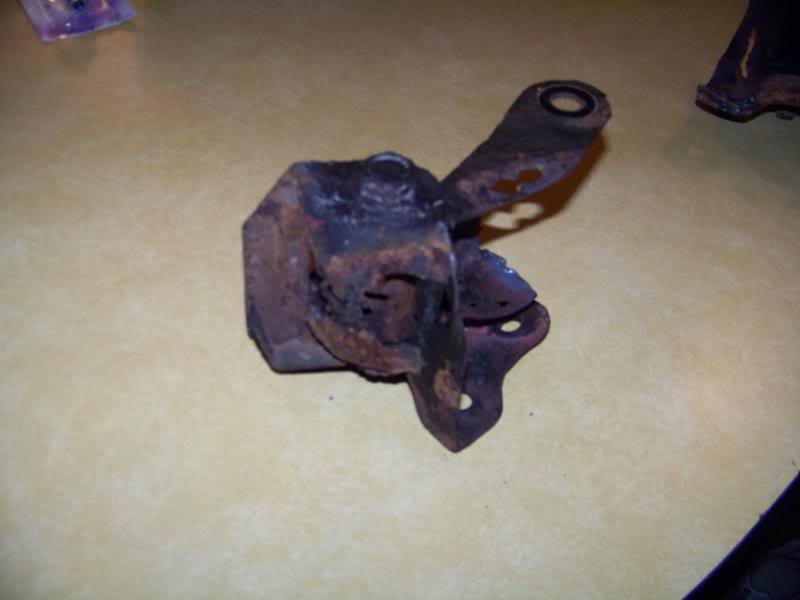
Last edited by racsan; 03-19-2009 at 09:05 PM.

Thread
Thread Starter
Forum
Replies
Last Post
93rangerXLT4x4
Exterior Semi-Tech
16
12-19-2009 10:55 PM
EdGe_wannabe
Suspension Tech
20
07-17-2005 10:19 PM


