Safari Pacific XT1 - Expedition Trailer (Photos)
#1
 05-22-2012


Join Date: Jul 2008
Location: Temecula, CA
Posts: 115
Likes: 0
Received 0 Likes
on
0 Posts
Safari Pacific XT1 - Expedition Trailer (Photos)
Restarting the thread since most of my photos have gone from the other thread.
I've decided to build myself an off-road trailer. Mostly to move all of my gear from both of my vehicles to one tow-able package. This way I don't need to swap things back and forth. And partly to build something cool again. More to come.


I've decided to build myself an off-road trailer. Mostly to move all of my gear from both of my vehicles to one tow-able package. This way I don't need to swap things back and forth. And partly to build something cool again. More to come.
#2
05-22-2012
Join Date: Jul 2008
Location: Temecula, CA
Posts: 115
Likes: 0
Received 0 Likes
on
0 Posts
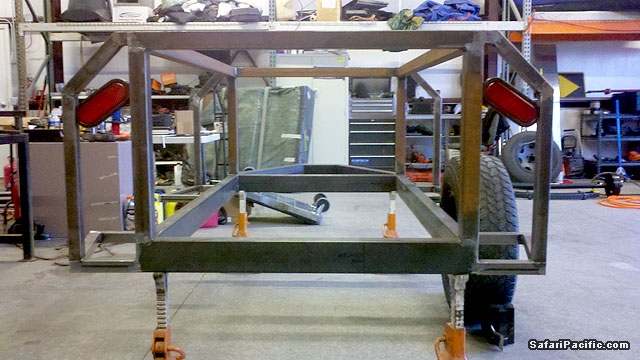
The base chassis is 2 x 4 x 0.125 rectangle tubing. I went with 4 inches tall for added strength.

Old Man Emu Dakar leaf springs from Sierra Expeditions along with hardware and led tail lights.

I start by basic assembly of the suspension and axle. Then check for placement.


After I find the axle placement and distances for tire clearance I make kick-outs for carrying fuel cans.

Old Man Emu Dakar leaf springs from Sierra Expeditions along with hardware and led tail lights.
I start by basic assembly of the suspension and axle. Then check for placement.
After I find the axle placement and distances for tire clearance I make kick-outs for carrying fuel cans.
#3
05-22-2012
Join Date: Jul 2008
Location: Temecula, CA
Posts: 115
Likes: 0
Received 0 Likes
on
0 Posts
Once all sections are cut and tacked into place I finish welding.

Then I move onto building the upper box. Since I didn't want to have the added expense of a one off custom sheet metal box I decided to make a frame to adhere panels too.

Off the main box I run additional tubing to connect to the kick-outs for added strength.


Trying to determine placement of the truck oval led lights. I'm thinking I need to find something else.
Then I move onto building the upper box. Since I didn't want to have the added expense of a one off custom sheet metal box I decided to make a frame to adhere panels too.
Off the main box I run additional tubing to connect to the kick-outs for added strength.
Trying to determine placement of the truck oval led lights. I'm thinking I need to find something else.
#4
05-22-2012
Join Date: Jul 2008
Location: Temecula, CA
Posts: 115
Likes: 0
Received 0 Likes
on
0 Posts
Demo of what I'm thinking. Room on the kick-outs for a 5 gallon fuel/water can or a 20 lb propane tank.

Back to suspension. I had new parts cut out to get the trailers axle where it needs to be. High wise that is.

Ruff setup to check if axle is square with chassis.


Once all aligned I weld up the parts and take the trailer outside to check hight.

Back to suspension. I had new parts cut out to get the trailers axle where it needs to be. High wise that is.
Ruff setup to check if axle is square with chassis.
Once all aligned I weld up the parts and take the trailer outside to check hight.
#5
05-22-2012
Join Date: Jul 2008
Location: Temecula, CA
Posts: 115
Likes: 0
Received 0 Likes
on
0 Posts
Back inside I swap tires with the Ranger, since they are 32x10.5 tires. I wanted to check clearances and assemble the remainder of the trailer with larger tires.

I also build the tow point similar to how I build Jim's hard side pop-up trailer.

I then toss on the tent mostly for the hell of it.

Next I weld in the floor cross supports, with one beam stronger to attach shock tabs.

Time for skinning.

I also build the tow point similar to how I build Jim's hard side pop-up trailer.
I then toss on the tent mostly for the hell of it.
Next I weld in the floor cross supports, with one beam stronger to attach shock tabs.
Time for skinning.
#6
05-22-2012
Join Date: Jul 2008
Location: Temecula, CA
Posts: 115
Likes: 0
Received 0 Likes
on
0 Posts
I start with the floor section and the front.

Then move onto the sides. I toss on a couple cans just because it makes for a cooler photo.

Once the main body is welded on I start on building the lid.

Then I move onto adding the skin to the lid.

I take off the tires so I can finish up welding where the tires blocked.

Then move onto the sides. I toss on a couple cans just because it makes for a cooler photo.
Once the main body is welded on I start on building the lid.
Then I move onto adding the skin to the lid.
I take off the tires so I can finish up welding where the tires blocked.
#7
05-22-2012
Join Date: Jul 2008
Location: Temecula, CA
Posts: 115
Likes: 0
Received 0 Likes
on
0 Posts

I like to over build. Good example is where the chassis tubes are split for the tongue.

With the trailer on its side I weld up all the small bits I couldn't get to from the top.

Before I flip back over and set up on jack stands I use the pallet scale to weigh in. So far what you see is 390 lbs. Not too bad.

#8
05-22-2012
Join Date: Jul 2008
Location: Temecula, CA
Posts: 115
Likes: 0
Received 0 Likes
on
0 Posts
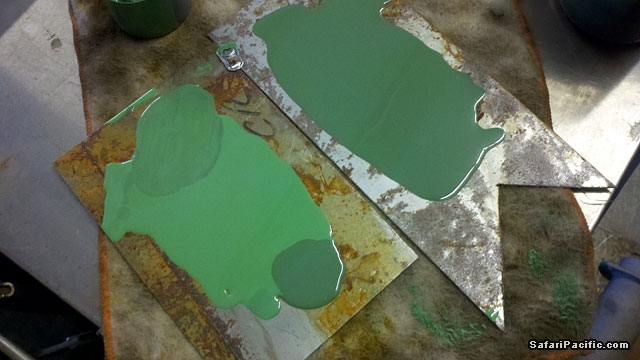
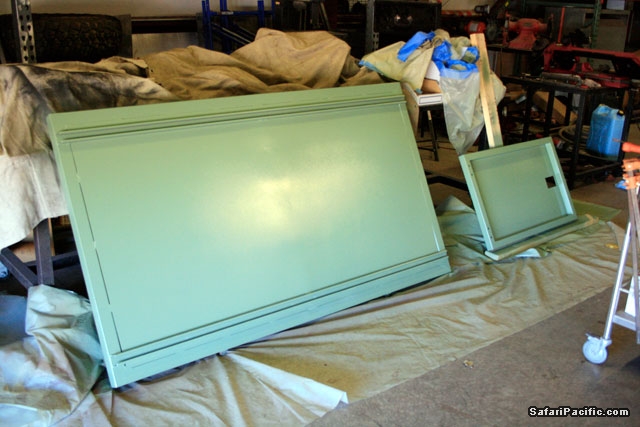
In between doing the metal work I decided to start figuring out what color to paint the trailer. At the paint store I picked a color I though would look good. Turned out the name of the color was "money." The color swatch looked good at the store, though once back at the shop the color was brighter than I wanted.

So I mixed small portions with black and brown to get something I like. I call the new color "dirty money"
So I mixed small portions with black and brown to get something I like. I call the new color "dirty money"
#9
05-22-2012
Join Date: Jul 2008
Location: Temecula, CA
Posts: 115
Likes: 0
Received 0 Likes
on
0 Posts
I modified the spring plate to add a bit more strength. Also painted them and the other suspension parts.

Welded on the trailer jack attachment point.

Then began to spray primer.


Next I sprayed on the green. It looks brighter in the photos, though is a more of a gray green in person. Might be the lighting.

Welded on the trailer jack attachment point.
Then began to spray primer.
Next I sprayed on the green. It looks brighter in the photos, though is a more of a gray green in person. Might be the lighting.
#10
05-22-2012
Join Date: Jul 2008
Location: Temecula, CA
Posts: 115
Likes: 0
Received 0 Likes
on
0 Posts
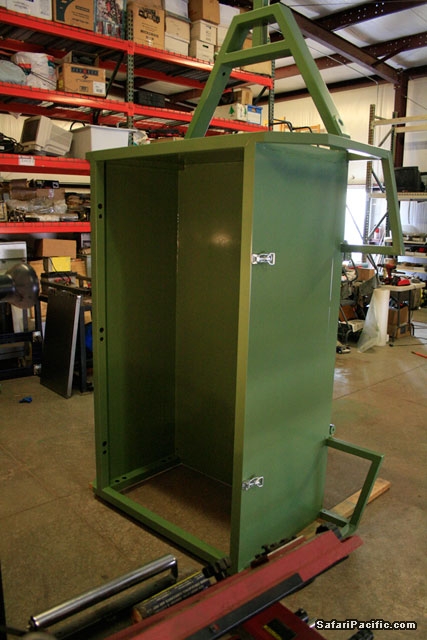
I painted the everything the green color since I didn't want to mess around with masking the chassis off over welds.

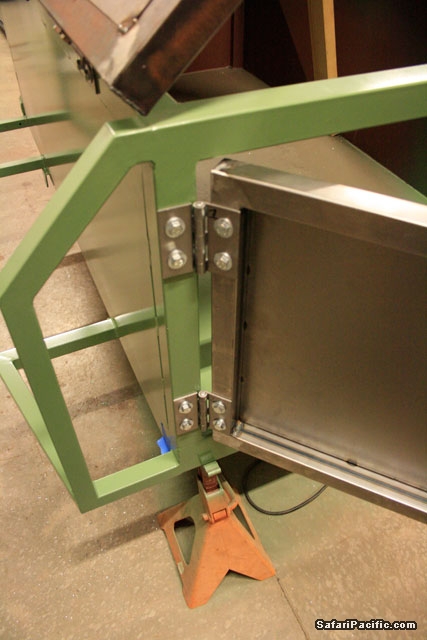
After drying a for a couple days I attach the hinges lid.

On the other side I attach over center latches. They have tabs that stick out to lock with a padlock.

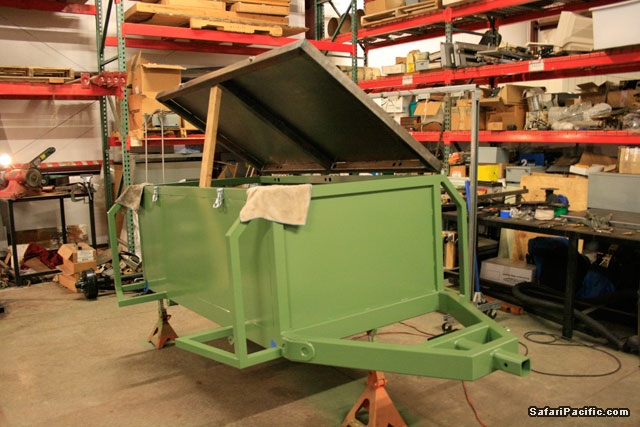
Next I build the rear door.

After drying a for a couple days I attach the hinges lid.
On the other side I attach over center latches. They have tabs that stick out to lock with a padlock.
Next I build the rear door.
#11
05-22-2012
Join Date: Jul 2008
Location: Temecula, CA
Posts: 115
Likes: 0
Received 0 Likes
on
0 Posts


#12
05-22-2012
Join Date: Jul 2008
Location: Temecula, CA
Posts: 115
Likes: 0
Received 0 Likes
on
0 Posts


#13
05-22-2012
Join Date: Jul 2008
Location: Temecula, CA
Posts: 115
Likes: 0
Received 0 Likes
on
0 Posts
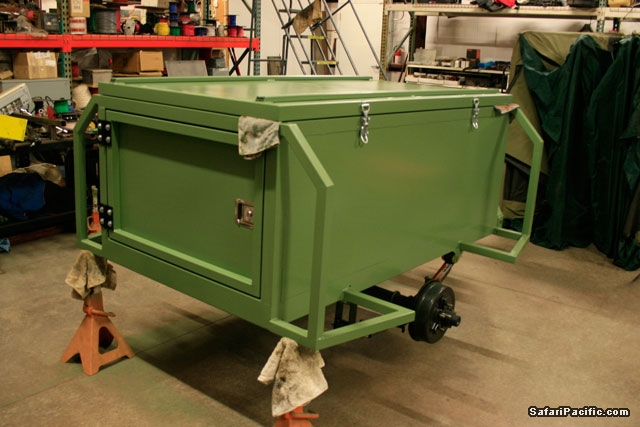
After the paint dried I attached the springs and axle.

Then set it down on some wheels and the jack.

Next I plasma cut a hole for the latch on the rear door.

I attach the door back on the trailer to figure out how to add a catch.

I had an old cut out from another project that worked perfectly. 3/8 inch plate.

Then set it down on some wheels and the jack.
Next I plasma cut a hole for the latch on the rear door.
I attach the door back on the trailer to figure out how to add a catch.
I had an old cut out from another project that worked perfectly. 3/8 inch plate.
#14
05-22-2012
Join Date: Jul 2008
Location: Temecula, CA
Posts: 115
Likes: 0
Received 0 Likes
on
0 Posts


#15
05-22-2012
Join Date: Jul 2008
Location: Temecula, CA
Posts: 115
Likes: 0
Received 0 Likes
on
0 Posts


#16
05-22-2012
Join Date: Jul 2008
Location: Temecula, CA
Posts: 115
Likes: 0
Received 0 Likes
on
0 Posts


#17
05-22-2012
Join Date: Jul 2008
Location: Temecula, CA
Posts: 115
Likes: 0
Received 0 Likes
on
0 Posts


#18
05-22-2012
Join Date: Jul 2008
Location: Temecula, CA
Posts: 115
Likes: 0
Received 0 Likes
on
0 Posts


#19
05-22-2012
Join Date: Jul 2008
Location: Temecula, CA
Posts: 115
Likes: 0
Received 0 Likes
on
0 Posts
The last photos posted are from January 10th, 2012. On the 13th my dad passed away and the project was put on hold. Currently the trailer is in a friends garage in Mesa, AZ as I had to vacate the shop. I'm hoping this summer I will be able to bring the trailer out to my new place in Temecula, CA and finish it. There's really not much left. Ironically I'll have to trailer the trailer since there is no plate, lights or wheels. More updates to come once I get rolling on the project again.

#22
05-28-2012
Join Date: Jul 2008
Location: Temecula, CA
Posts: 115
Likes: 0
Received 0 Likes
on
0 Posts
#23
06-28-2012
Join Date: Jul 2008
Location: Temecula, CA
Posts: 115
Likes: 0
Received 0 Likes
on
0 Posts
I towed my trailer back with me from AZ yesterday. The trailer towed awesome and I did a small test run down a power line road. Most of the trip I forgot I was even towing anything. Now its to getting it finished up, now that I'll have it near by. Thanks to Dave Druck for helping with a Lock and Roll so I could get the trailer towed here.


Also, I may be selling this once I get it finished. I still need to add up what I've put into it, though it'll be around $3000 for the trailer alone I'm guessing.
Also, I may be selling this once I get it finished. I still need to add up what I've put into it, though it'll be around $3000 for the trailer alone I'm guessing.


