
Help with bed rails
#1
 06-30-2012


#4
06-30-2012
Any other useful info you've got laying around?
#5
06-30-2012
#6
06-30-2012

It can, but the 4x8 sheets ride on top of the wheel wells. And Stick out the back of the truck 3ft if you have a tool box back there, 2ft if you don't. That is if your not like me and just stick the plywood resting on the cab, close tailgate, ratchet strap the front of the plywood down. Done and done.
#7
07-02-2012
Here is what I did for my steppie to carry large material.
The Styleside has steps in the bed for adding 2x4s.
1) Cut two 2x4s to a length appropriate for your need, the bed width plus extra to hold say a 4x8 sheet; rounds the ends if you want to.
2) Cut two more 2x4s to fit just inside of the bed rails; round only one long side but both ends.
3) Drill holes on both end of the #2, approximately 1” OD.
4) Center #2 on #1, both length and width, and glue and screw them together (5 screws each minimum).
Now what you have are two reenforced 2x4 racks, if tied properly will not slide sideways and will not more back and forth.
The holes in the #2 2x4s are for tying the rack to the bed rails of the truck using the tie-downs.
The width of the #1 2x4s will hold the sheets of material or cover your needs.
You can secure the material to the 2x4s or around them to the bed tie-downs.
Make sure to leave some room at the cab and secure the load so it will not slide forward. You could add some extra 2x4s to the front rack to allow for sliding loads or not.
You may want to add a third 2x4 rack or fourth along the length of the bed and secure them to the material or to added tie-downs that you add to the bed sides.
This has worked for me, not only for 4x8 material but also for a Jeep Tub and a Truck Bed so if done correctly they will hold up.
Luck

#9
07-03-2012
#10
07-05-2012
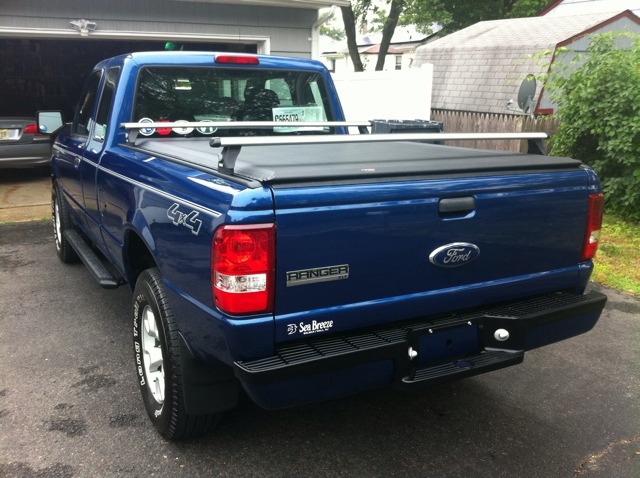
it can be done!
this is the system I use. My low profile tonneau cover stays in place. If i need the cross bars i simply drop them on, if i dont need them i leave them off. Its a versatile set up. I just ran 6' flat tracks down the rails, the feet slide around super easy if you need to change spacing. The cross bars drop on and pull off in seconds...
this is the system I use. My low profile tonneau cover stays in place. If i need the cross bars i simply drop them on, if i dont need them i leave them off. Its a versatile set up. I just ran 6' flat tracks down the rails, the feet slide around super easy if you need to change spacing. The cross bars drop on and pull off in seconds...
Last edited by B737; 07-05-2012 at 06:44 PM.
#11
07-05-2012

Join Date: Nov 2010
Location: tampa fl
Posts: 14
Likes: 0
Received 0 Likes
on
0 Posts
it can be done!
this is the system is use. My low profile tonneau cover stays in place. If i need the cross bars i simply drop them on, if i dont need them i leave them off. Its a versatile set up. I just ran 6' flat tracks down the rails, the feet slide around super easy if you need to change spacing. The cross bars drop on and pull off in seconds...
this is the system is use. My low profile tonneau cover stays in place. If i need the cross bars i simply drop them on, if i dont need them i leave them off. Its a versatile set up. I just ran 6' flat tracks down the rails, the feet slide around super easy if you need to change spacing. The cross bars drop on and pull off in seconds...
#13
07-05-2012
#15
07-05-2012
it can be done!
this is the system is use. My low profile tonneau cover stays in place. If i need the cross bars i simply drop them on, if i dont need them i leave them off. Its a versatile set up. I just ran 6' flat tracks down the rails, the feet slide around super easy if you need to change spacing. The cross bars drop on and pull off in seconds...
this is the system is use. My low profile tonneau cover stays in place. If i need the cross bars i simply drop them on, if i dont need them i leave them off. Its a versatile set up. I just ran 6' flat tracks down the rails, the feet slide around super easy if you need to change spacing. The cross bars drop on and pull off in seconds...
Care to post up a thread including pictures of how you built it?

#17
07-06-2012
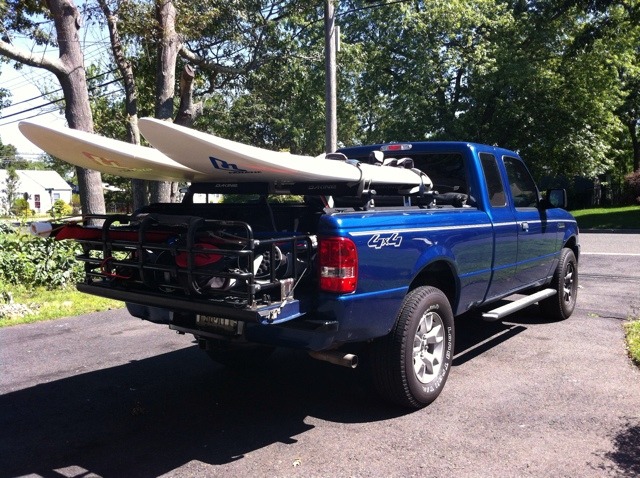
Thanks for the thumbs up gents :) here are the details, it was really easy to do...
I started out with a Tonneau cover that sits inside the bedrails, "Access Low Profile" cover.
for the rack I used Thule parts, but Yakima ect, have the same similar parts:
60" Roof rack Rails
60" Rapid Aero Load Bars
Foot Pack
Foot Pack Mounts
Cut the tracks to fit down the bed rails, and use stainless hardware to fasten them into the bed rails... put the end caps on so it finishes it up nice. install the foot mounts. Install the feet onto the load bars. I also cut down my load bars to make them a little shorter. thats it! the load bars come off with by pushing the button on the feet. They stay locked in place well, have never moved on me.
Last edited by B737; 07-06-2012 at 06:12 AM.
#19
07-06-2012
Thanks for the thumbs up gents :) here are the details, it was really easy to do...
I started out with a Tonneau cover that sits inside the bedrails, "Access Low Profile" cover.
for the rack I used Thule parts, but Yakima ect, have the same similar parts:
60" Roof rack Rails
60" Rapid Aero Load Bars
Foot Pack
Foot Pack Mounts
Cut the tracks to fit down the bed rails, and use stainless hardware to fasten them into the bed rails... put the end caps on so it finishes it up nice. install the foot mounts. Install the feet onto the load bars. I also cut down my load bars to make them a little shorter. thats it! the load bars come off with by pushing the button on the feet. They stay locked in place well, have never moved on me.
I started out with a Tonneau cover that sits inside the bedrails, "Access Low Profile" cover.
for the rack I used Thule parts, but Yakima ect, have the same similar parts:
60" Roof rack Rails
60" Rapid Aero Load Bars
Foot Pack
Foot Pack Mounts
Cut the tracks to fit down the bed rails, and use stainless hardware to fasten them into the bed rails... put the end caps on so it finishes it up nice. install the foot mounts. Install the feet onto the load bars. I also cut down my load bars to make them a little shorter. thats it! the load bars come off with by pushing the button on the feet. They stay locked in place well, have never moved on me.
#20
07-06-2012
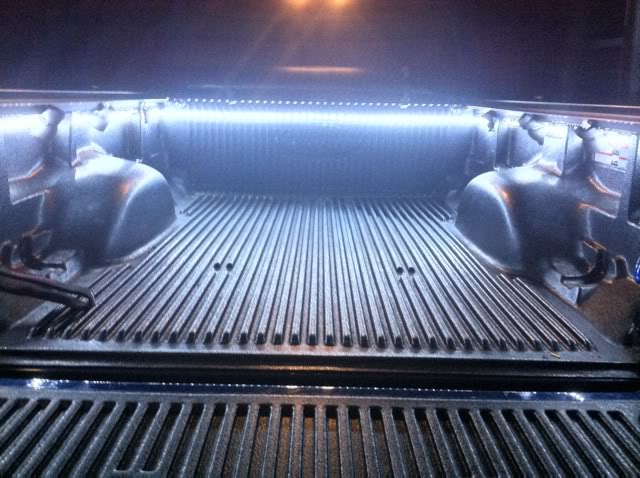
plus the tonneau cover! i was in for almost a g-note by the time i finished the bed (including the upper lower bed flood lights, liner, ect). you only gotta do it once, plus you can remove the hardware if you sell the truck. but yeah, the sticker shock sucked.
rack systems are such a scam rip-off, esp with all the 'proprietary' parts...
rack systems are such a scam rip-off, esp with all the 'proprietary' parts...
Last edited by B737; 07-10-2012 at 10:53 AM.
#22
07-10-2012
Join Date: Jan 2012
Location: Woodbridge, VA
Posts: 304
Likes: 0
Received 0 Likes
on
0 Posts

Thread
Thread Starter
Forum
Replies
Last Post


