
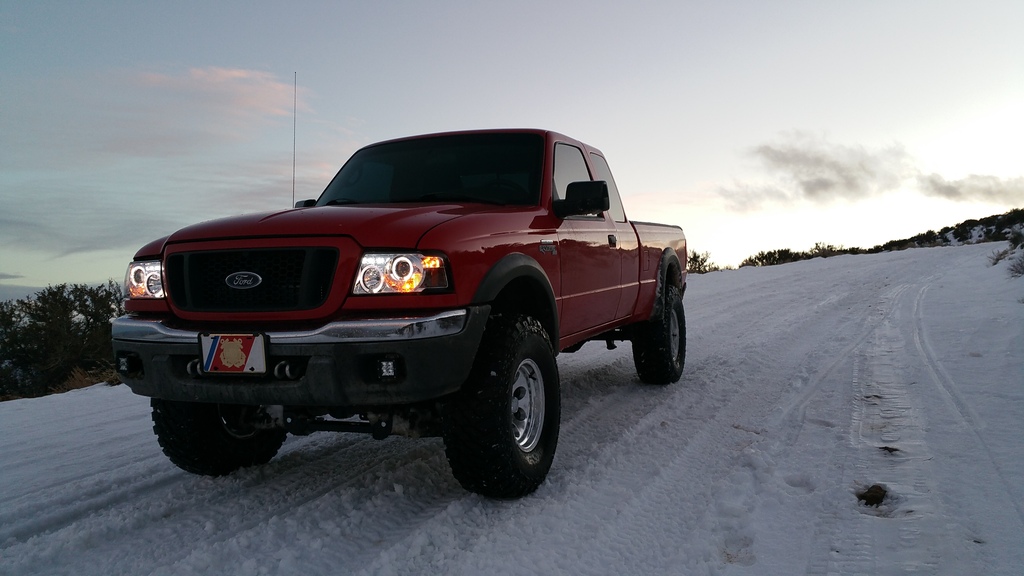
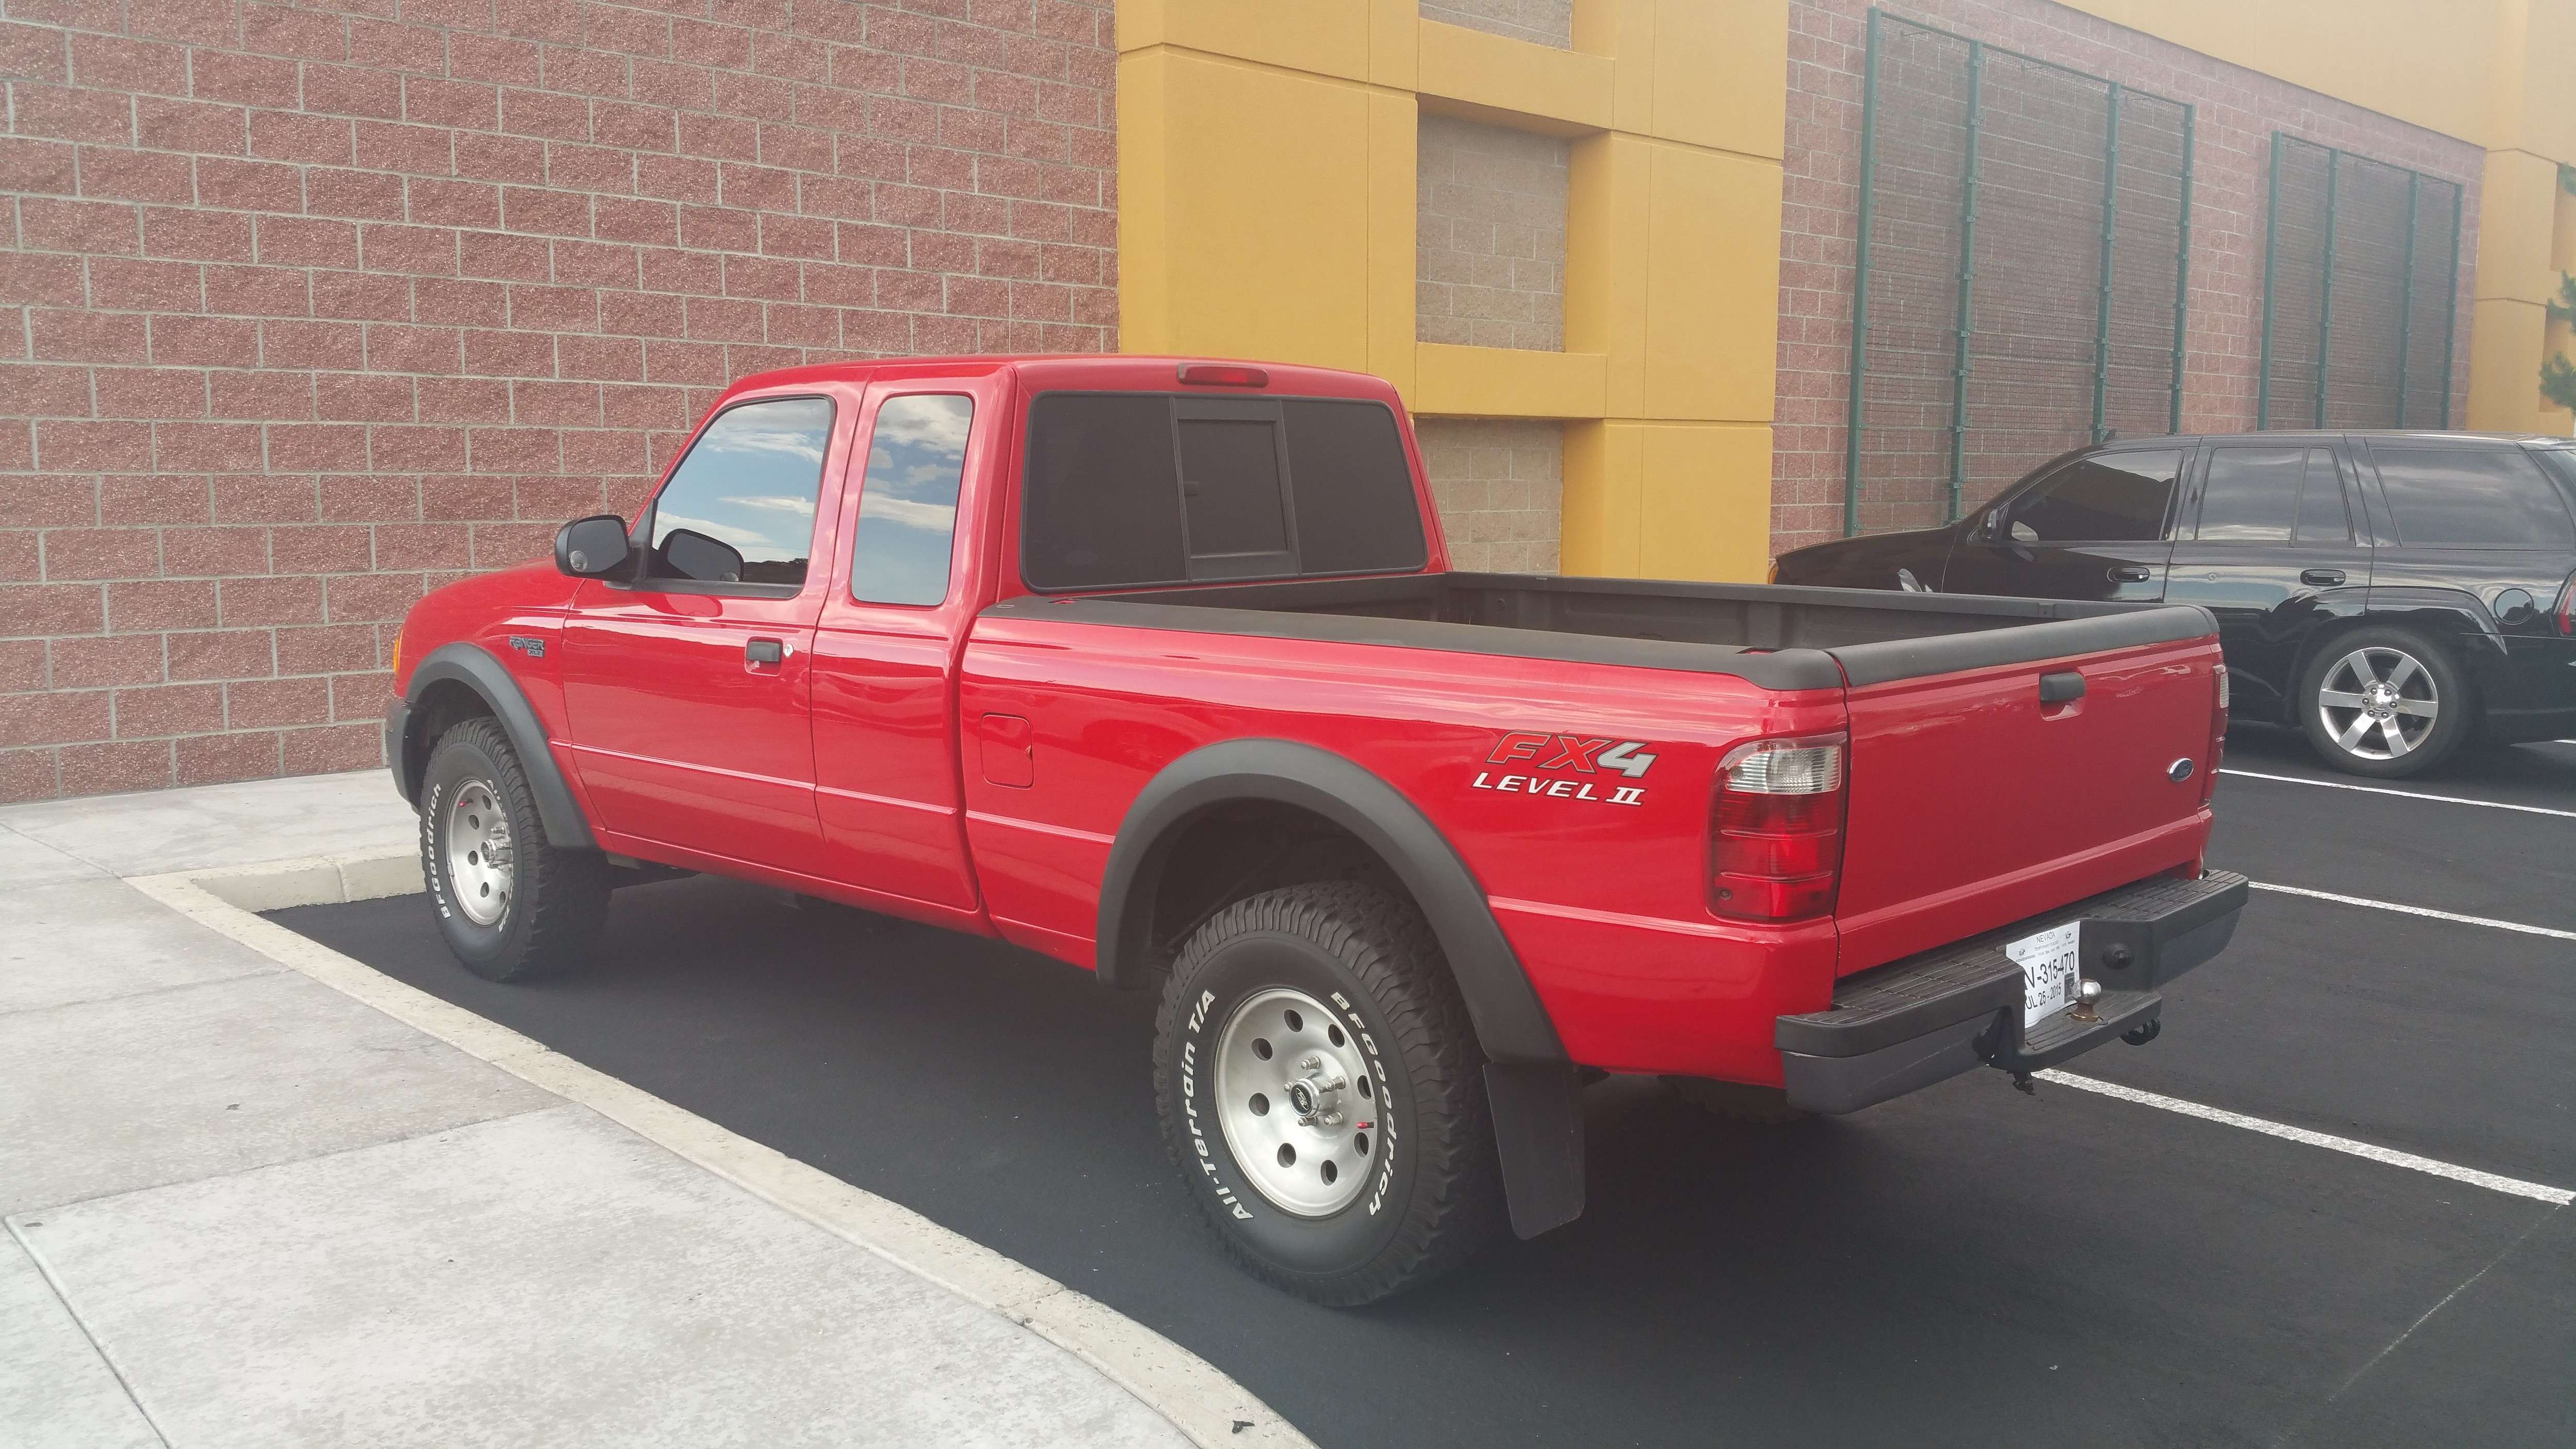
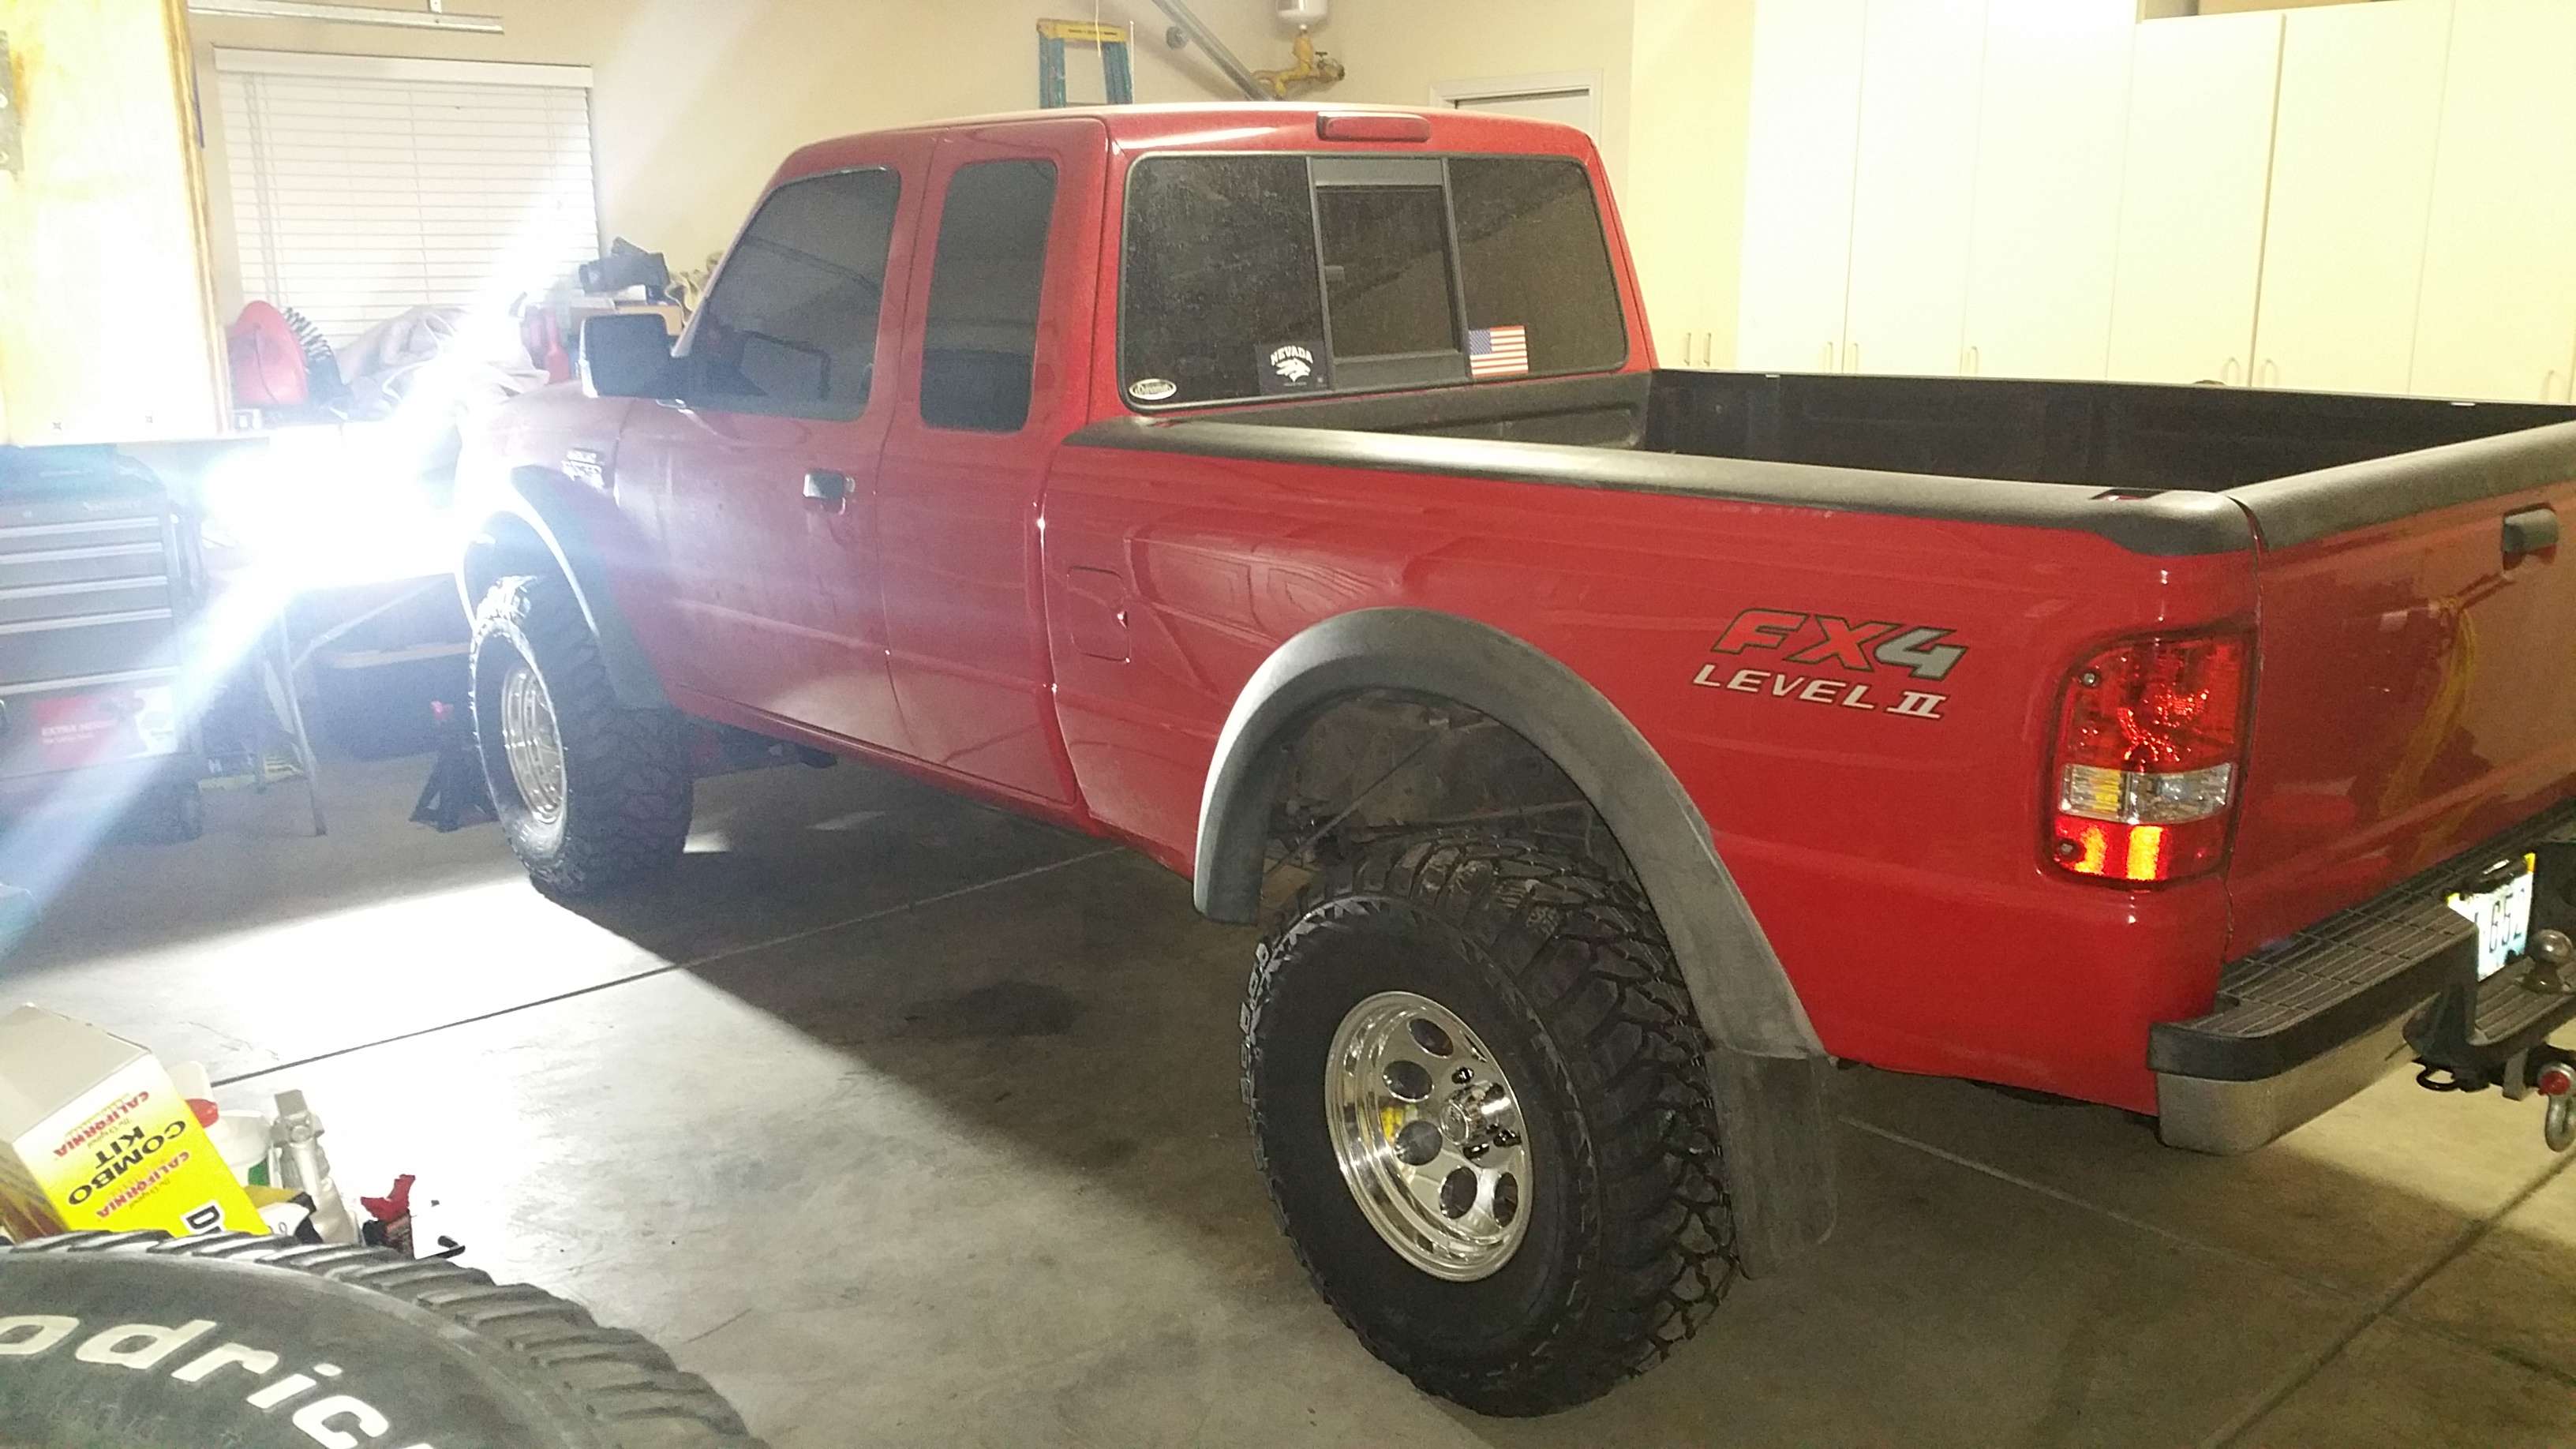
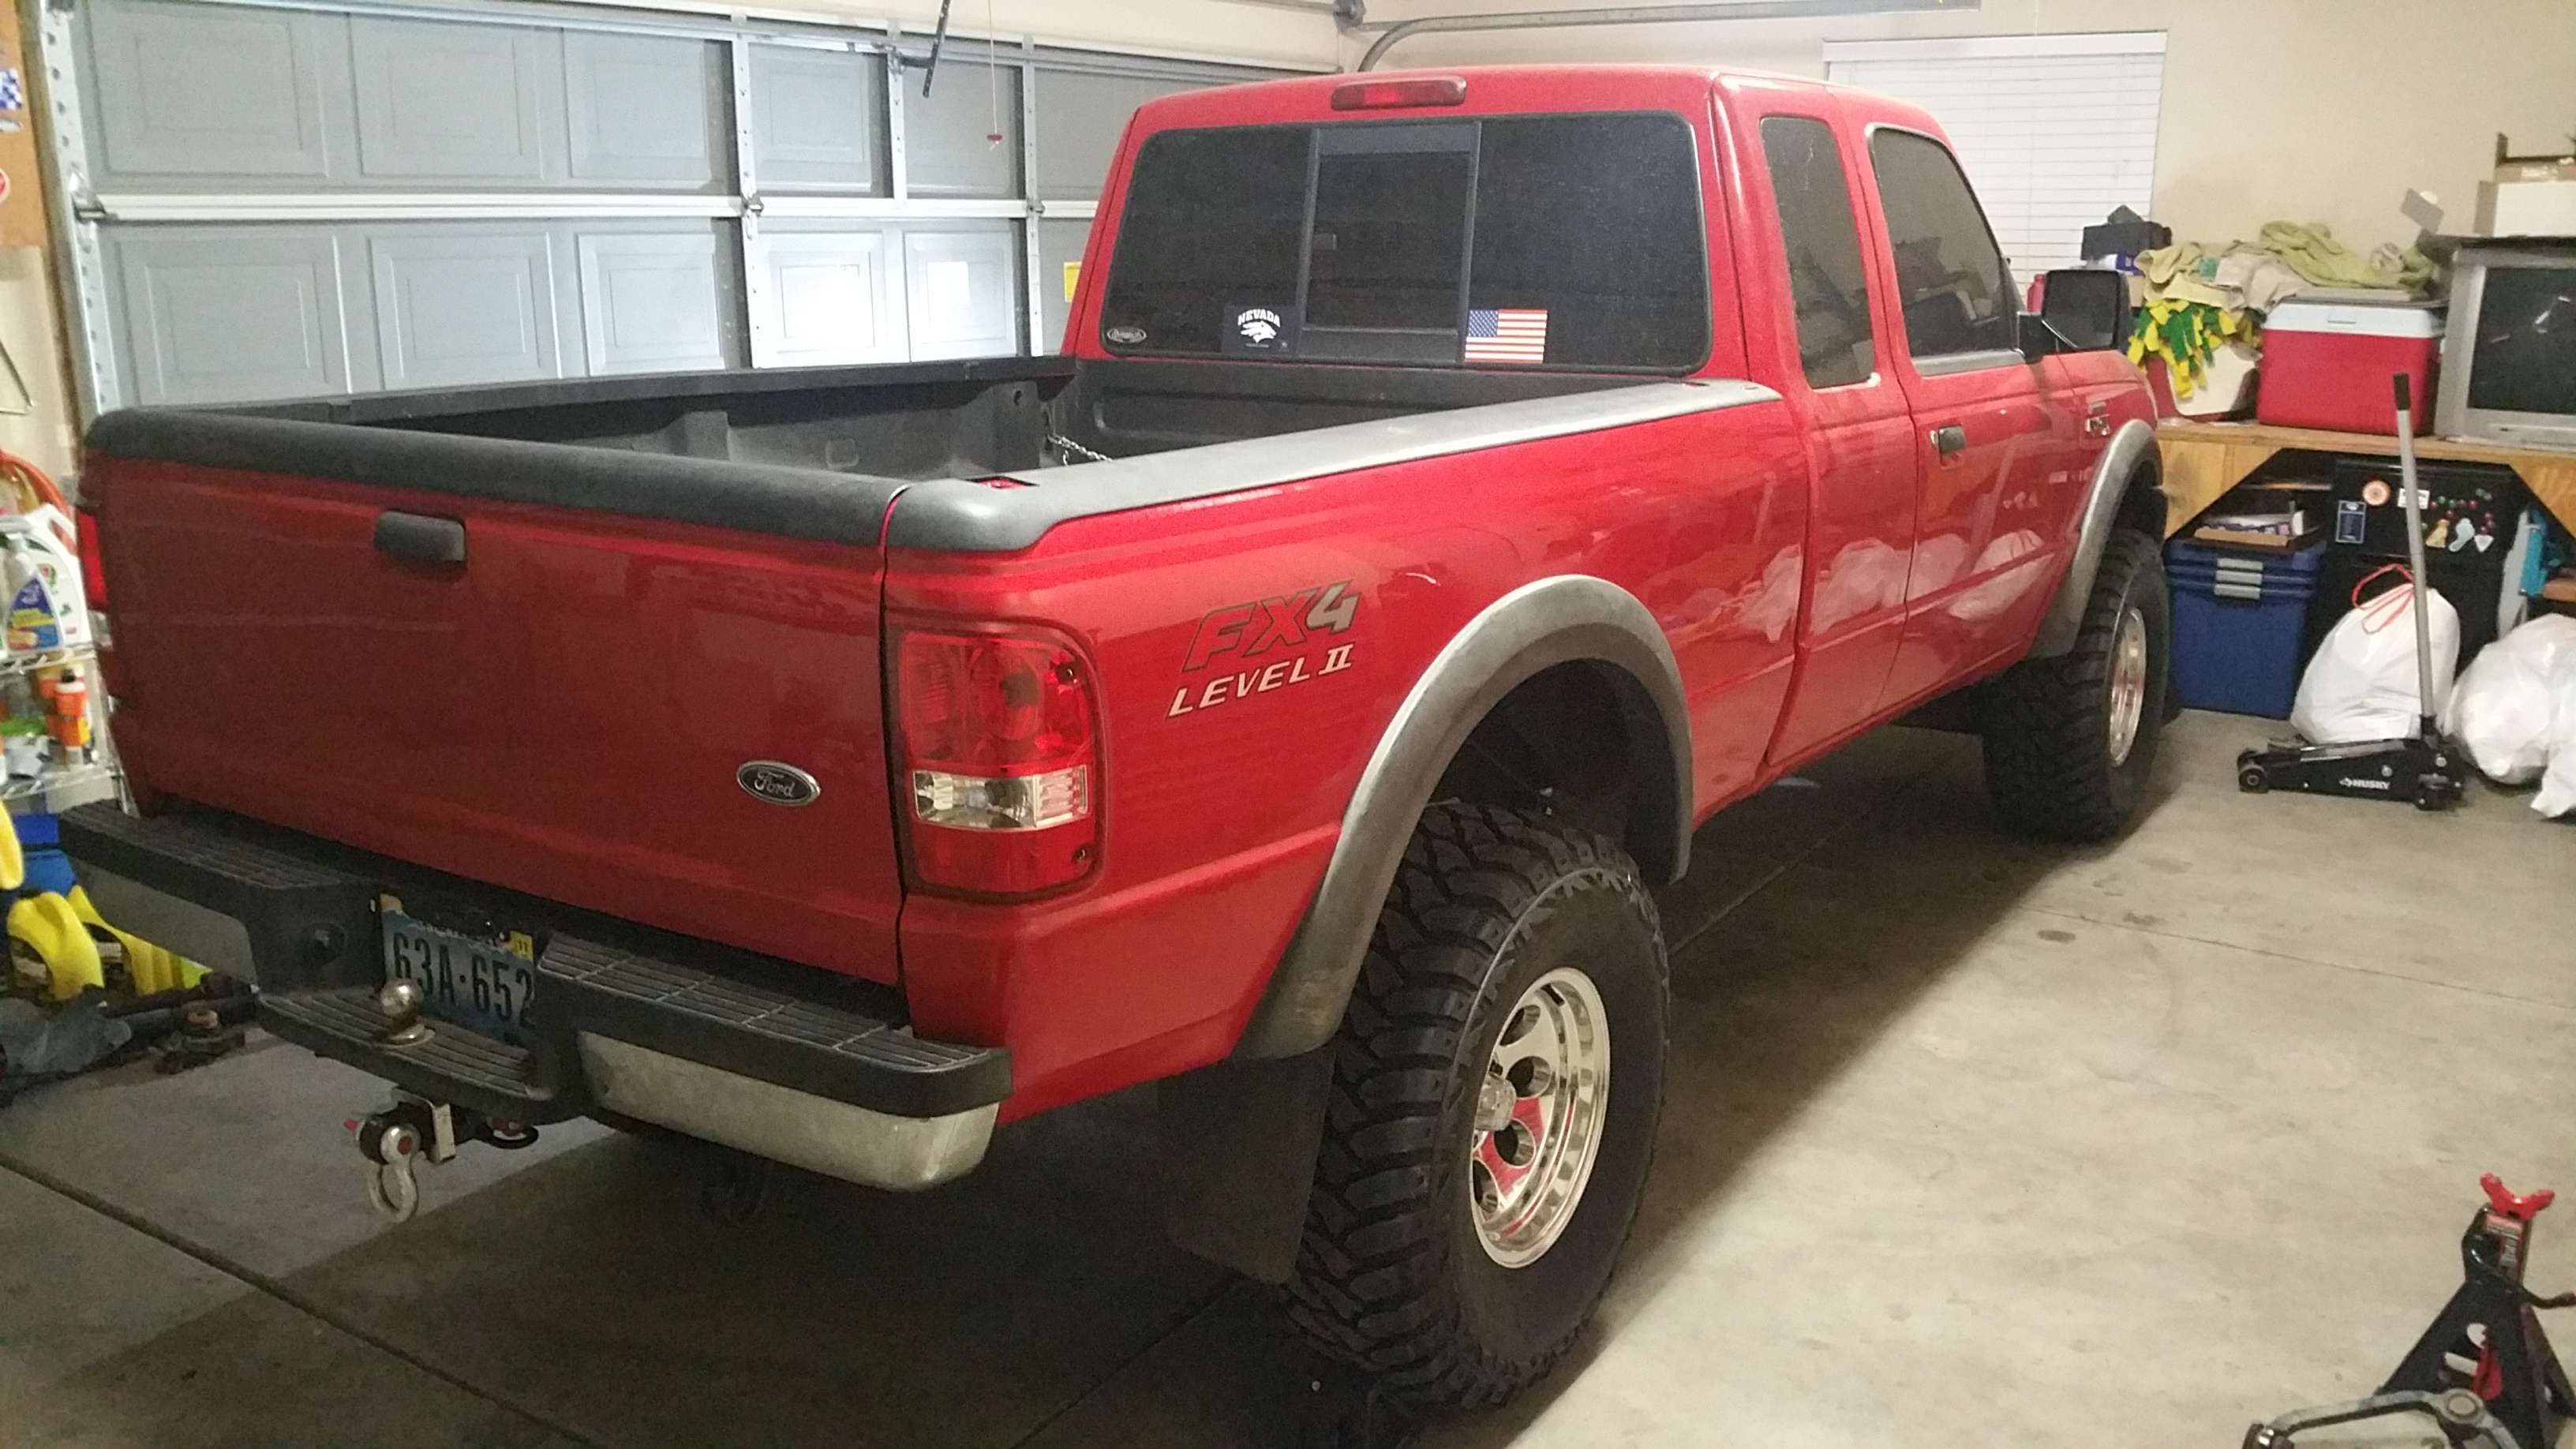
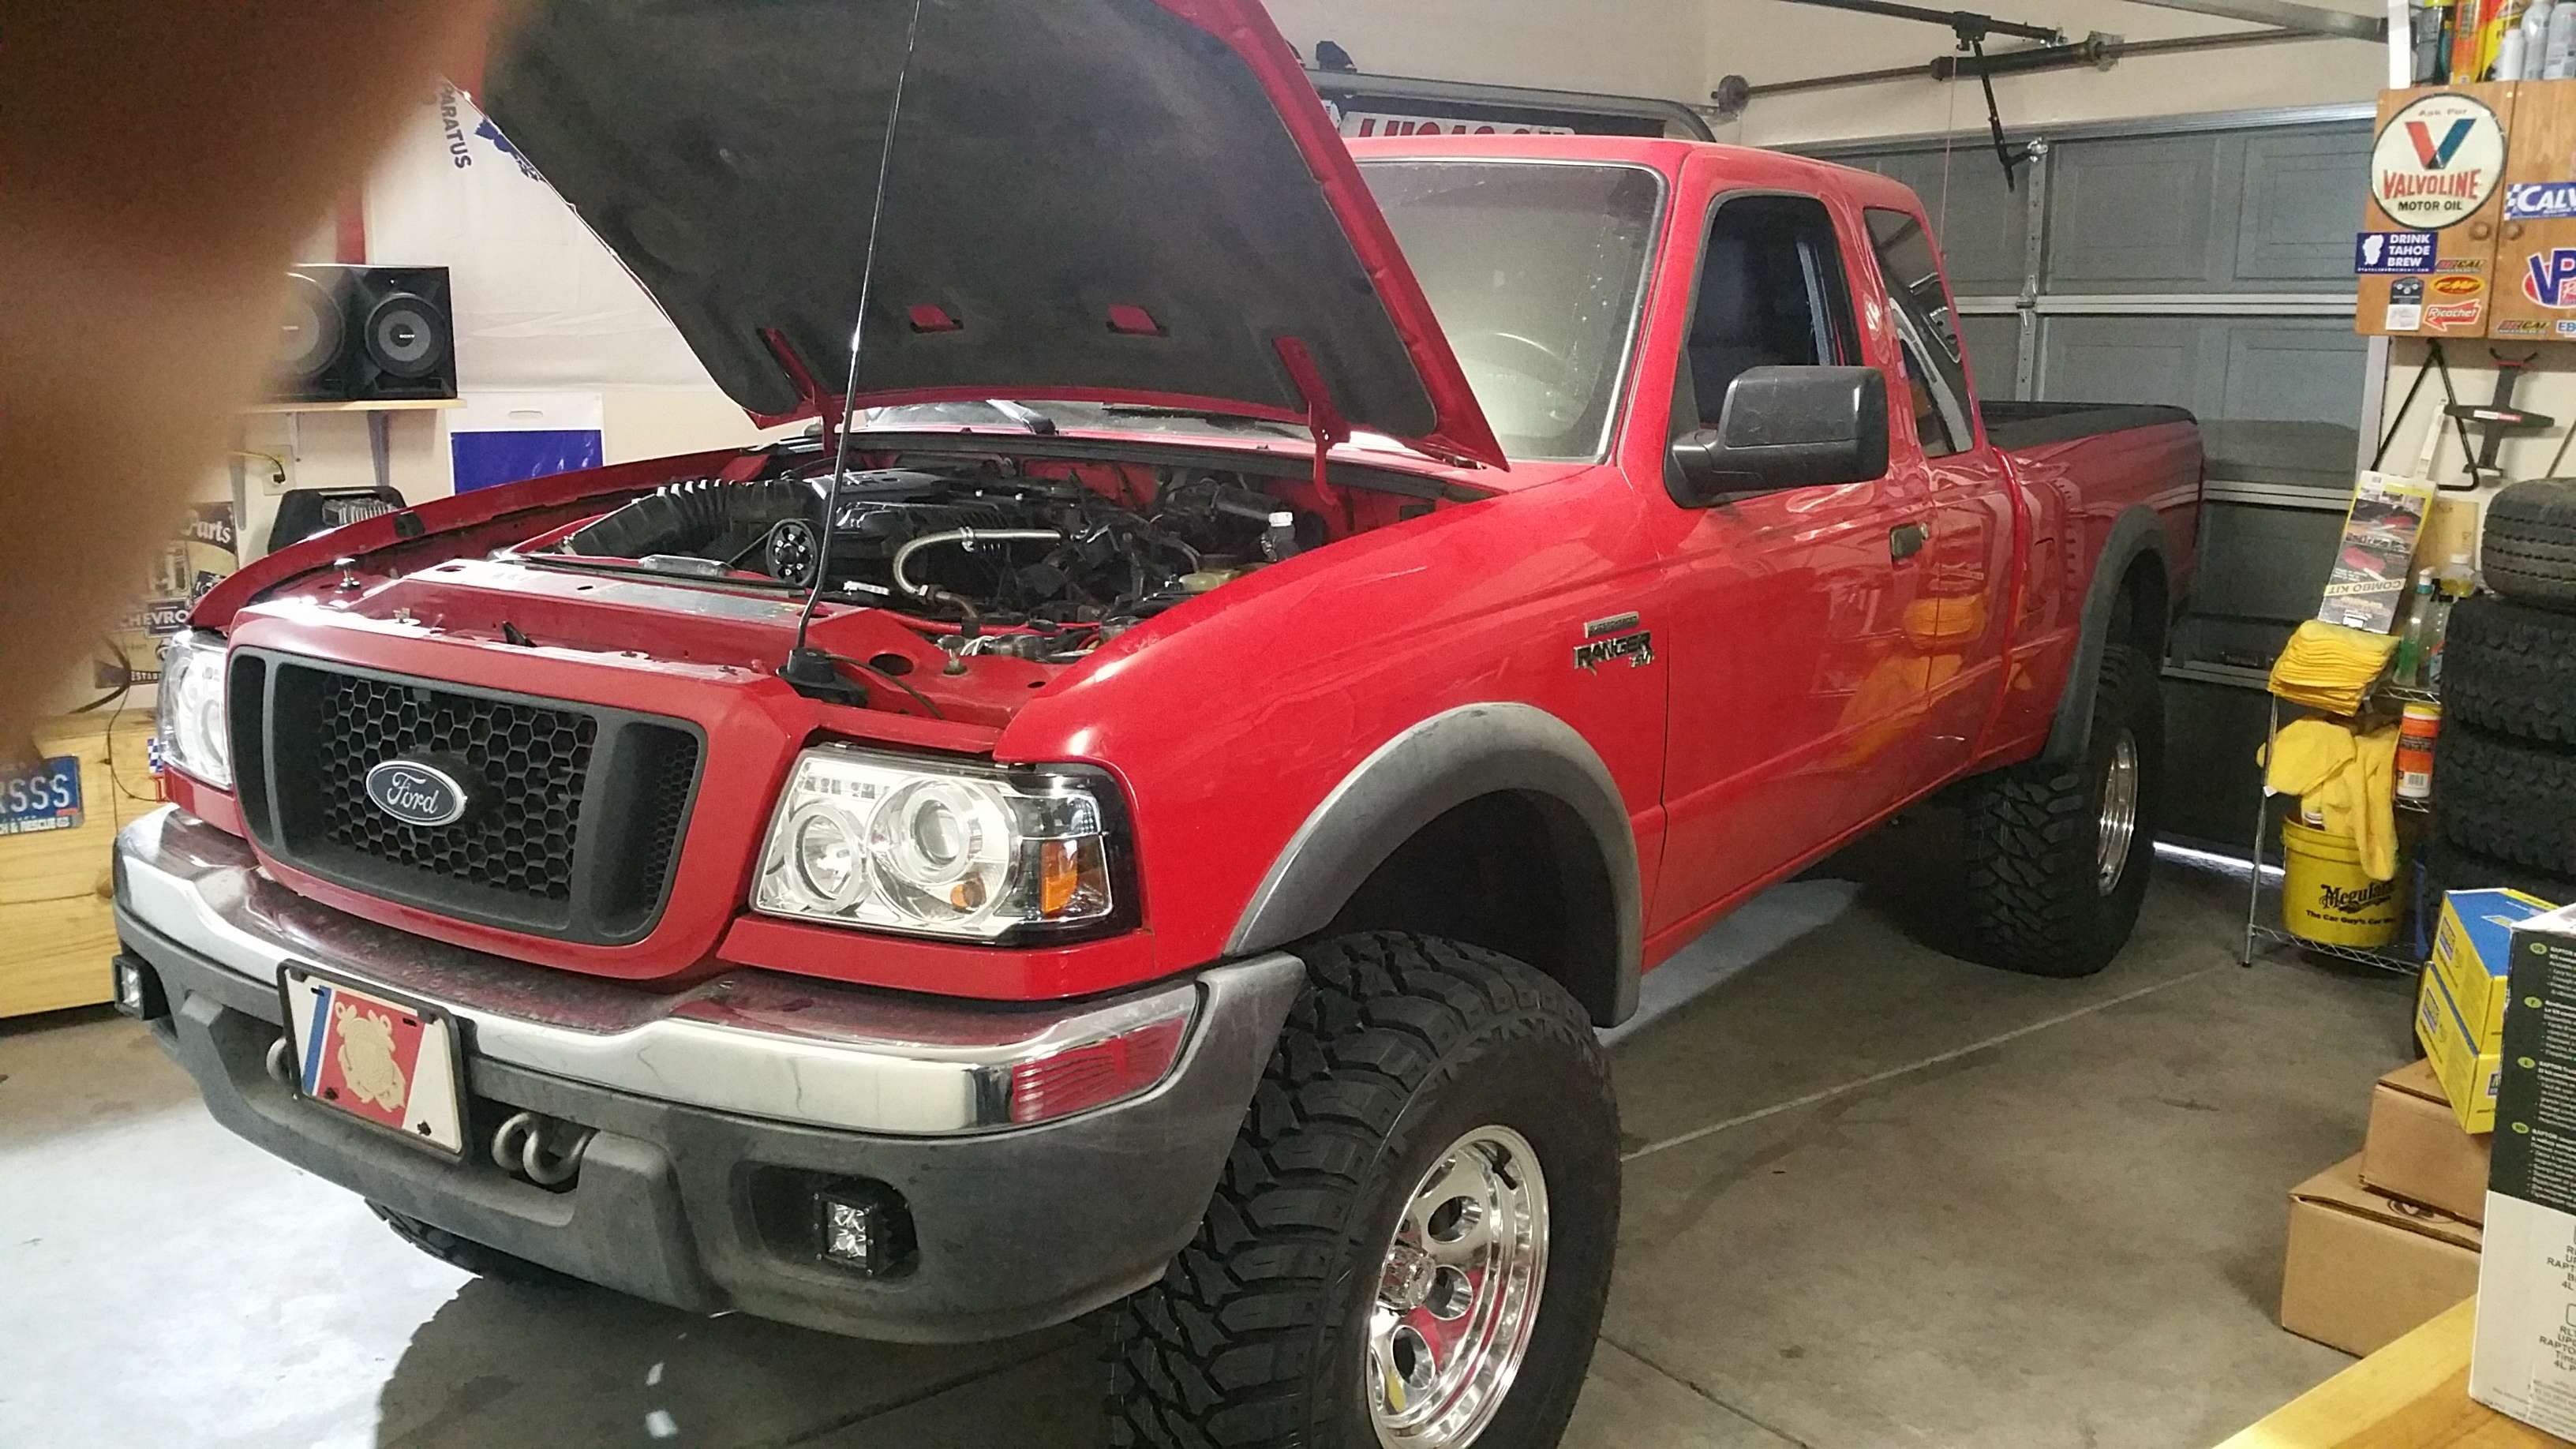
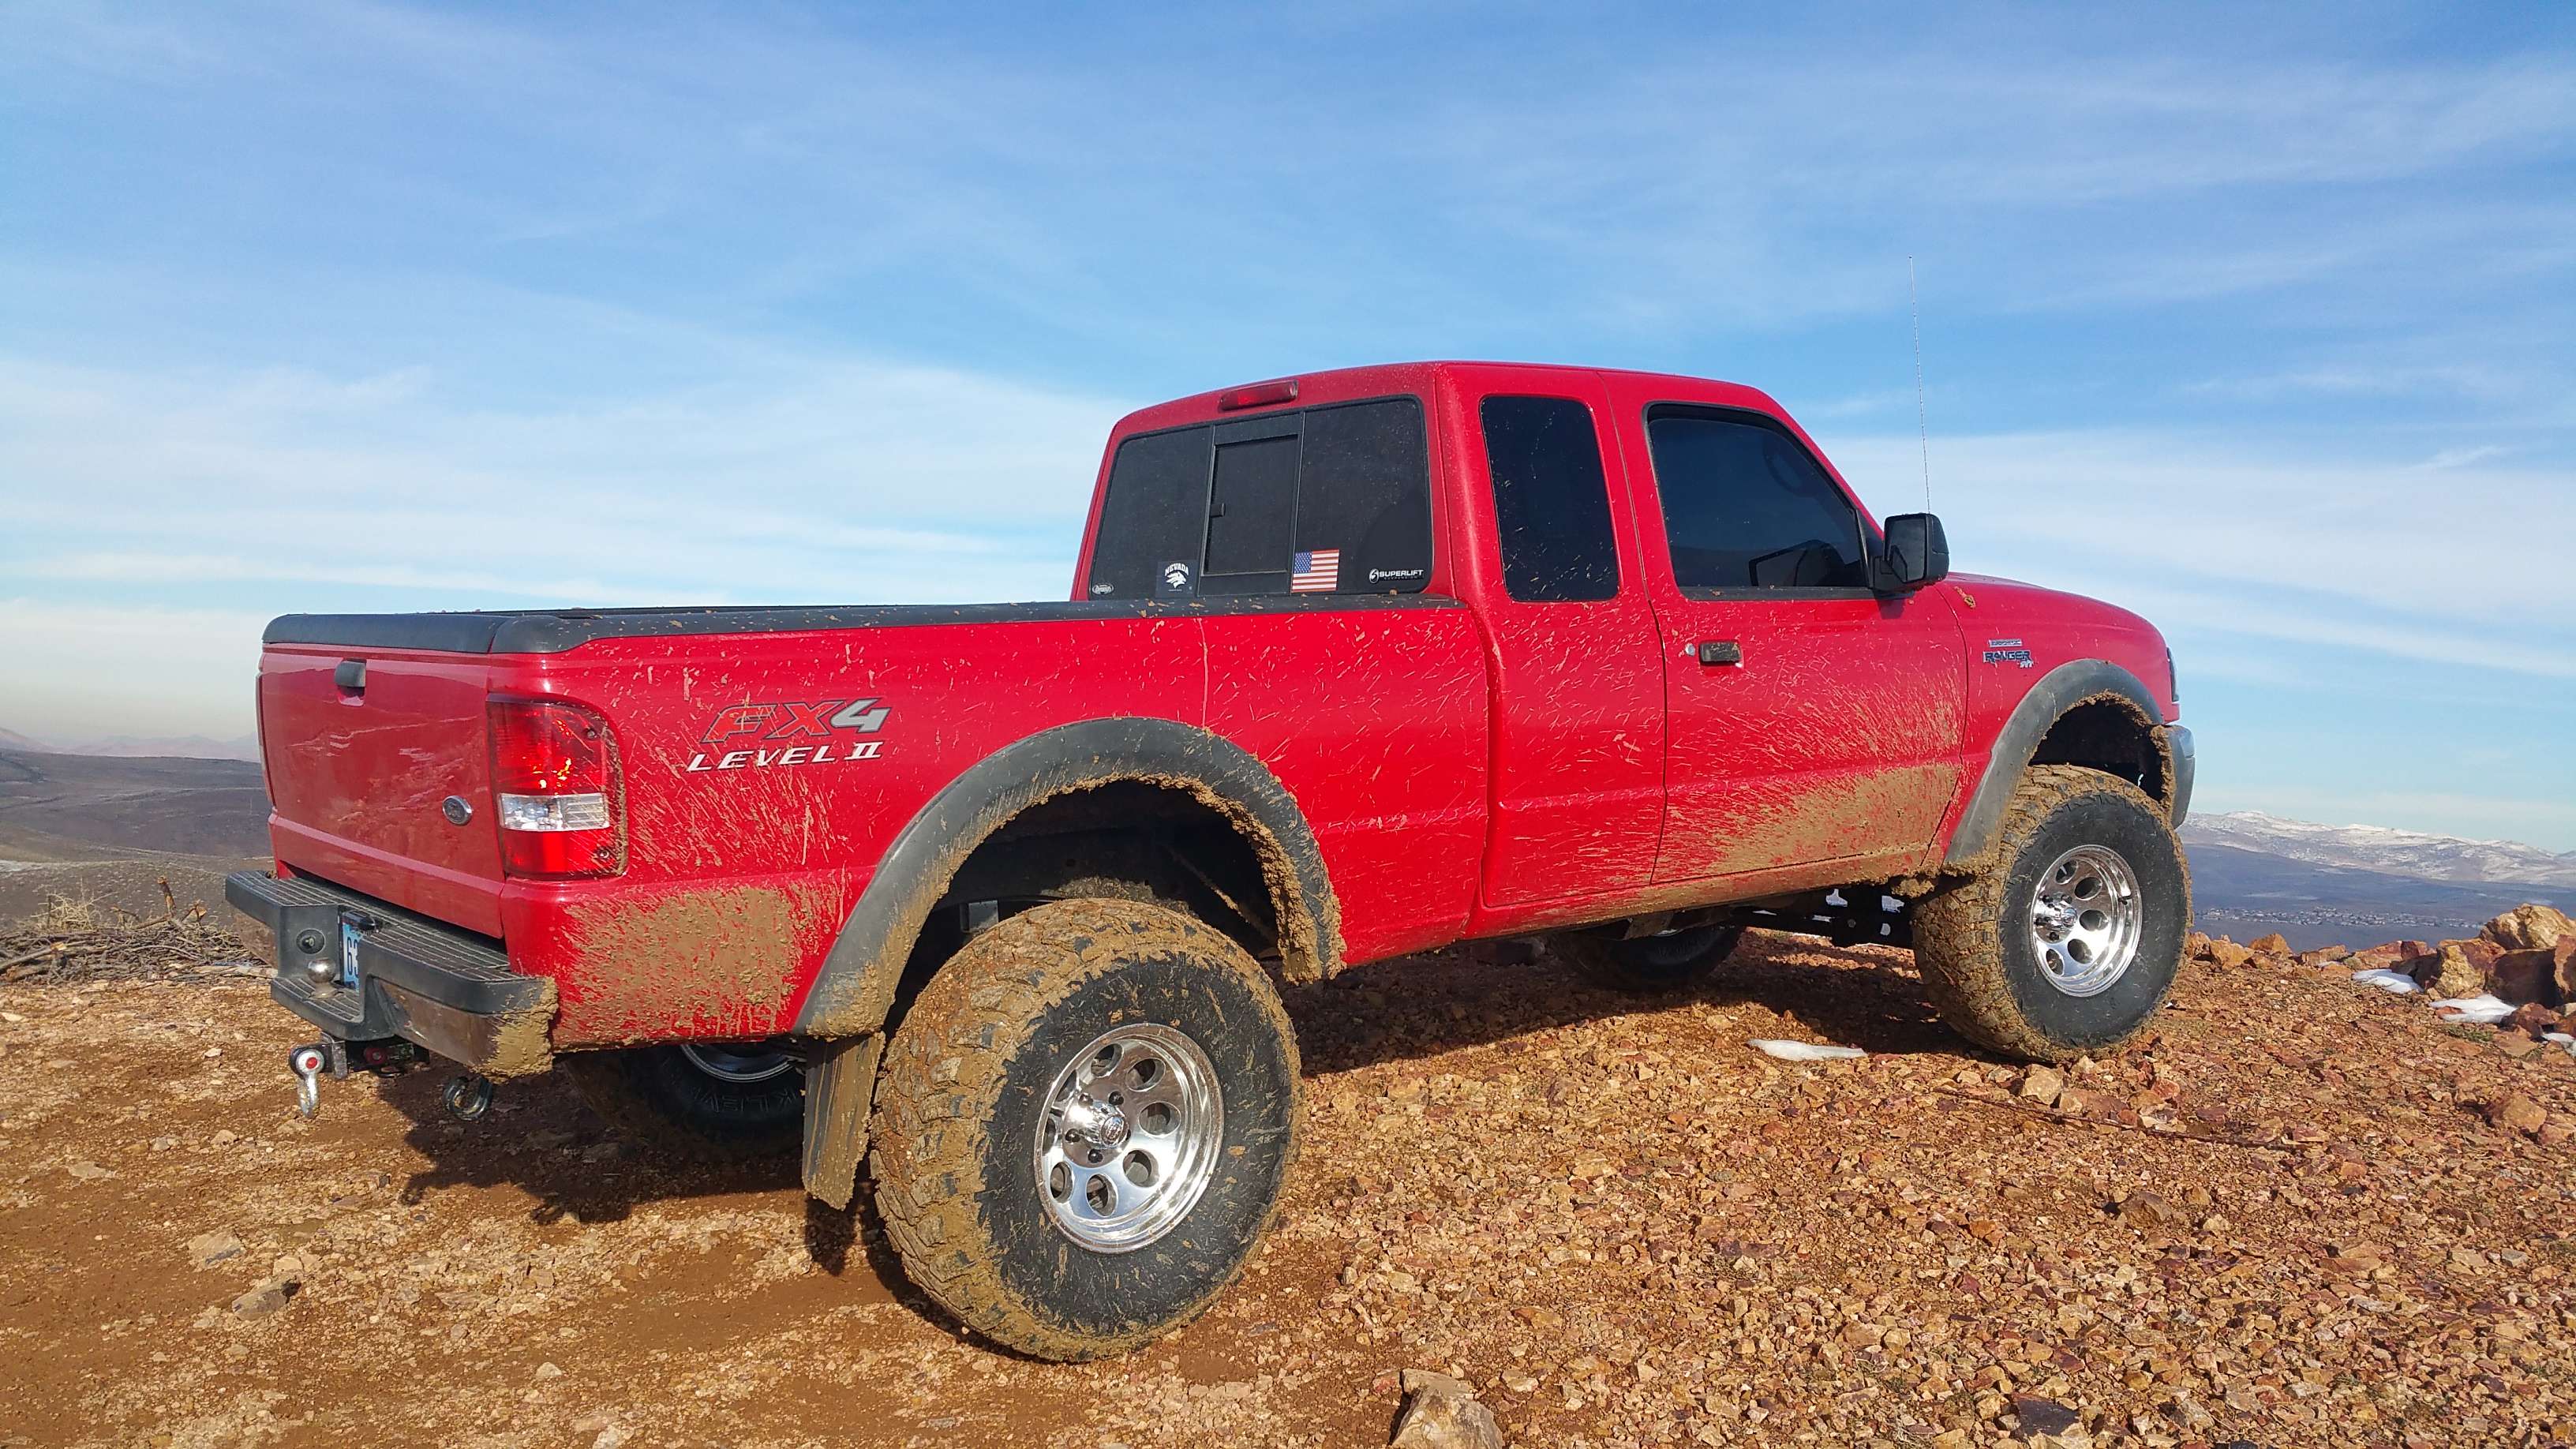
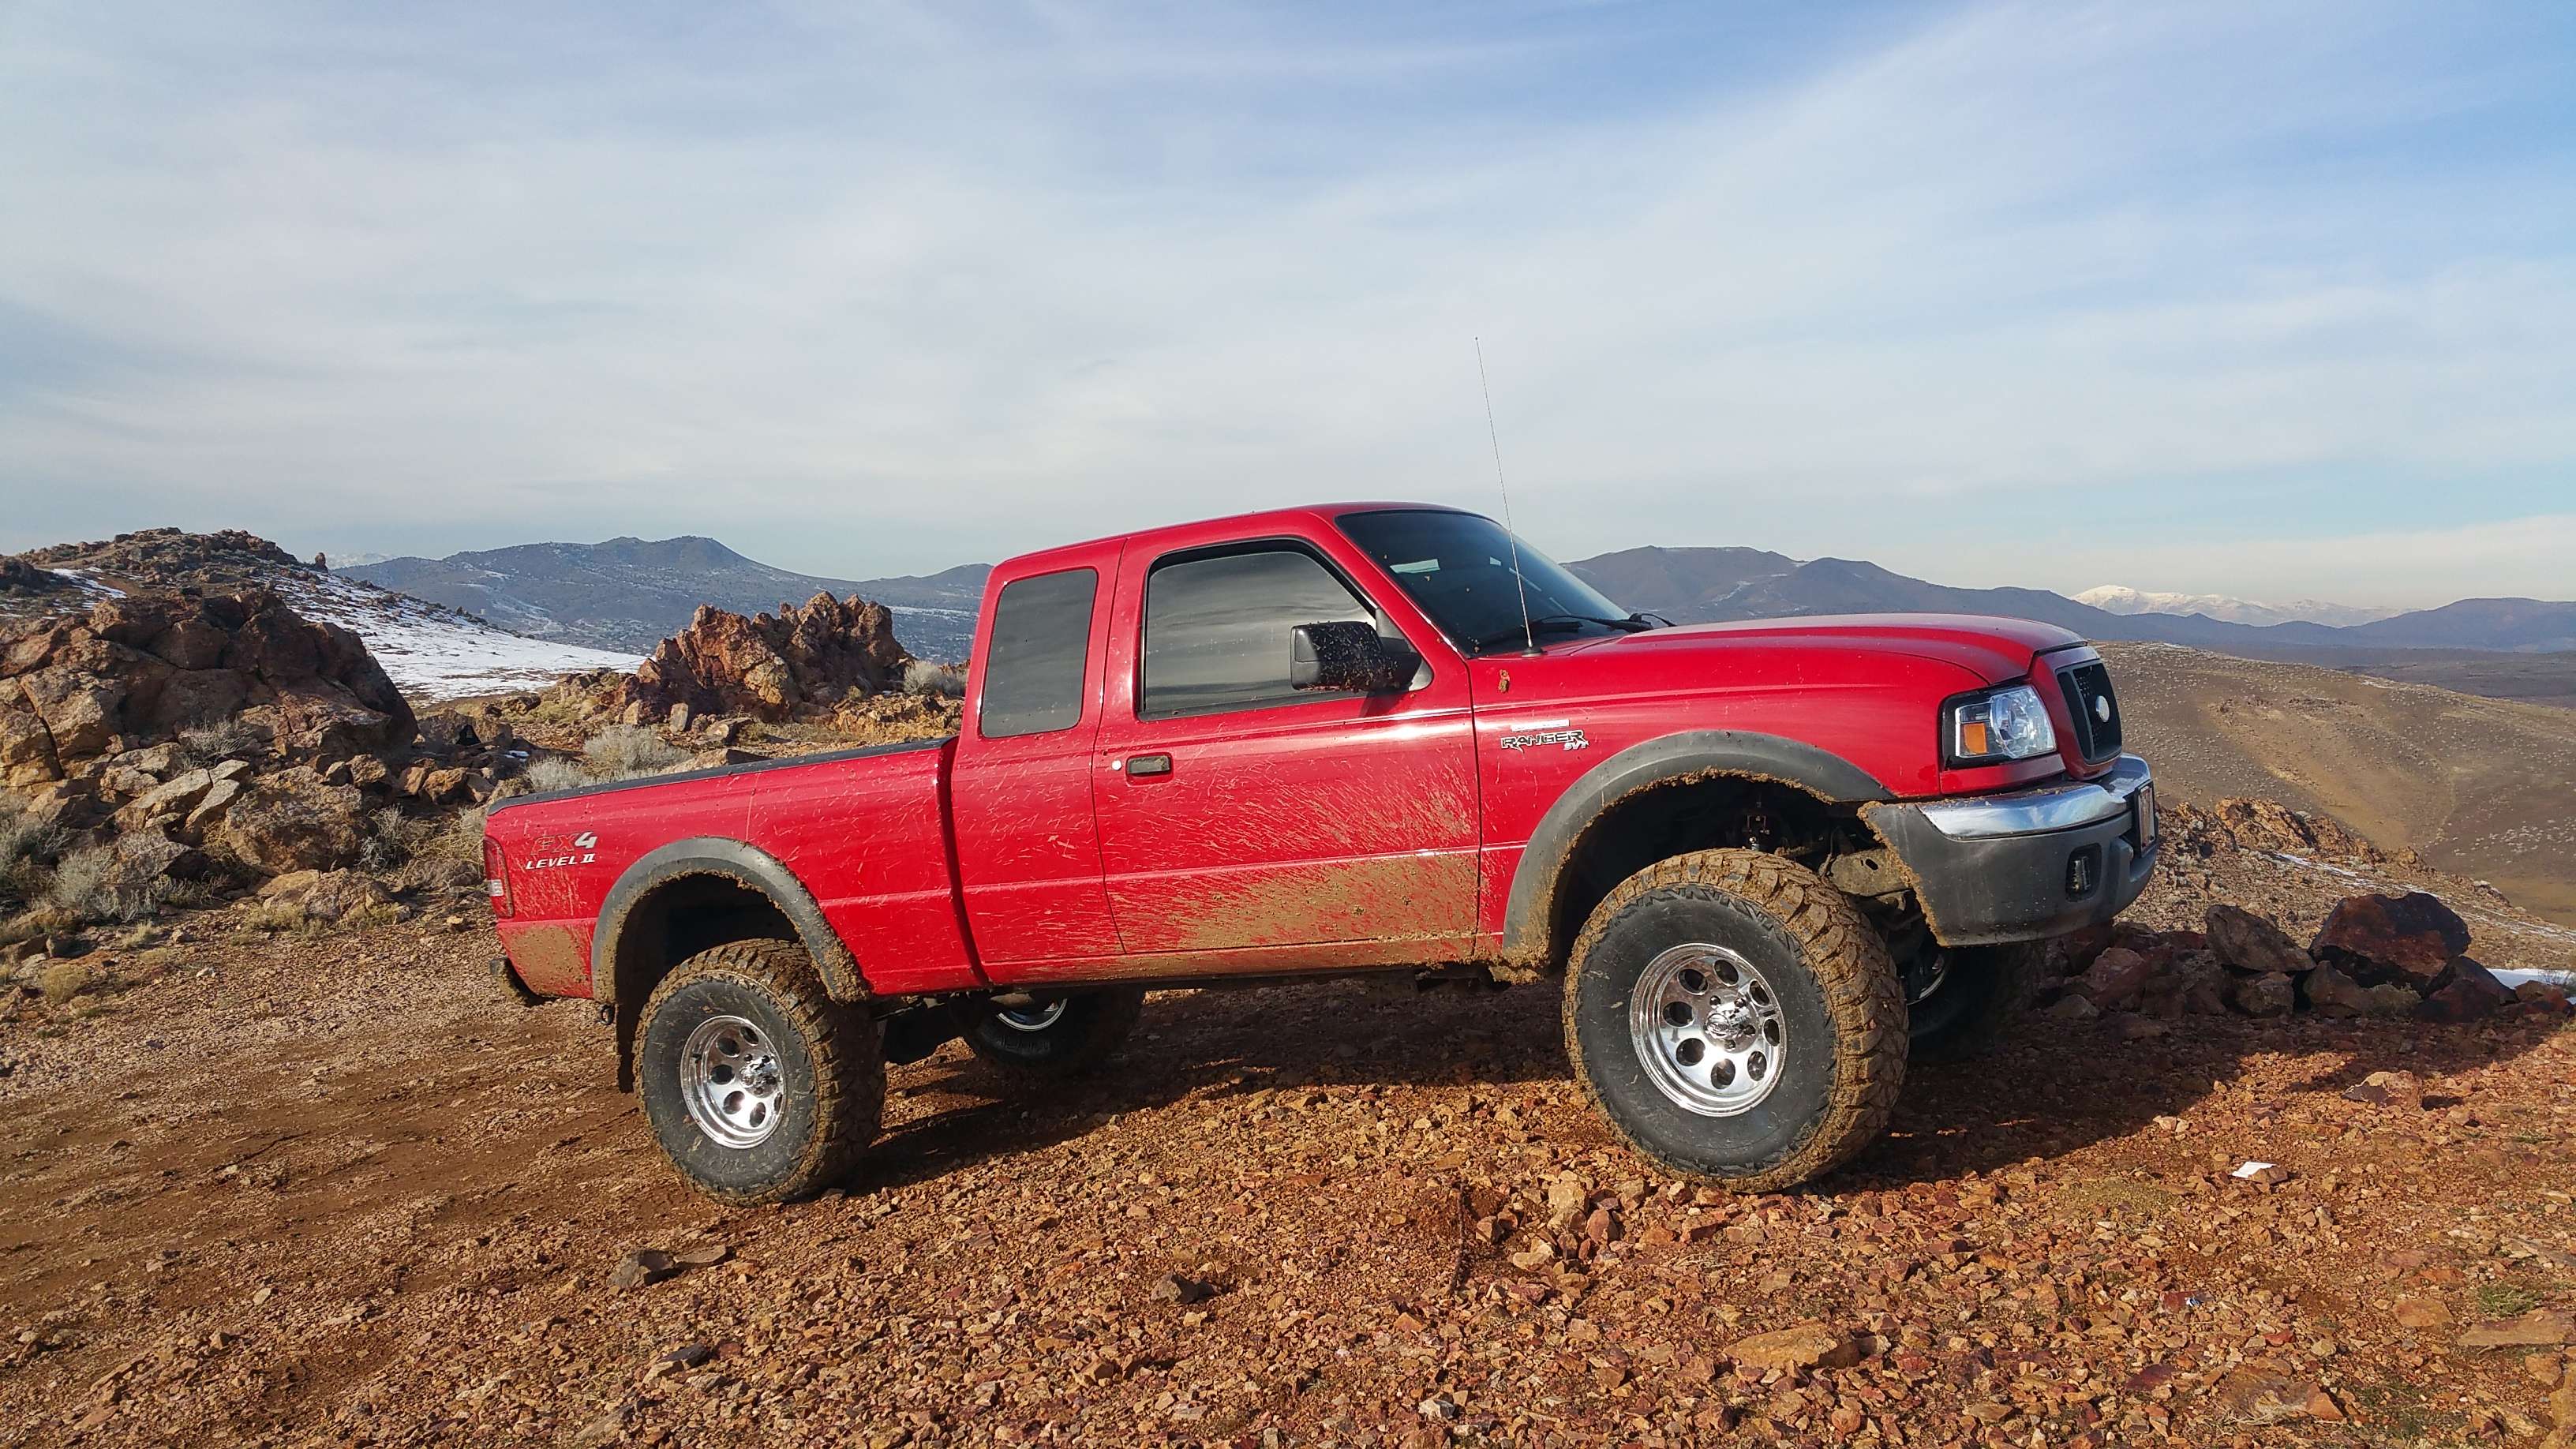
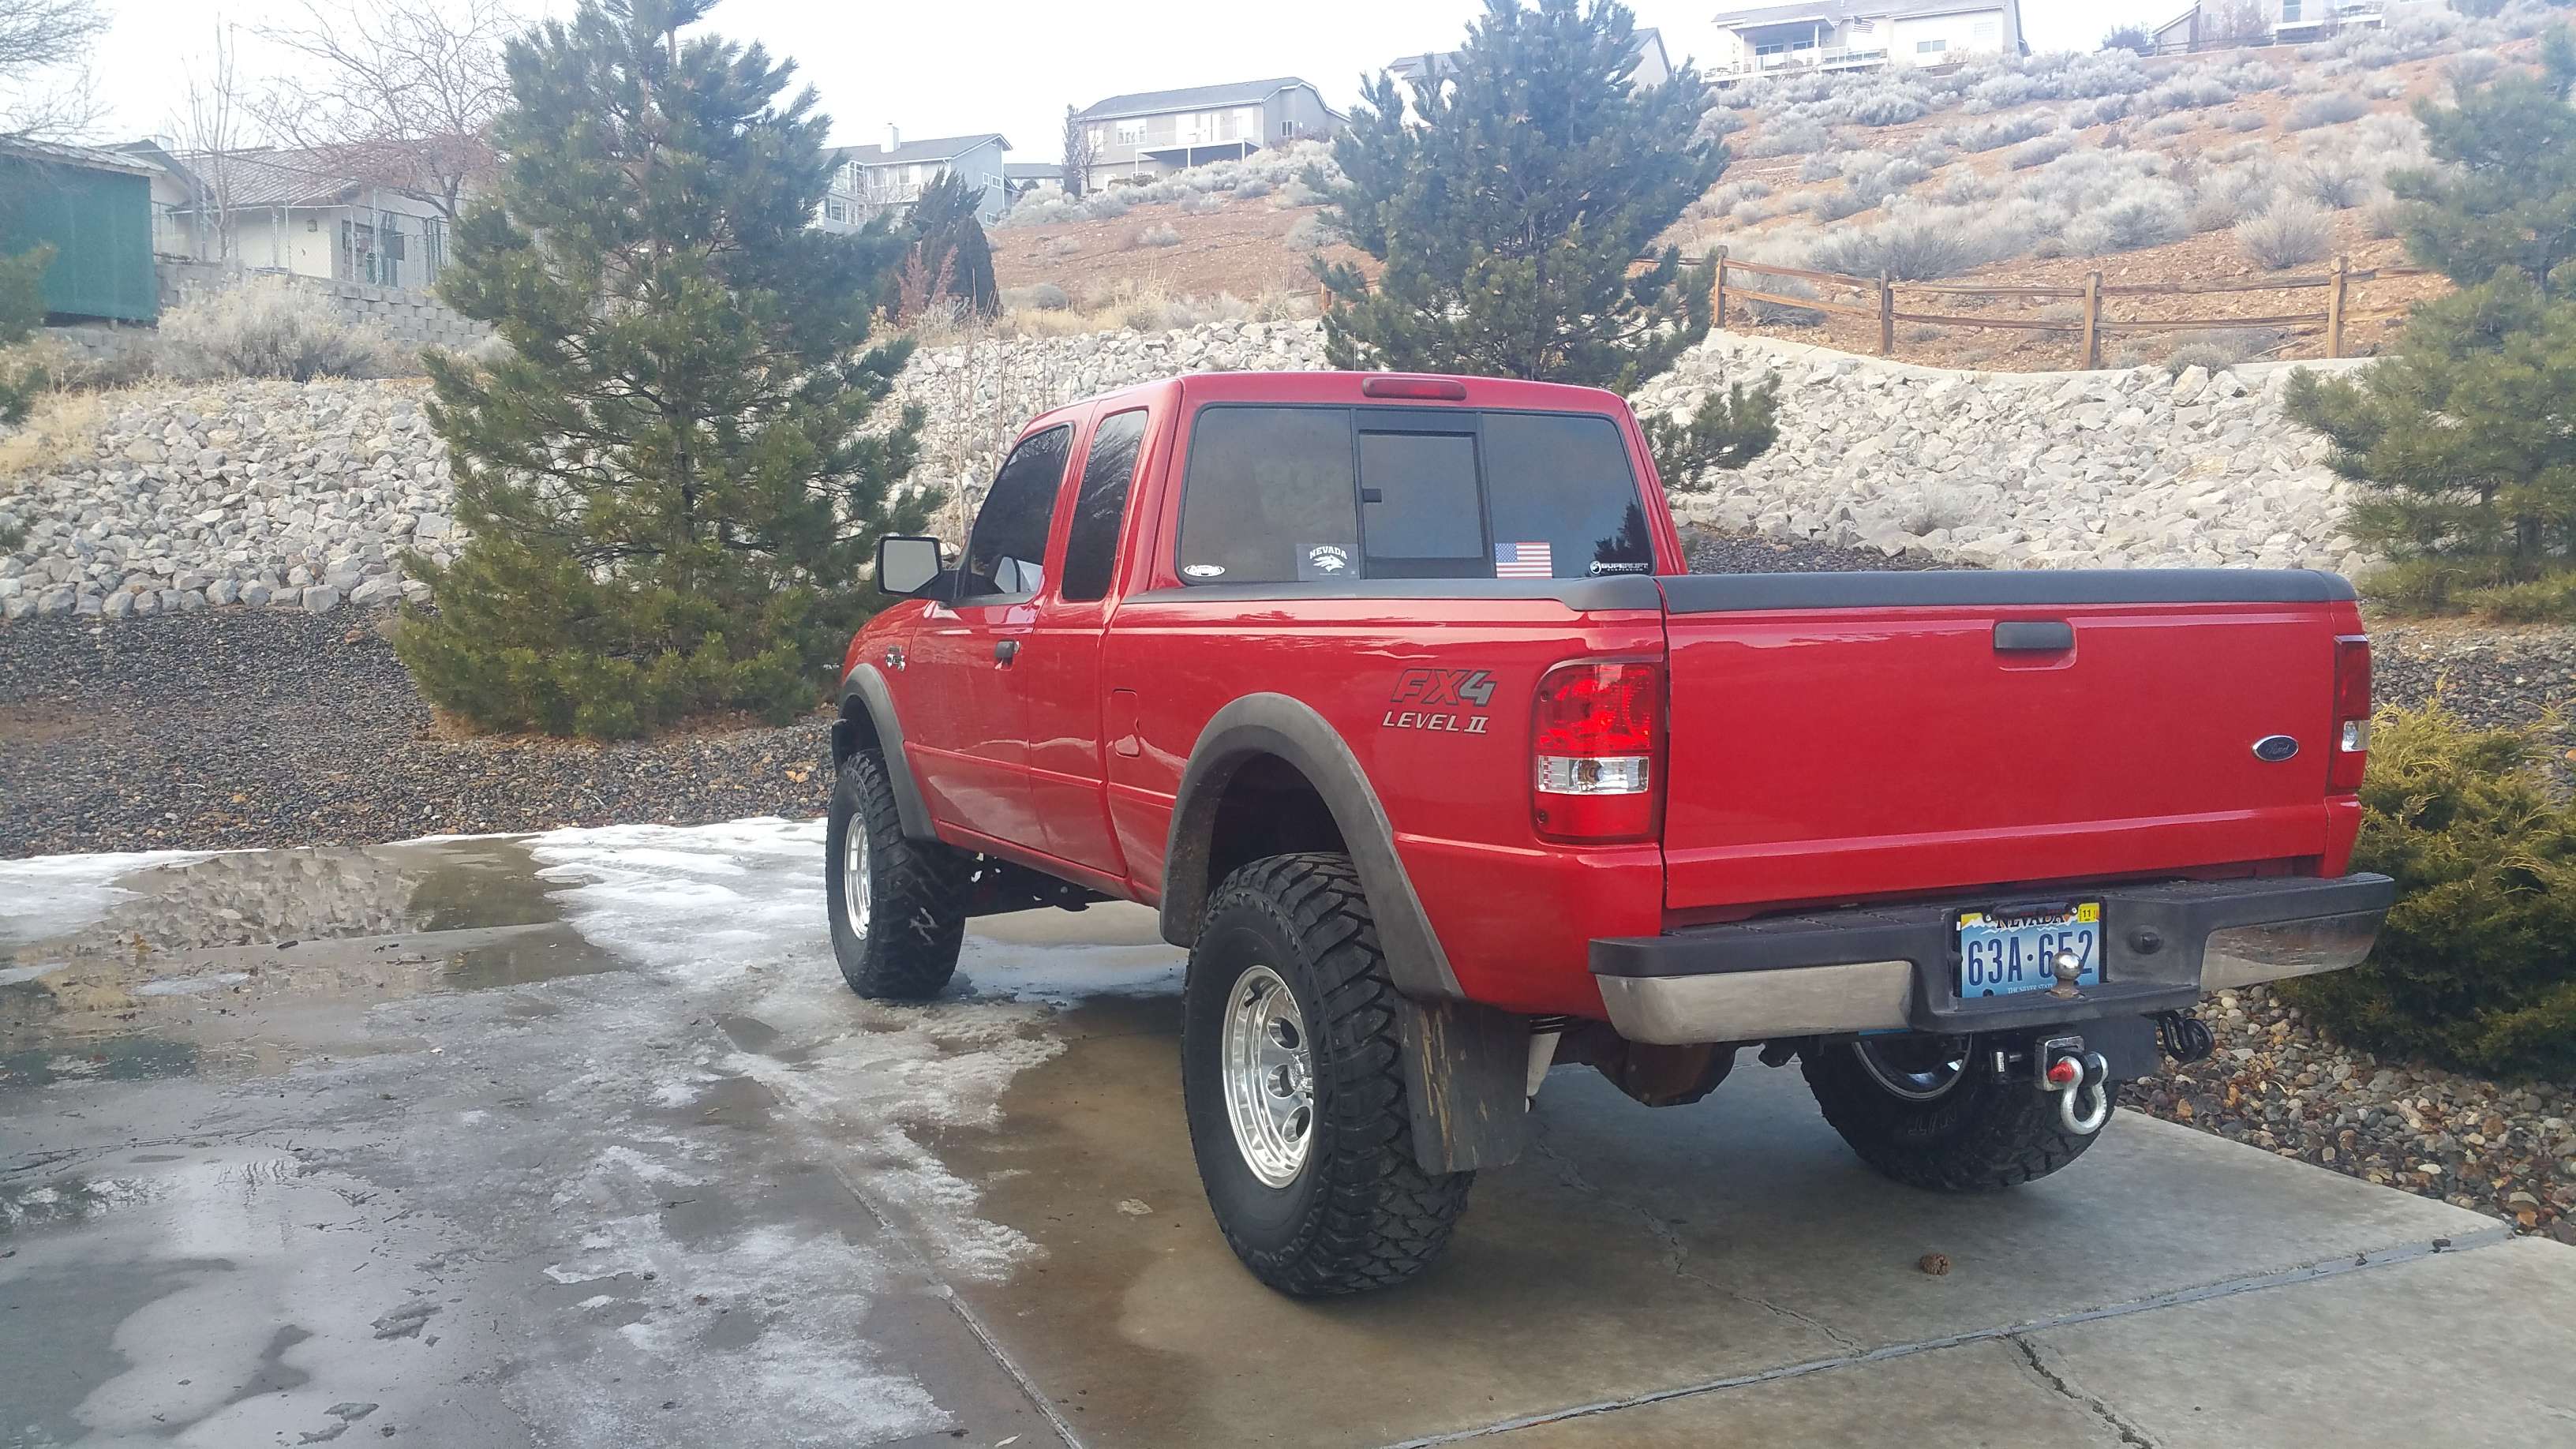
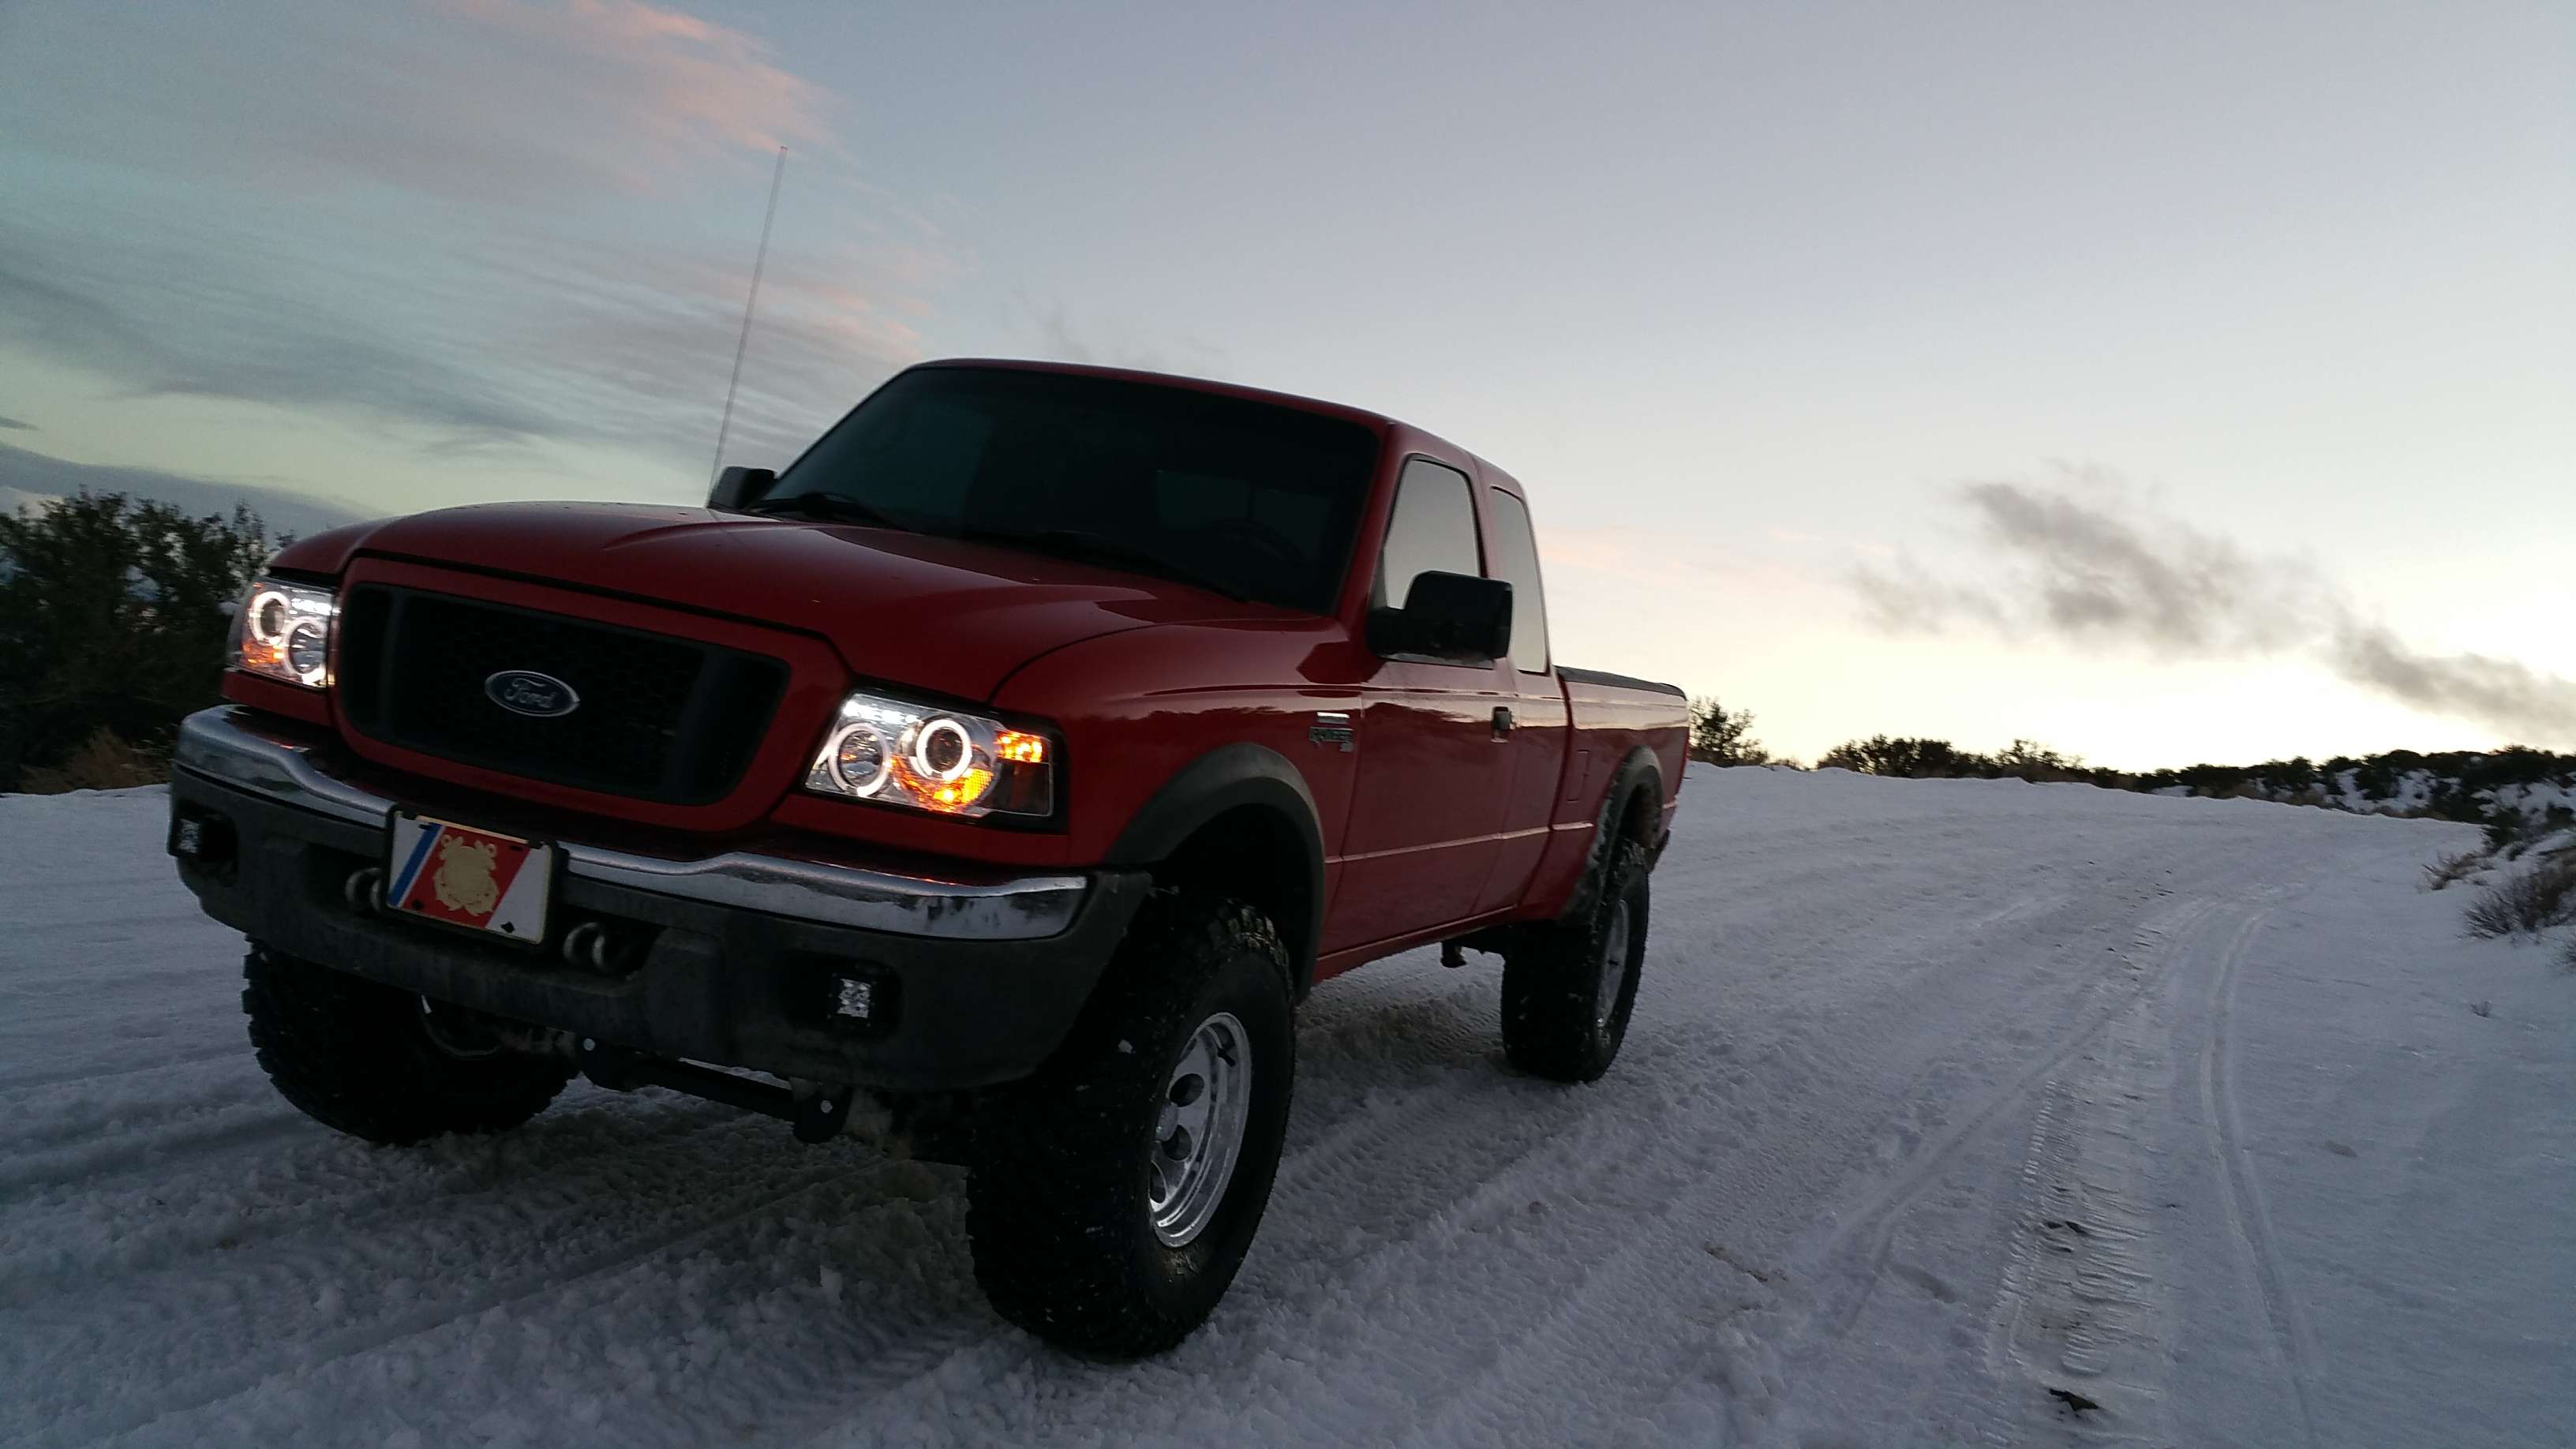
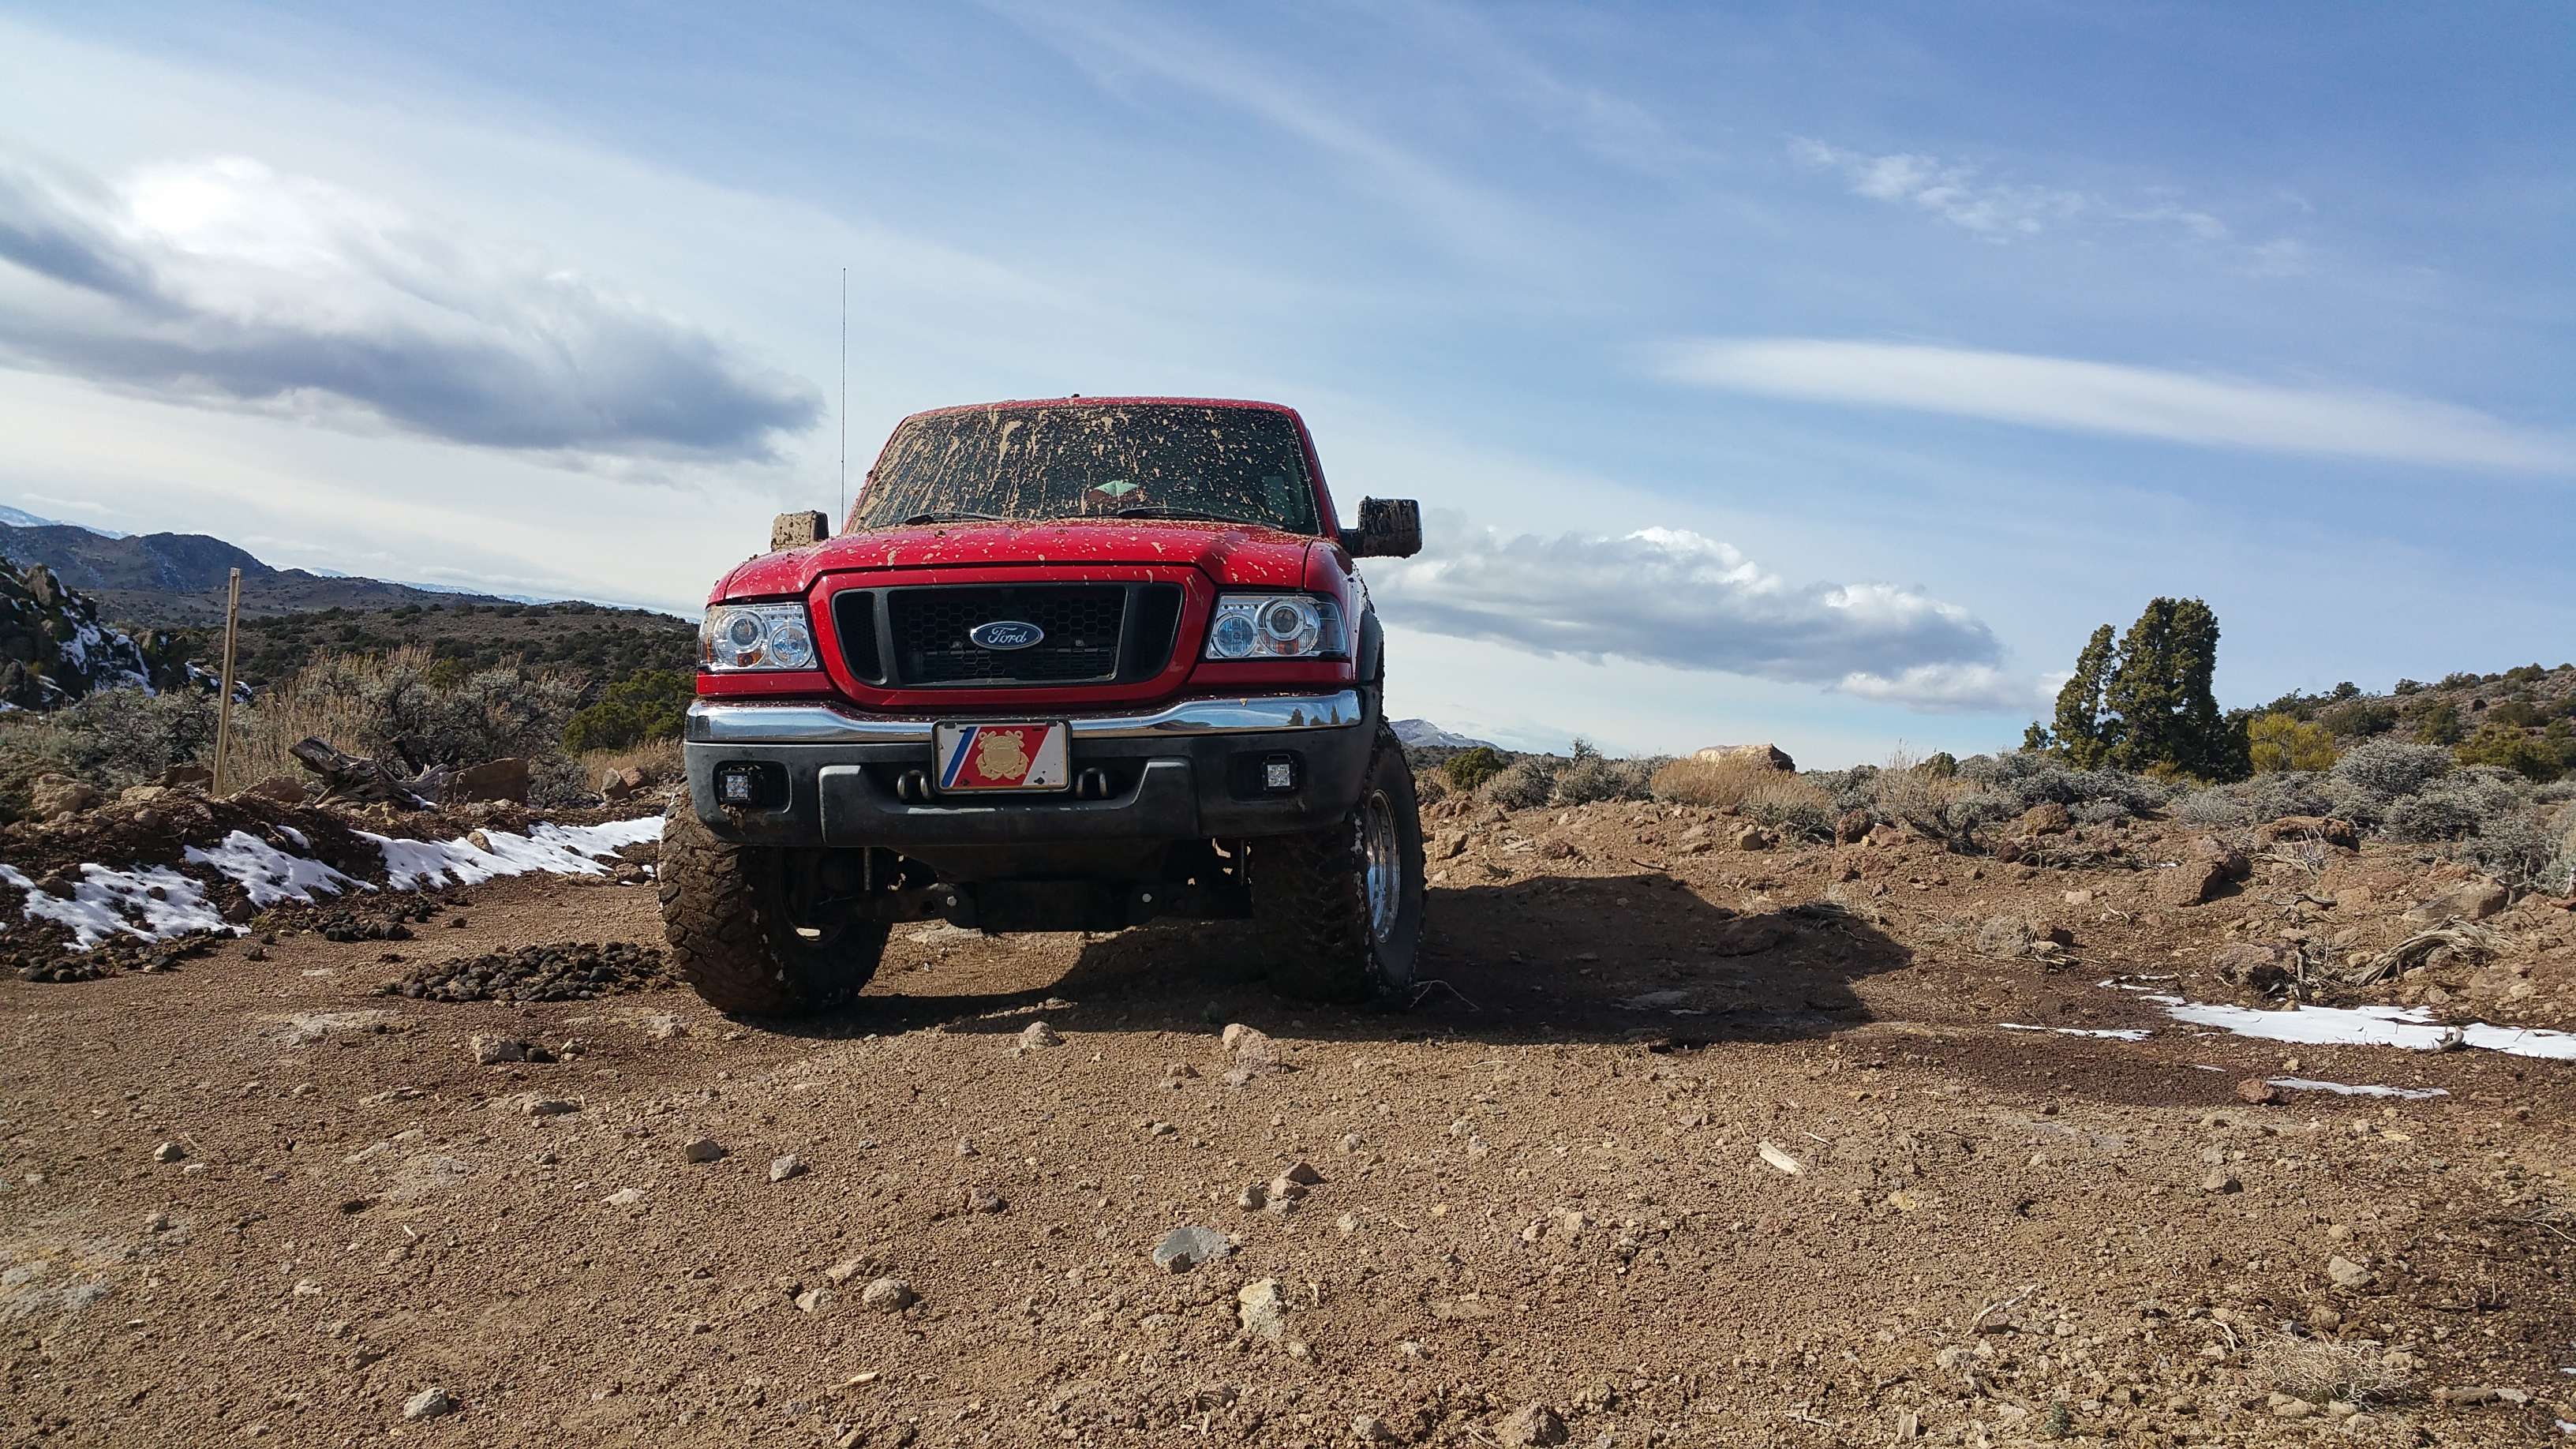
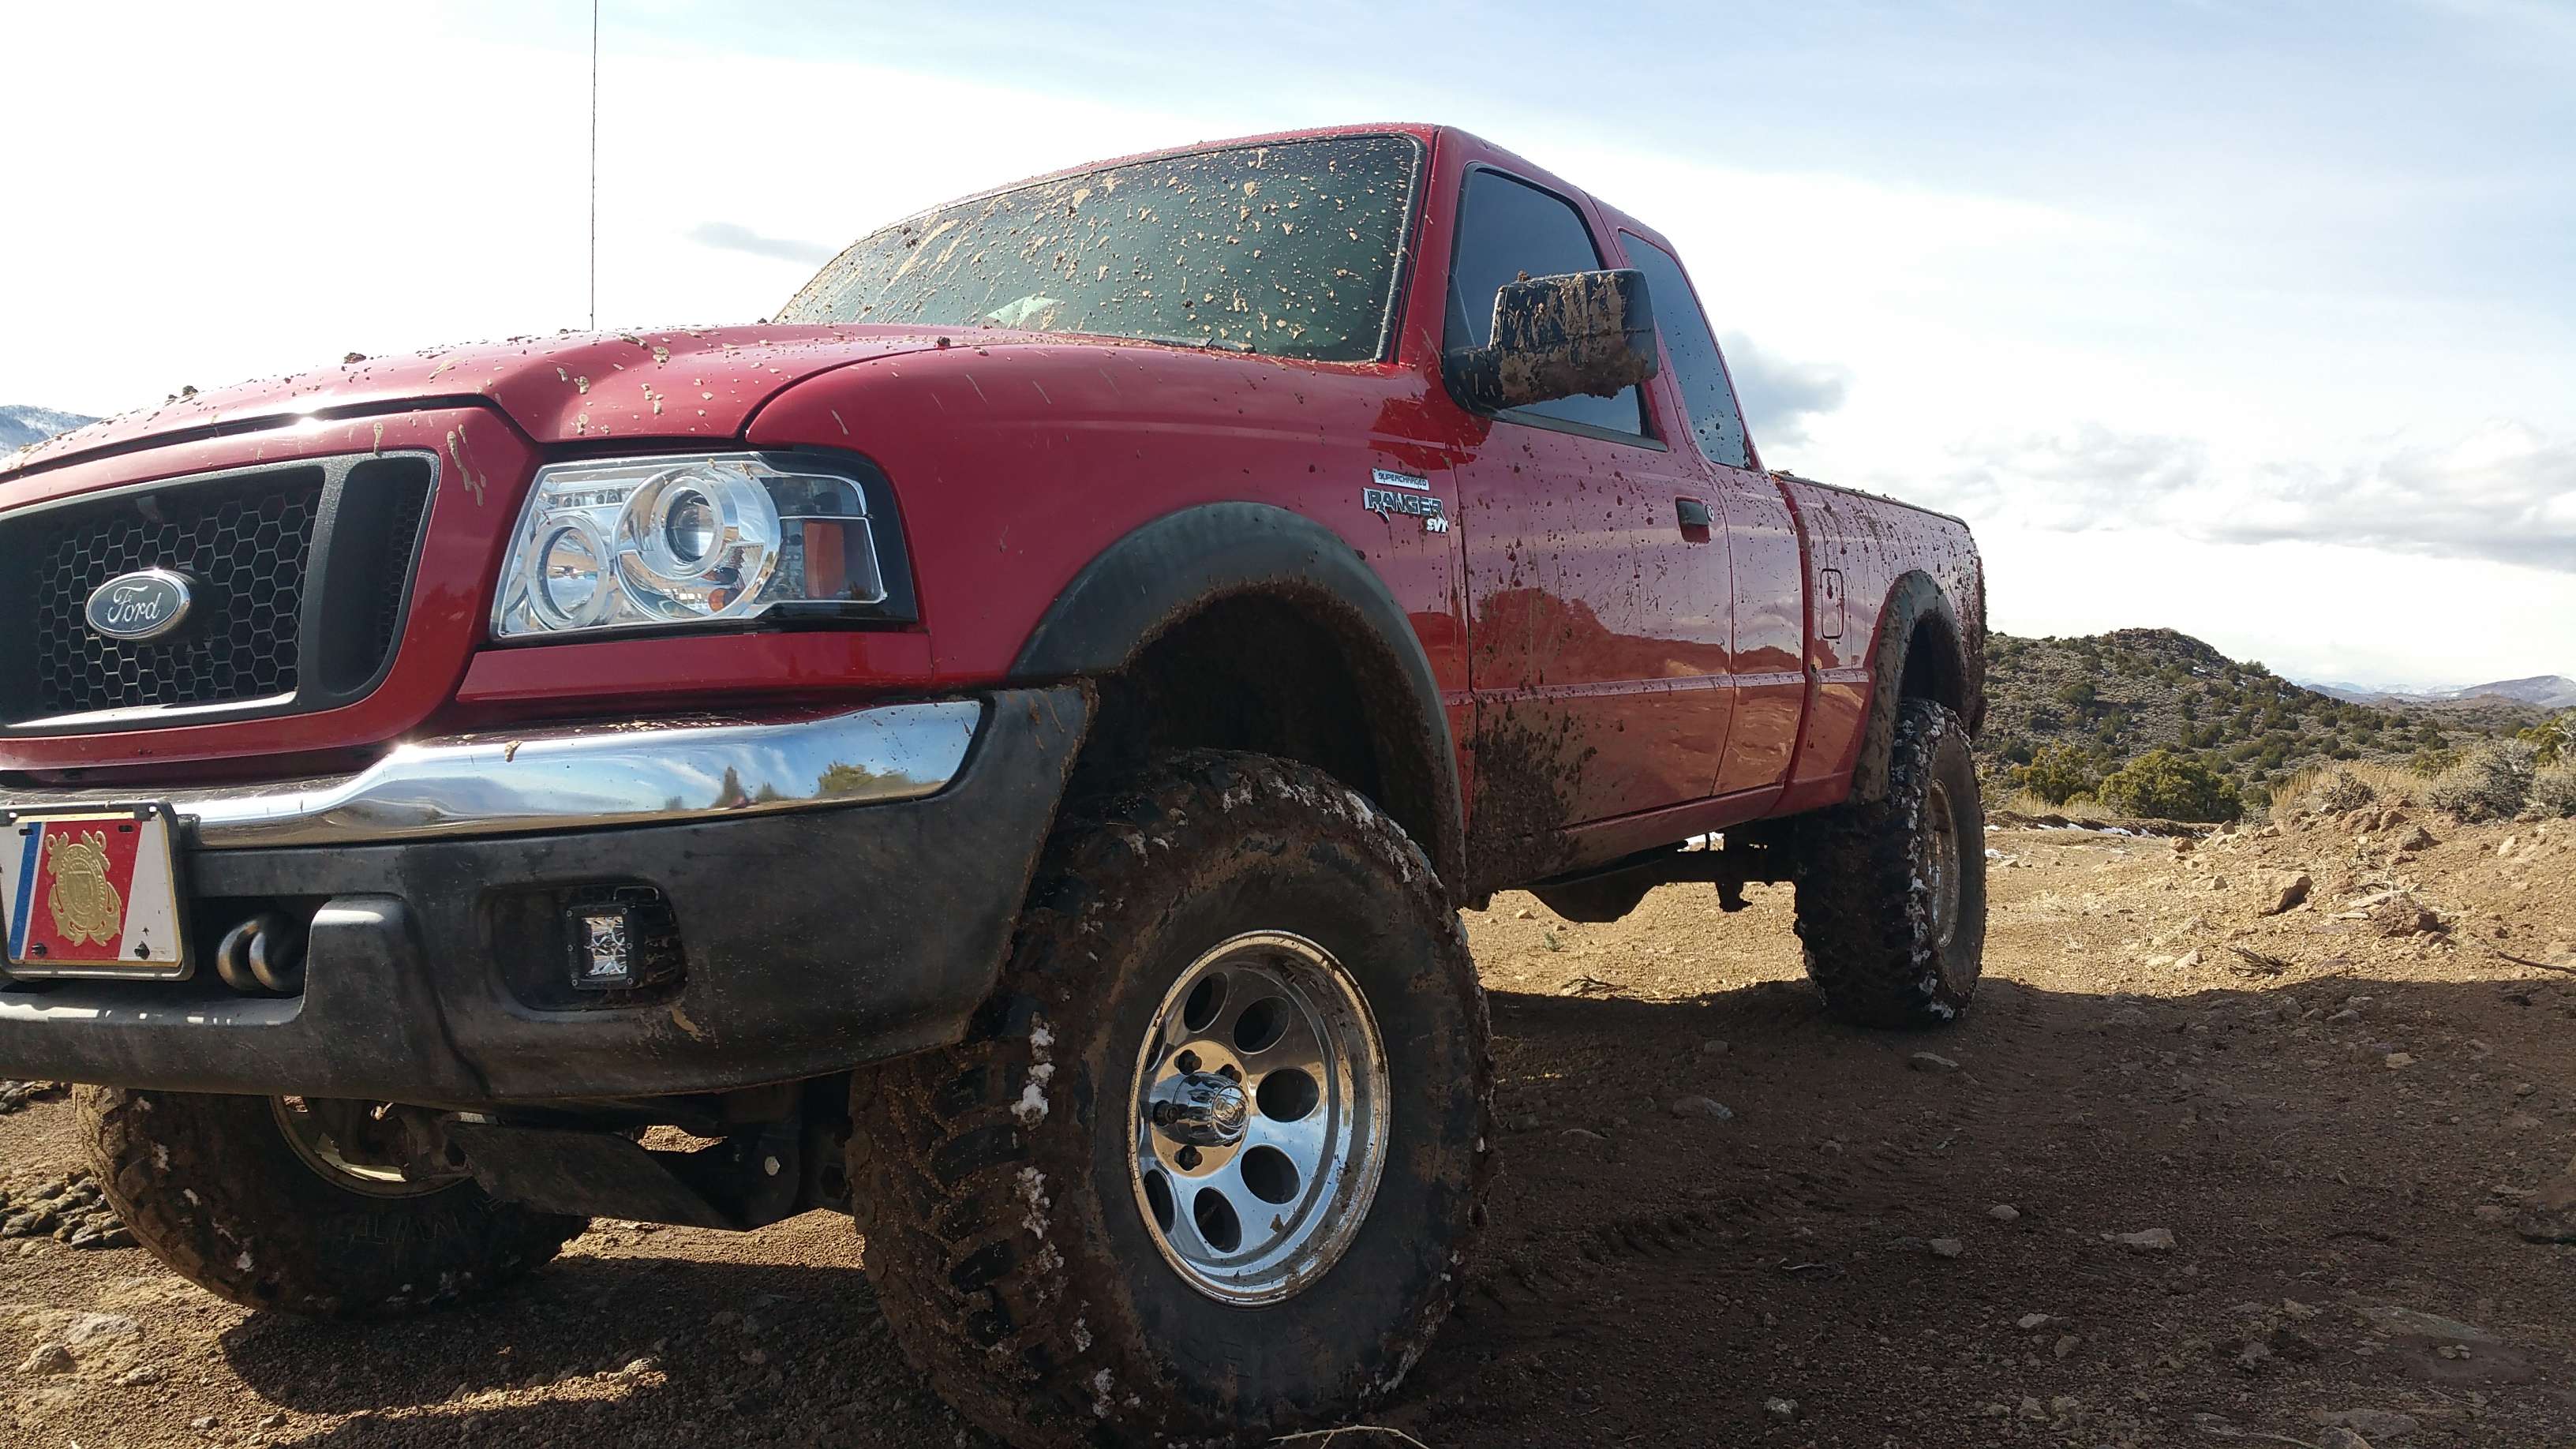
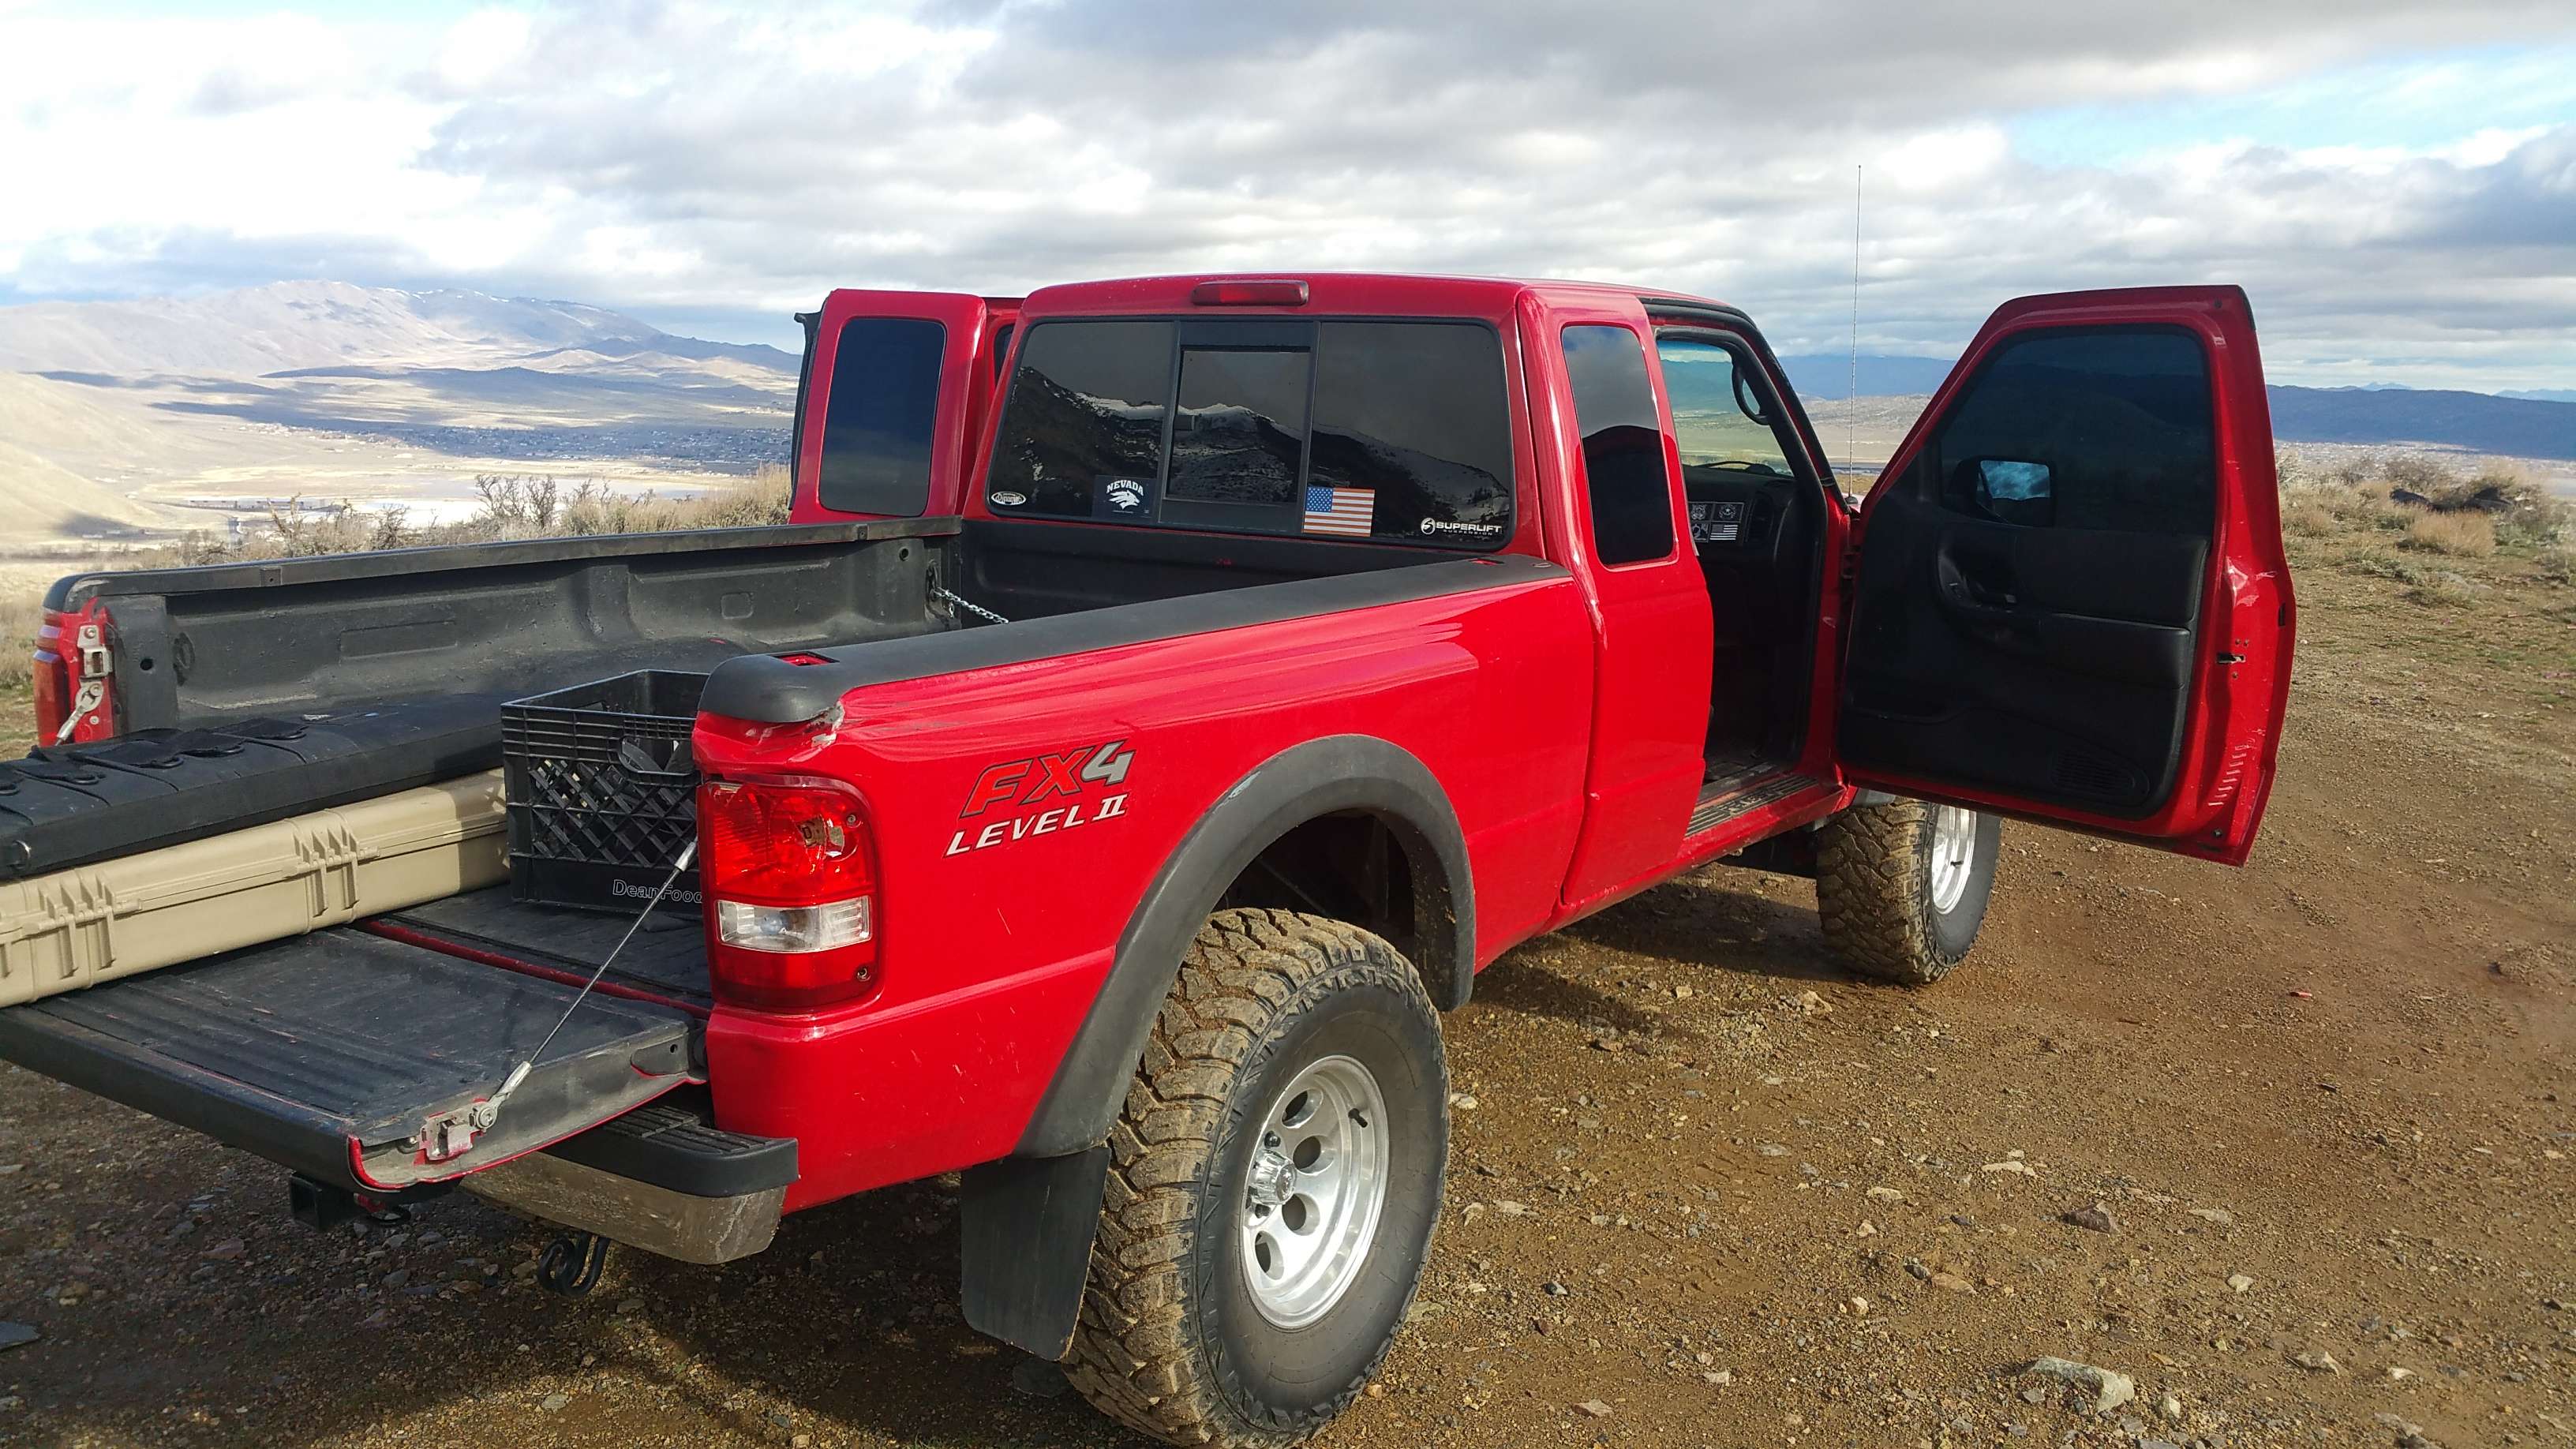
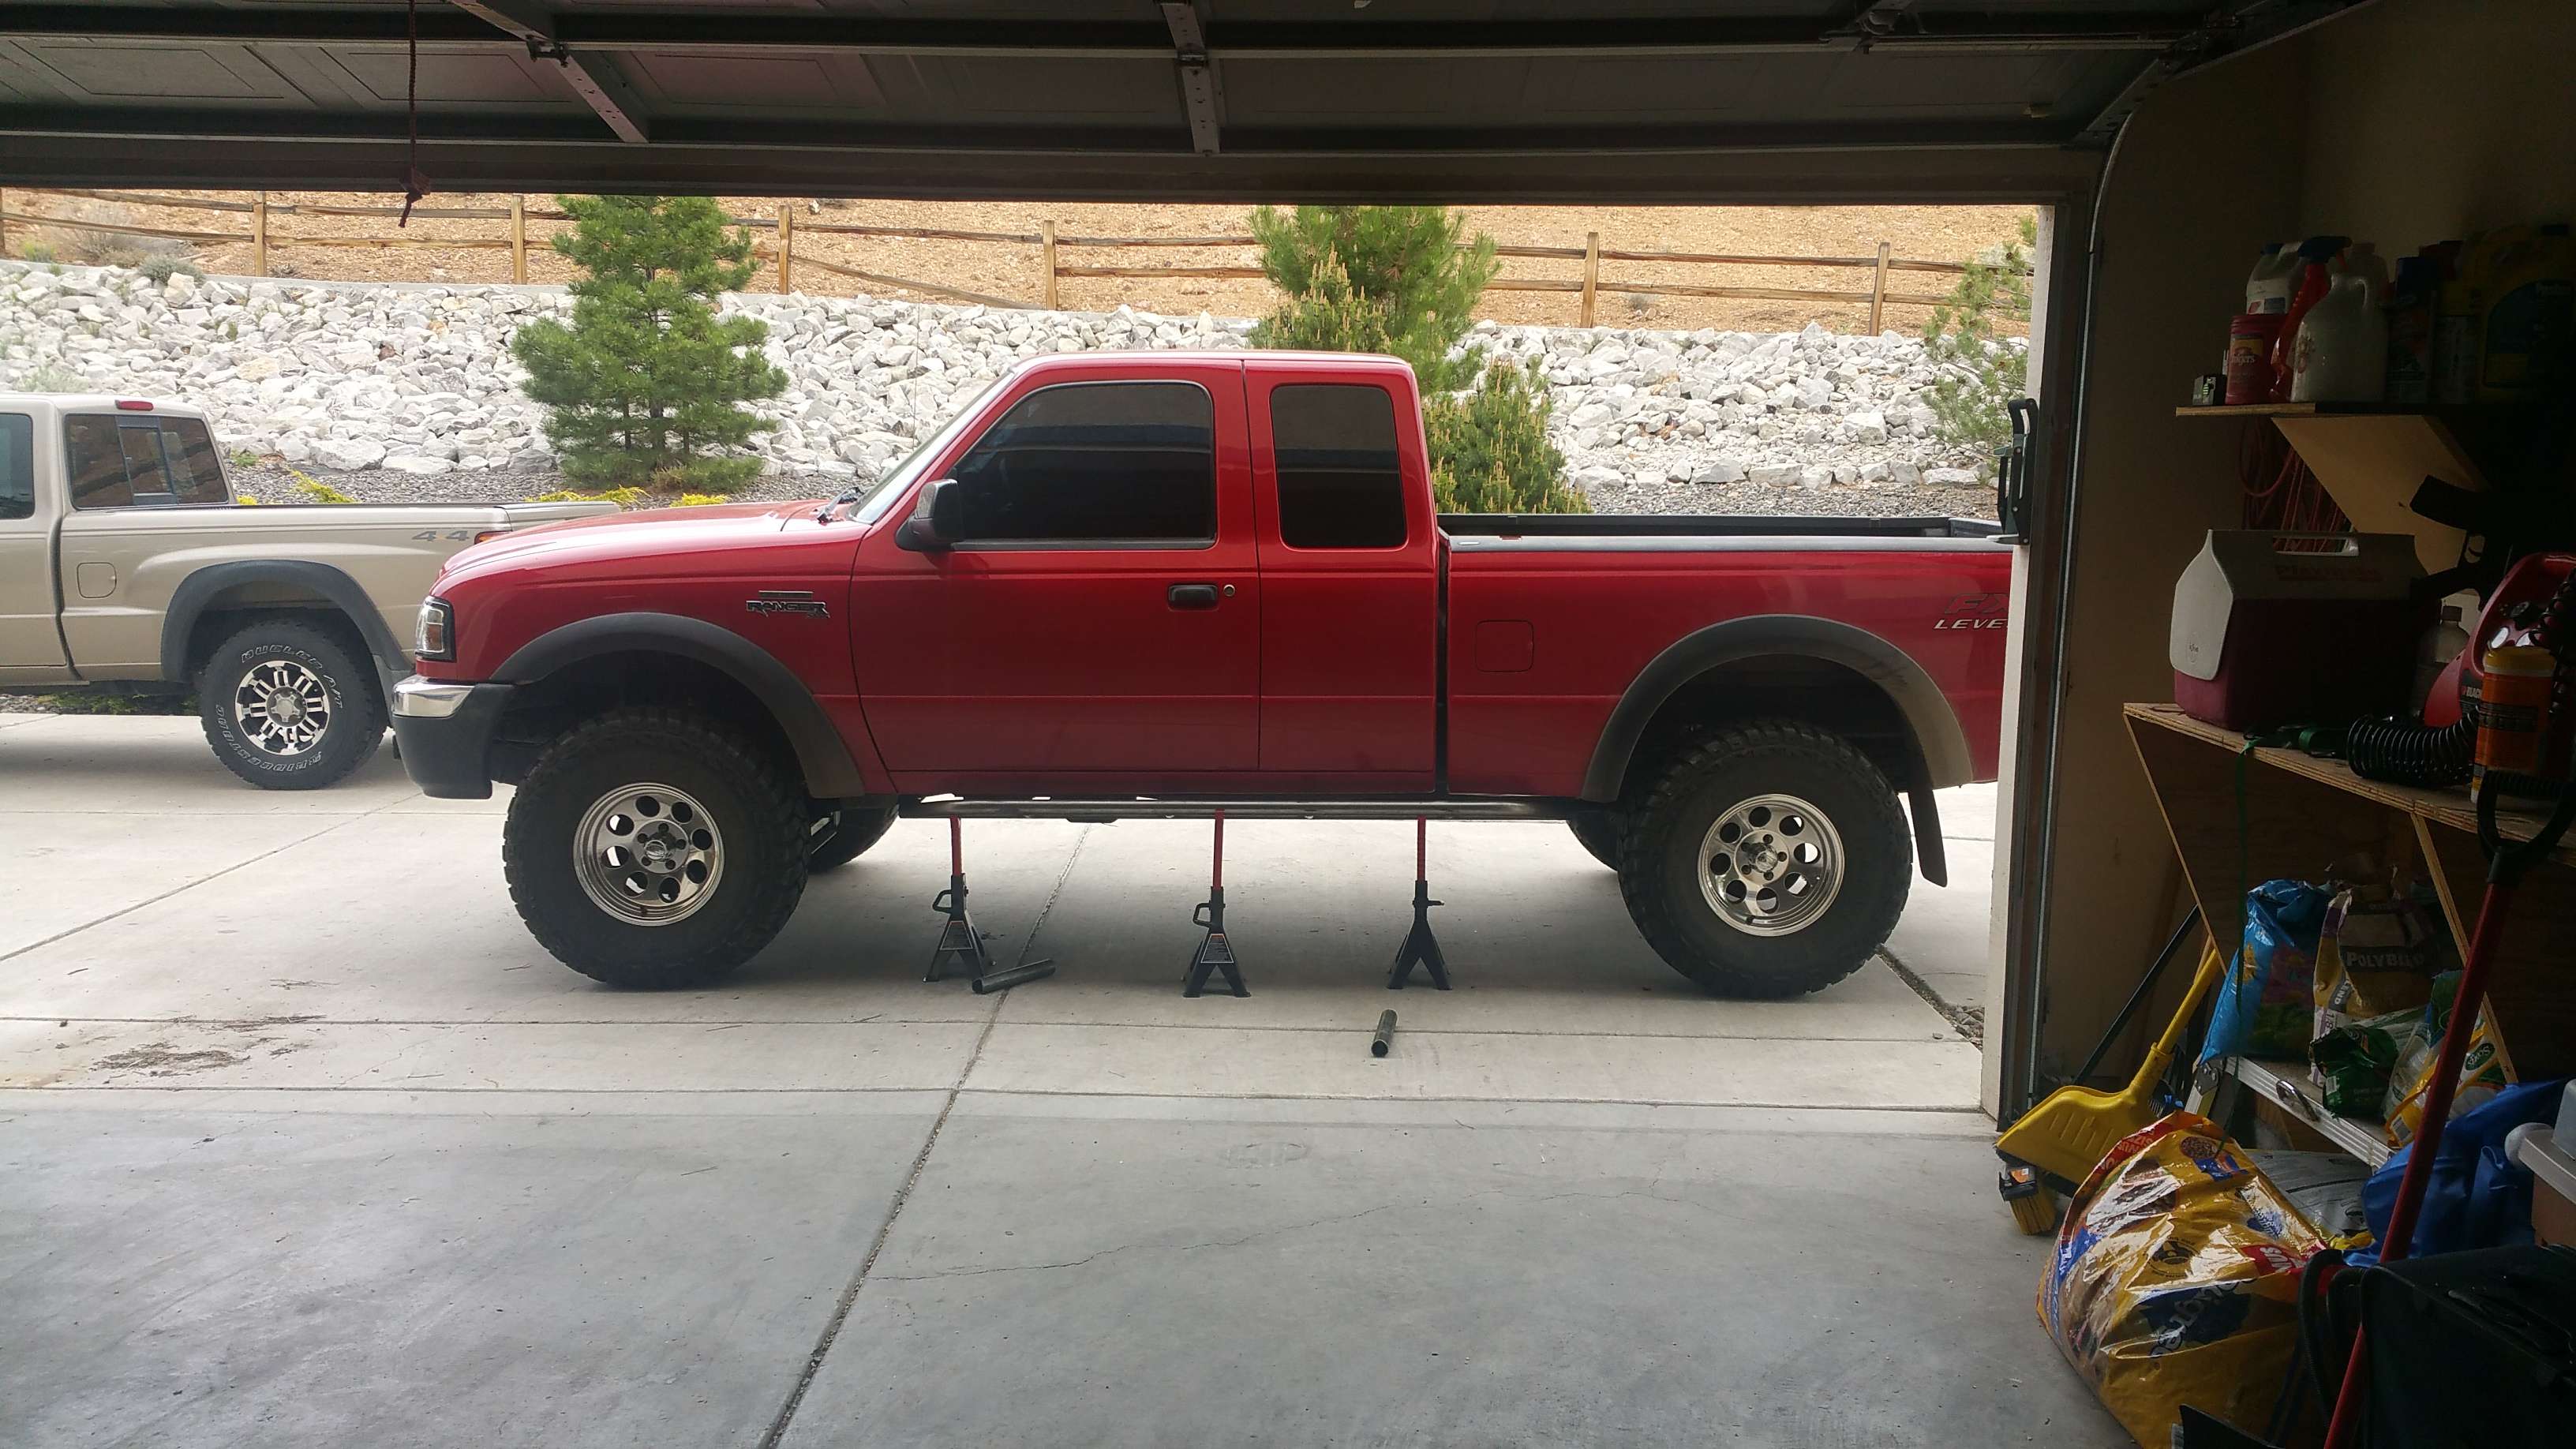
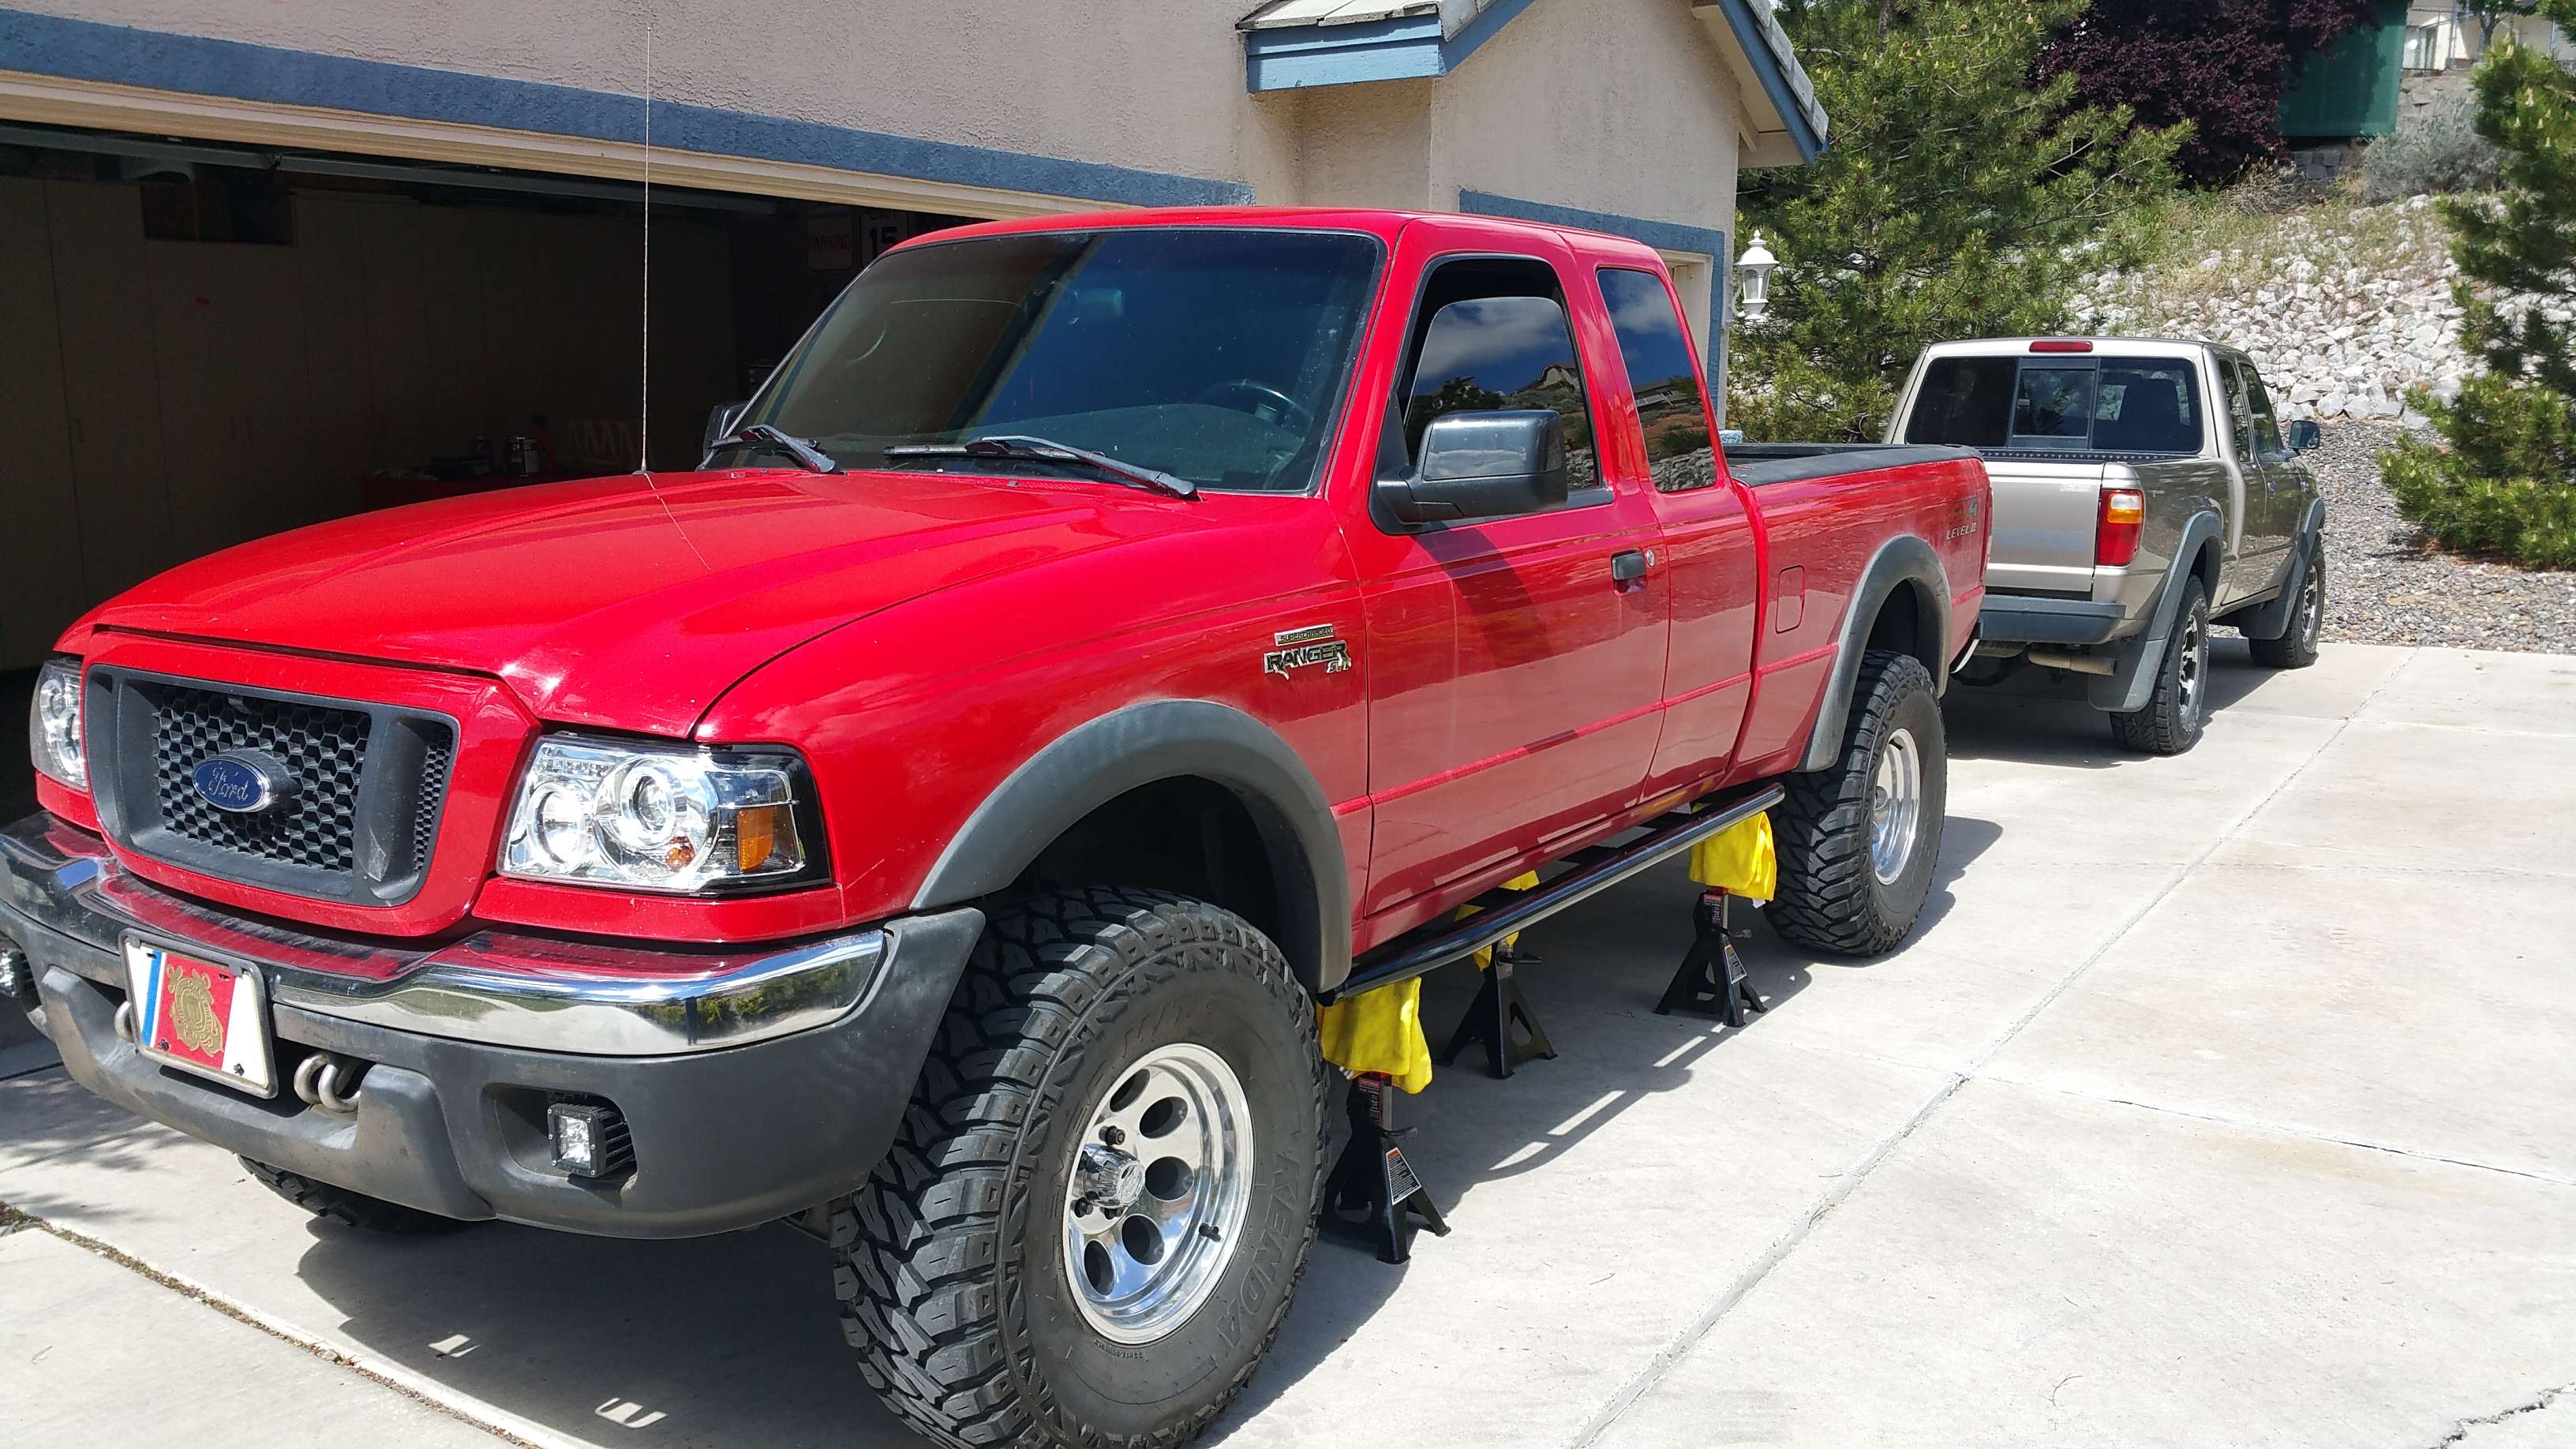
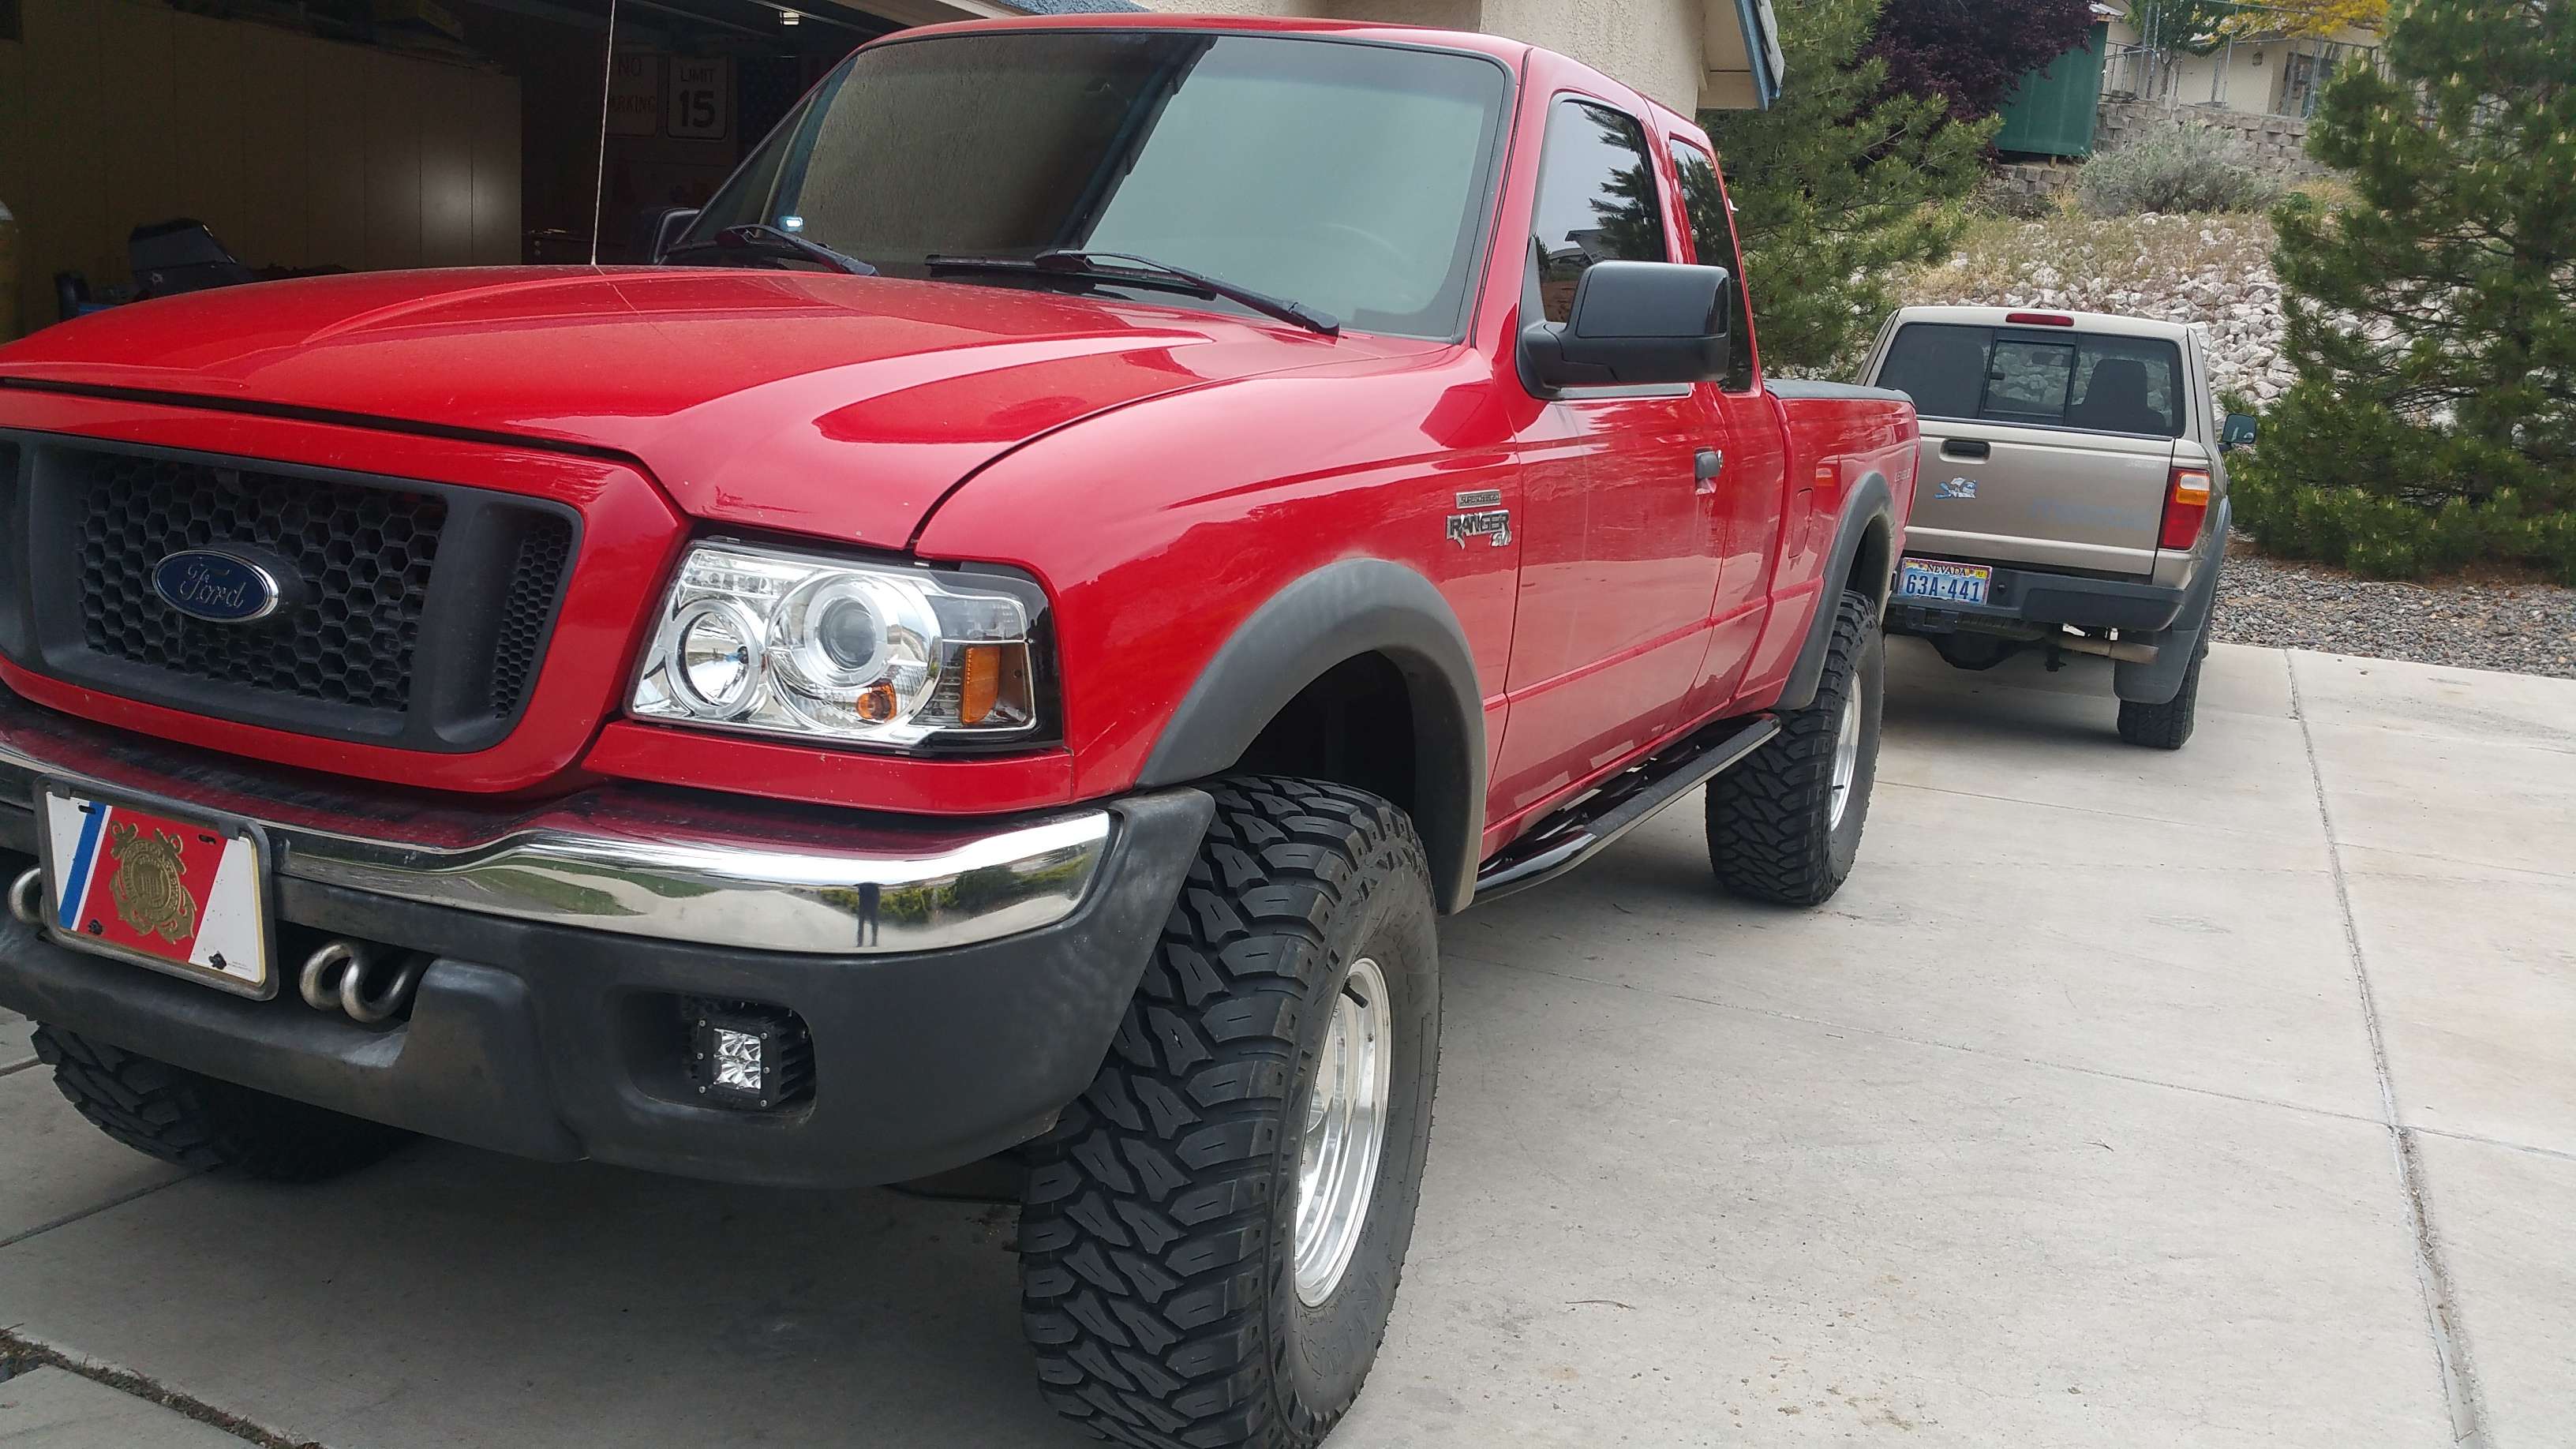
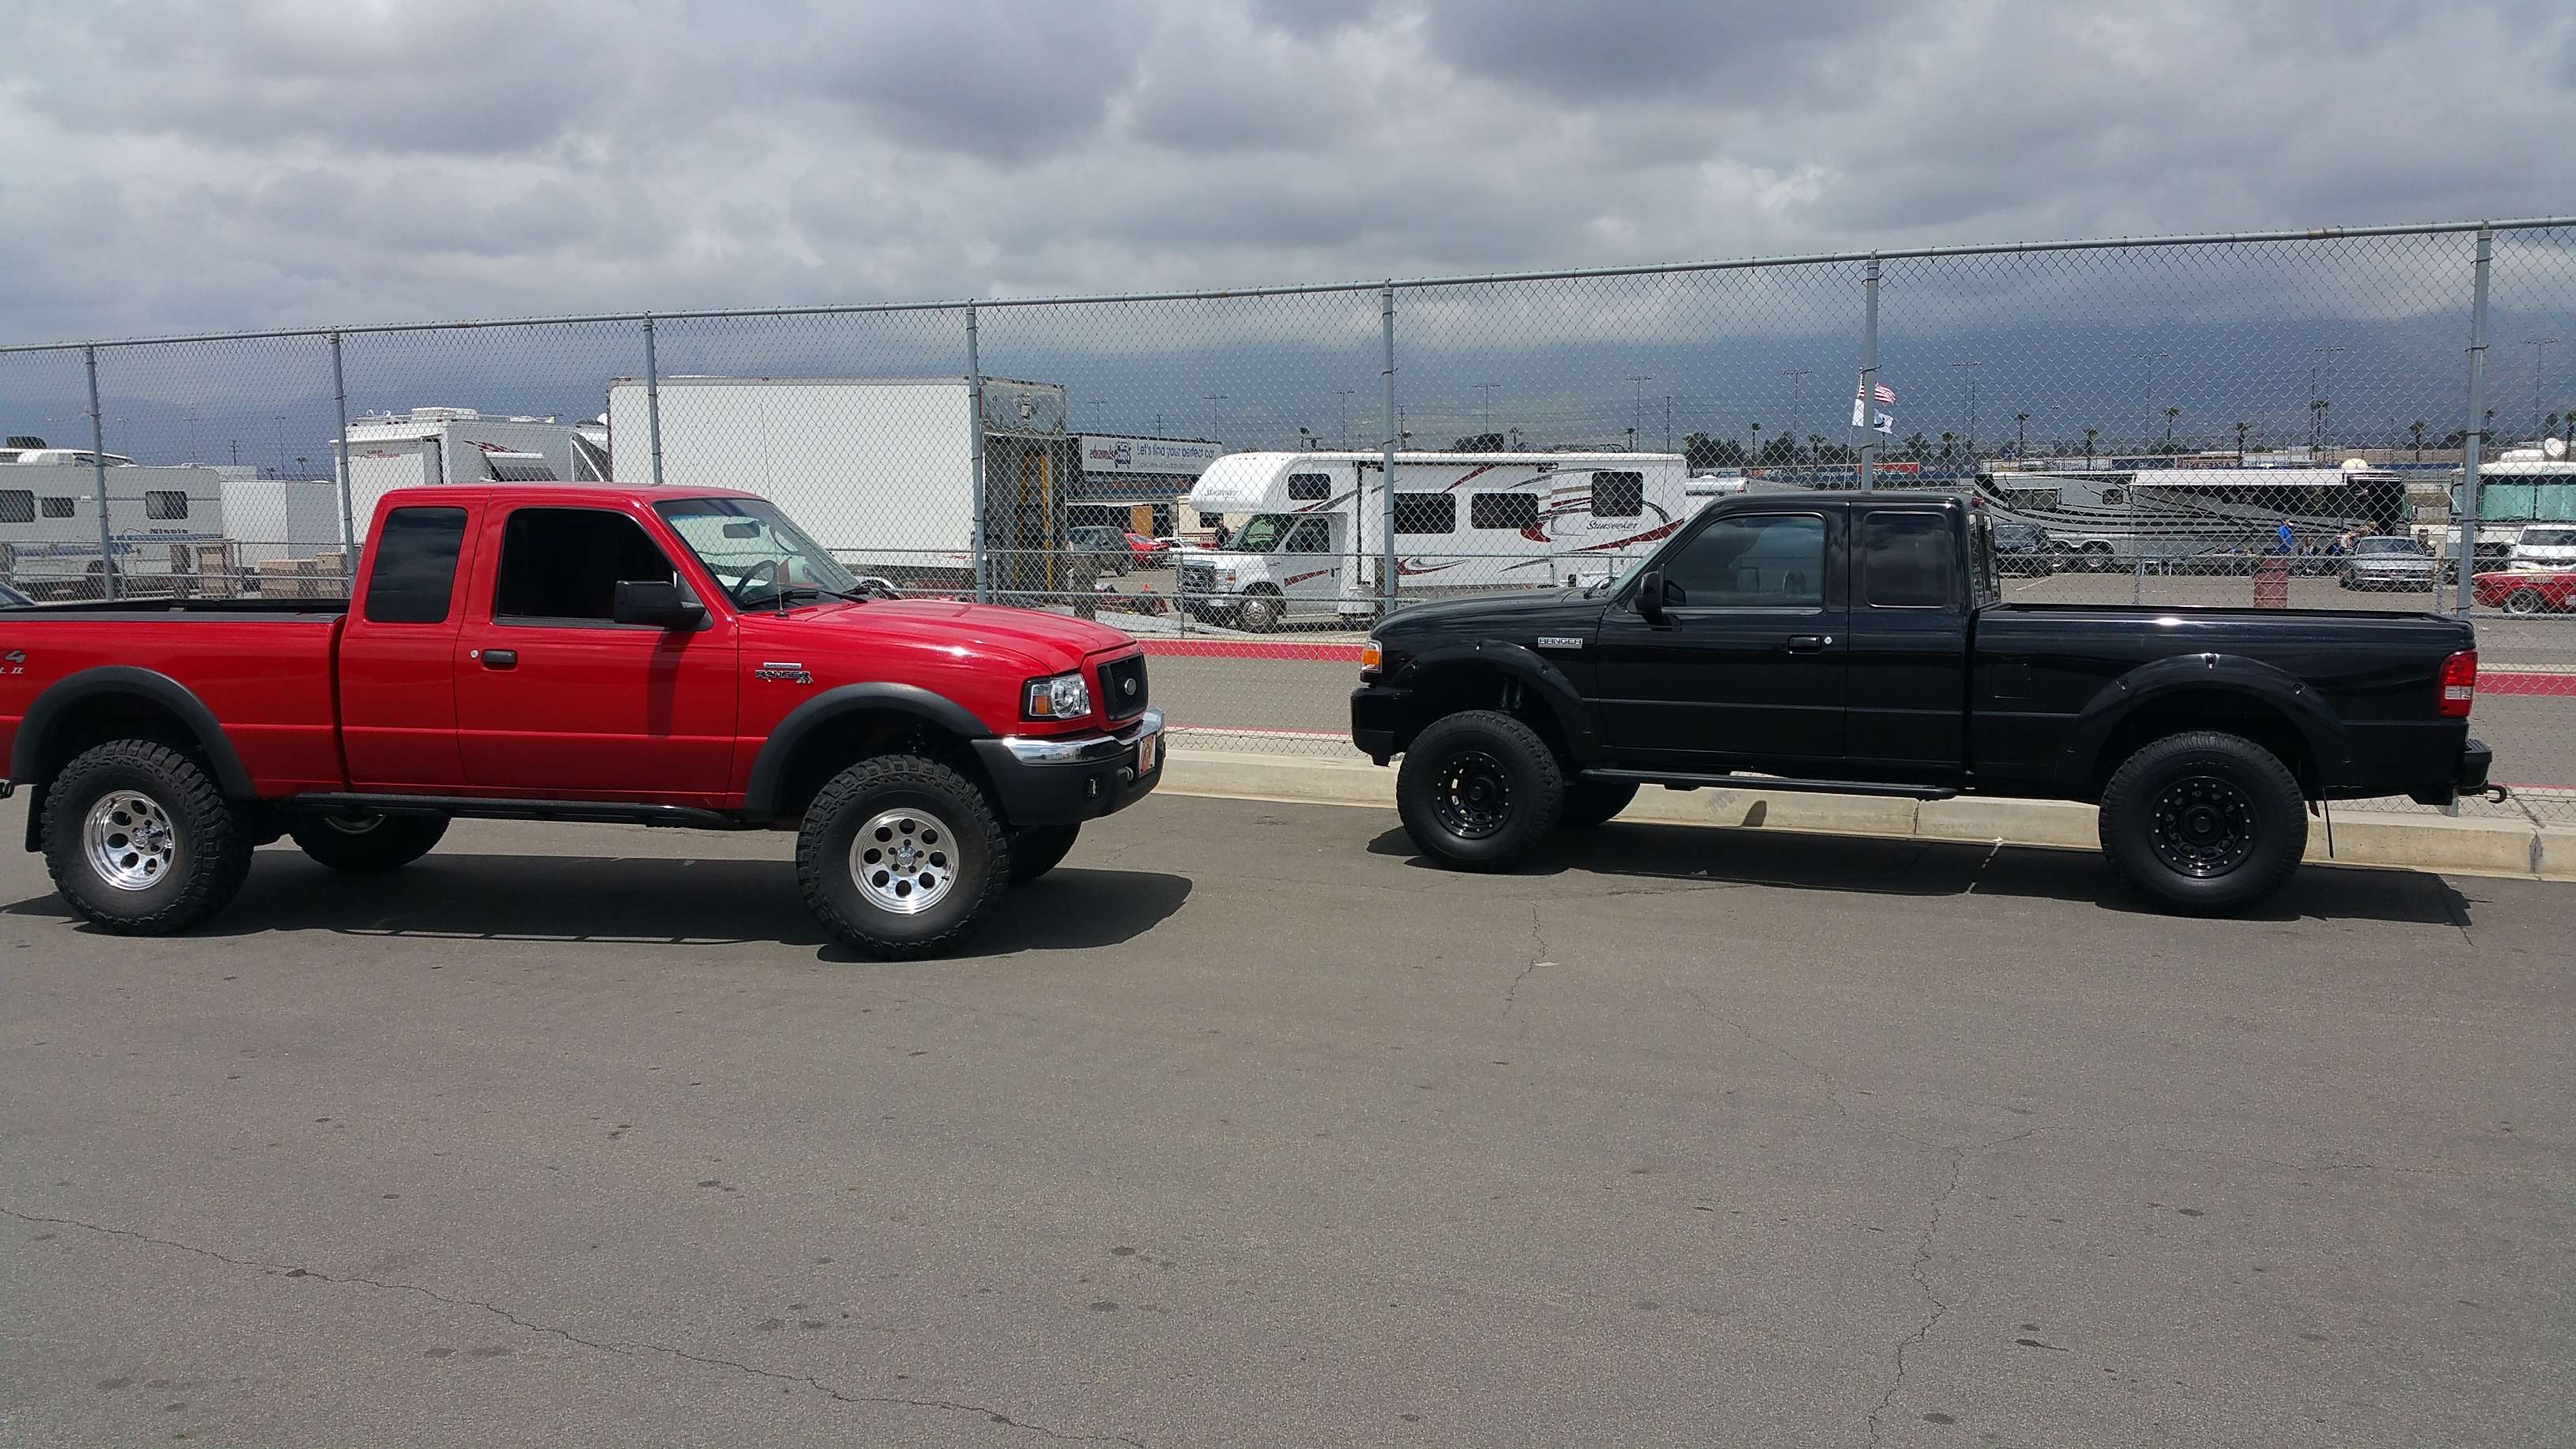
My 2004 Ranger FX4 LVL II superlift/coilovers/supercharged etc..
#1
 02-05-2016


Join Date: Jul 2015
Location: Reno, Nevada
Posts: 52
Likes: 0
Received 0 Likes
on
0 Posts
My 2004 Ranger FX4 LVL II superlift/coilovers/supercharged etc..
Alright, as promised a few months ago, I have finished the majority of the work on my truck. Here is a mostly comprehensive list of parts!!!!
Base:
2004 Ford Ranger FX4 LVL II
4.0 SOHC
5 speed M5OD-R1HD
Skid Plates
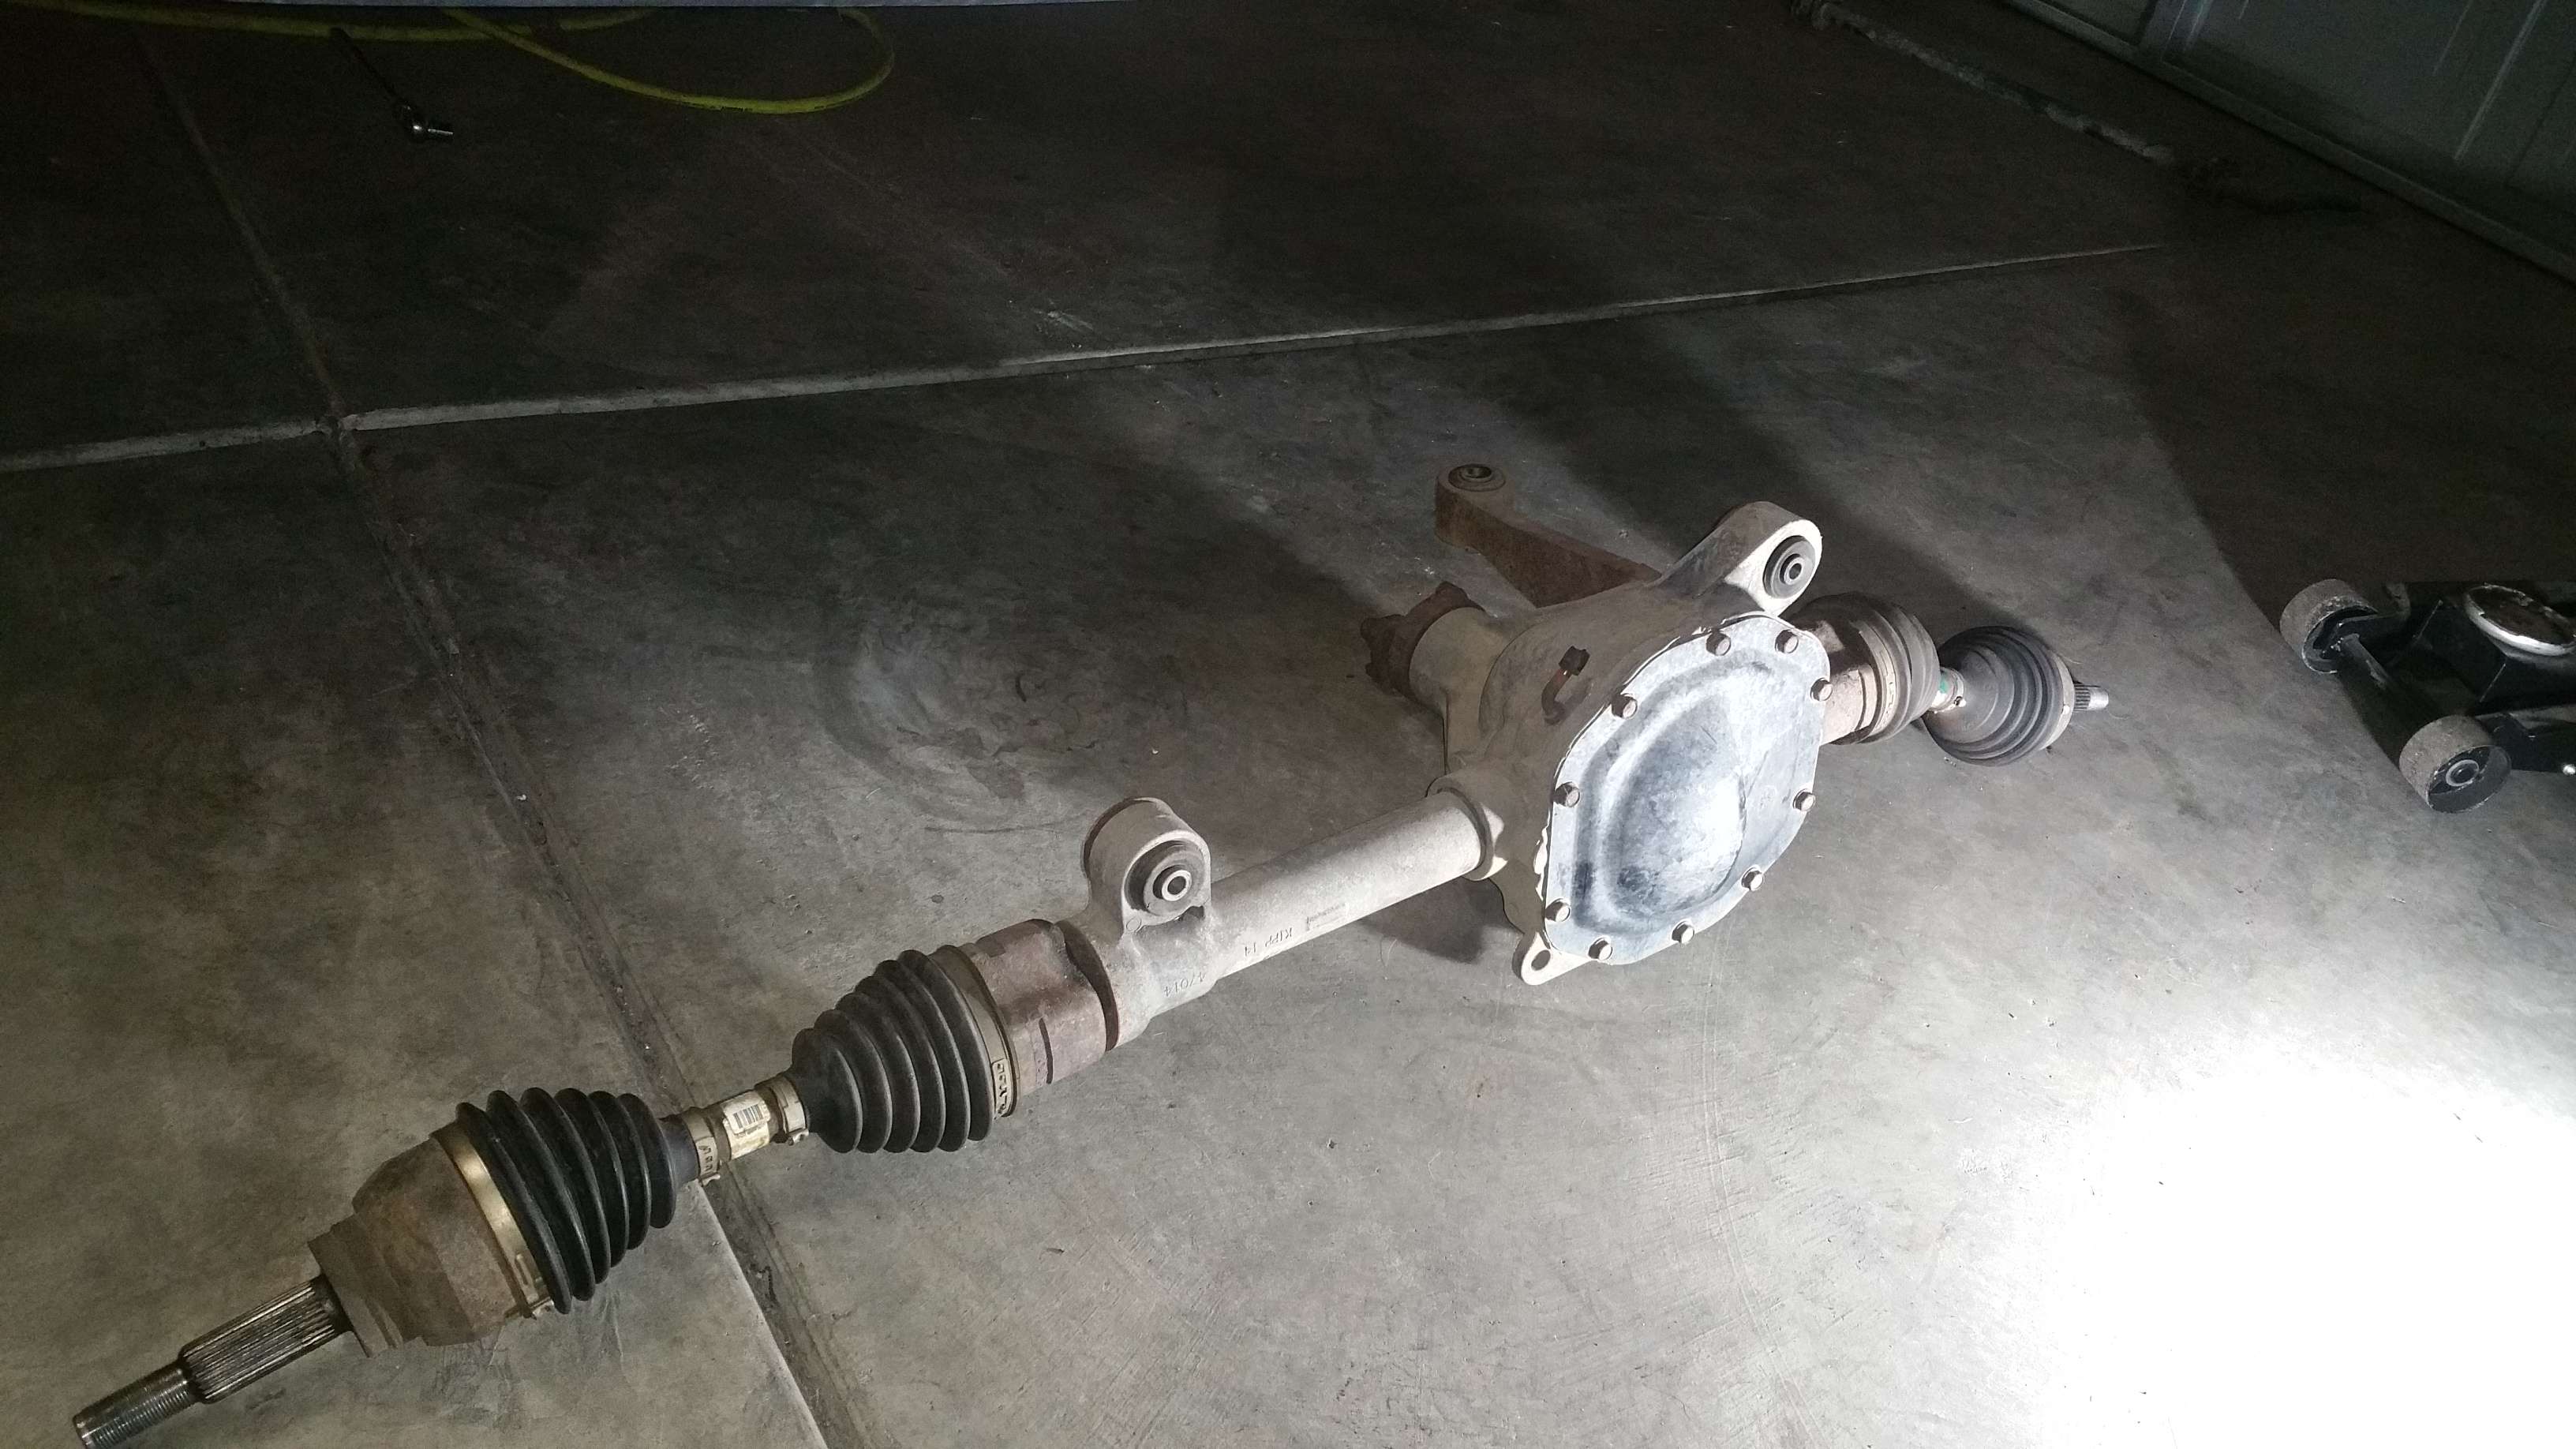
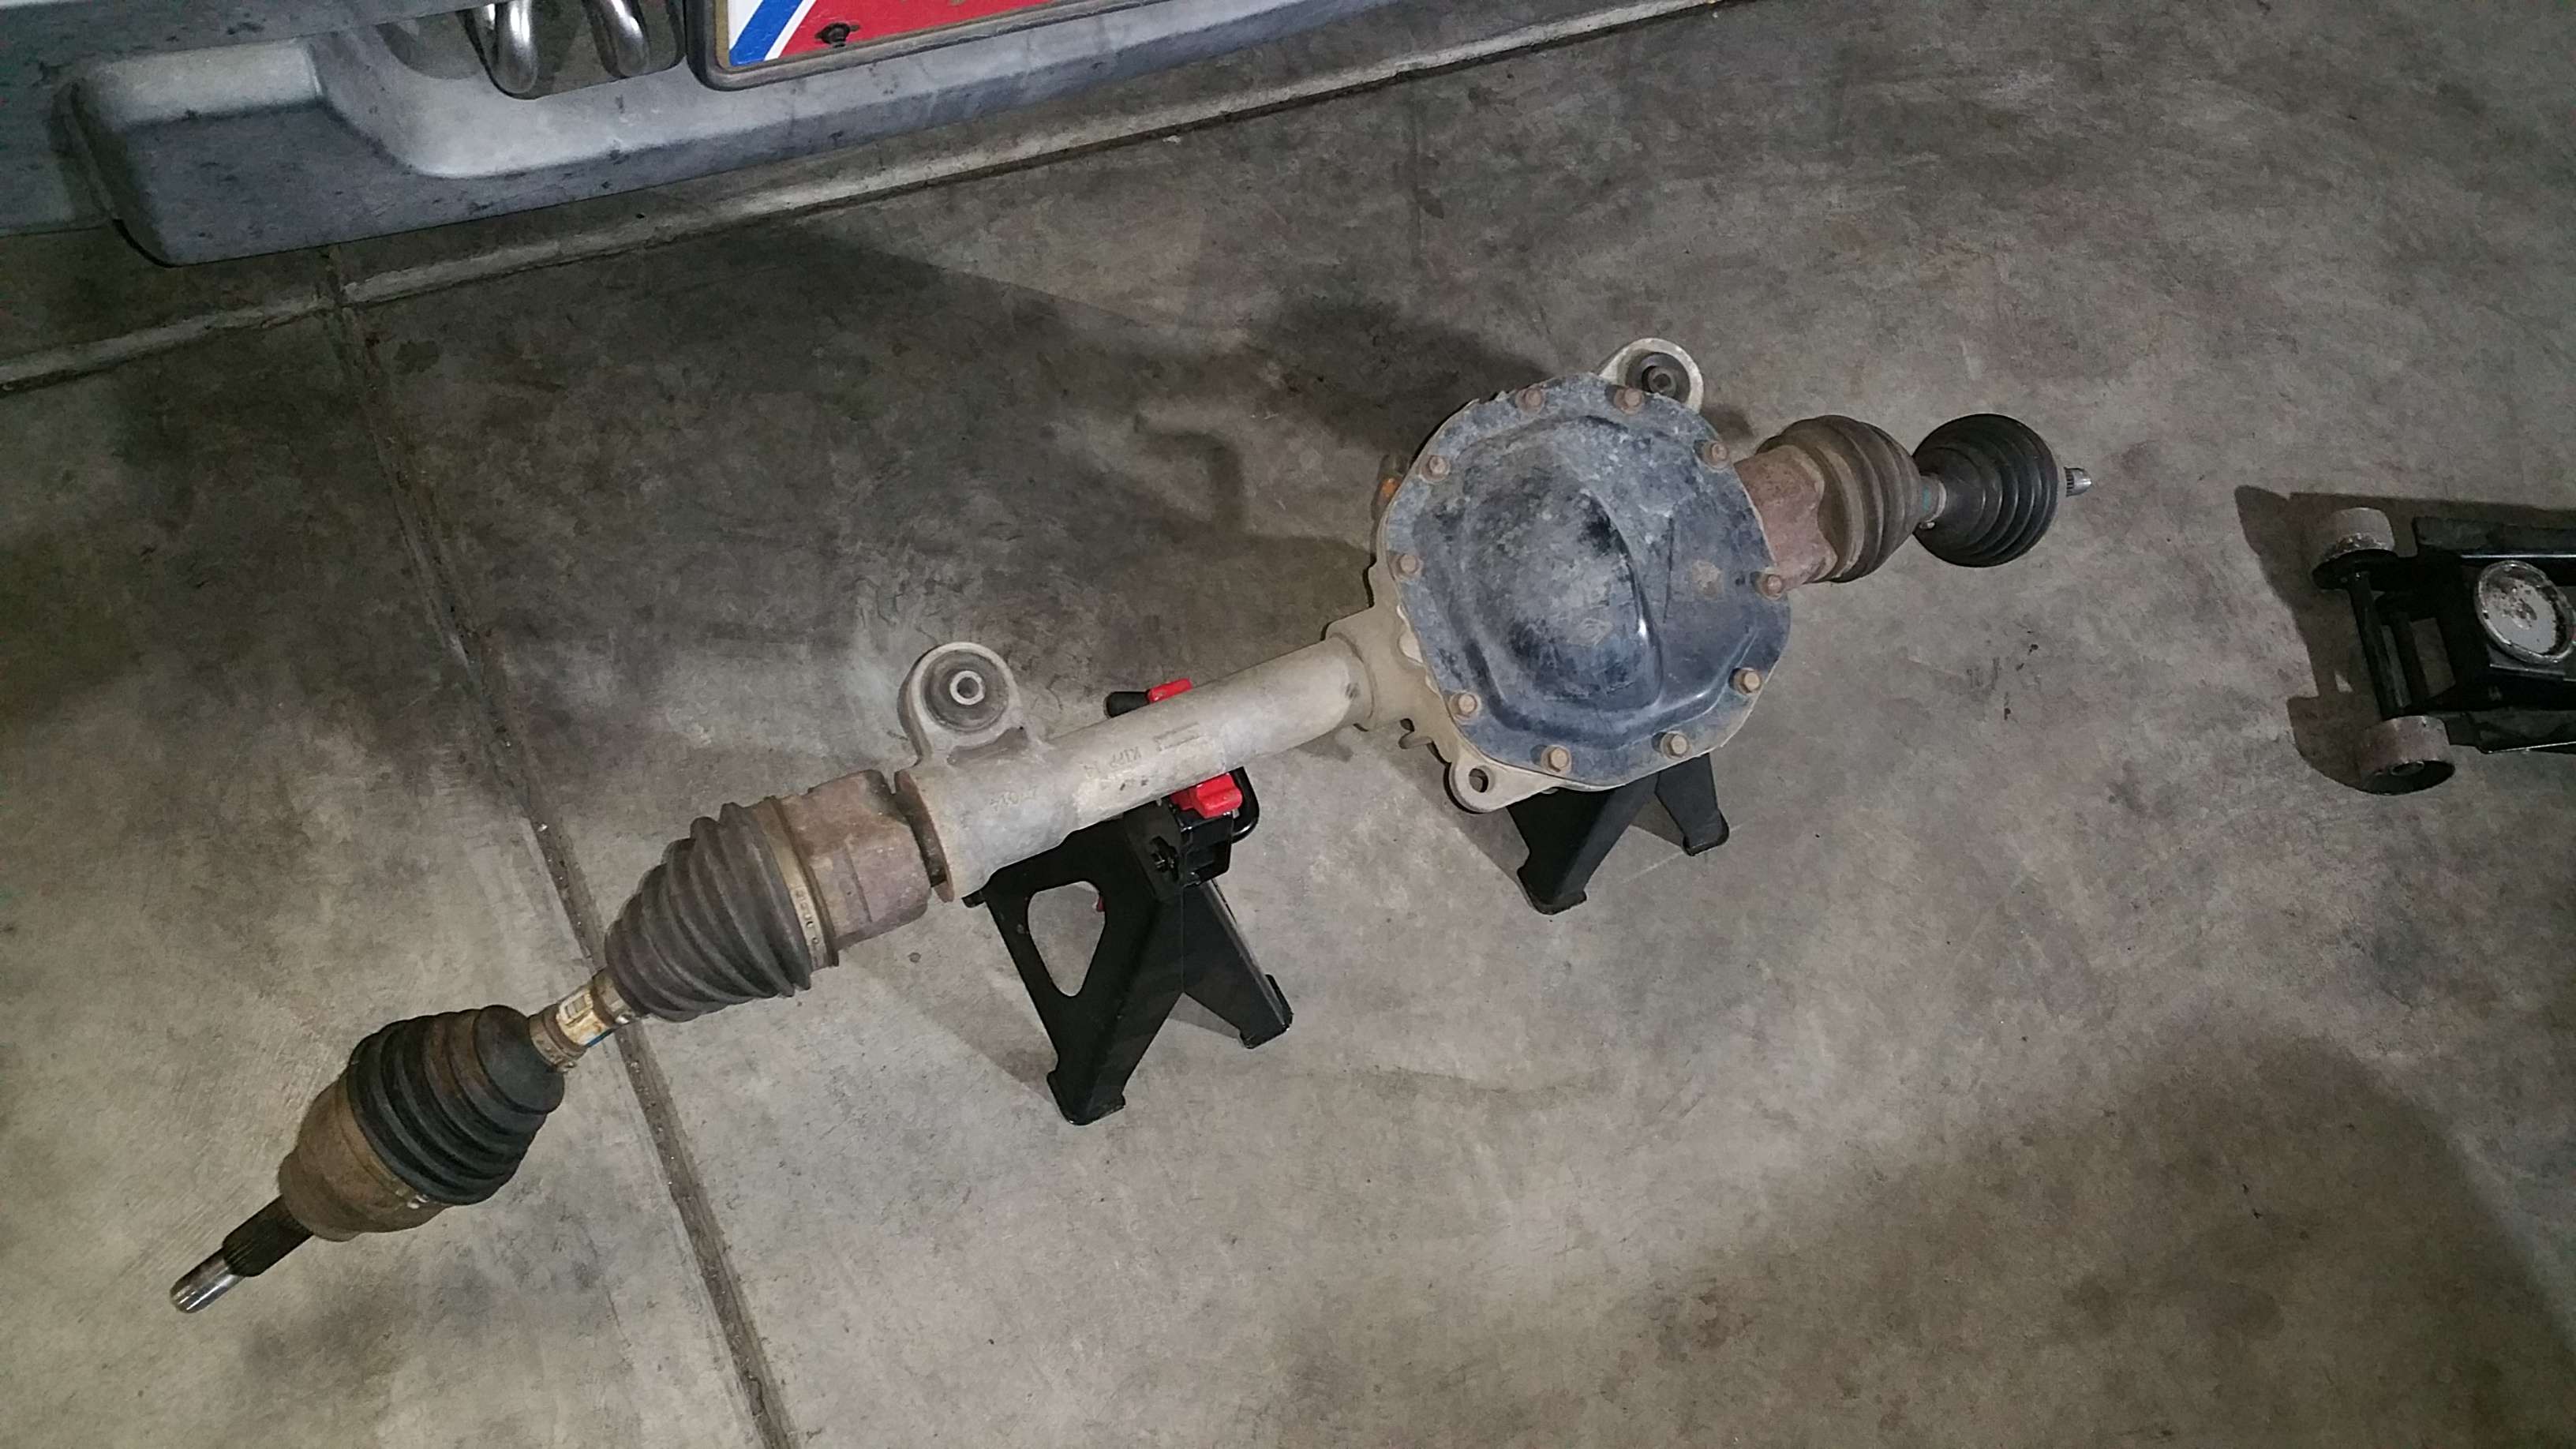
8.8" 31 spline rear axle
Rear Torsen LSD
Discs in the front and drums in the rear
Cruise
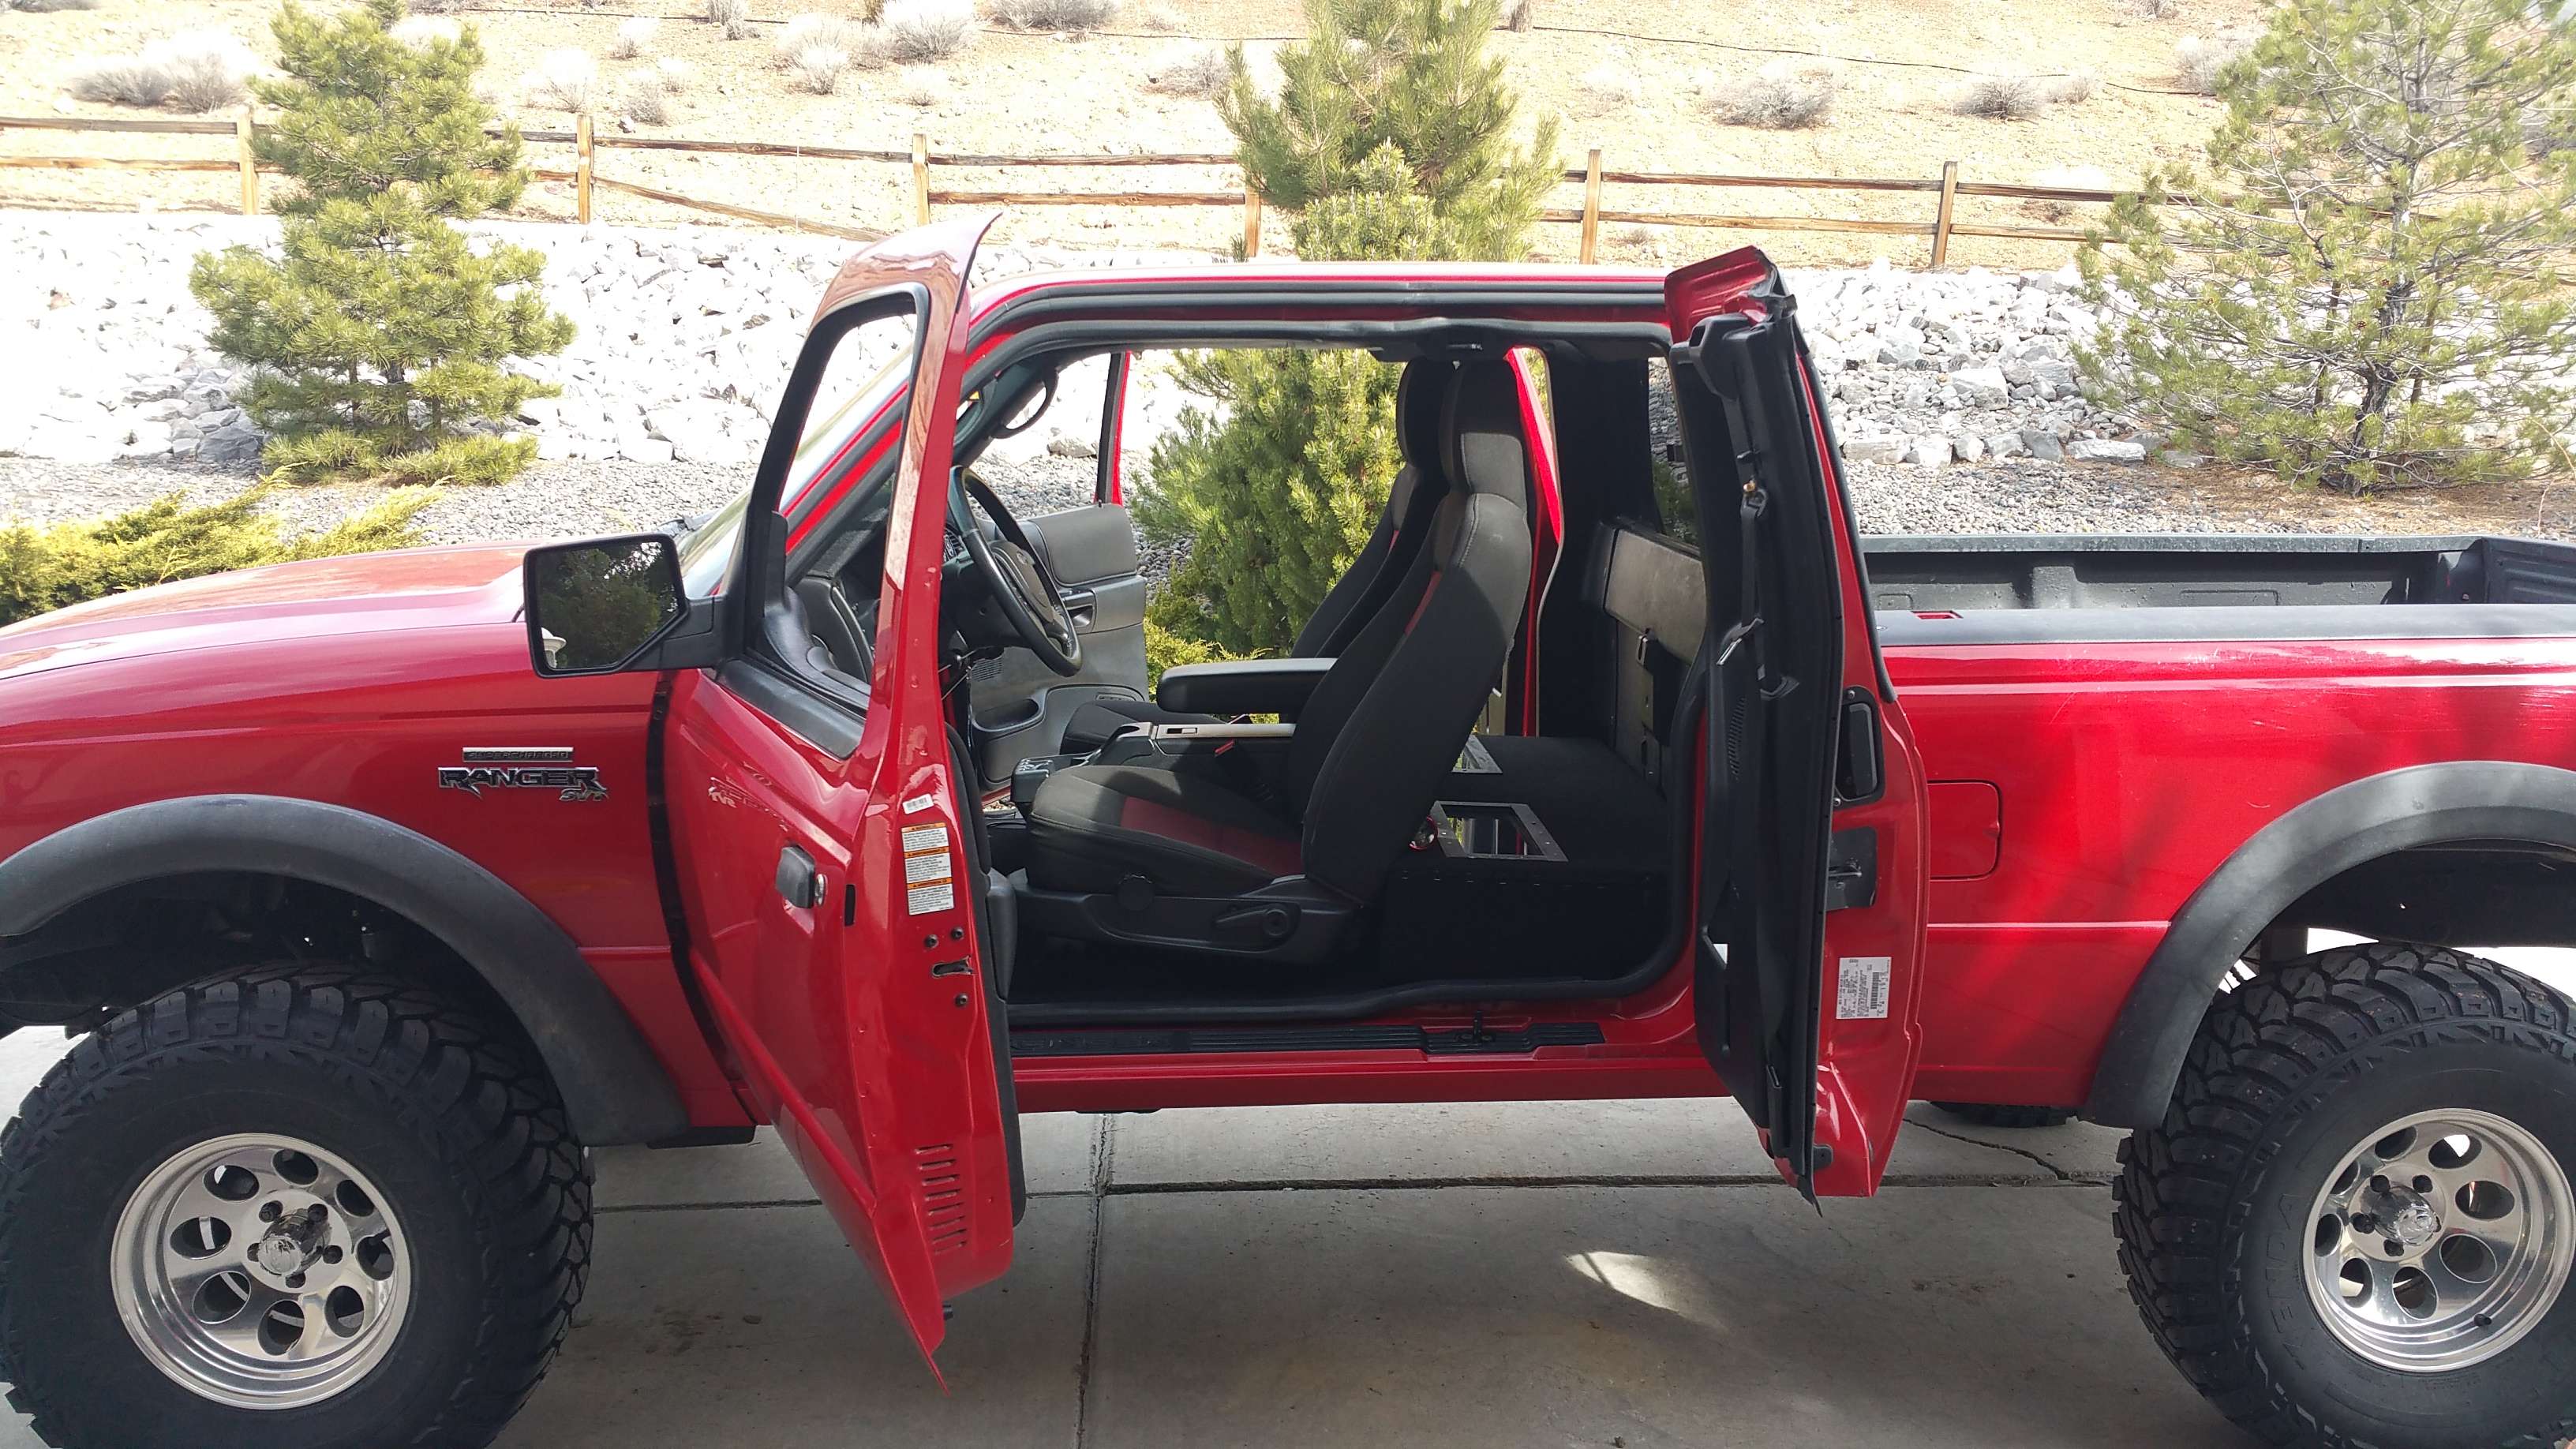
All black interior with read seats
Power everything
Bed sprayed with some kind of bed liner
Alcoas and BFG A/T's
4.10 gears
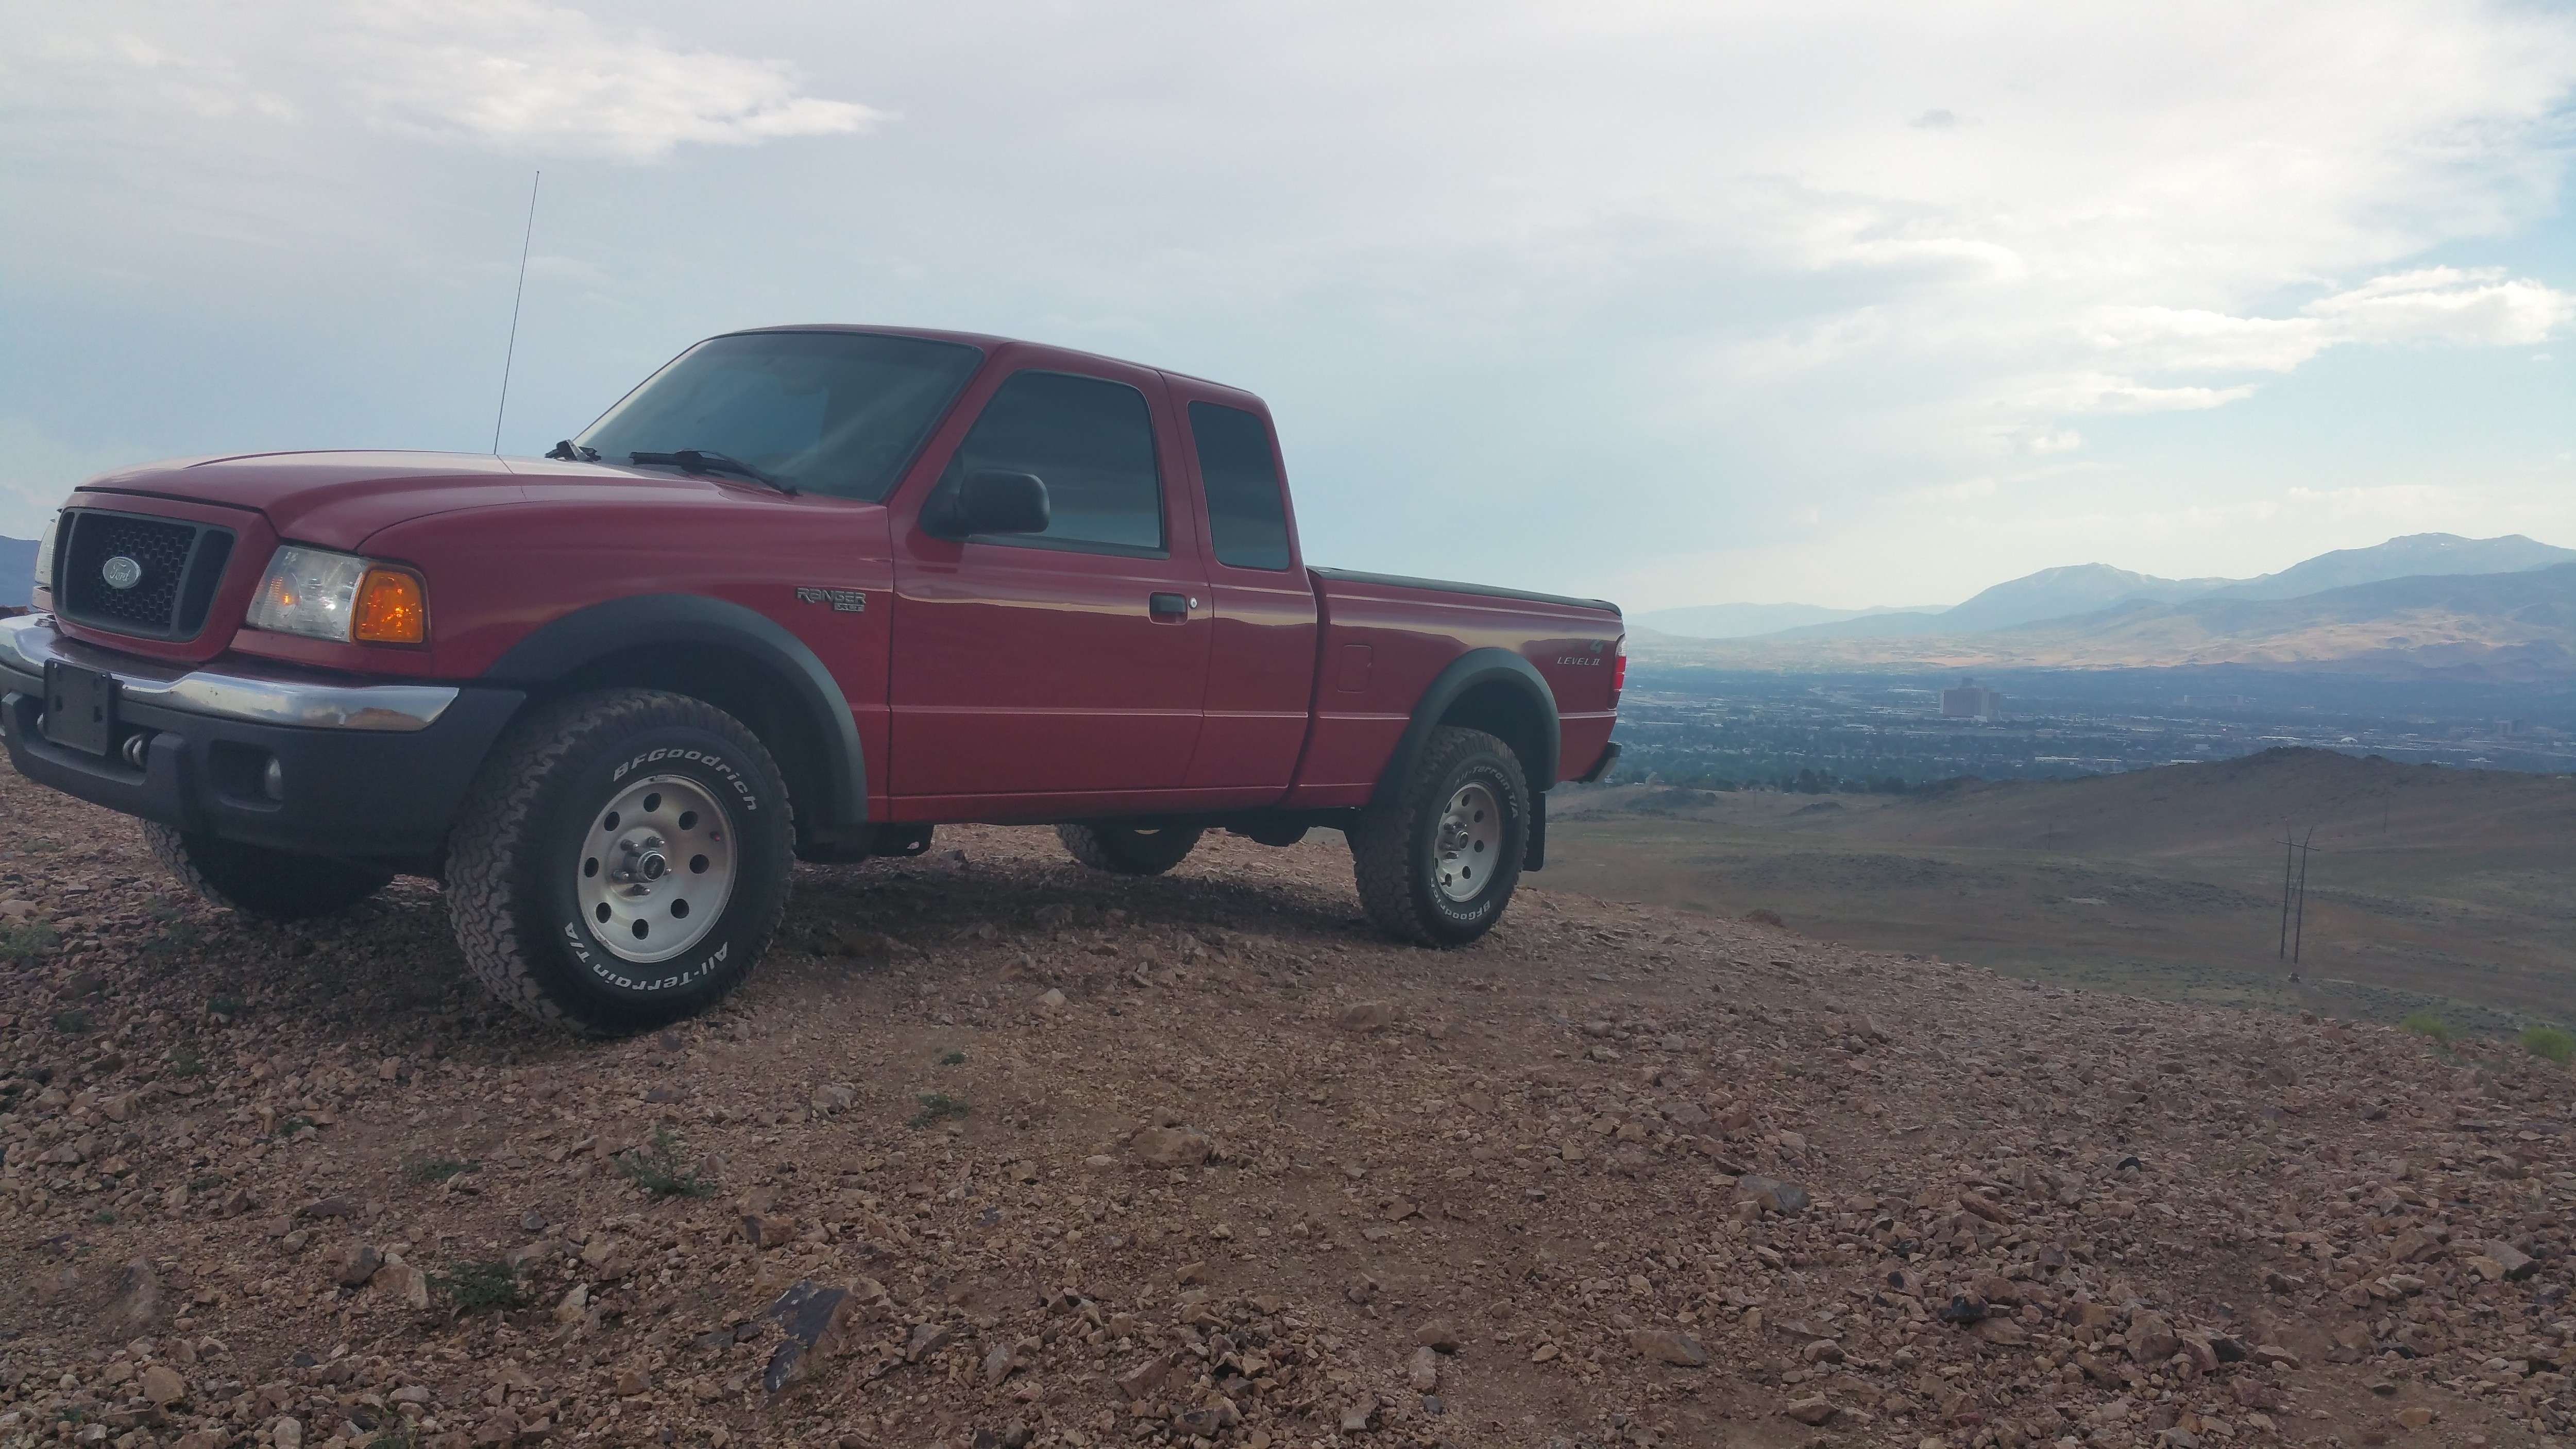
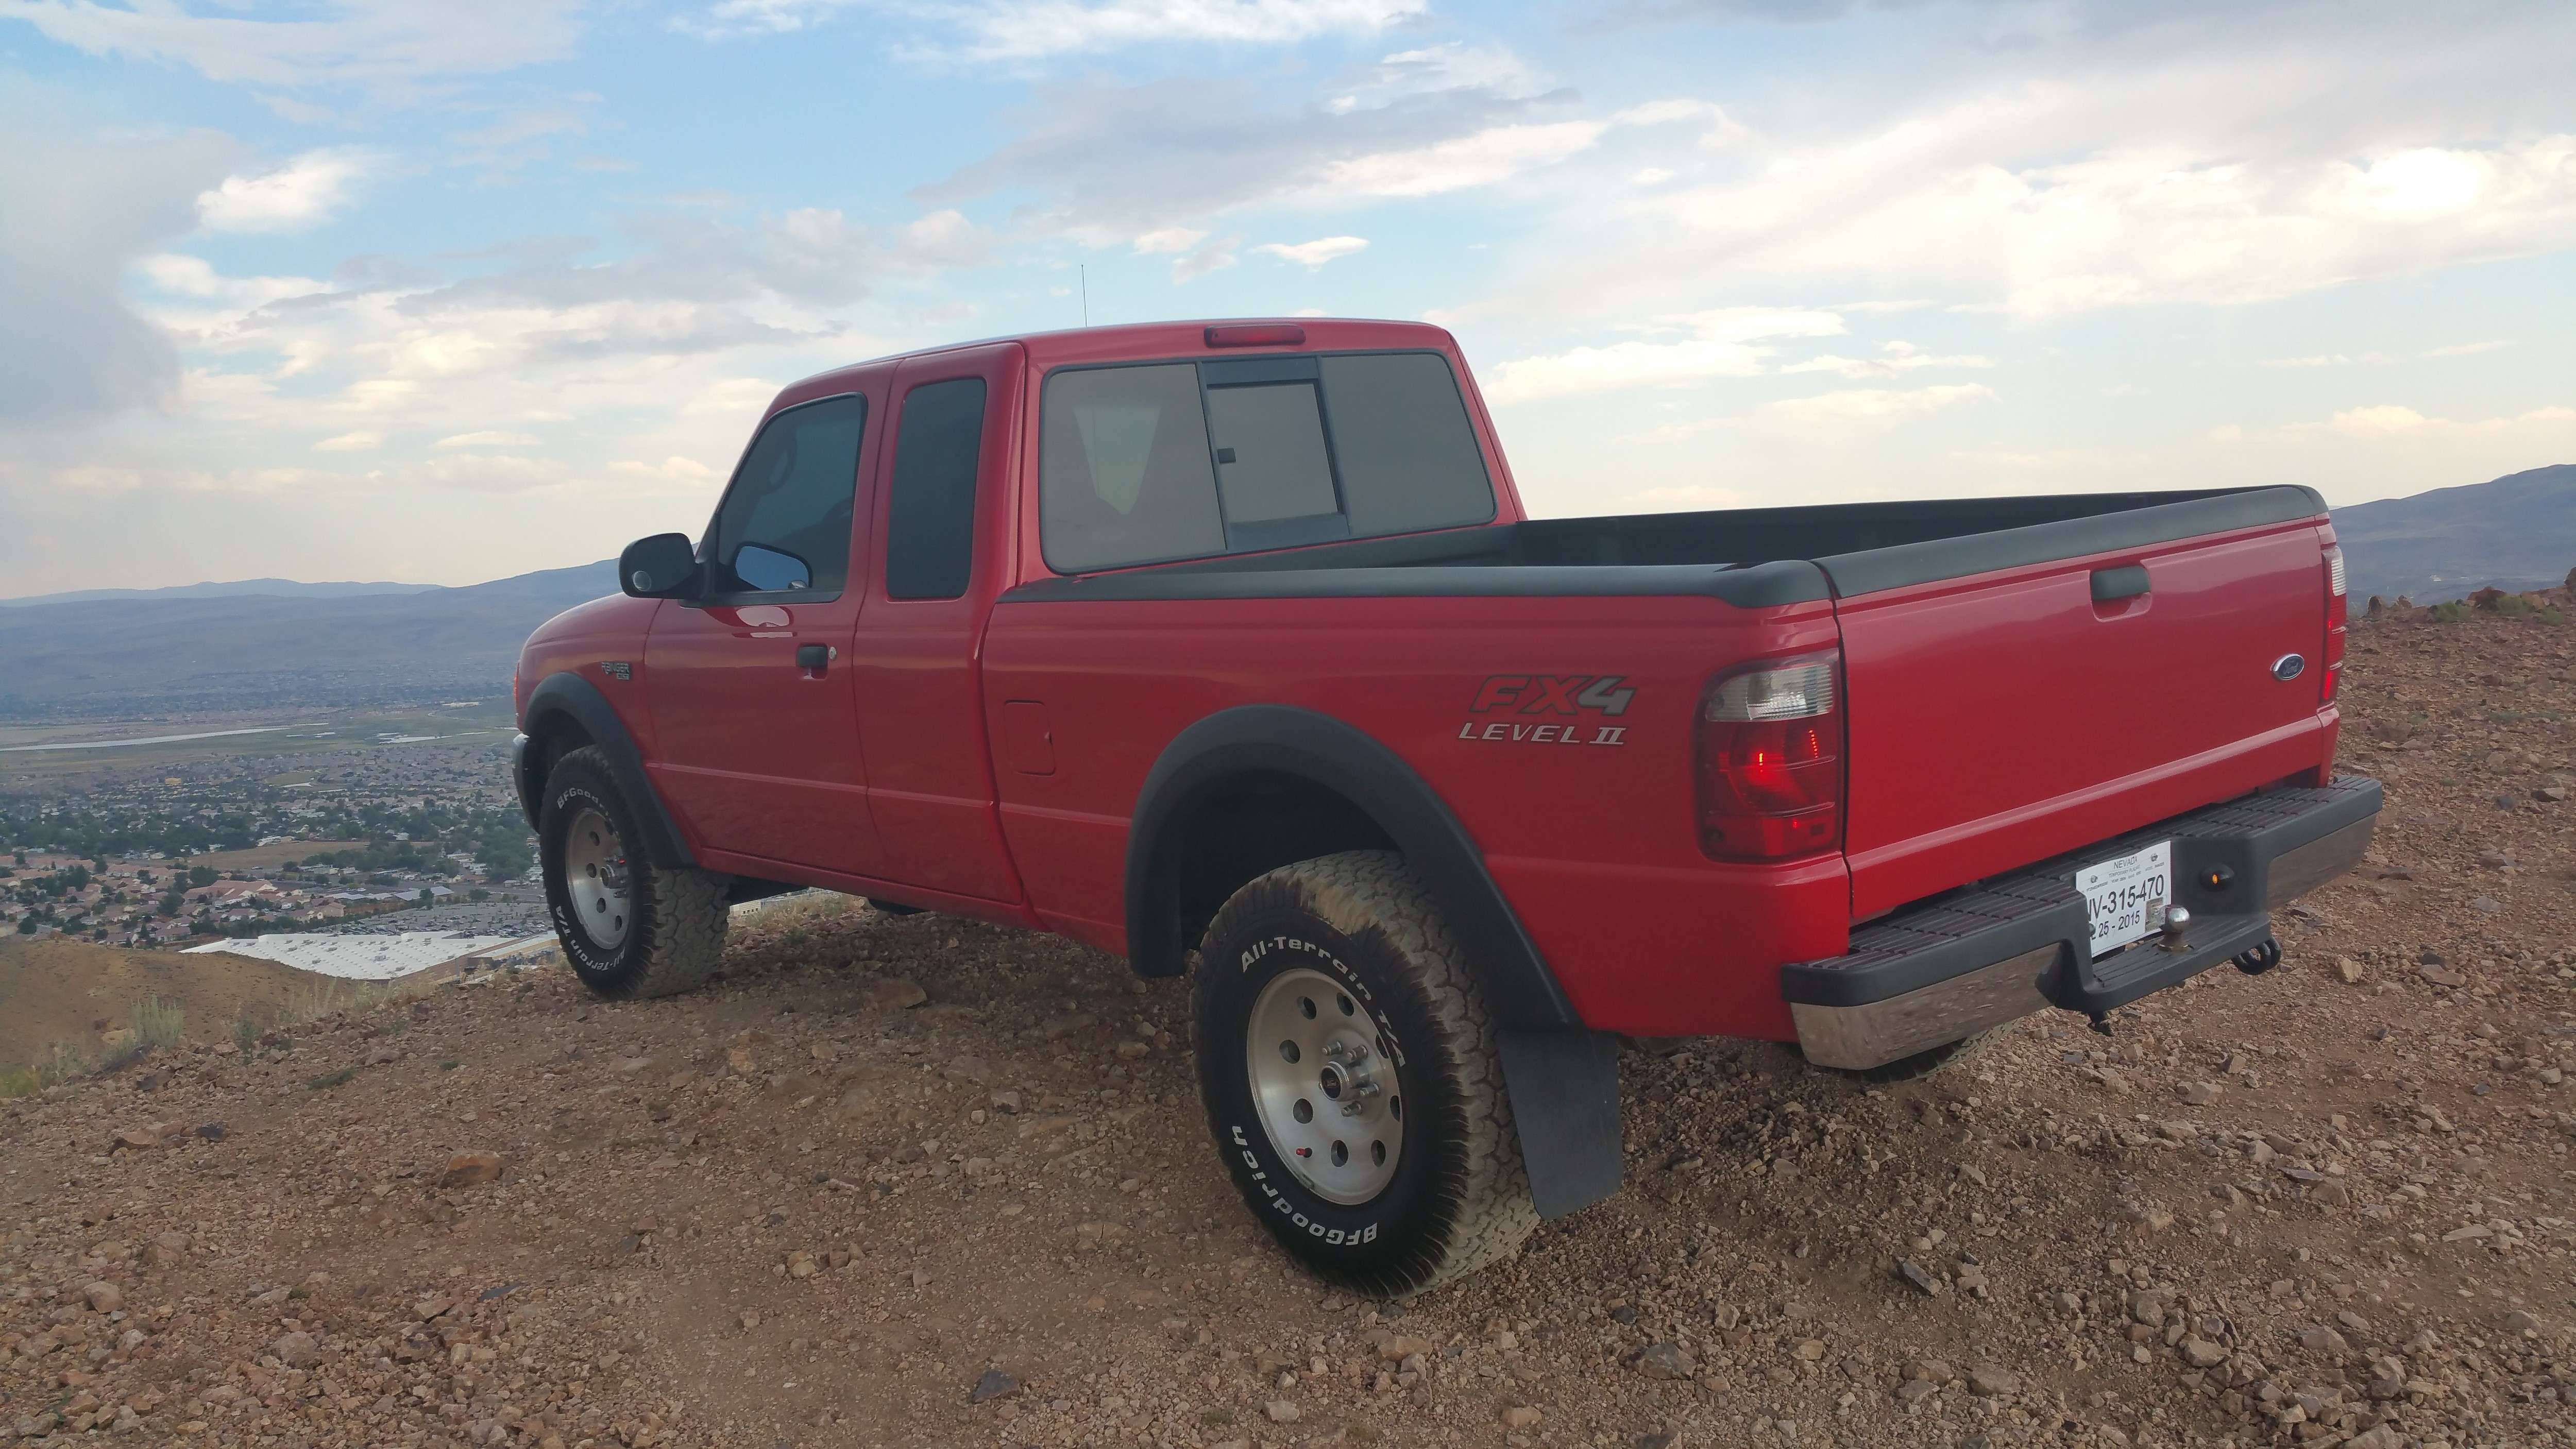
Now lifted:
4" Superlift front
FR36S Skyjacker rear leaf springs
Rear superlift shocks
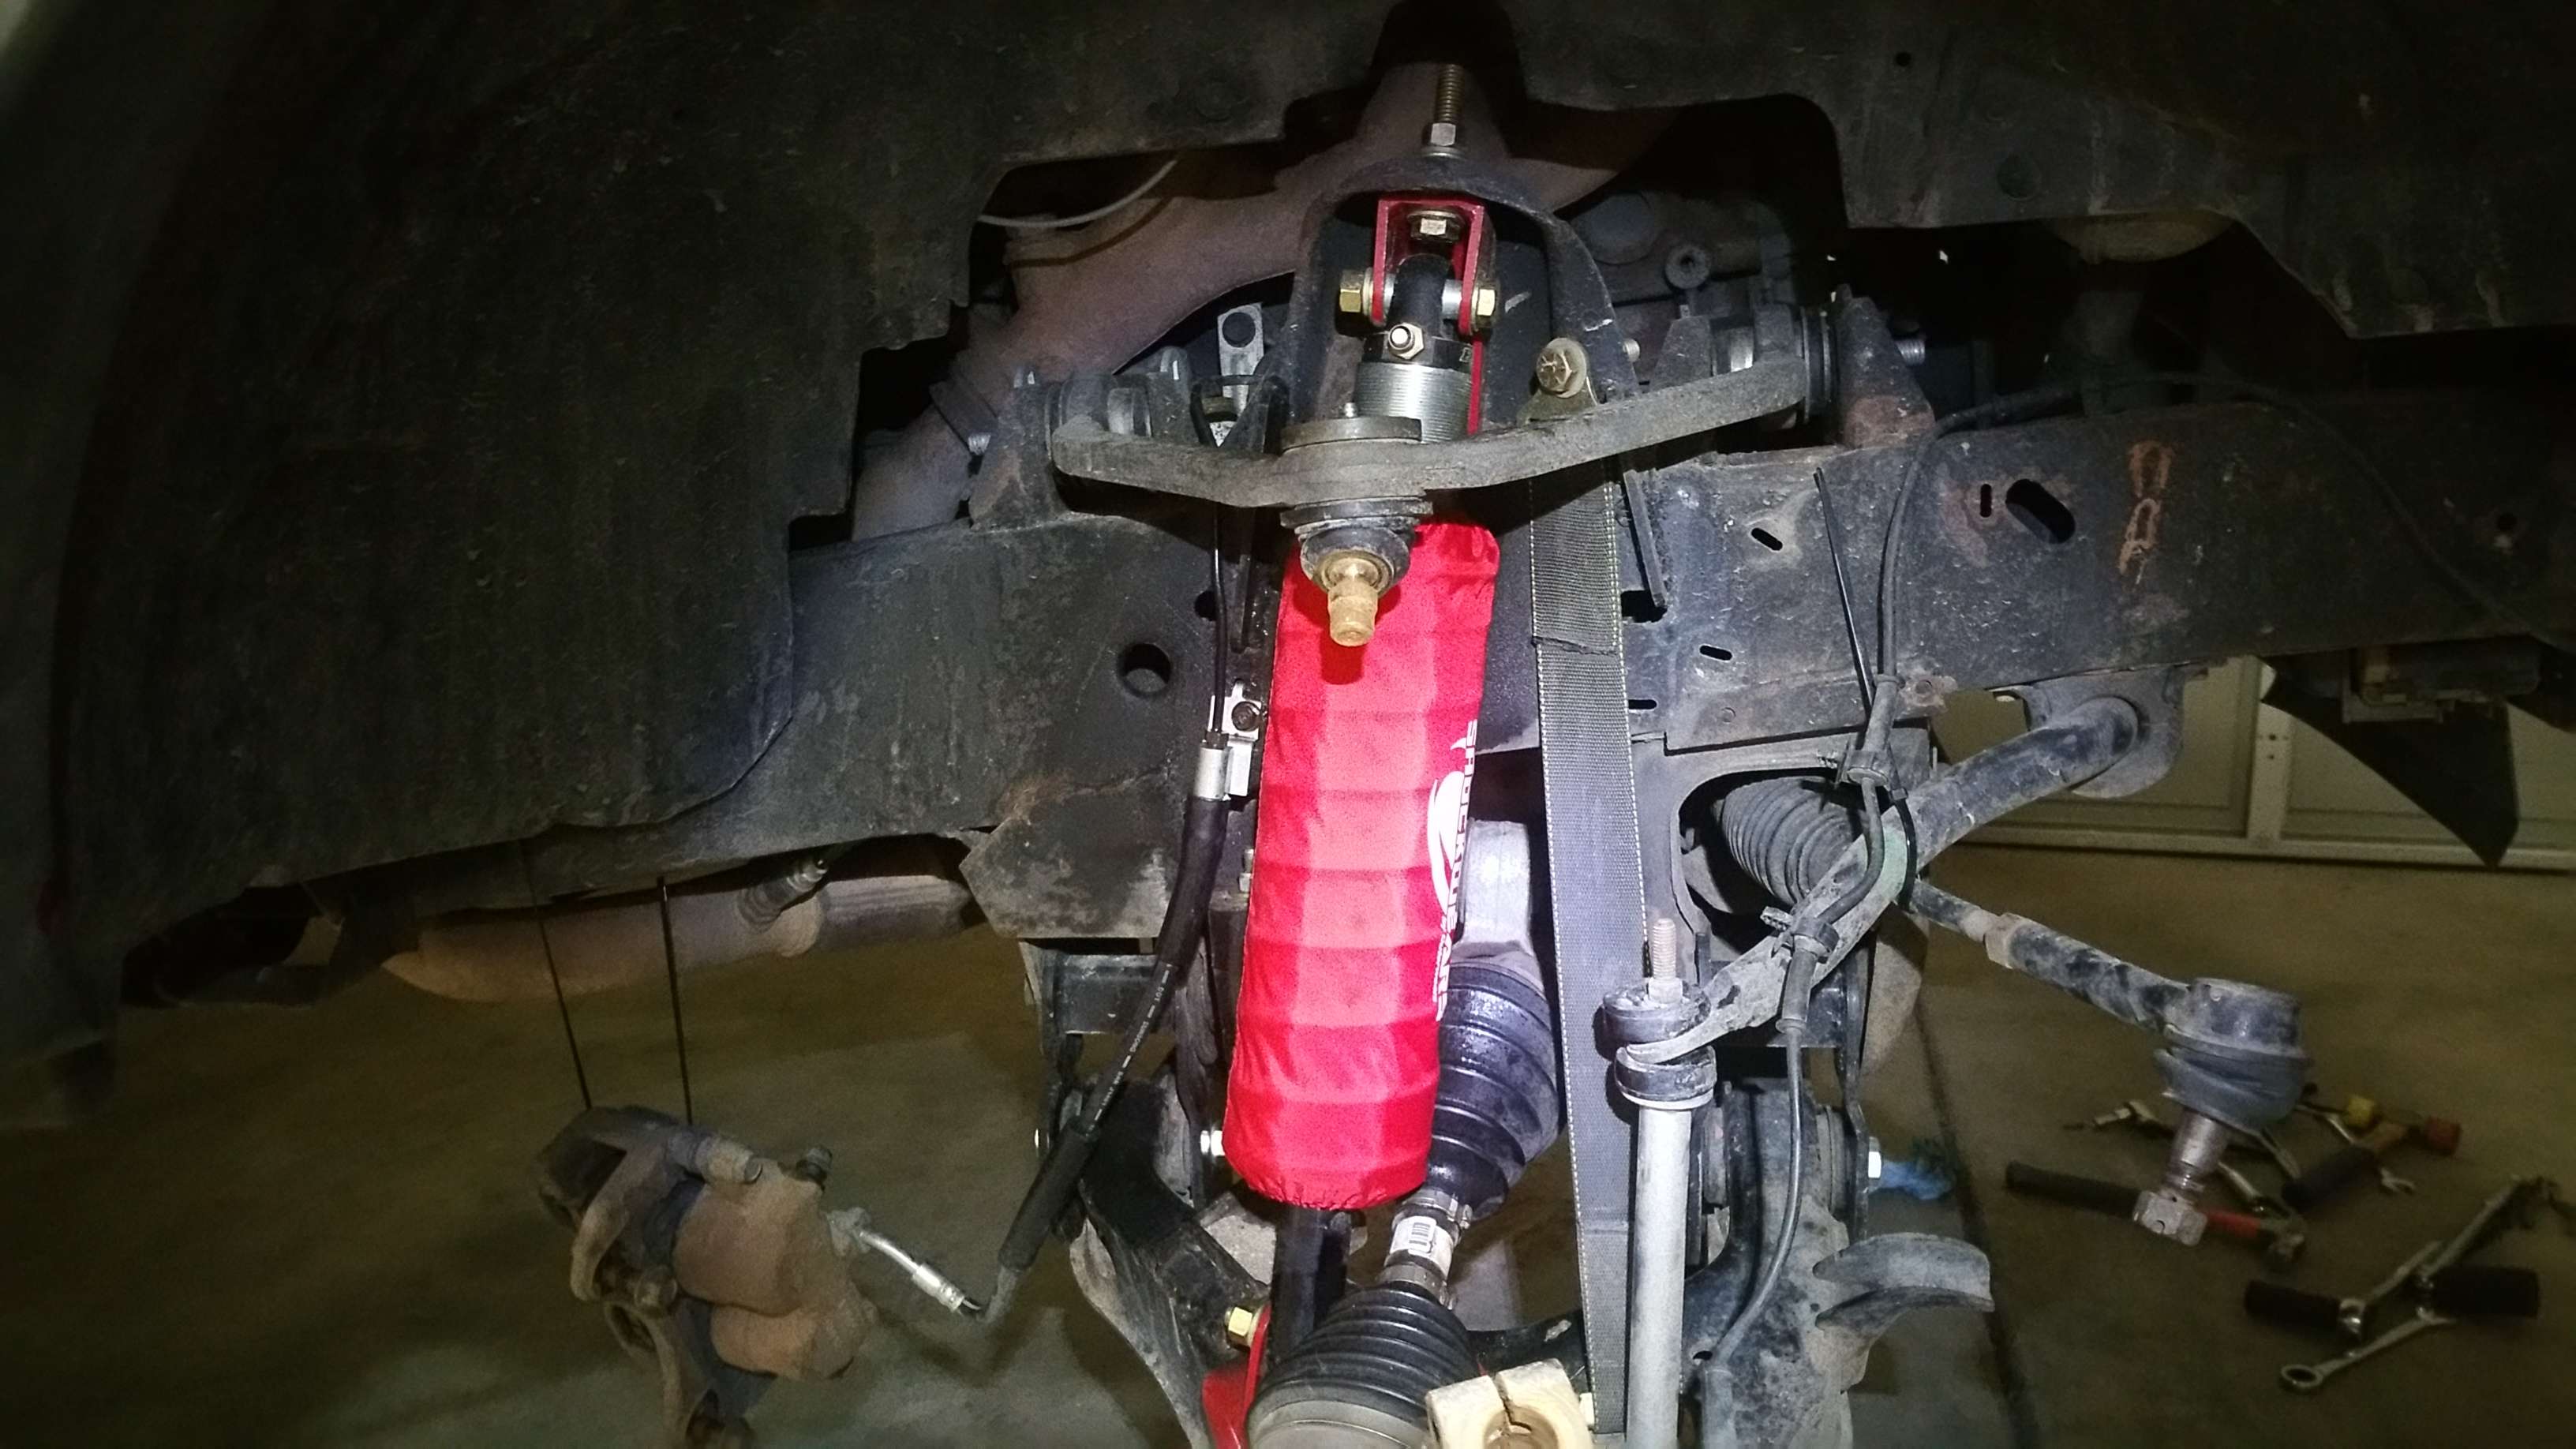
ME00Stepside coilover brackets
Fox 2.0 Coilovers w/ Eibach 750lb springs and extended eyelets
Ingall Cam bolts
Daystar extended bumpstops
Dorman brake lines
Superlift front driveshaft
Torsen T2 D35 LSD in front
Moog upper a balljoints and control arms
Moog lower ball joints
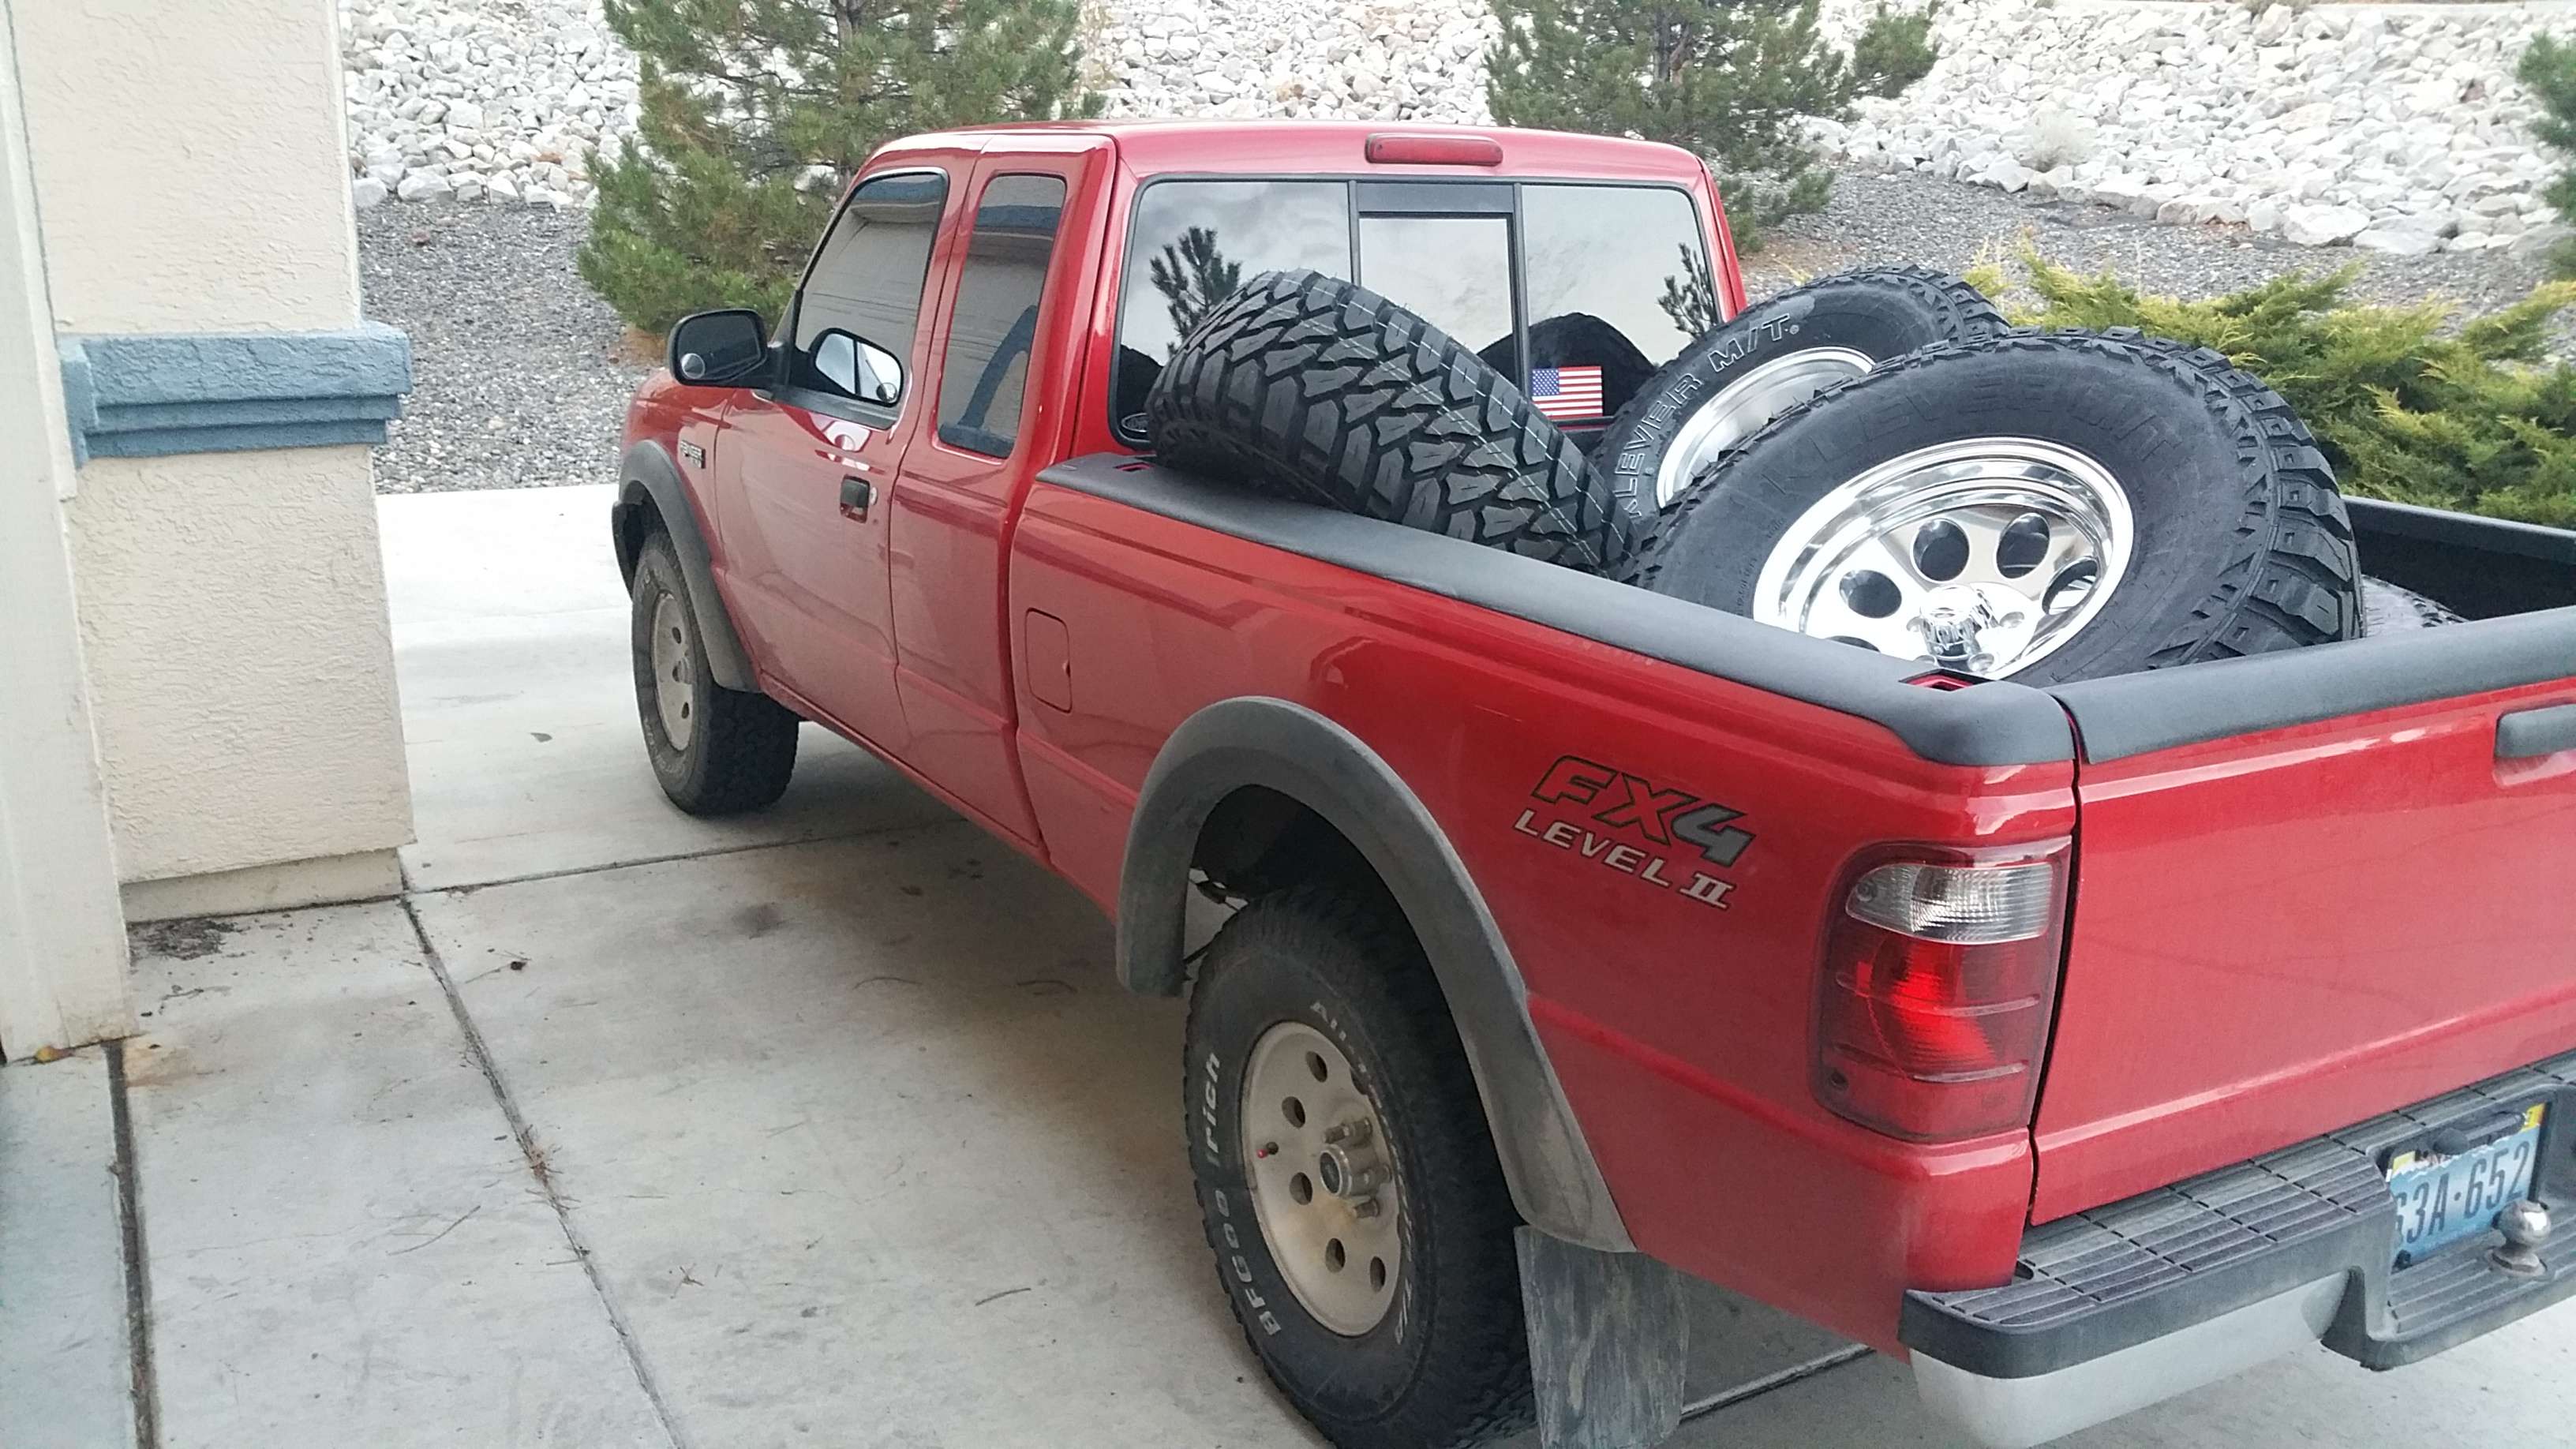
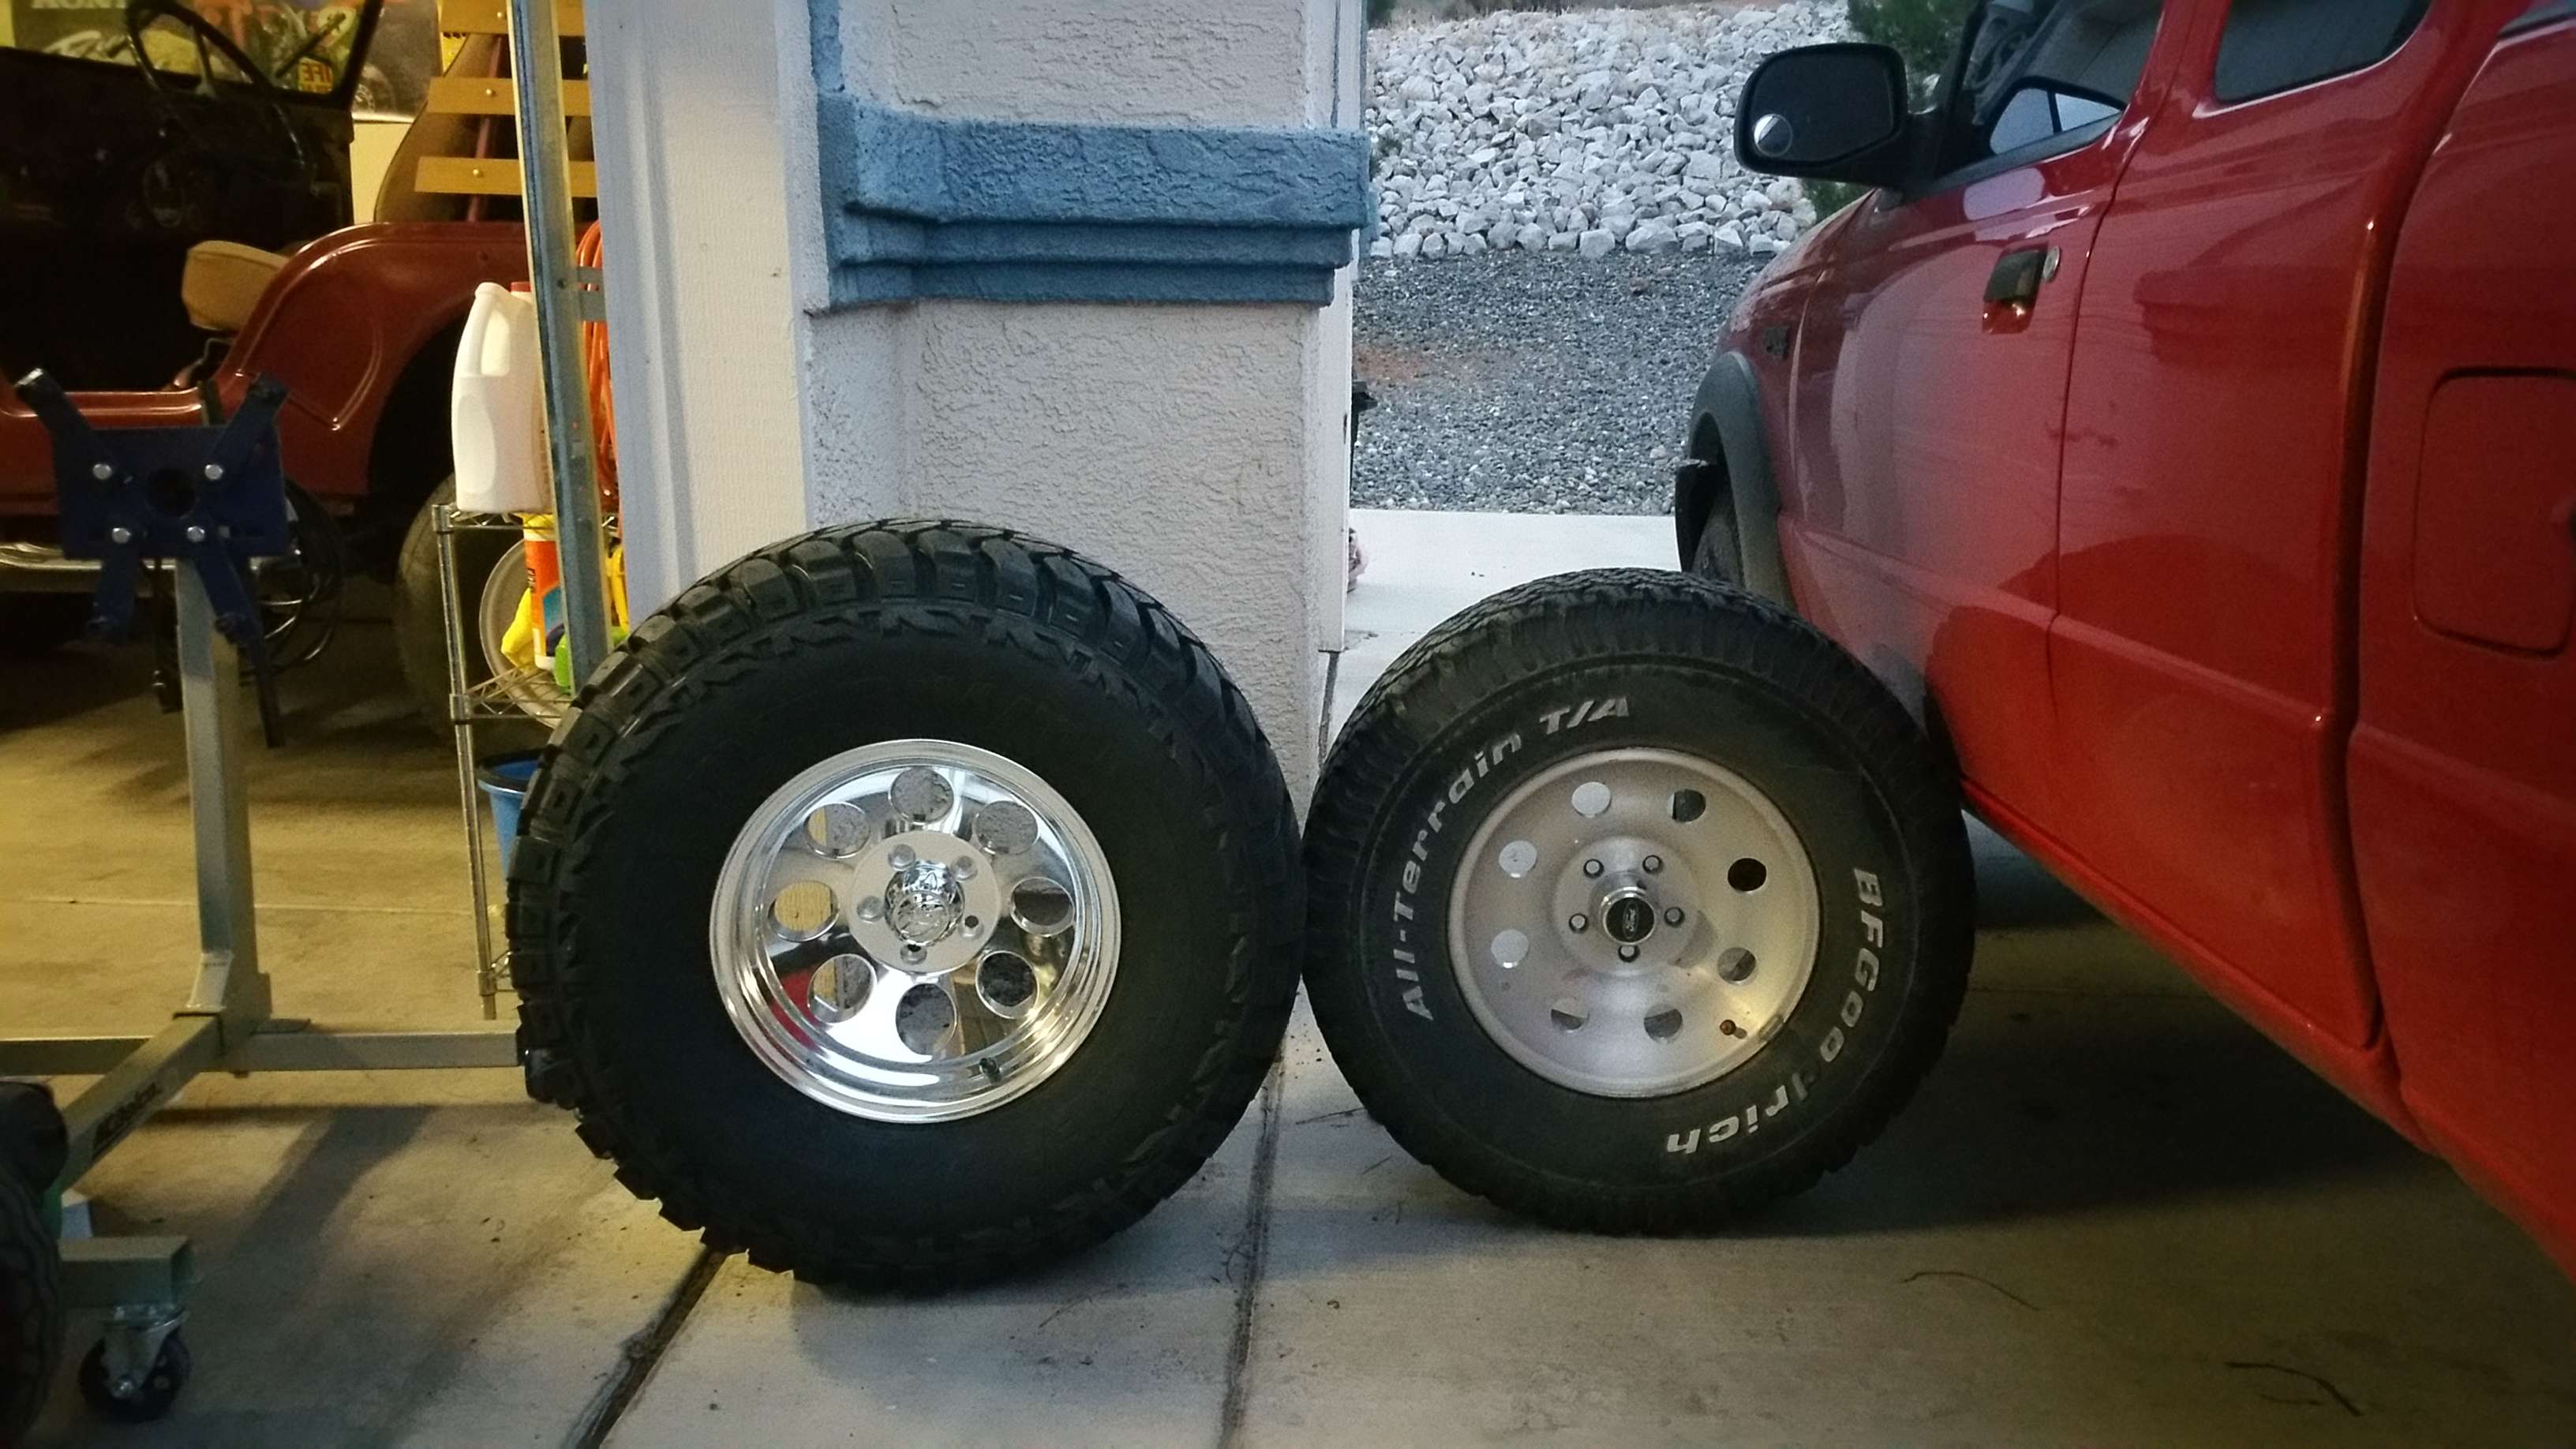
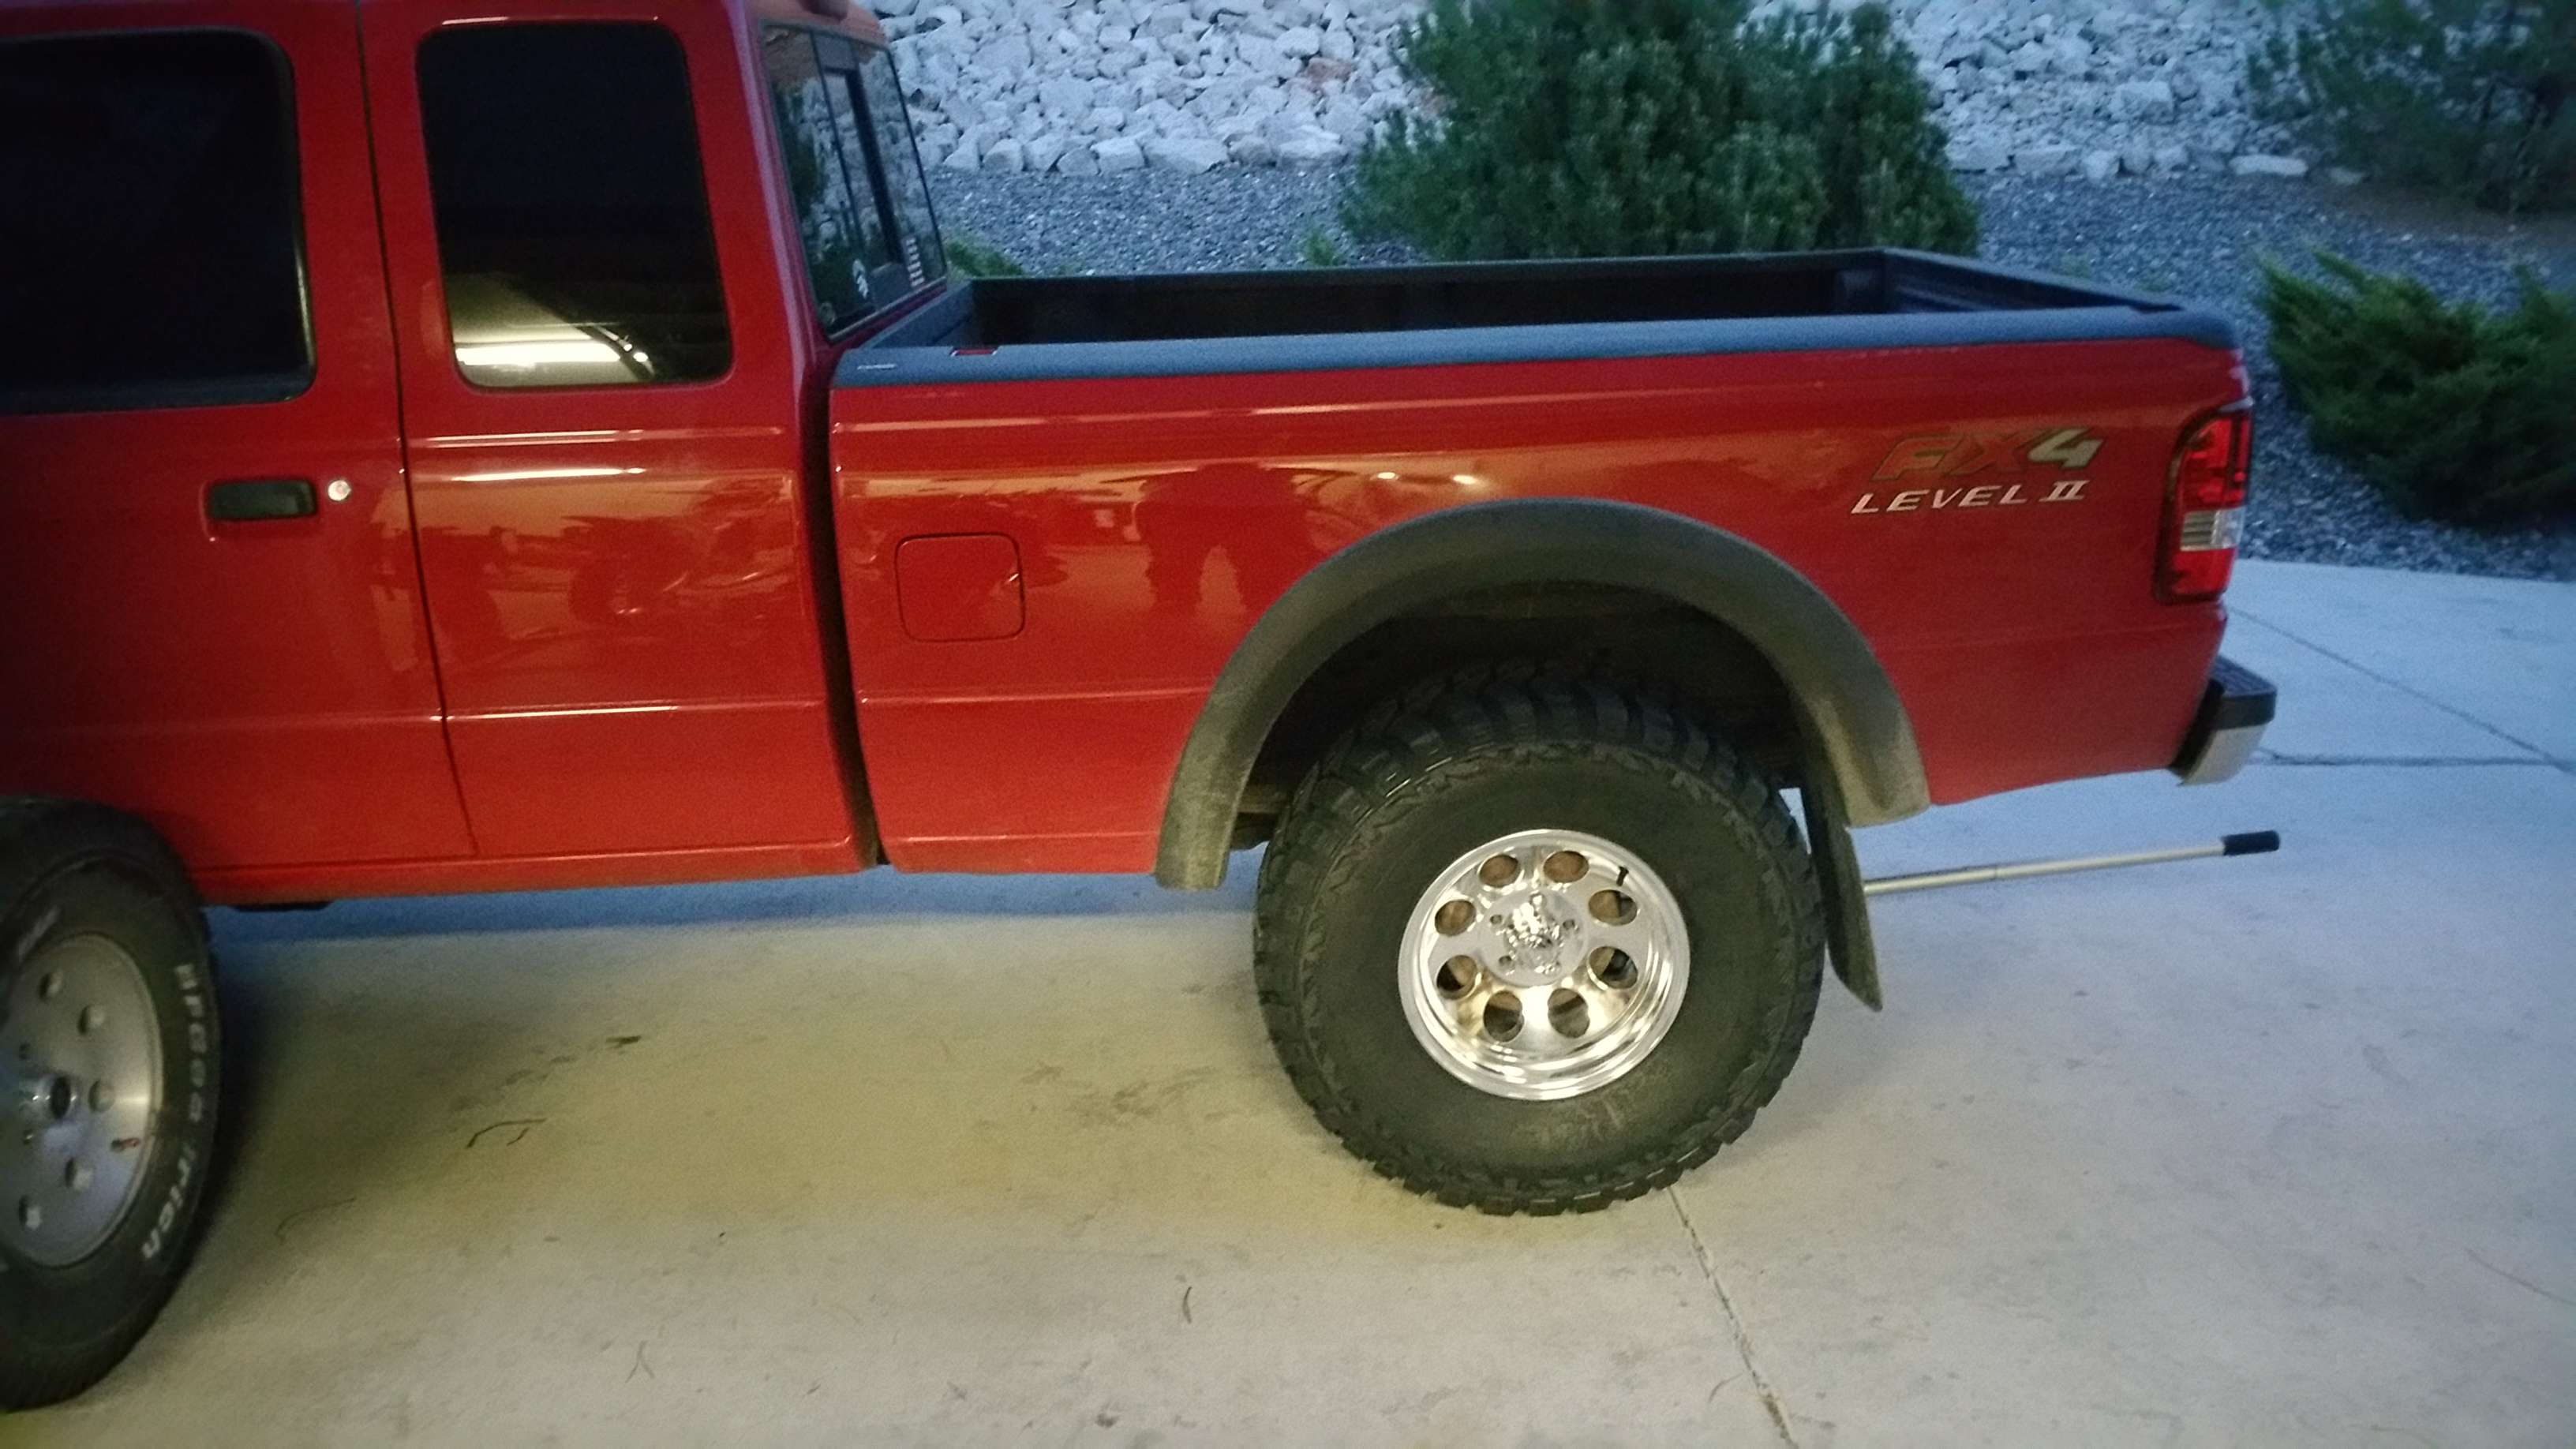
Wheels+Tires
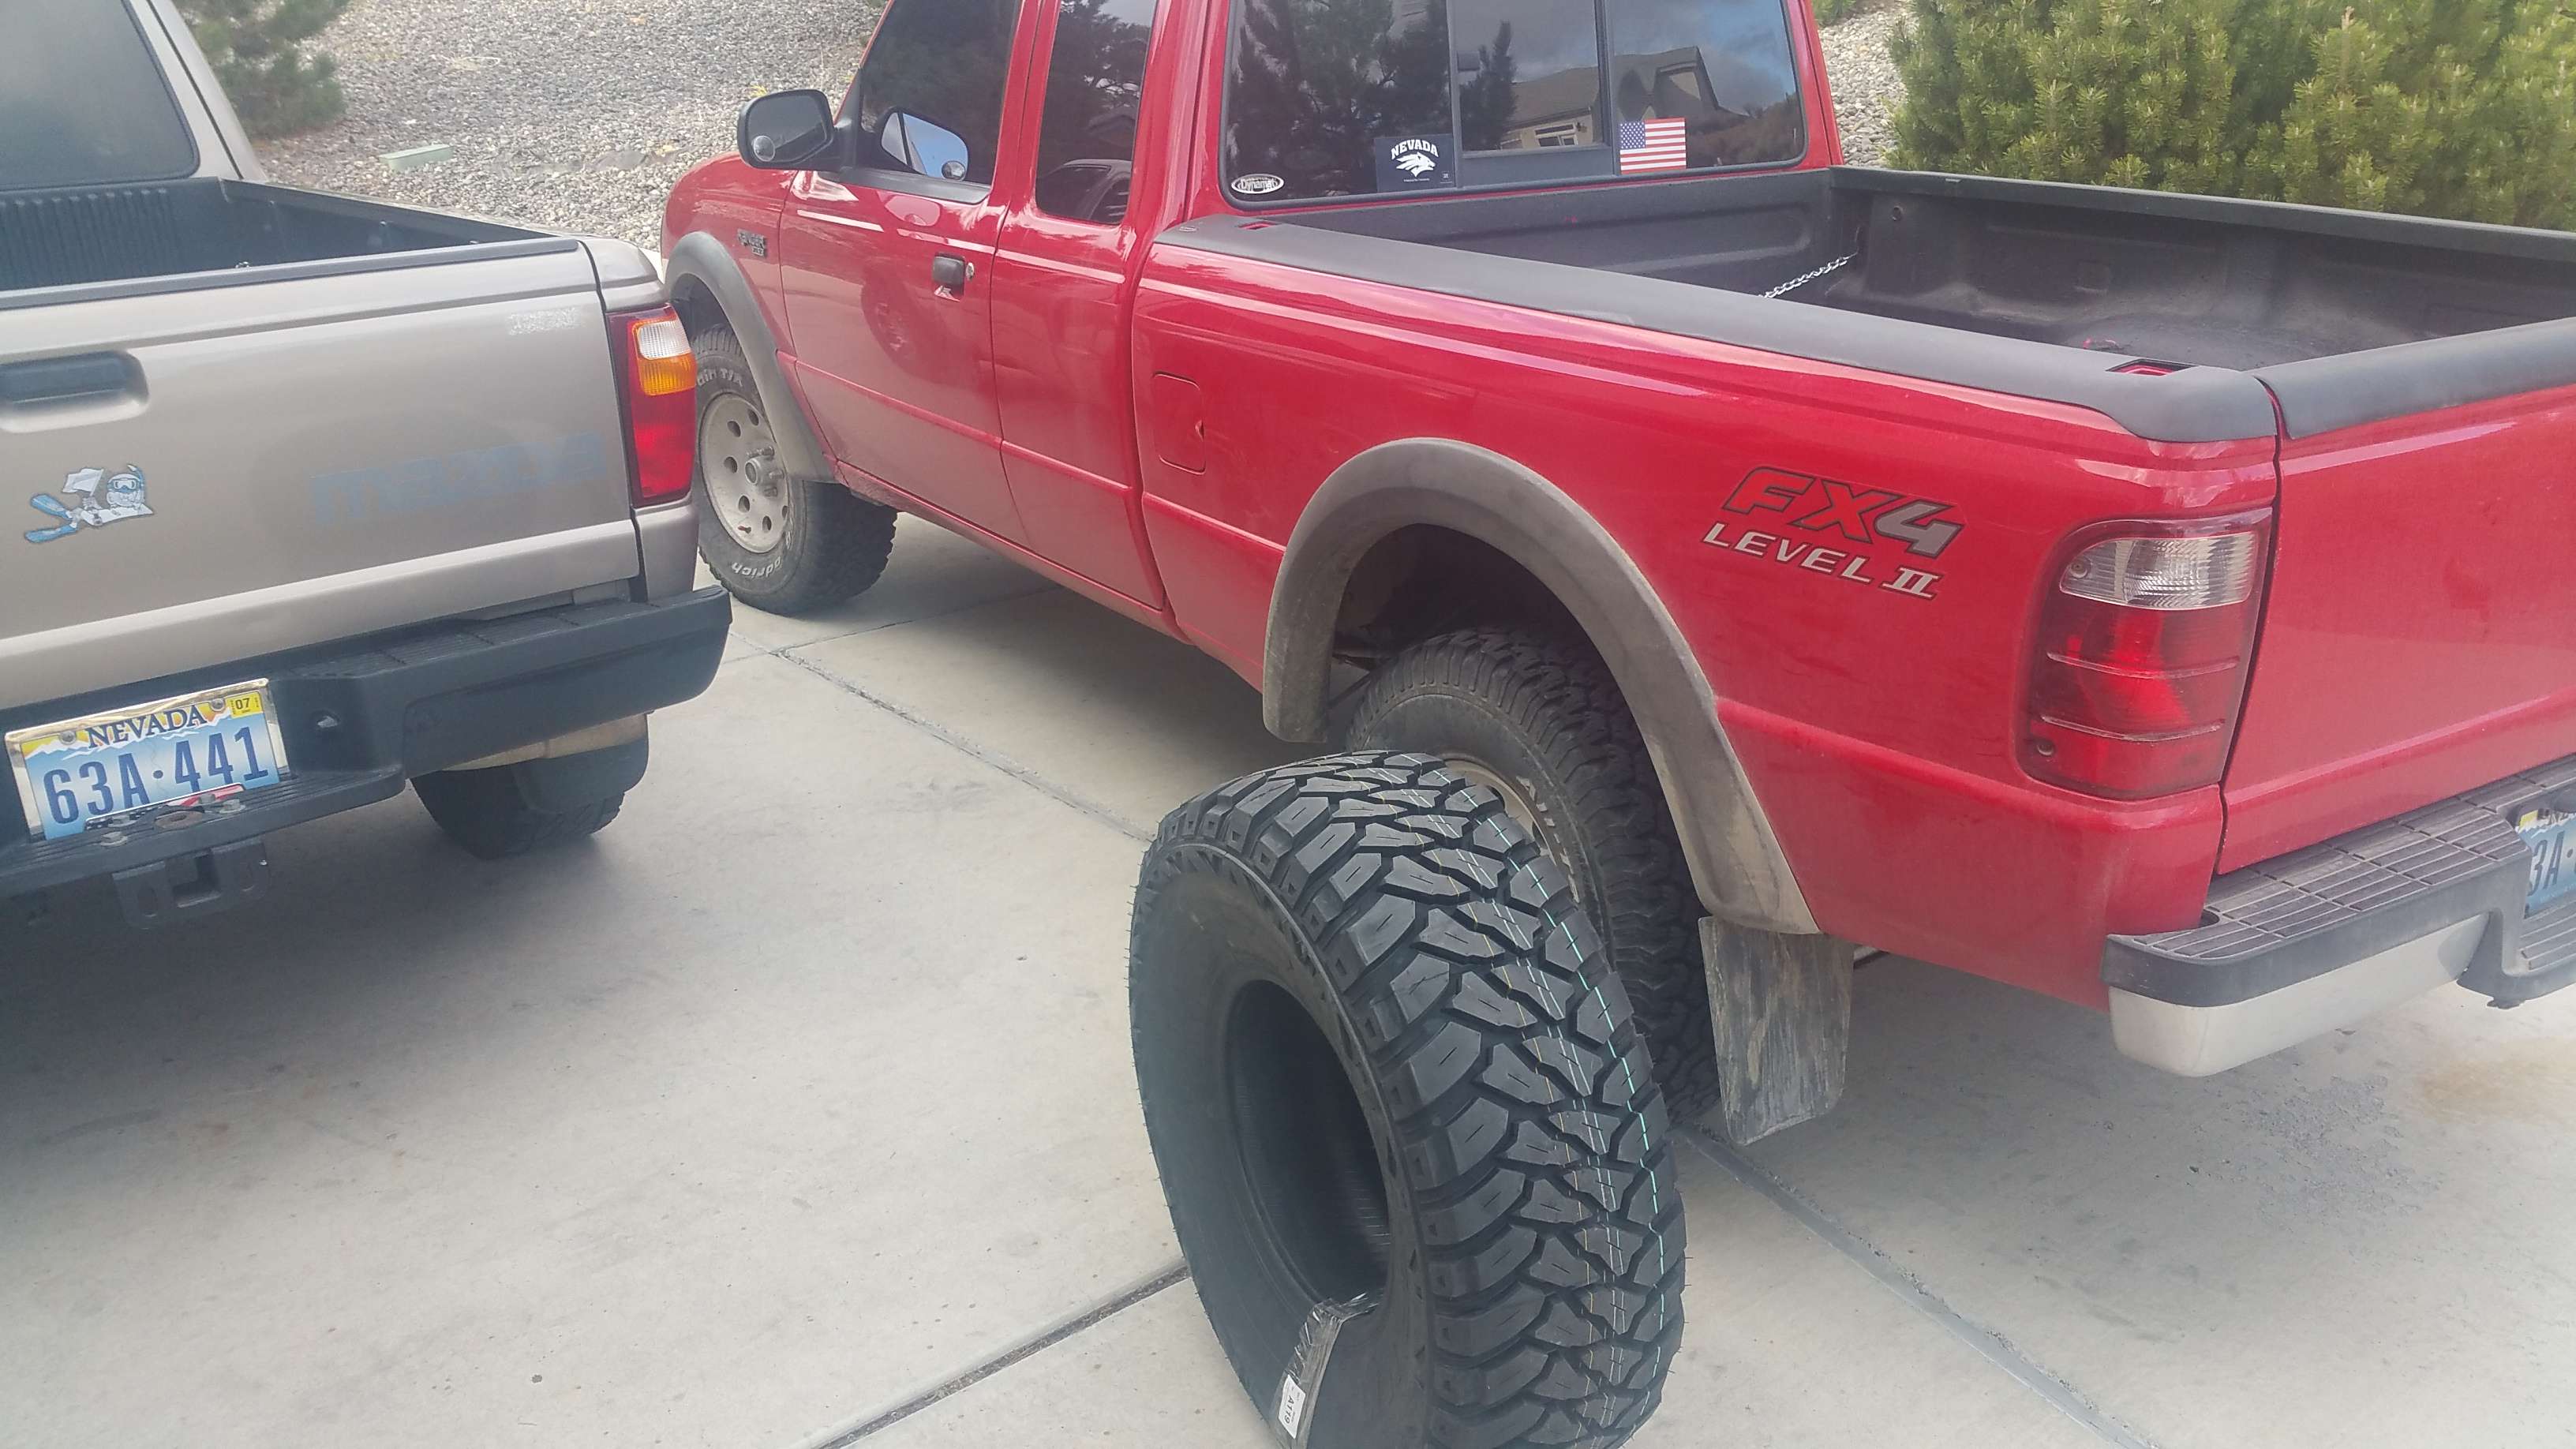
Kenda Klever 33x12.5r15
Ion Alloy 15x8's w/ 3.5 B.S
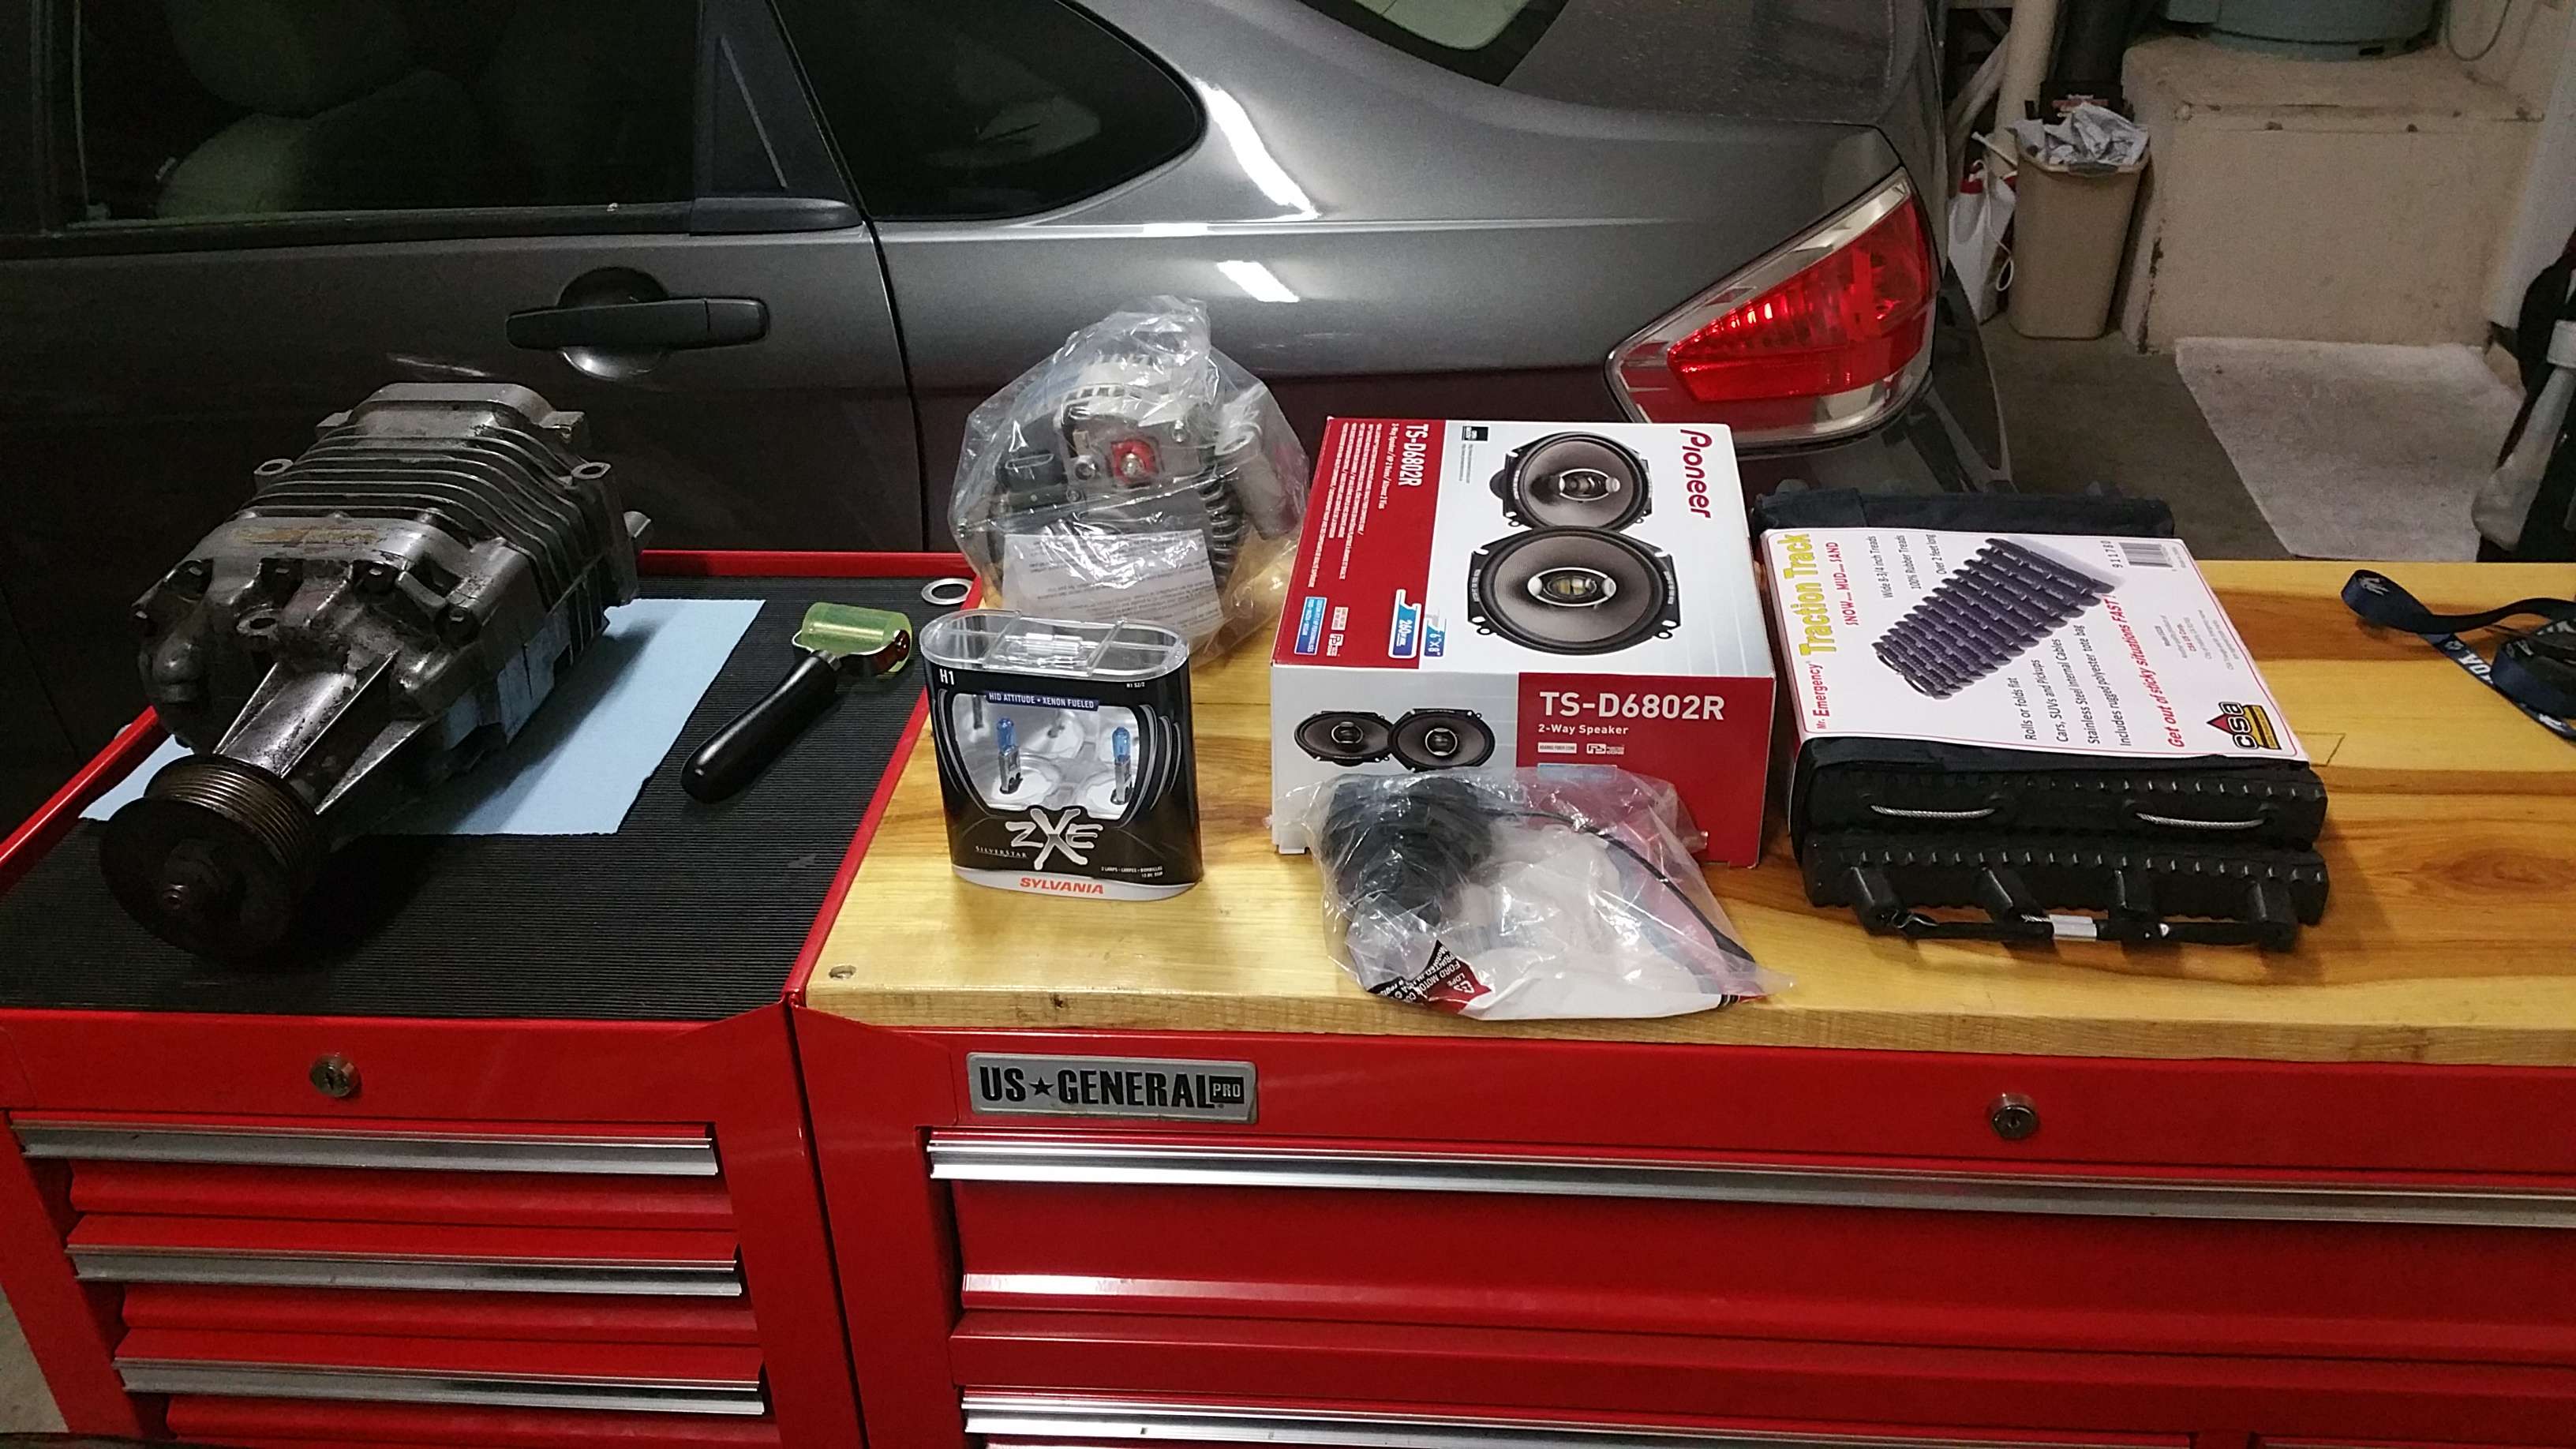
Supercharger:
Moddbox ranger supercharger kit
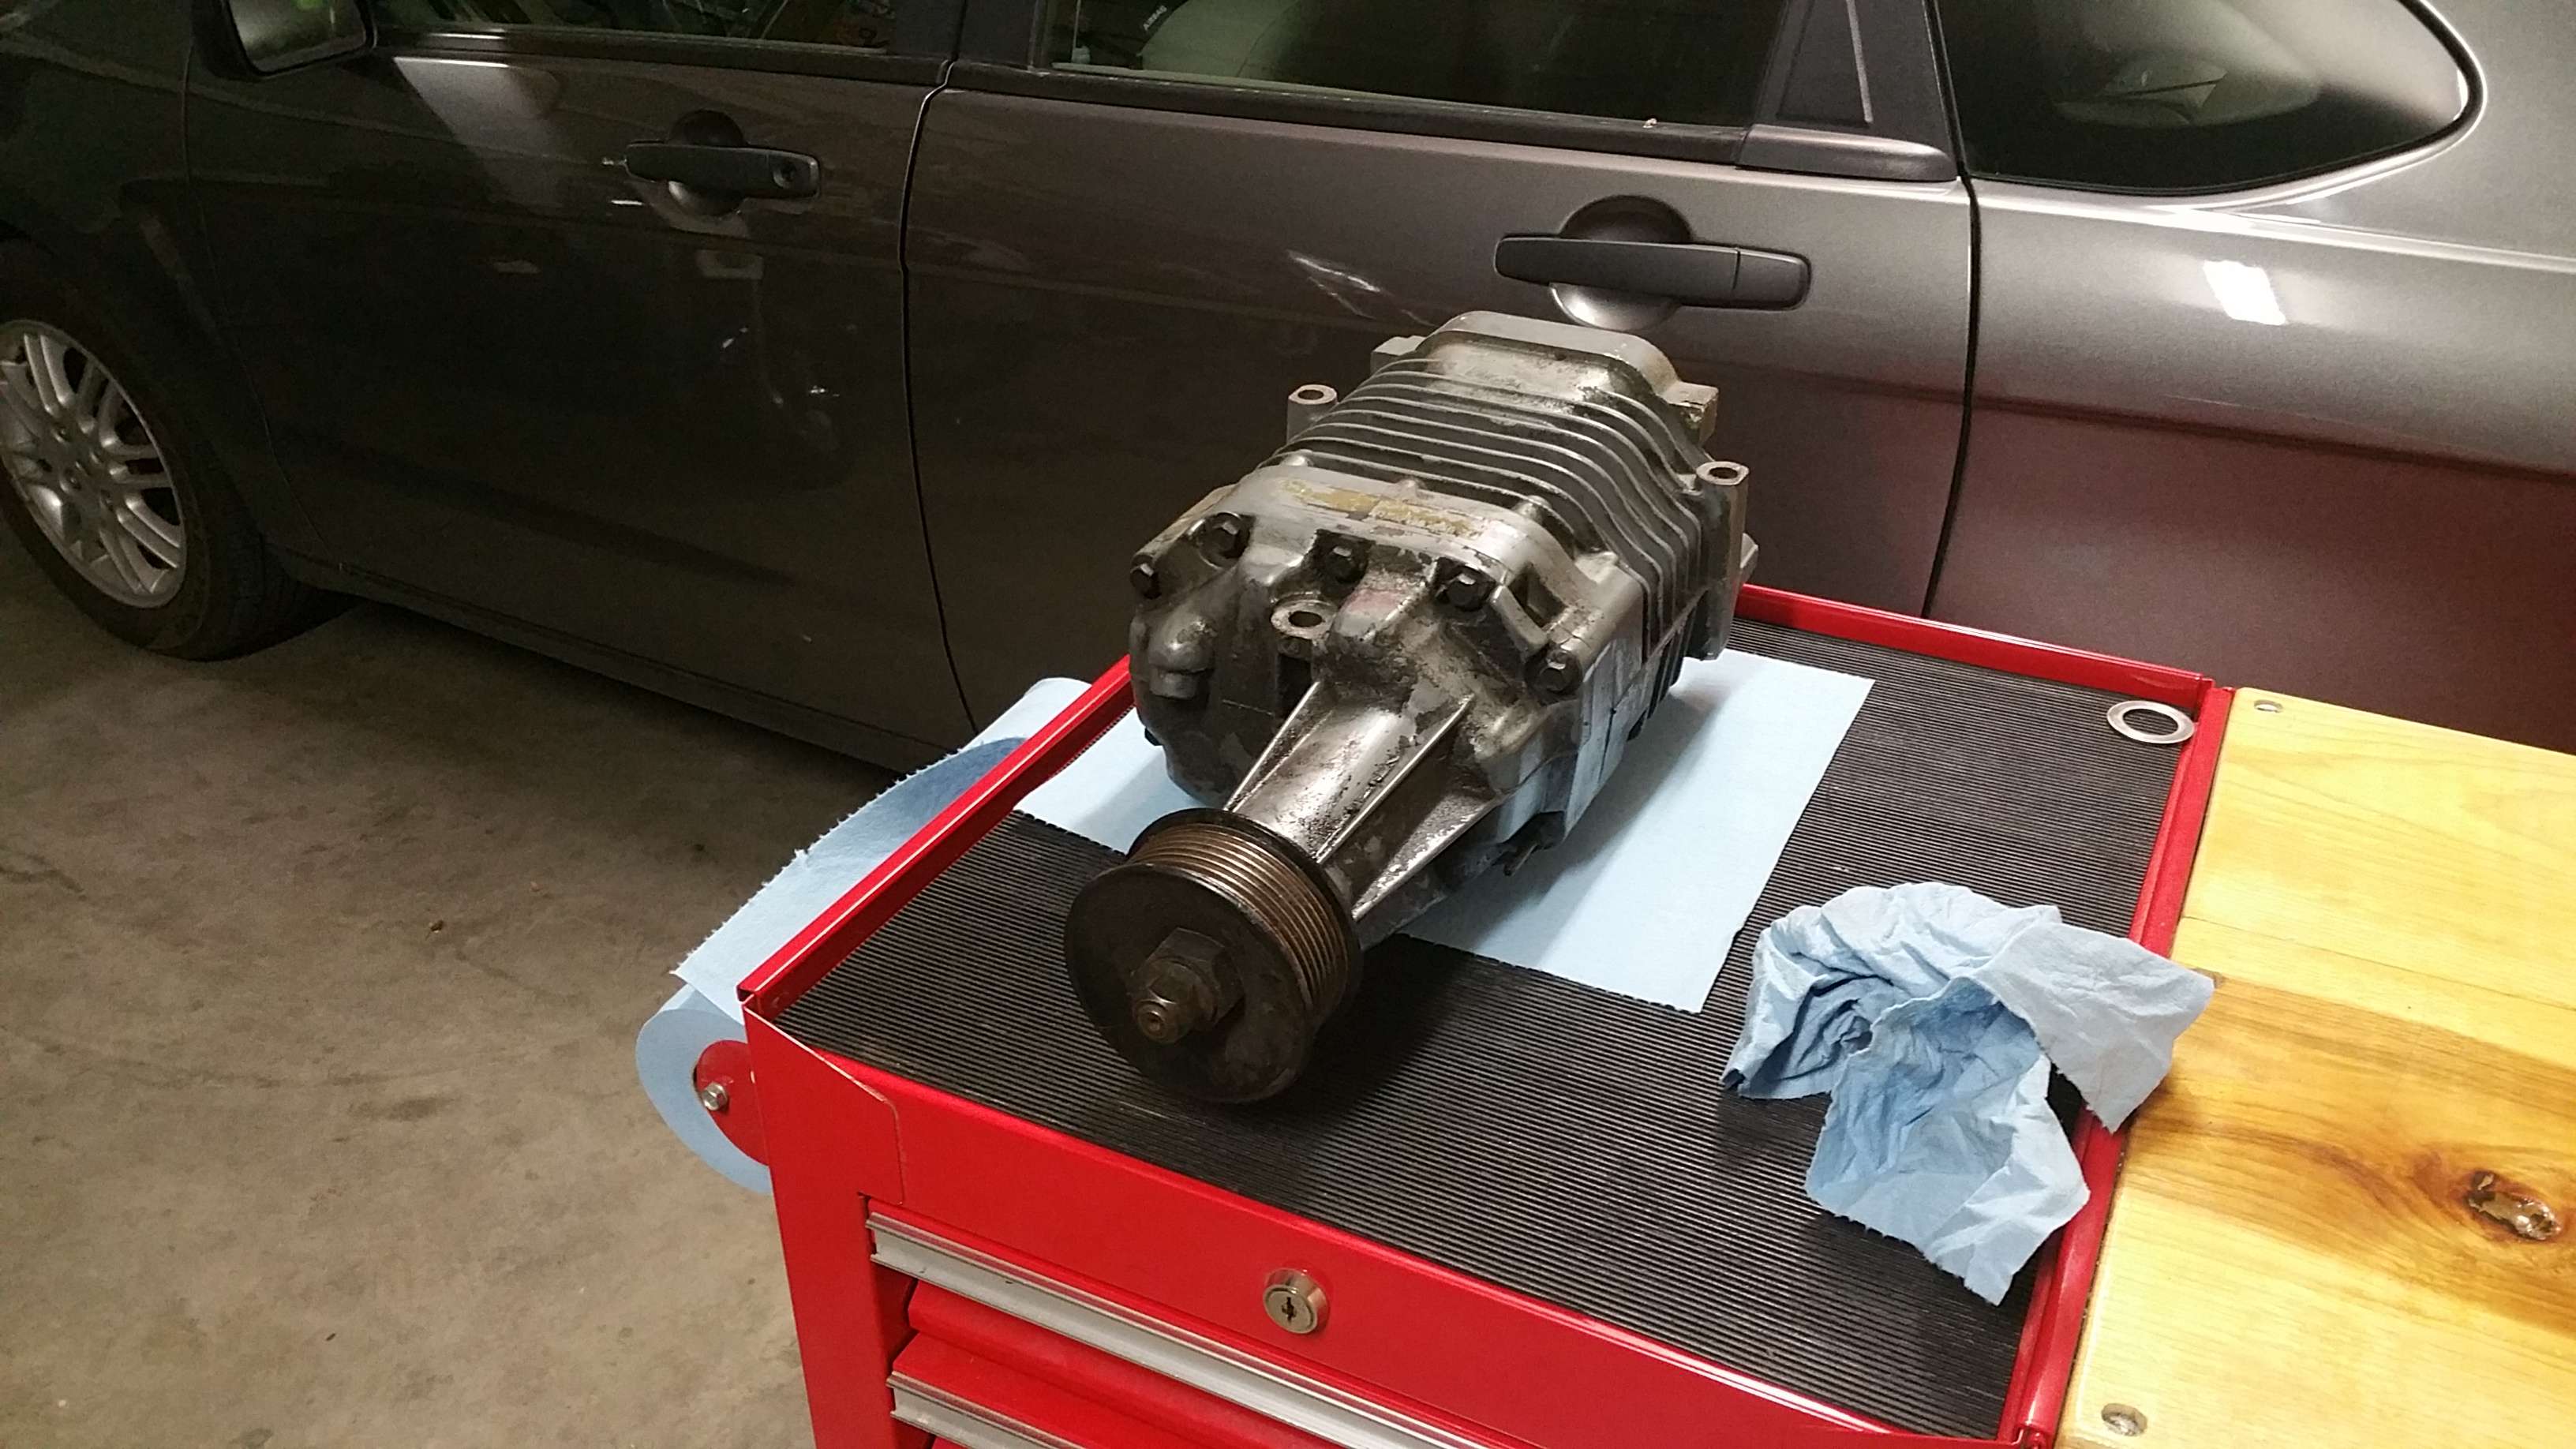
90's Eaton M90 (rebuilt and painted)
Moddbox intercooler kit
Stereo:
Pioneer AVH3800xxxxxx
Pioneer 10" shallow
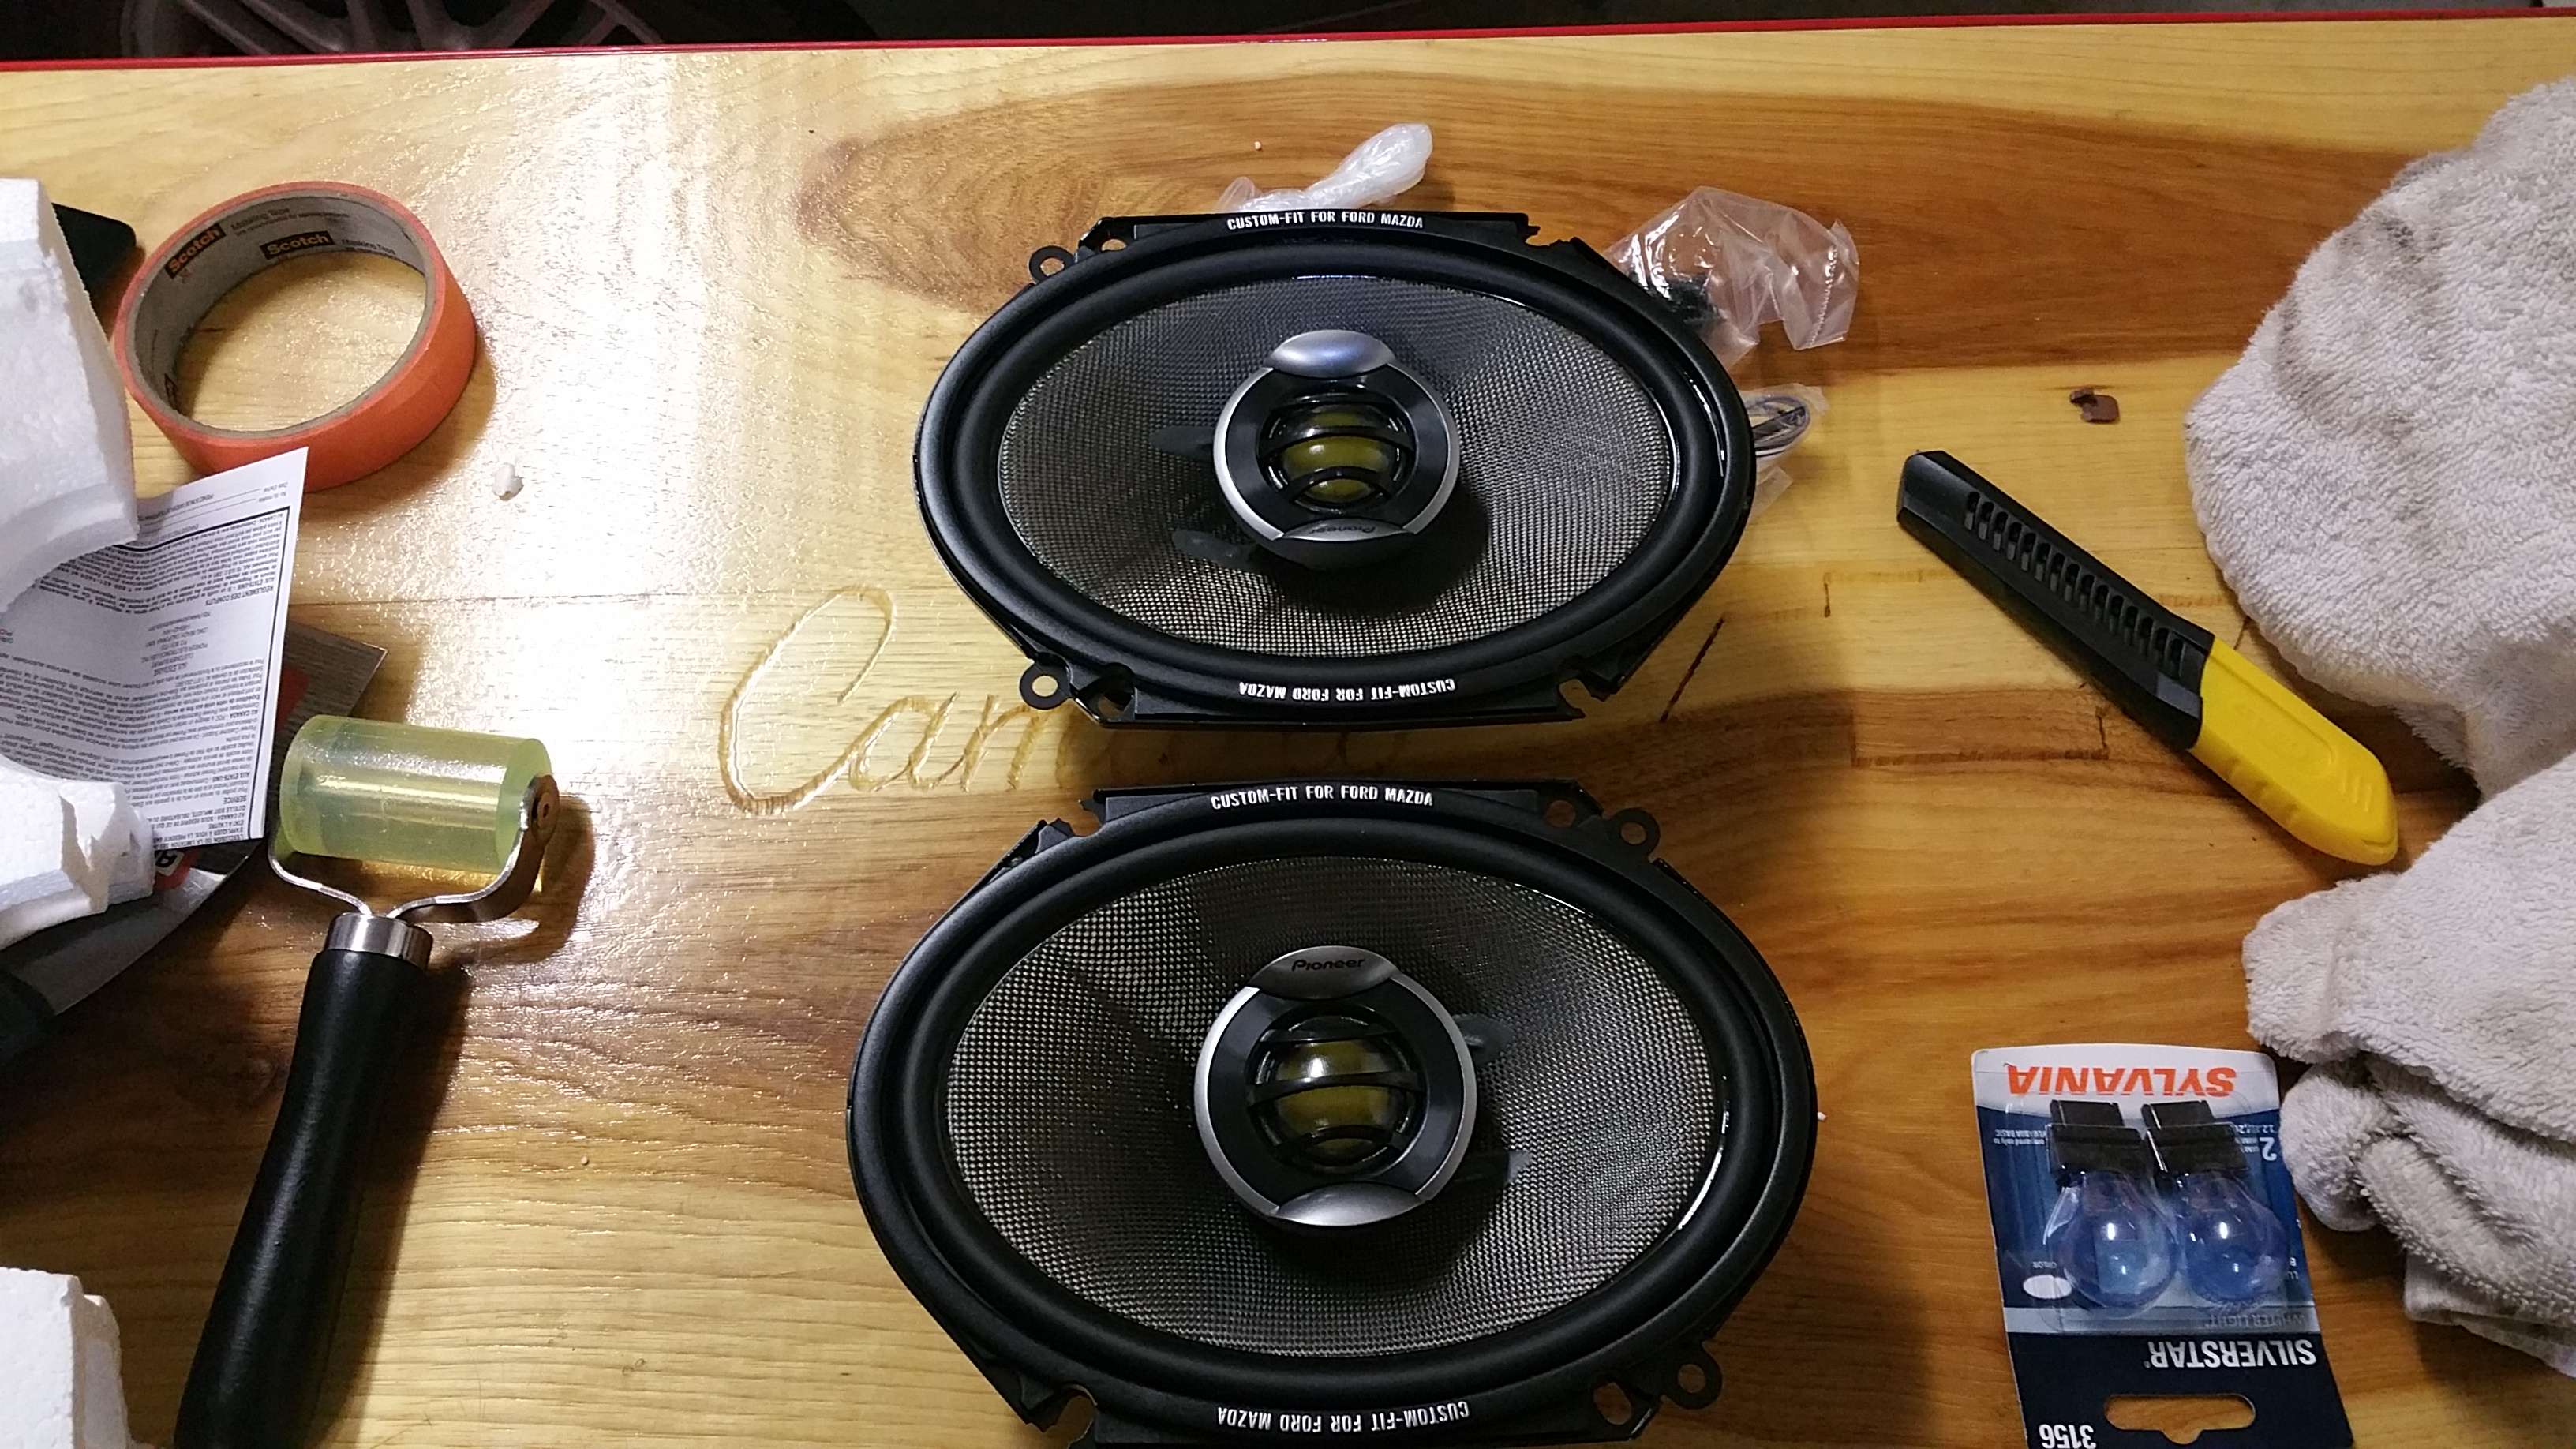
x4 6x8" Pioneer speakers w/ Carbon Fiber cones
Pioneer Amp
Scosche 1F capacitor
Custom built box (by me)
Other:
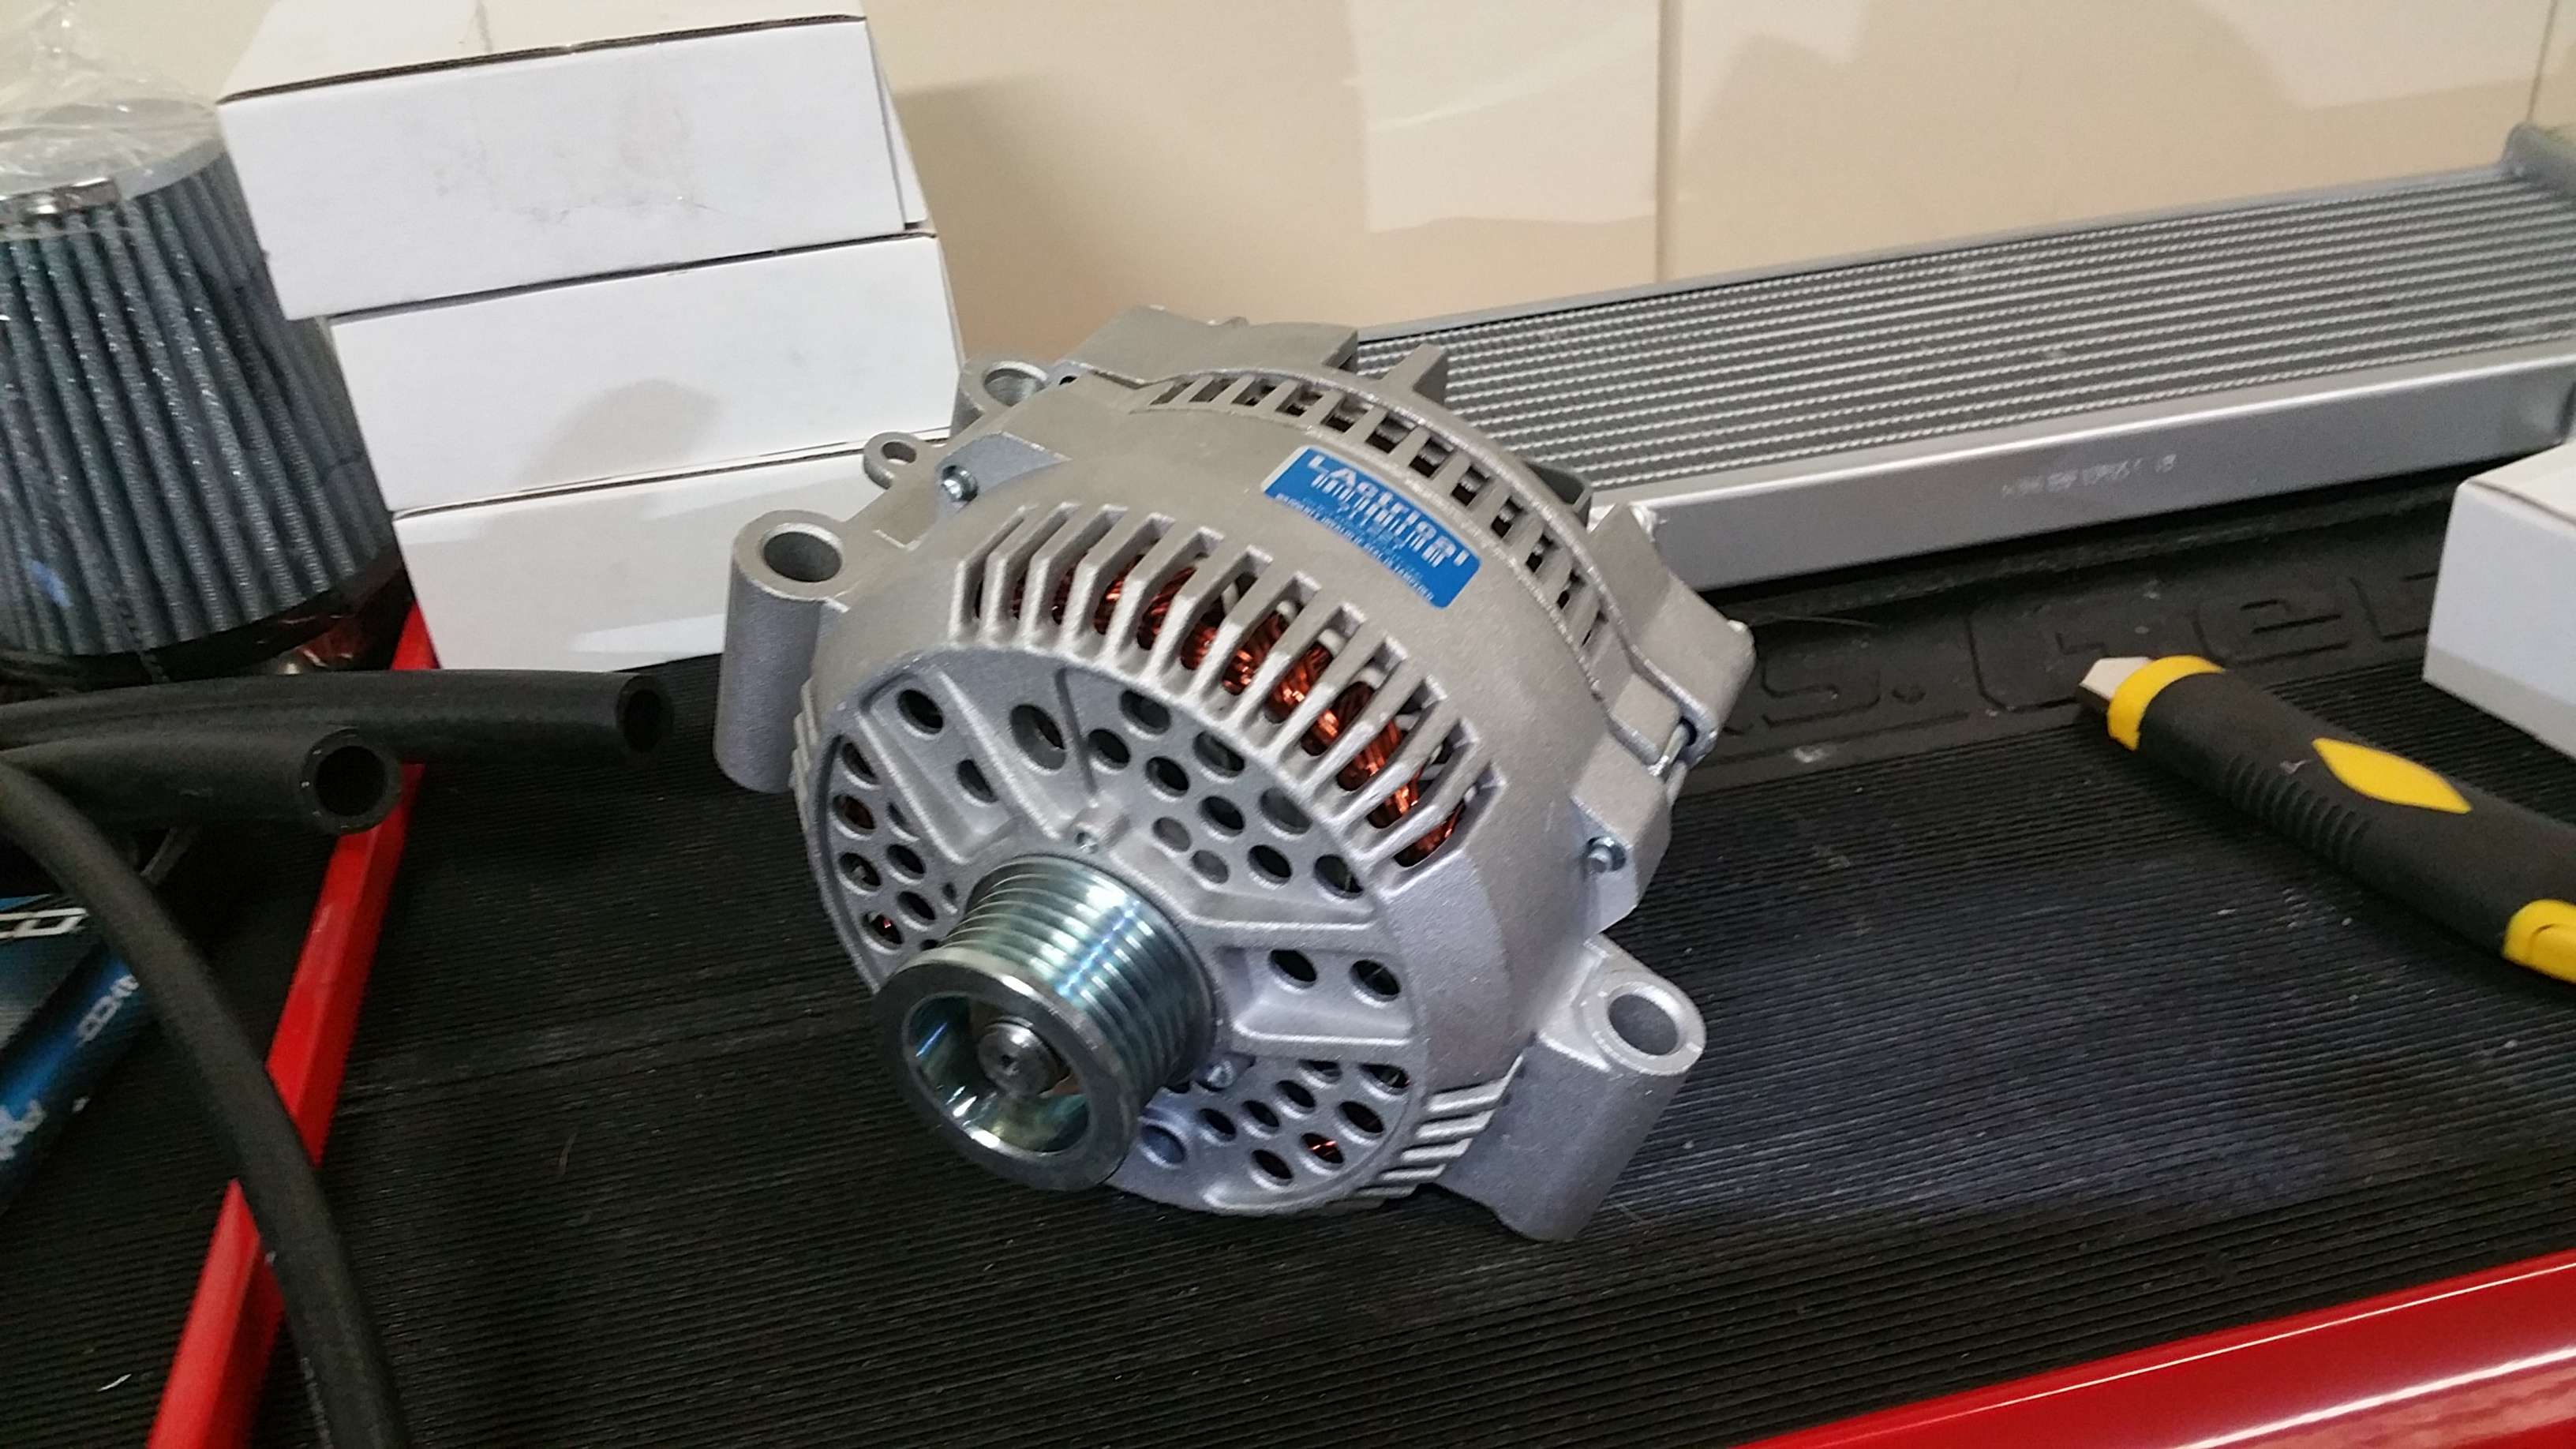
220 Alternator with big 3 upgrade to 1/0 gauge wiring
Rockford Fosgate terminals
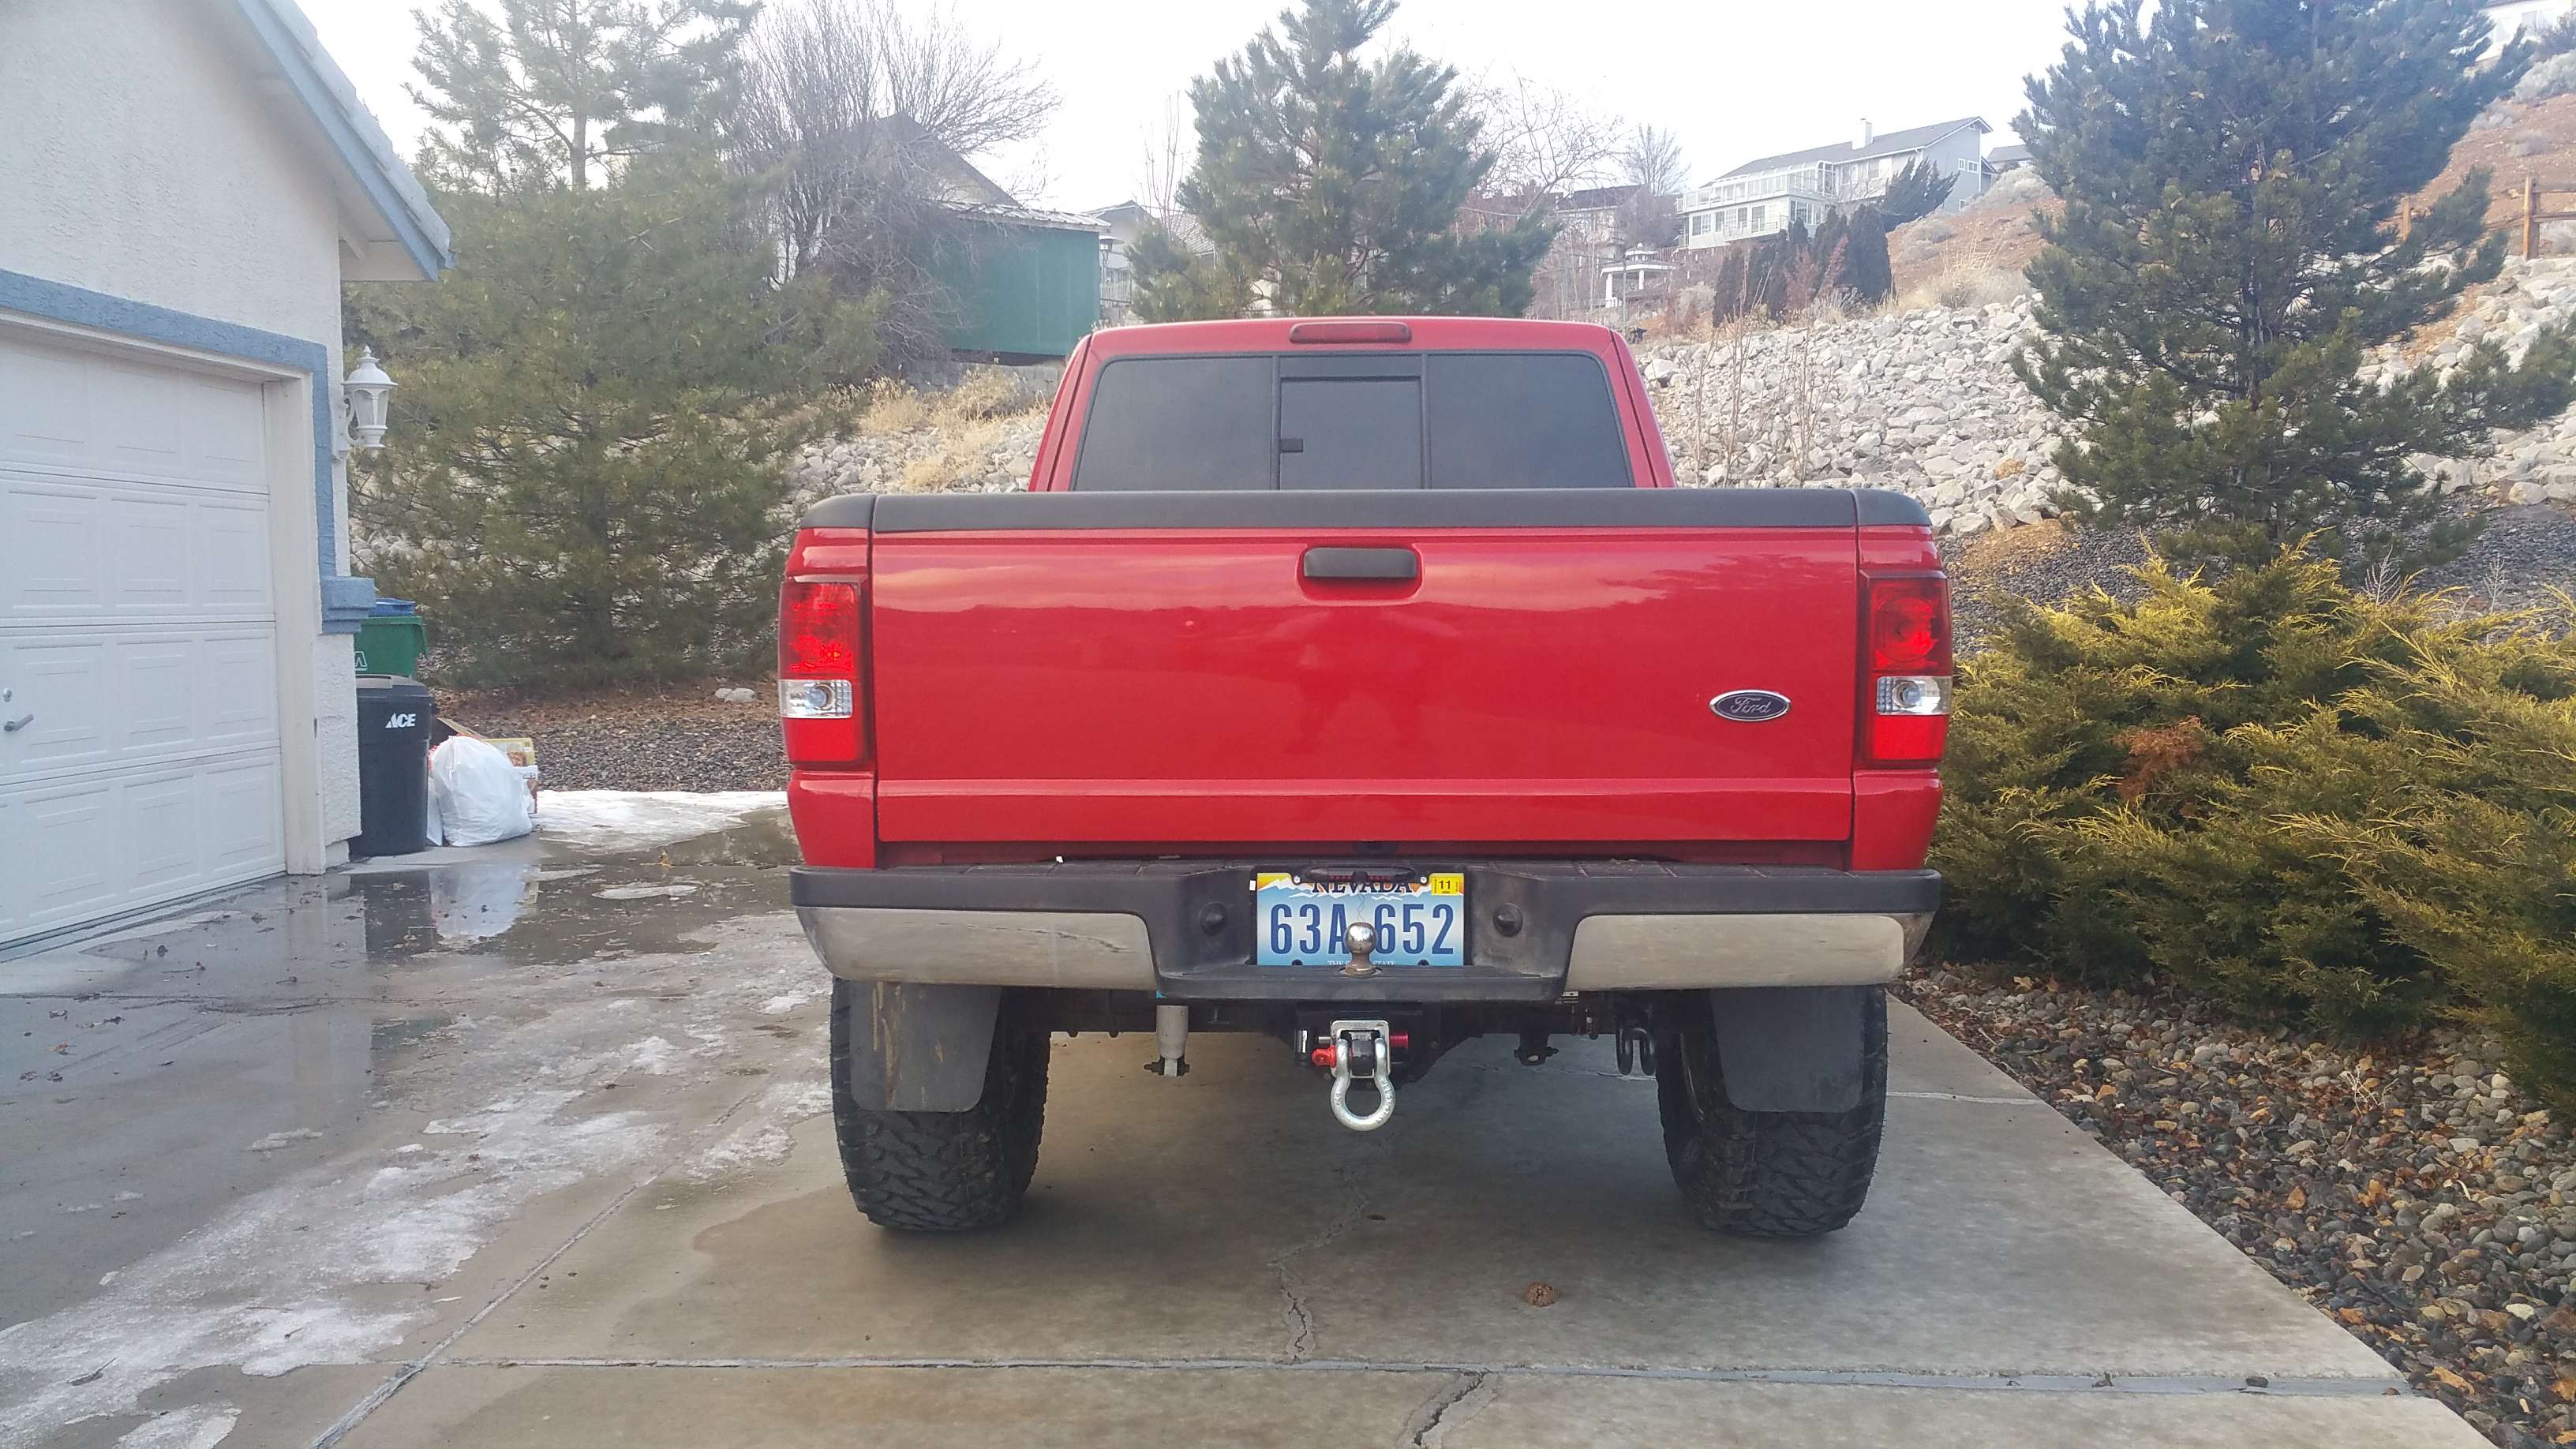
Reese Towpower hidden hitch
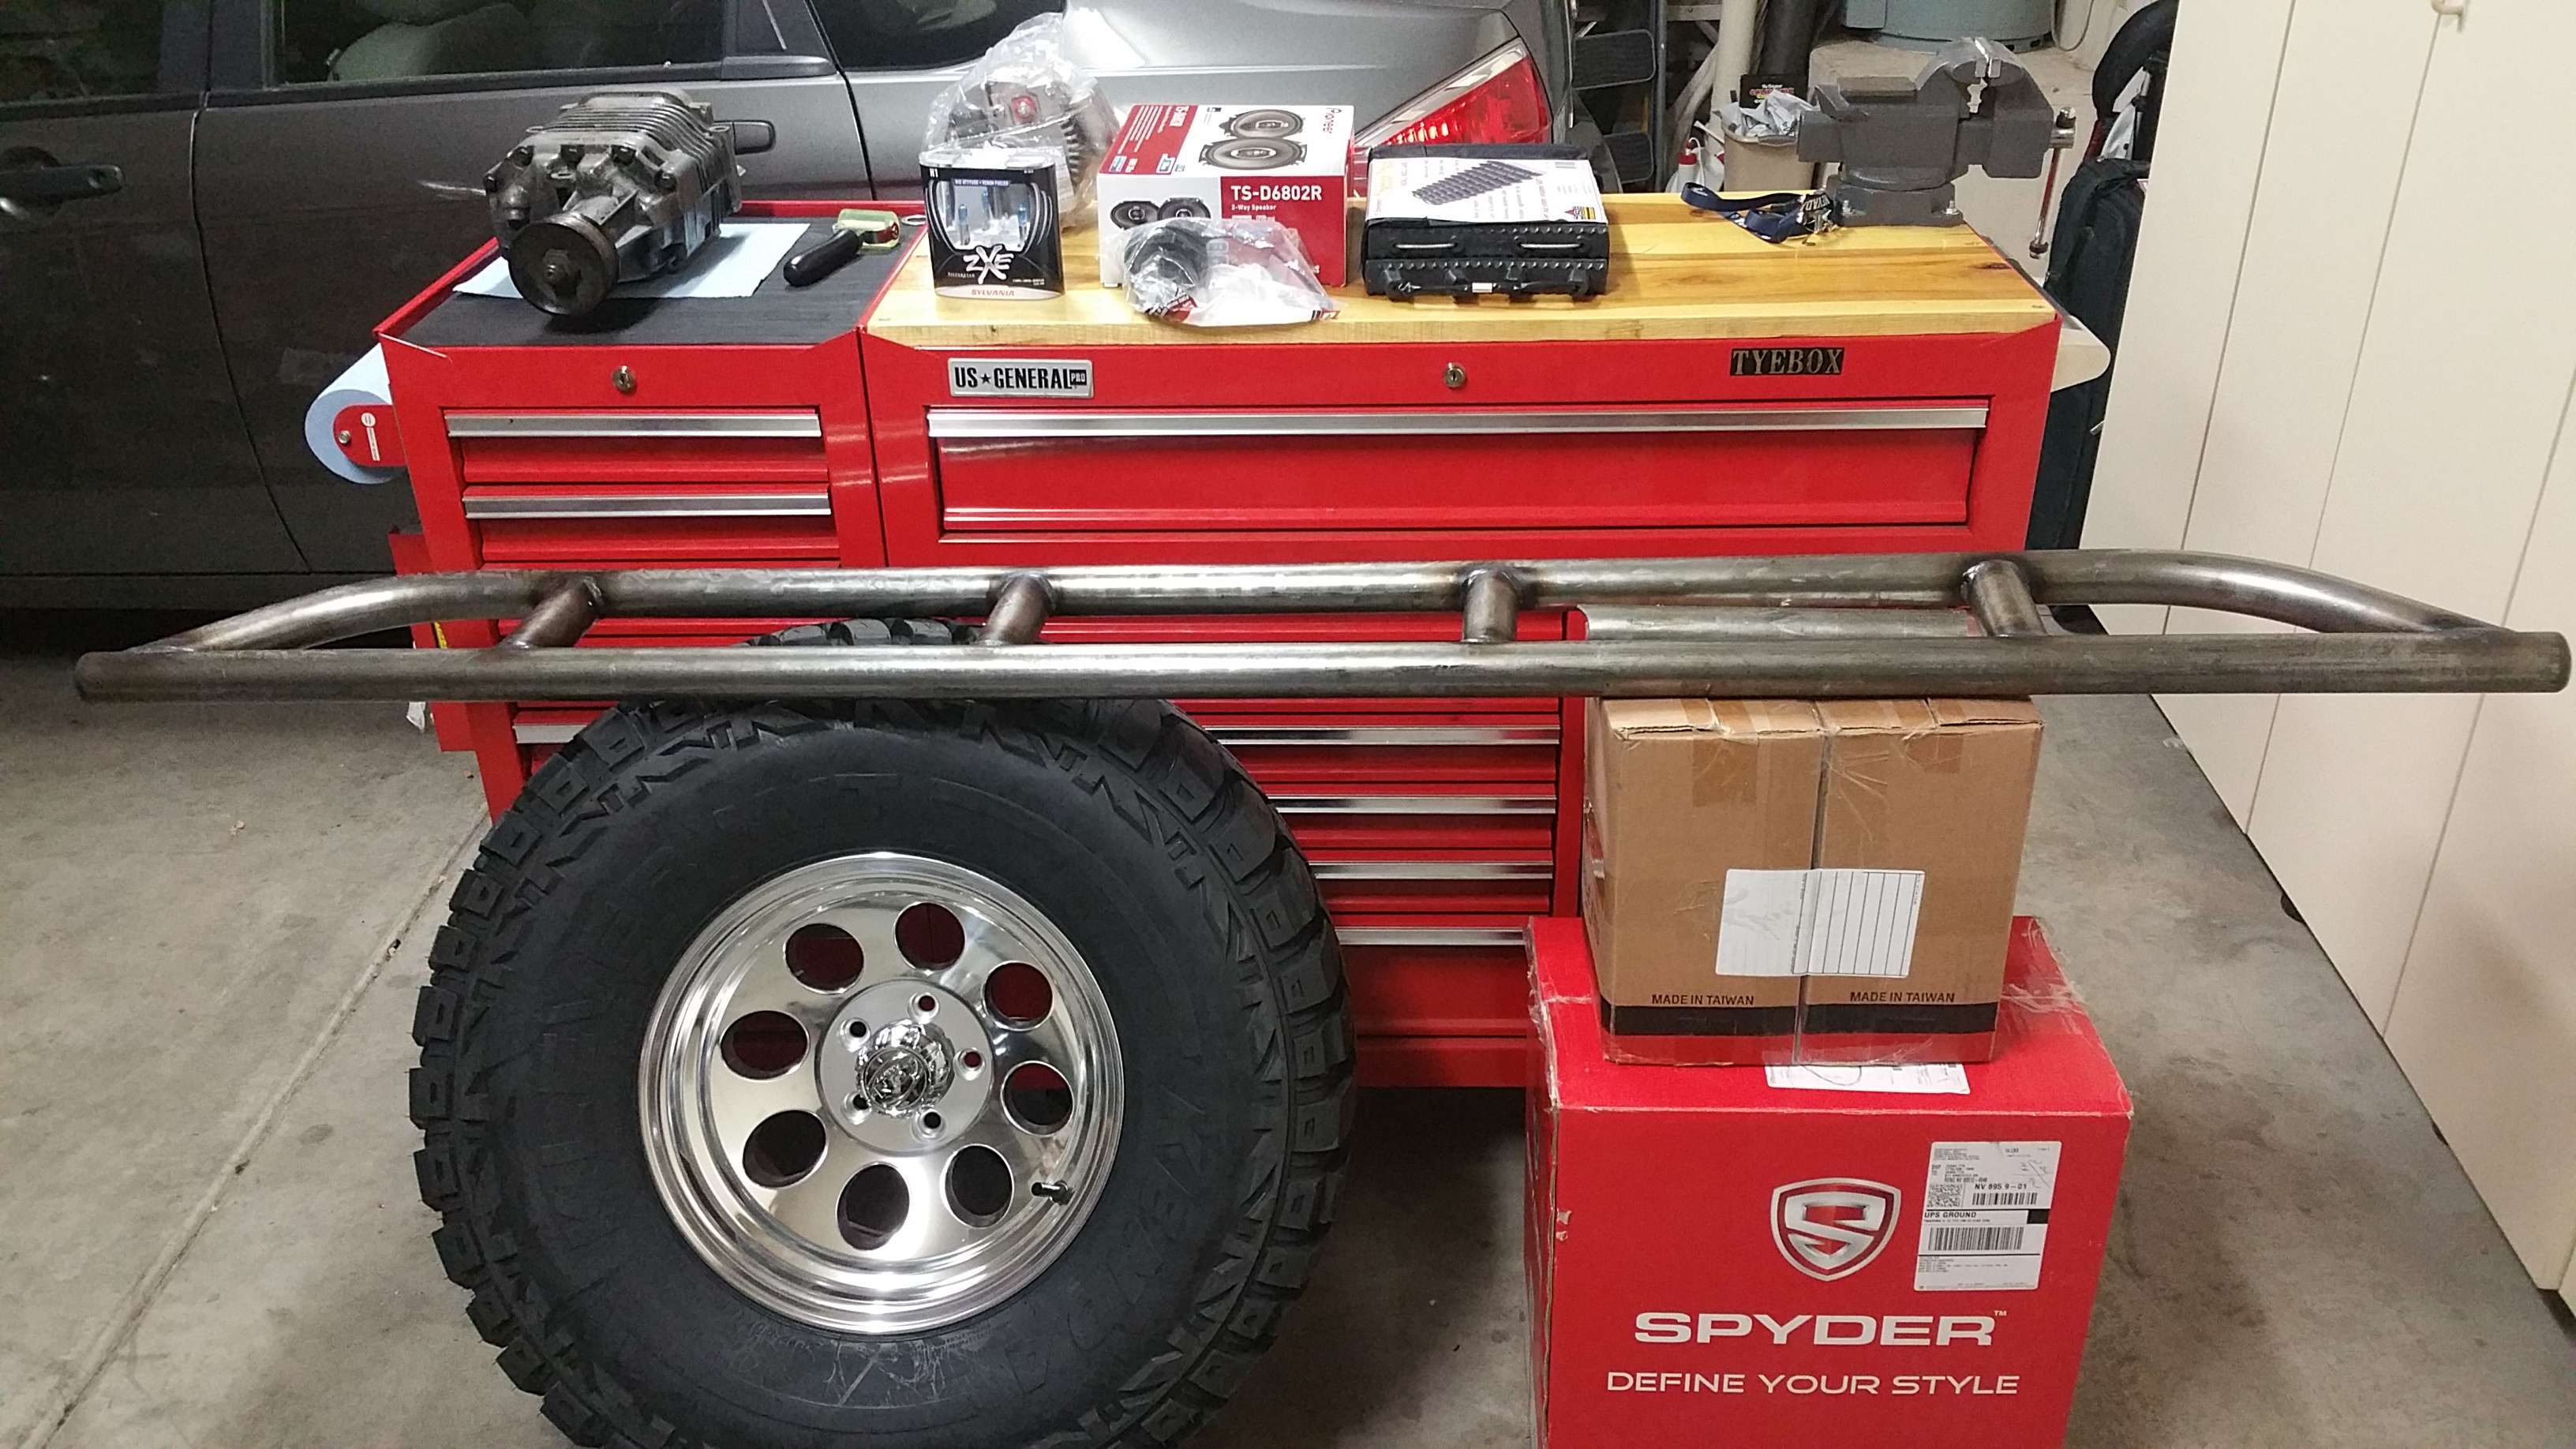
Spyder HID Projector Headlights
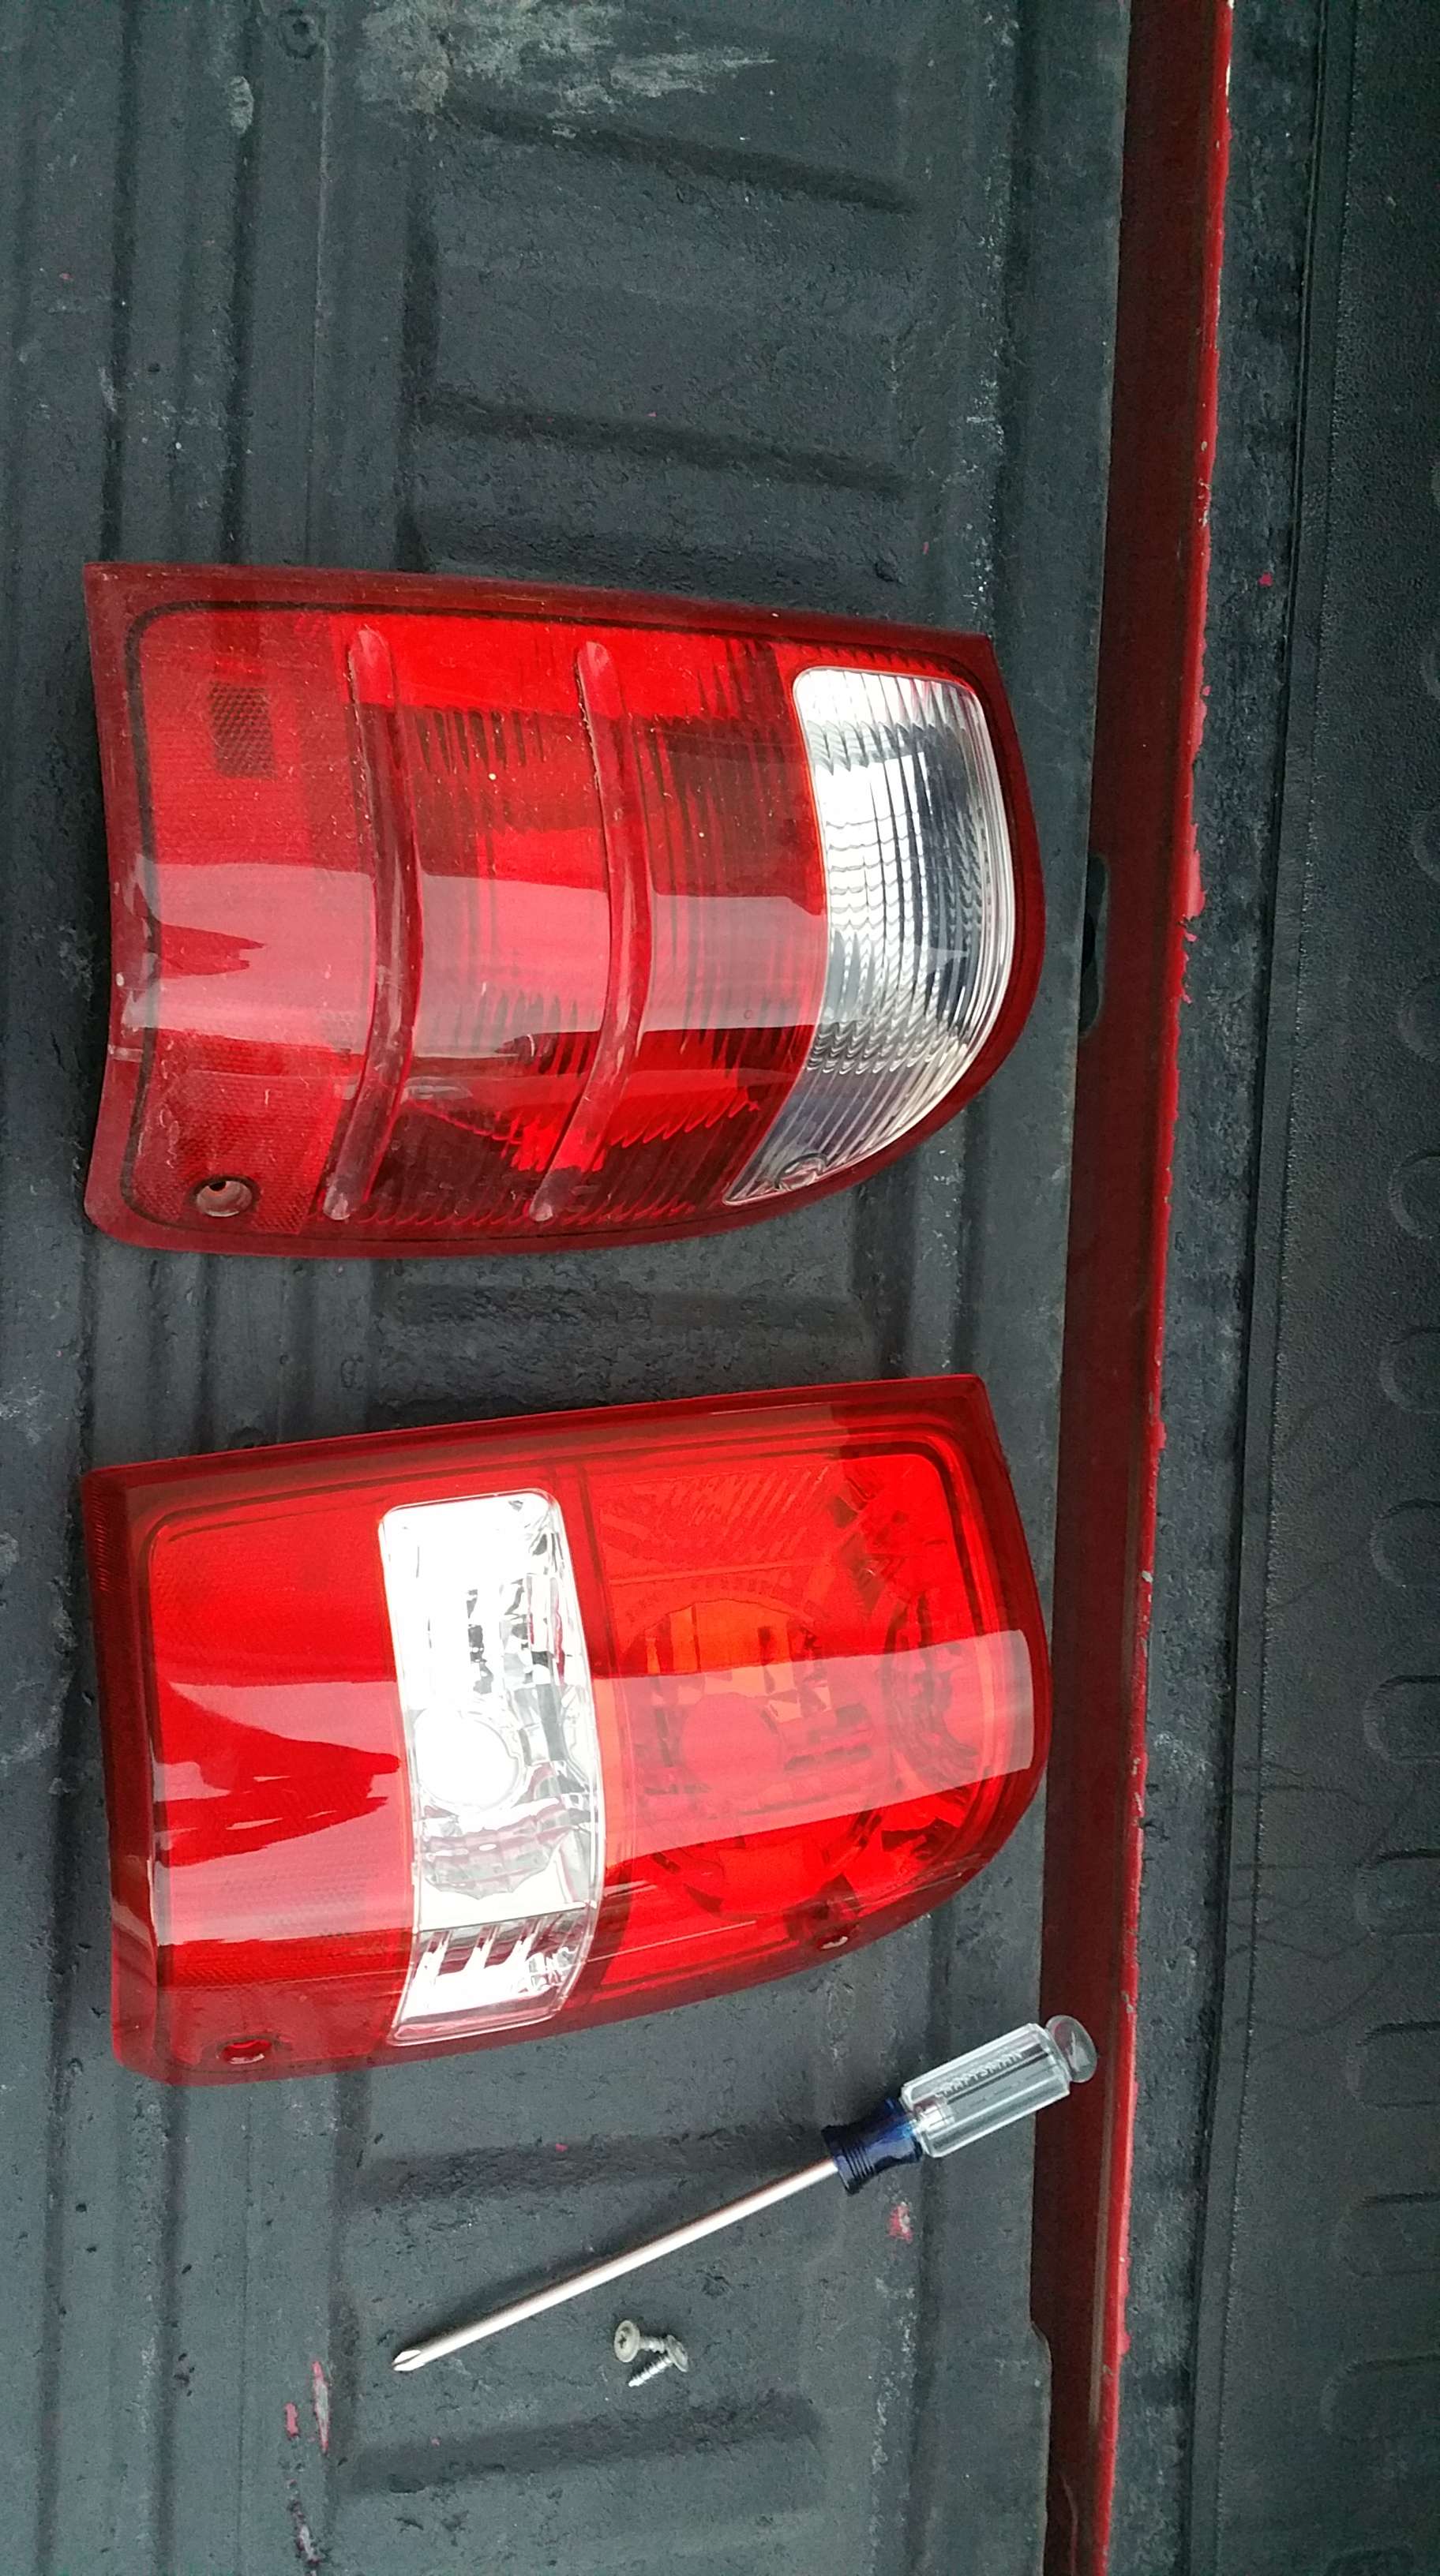
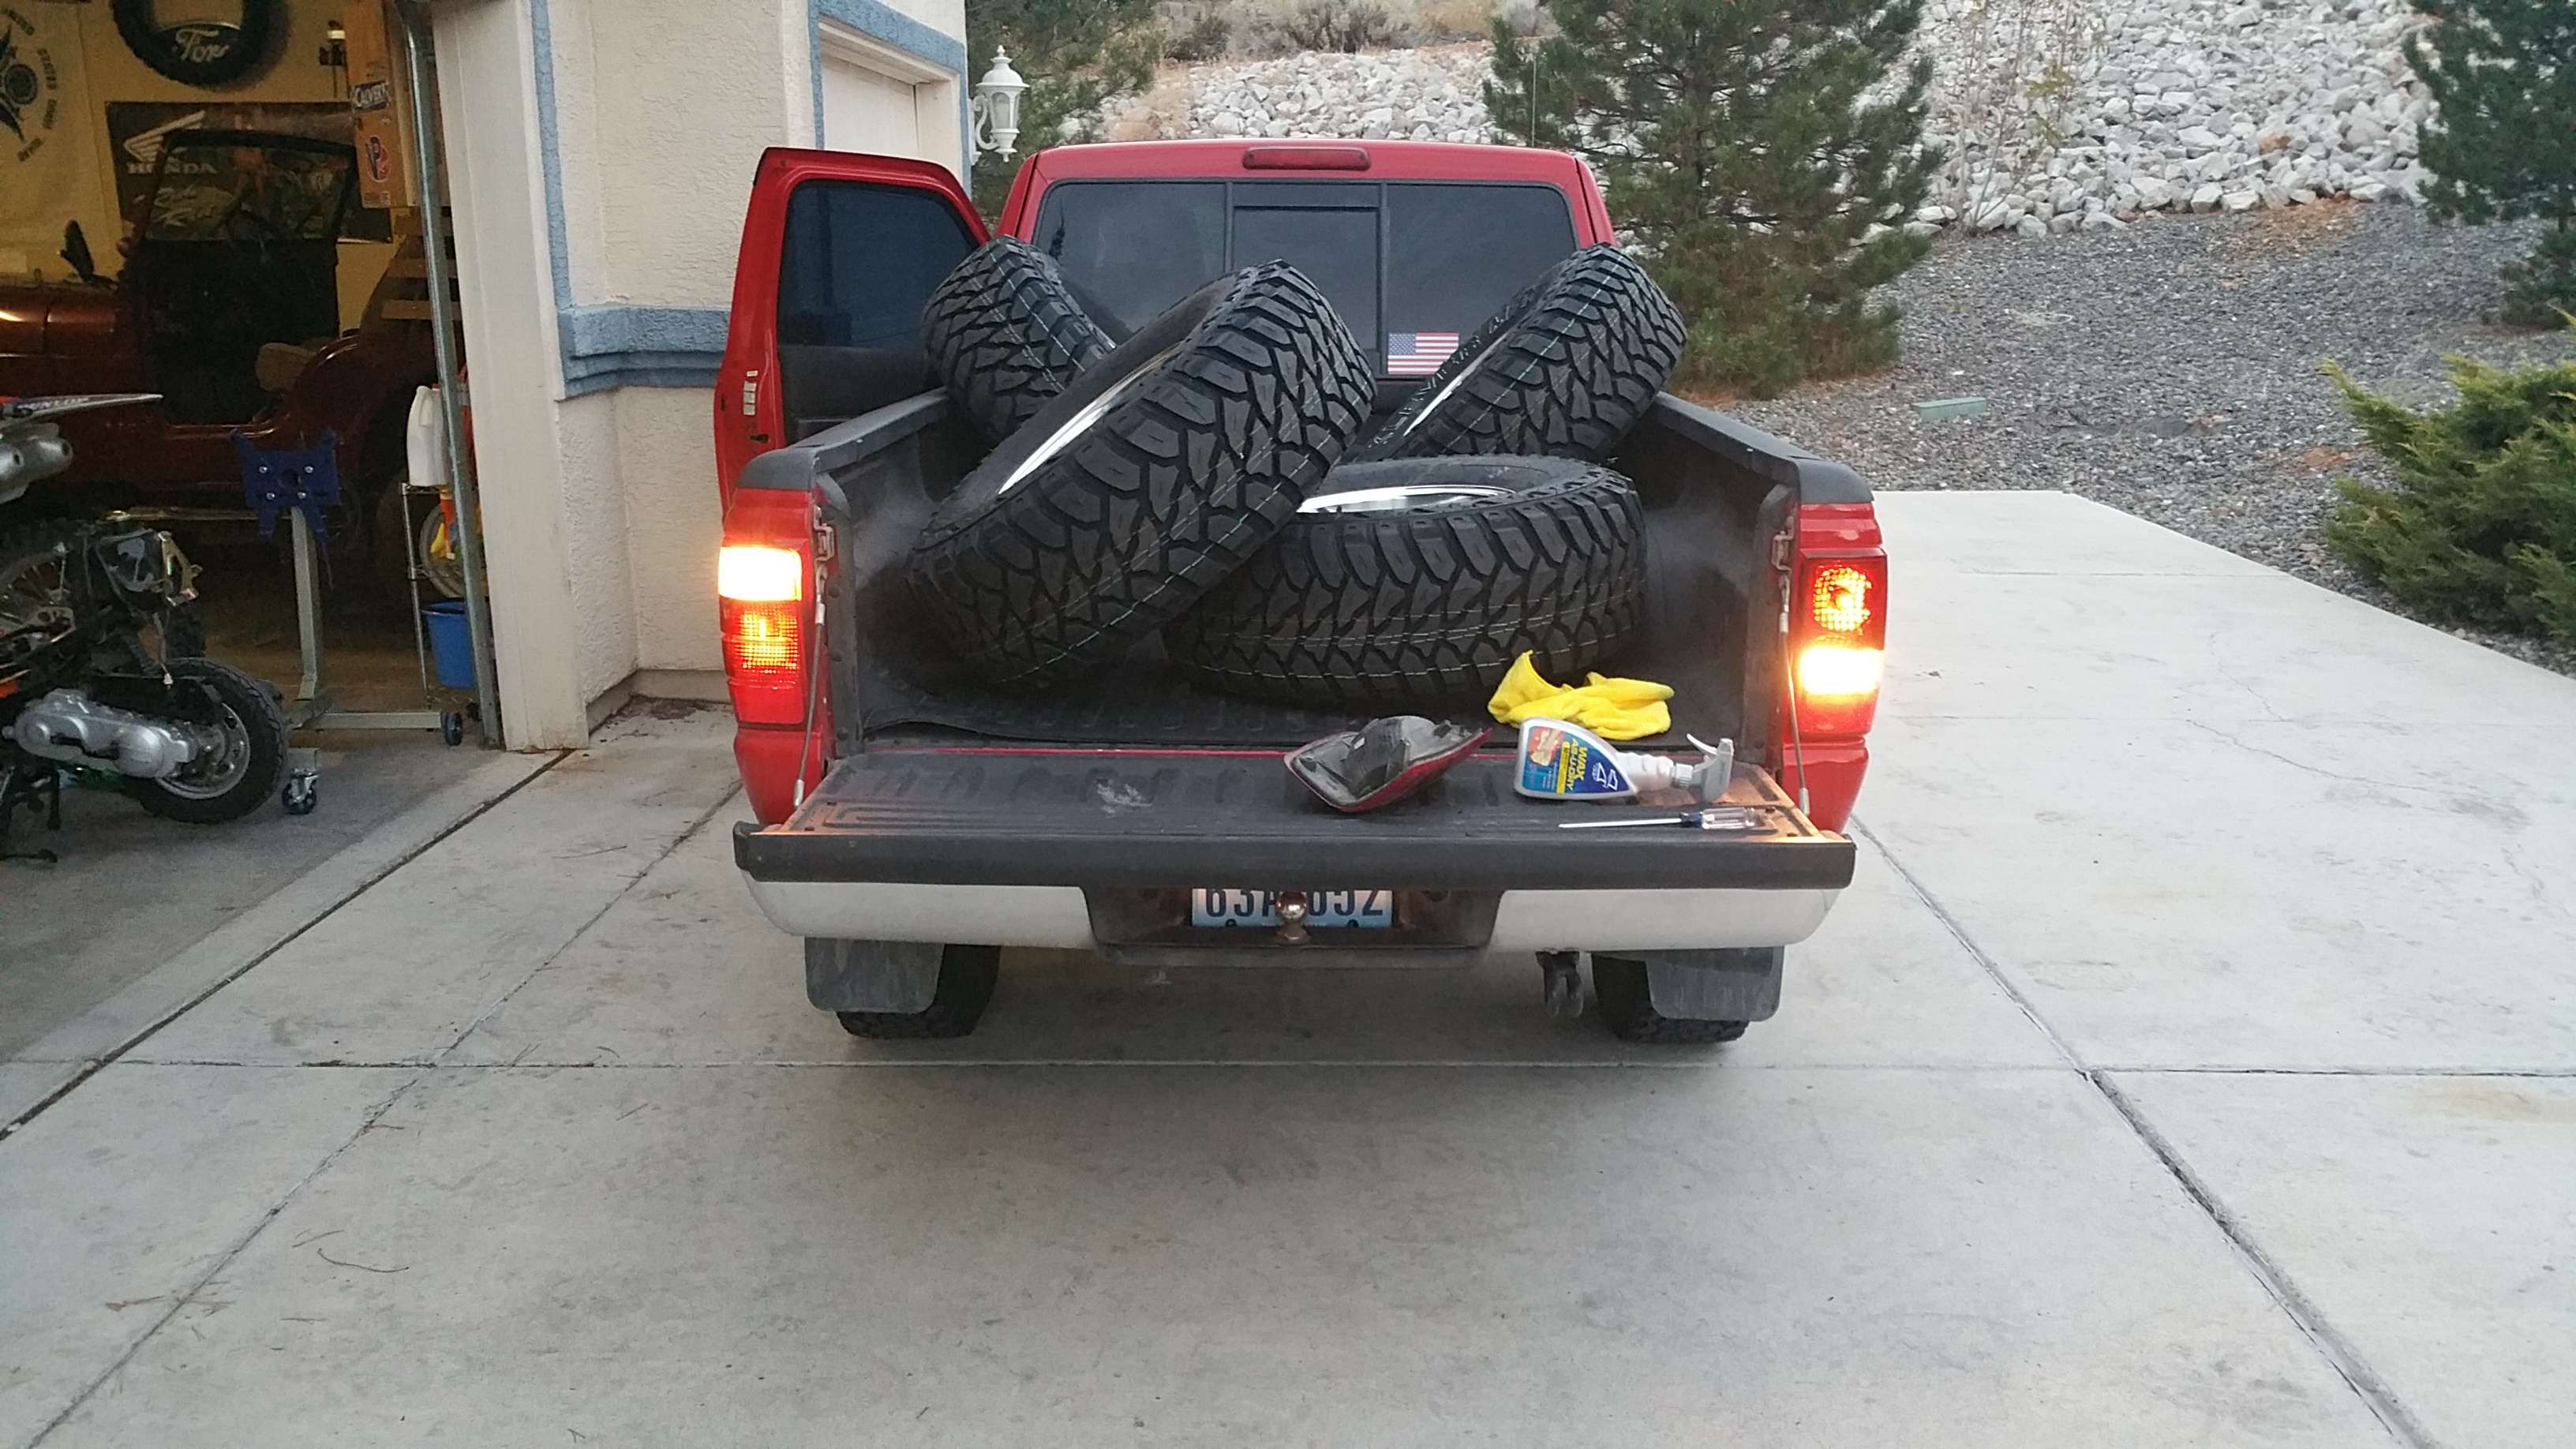
06 Taillights
06 Mirrors
Trail Gear Sliders (yet to be put on)
Rigid LED Fog Lights
Front and Read Cameras
DeeZee bet mat
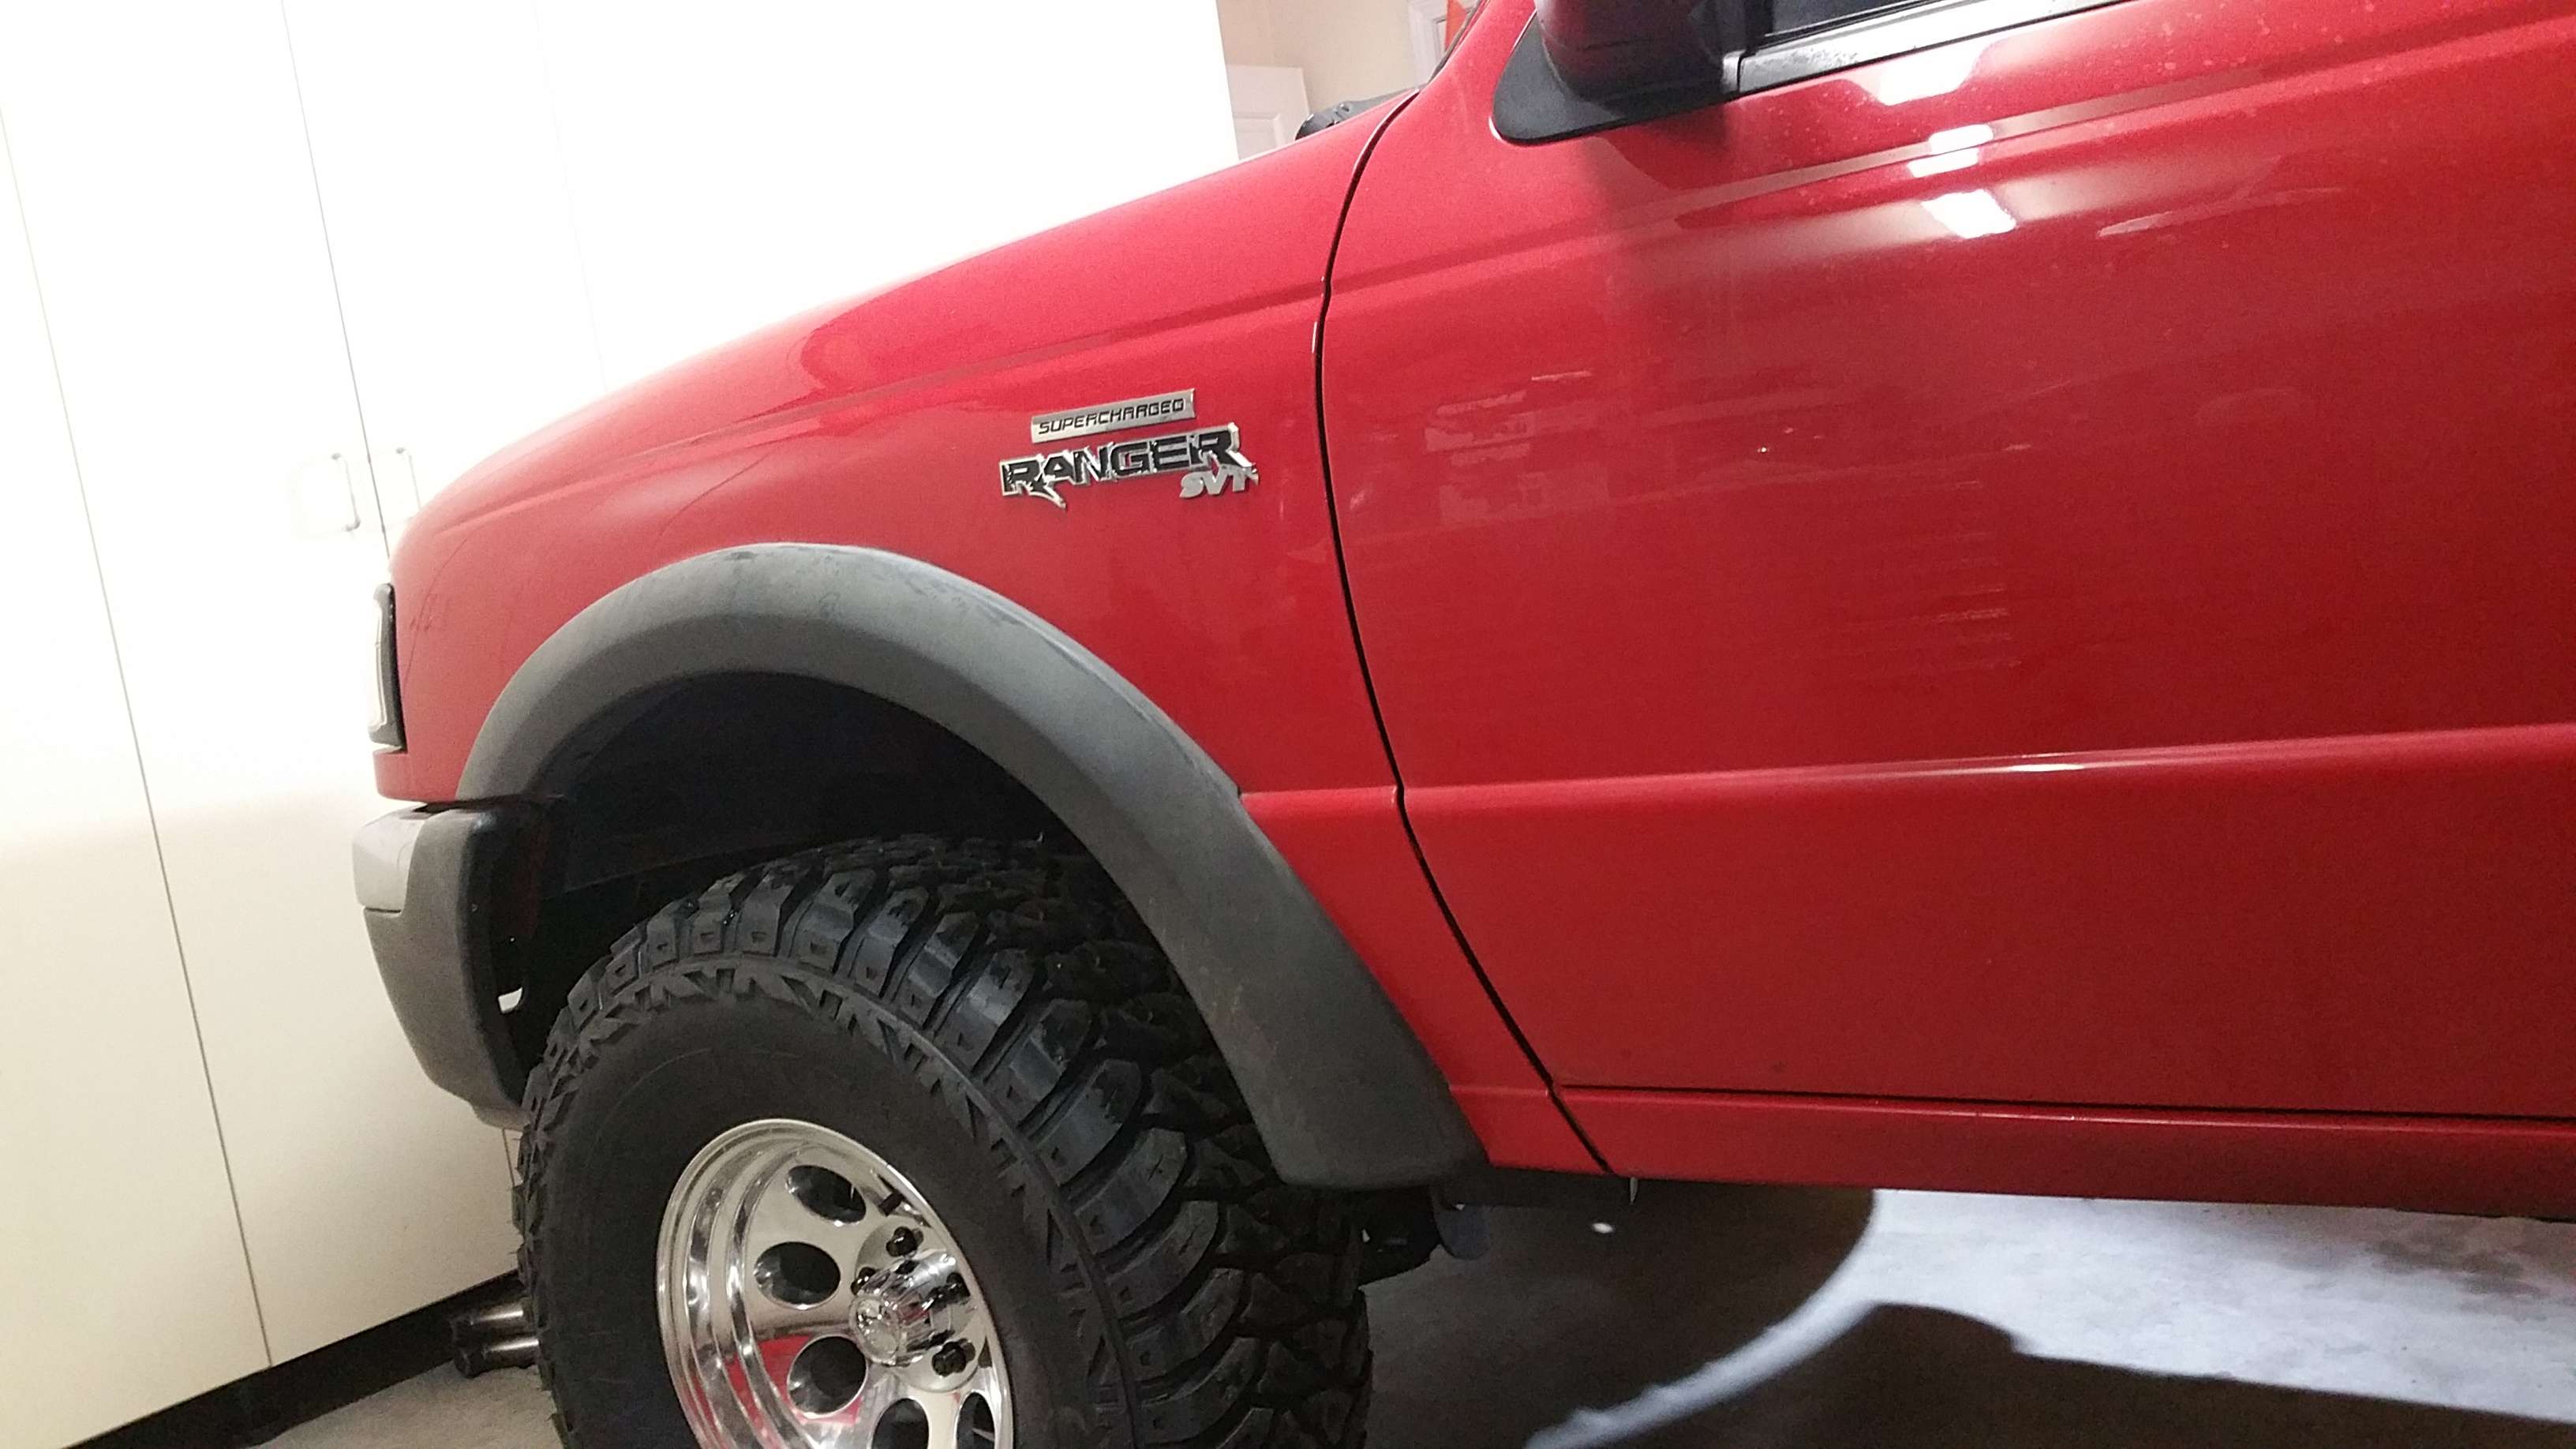
Sweet "Ranger SVT" emblems
Dynamat throughout the entire interior
.....And likely a few other things I forgot to mention.
I have yet to put on the front superlift skid plate and original skid plate above it. I also wish to fab some support bars for the rear LCA control arm, and build the mounts for the Trail Gear sliders. I also have a ding to get fixed now in the bed. It snowed hard and a family member came in the night and parked her white truck in my blind spot. It was covered by snow and I didn't know it was there, so BANG..... right into it. My beautiful truck............
Anyways. I bought the truck back in July of 2015. I put the system in it and did all the basic maintenance when purchased. During winter break is when I did all the good stuff. So far, it has all worked very well with no catastrophic failures. A few odd creeks from the front suspension since the install, and I have to pull the front diff back out to get the backspacing set properly (another thread is open on that topic). When I put it back together for the second time, I will double check all the bolts and welds for safety, and she will be golden.
The supercharger install went well, and I haven't had any problems. I am only running the 3.5 psi pulley with no tune. But I do have the intercooler, which helps. Bleeding it is quite difficult since I didn't use the bleeders on the inner radiator while it was exposed. Down the road, I plan on getting a tune, larger injectors, and putting on the 7.5 psi pulley that I already have from moddbox. I recommend Moddbox for any ranger supercharging needs. They have great customer service and expertise, and have a high quality product.
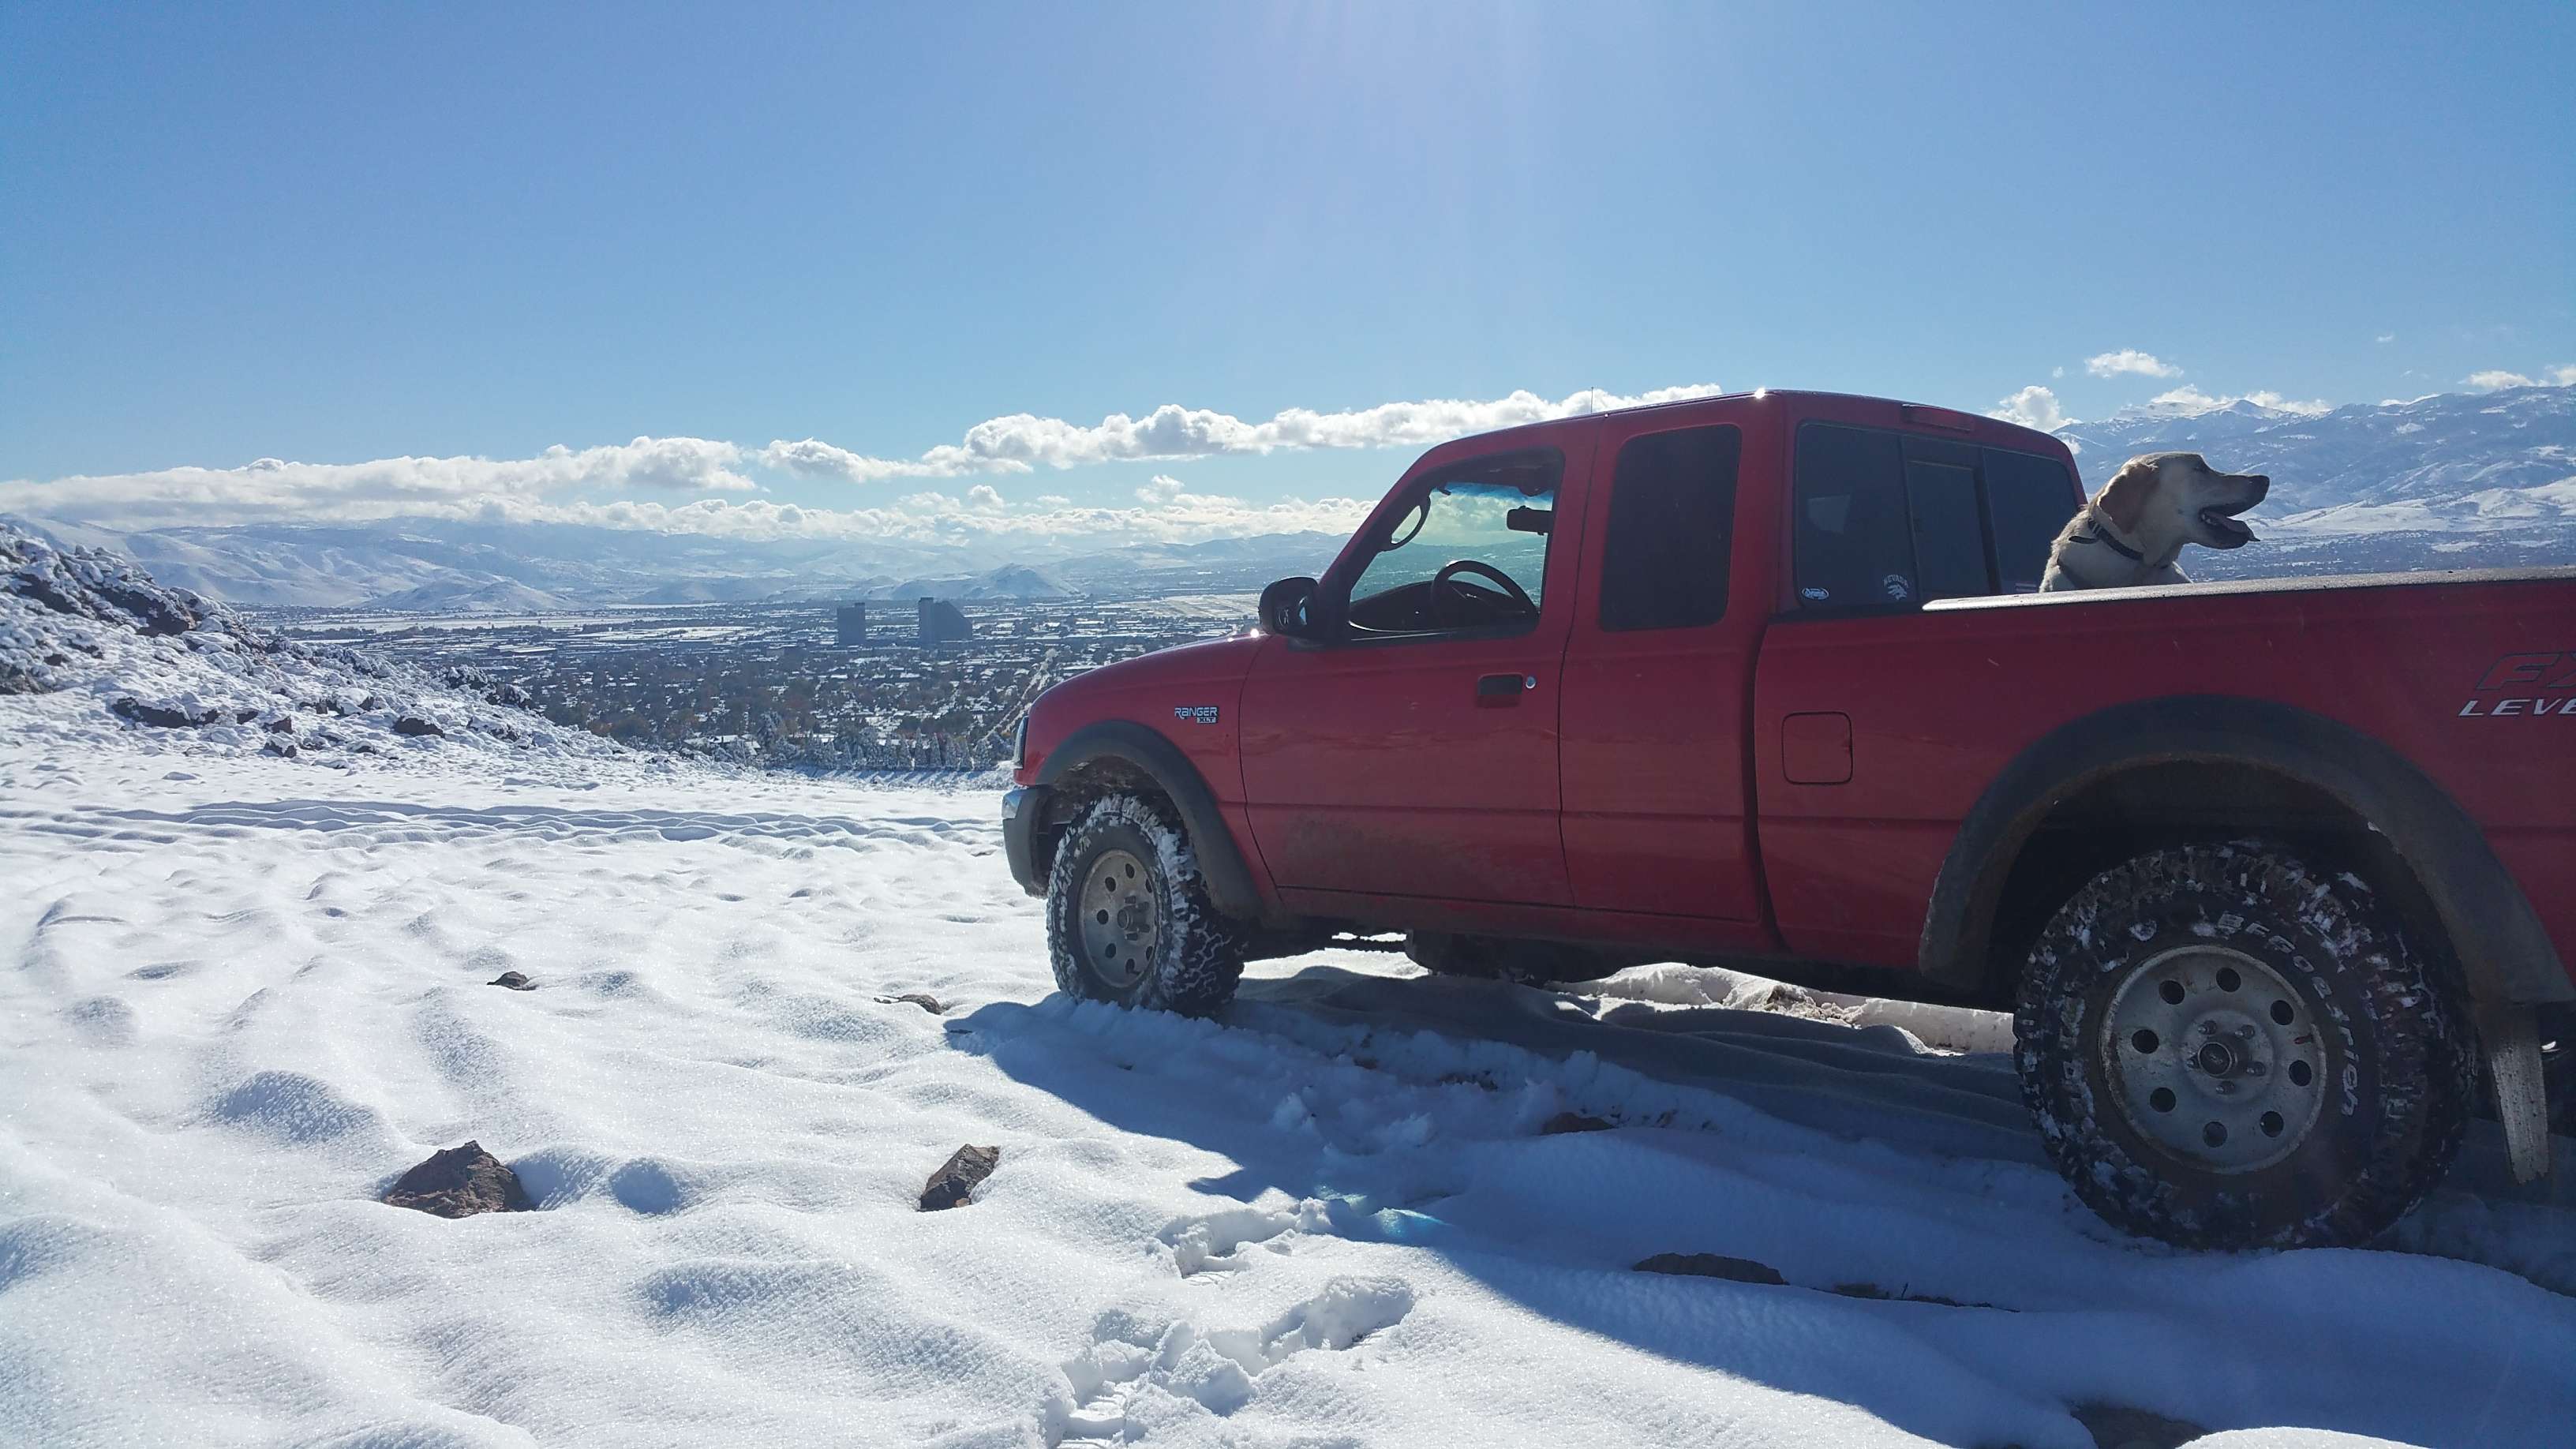
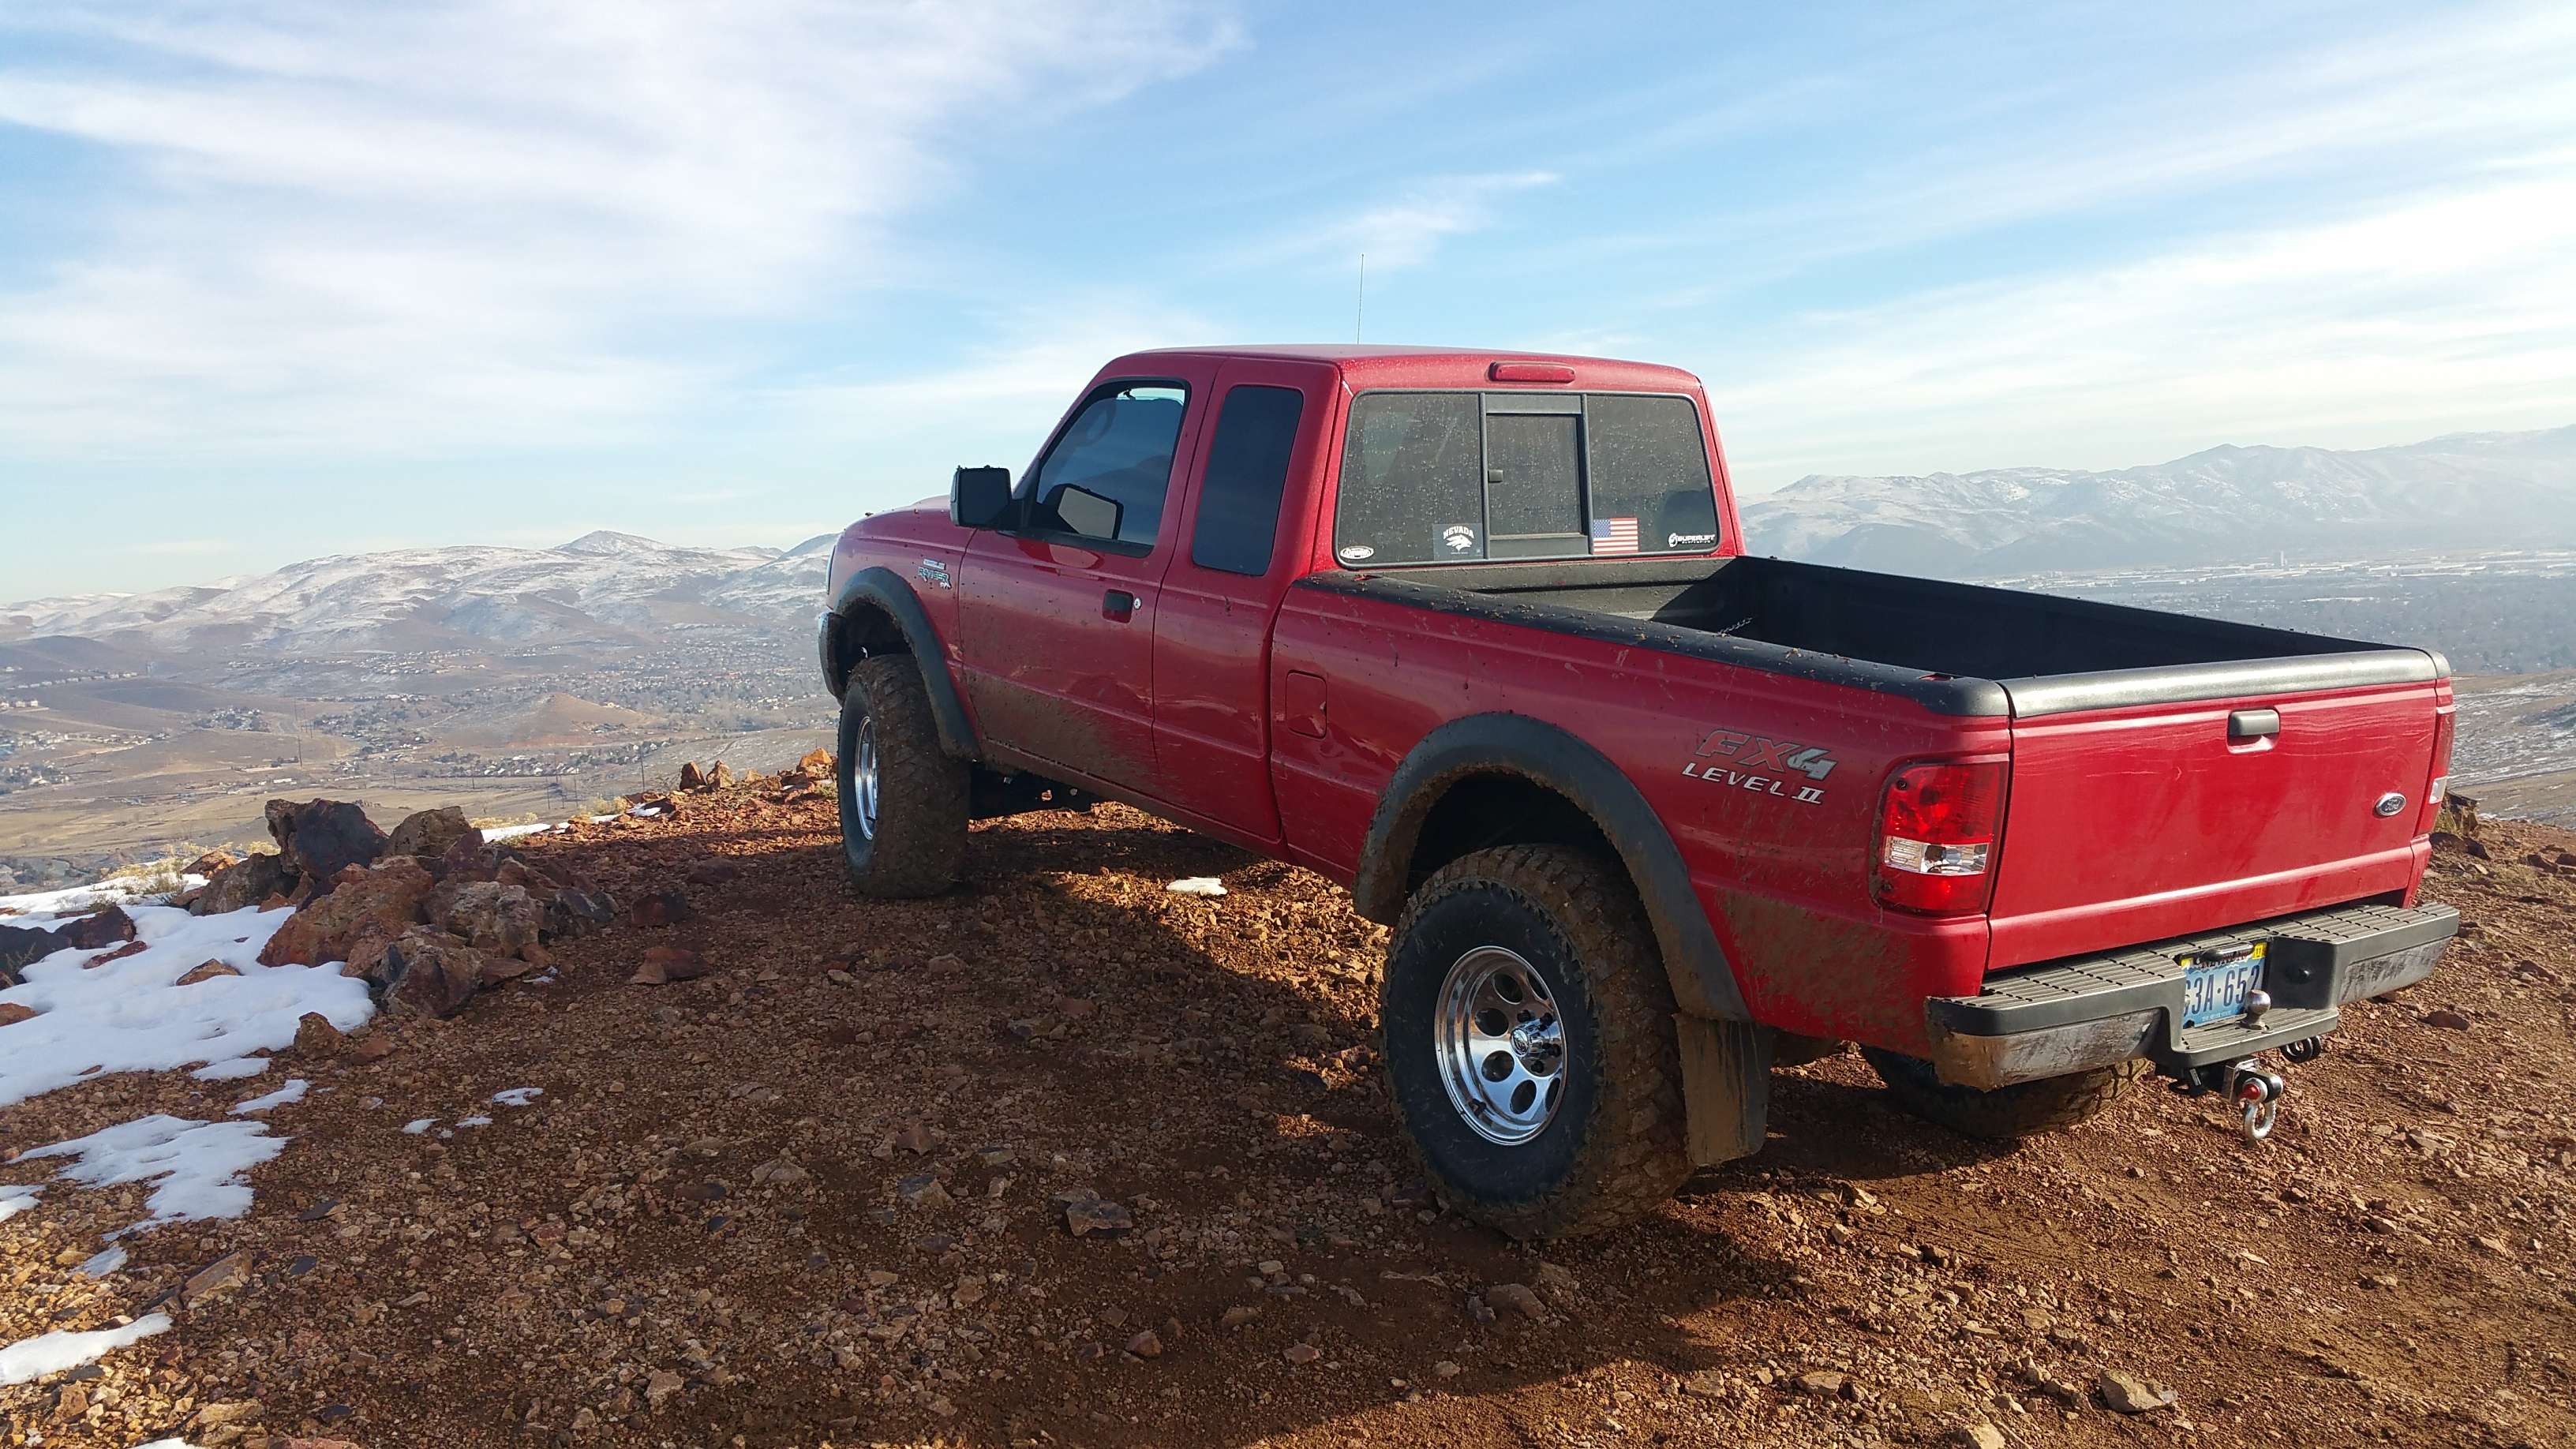
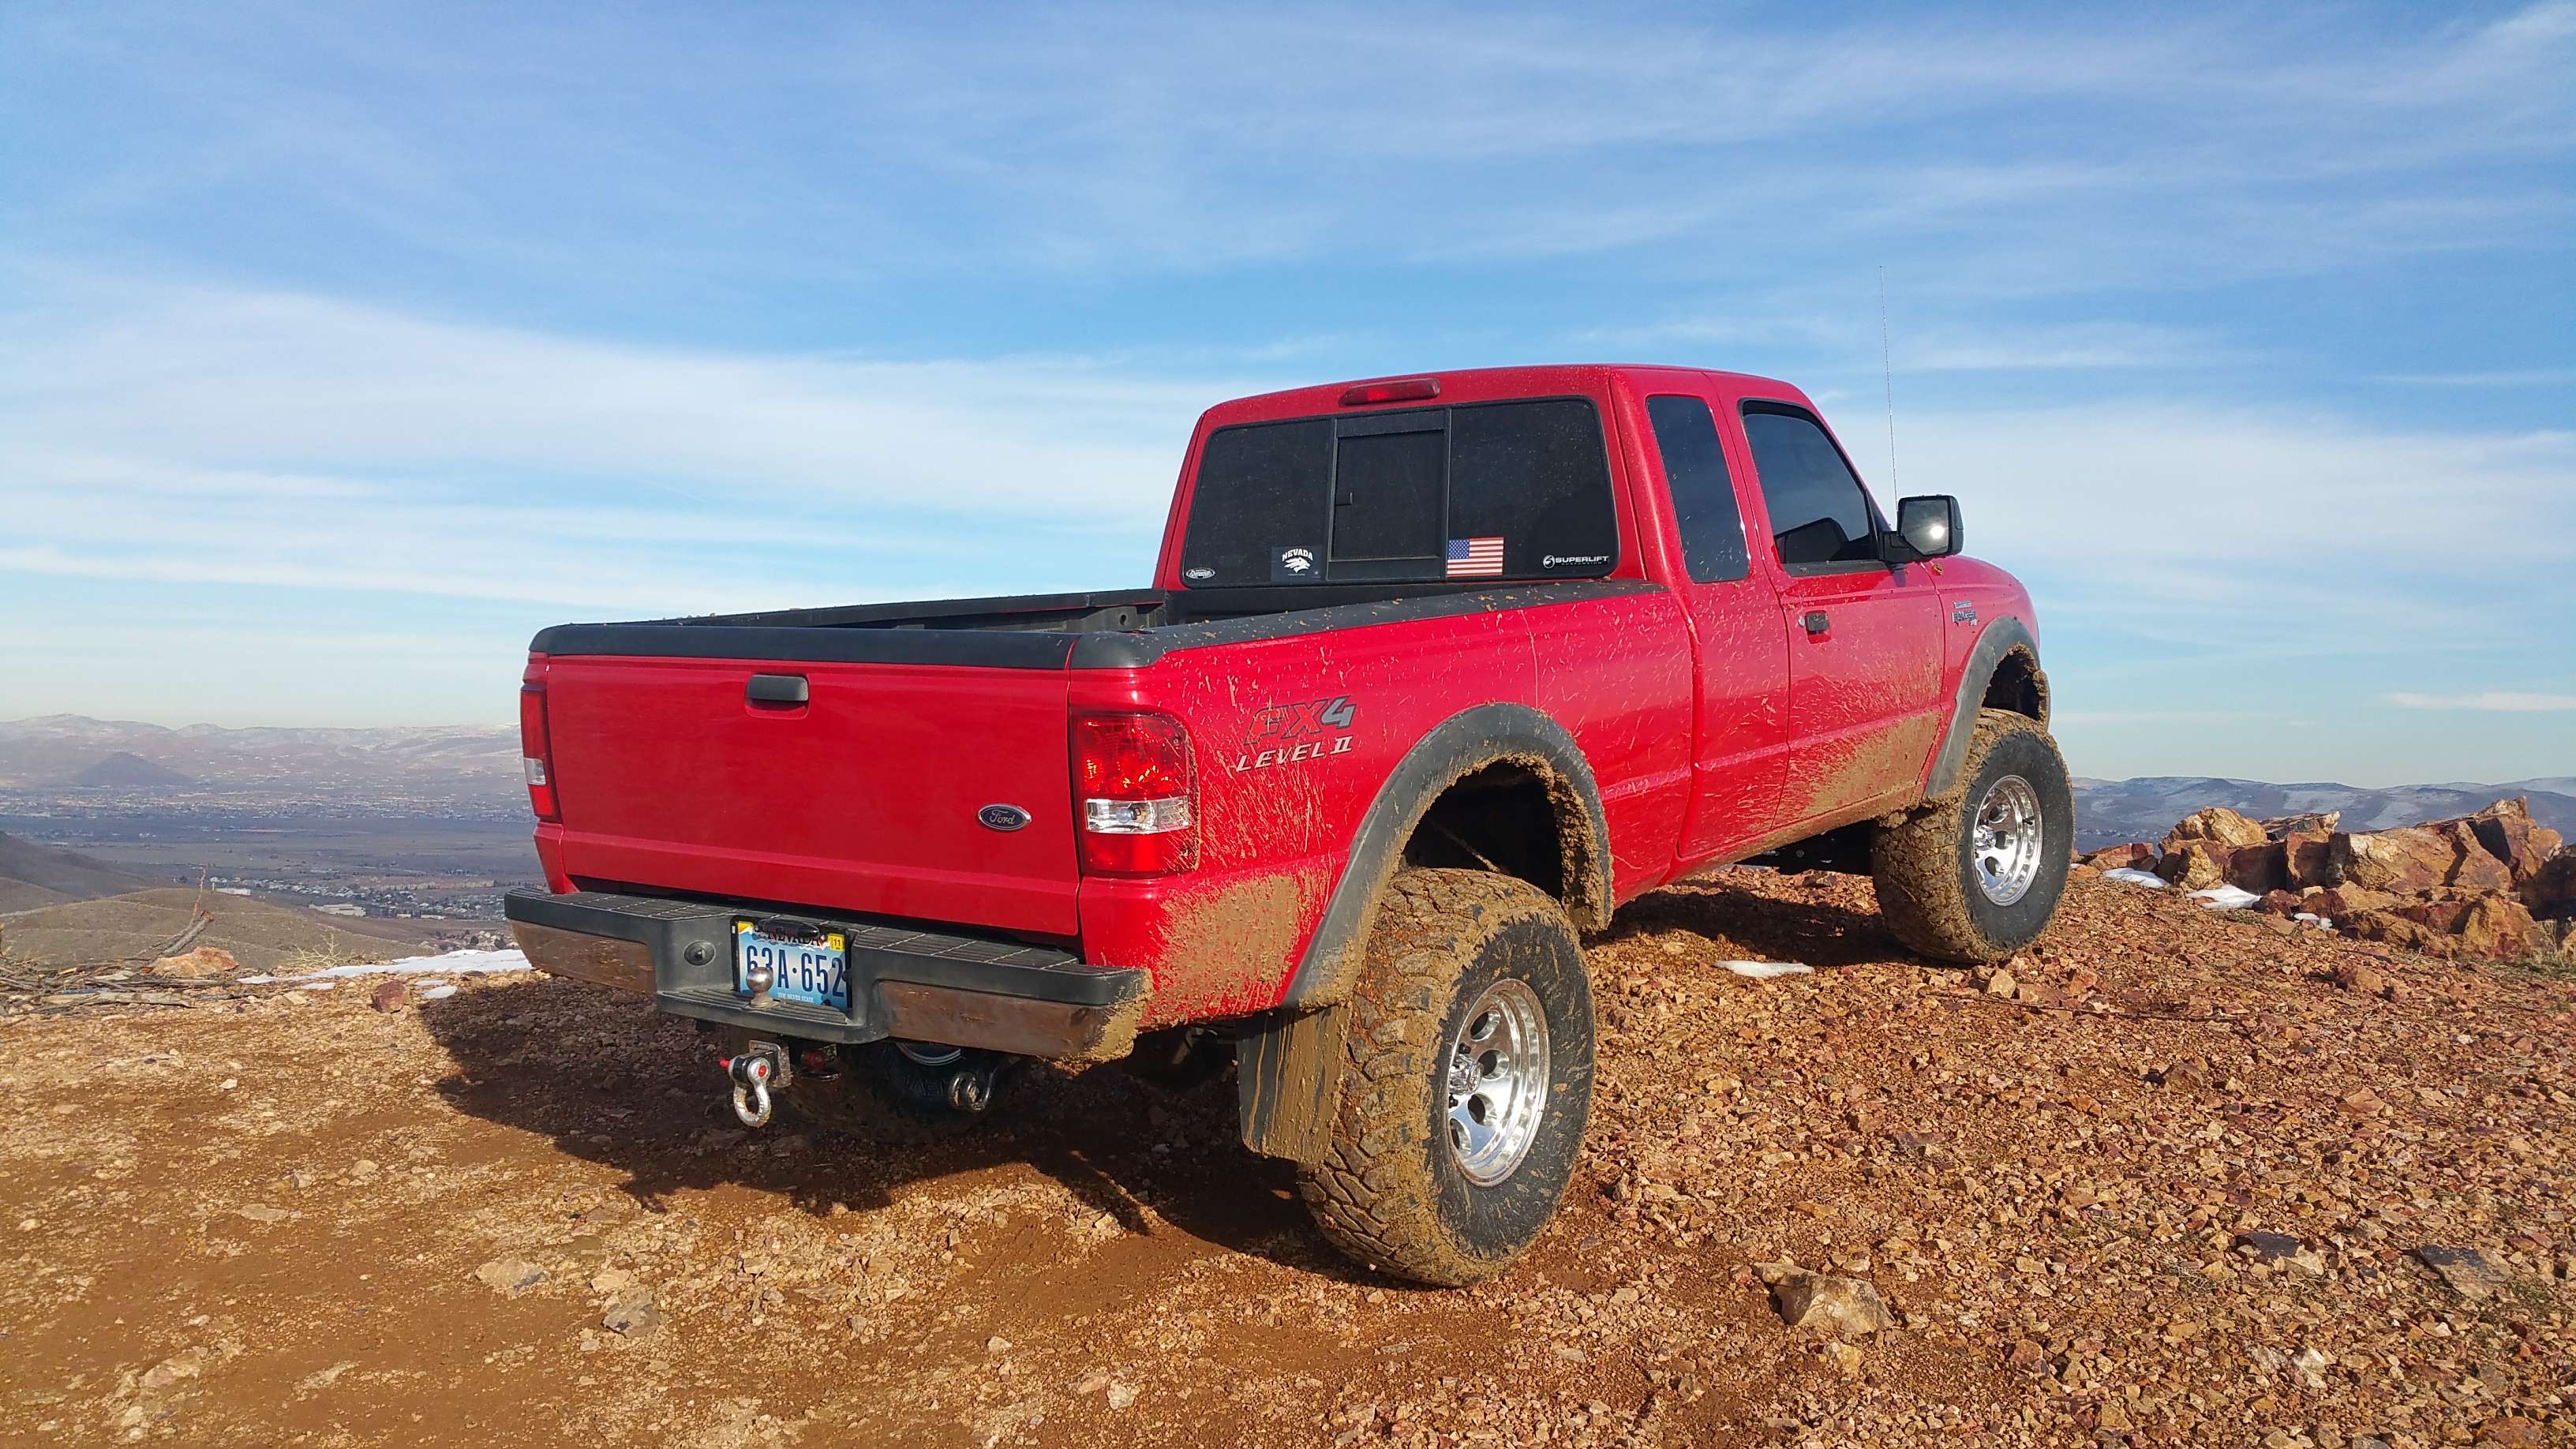
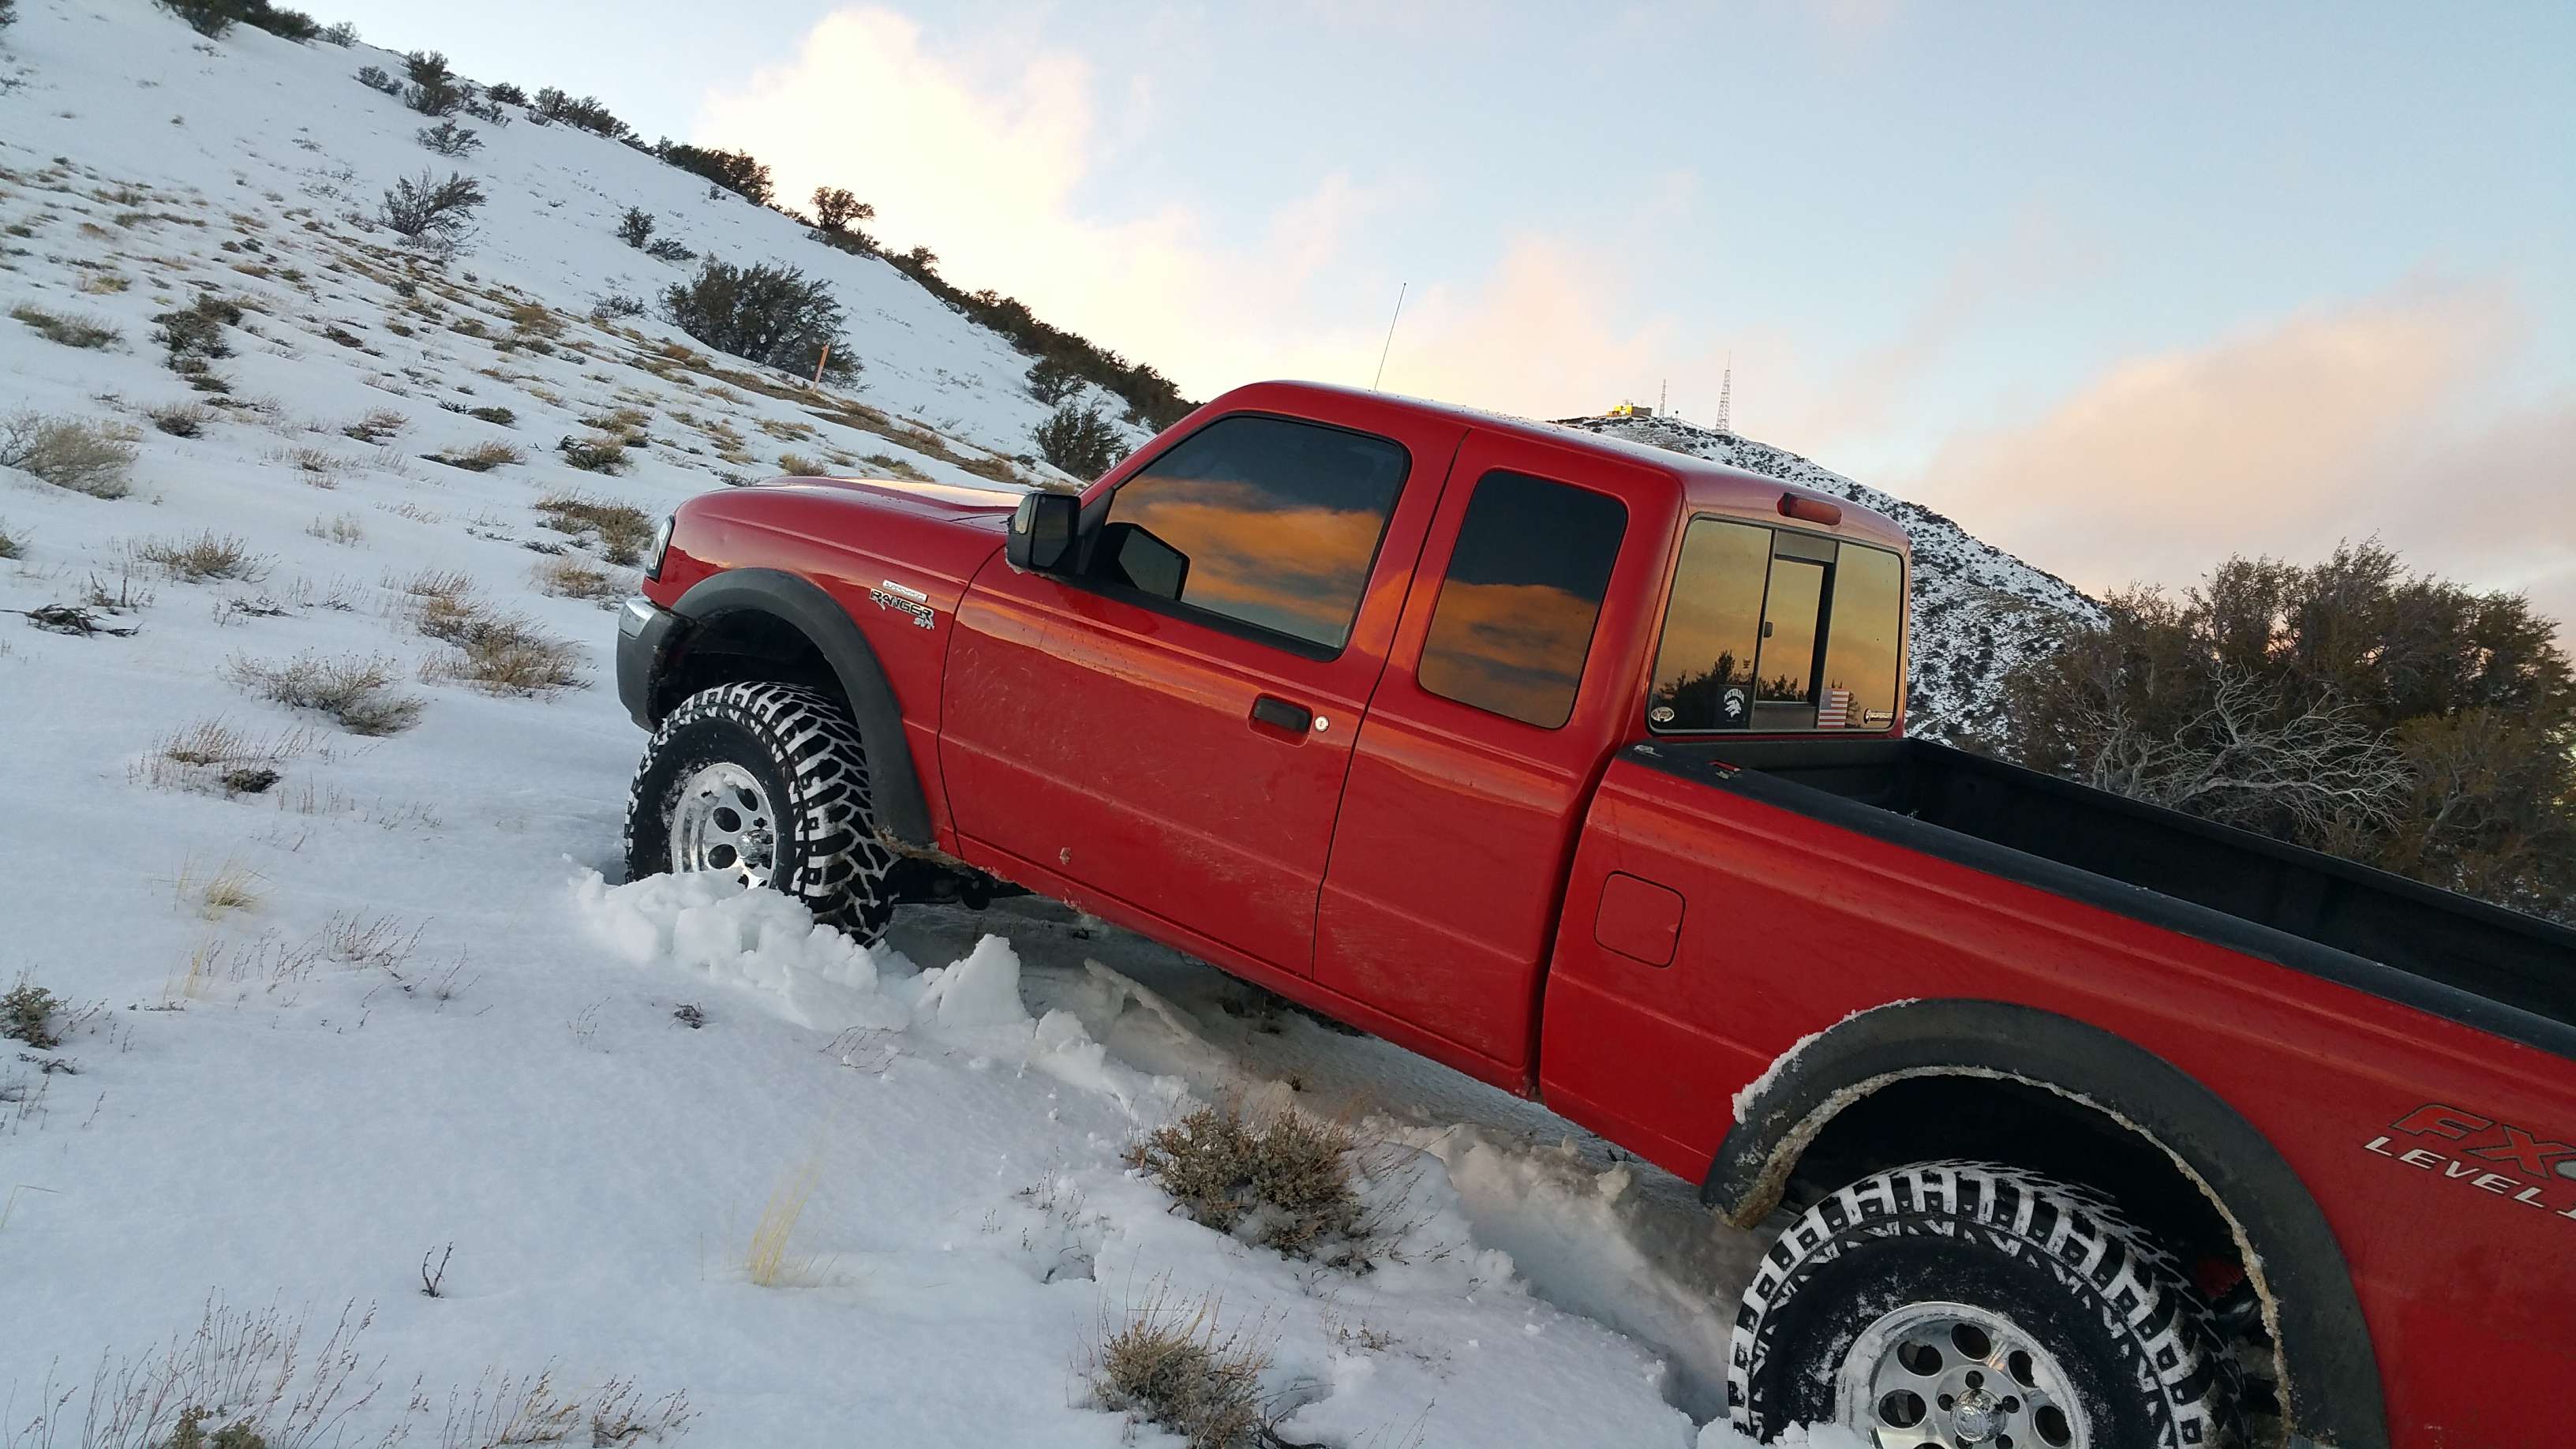
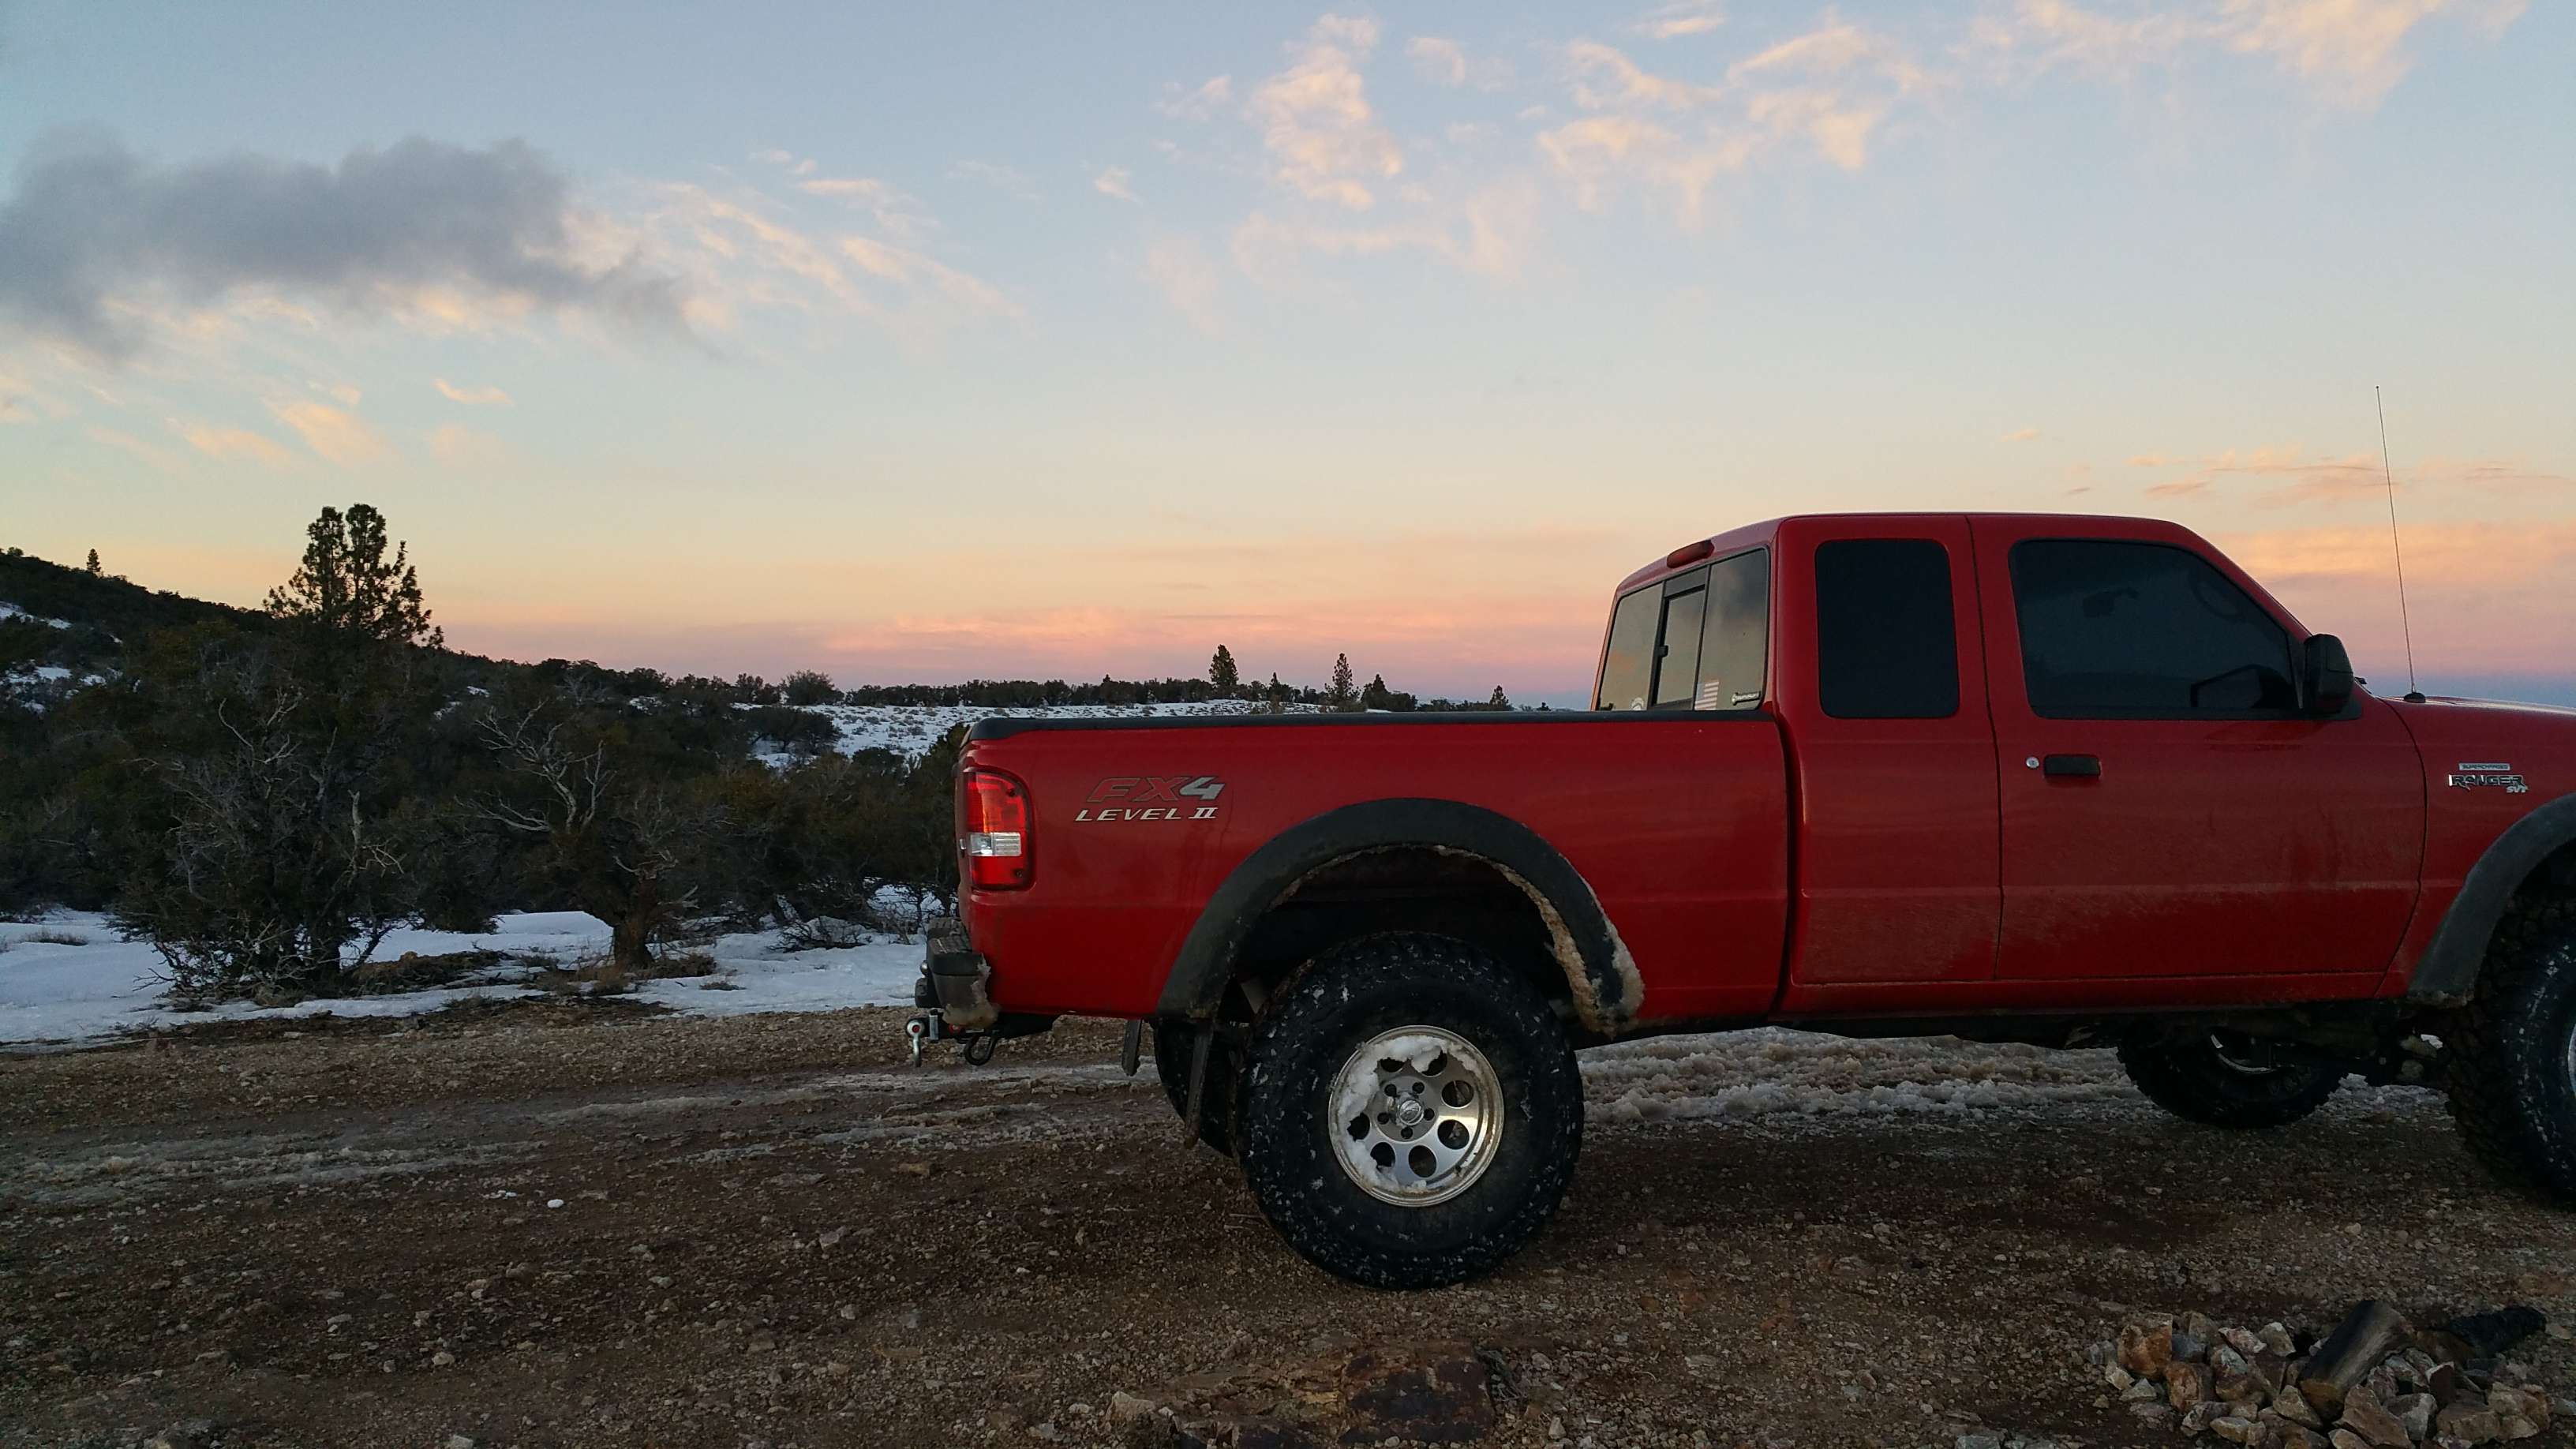
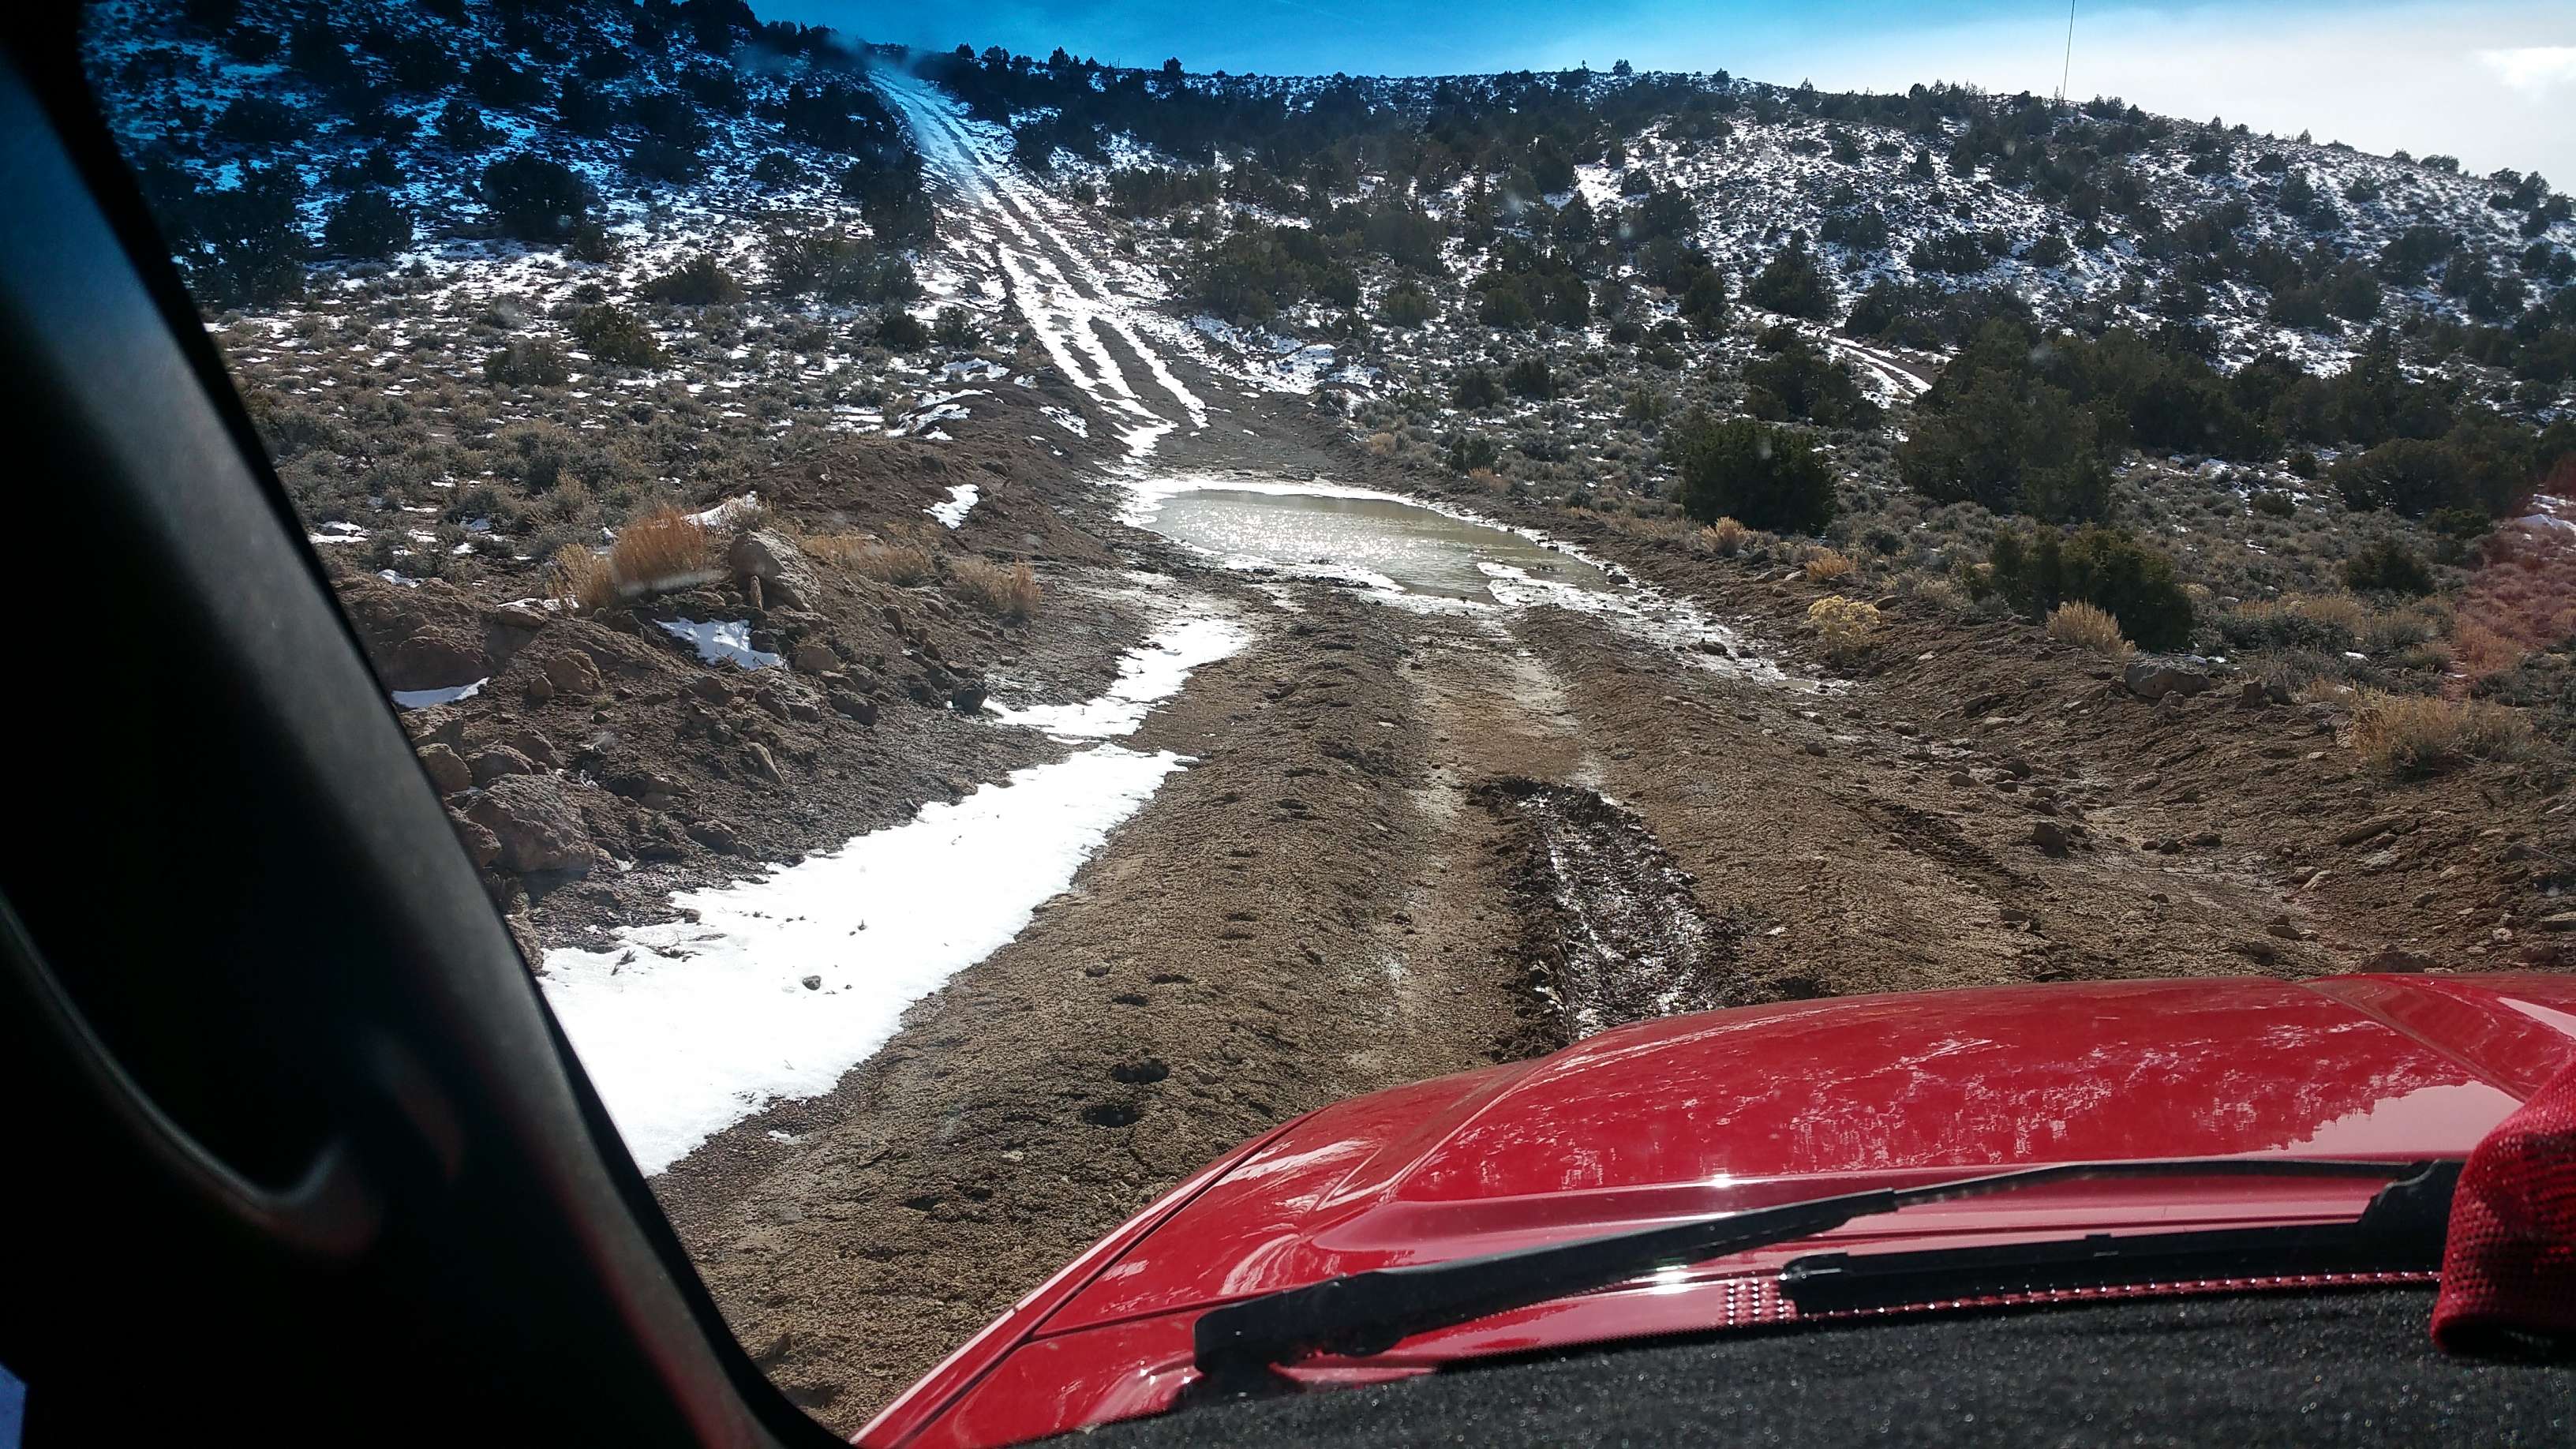
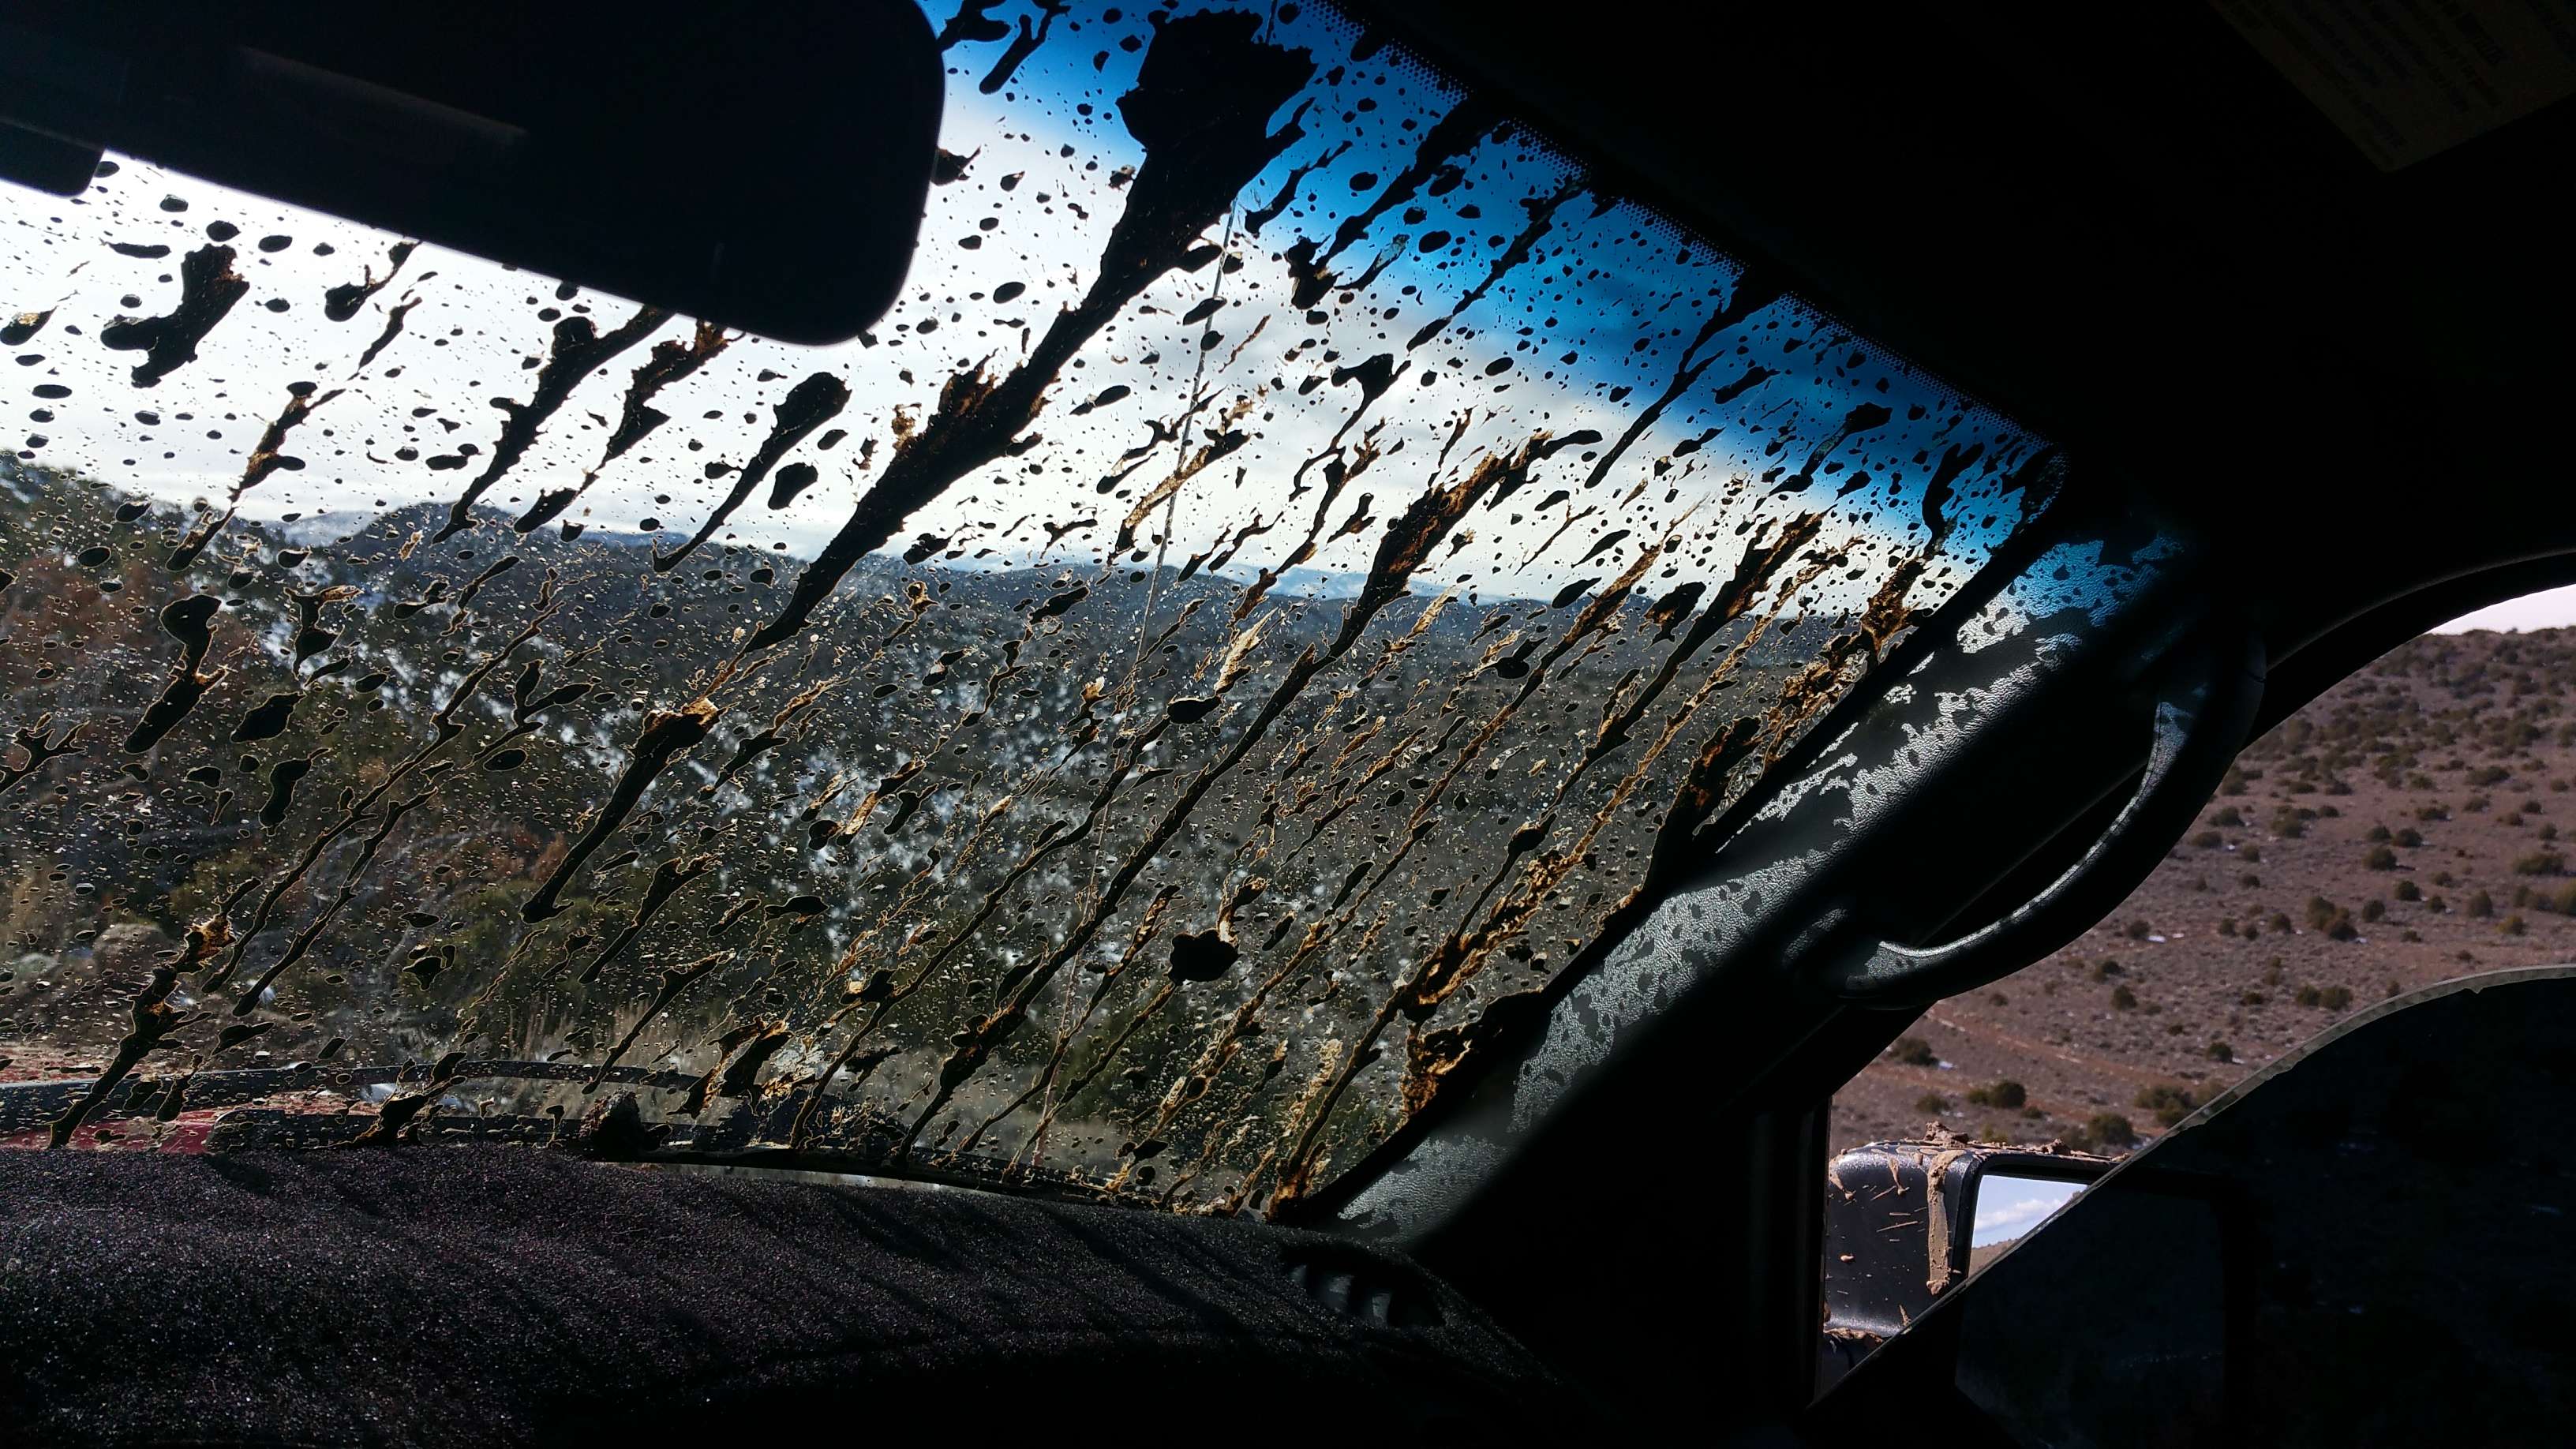
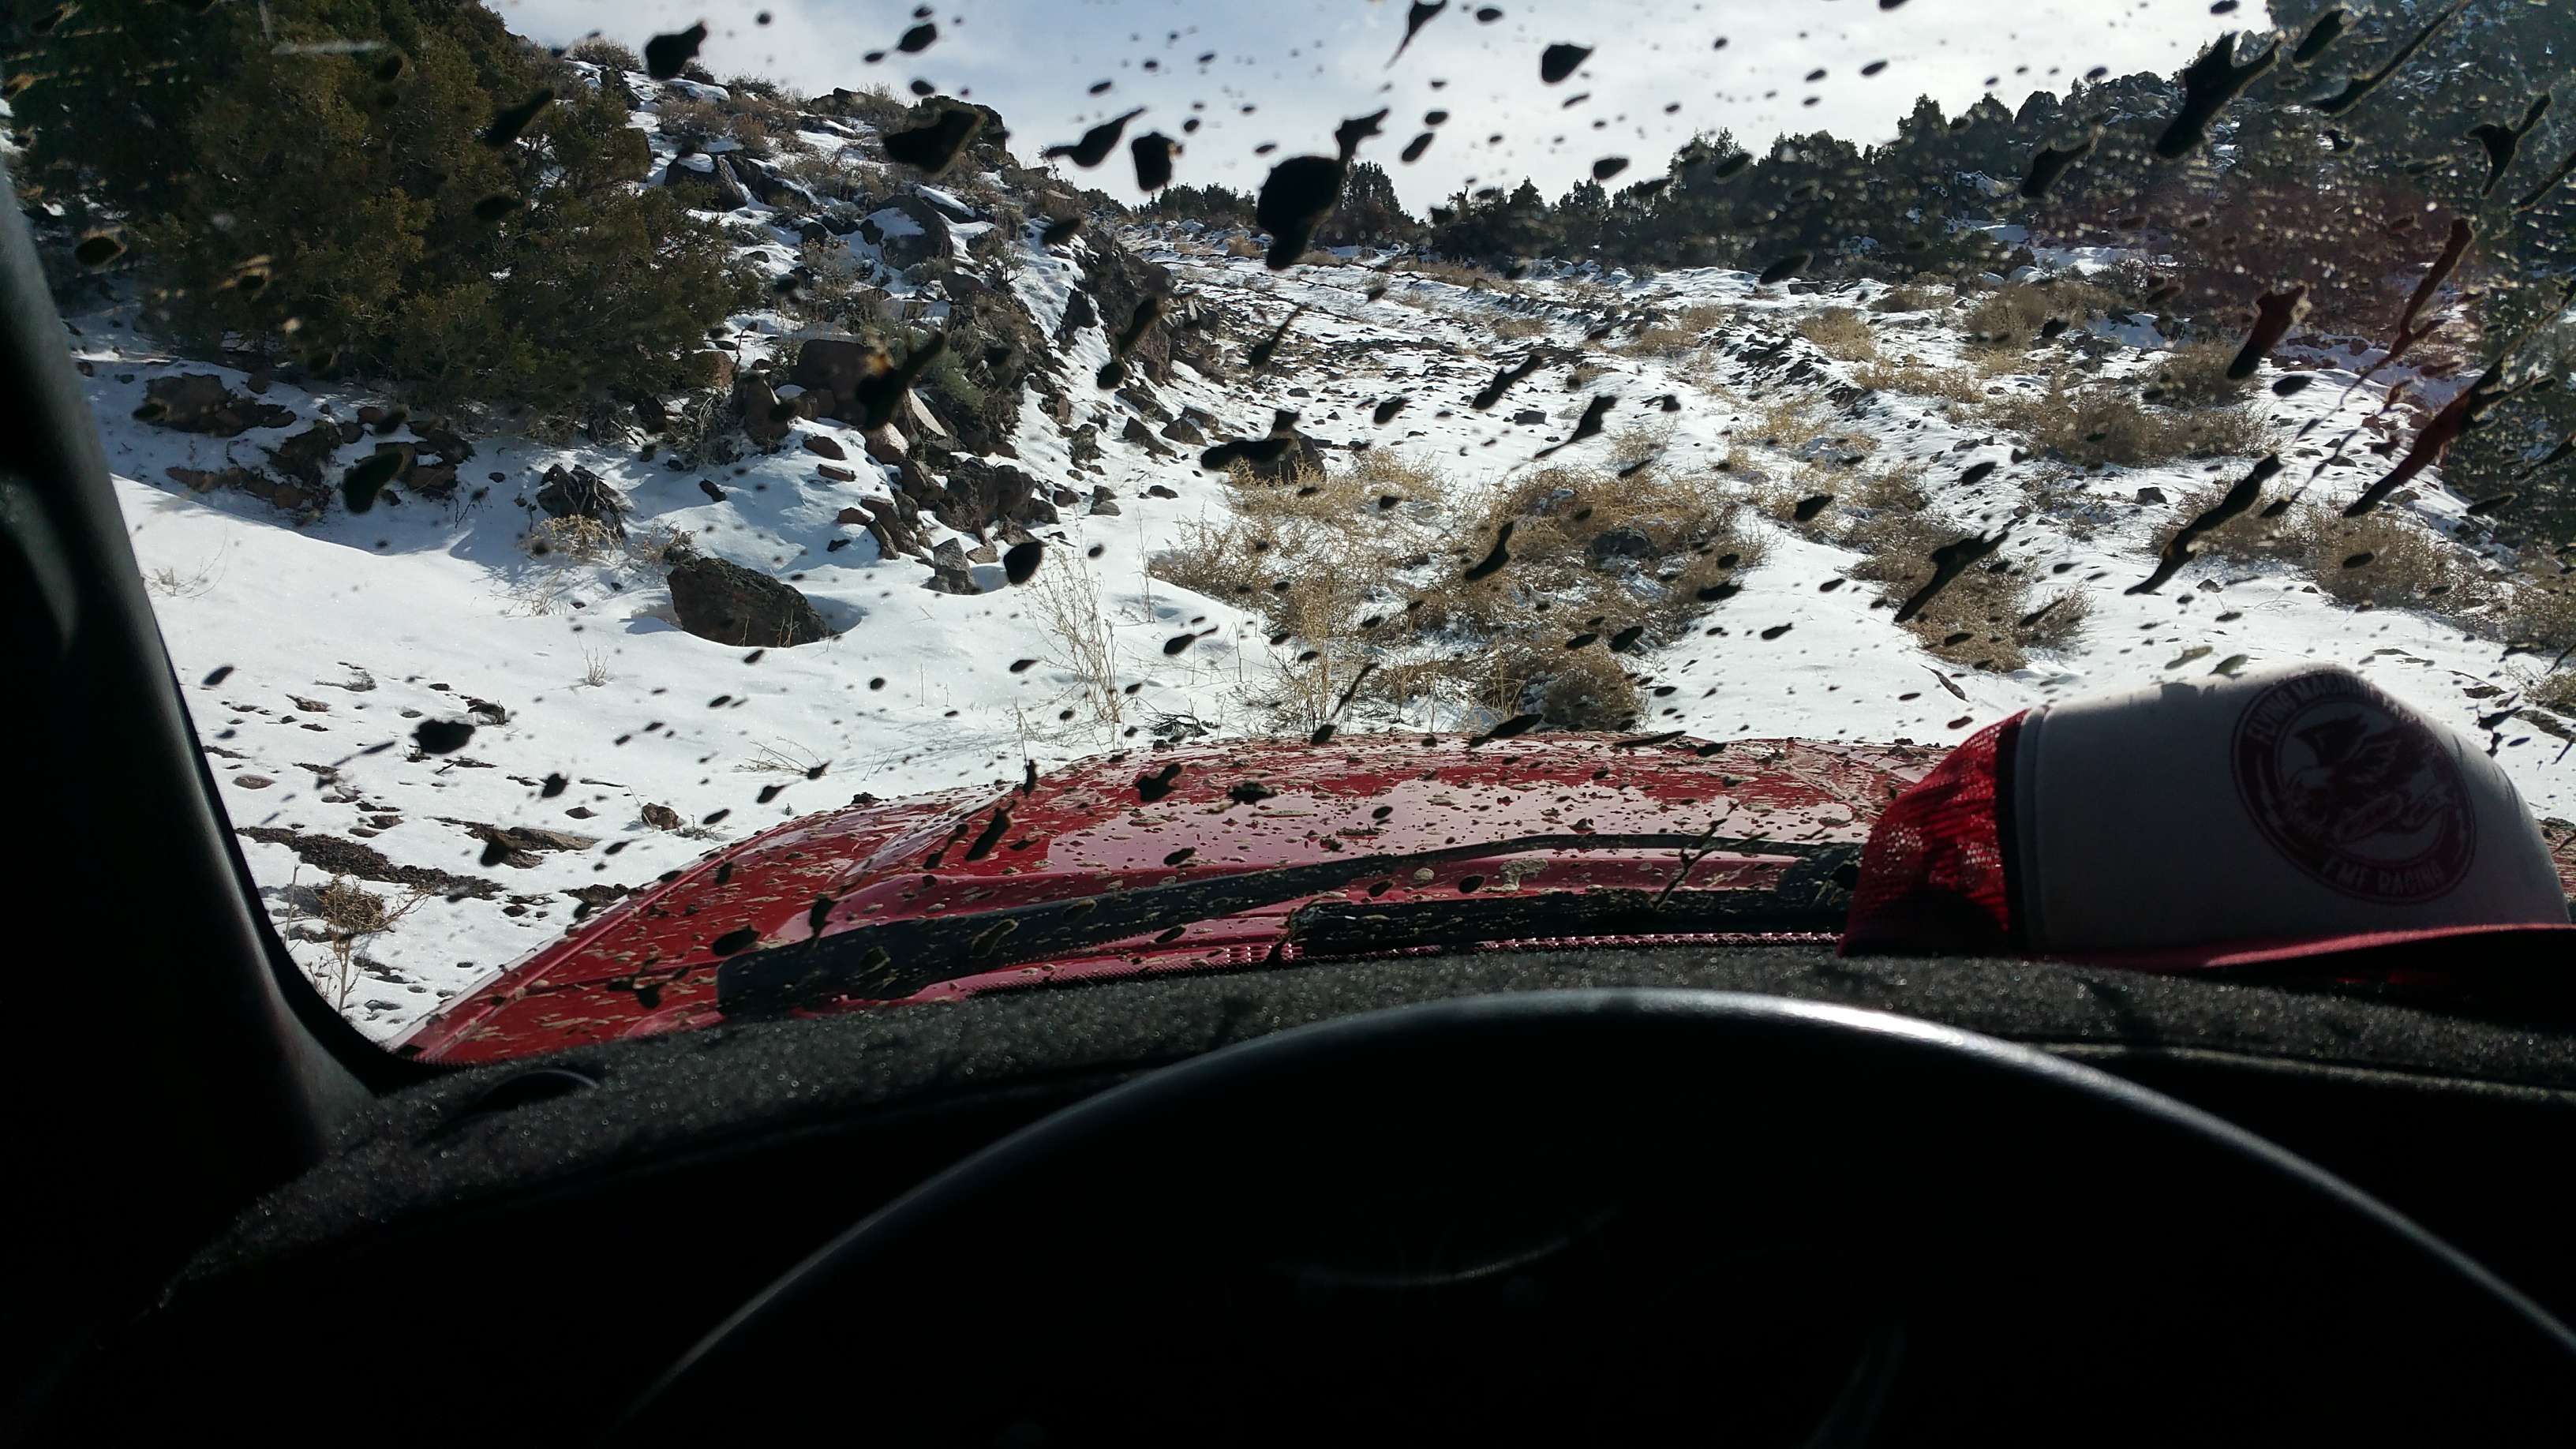
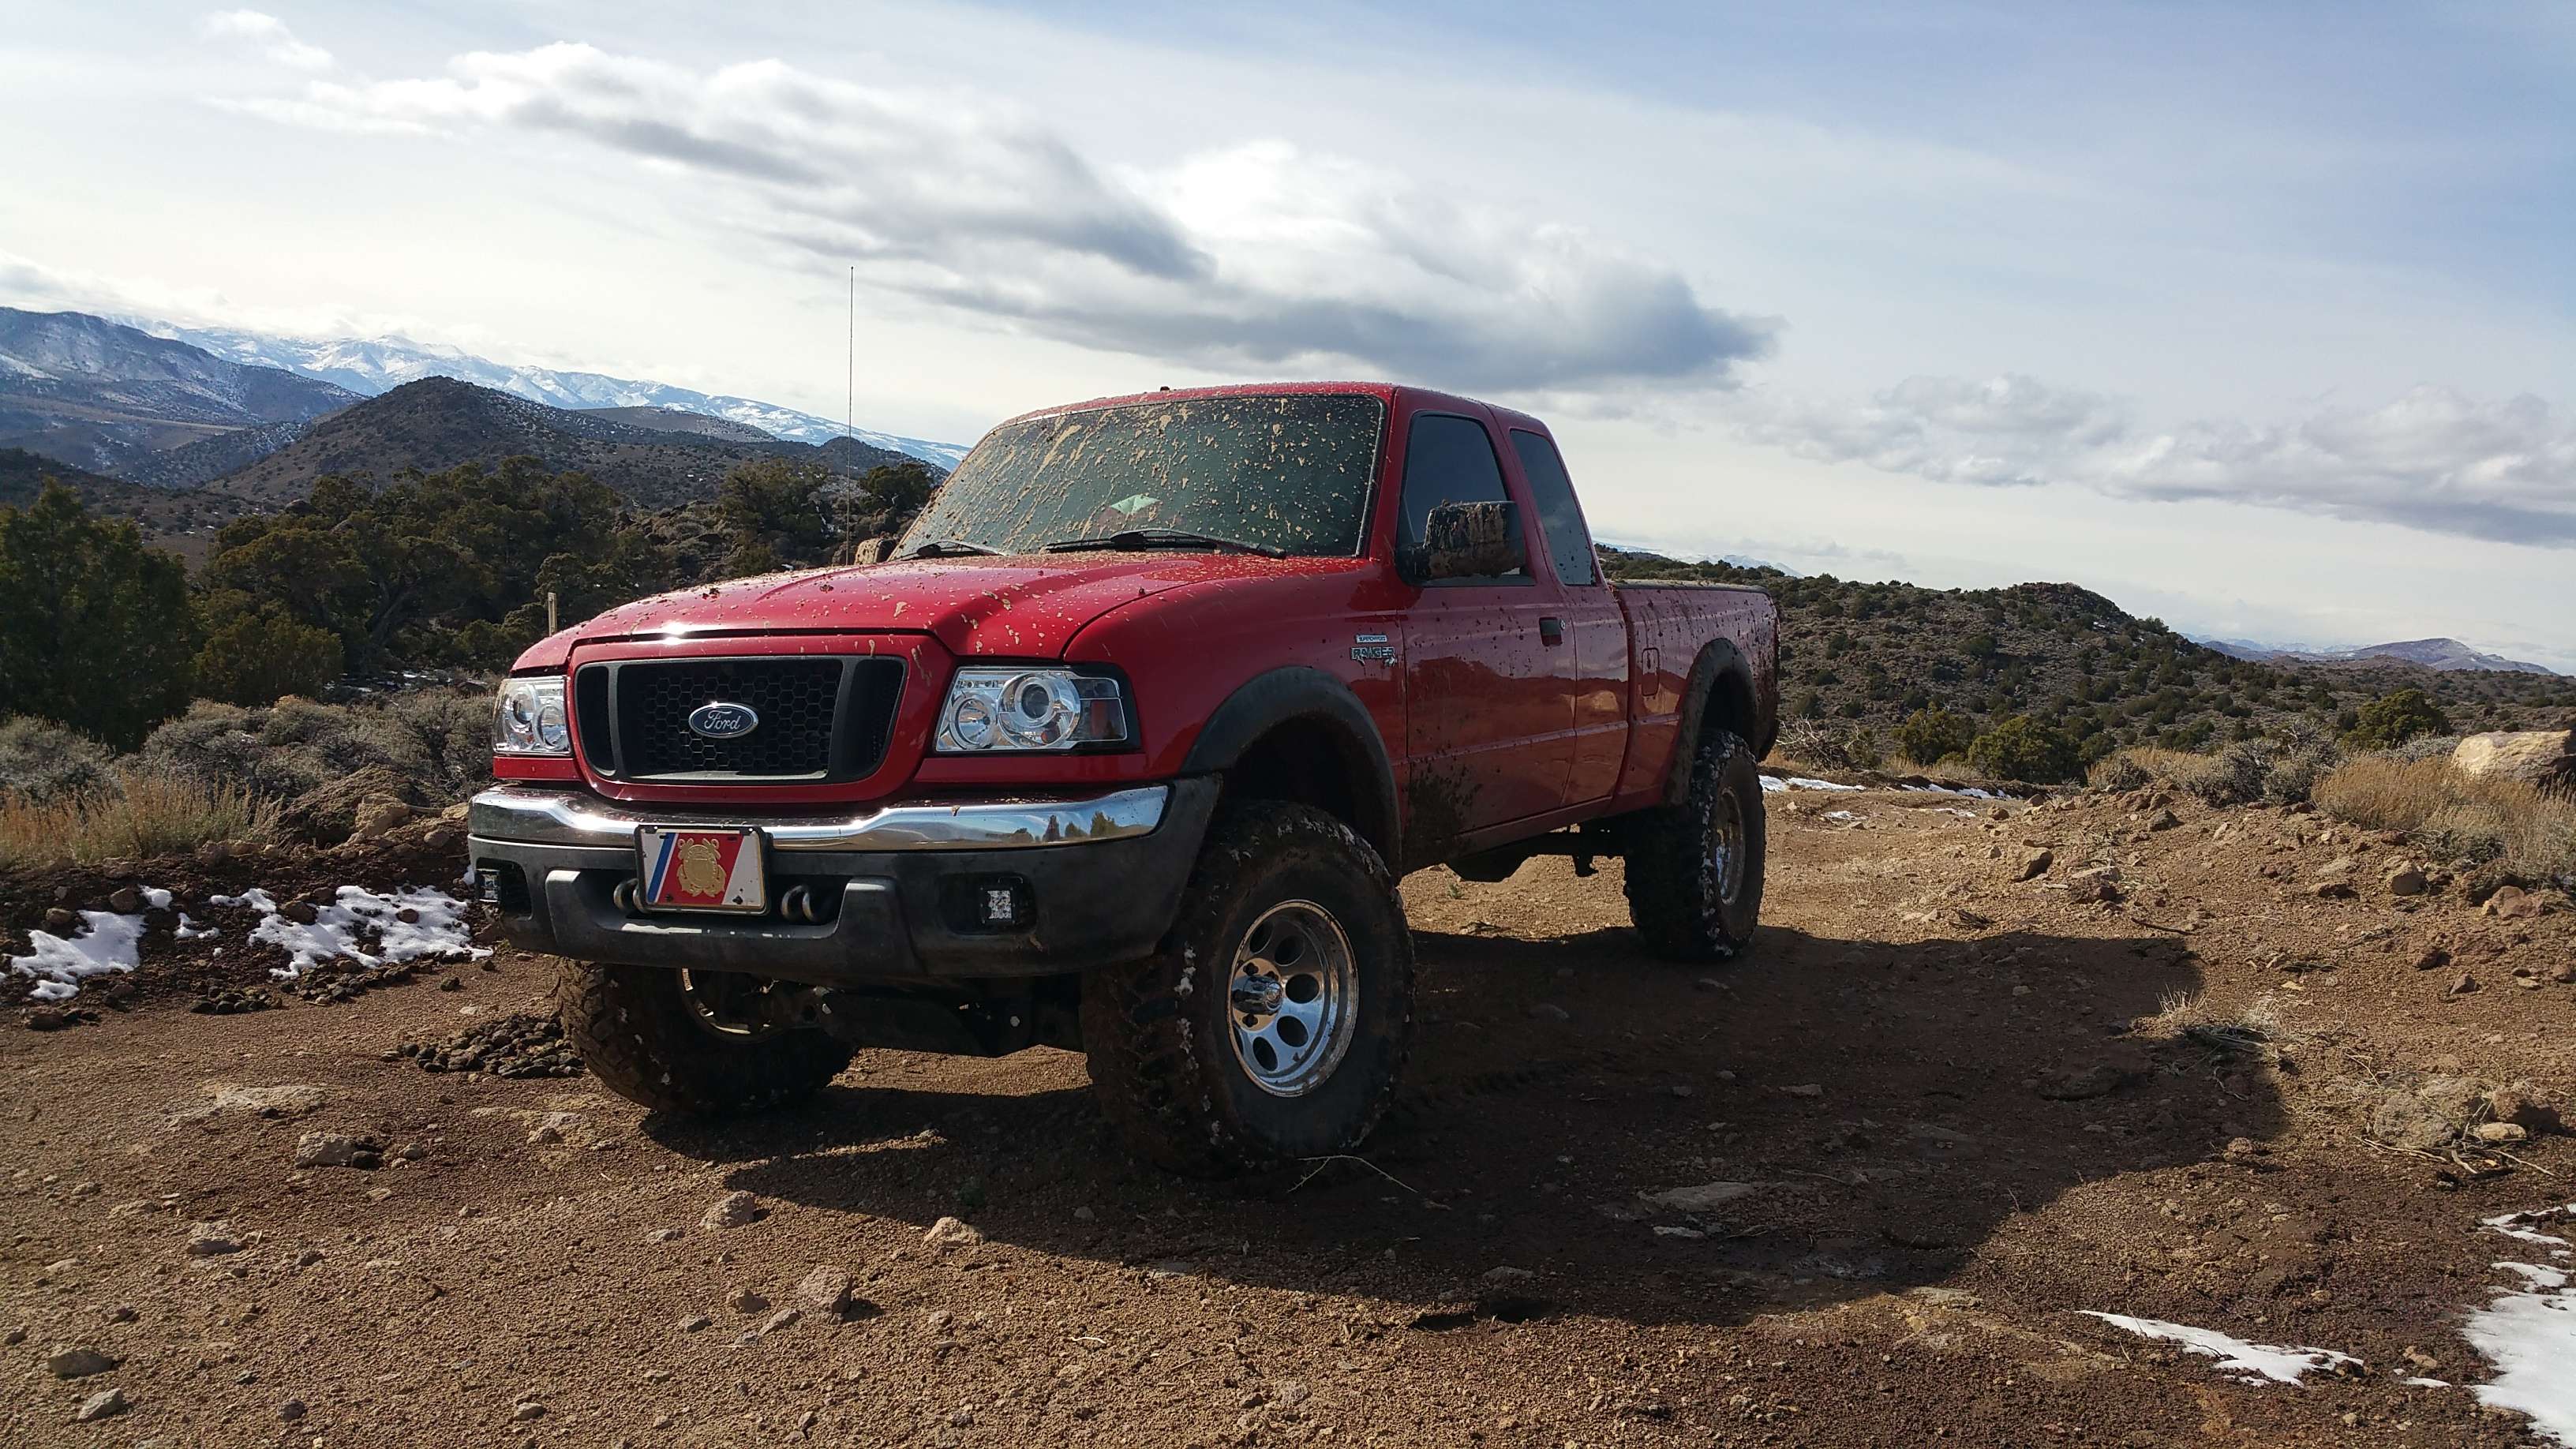
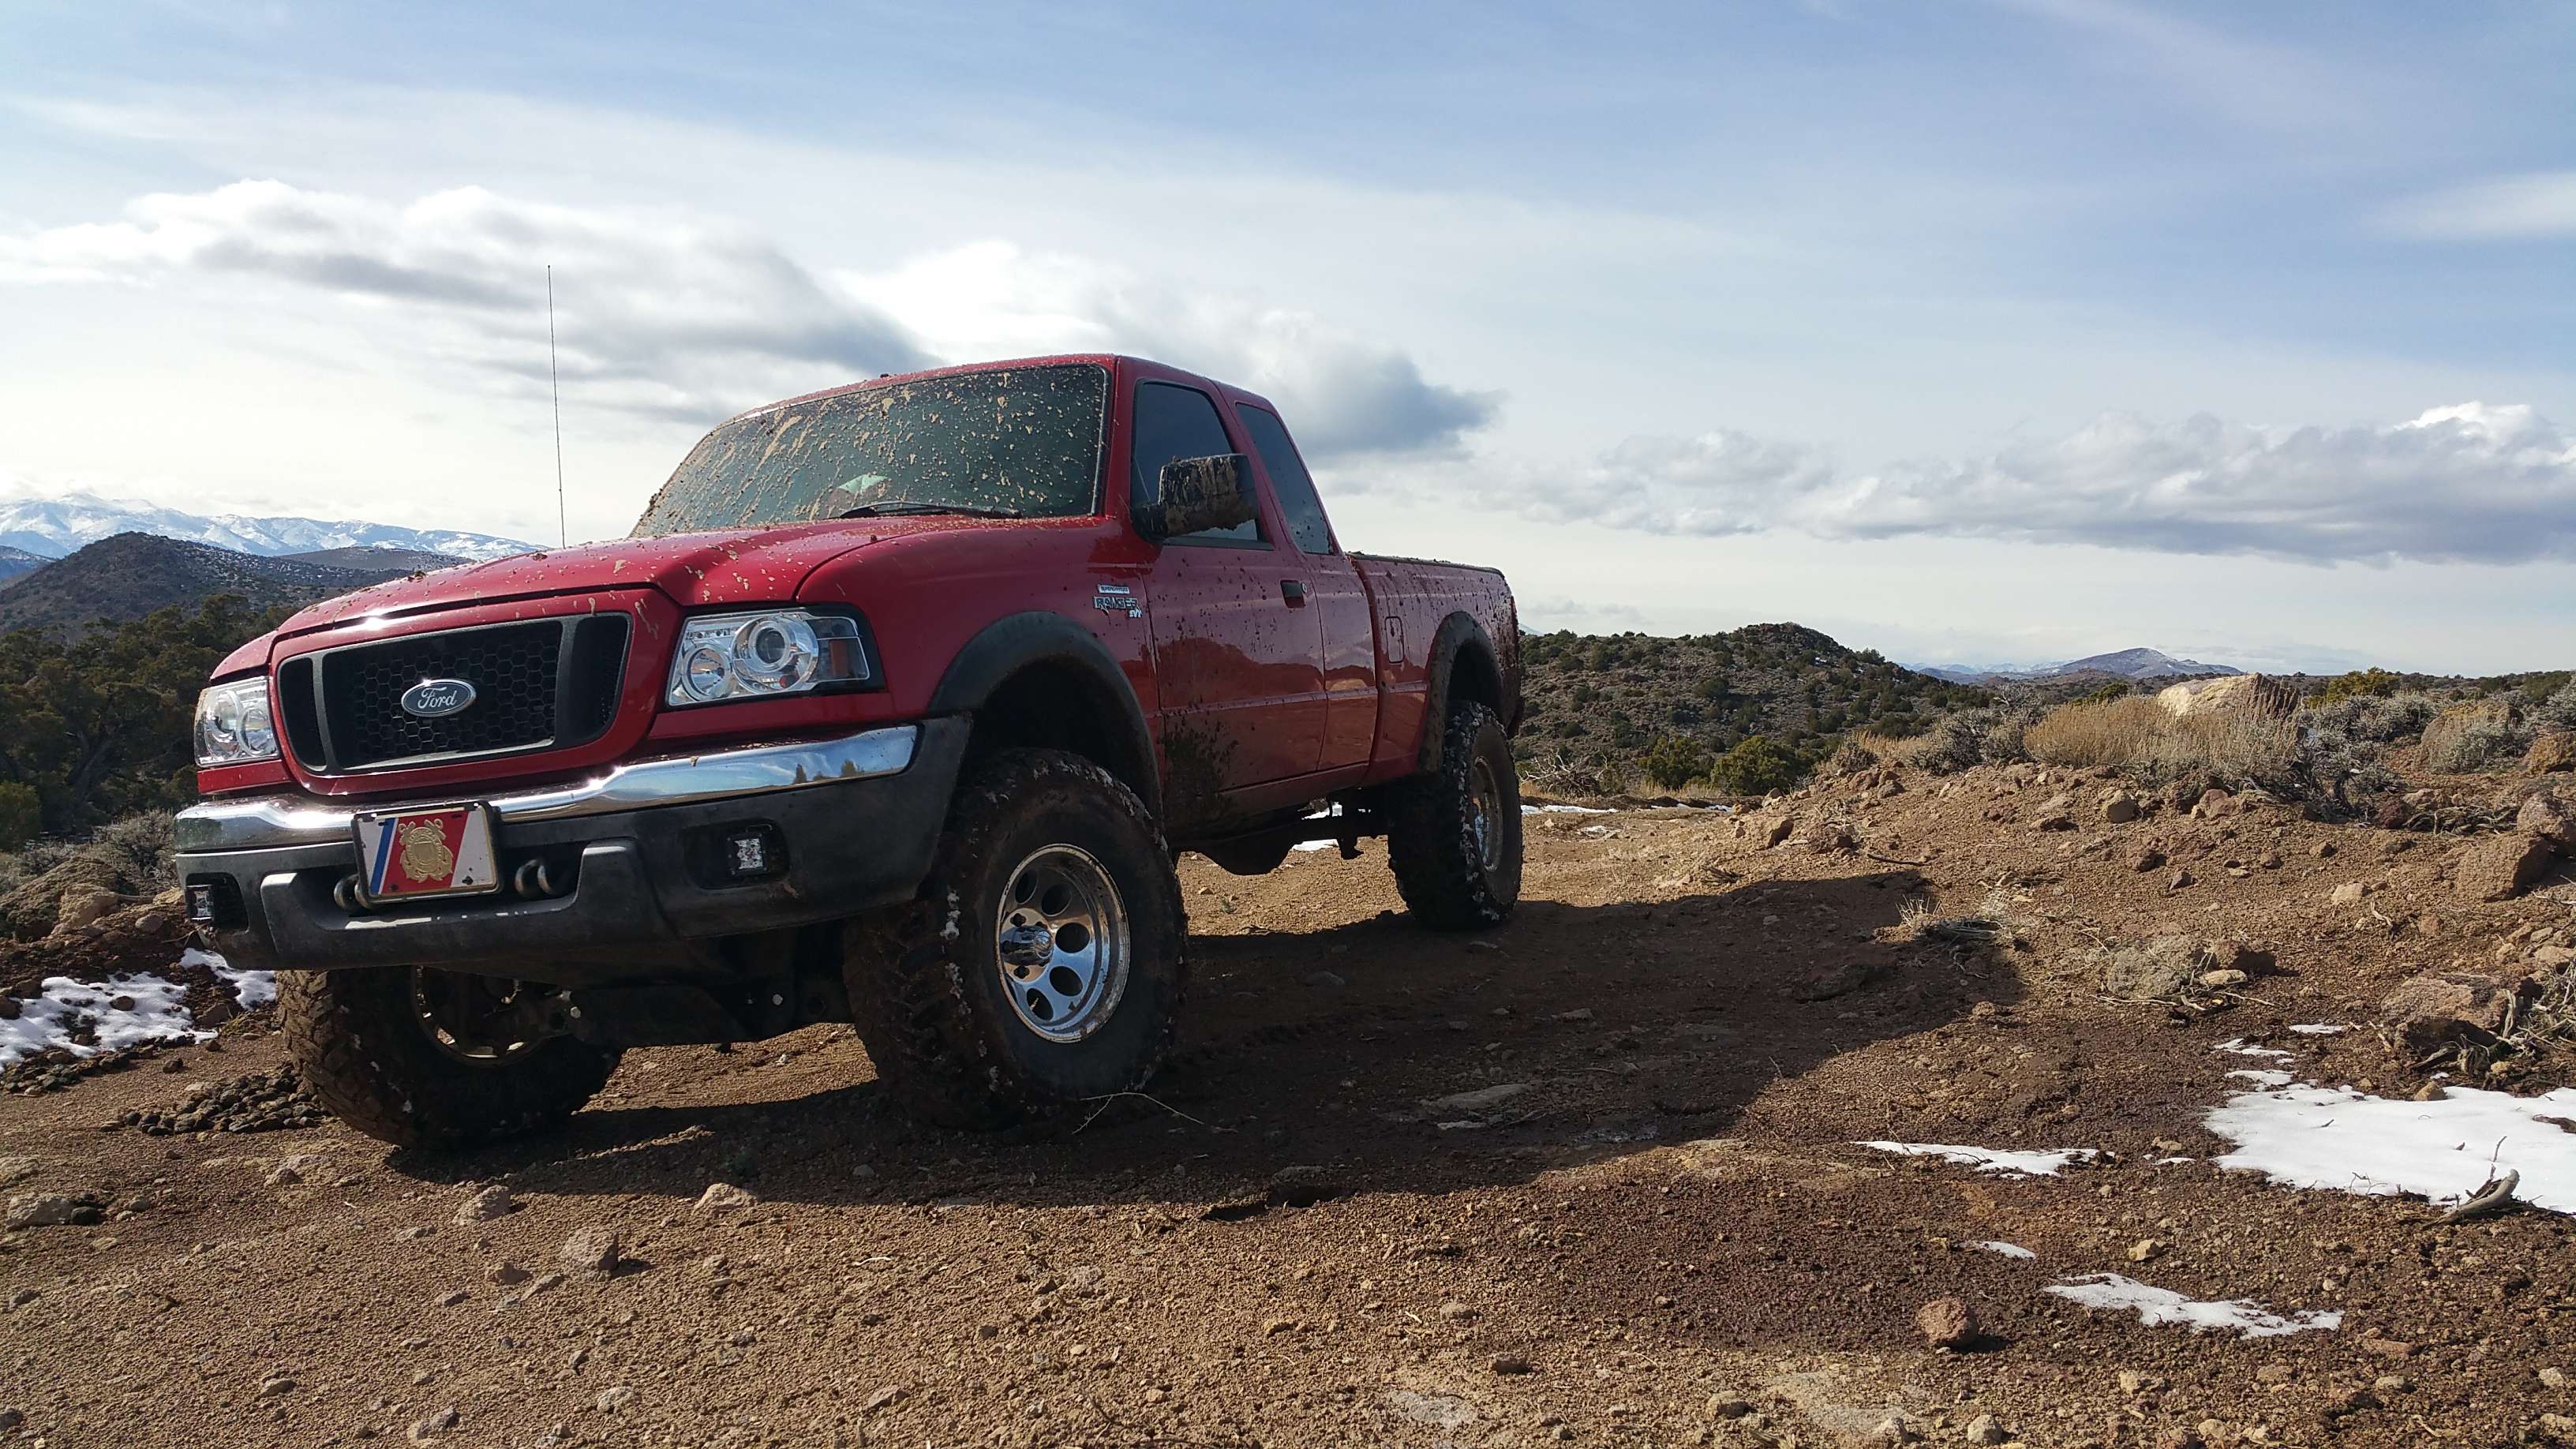
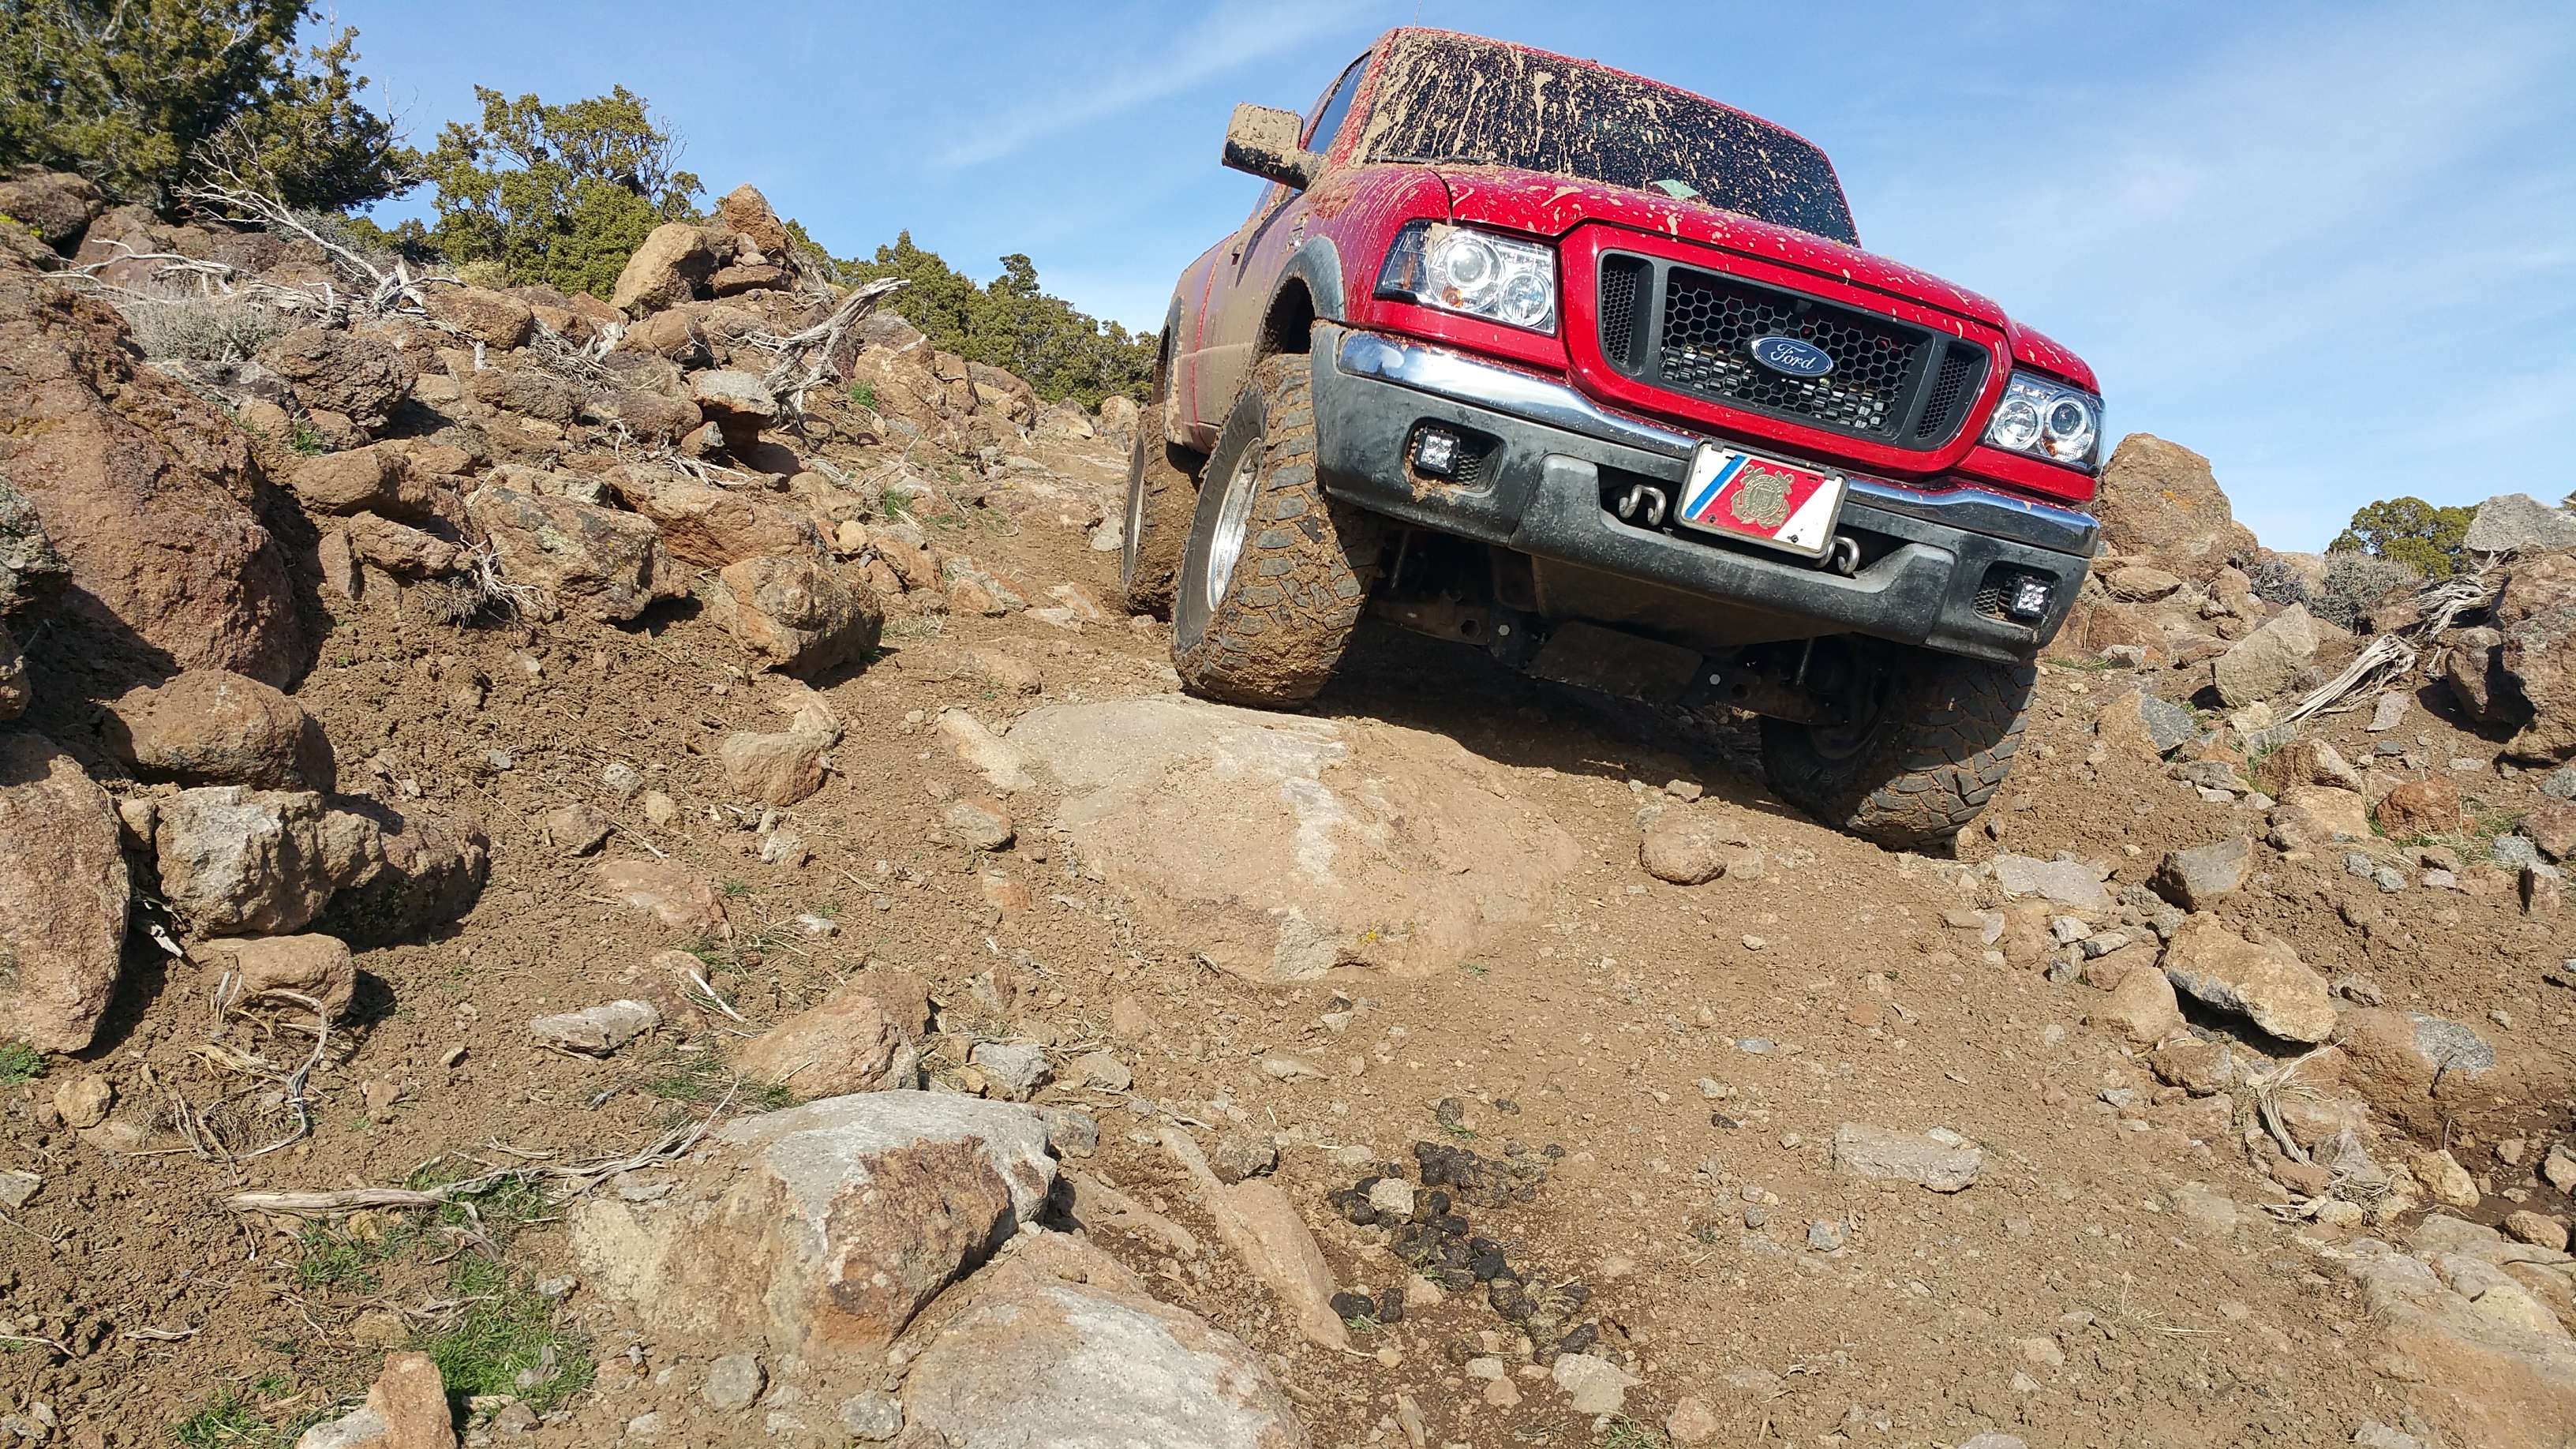
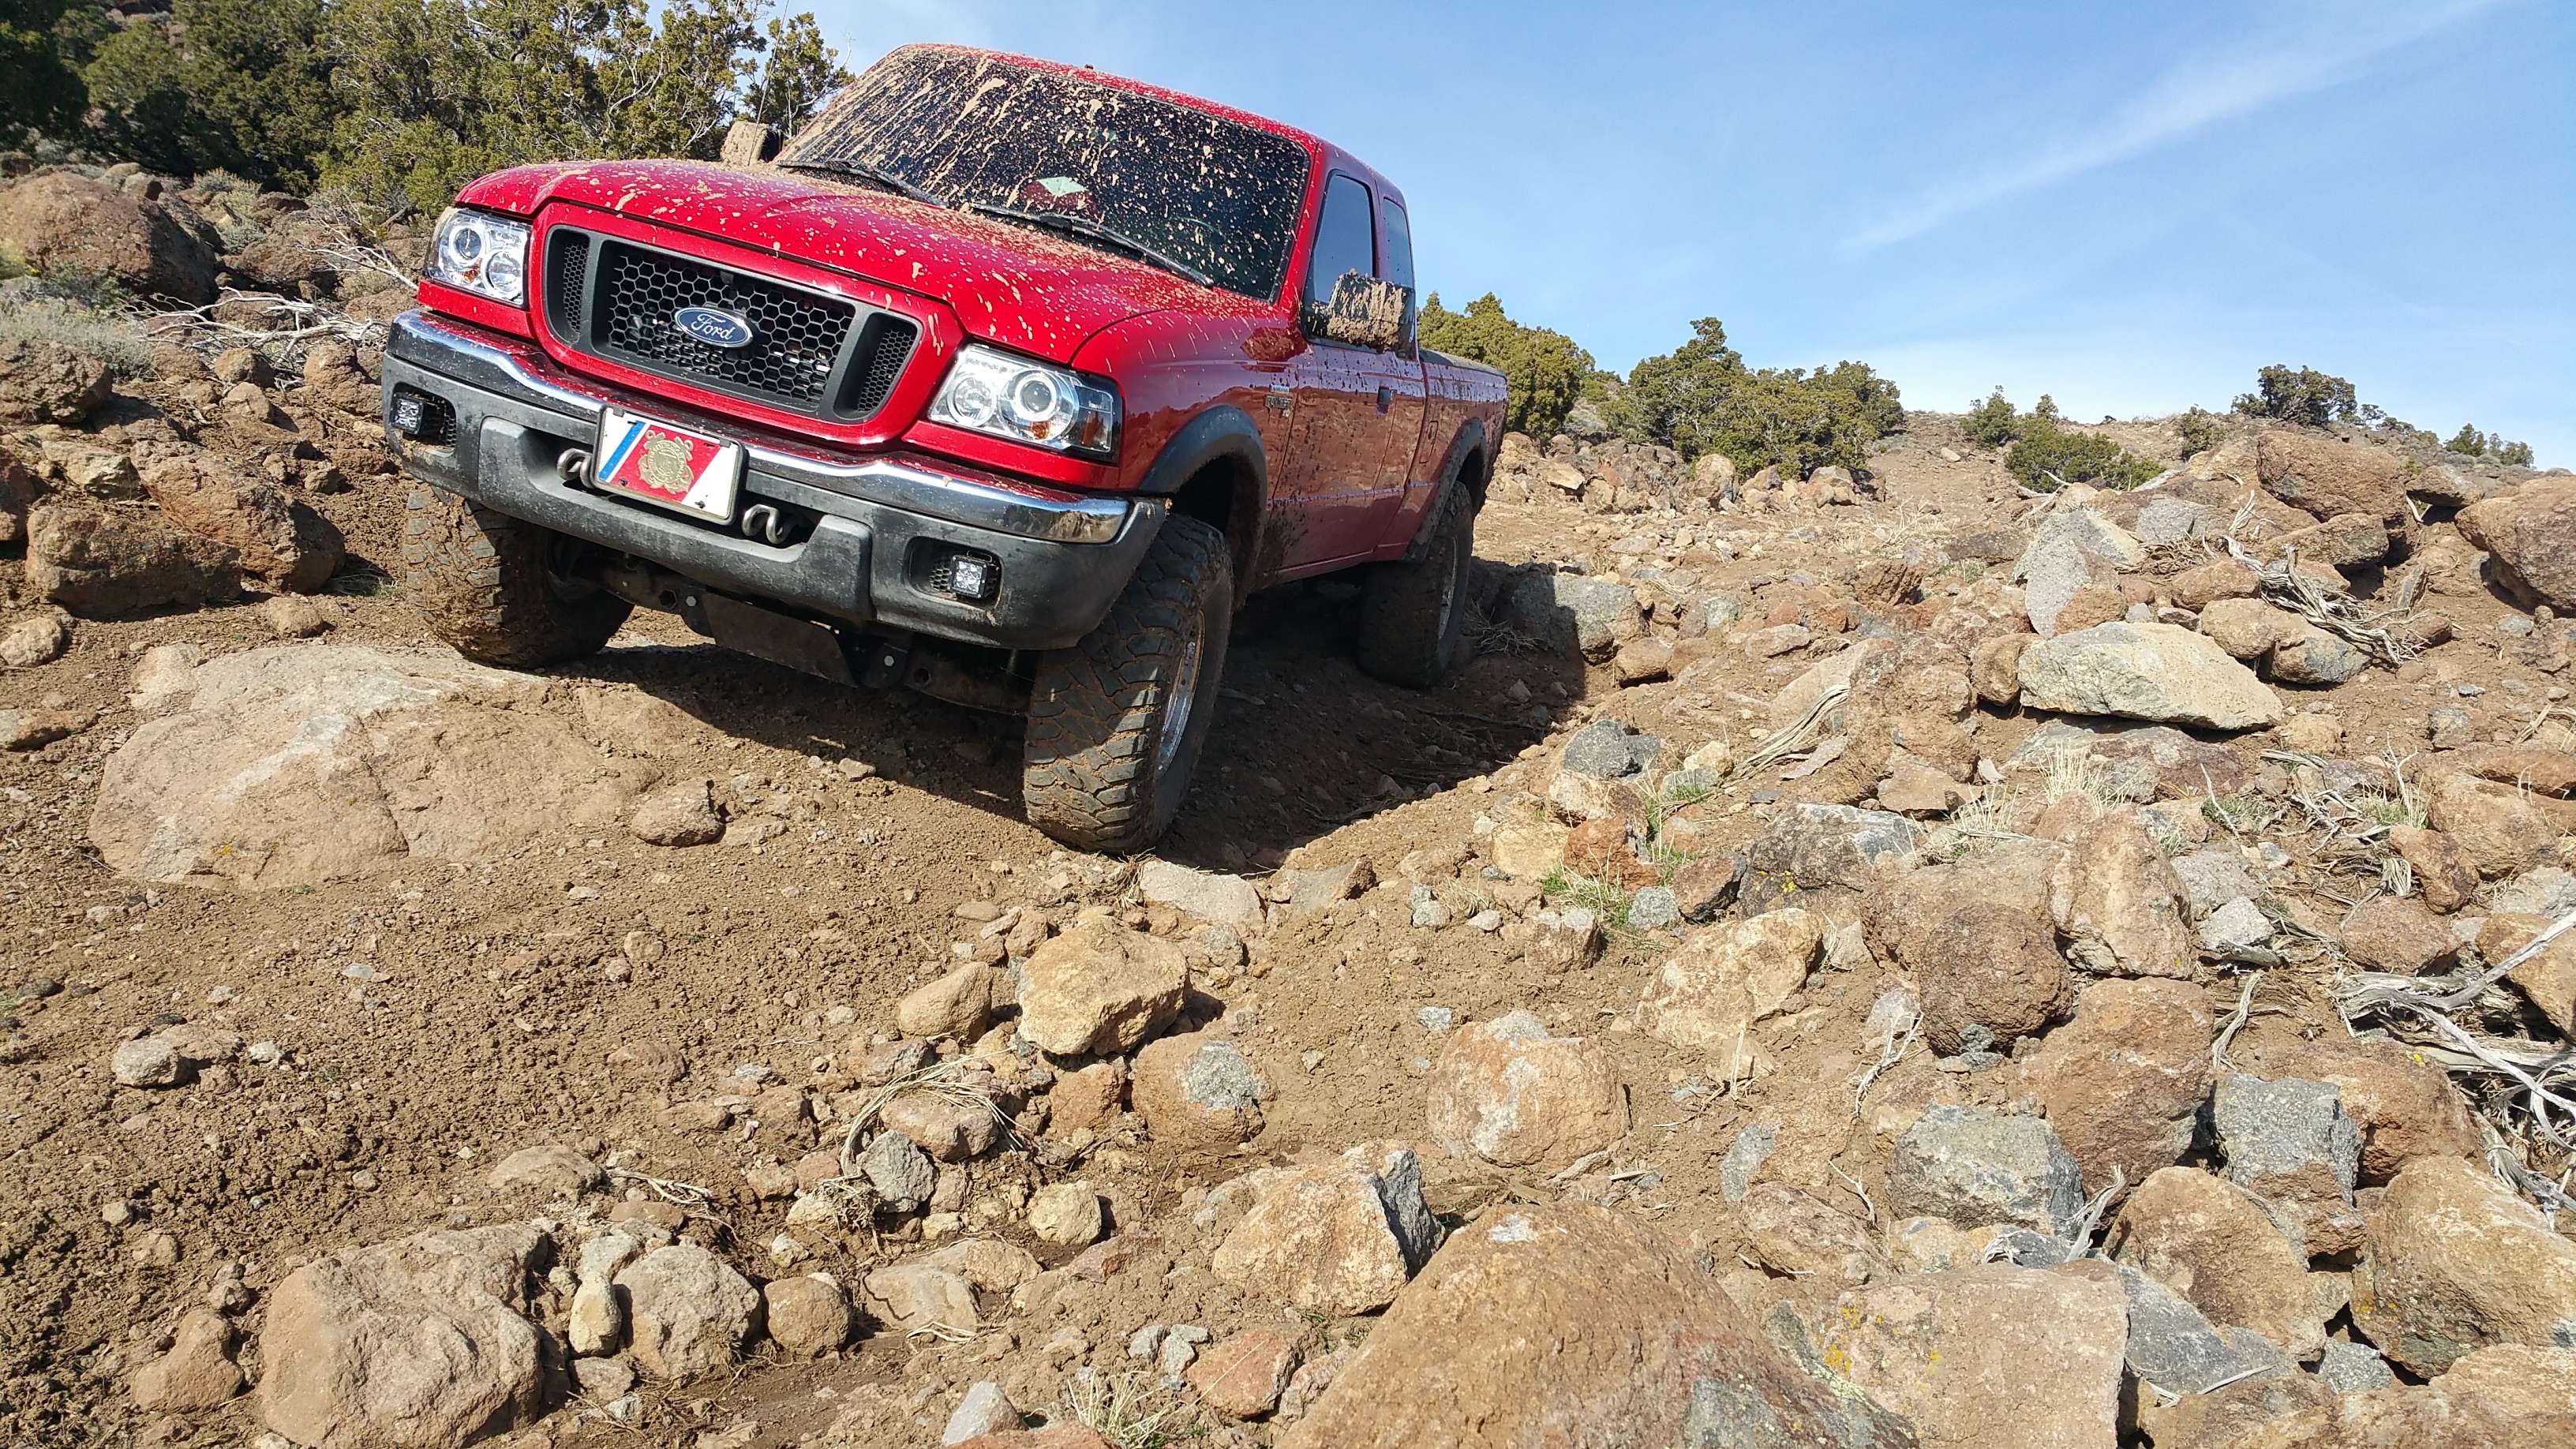
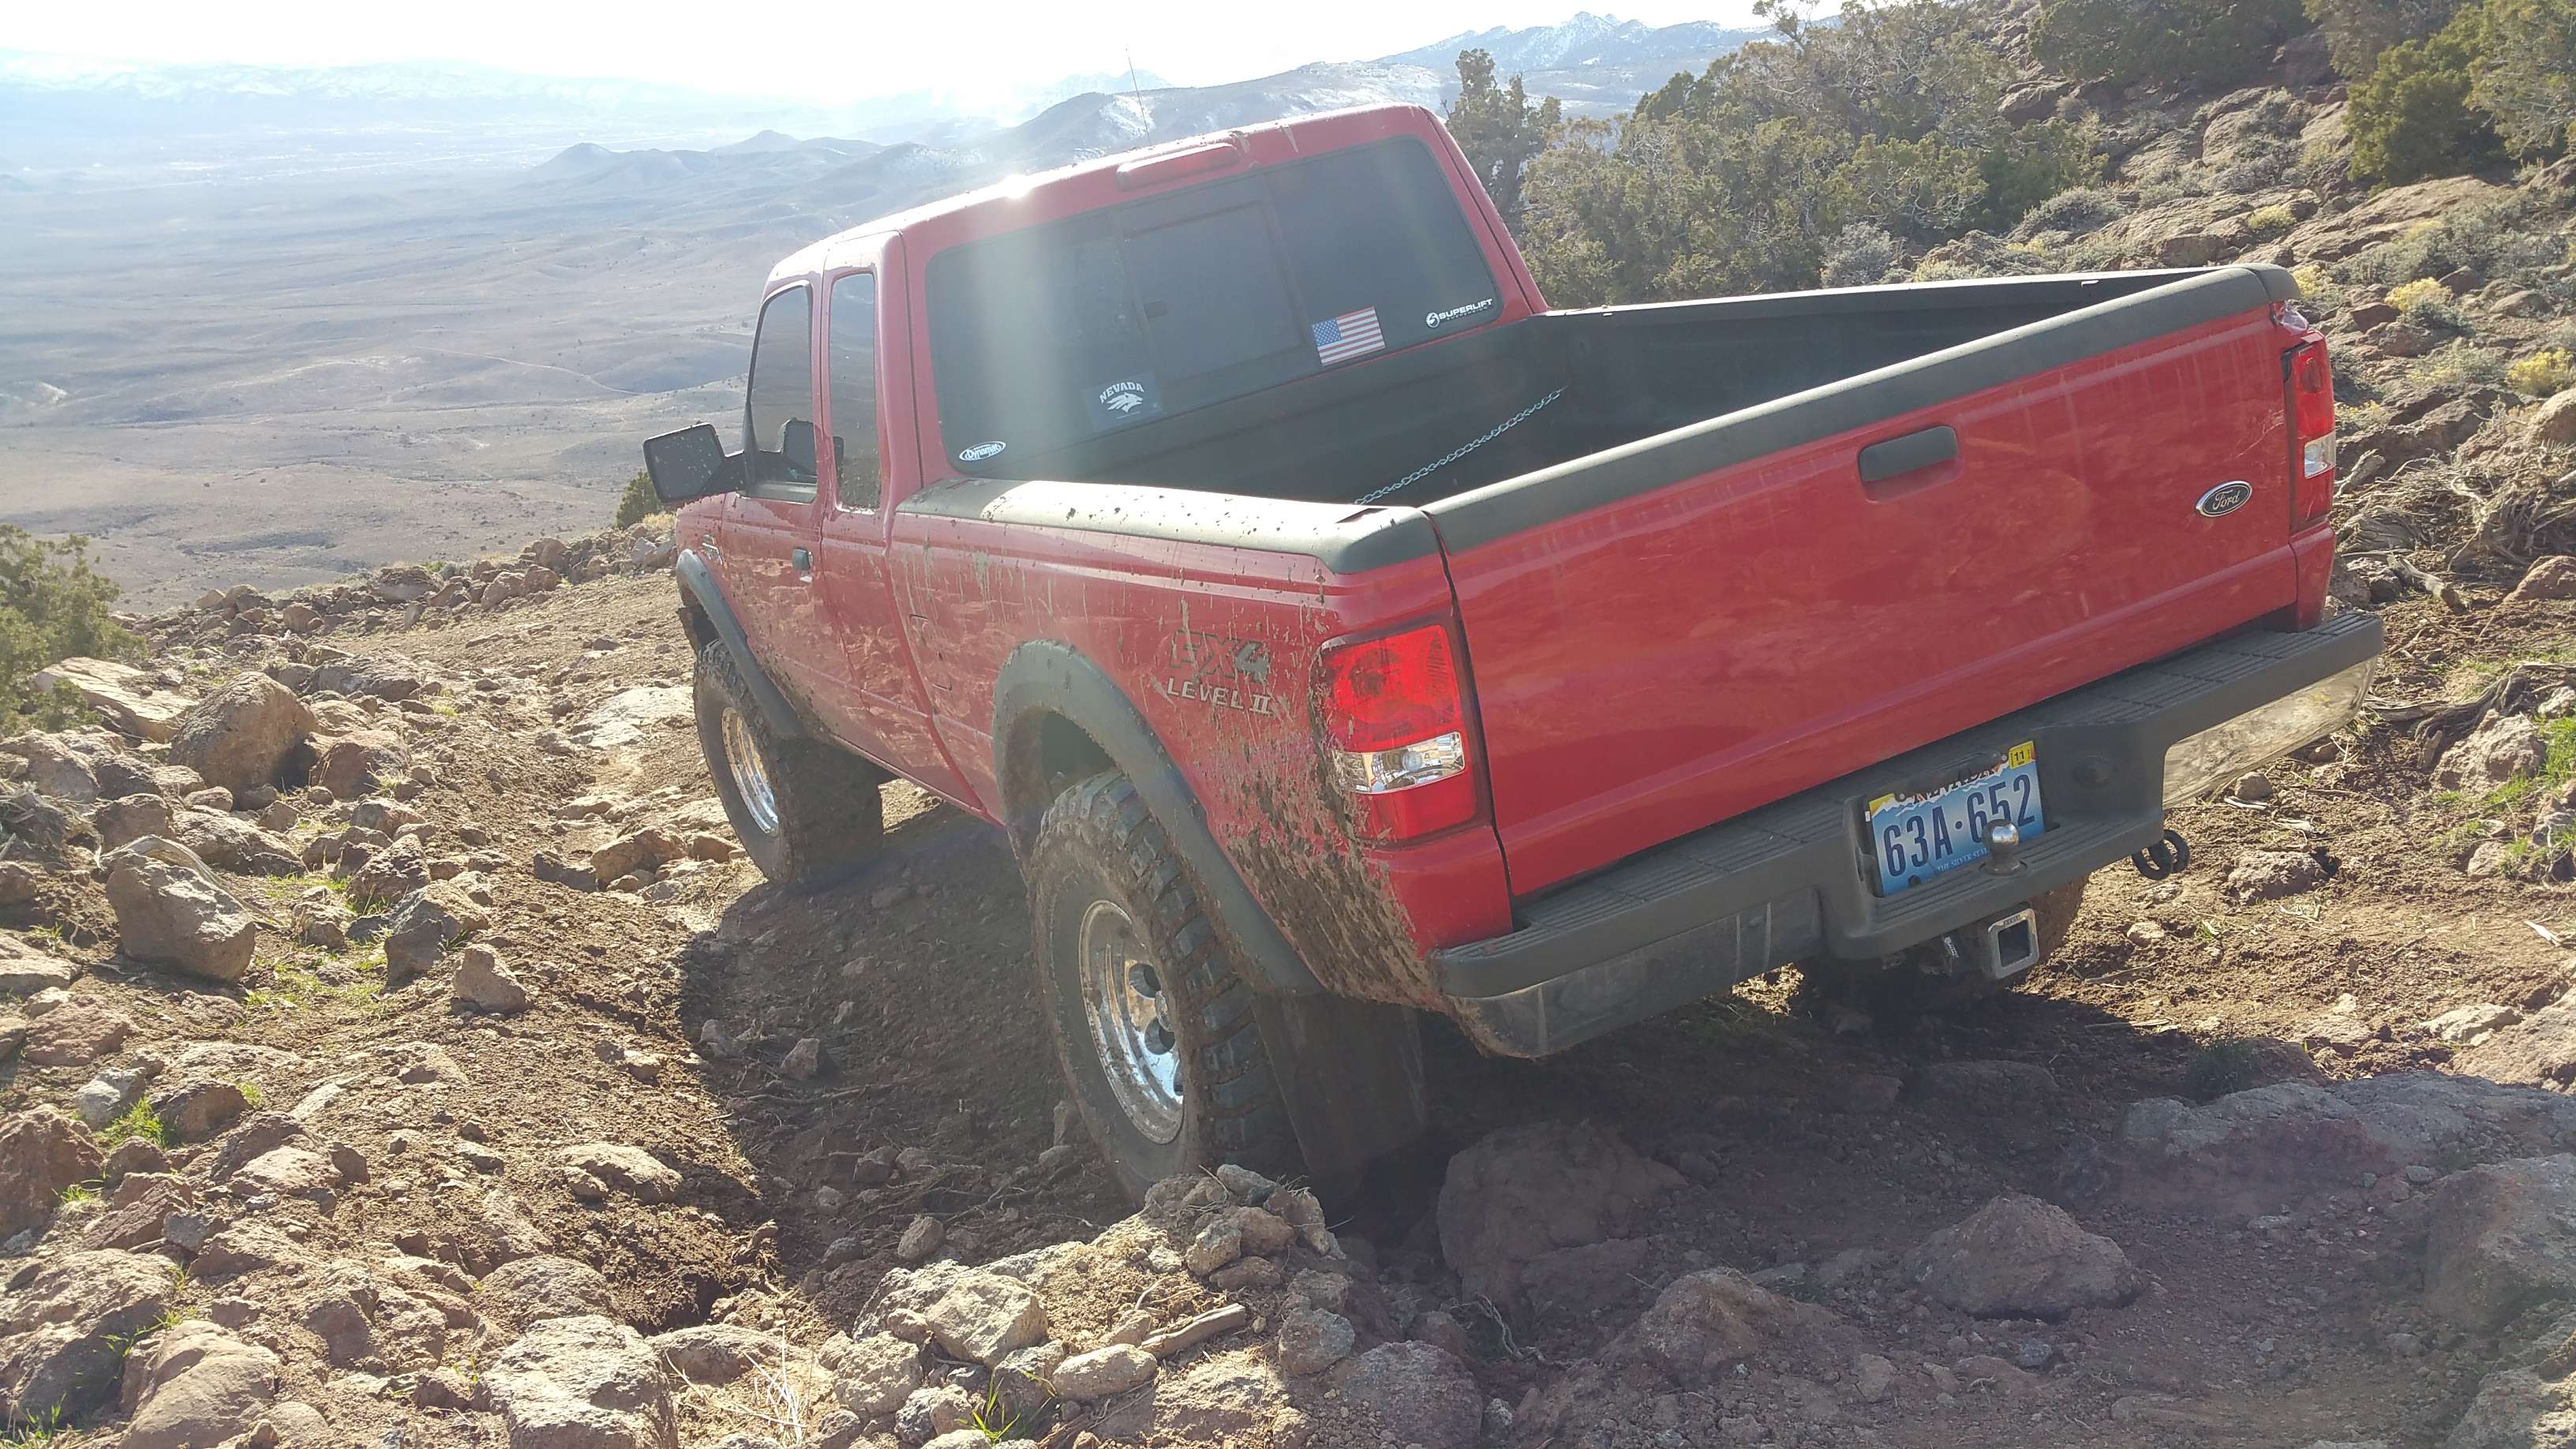
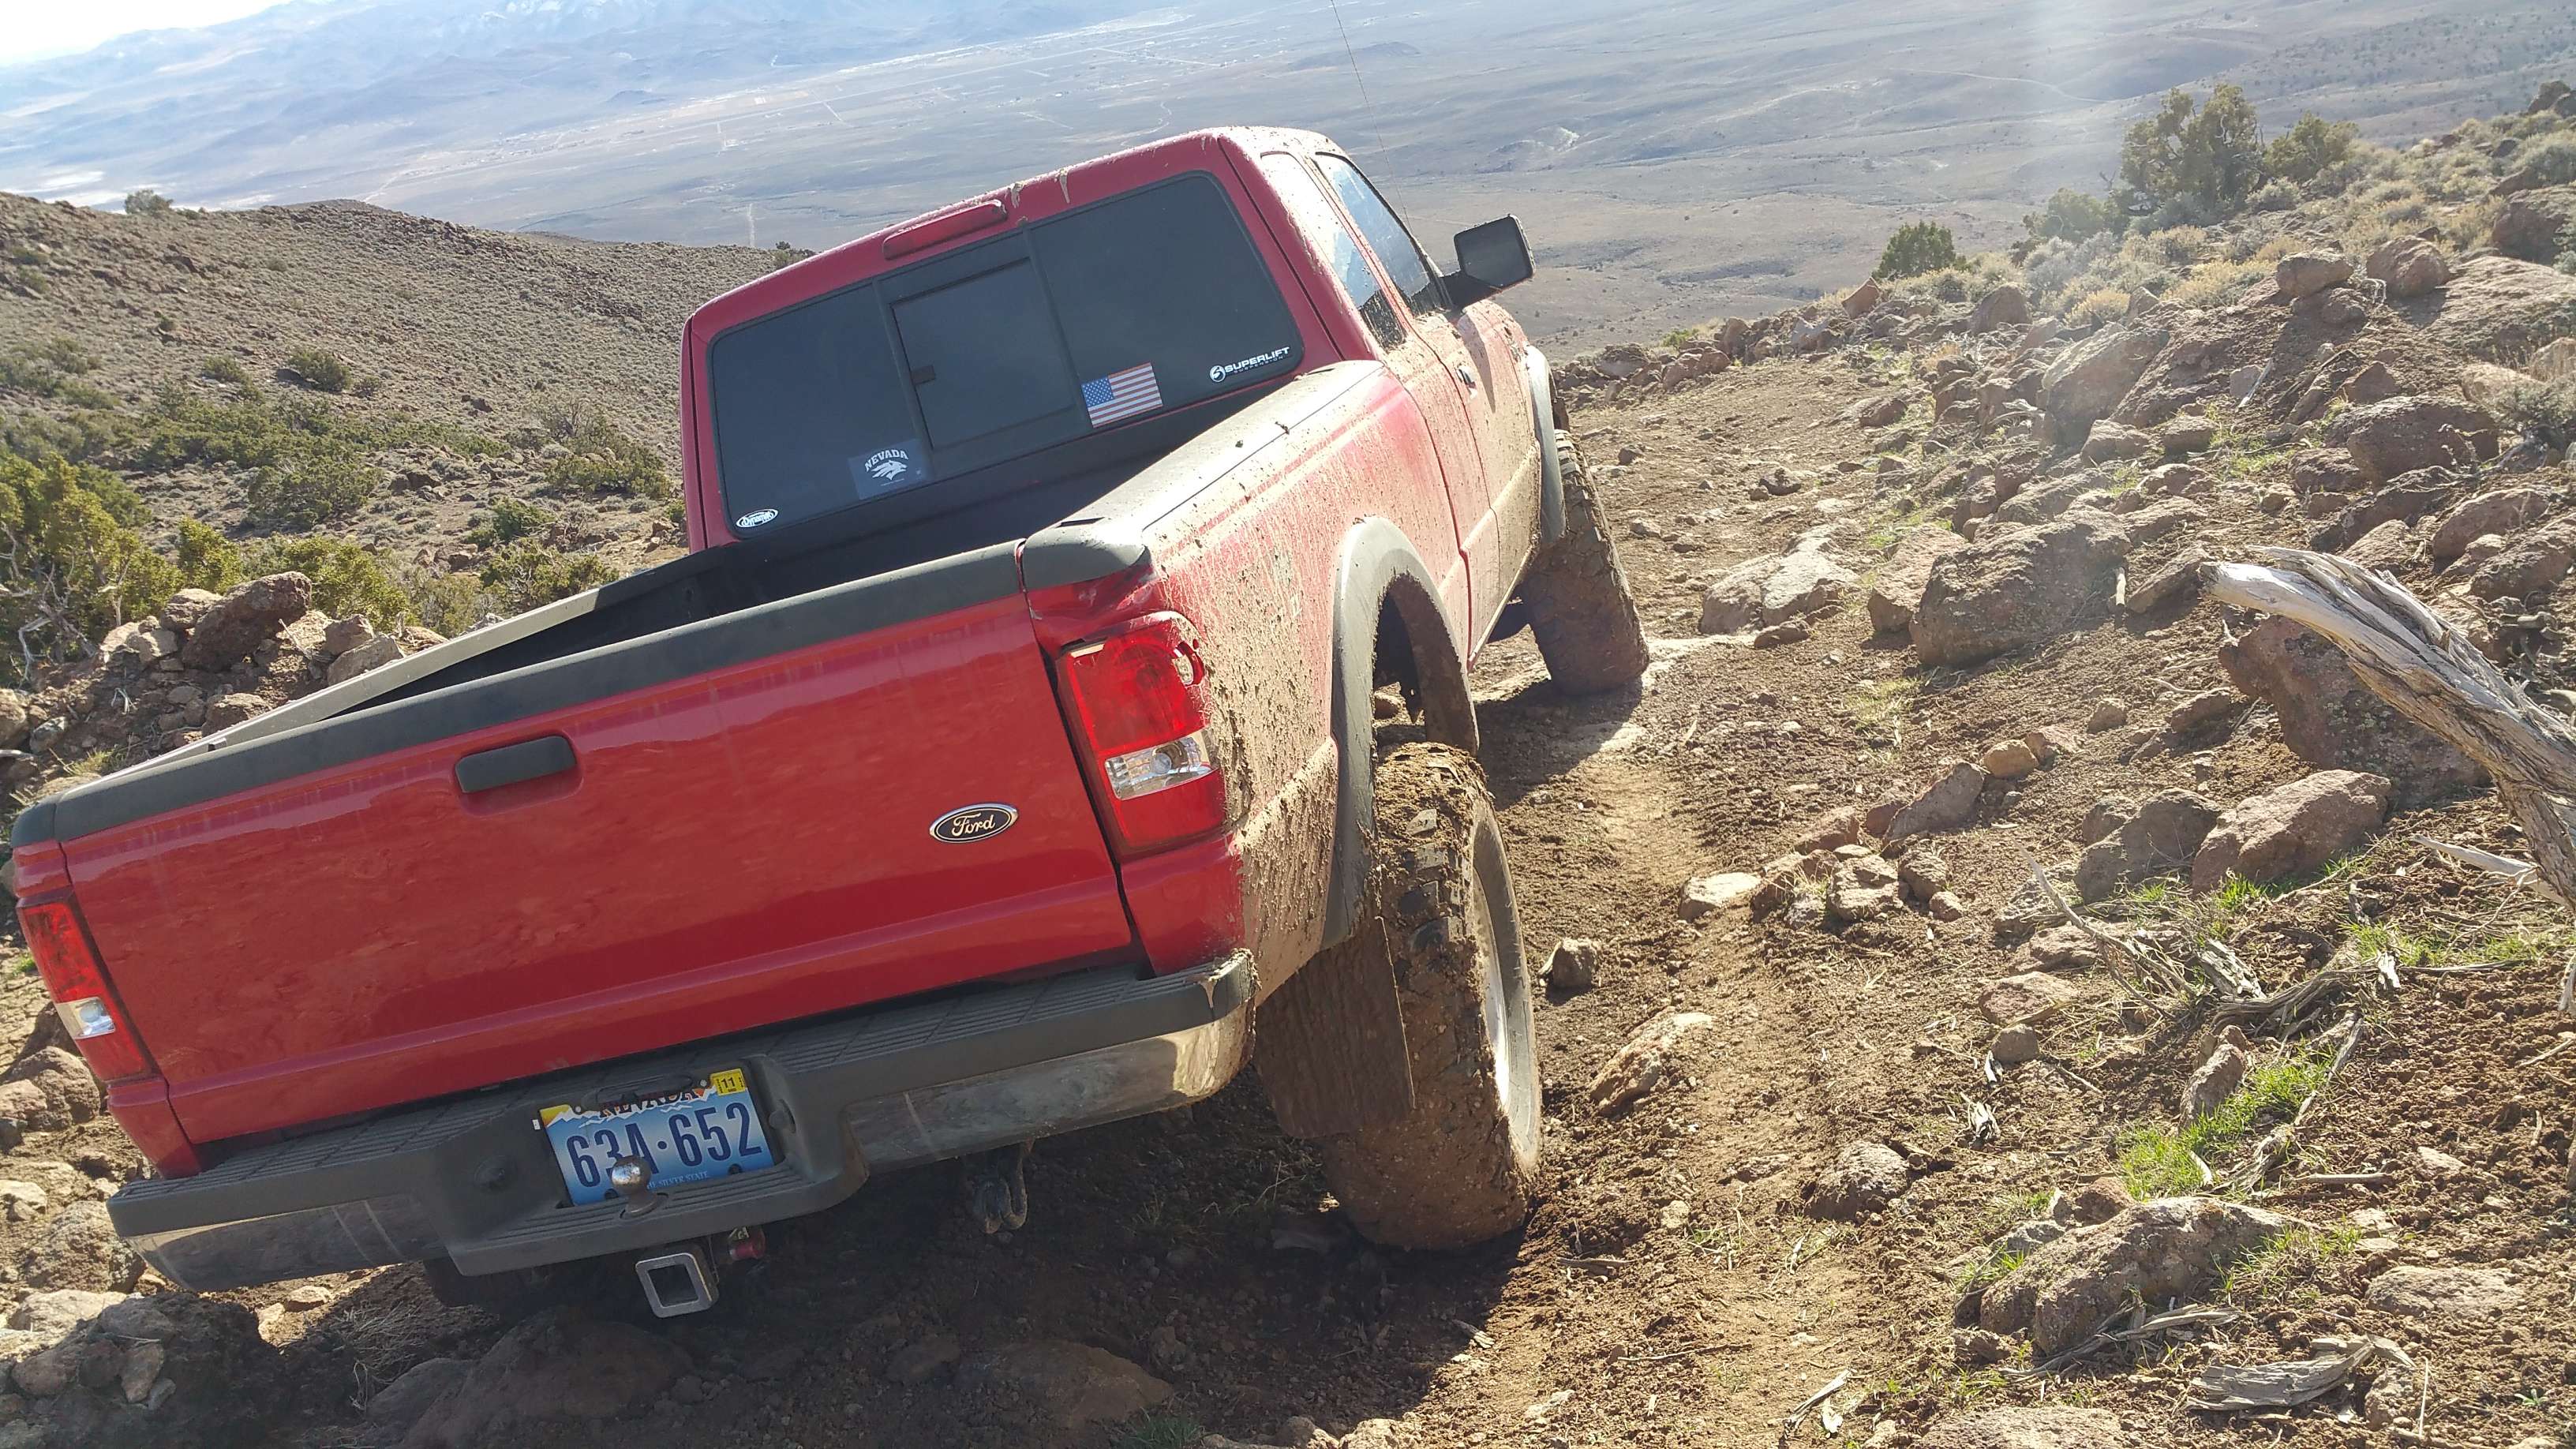
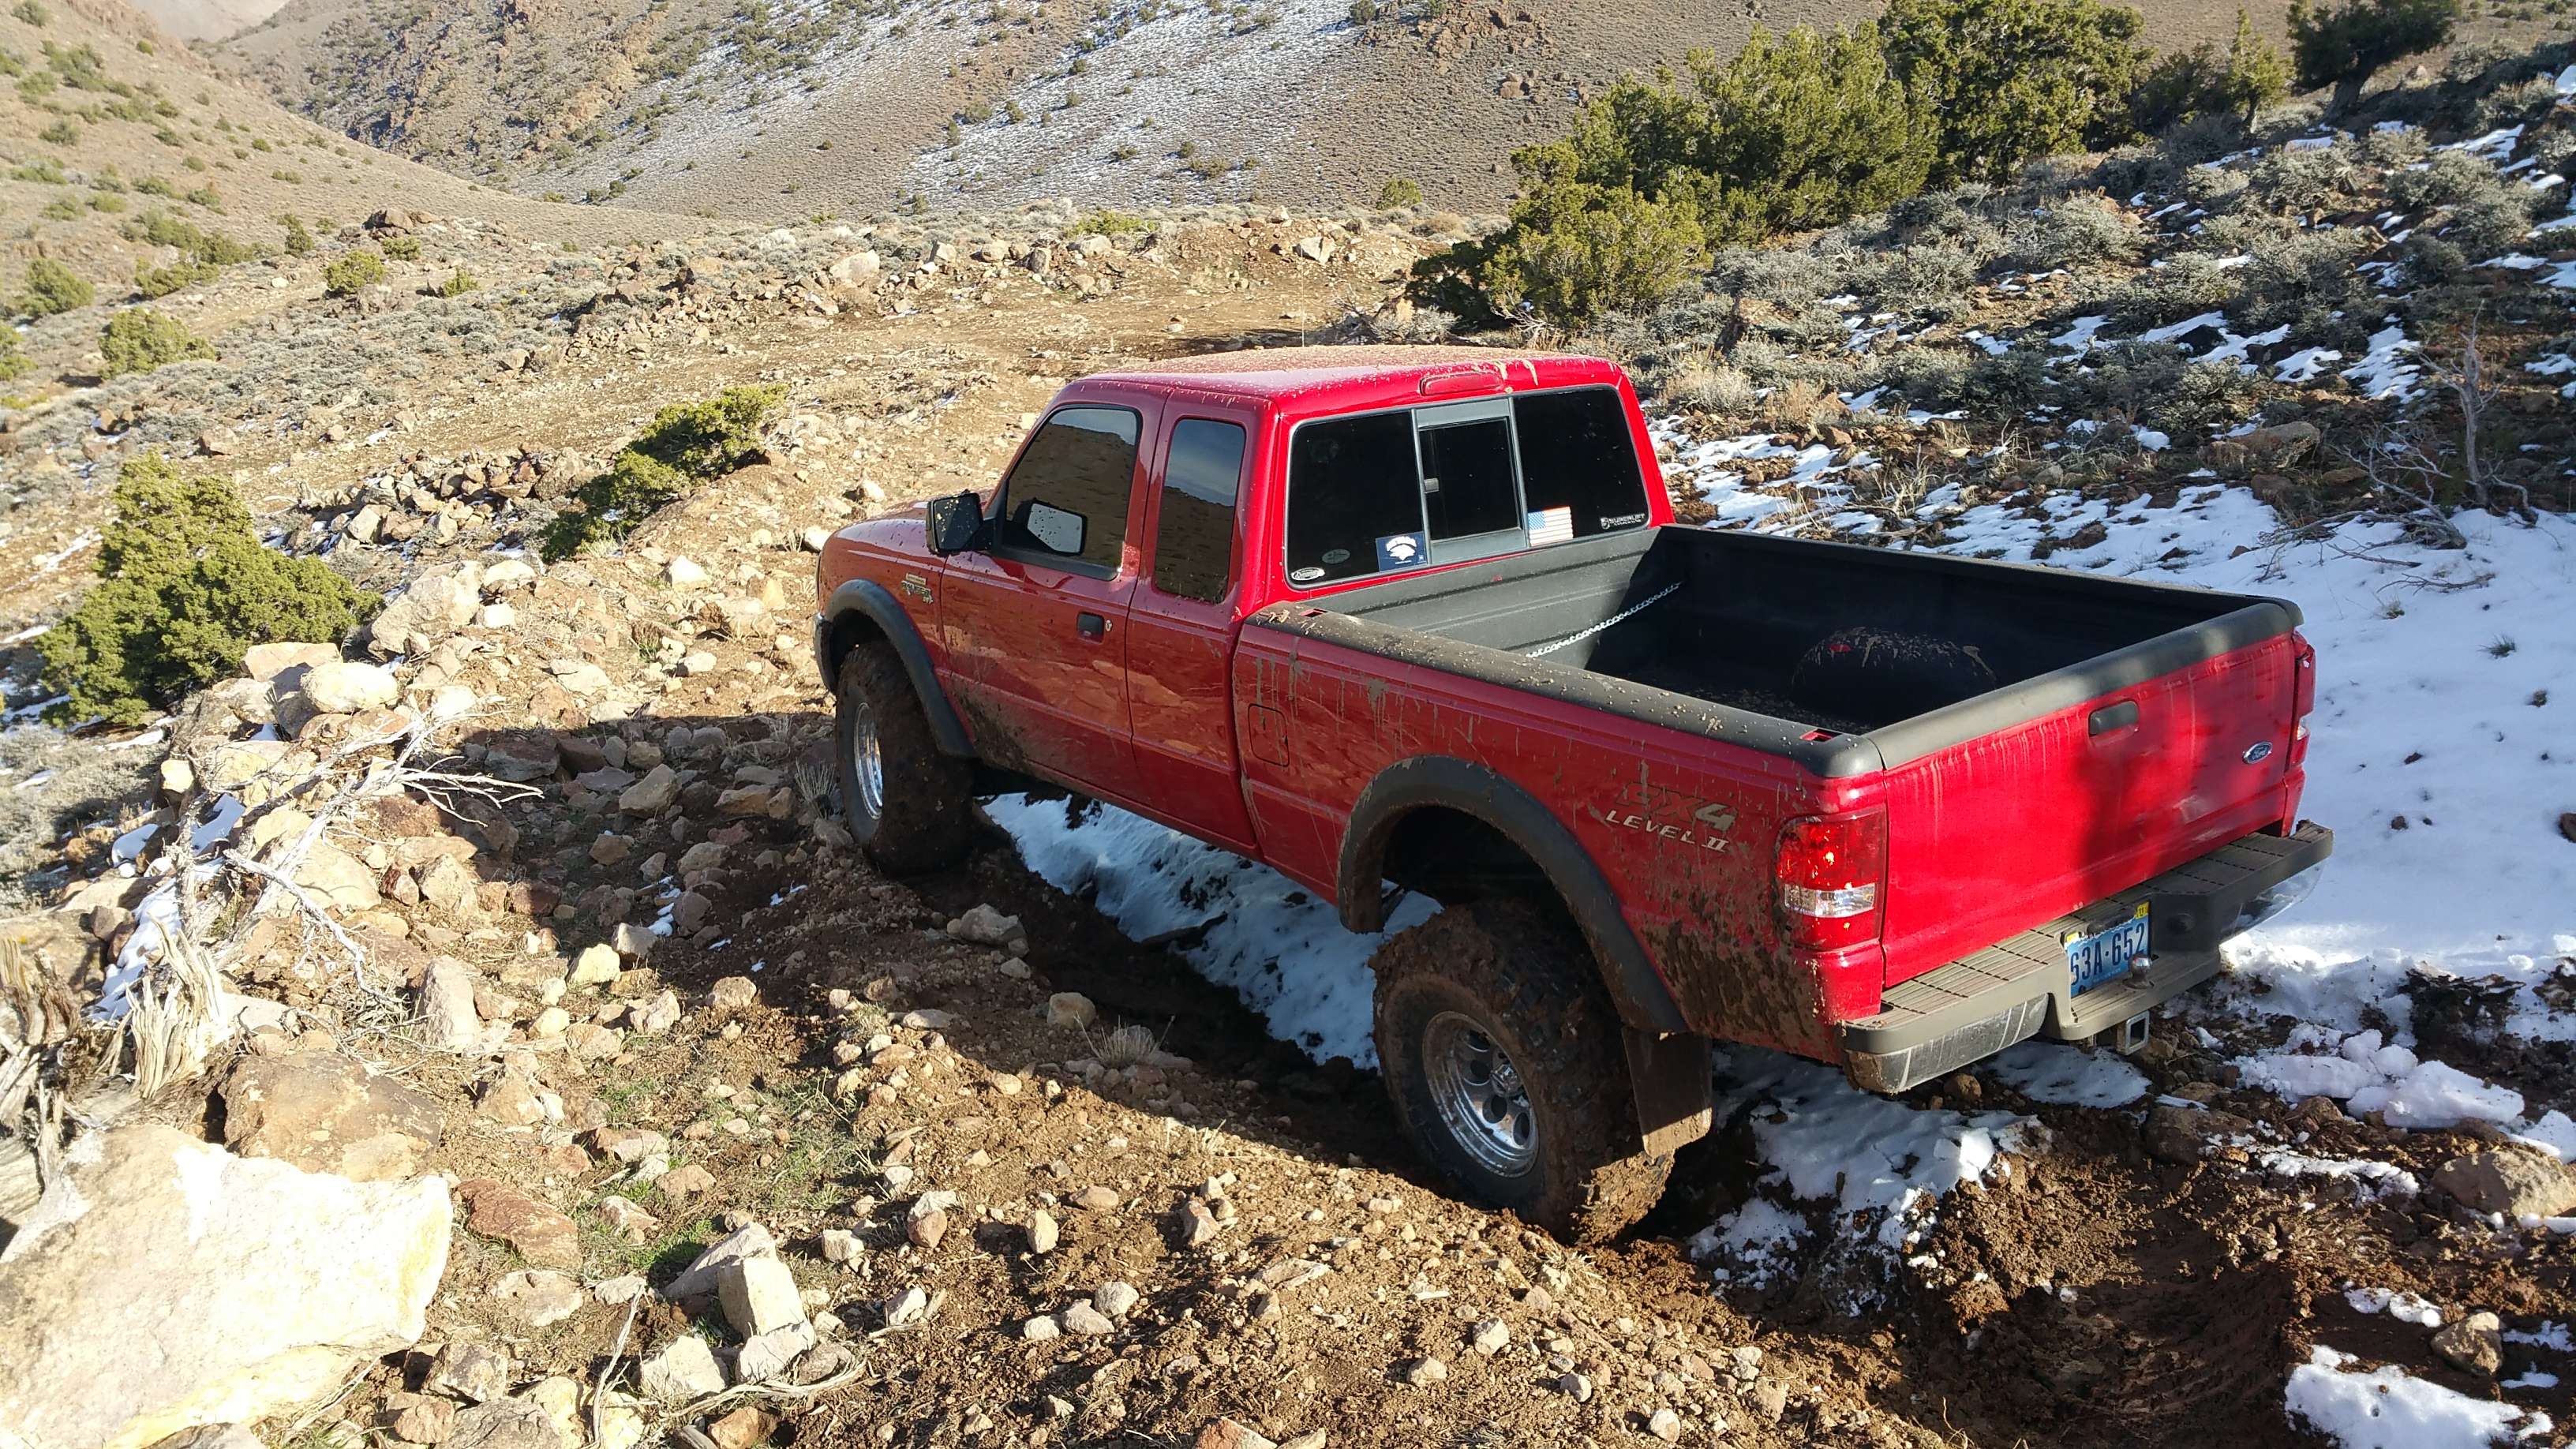
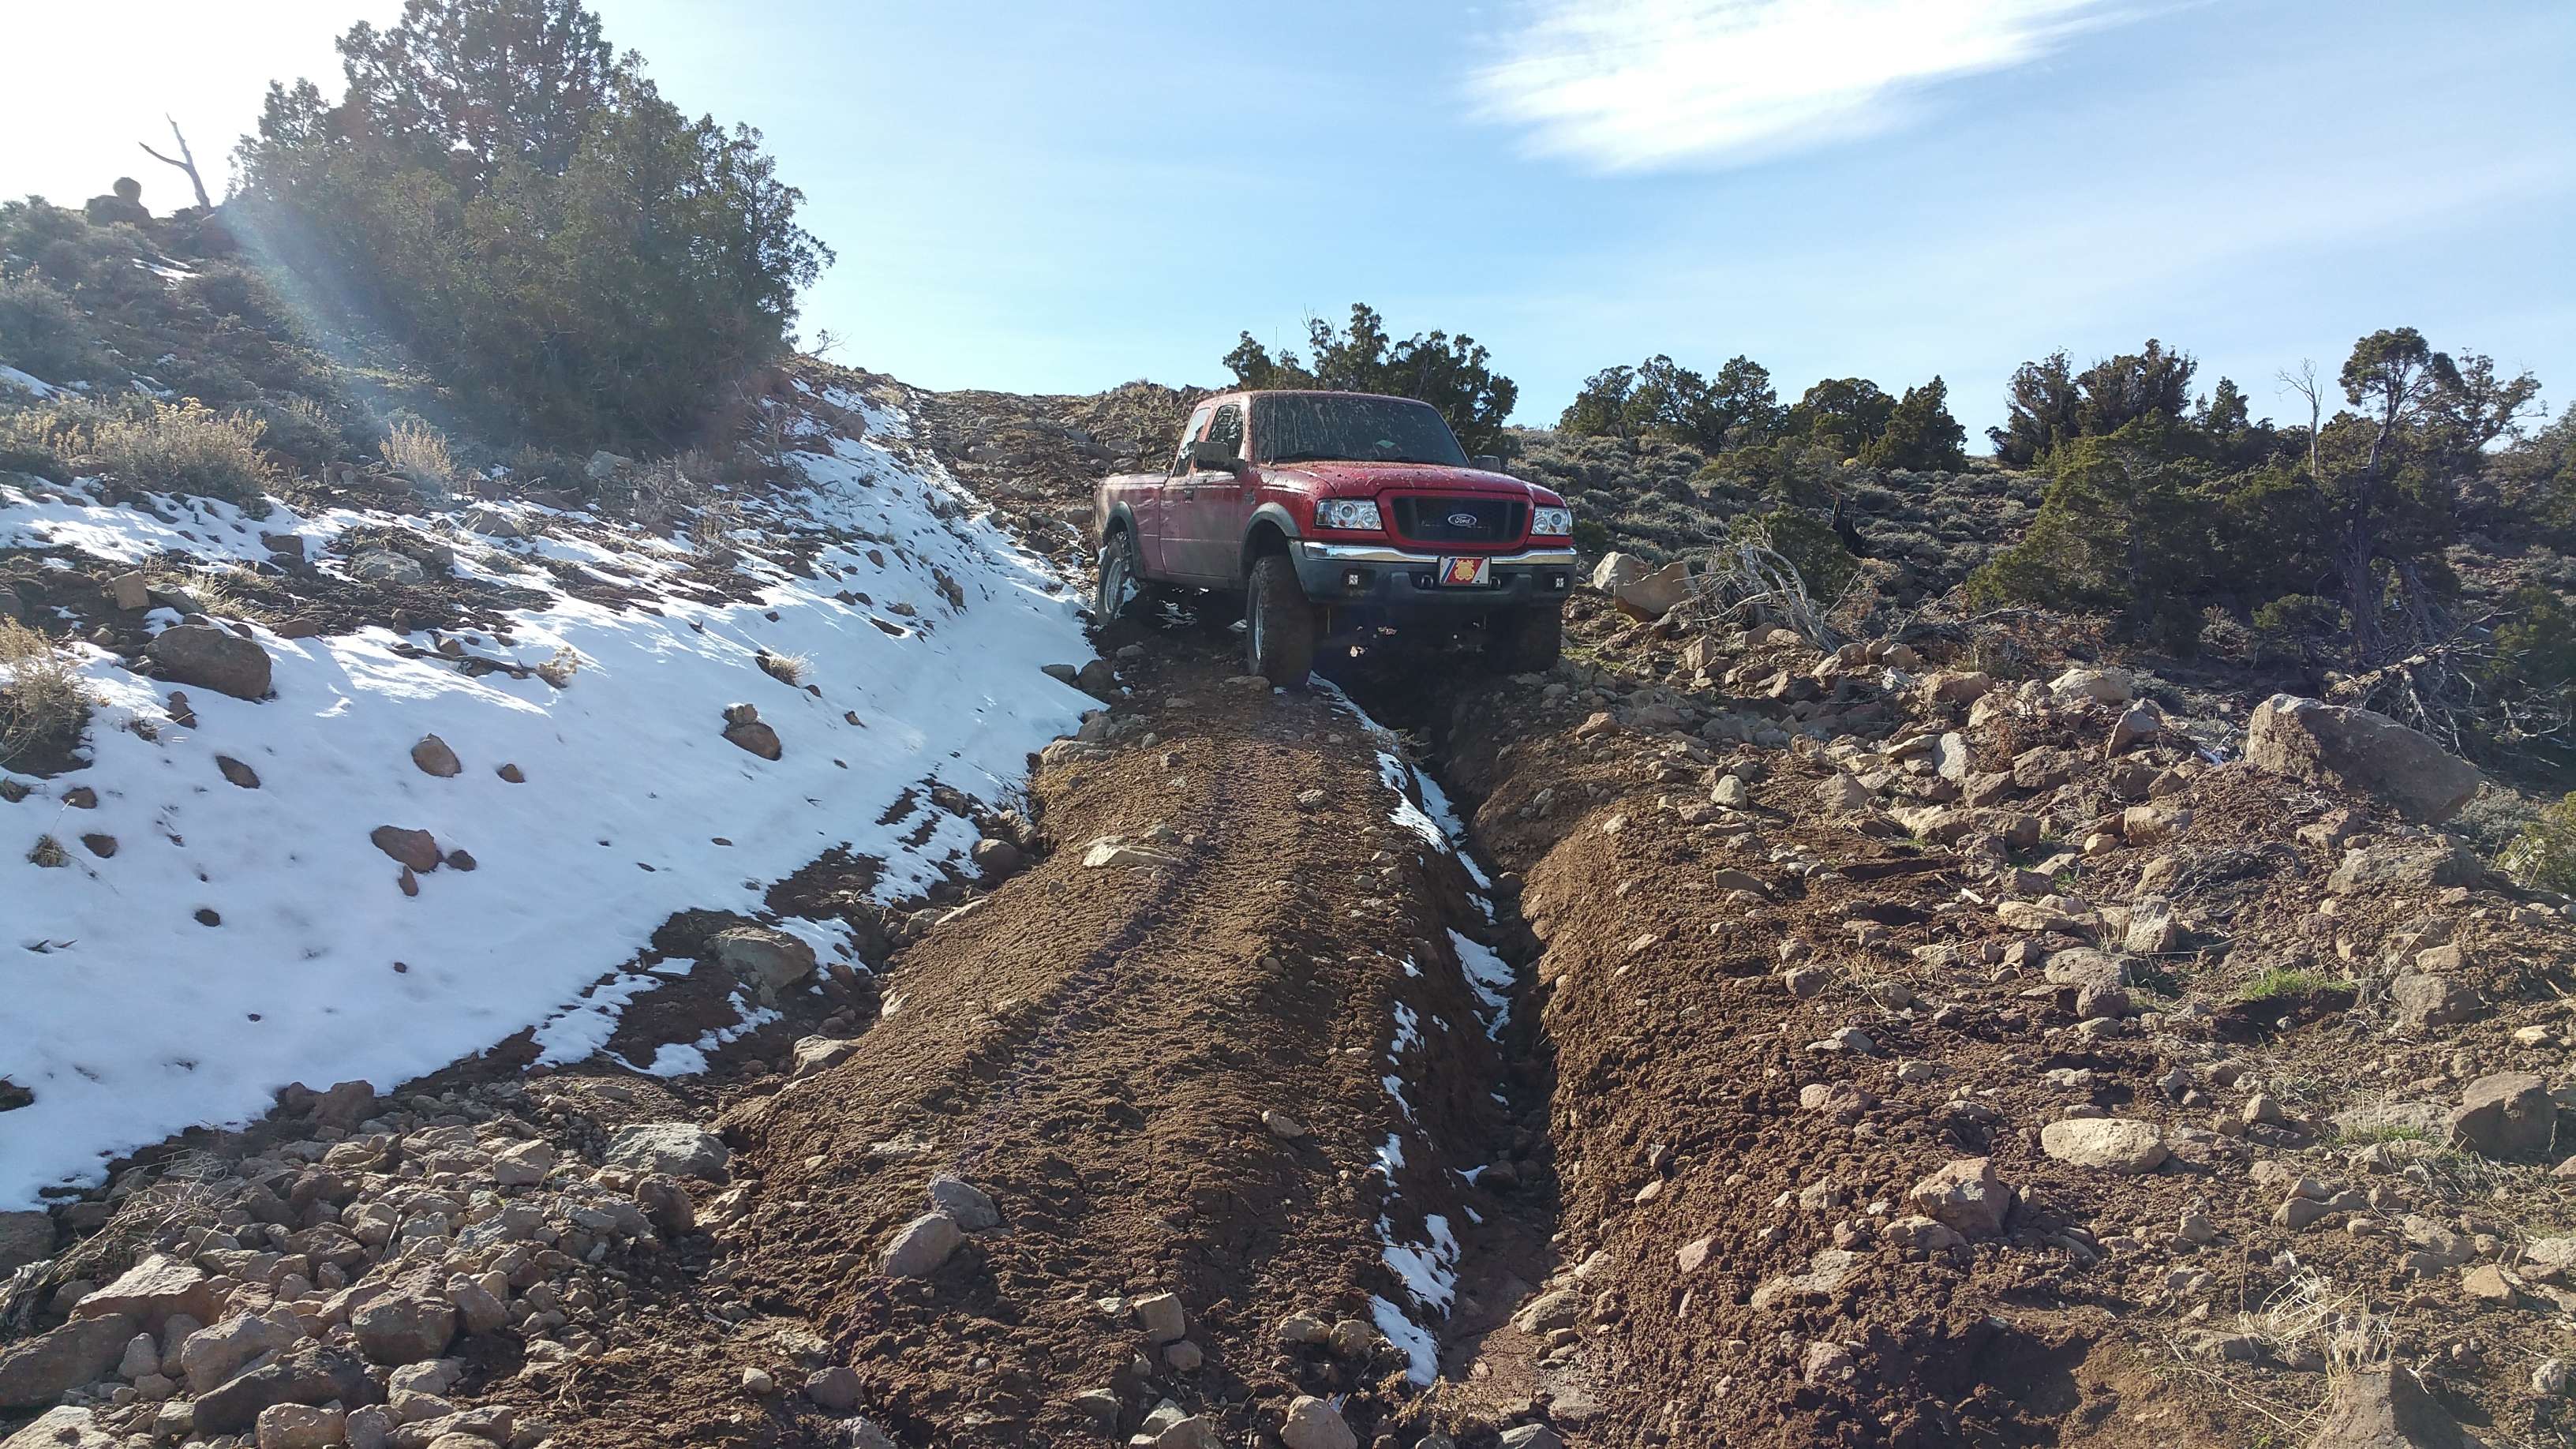
I have taken it offroad 3 times, and pushed it pretty hard. The combo of the mud tires with the lift, front and rear Torsens, and the supercharger to push it, the truck just keeps on diggin and rolling, mud or snow. It is freaking awesome.
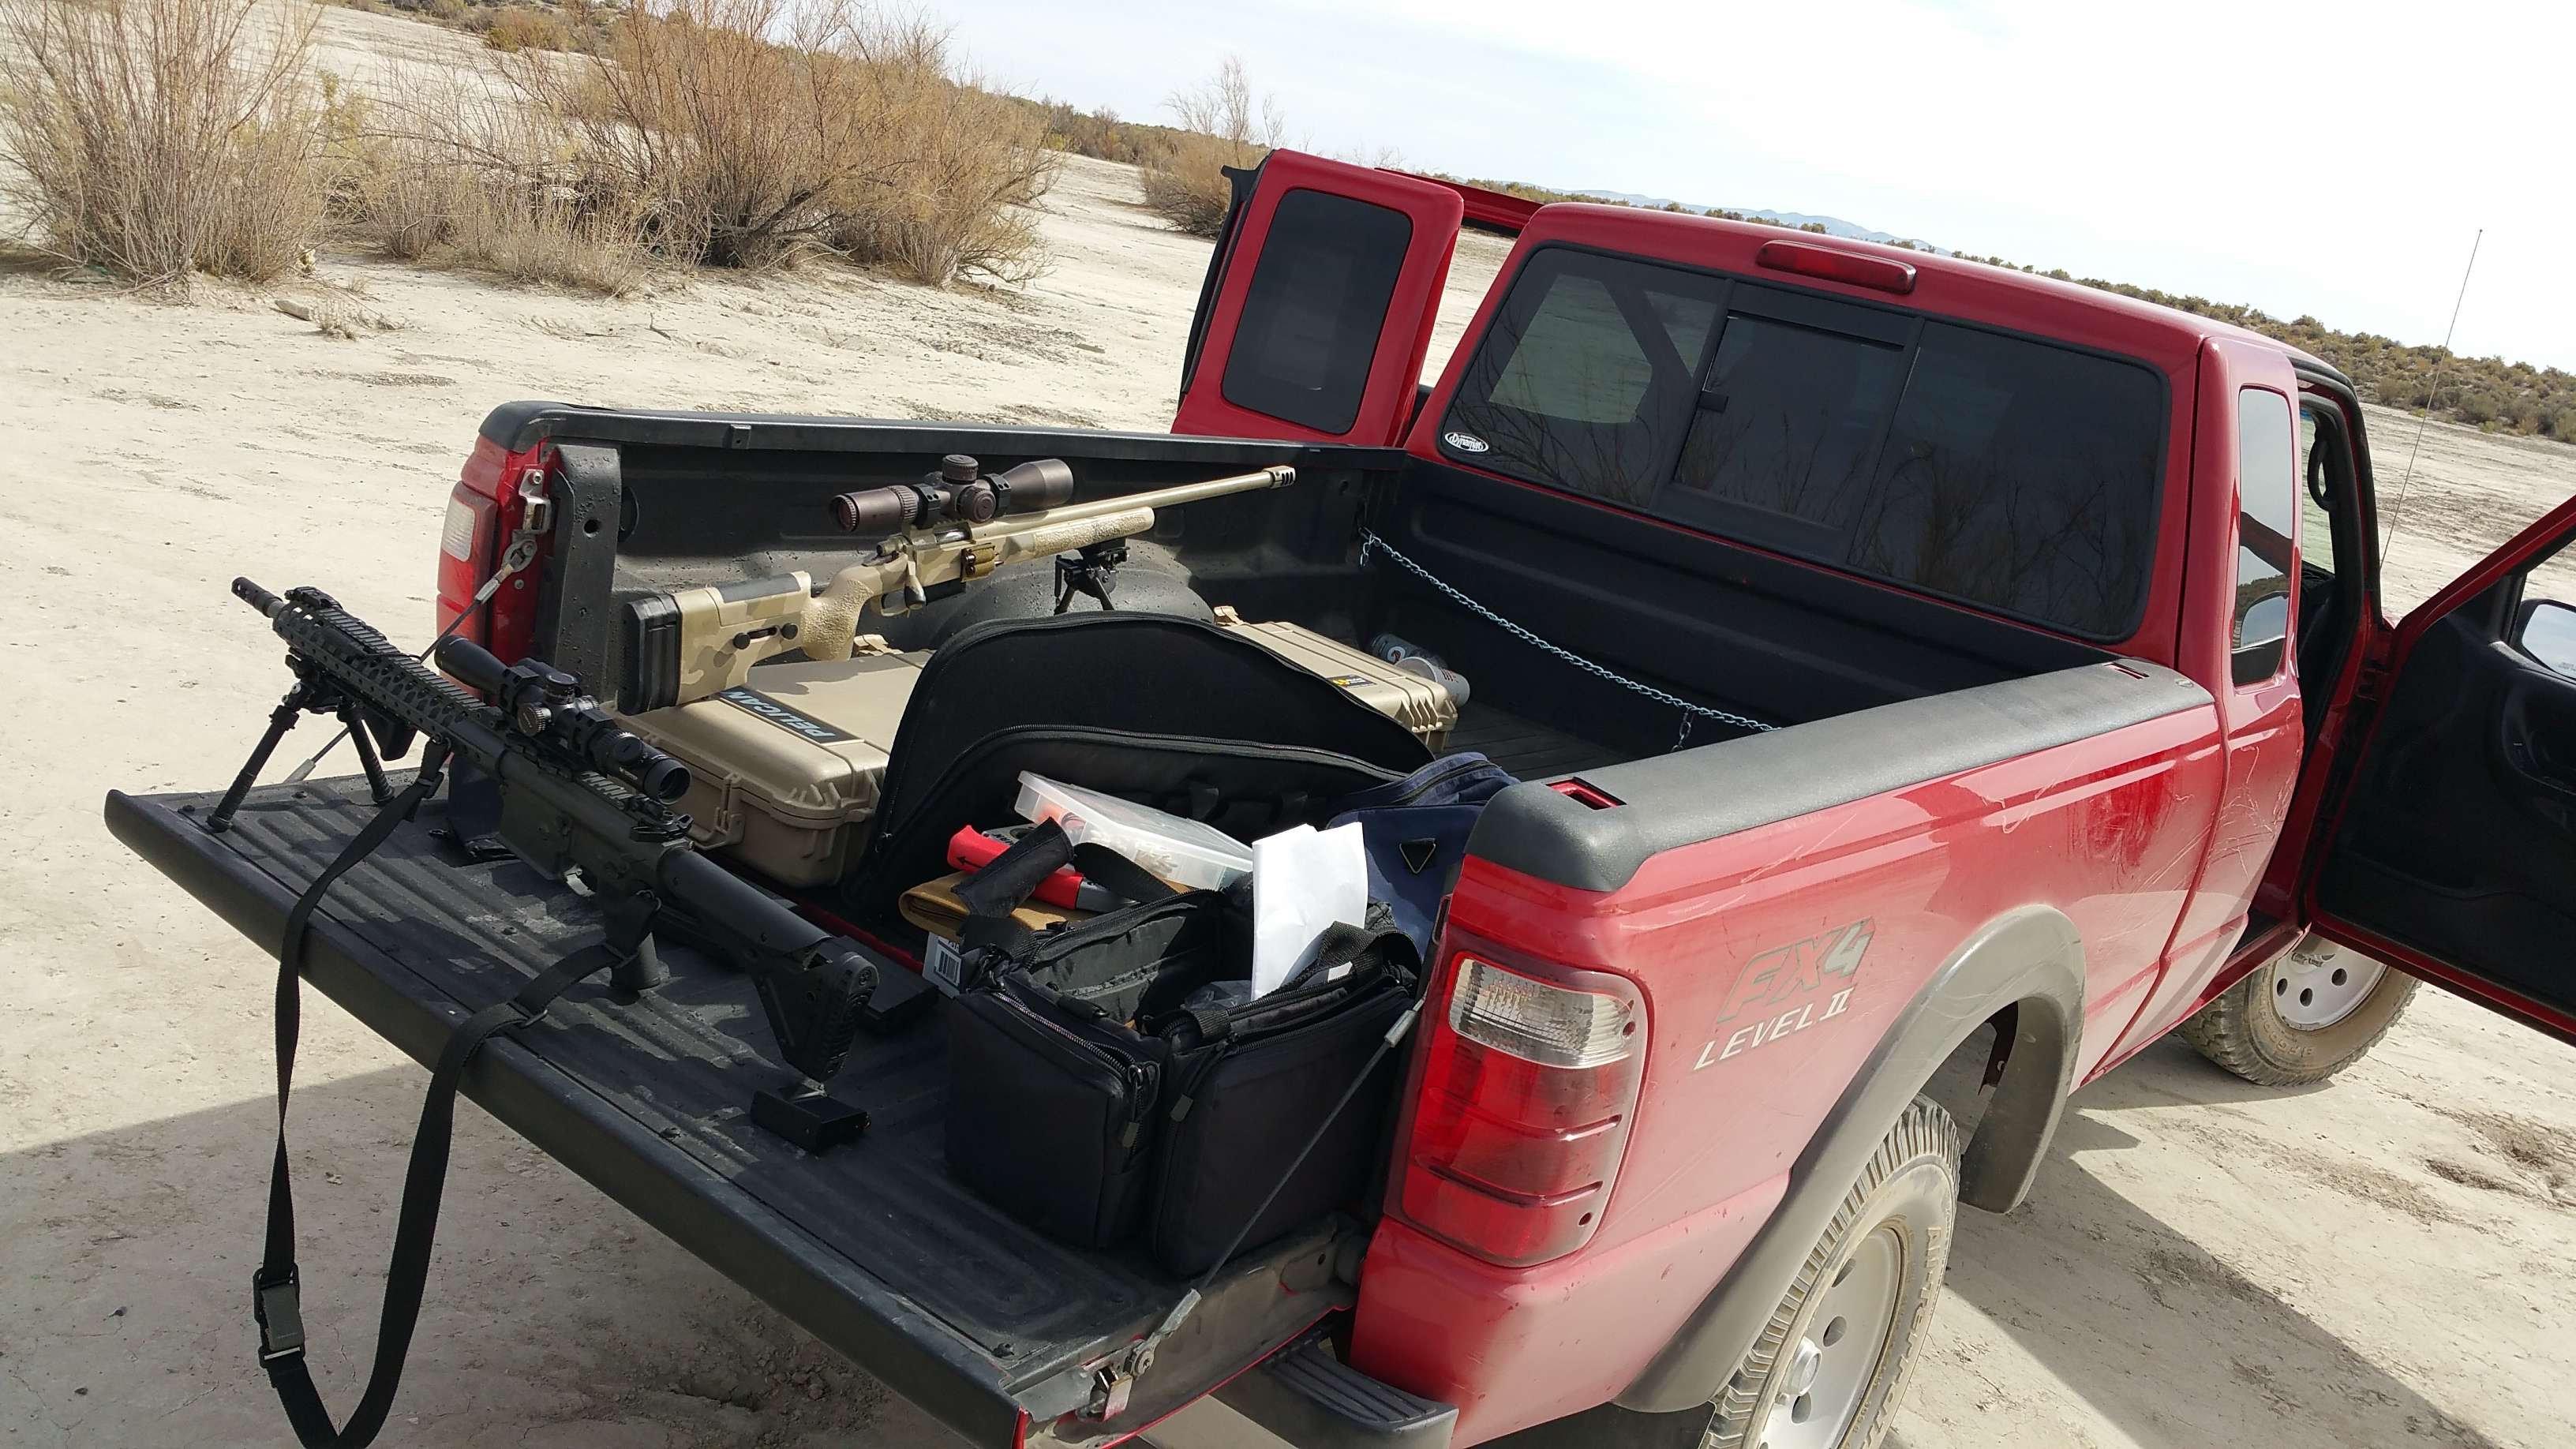
Its getting late here, and I can't remember what else I wanted to type, so I will put all the pictures in here tomorrow night........tease....tease. Here are a few for now.
[IMG]https://www.ranger-forums.com/a href=http://s182.photobucket.com/user/jetdirtbike12/media/Truck/20160112_115119.jpg.html target=_blank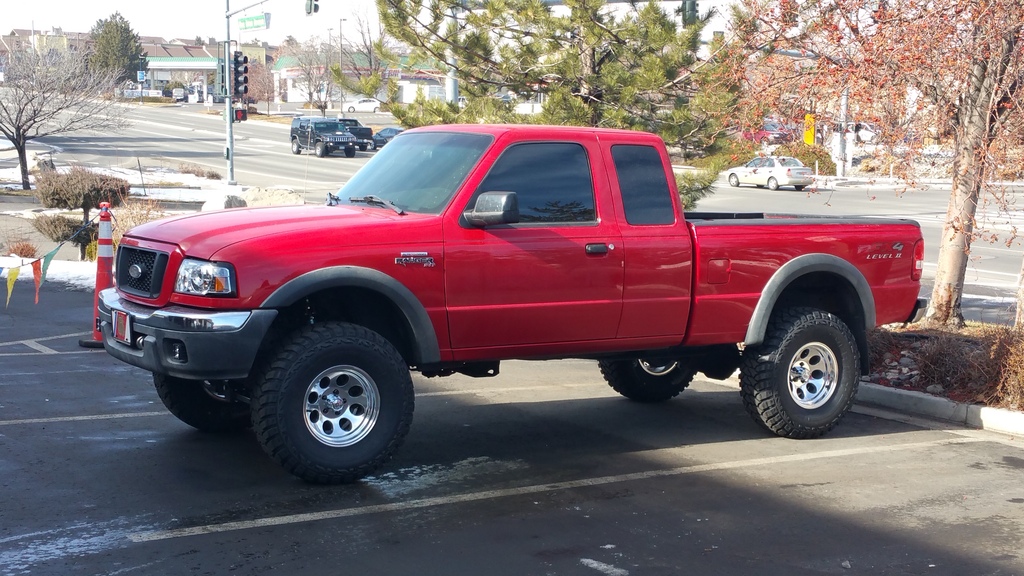
Ask away with questions and I will do my best to answer them. Many more pictures are coming.
Base:
2004 Ford Ranger FX4 LVL II
4.0 SOHC
5 speed M5OD-R1HD
Skid Plates
8.8" 31 spline rear axle
Rear Torsen LSD
Discs in the front and drums in the rear
Cruise
All black interior with read seats
Power everything
Bed sprayed with some kind of bed liner
Alcoas and BFG A/T's
4.10 gears
Now lifted:
4" Superlift front
FR36S Skyjacker rear leaf springs
Rear superlift shocks
ME00Stepside coilover brackets
Fox 2.0 Coilovers w/ Eibach 750lb springs and extended eyelets
Ingall Cam bolts
Daystar extended bumpstops
Dorman brake lines
Superlift front driveshaft
Torsen T2 D35 LSD in front
Moog upper a balljoints and control arms
Moog lower ball joints
Wheels+Tires
Kenda Klever 33x12.5r15
Ion Alloy 15x8's w/ 3.5 B.S
Supercharger:
Moddbox ranger supercharger kit
90's Eaton M90 (rebuilt and painted)
Moddbox intercooler kit
Stereo:
Pioneer AVH3800xxxxxx
Pioneer 10" shallow
x4 6x8" Pioneer speakers w/ Carbon Fiber cones
Pioneer Amp
Scosche 1F capacitor
Custom built box (by me)
Other:
220 Alternator with big 3 upgrade to 1/0 gauge wiring
Rockford Fosgate terminals
Reese Towpower hidden hitch
Spyder HID Projector Headlights
06 Taillights
06 Mirrors
Trail Gear Sliders (yet to be put on)
Rigid LED Fog Lights
Front and Read Cameras
DeeZee bet mat
Sweet "Ranger SVT" emblems
Dynamat throughout the entire interior
.....And likely a few other things I forgot to mention.
I have yet to put on the front superlift skid plate and original skid plate above it. I also wish to fab some support bars for the rear LCA control arm, and build the mounts for the Trail Gear sliders. I also have a ding to get fixed now in the bed. It snowed hard and a family member came in the night and parked her white truck in my blind spot. It was covered by snow and I didn't know it was there, so BANG..... right into it. My beautiful truck............
Anyways. I bought the truck back in July of 2015. I put the system in it and did all the basic maintenance when purchased. During winter break is when I did all the good stuff. So far, it has all worked very well with no catastrophic failures. A few odd creeks from the front suspension since the install, and I have to pull the front diff back out to get the backspacing set properly (another thread is open on that topic). When I put it back together for the second time, I will double check all the bolts and welds for safety, and she will be golden.
The supercharger install went well, and I haven't had any problems. I am only running the 3.5 psi pulley with no tune. But I do have the intercooler, which helps. Bleeding it is quite difficult since I didn't use the bleeders on the inner radiator while it was exposed. Down the road, I plan on getting a tune, larger injectors, and putting on the 7.5 psi pulley that I already have from moddbox. I recommend Moddbox for any ranger supercharging needs. They have great customer service and expertise, and have a high quality product.
I have taken it offroad 3 times, and pushed it pretty hard. The combo of the mud tires with the lift, front and rear Torsens, and the supercharger to push it, the truck just keeps on diggin and rolling, mud or snow. It is freaking awesome.
Its getting late here, and I can't remember what else I wanted to type, so I will put all the pictures in here tomorrow night........tease....tease. Here are a few for now.
[IMG]https://www.ranger-forums.com/a href=http://s182.photobucket.com/user/jetdirtbike12/media/Truck/20160112_115119.jpg.html target=_blank


Ask away with questions and I will do my best to answer them. Many more pictures are coming.
Last edited by Sempertye; 02-09-2016 at 11:16 PM.

#3
02-05-2016


#4
02-07-2016


#6
10-28-2016
Join Date: Jul 2015
Location: Reno, Nevada
Posts: 52
Likes: 0
Received 0 Likes
on
0 Posts
Holy crap. It has been 10ish months since I thought about updating this. I left everyone hanging. Well, I have done a few more things, and have pictures of it all, so prepare yourself. I will spend the next few hours uploading and commenting what feels like 100 billion pictures for your enjoyment.
#7
10-28-2016
Join Date: Jul 2015
Location: Reno, Nevada
Posts: 52
Likes: 0
Received 0 Likes
on
0 Posts
This is a test post for pictures. Photobucket is down, so I am trying ImageShack.
The truck when I first bought her.
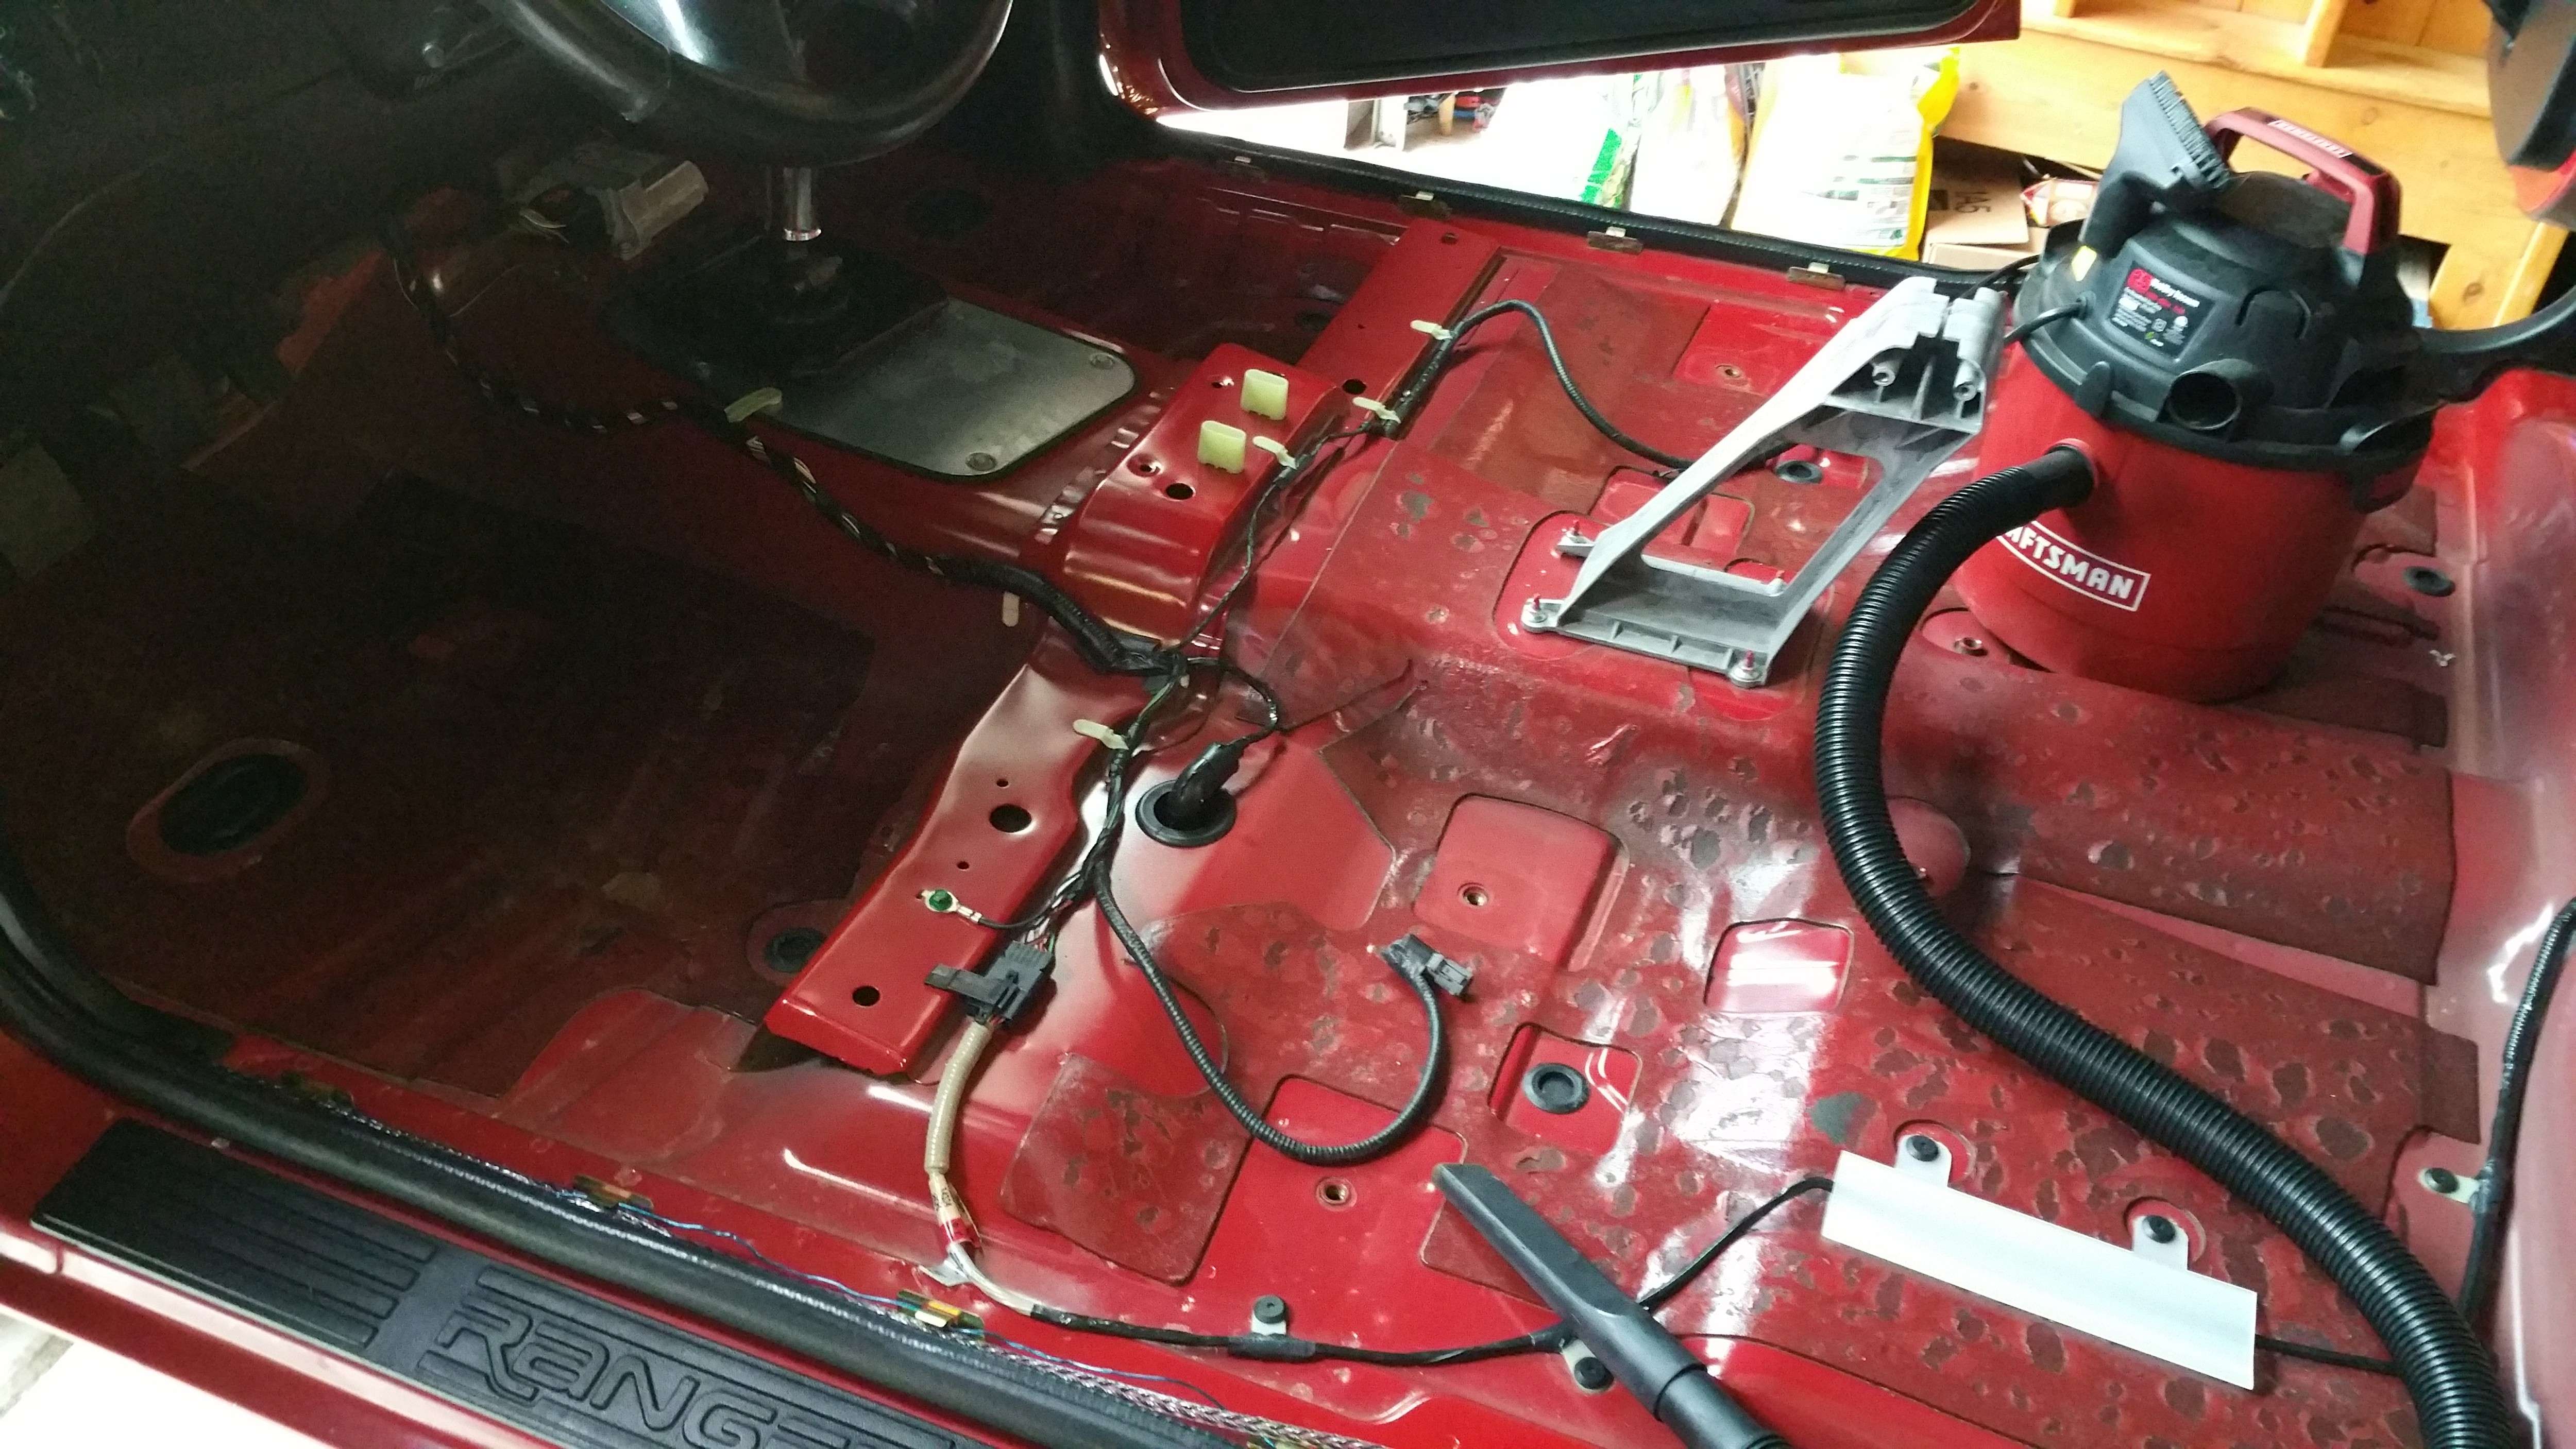
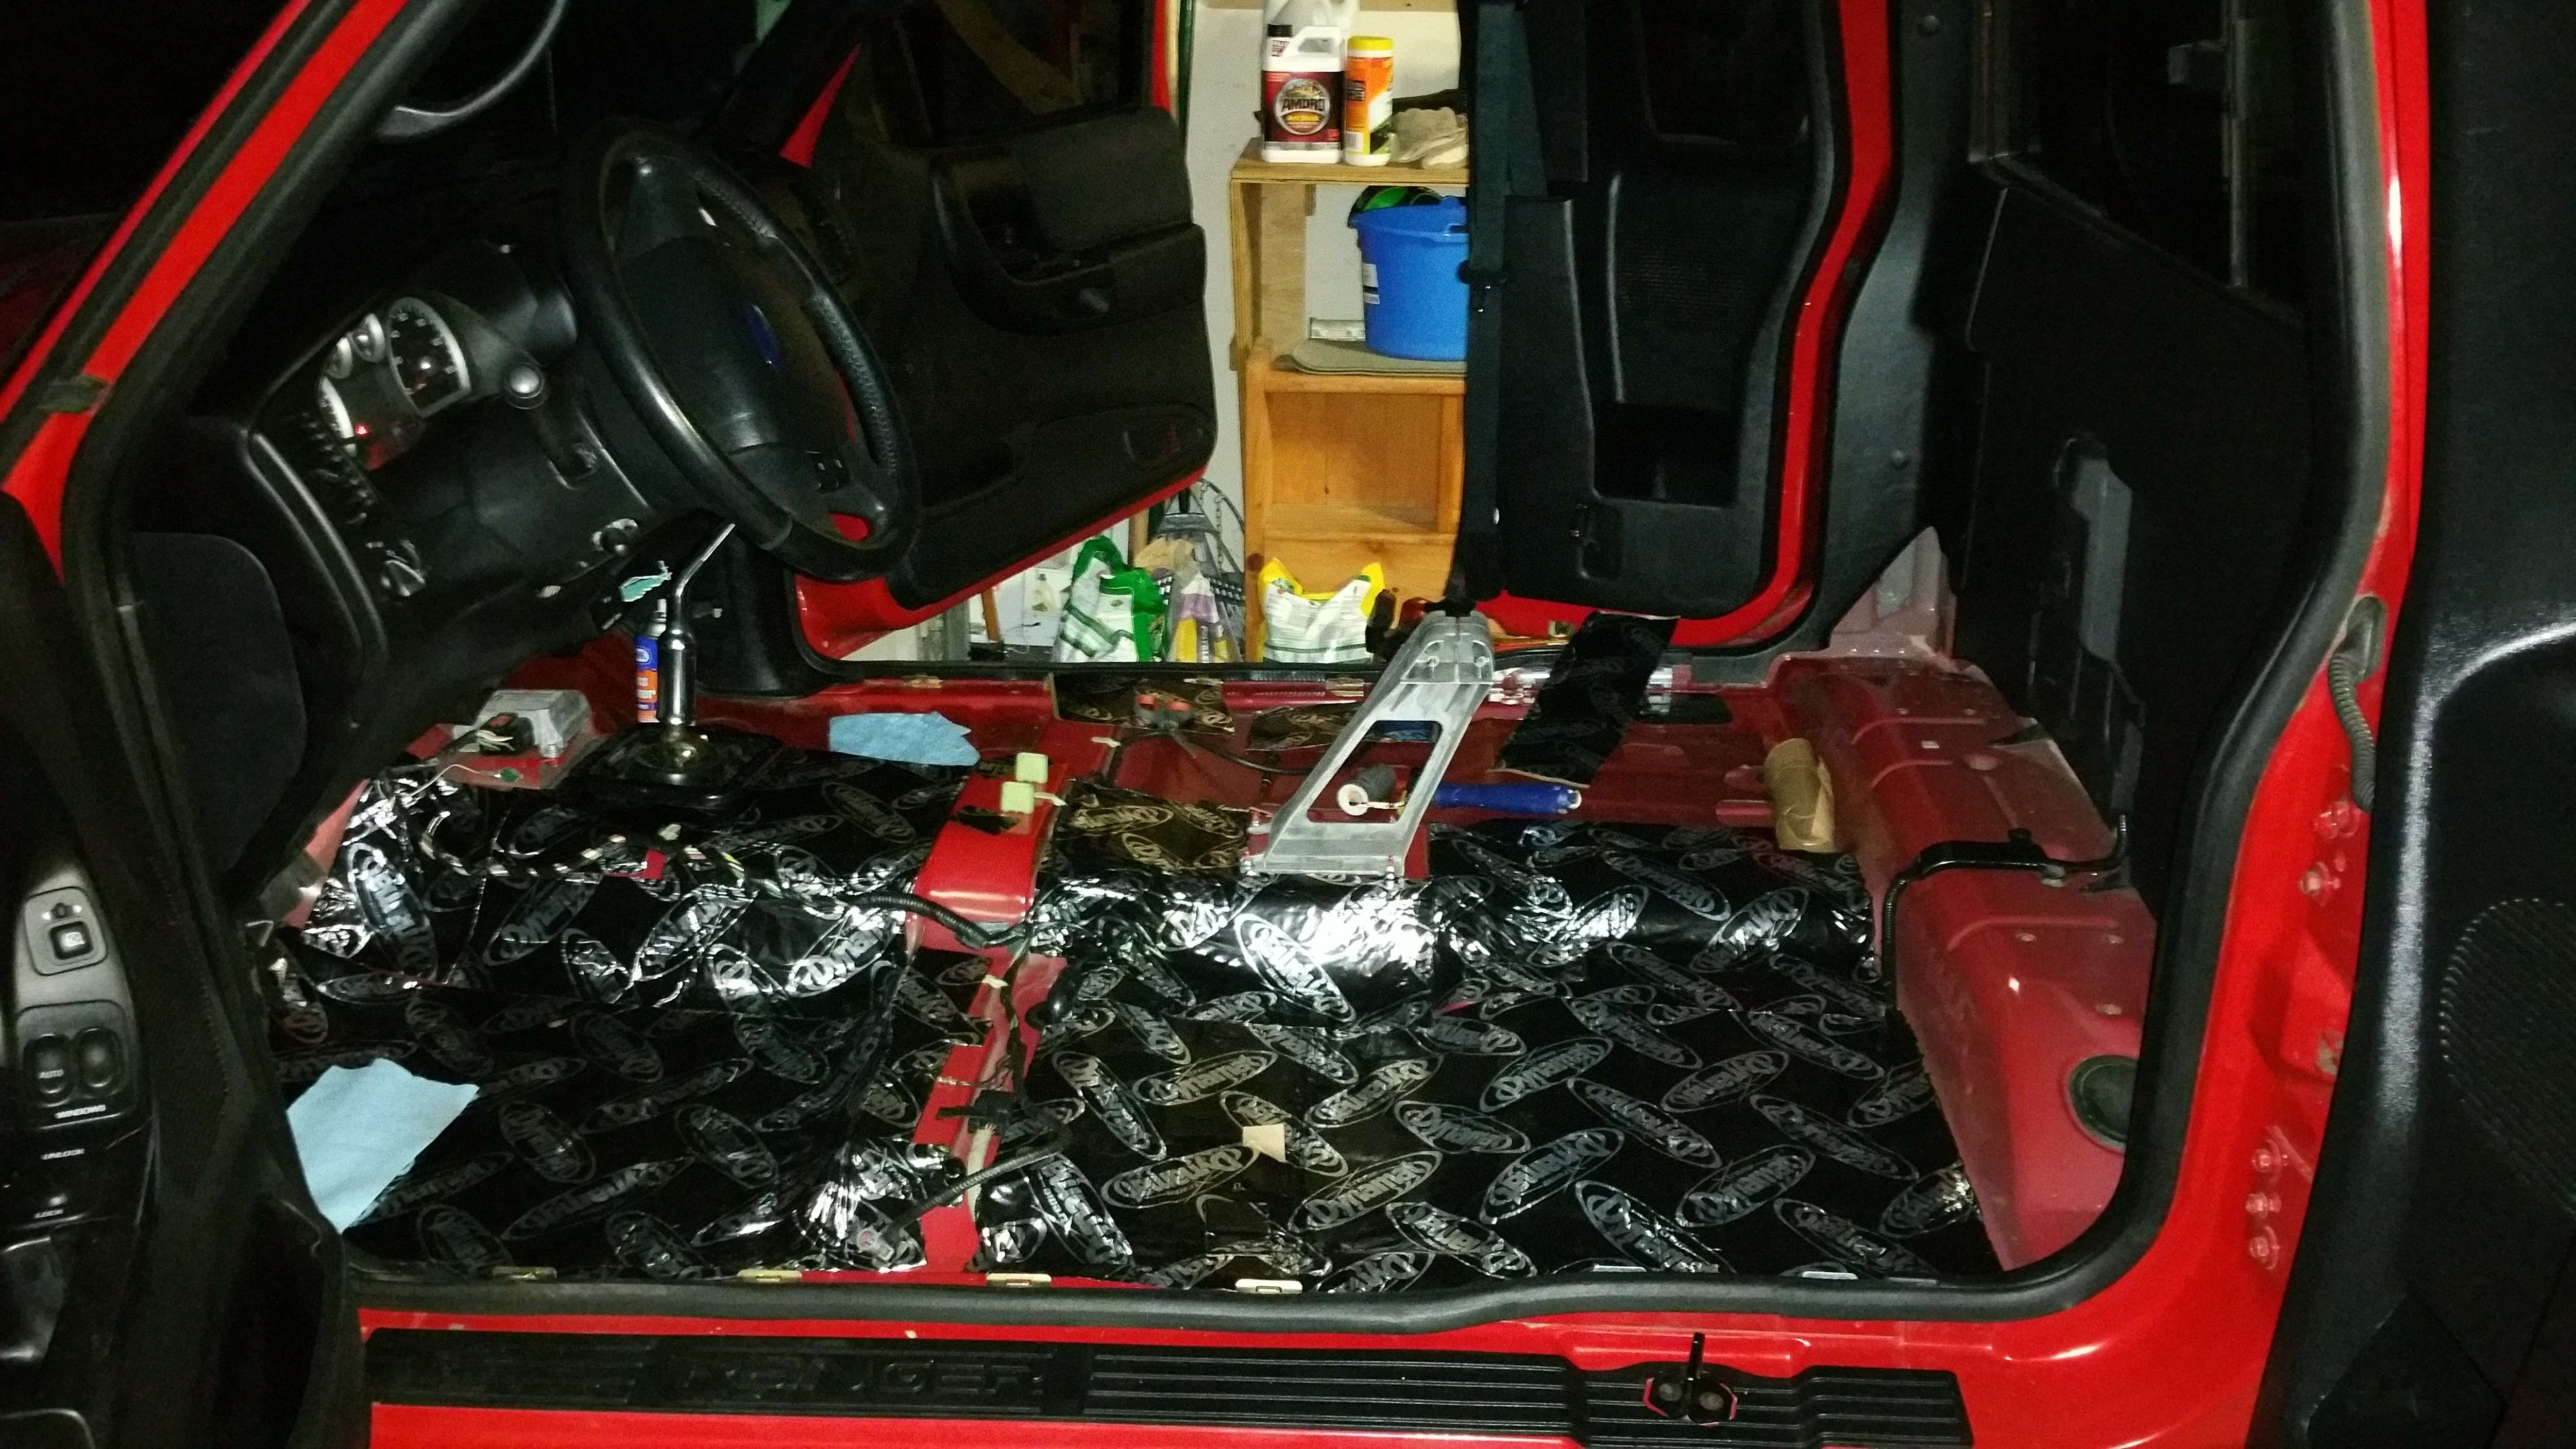
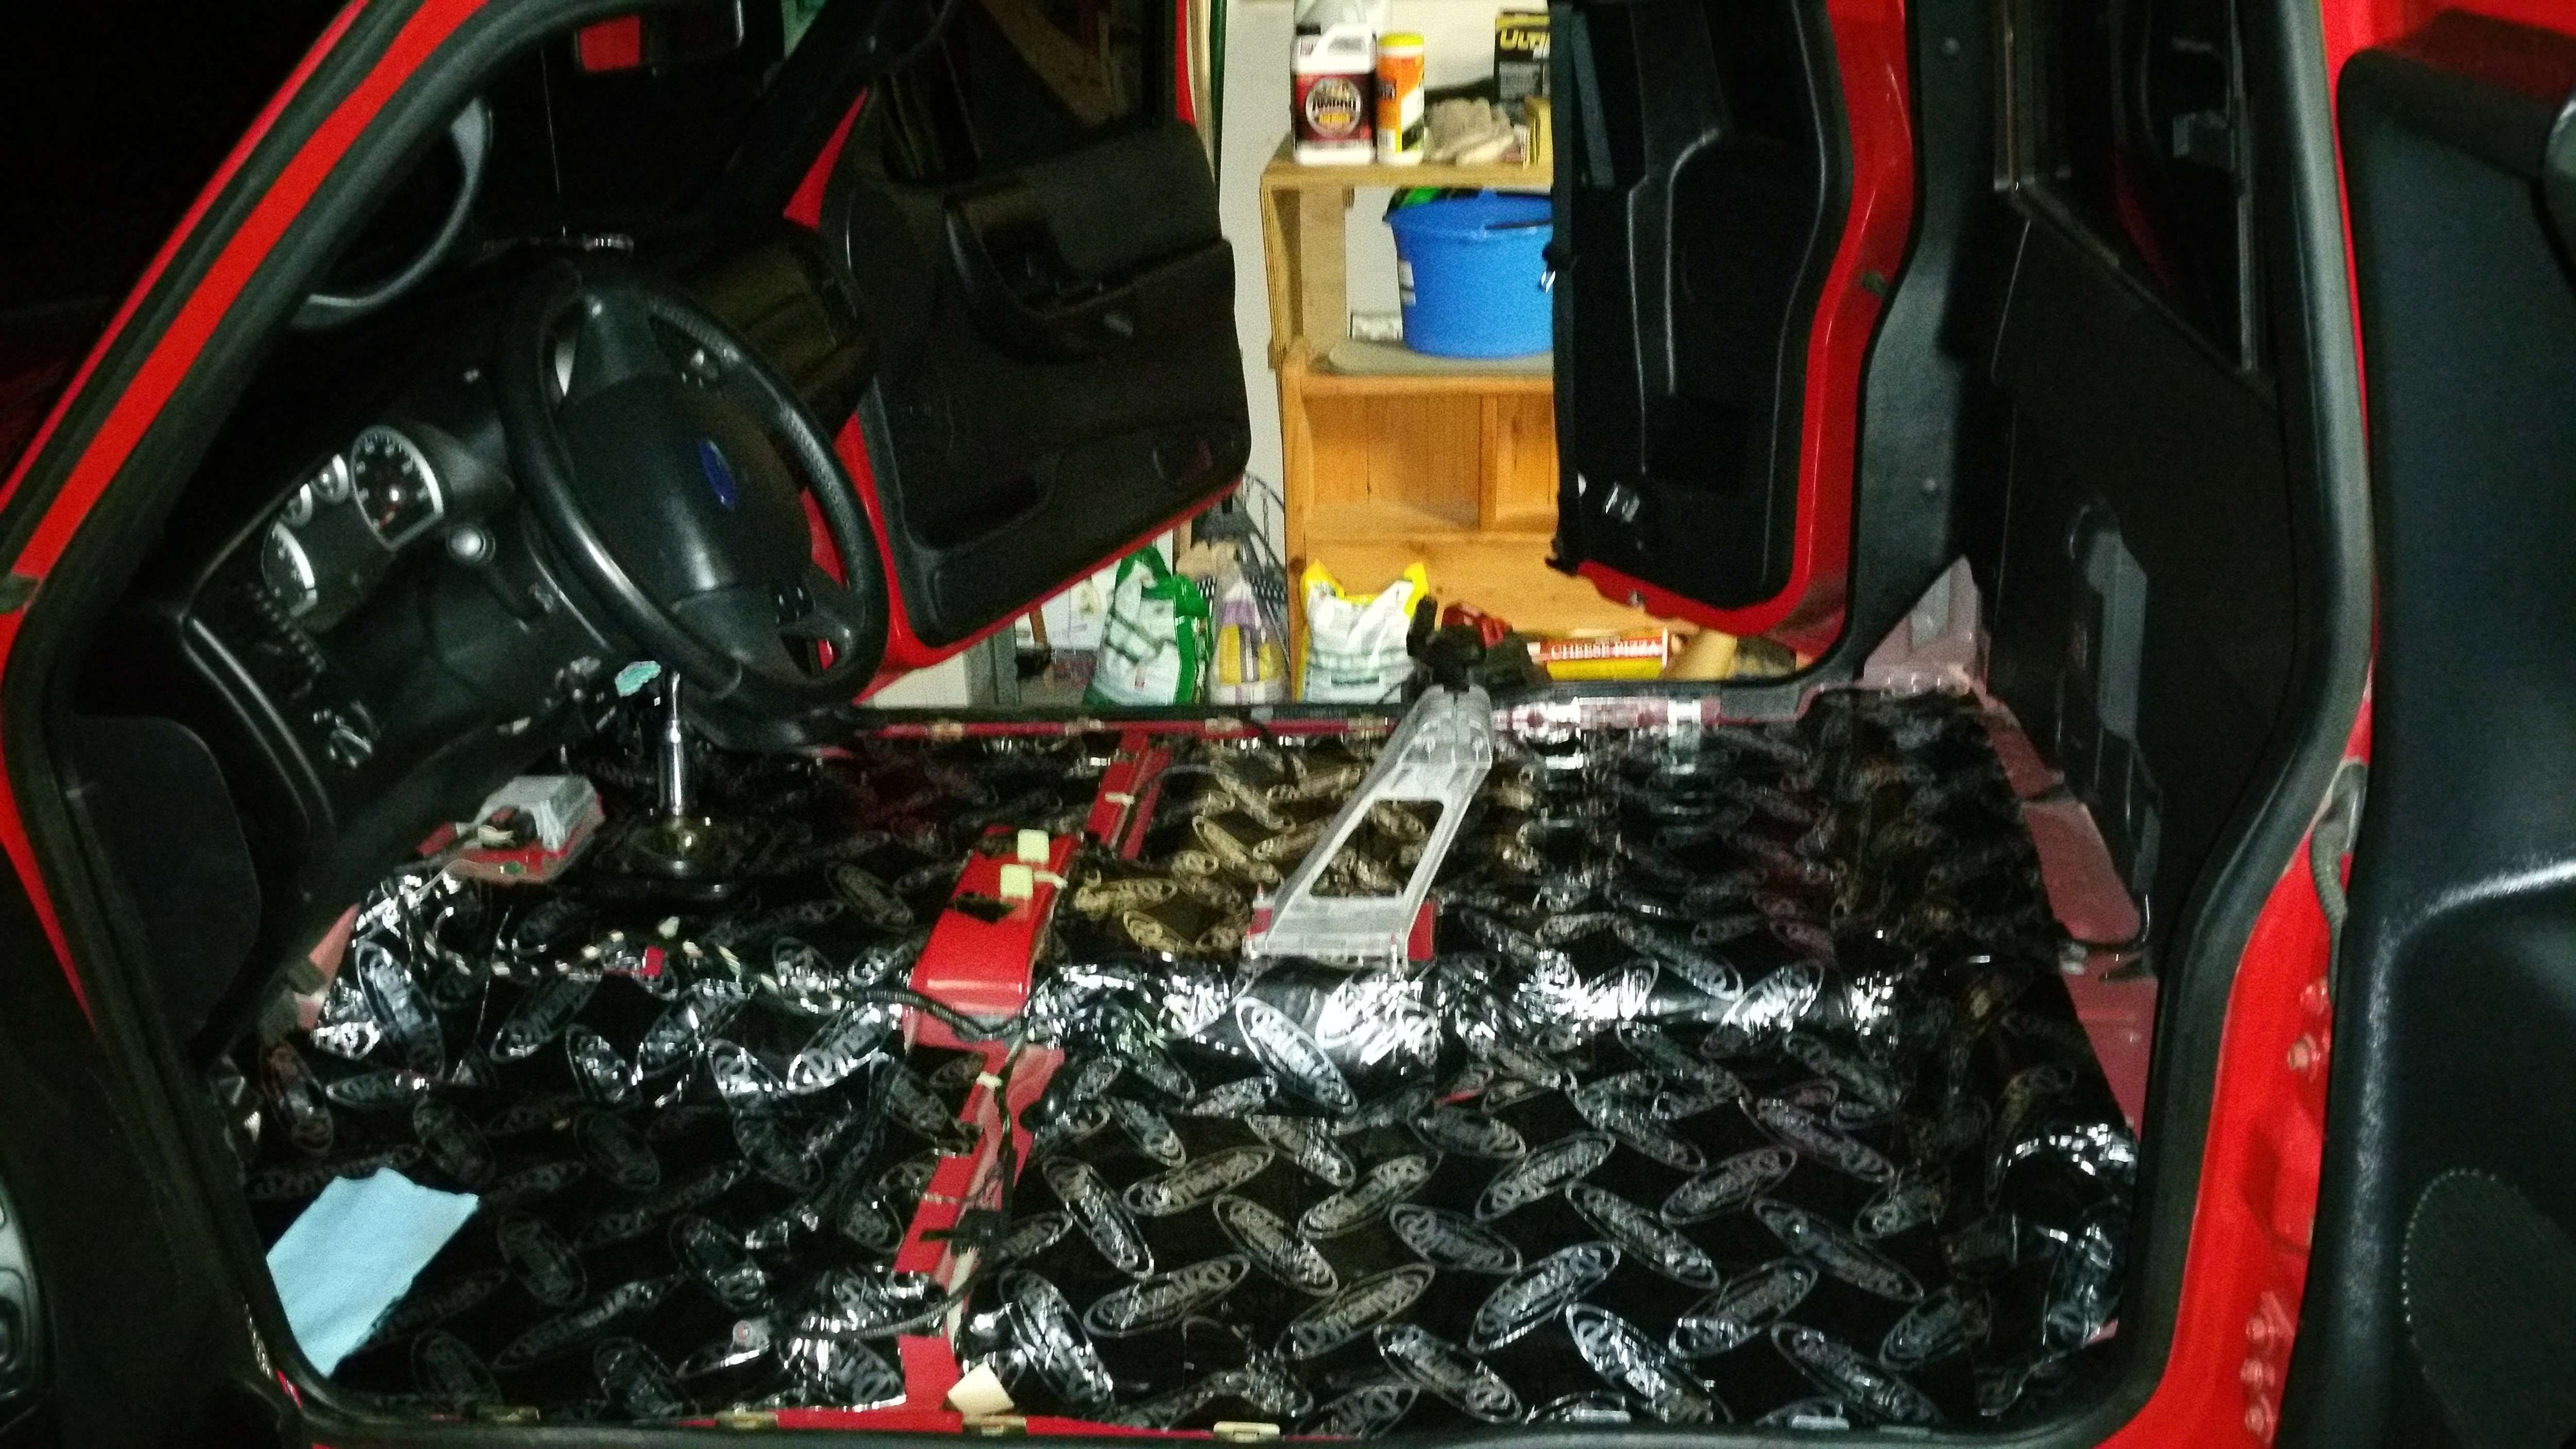
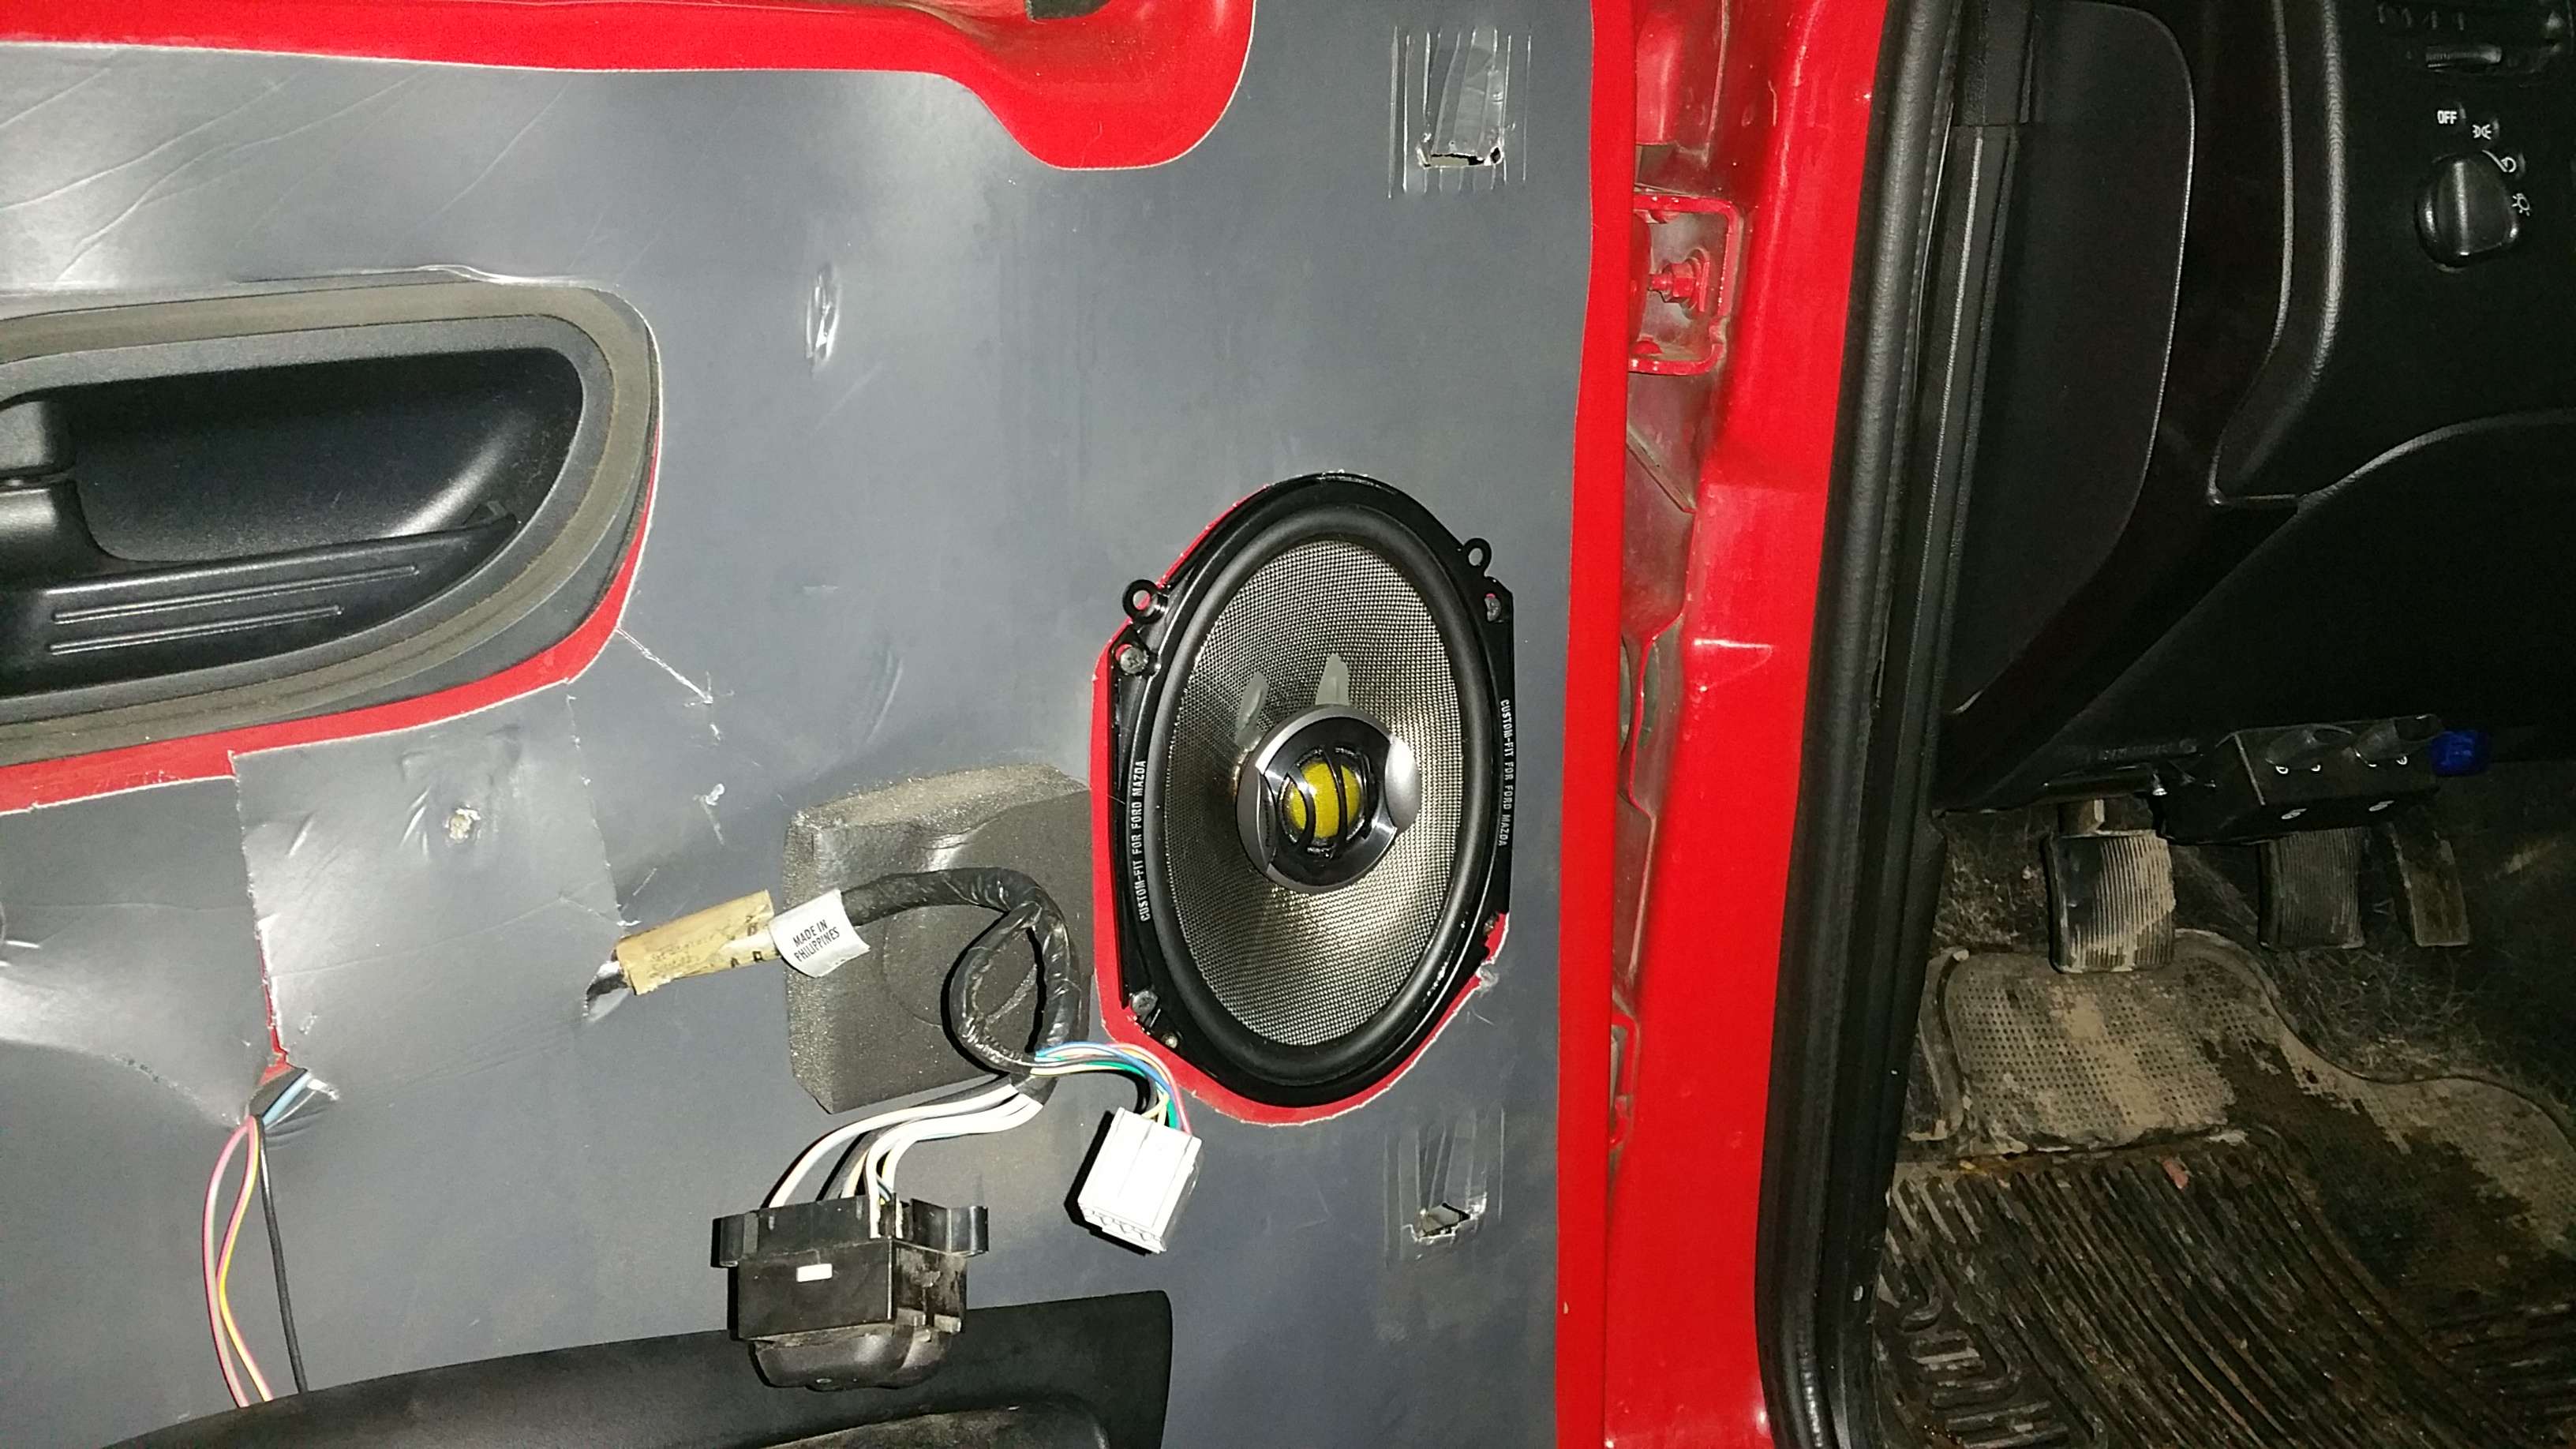
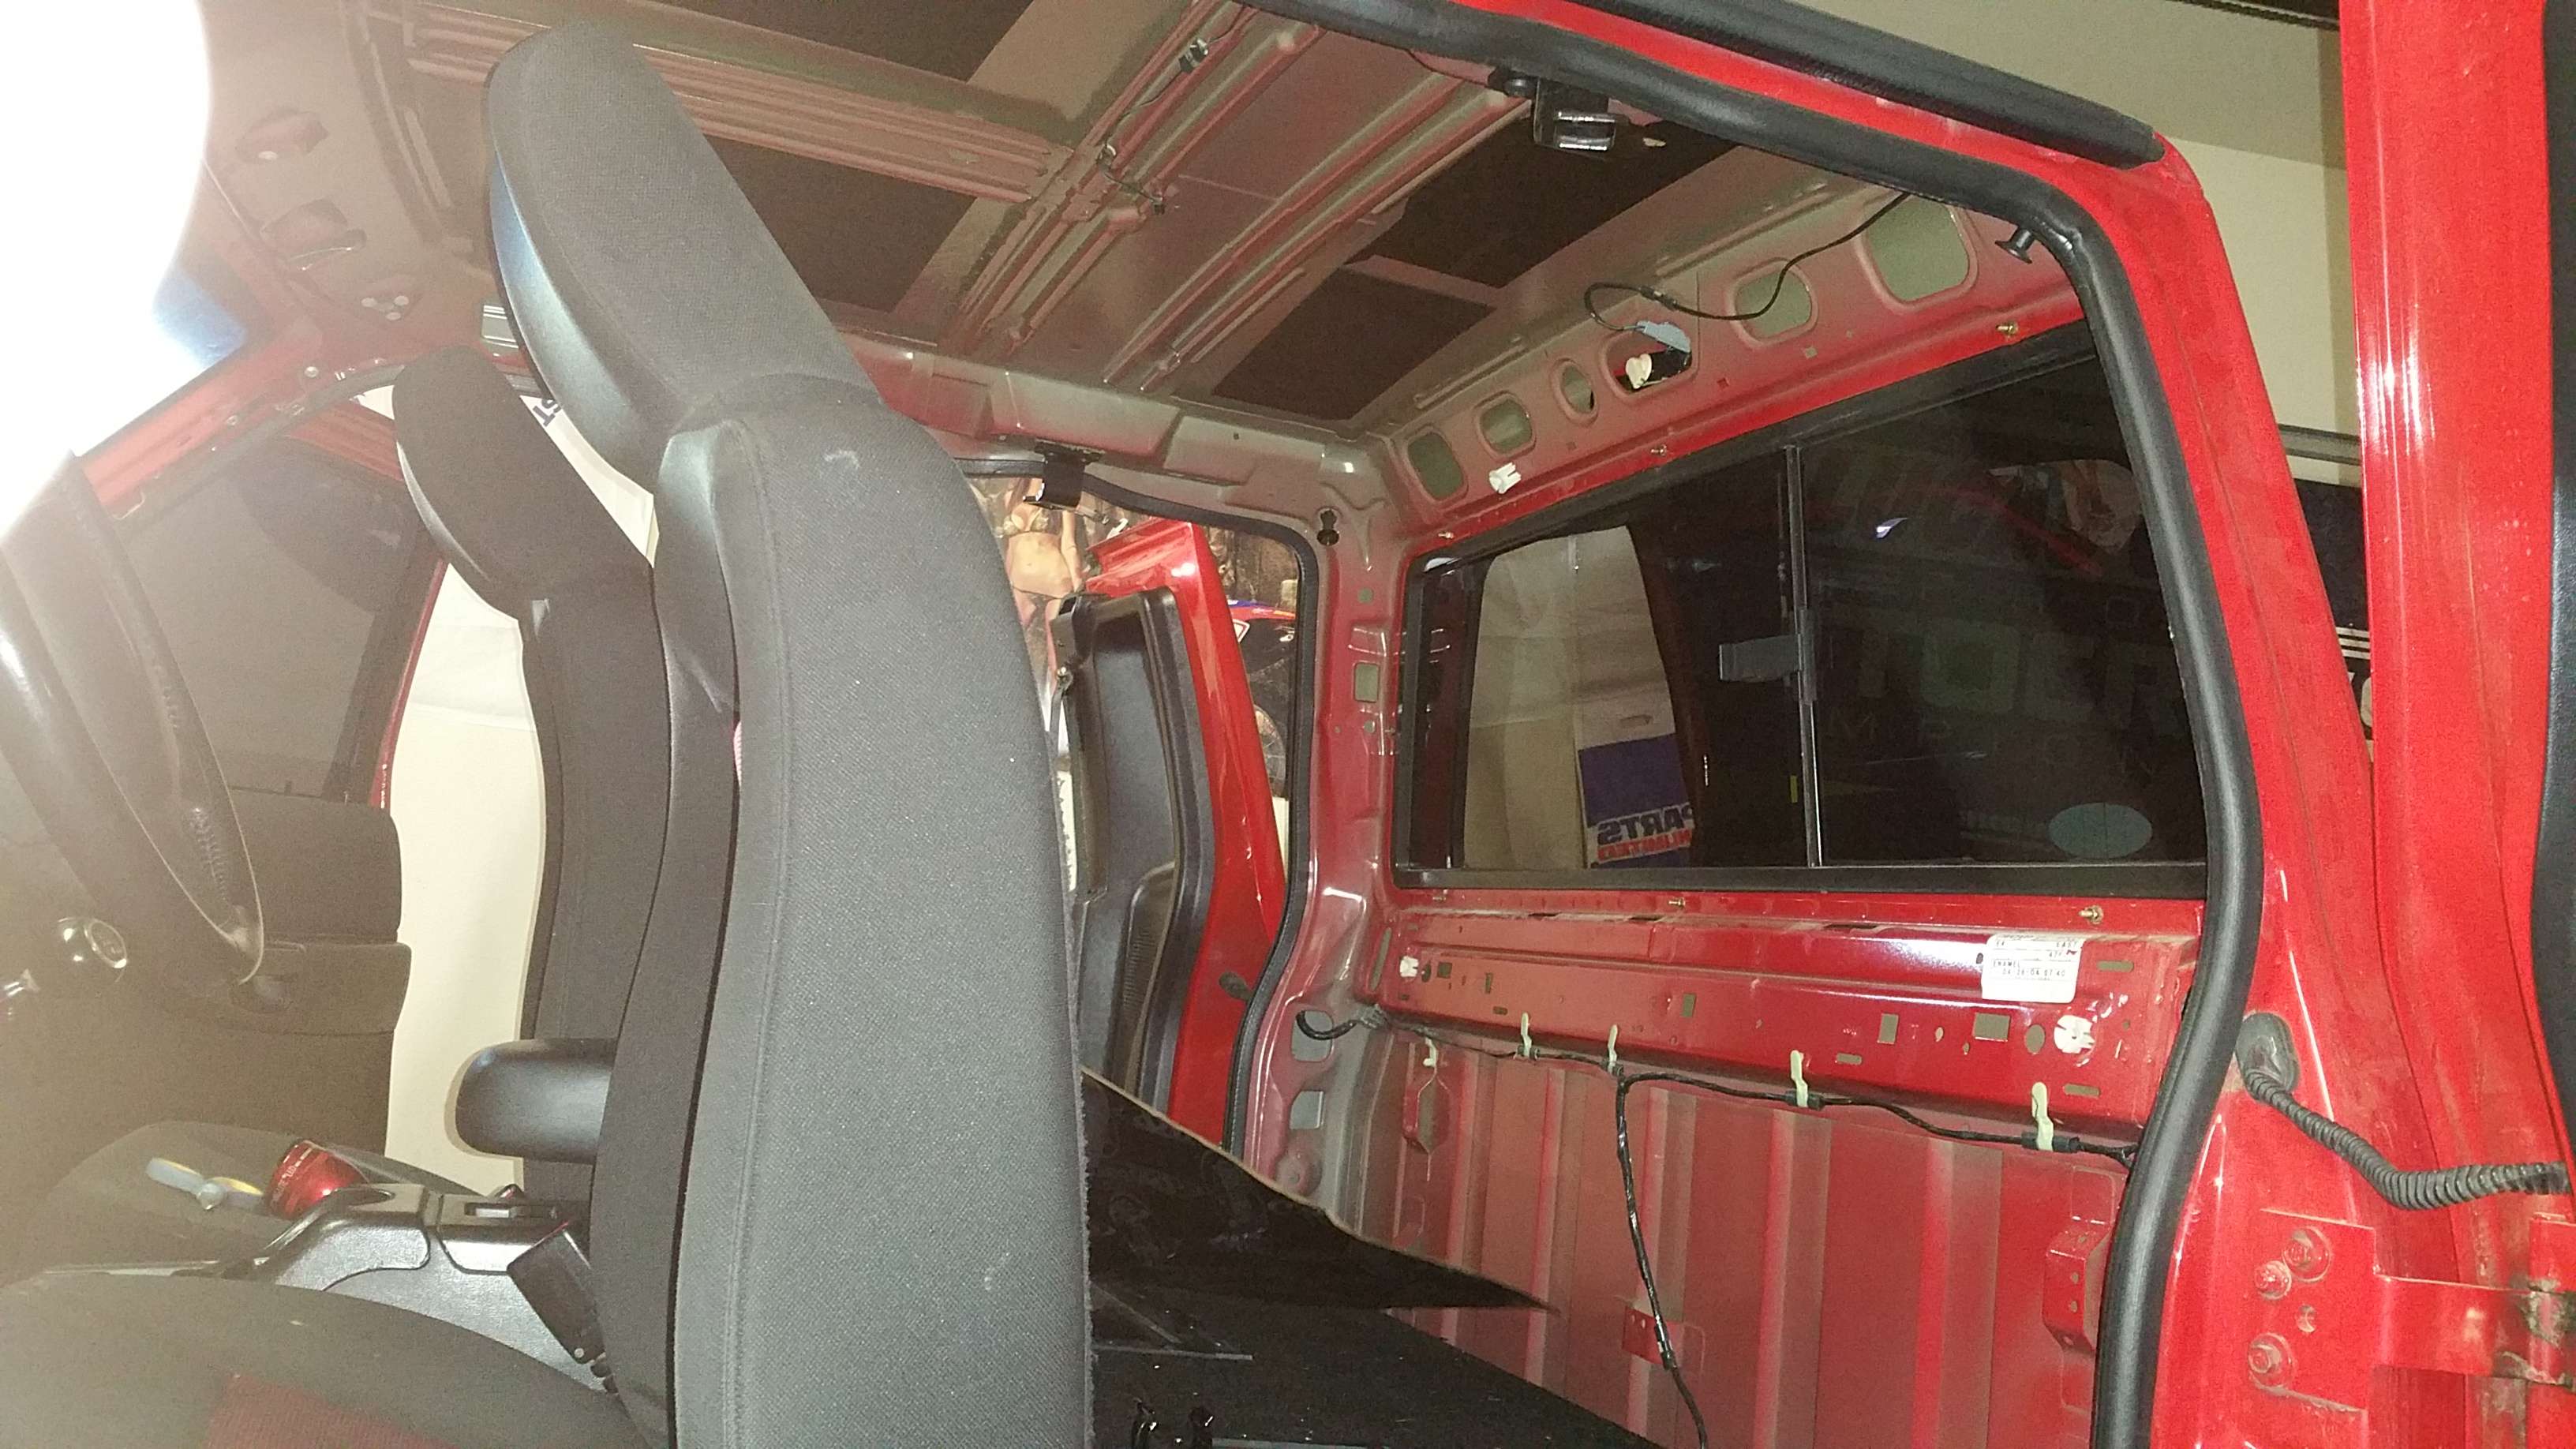
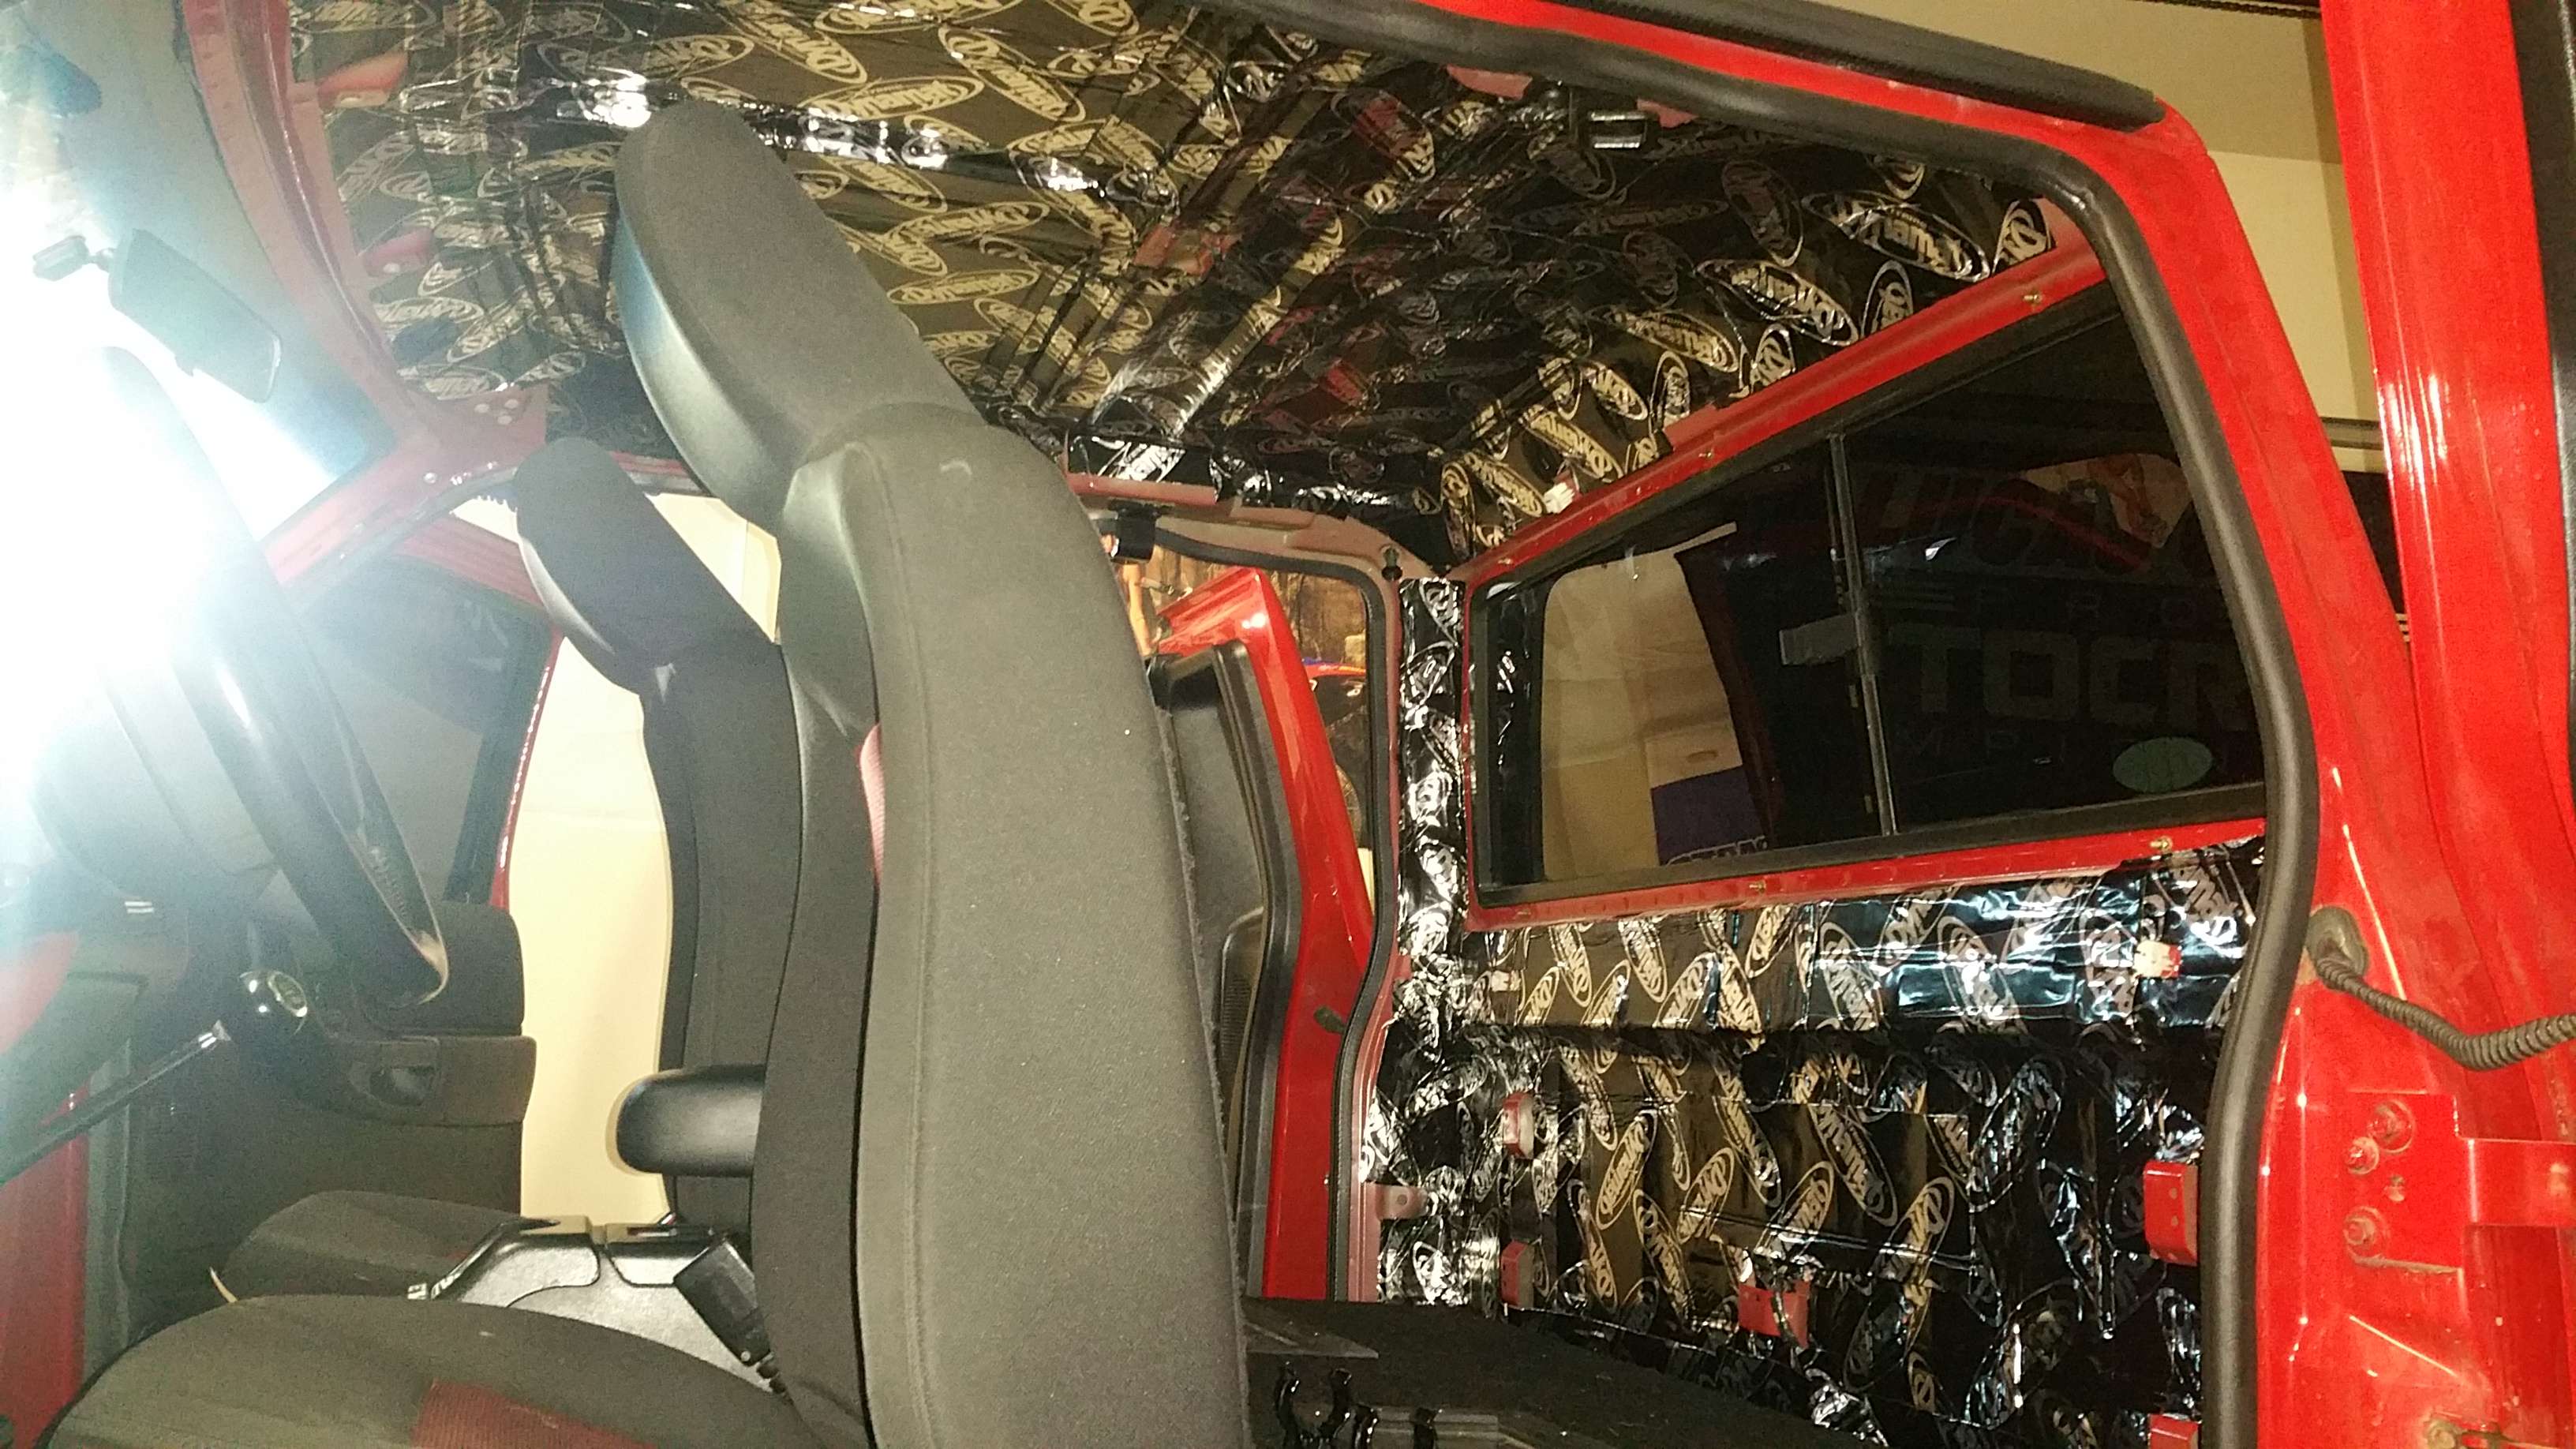
First on the to do list was quiet up the cabin some so I can hear some sweet tunes. On goes some Dynamat Extreme. I only do the floor and doors for now, but in later pictures, you can see the back and roof done also. It works very well, insulating the cabin and reducing vibration and outside sound. My truck isn't a Cadillac, but considering the tire size, exhaust, supercharger etc... It is relatively quiet inside!
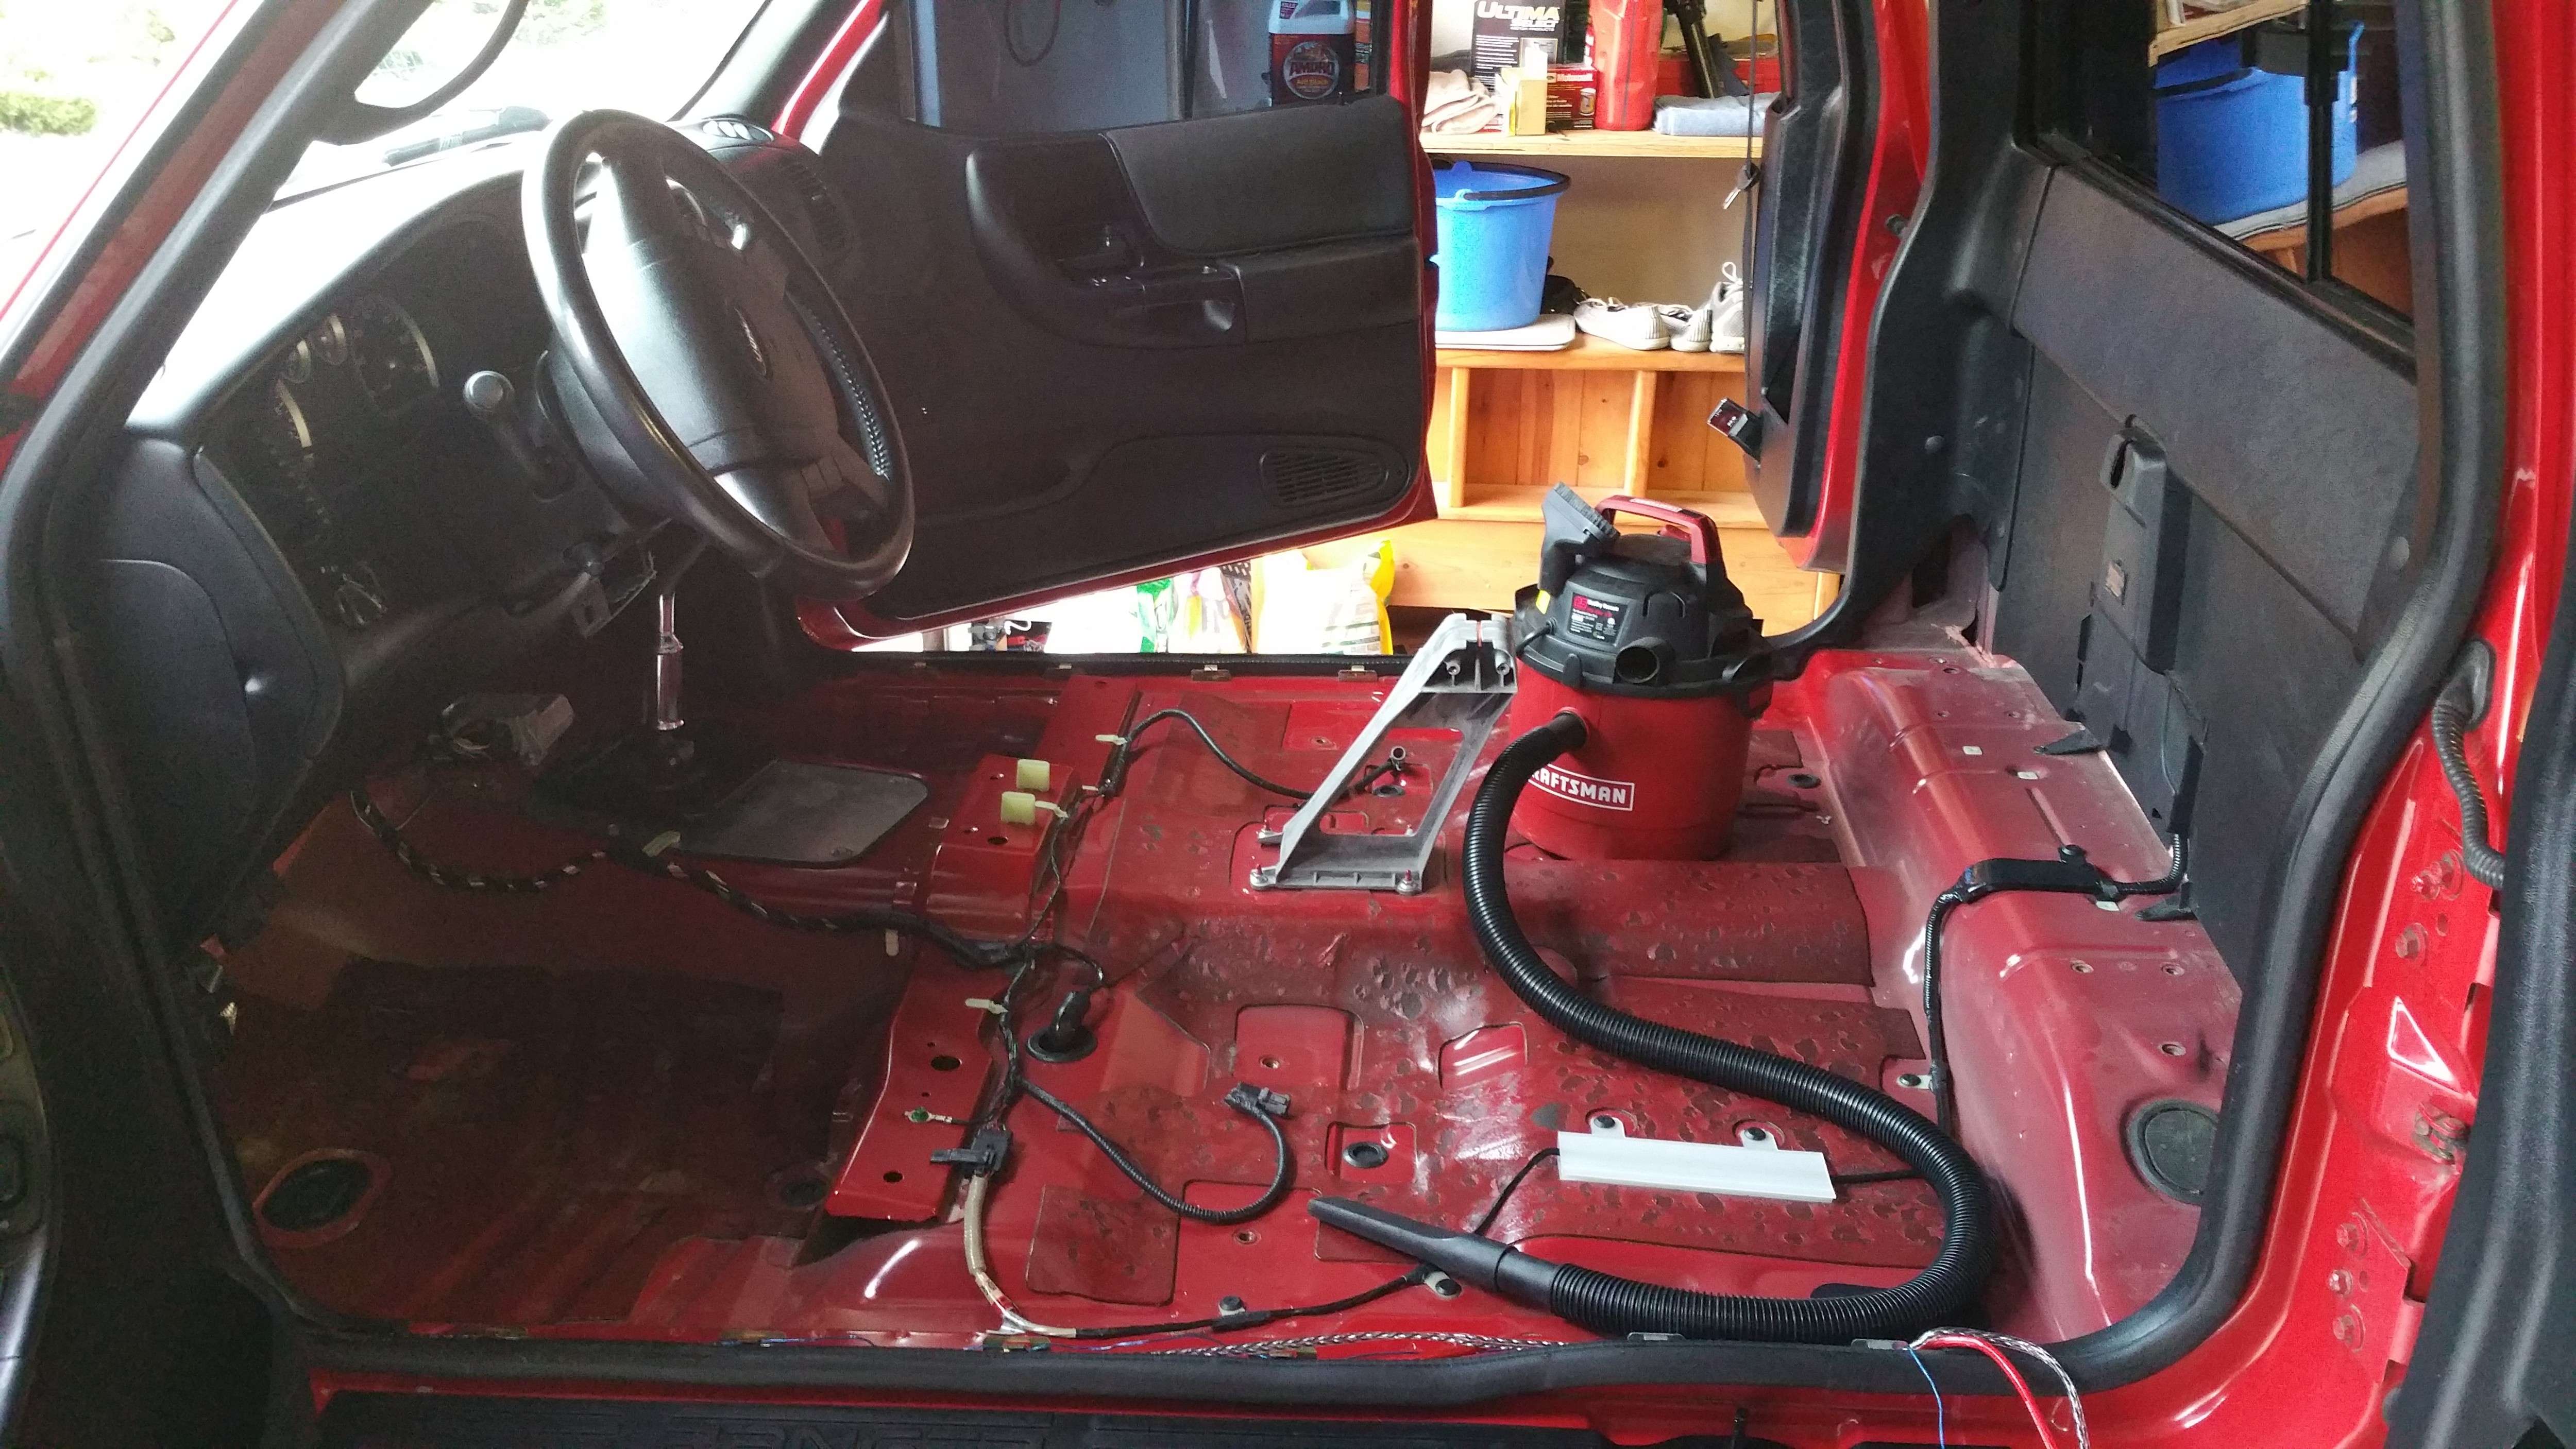
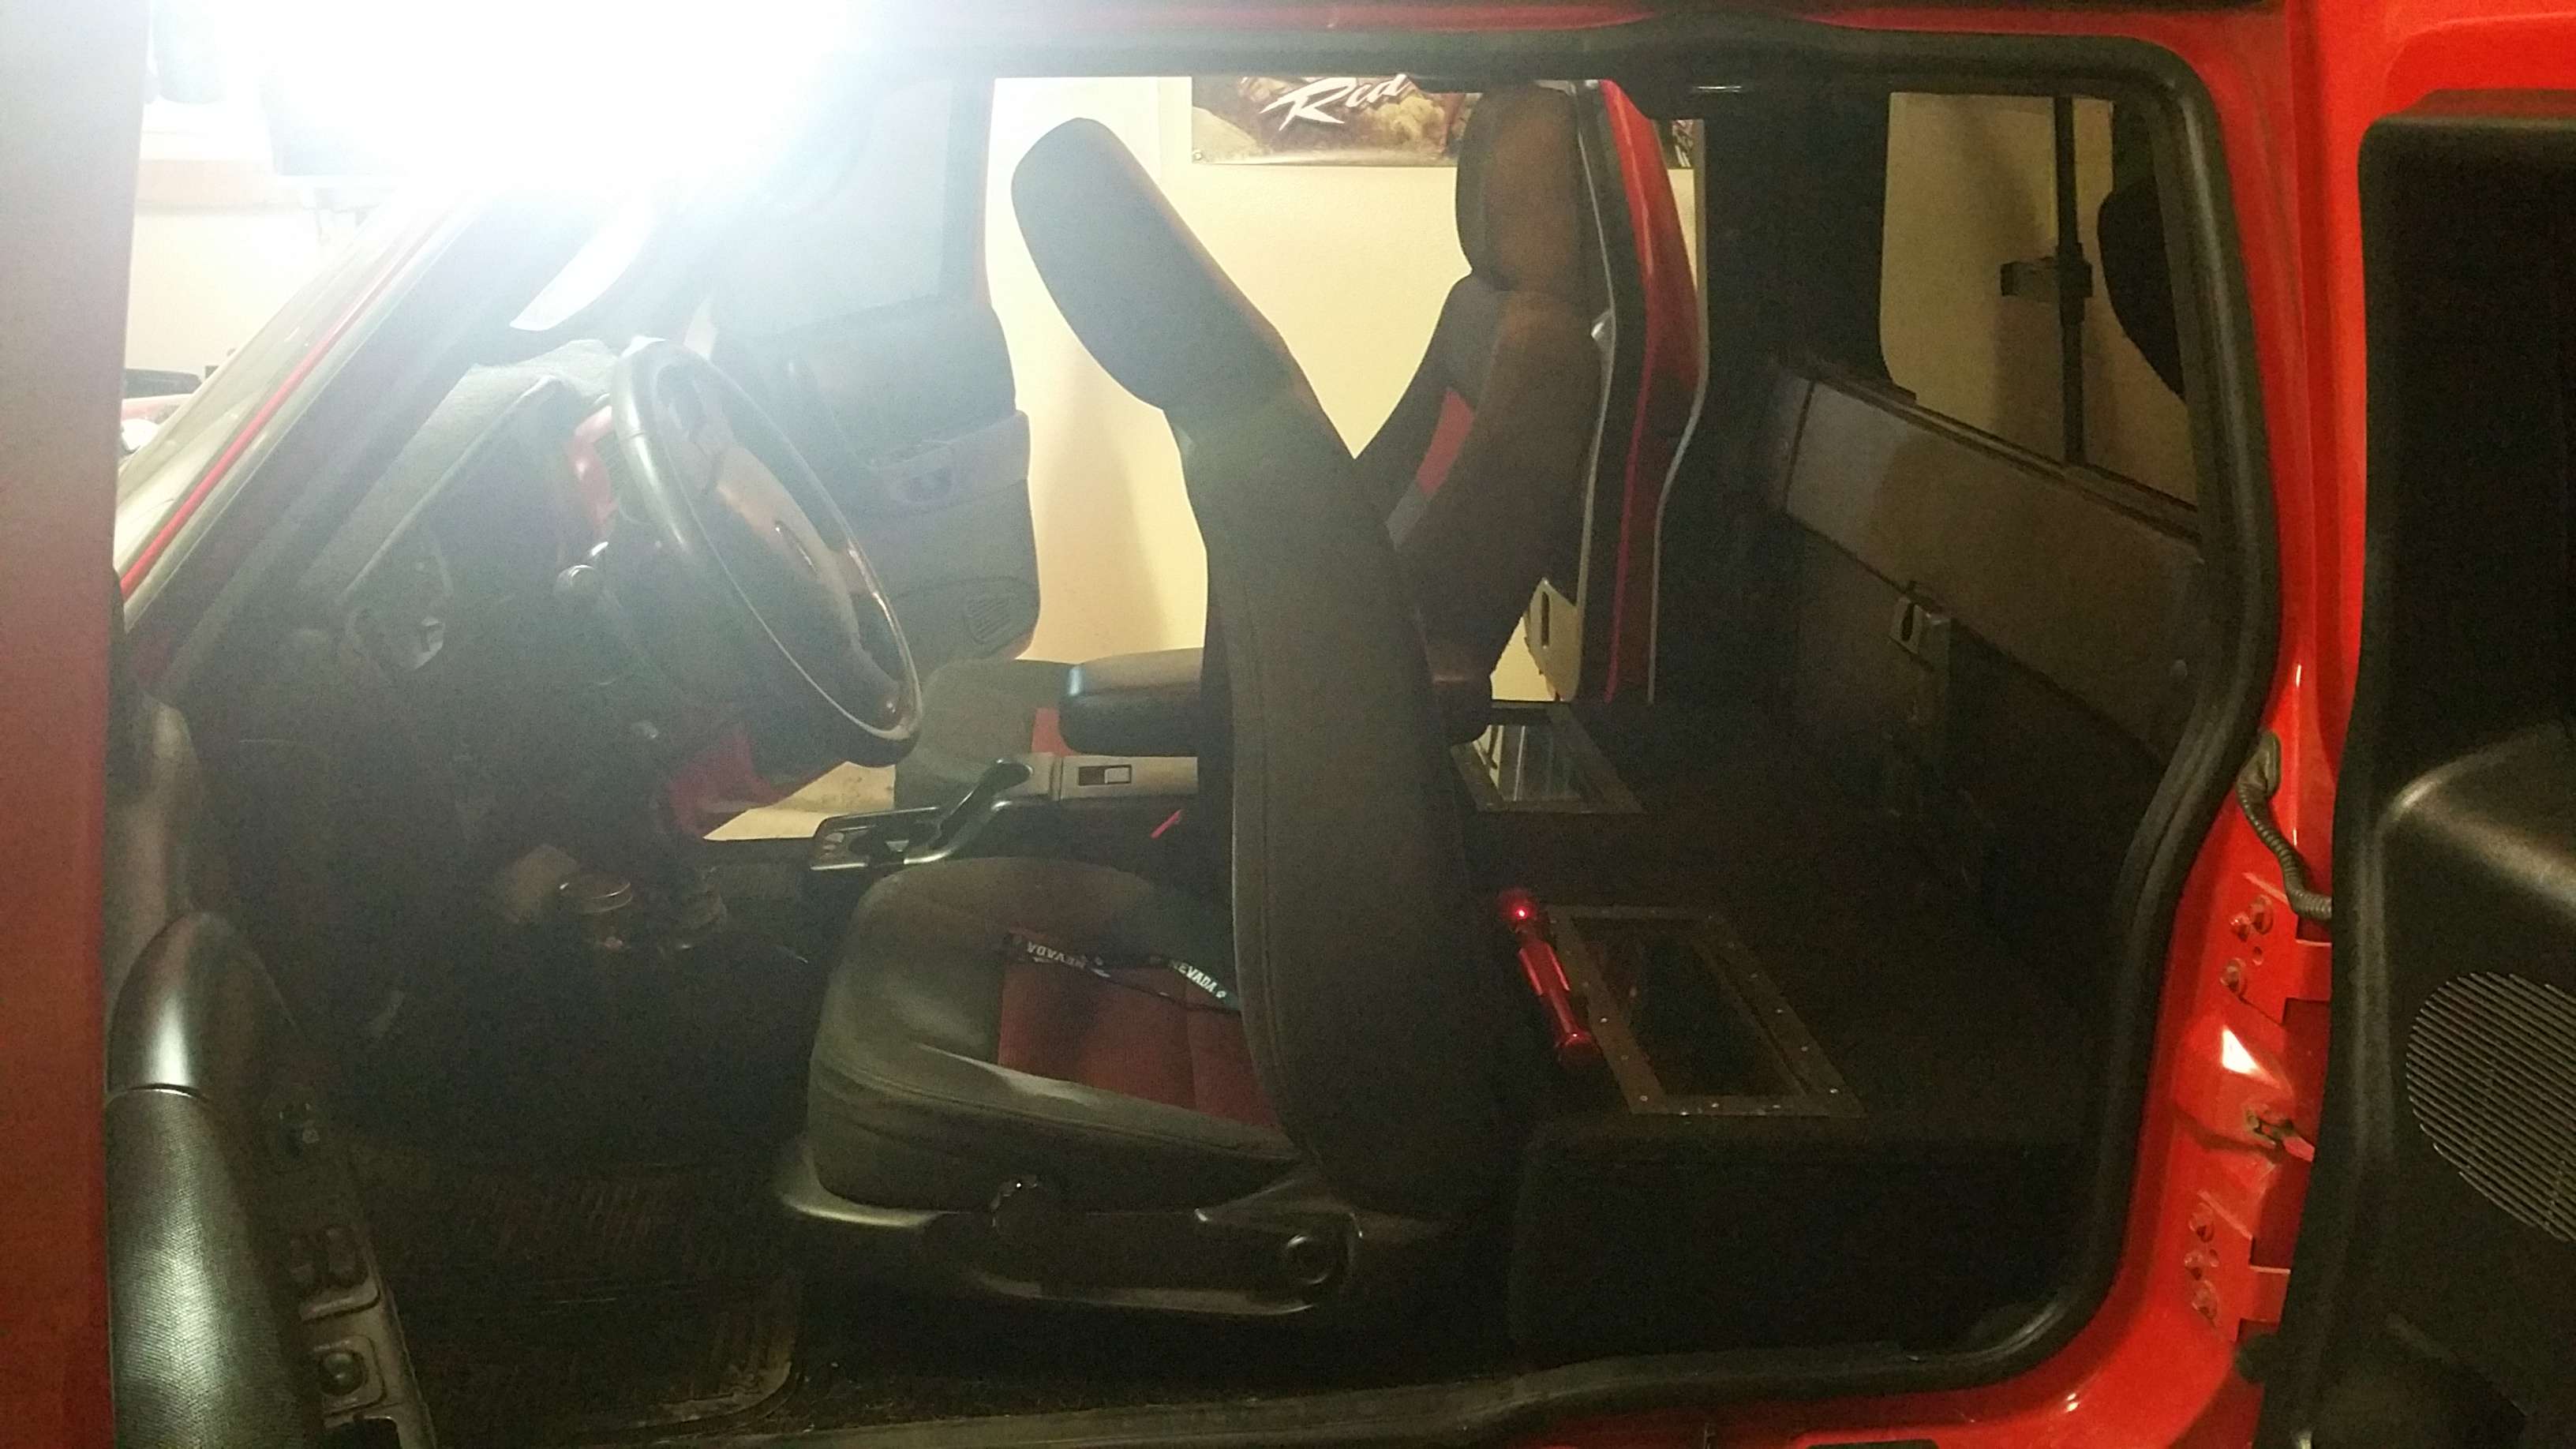
Now comes the sound system. In my previous ranger (2 door ext. cab) I had a big 12" in a big box, and a amp that could barely run it. I wanted something better, but not over the top. I wanted a double din with all the connectivity features, with a way to connect a front and rear camera. Check. I also wanted all 4 speakers and 1 sub to run off an amp, without any headlight dimming. Check. The wiring isn't hard if you take your time. The trick was making a quality box that housed a sub, amp, and capacitor that was ergonomic and not over the top. I spent a few days mulling over ideas before I started drawing and measuring. Here are the fruits of my labor.
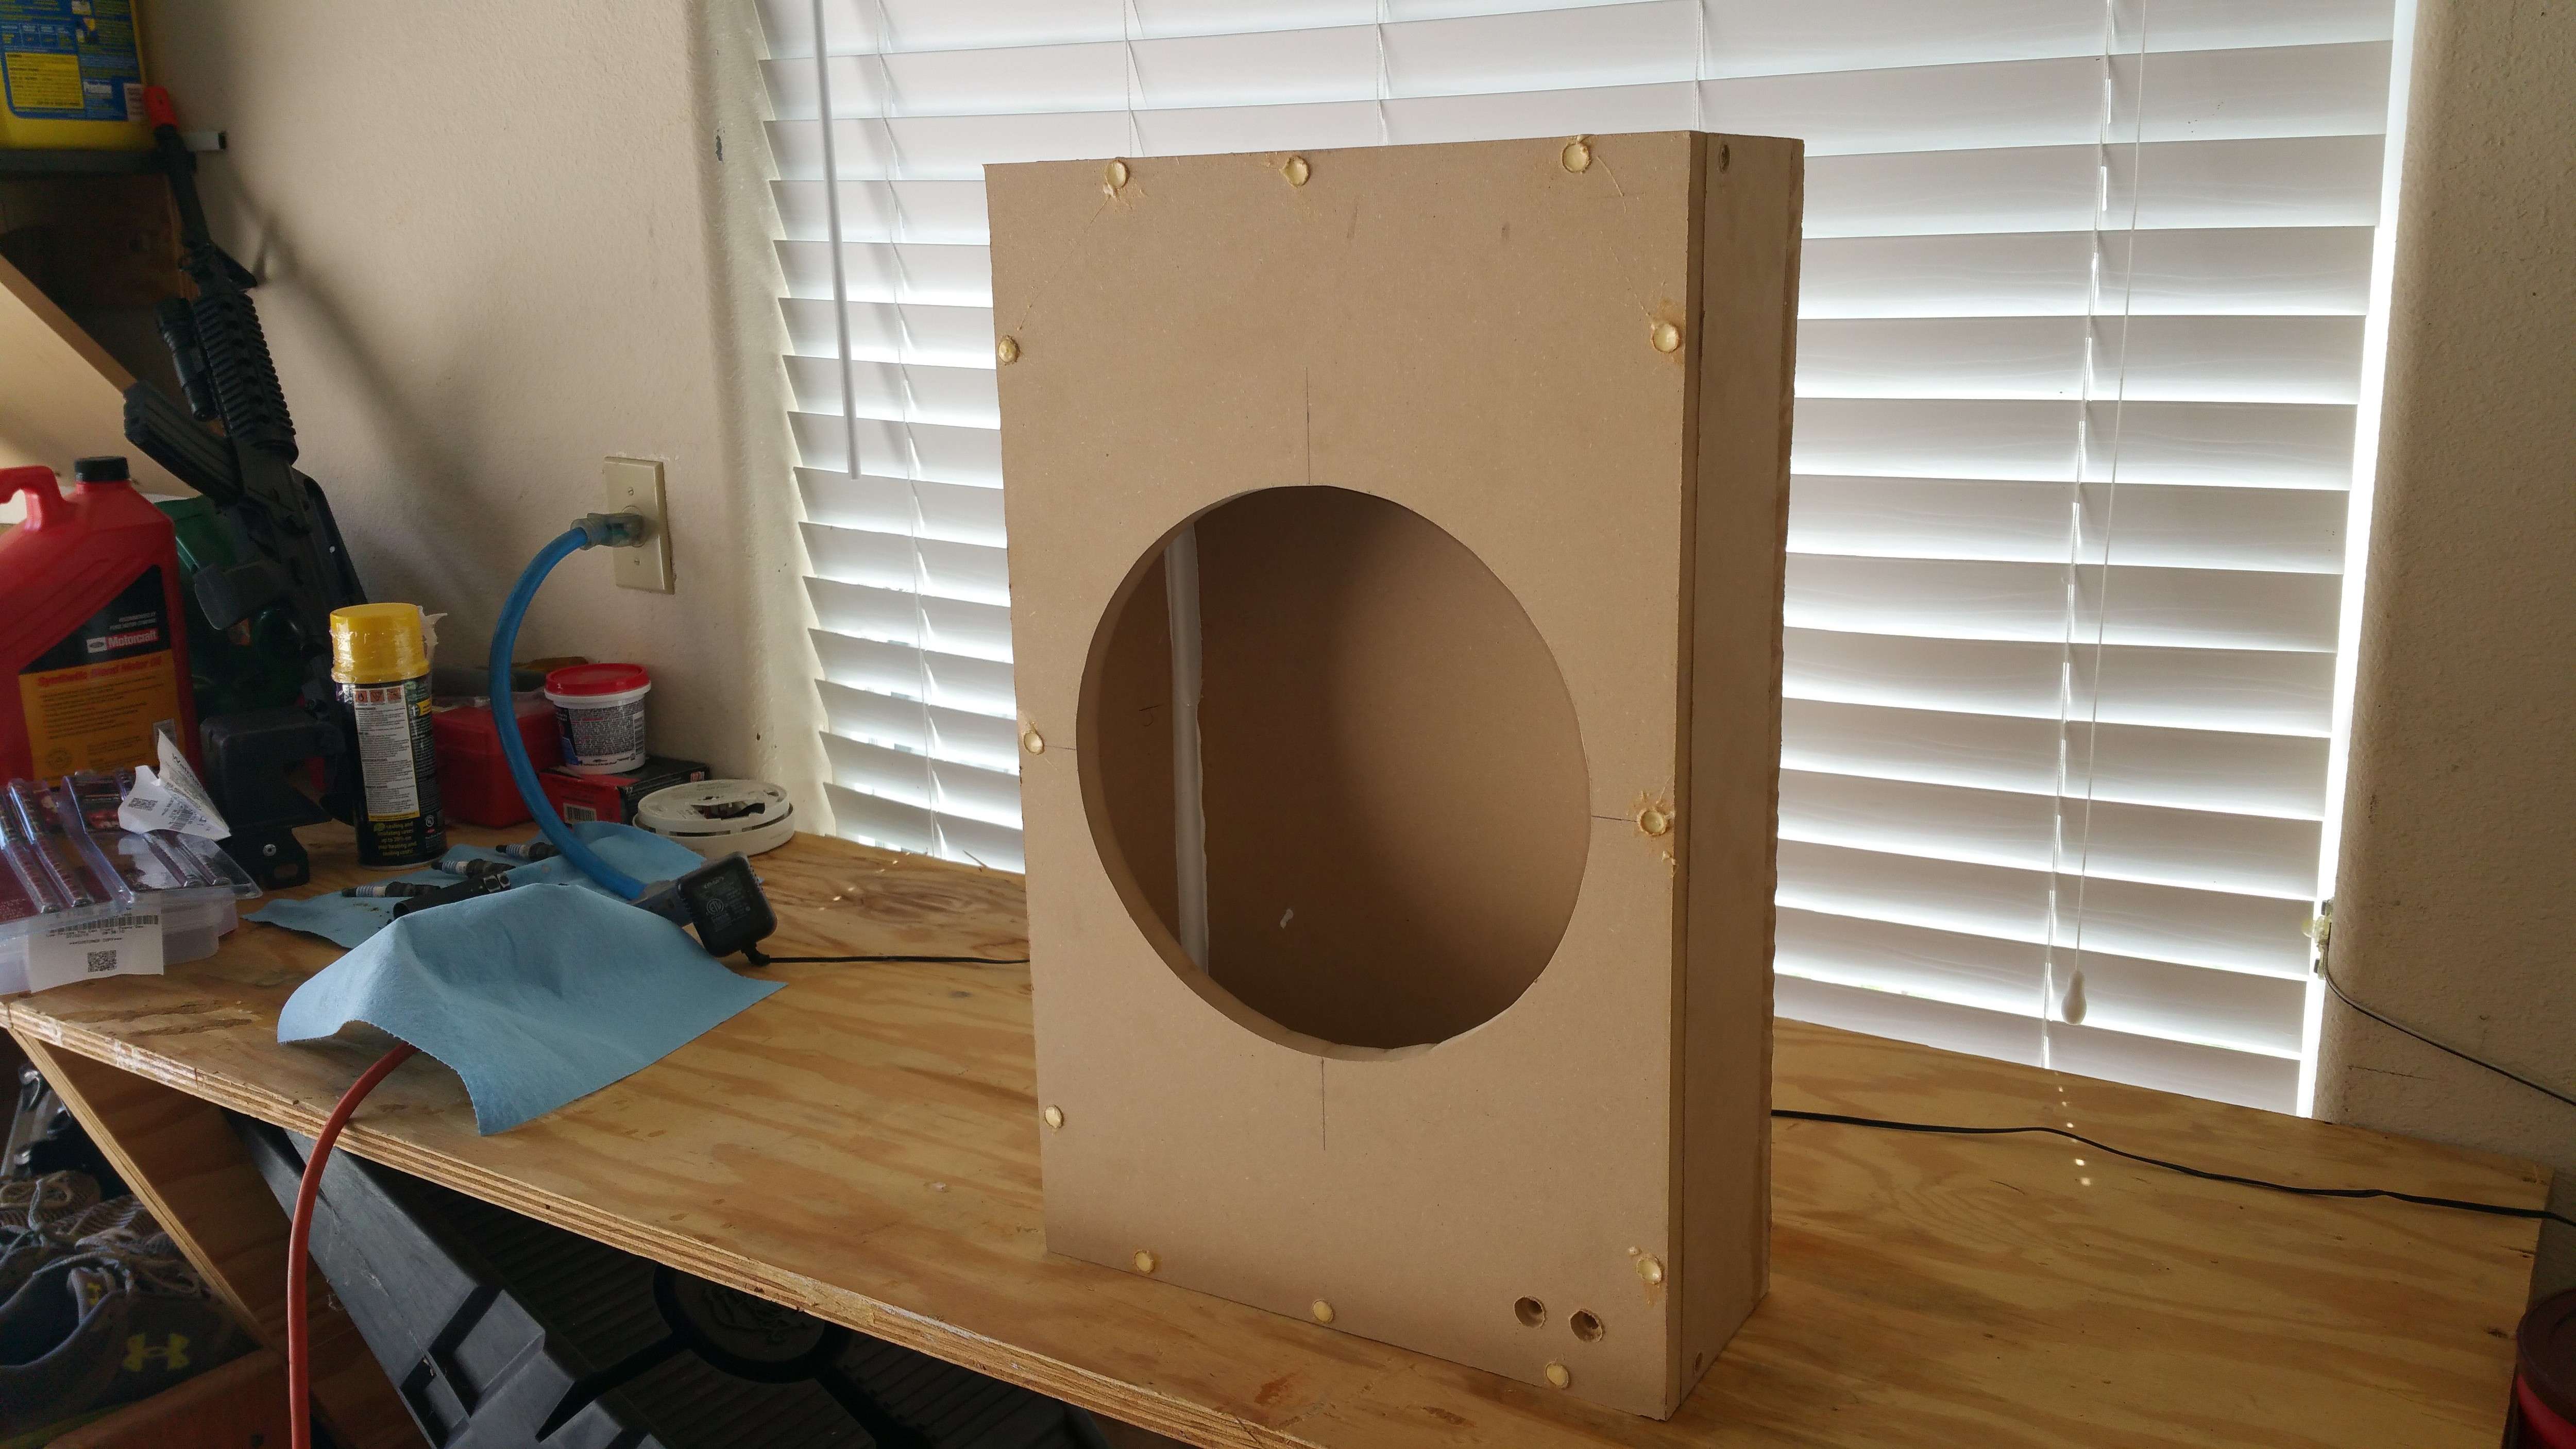

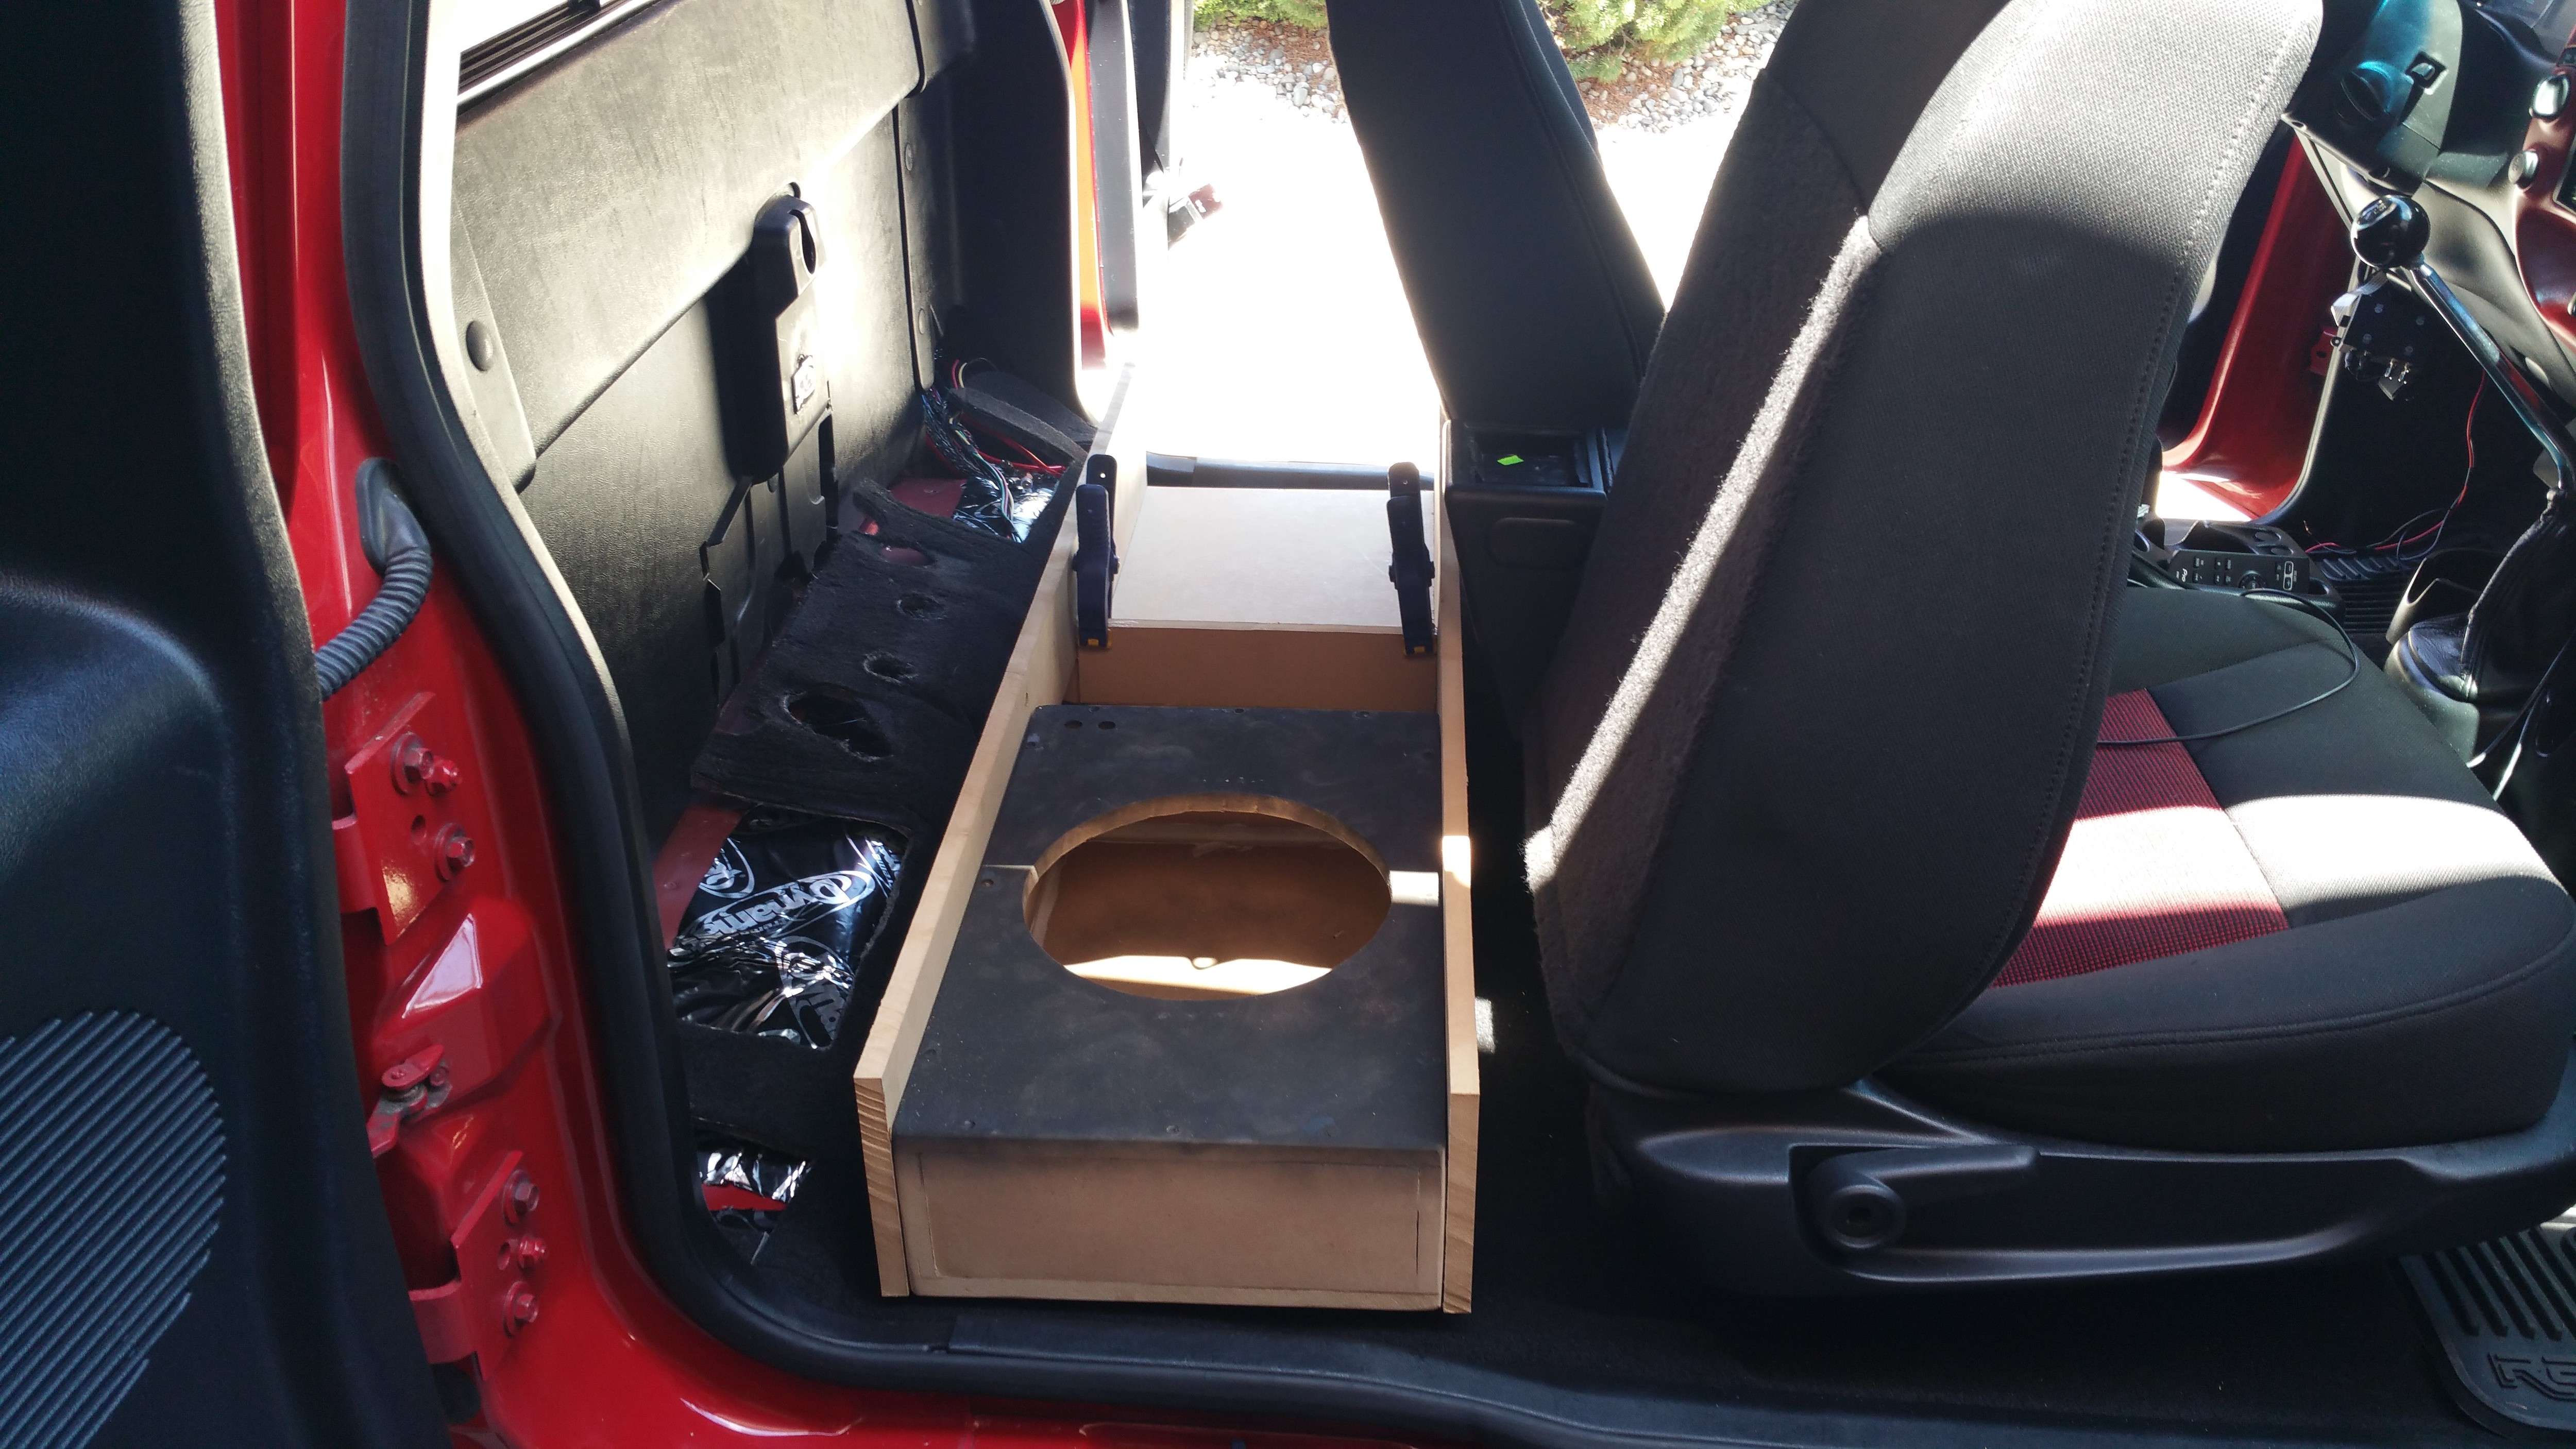

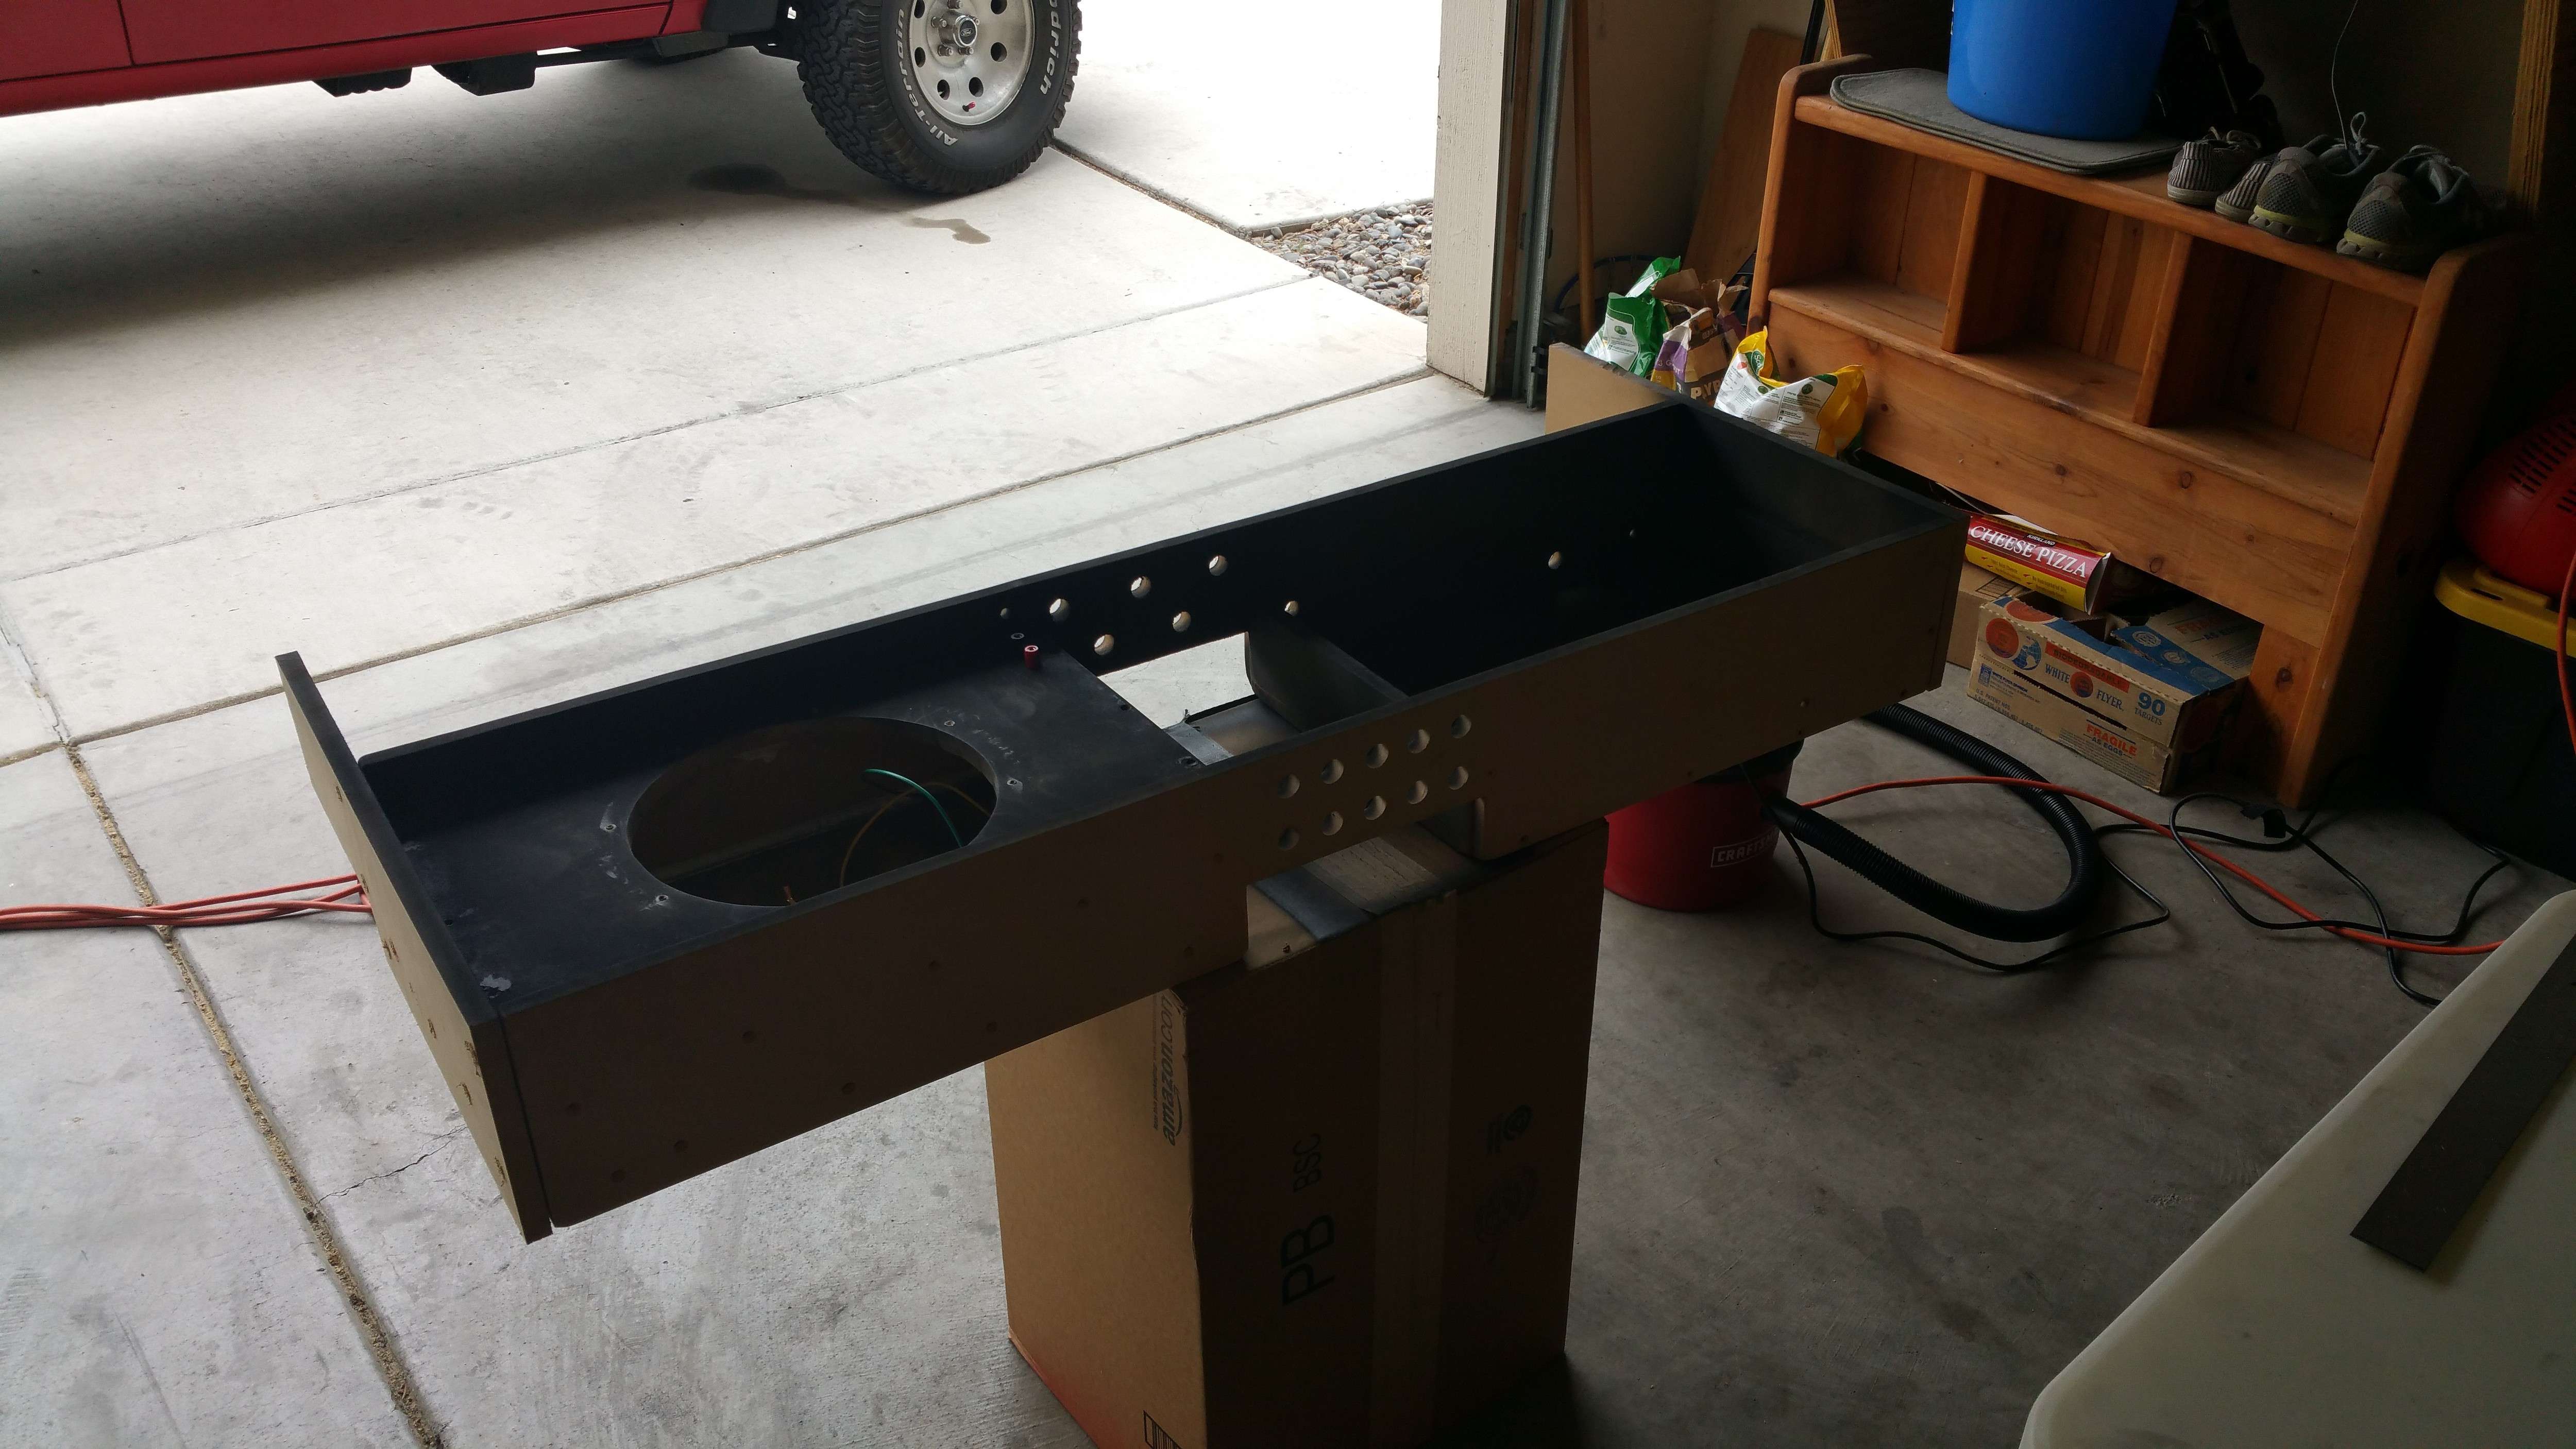
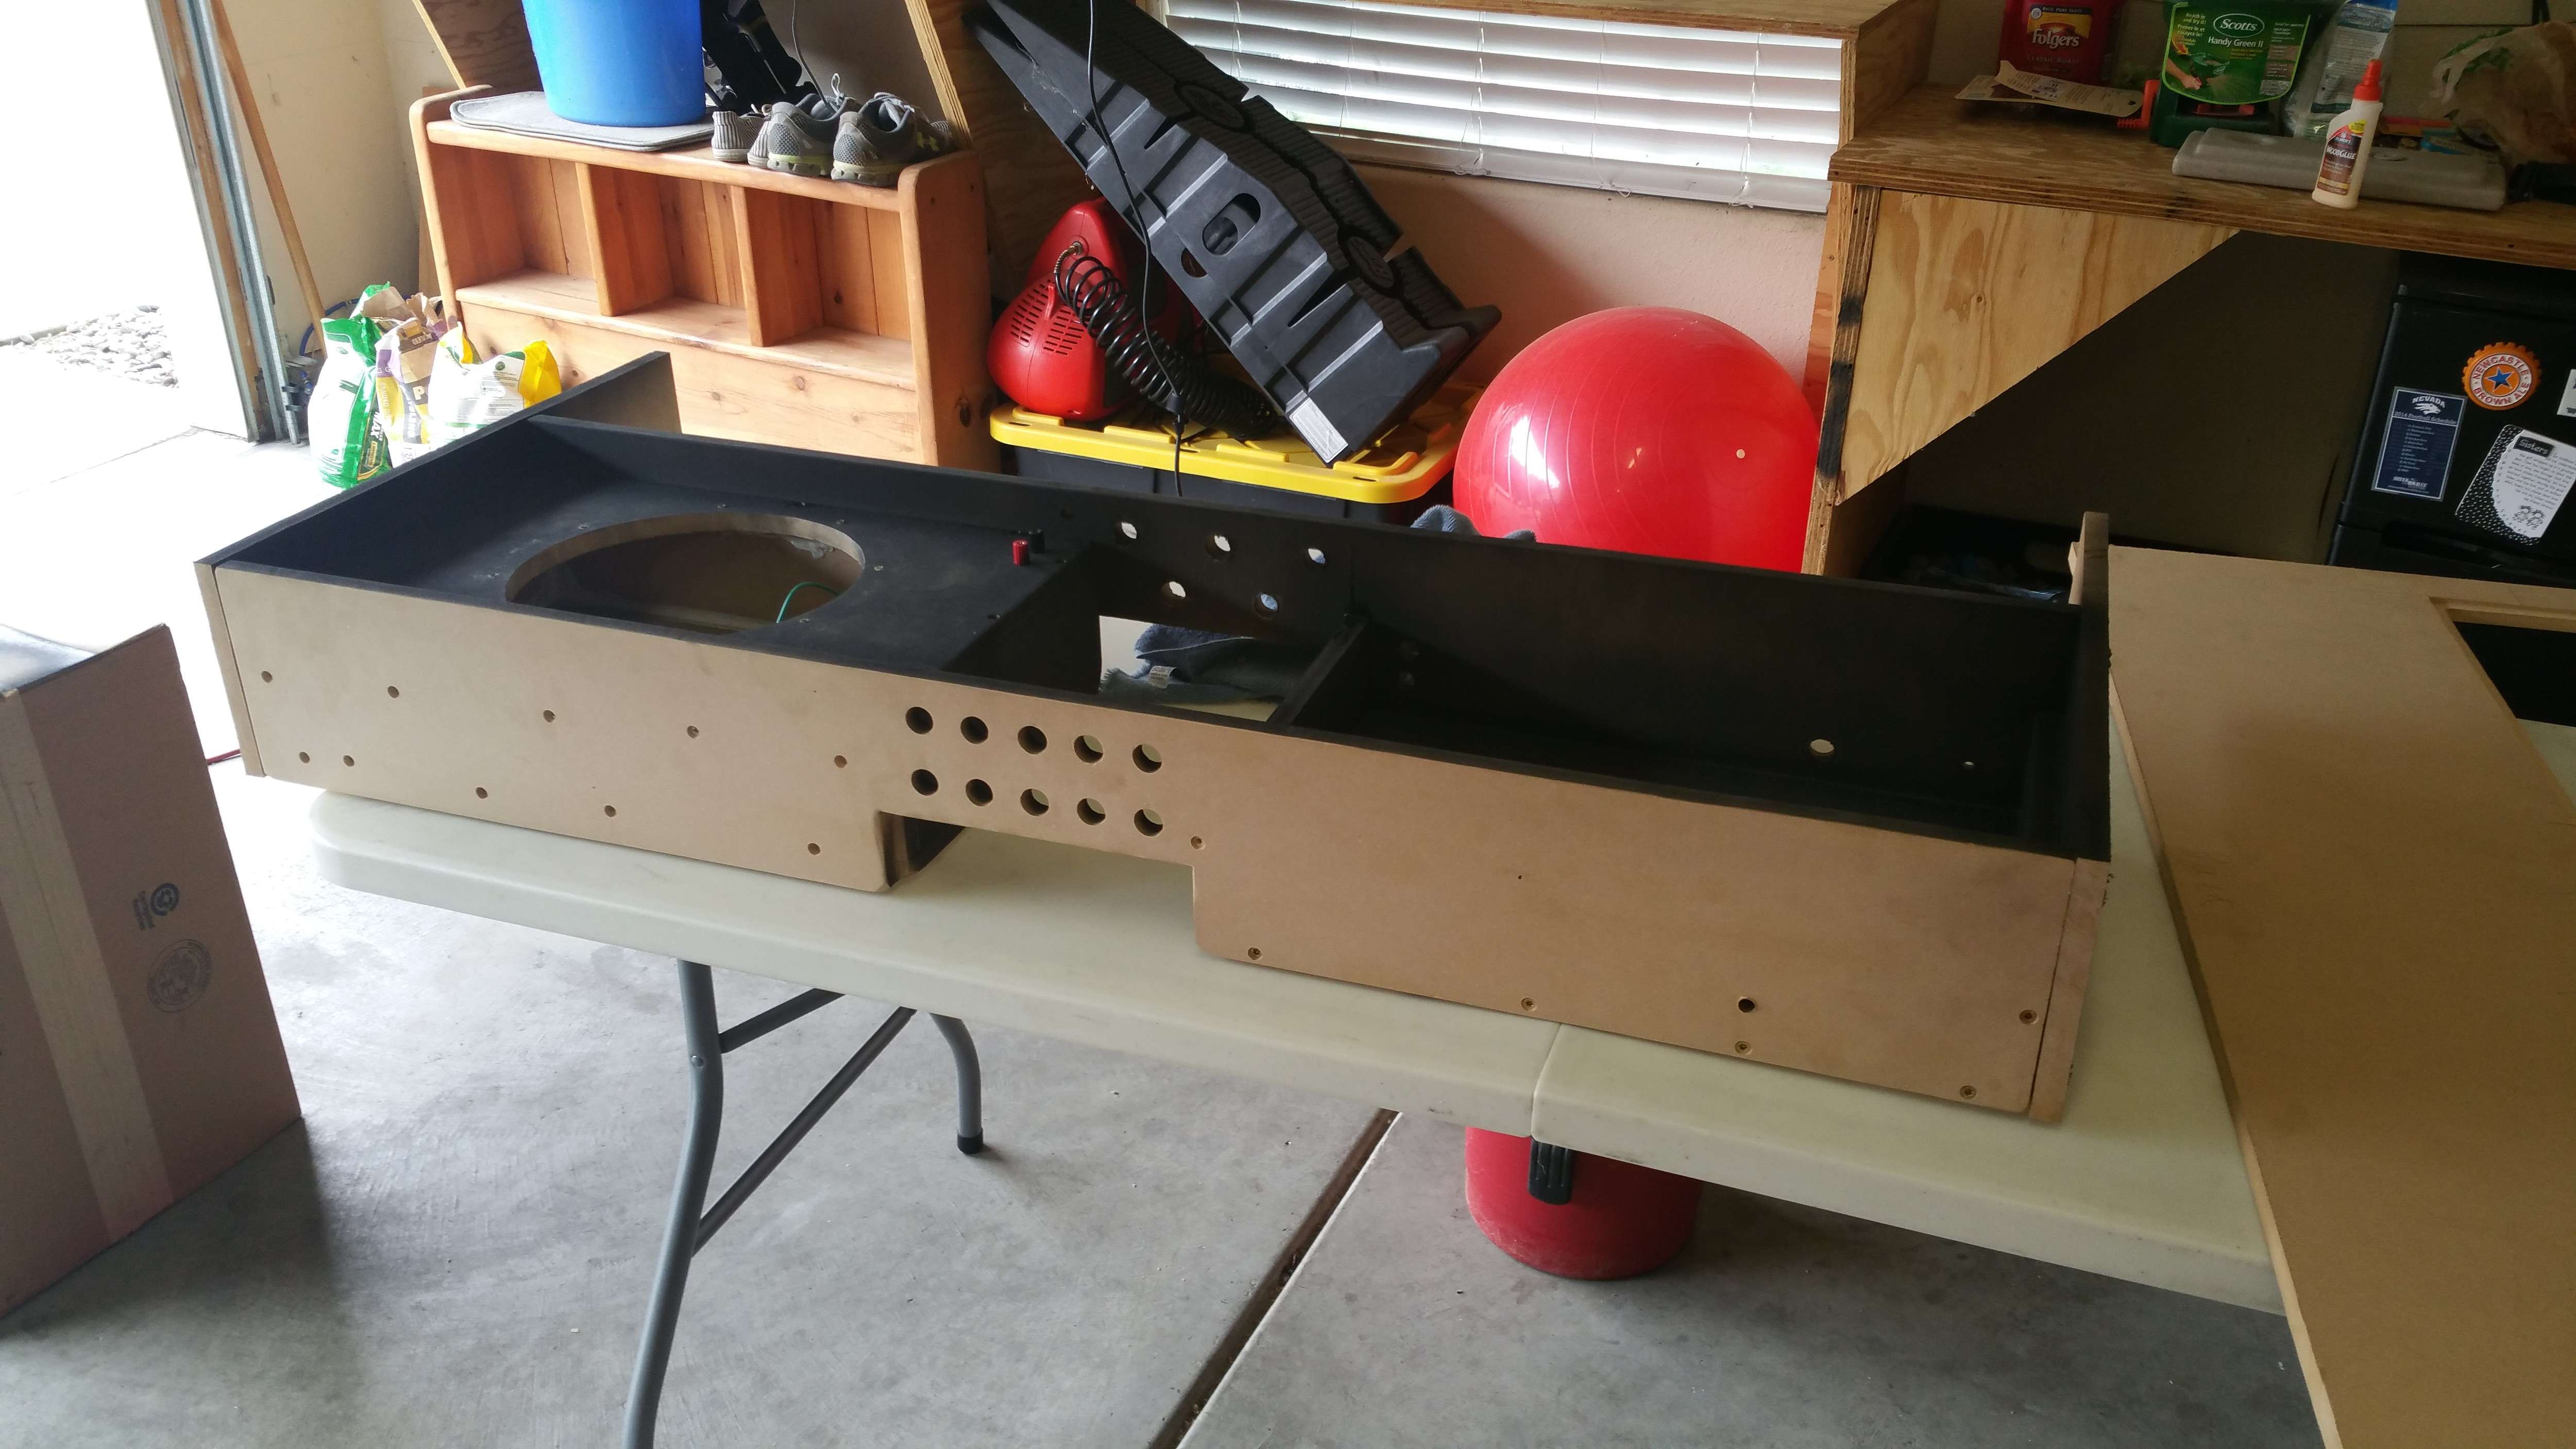
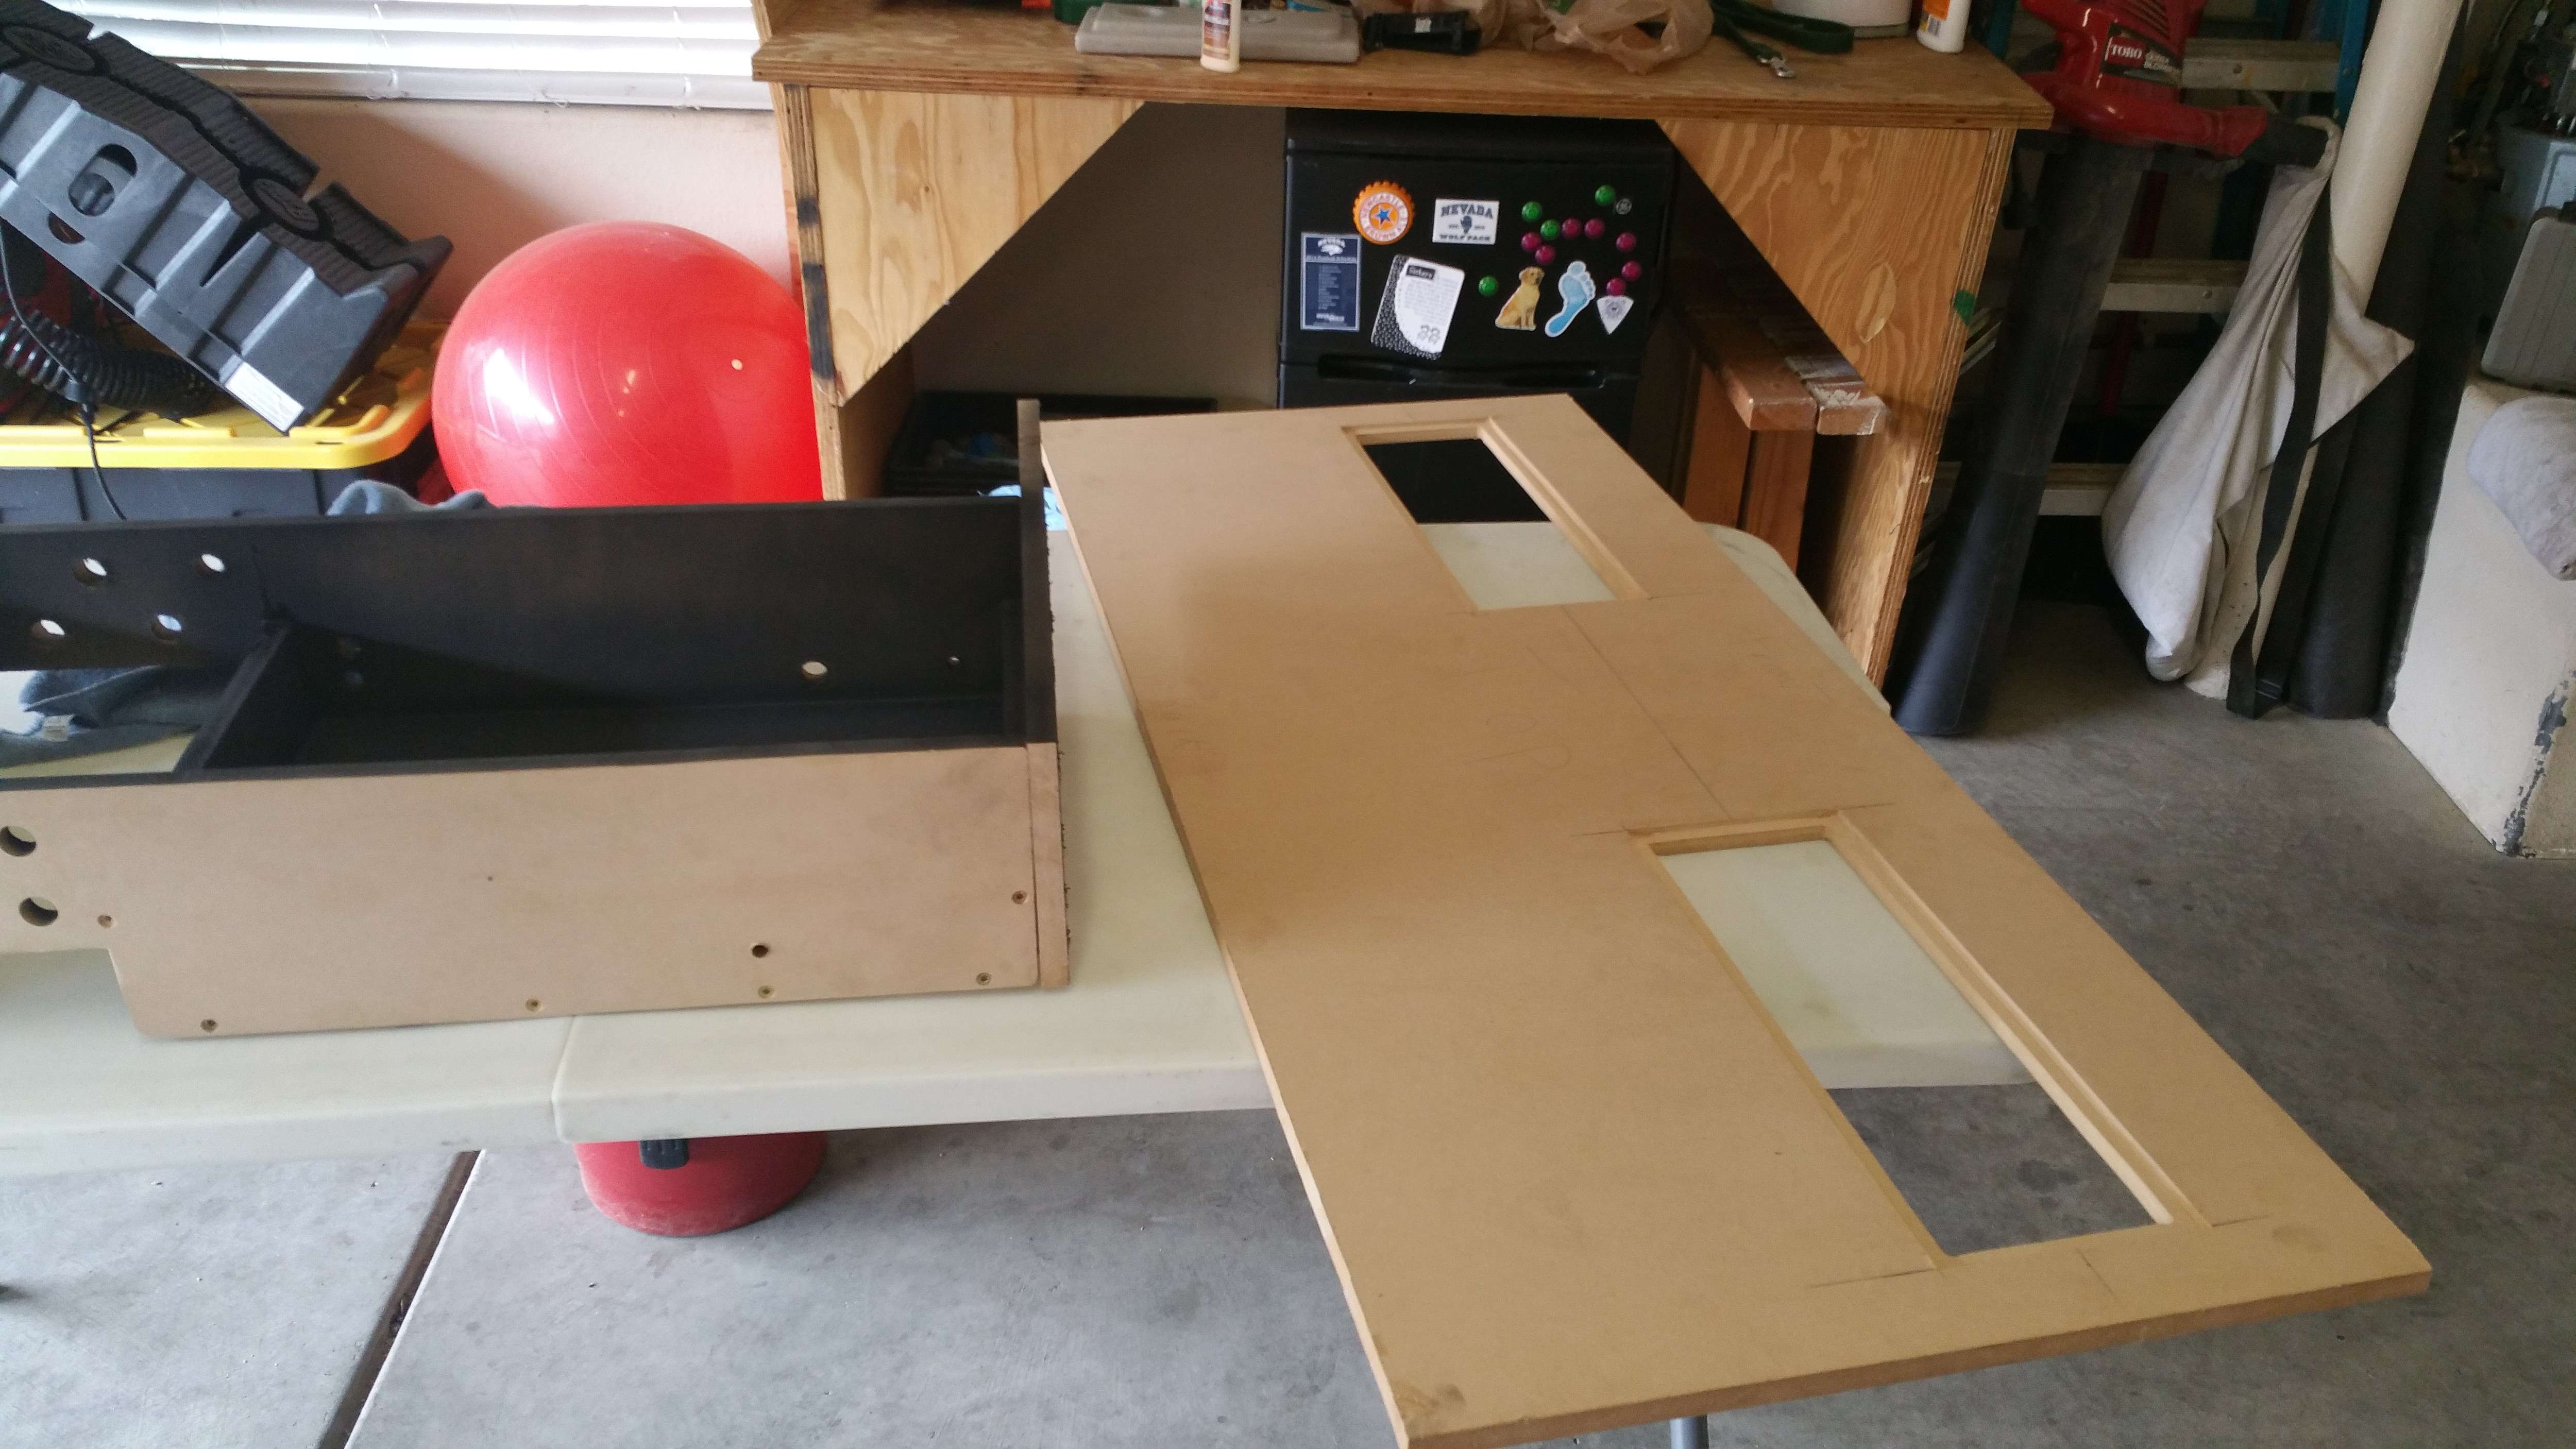
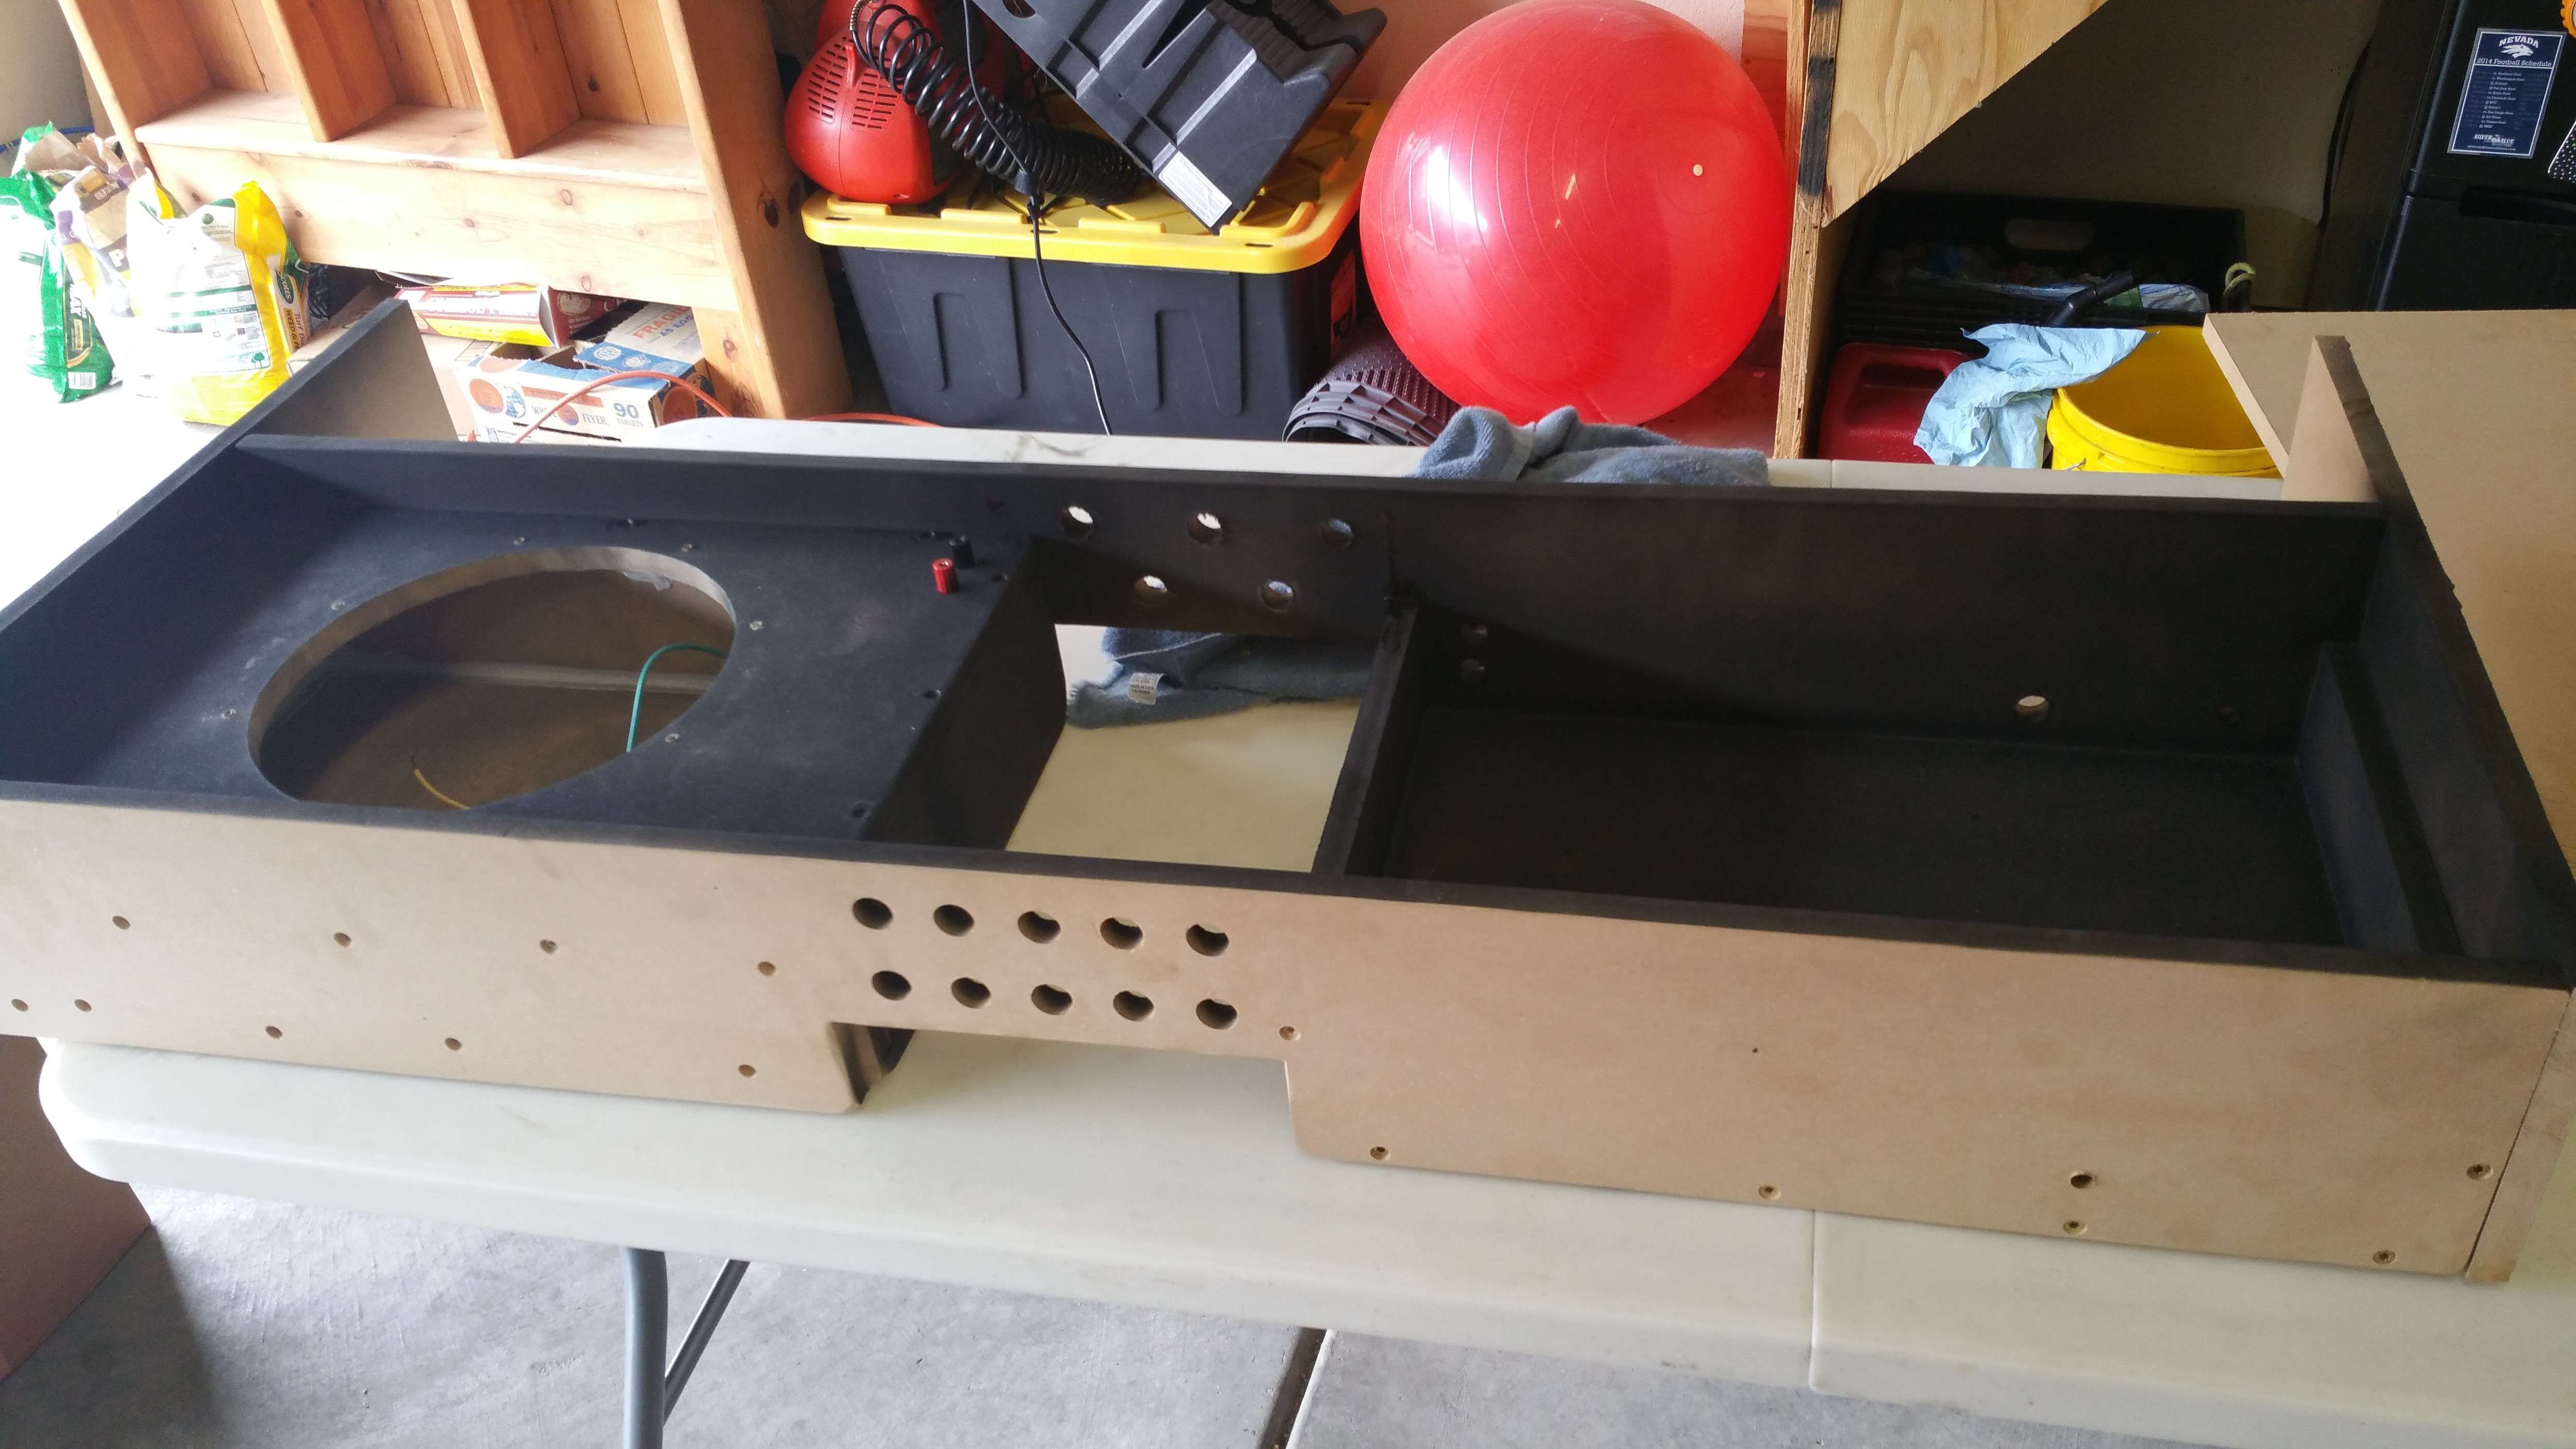
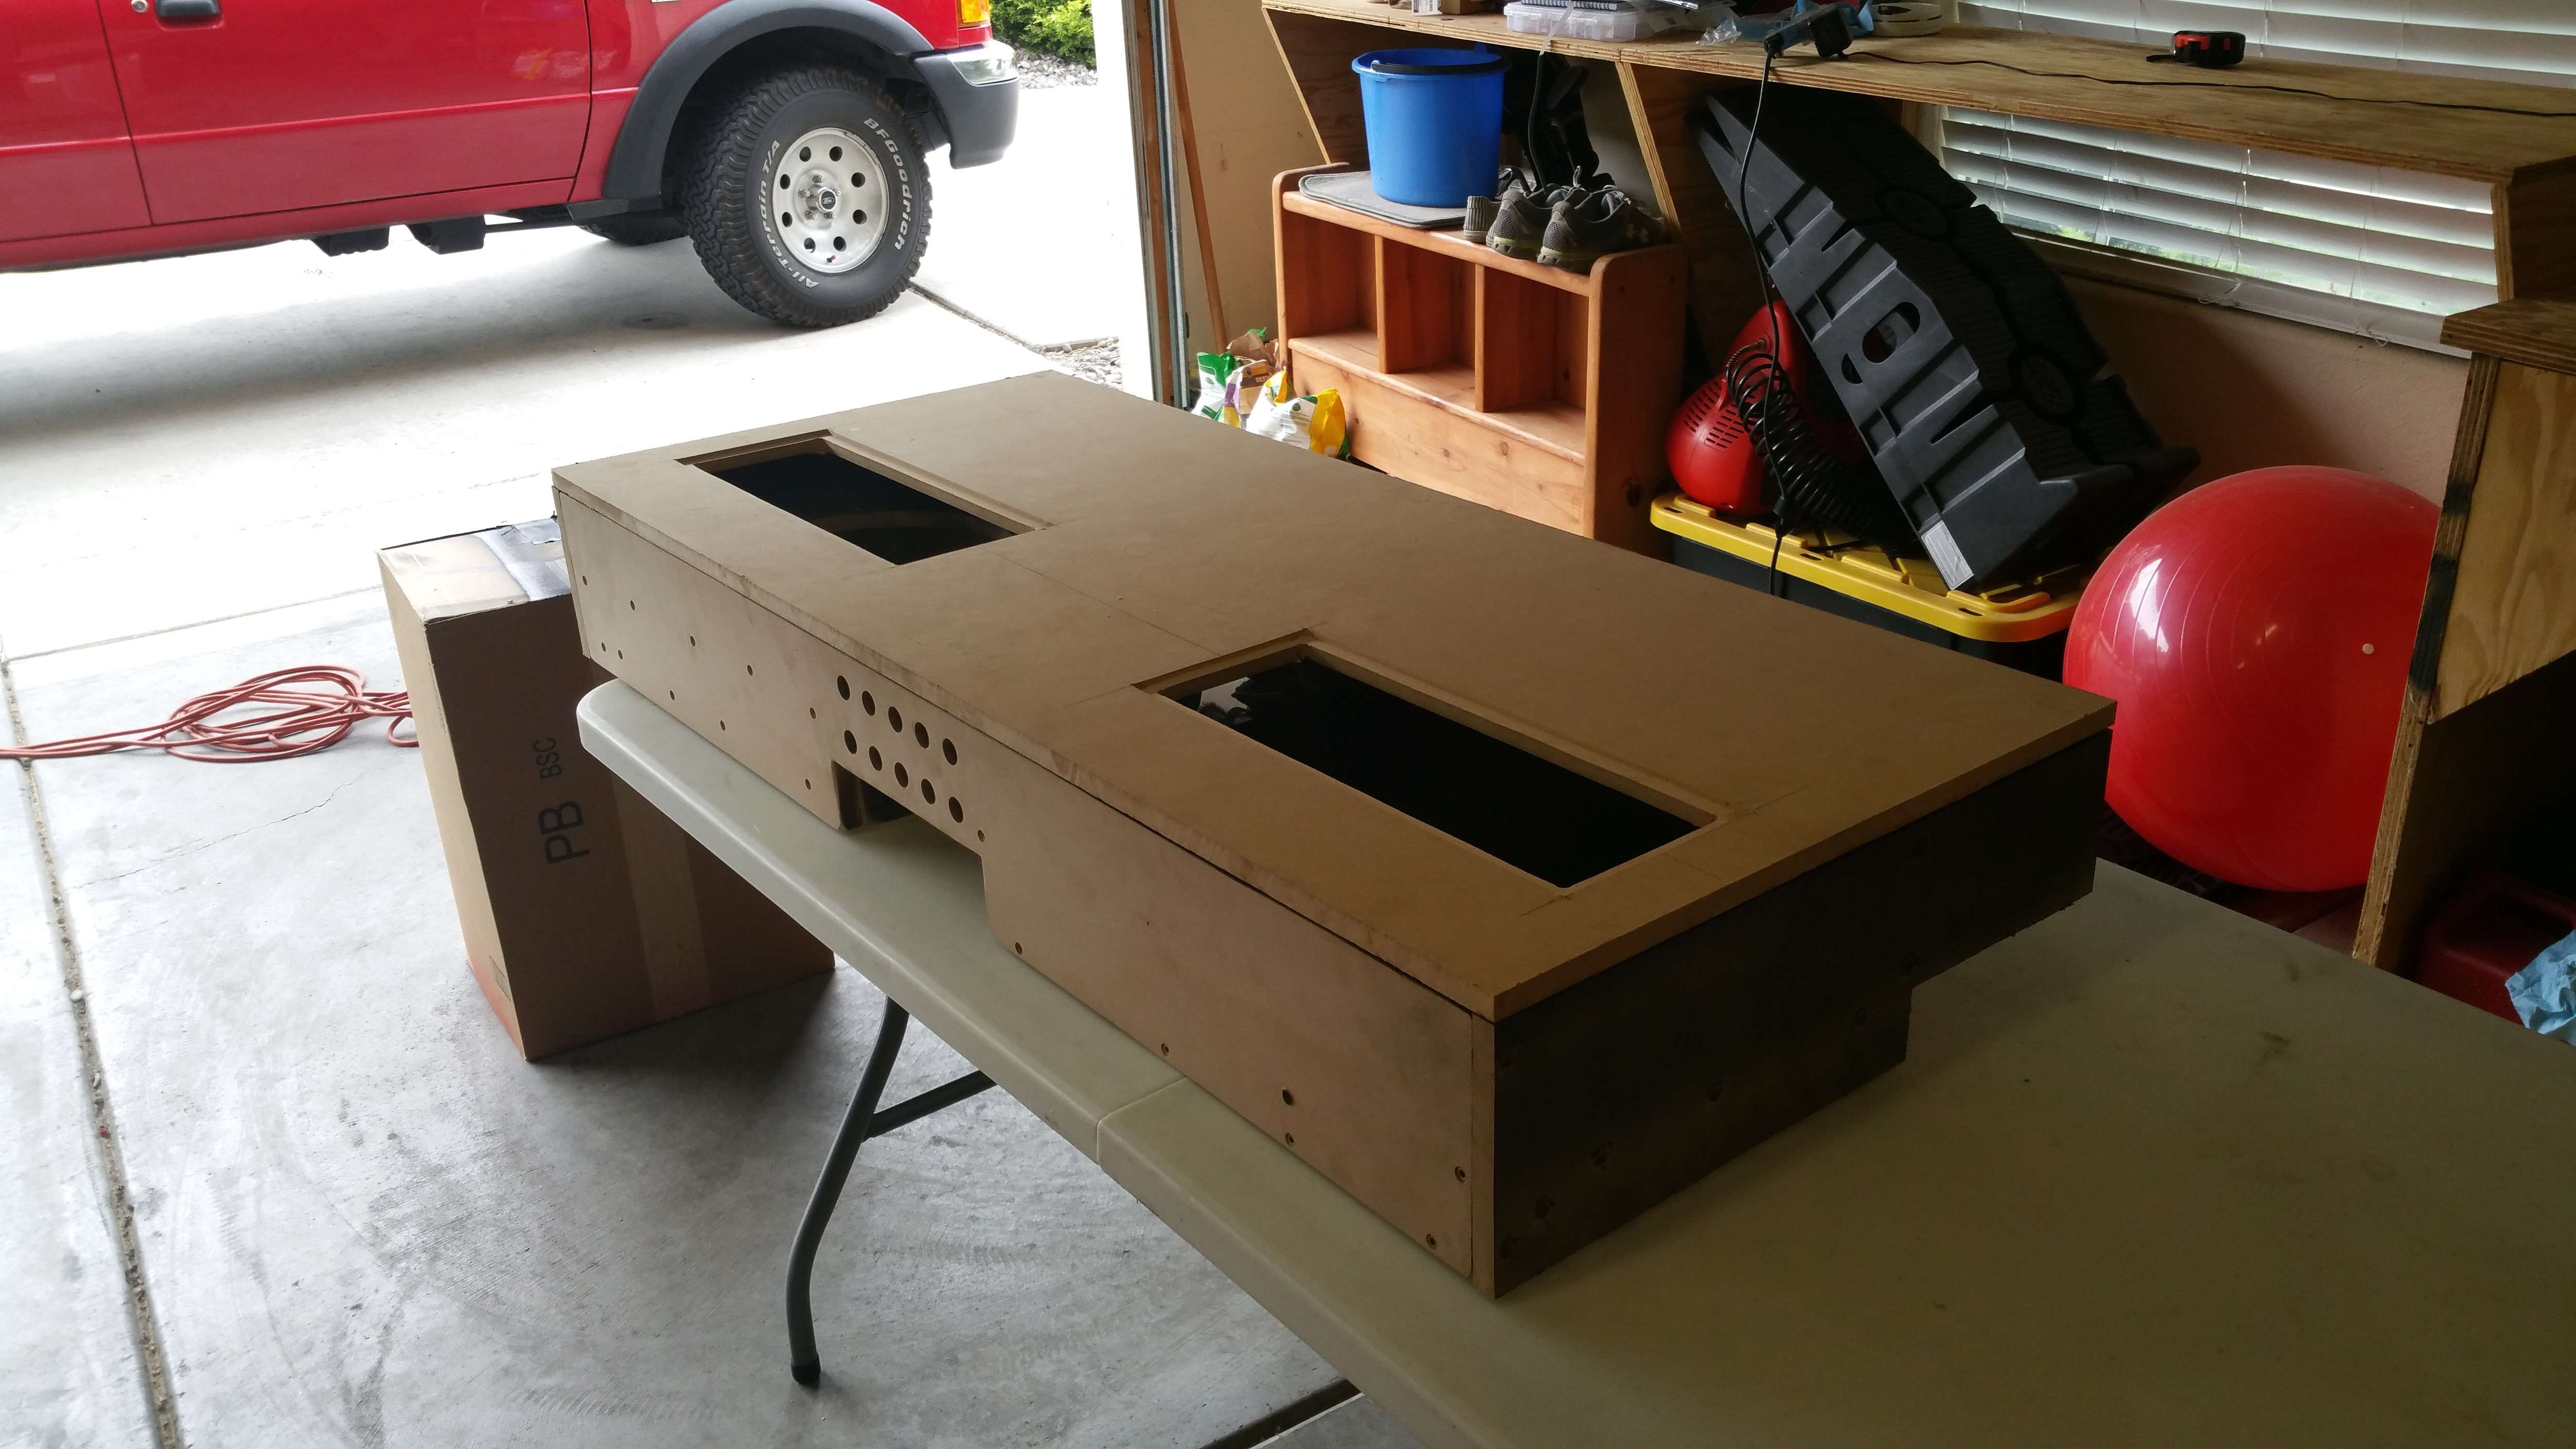
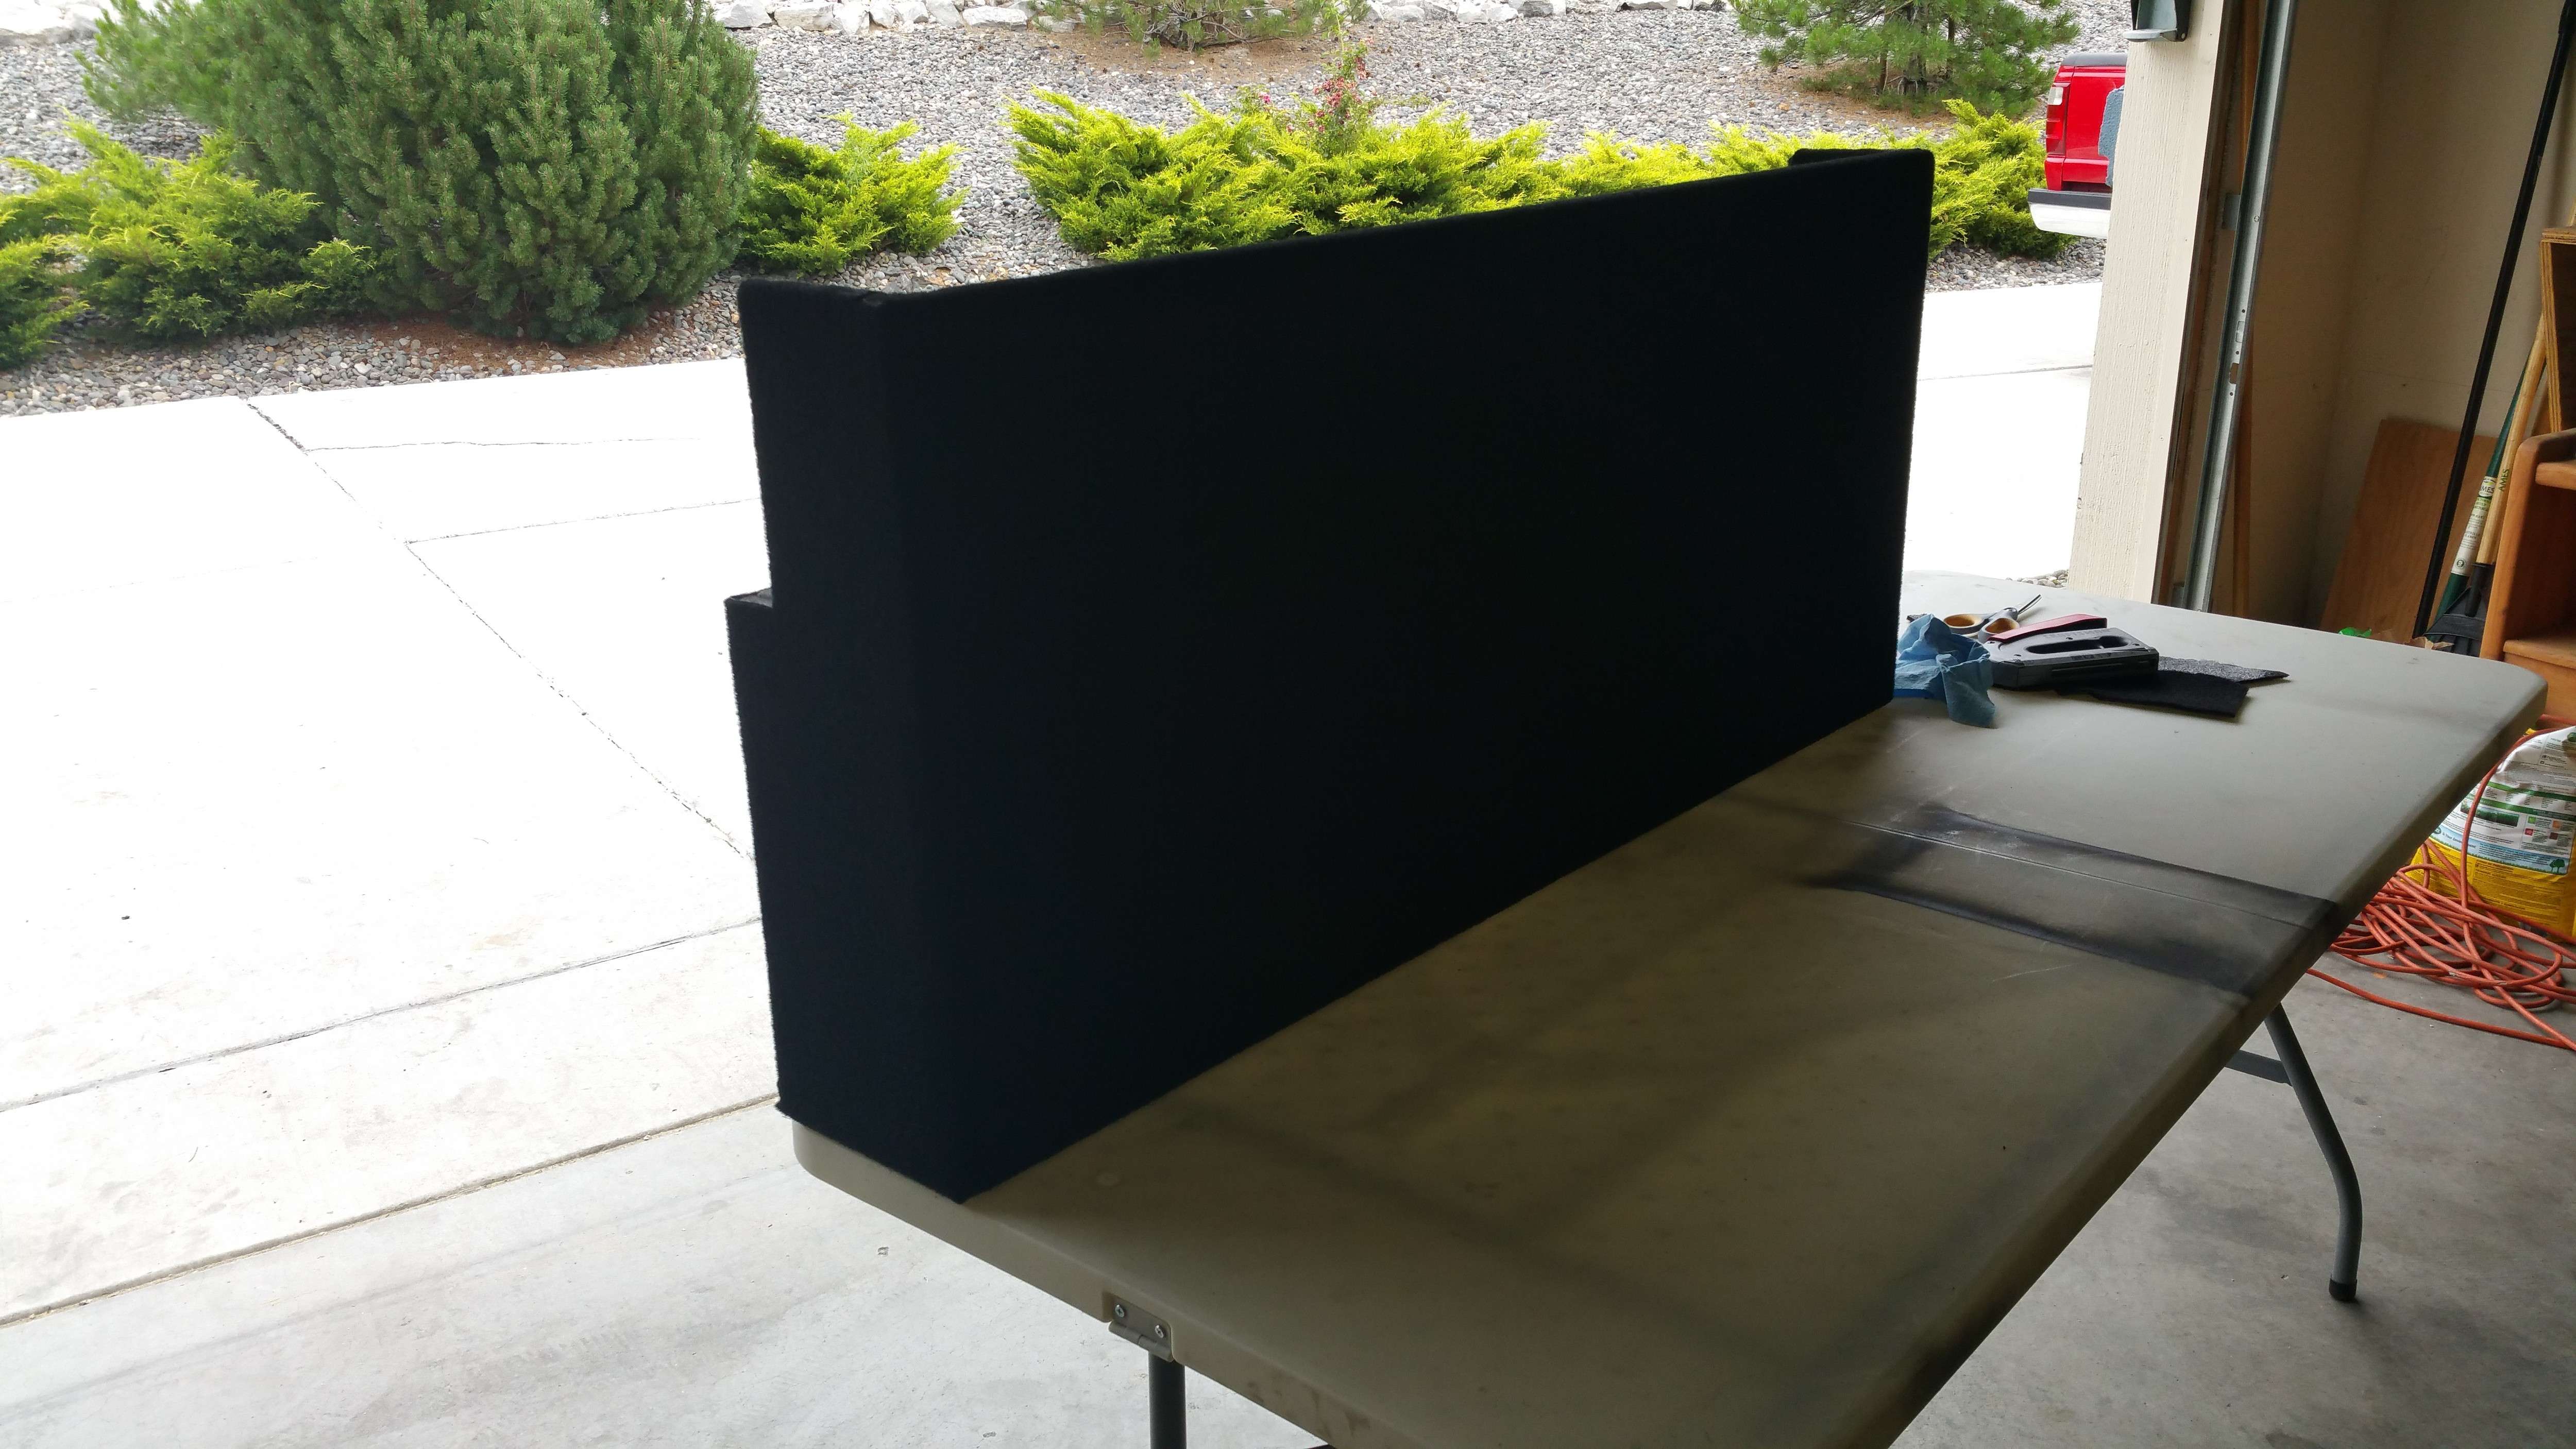

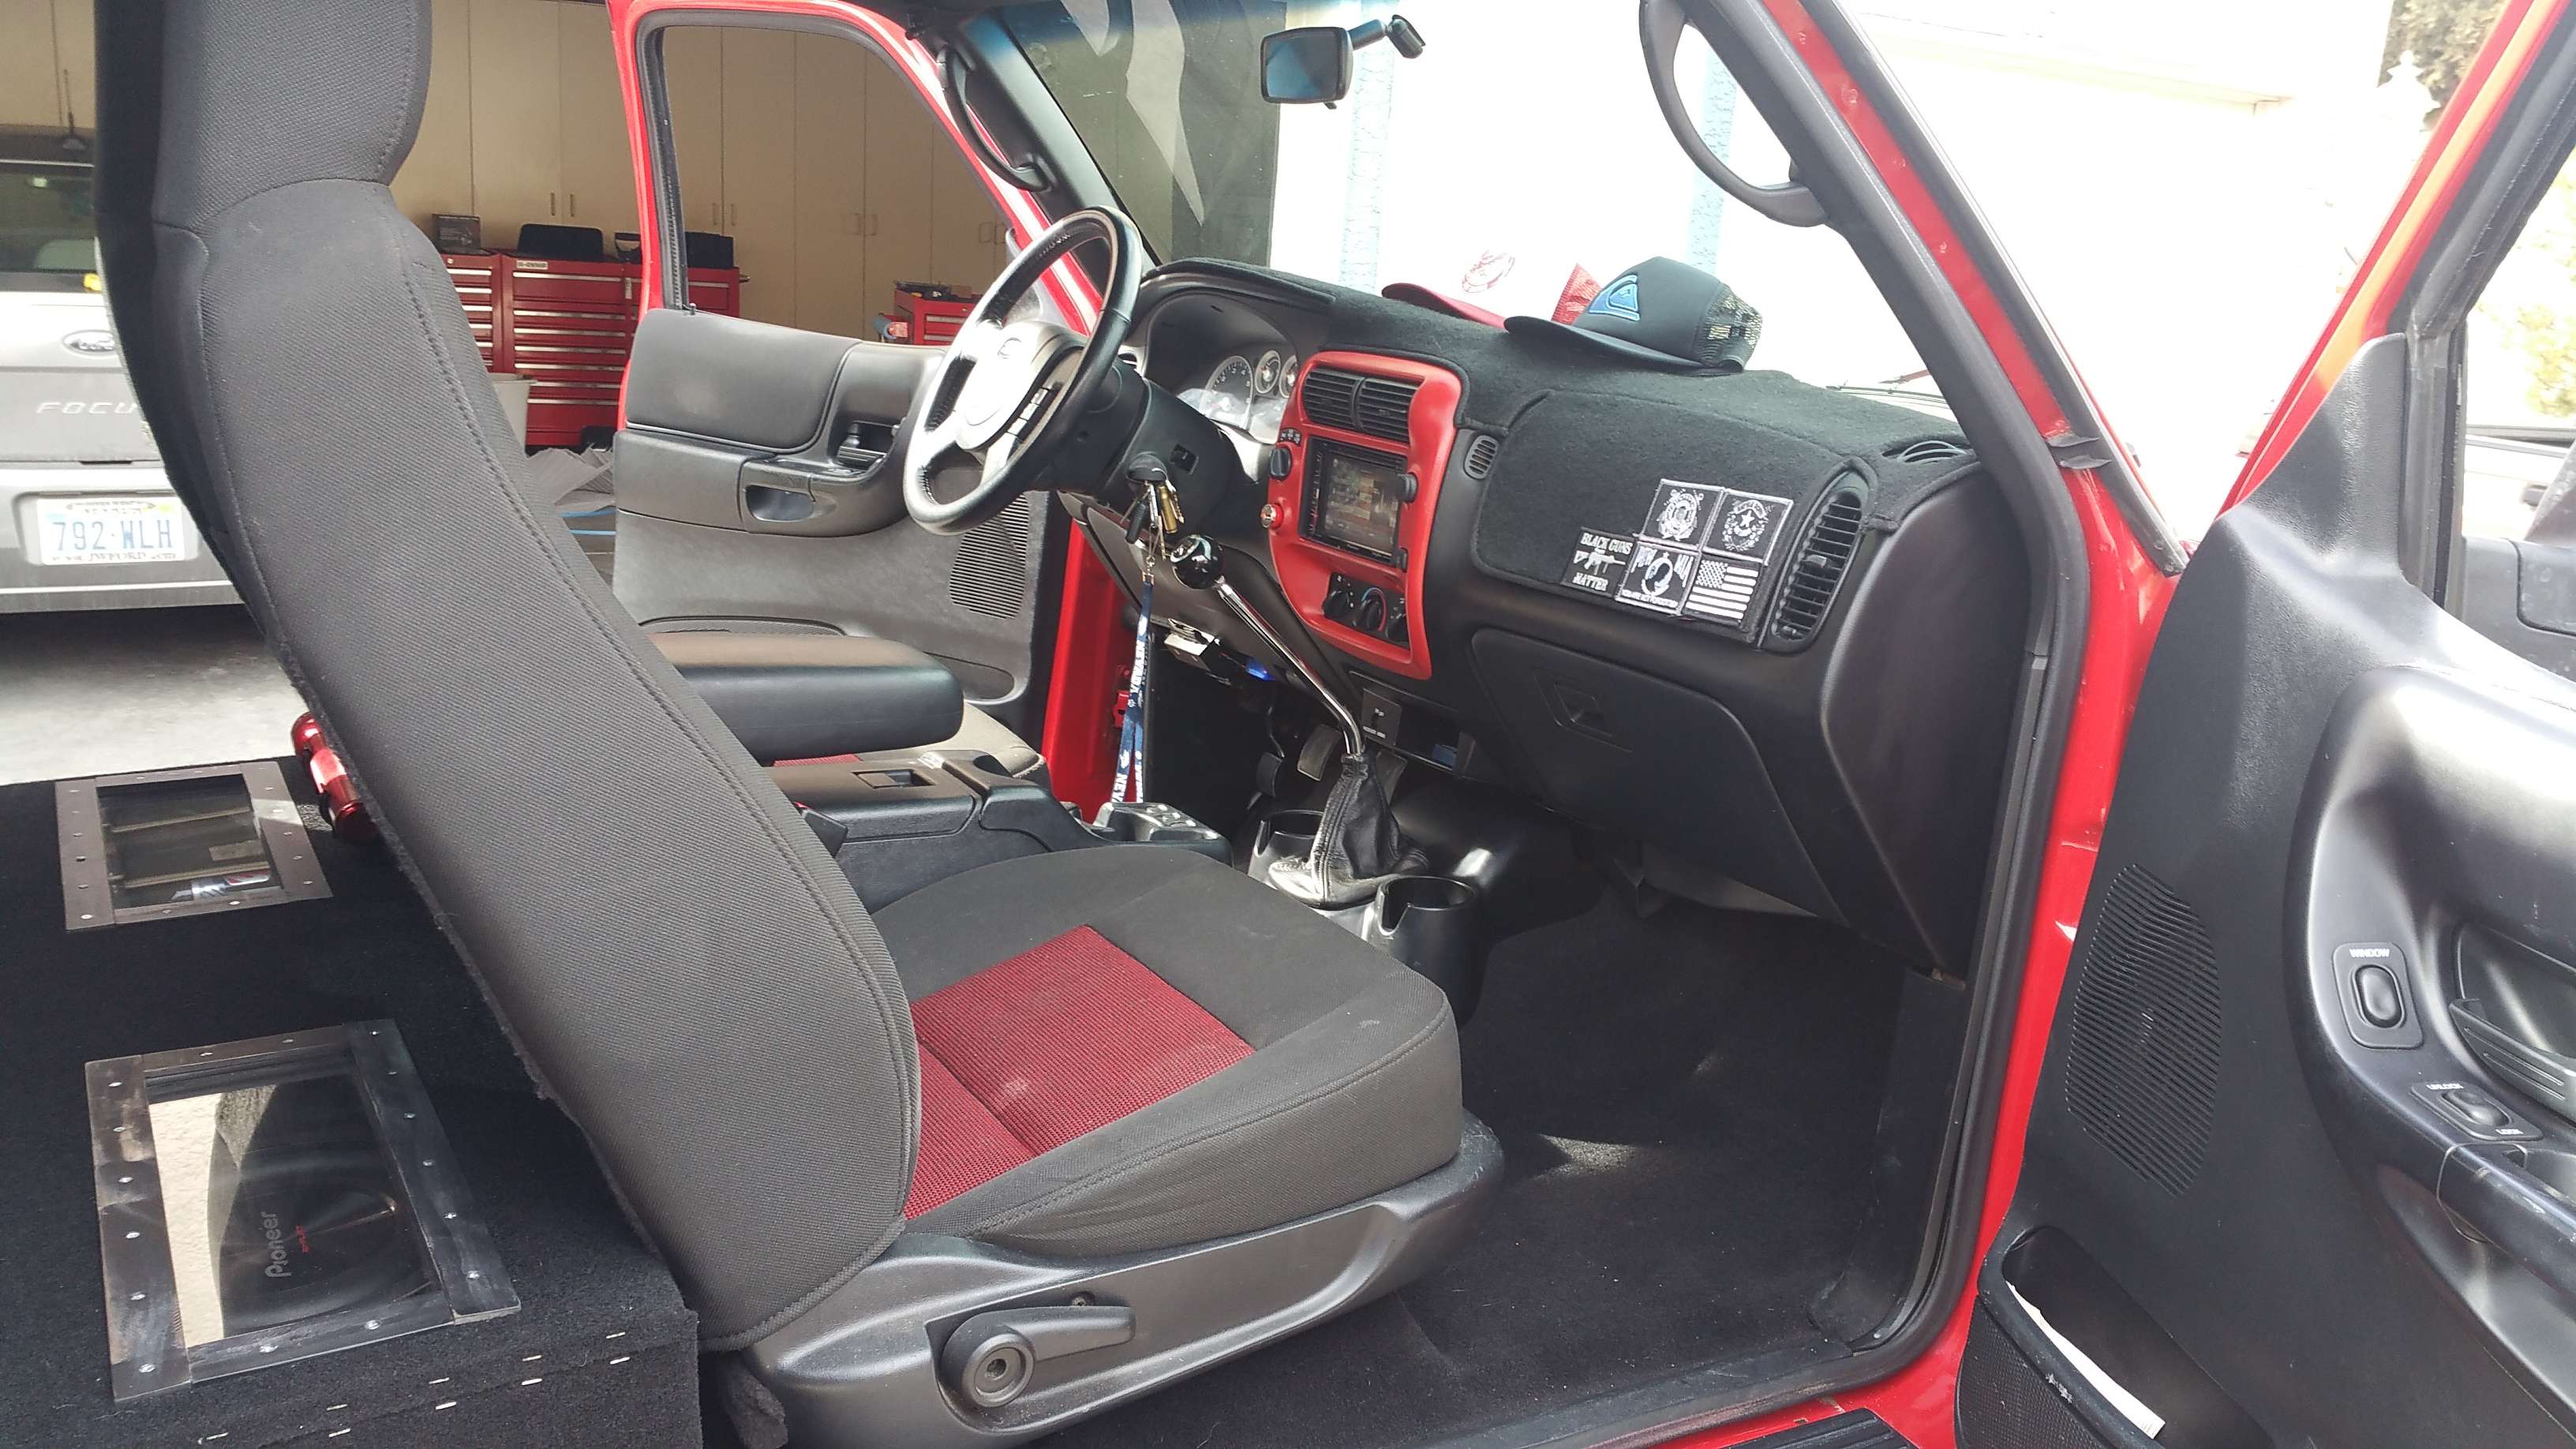
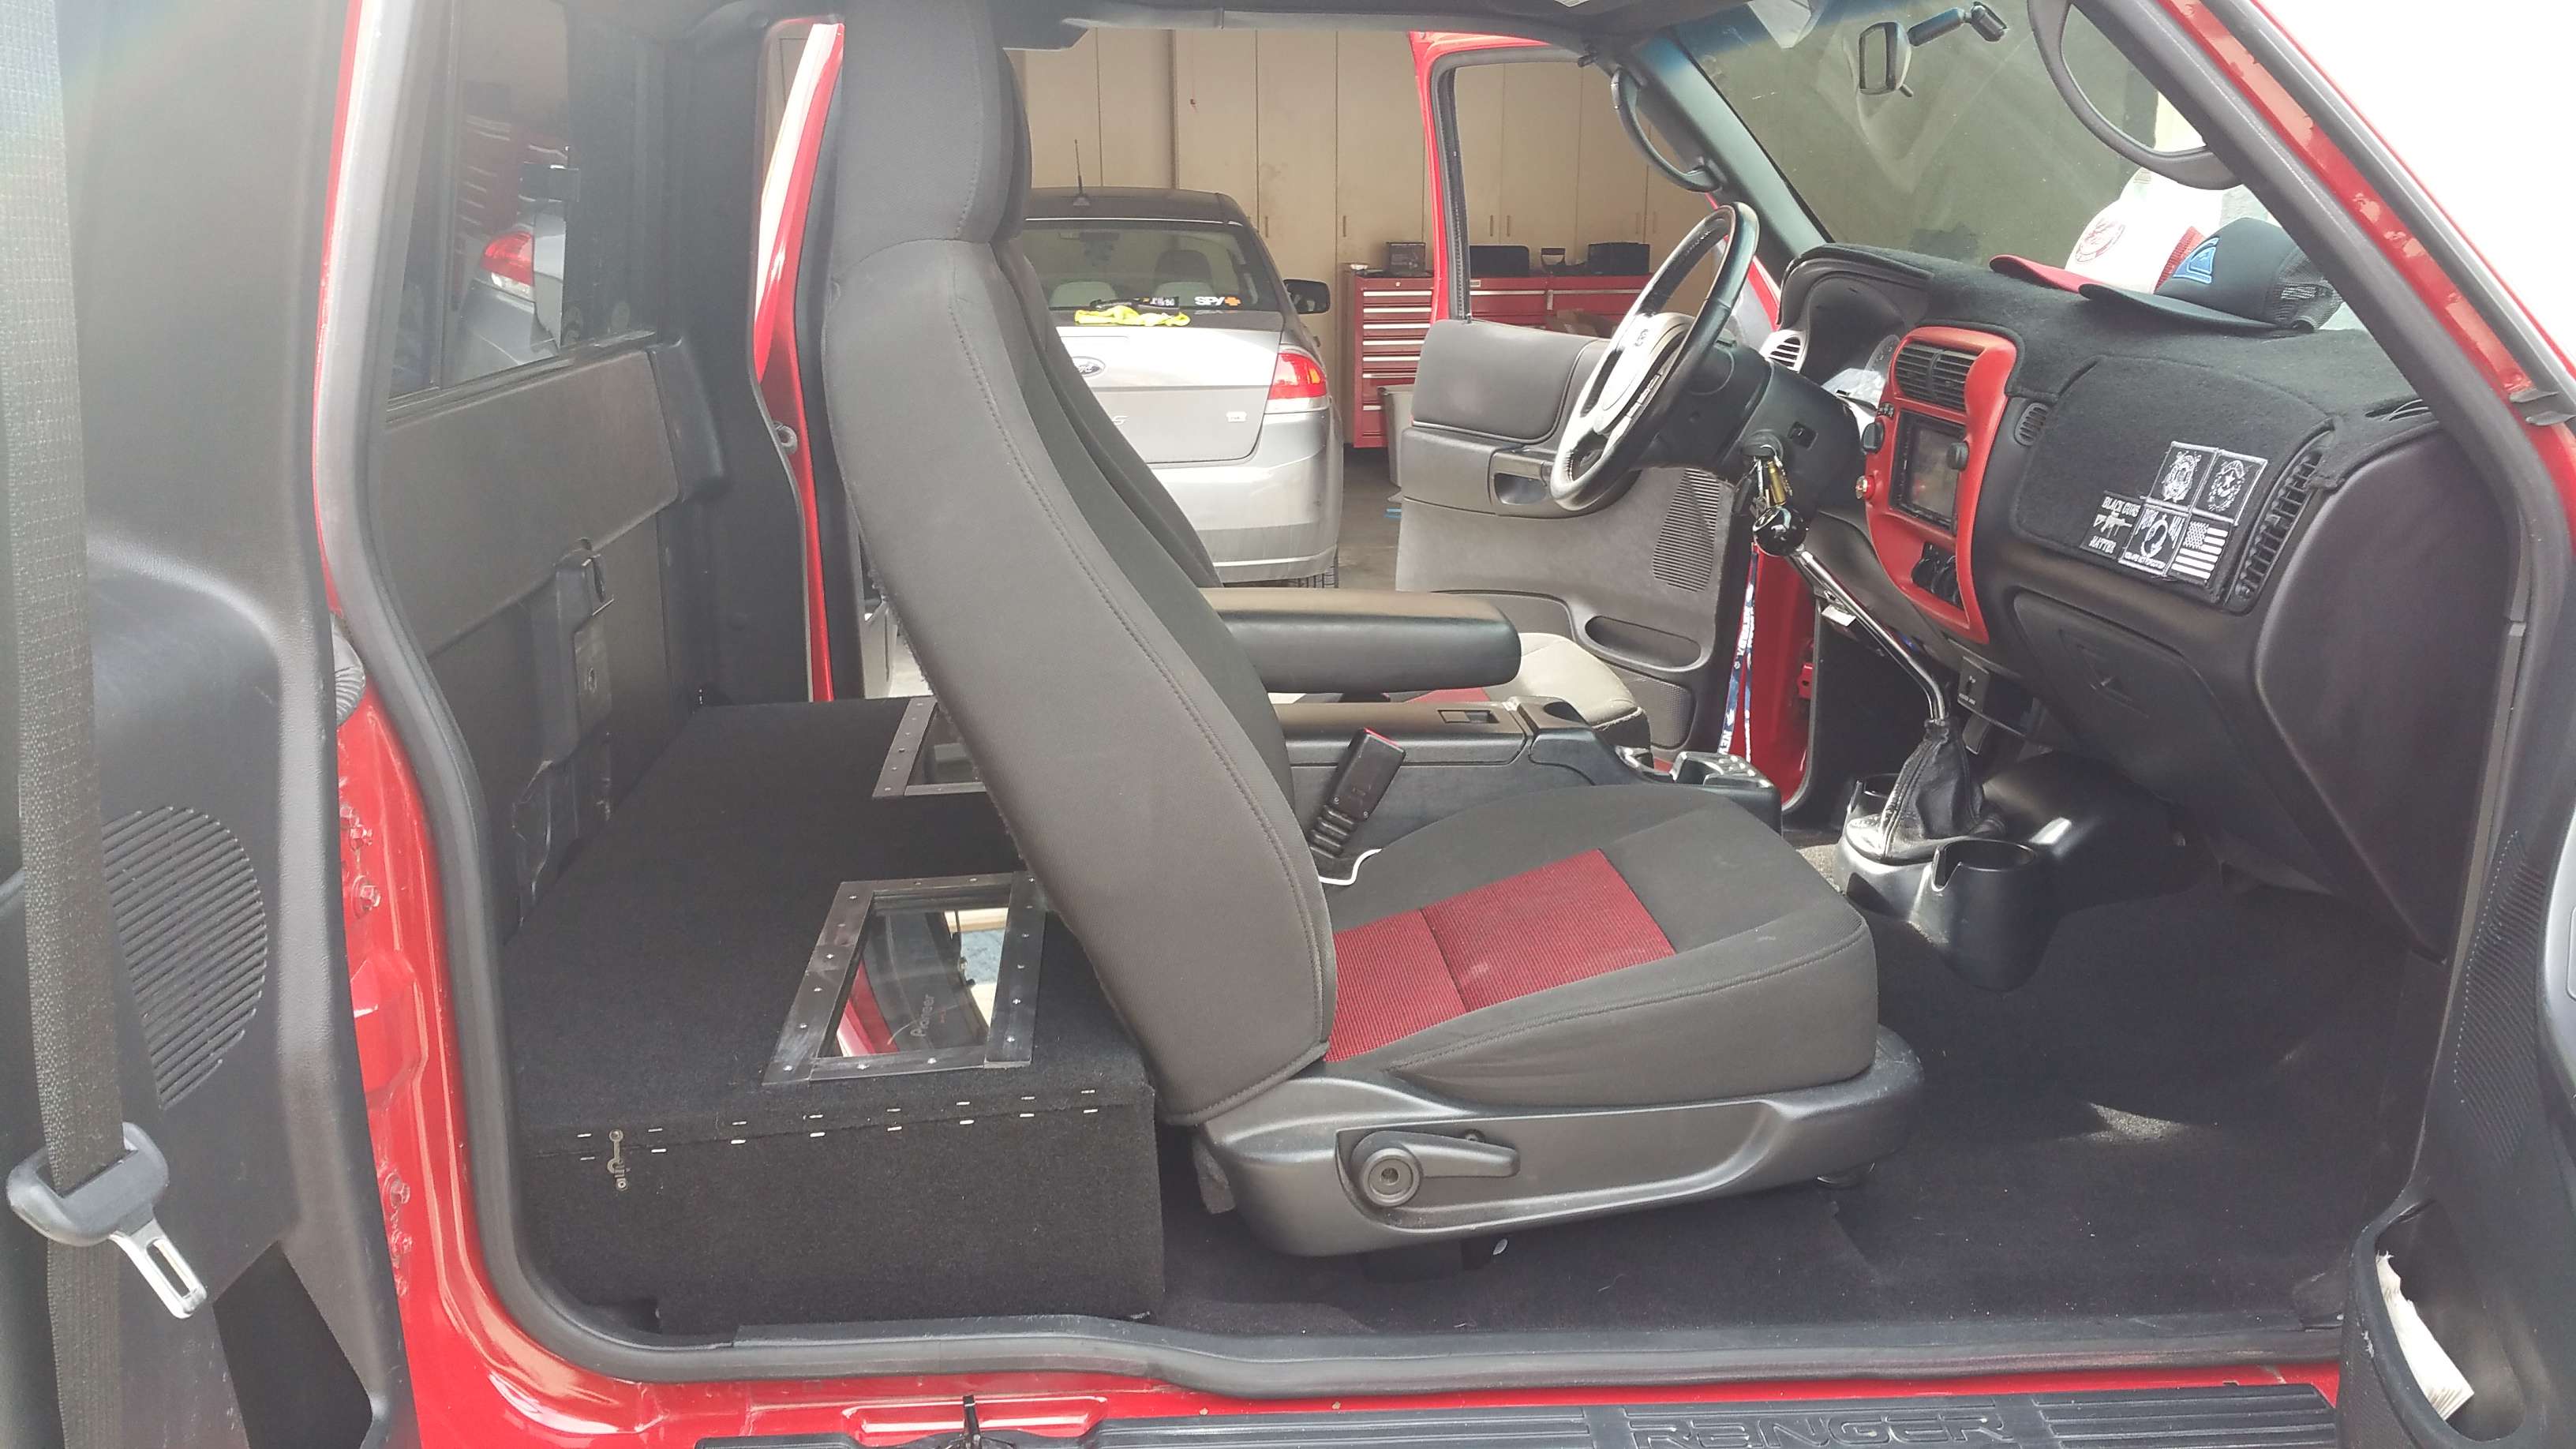
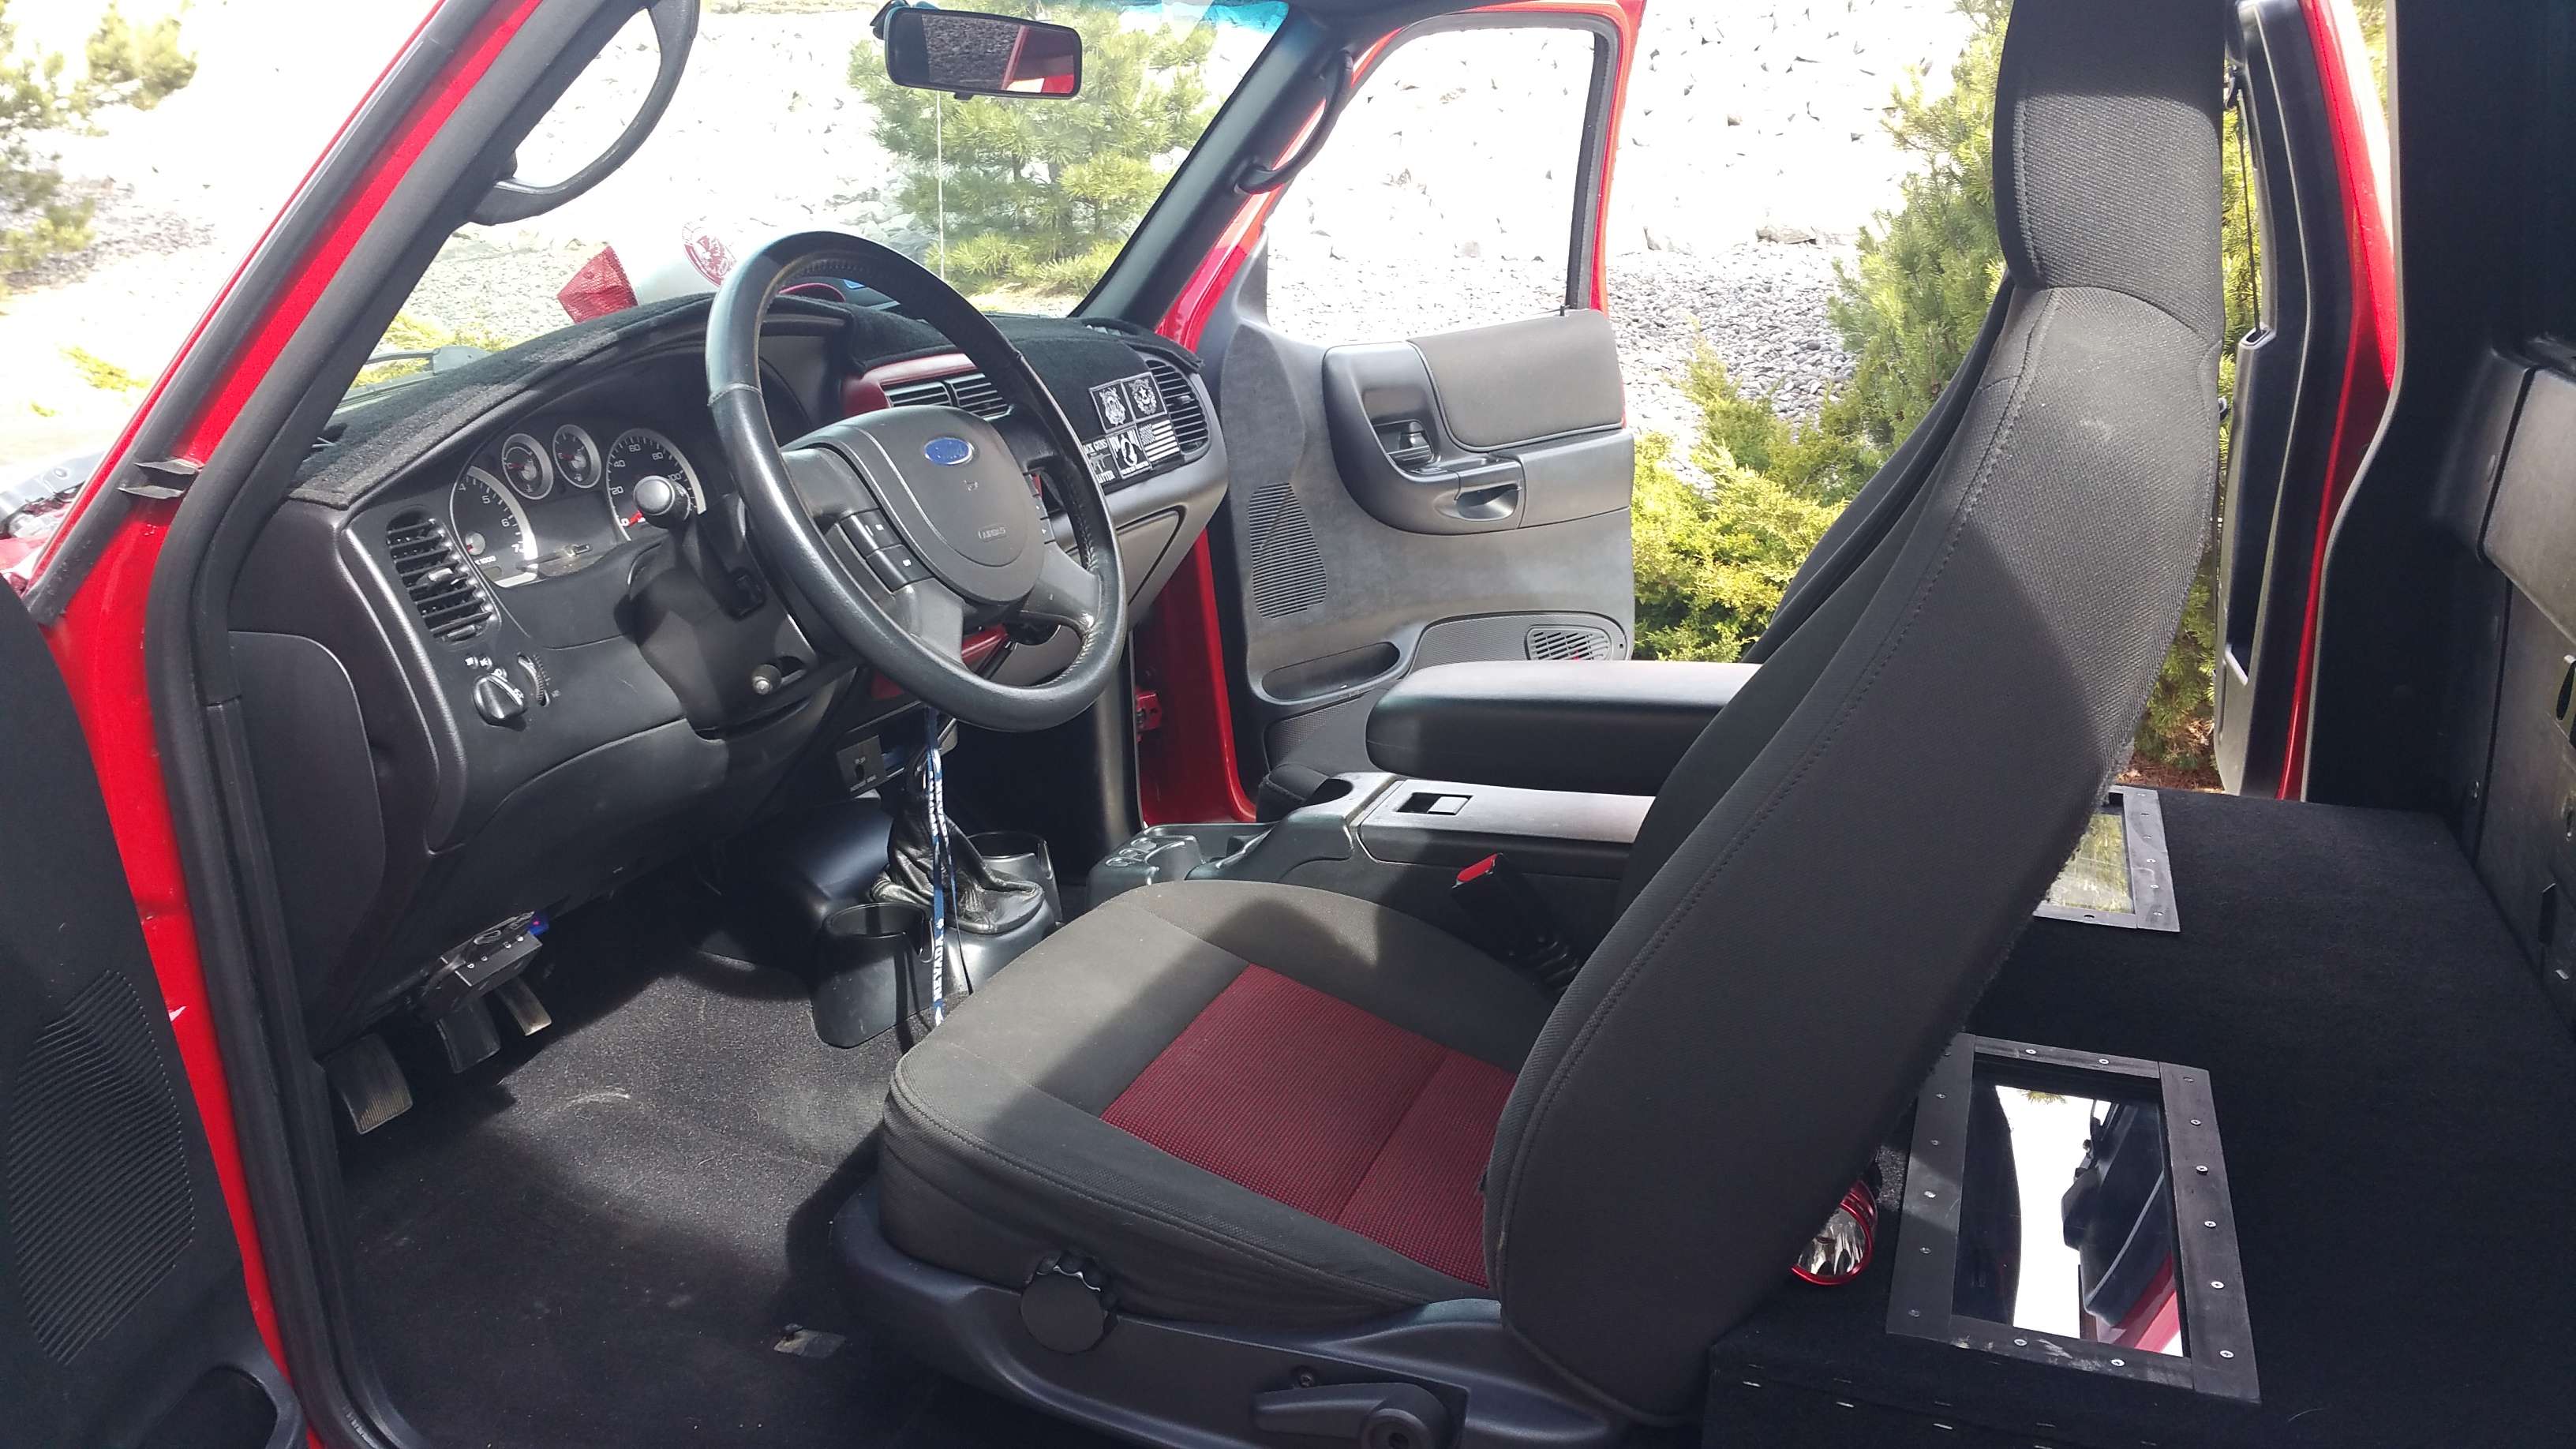
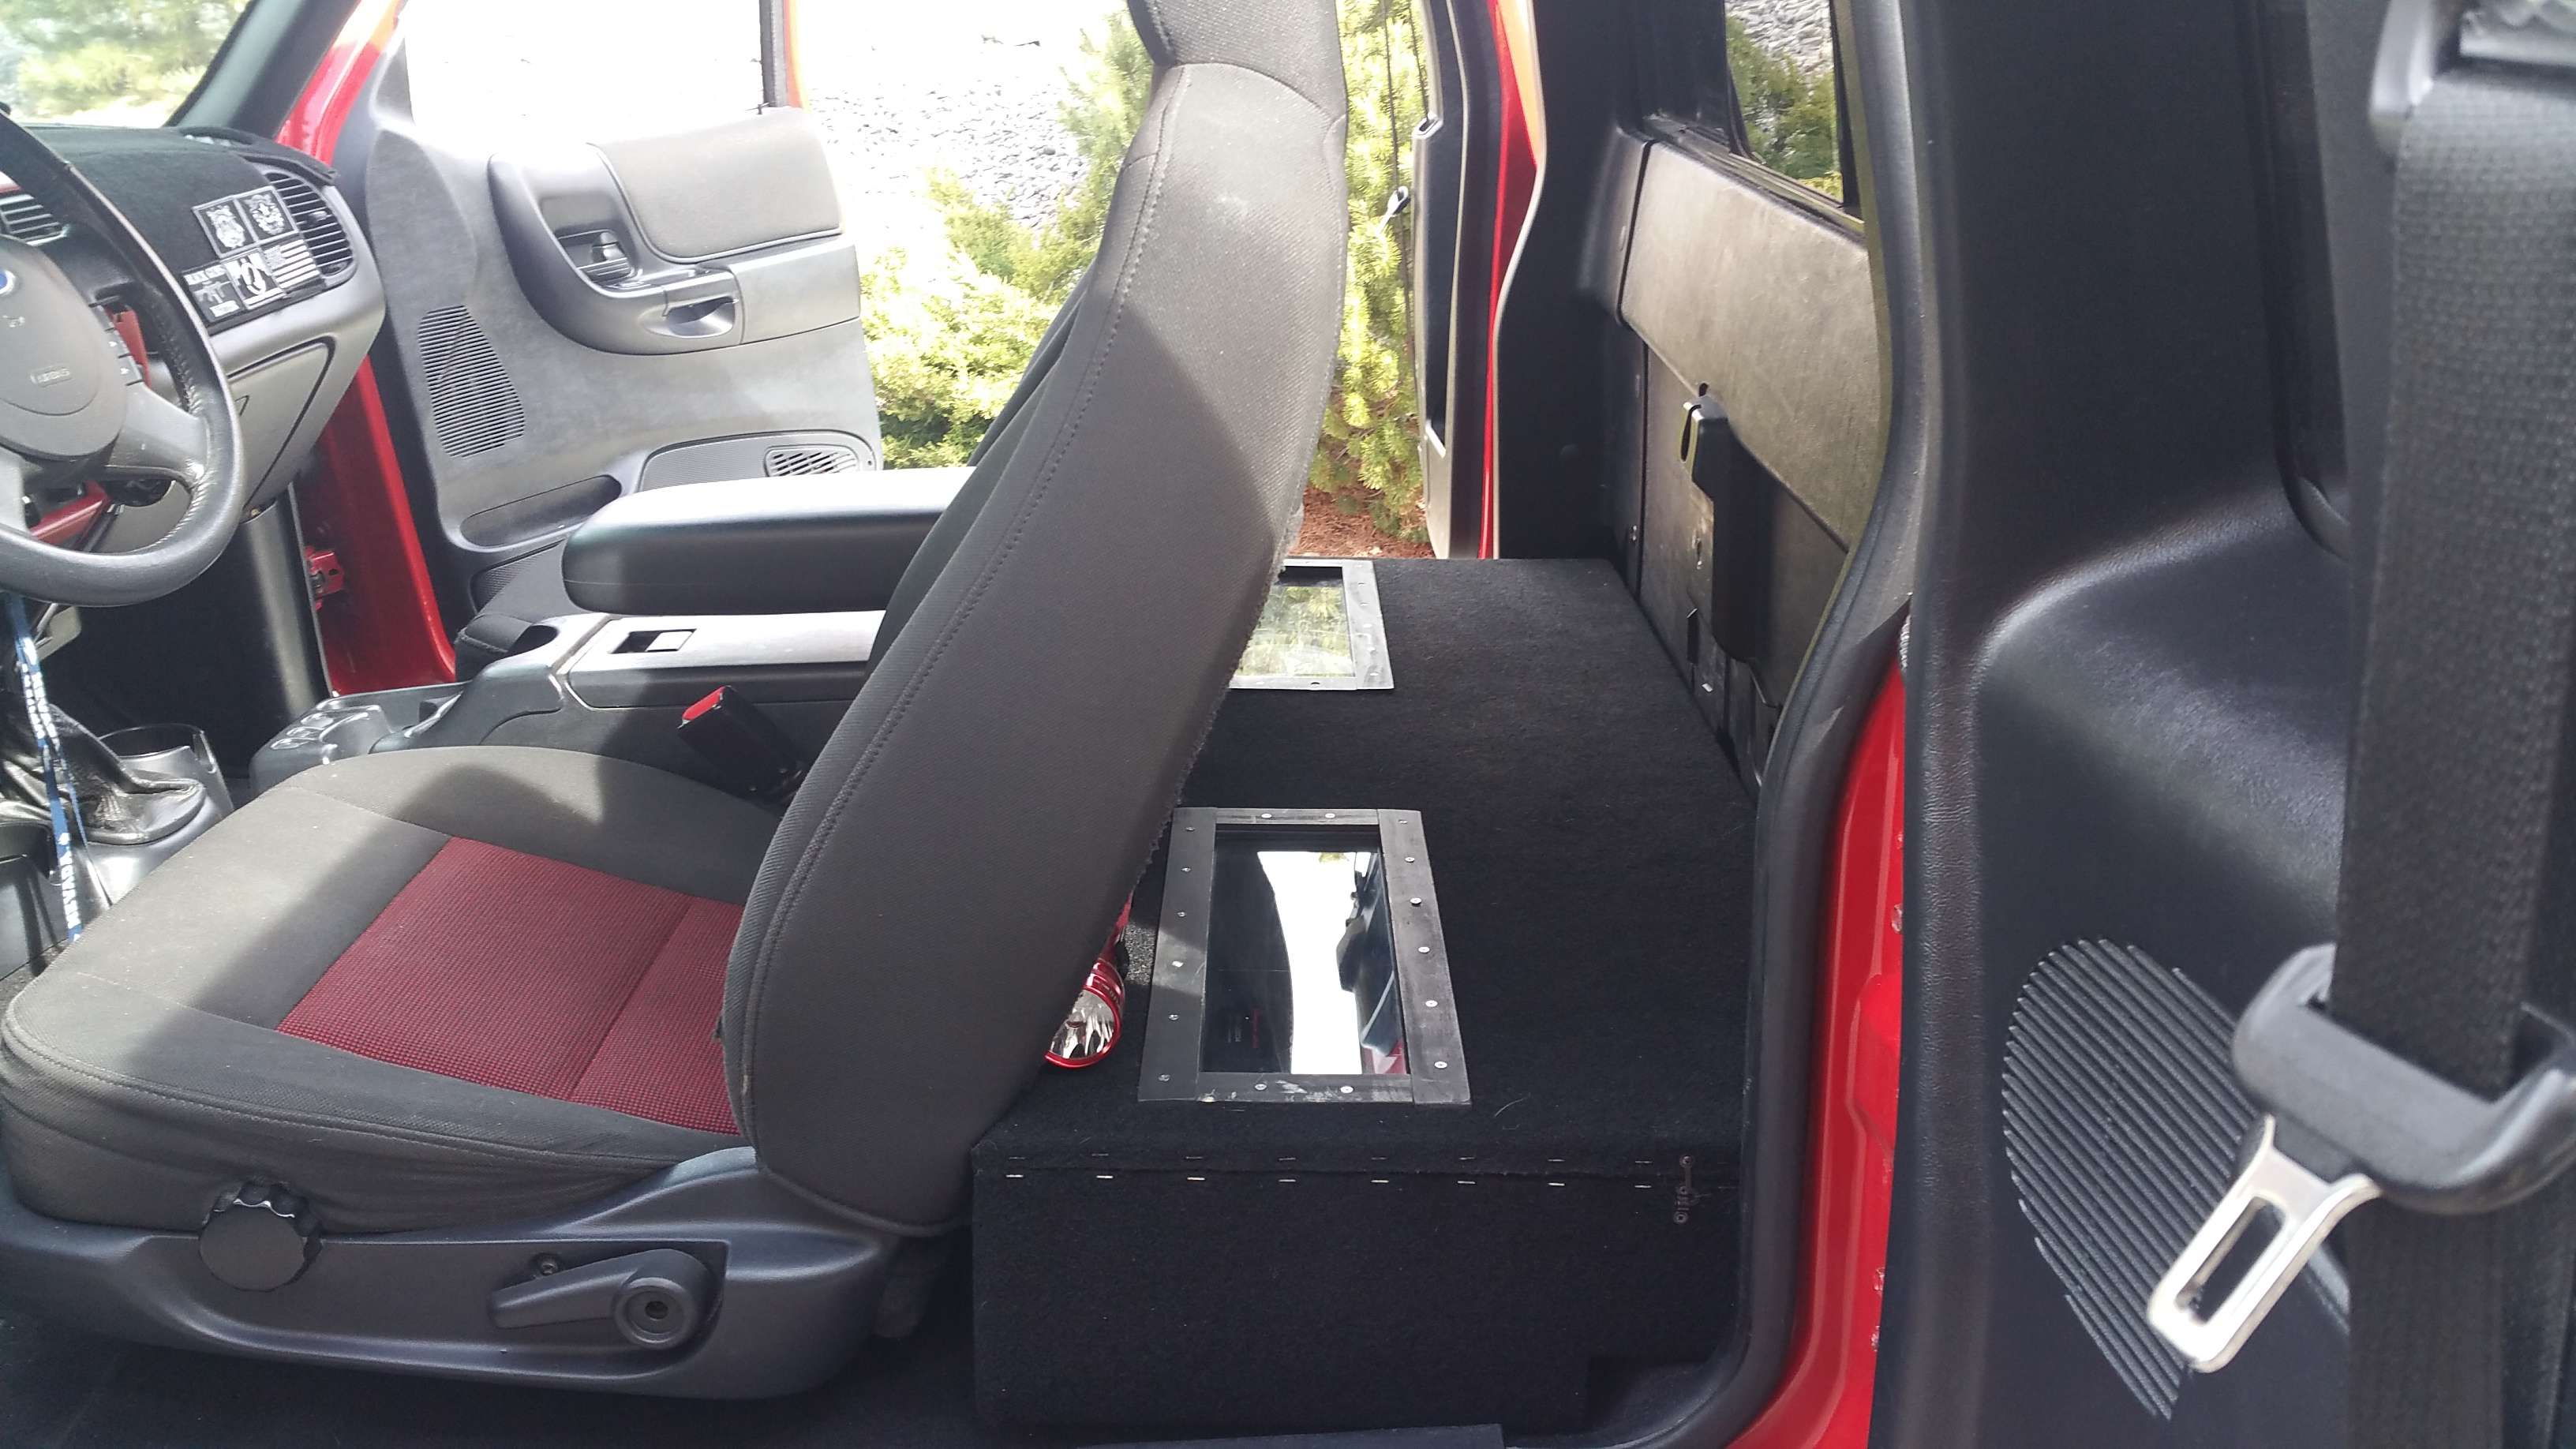
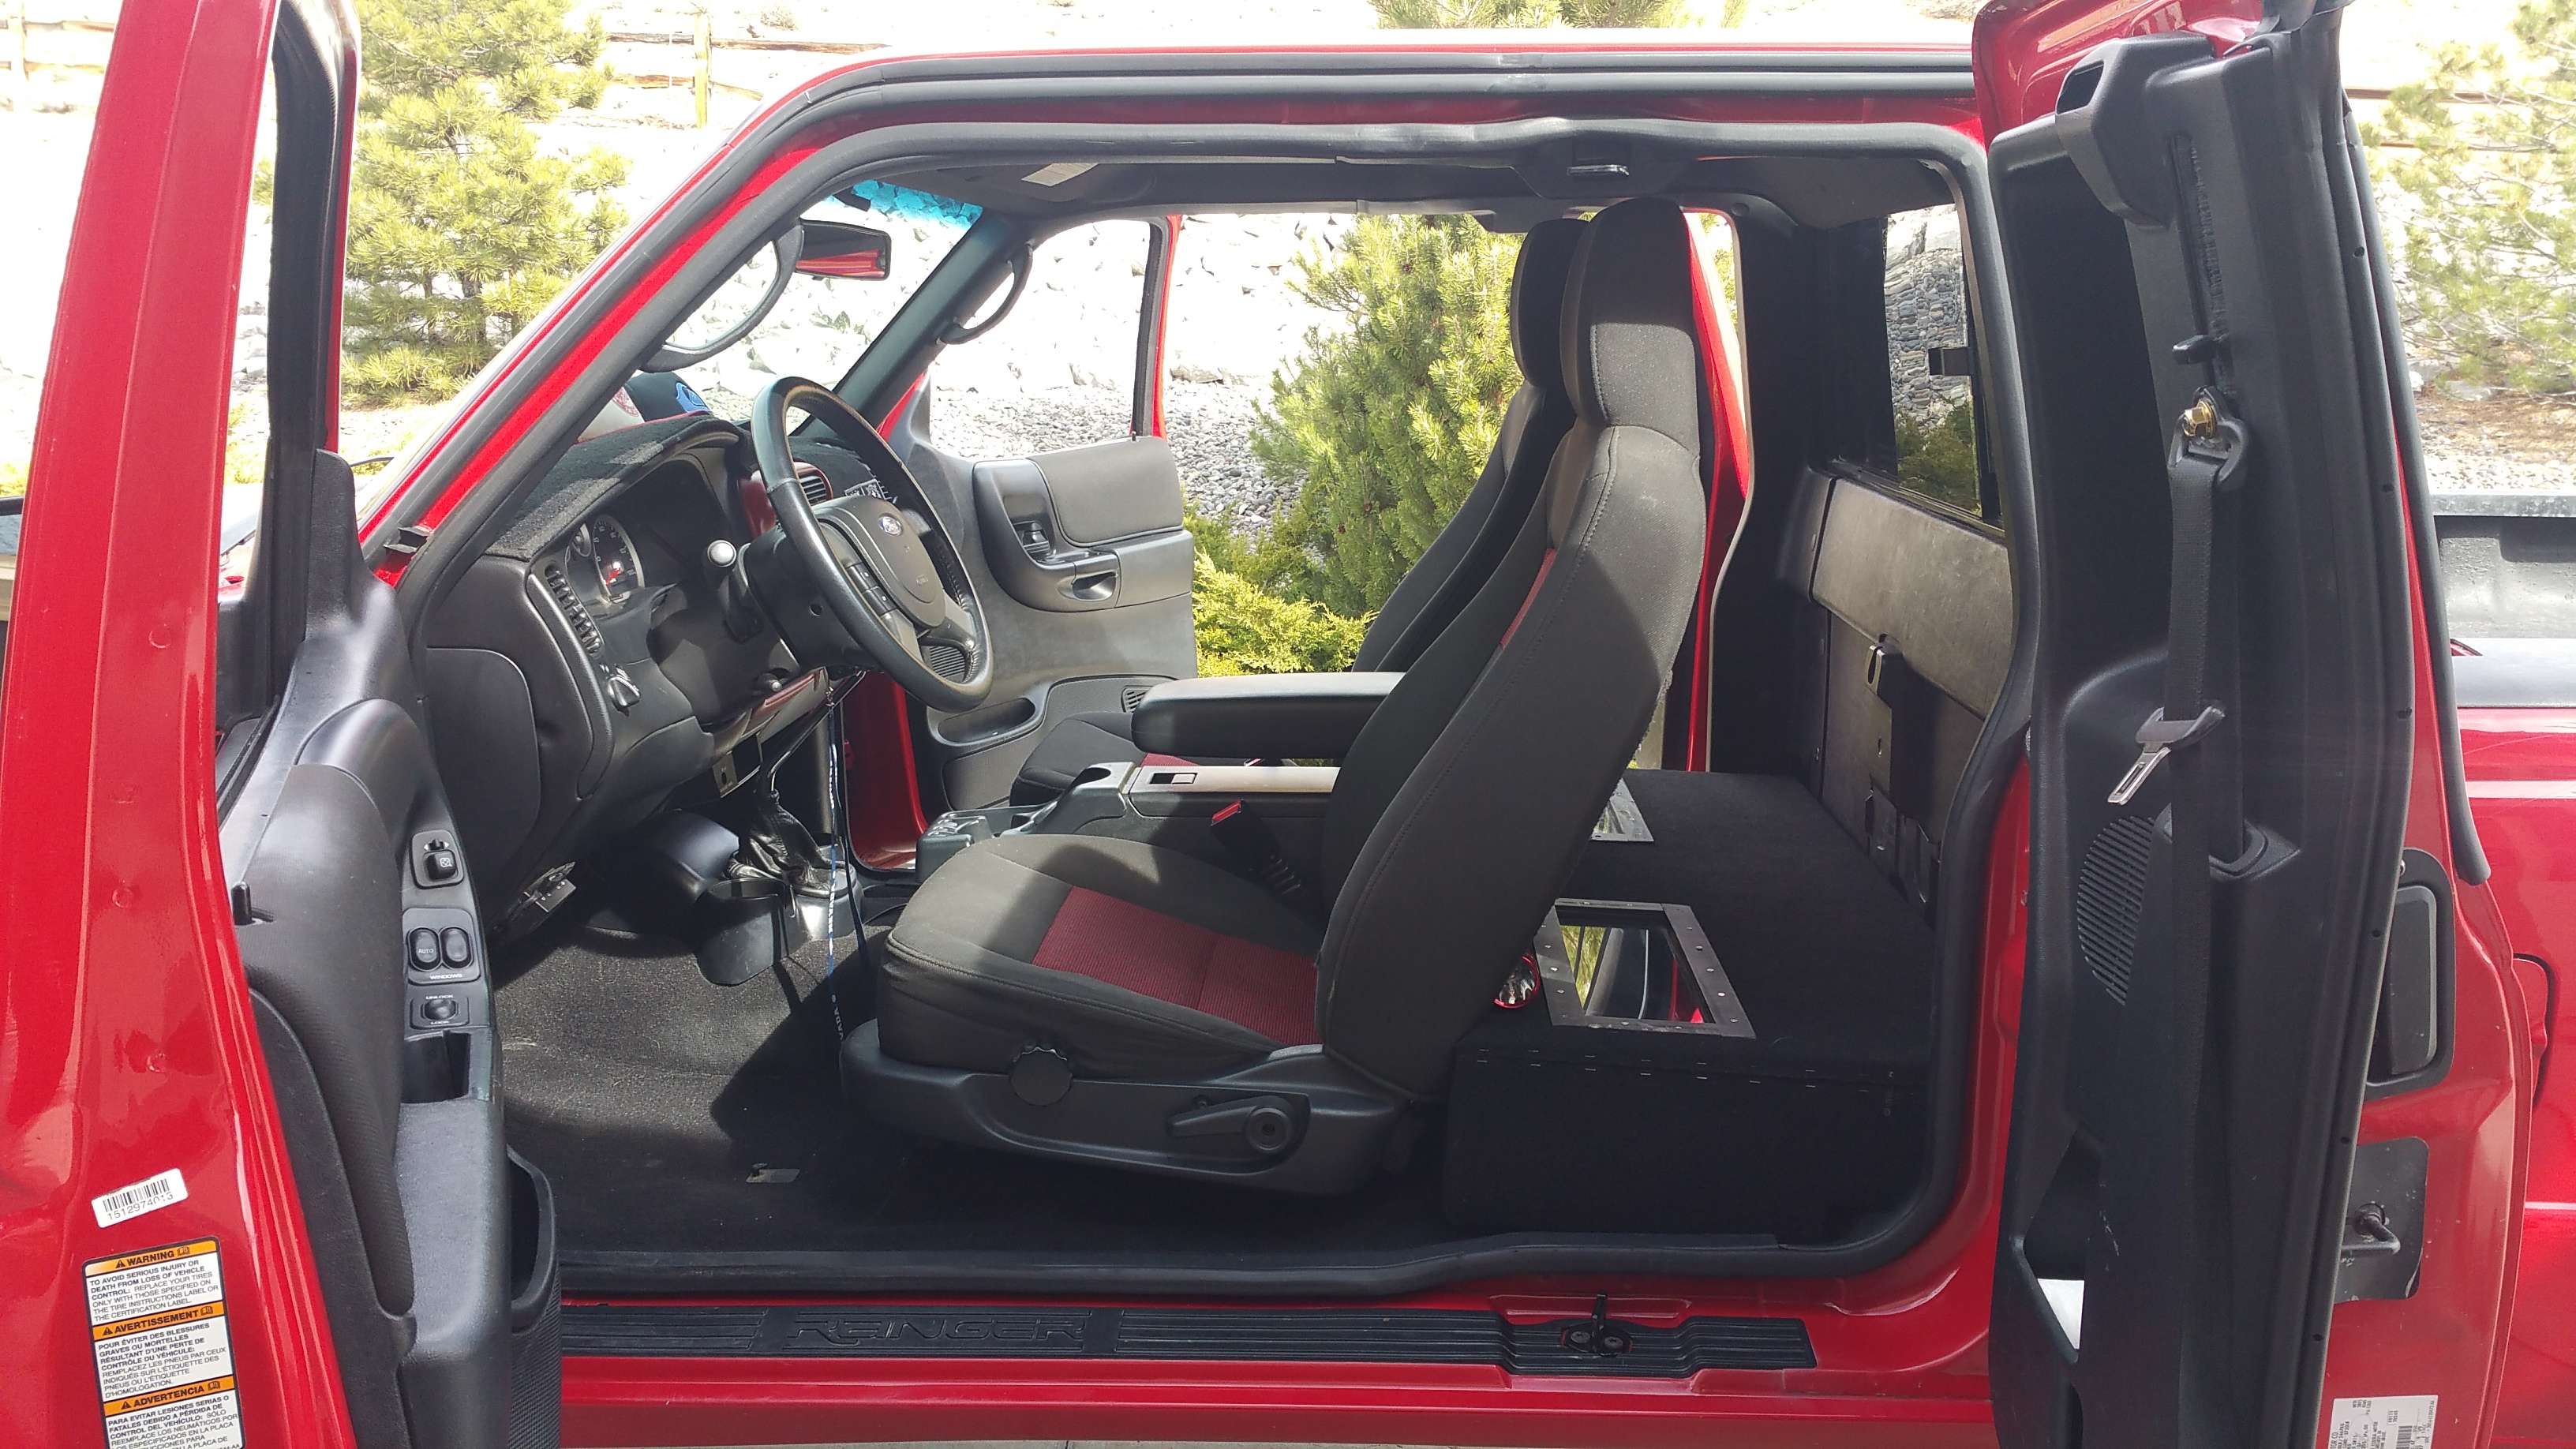
It sounds extremely good. It isn't over the top, but I can crank it without hearing any distortion. The Pioneer shallow mount 10" sounds very good. It has impressed me. I would have loved to throw in a 12 along with the 10 for better lows, but space and ergonomics were a higher priority. It still does the job and then some. I really like having that large flat surface to throw stuff on, instead of the dips in the floor with the center hump. I can still haul a bunch of stuff behind the seats. I don't have pictures of it, but there are red led strips under the dash, and inside the box under both glass windows. When I flip the switch, It looks pretty sweet. I will have to go get a picture tonight of it.
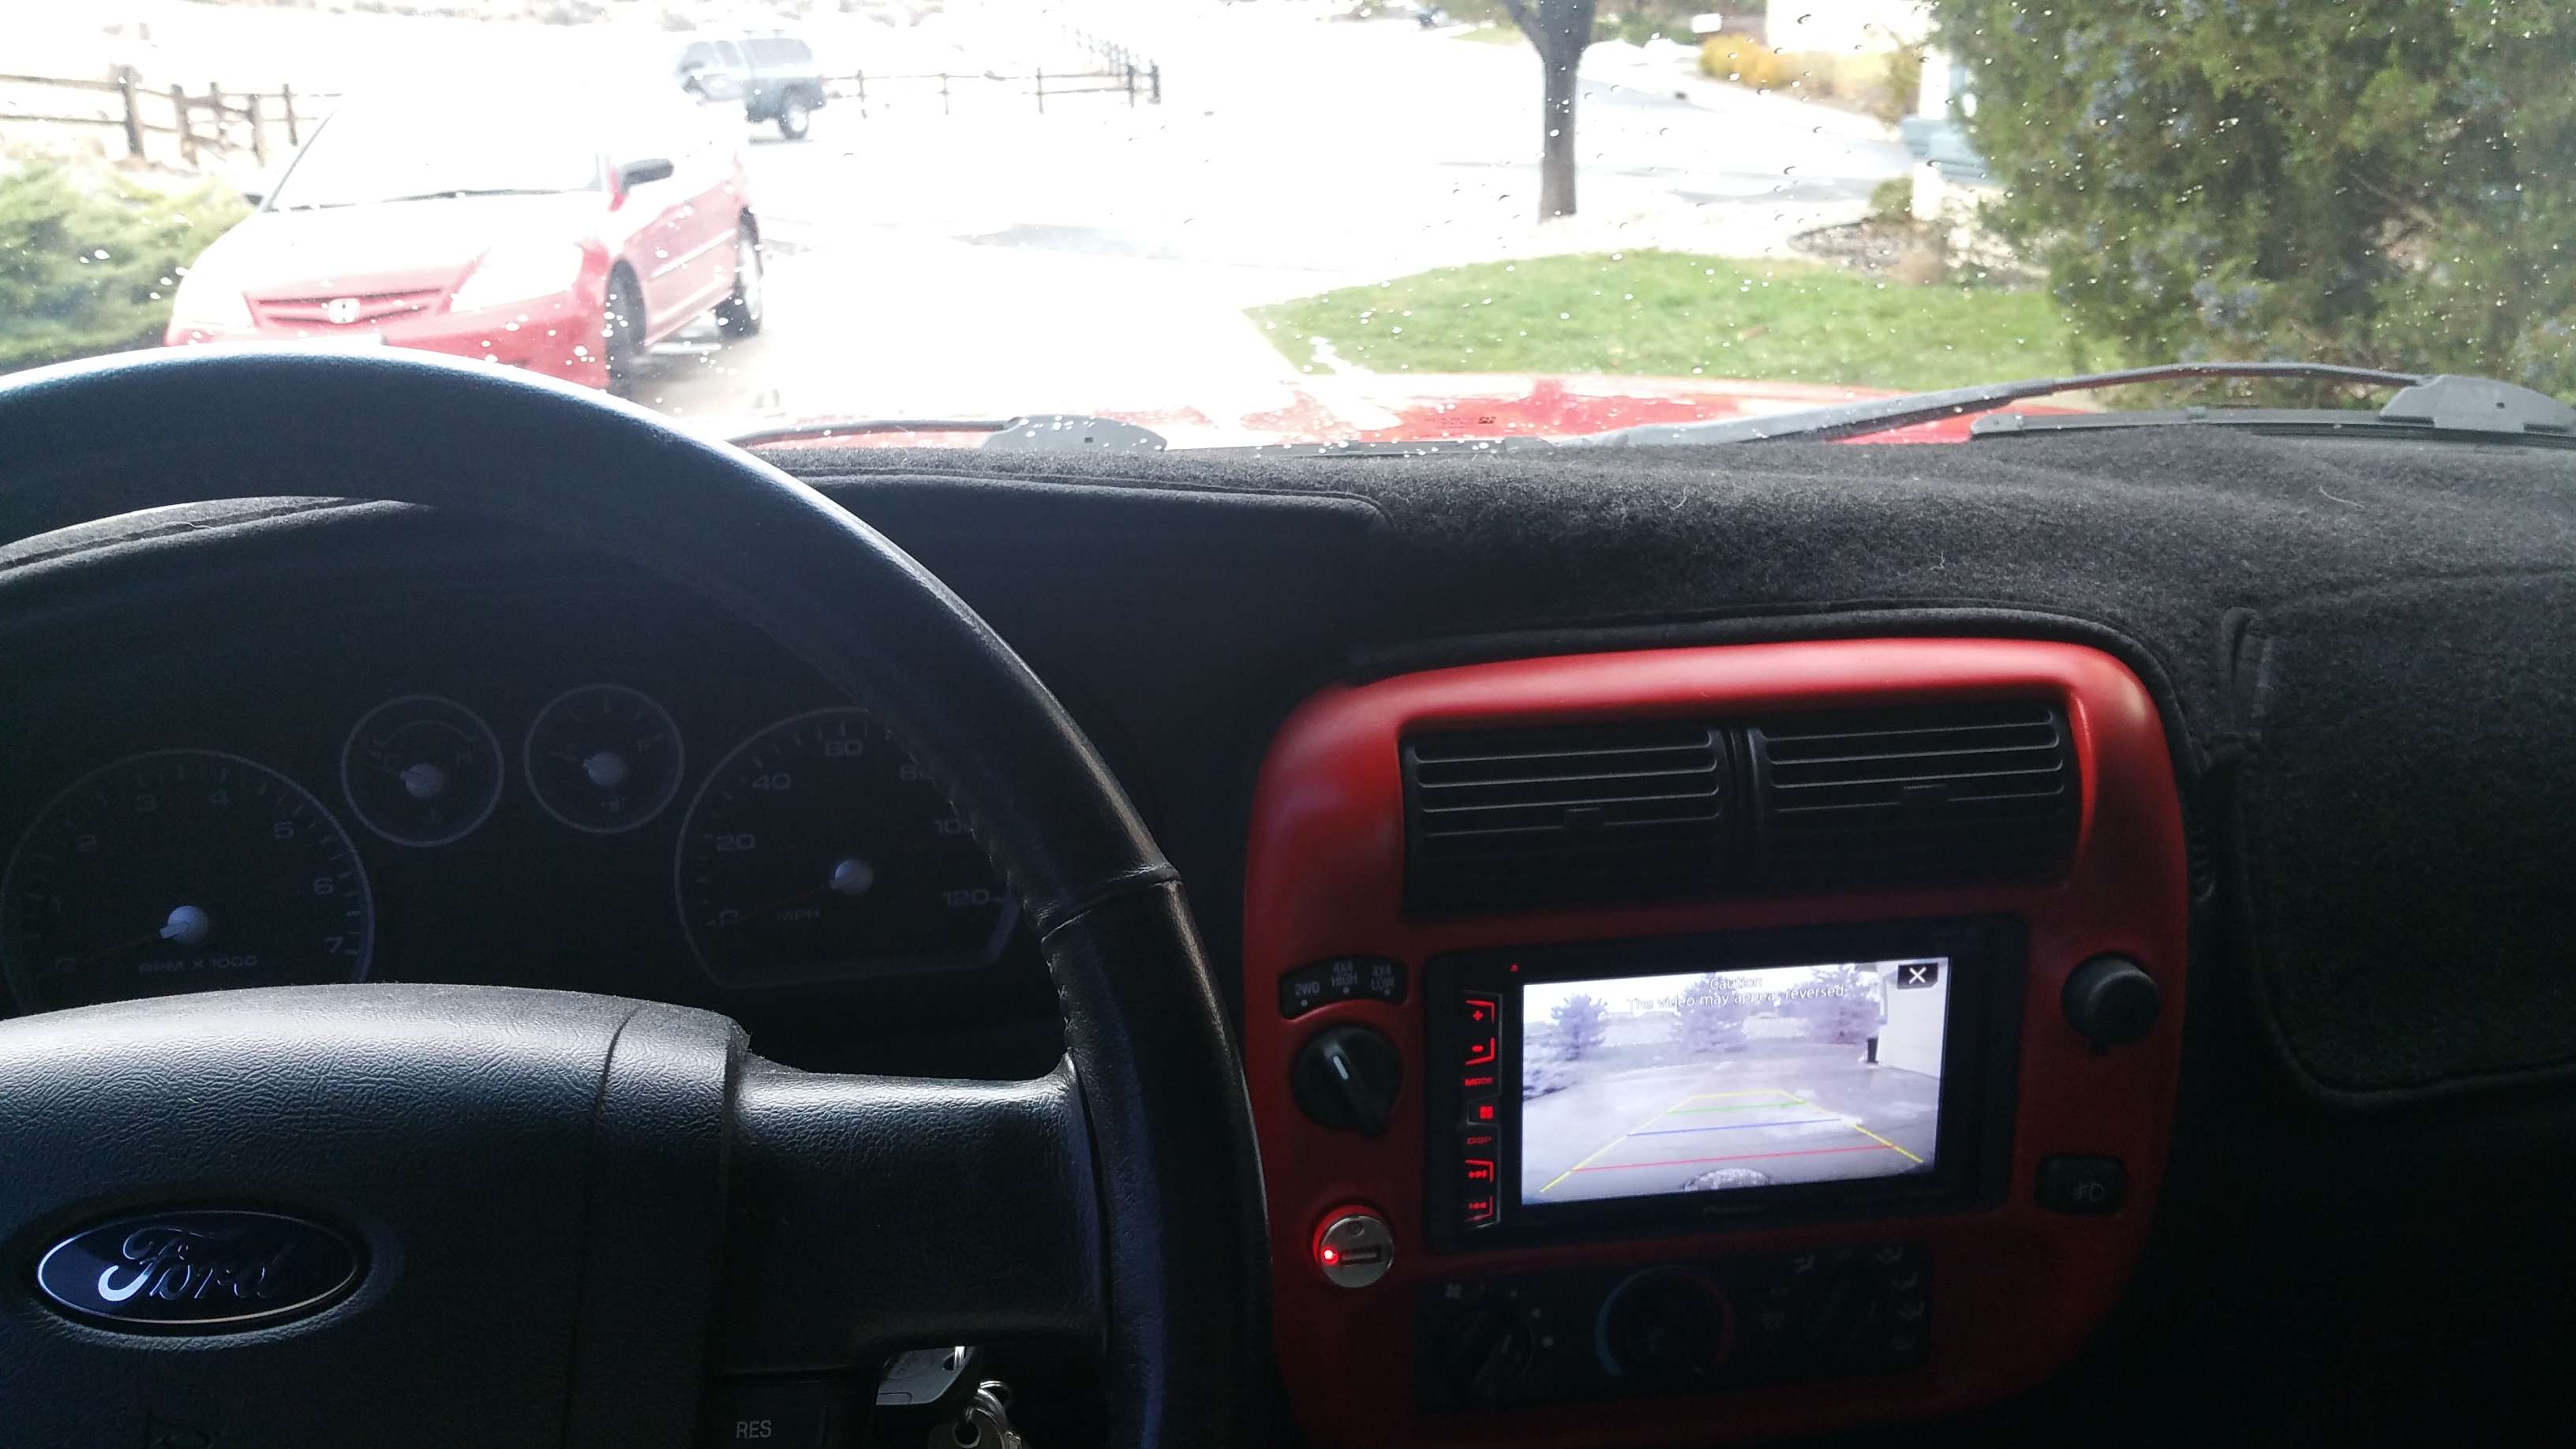
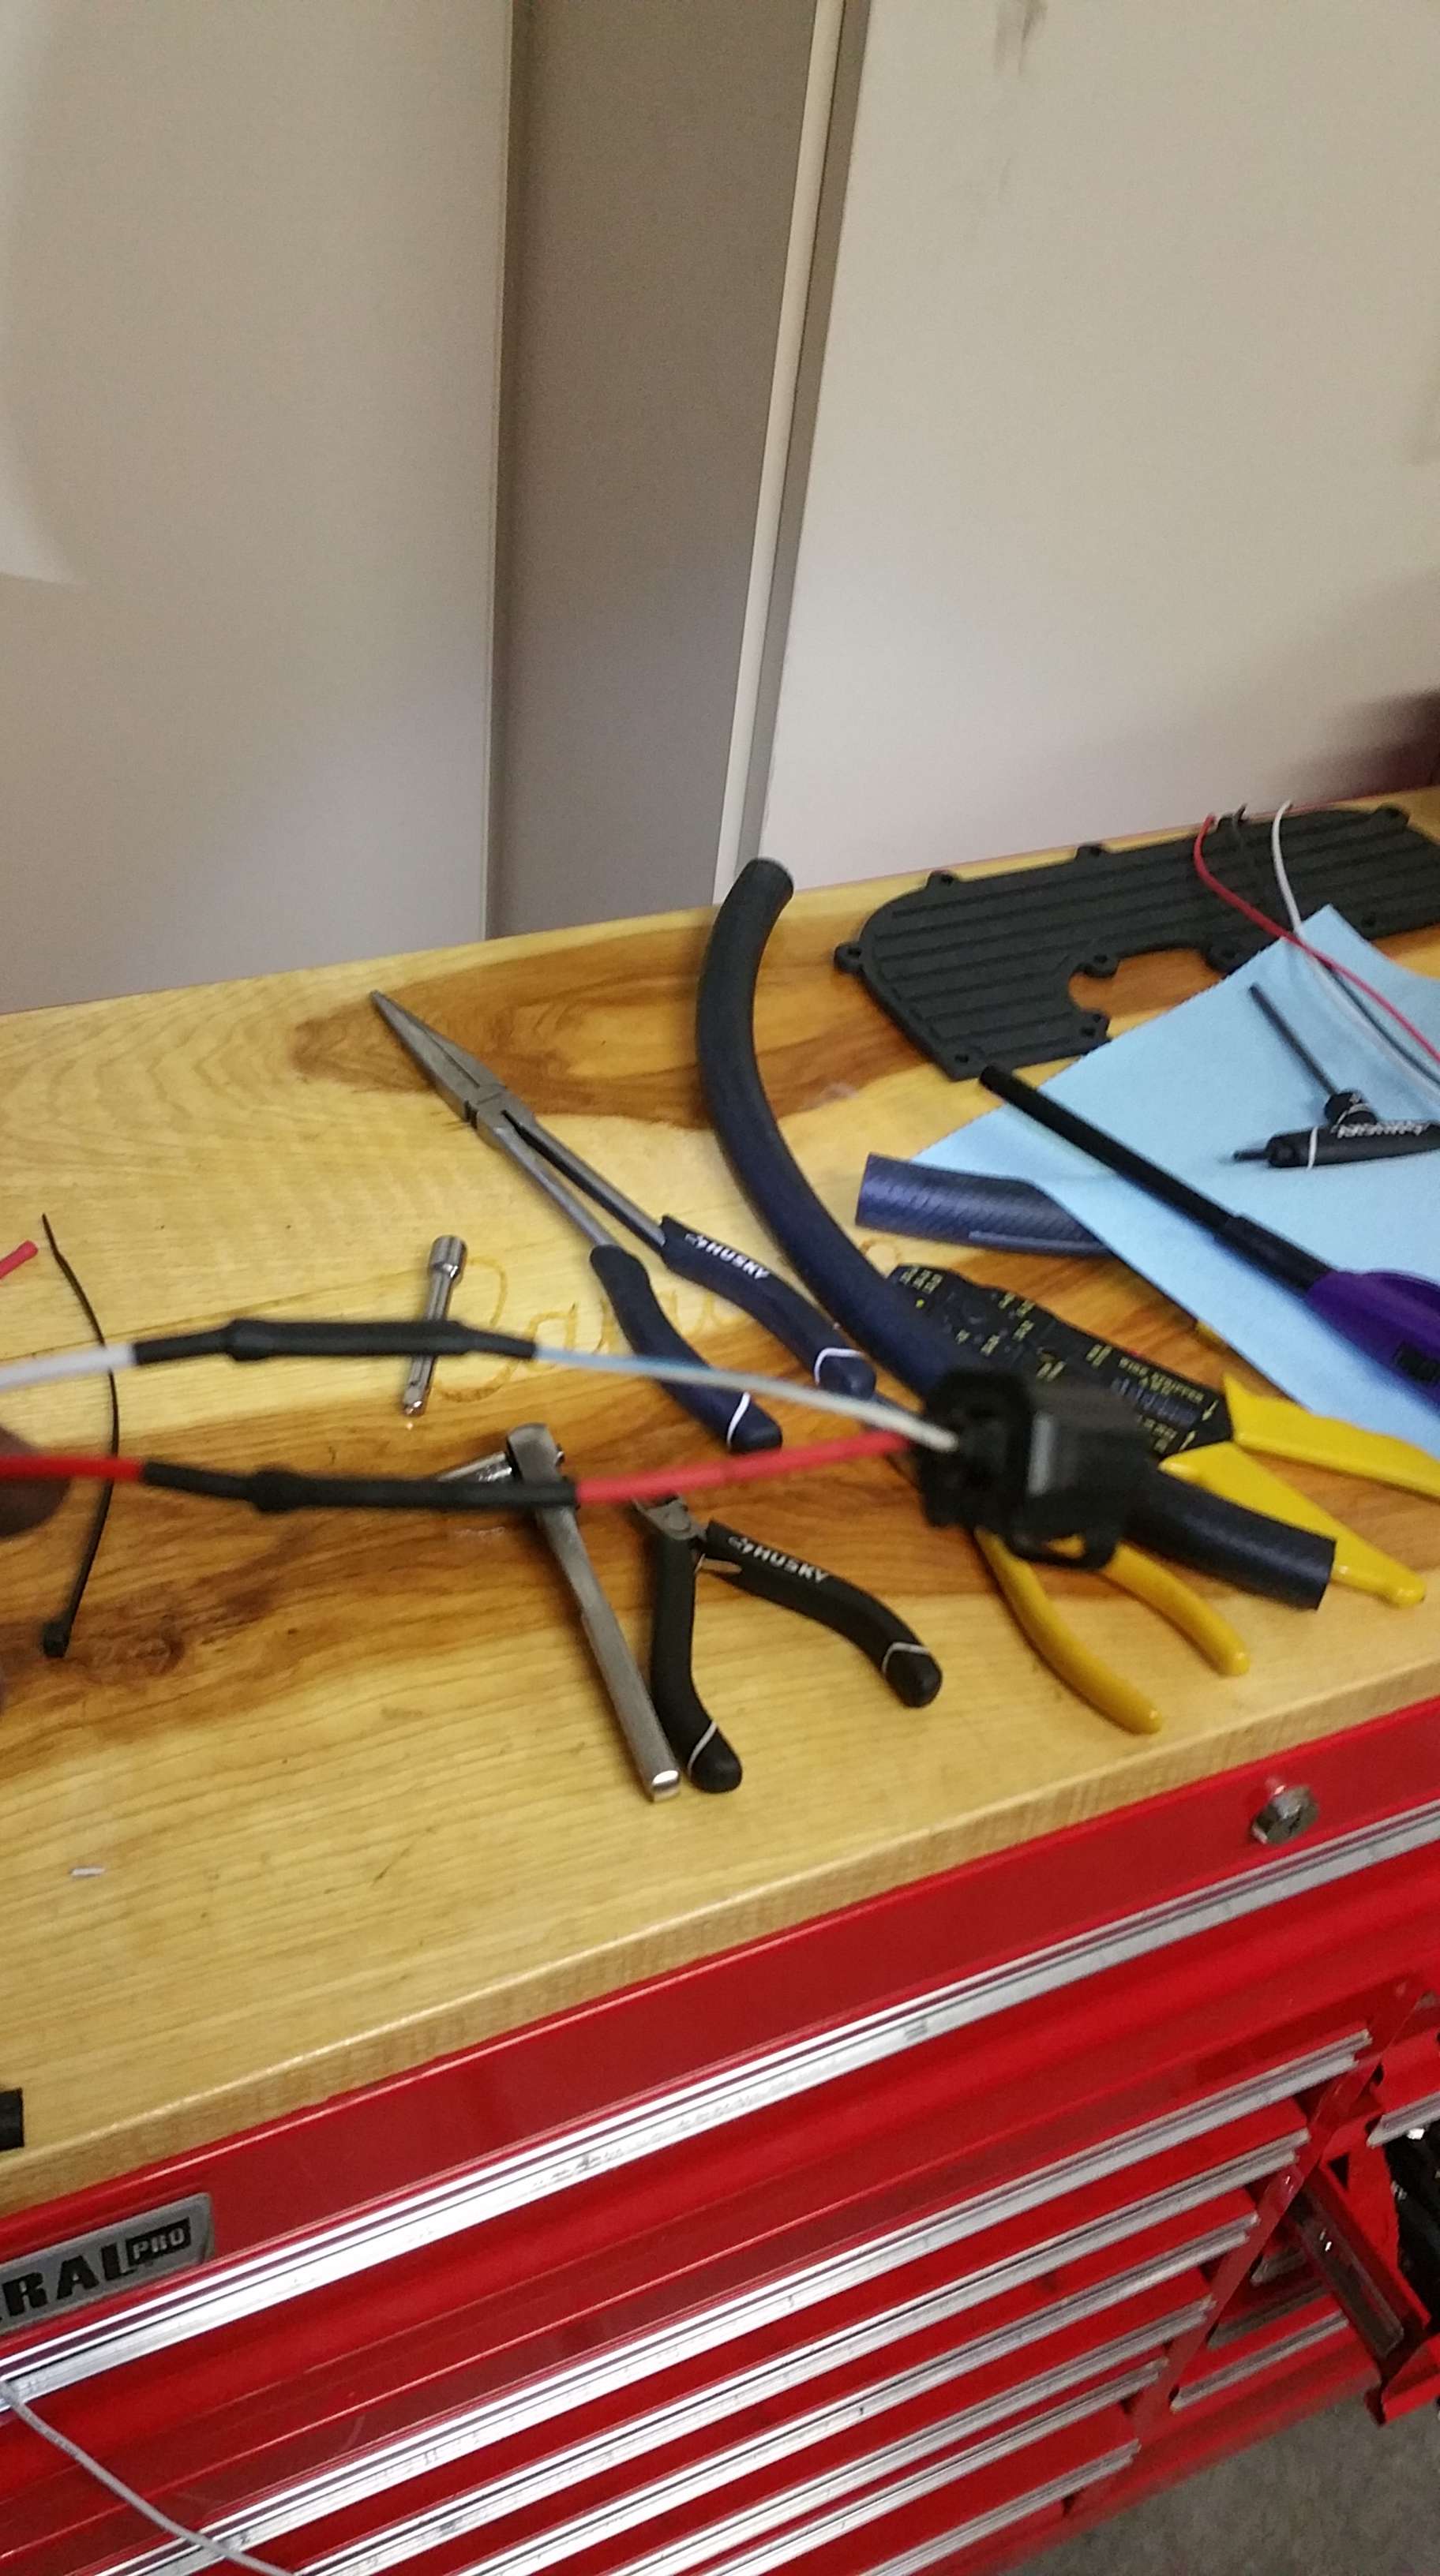
Something else I didn't take a picture of was my switchbox. In the previous picture, you can see a box attached to the bottom of the dash above the parking brake. It is a nifty power/switch distribution block I found at autozone for $20. It isn't the best quality as I have found, but it works, and has a fuse in front of it, so everything is safe. It has 4 sets of terminals on it for 4 additional circuits. It then has a small ribbon cable that goes to a large flat "sticker" with 4 push buttons on it. It is attached to the botton of the steering console next to the tilt wheel adjustment. It is completely hidden, but easy to access. You just have to memorize which of the 4 buttons do what. 1 is for the inside red led's, and 2 are for turning on the front and rear cameras, which the stereo detects and switches to. It turned out pretty good.
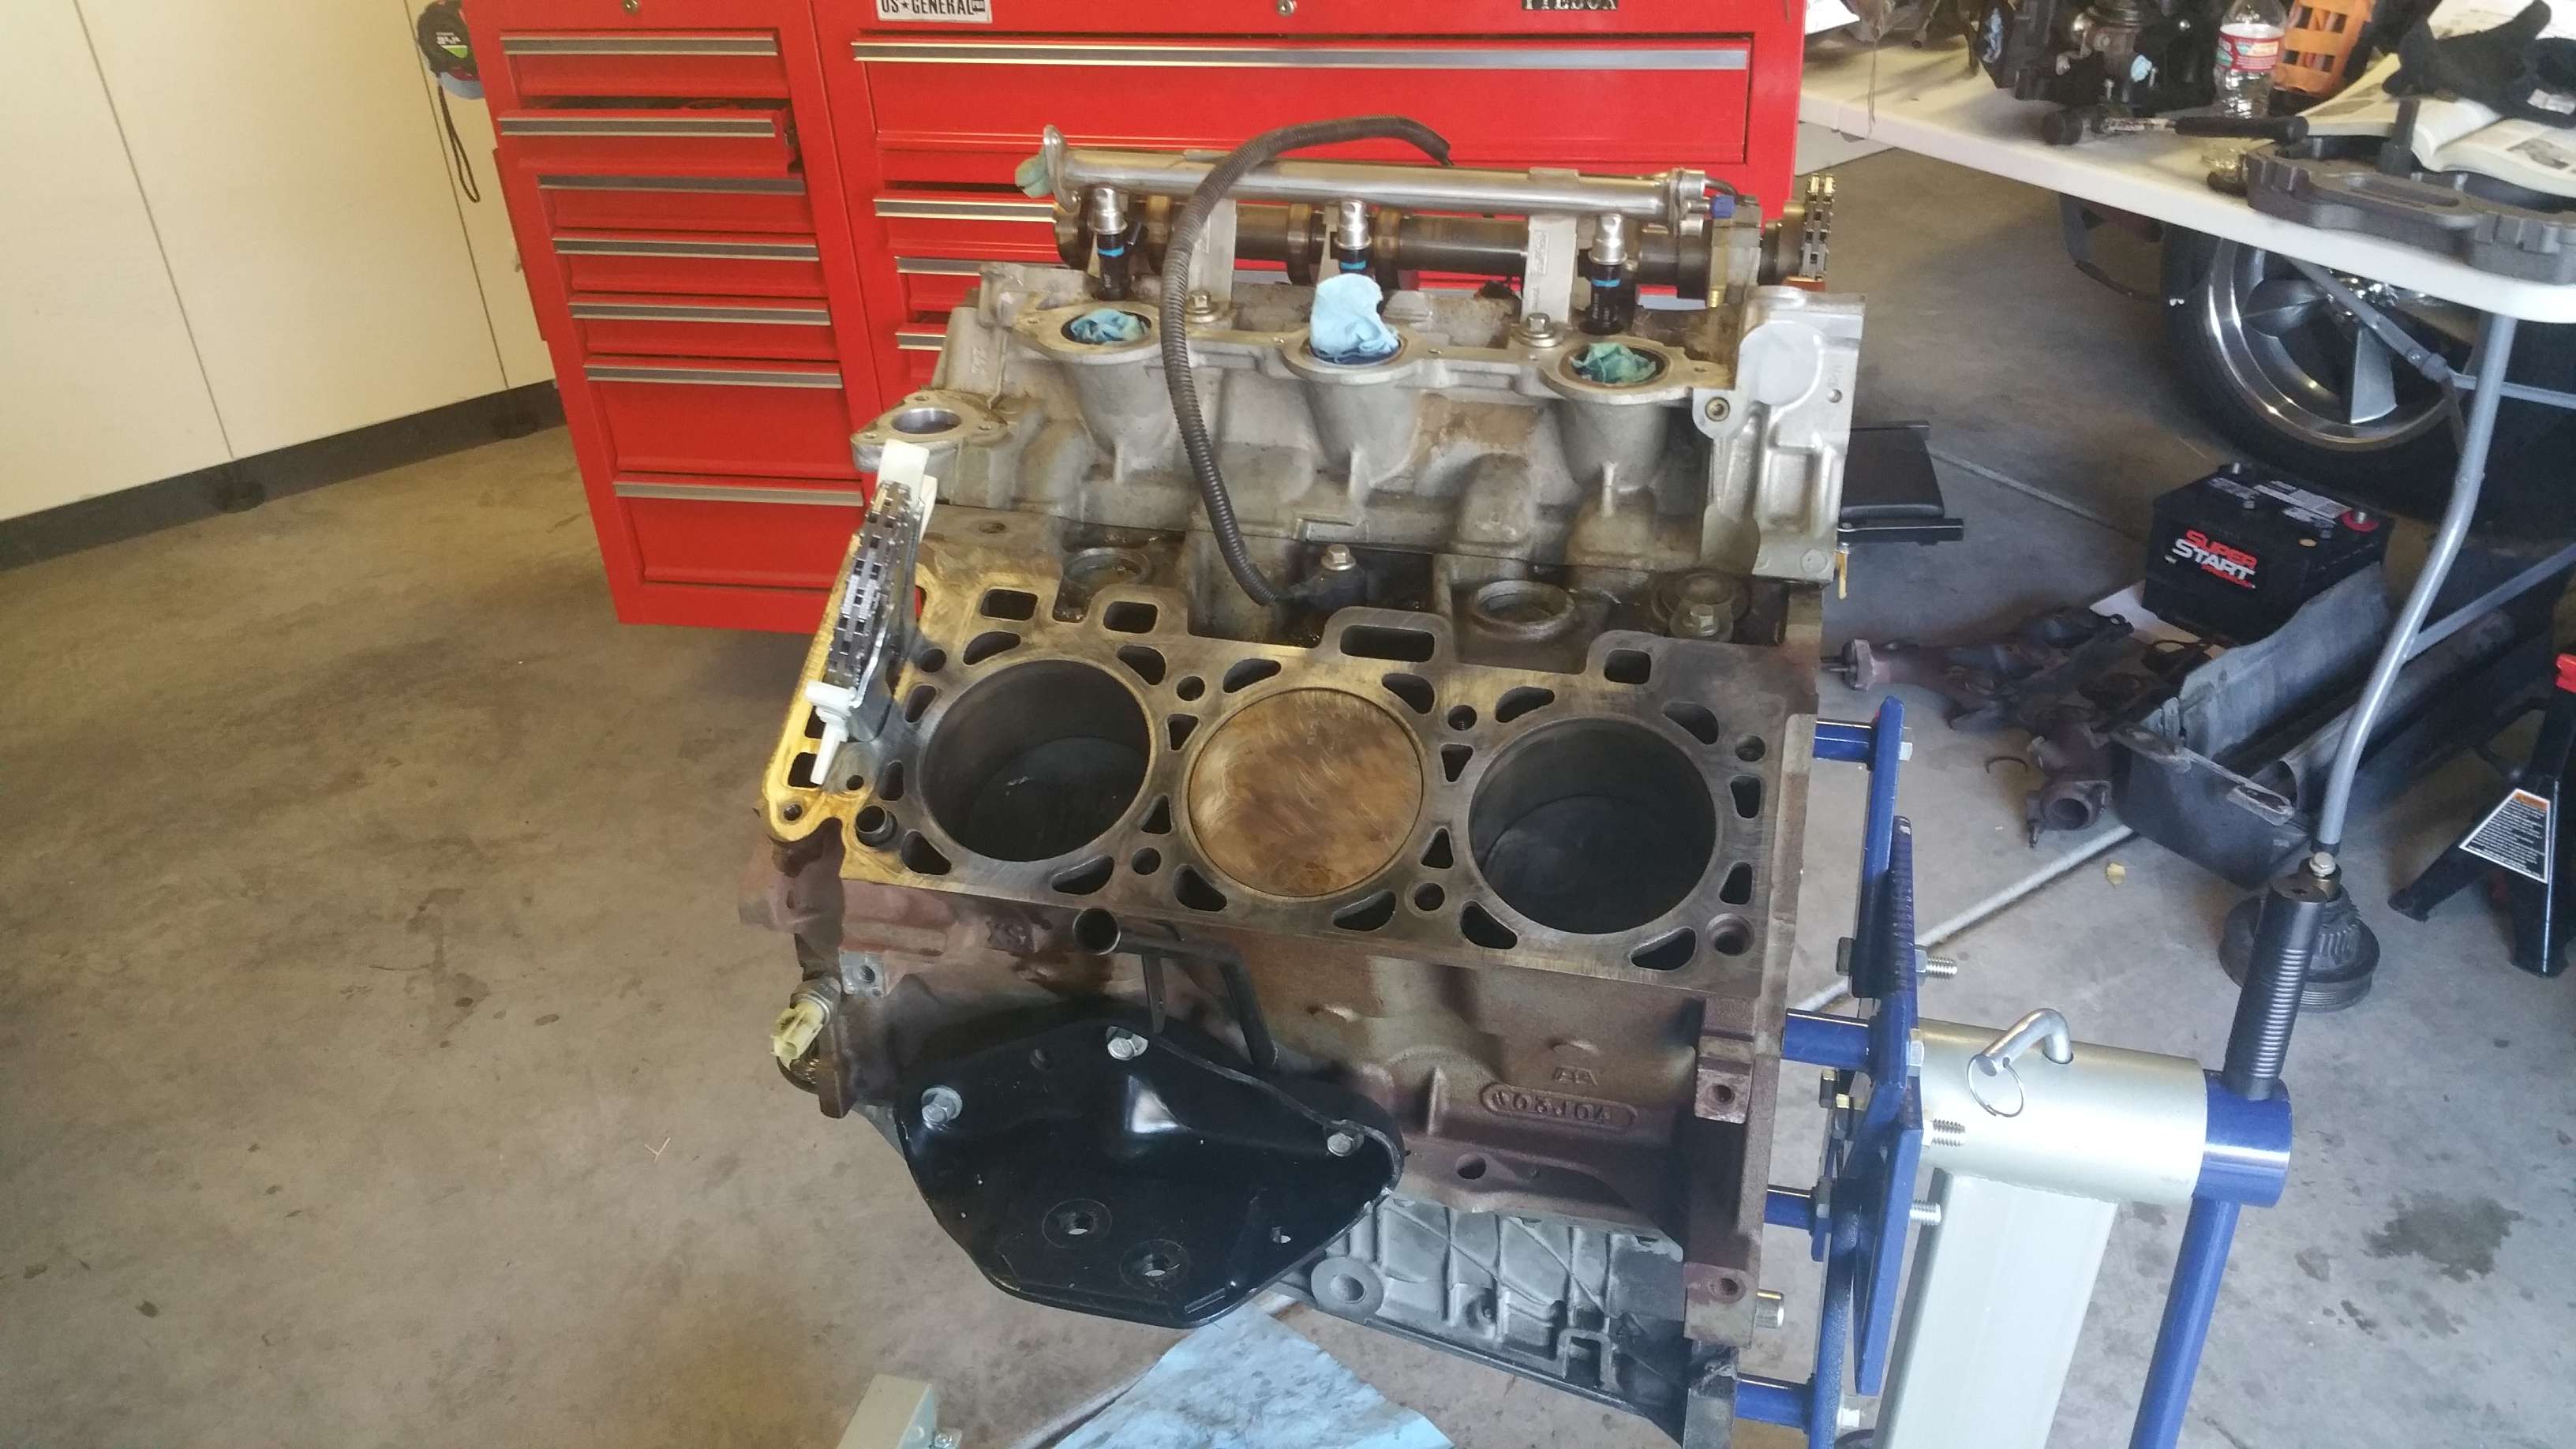
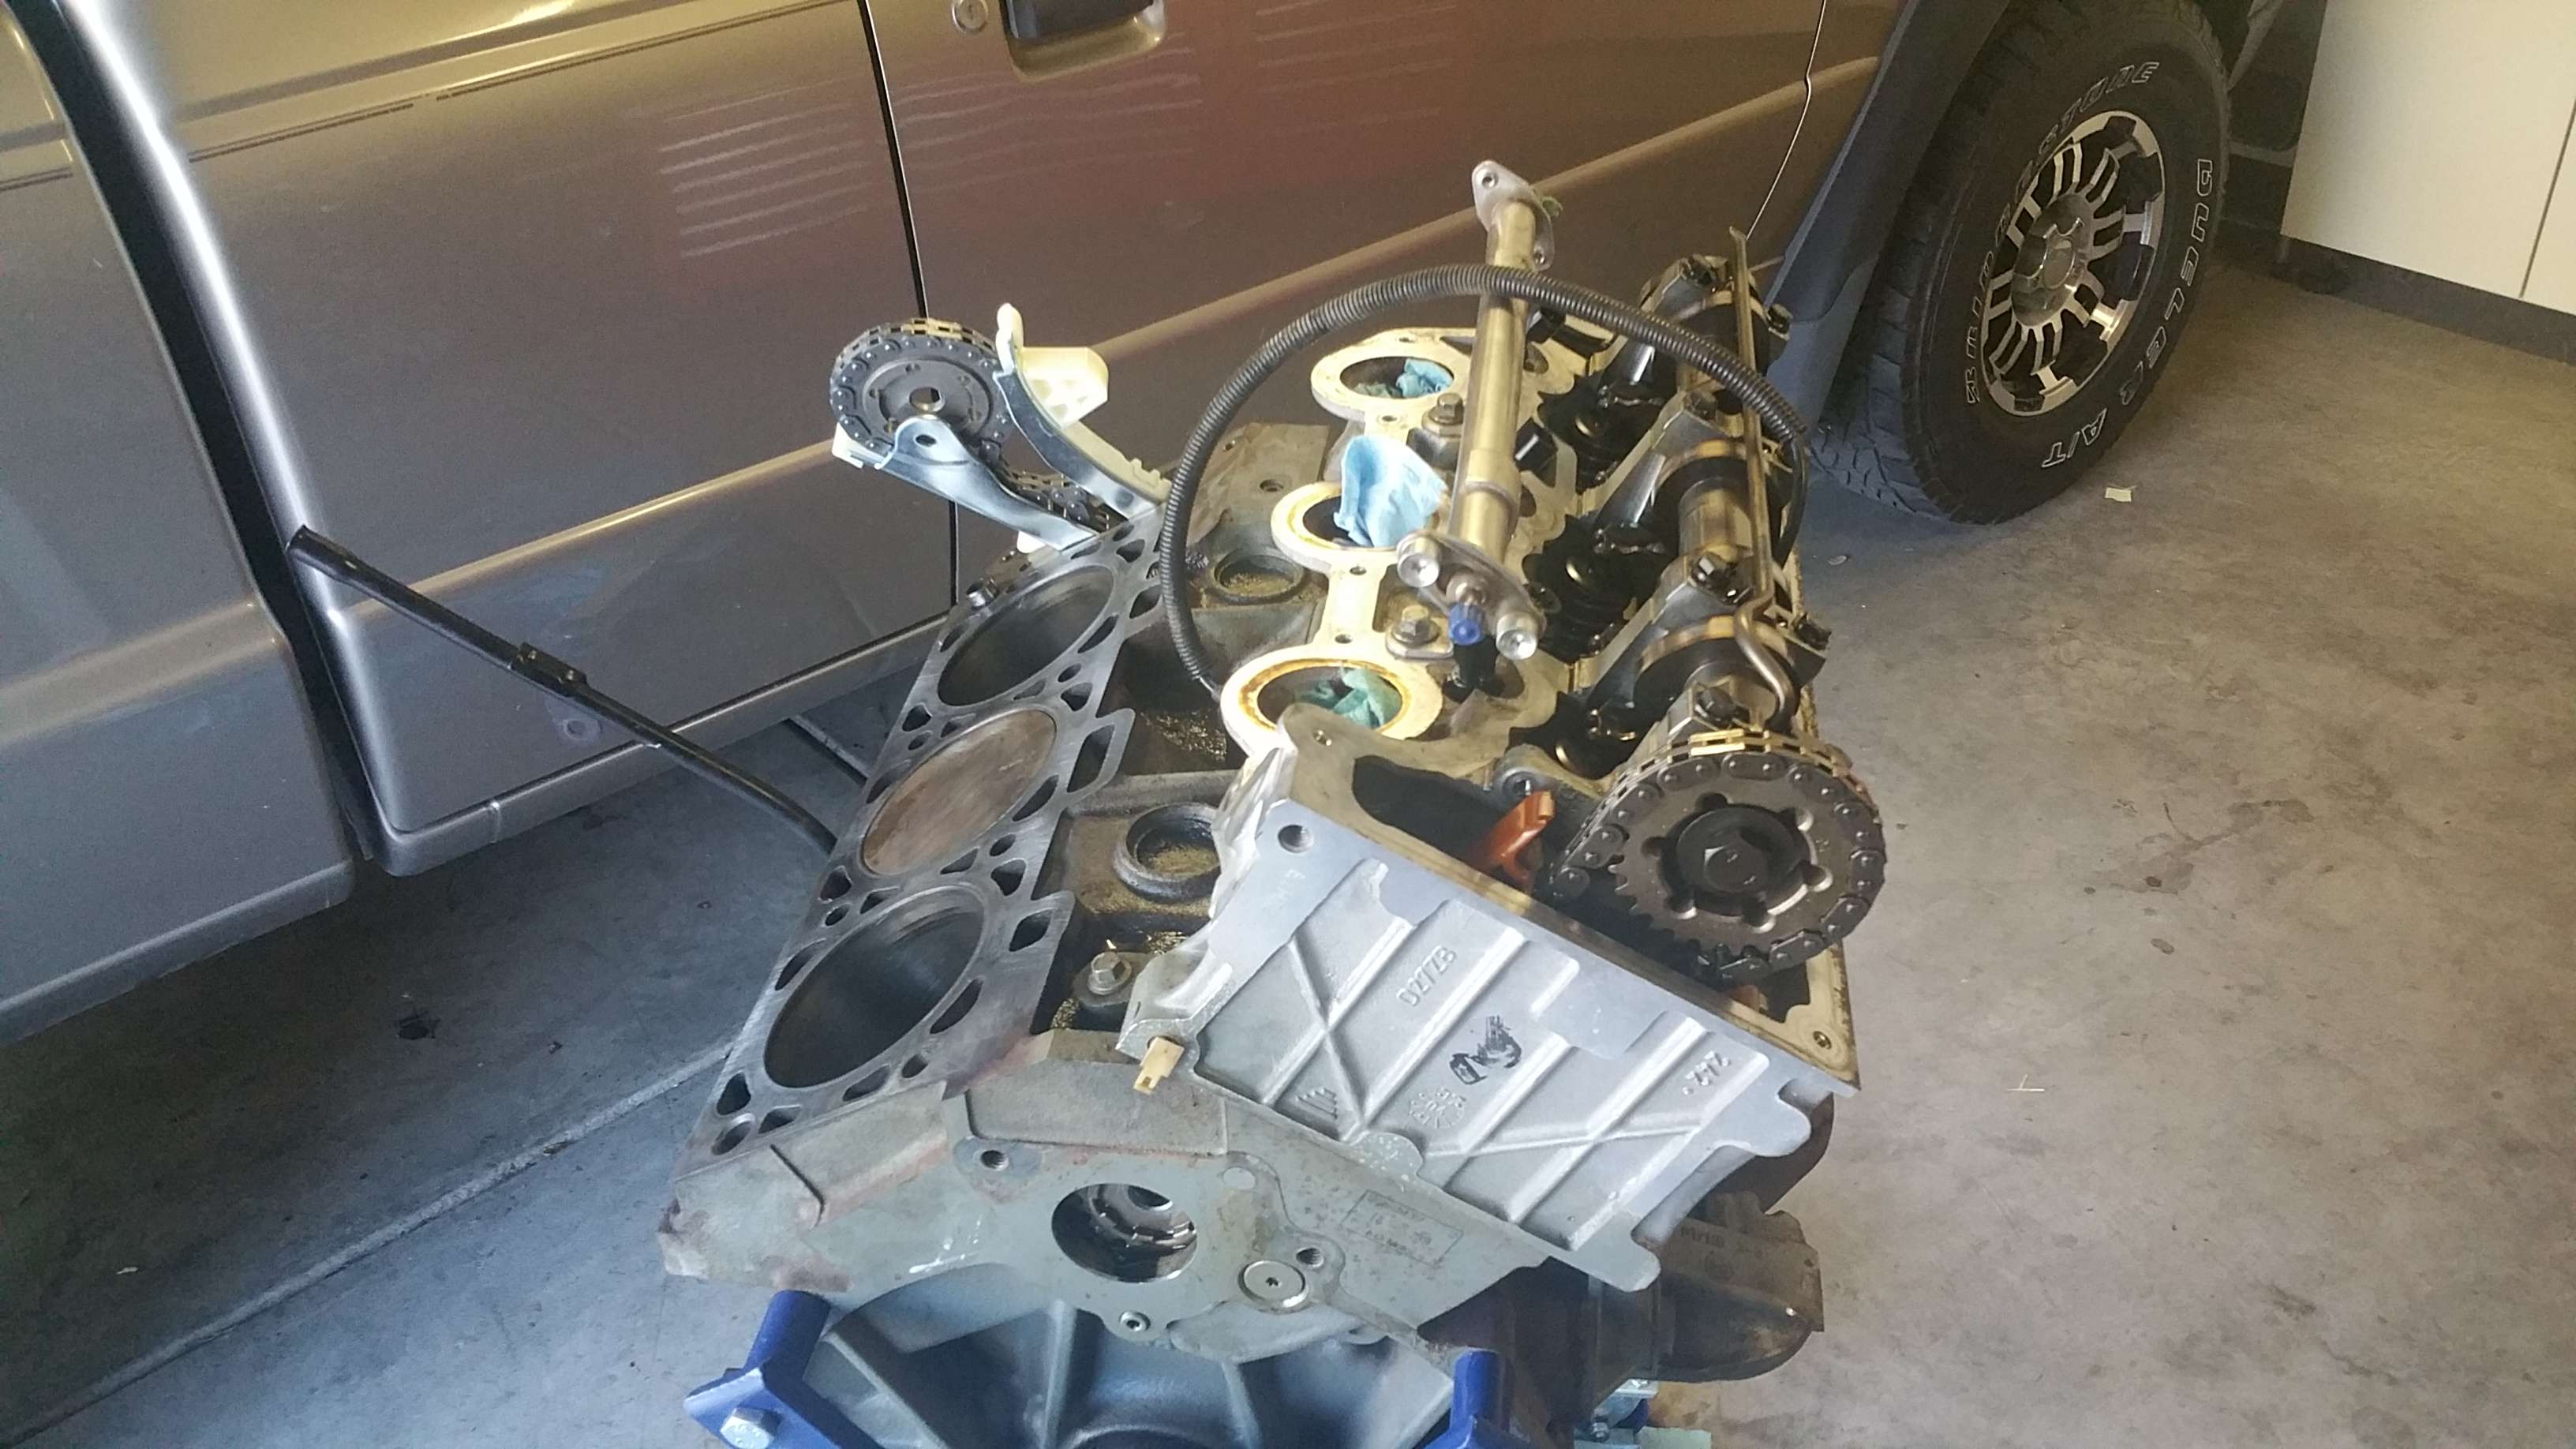
Here are a few random pictures I will throw in. I had to pull my sister's 4.0 SOHC out of here '05 B4000. It wouldn't run right at all, and after doing all sorts of tests, determined it was certainly a problem on the passengers side with the timing chain. Out comes the engine! It turned out that the bolt that holds the upper sprocket the the back of the passenger camshaft had snapped completely, so the left bank simply wasn't spinning. Since I had it apart, I replaced both timing chain sets with the updated ones. Runs like a champ now. The friggin auto shop wanted $5-$6k for installing a new engine, or $4k to repair the existing one. The actual repair cost about $650 in parts, plus my extremely discounted family labor. That is including other parts being replaced just for good maintenance, such as a whole new set of injectors, fuel pump, etc...
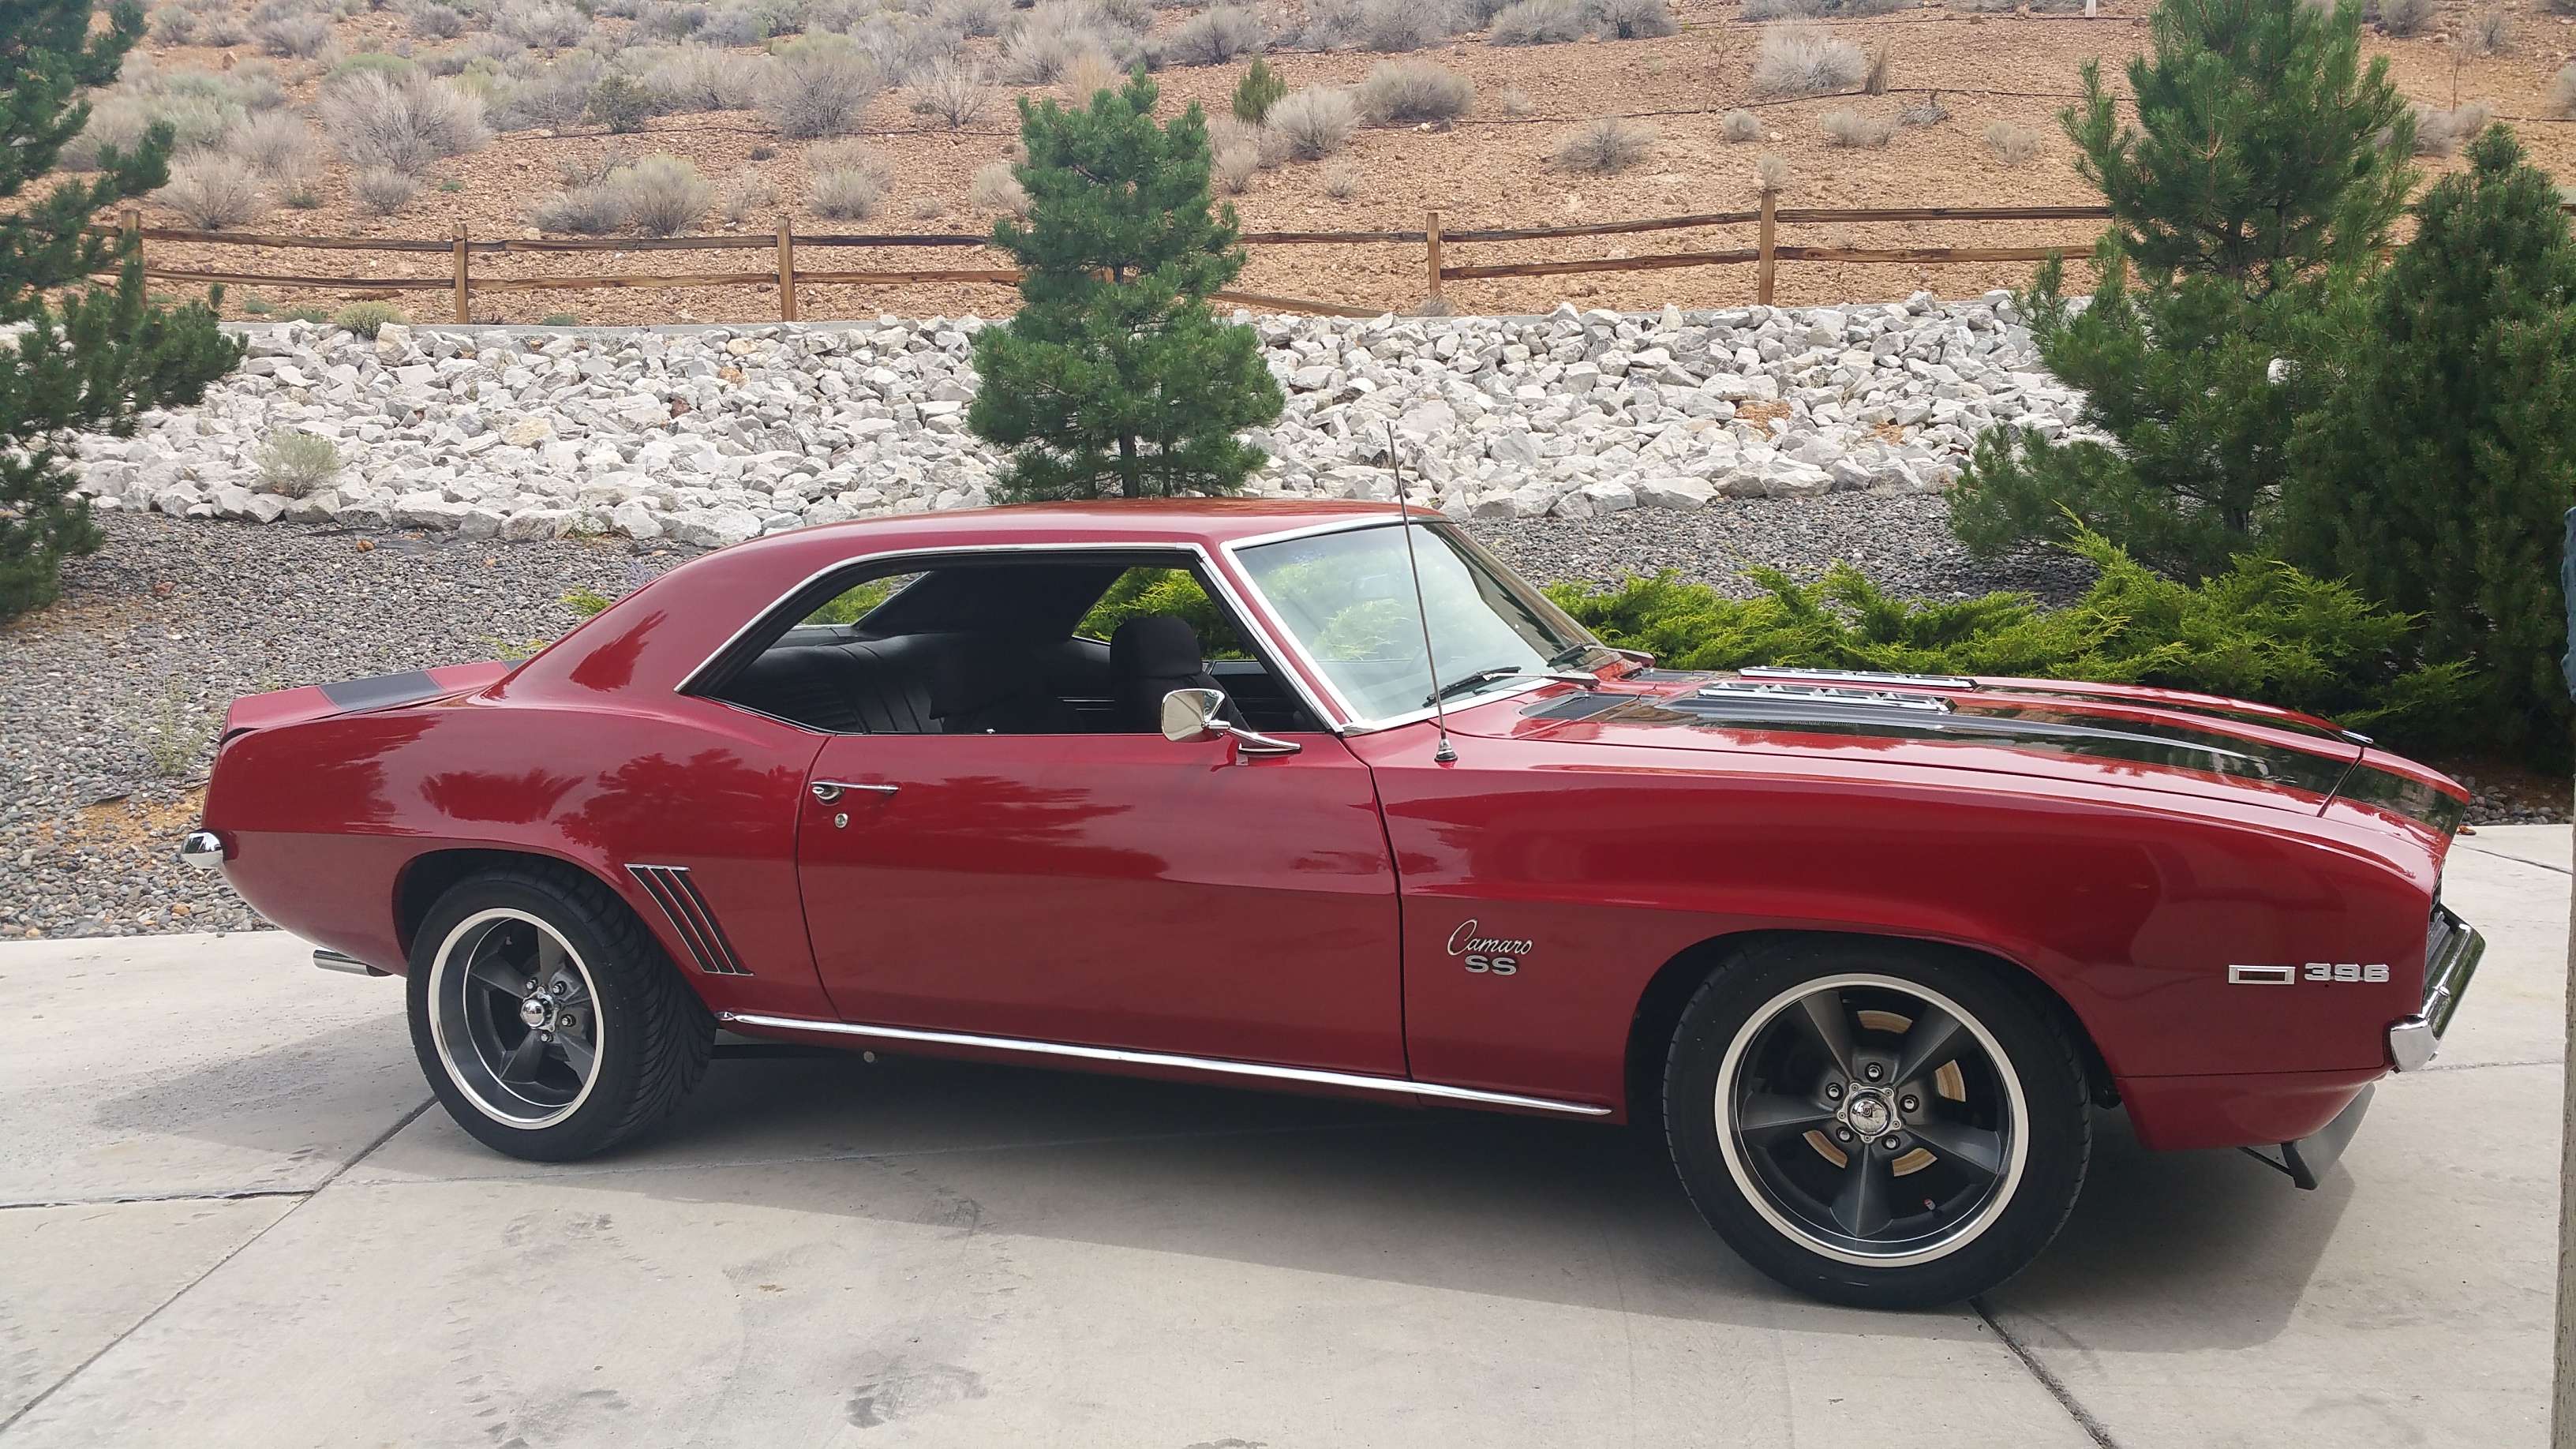
Also is my beautiful '69 Camaro SS/RS I sold to fund this truck build and a few other things. I sold it with the promise of buying another one the second I graduate college. It had all the good stuff, but was rusty as hell and beyond my skill level to repair....Oh yeah, and I nearly doubled my initial investment!
OK. Back to the truck!
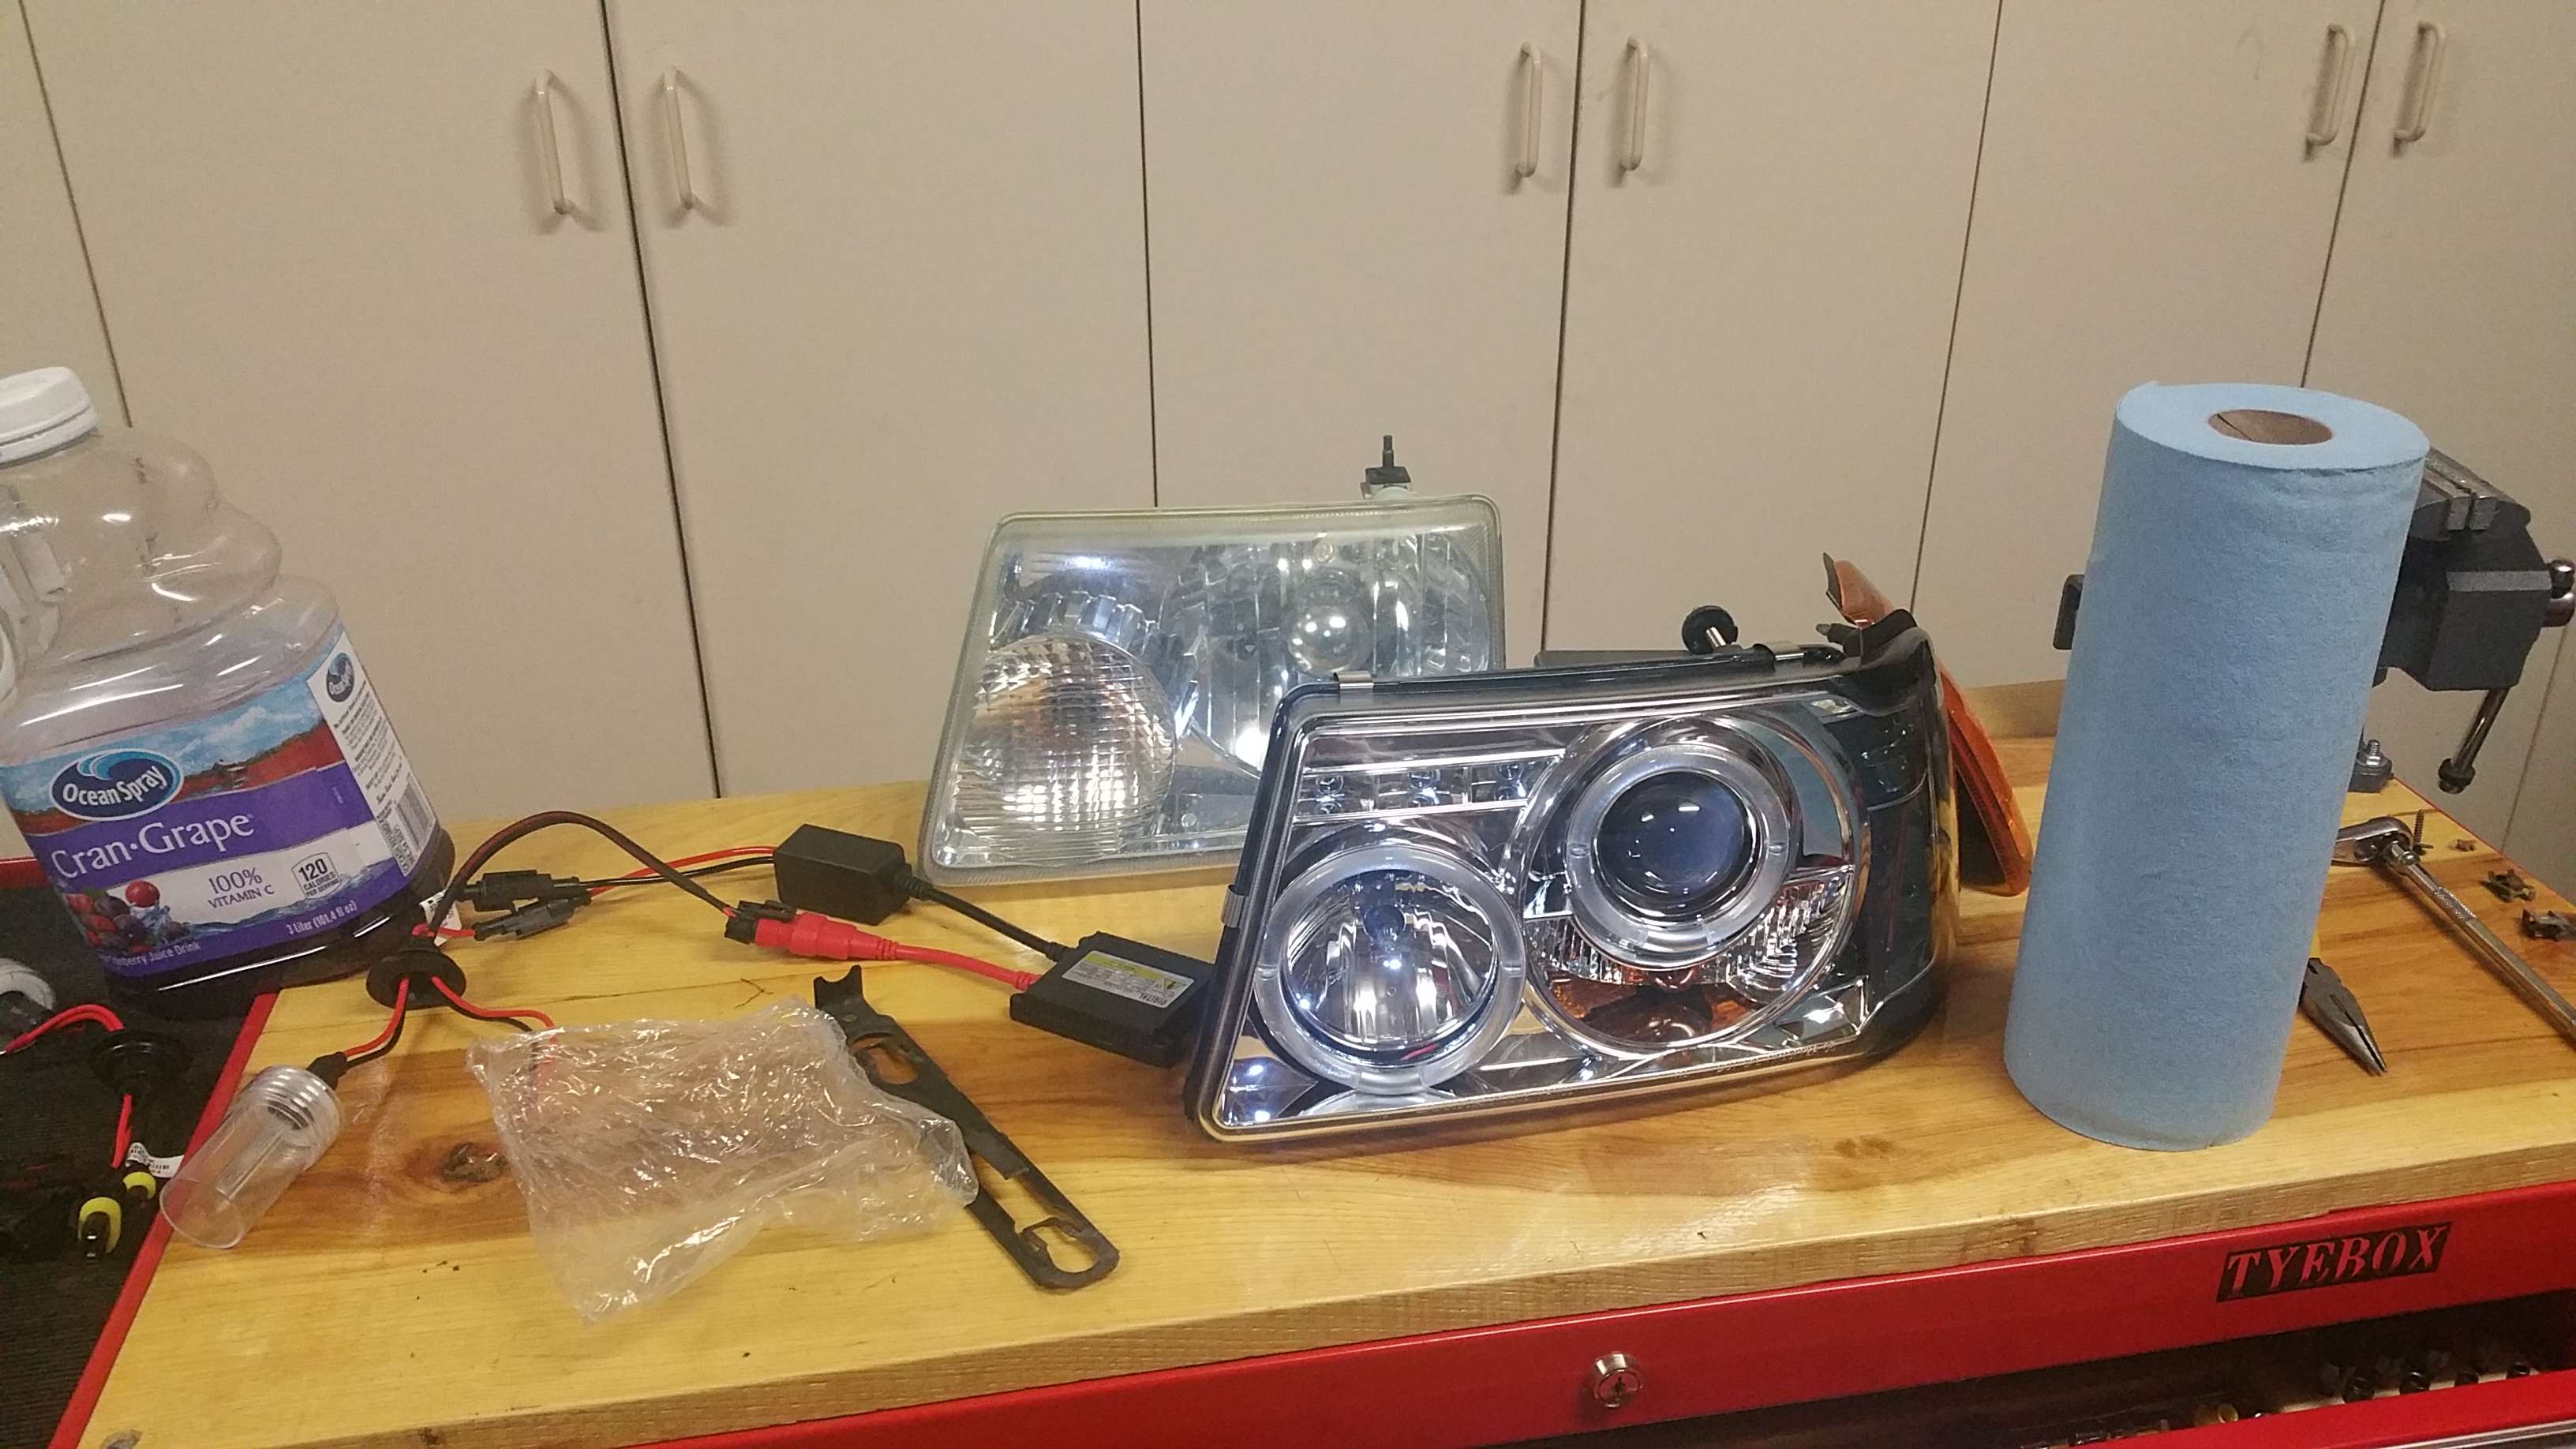
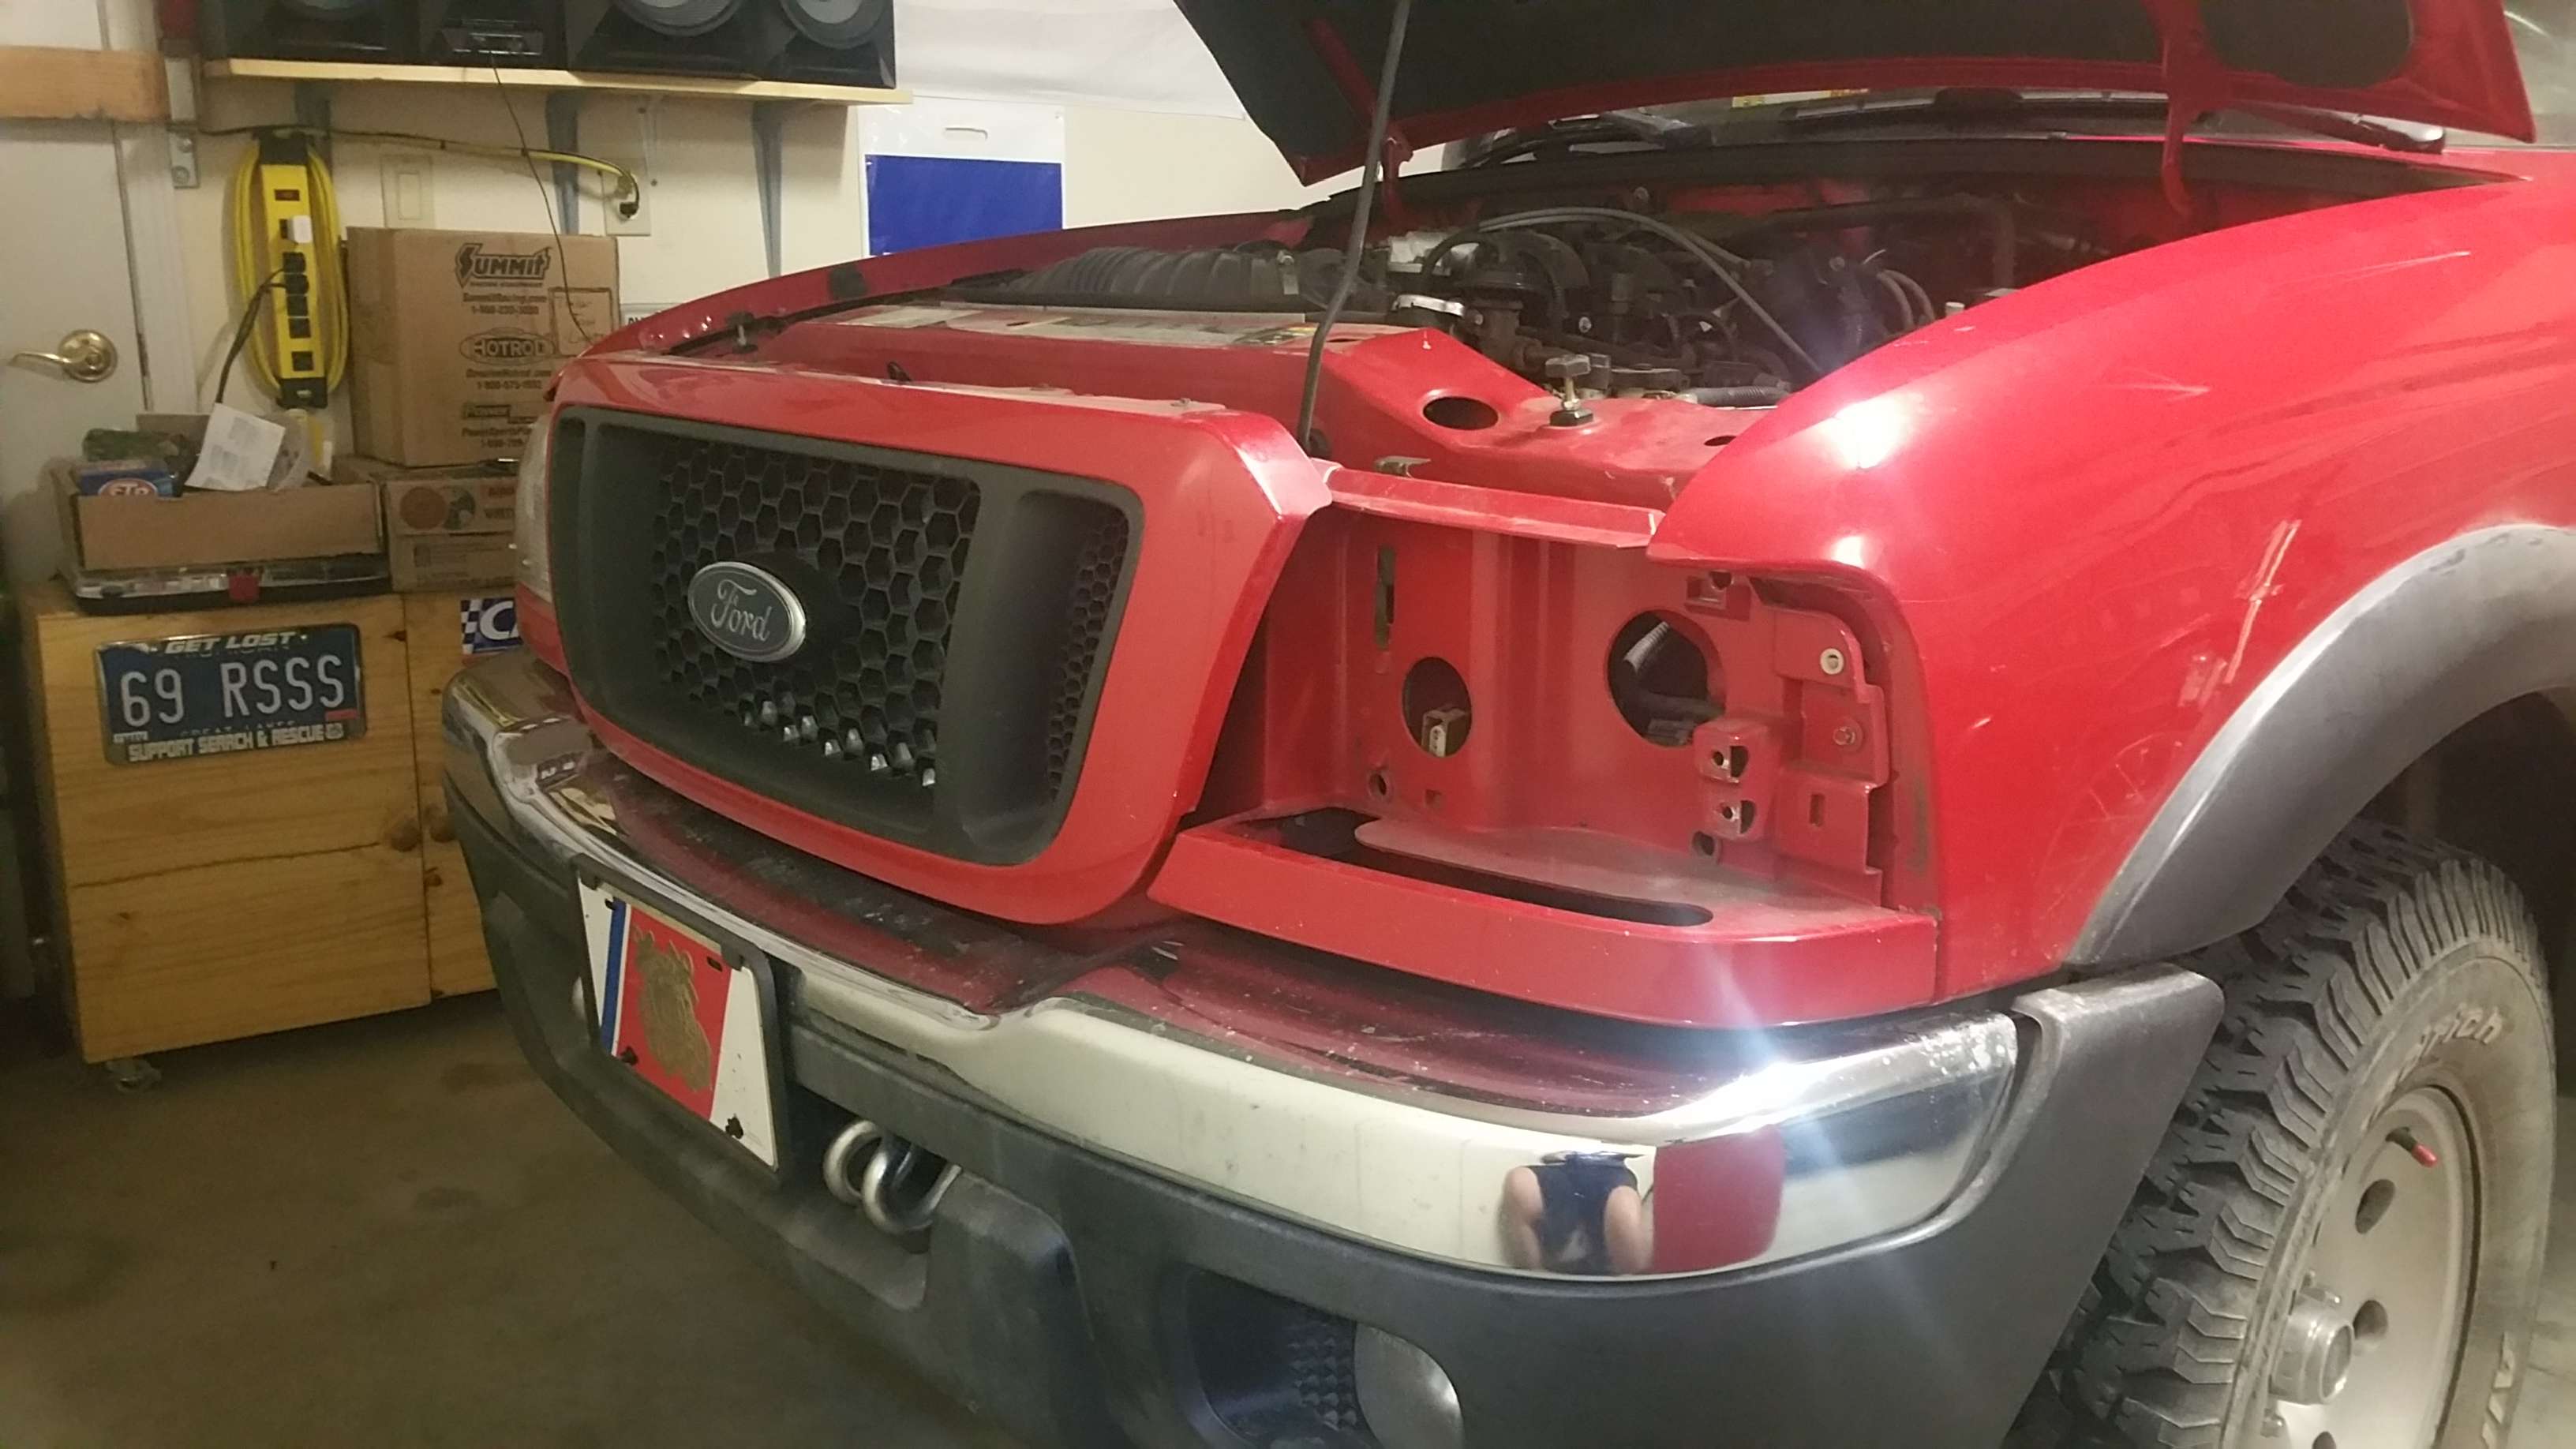
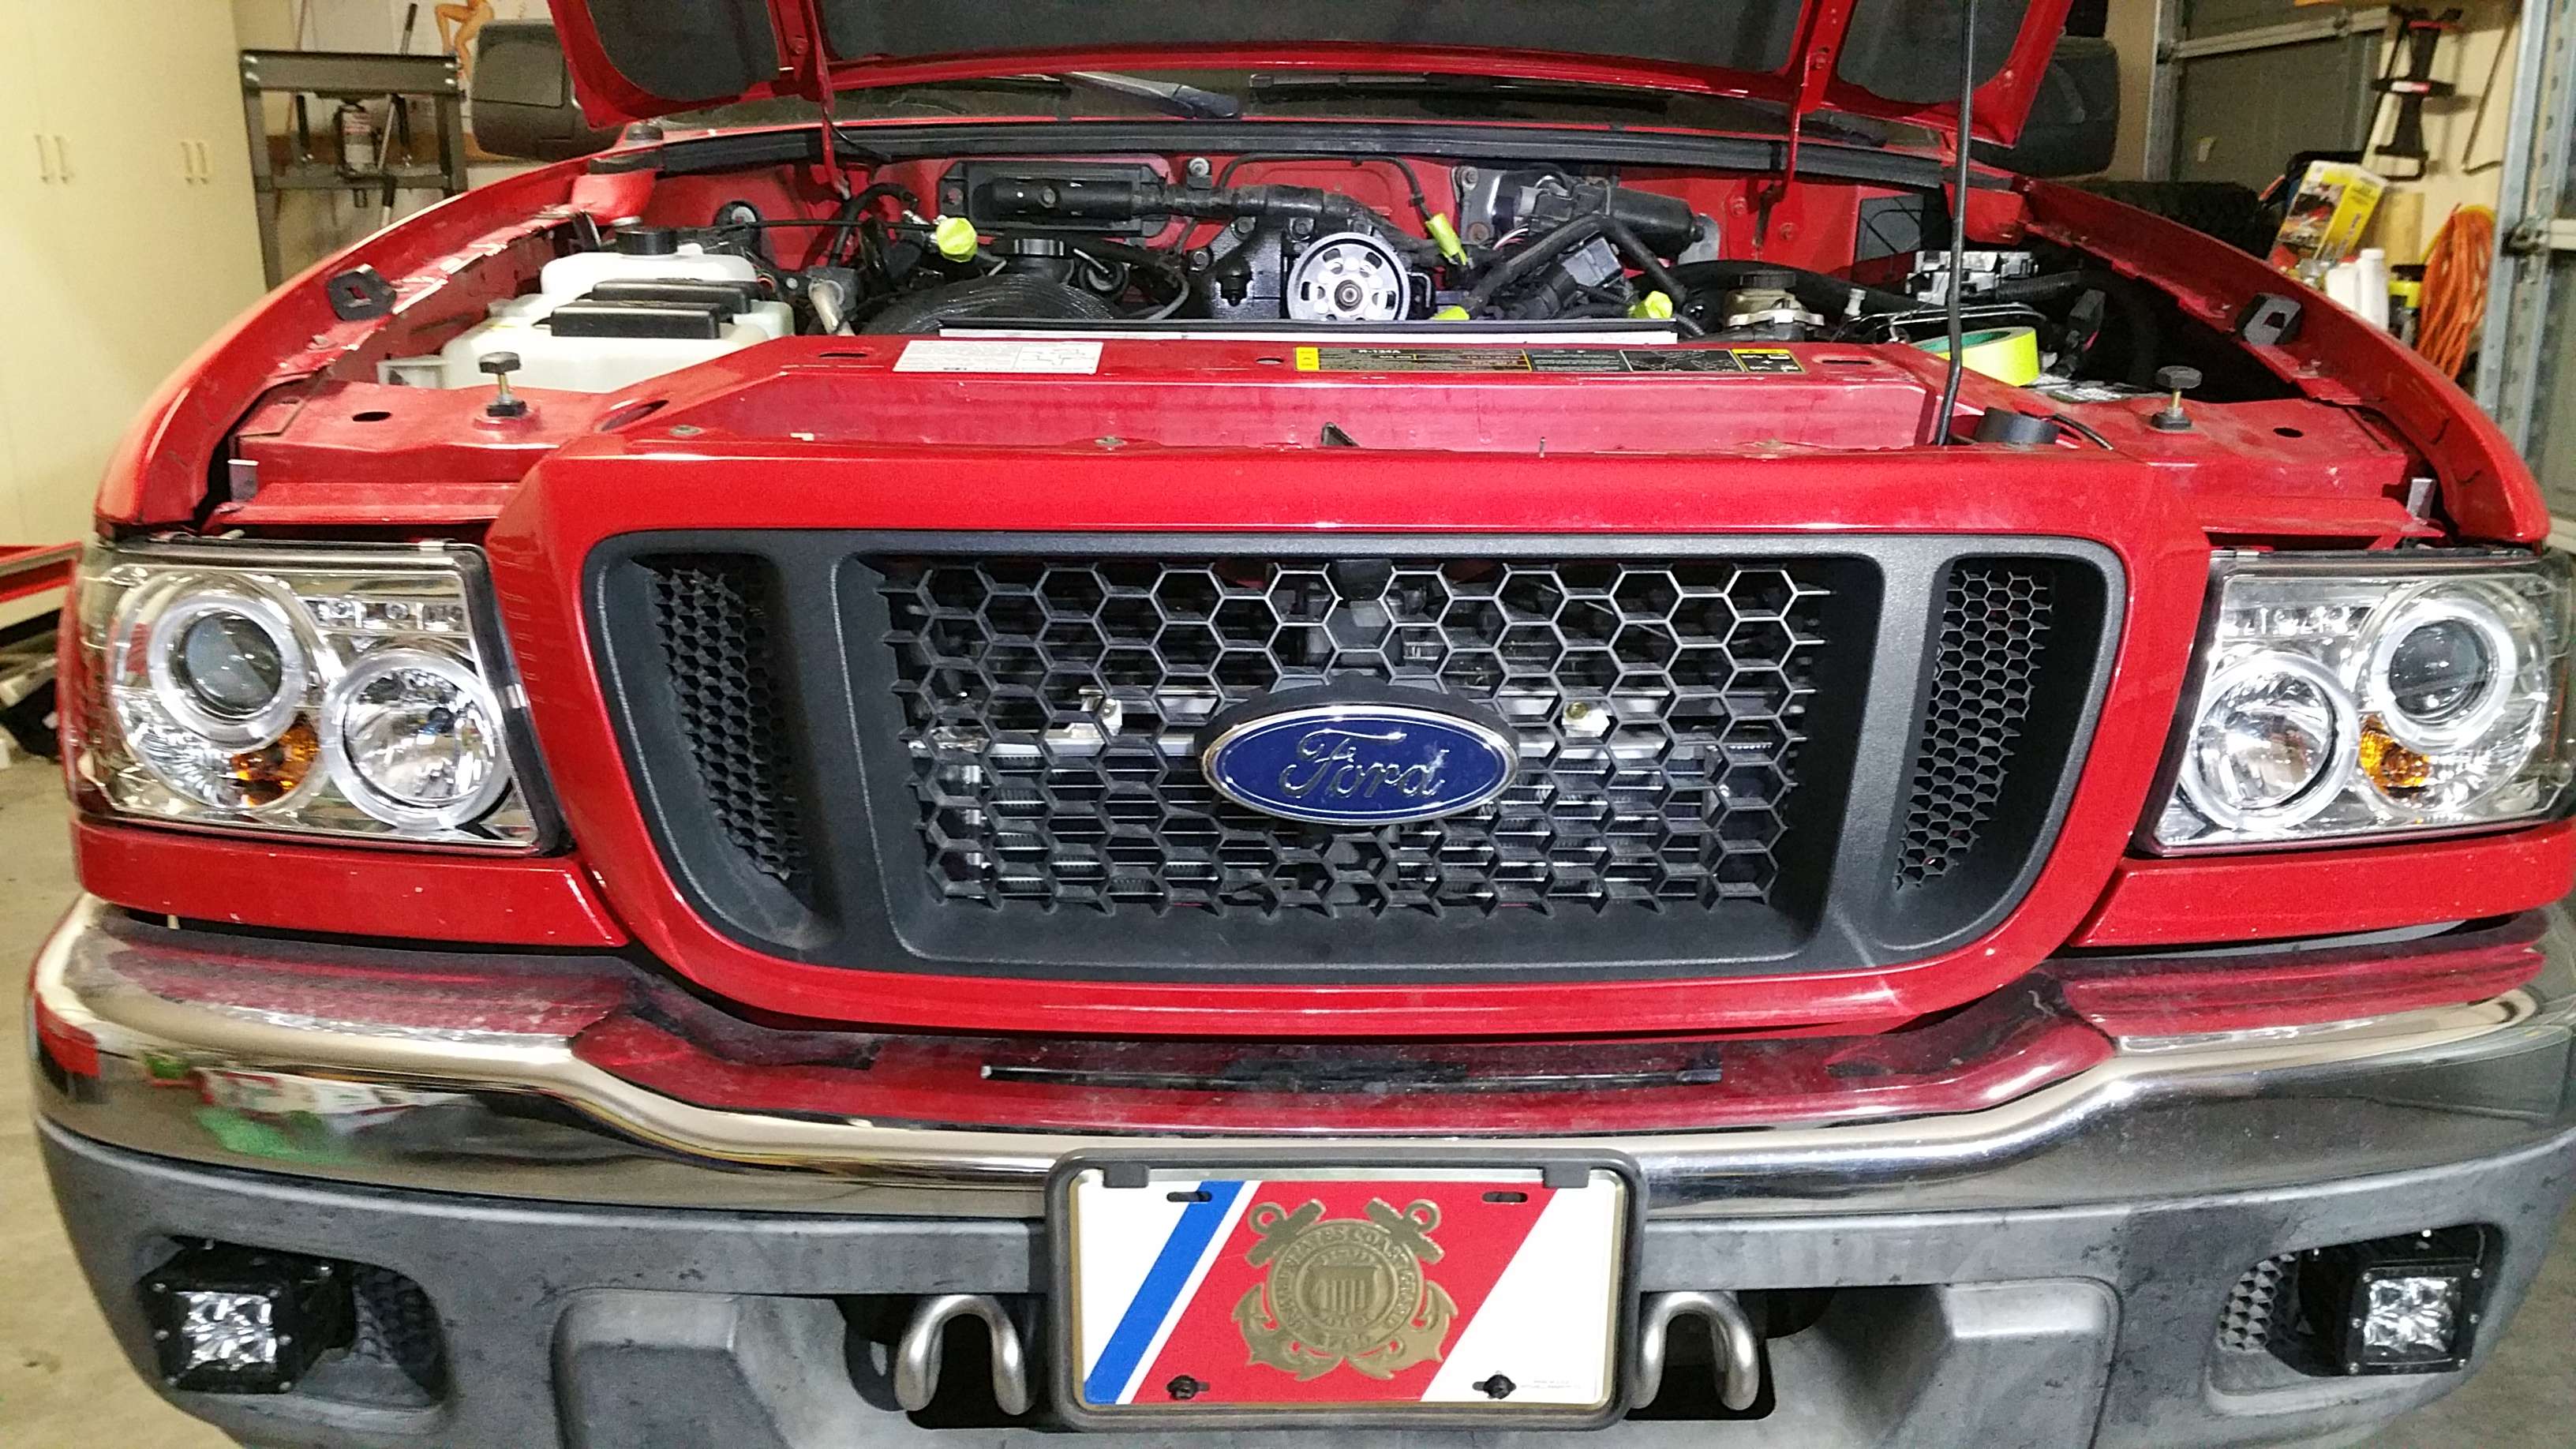
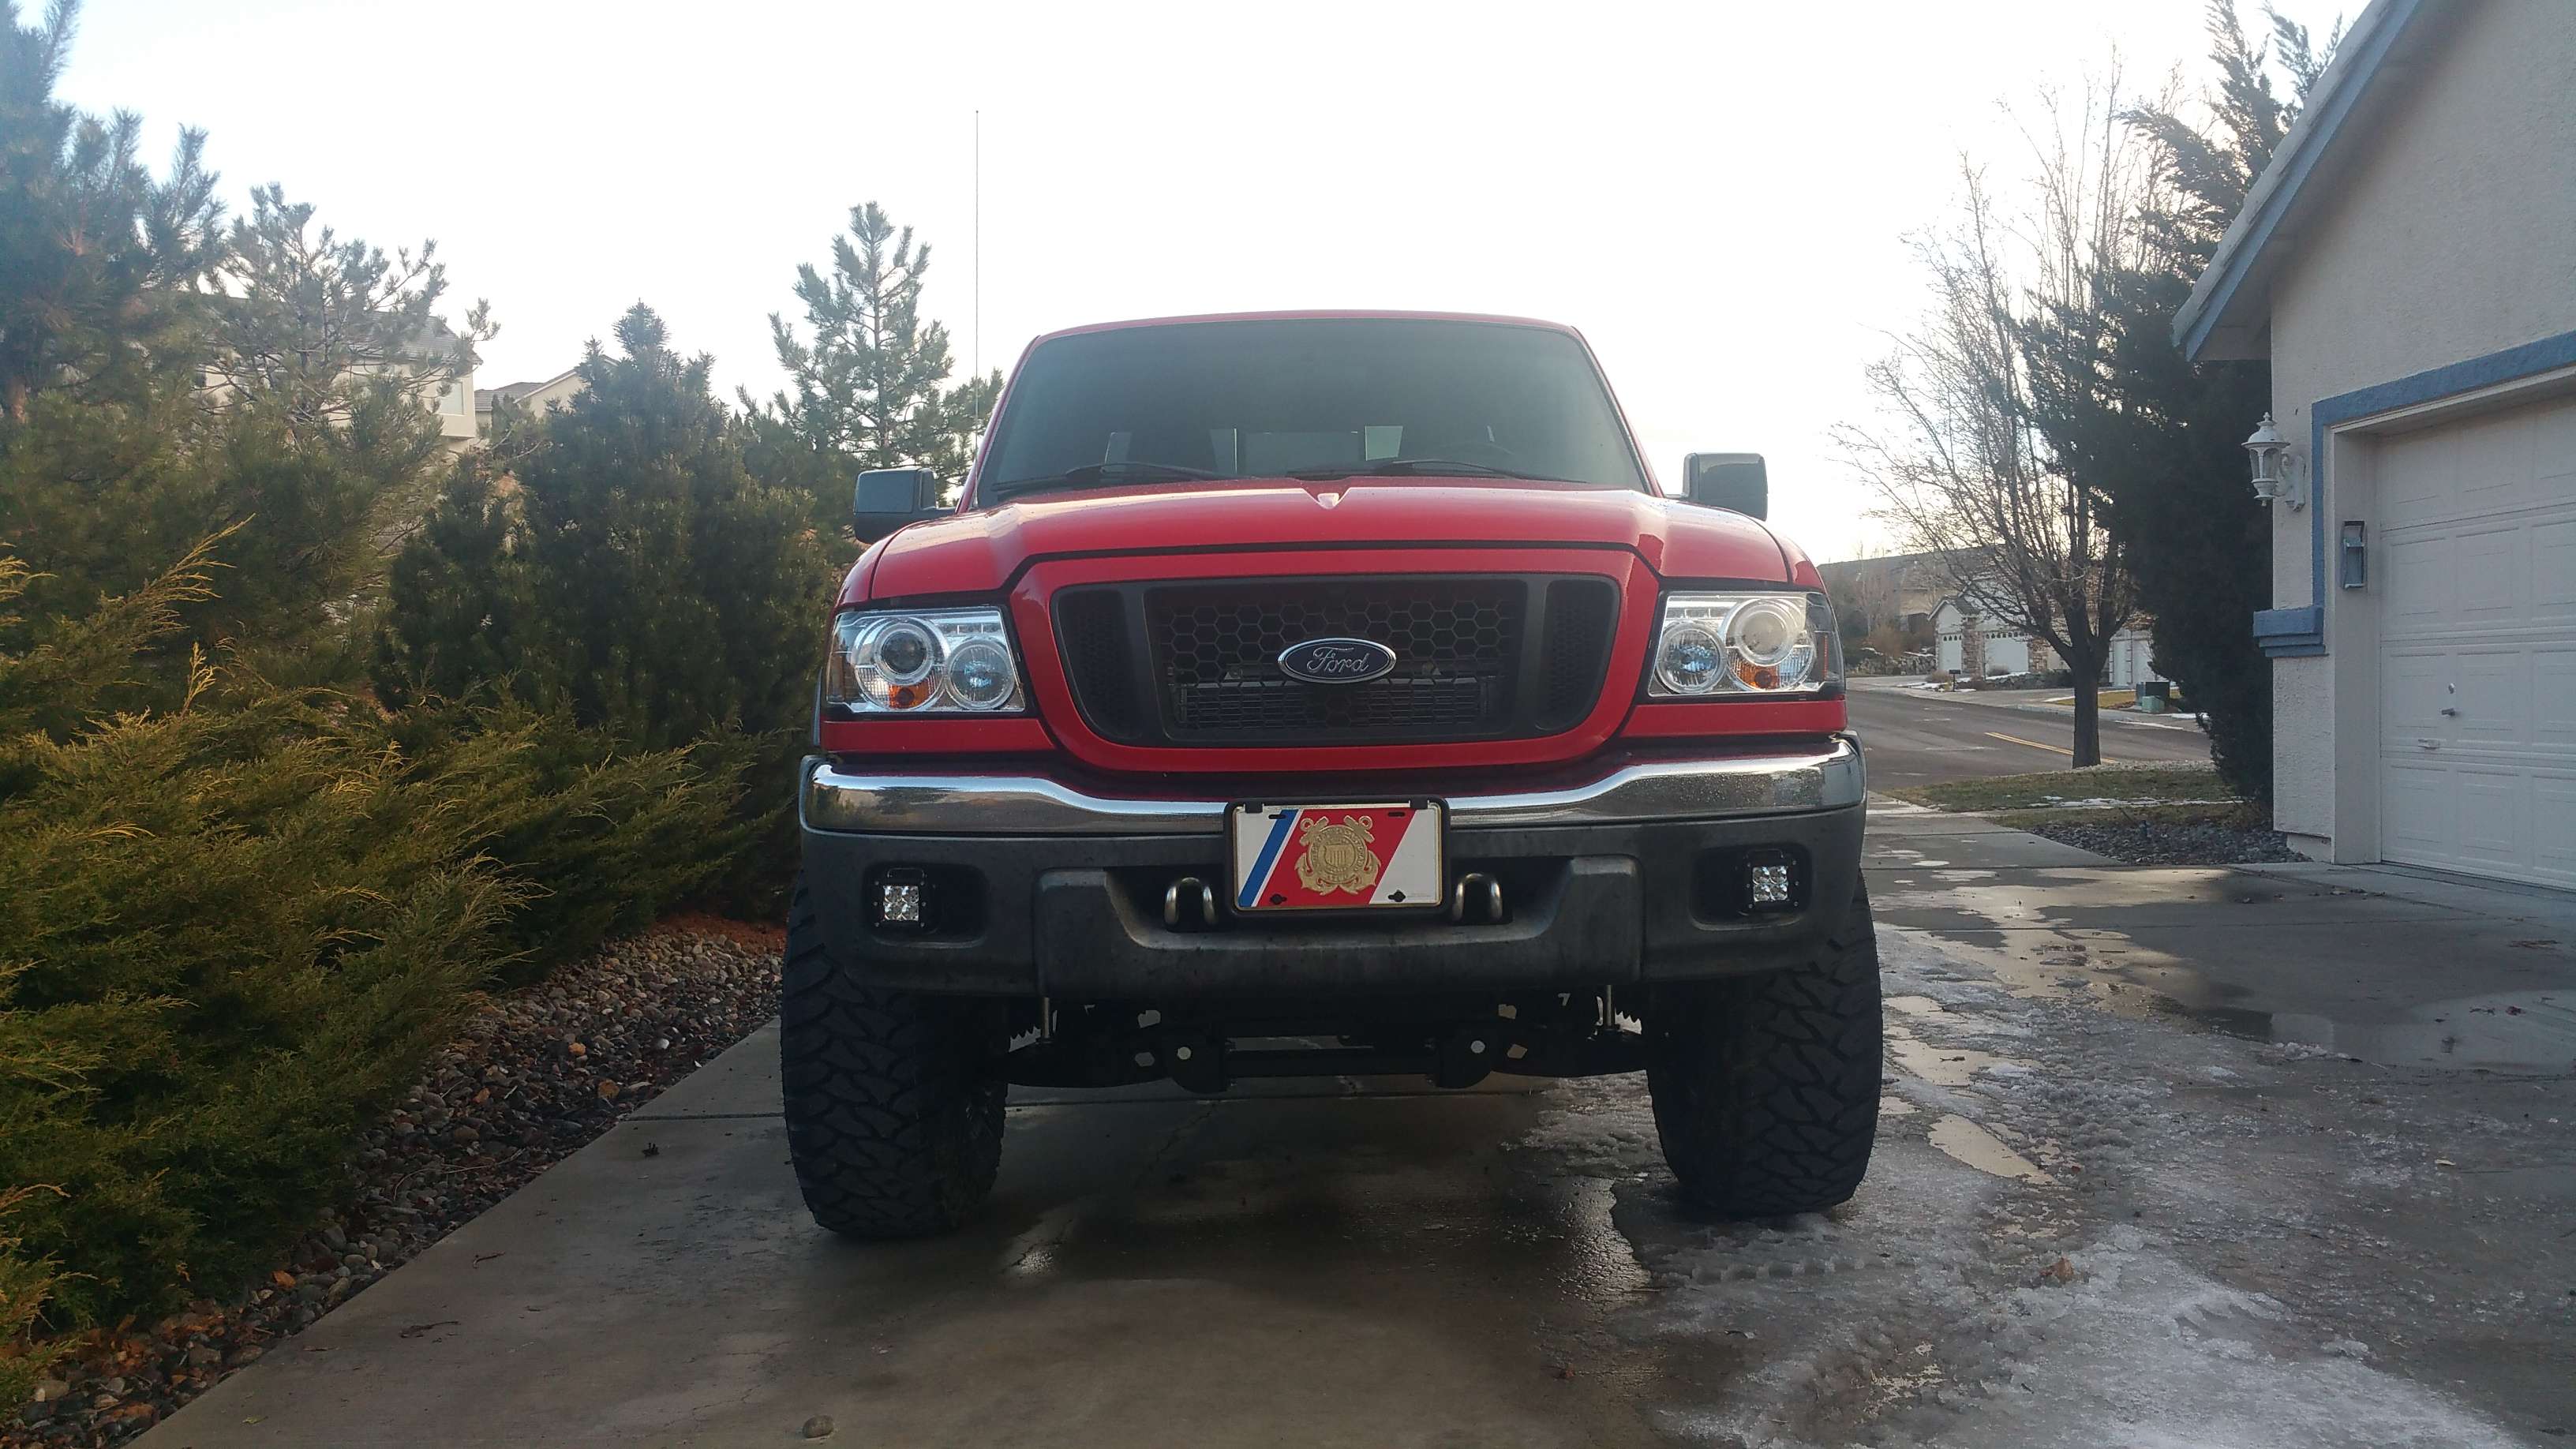
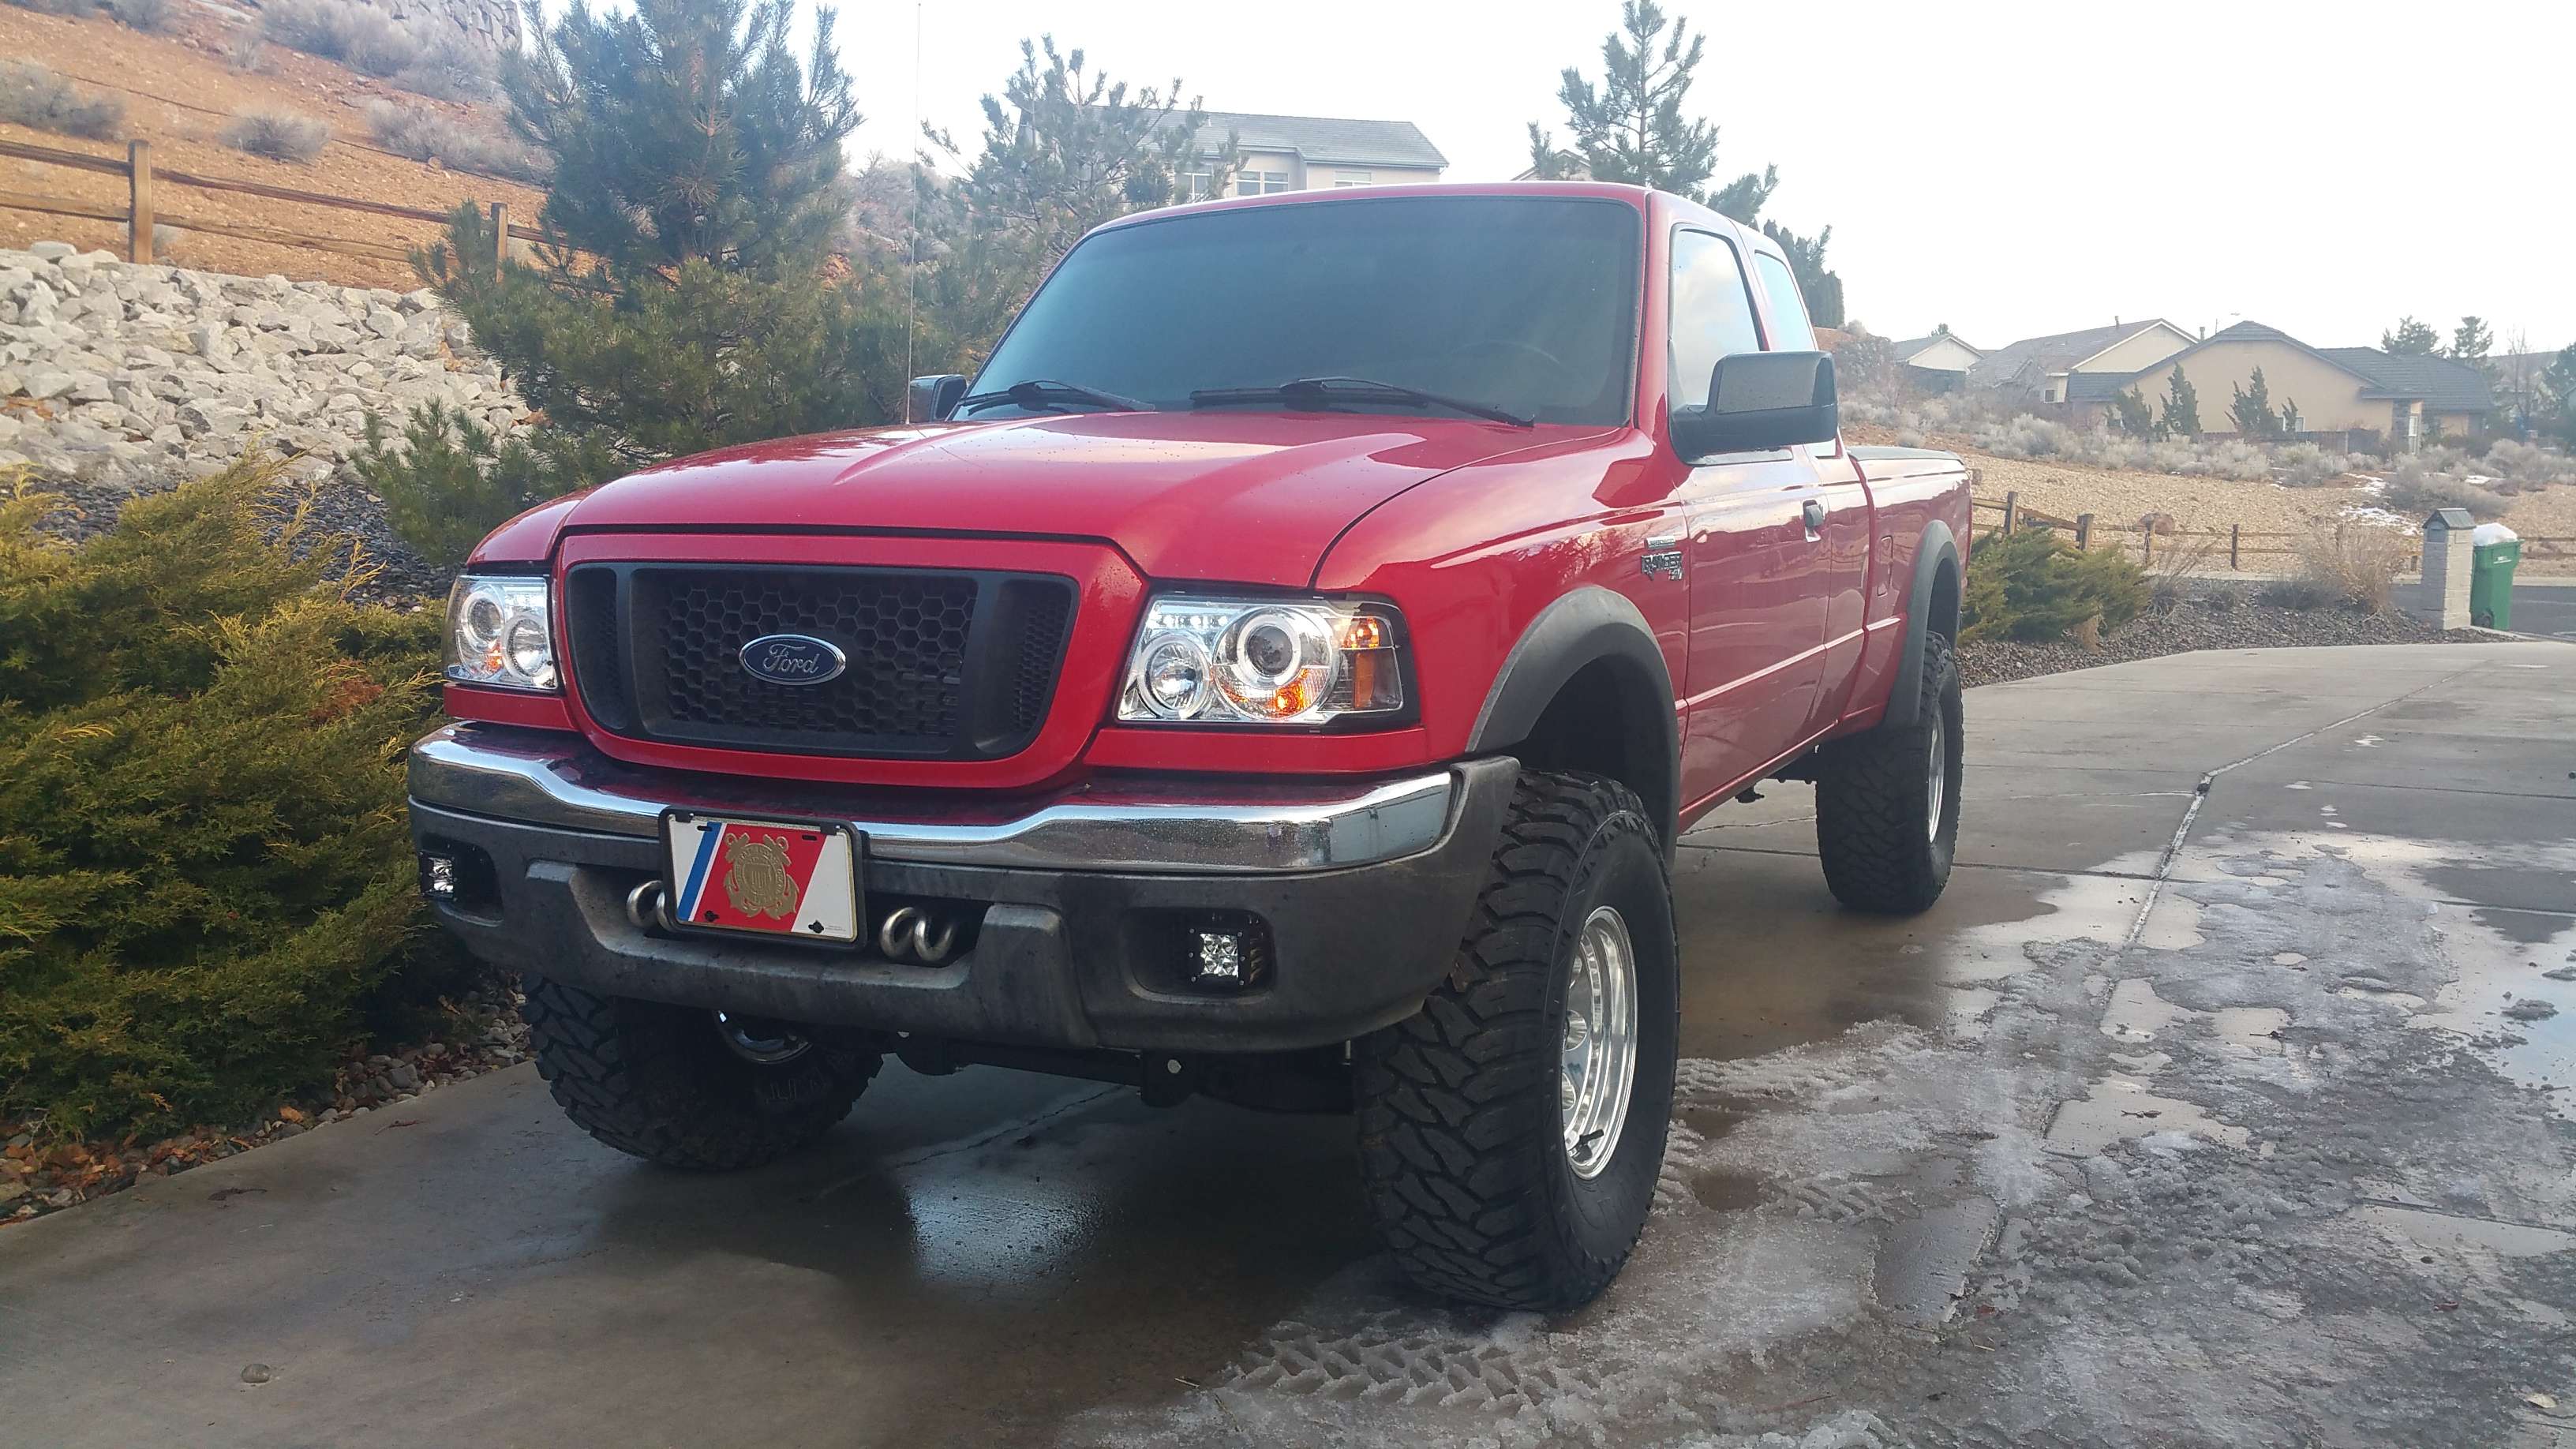
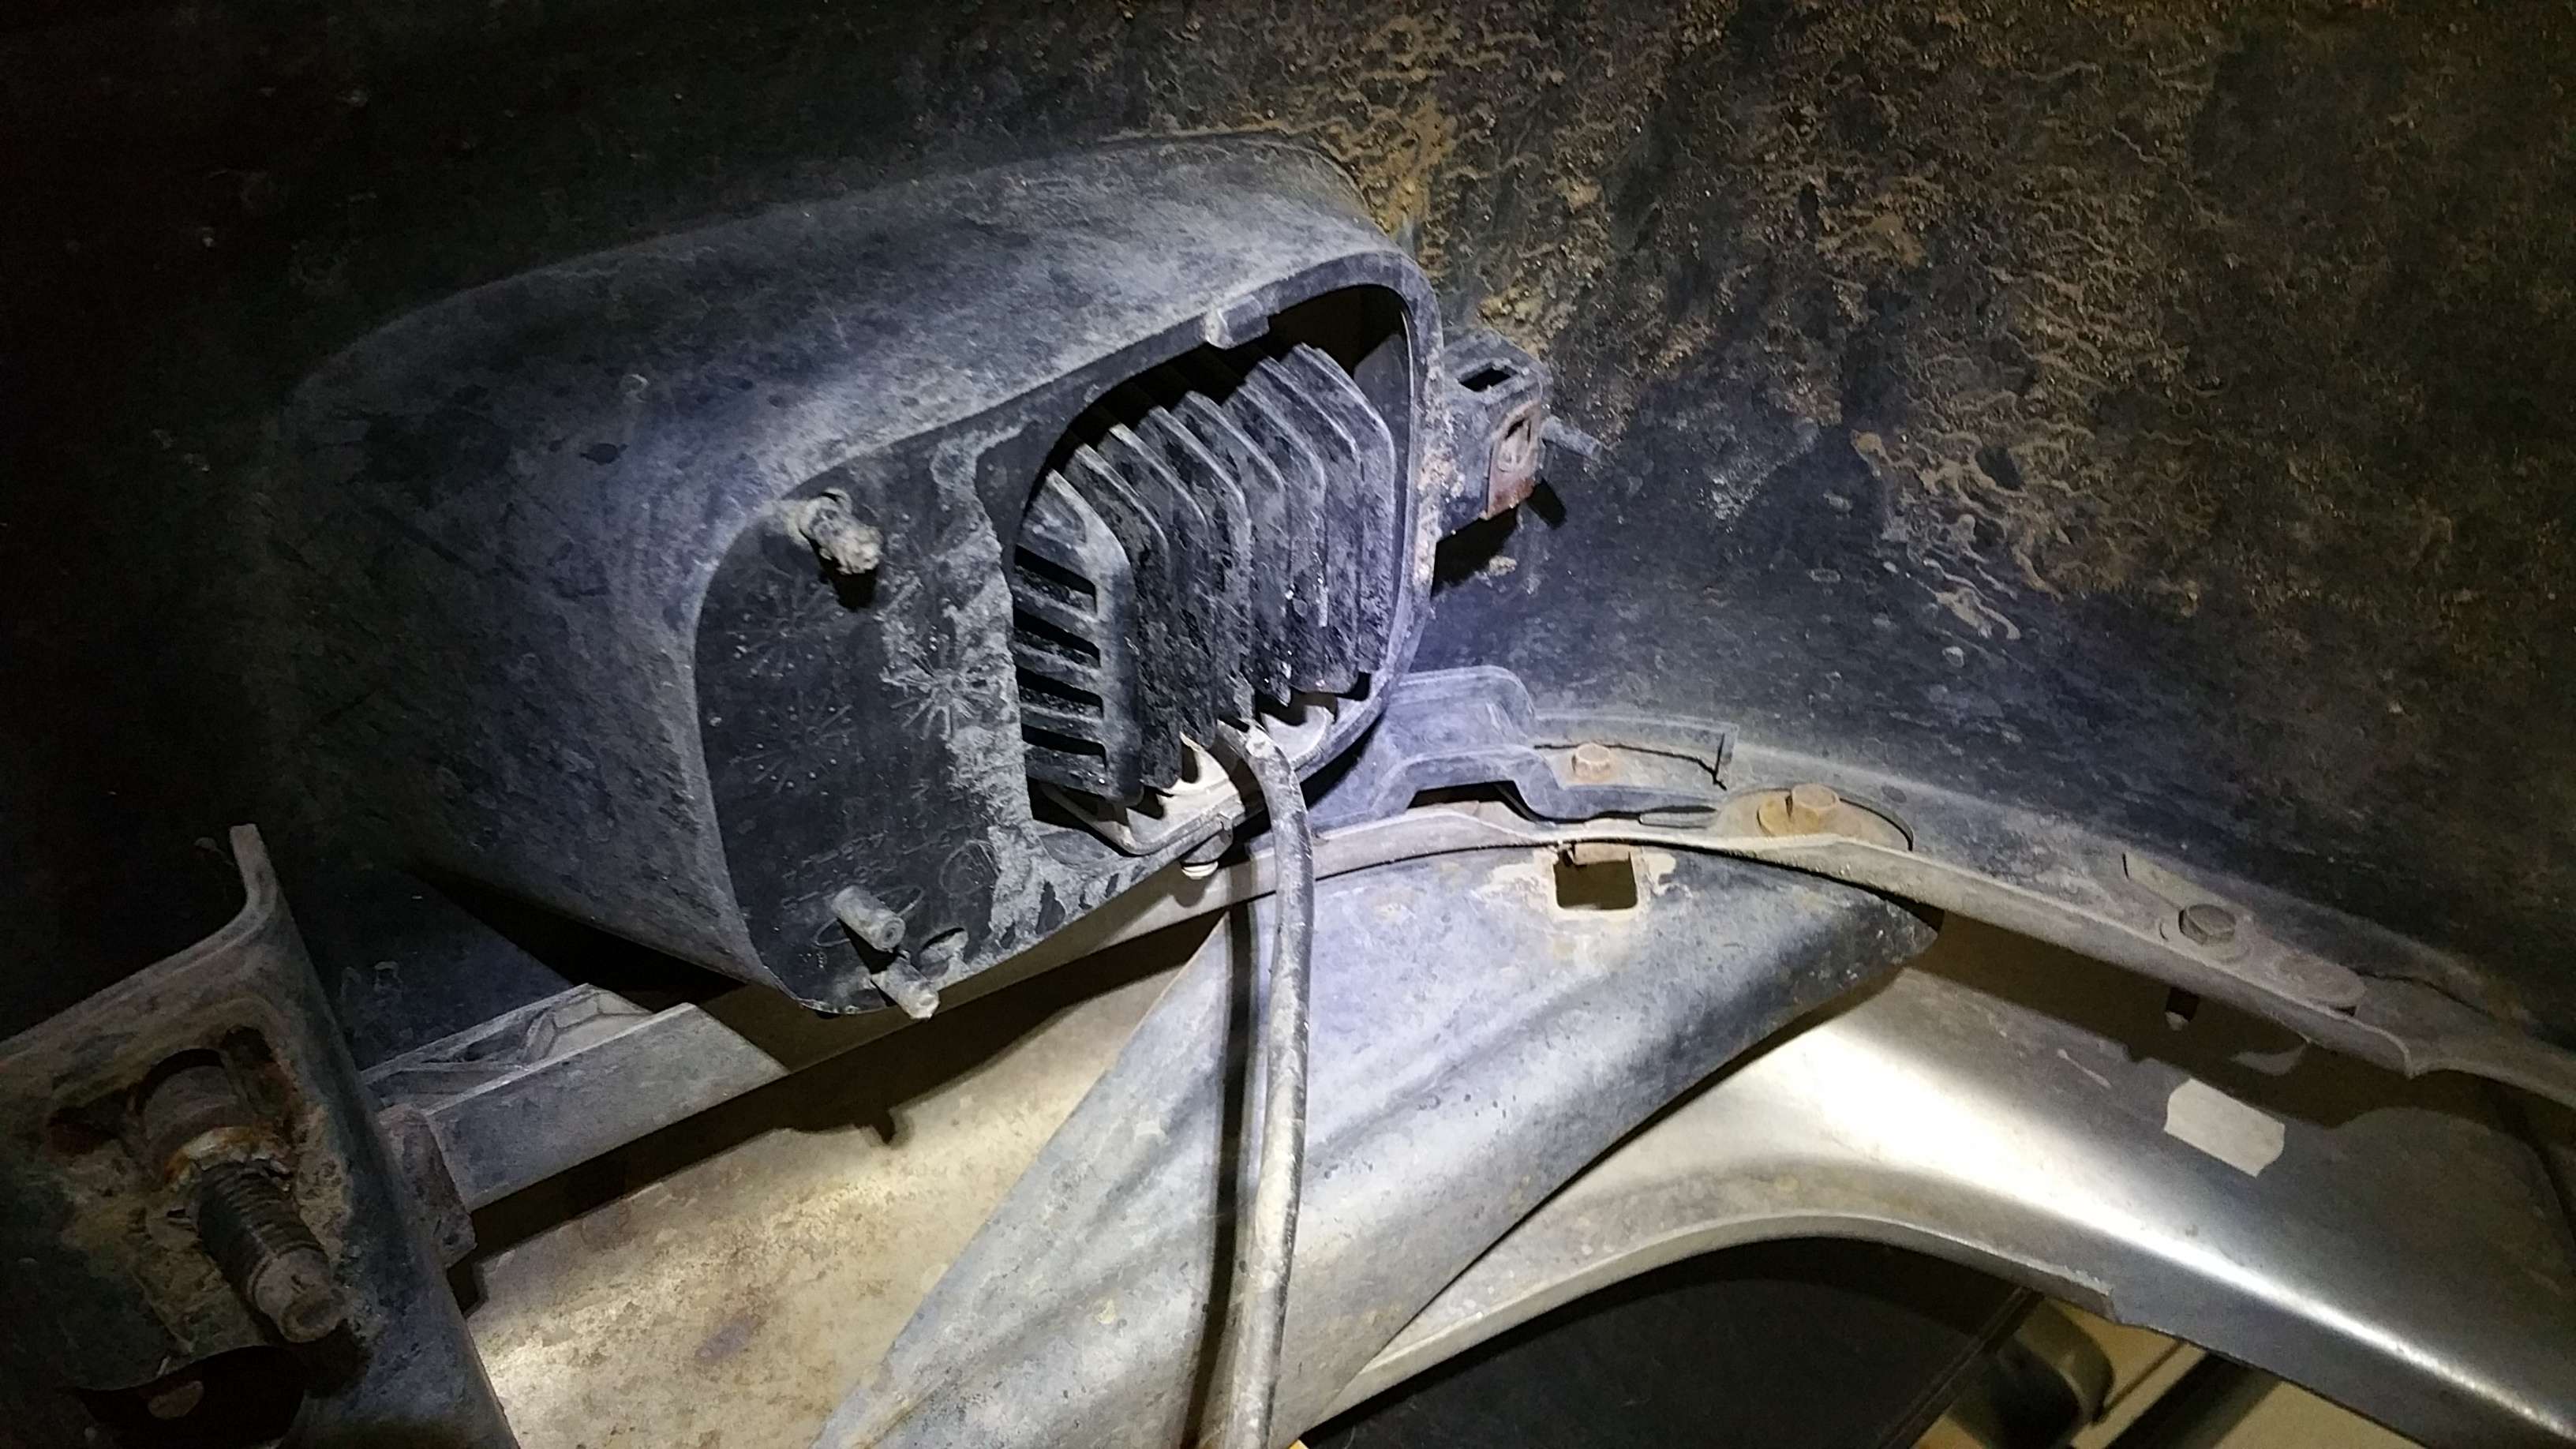
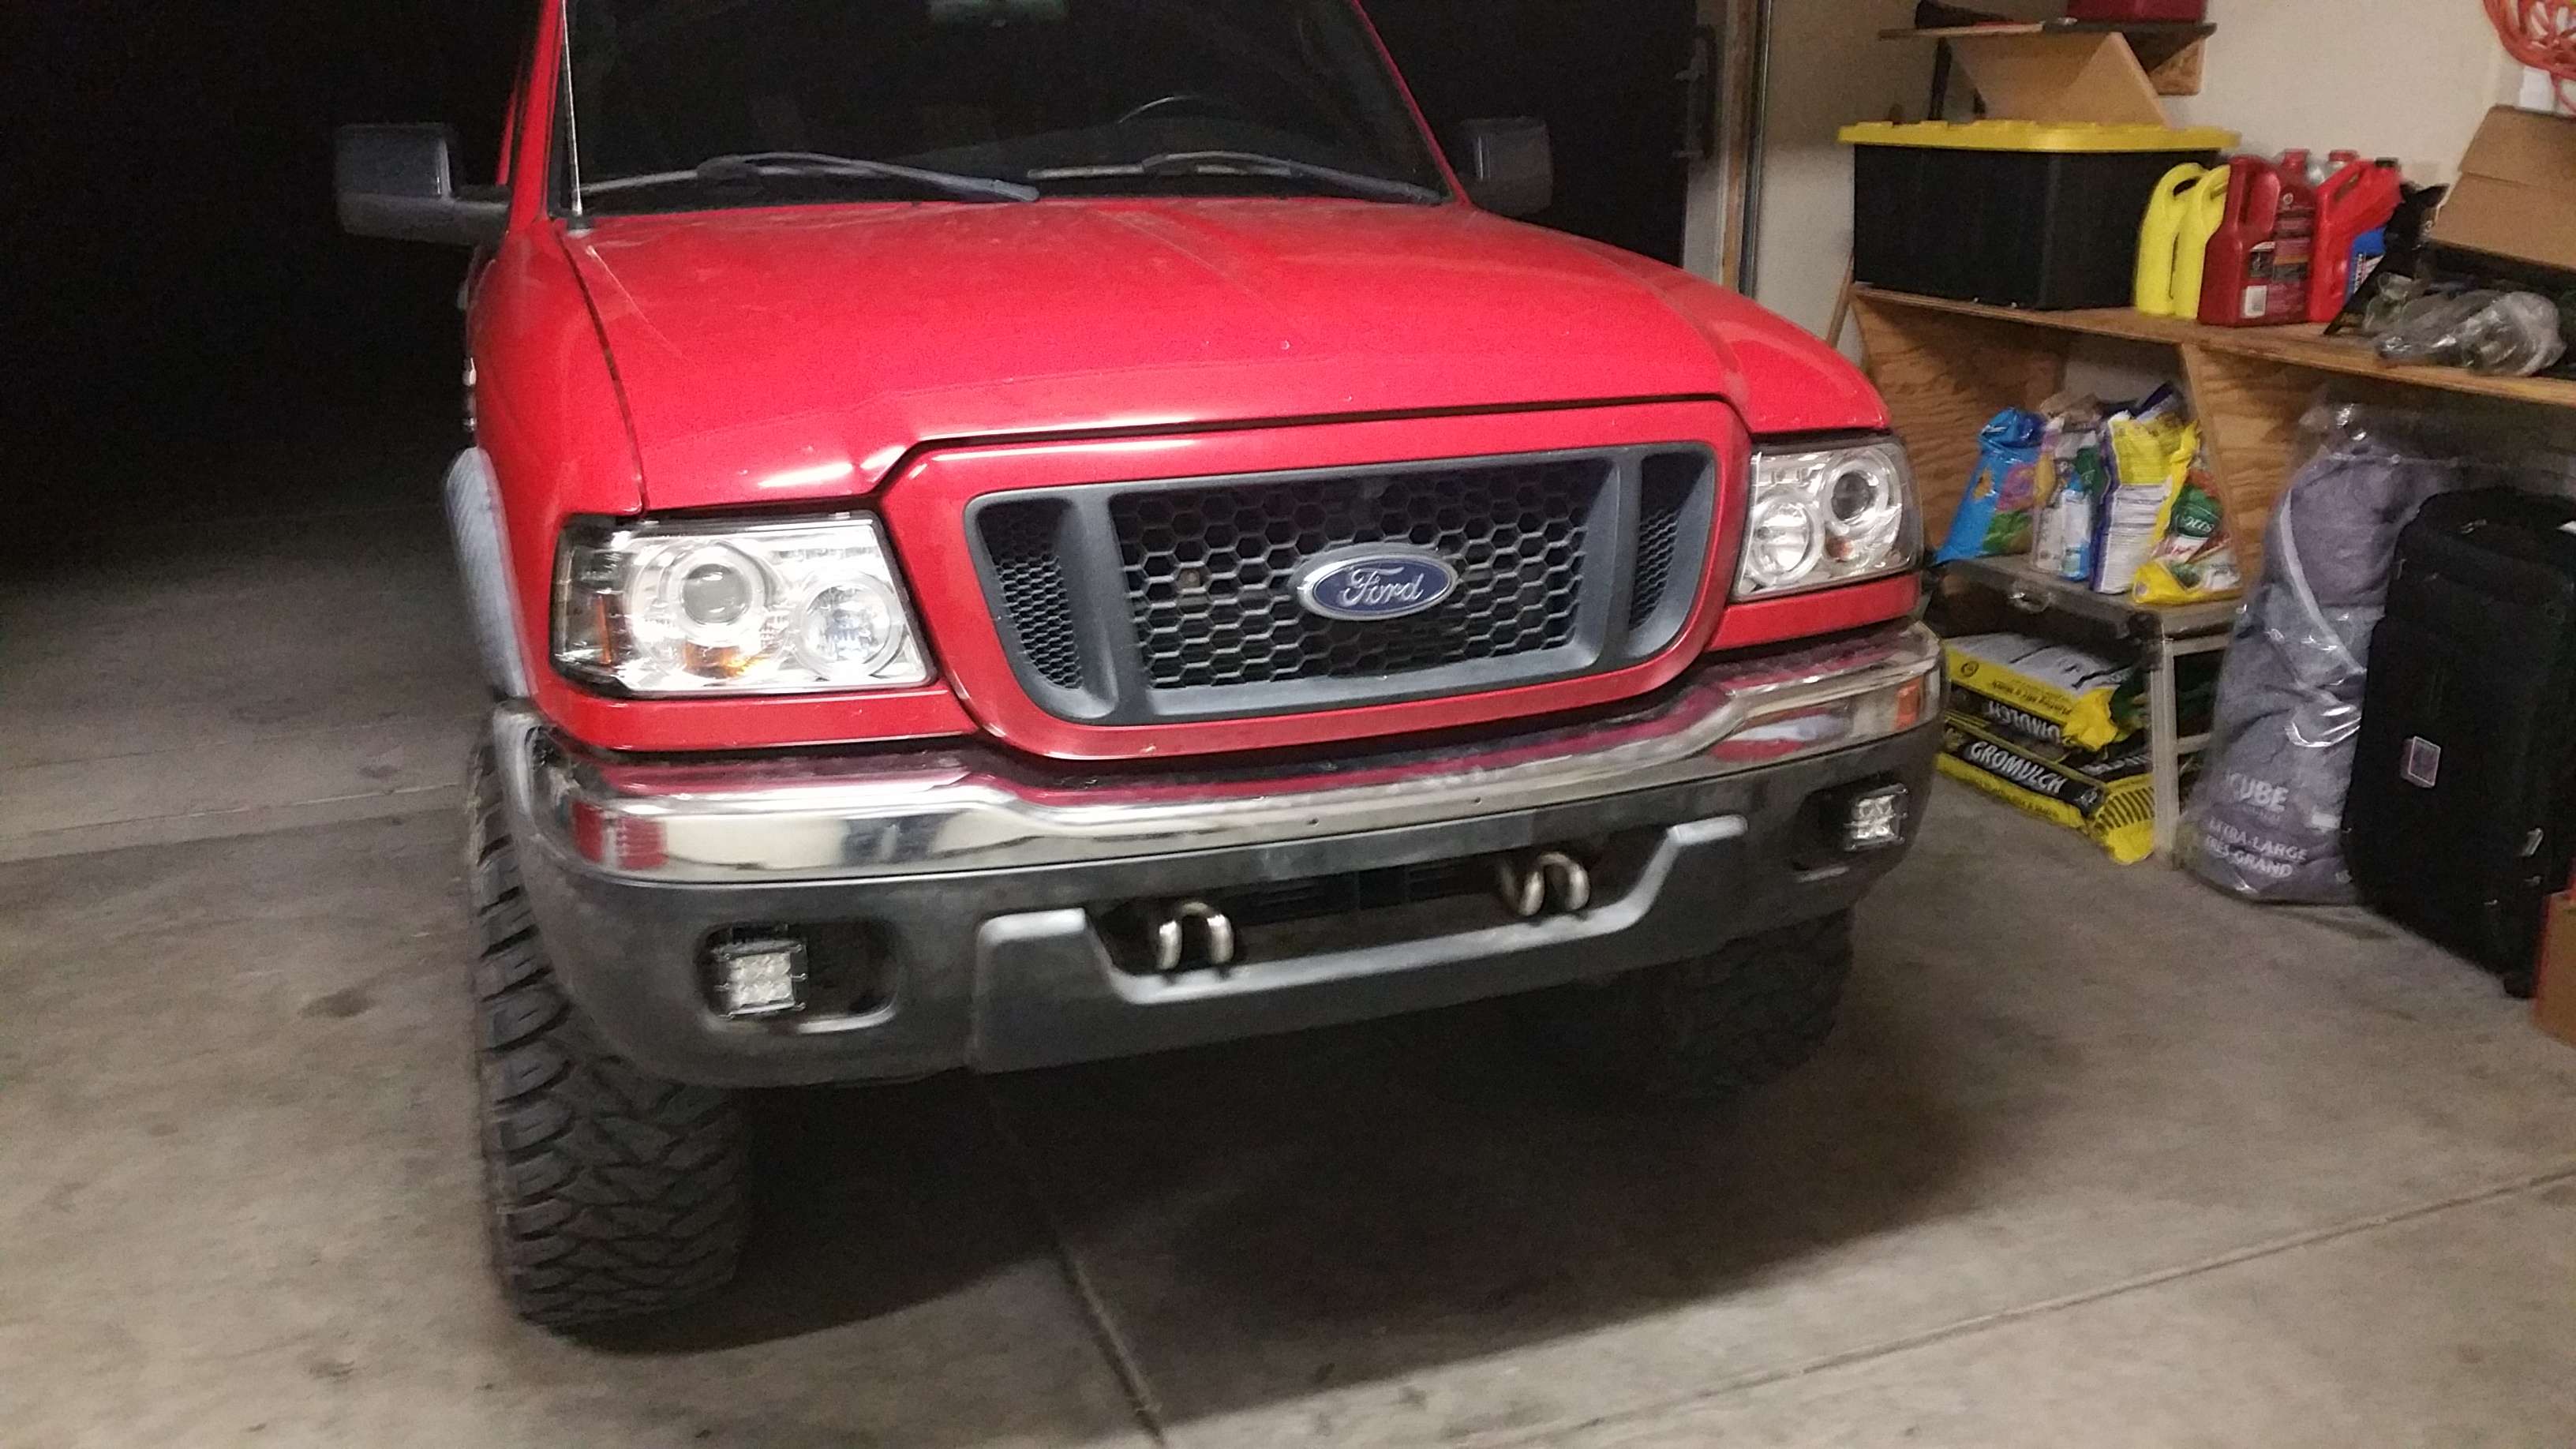
I wanted to upgrade the lights, and ended up buying these halo hid projectors by Spyder. The projectors and HID's work great. They fit fairly well with a little trimming and finicking. The halo's are very dim, and I don't see a way to upgrade them without risking completely destroying the light enclosure, so oh well. I dont even bother using the high beams as they are normal lamps and pale in comparison. If I need extra light, I flip on my Rigid LED fog lights that will be shown soon.
By now it is about November 2015, and I am gathering all the parts and tools and such to to the big overhaul during winter break.
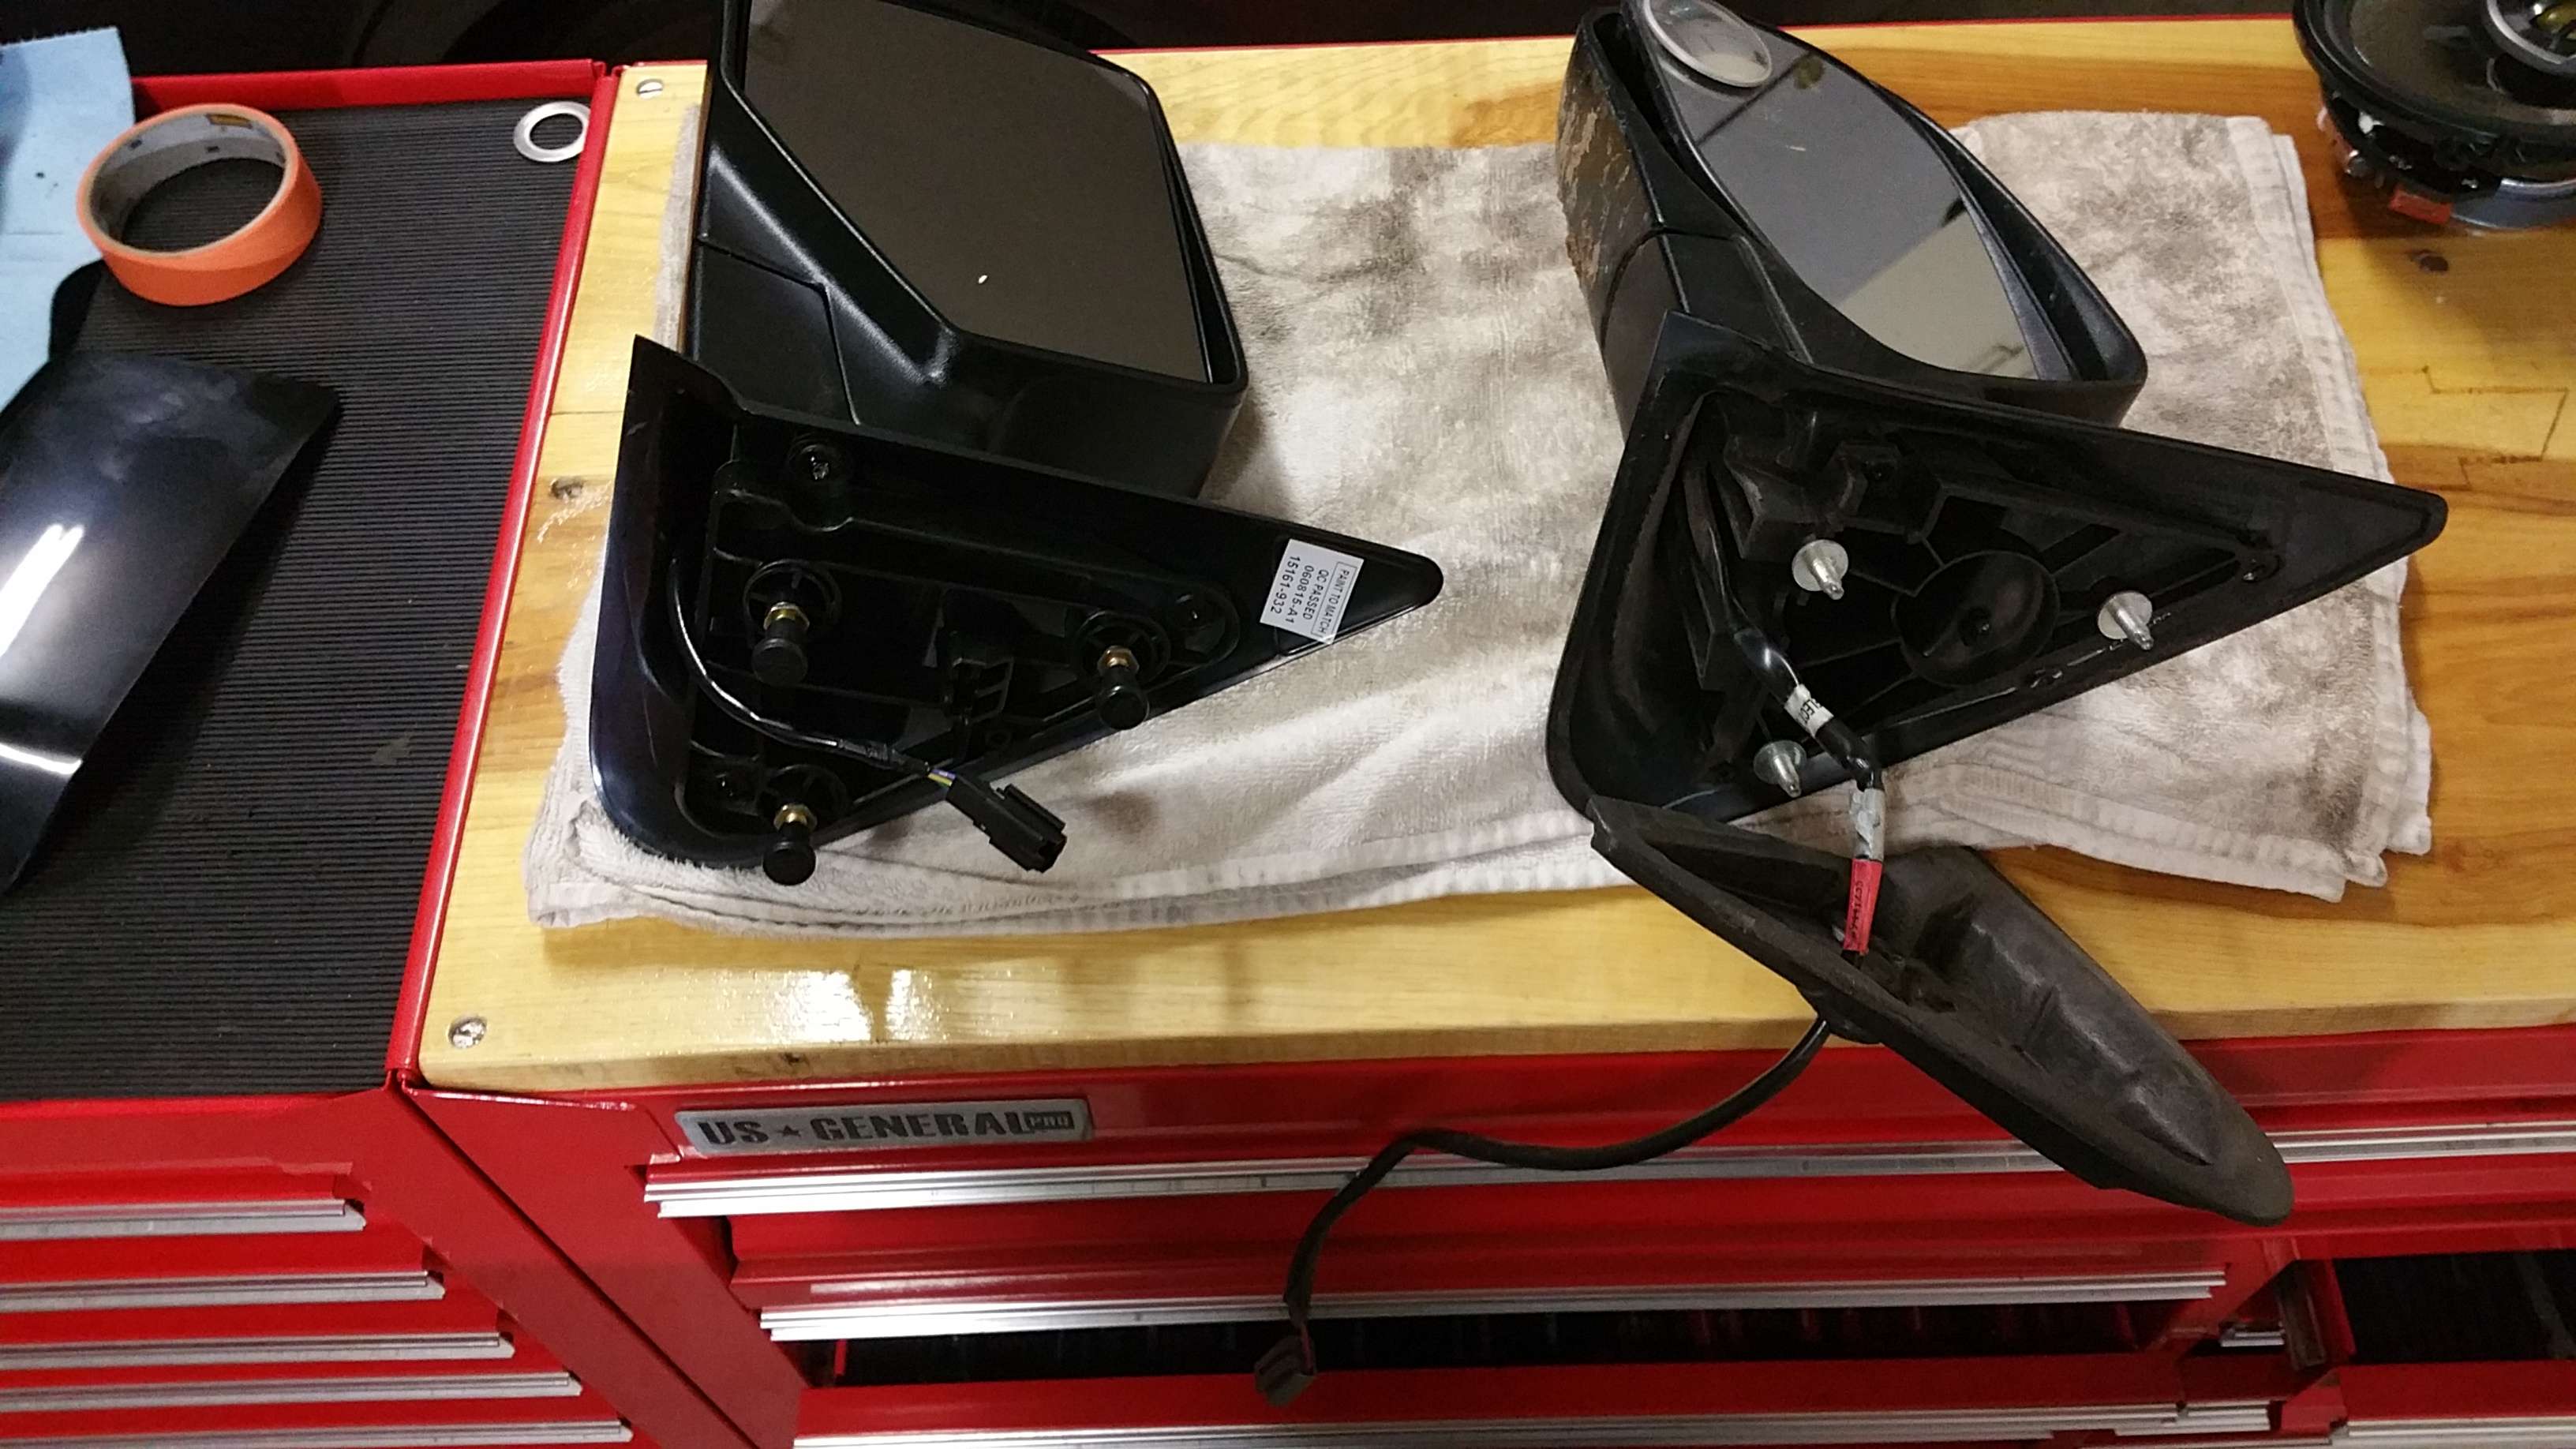
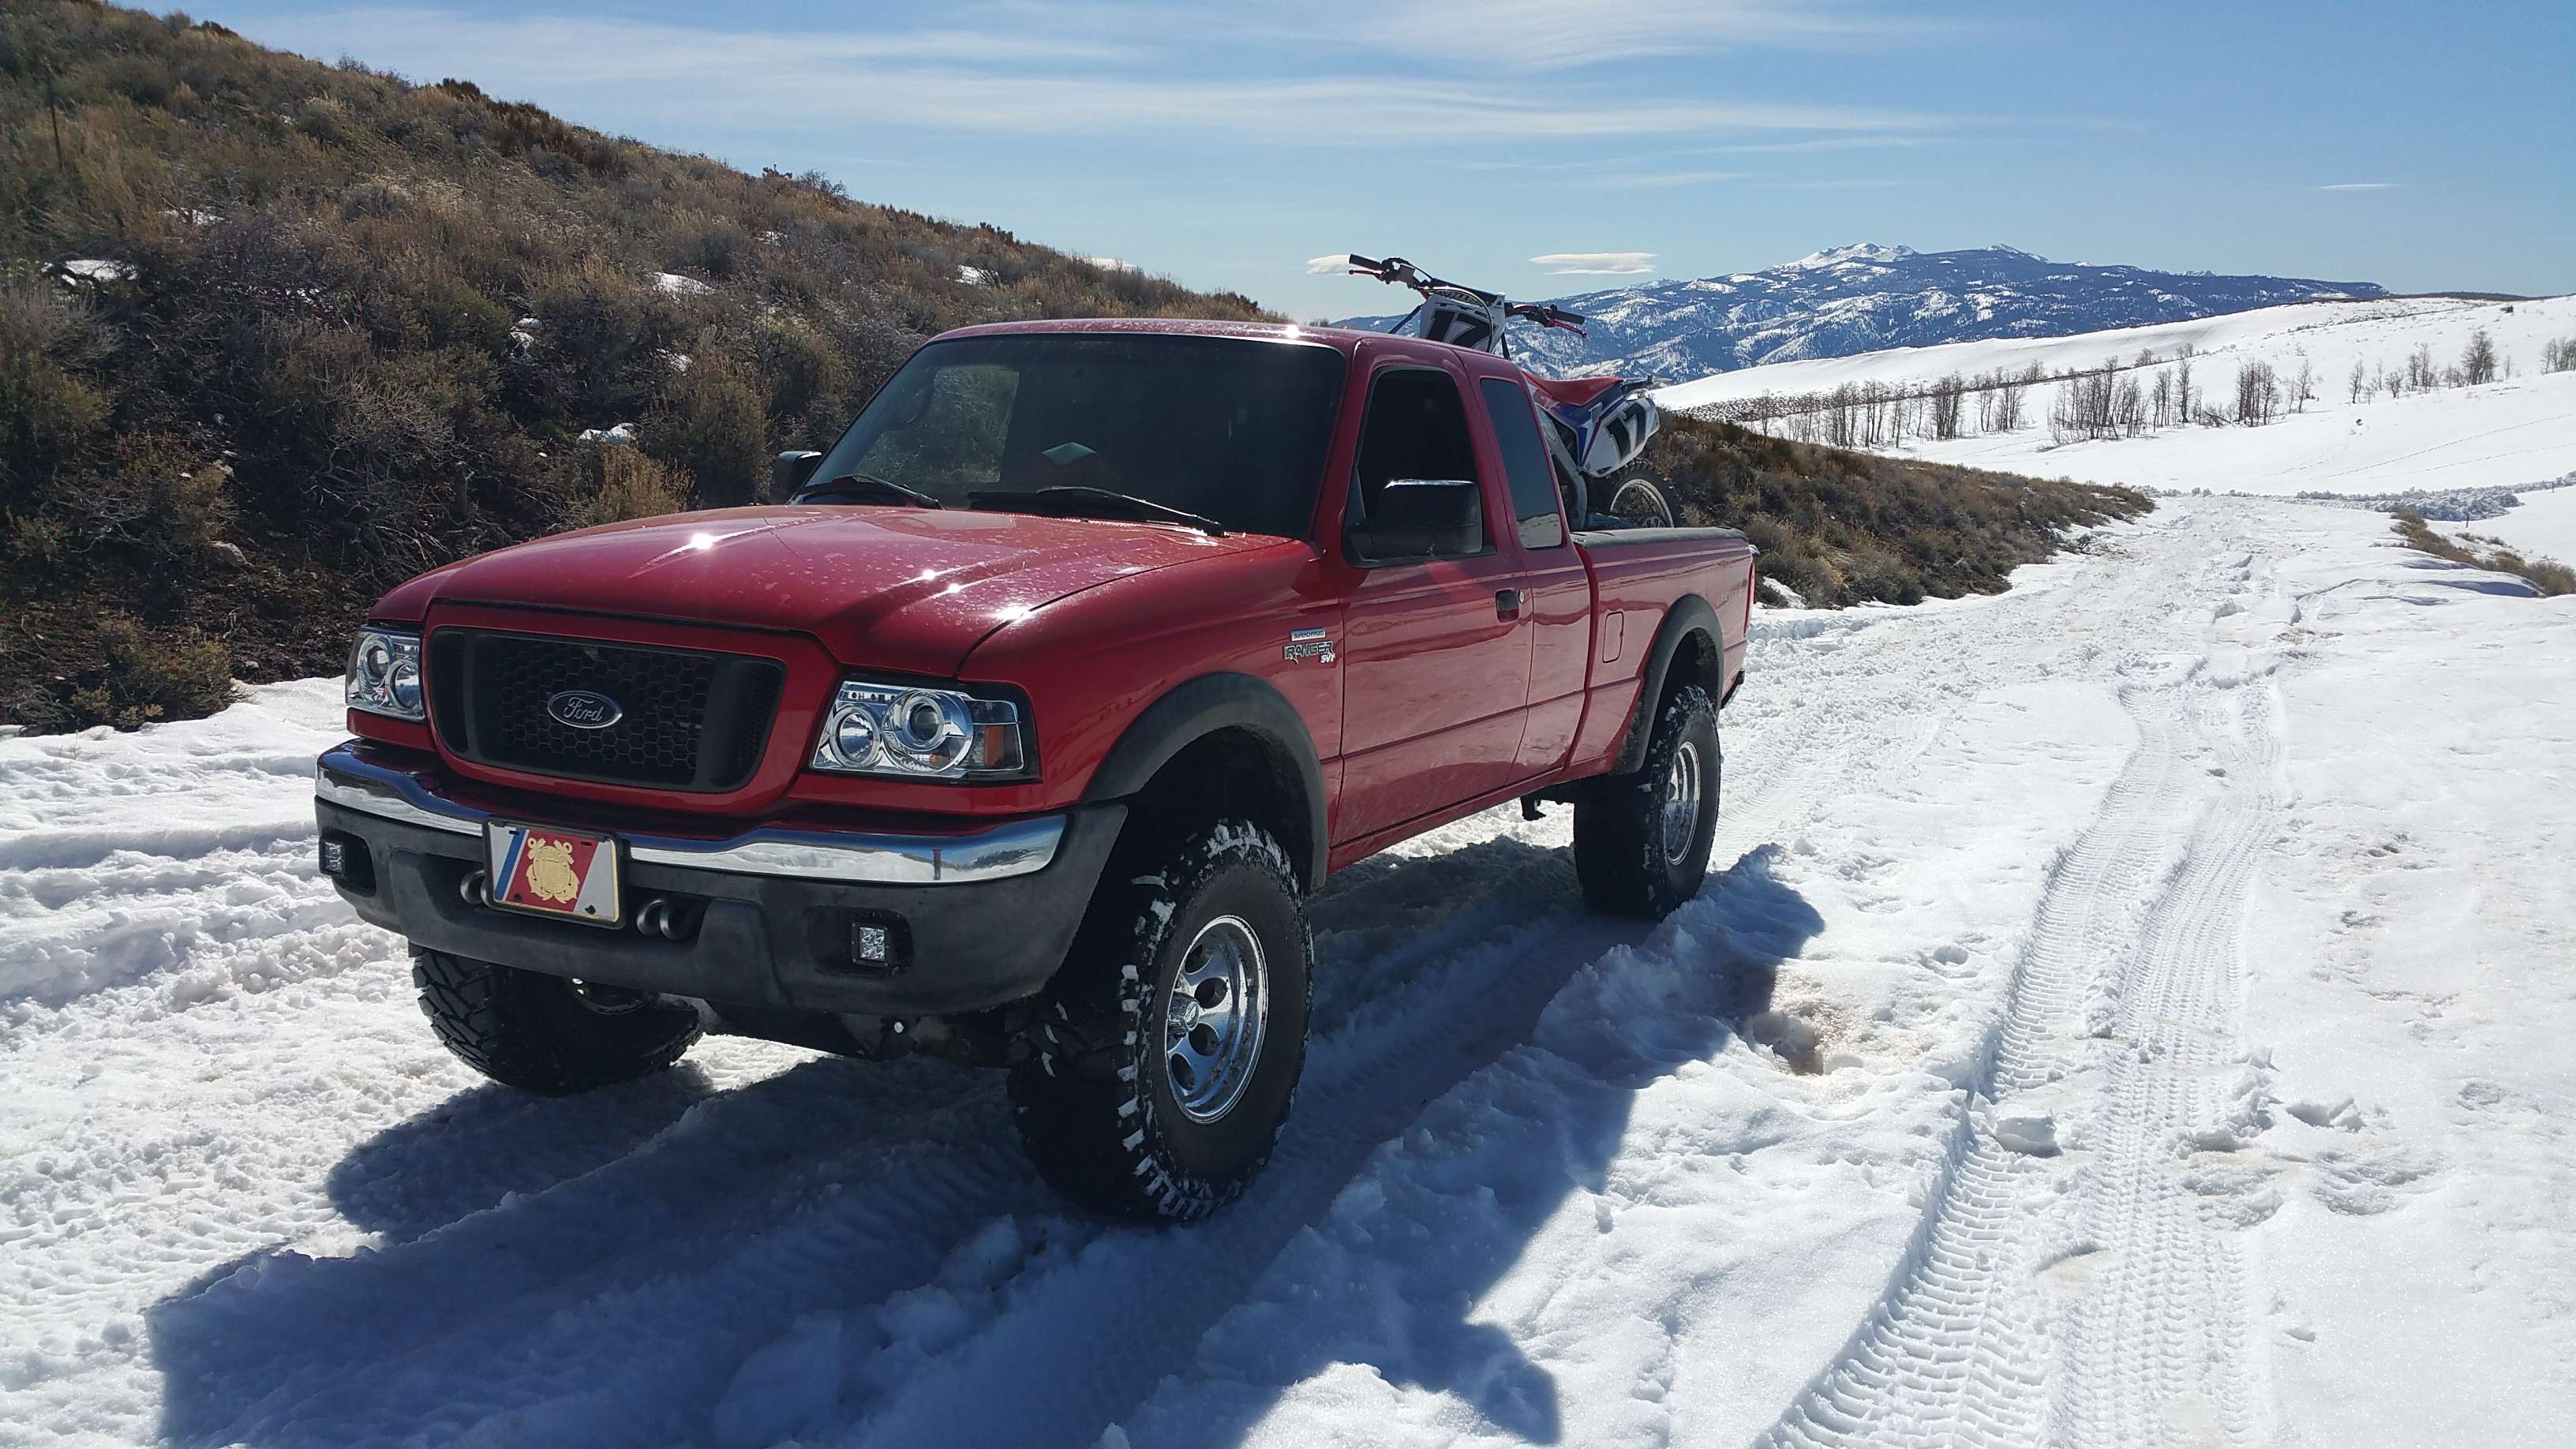
I did install 06+ rear lights and power mirrors which you can see throughout the remaining pictures. I couldn't contain myself and had to throw the new wheels on and off to keep me pumped for the coming winter.
The truck when I first bought her.
First on the to do list was quiet up the cabin some so I can hear some sweet tunes. On goes some Dynamat Extreme. I only do the floor and doors for now, but in later pictures, you can see the back and roof done also. It works very well, insulating the cabin and reducing vibration and outside sound. My truck isn't a Cadillac, but considering the tire size, exhaust, supercharger etc... It is relatively quiet inside!
Now comes the sound system. In my previous ranger (2 door ext. cab) I had a big 12" in a big box, and a amp that could barely run it. I wanted something better, but not over the top. I wanted a double din with all the connectivity features, with a way to connect a front and rear camera. Check. I also wanted all 4 speakers and 1 sub to run off an amp, without any headlight dimming. Check. The wiring isn't hard if you take your time. The trick was making a quality box that housed a sub, amp, and capacitor that was ergonomic and not over the top. I spent a few days mulling over ideas before I started drawing and measuring. Here are the fruits of my labor.
It sounds extremely good. It isn't over the top, but I can crank it without hearing any distortion. The Pioneer shallow mount 10" sounds very good. It has impressed me. I would have loved to throw in a 12 along with the 10 for better lows, but space and ergonomics were a higher priority. It still does the job and then some. I really like having that large flat surface to throw stuff on, instead of the dips in the floor with the center hump. I can still haul a bunch of stuff behind the seats. I don't have pictures of it, but there are red led strips under the dash, and inside the box under both glass windows. When I flip the switch, It looks pretty sweet. I will have to go get a picture tonight of it.
Something else I didn't take a picture of was my switchbox. In the previous picture, you can see a box attached to the bottom of the dash above the parking brake. It is a nifty power/switch distribution block I found at autozone for $20. It isn't the best quality as I have found, but it works, and has a fuse in front of it, so everything is safe. It has 4 sets of terminals on it for 4 additional circuits. It then has a small ribbon cable that goes to a large flat "sticker" with 4 push buttons on it. It is attached to the botton of the steering console next to the tilt wheel adjustment. It is completely hidden, but easy to access. You just have to memorize which of the 4 buttons do what. 1 is for the inside red led's, and 2 are for turning on the front and rear cameras, which the stereo detects and switches to. It turned out pretty good.
Here are a few random pictures I will throw in. I had to pull my sister's 4.0 SOHC out of here '05 B4000. It wouldn't run right at all, and after doing all sorts of tests, determined it was certainly a problem on the passengers side with the timing chain. Out comes the engine! It turned out that the bolt that holds the upper sprocket the the back of the passenger camshaft had snapped completely, so the left bank simply wasn't spinning. Since I had it apart, I replaced both timing chain sets with the updated ones. Runs like a champ now. The friggin auto shop wanted $5-$6k for installing a new engine, or $4k to repair the existing one. The actual repair cost about $650 in parts, plus my extremely discounted family labor. That is including other parts being replaced just for good maintenance, such as a whole new set of injectors, fuel pump, etc...
Also is my beautiful '69 Camaro SS/RS I sold to fund this truck build and a few other things. I sold it with the promise of buying another one the second I graduate college. It had all the good stuff, but was rusty as hell and beyond my skill level to repair....Oh yeah, and I nearly doubled my initial investment!
OK. Back to the truck!
I wanted to upgrade the lights, and ended up buying these halo hid projectors by Spyder. The projectors and HID's work great. They fit fairly well with a little trimming and finicking. The halo's are very dim, and I don't see a way to upgrade them without risking completely destroying the light enclosure, so oh well. I dont even bother using the high beams as they are normal lamps and pale in comparison. If I need extra light, I flip on my Rigid LED fog lights that will be shown soon.
By now it is about November 2015, and I am gathering all the parts and tools and such to to the big overhaul during winter break.
I did install 06+ rear lights and power mirrors which you can see throughout the remaining pictures. I couldn't contain myself and had to throw the new wheels on and off to keep me pumped for the coming winter.
#8
10-28-2016
Join Date: Jul 2015
Location: Reno, Nevada
Posts: 52
Likes: 0
Received 0 Likes
on
0 Posts
Moving on. I have a metric ton more of pictures, so I will have to do several posts to break up the monotony.
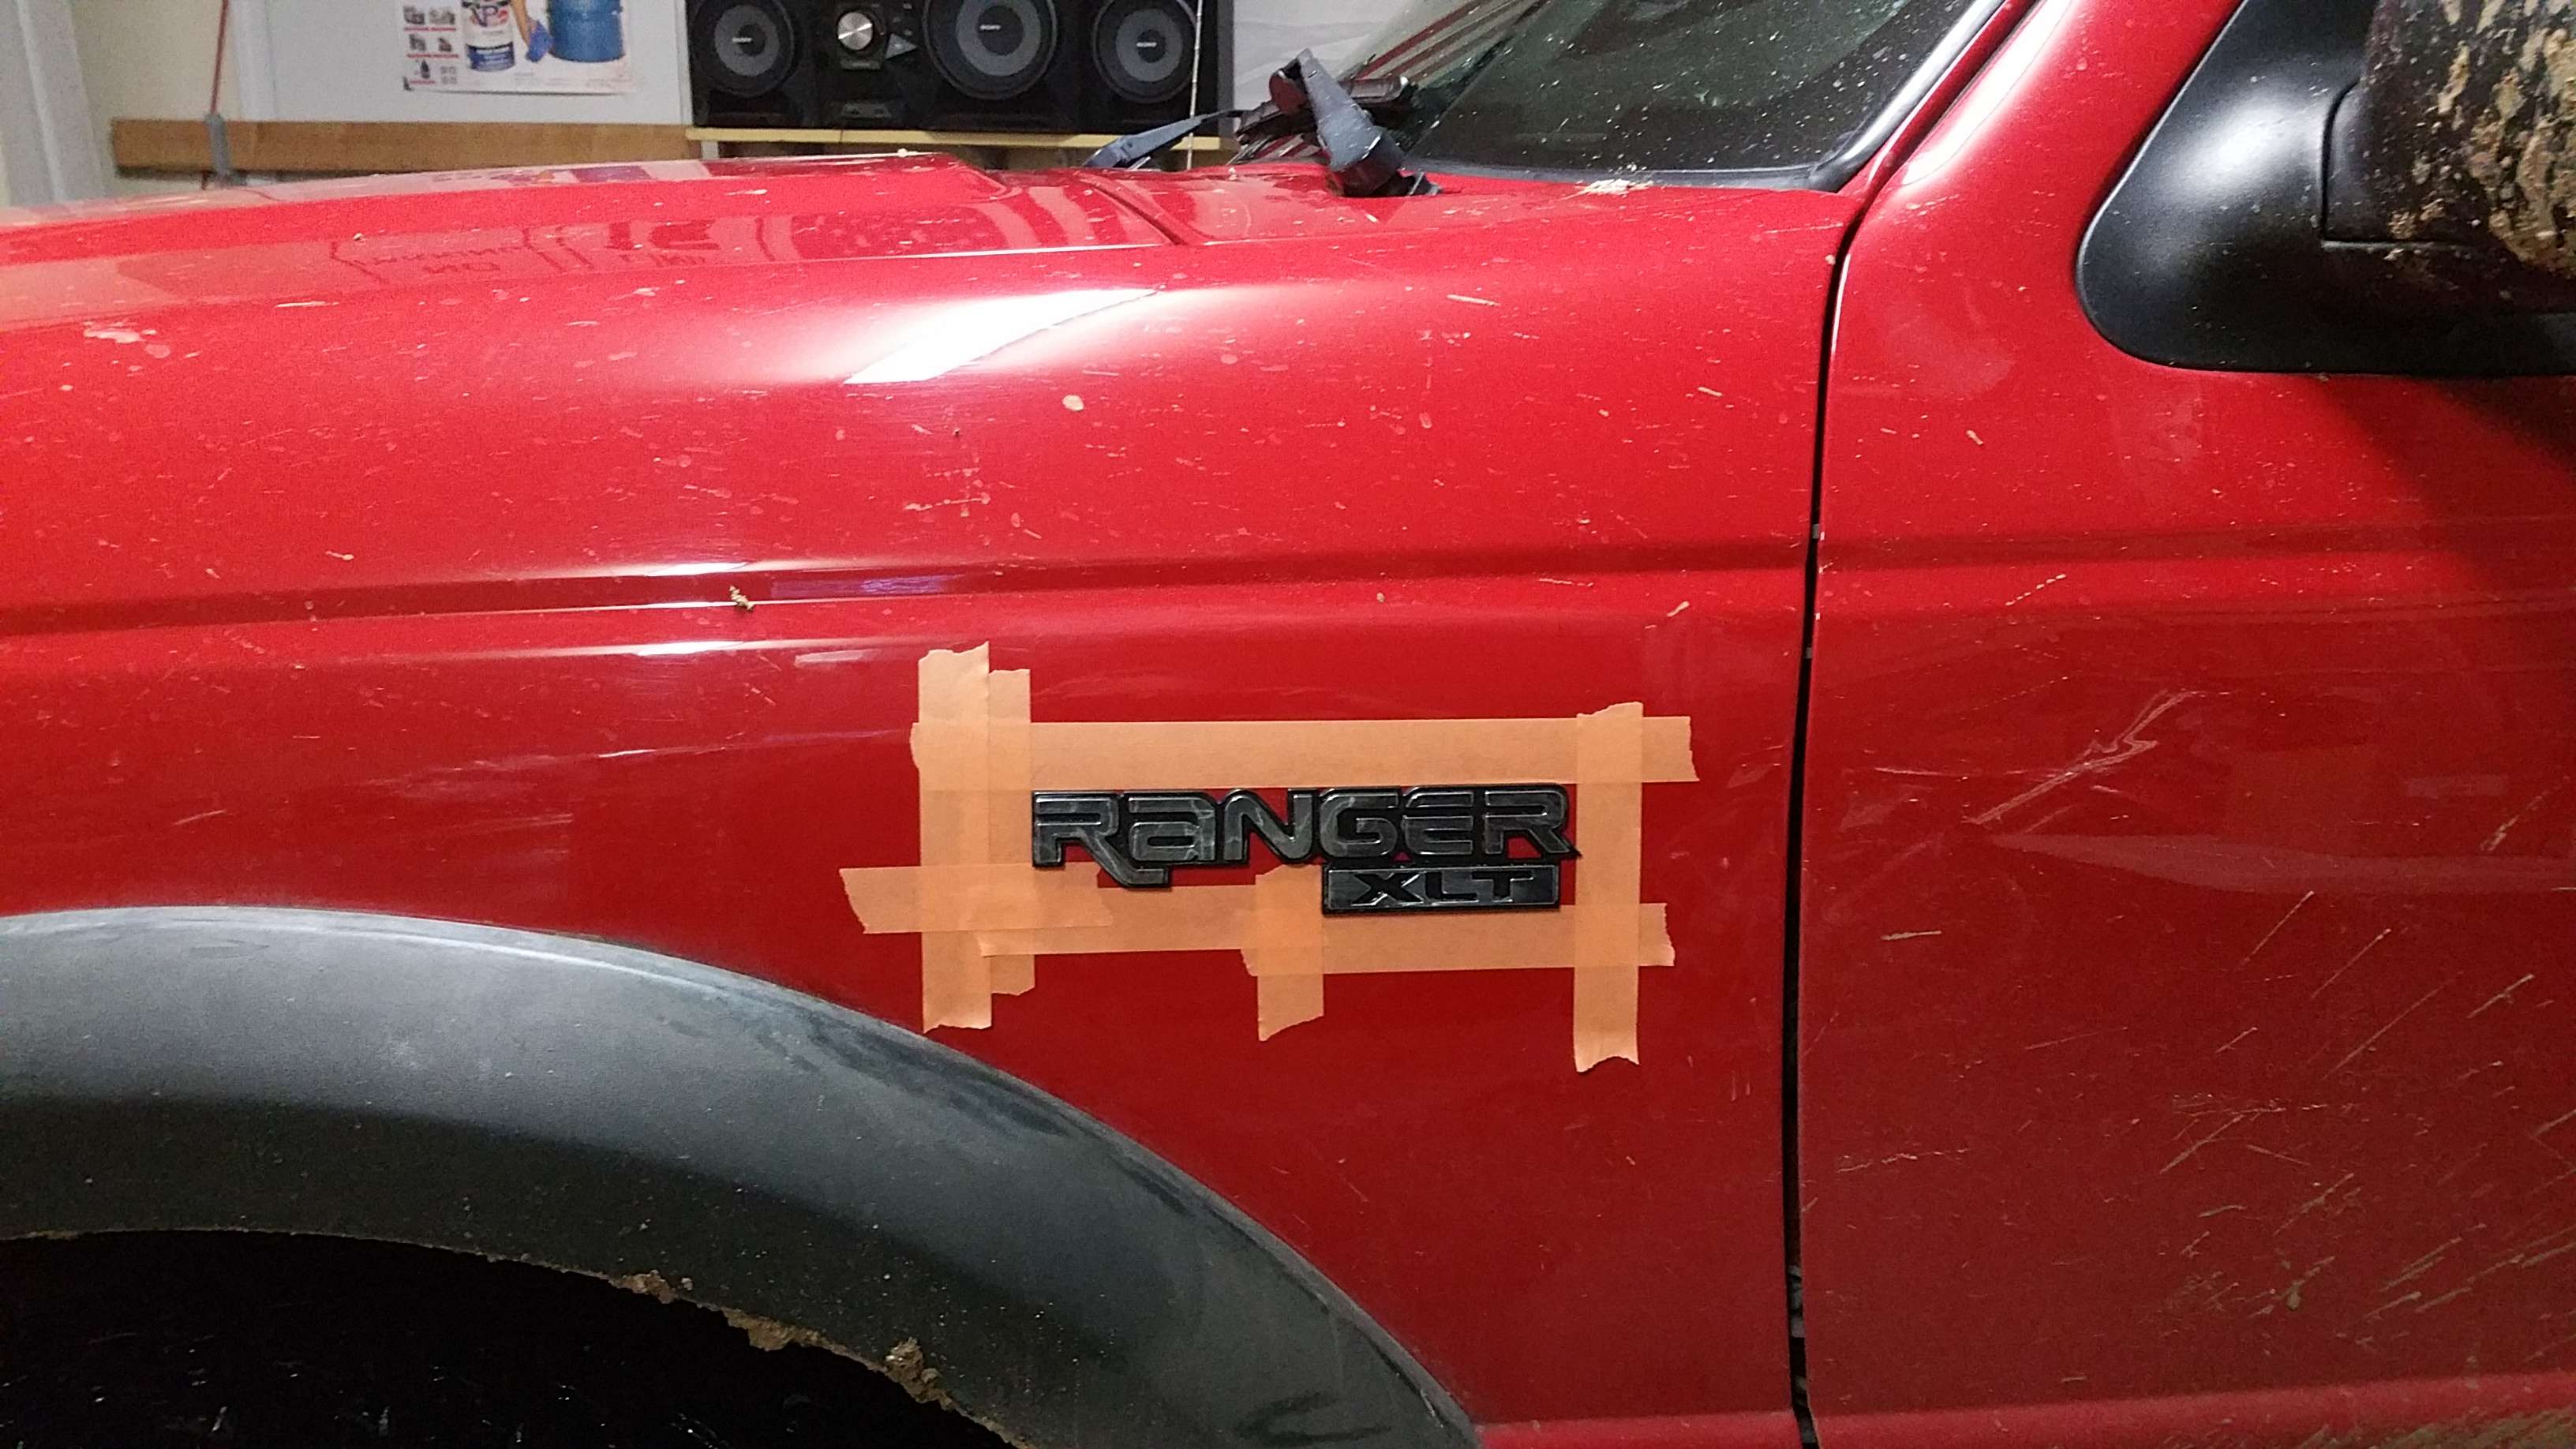
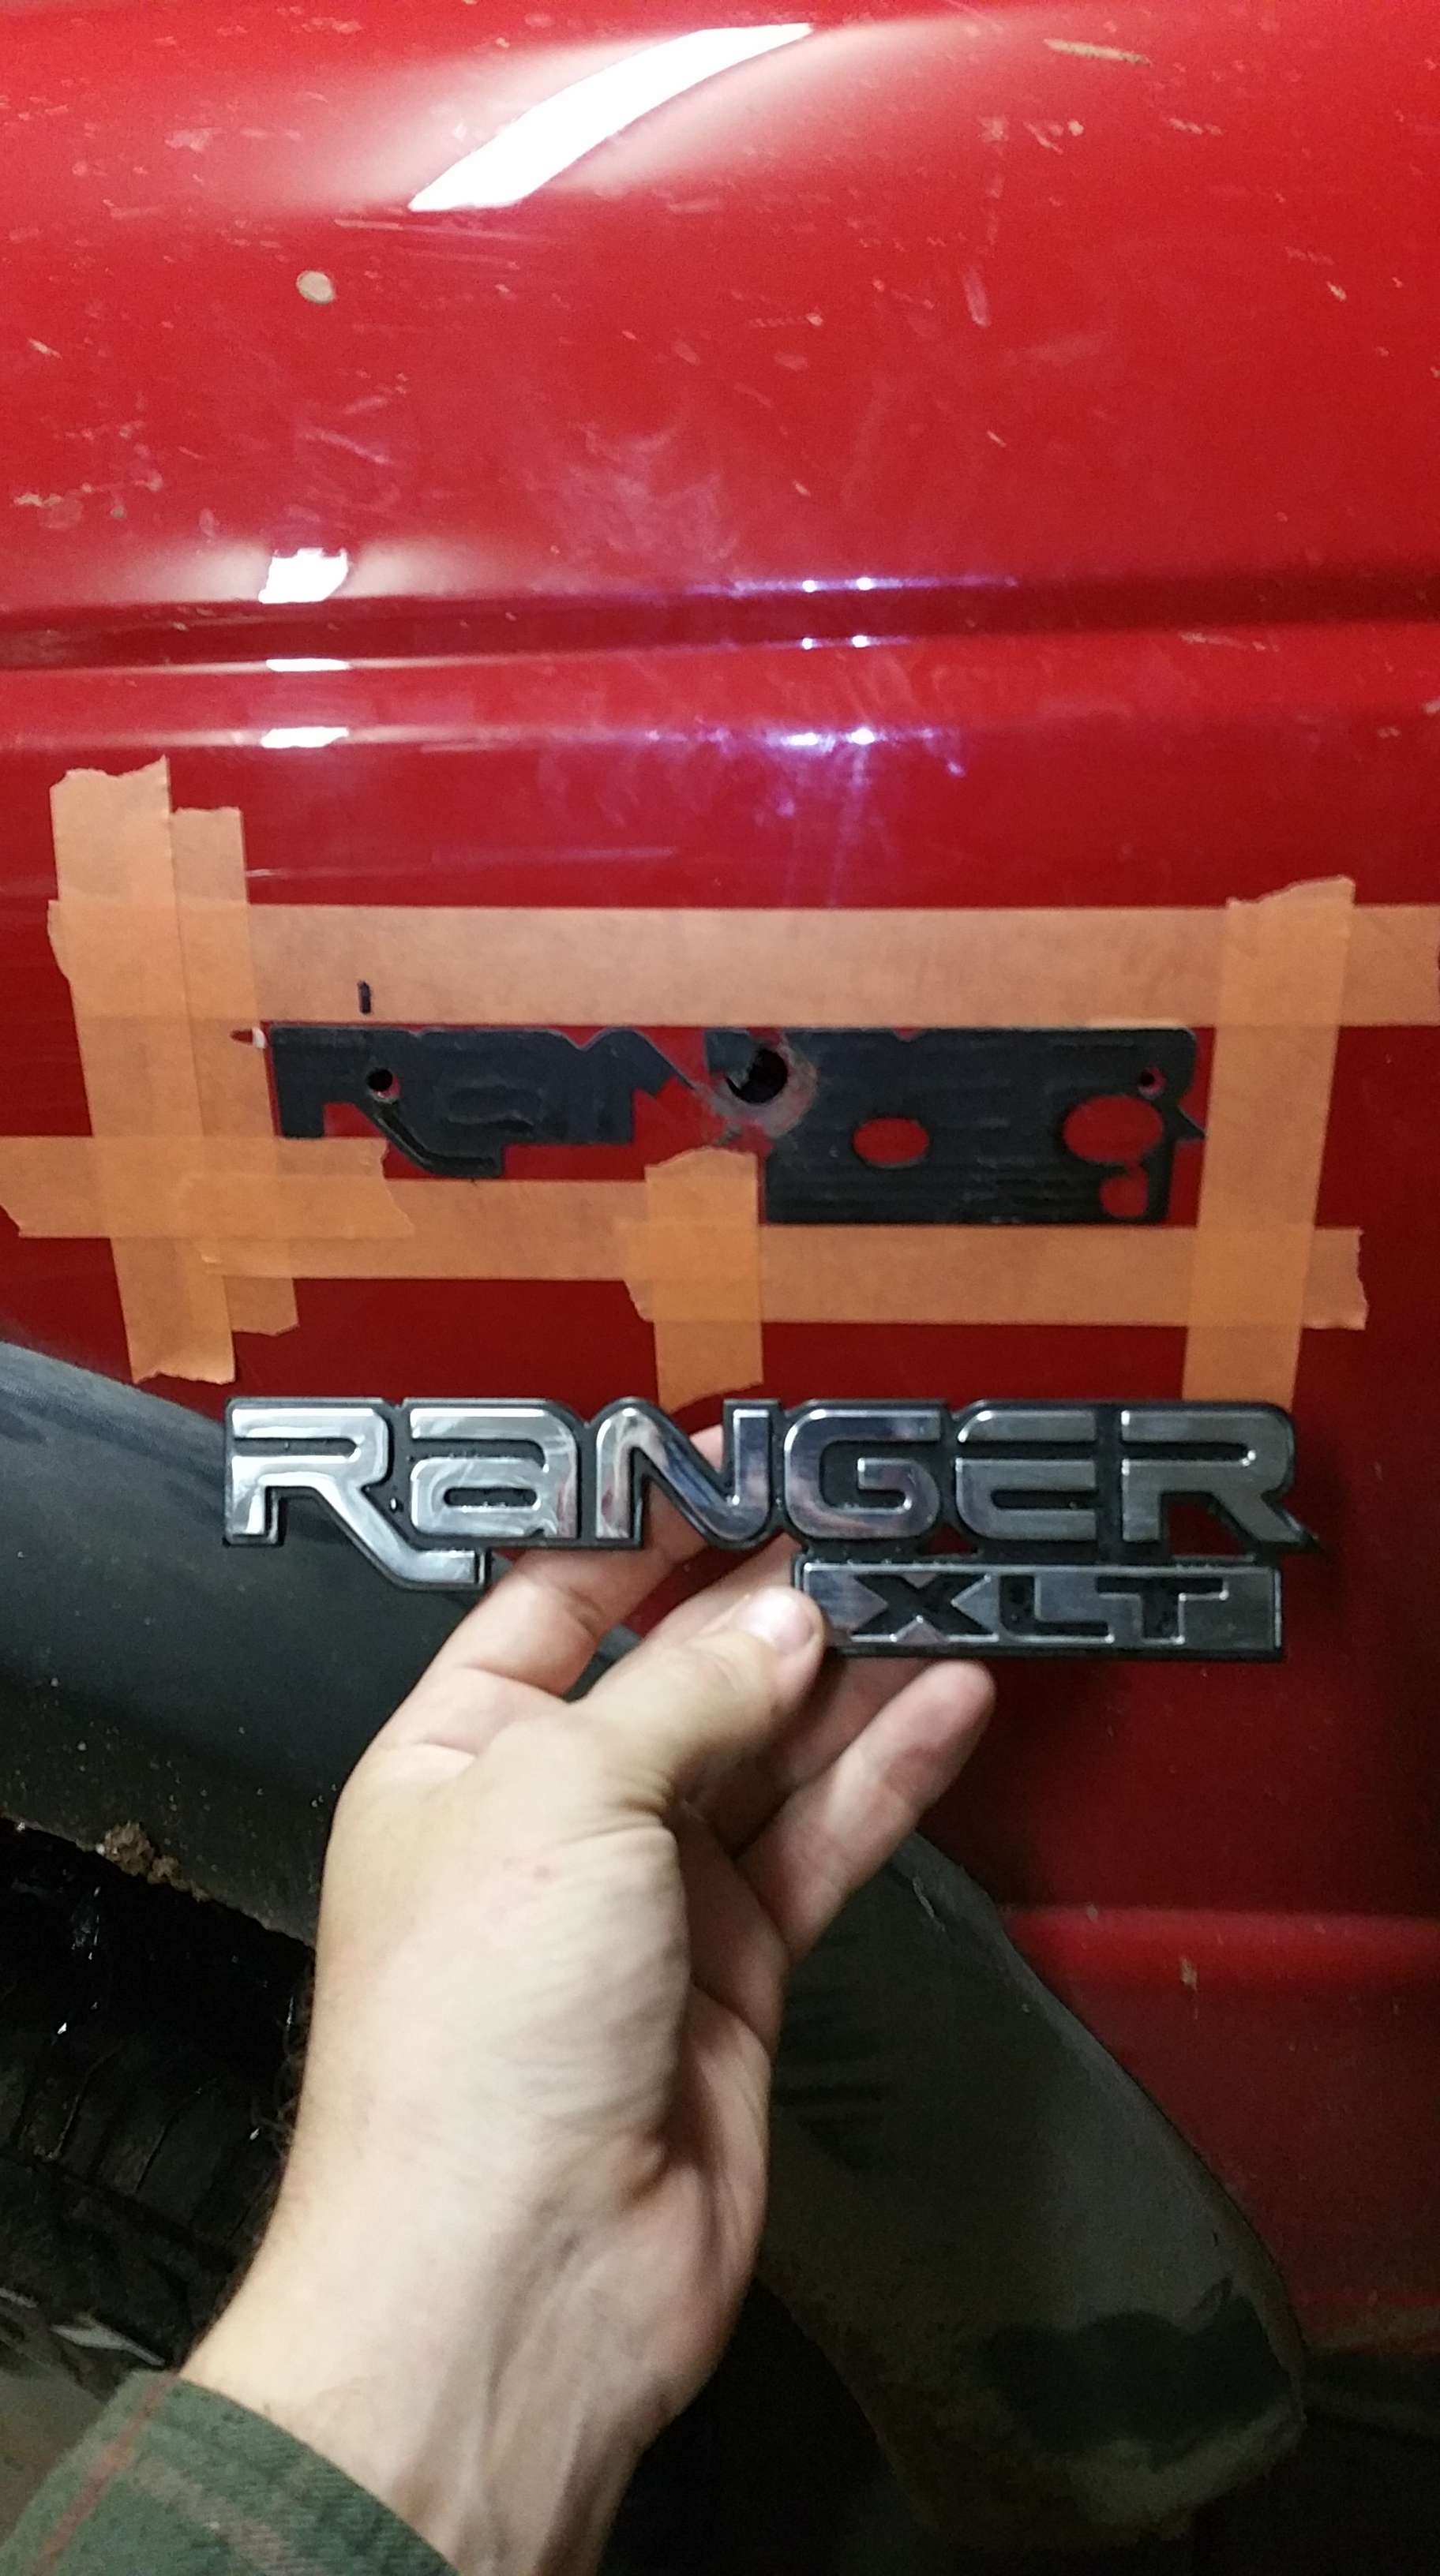
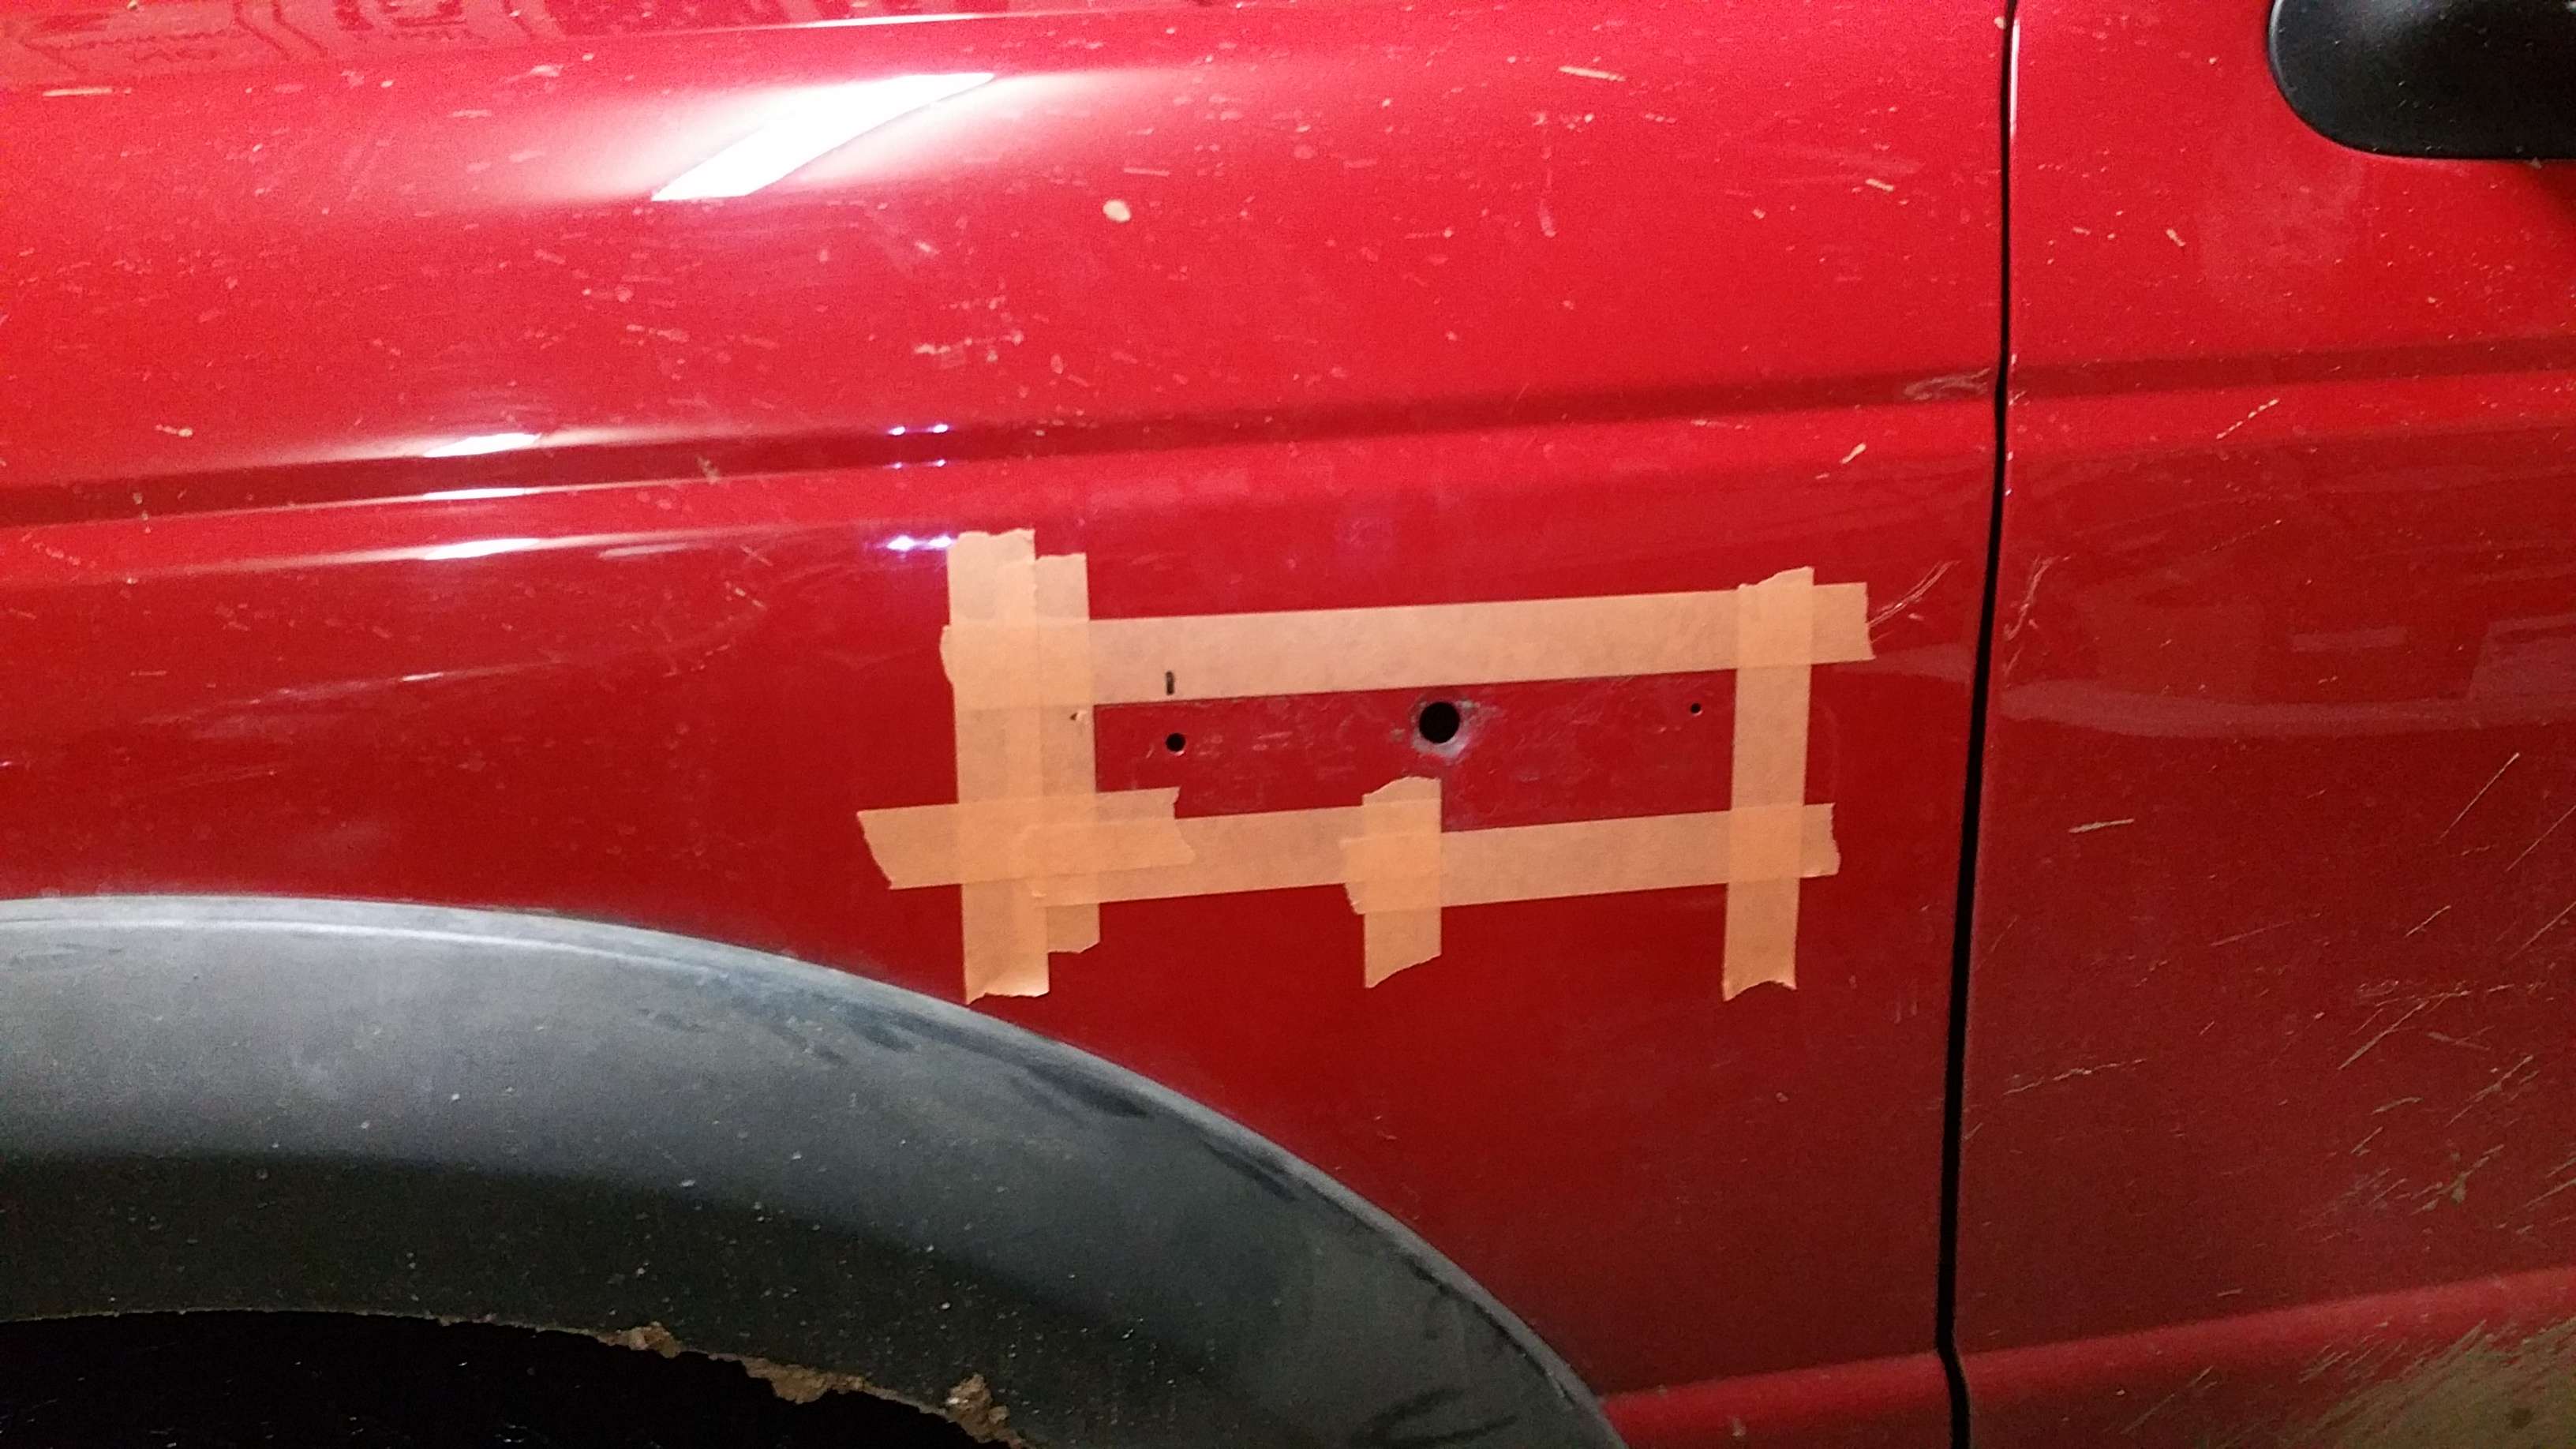
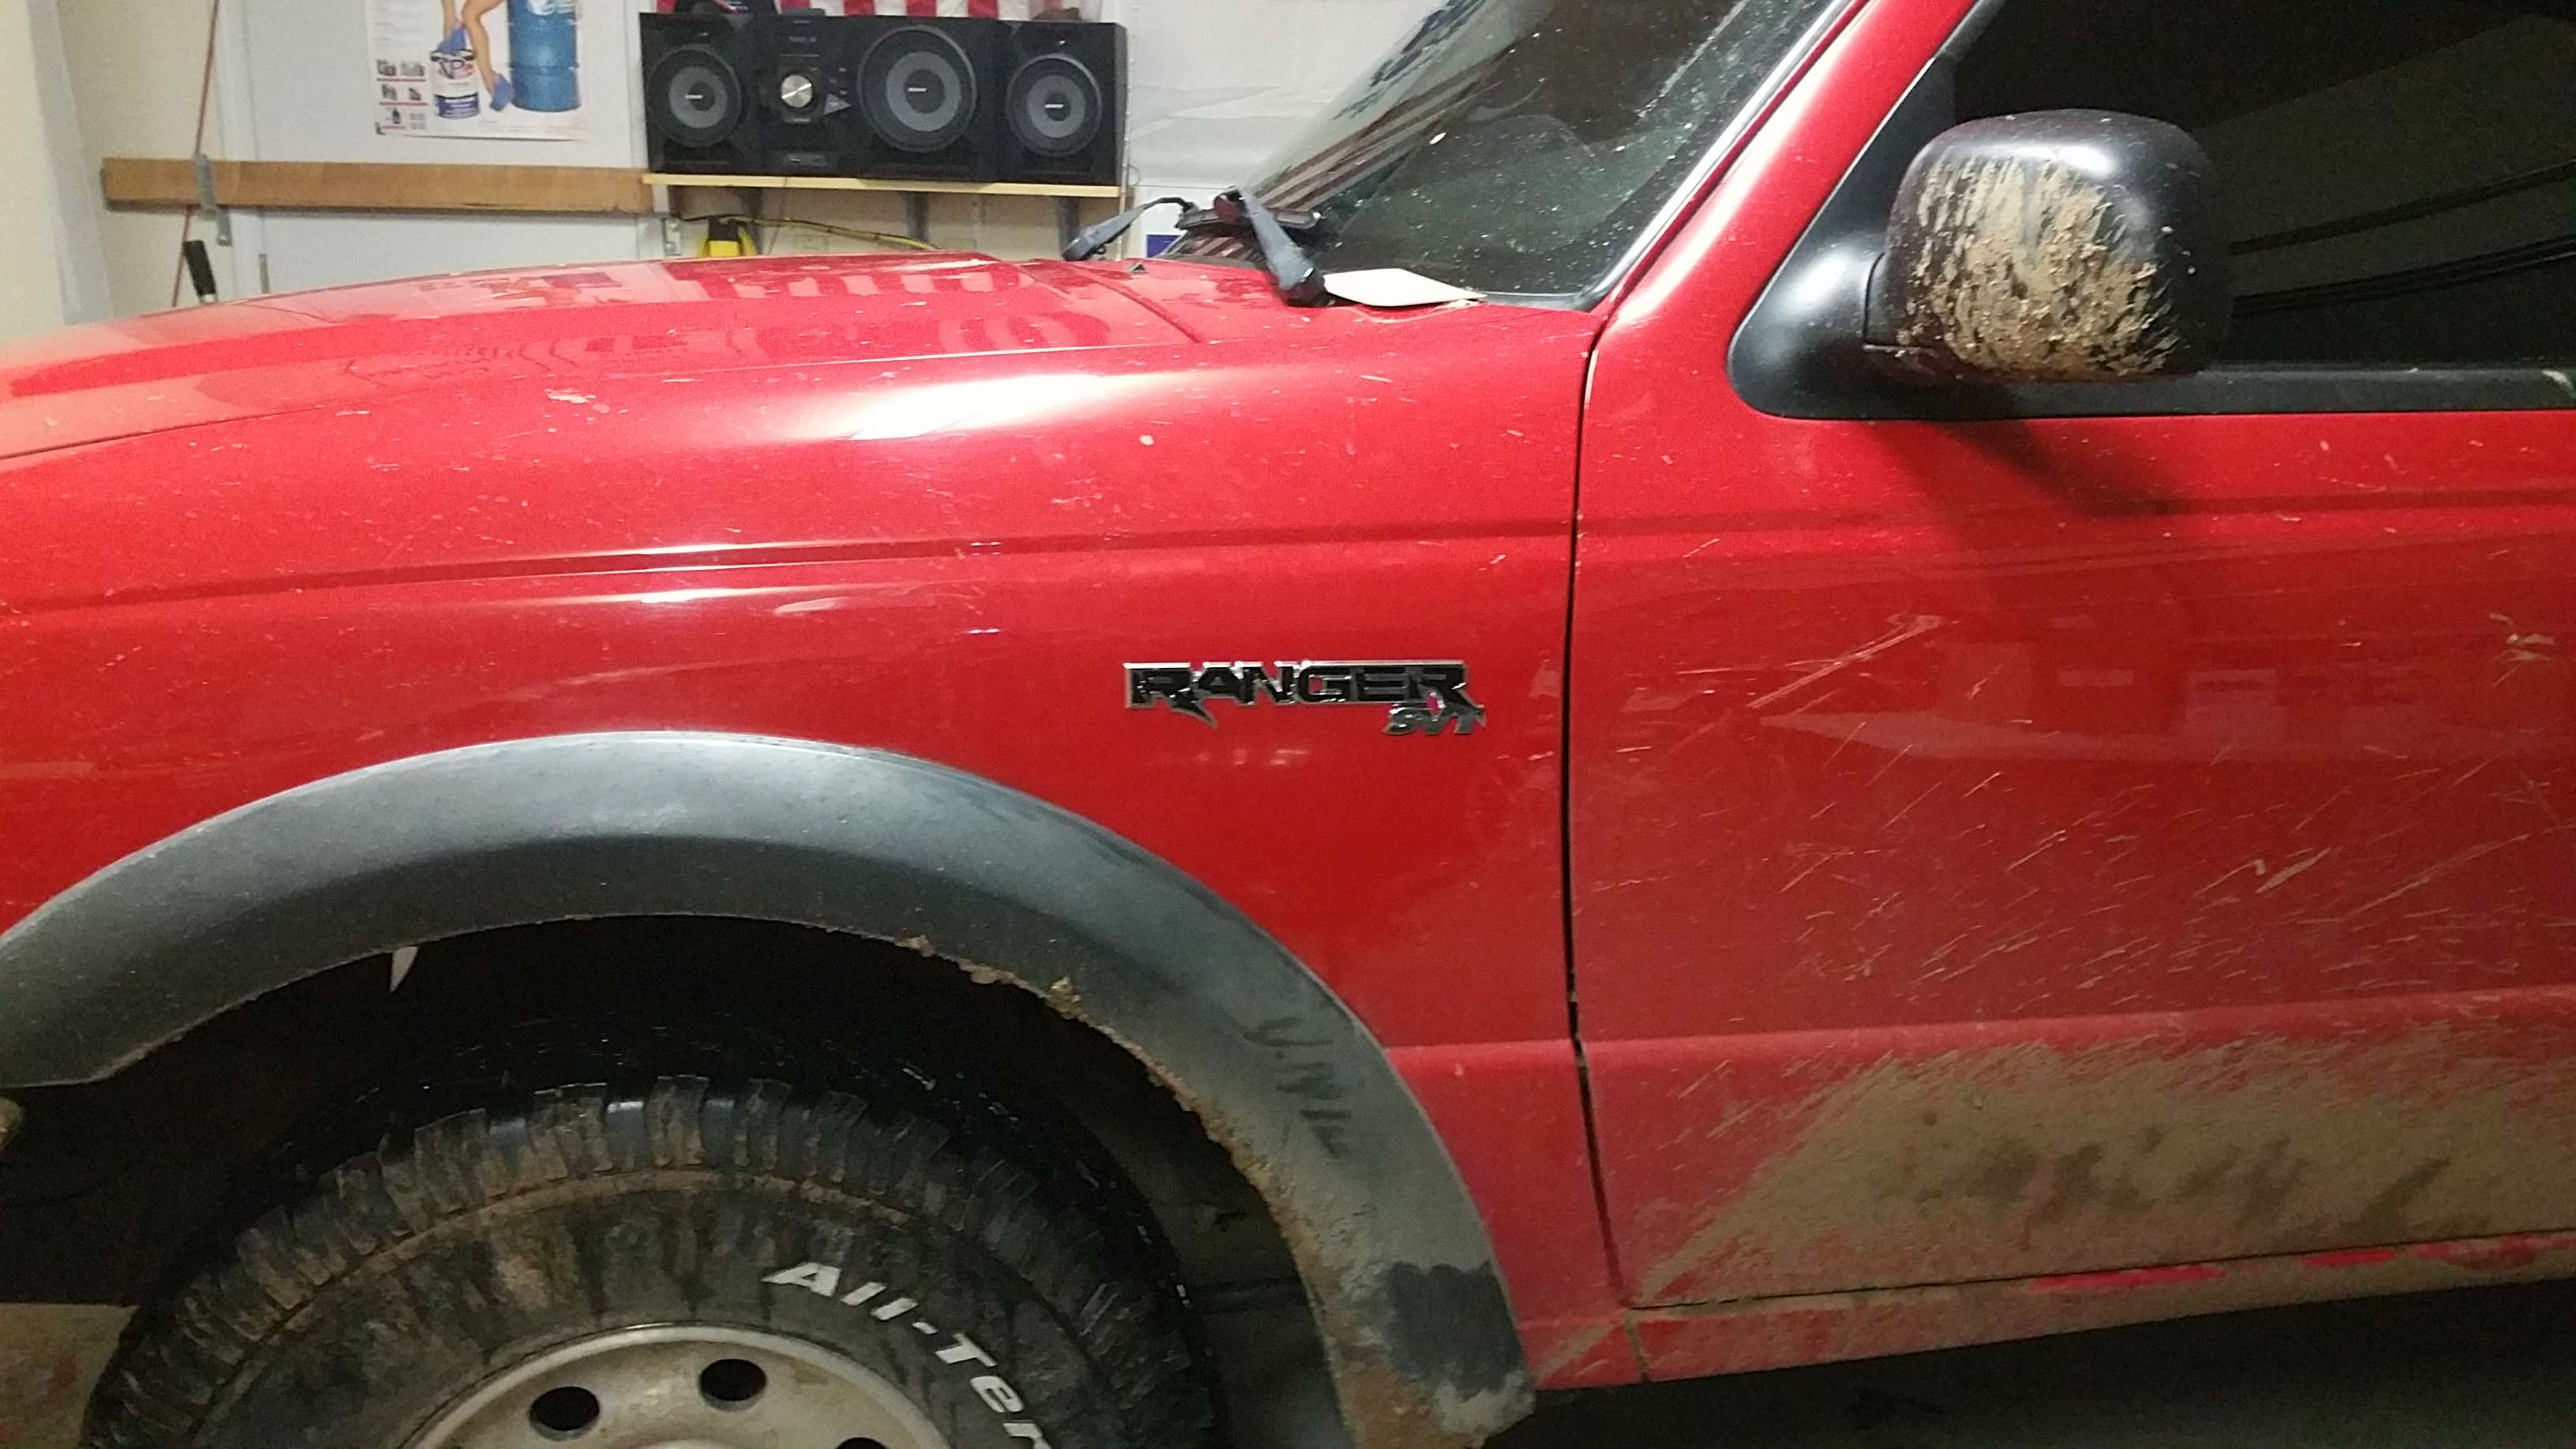
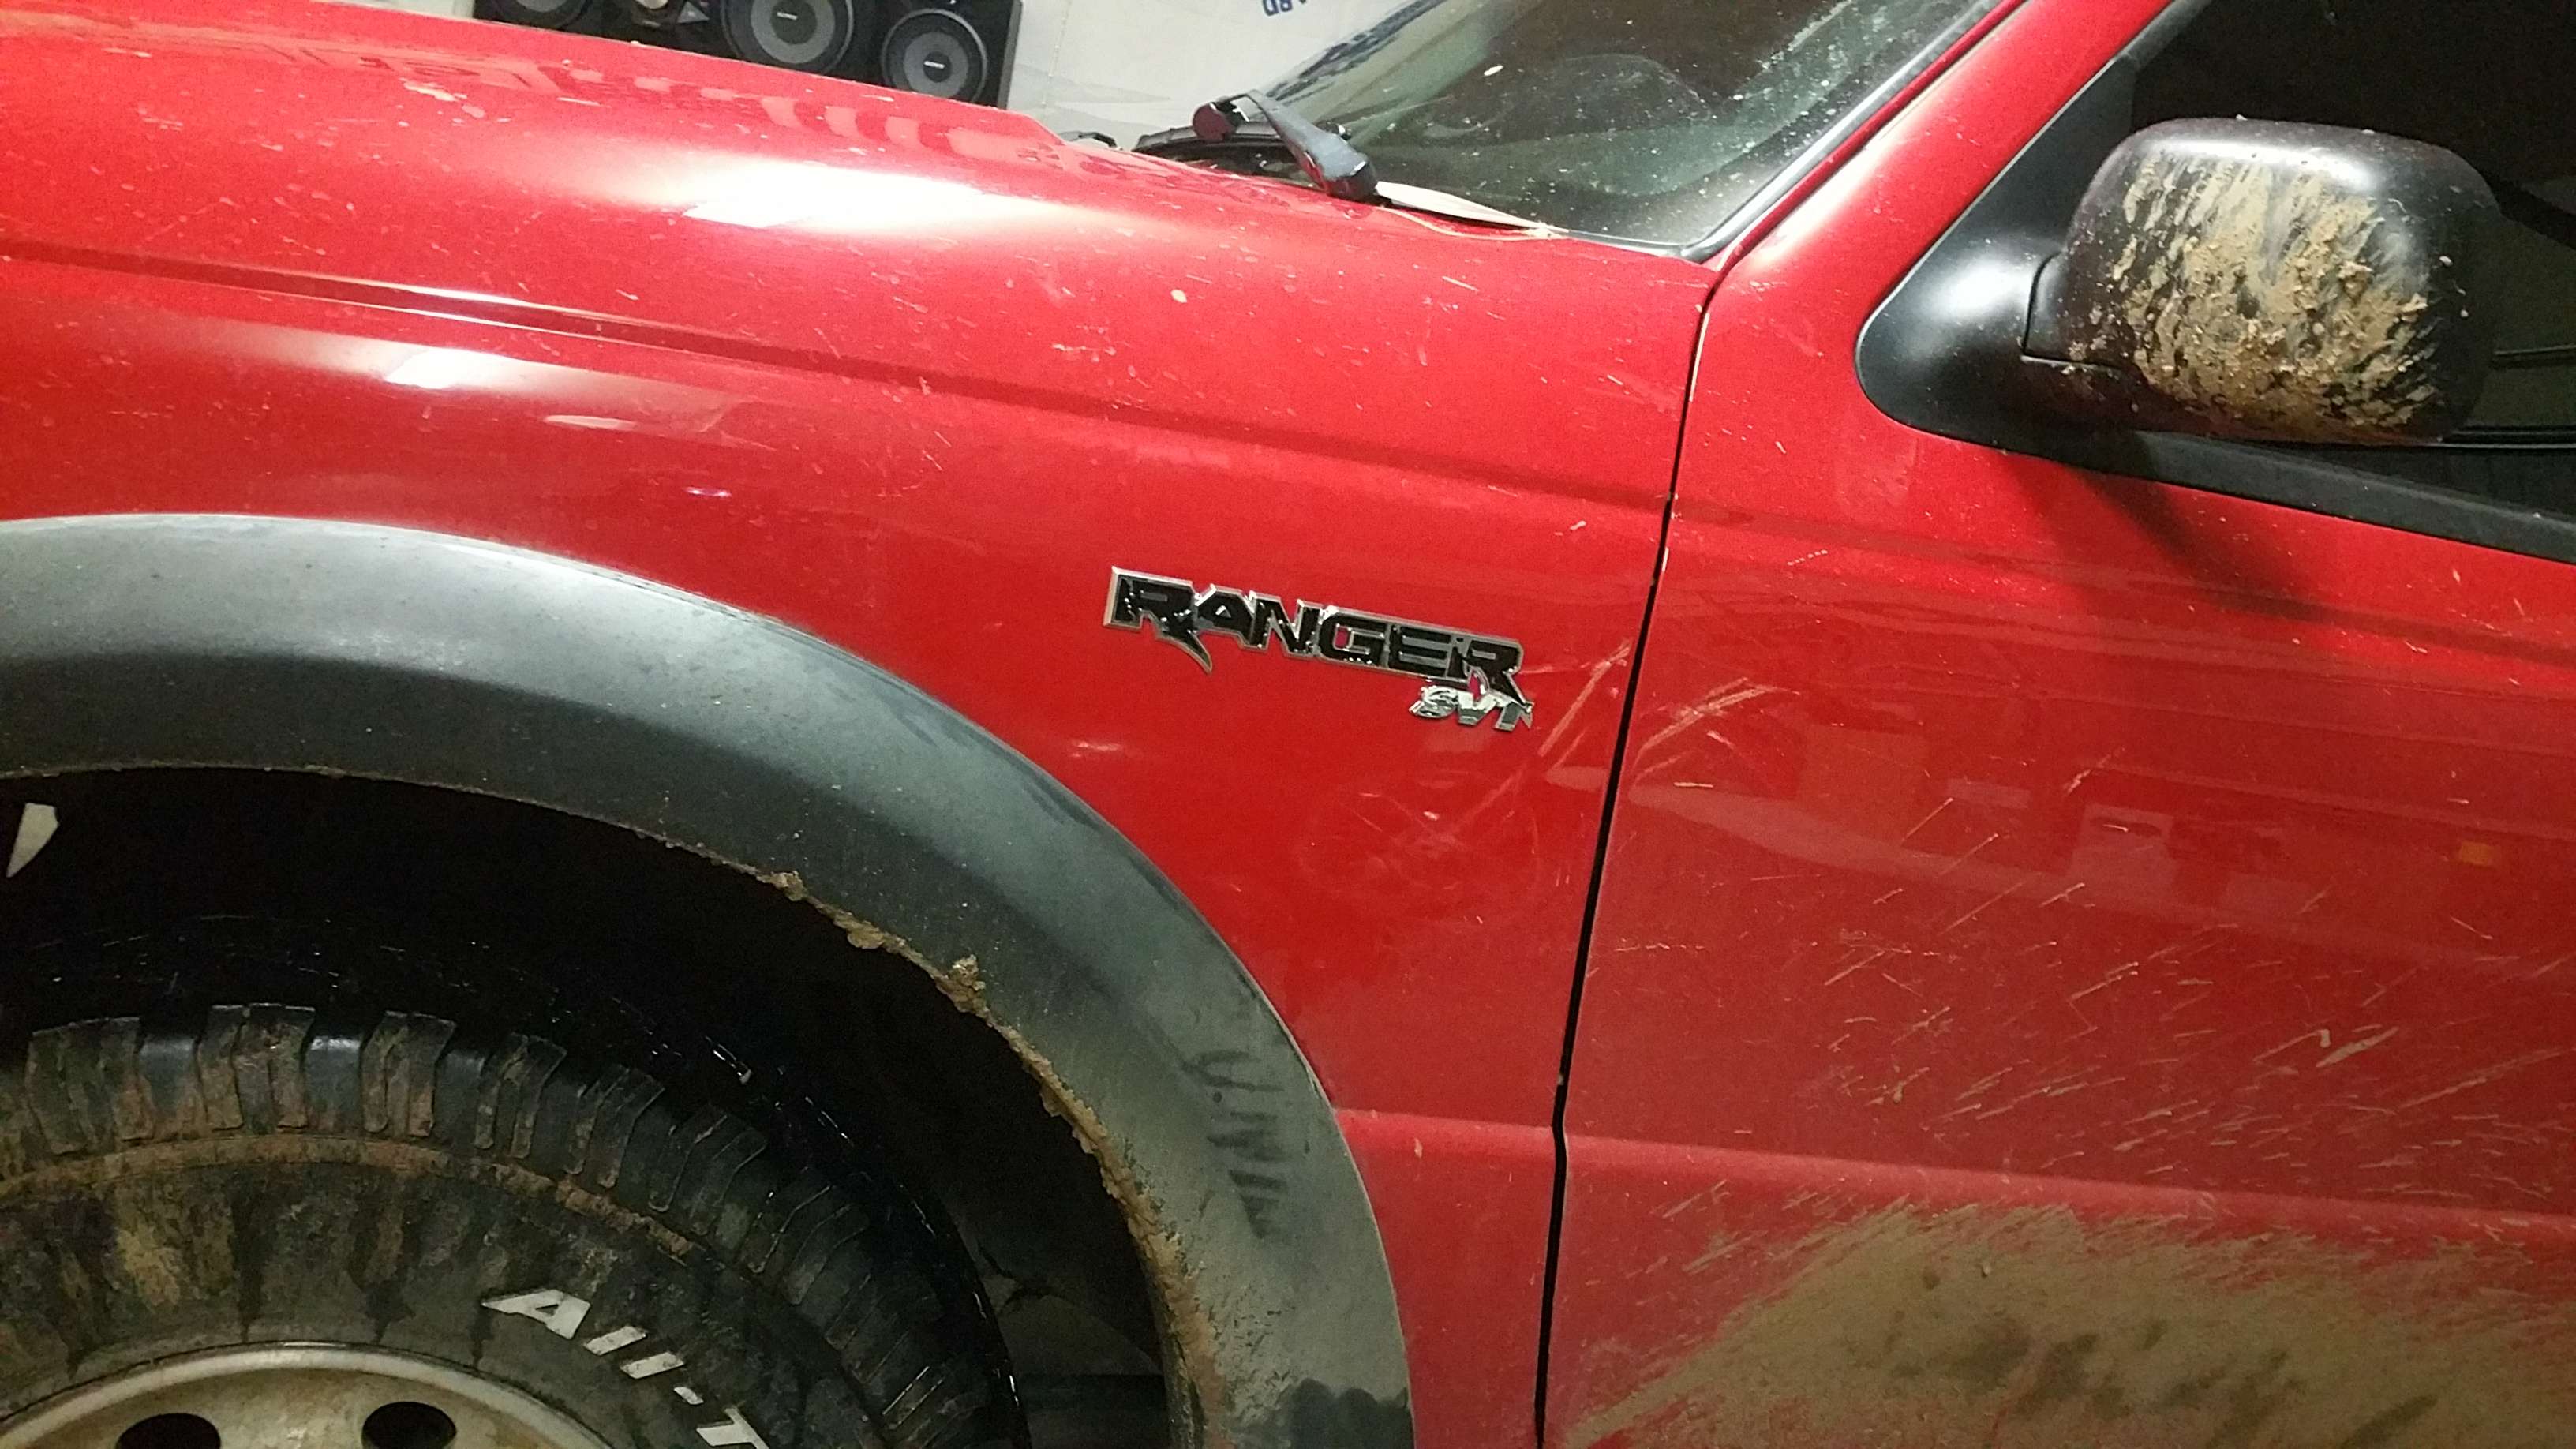
Since I couldn't do any of the big projects yet as I still needed my truck for school, I did some of the smaller stuff. Apparently back in '03 or something, Ford made an SVT Ranger protoype, but nothing ever came of it. I felt this truck was deserving of some new badging, including a supercharger emblem to come later. I found some pretty sweet Ranger SVT emblems on amazon, that mimicked the styling of the Raptor's emblem and had to have them. Since there was never officially a SVT Ranger, I didn't feel guilty for putting them on, whereas every mustang owner who puts cobra and SVT emblems on their car should! I am not mimicking anything lol! GD posers (just kidding, but really). Anyways, more pictures.


Here comes the rest of the dynamat. The only place I couldn't get it was in the dash.
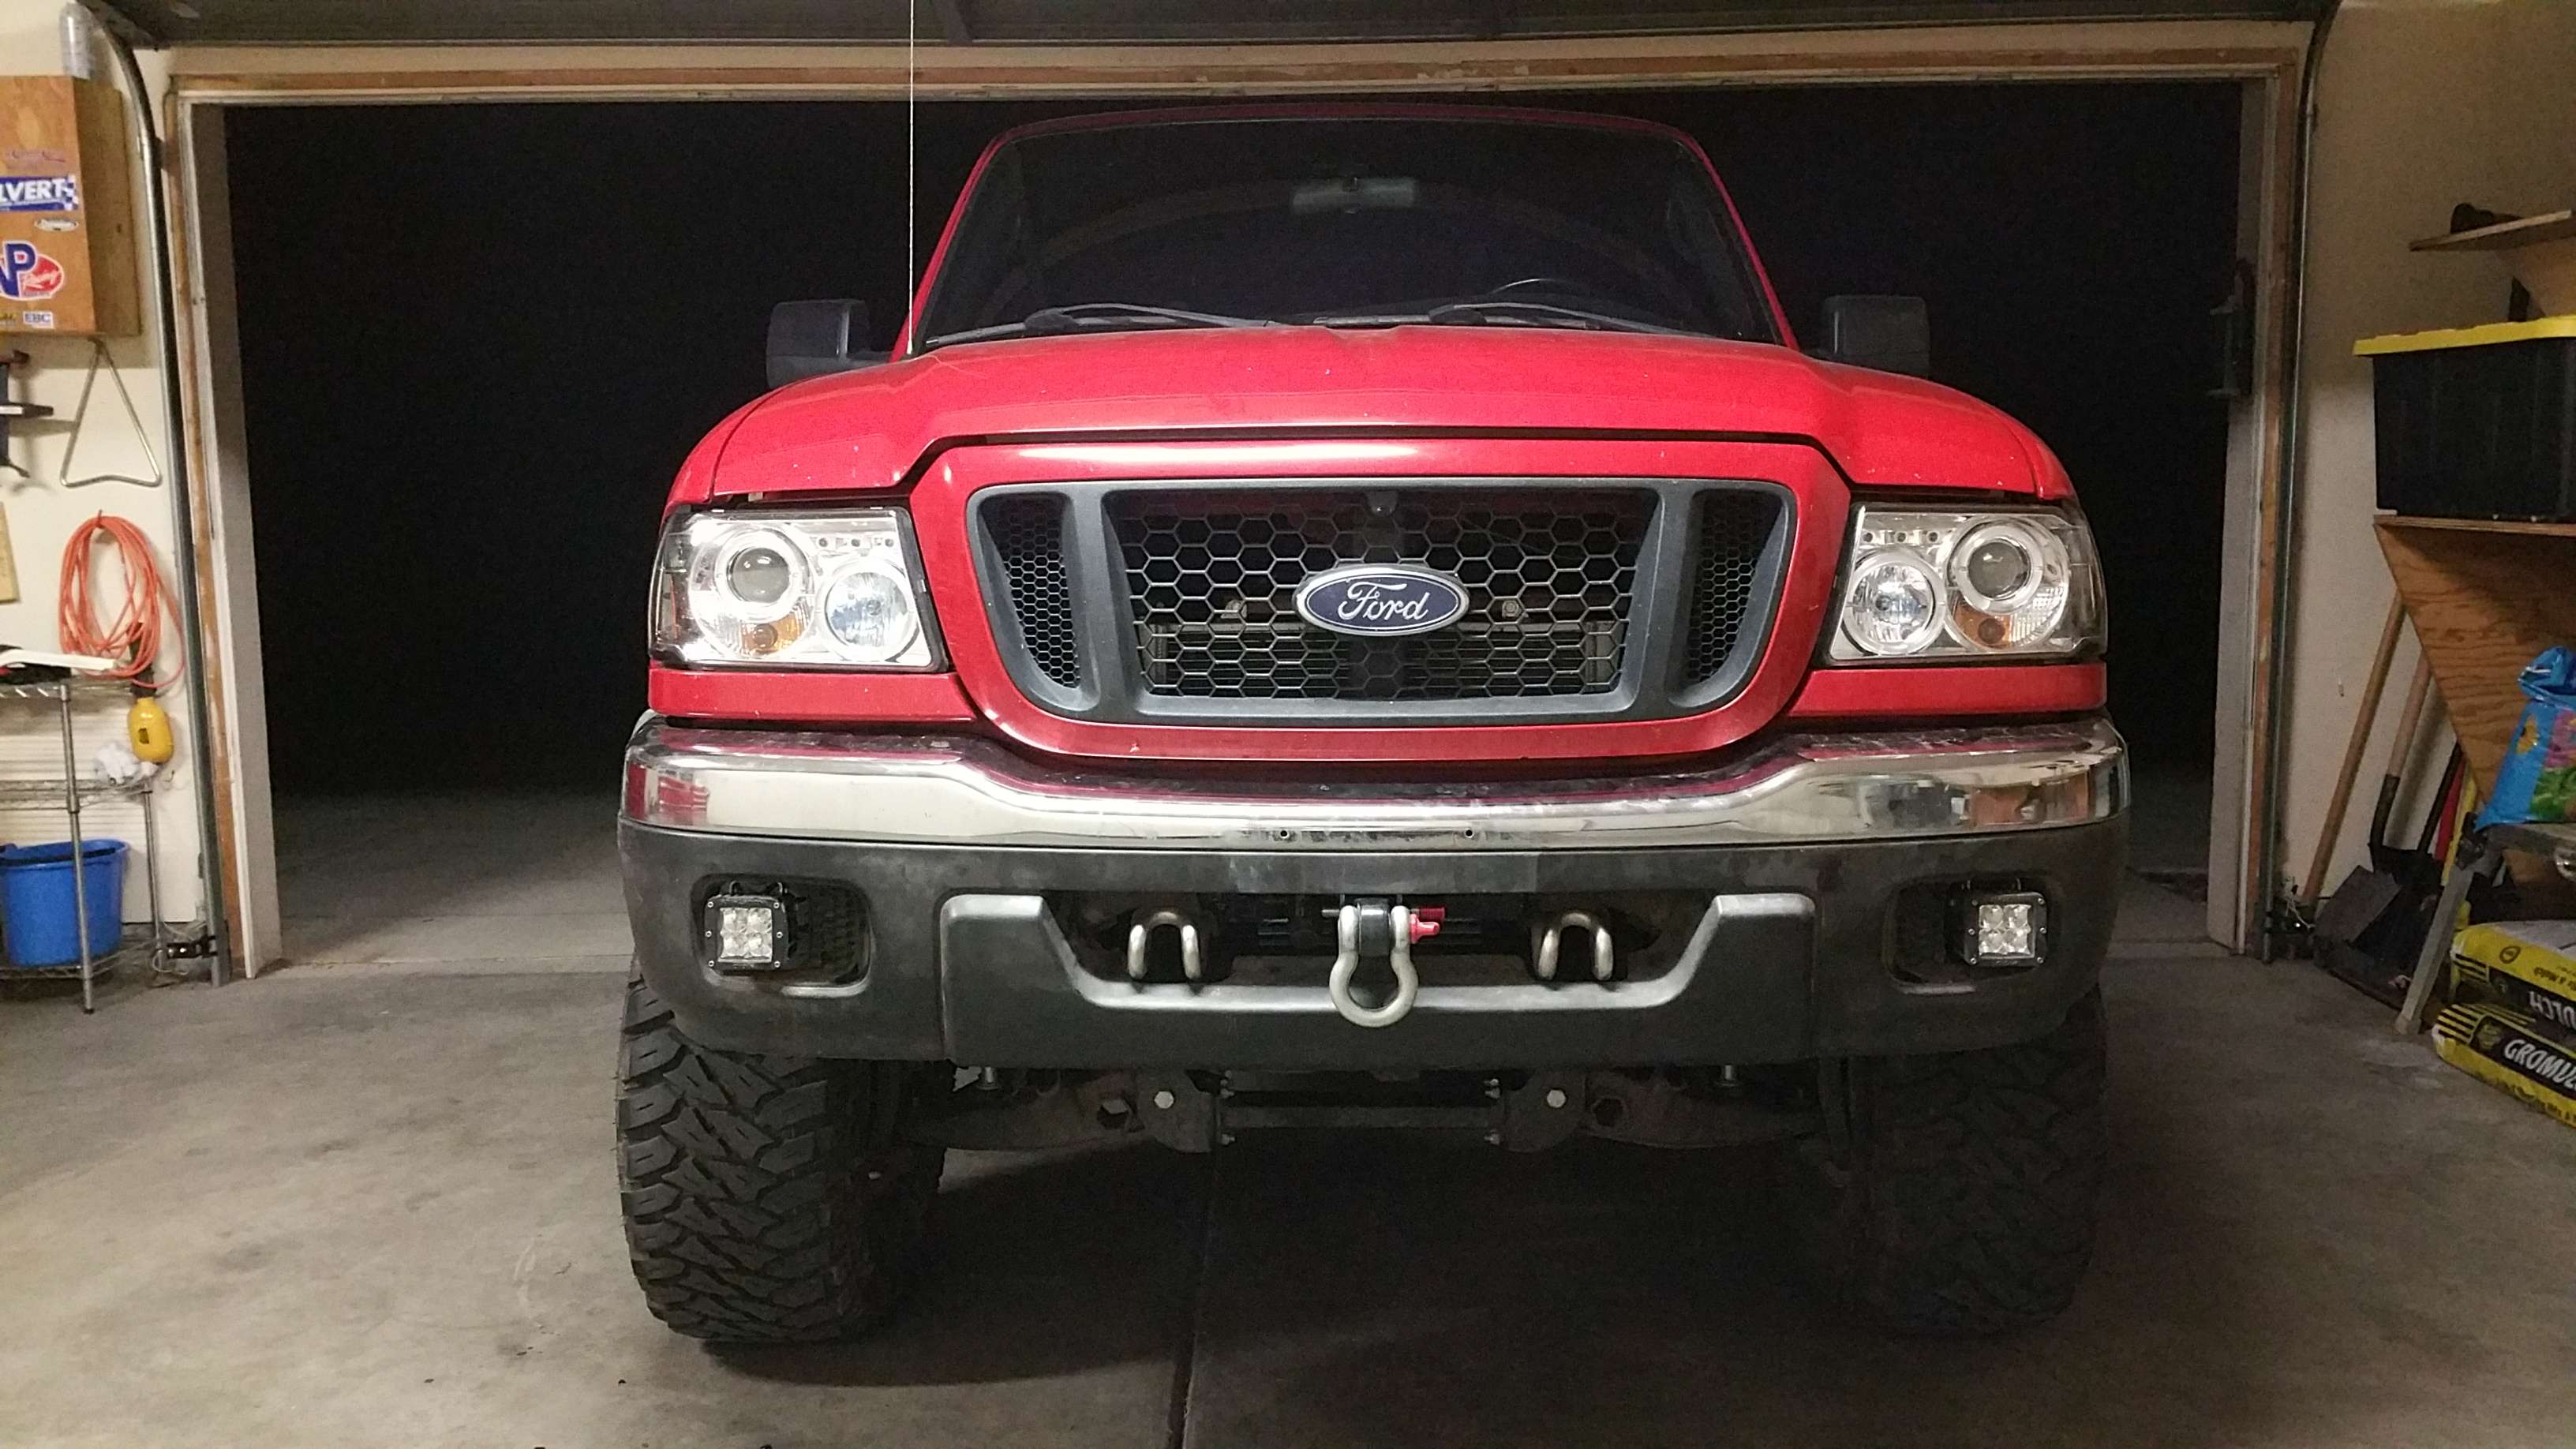
Here are the Rigid LED's I used to replace the stock foglight assemblies. Took a bit of wiring and finagling, but got them bolted on pretty snug. WOW they are freaking bright. I love them.
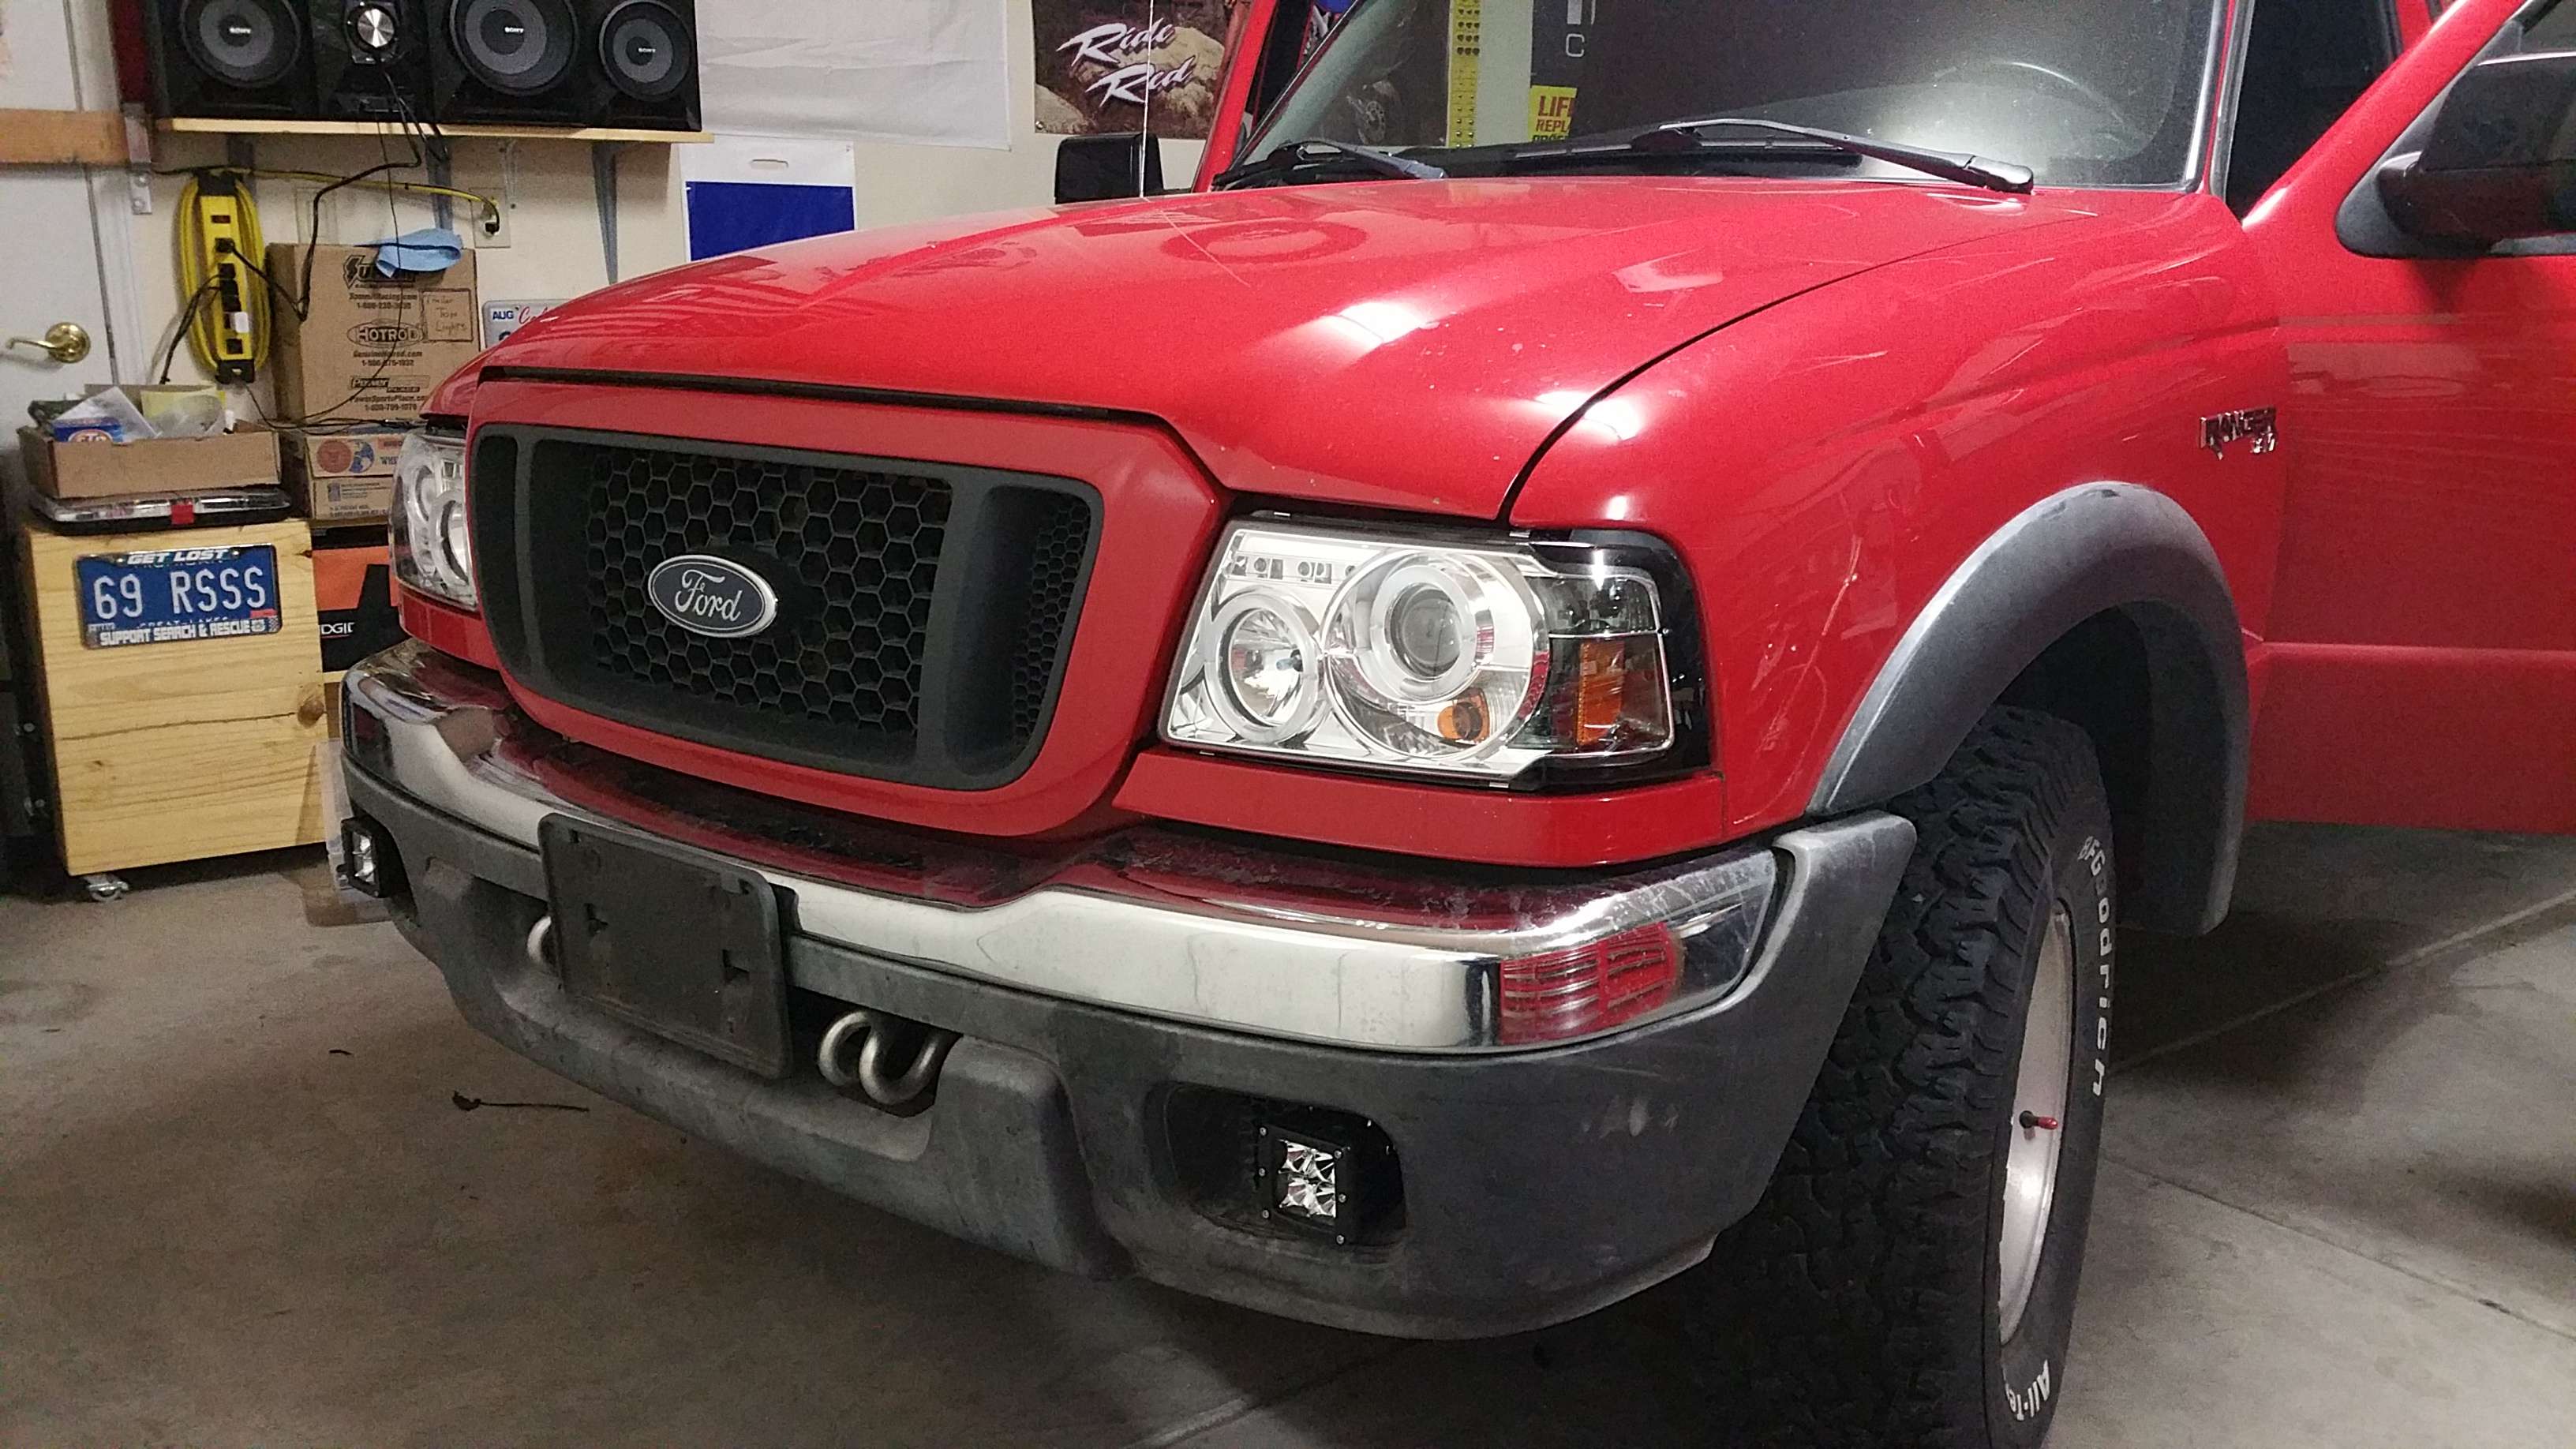
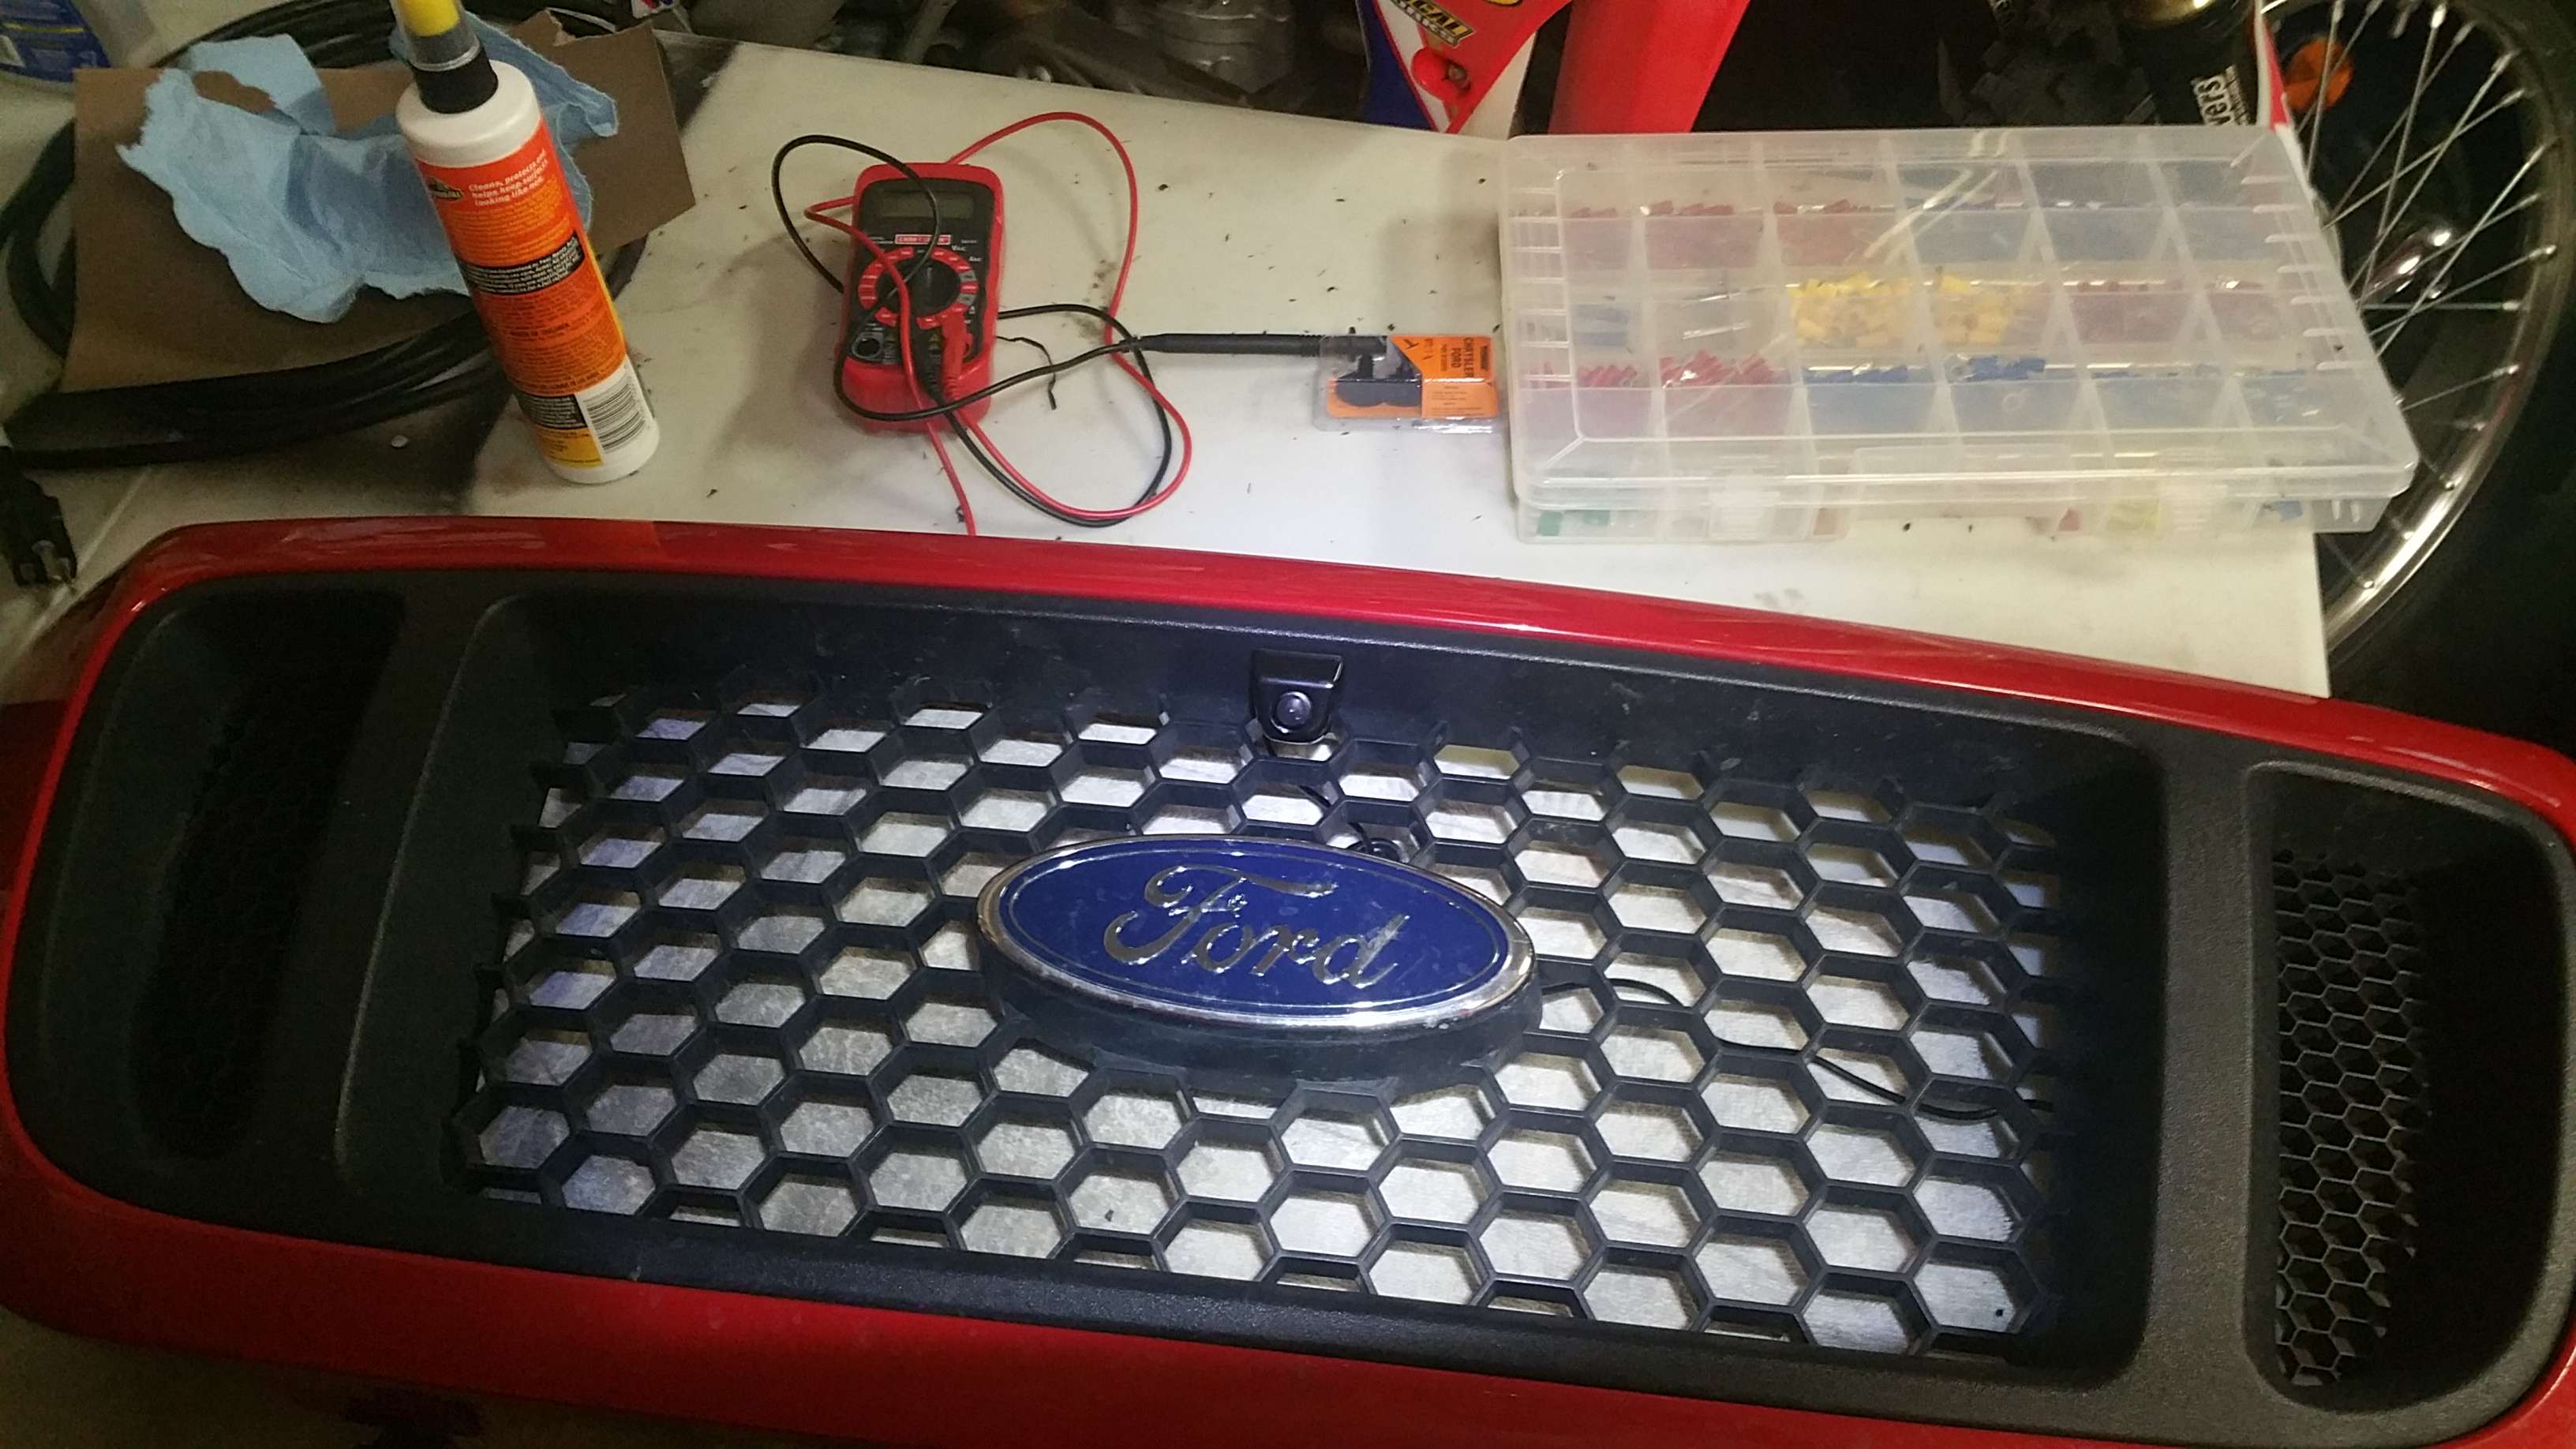
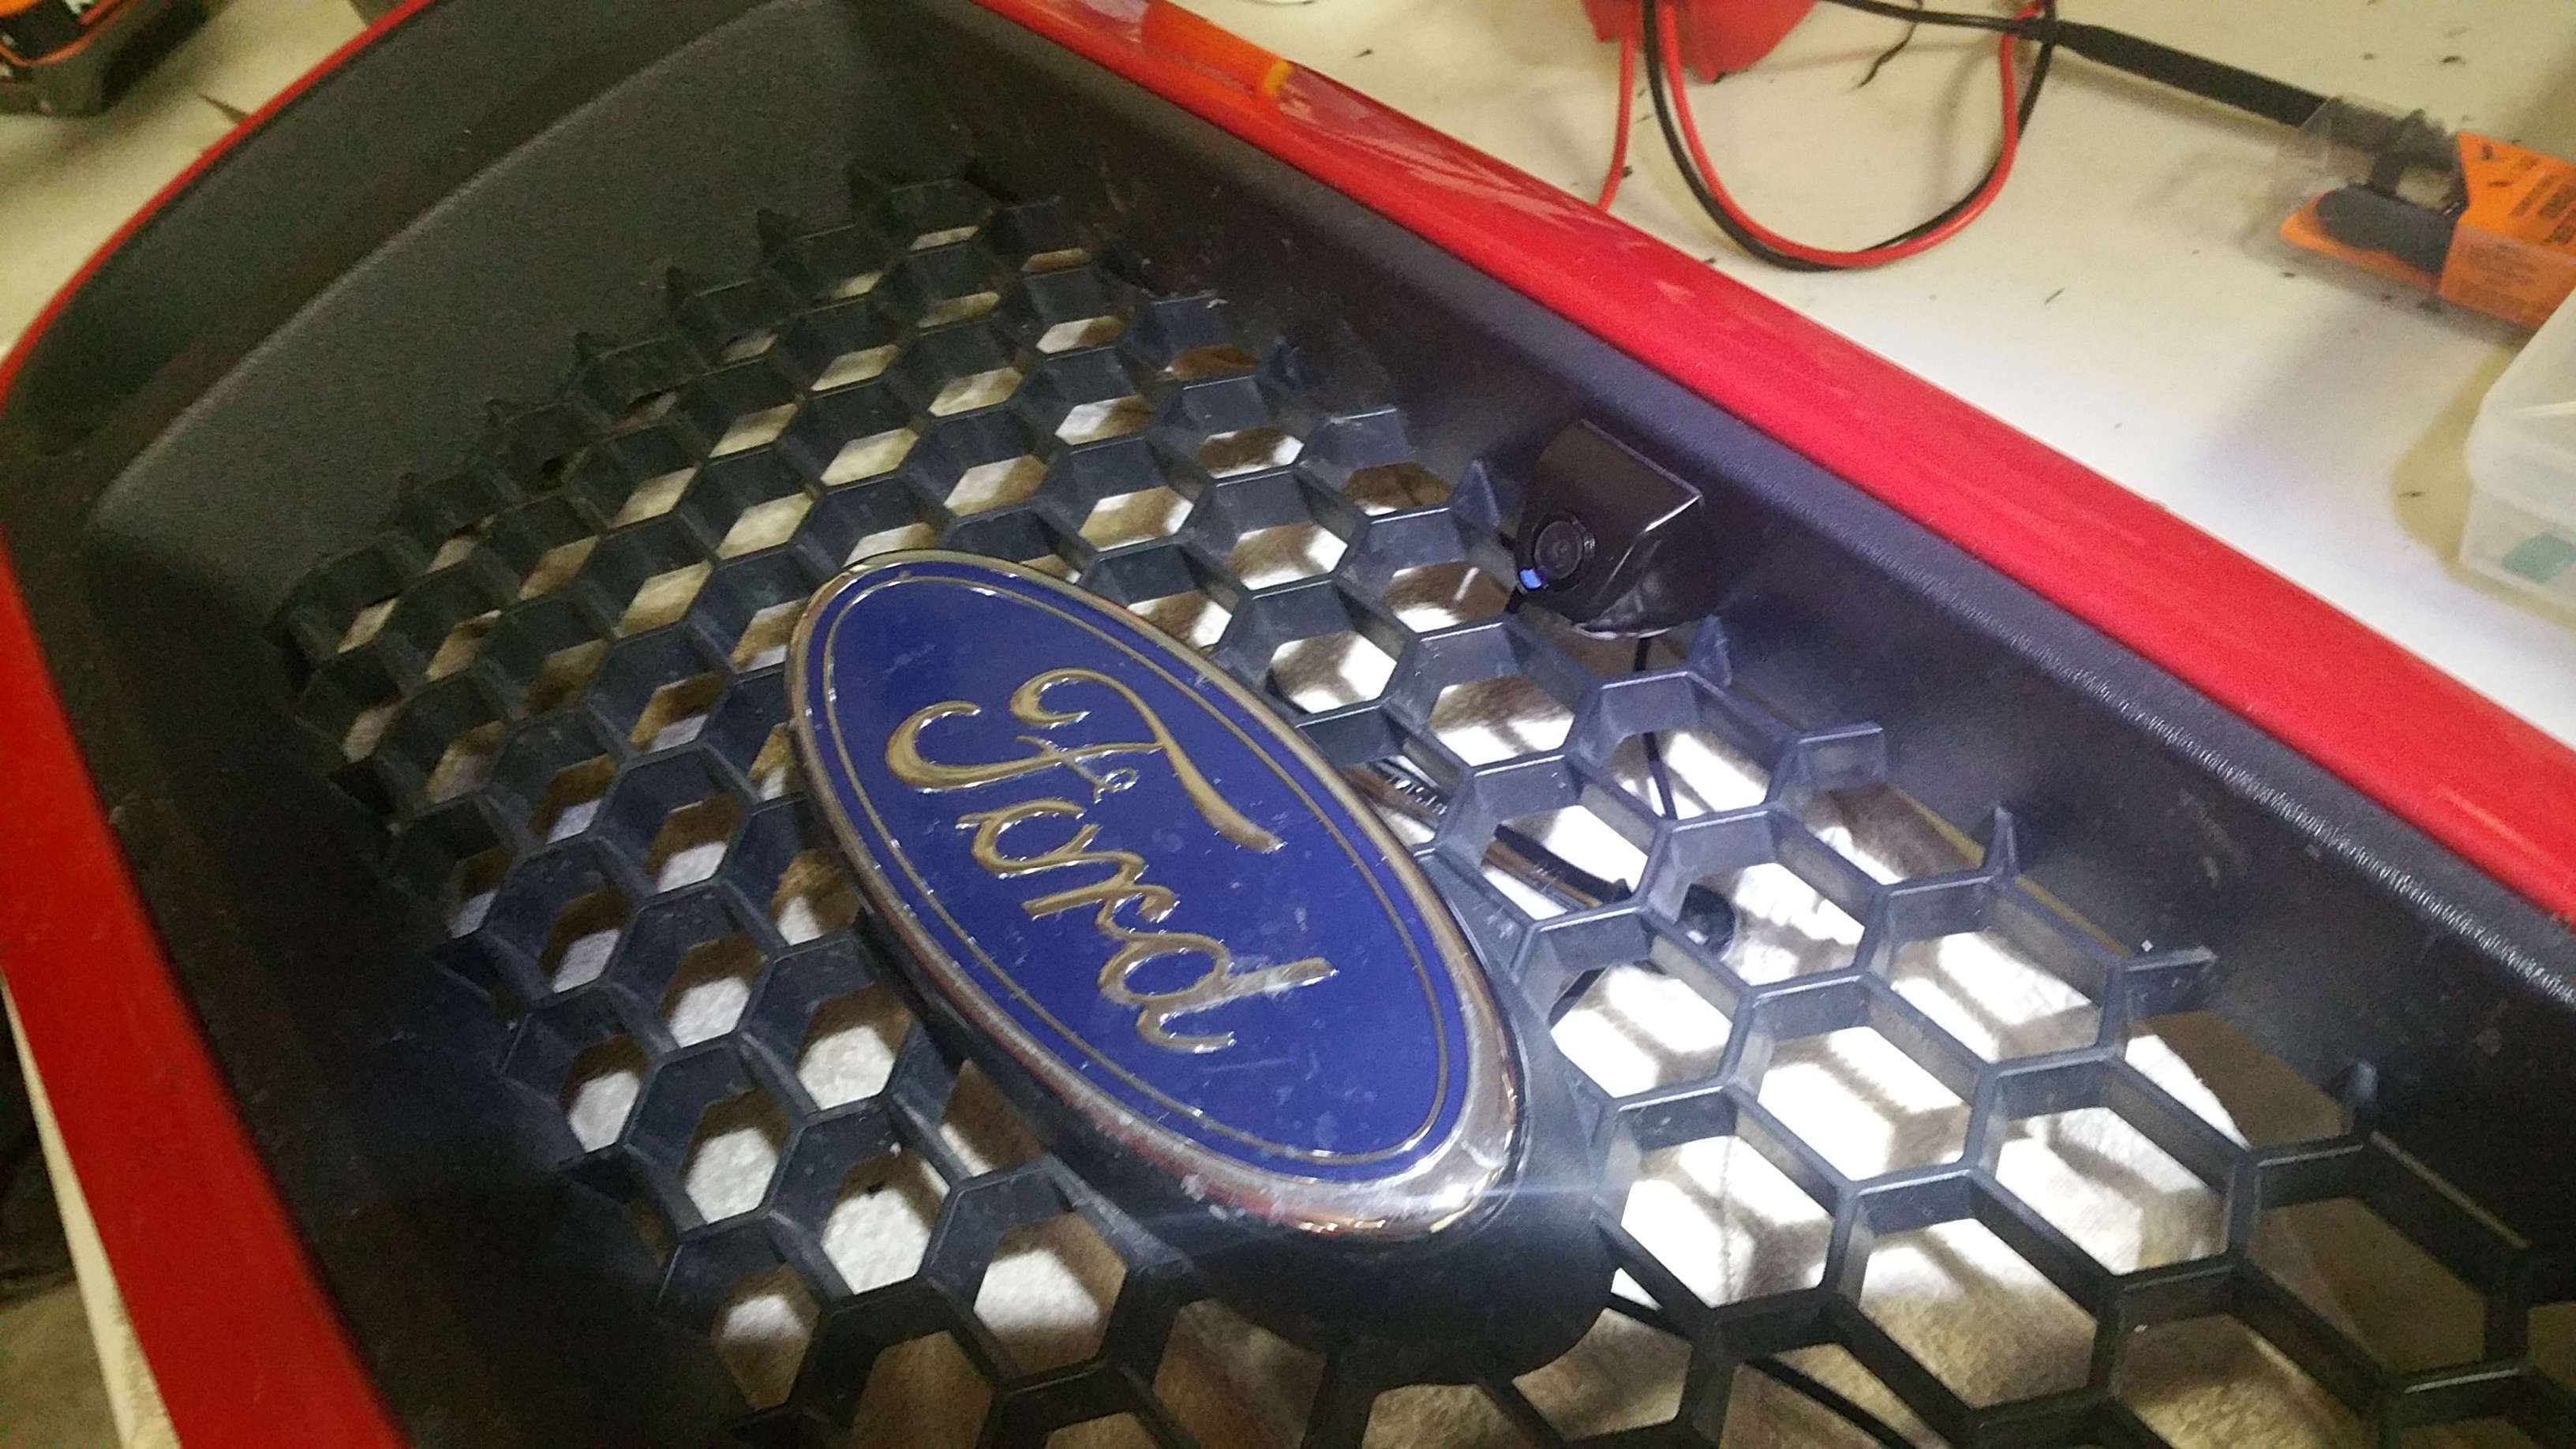
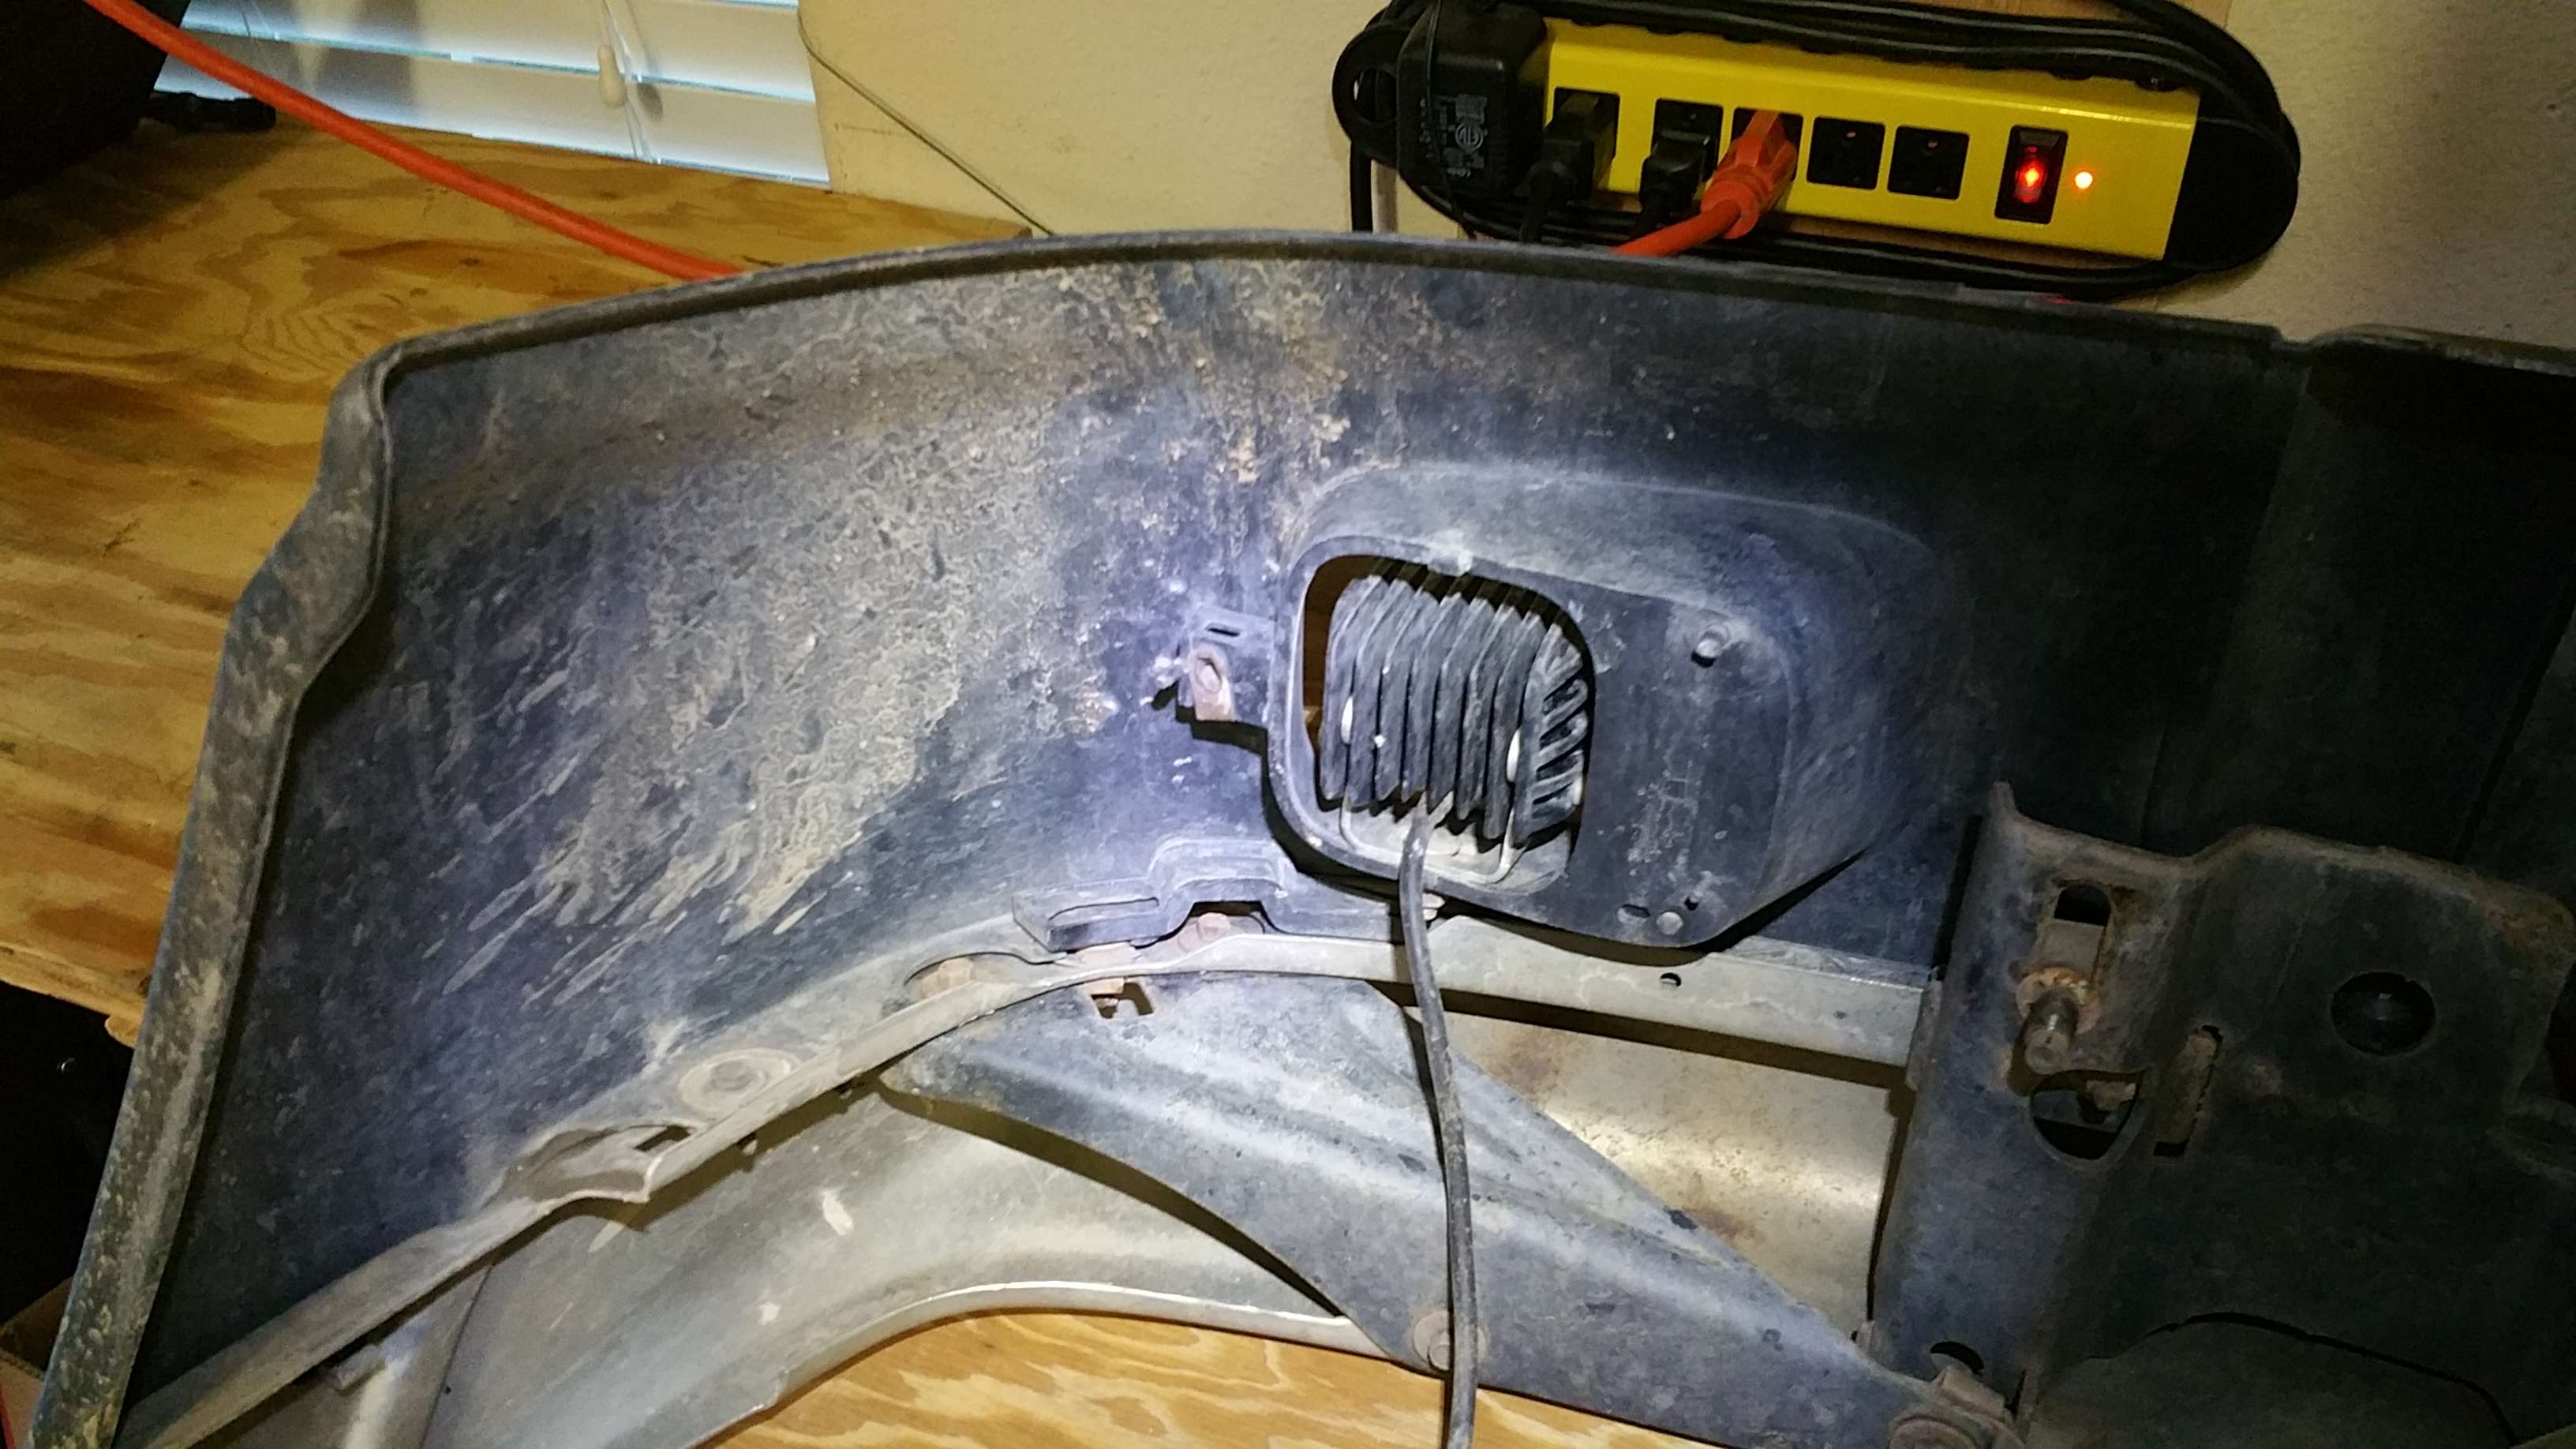
The backup camera is in the license plate frame, but the front one is in the top of the grill. I am not impressed with the quality of it, but it works. I had to install it slightly crooked to get the picture on the screen to line up and be square (slightly annoying). You don't ever notice it thought just from looking at the truck.
Since I couldn't do any of the big projects yet as I still needed my truck for school, I did some of the smaller stuff. Apparently back in '03 or something, Ford made an SVT Ranger protoype, but nothing ever came of it. I felt this truck was deserving of some new badging, including a supercharger emblem to come later. I found some pretty sweet Ranger SVT emblems on amazon, that mimicked the styling of the Raptor's emblem and had to have them. Since there was never officially a SVT Ranger, I didn't feel guilty for putting them on, whereas every mustang owner who puts cobra and SVT emblems on their car should! I am not mimicking anything lol! GD posers (just kidding, but really). Anyways, more pictures.
Here comes the rest of the dynamat. The only place I couldn't get it was in the dash.
Here are the Rigid LED's I used to replace the stock foglight assemblies. Took a bit of wiring and finagling, but got them bolted on pretty snug. WOW they are freaking bright. I love them.
The backup camera is in the license plate frame, but the front one is in the top of the grill. I am not impressed with the quality of it, but it works. I had to install it slightly crooked to get the picture on the screen to line up and be square (slightly annoying). You don't ever notice it thought just from looking at the truck.
#9
10-28-2016
Join Date: Jul 2015
Location: Reno, Nevada
Posts: 52
Likes: 0
Received 0 Likes
on
0 Posts
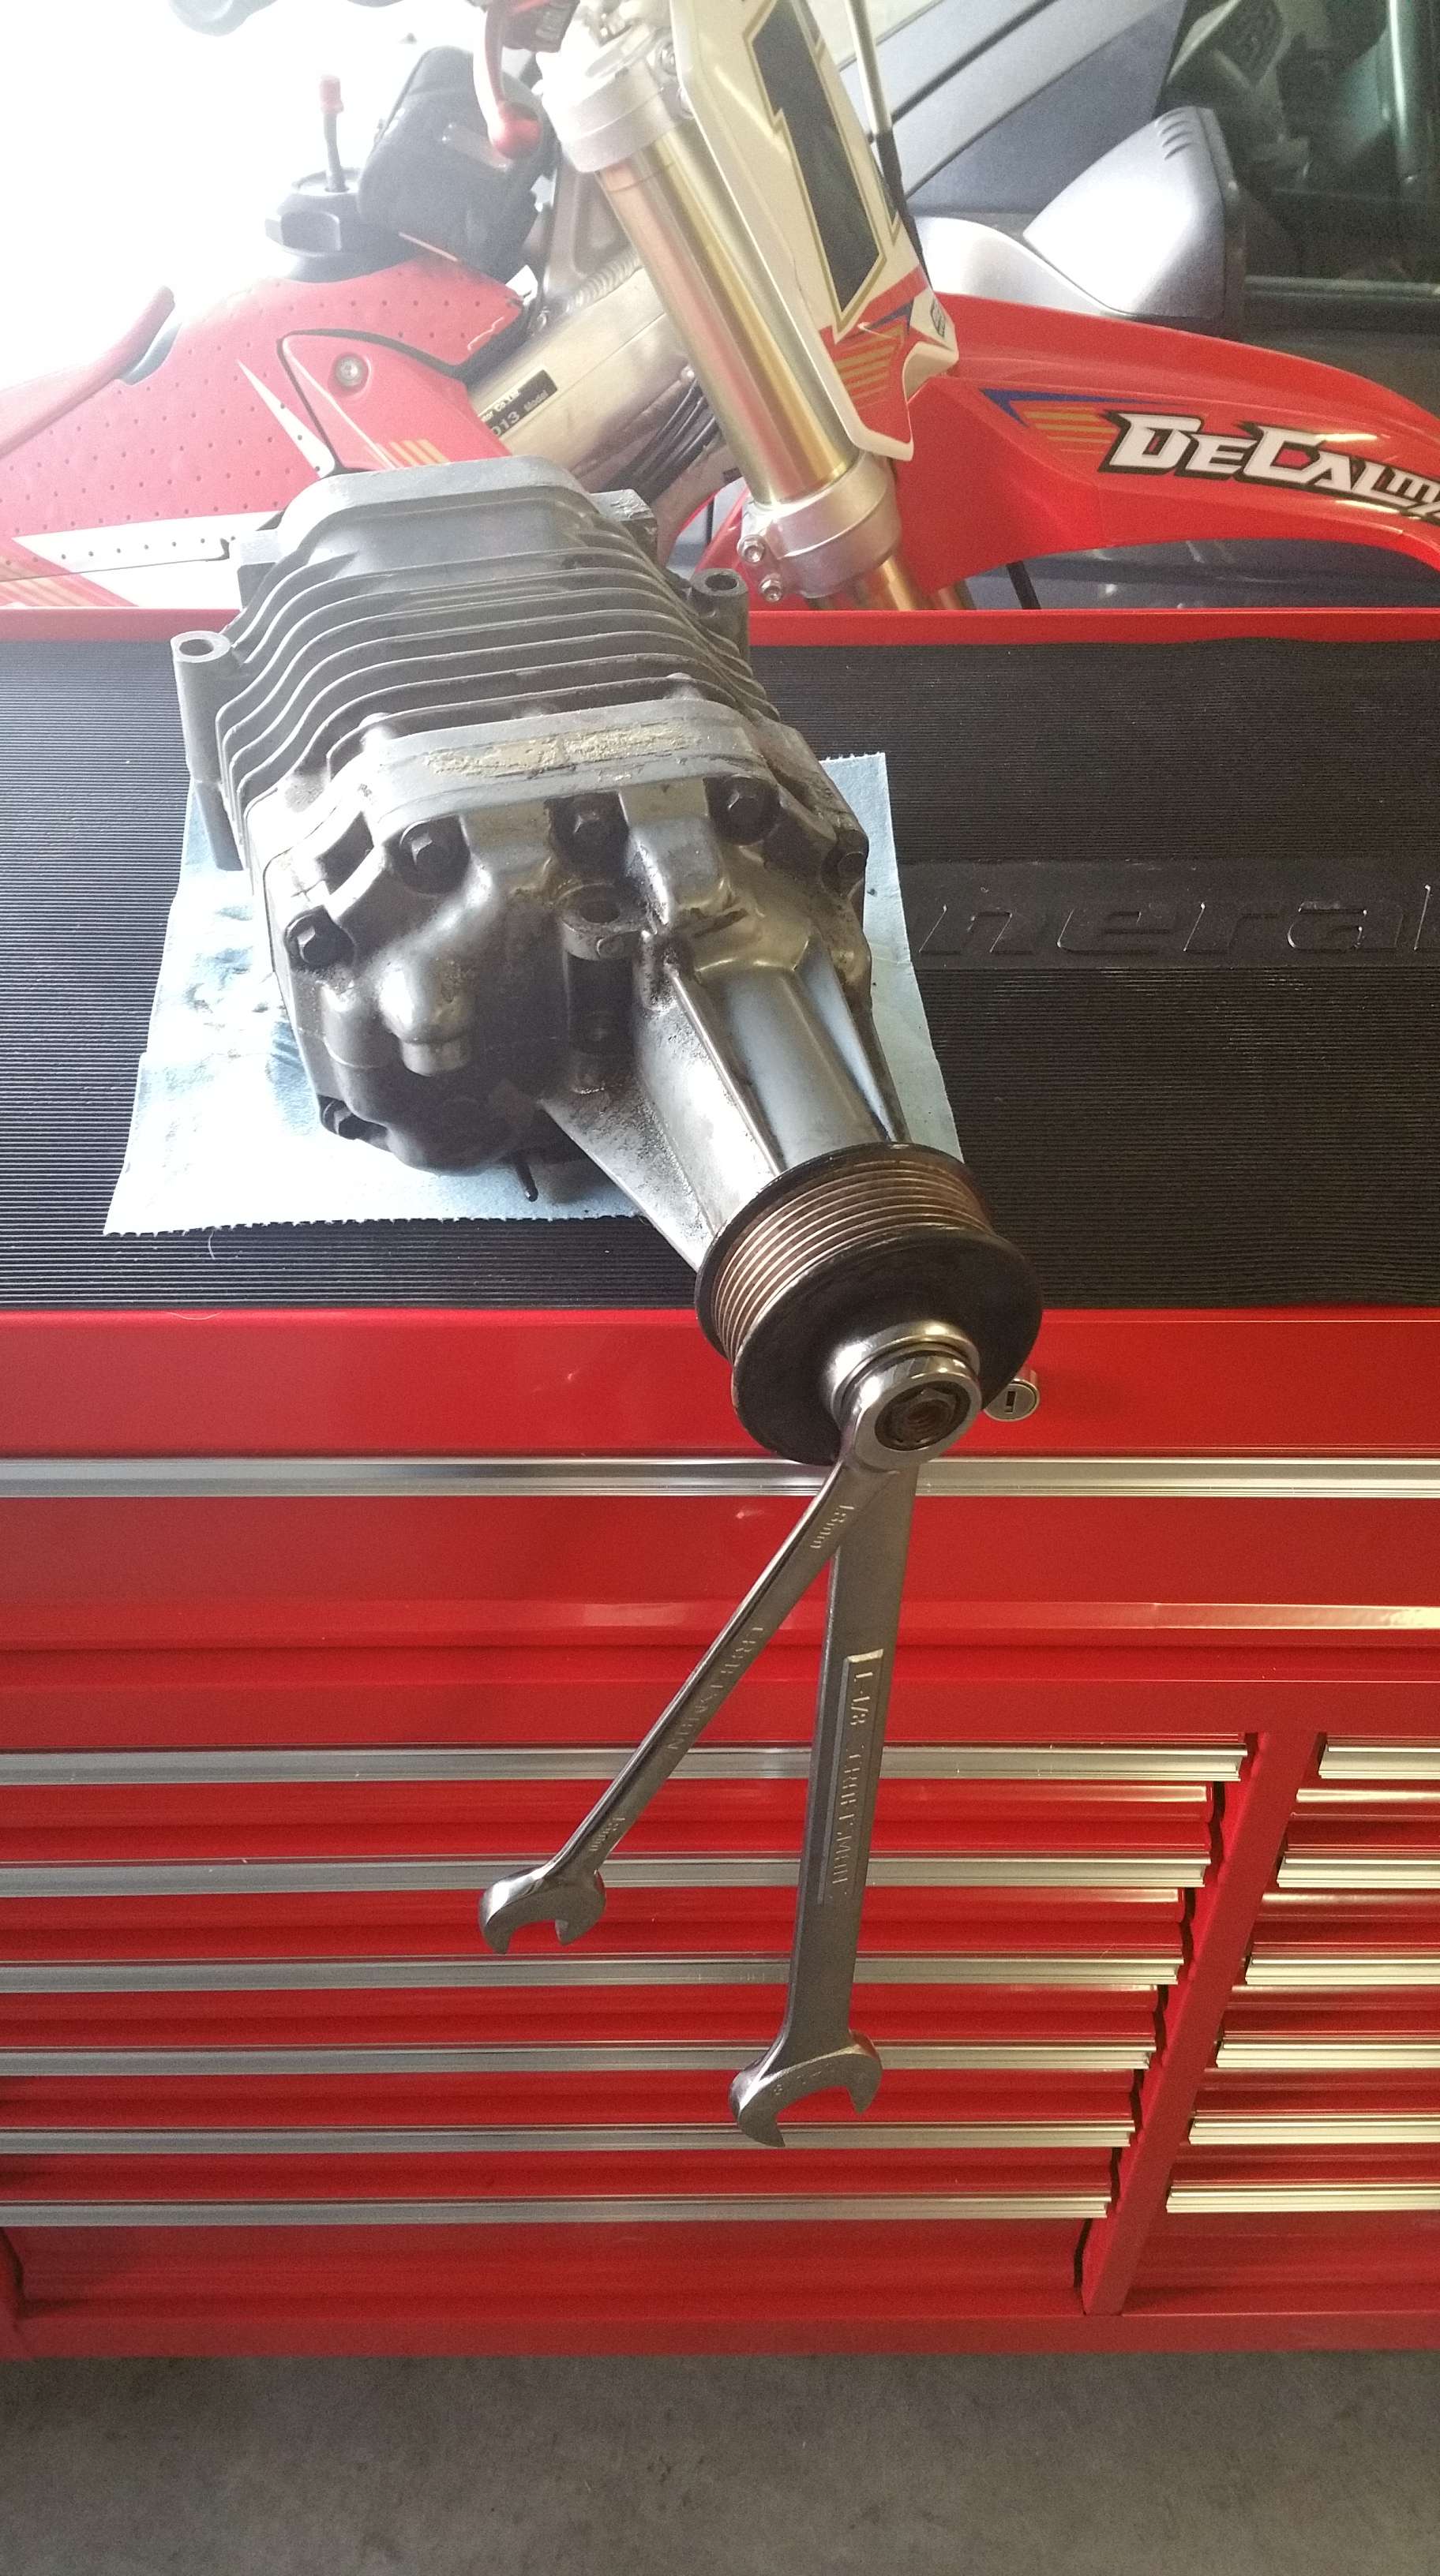
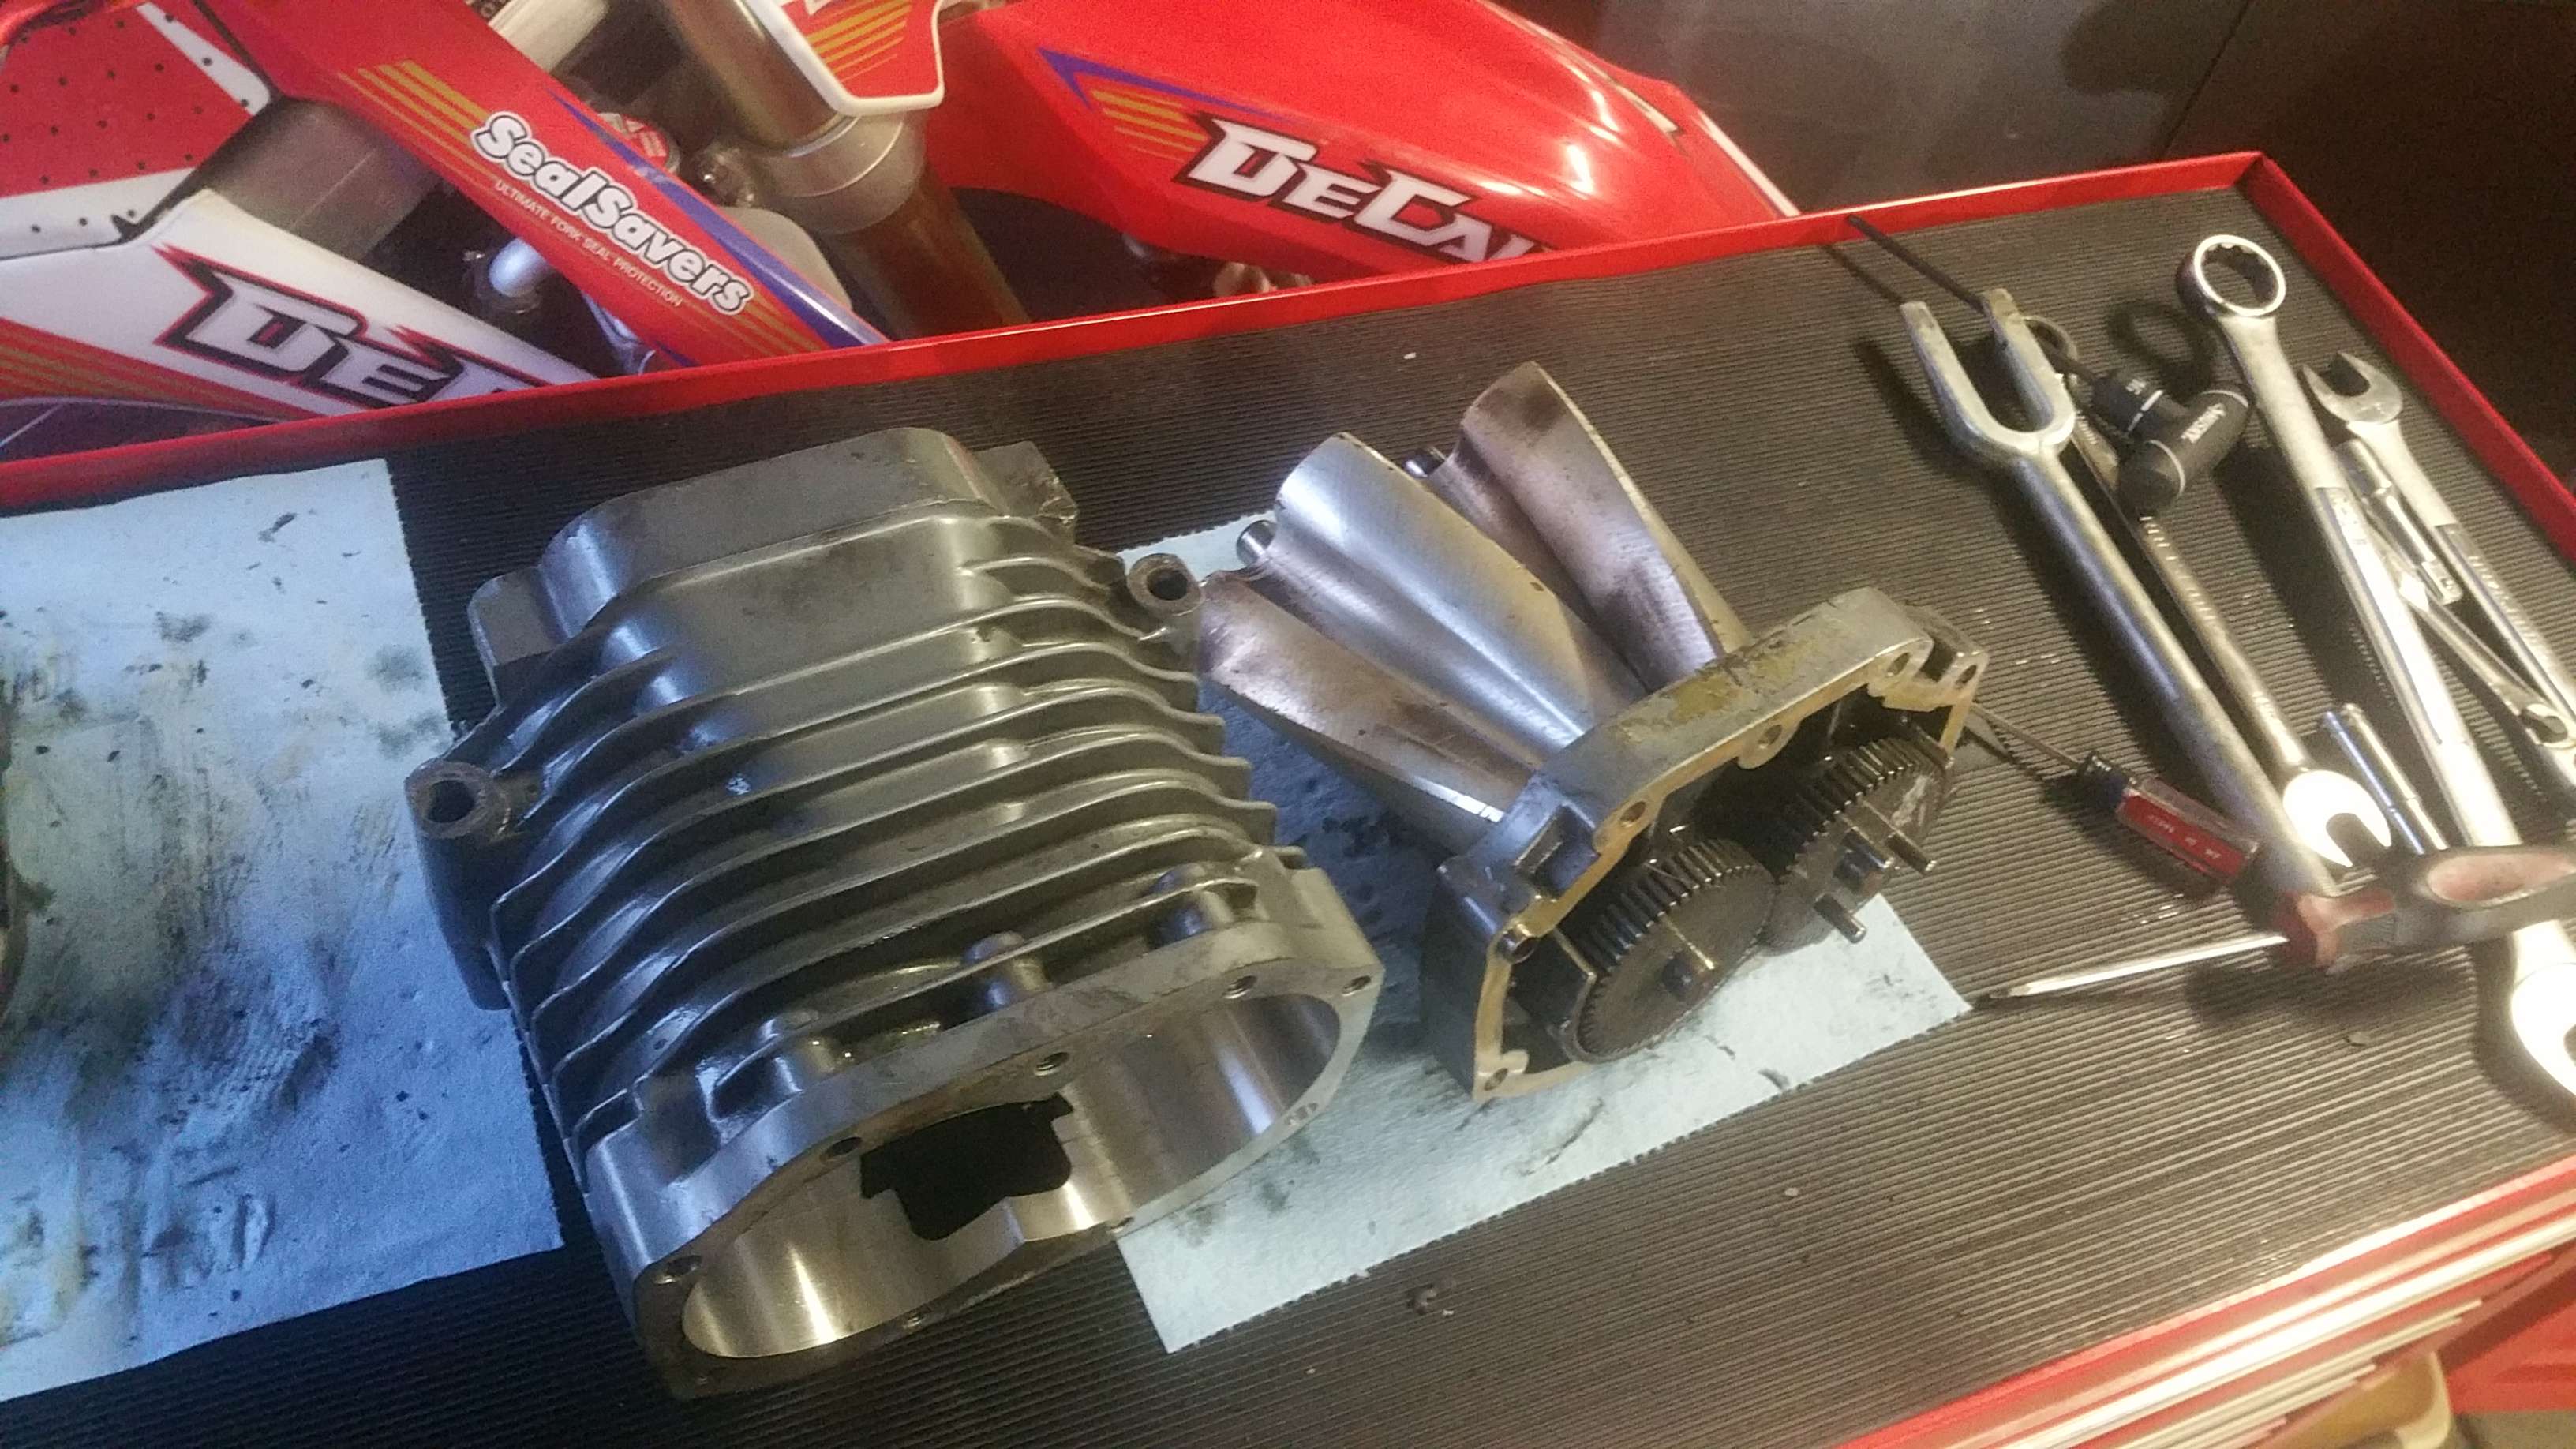
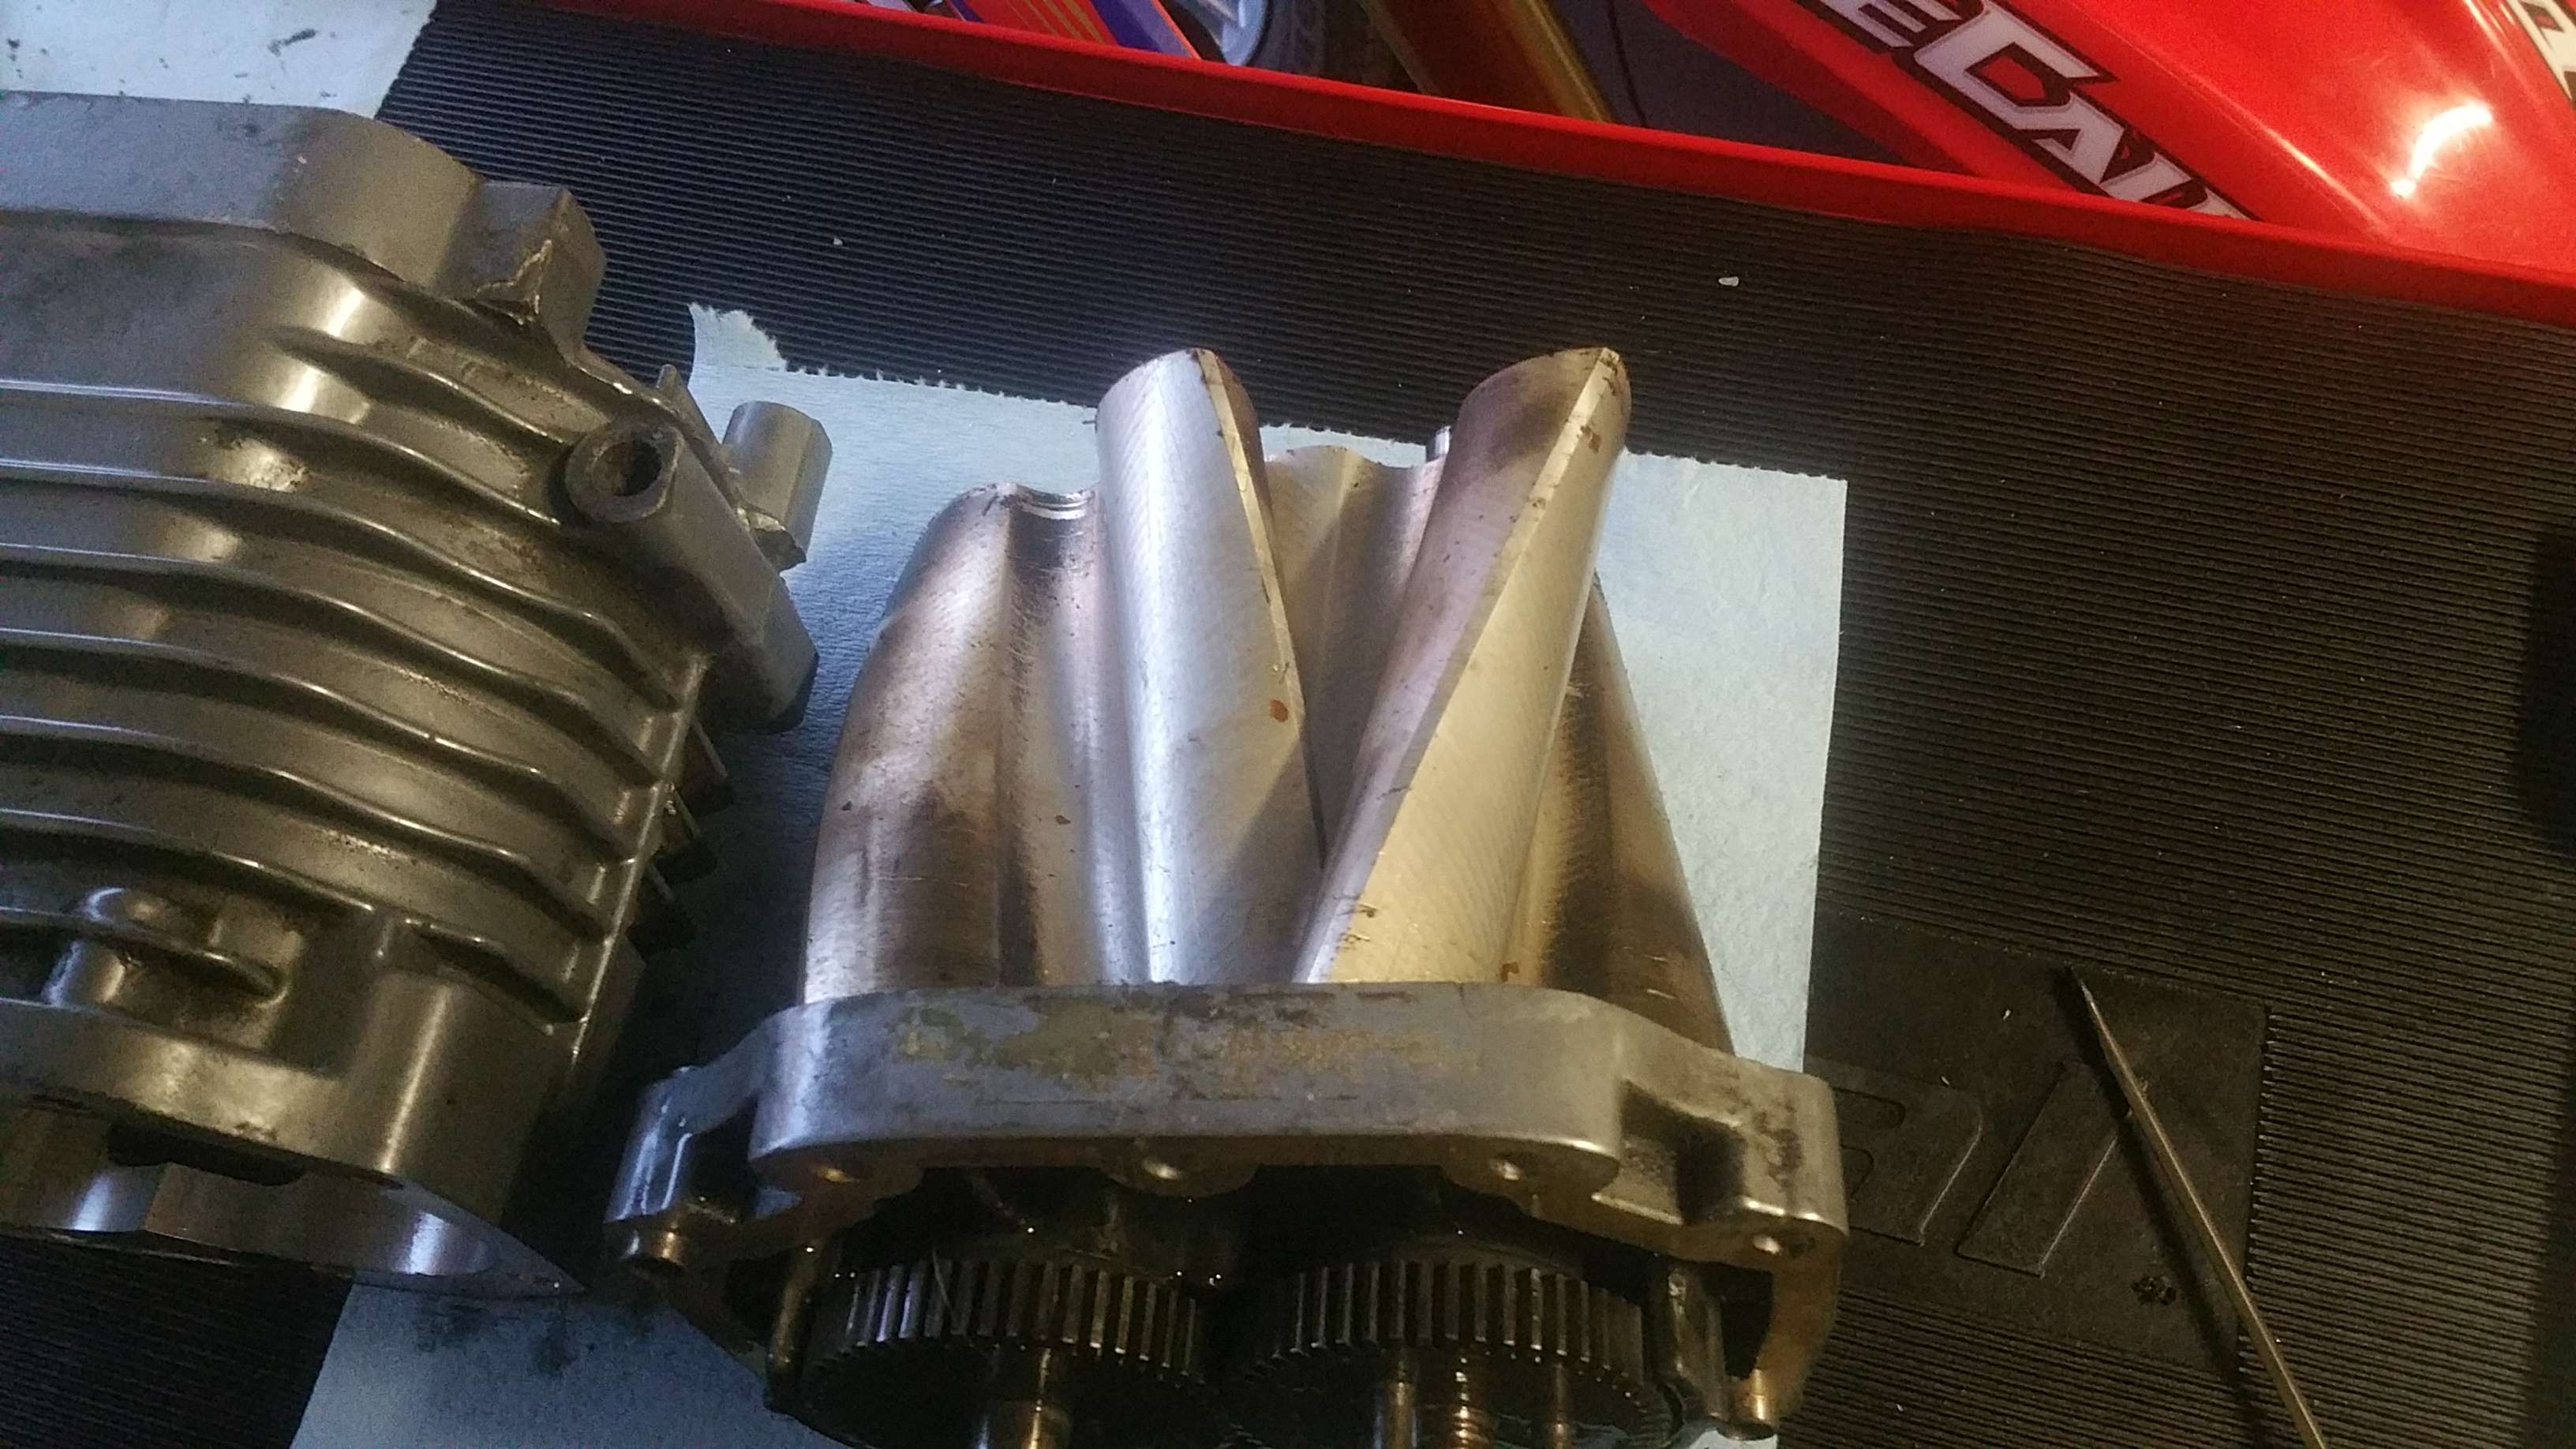
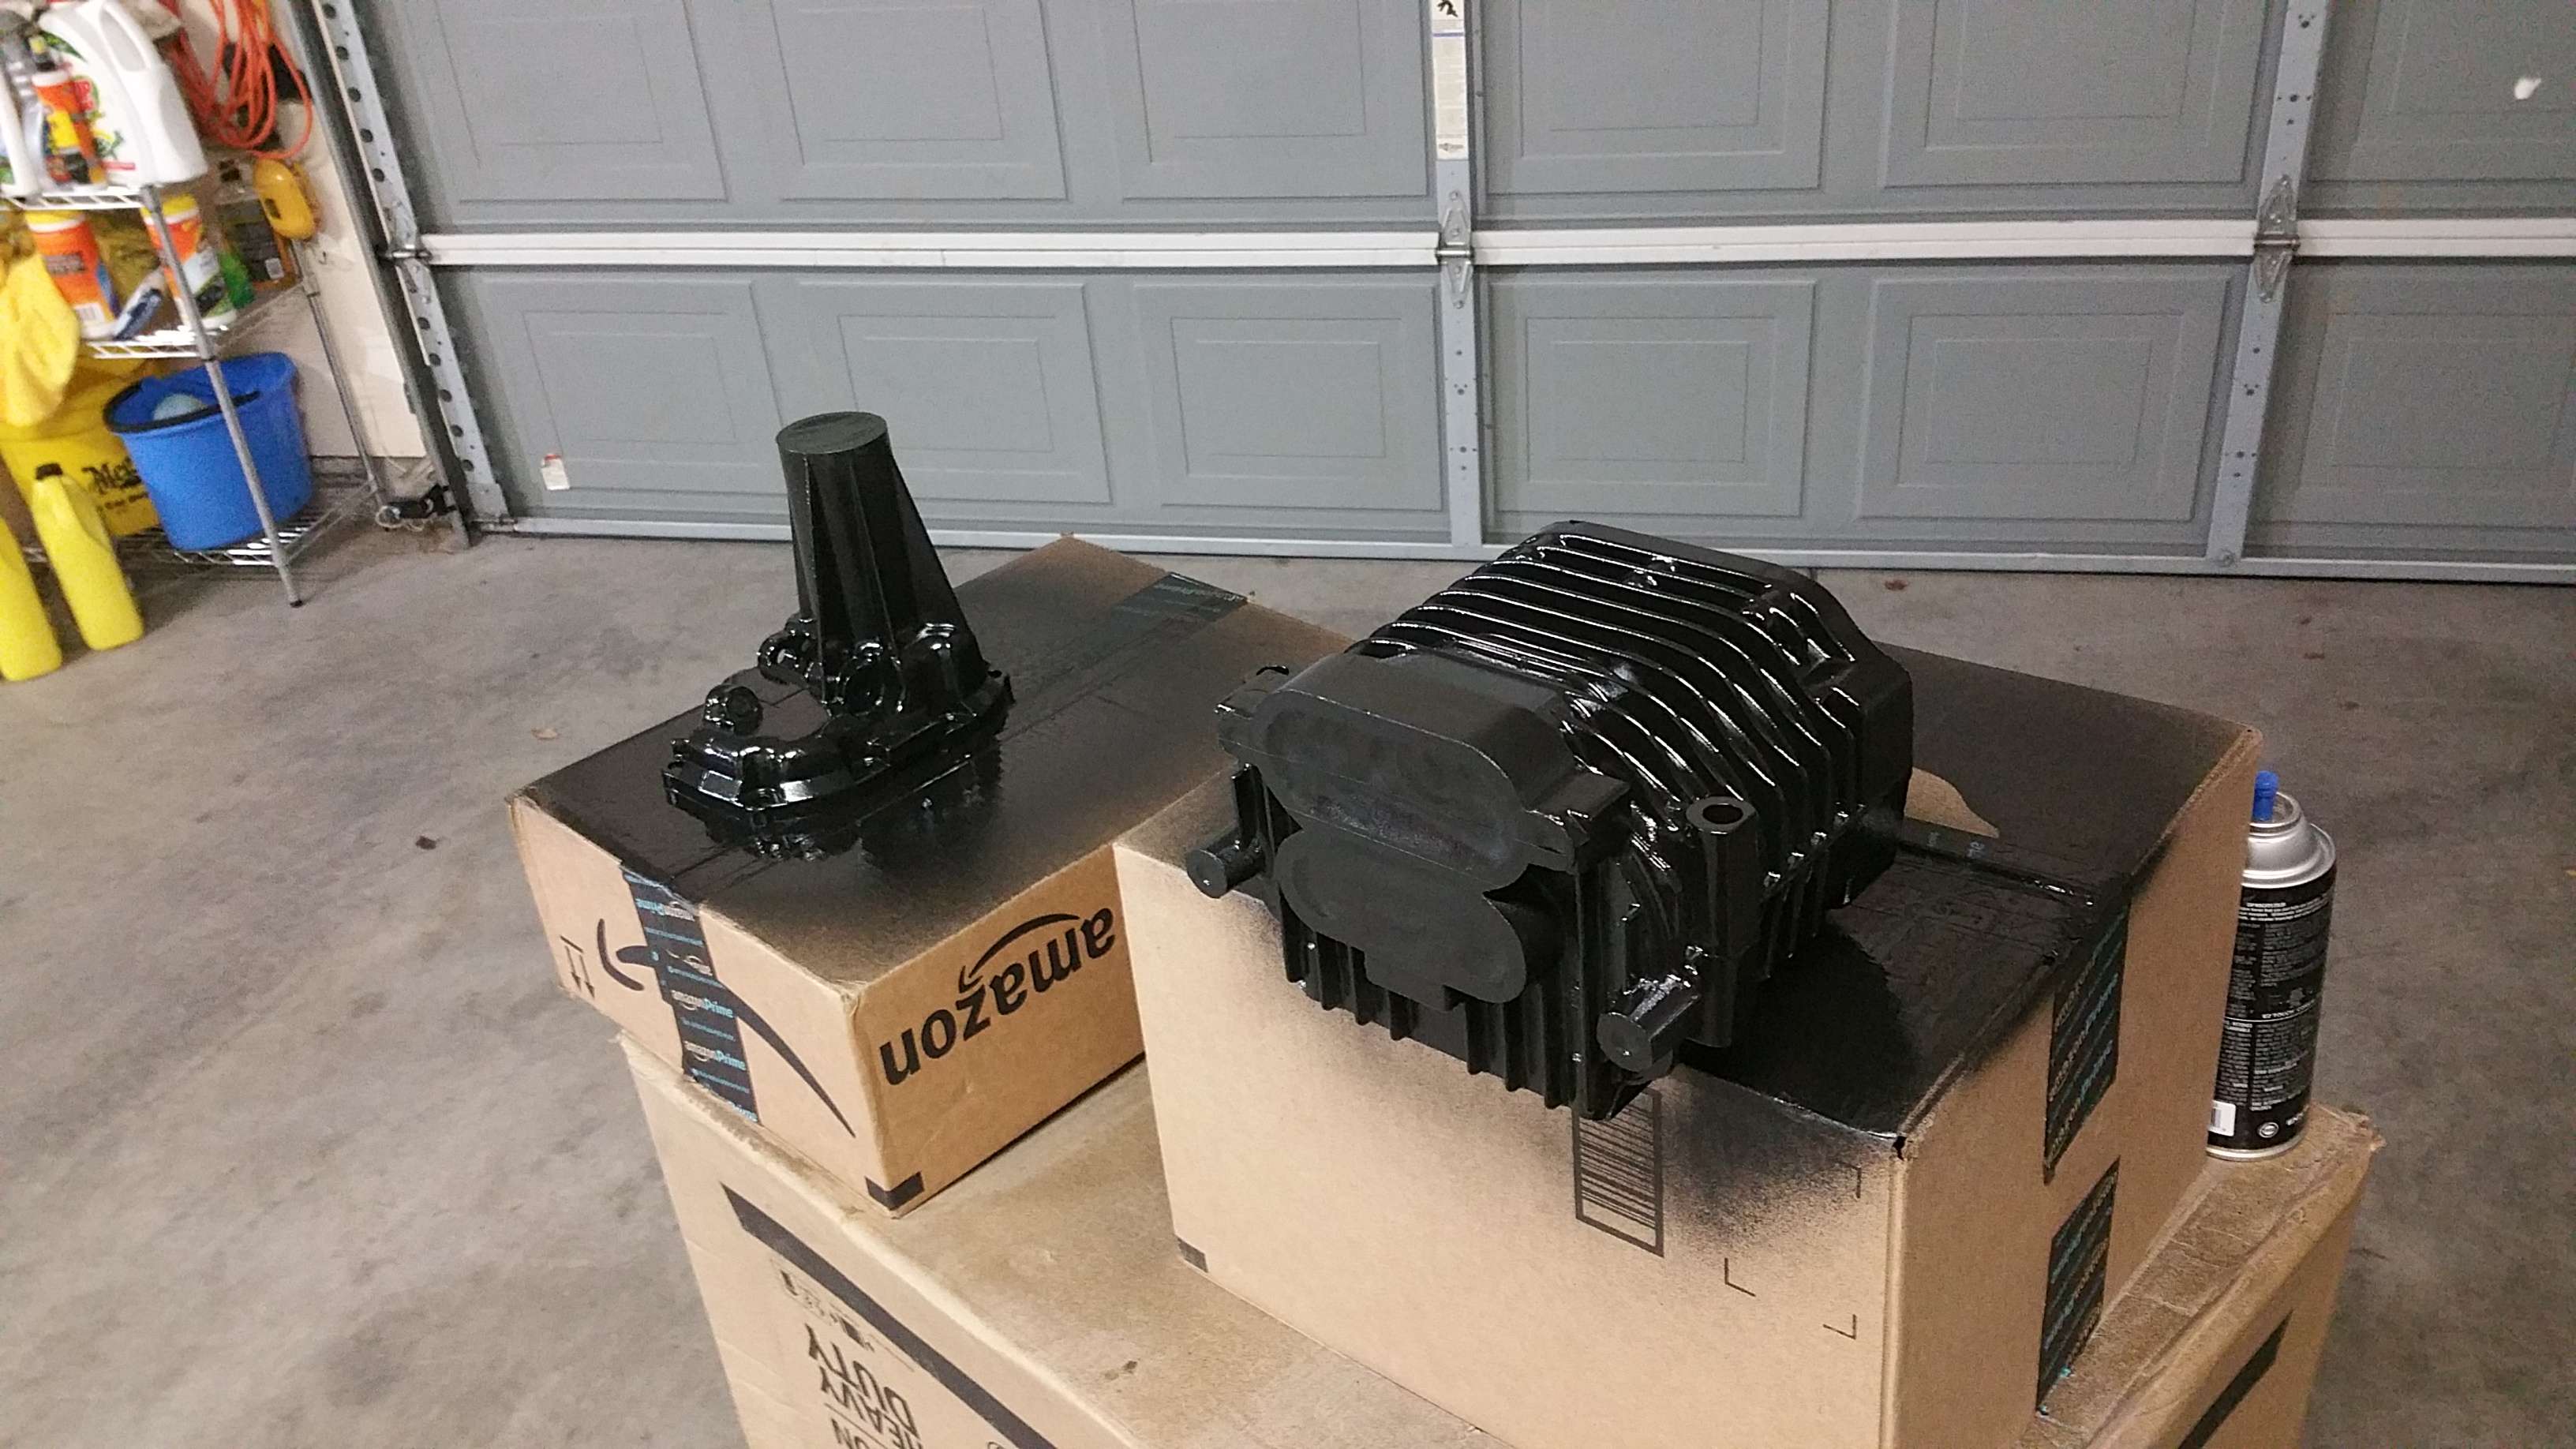
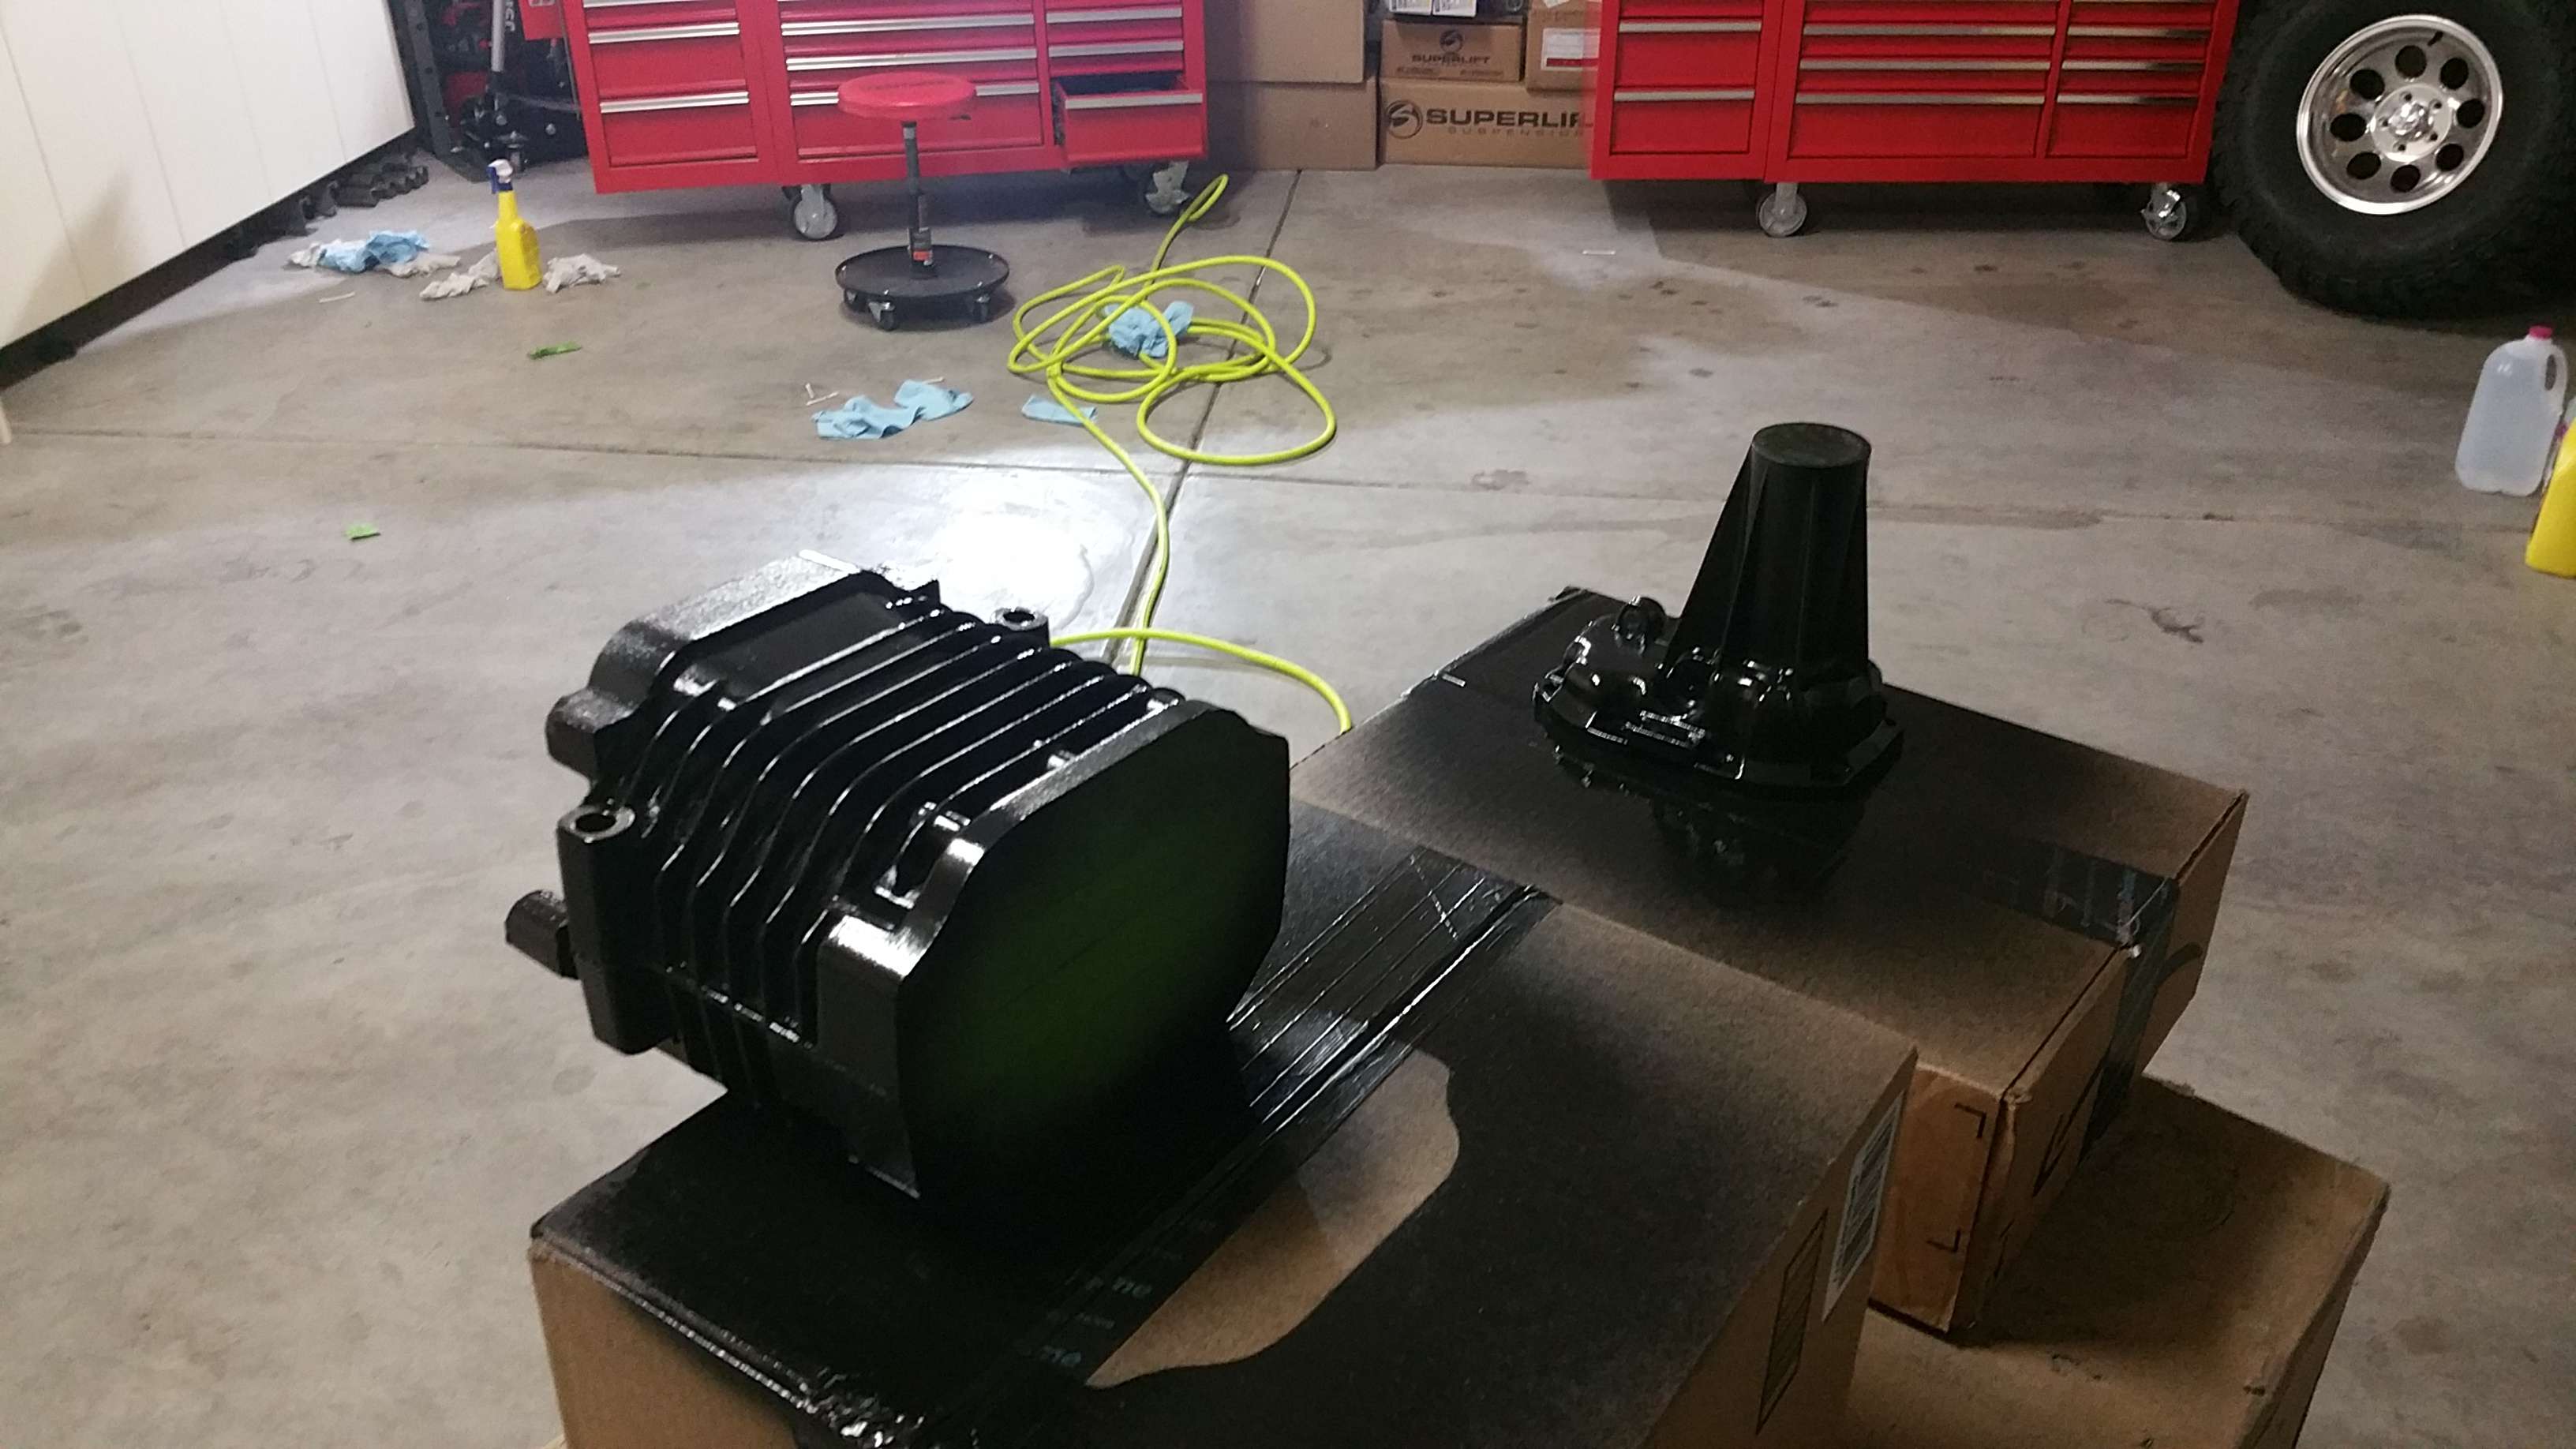
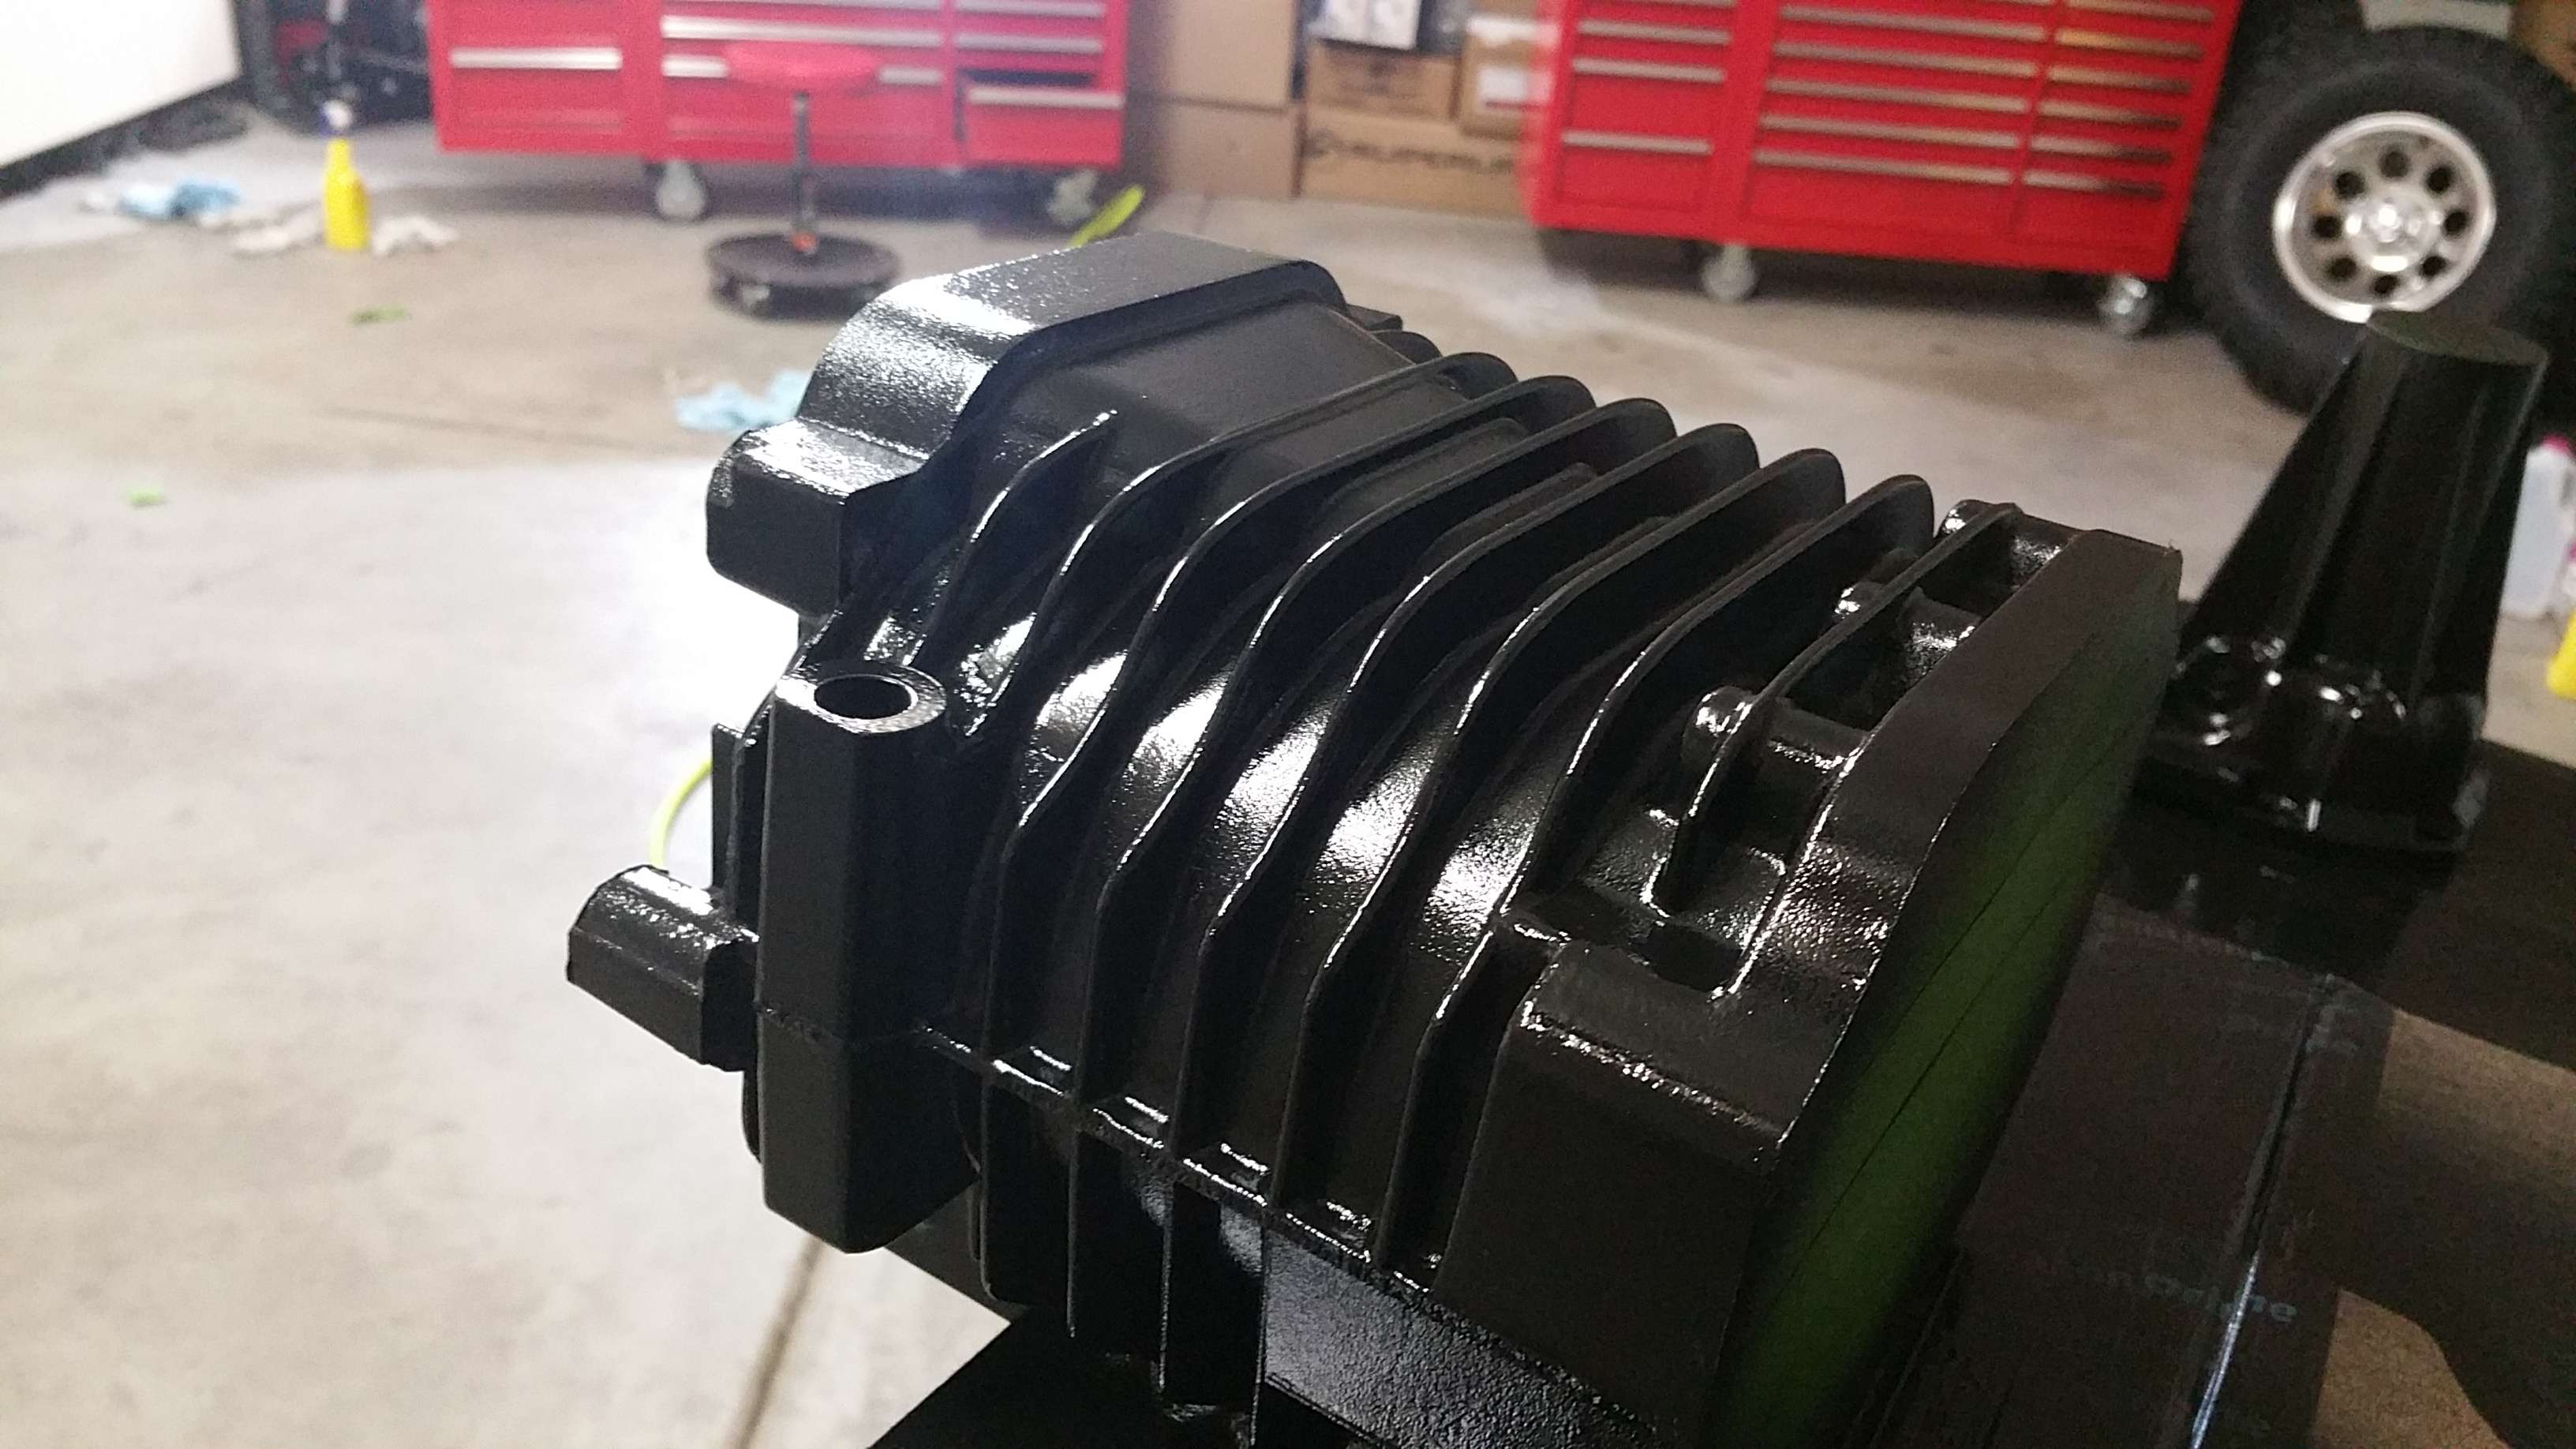
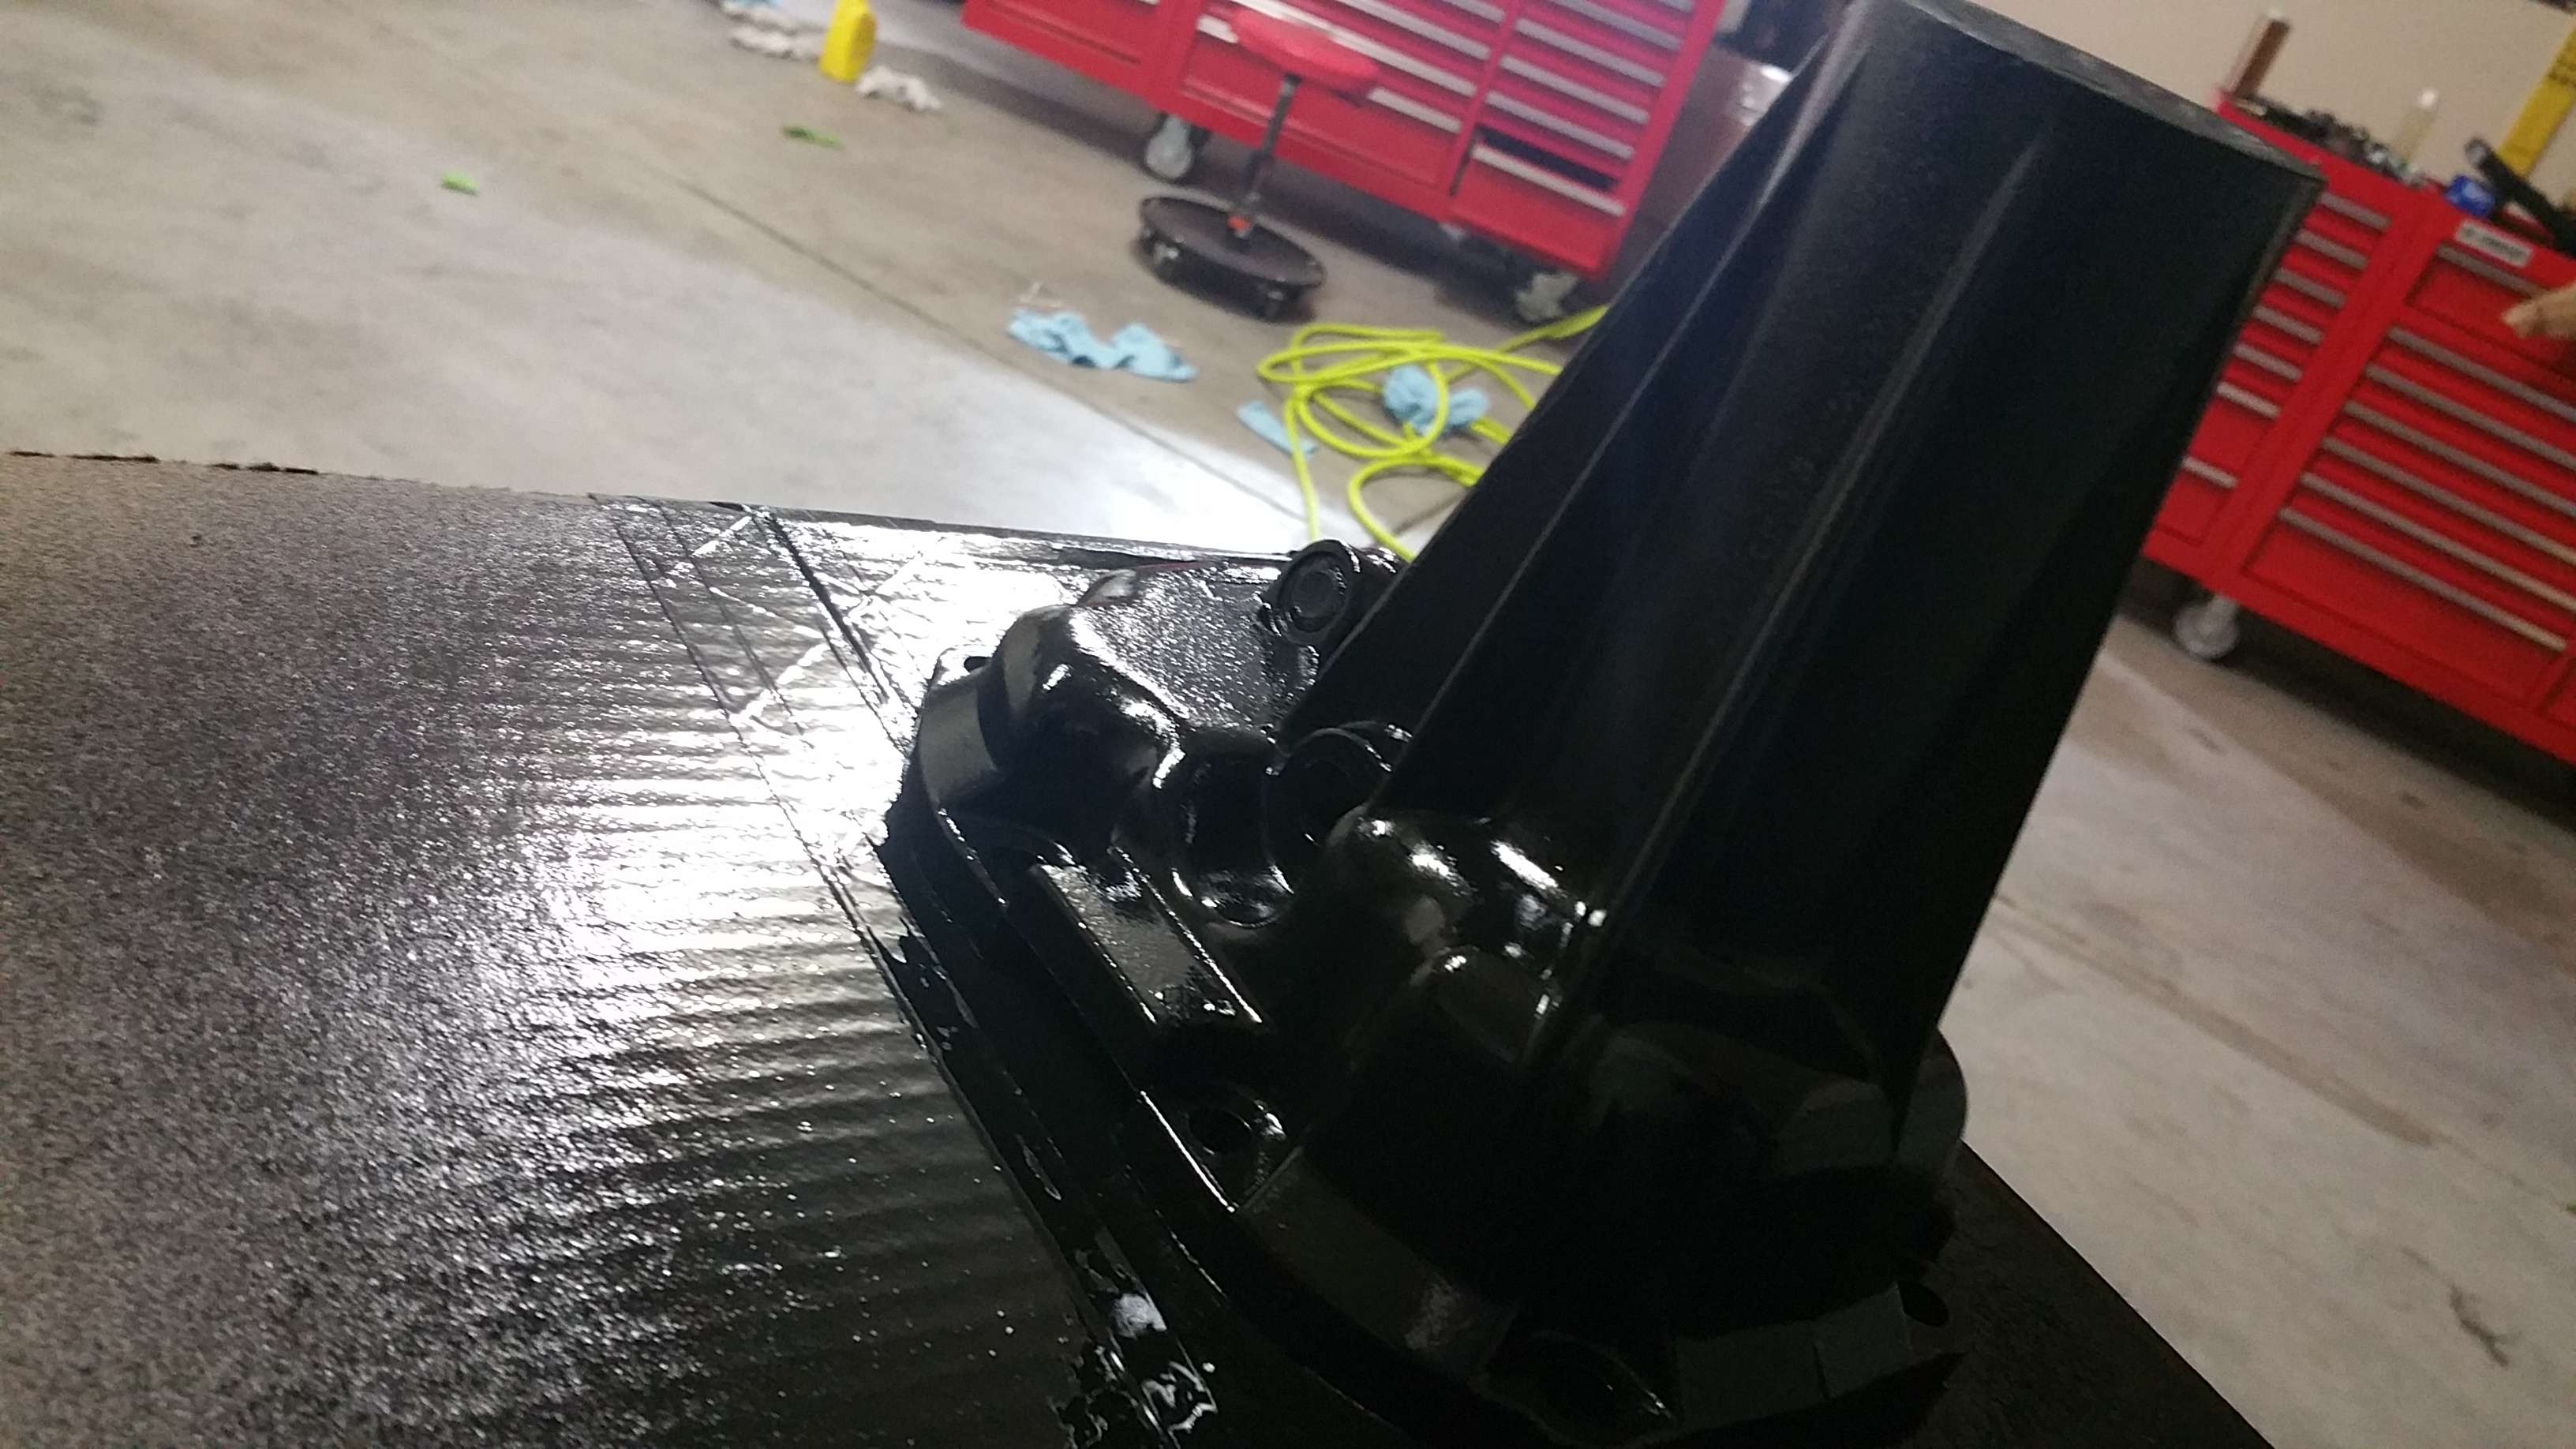
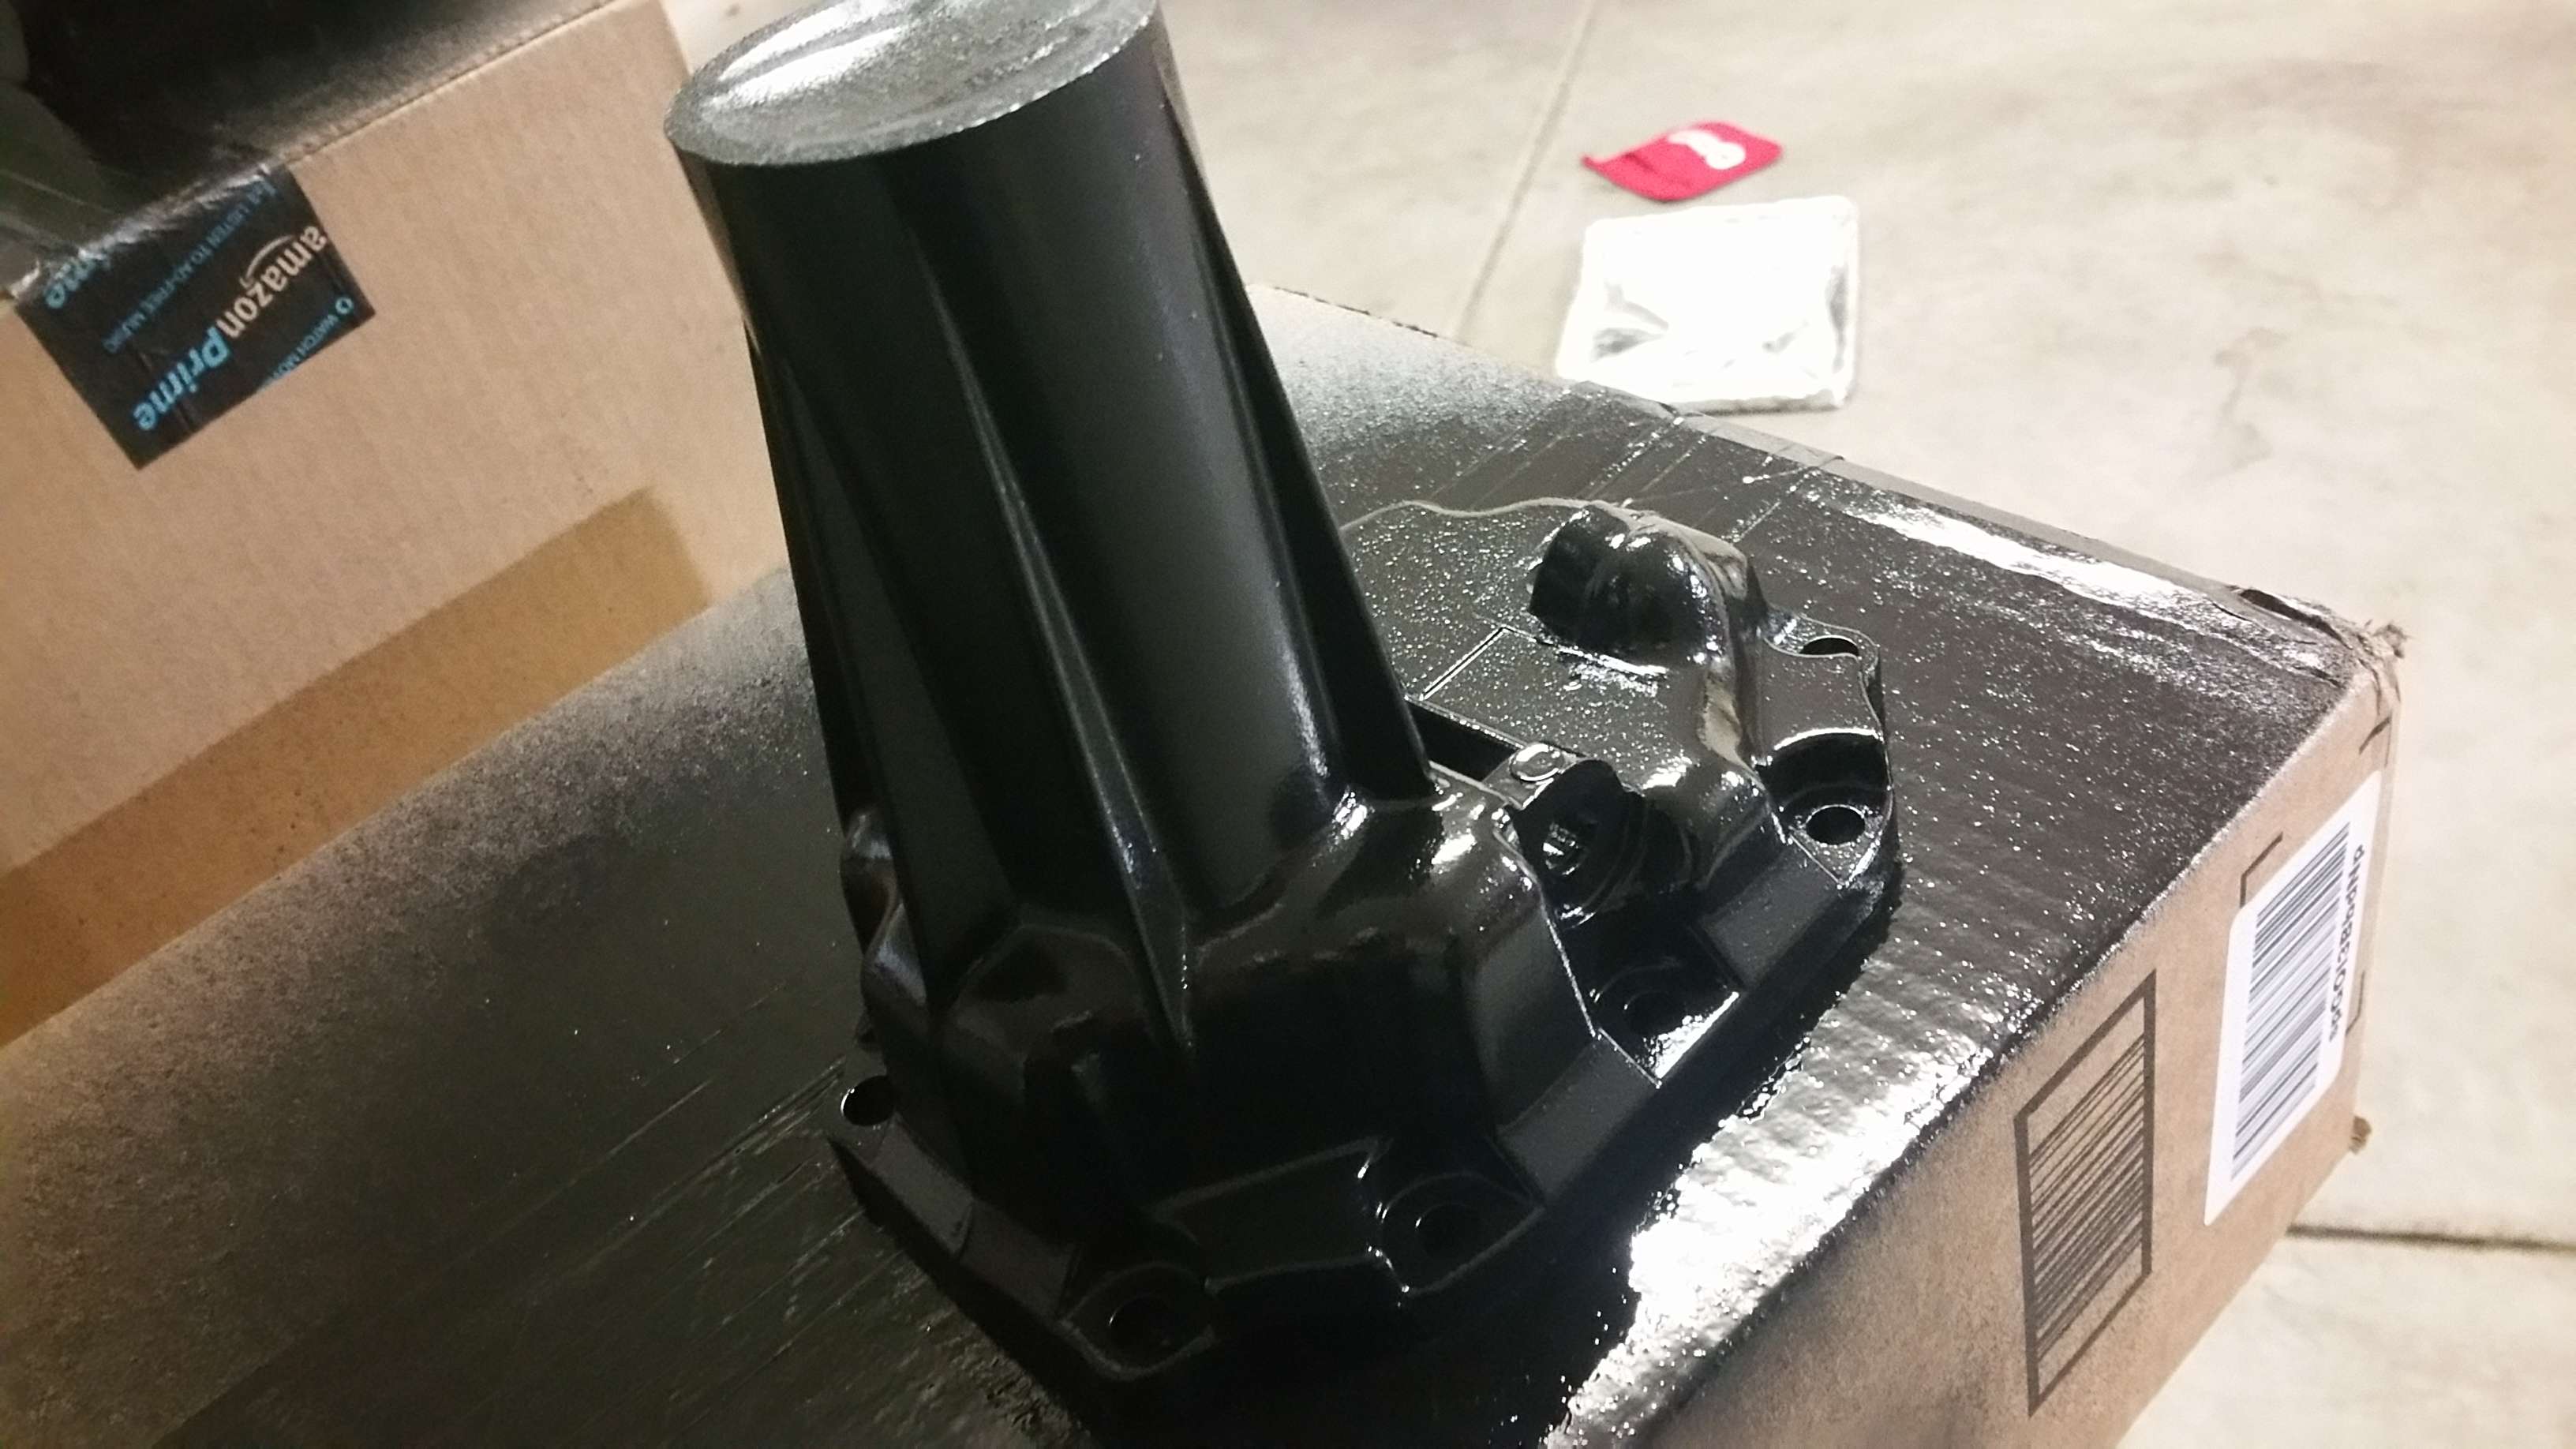
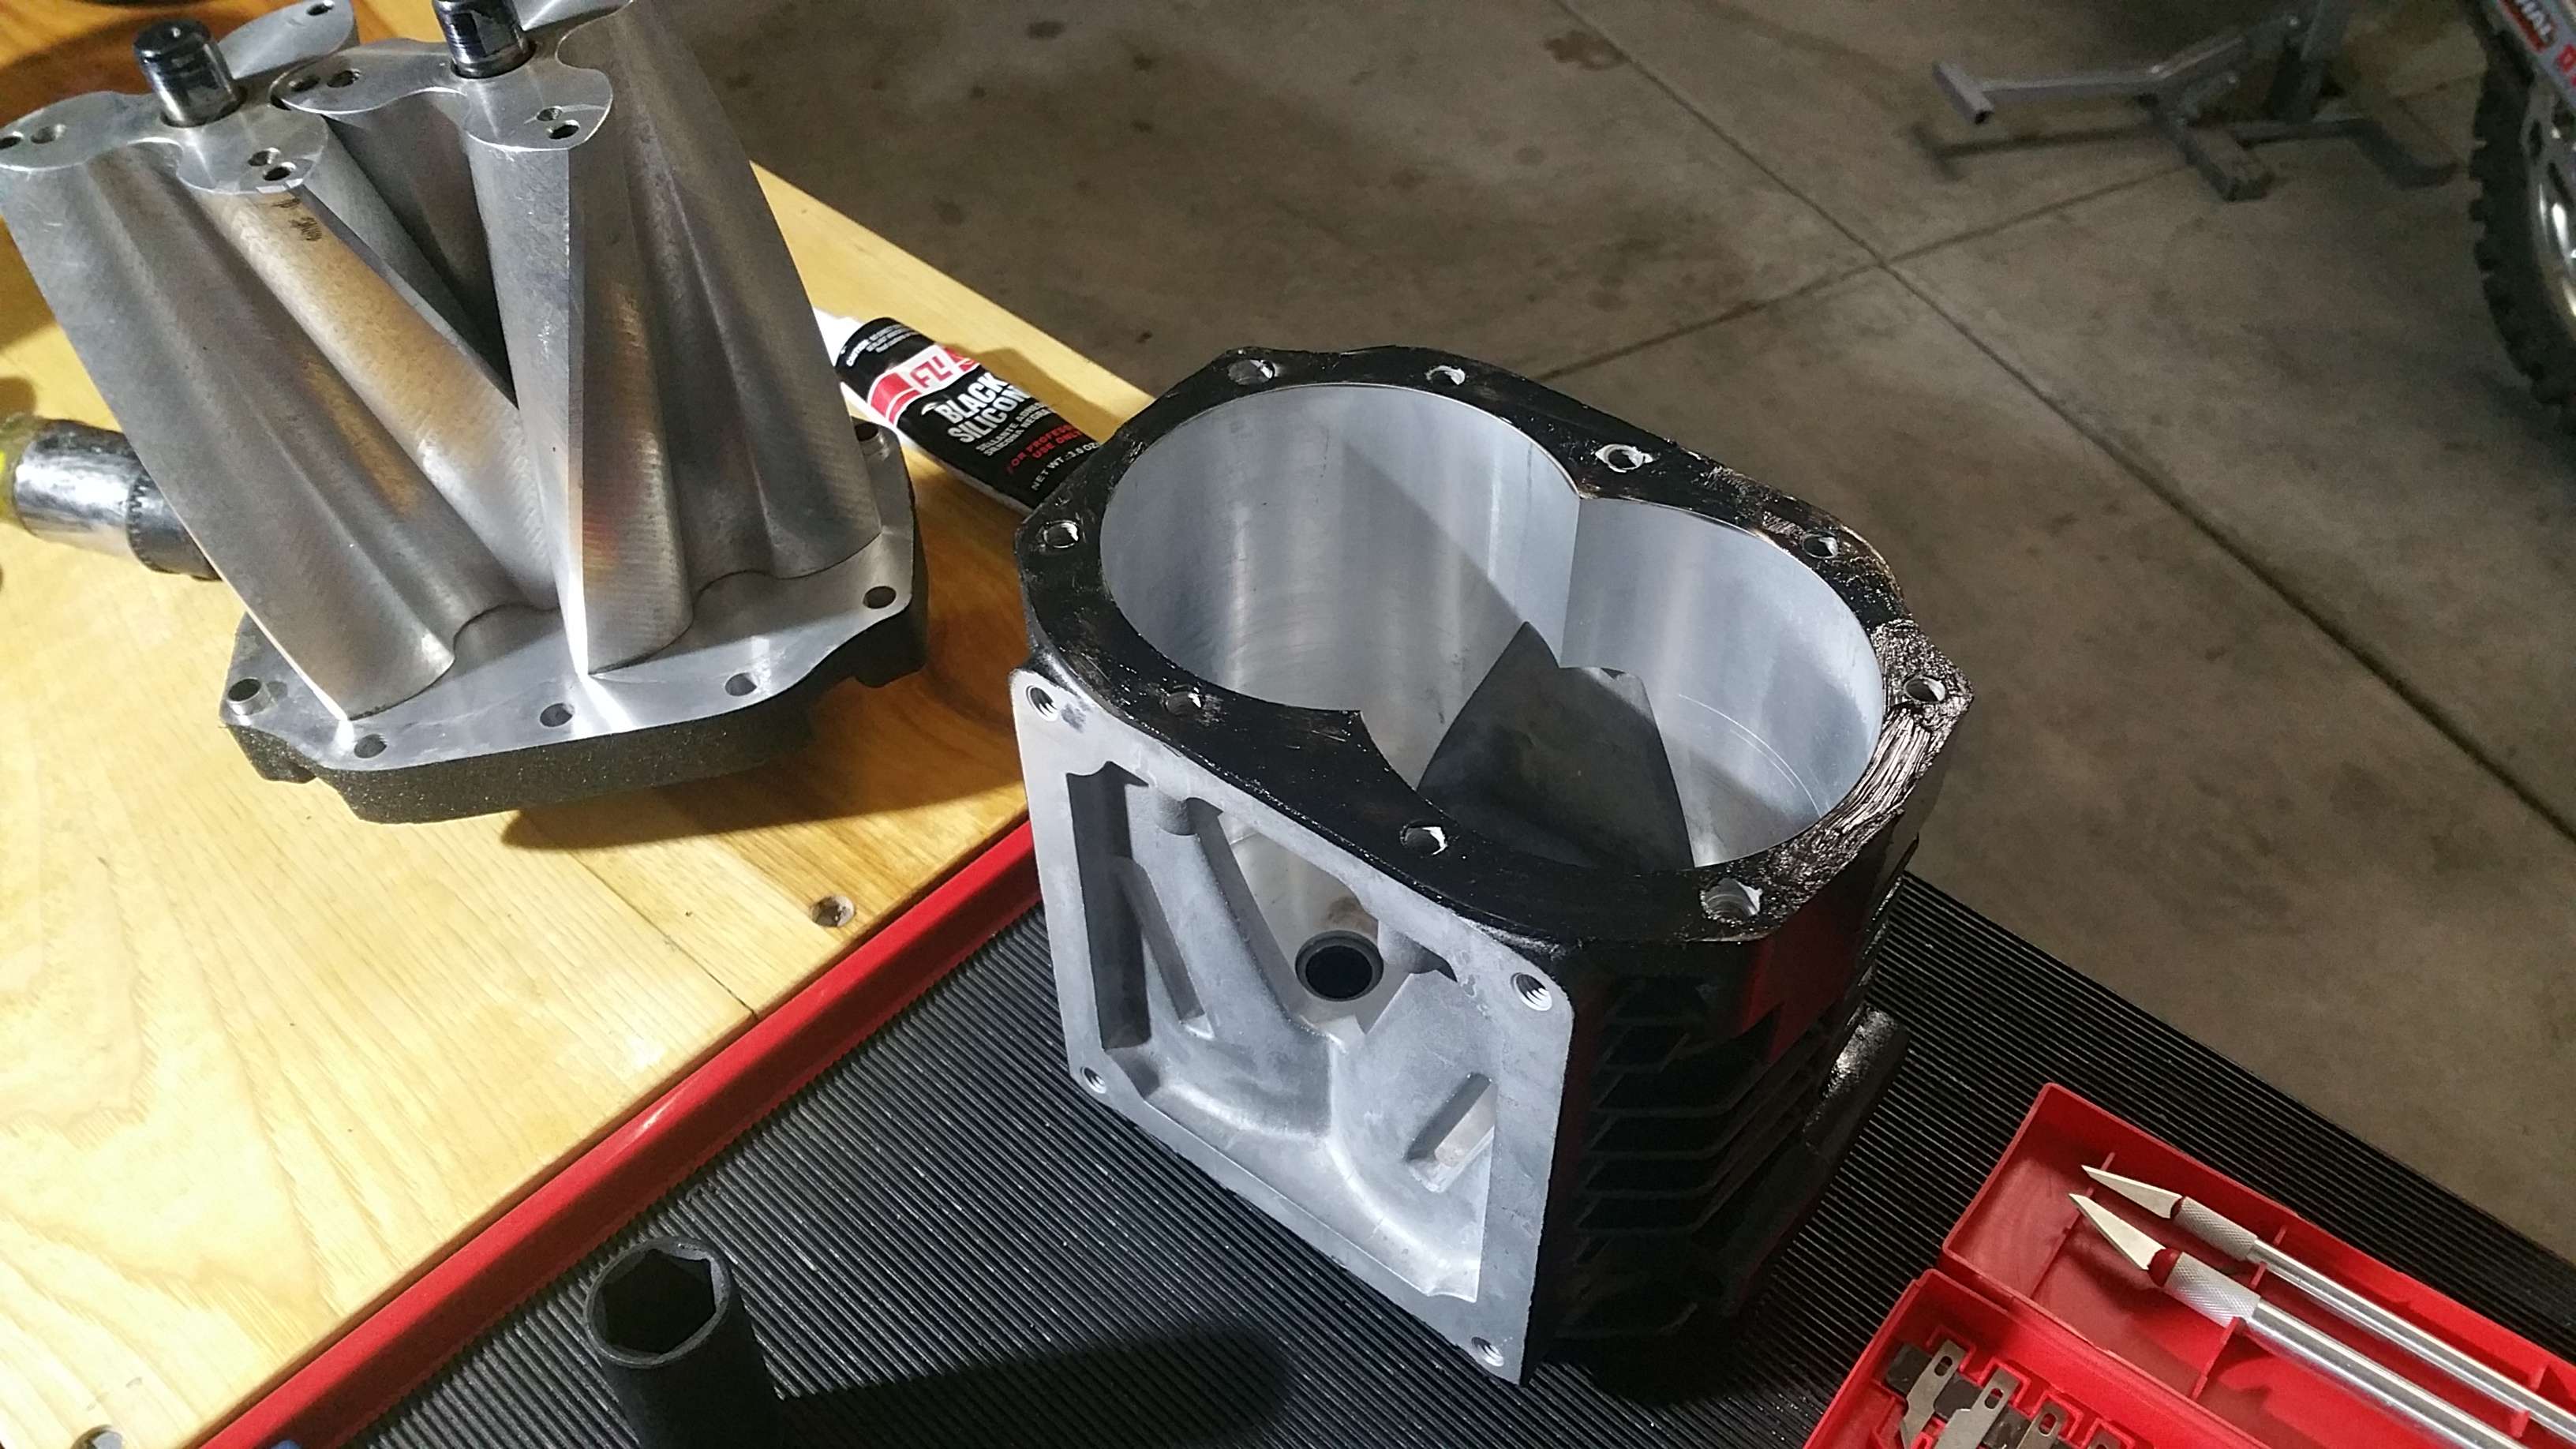
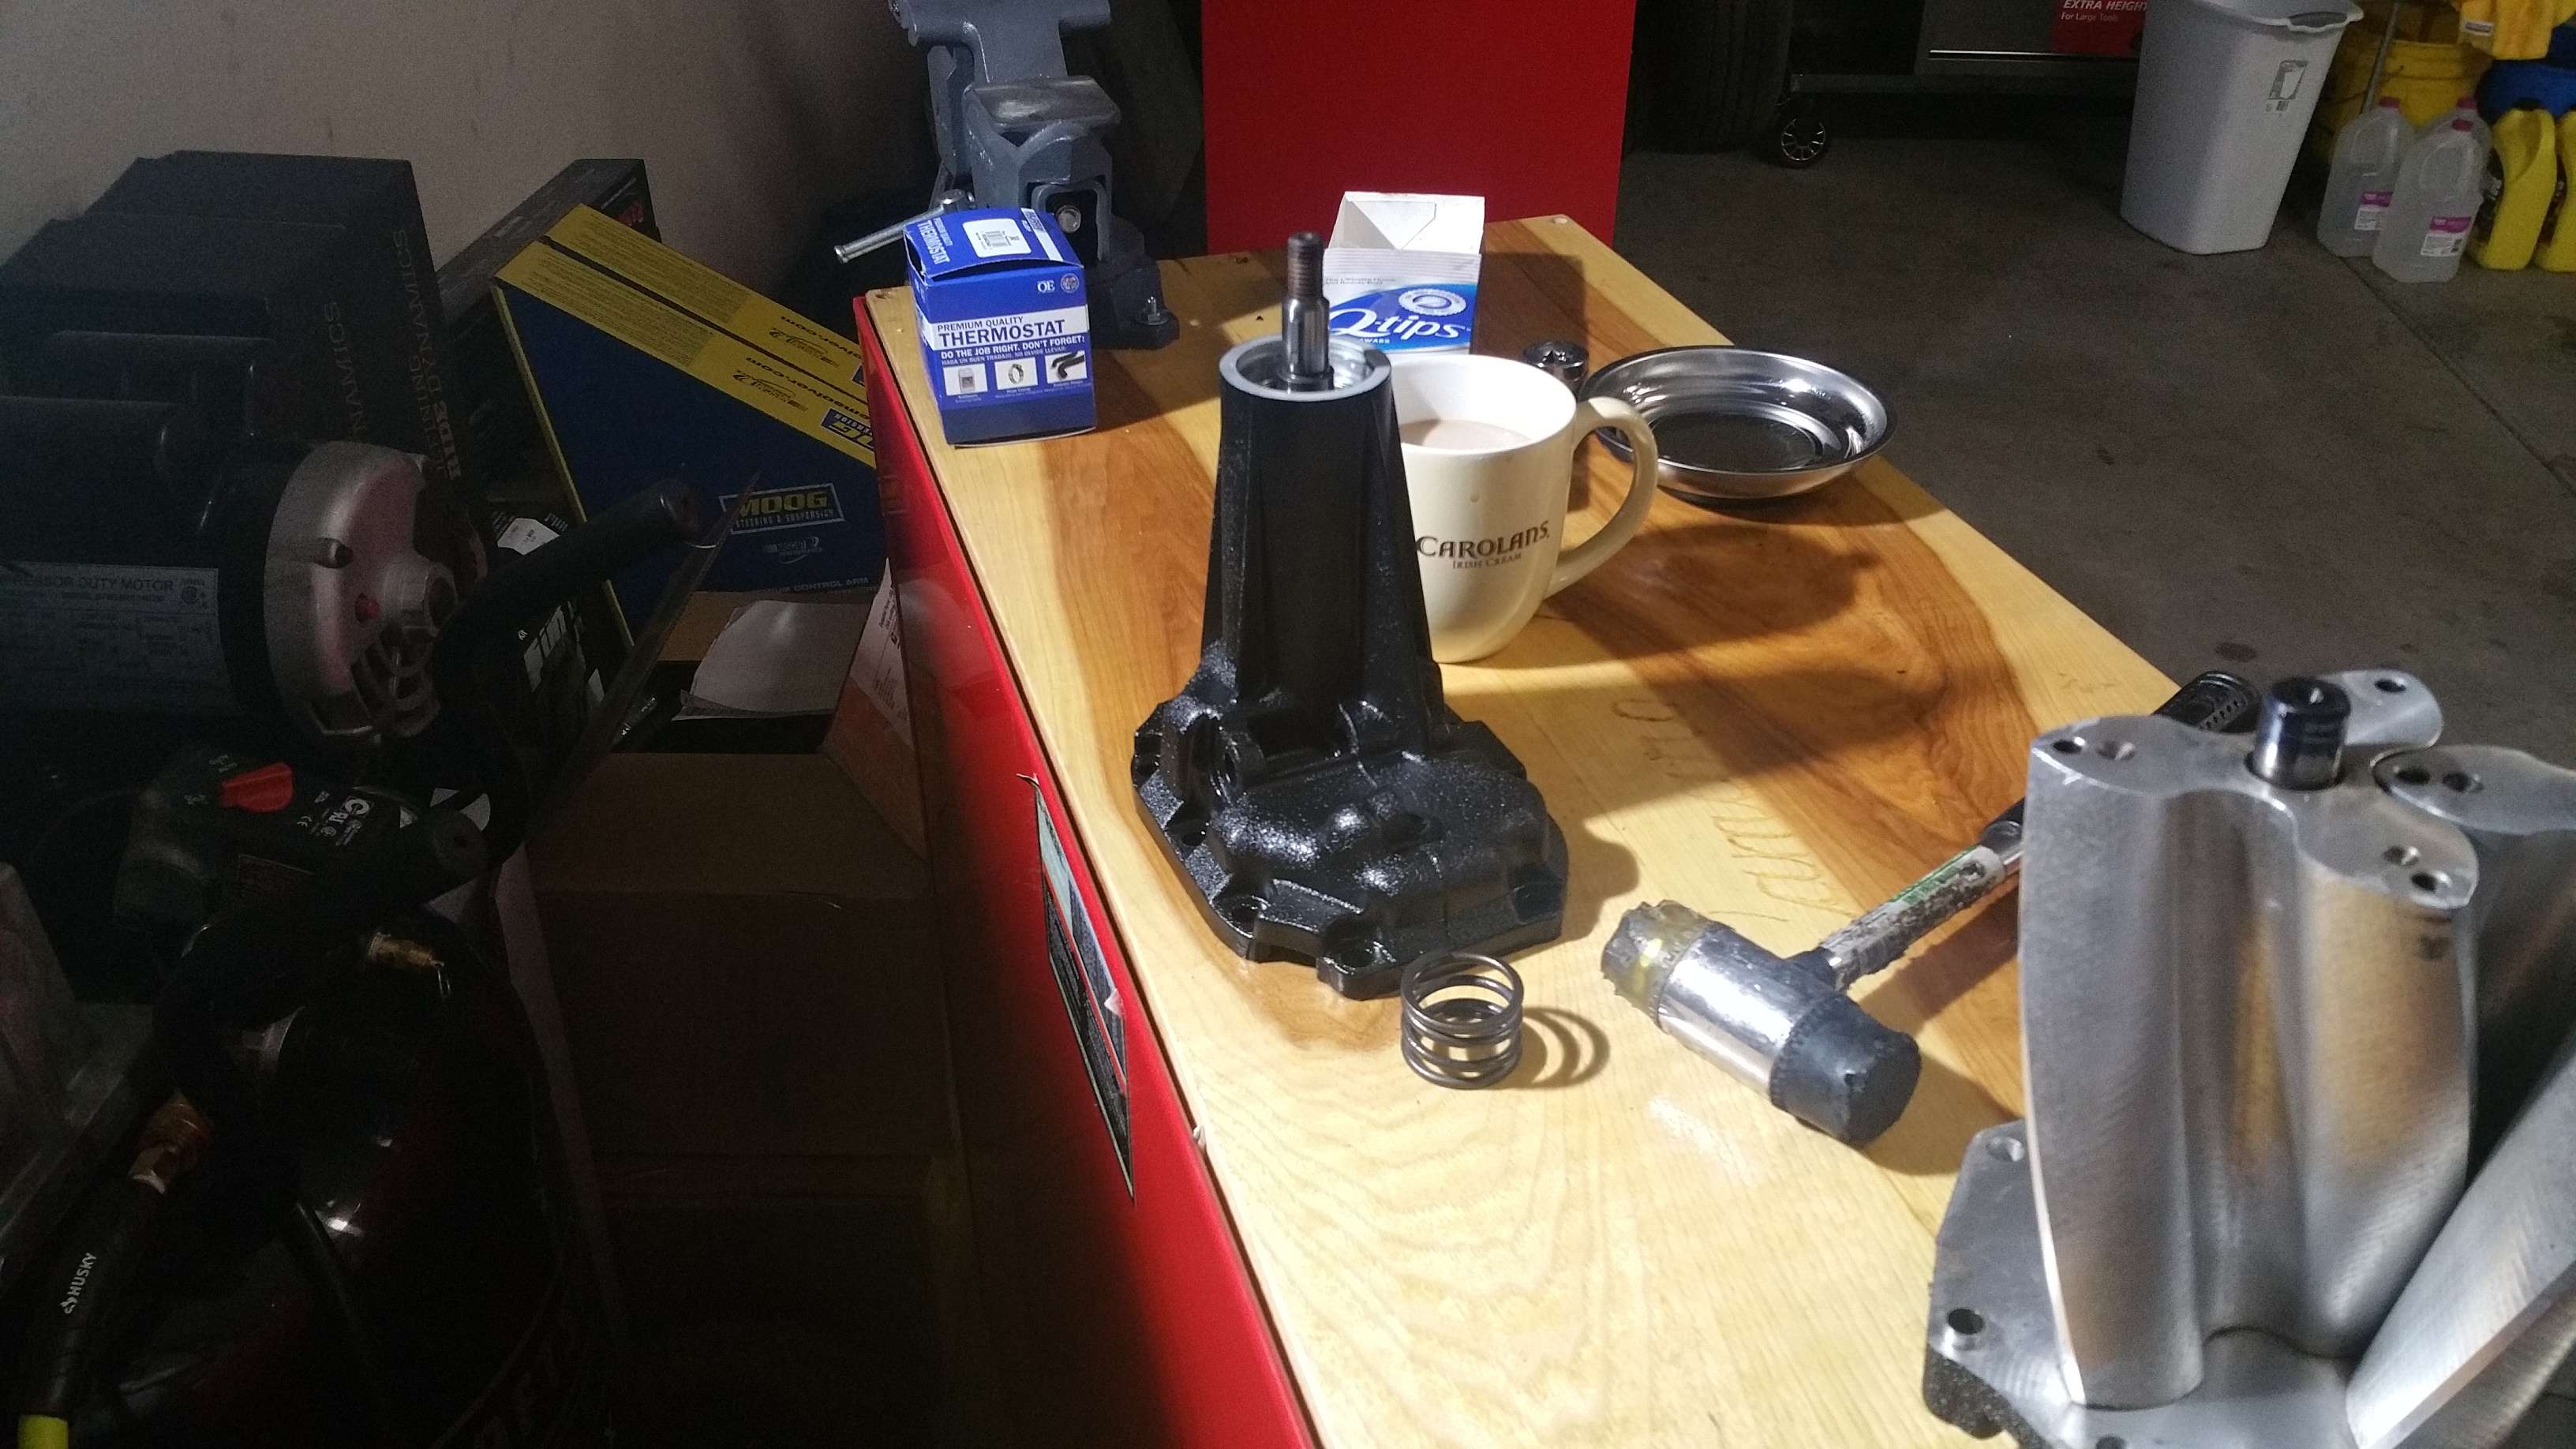
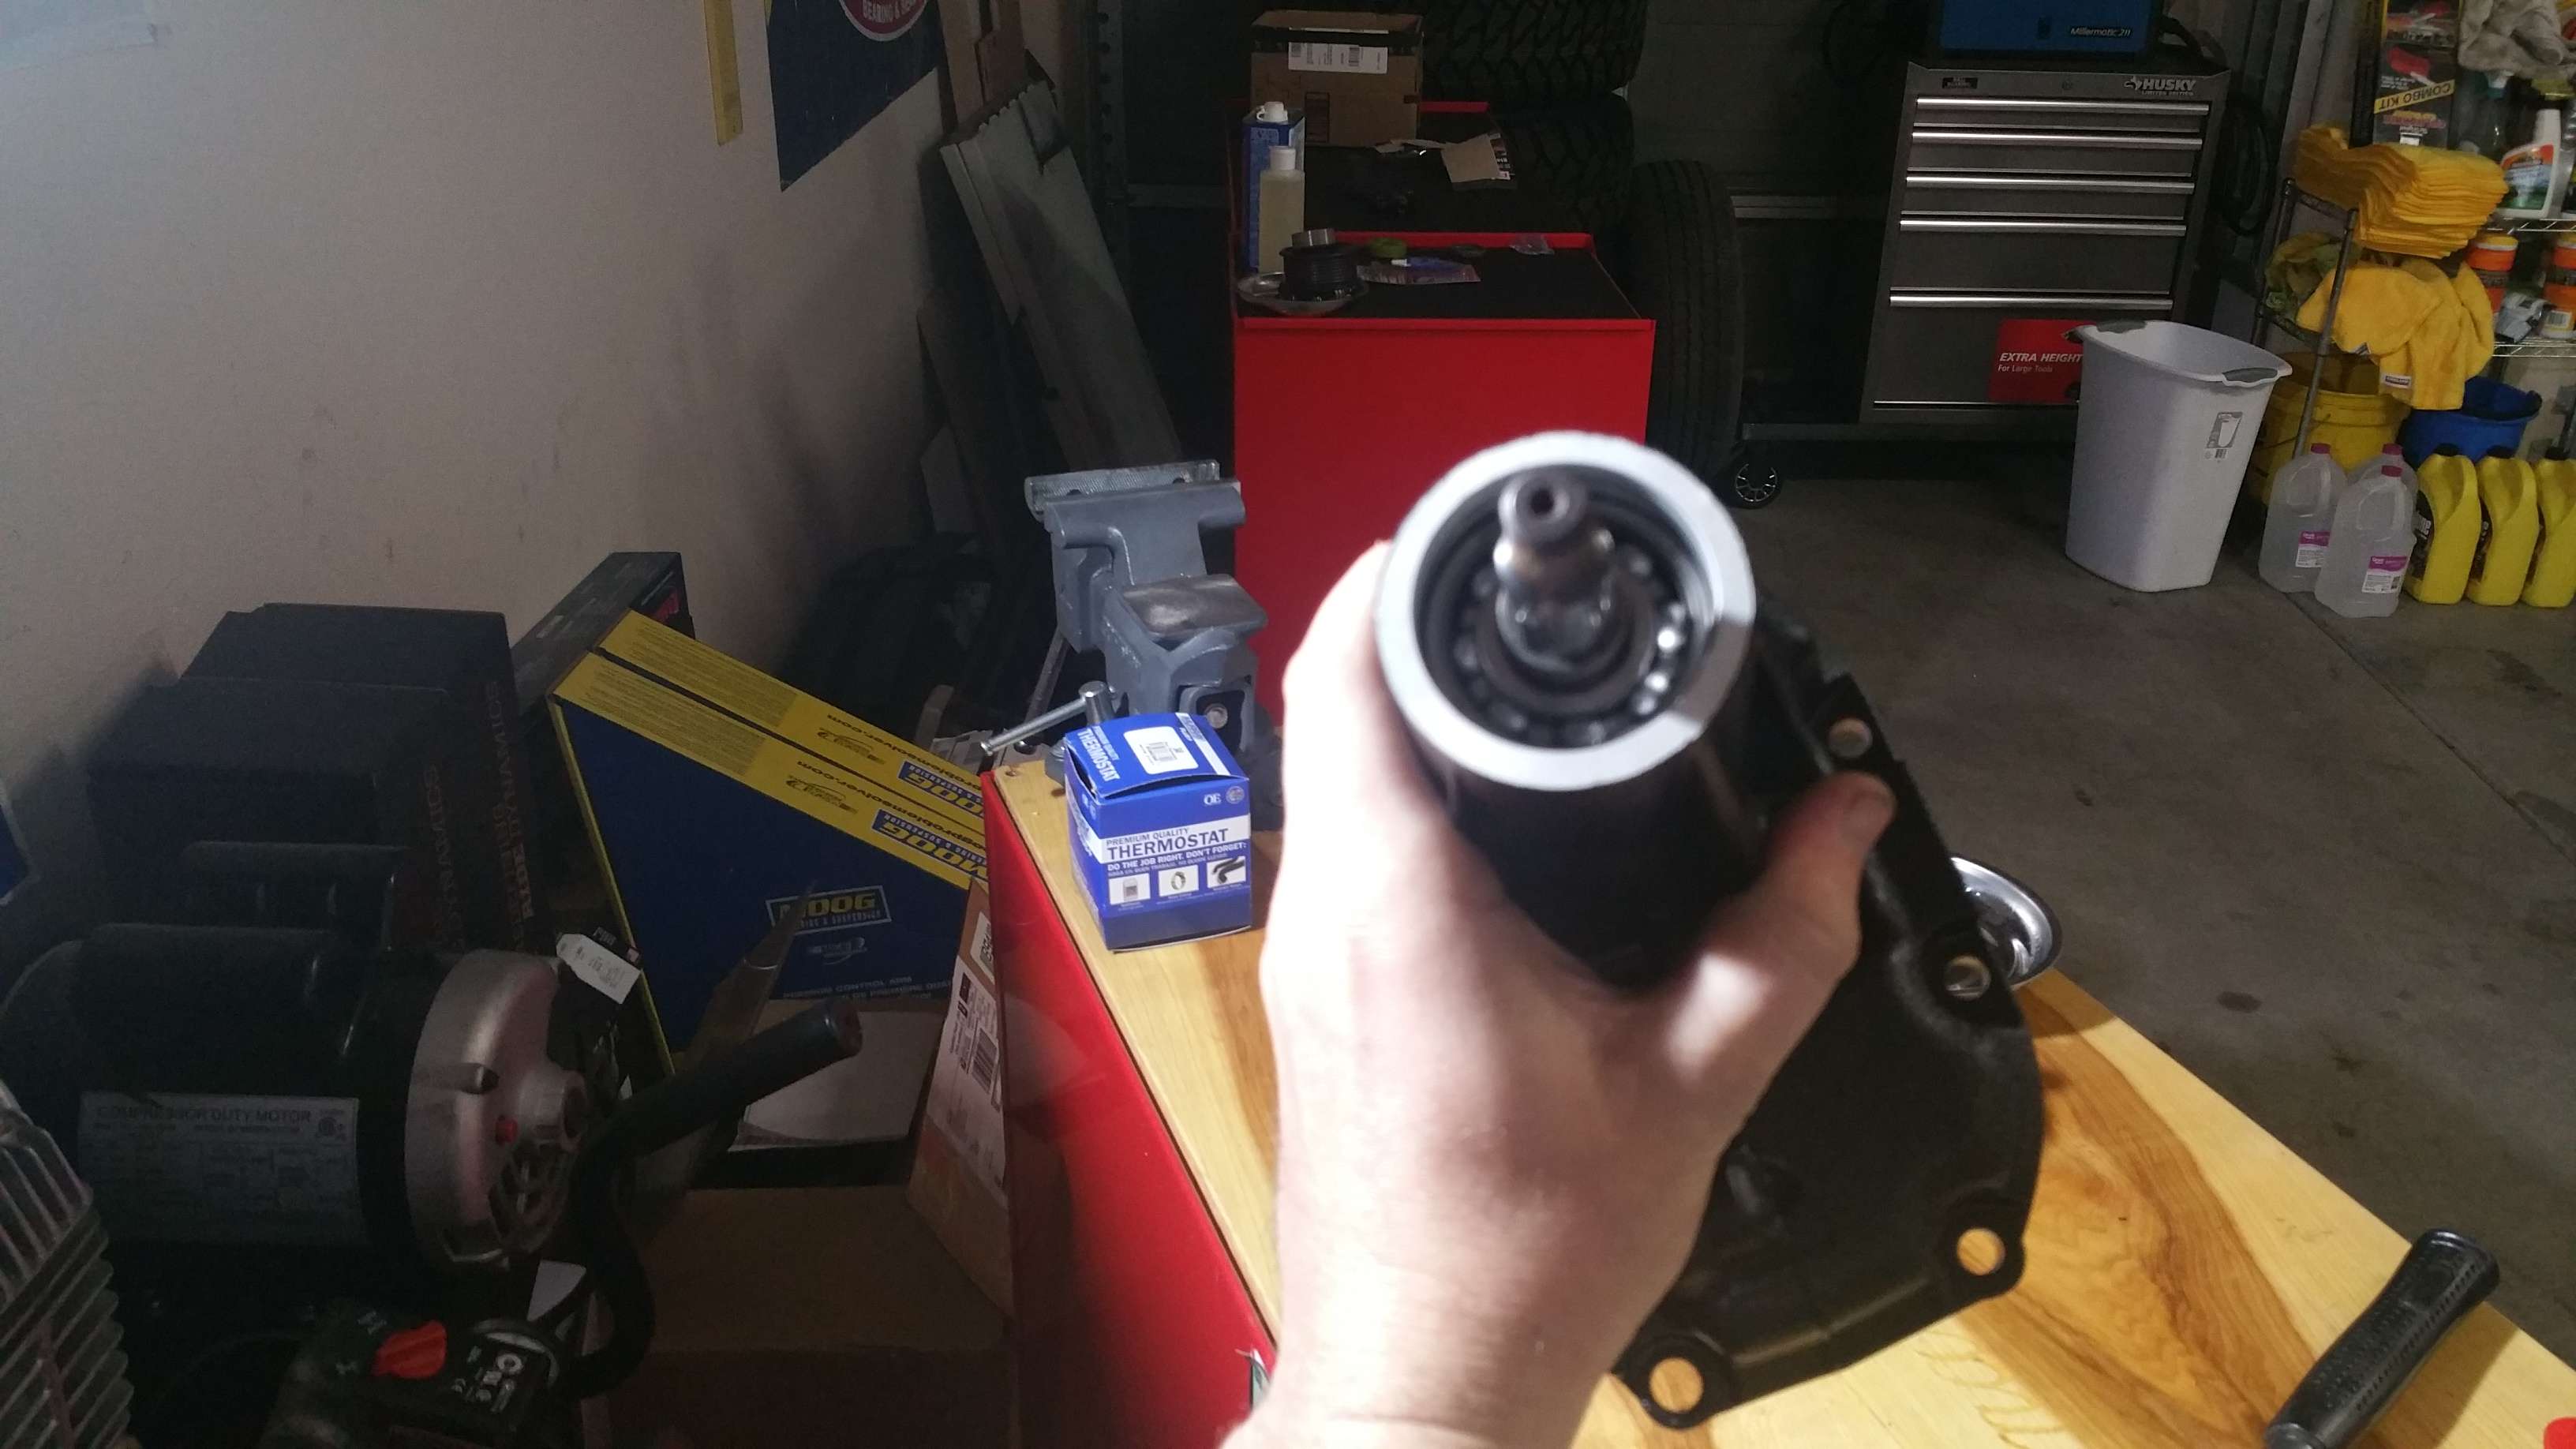
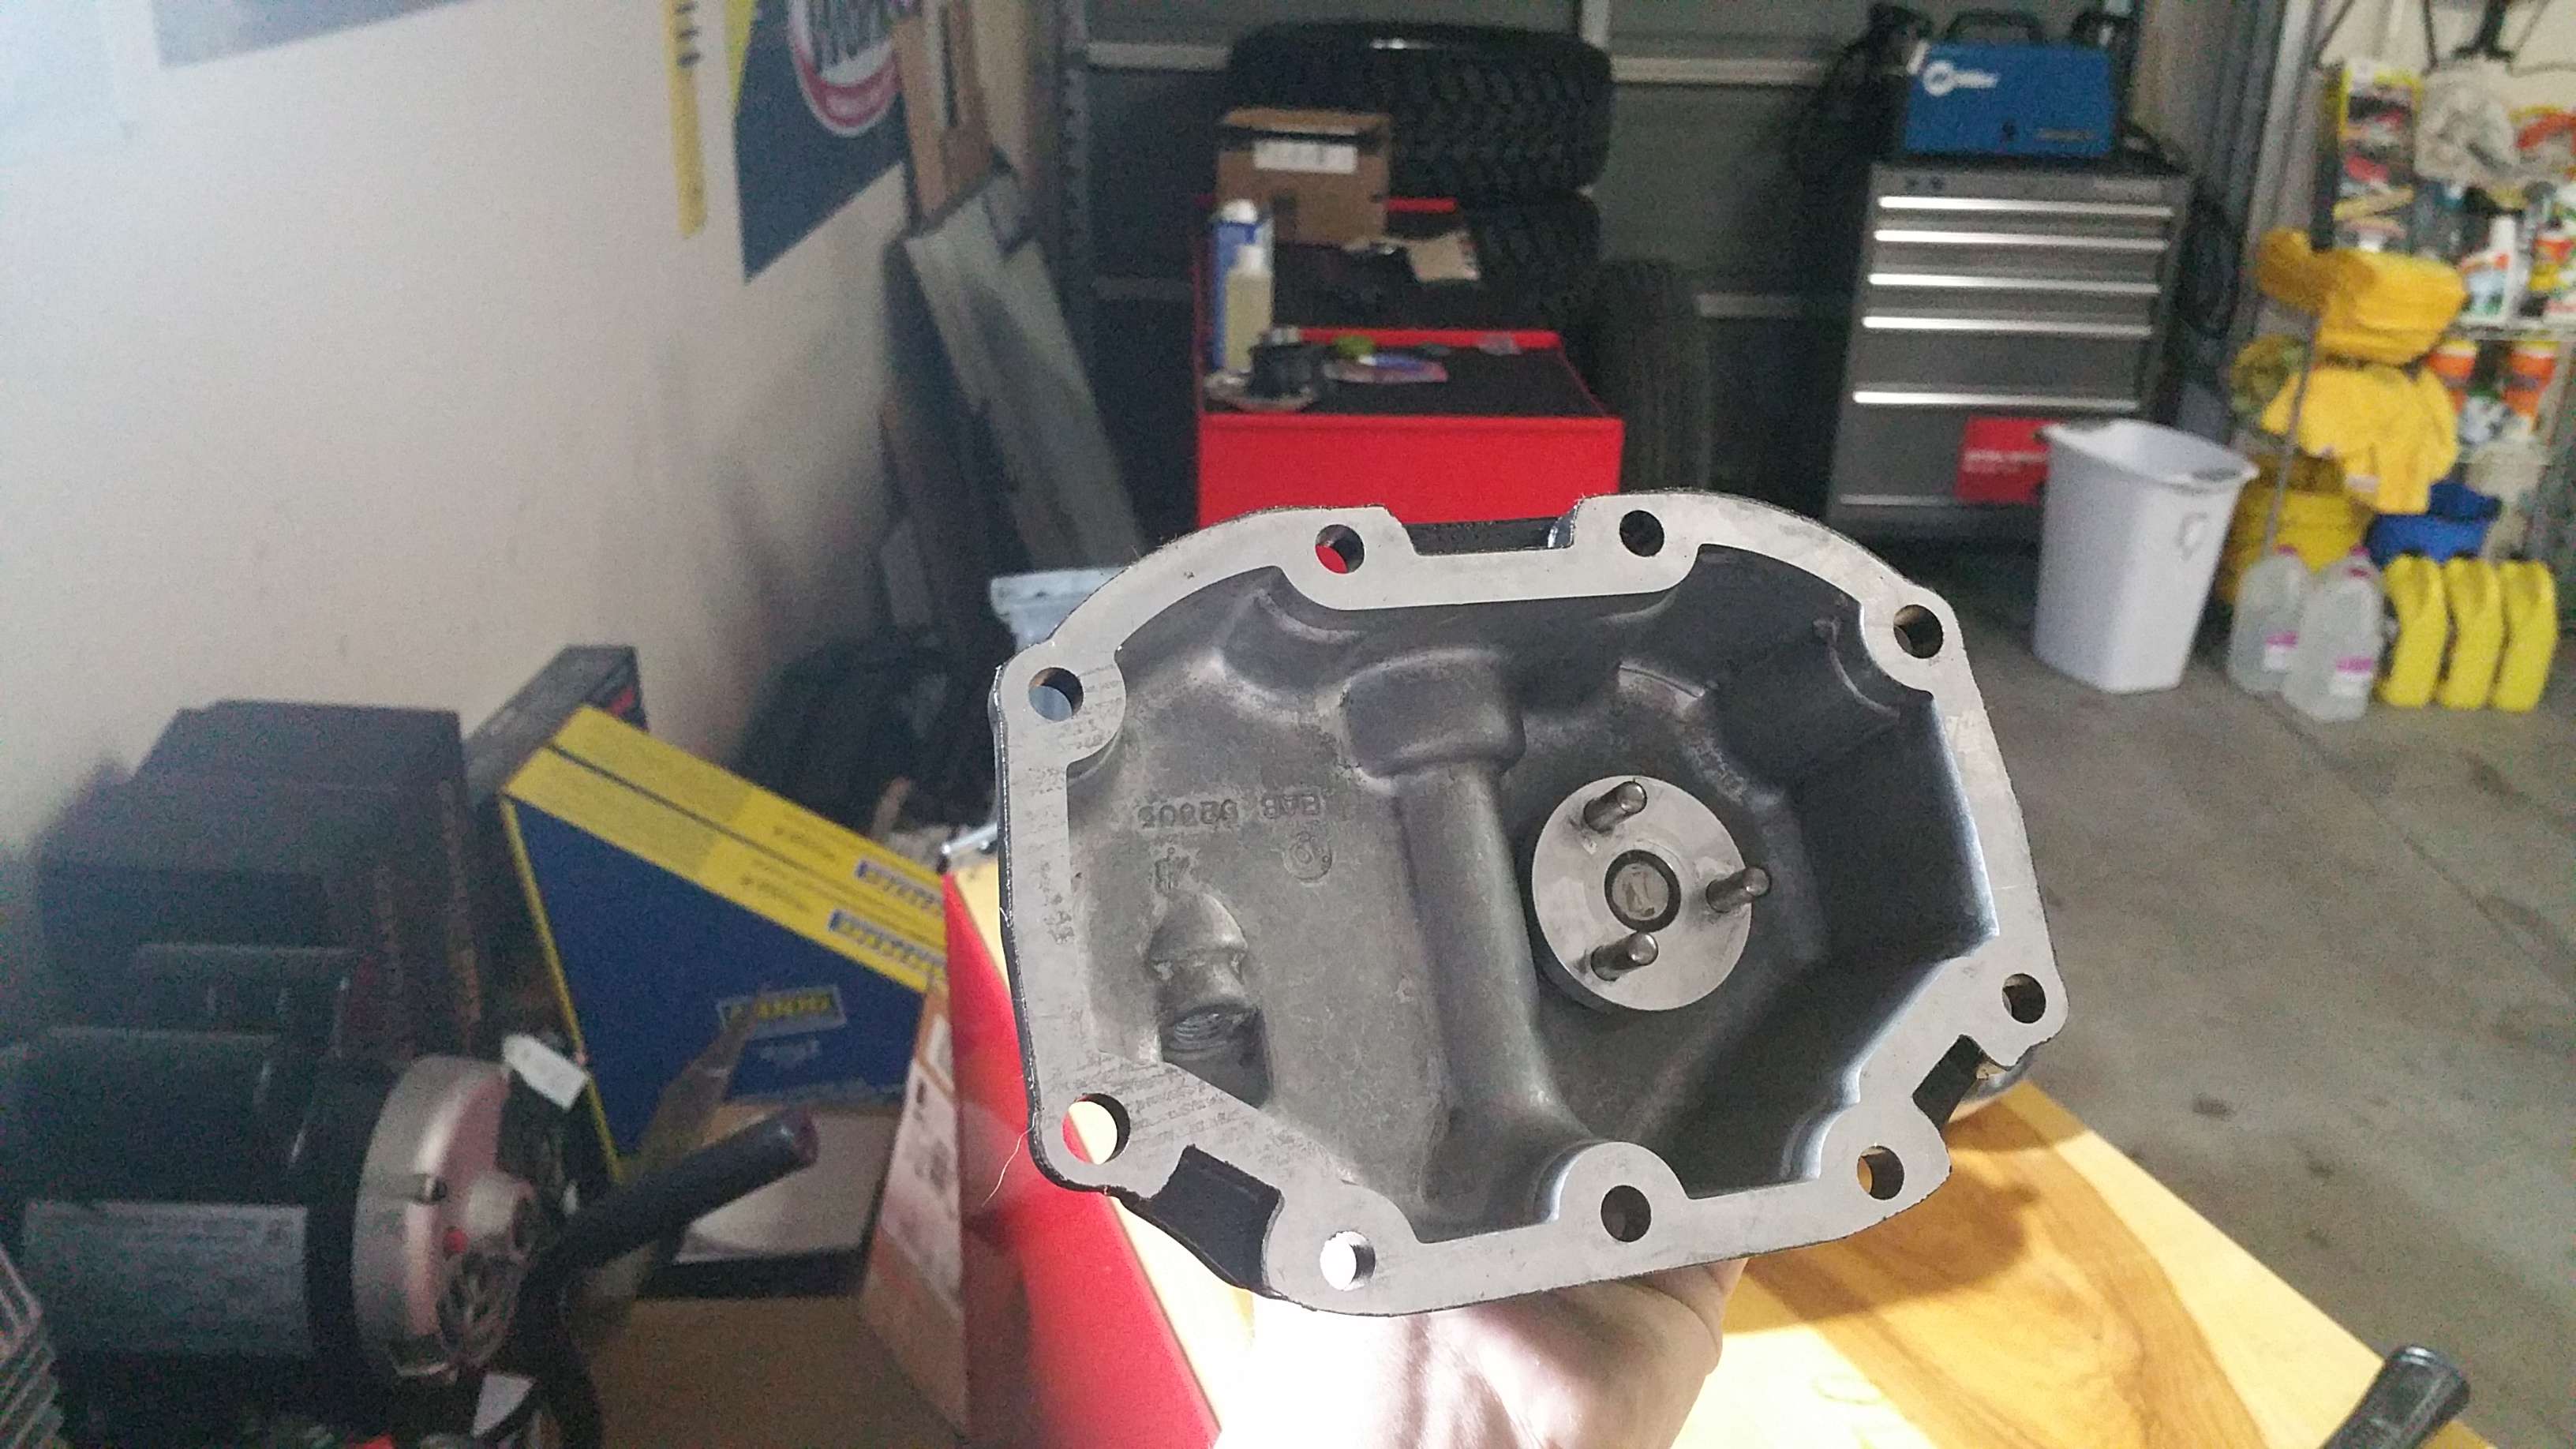
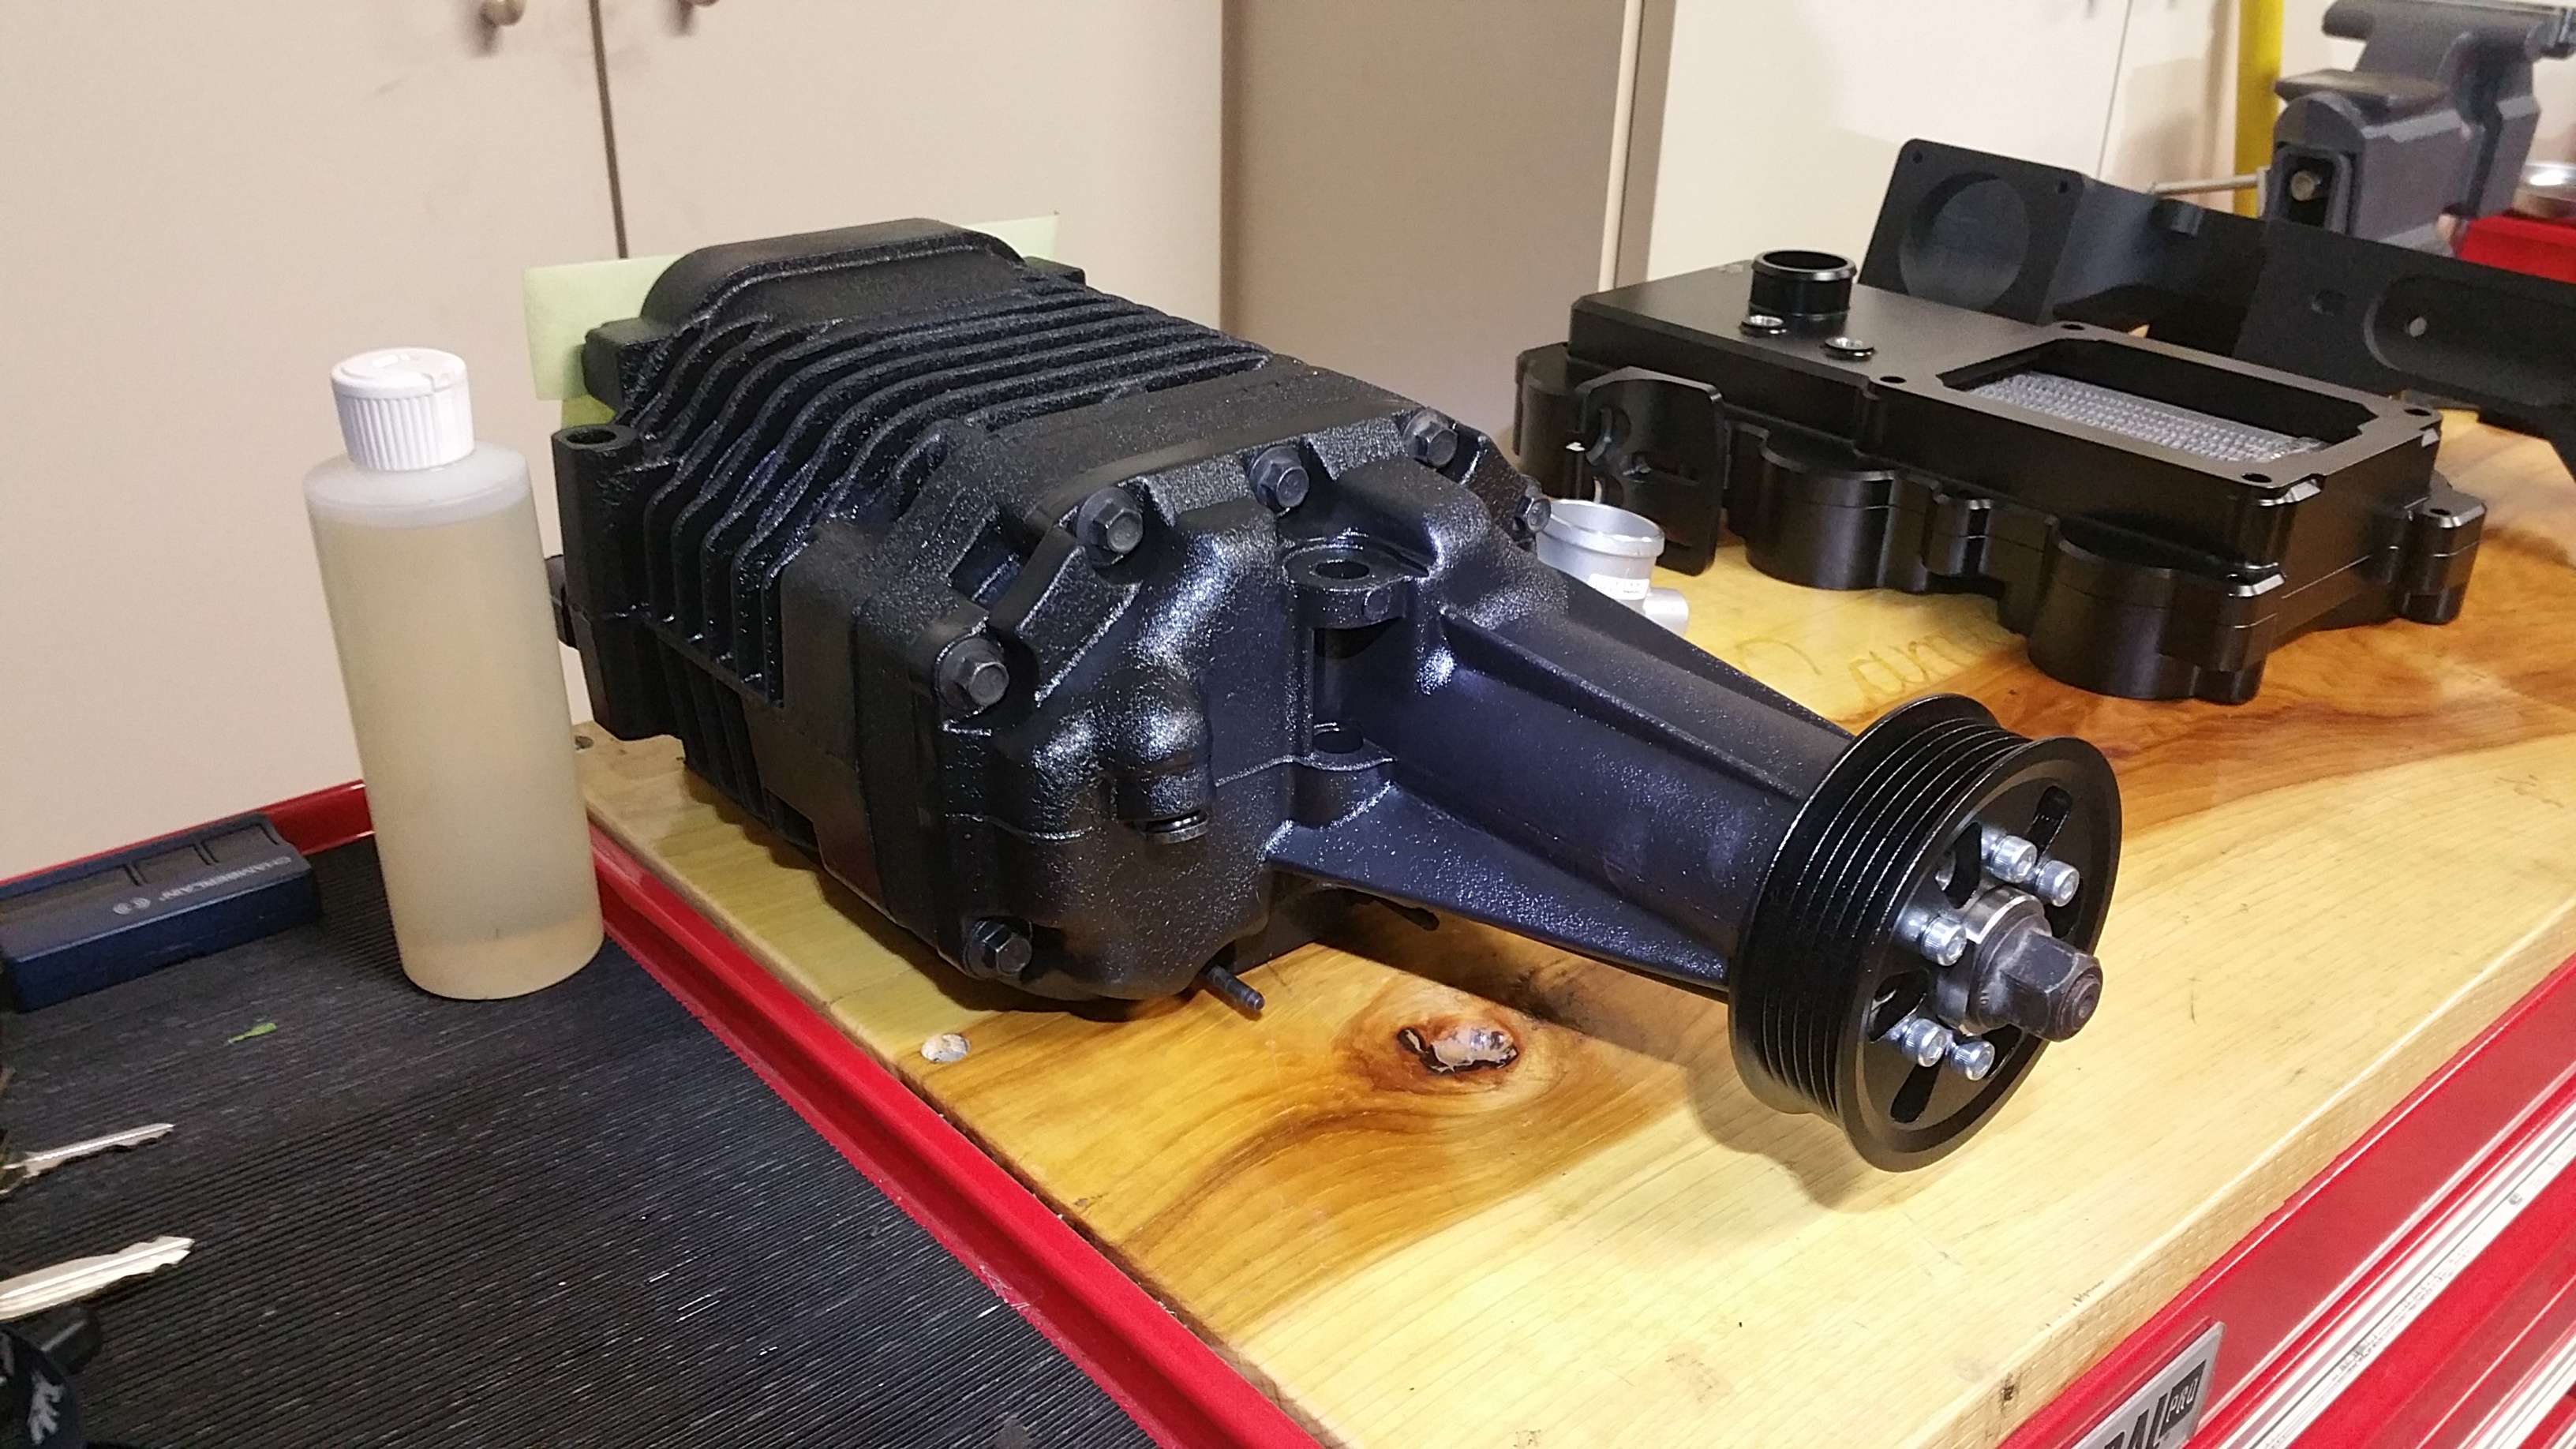
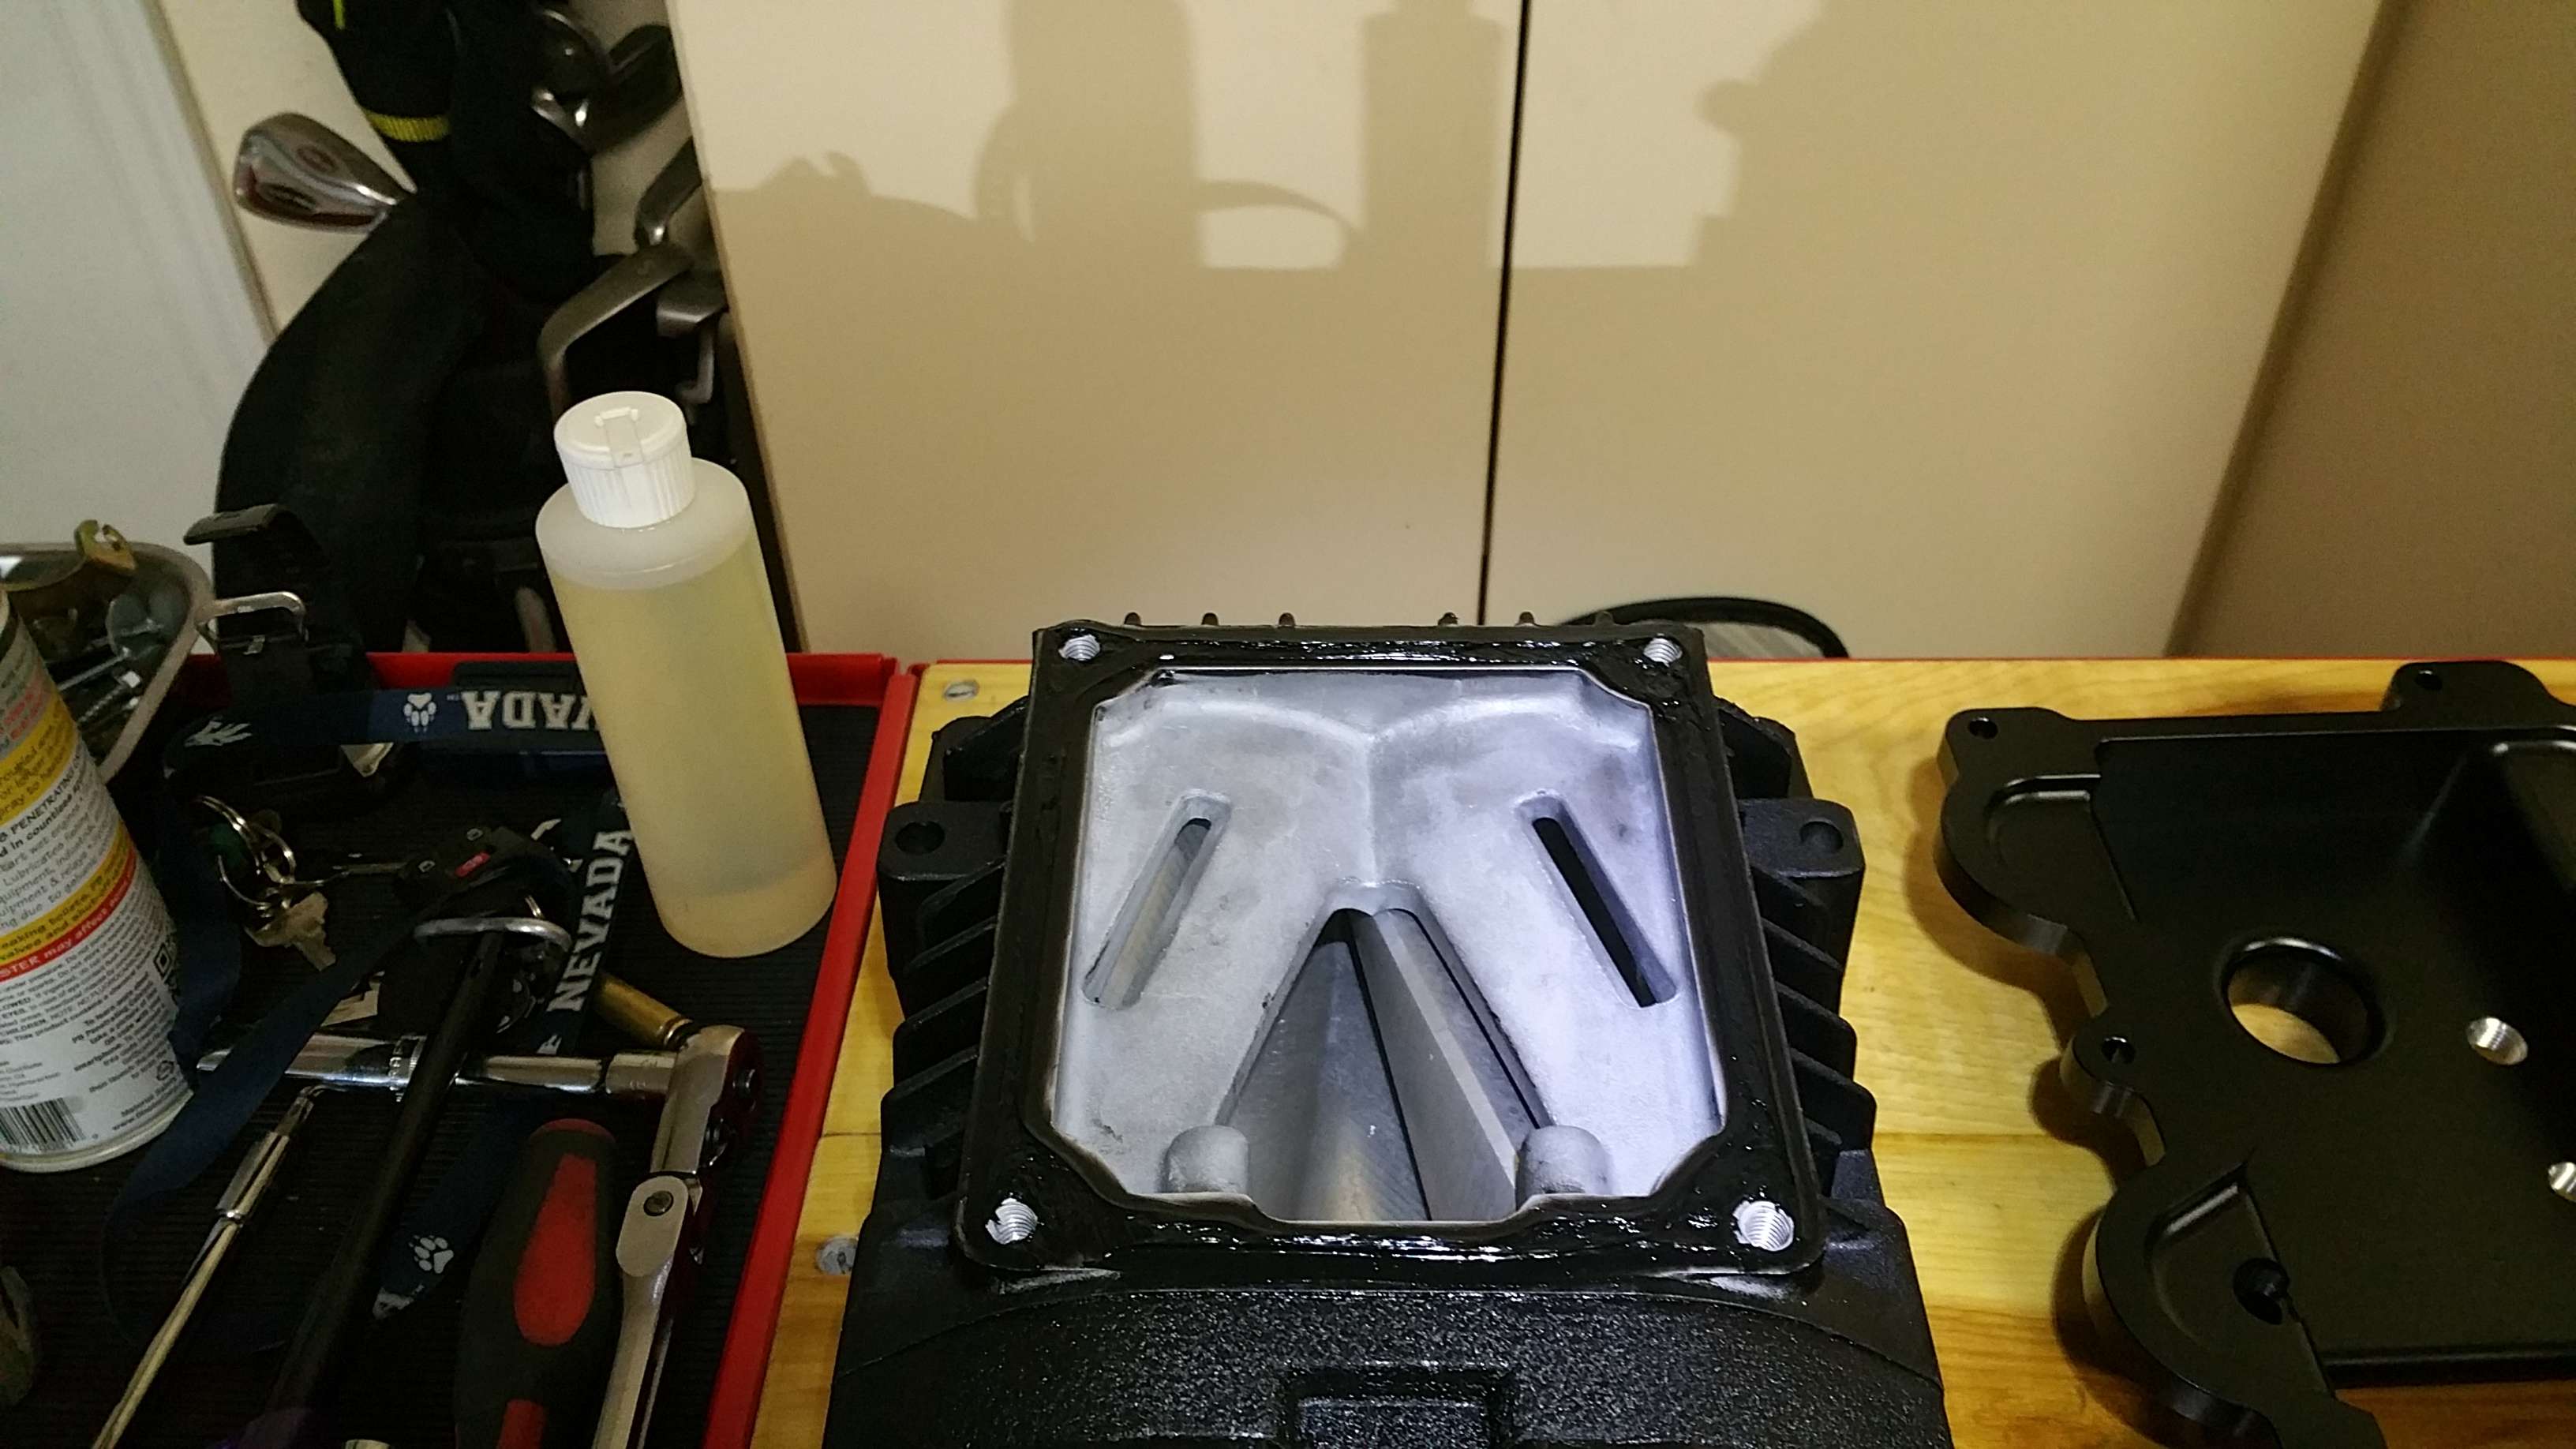
Now I start to dig into the 1994 Eaton M90 (Oval Port) supercharger. I got it off cragslist I think? for $300. I actually think I got it off these forums. Anyways, I bought a rebuild kit from a private site that has all the quality bearings, seals, and original oil for the thing. I yanked it apart, inspected everything, had the exterior sodablasted for $50, painted it with wrinkle spray paint, and re-assembled it. When pulling one of the inner bearings off, It shattered and left the inner race still on the shaft. I had to do some creative grinding and wrenching to get it off, but everything came apart eventually.


#10
10-28-2016
Join Date: Jul 2015
Location: Reno, Nevada
Posts: 52
Likes: 0
Received 0 Likes
on
0 Posts
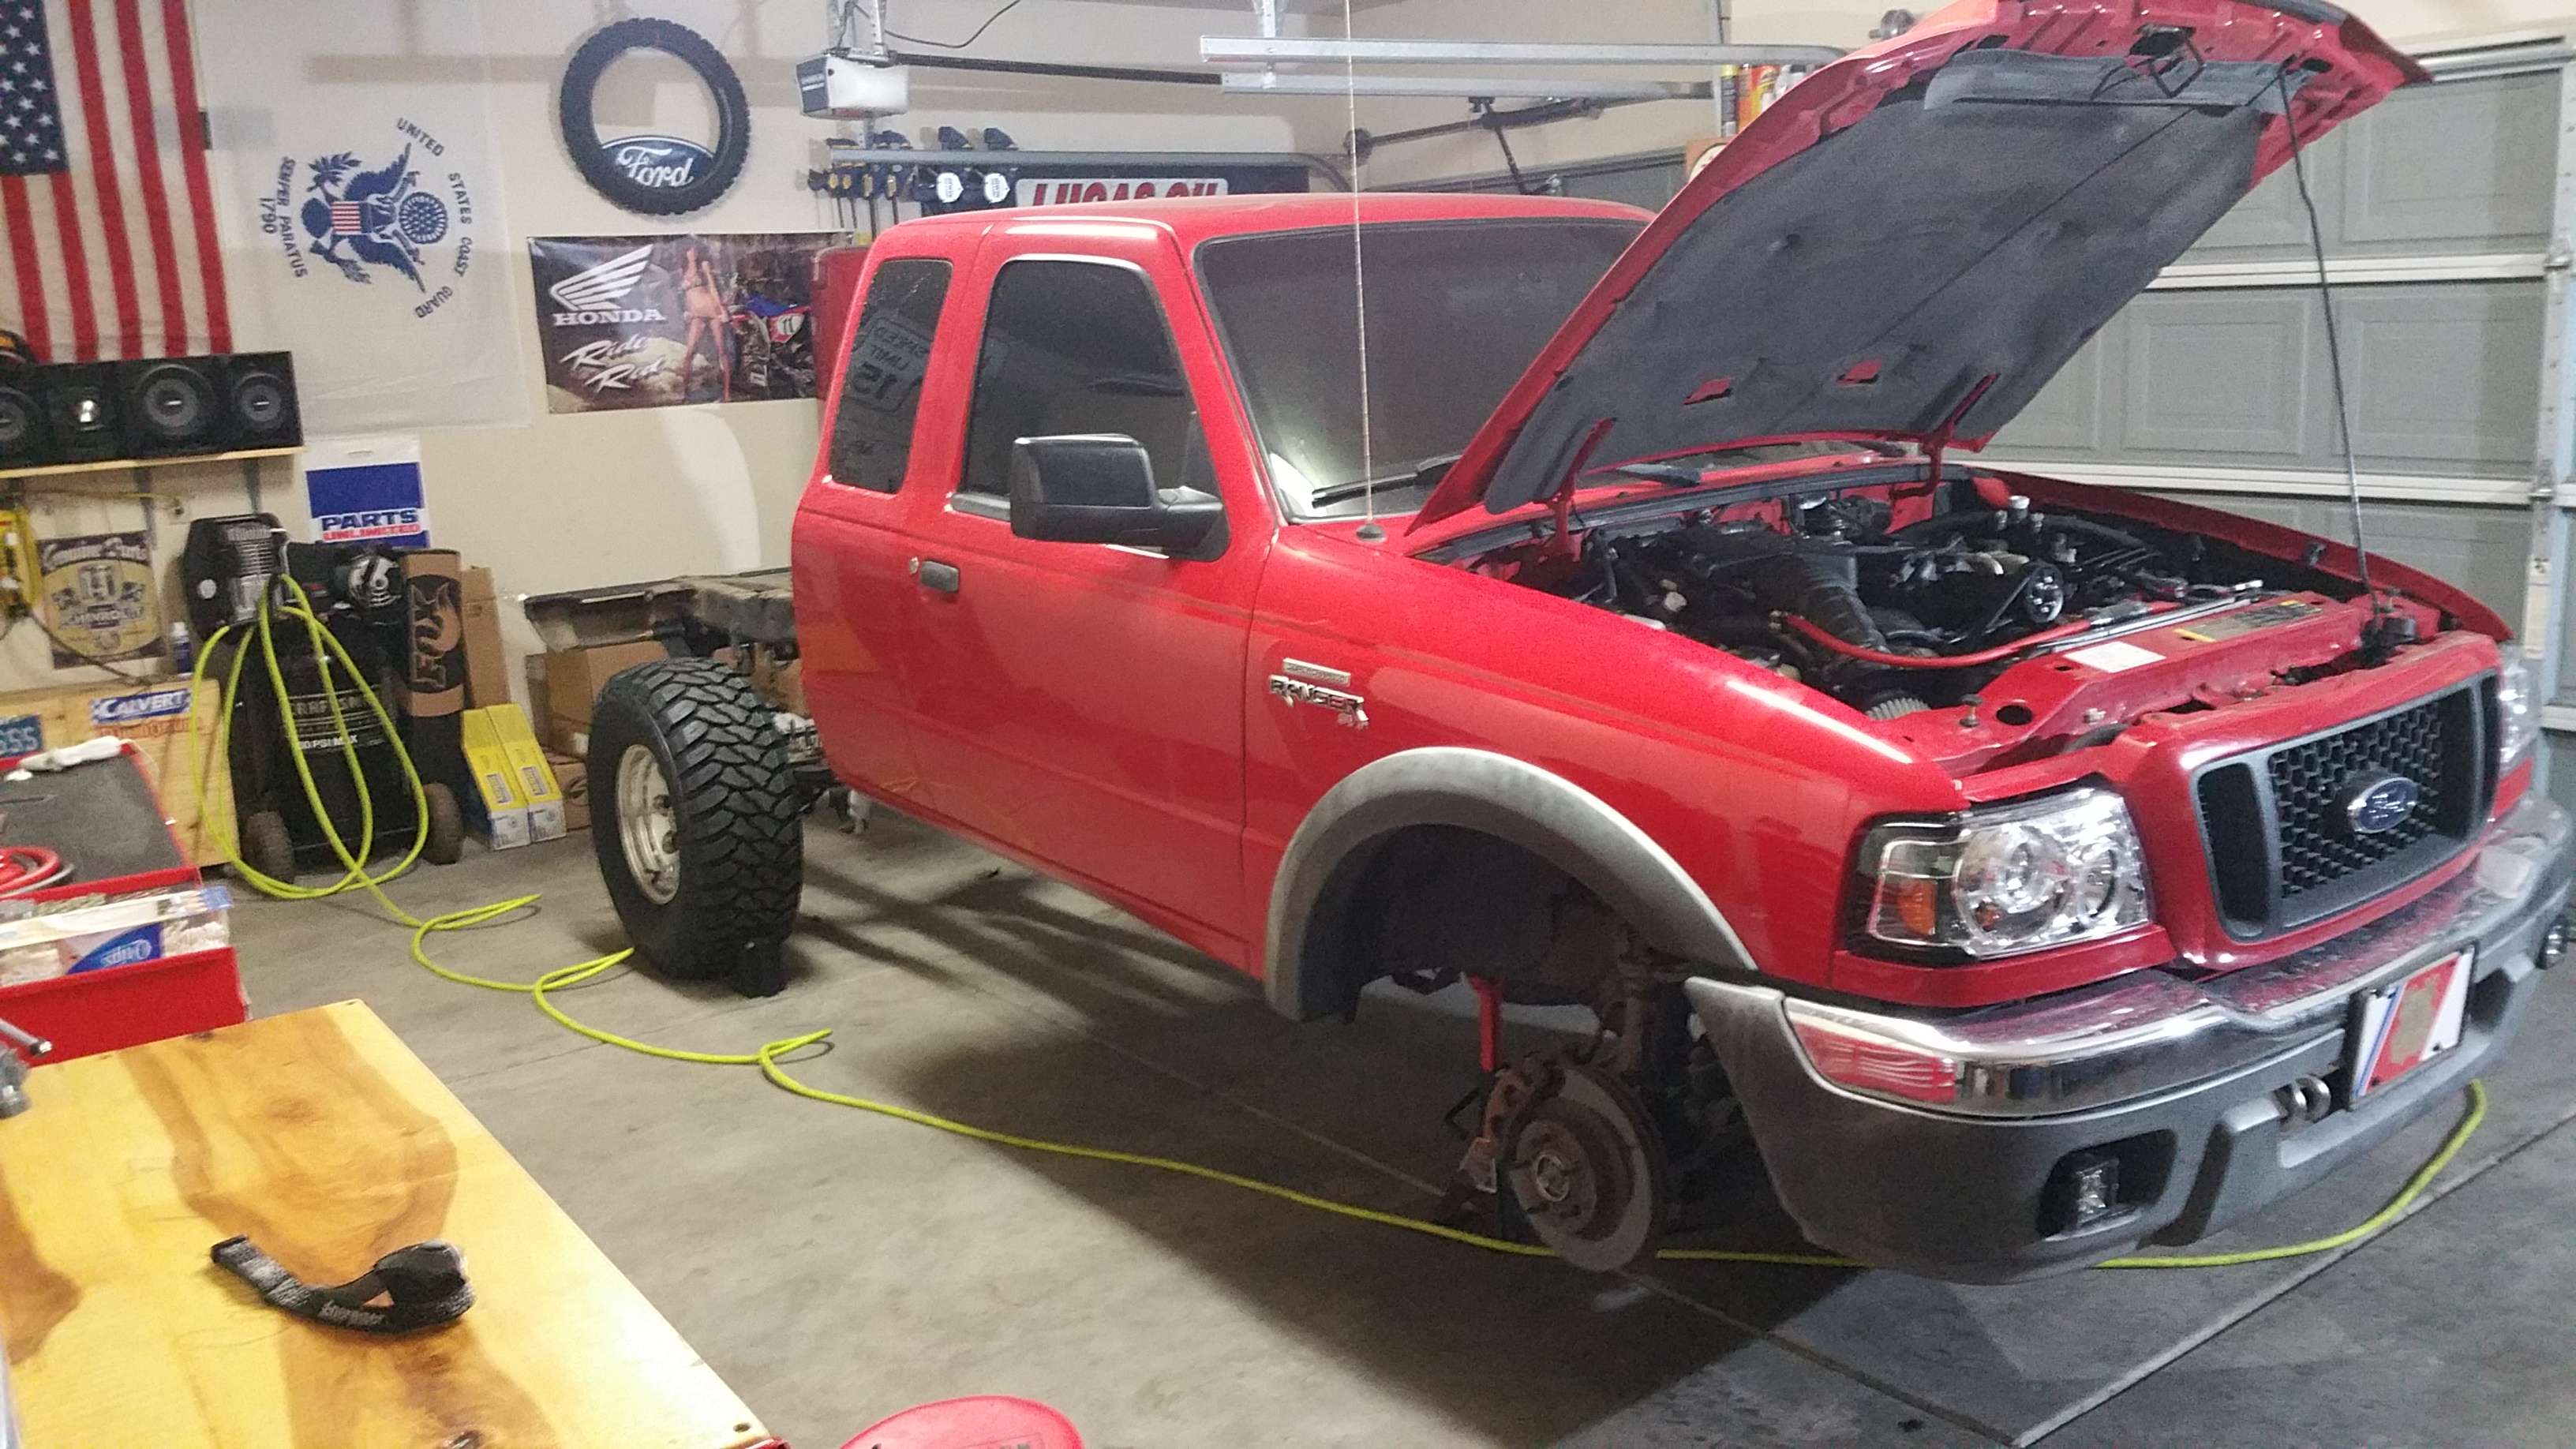
By now I think Winter break has started, and I begin to dig into the big projects: The superlift/coilover conversion, and the supercharger install.
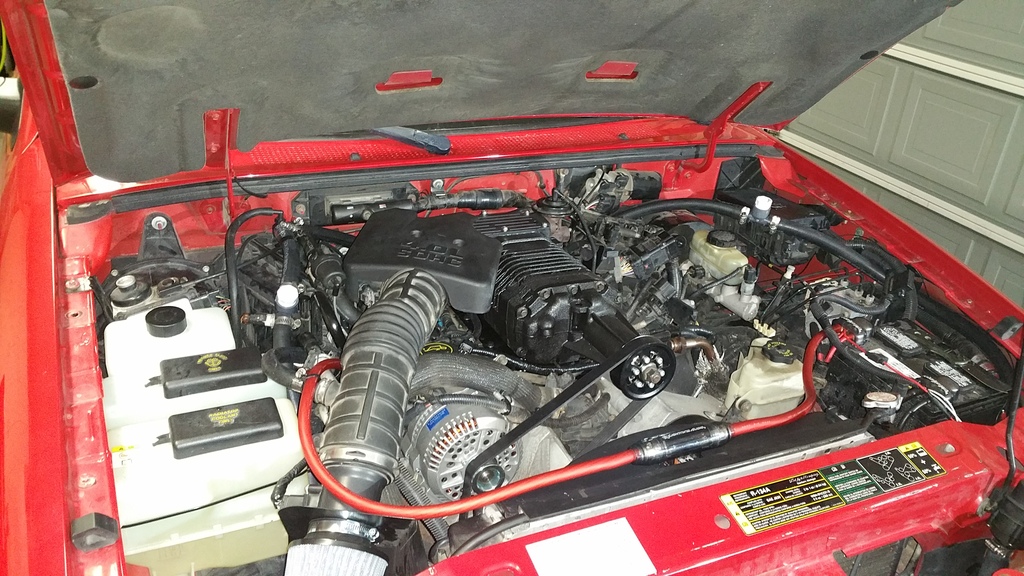
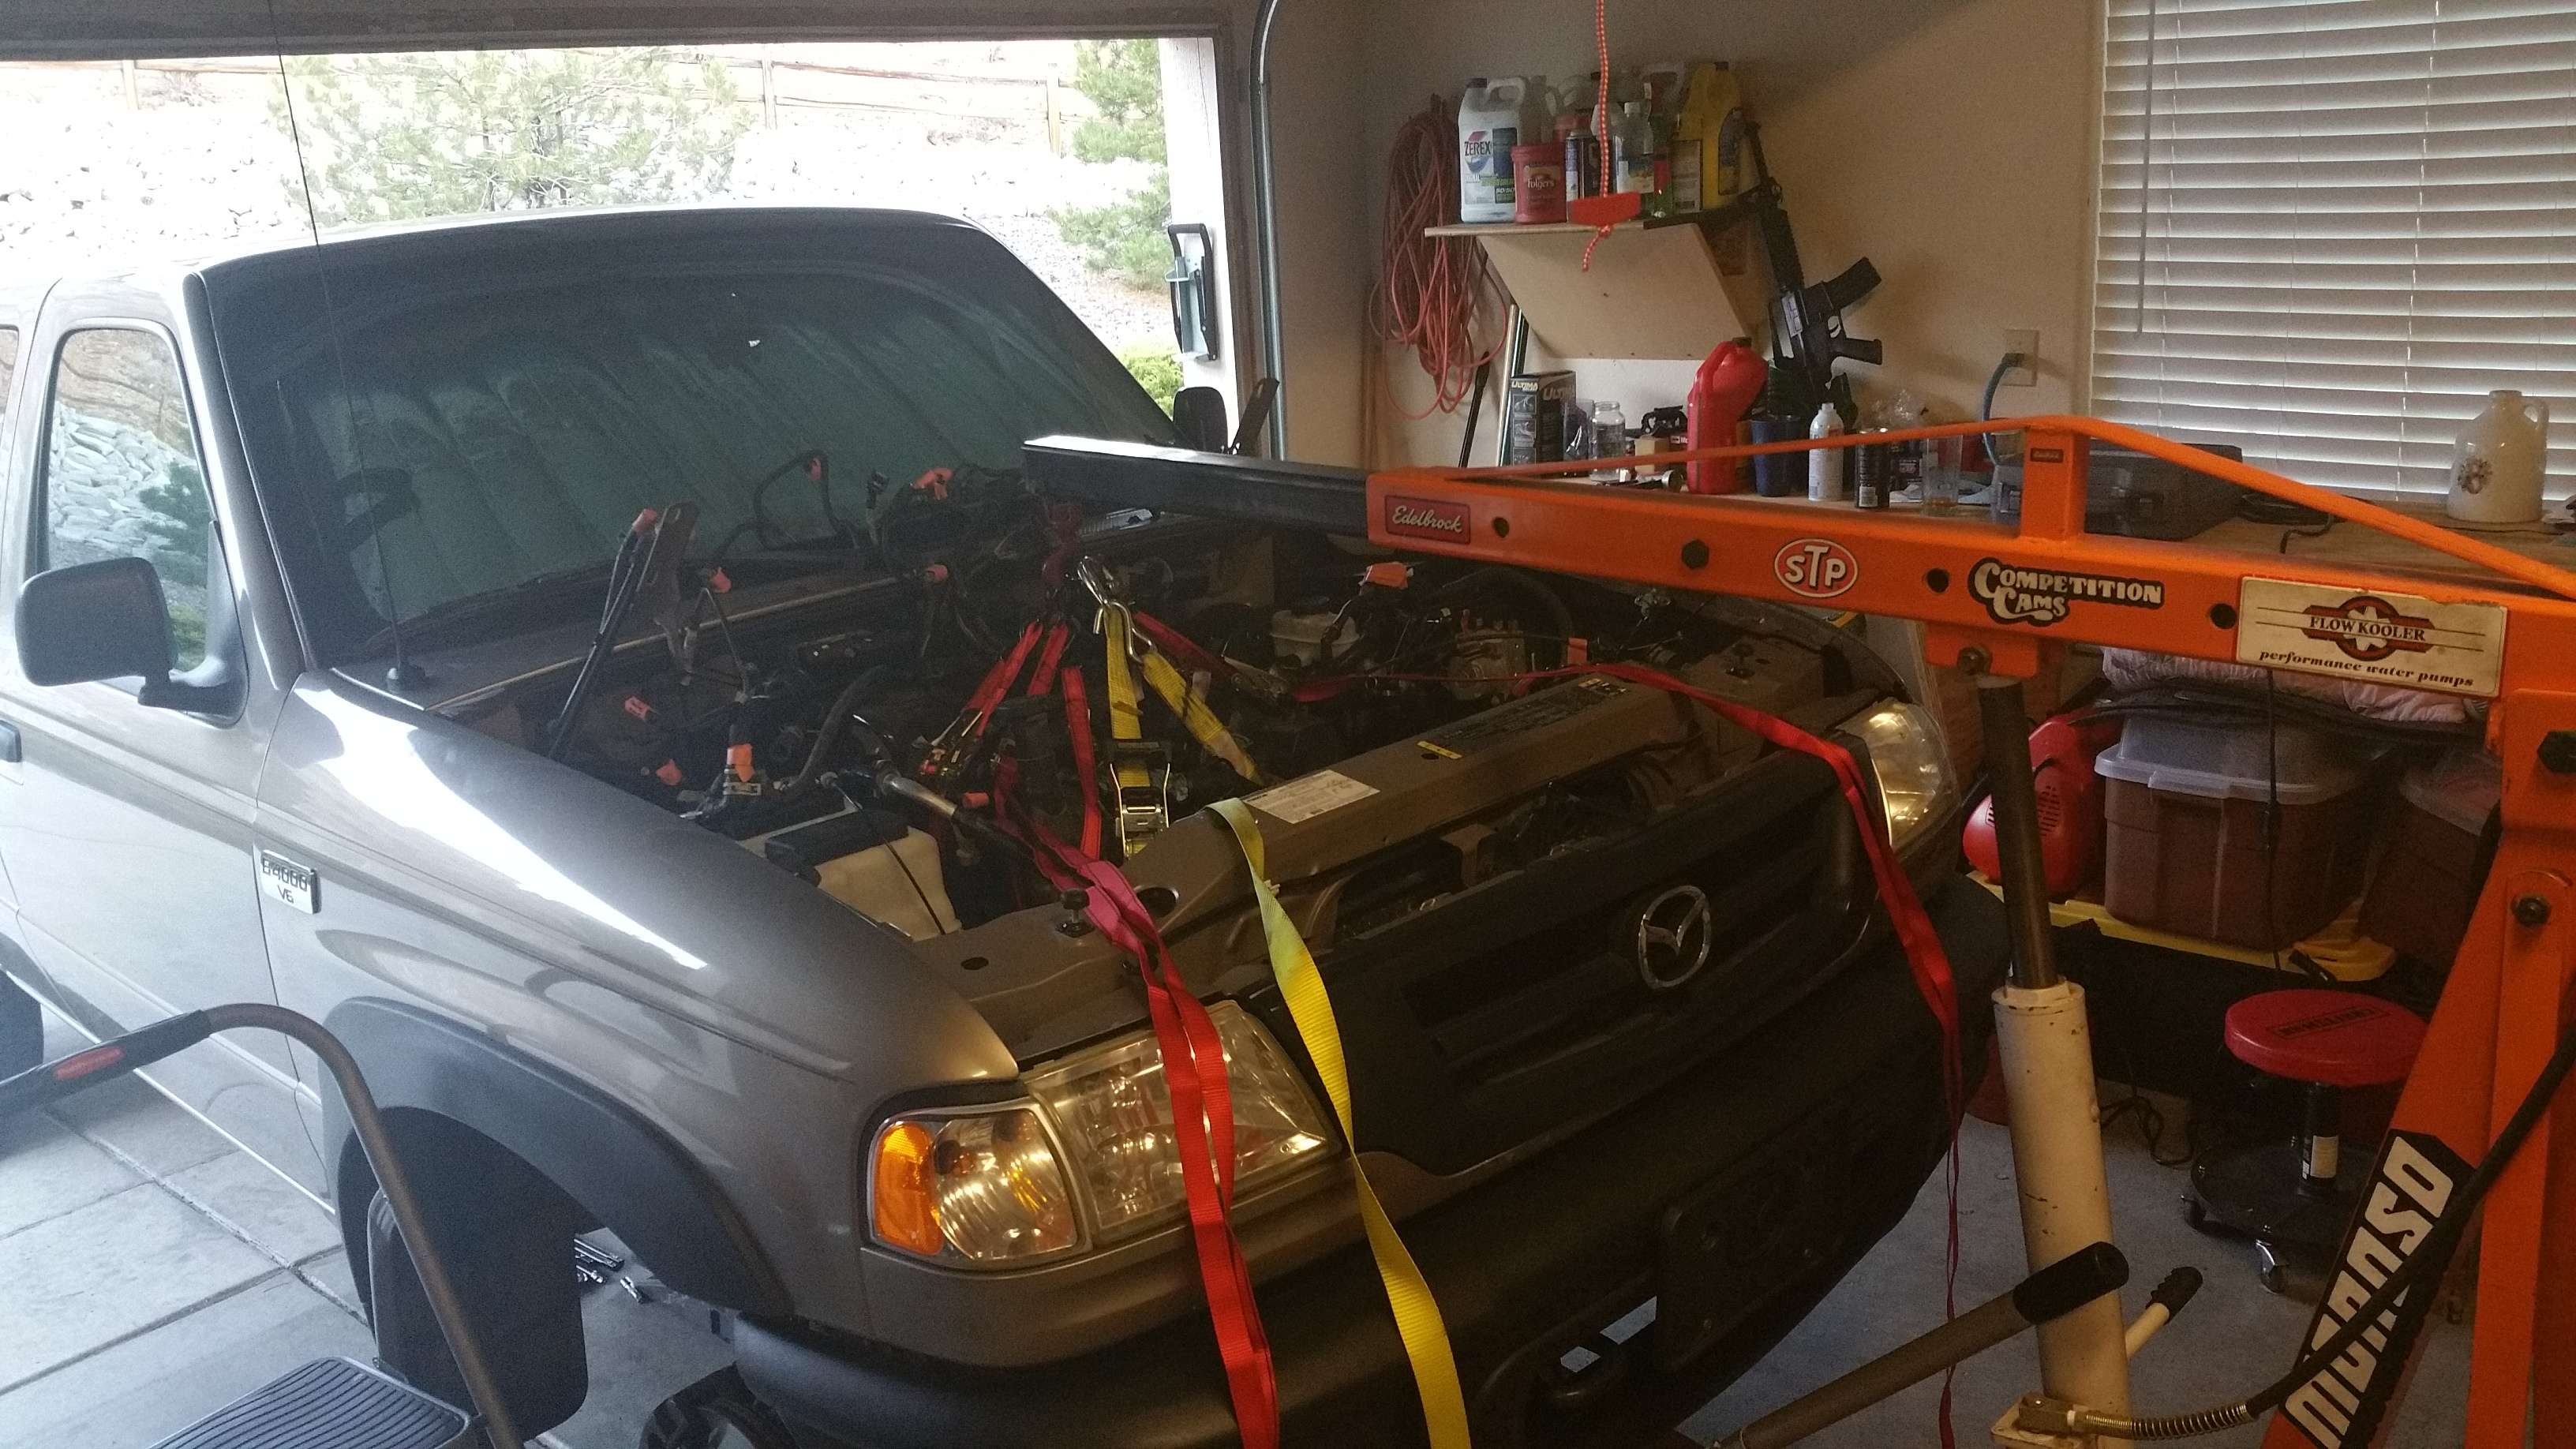
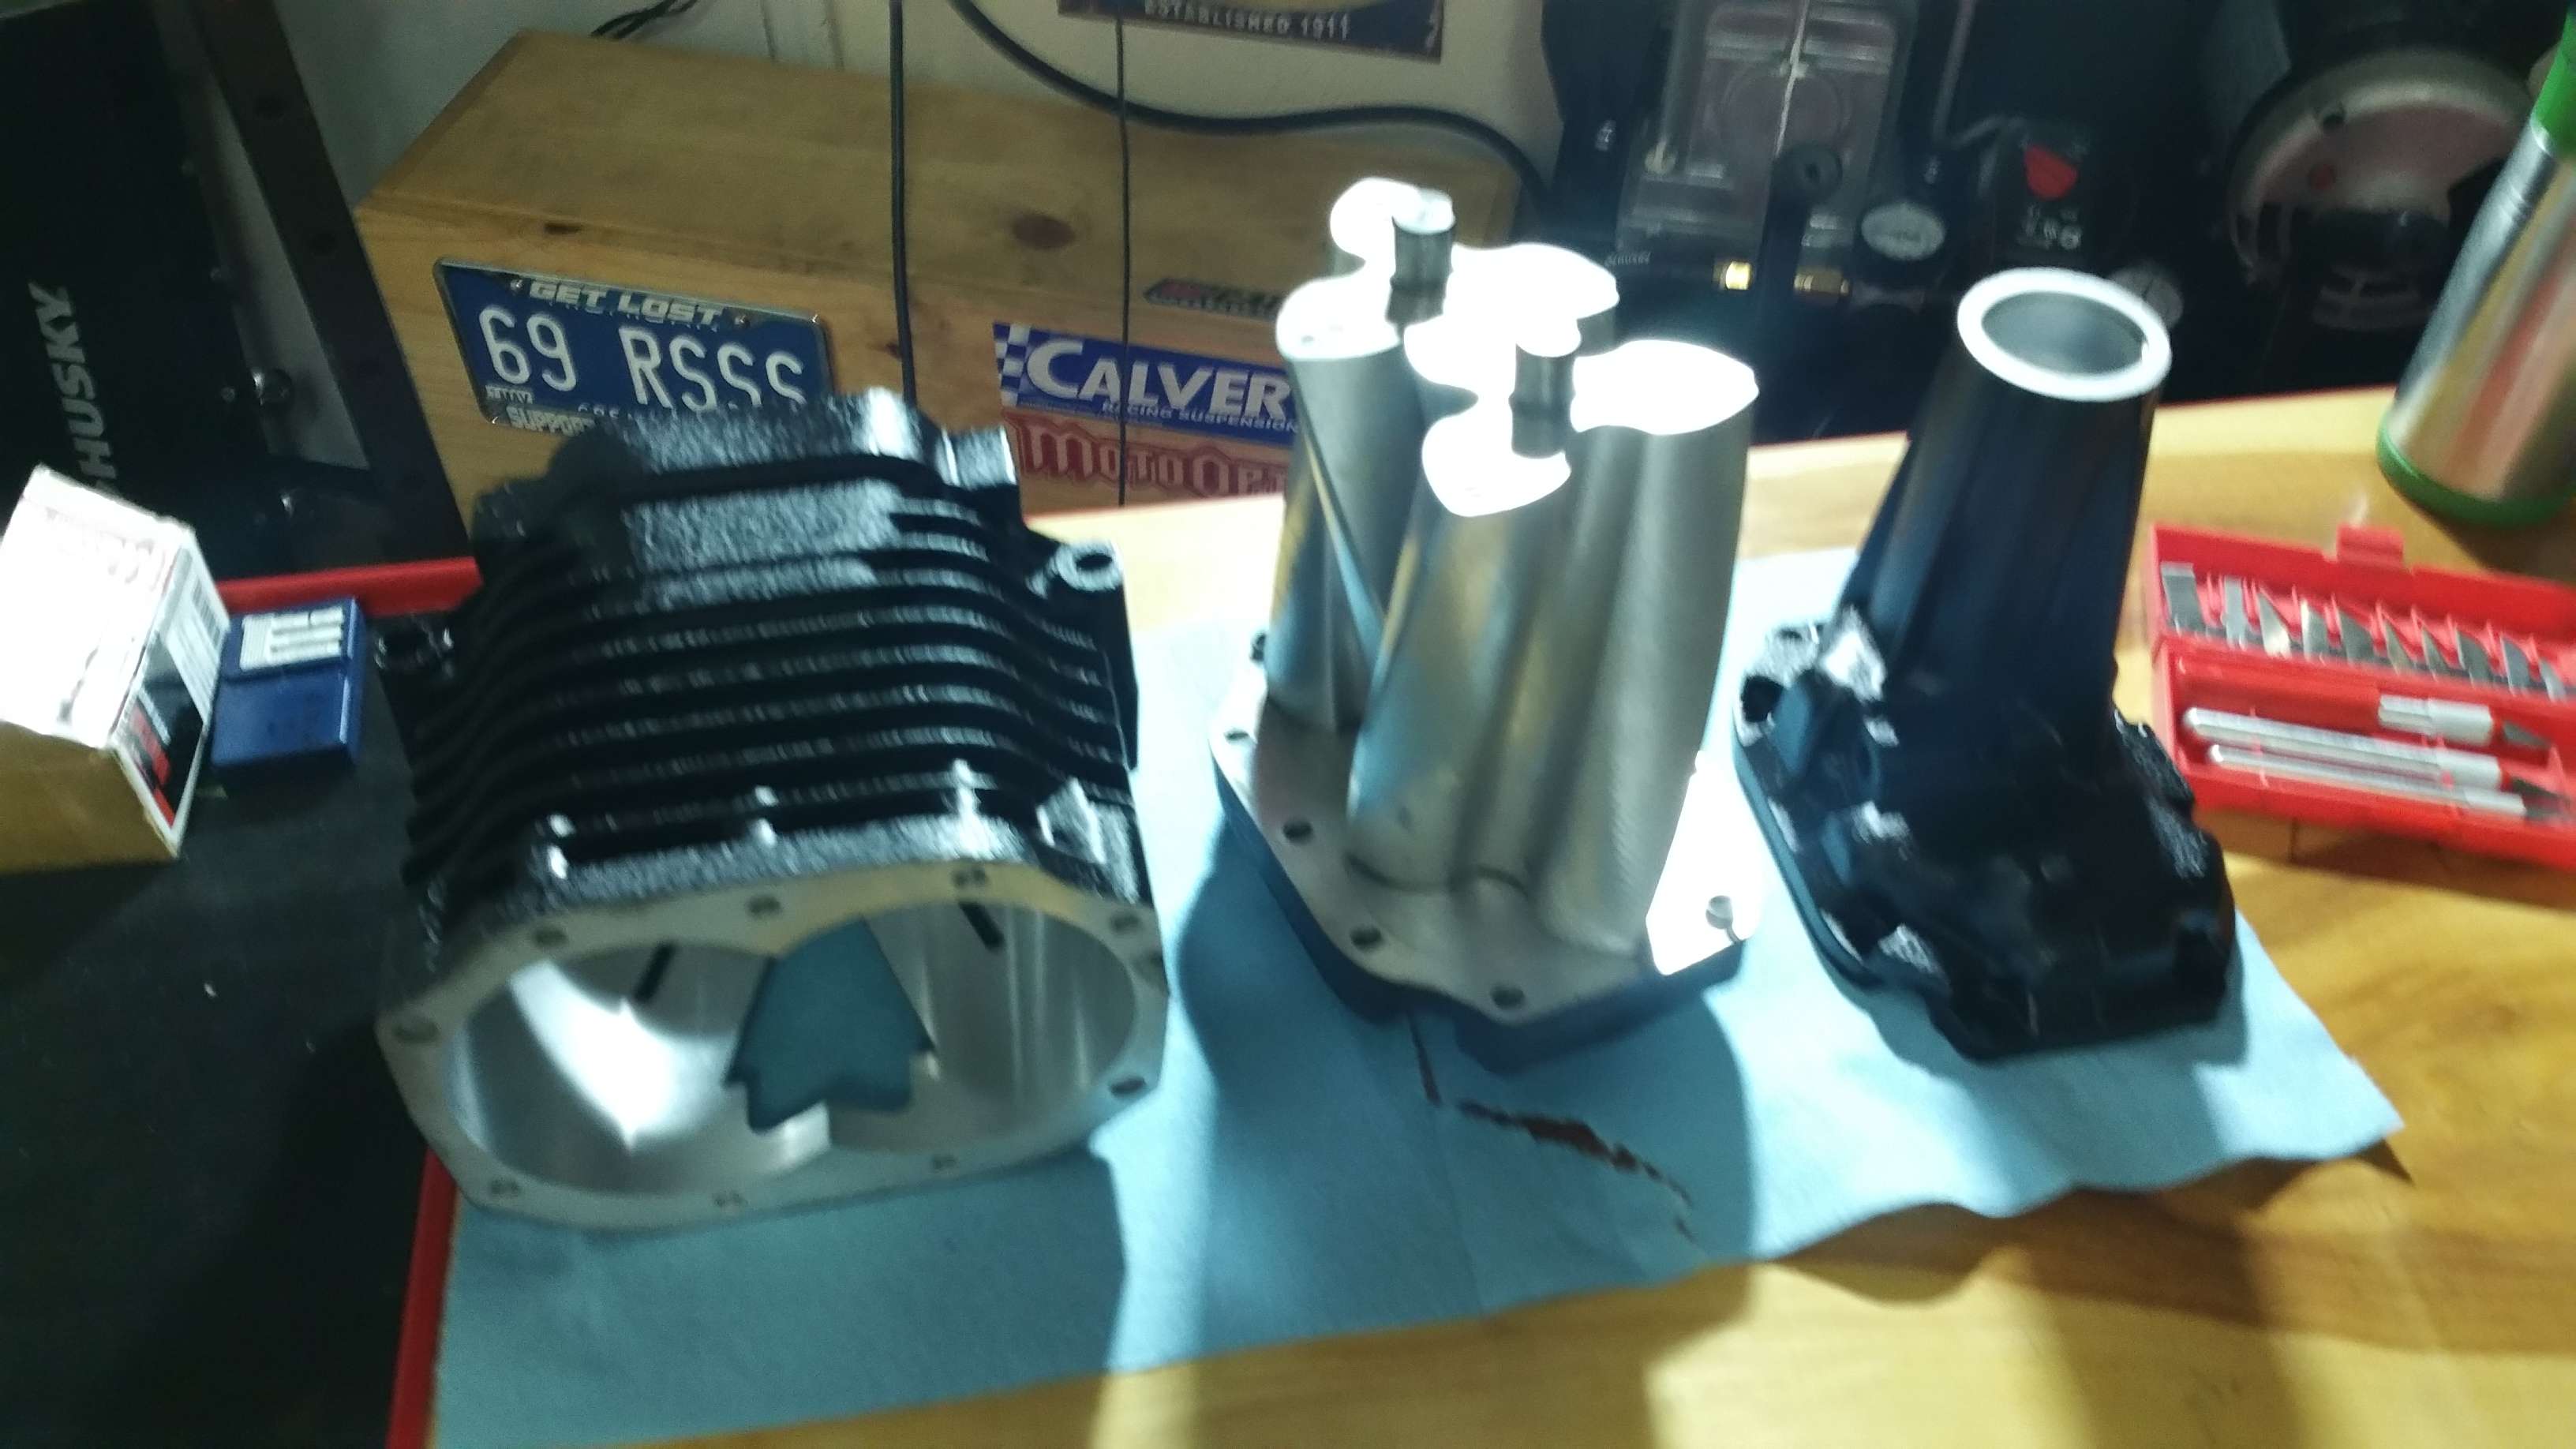
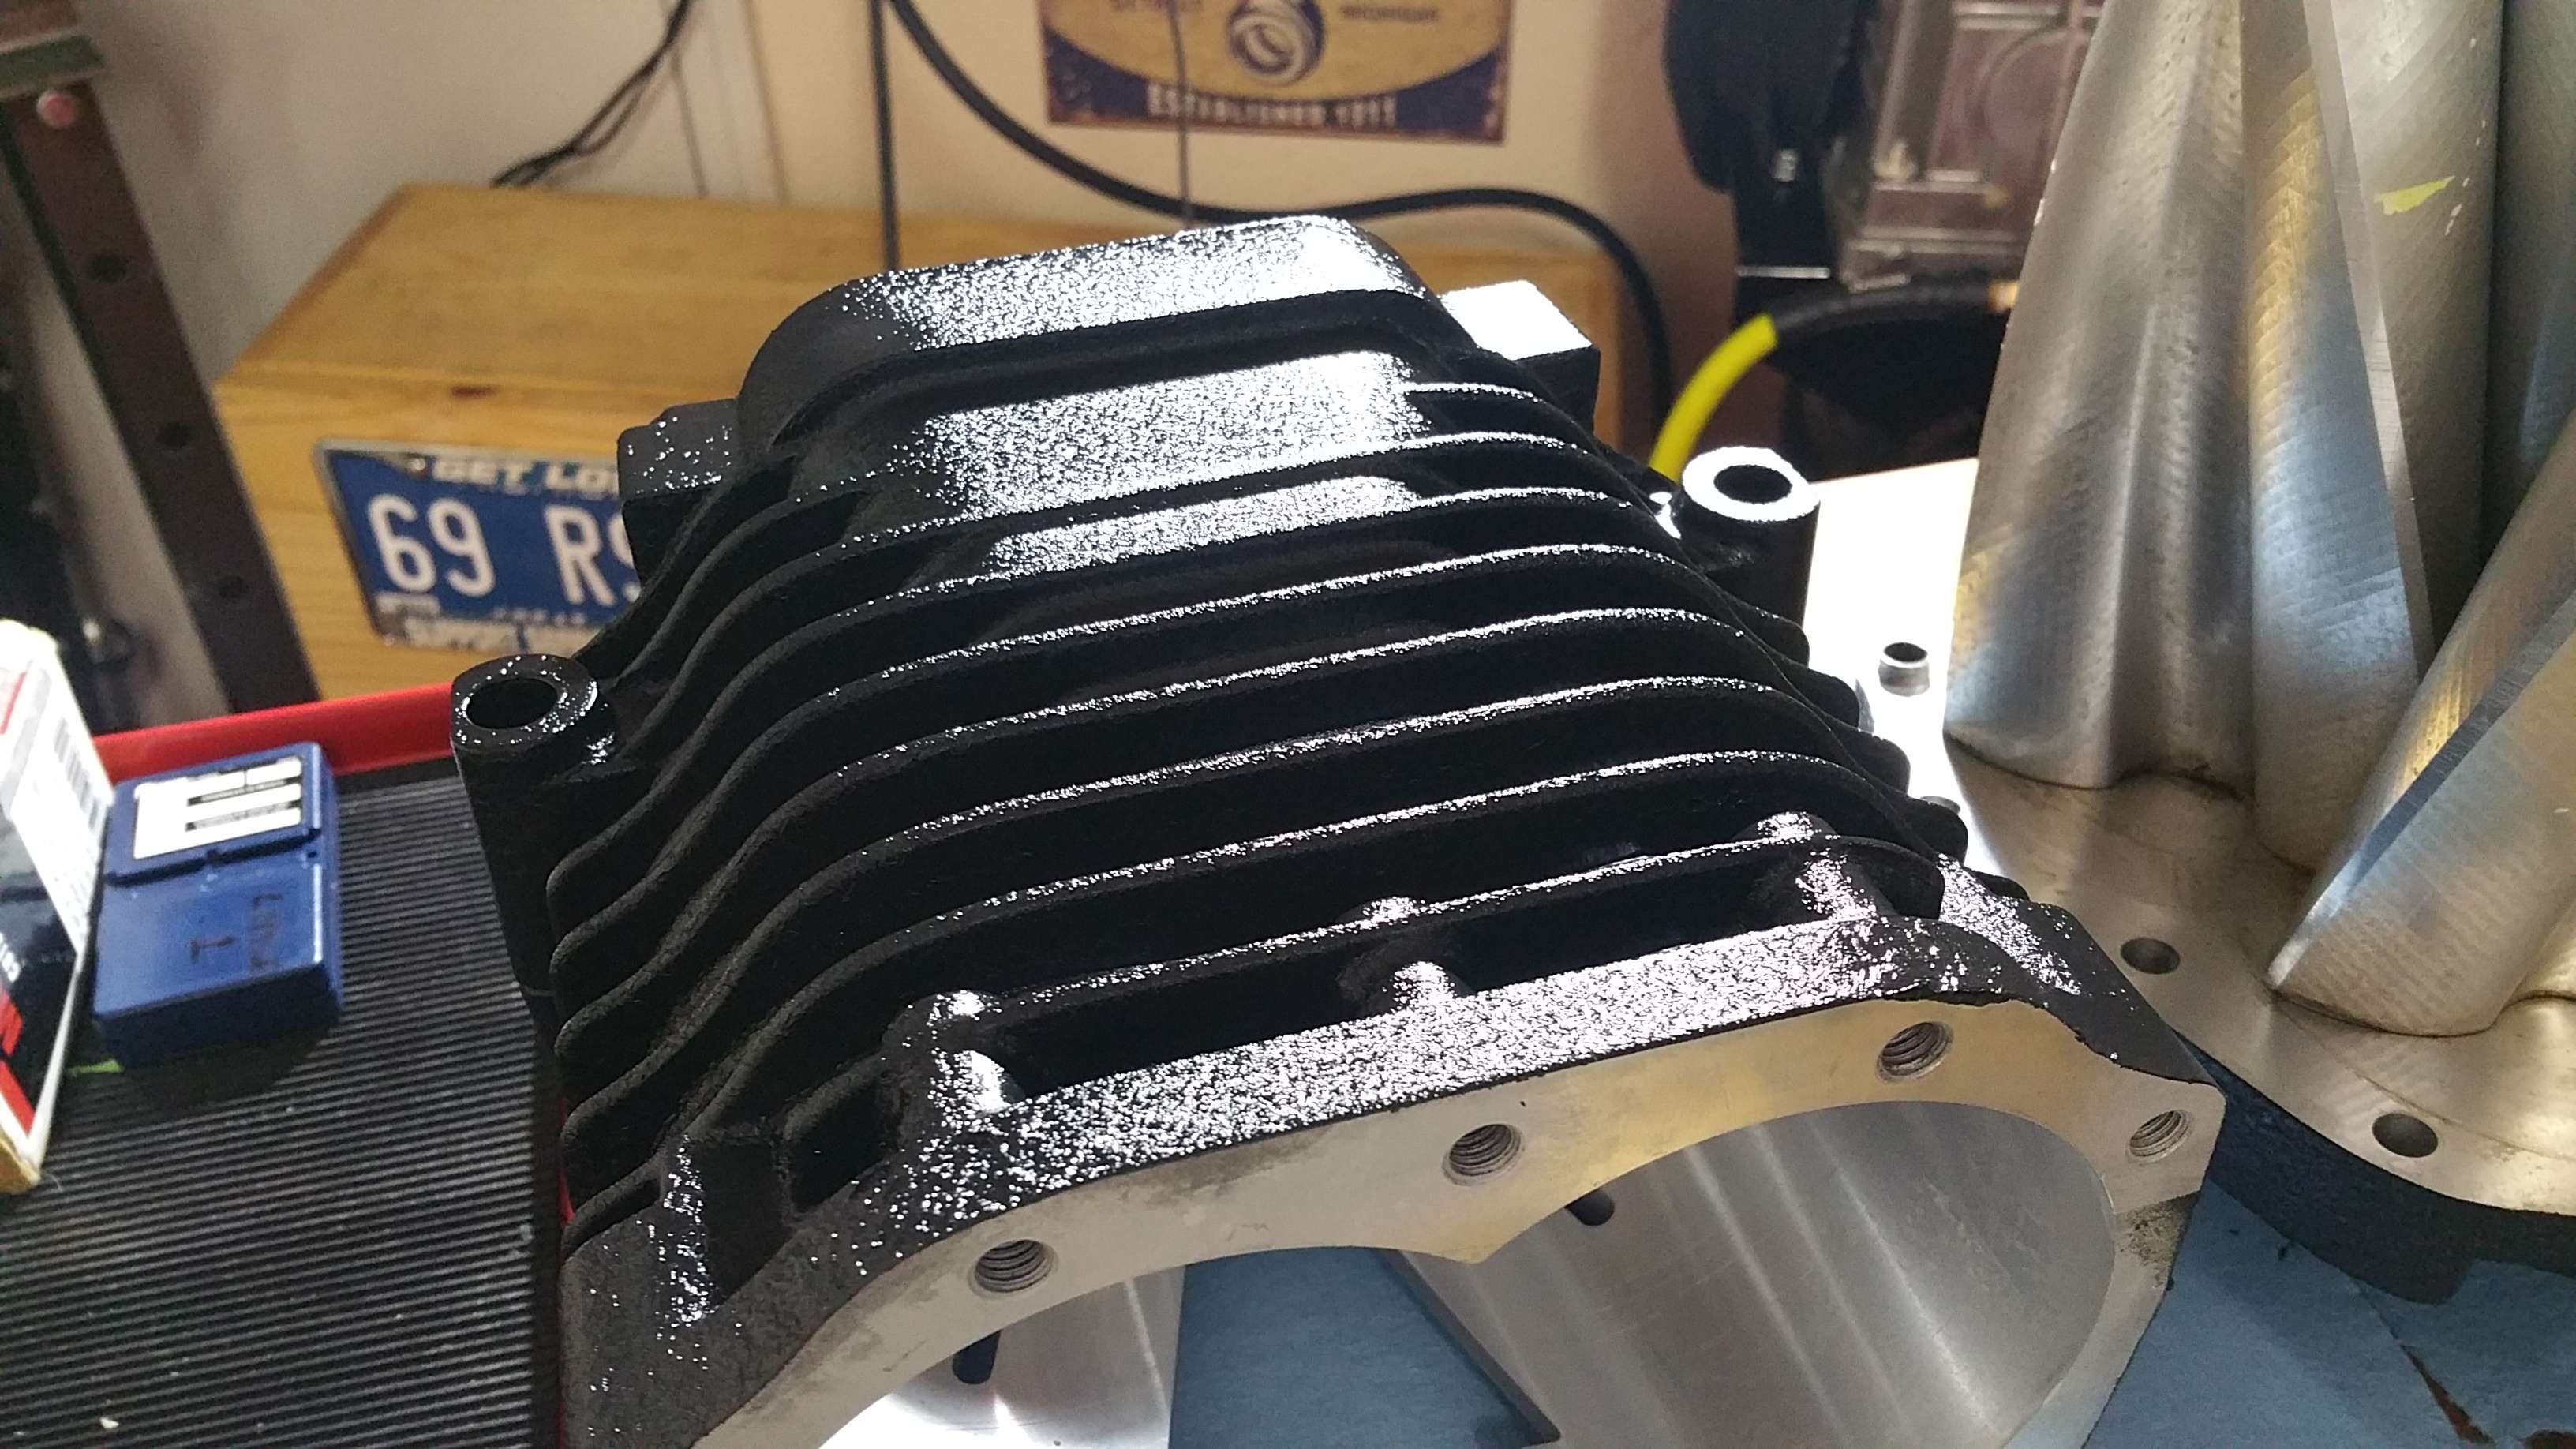
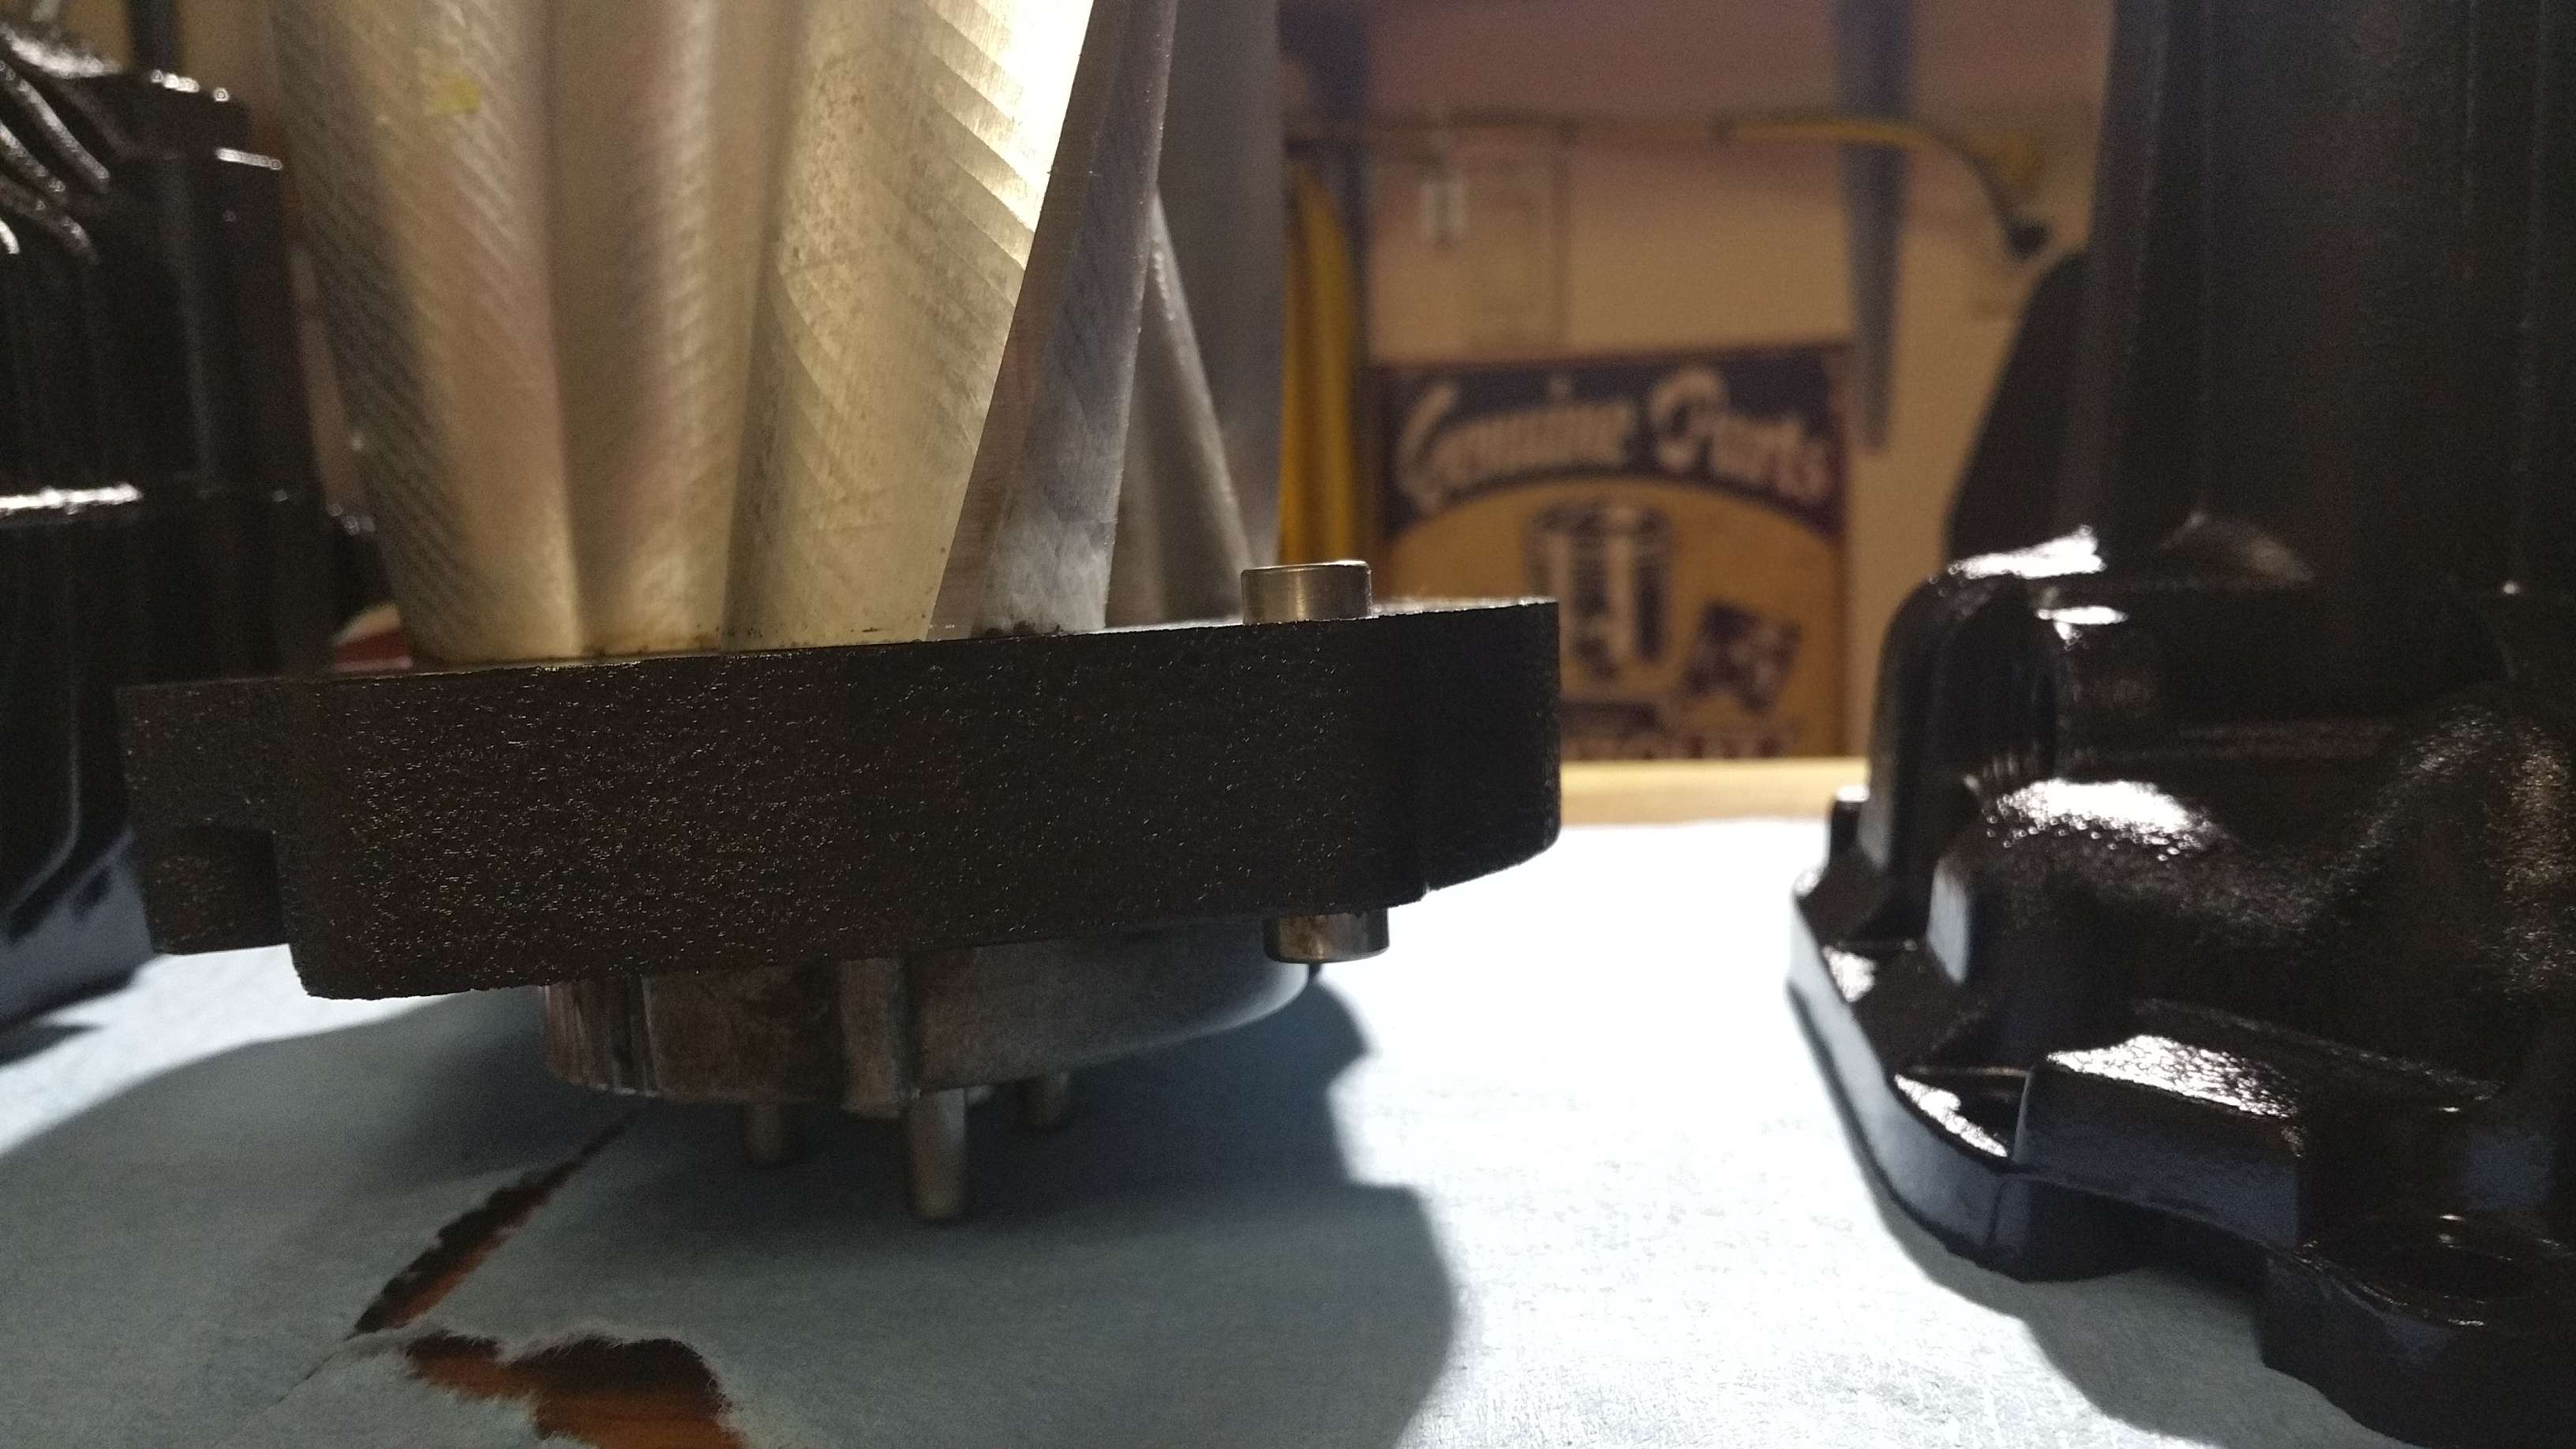
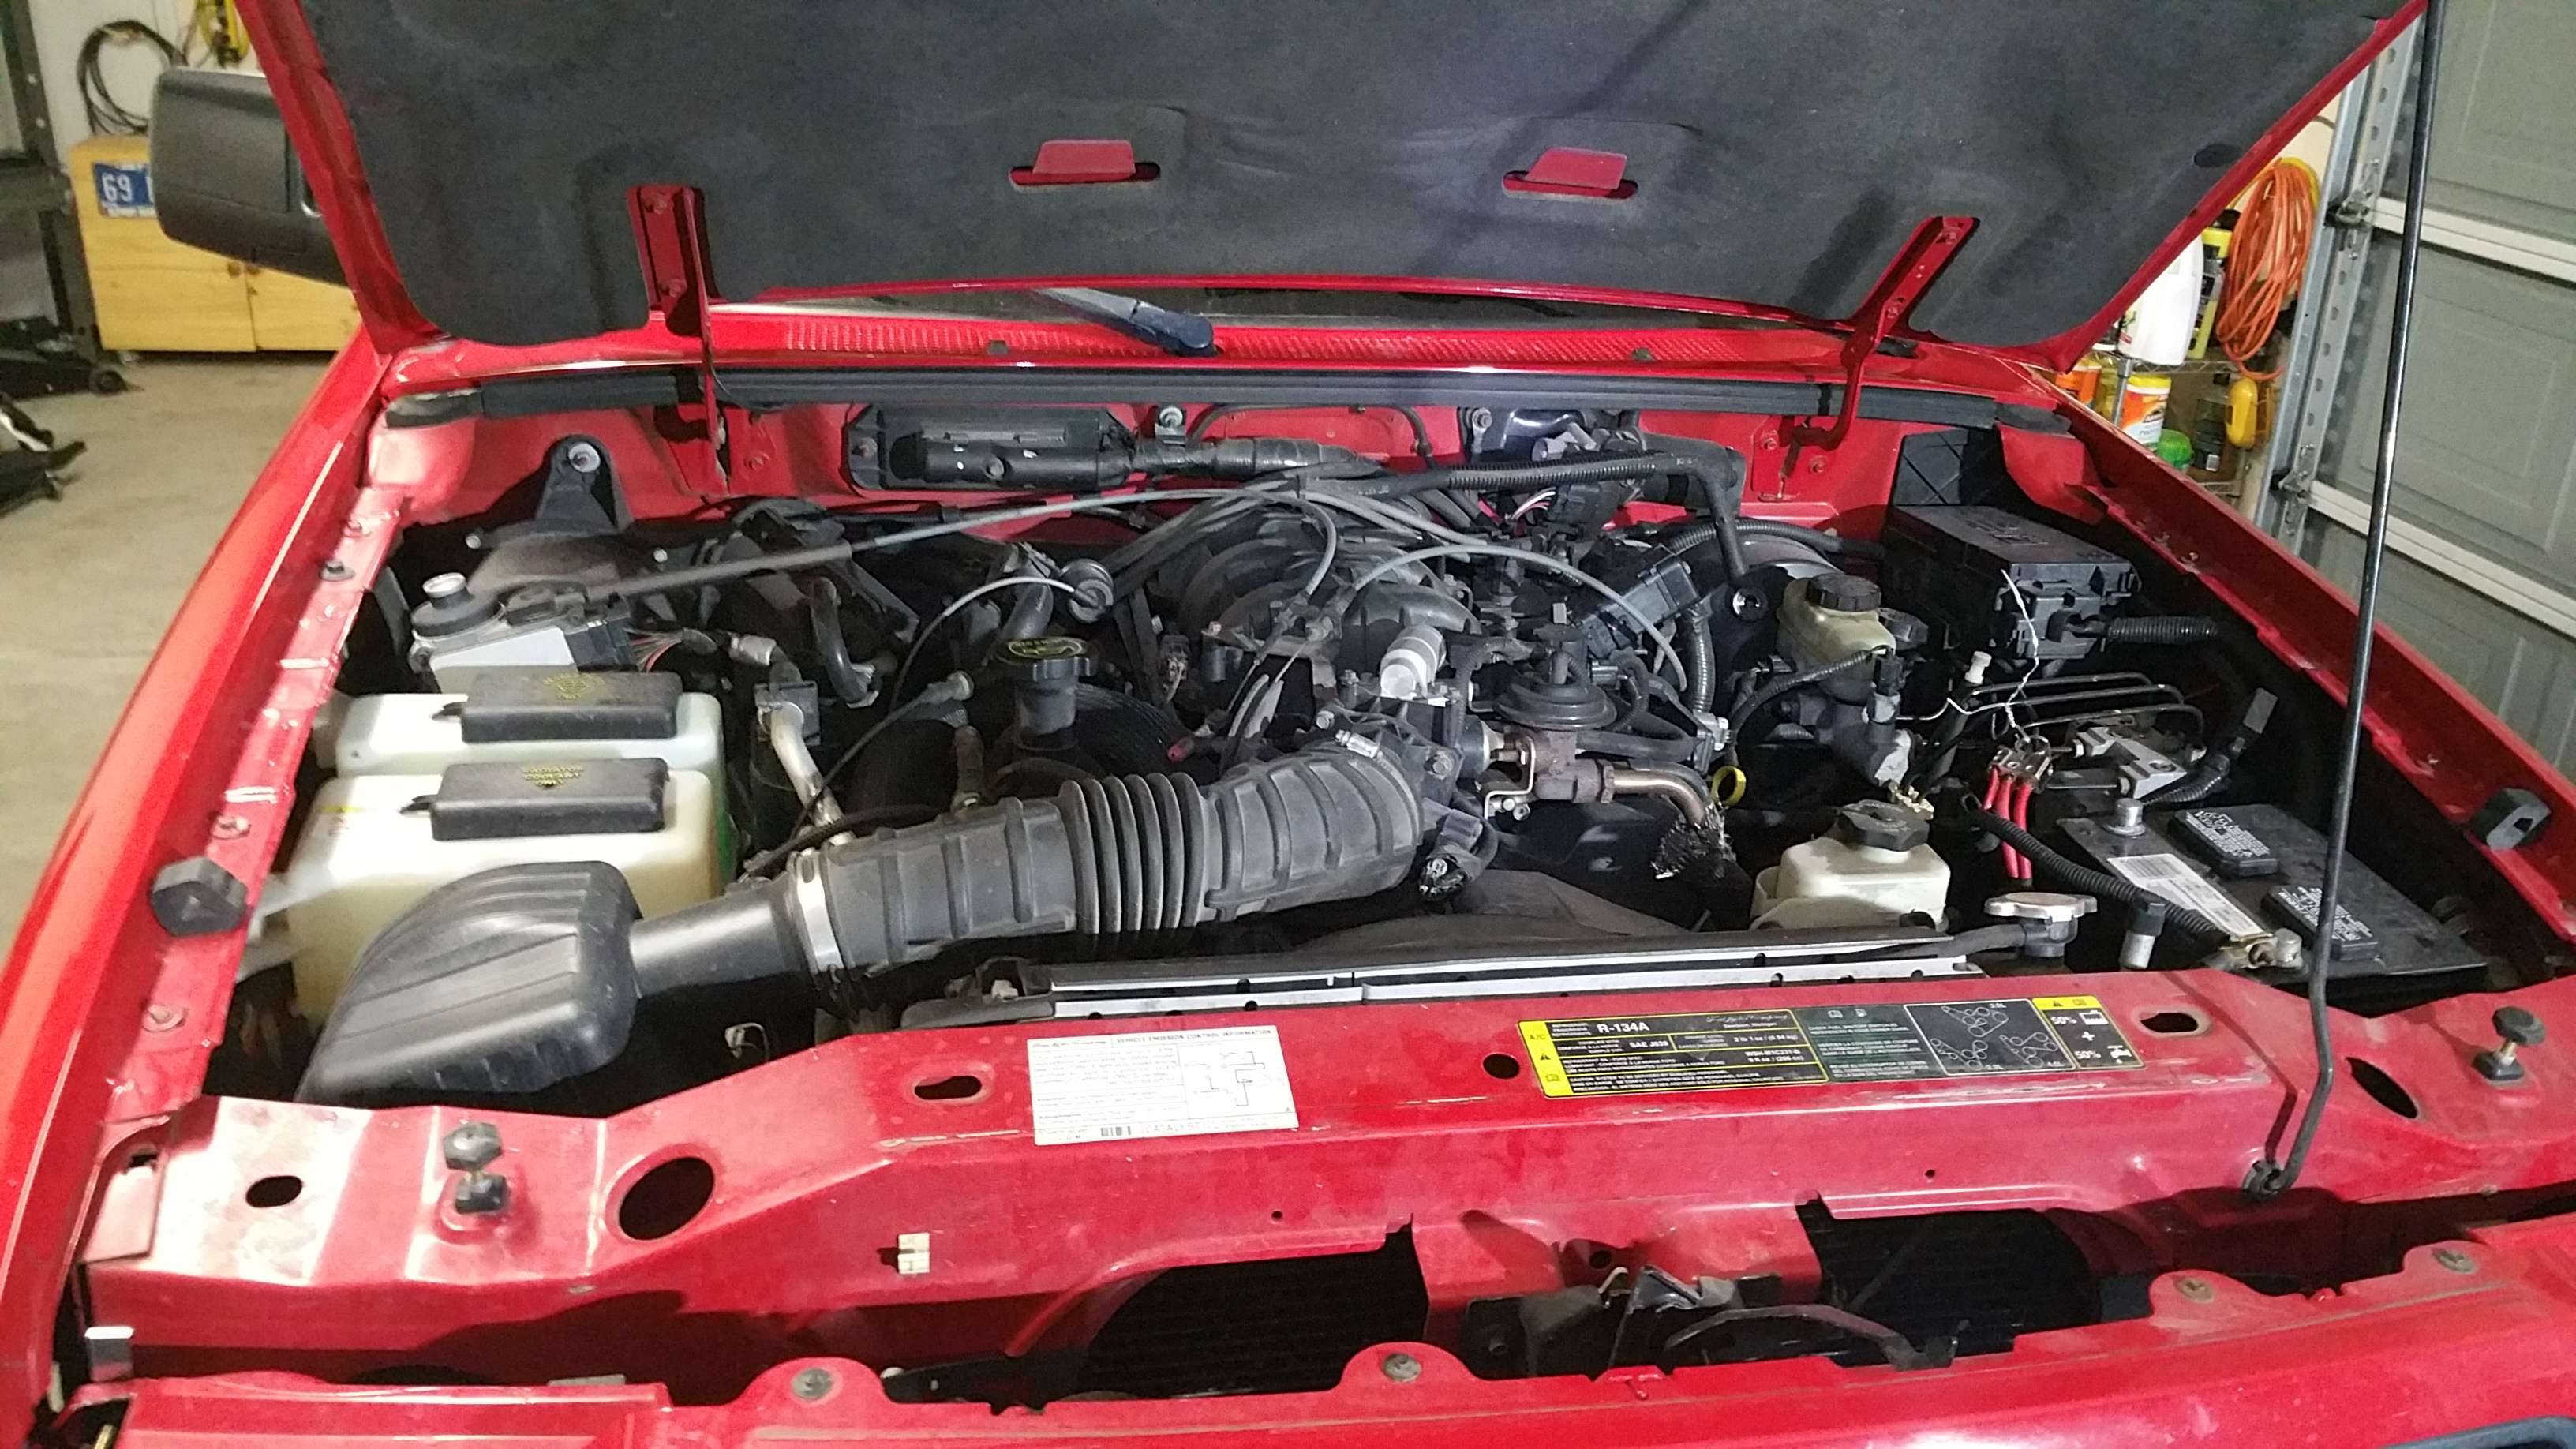
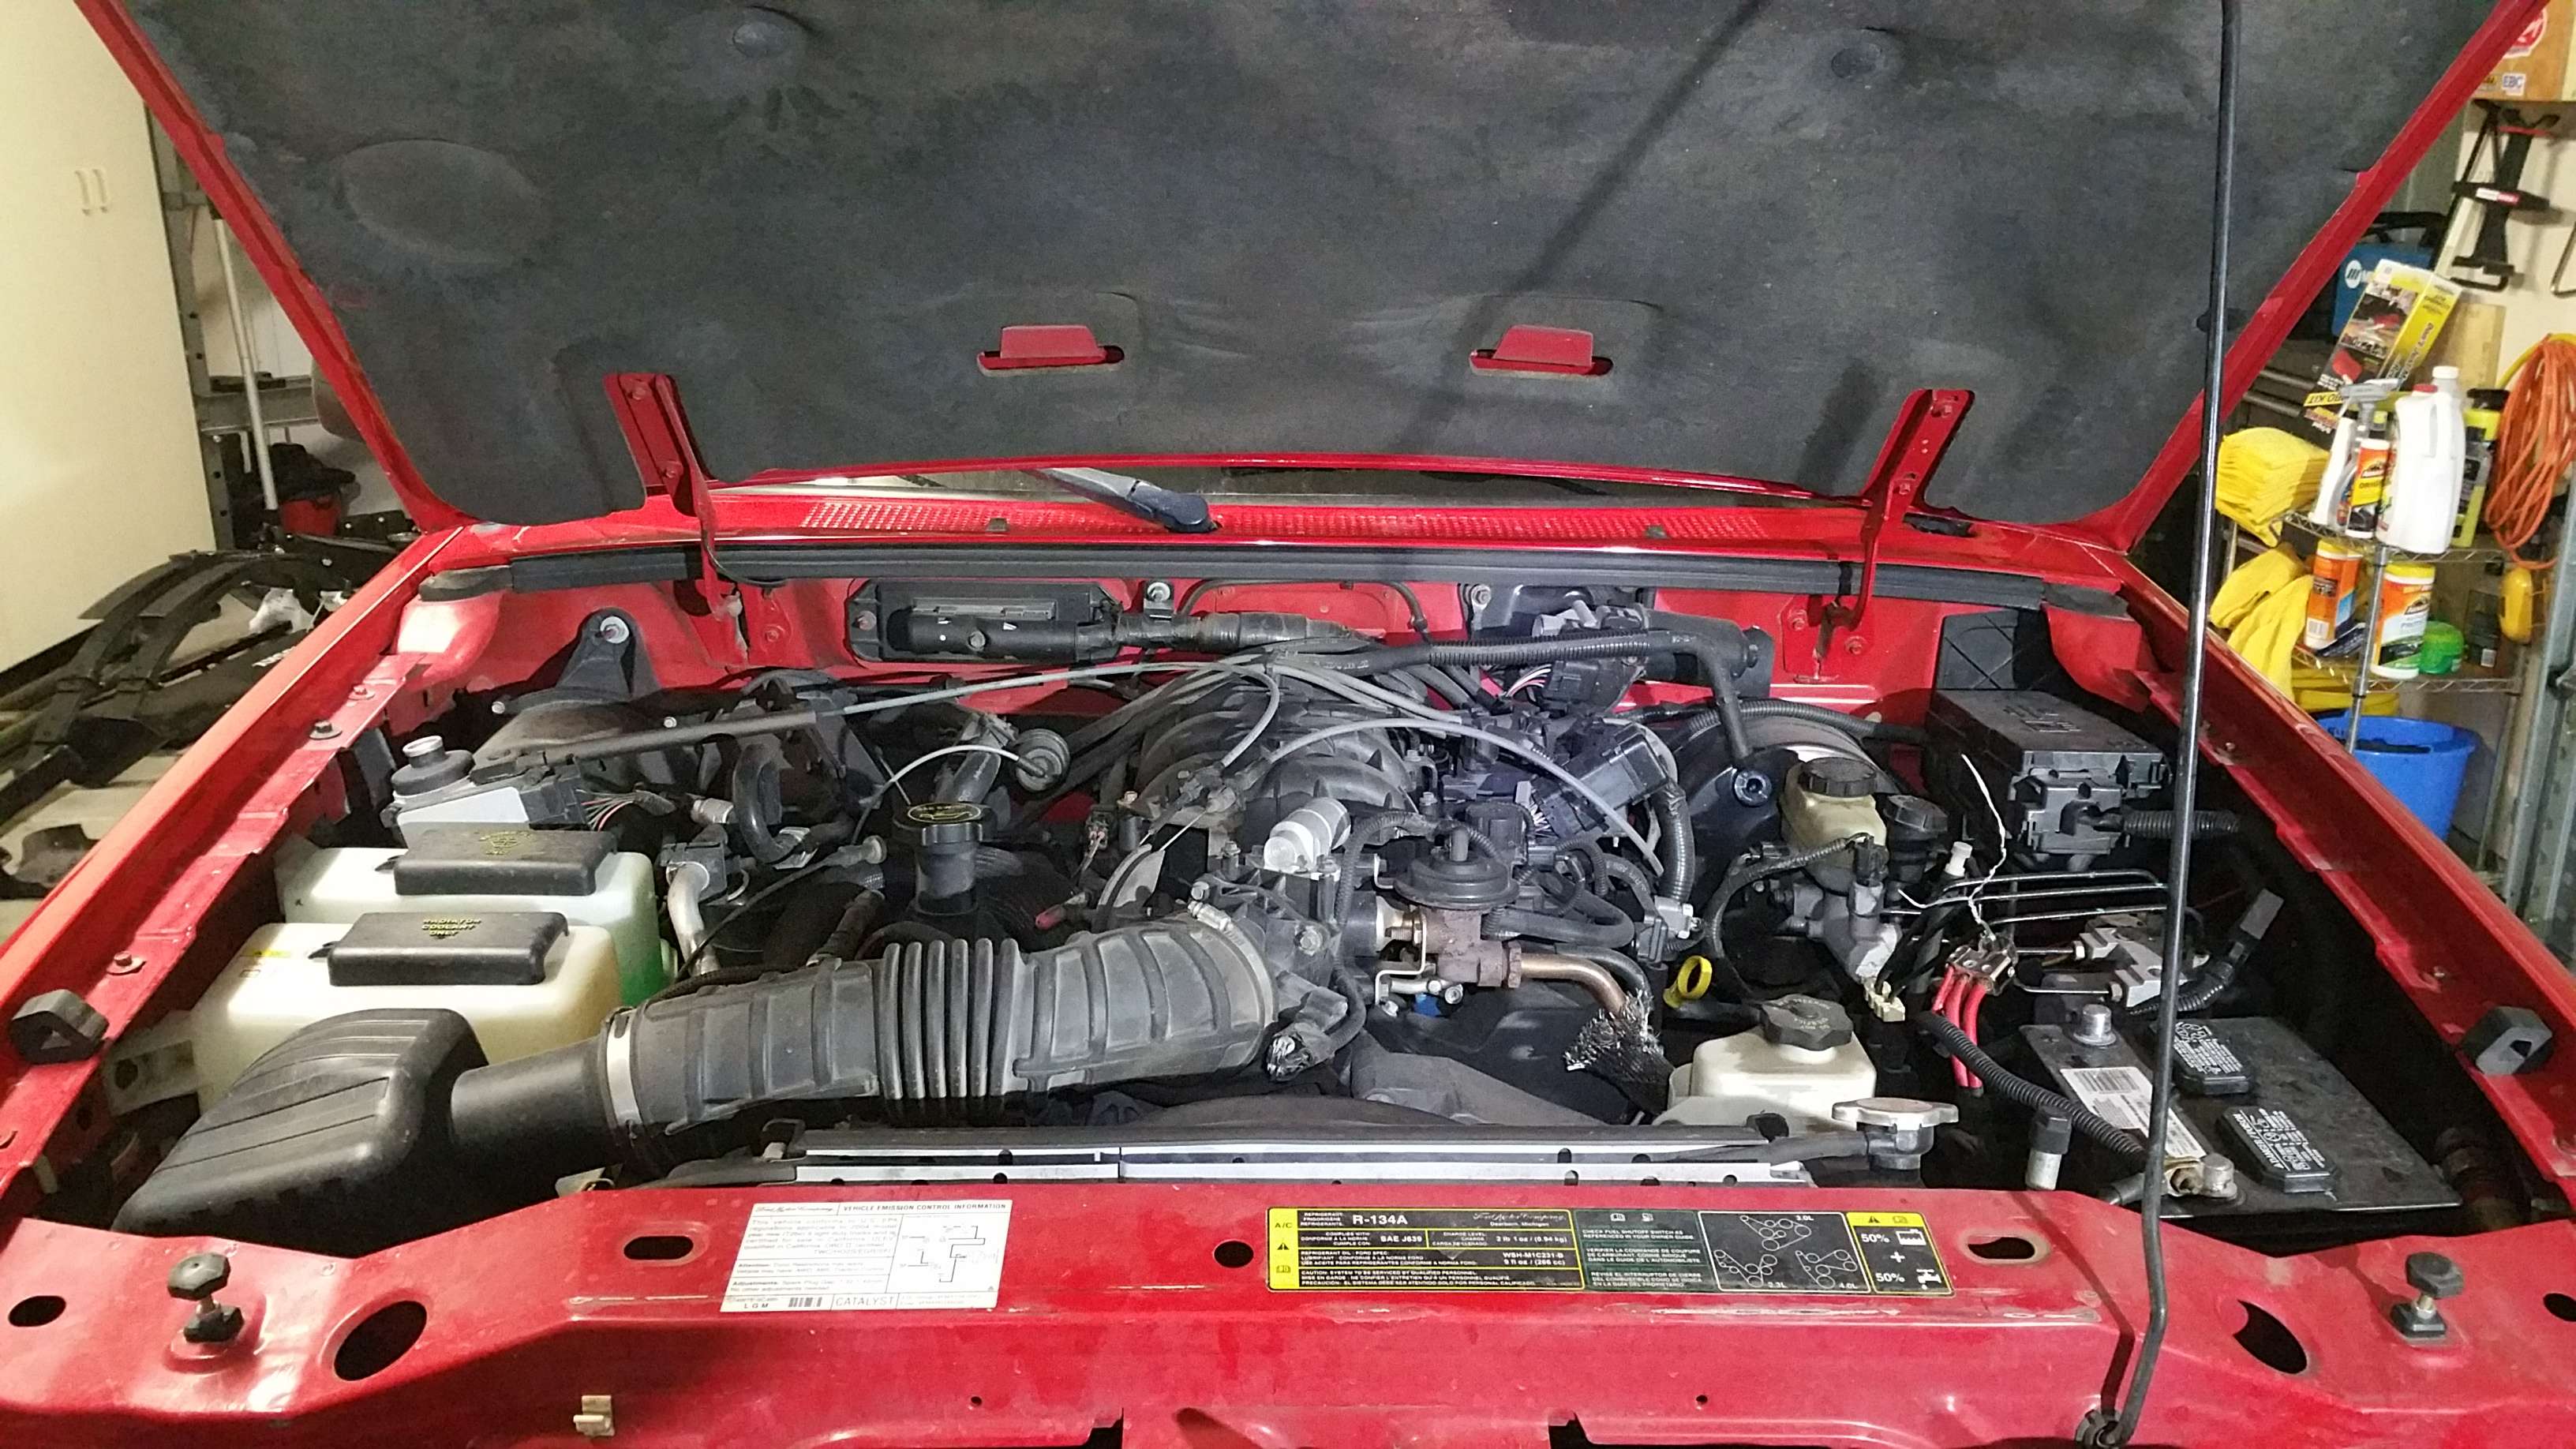
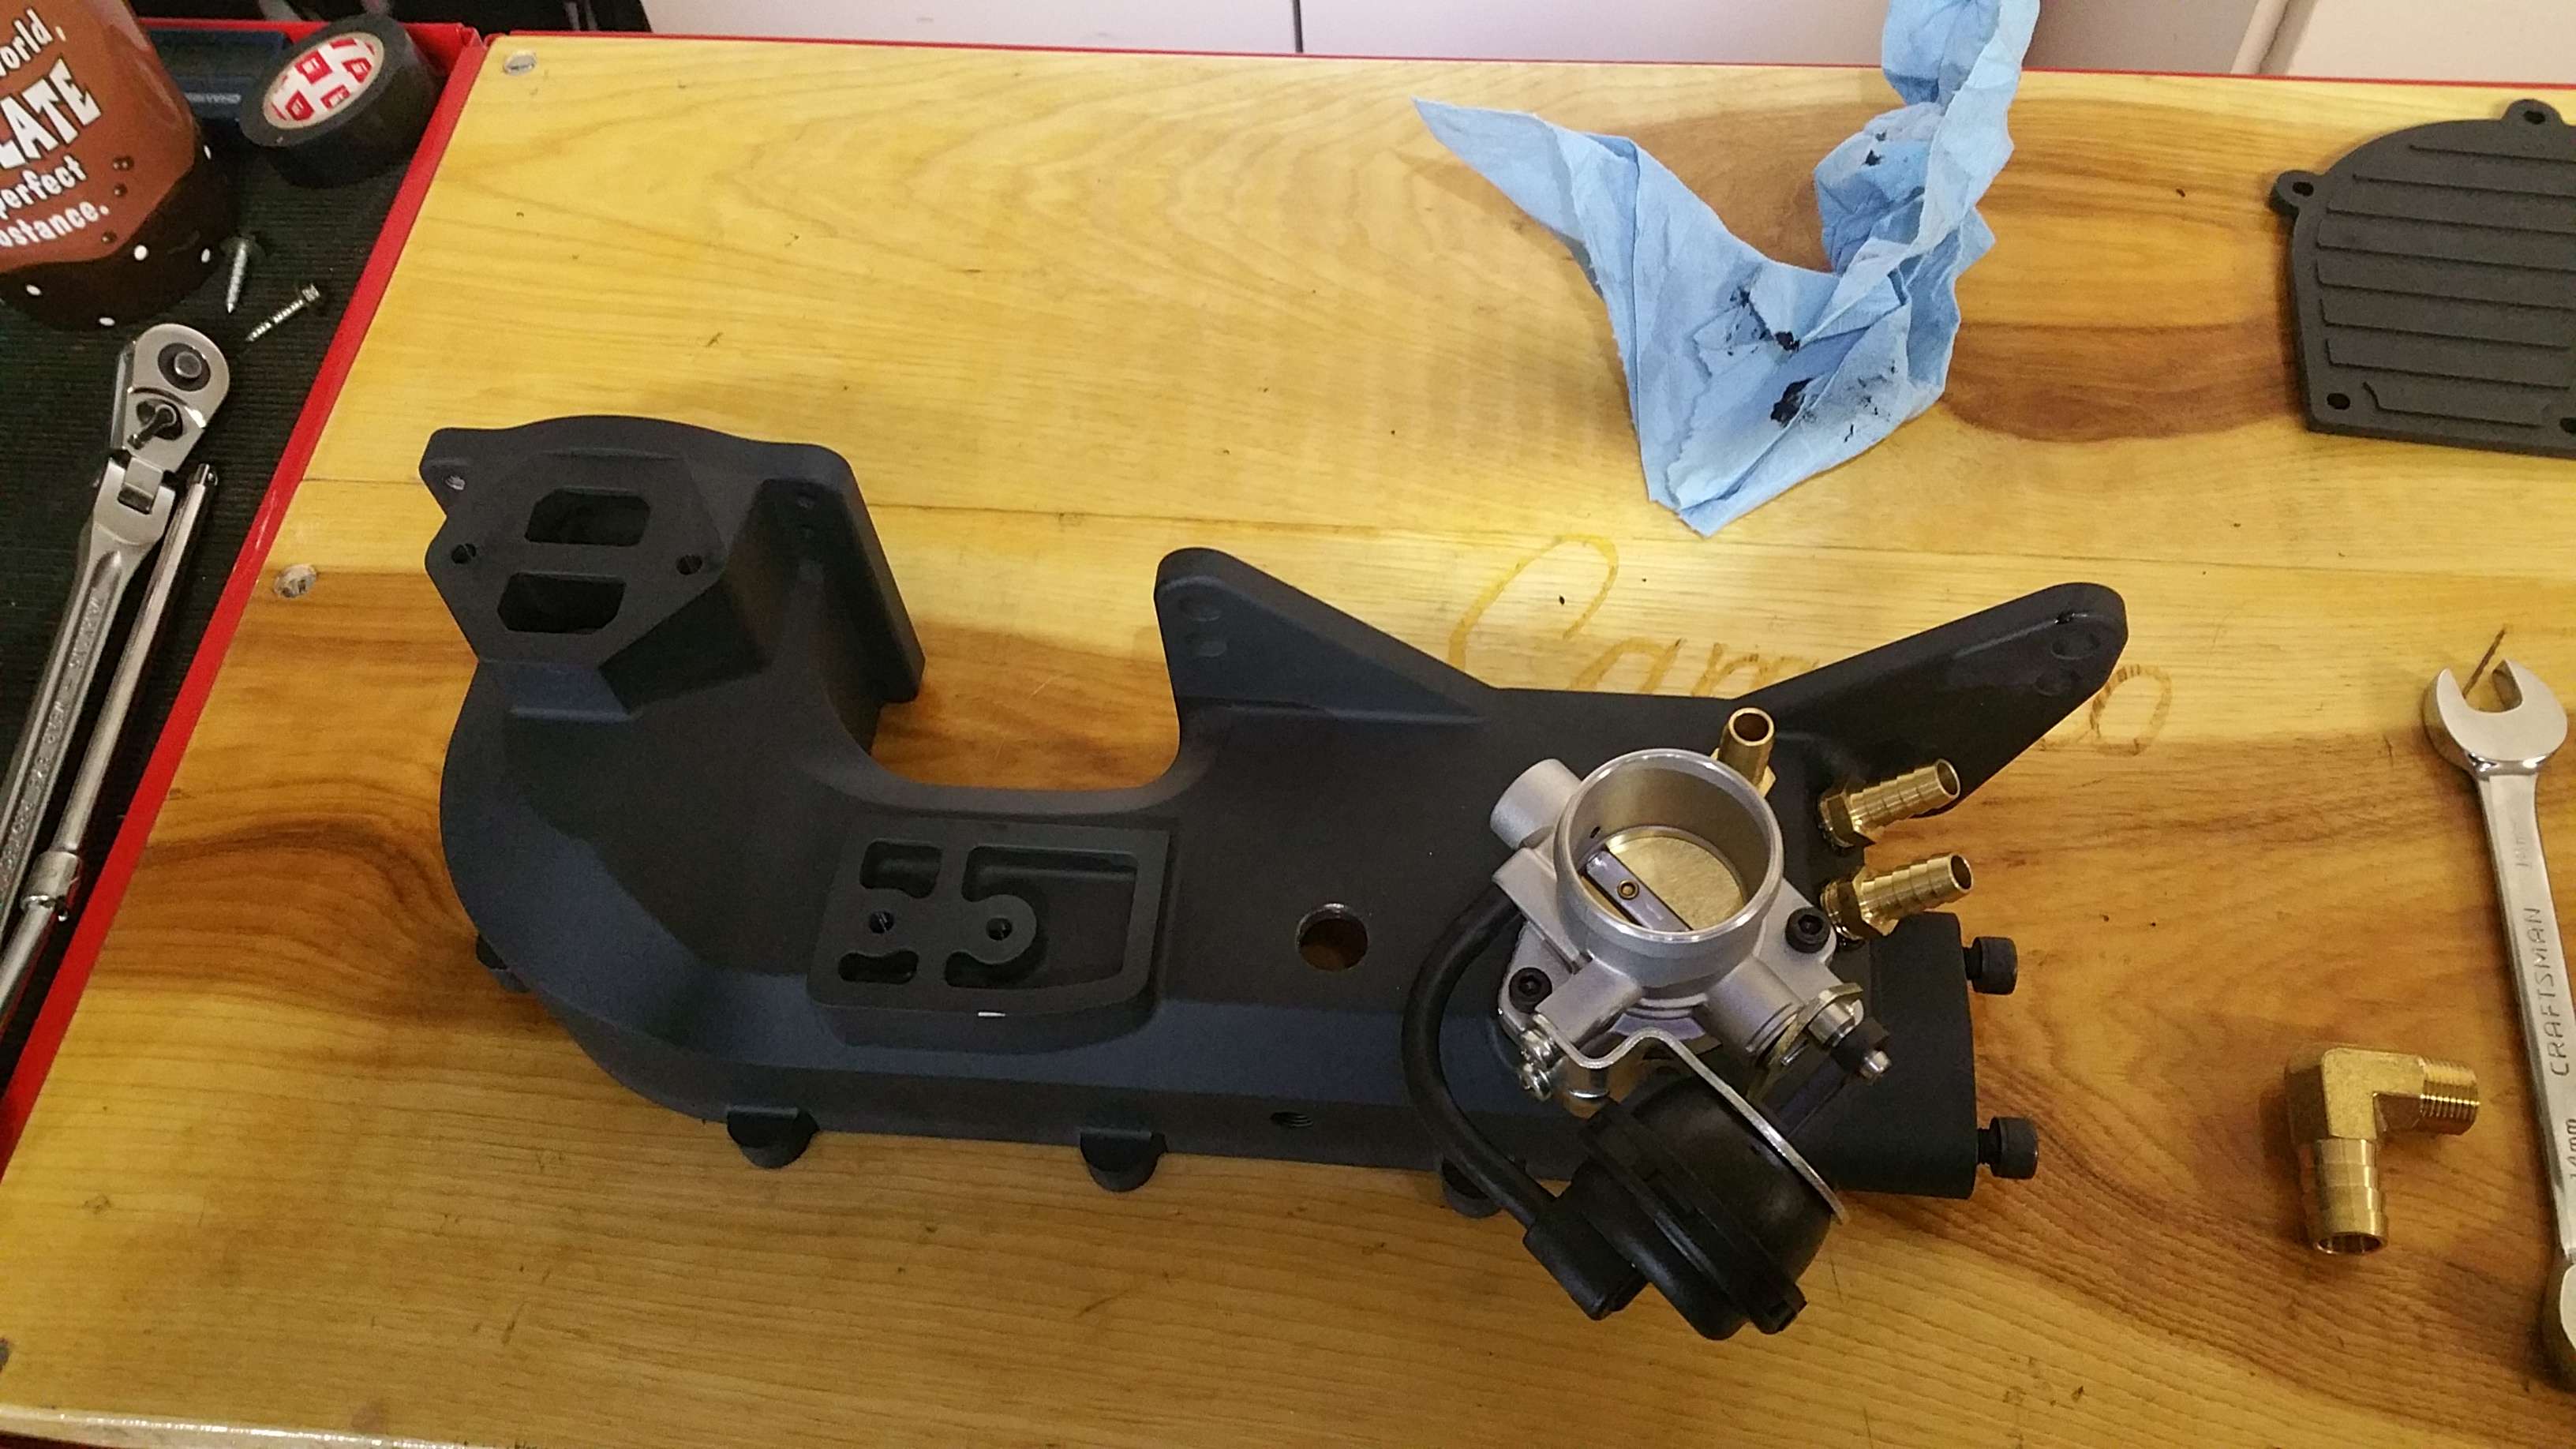
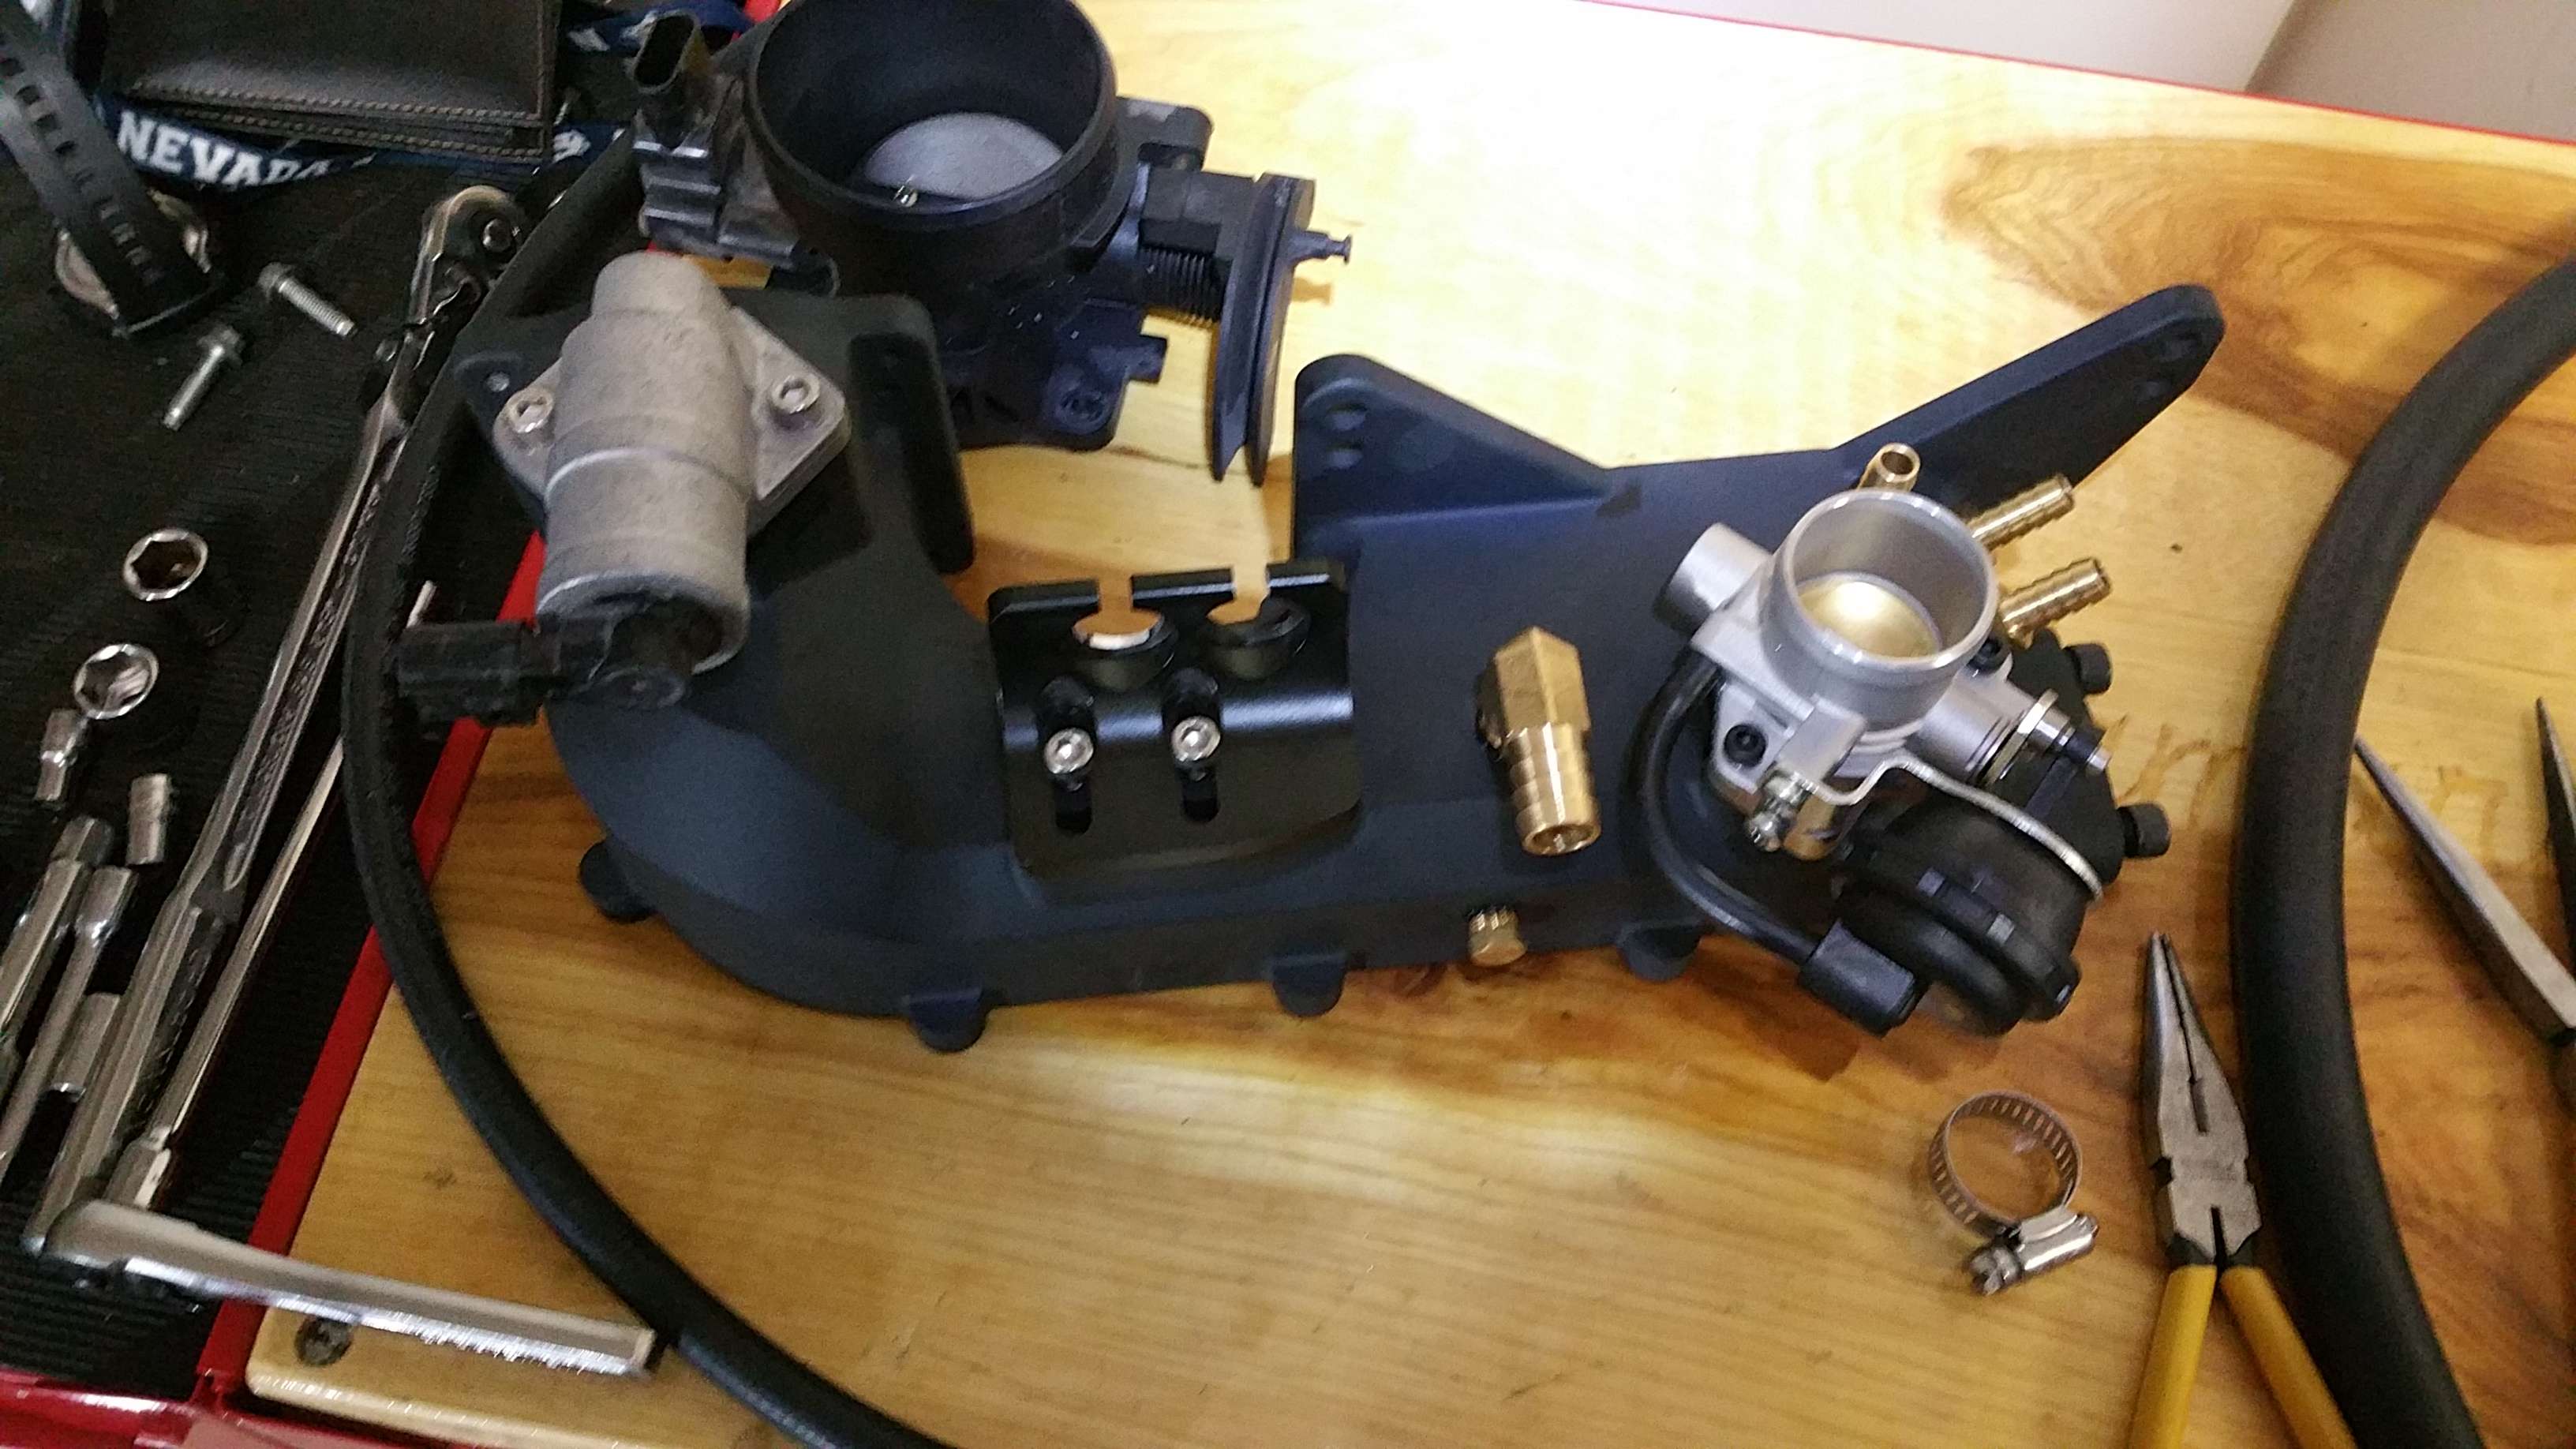
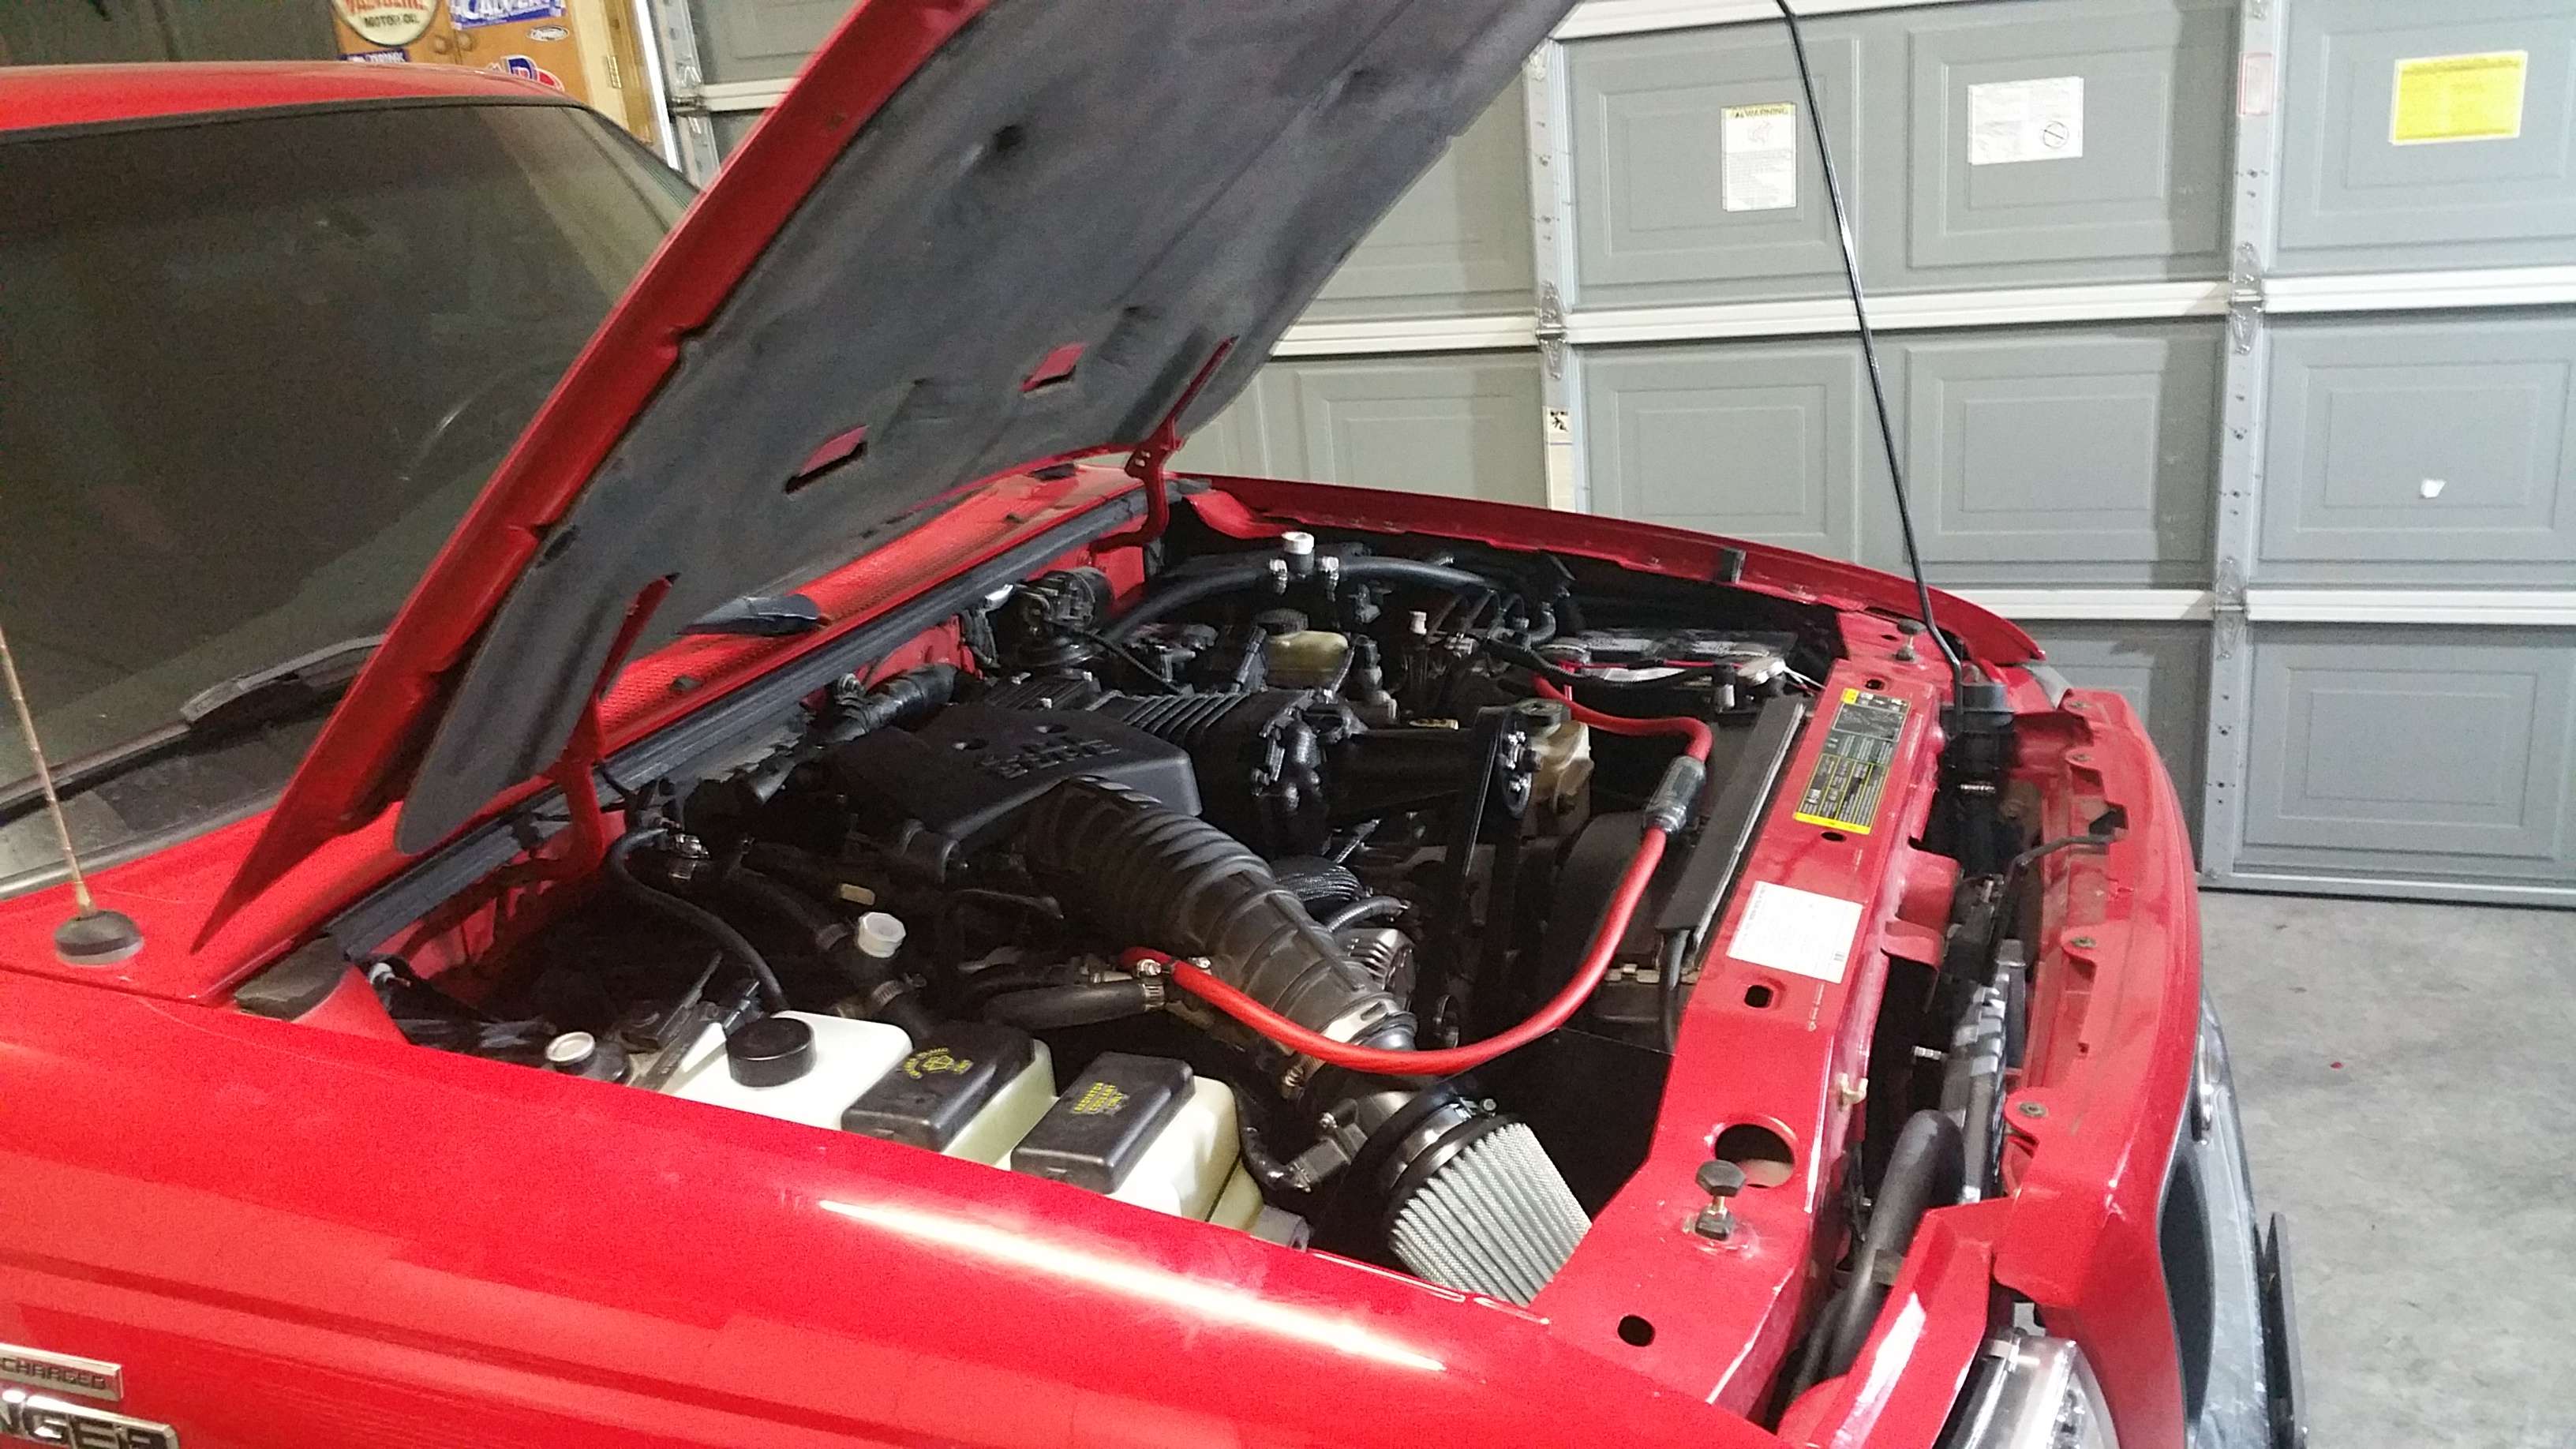
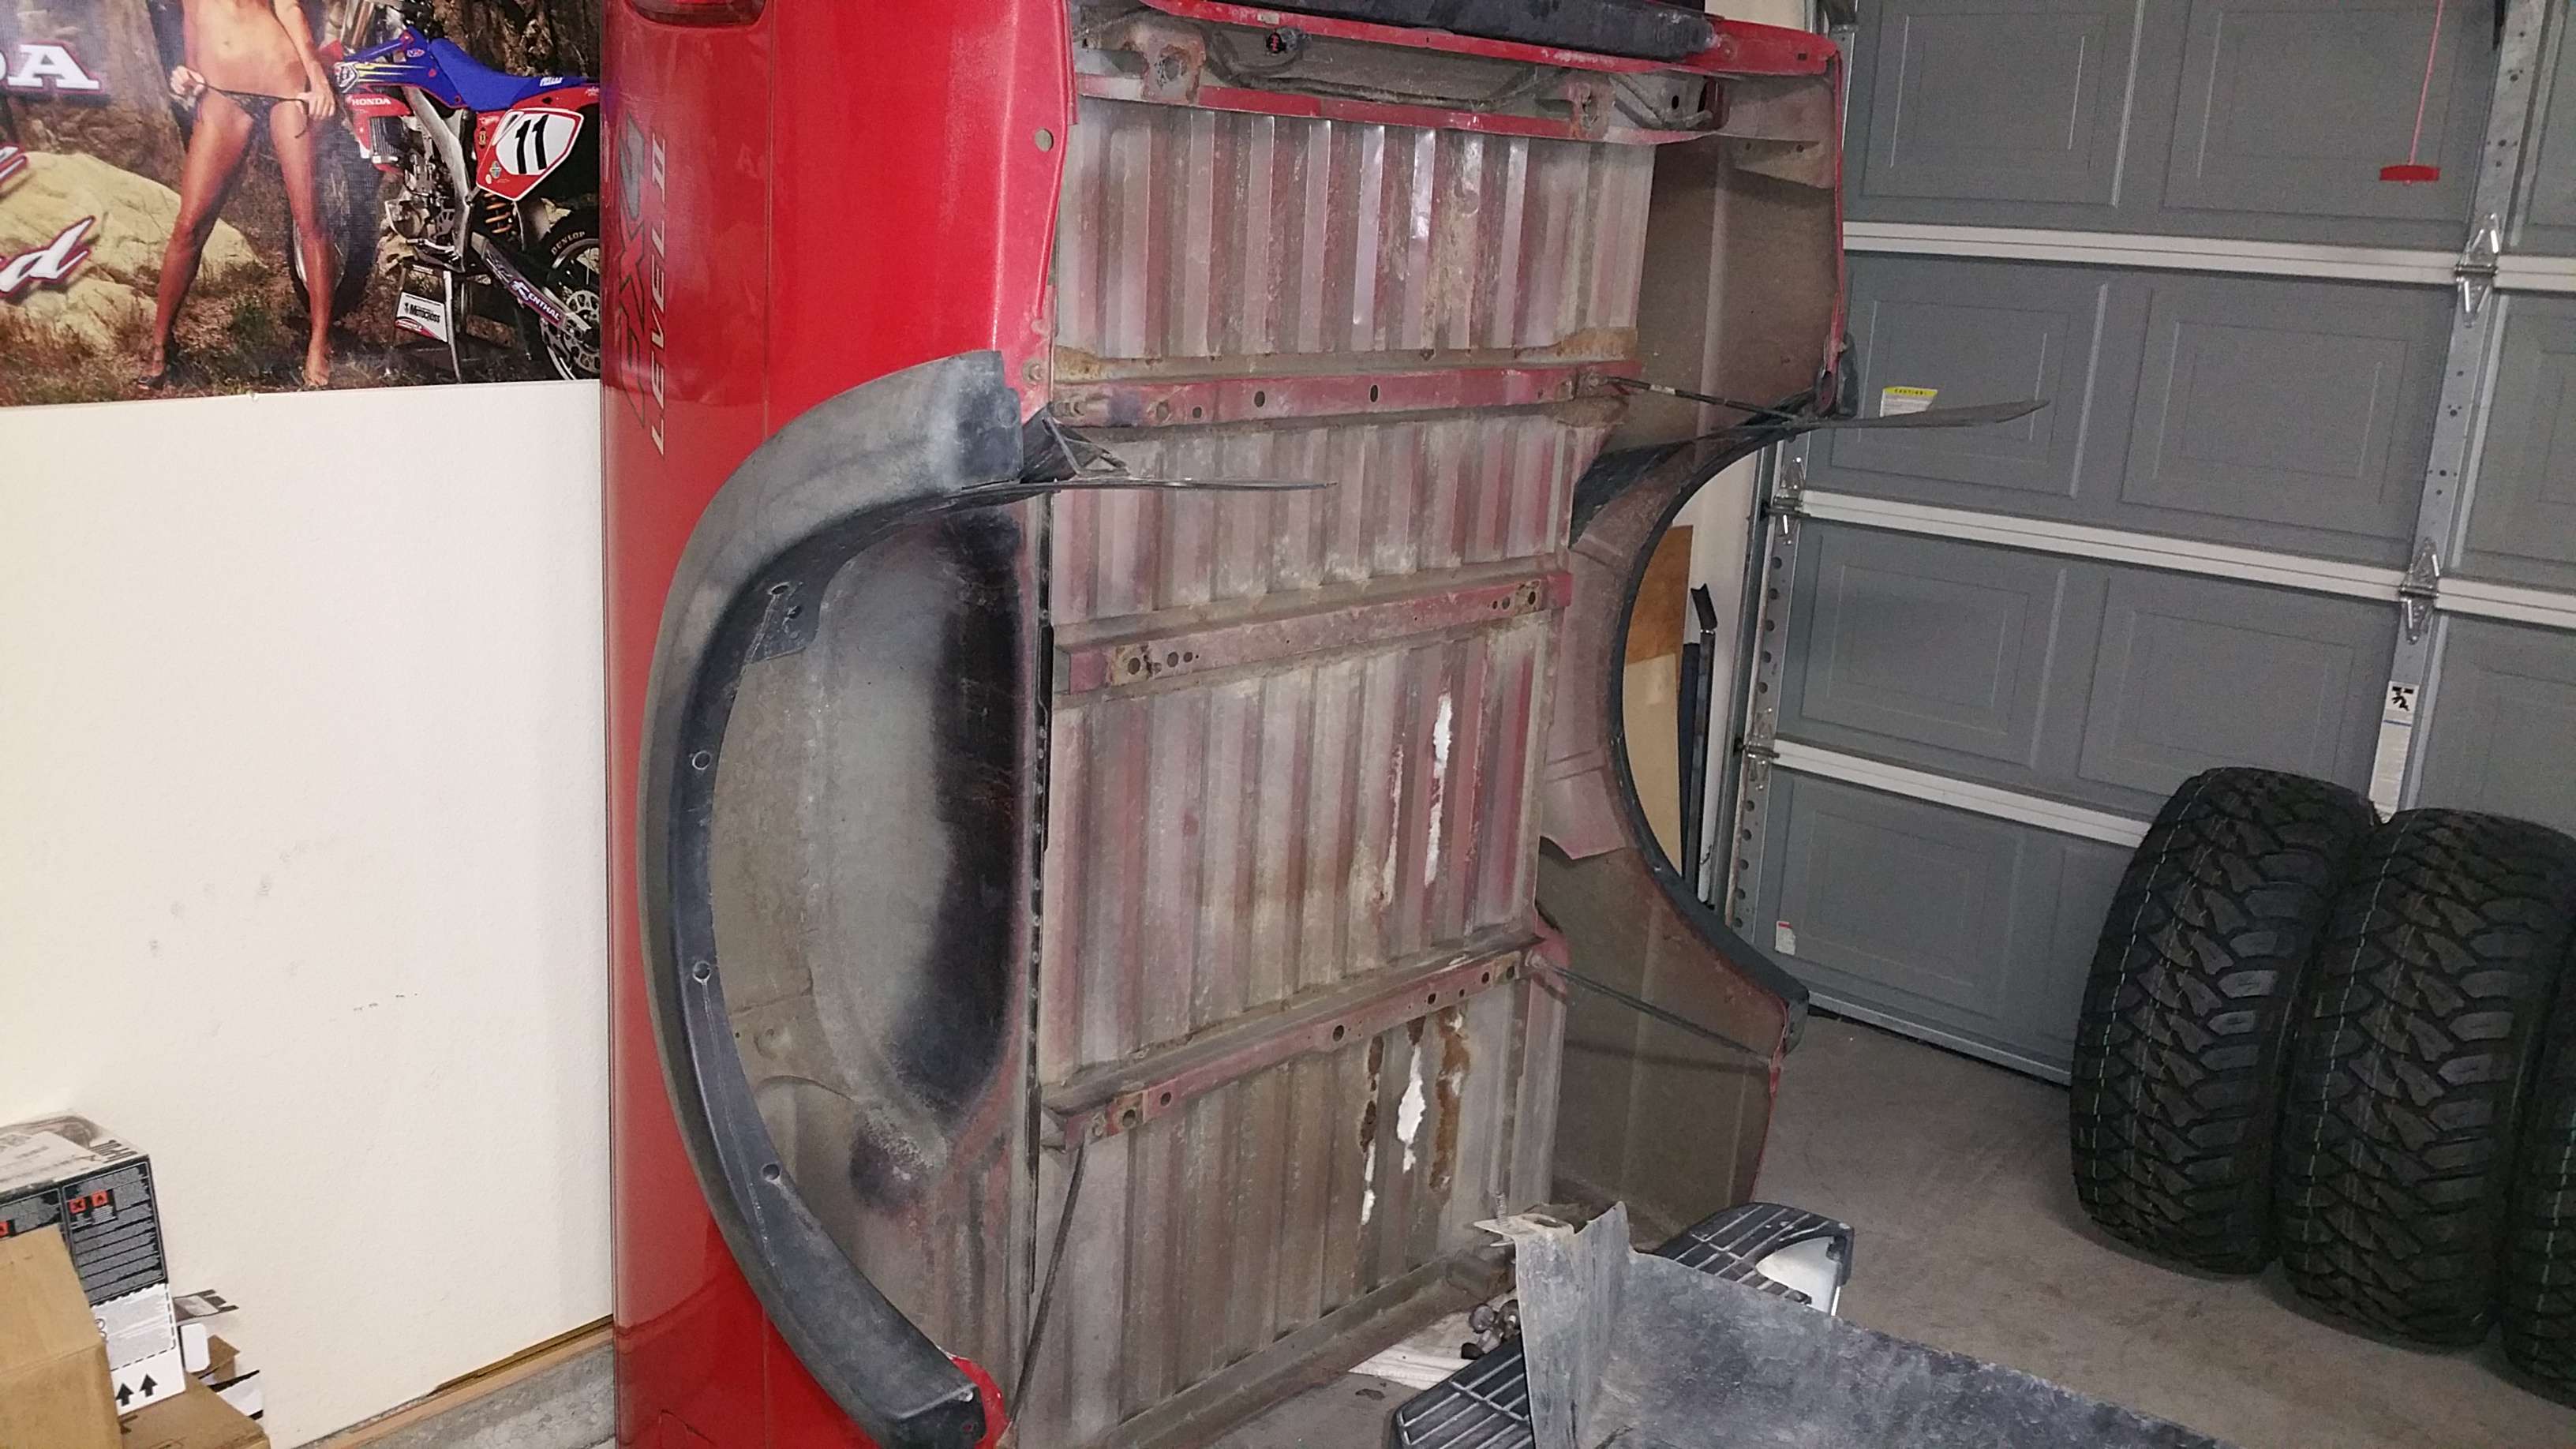
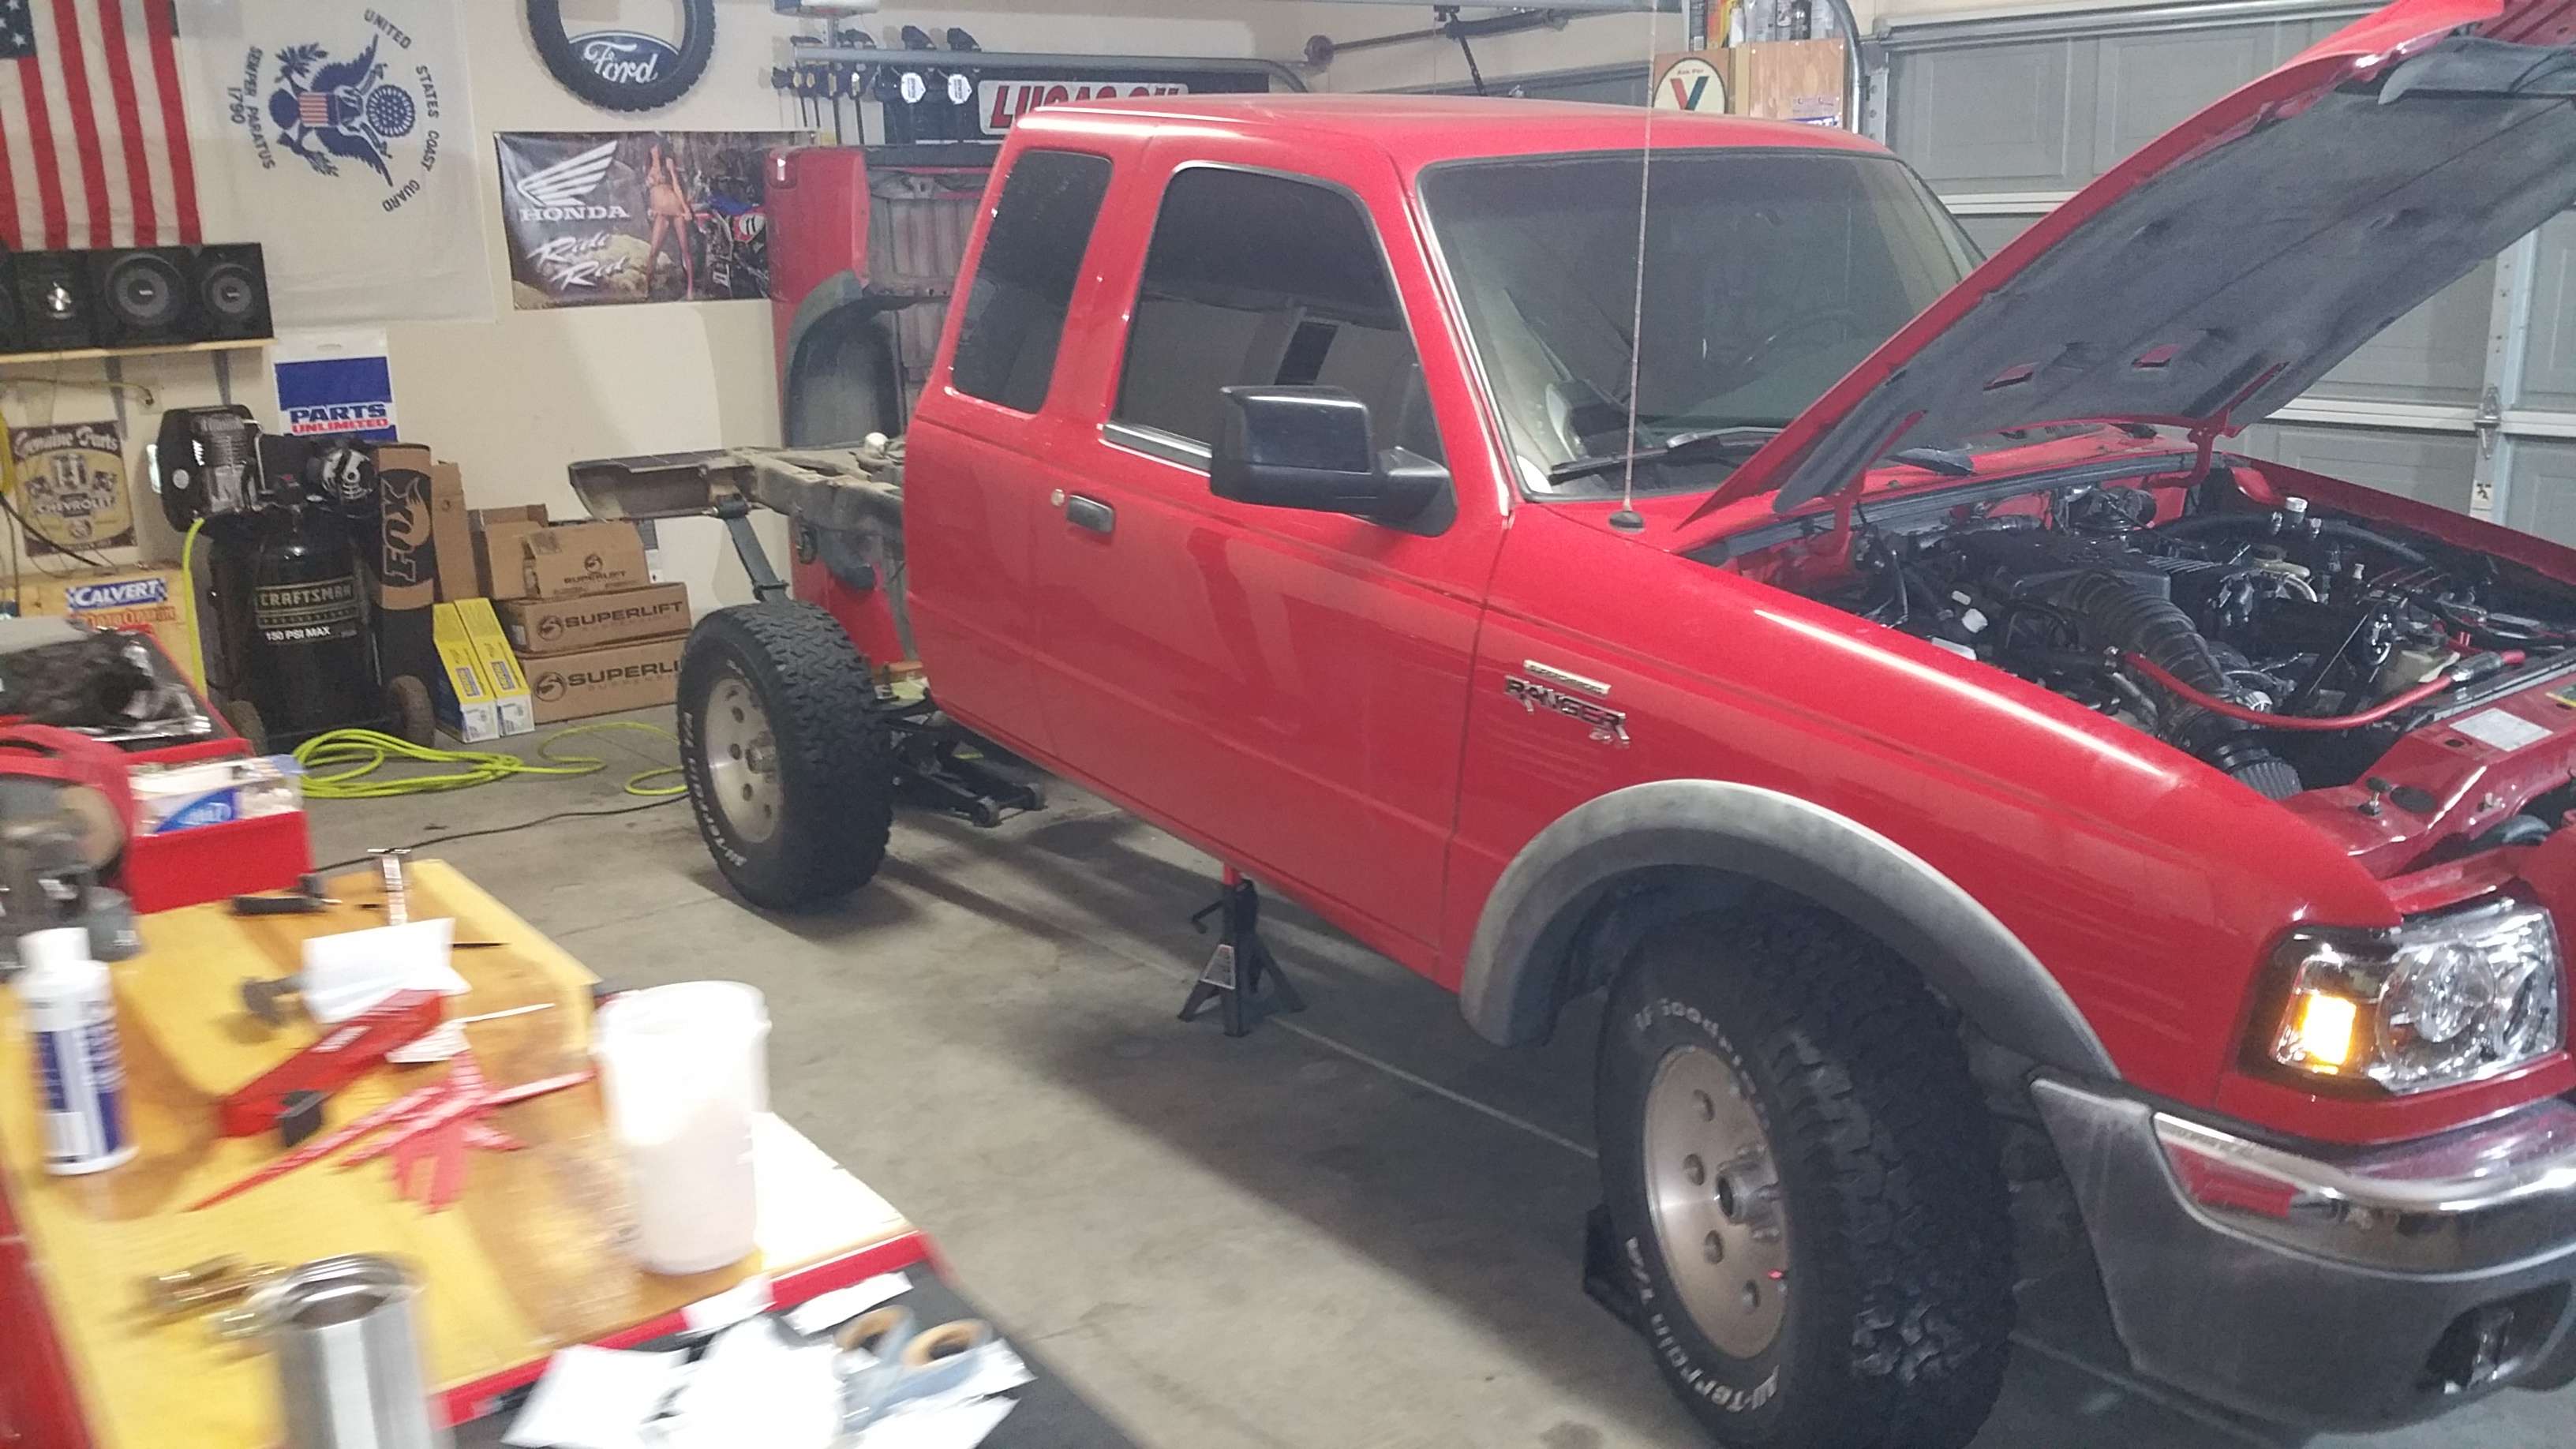
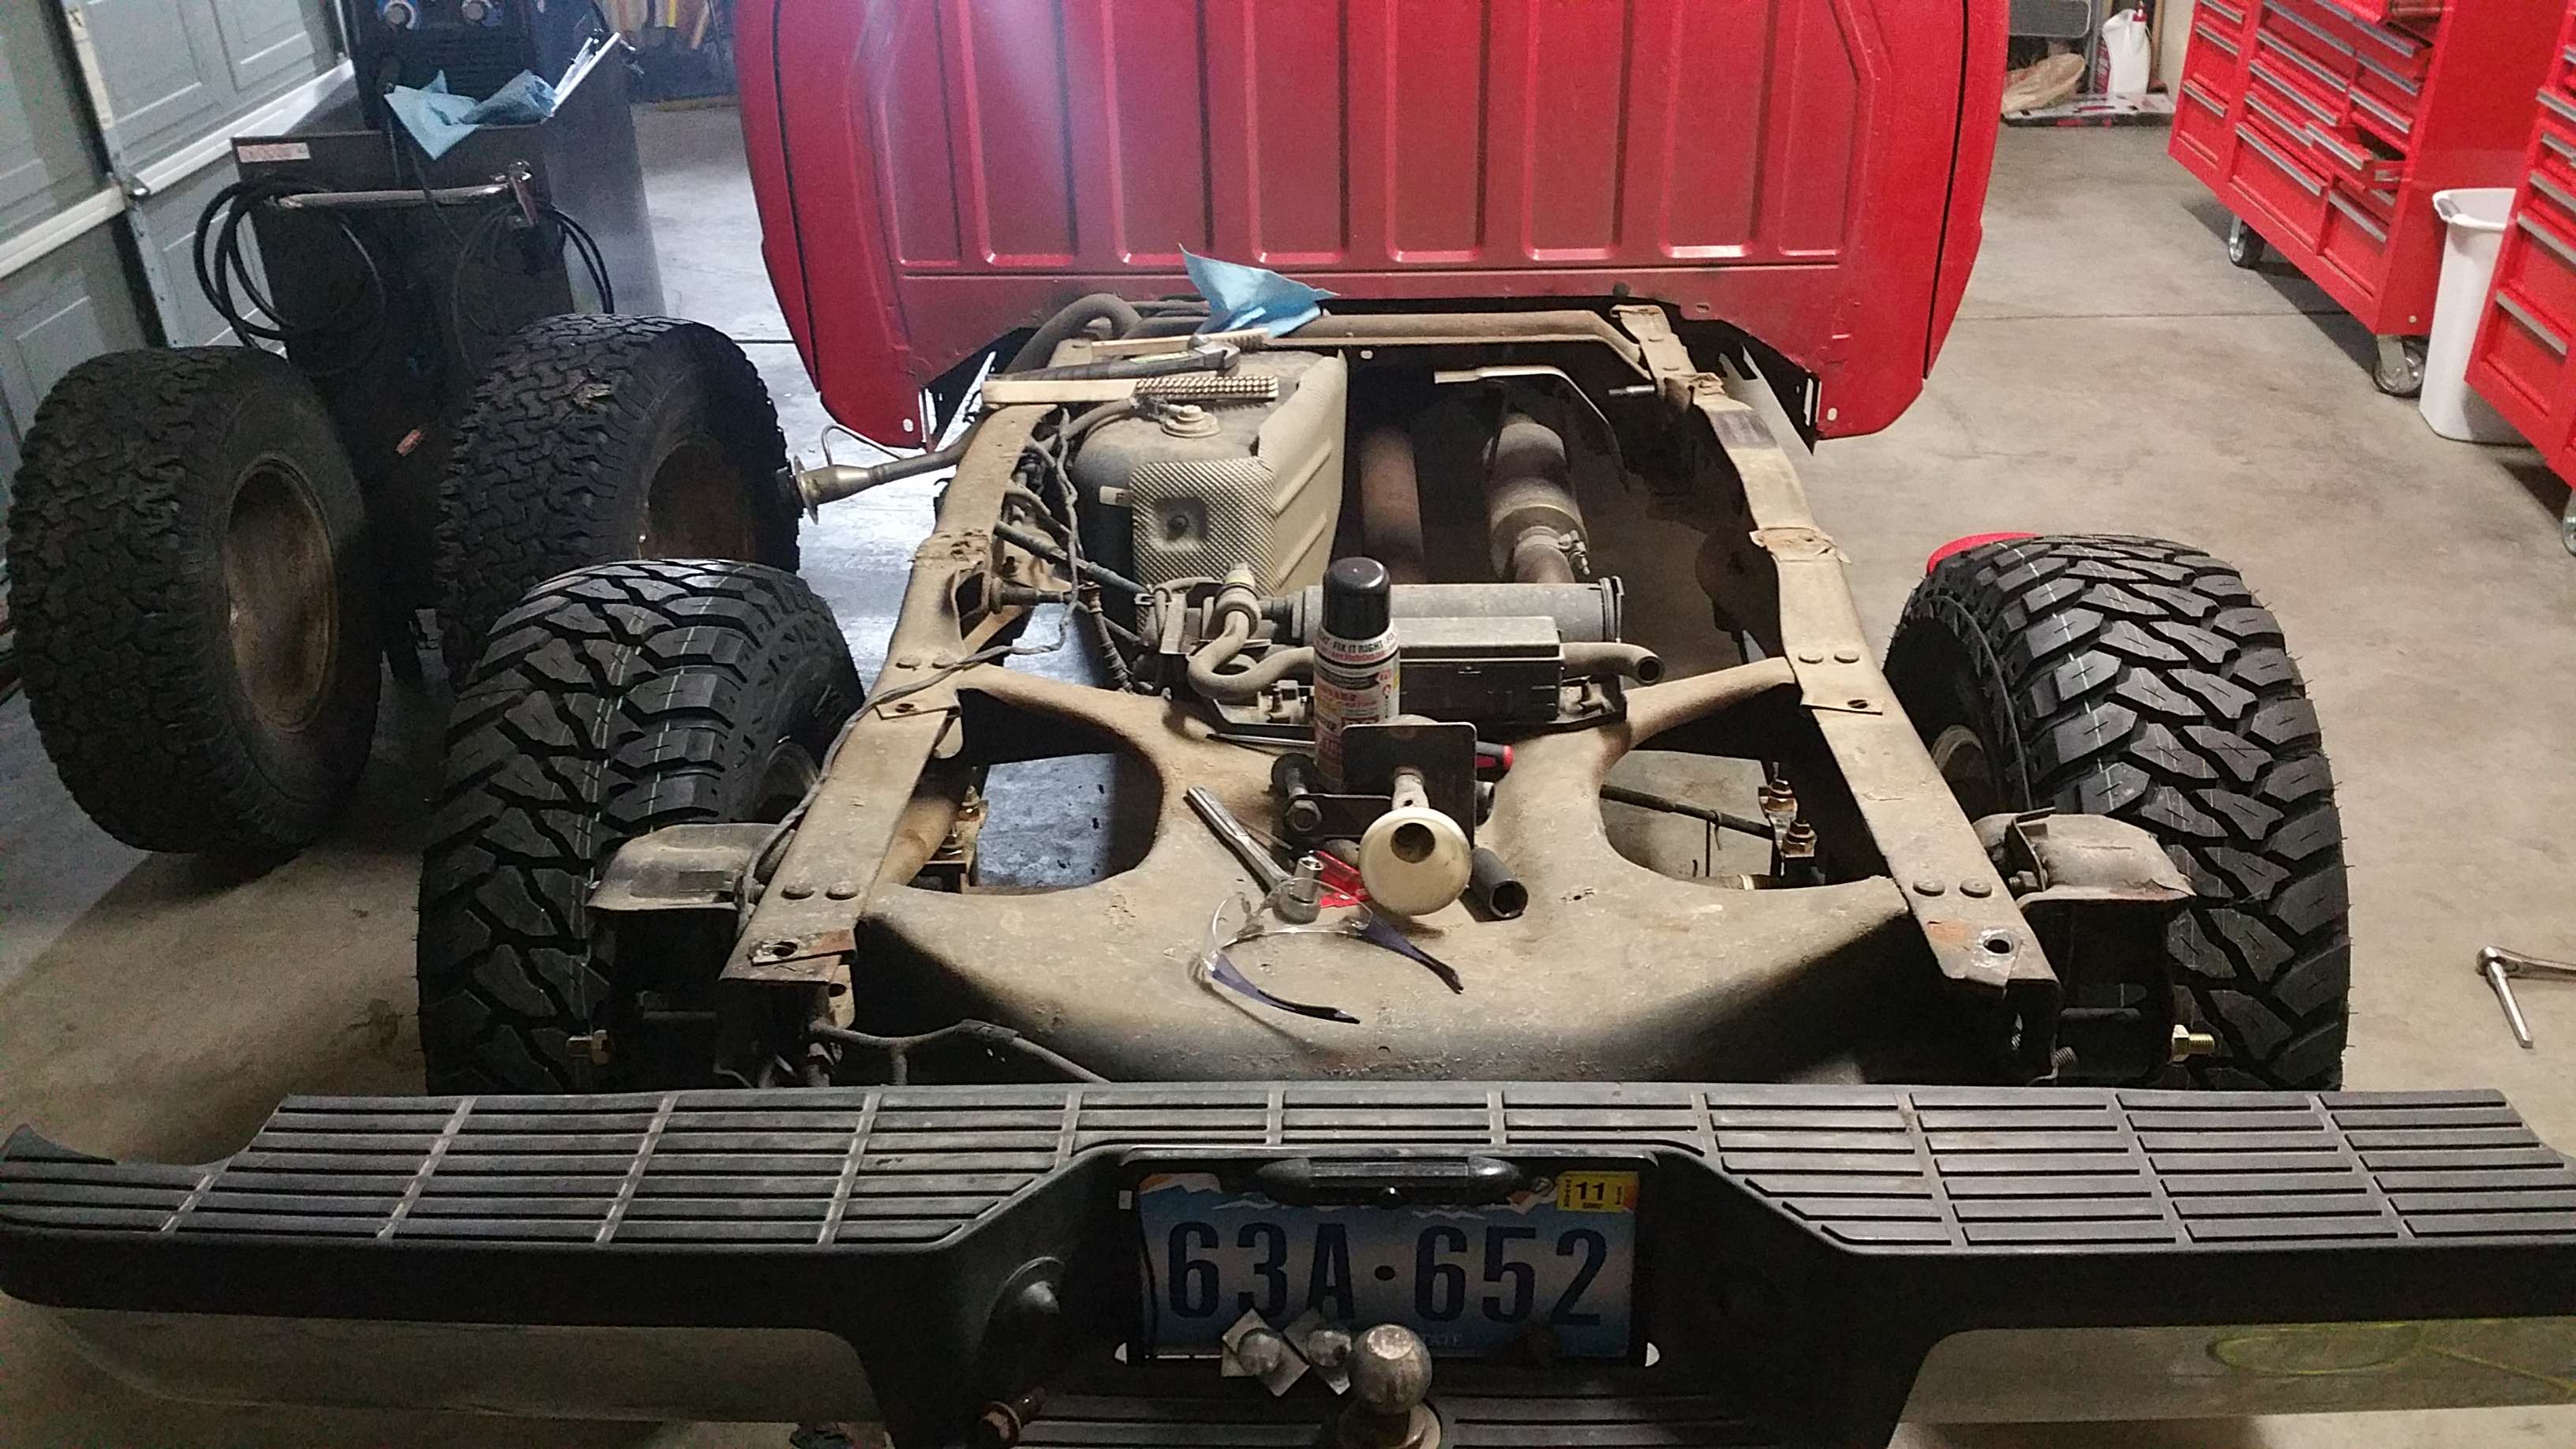
First on the list was to get the supercharger installed. Off comes the bed to get to the fuel pump. Moddbox provides a quality high performance fuel pump for their install kit. It is nice as is provides insurance, and is ready to supply fuel for down the road when I want to up the boost and fuel injectors. The fuel pump wasn't too hard.
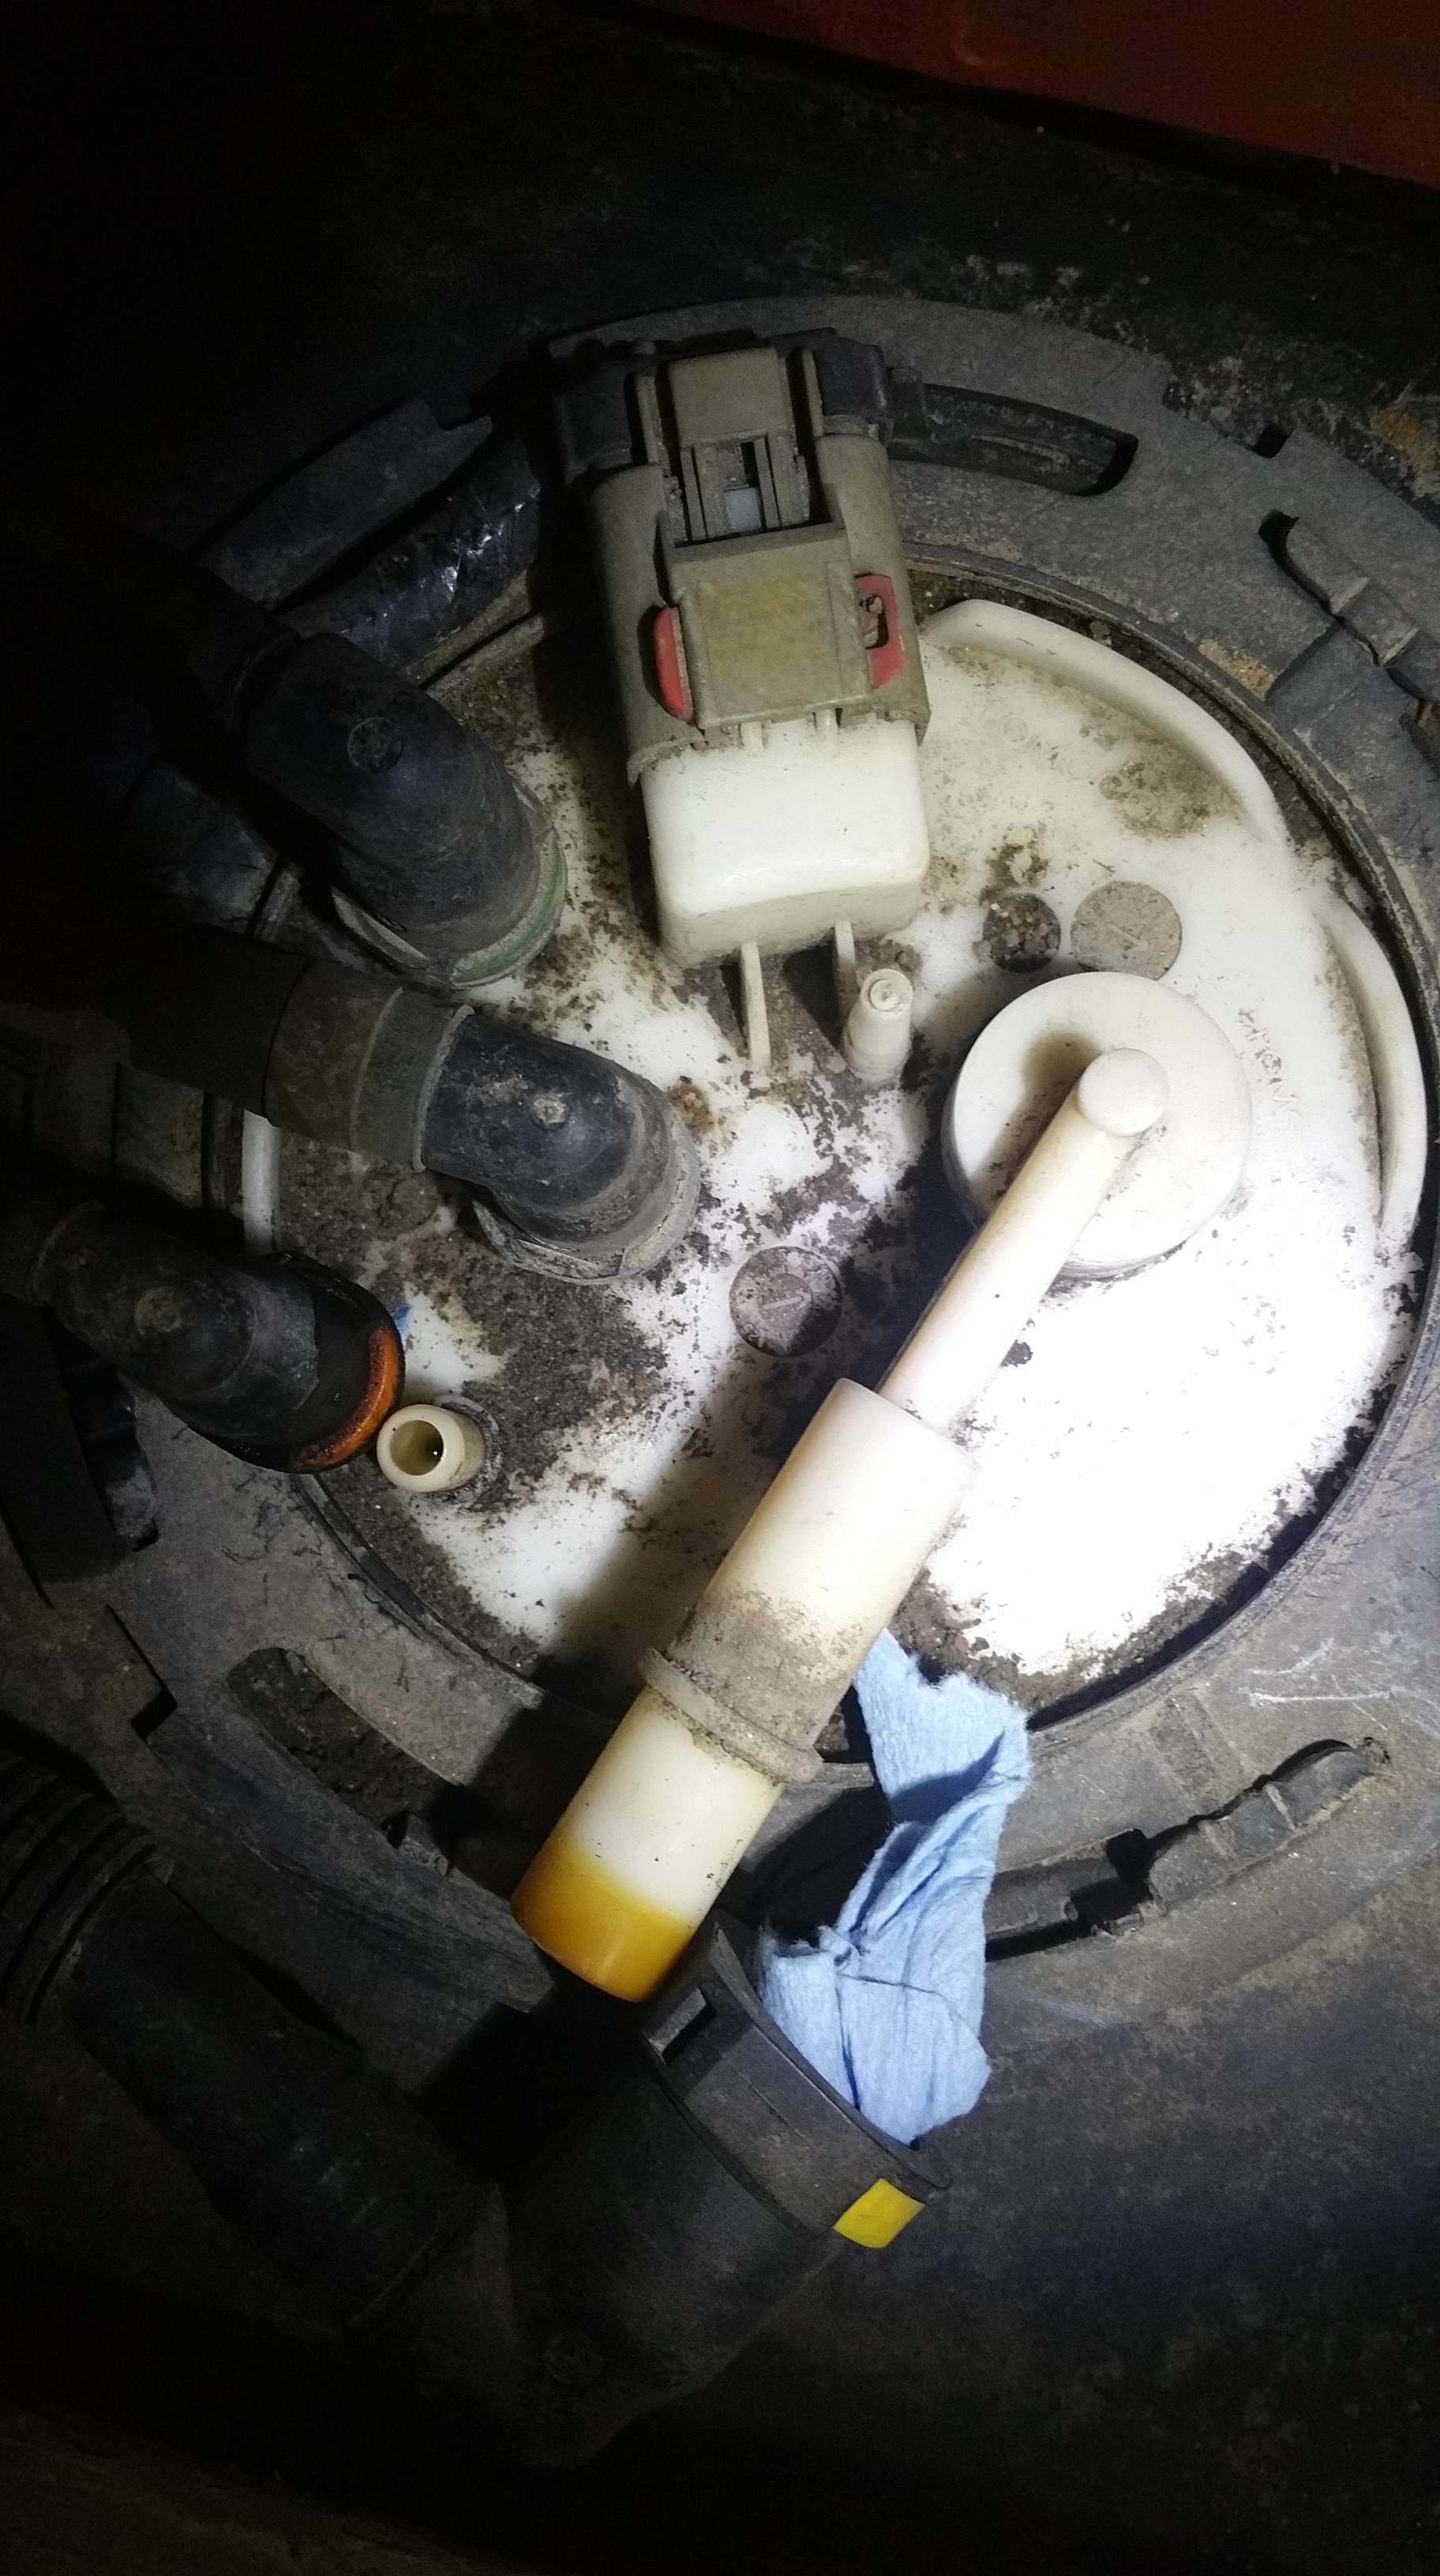
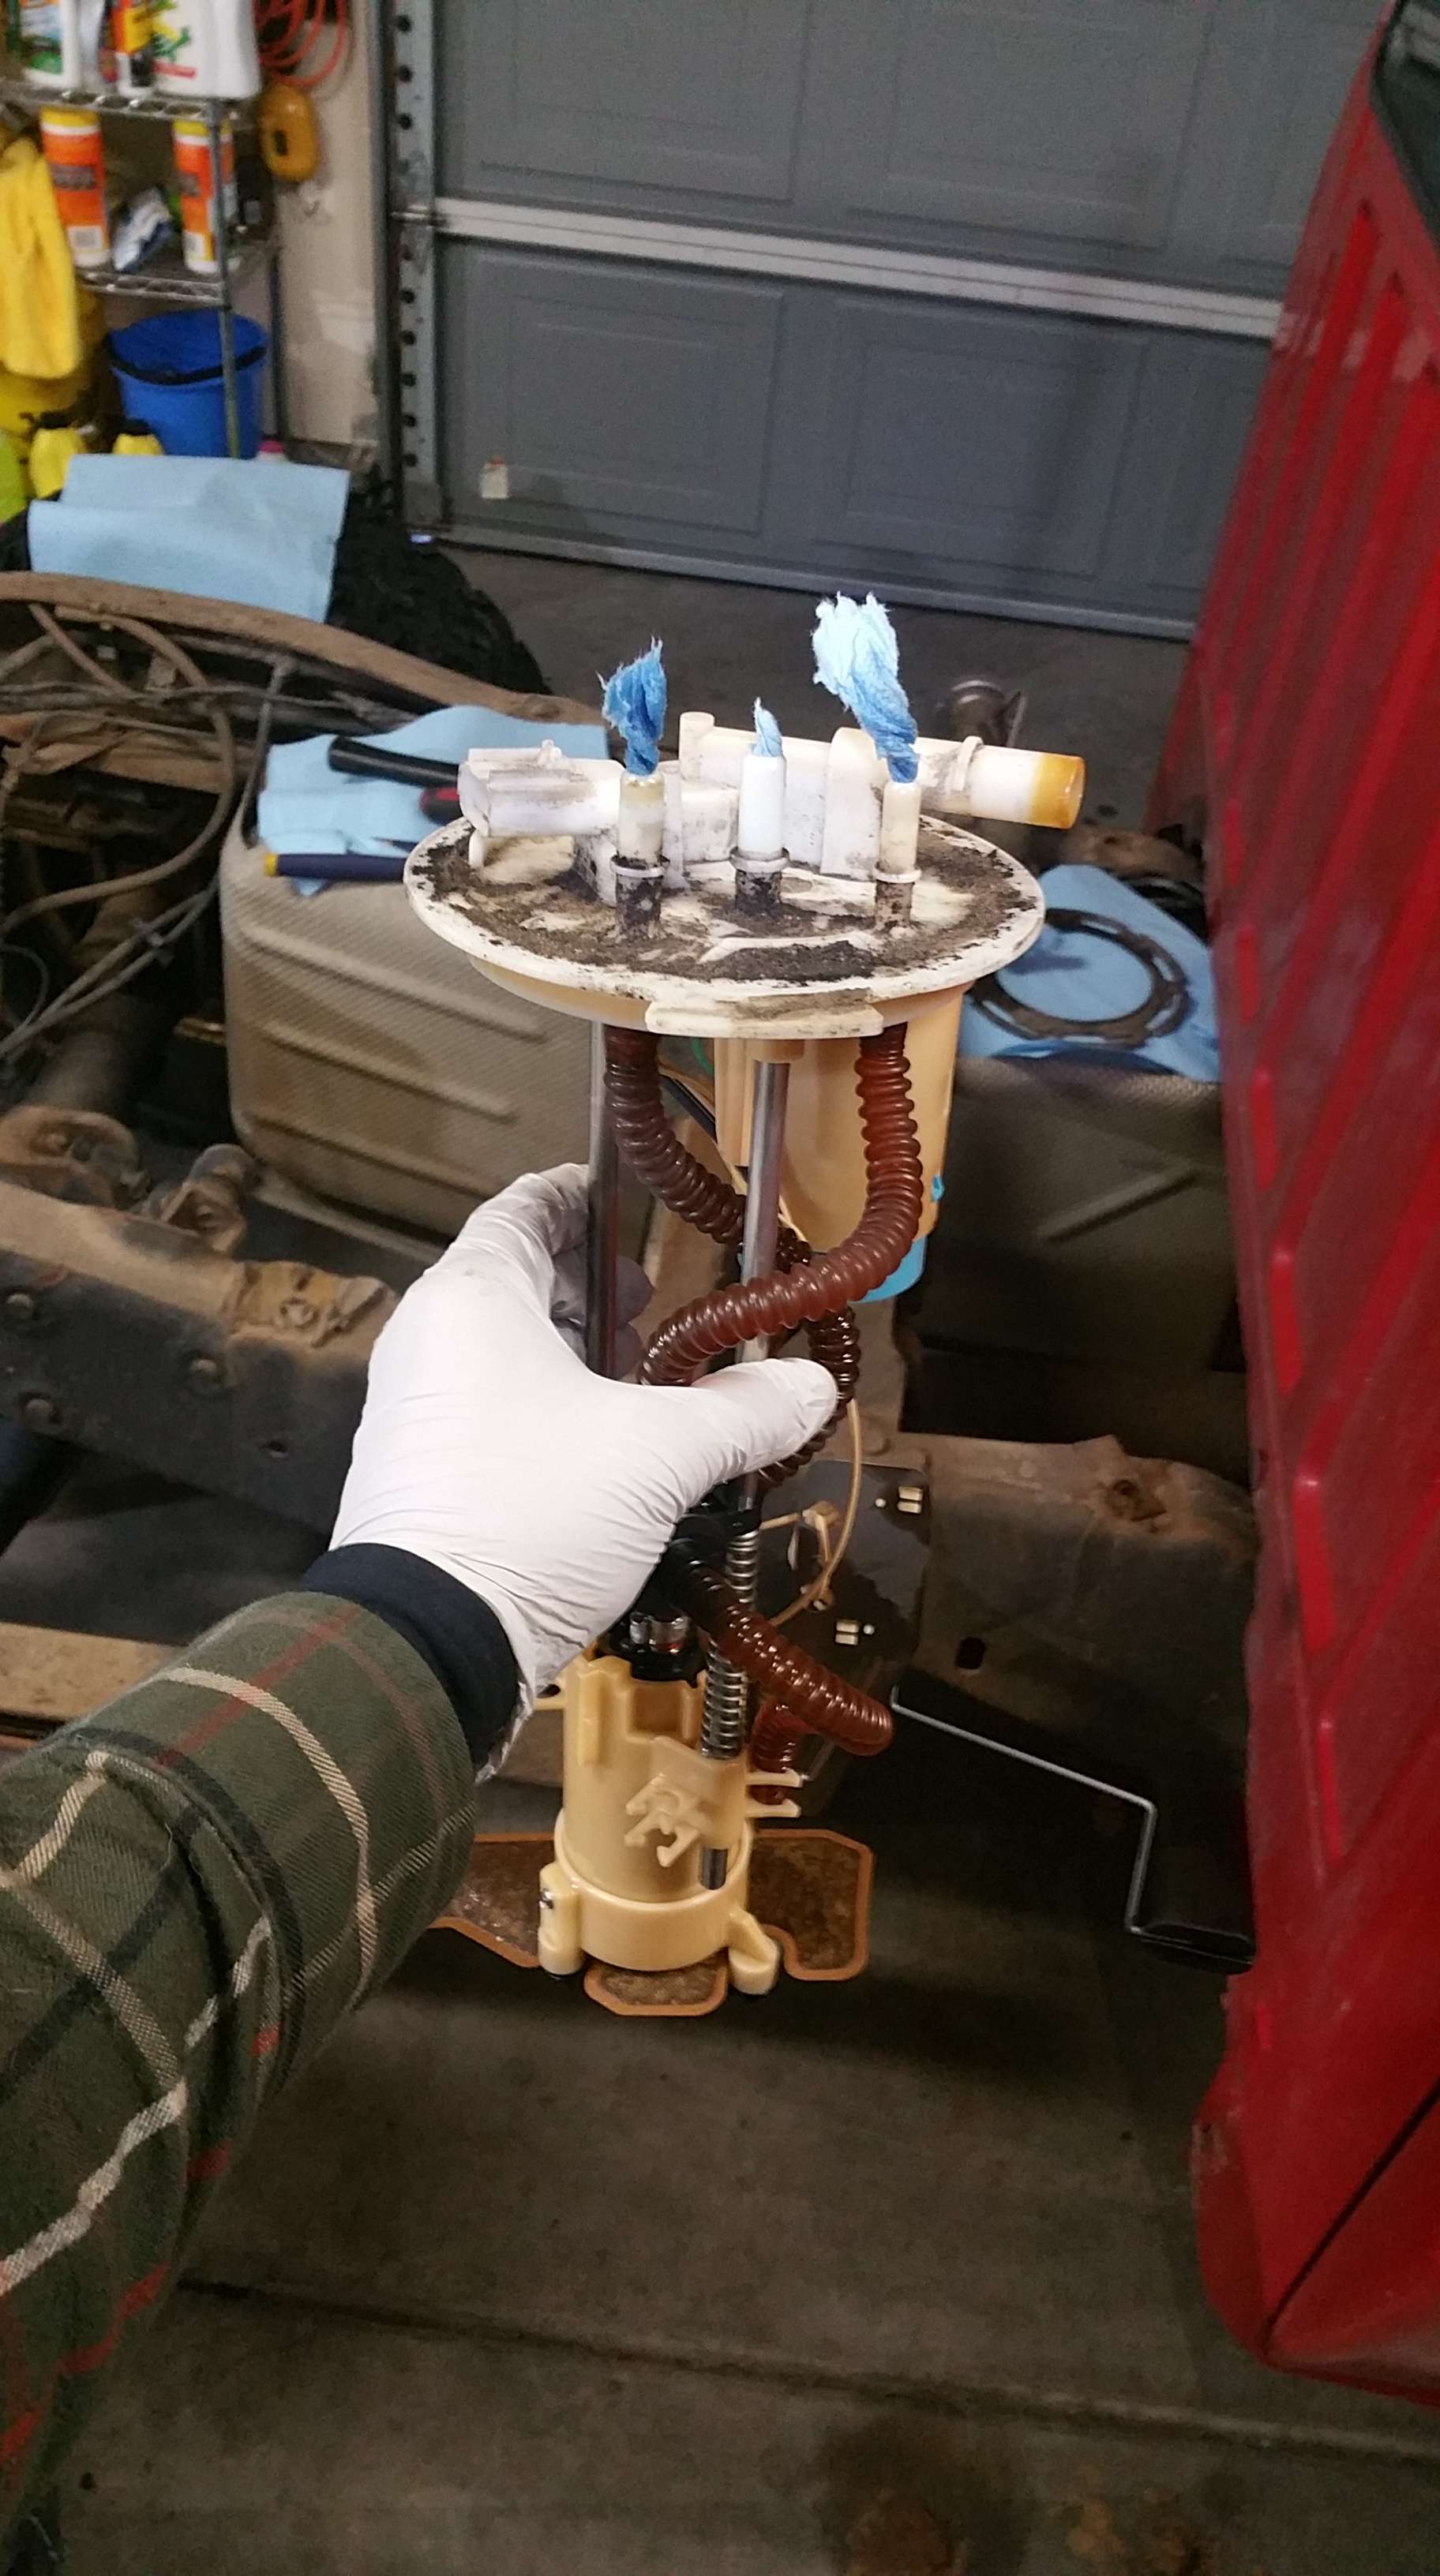
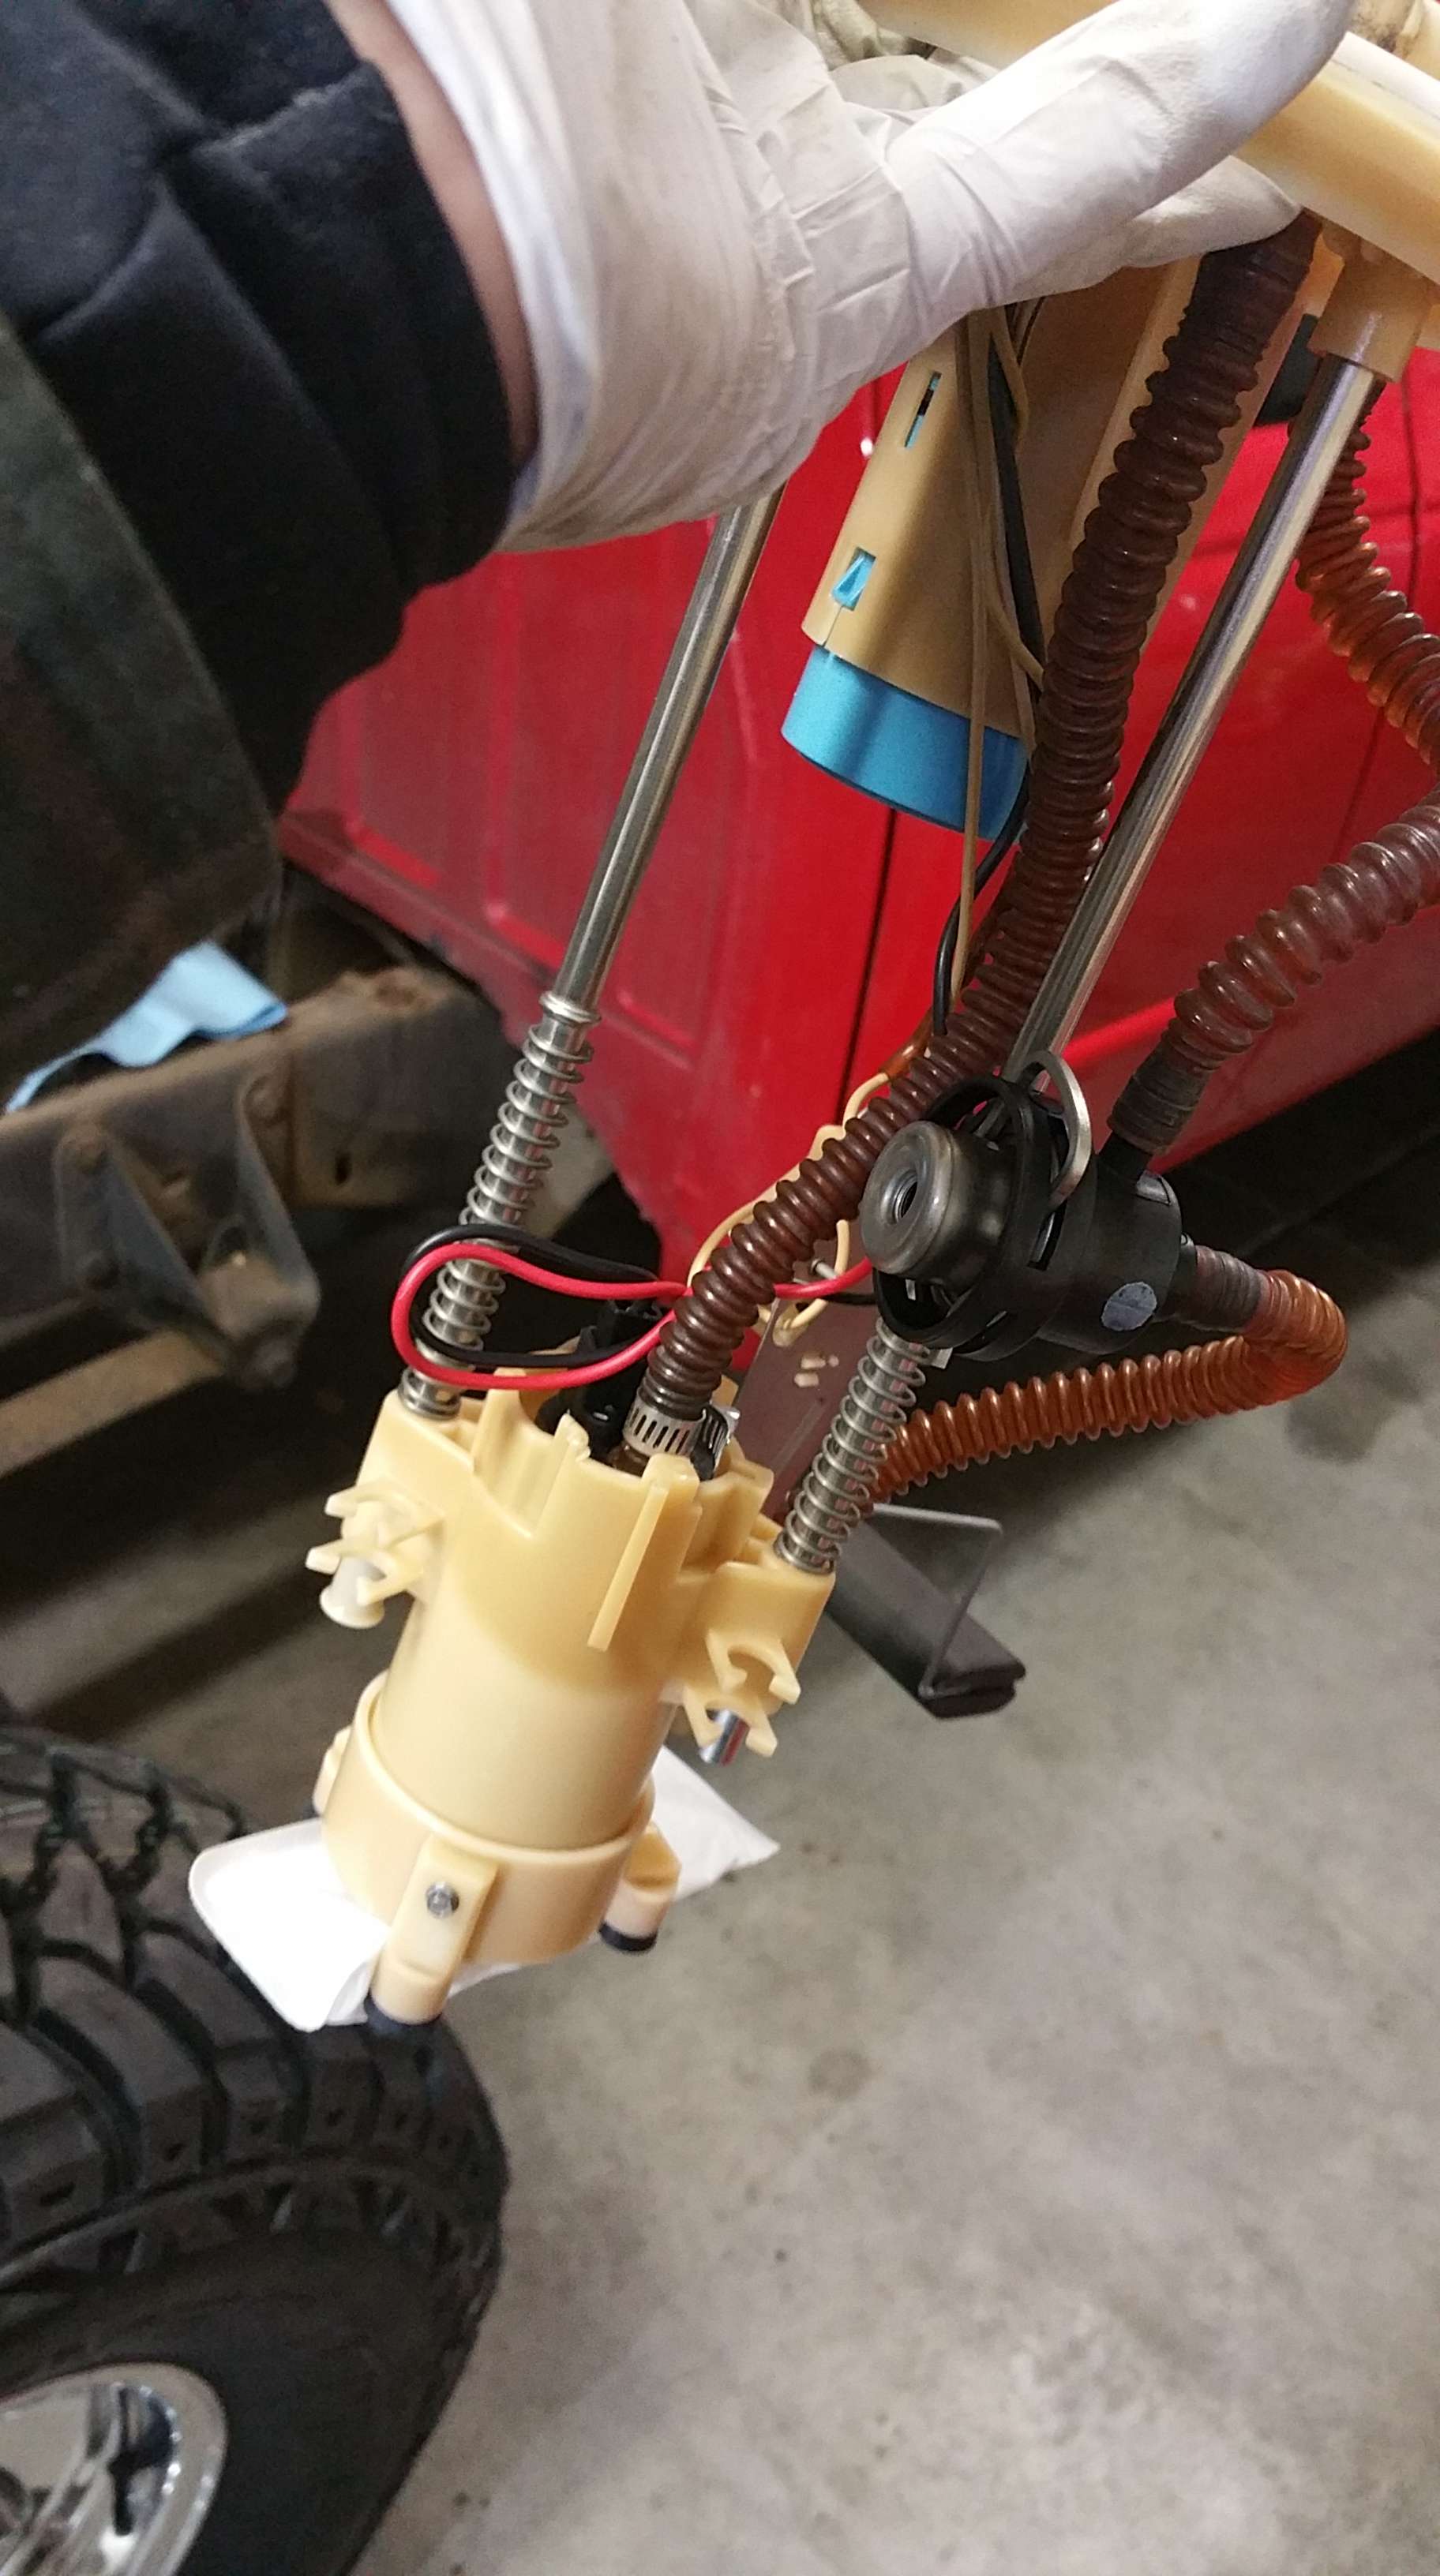
Now with the fuel pump done, I move to the front of the truck. I have to many pictures to comment of individually, so I will just throw them all in together. The moddbox kit is very high quality. They provide a well thought out solution for supercharging a 4.0 SOHC. It has provisions for sensors, both supercharger port types, an optional intercooler etc... At no point did I have second thoughts about adding allthis new equipment to my truck, or question its durability. I am a studying mechanical engineer, and have tinkered with things all my life, looking for the better ways to build, assemble, design, etc... This is a quality piece of kit. Of course, it is only as good as how you install it. I took my time, and it came out excellent. I did not install any sensors, but wqhen I make the jump to 7.5 psi, I will likely install a few since I have to get to the injectors anyways.
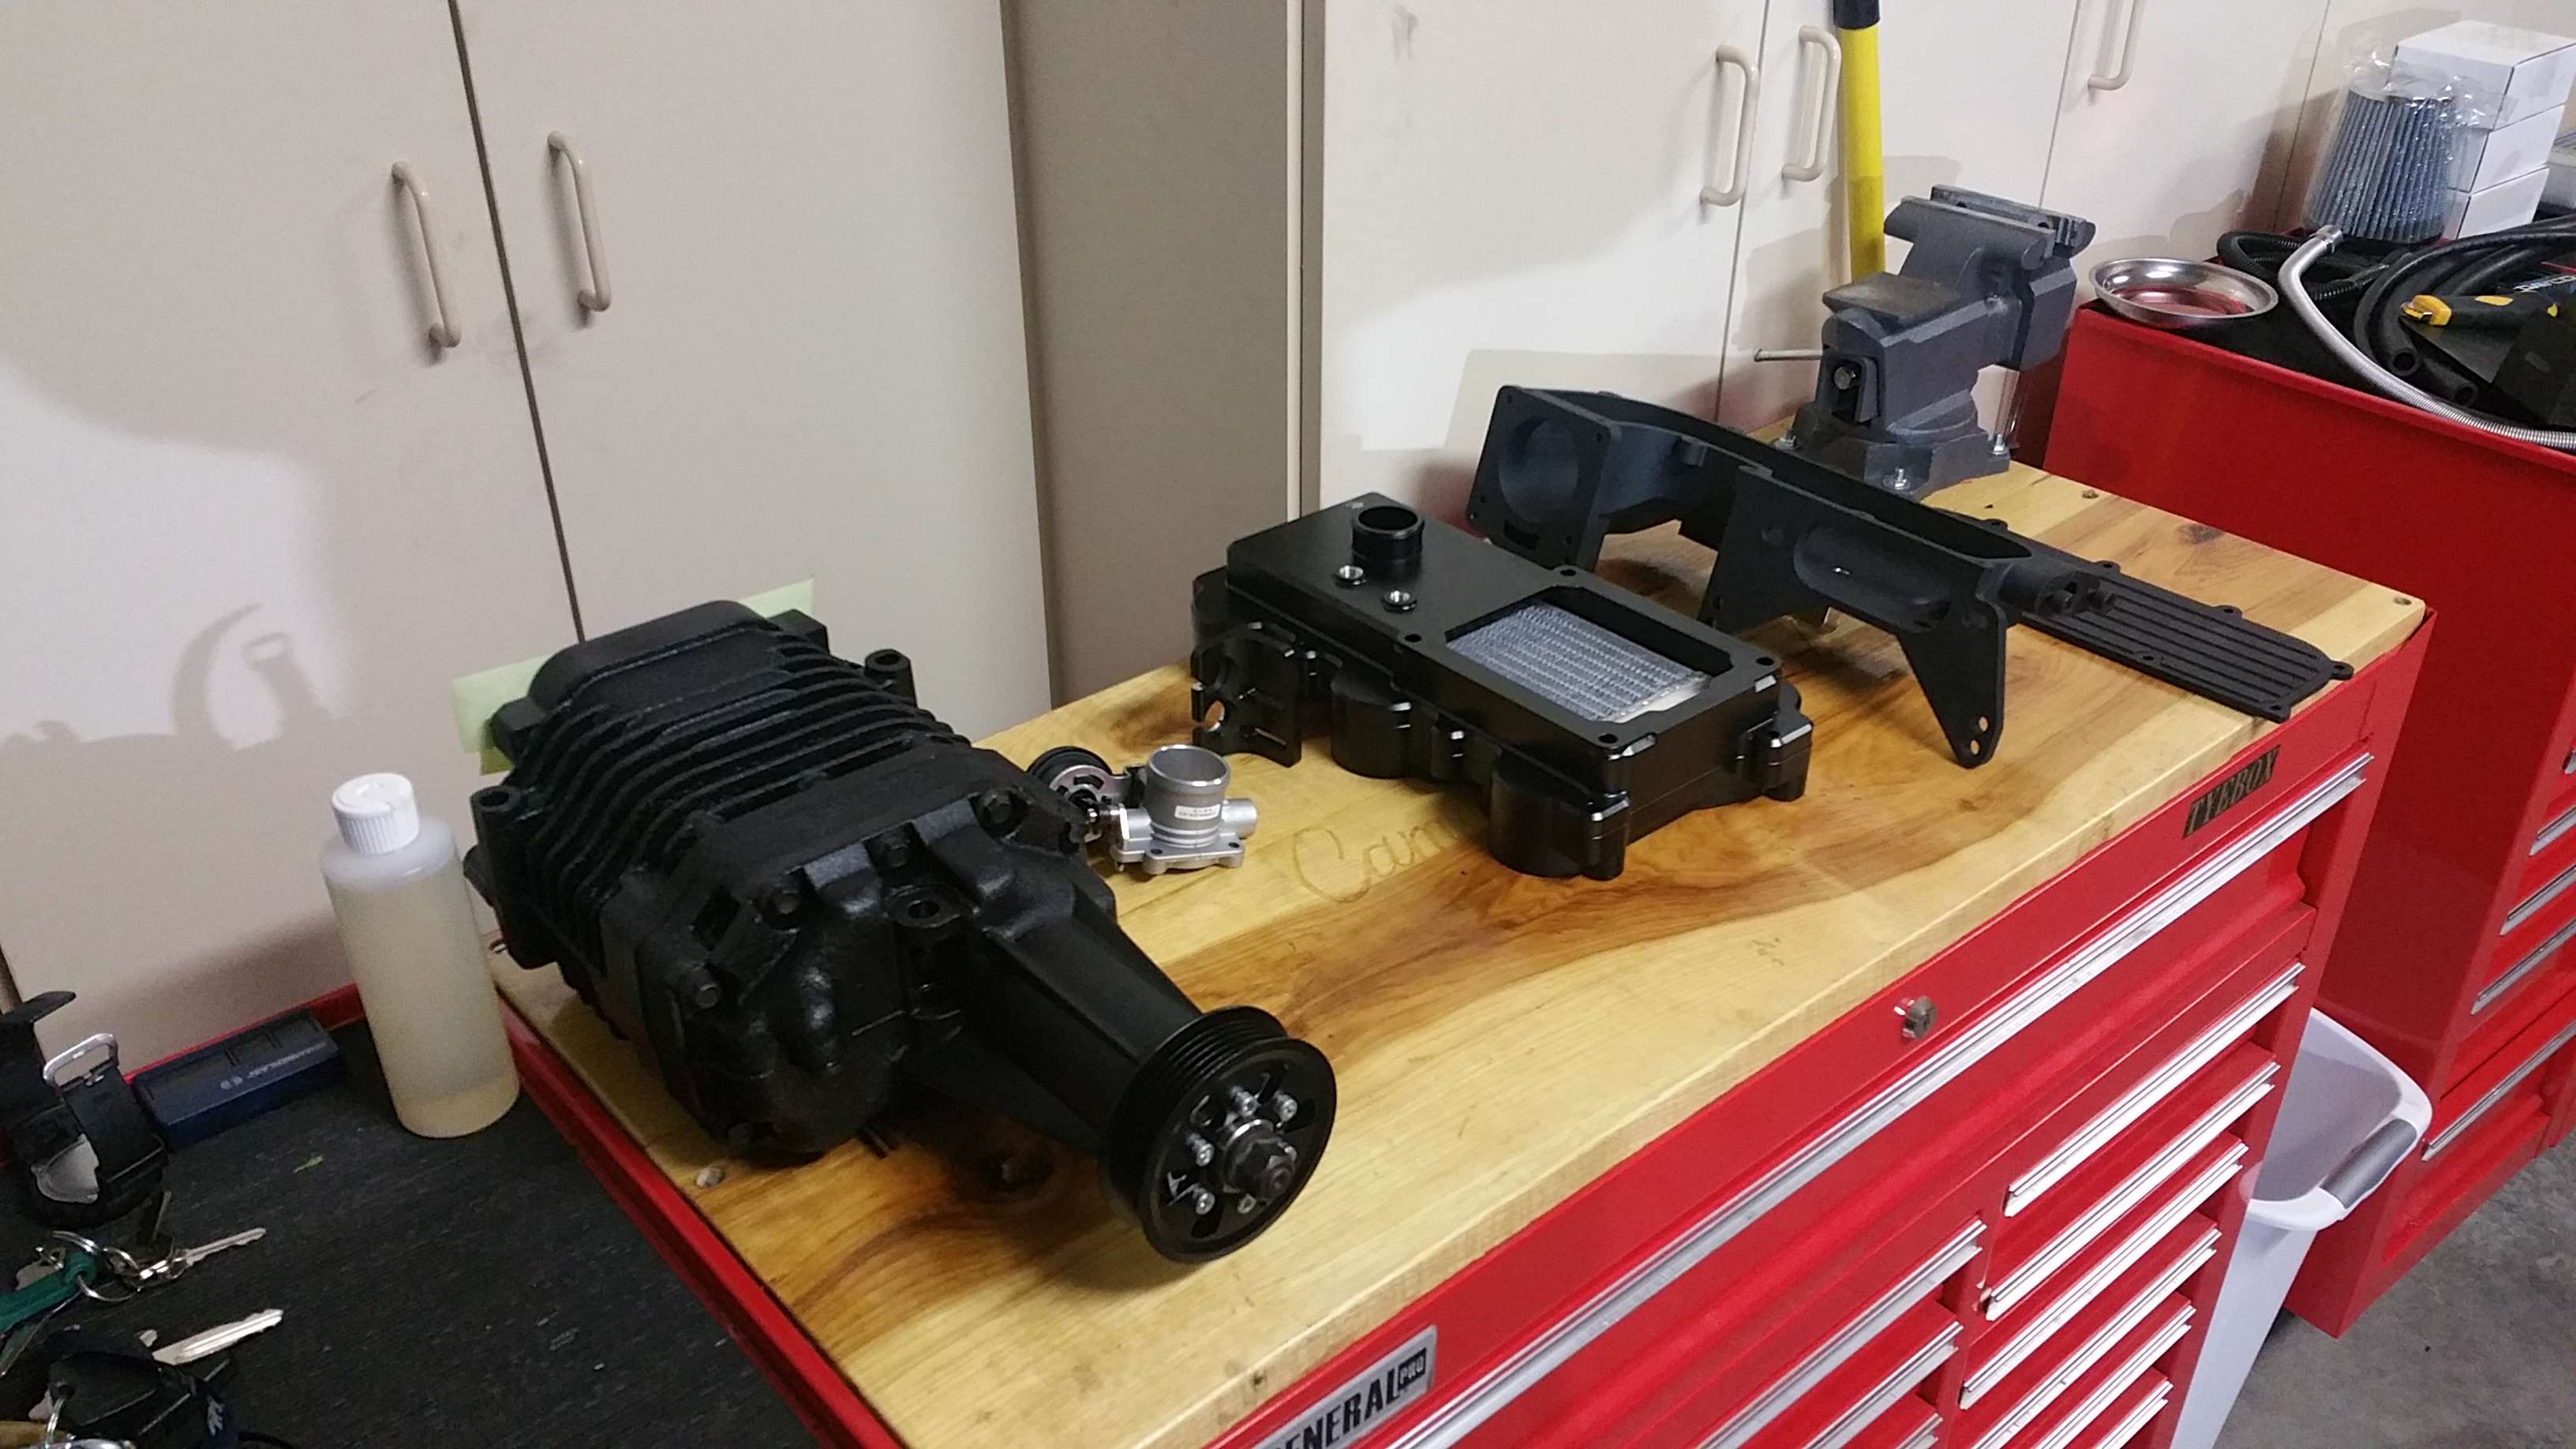
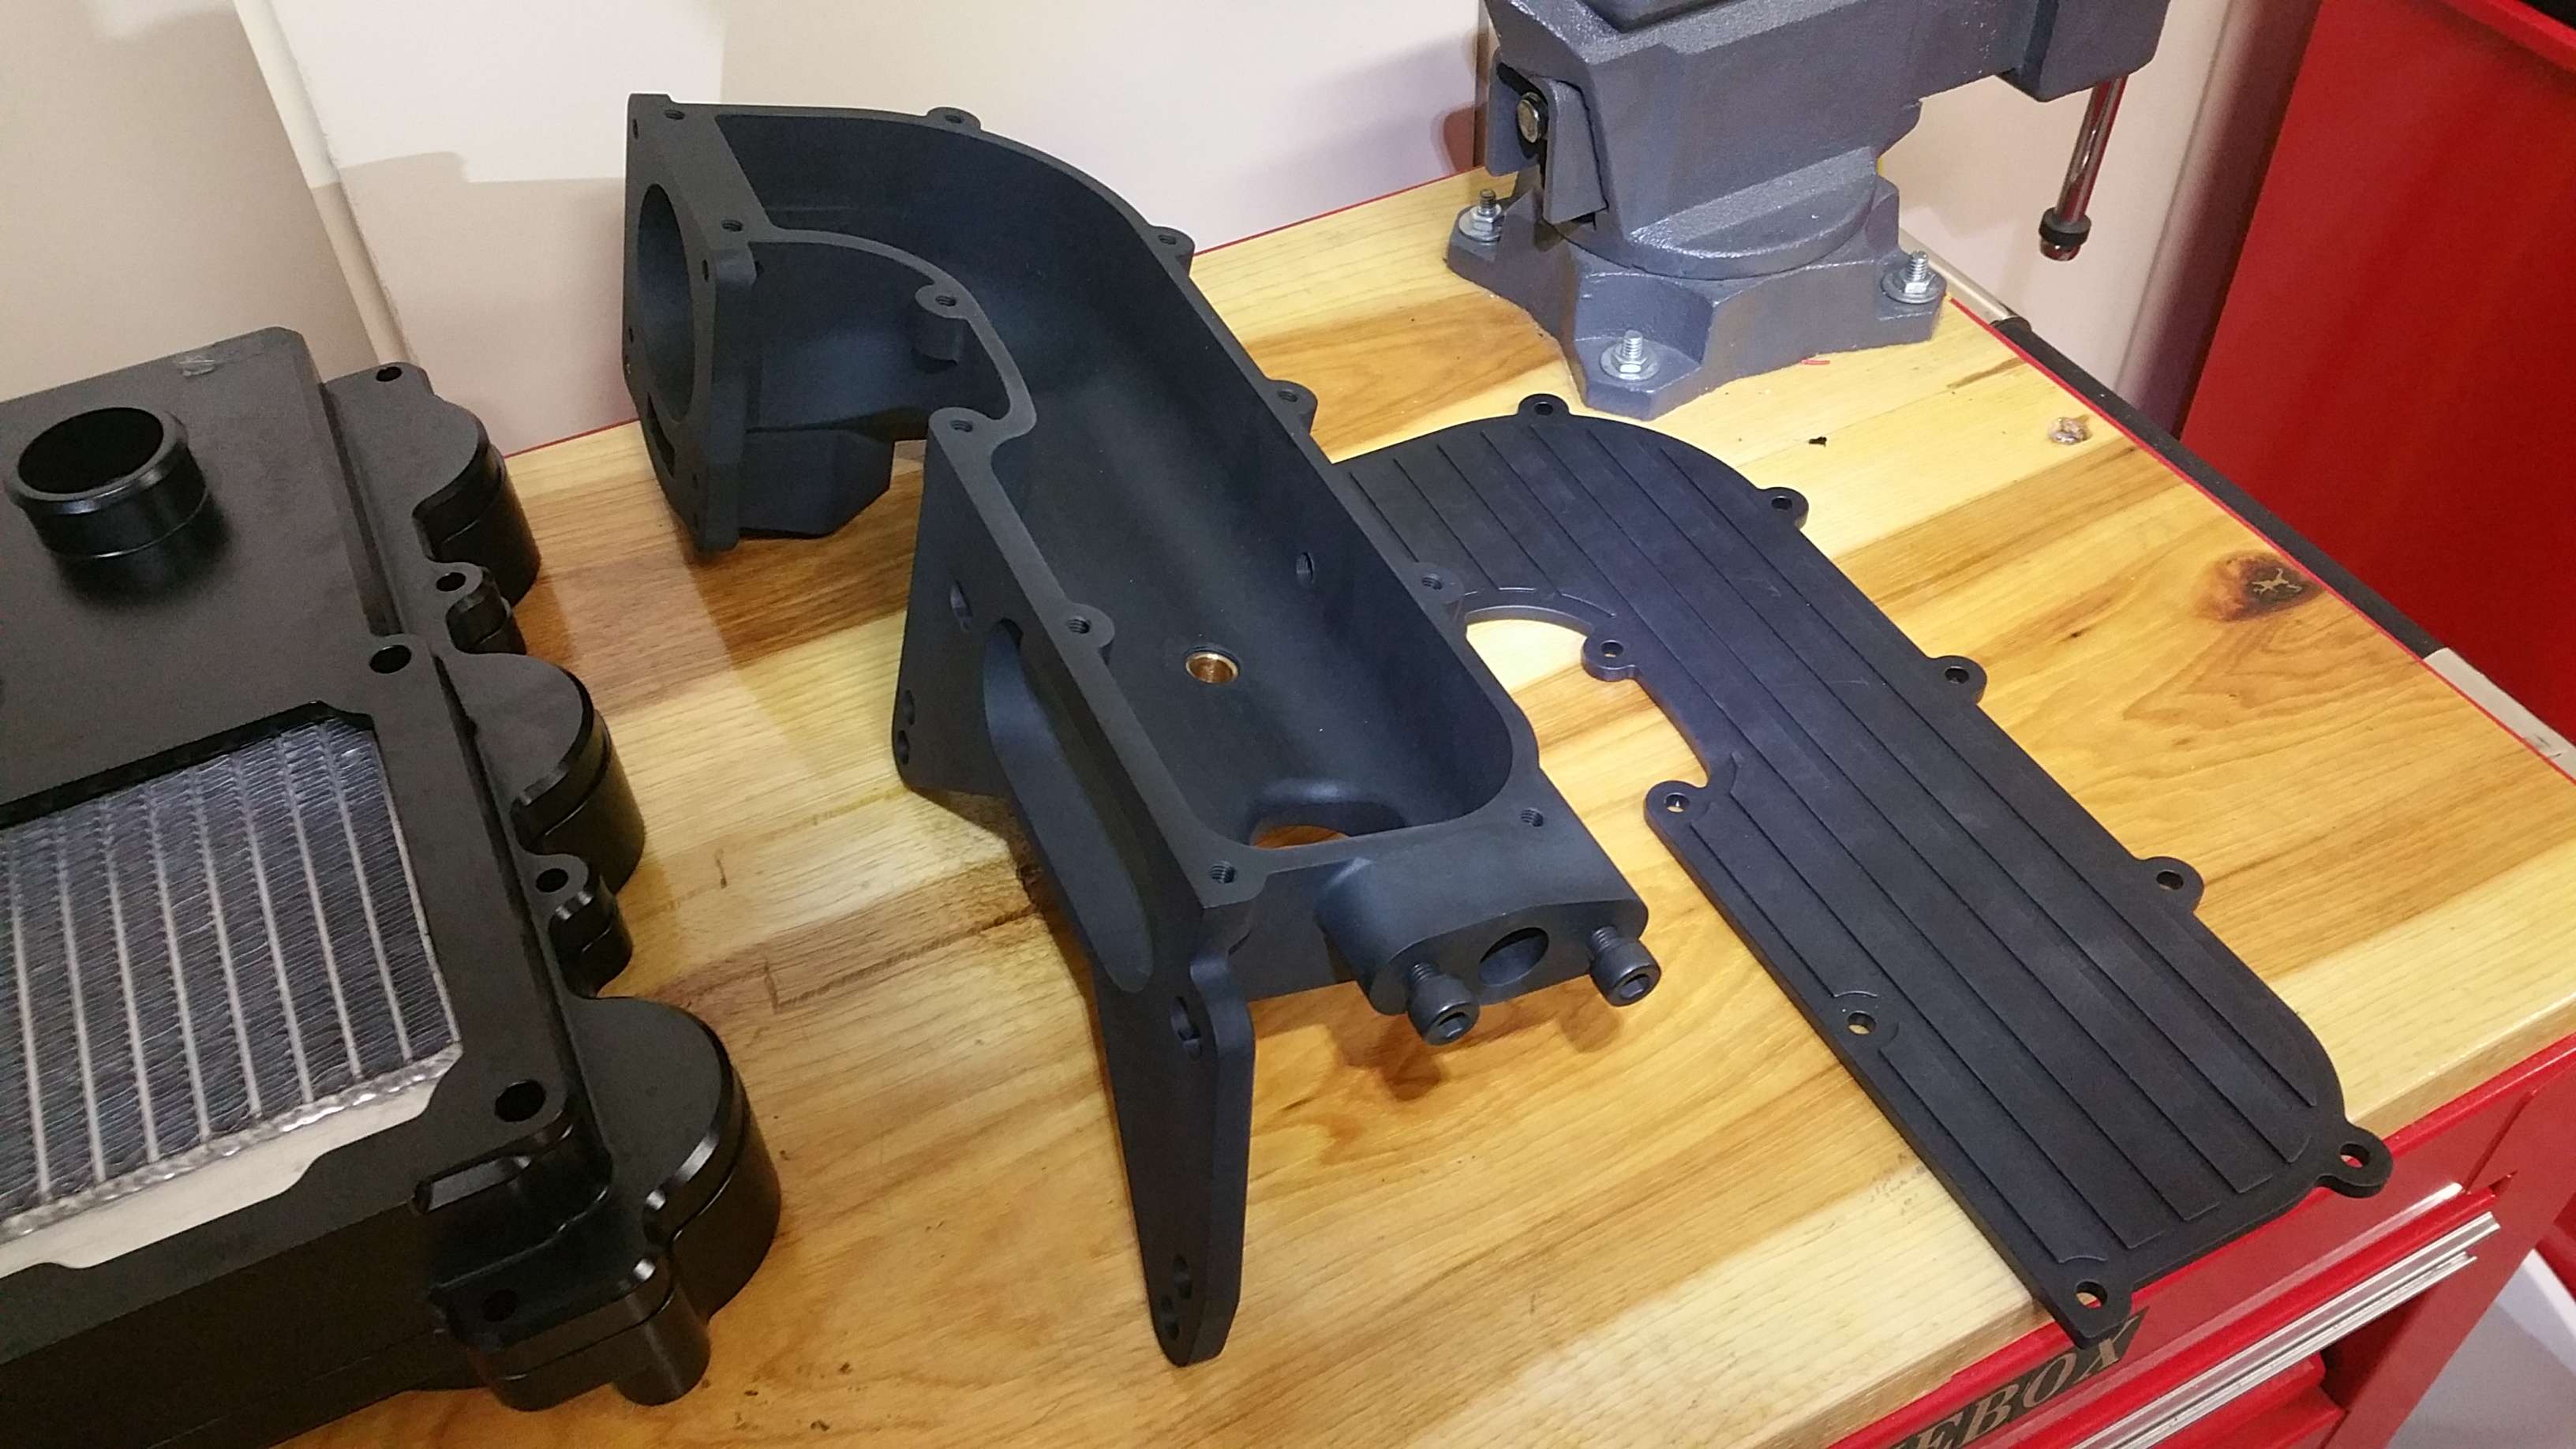
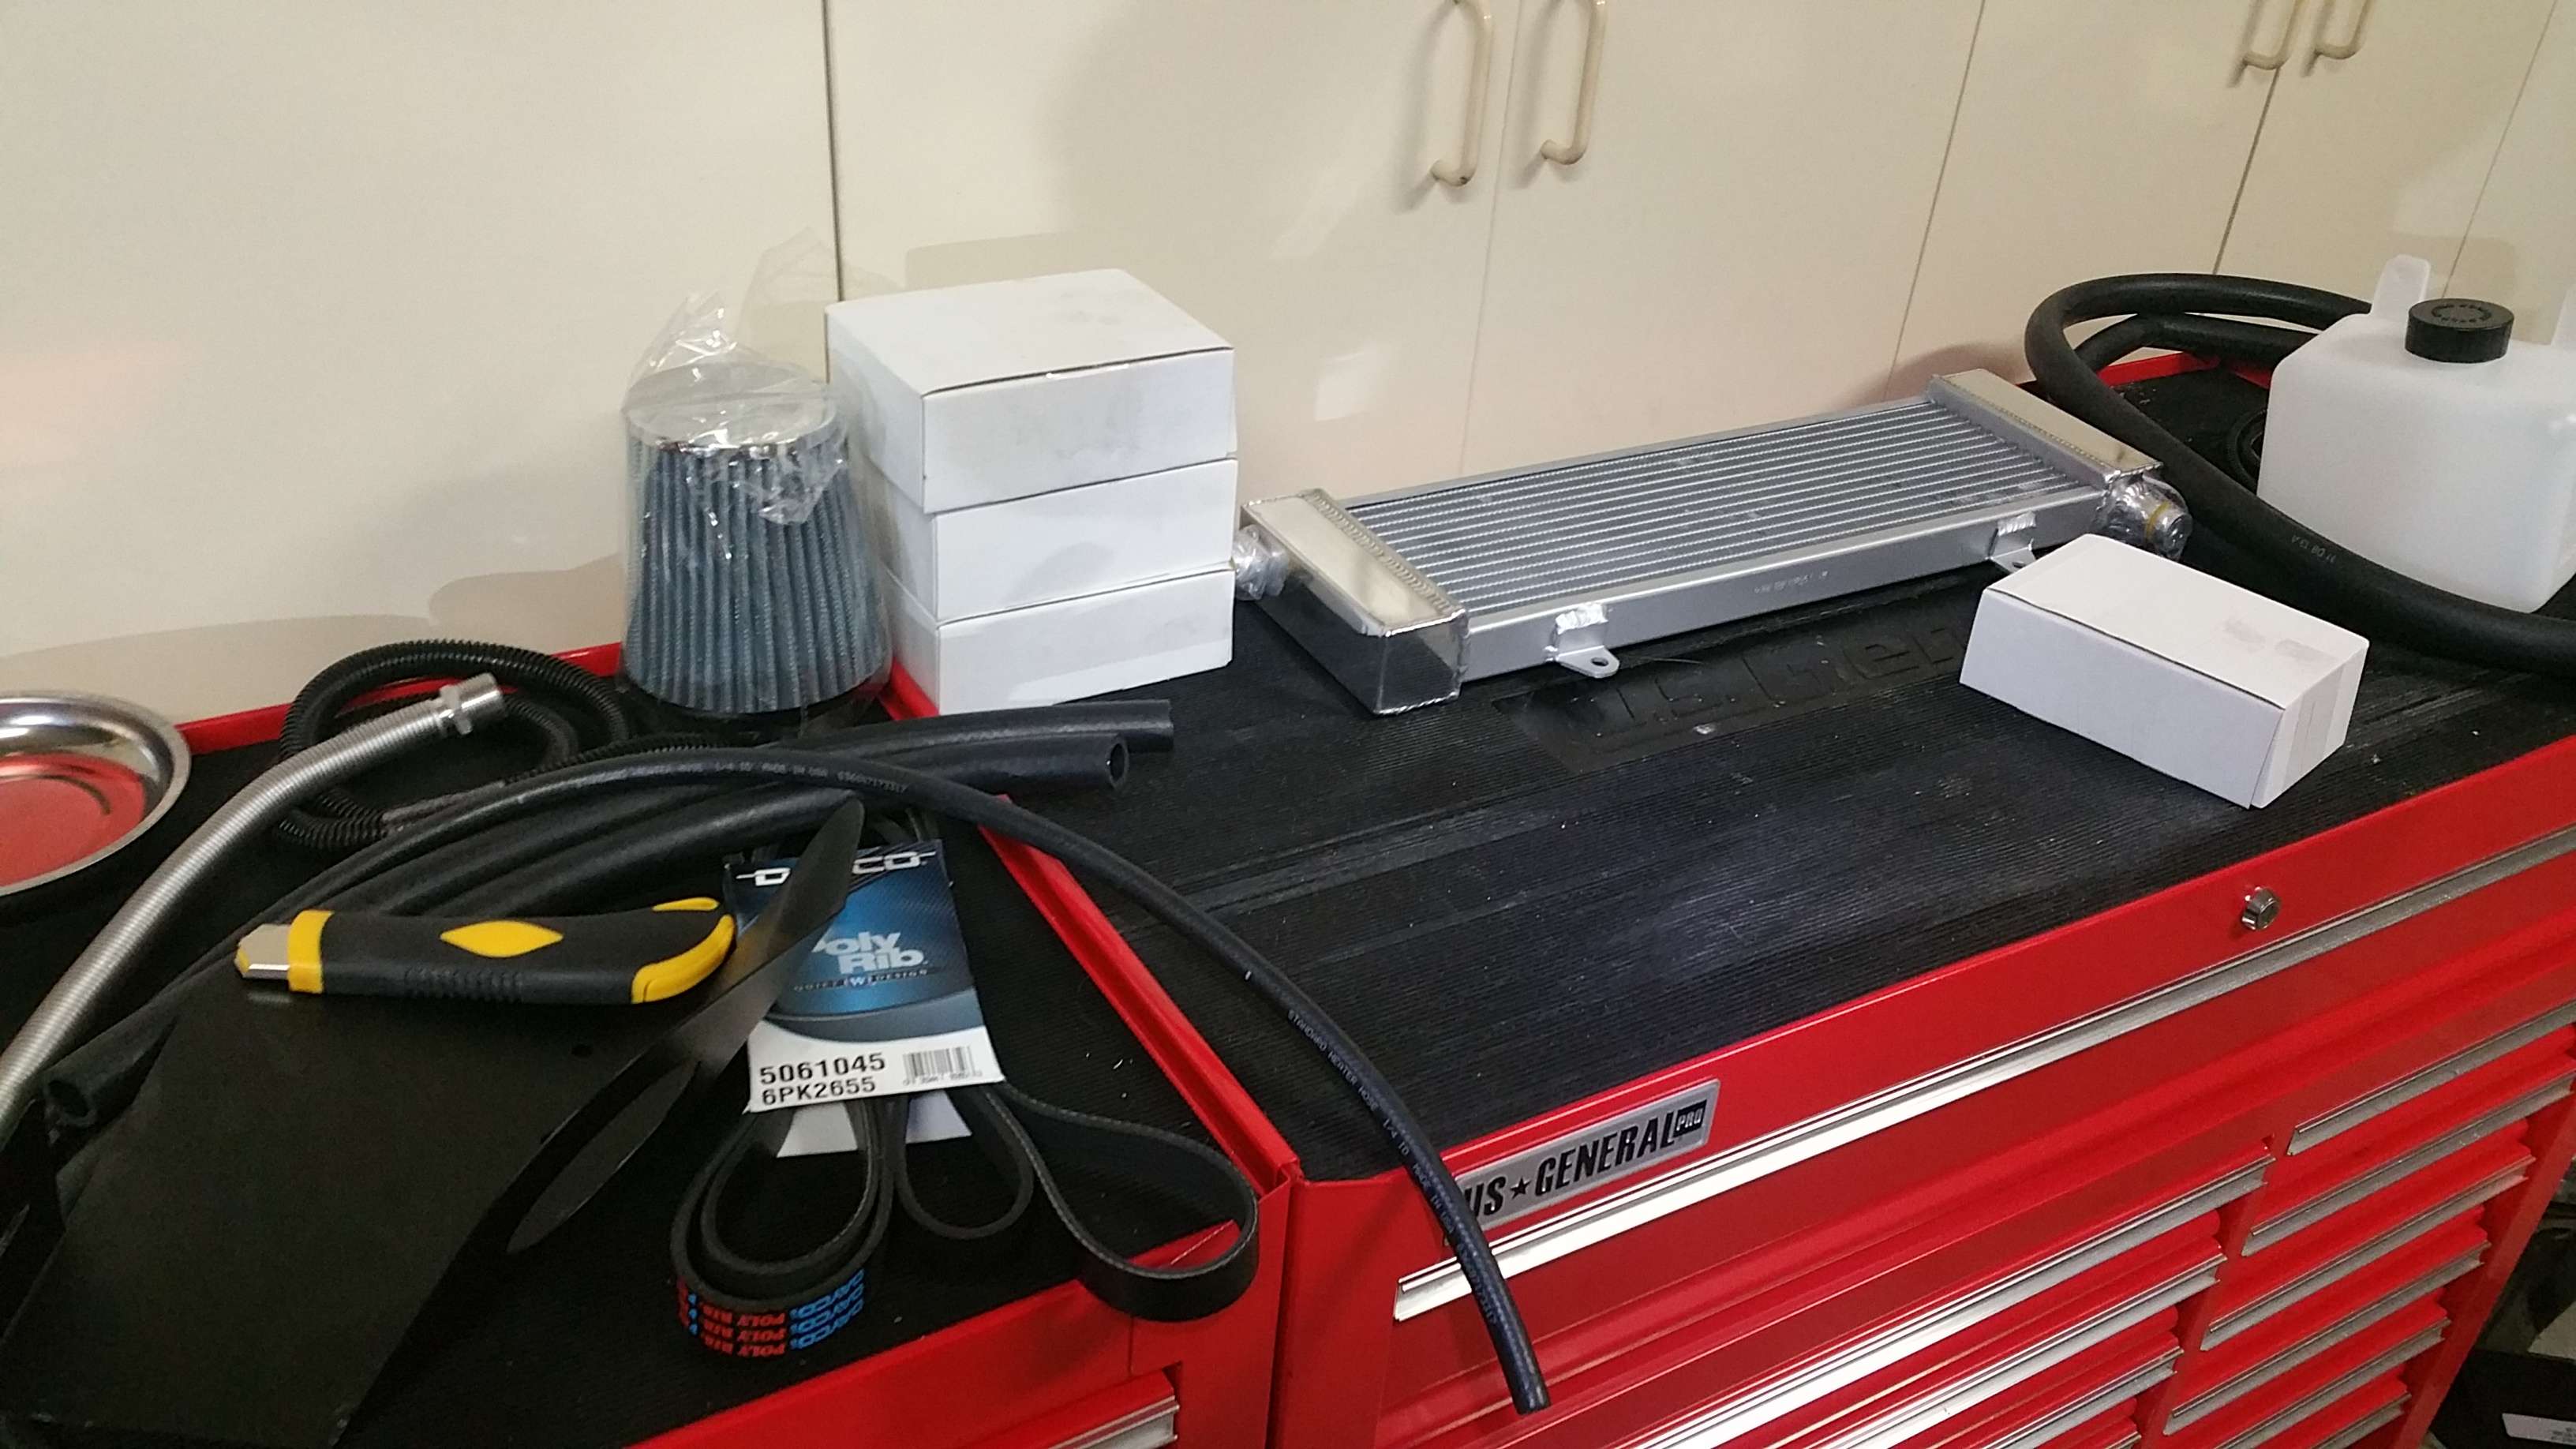
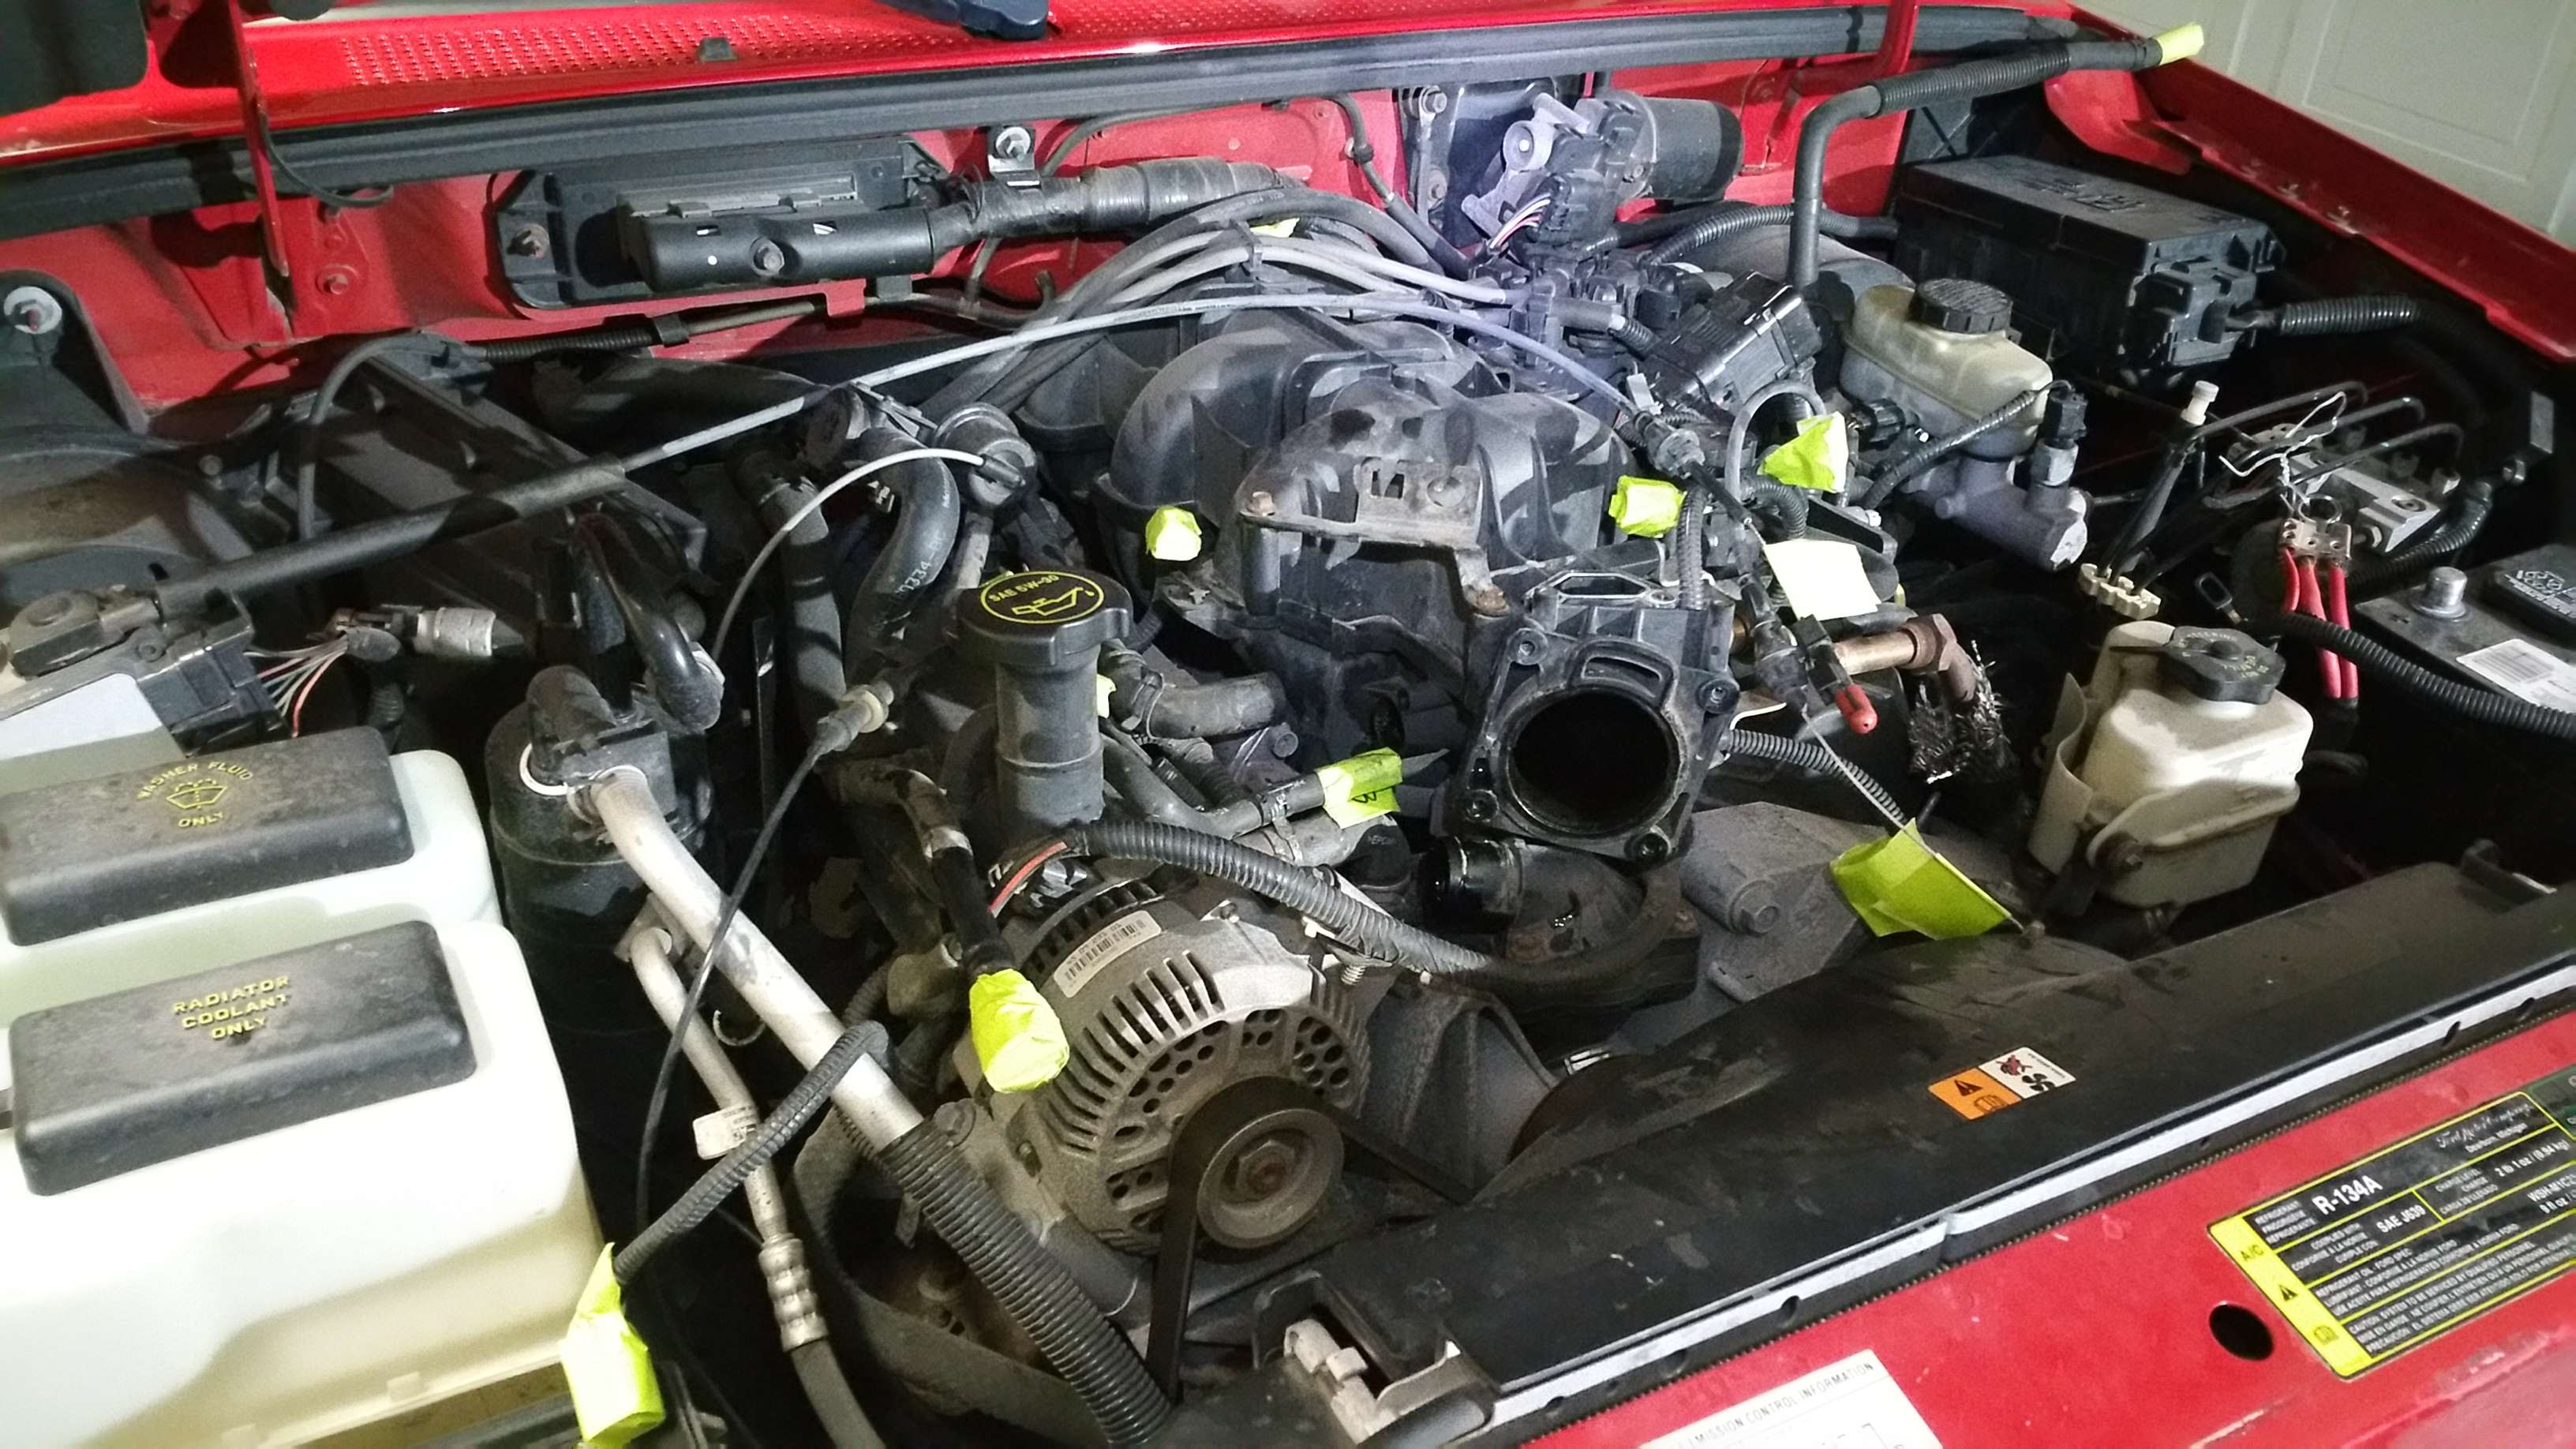
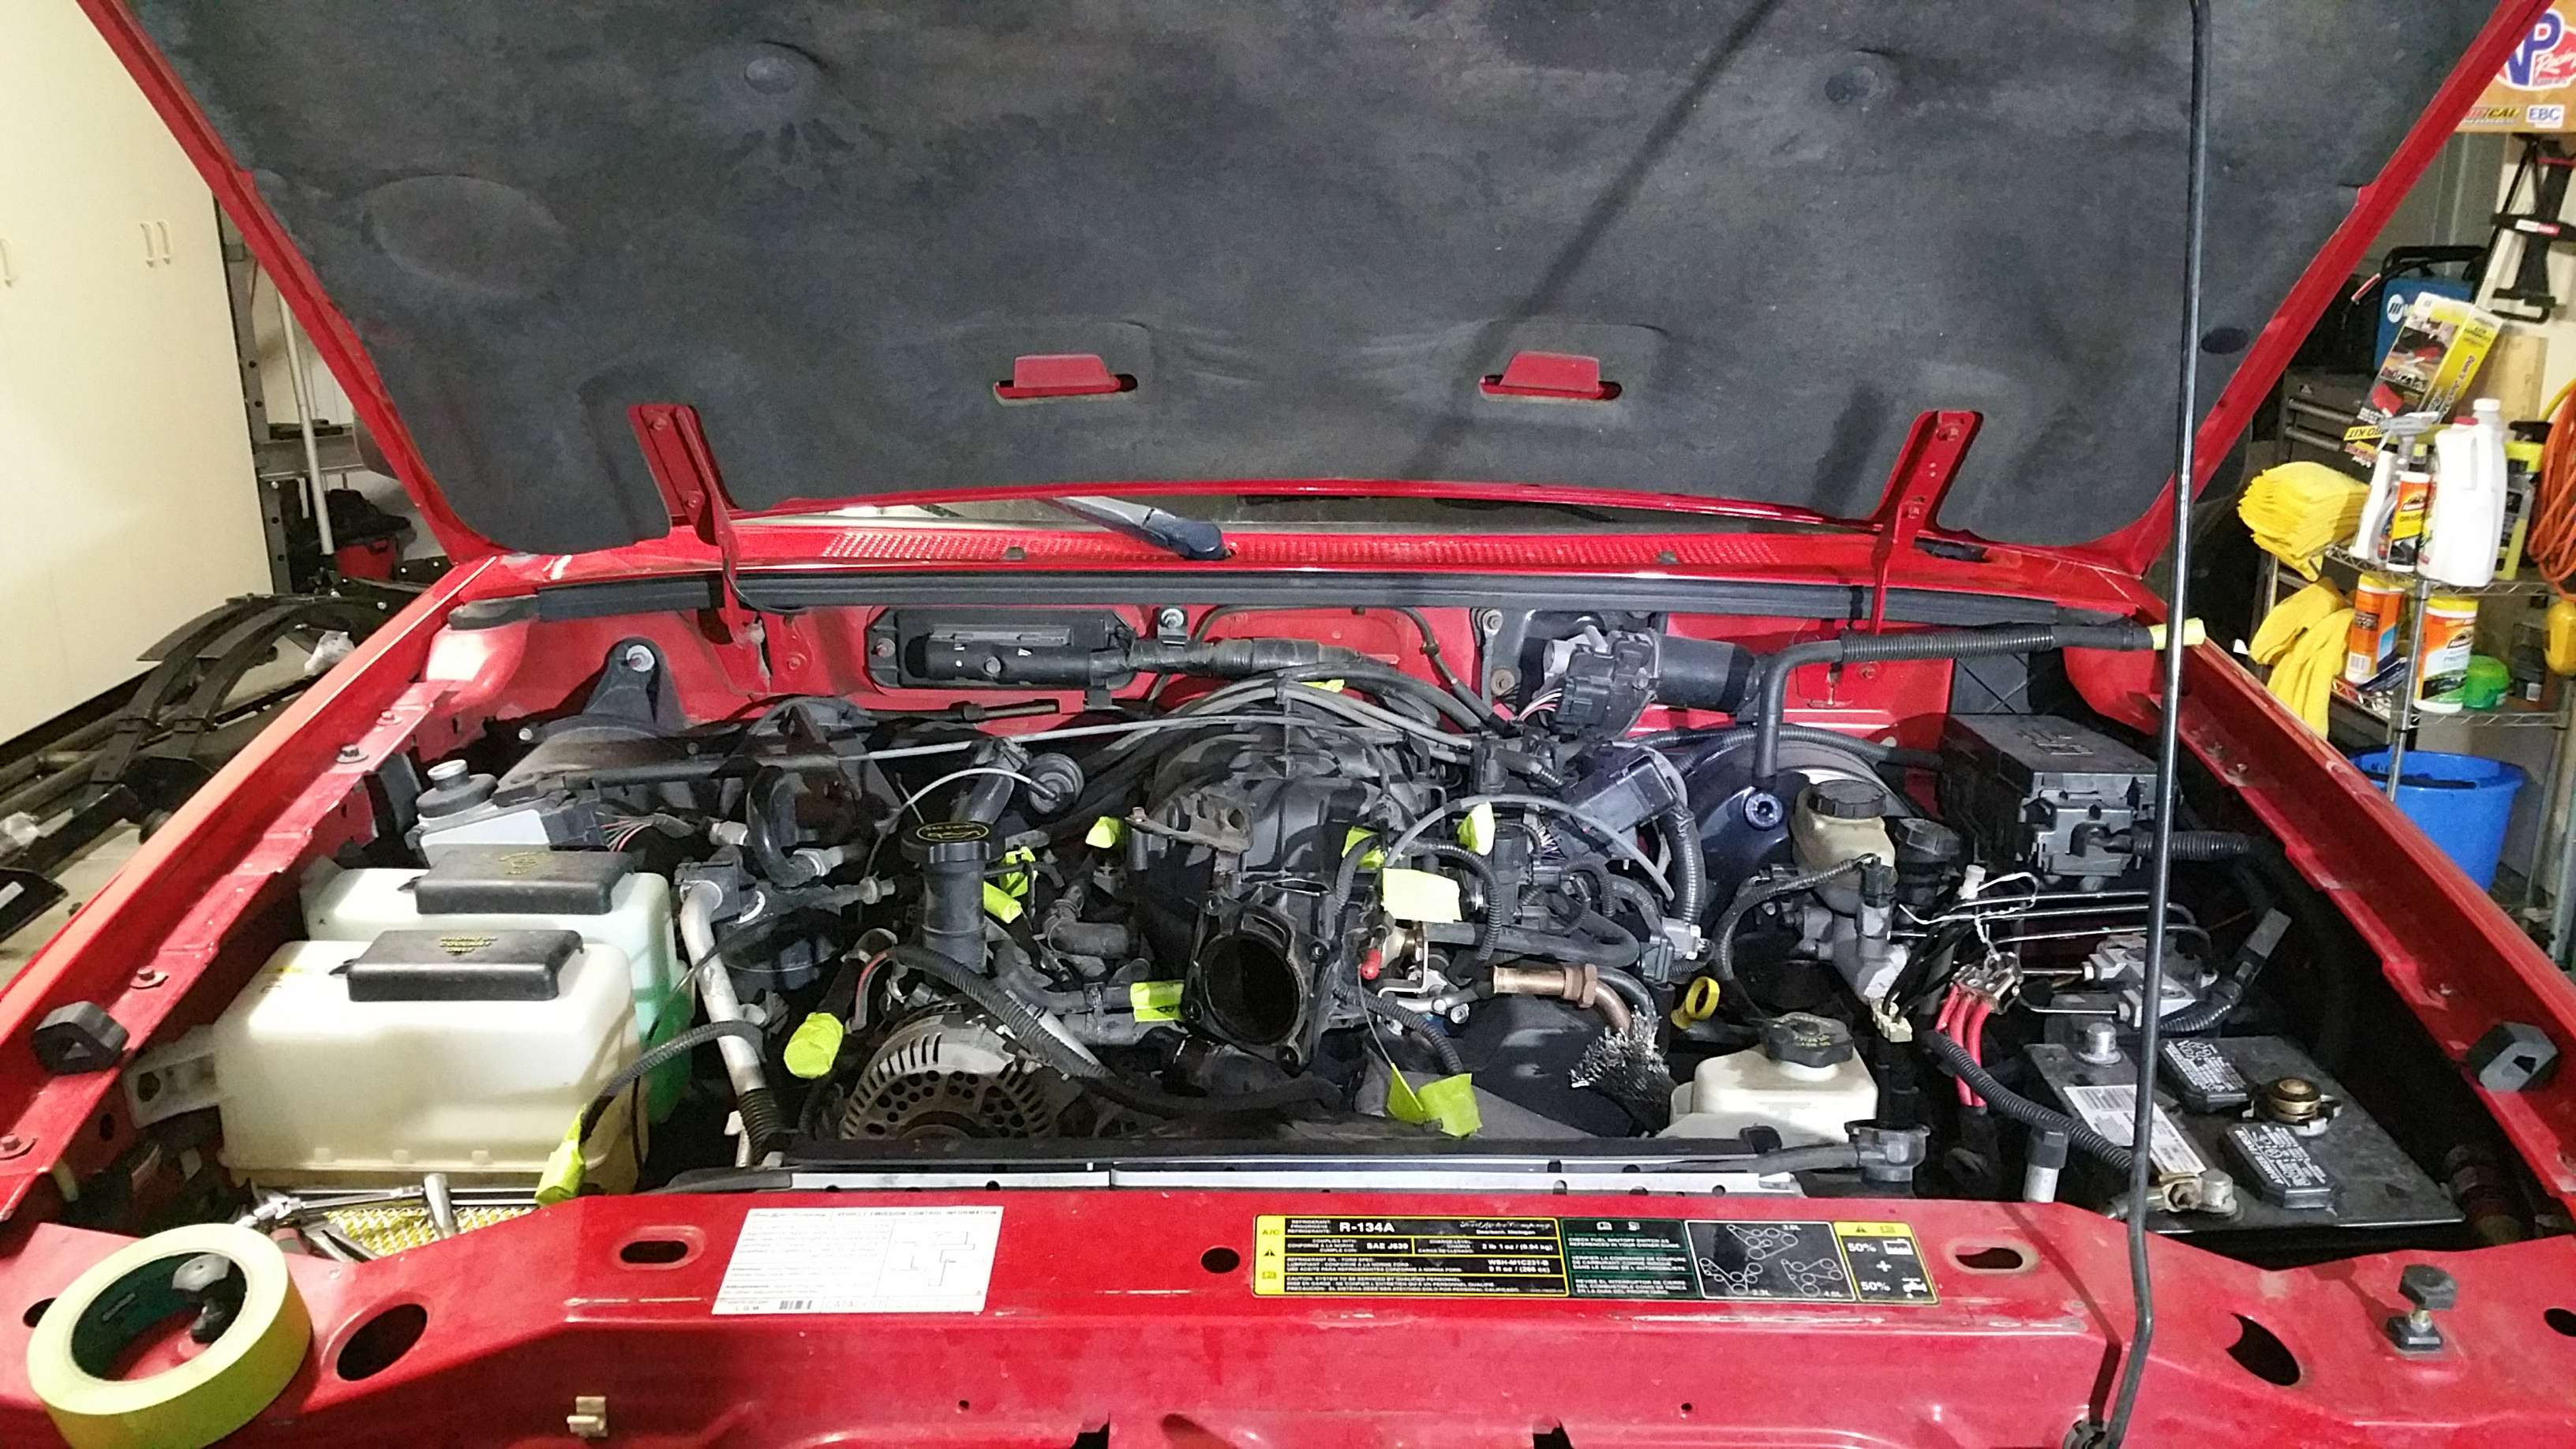
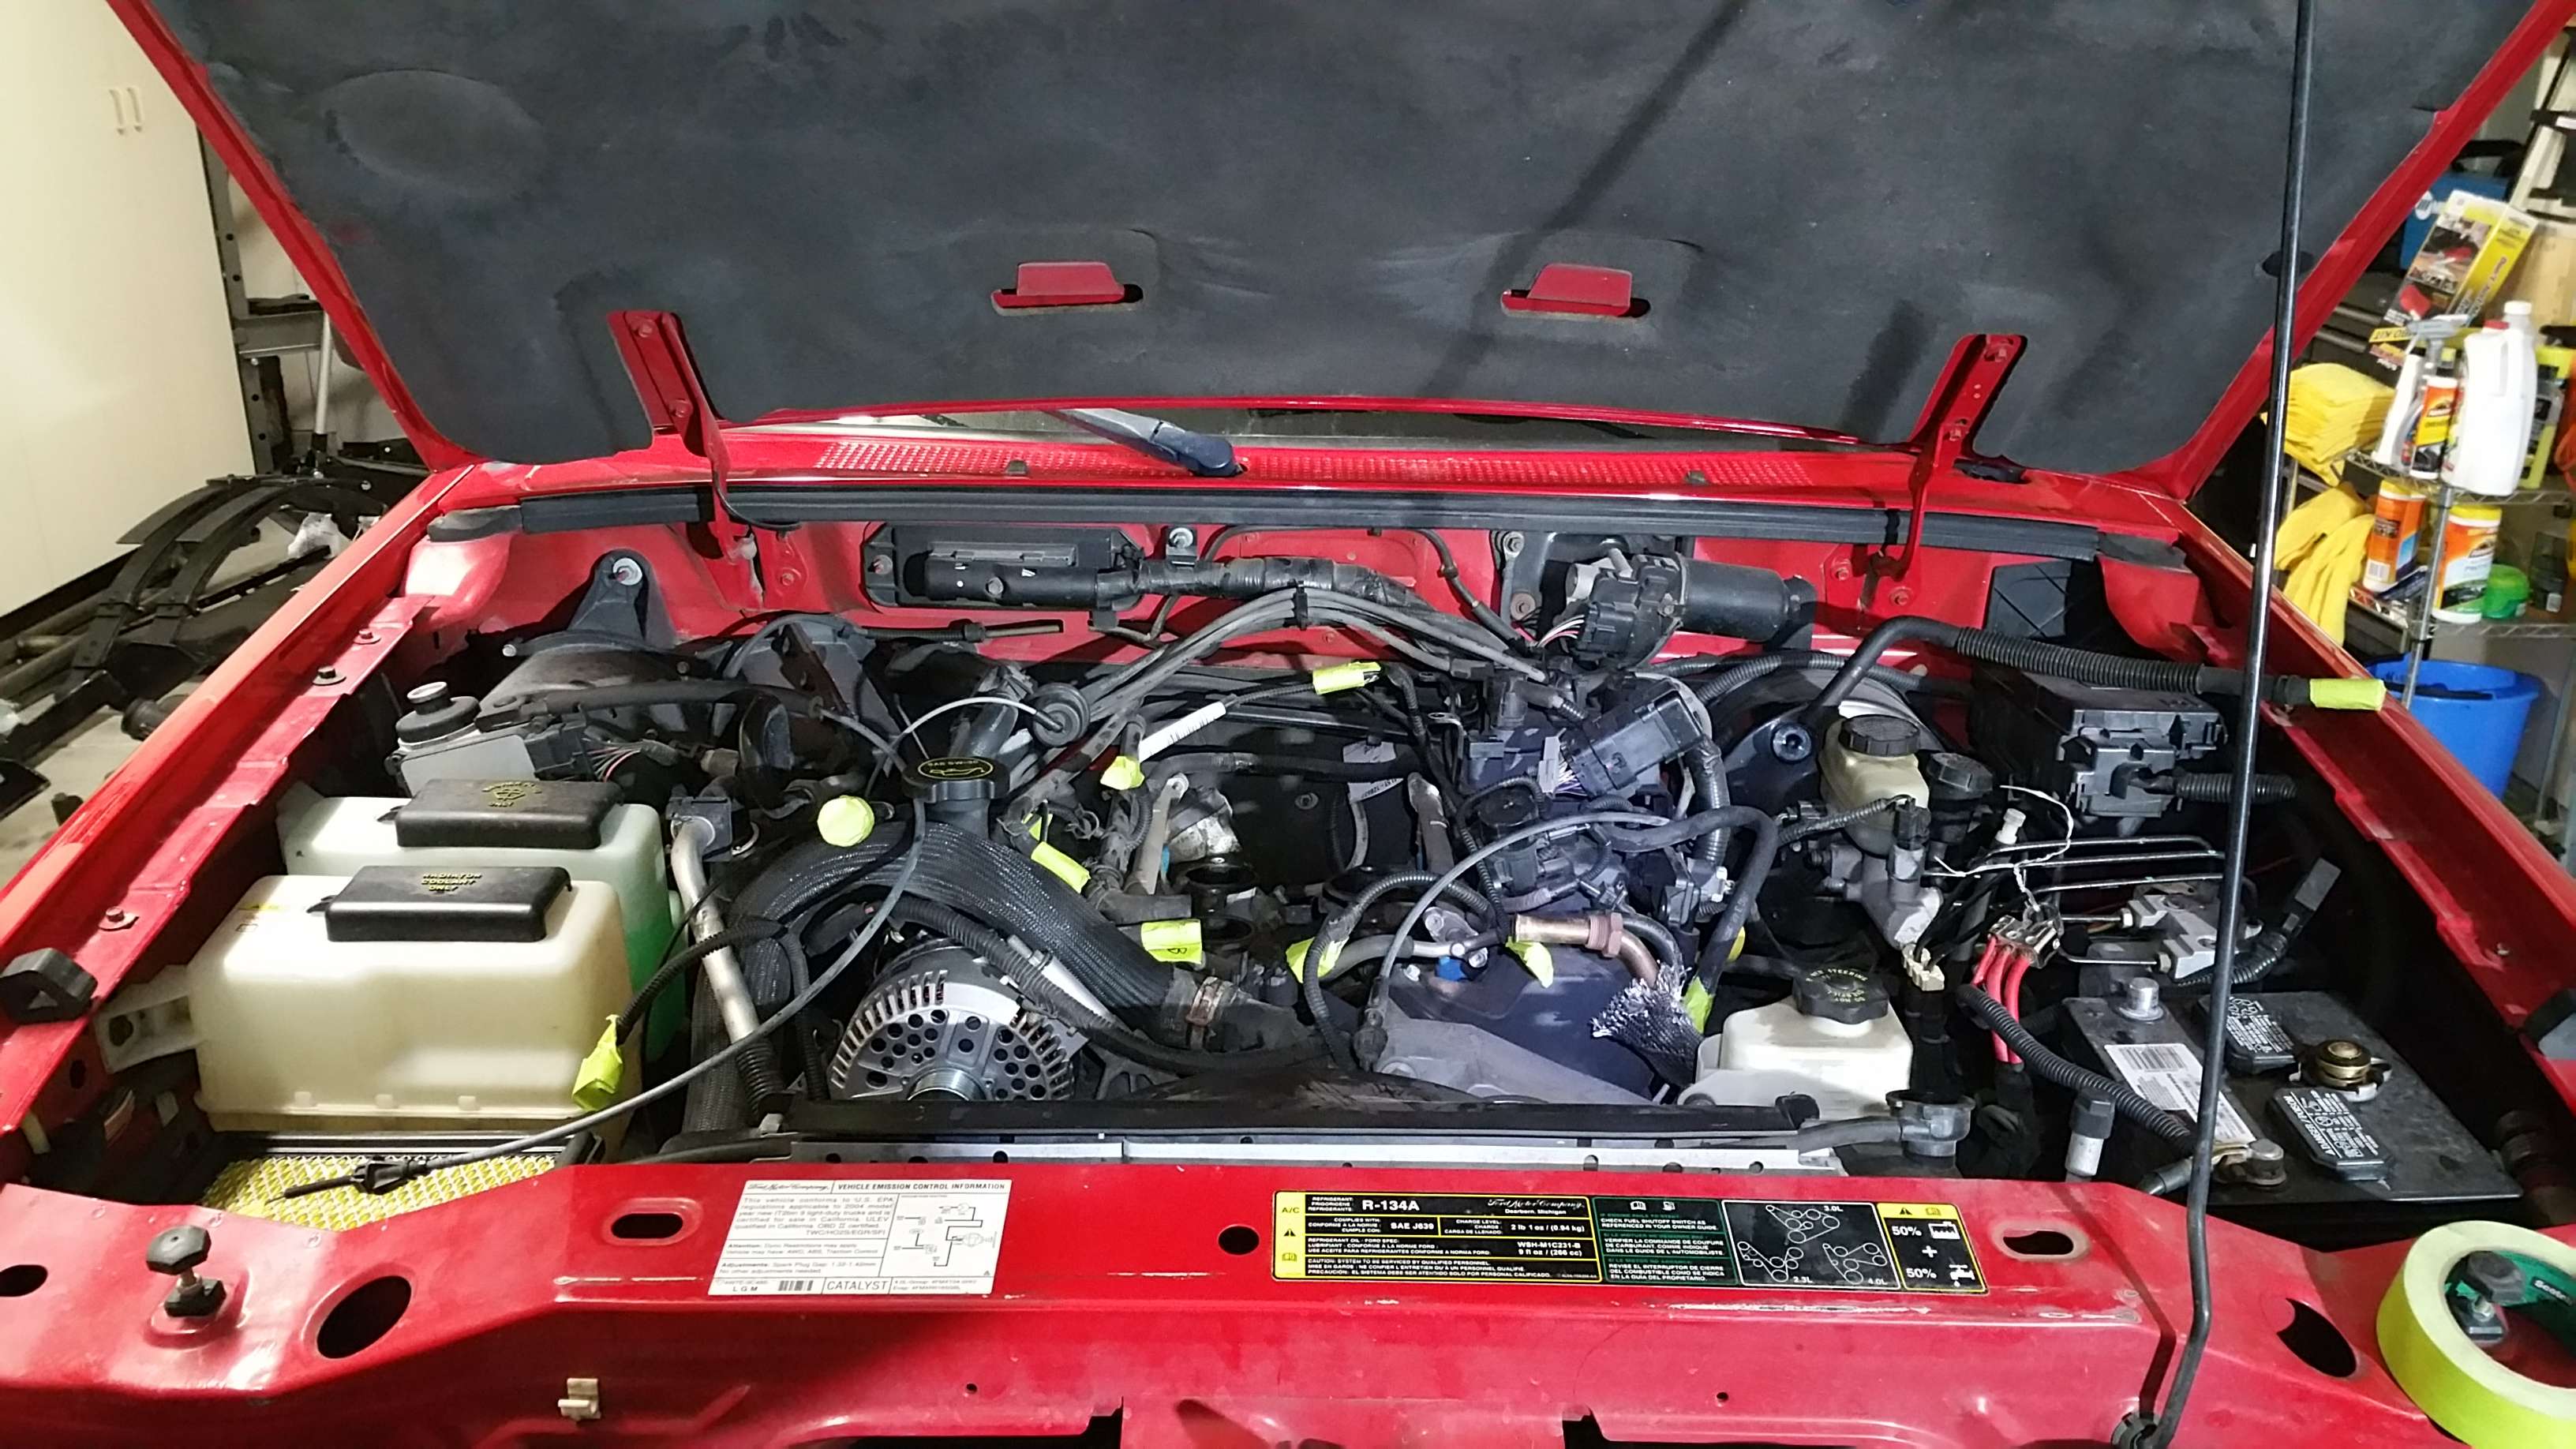
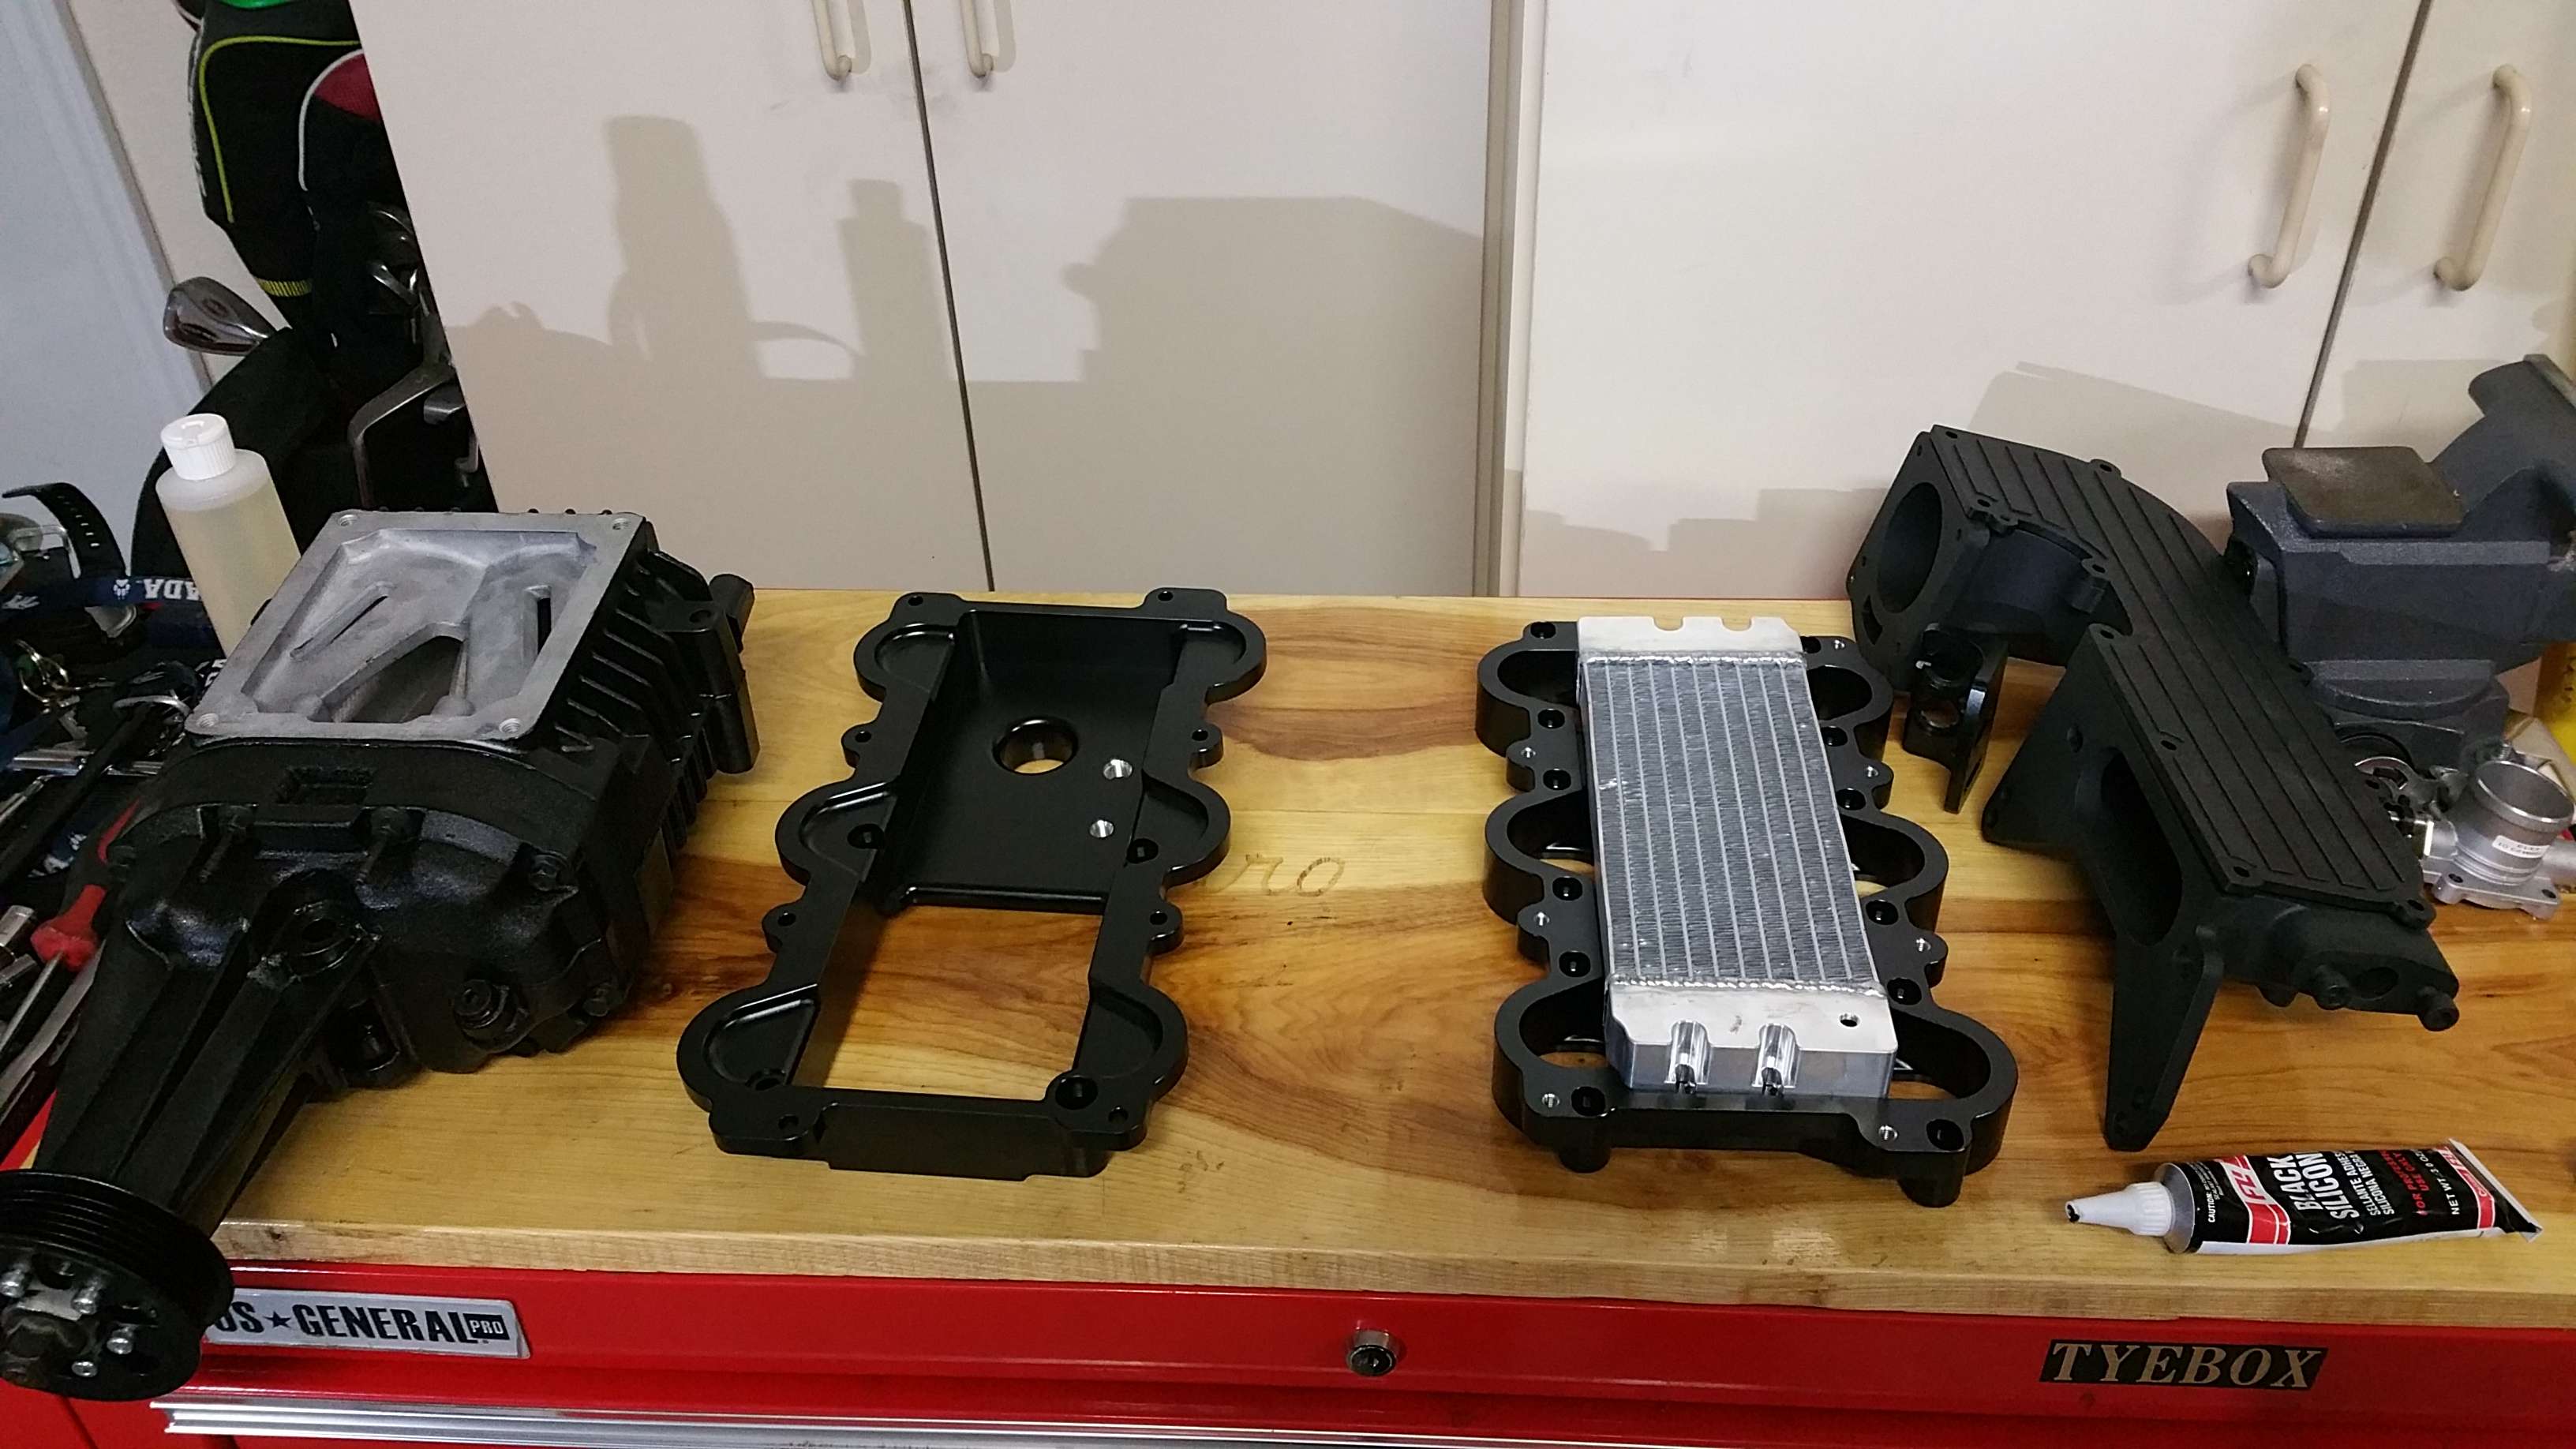
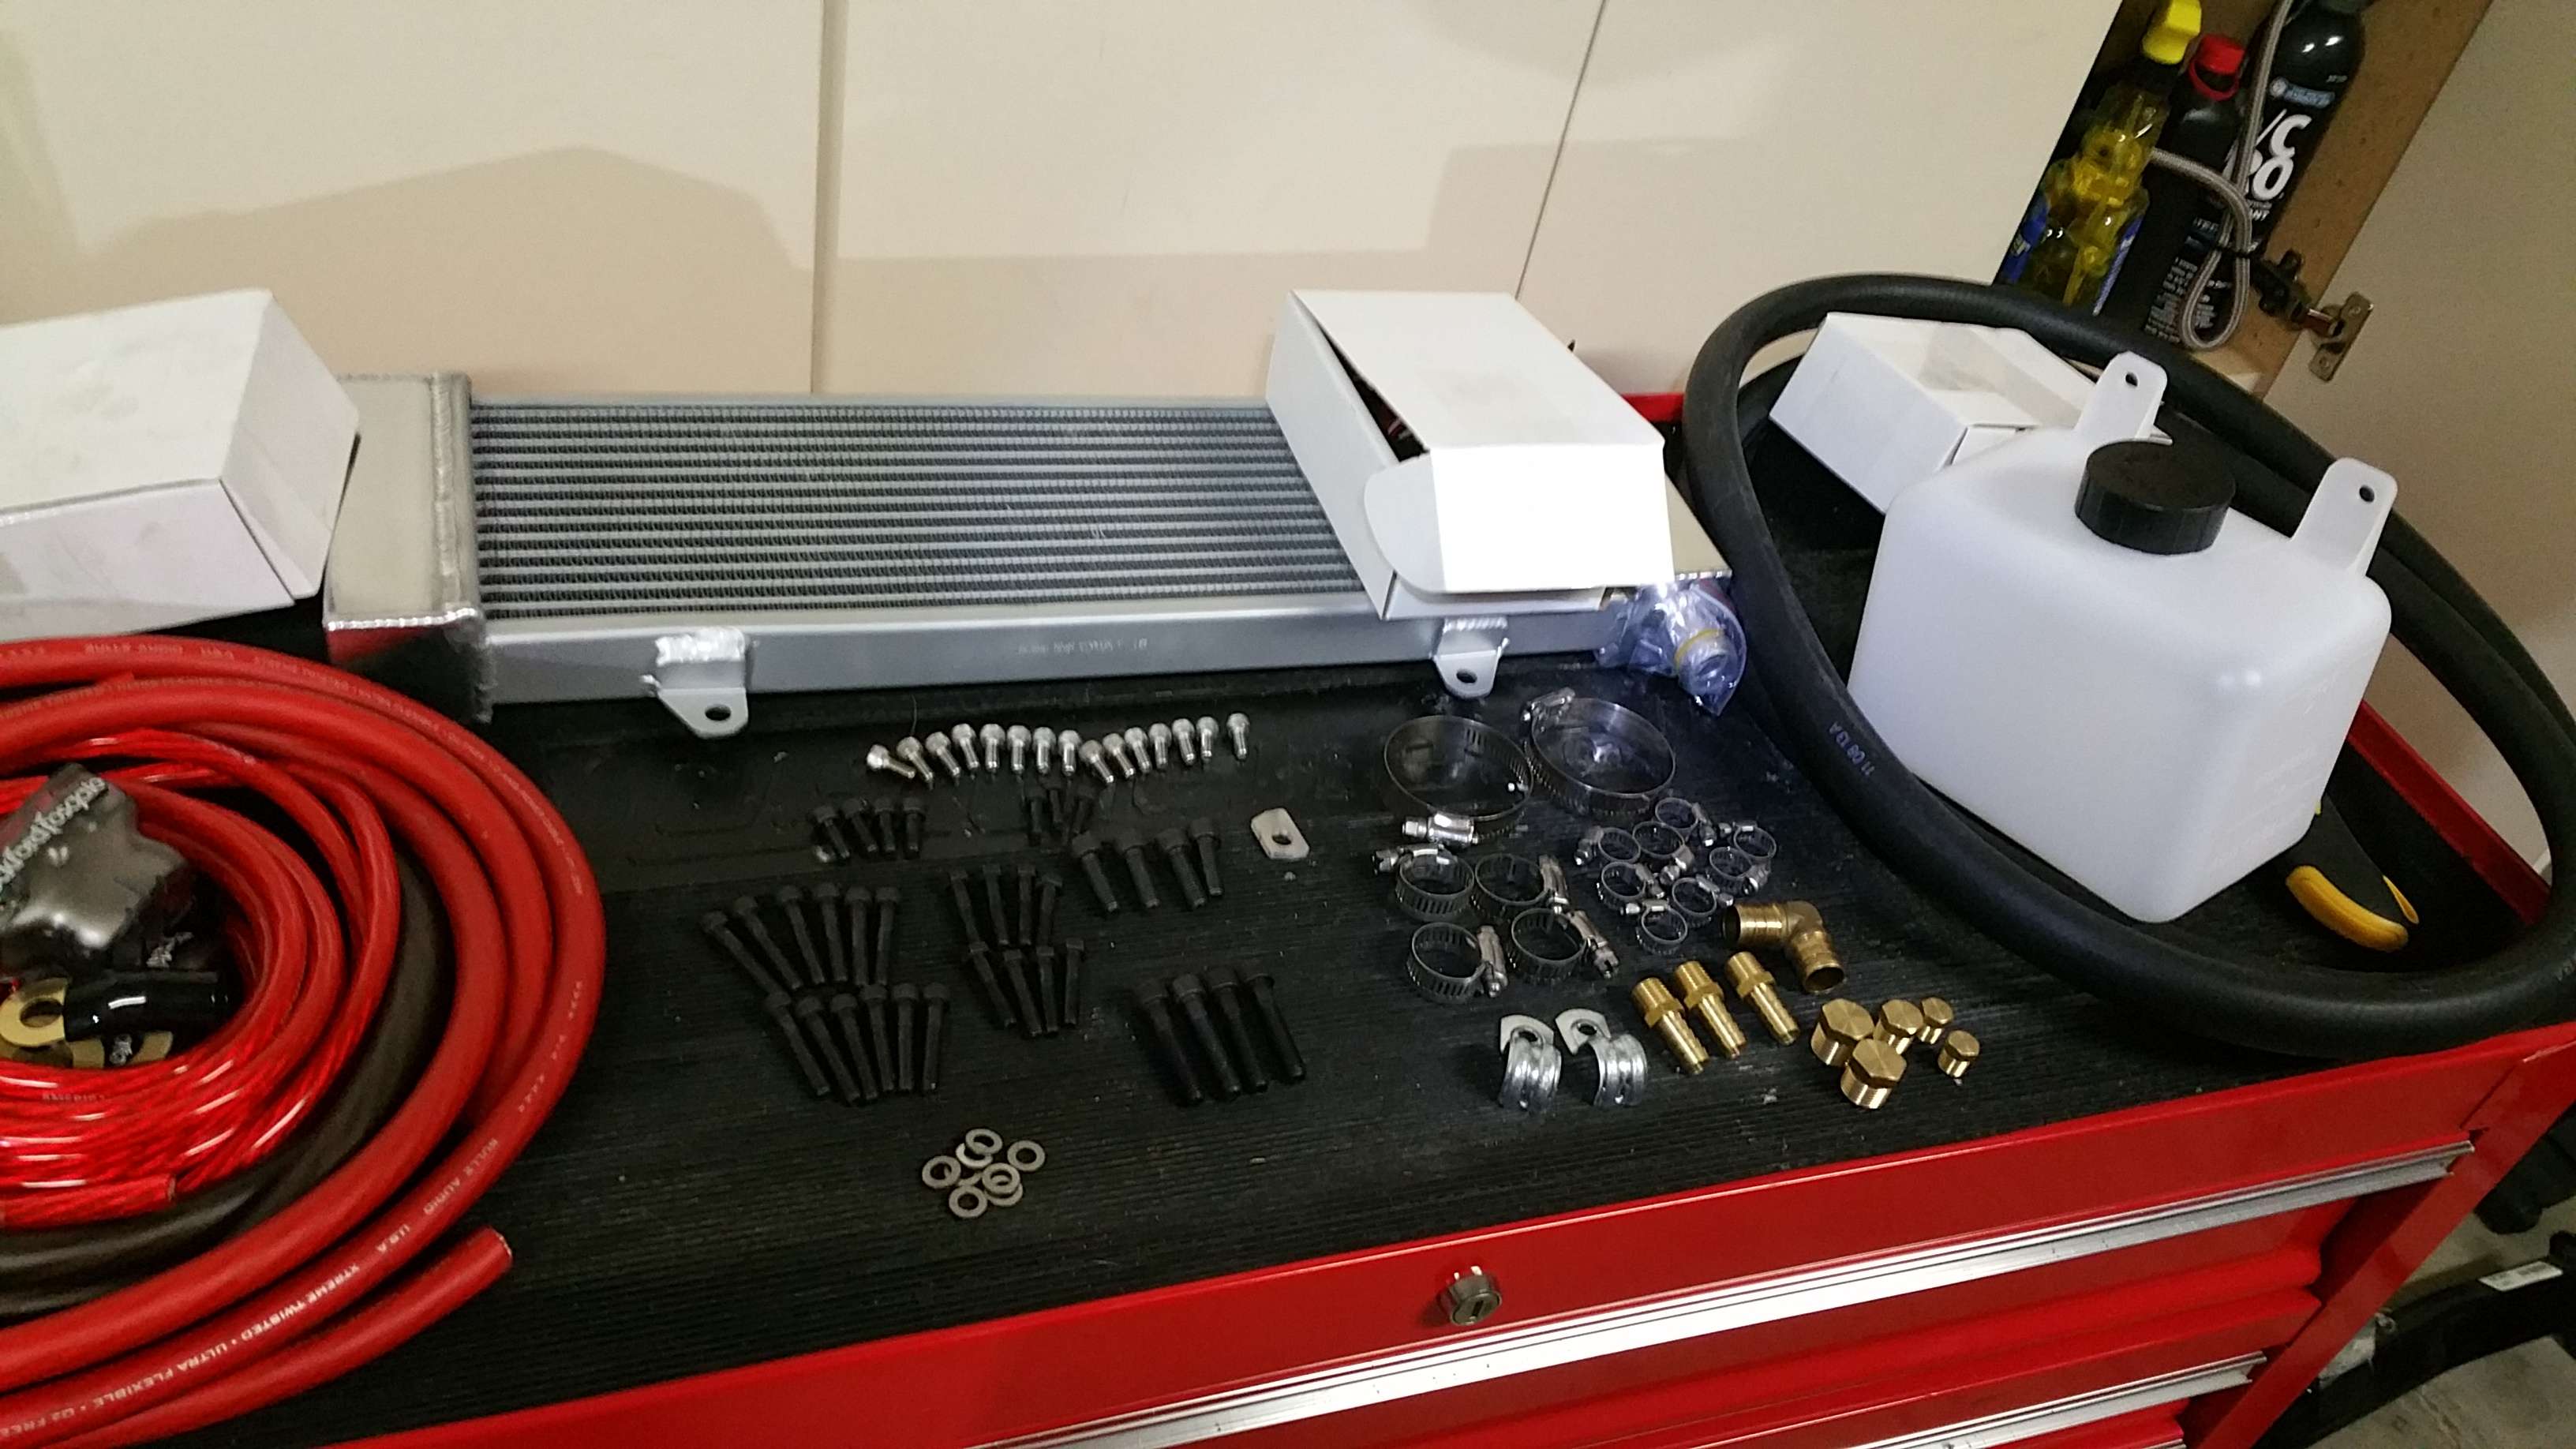

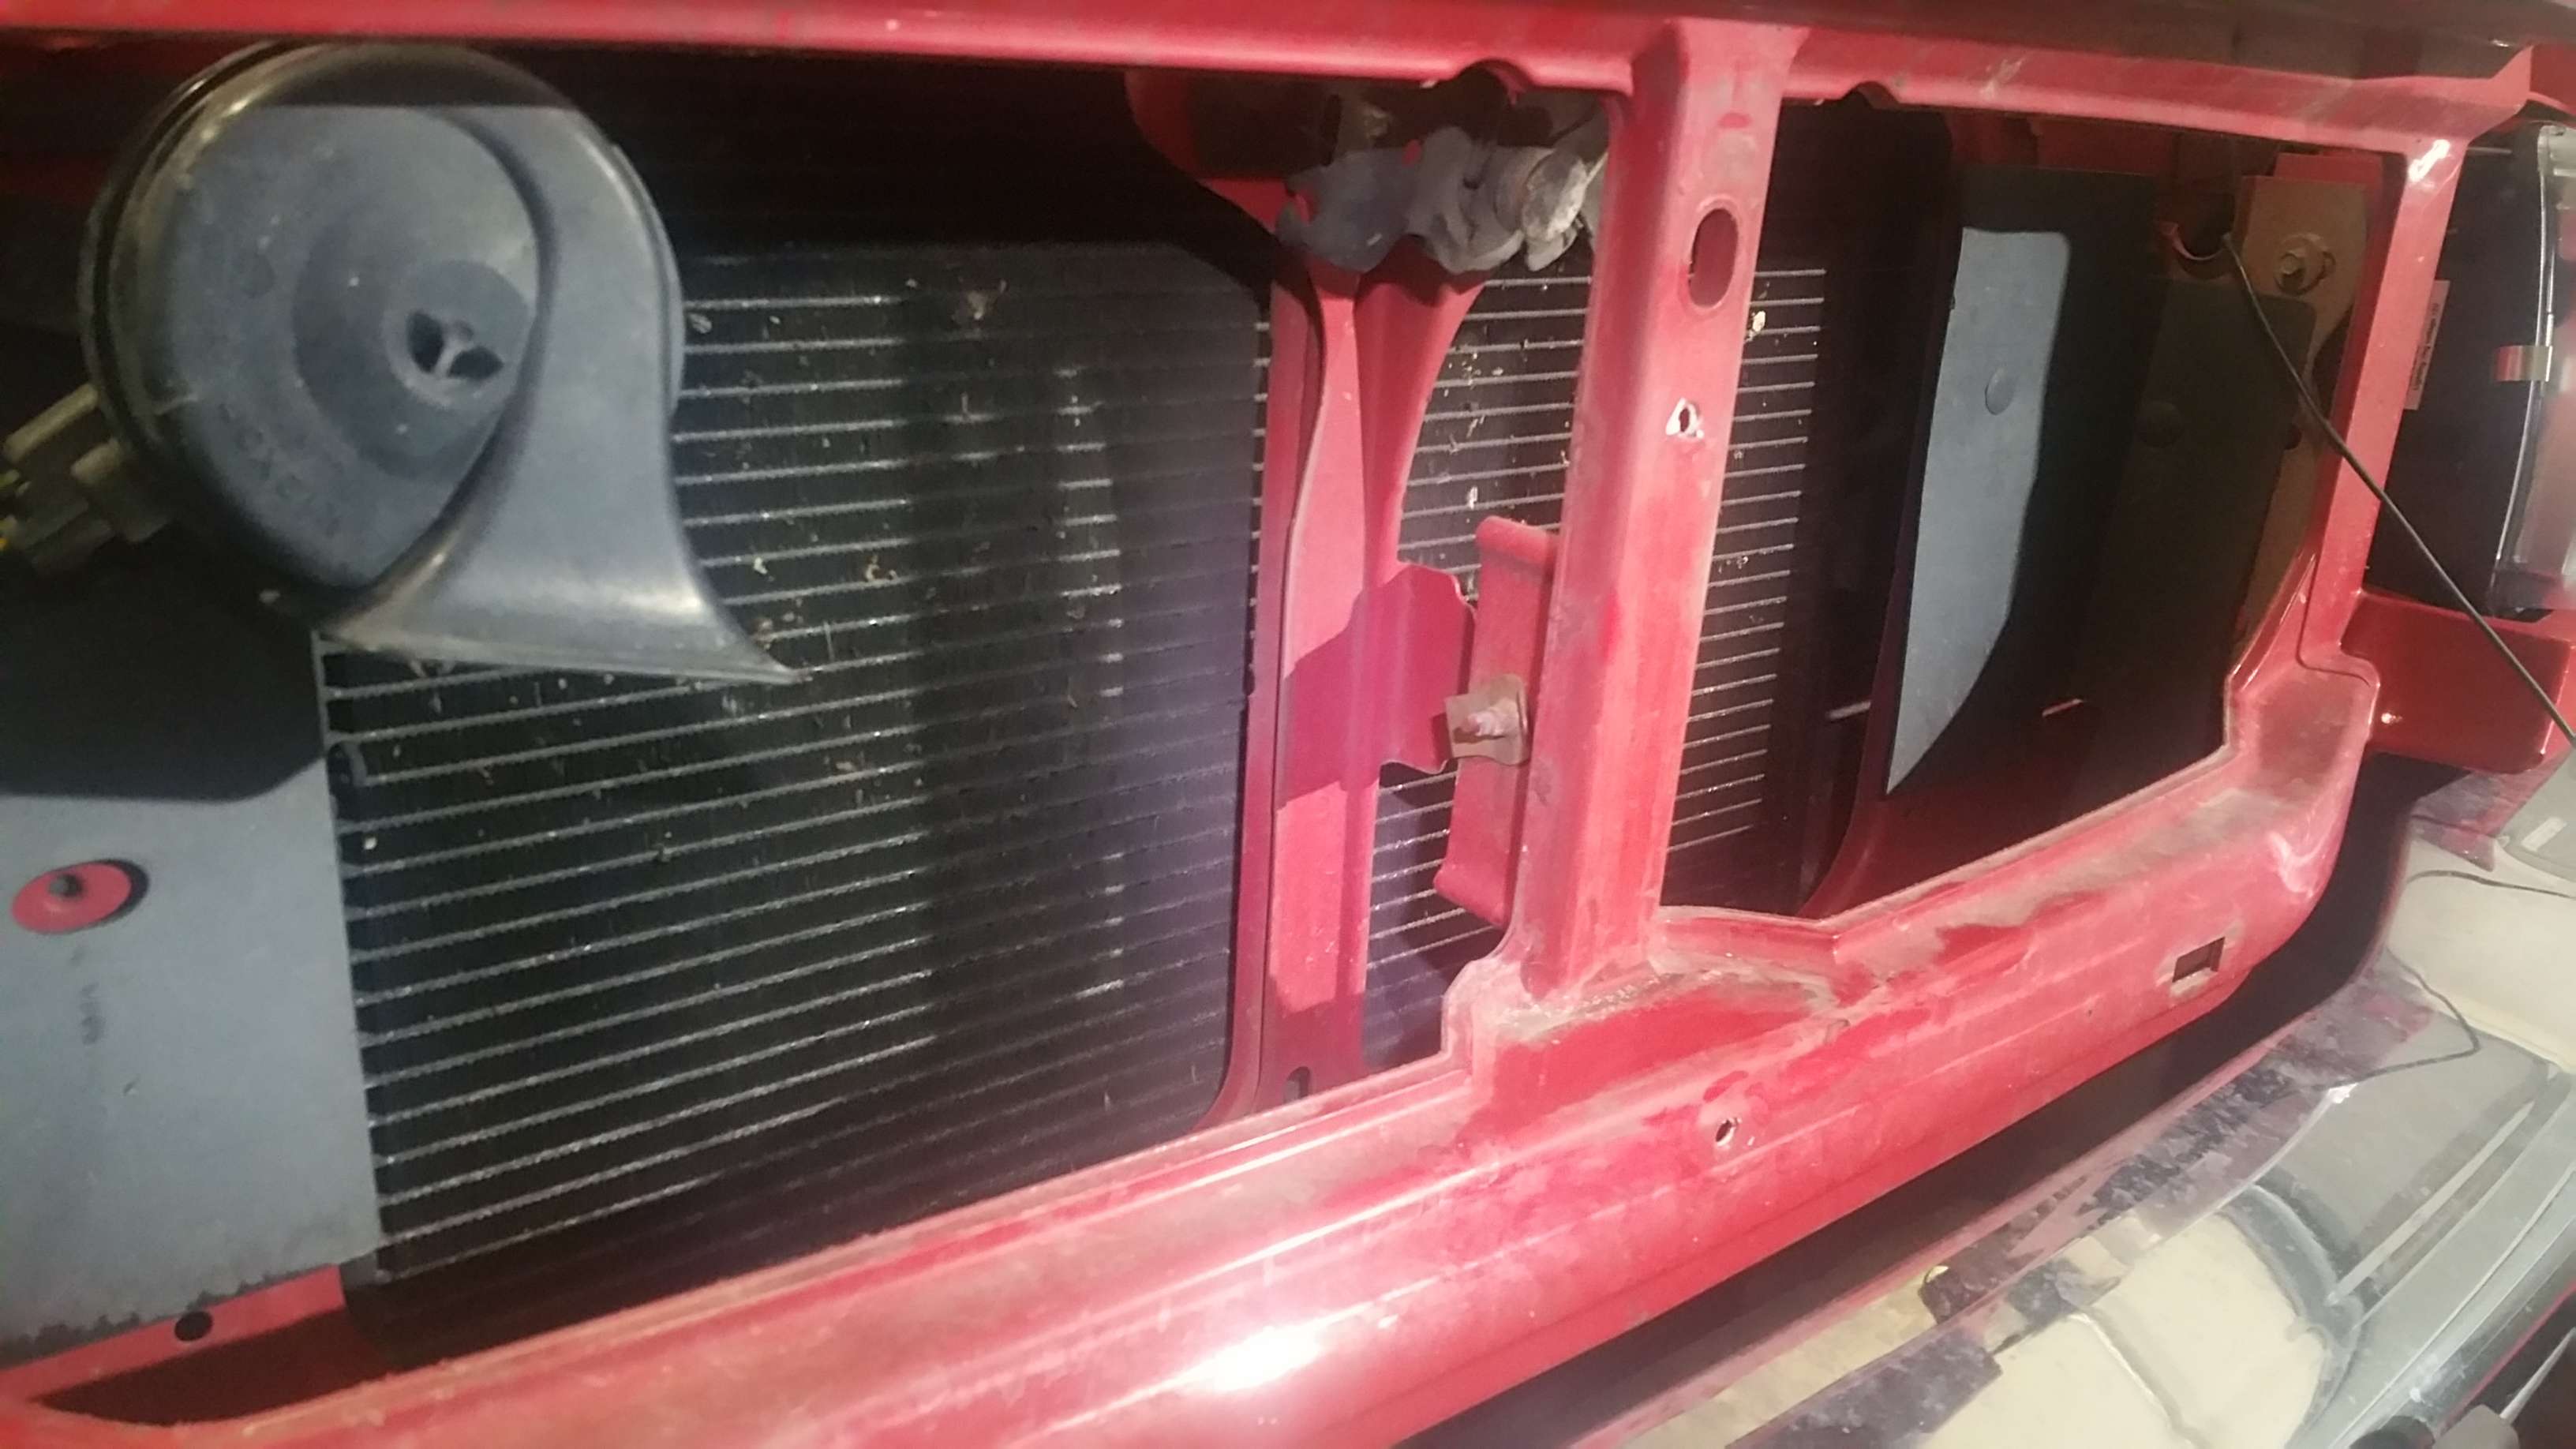
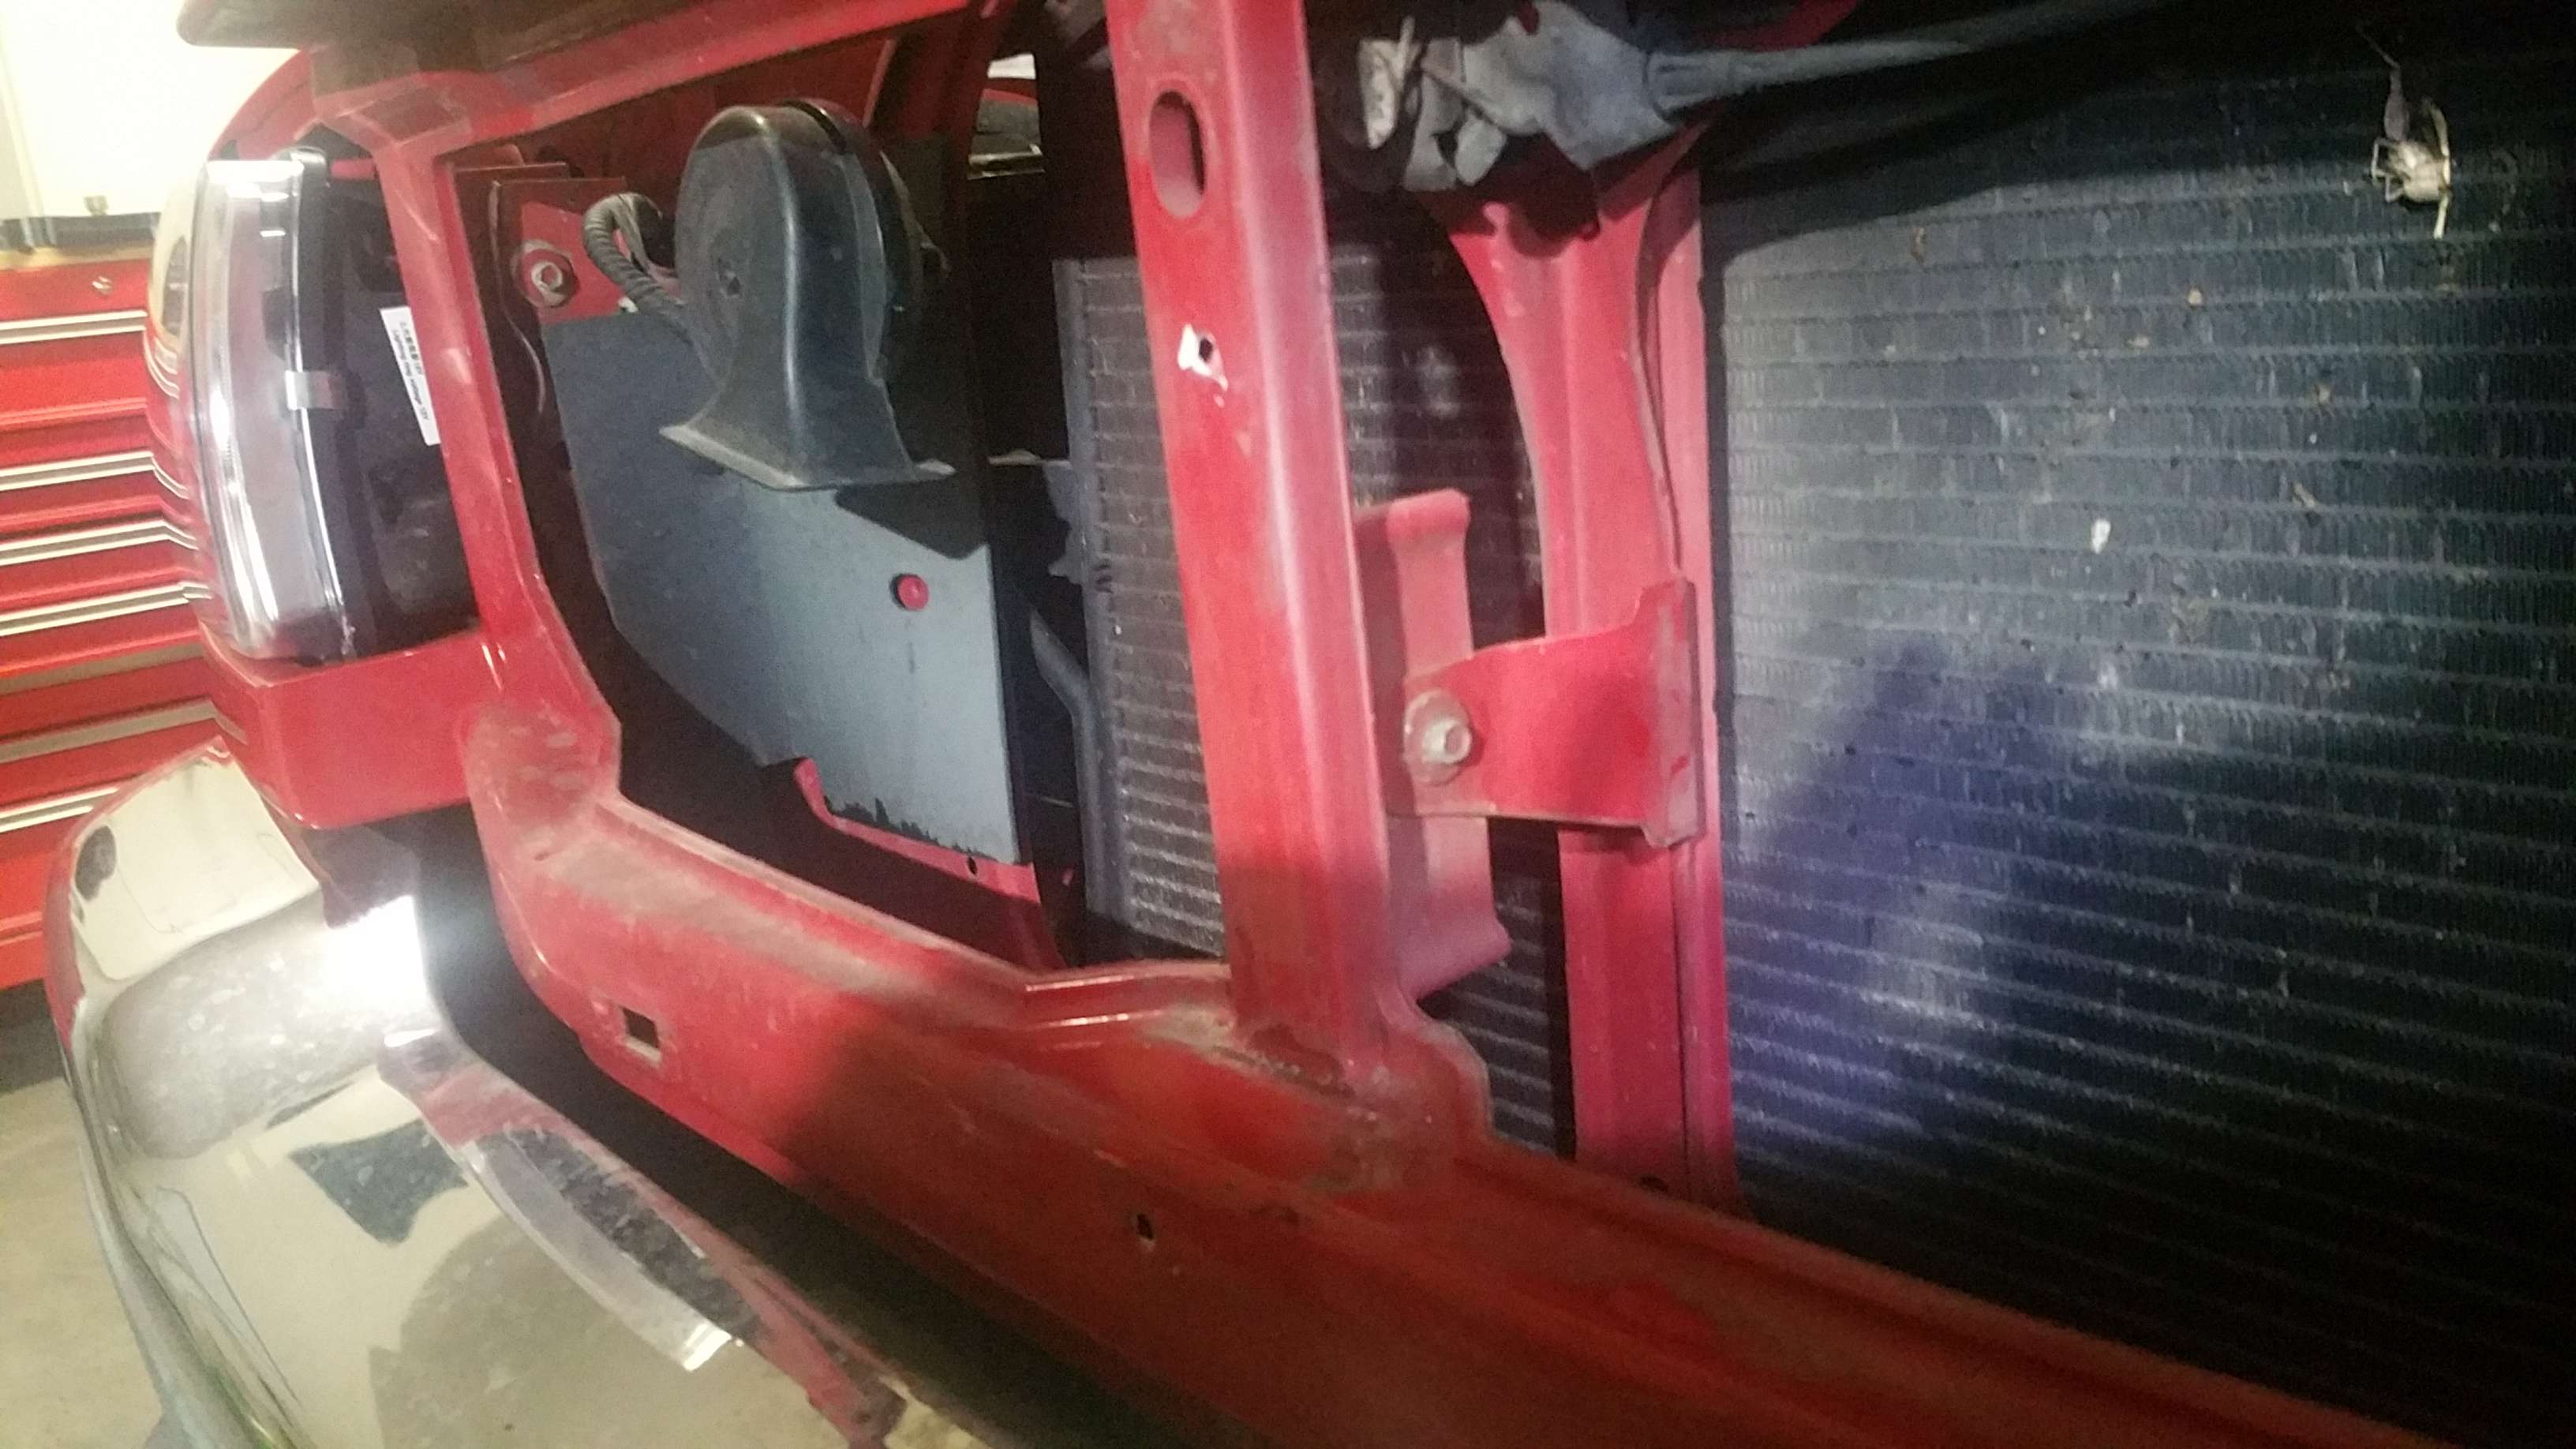
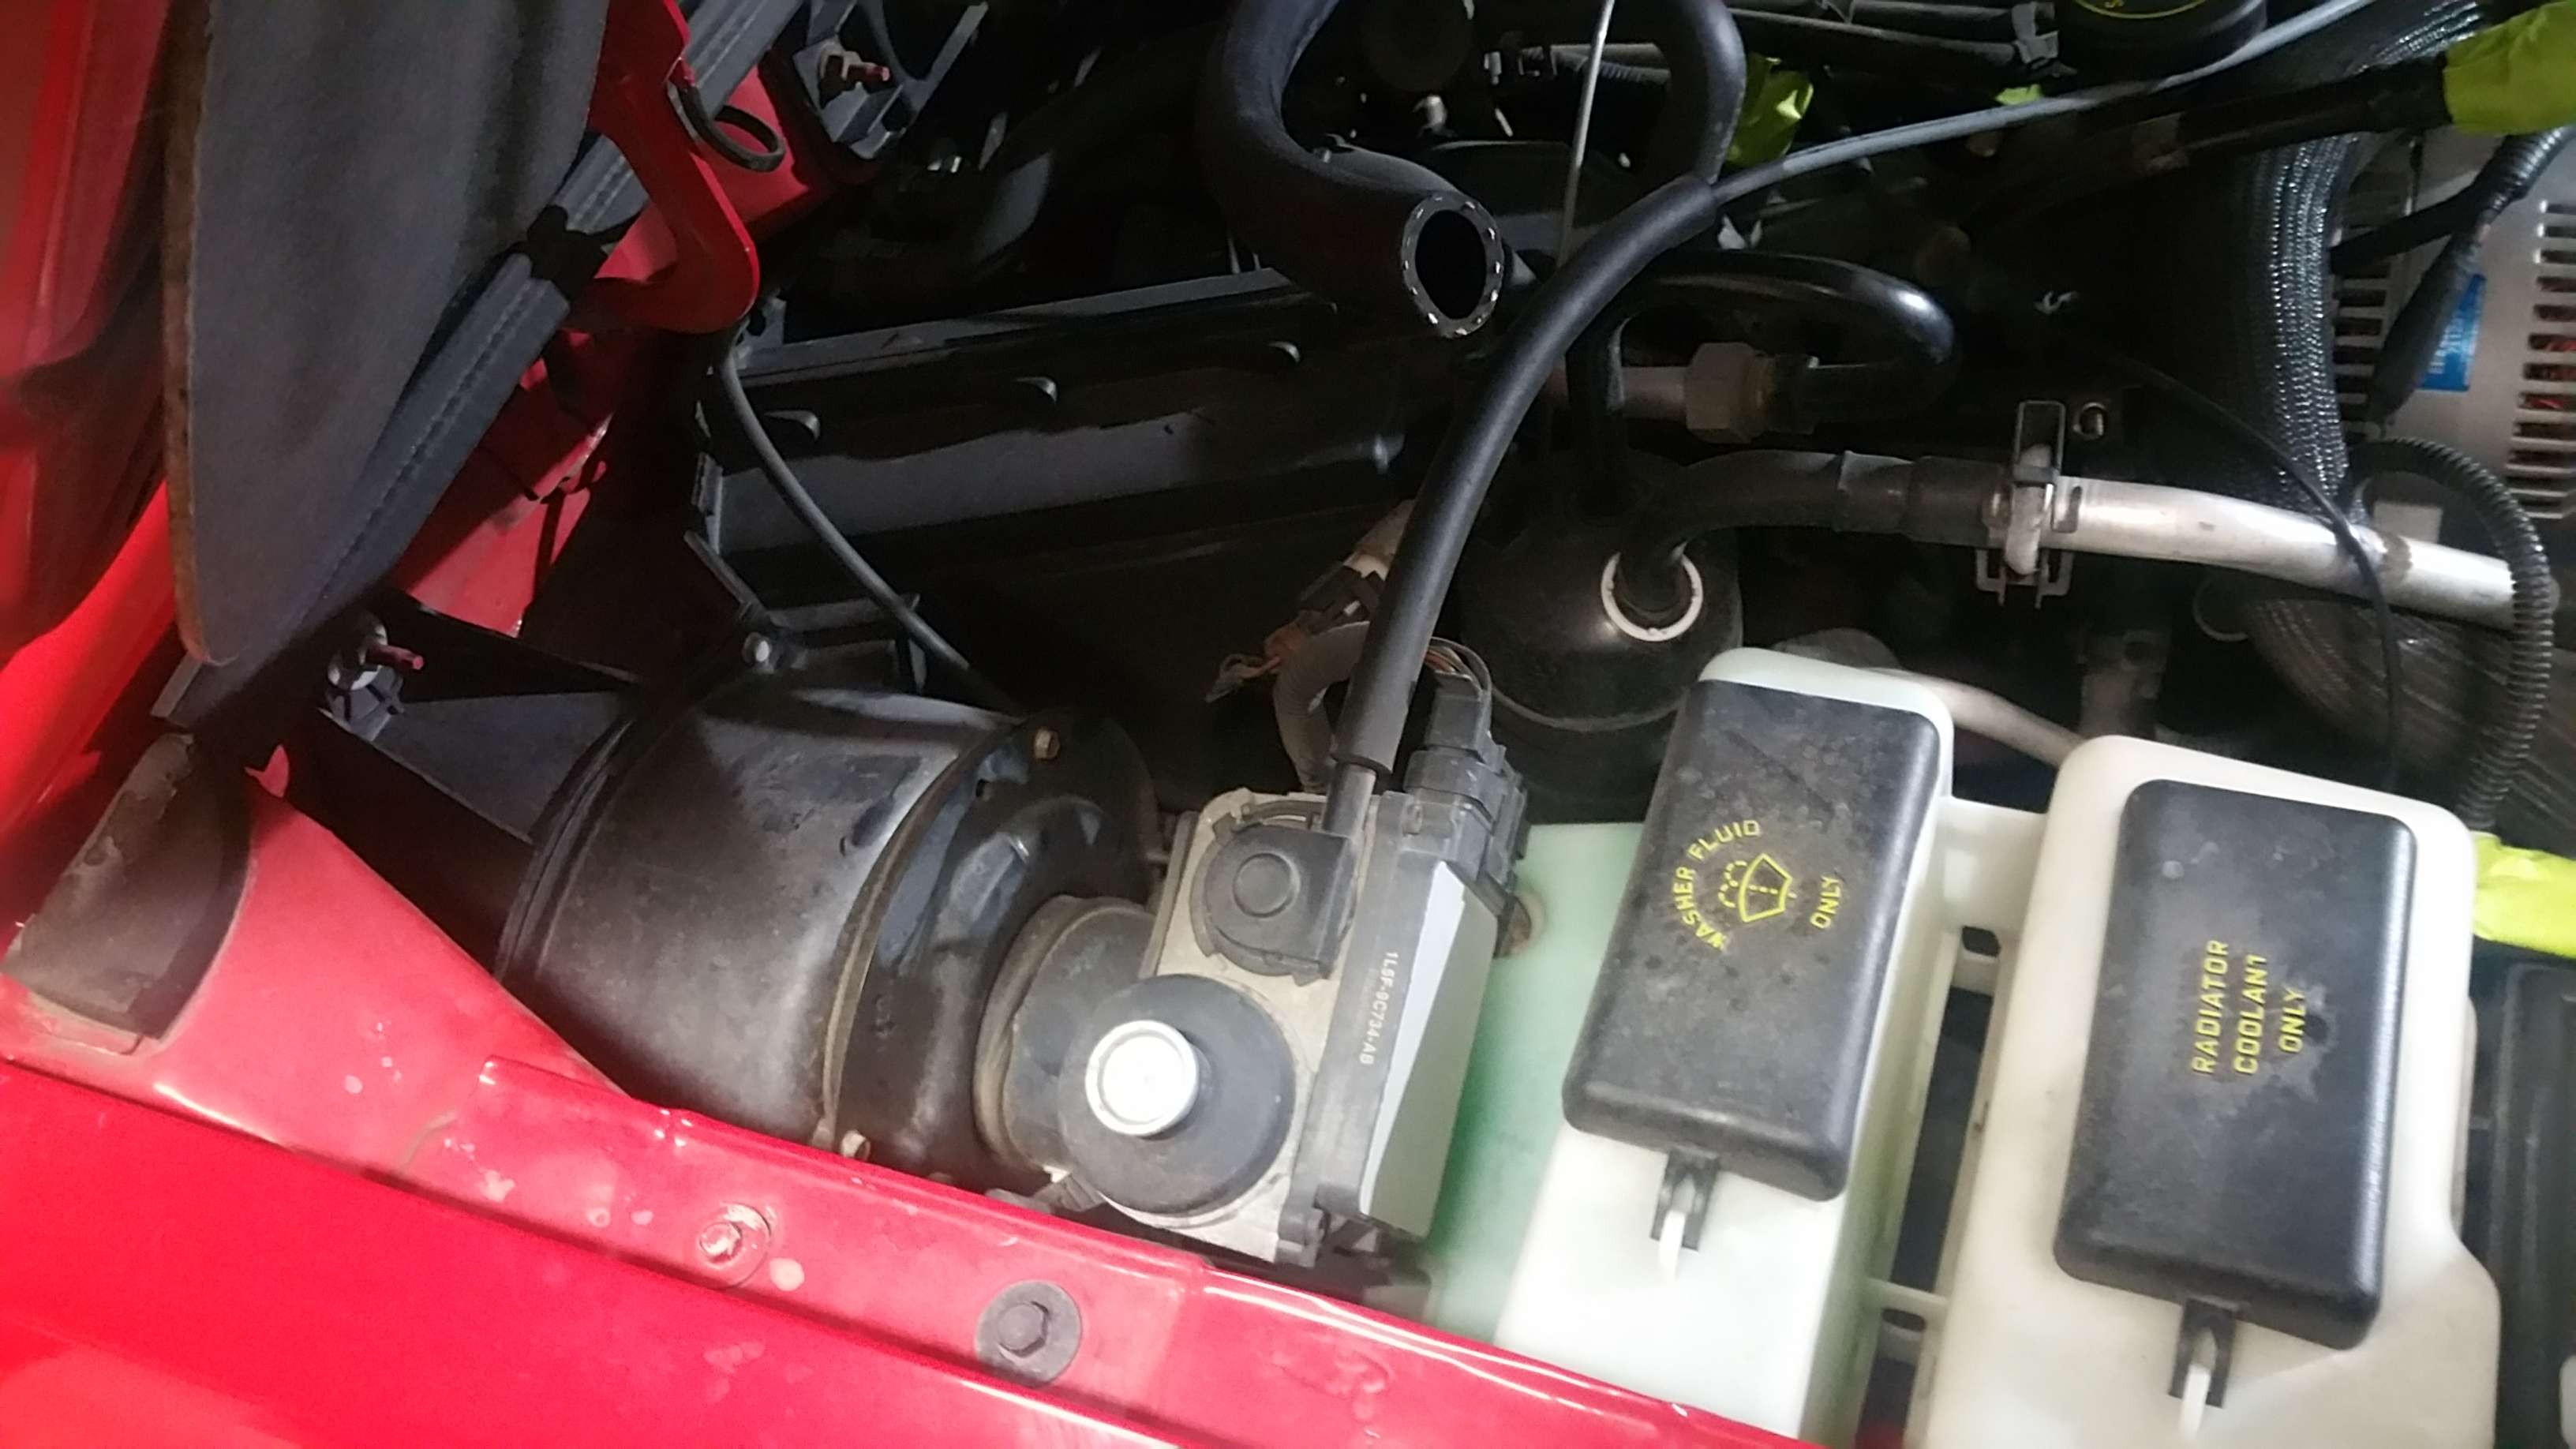
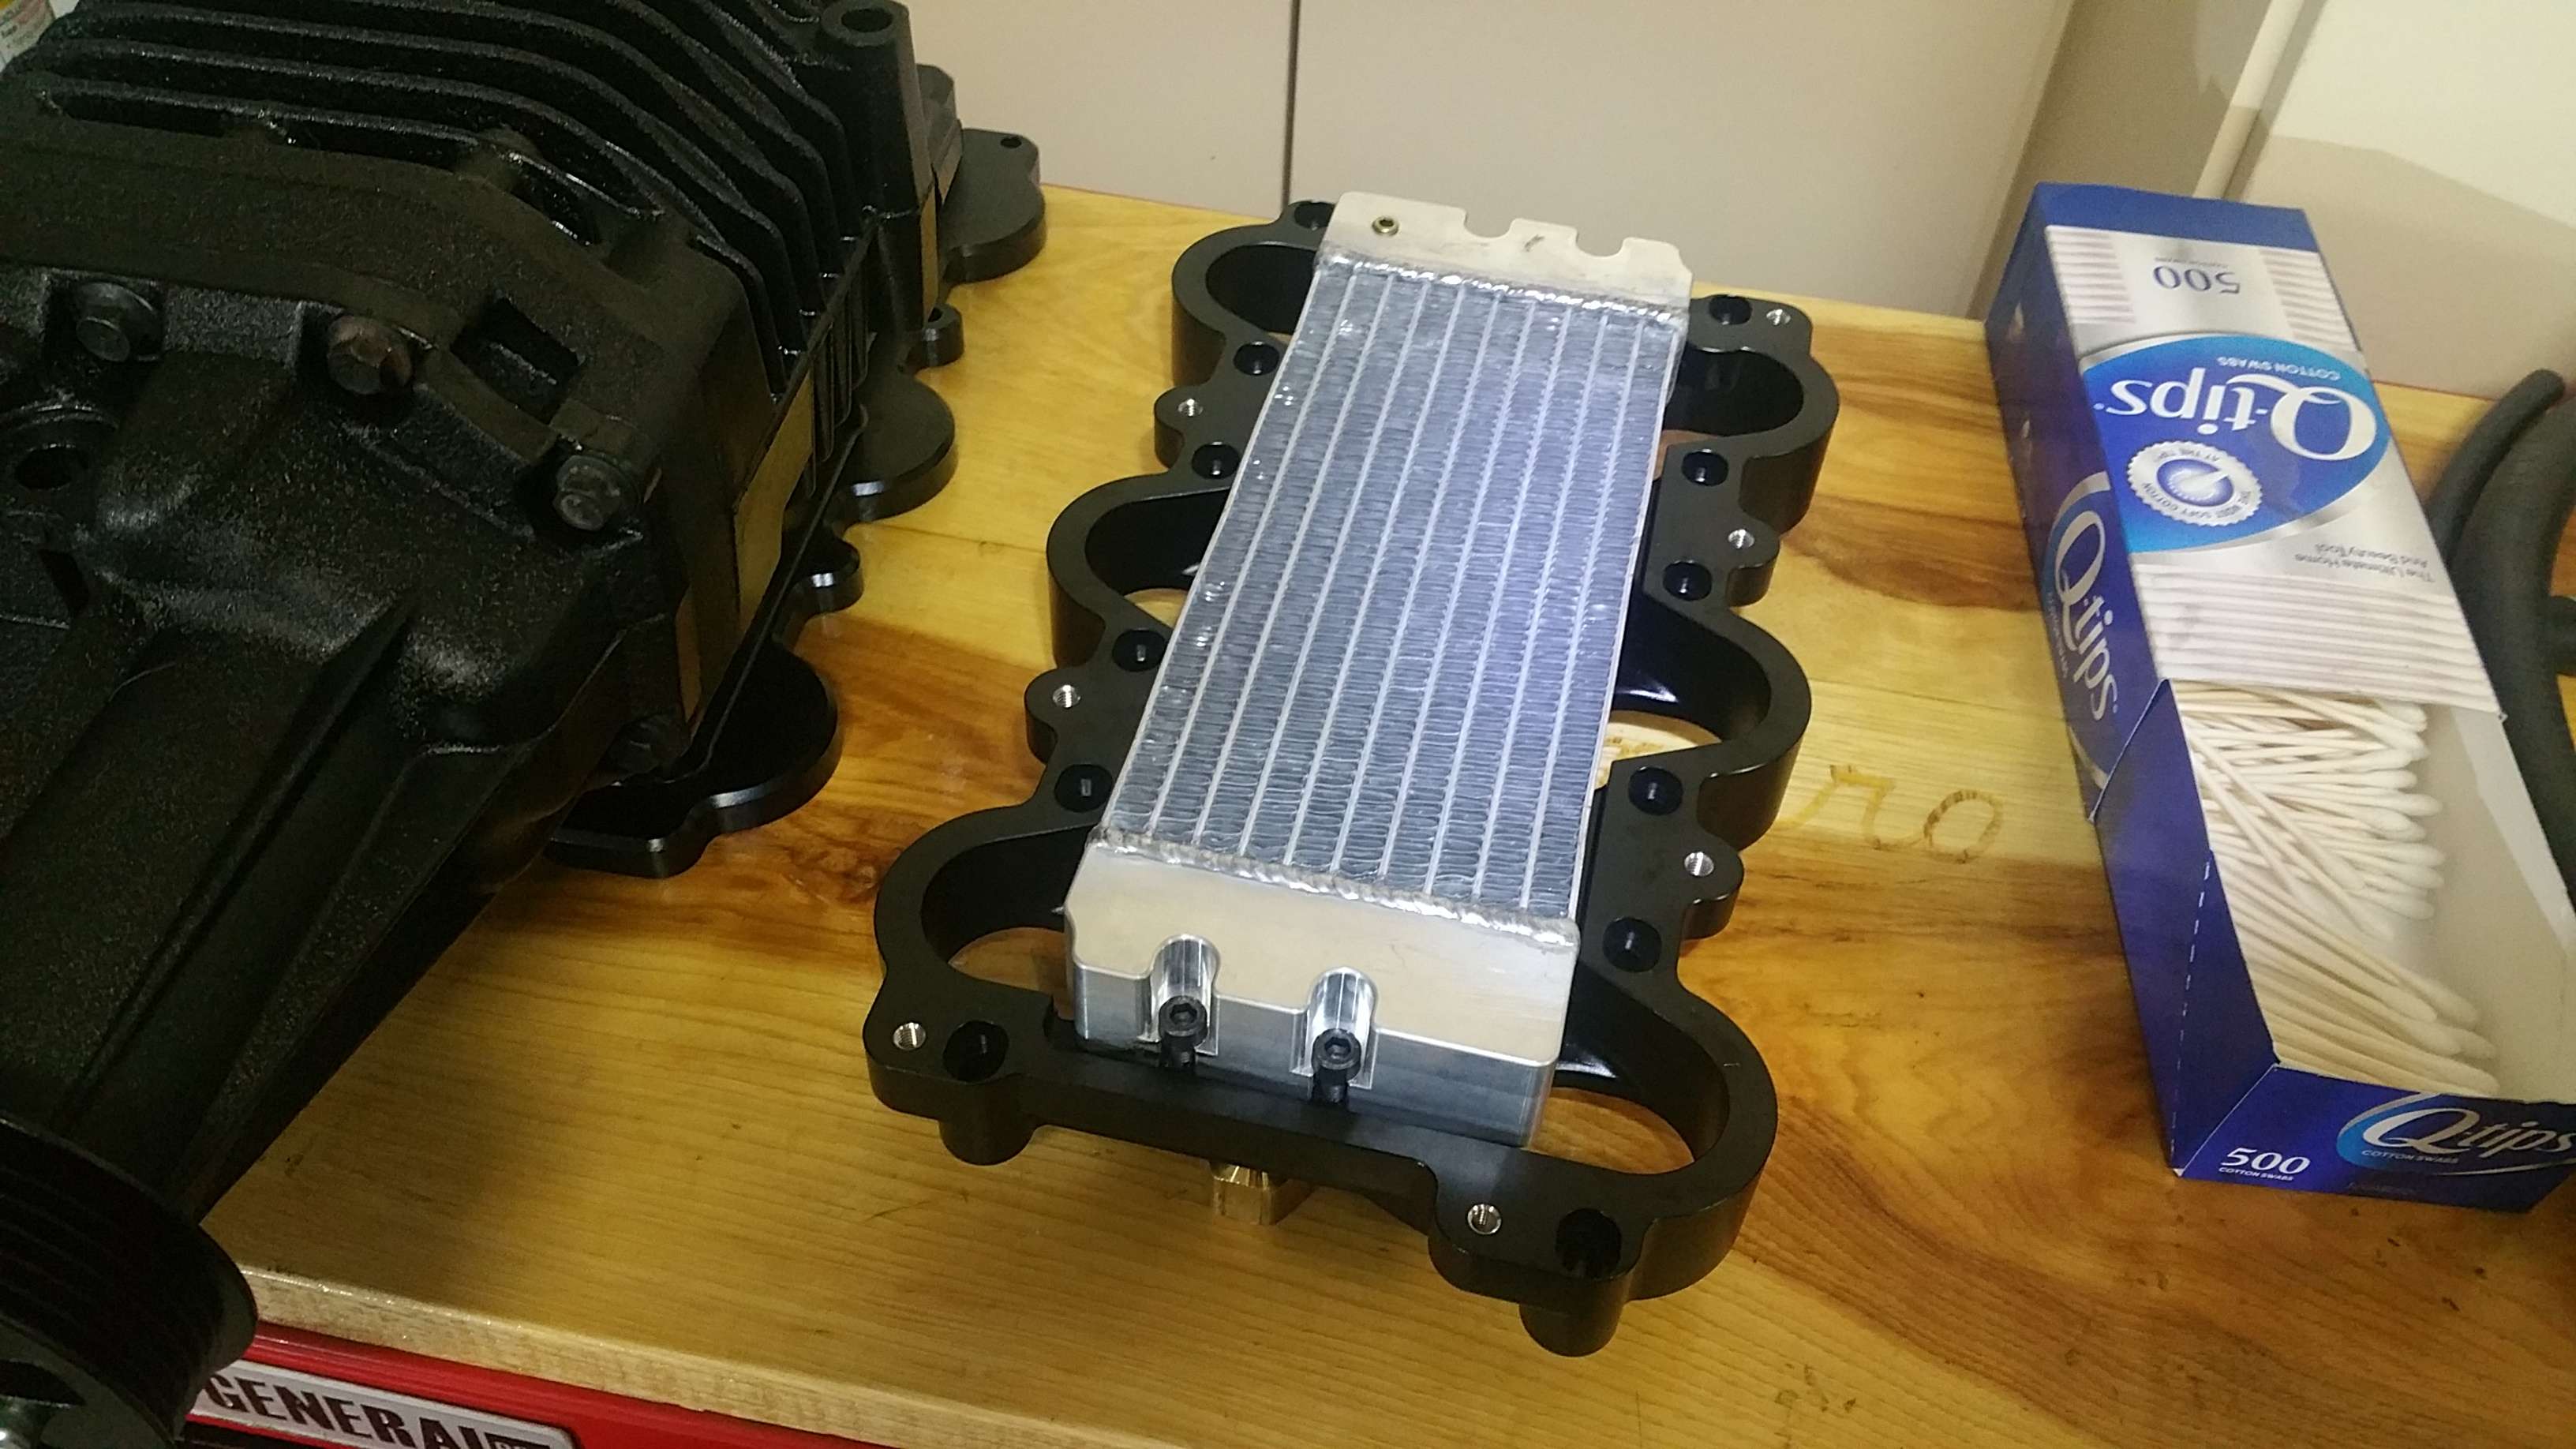
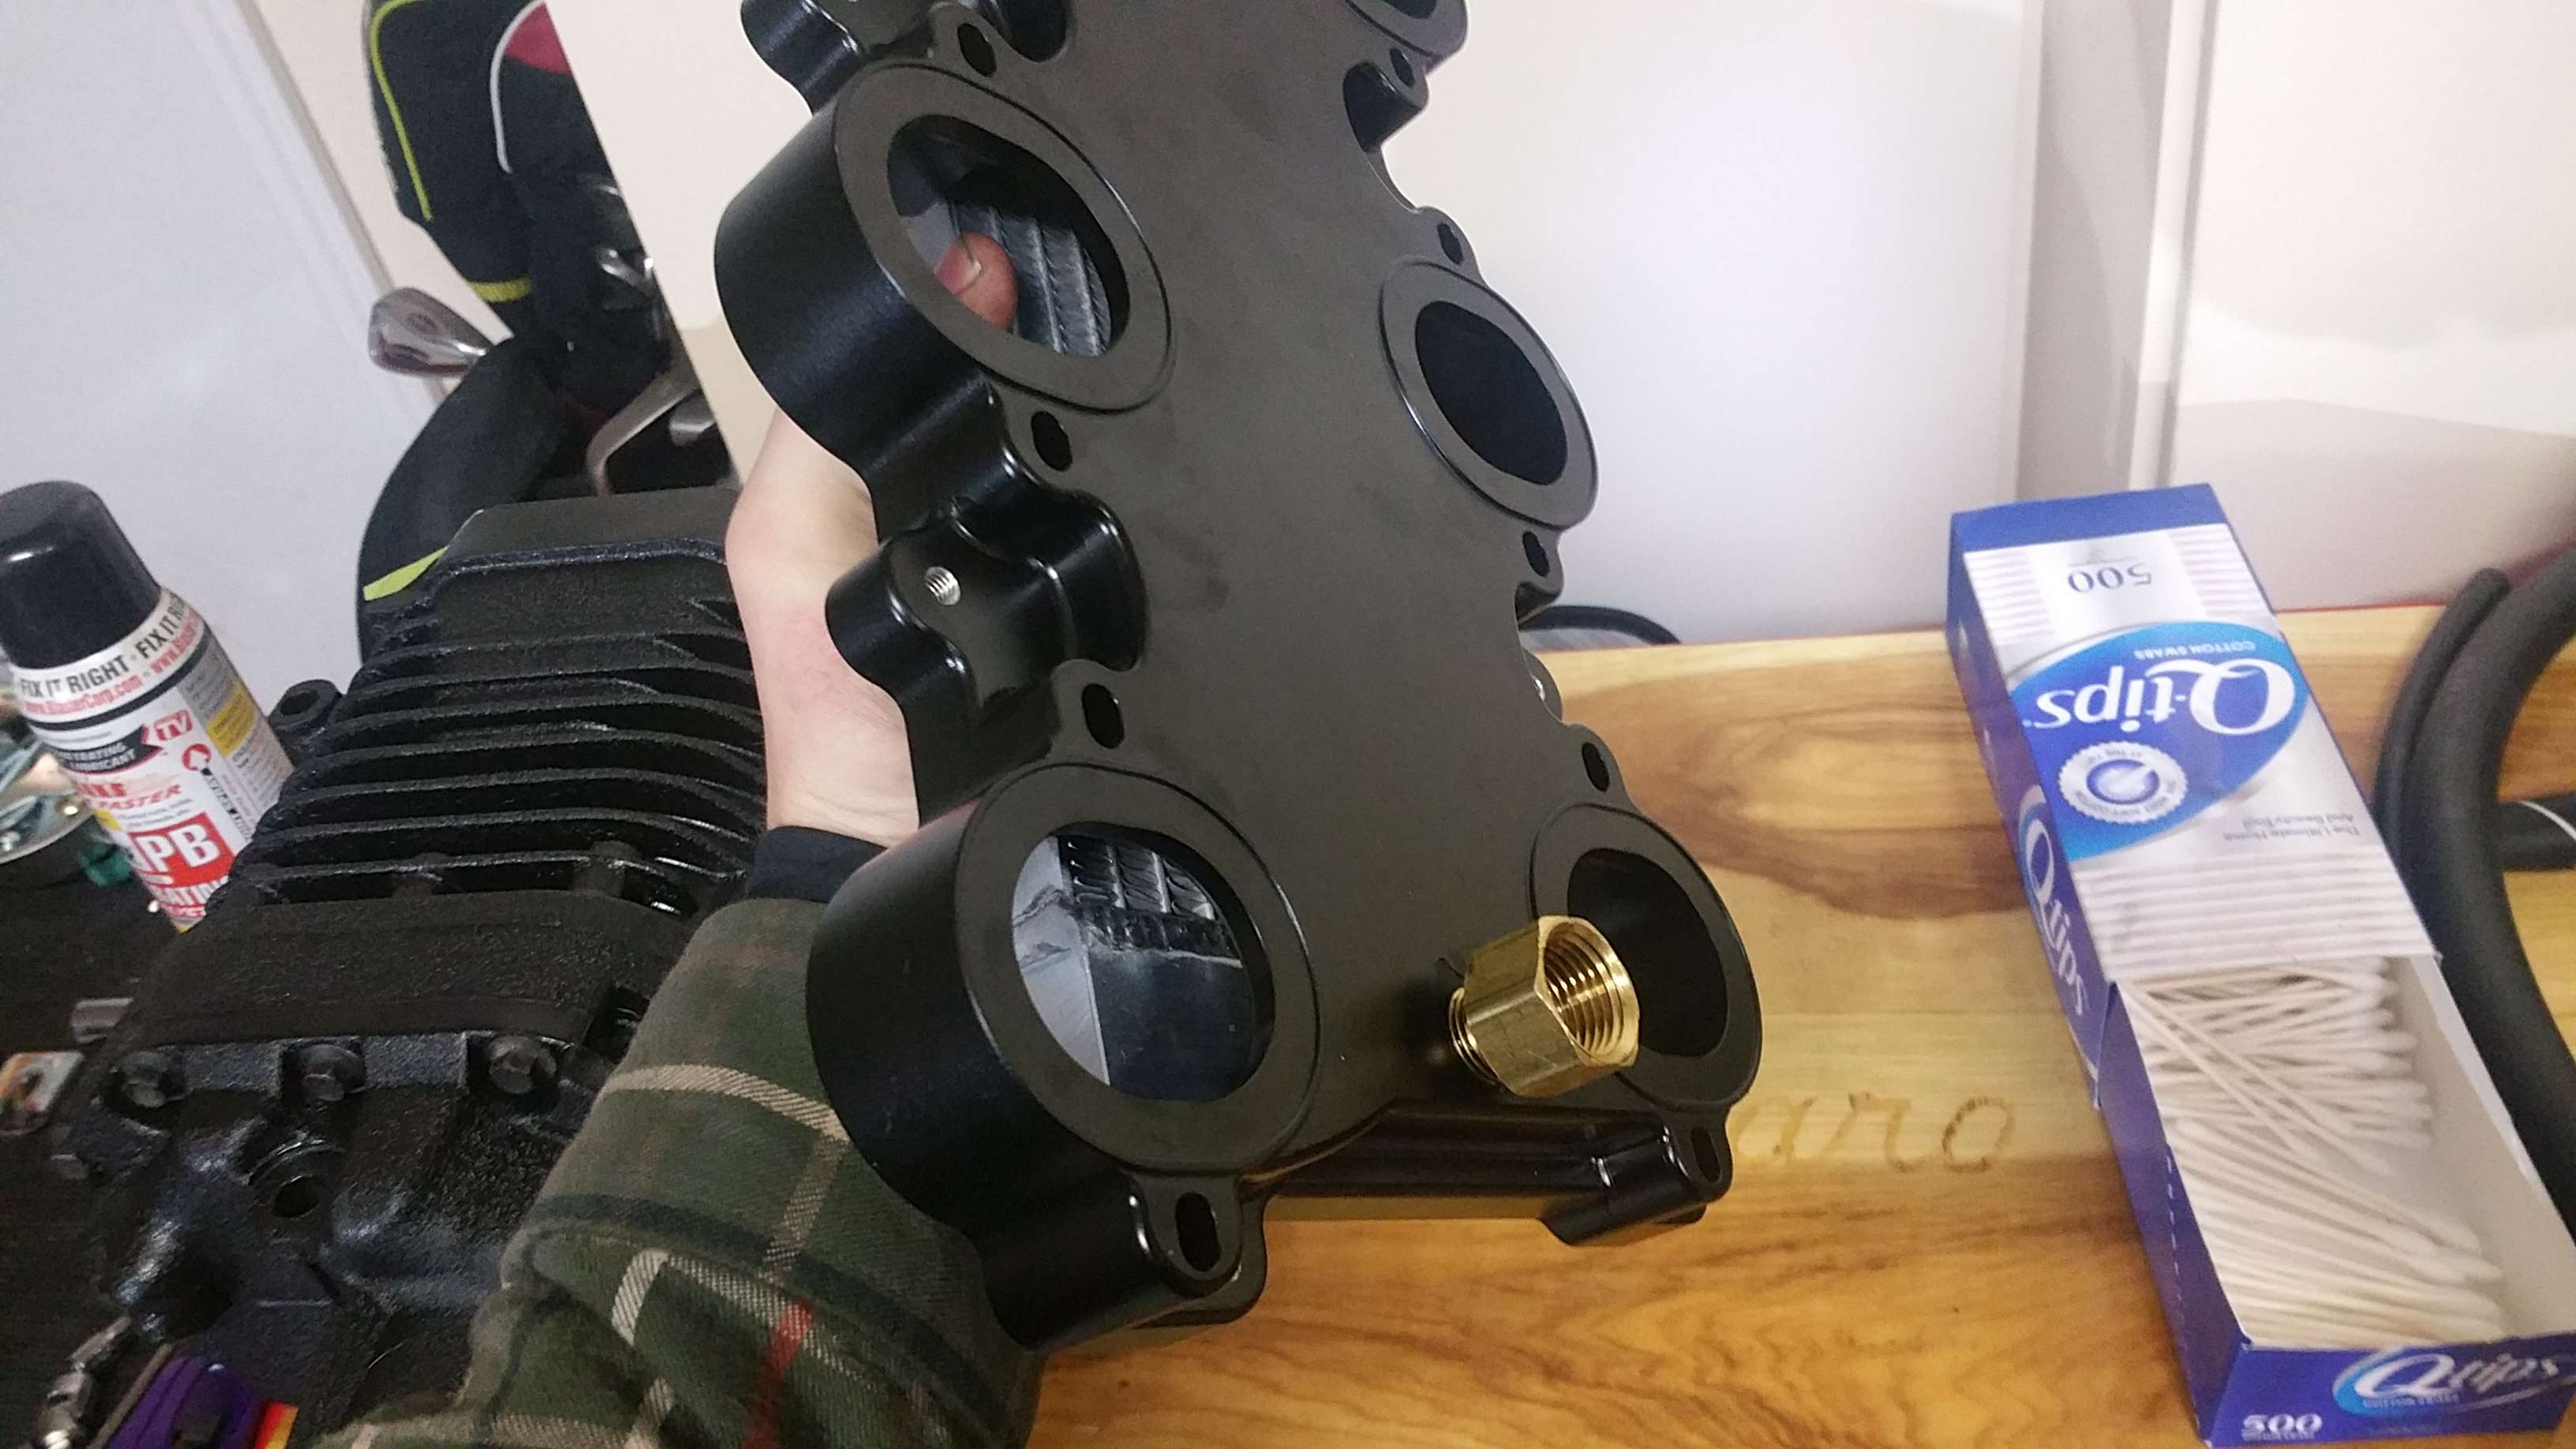
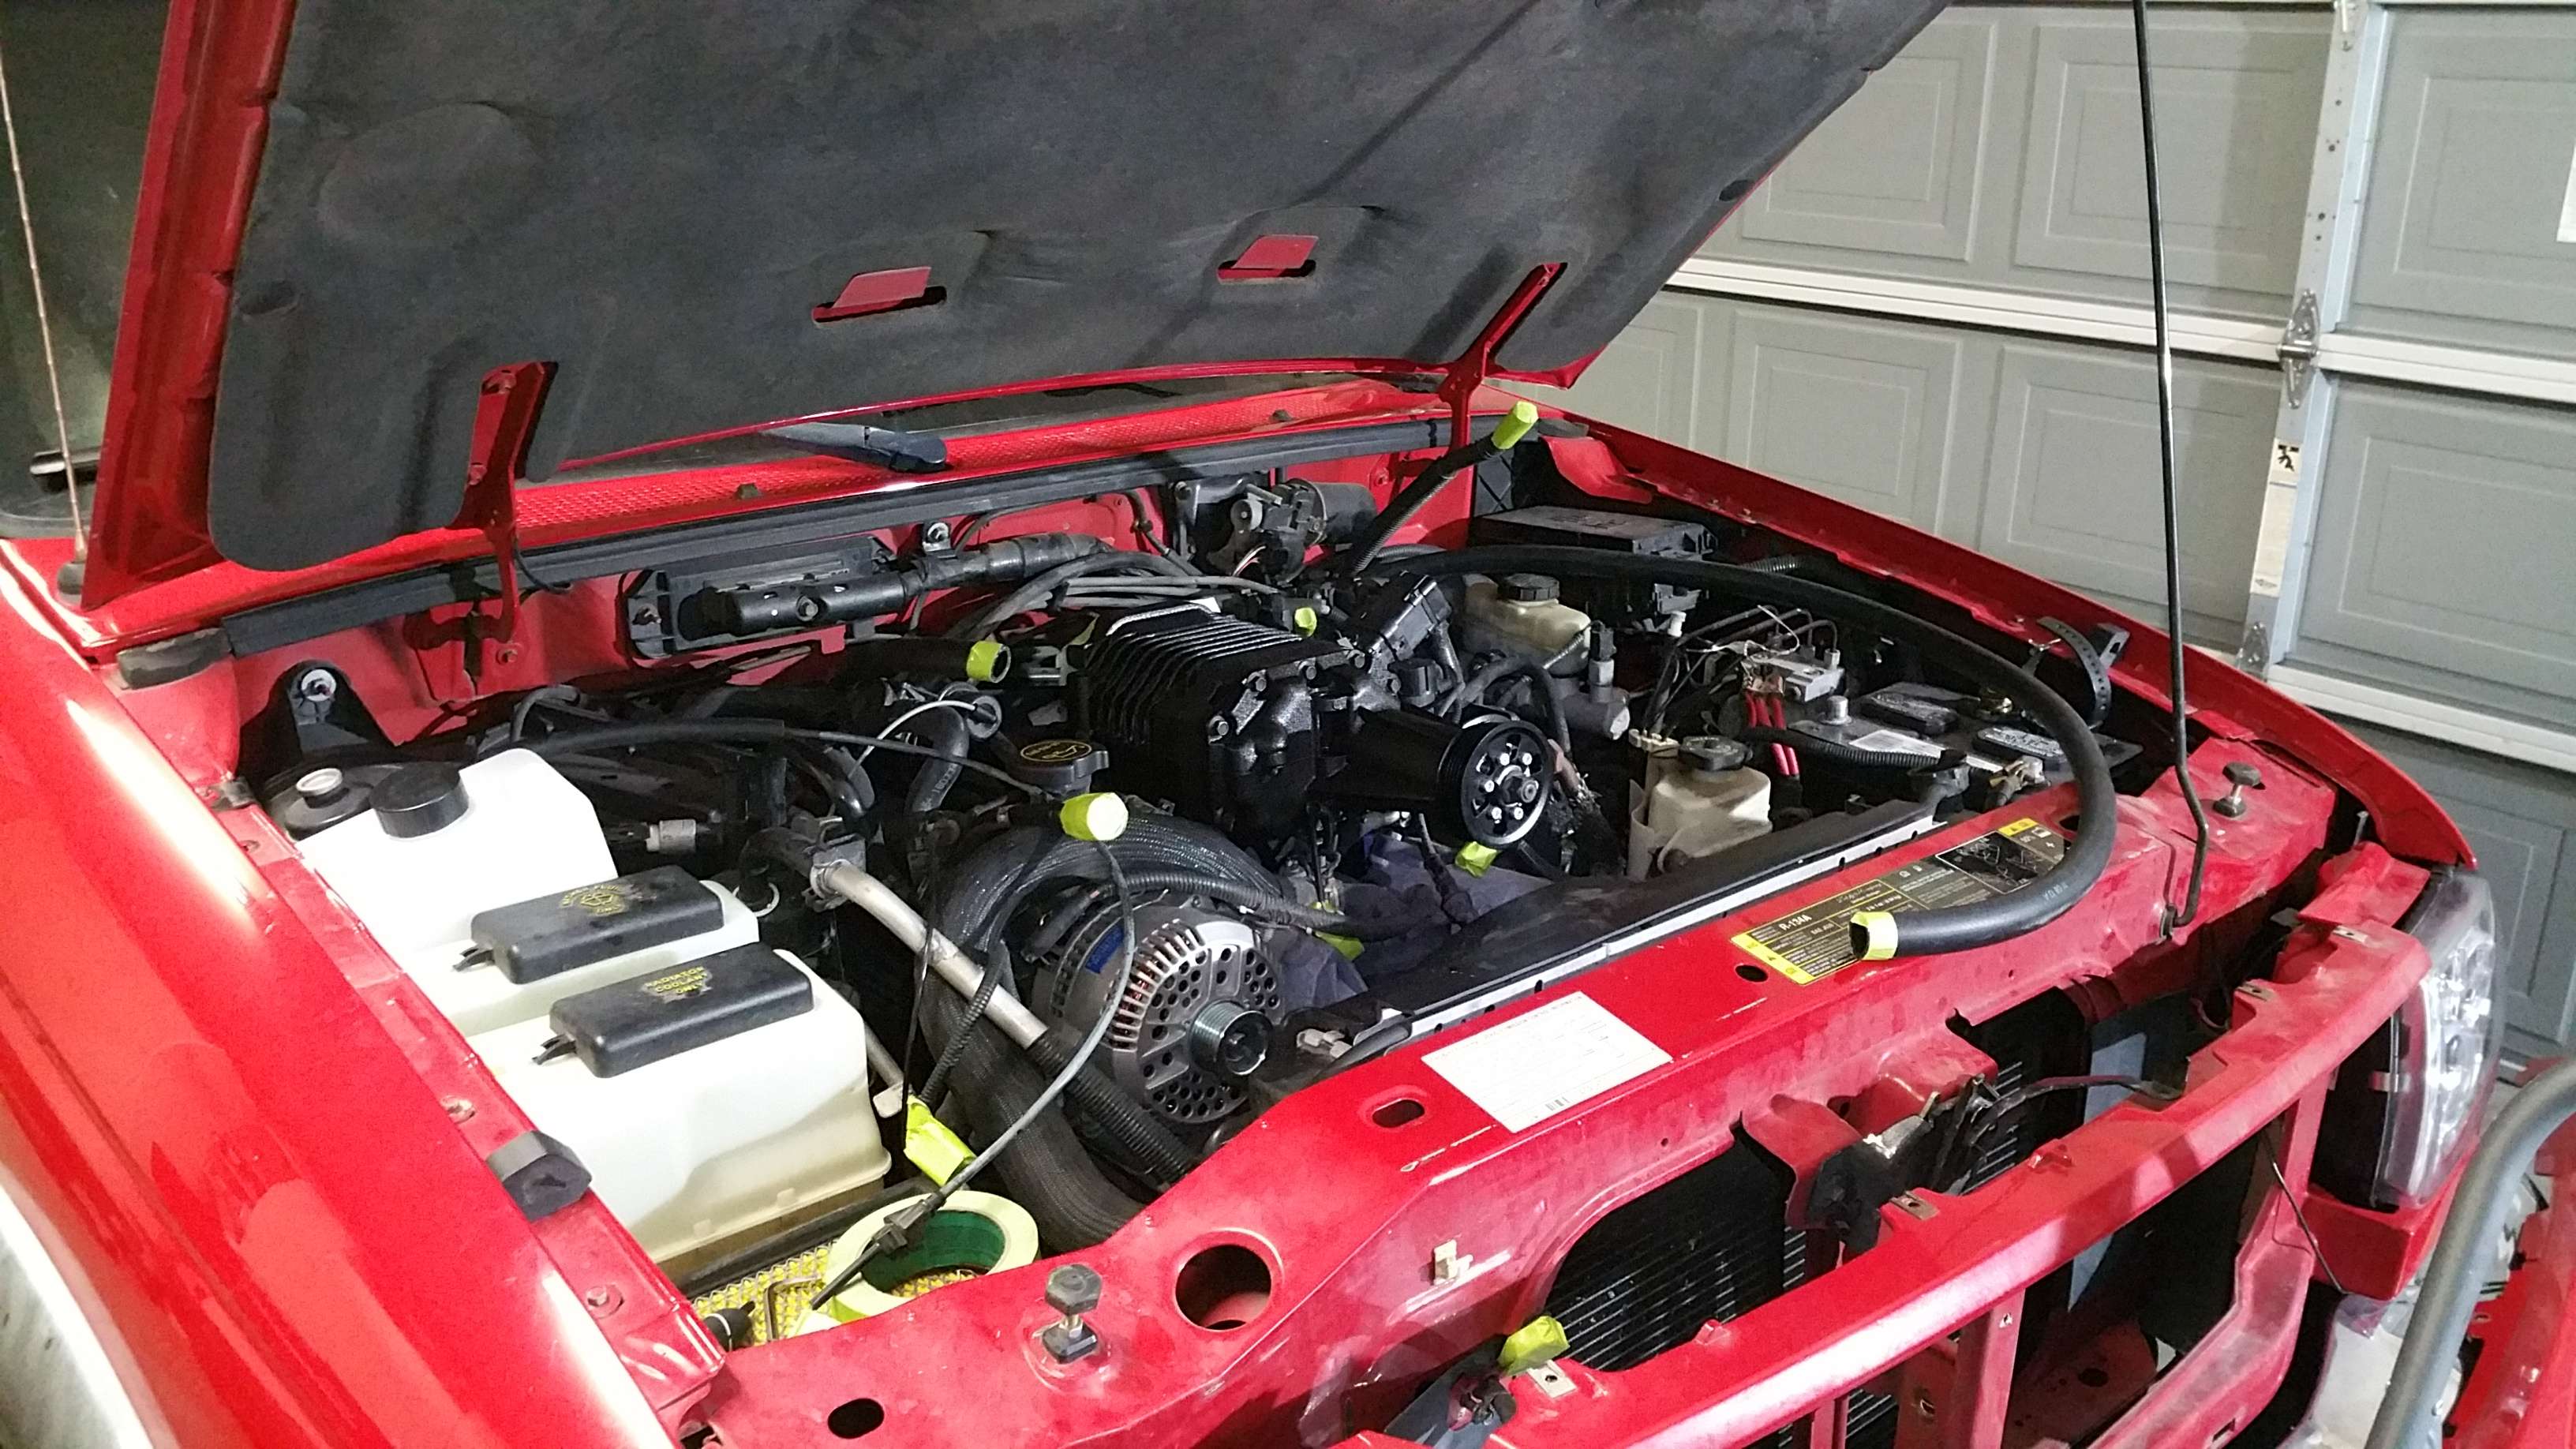
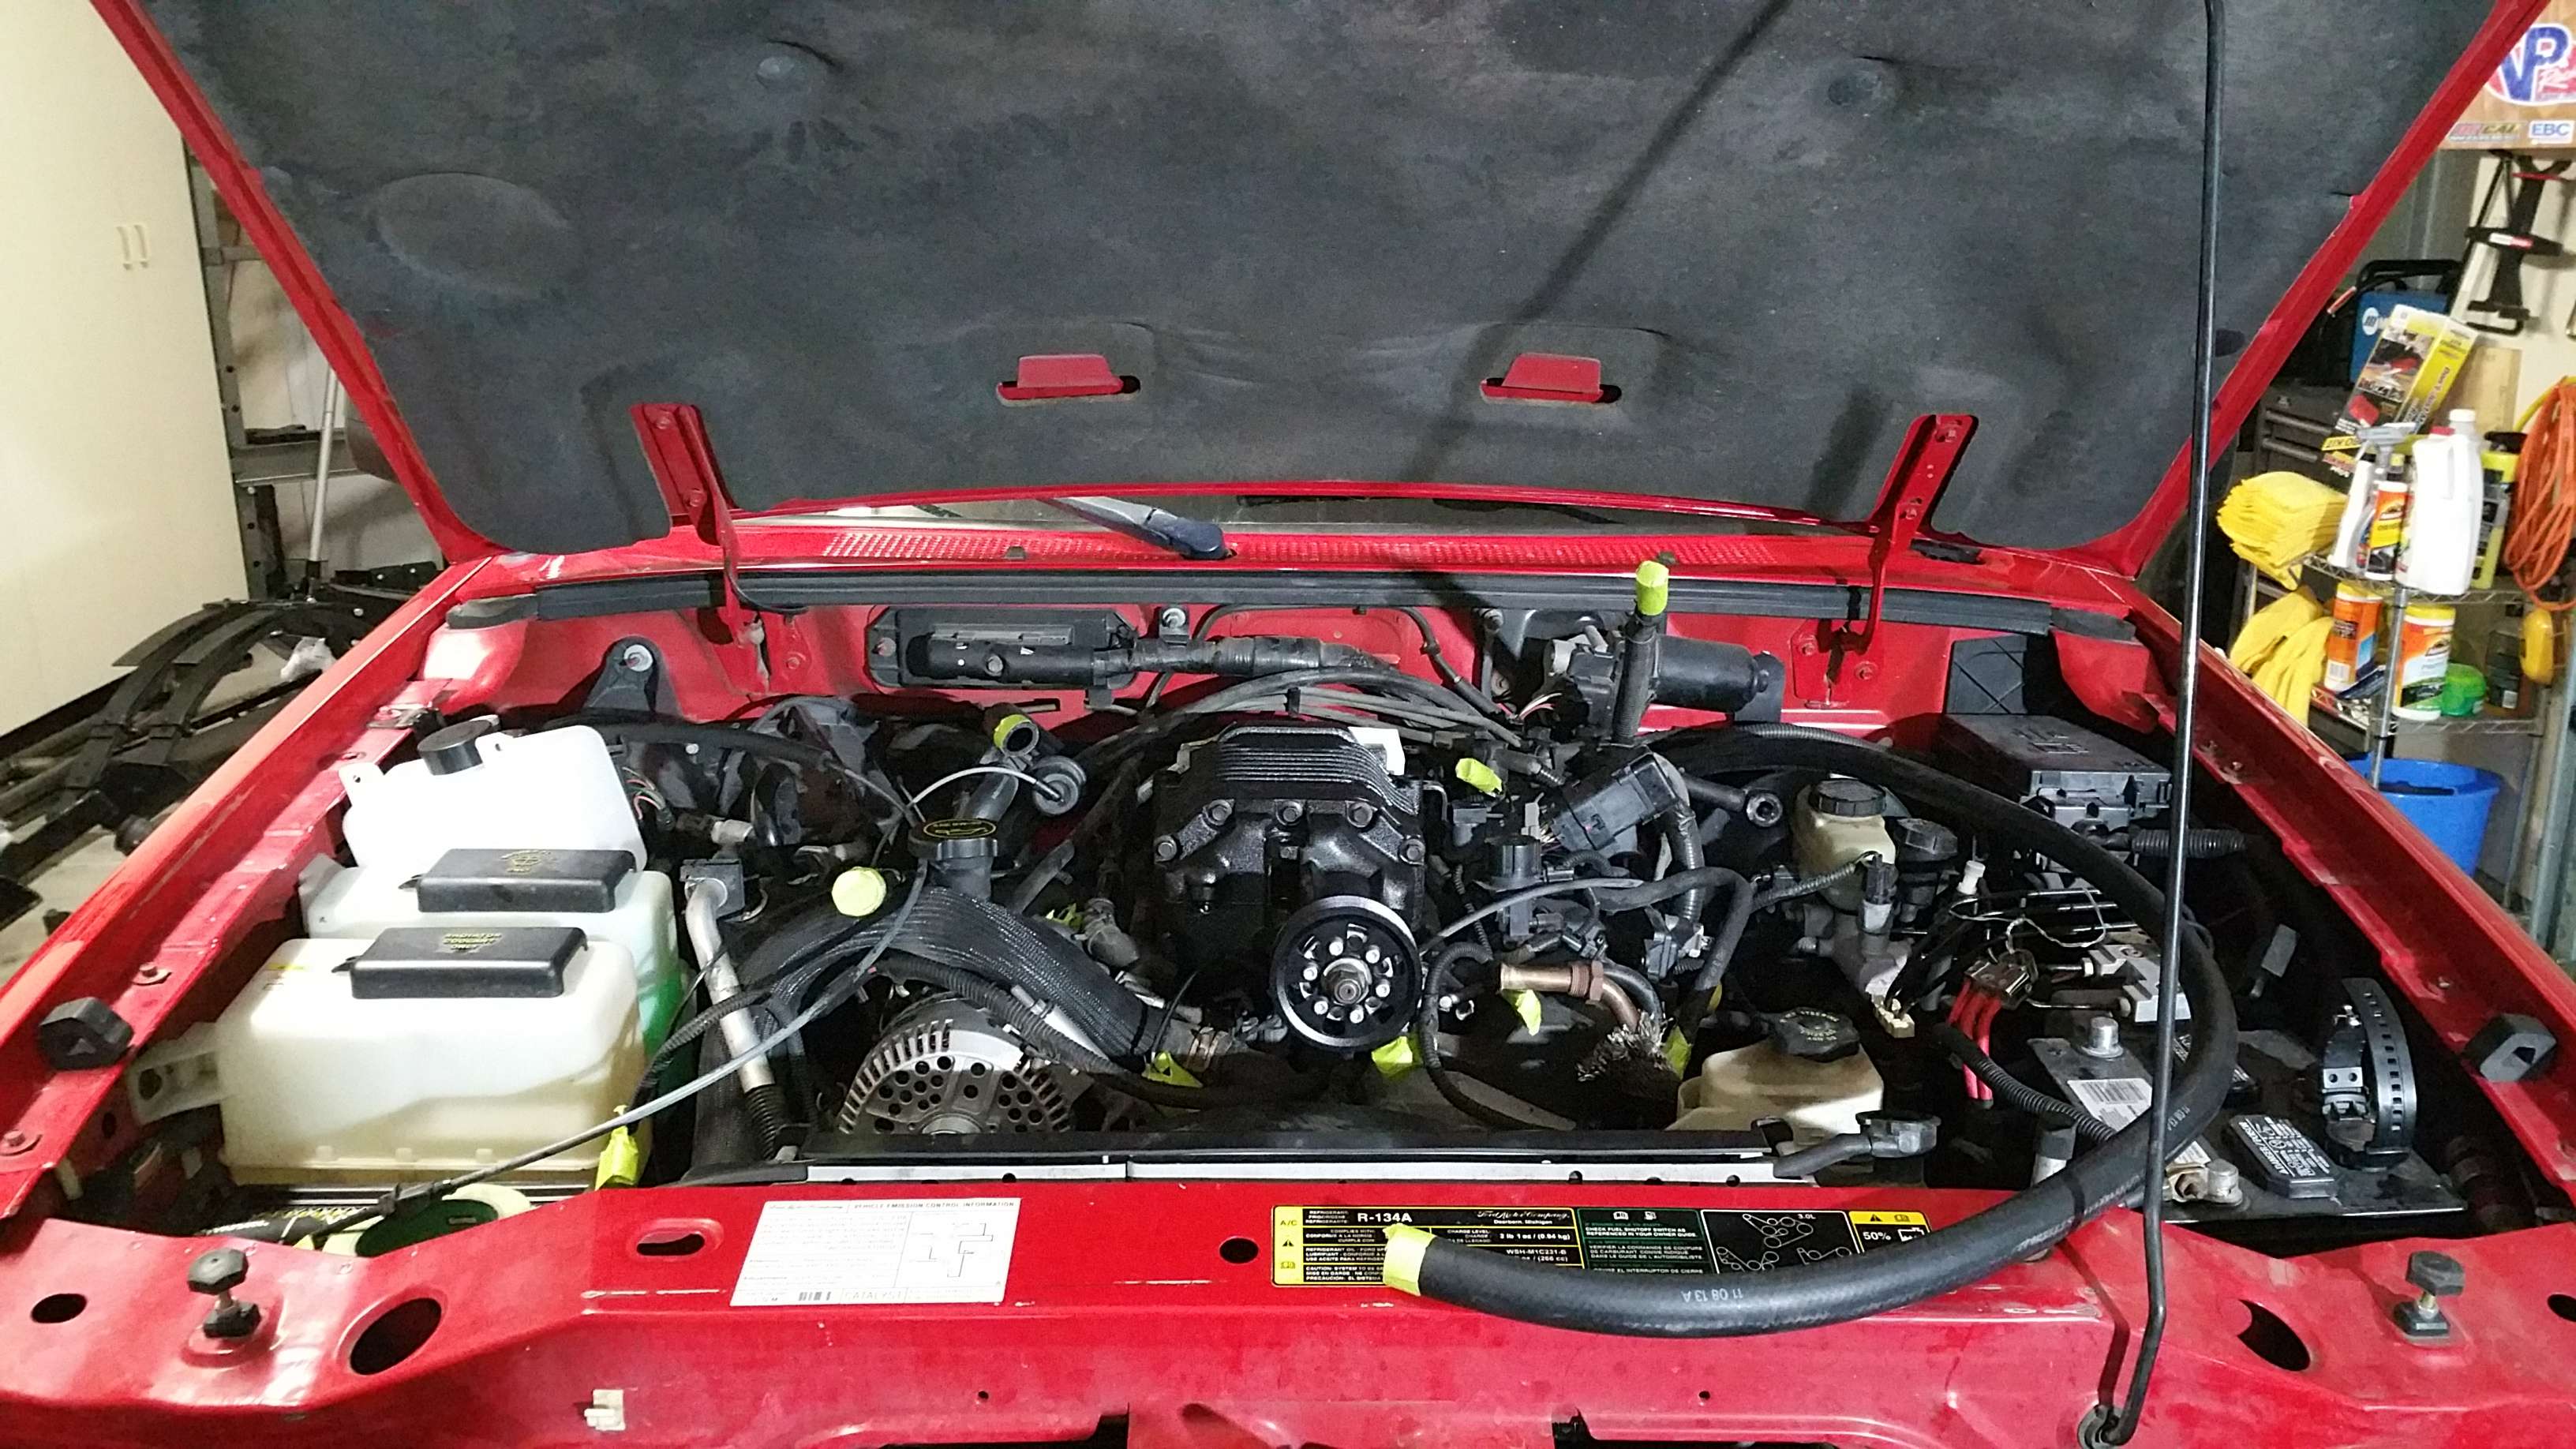
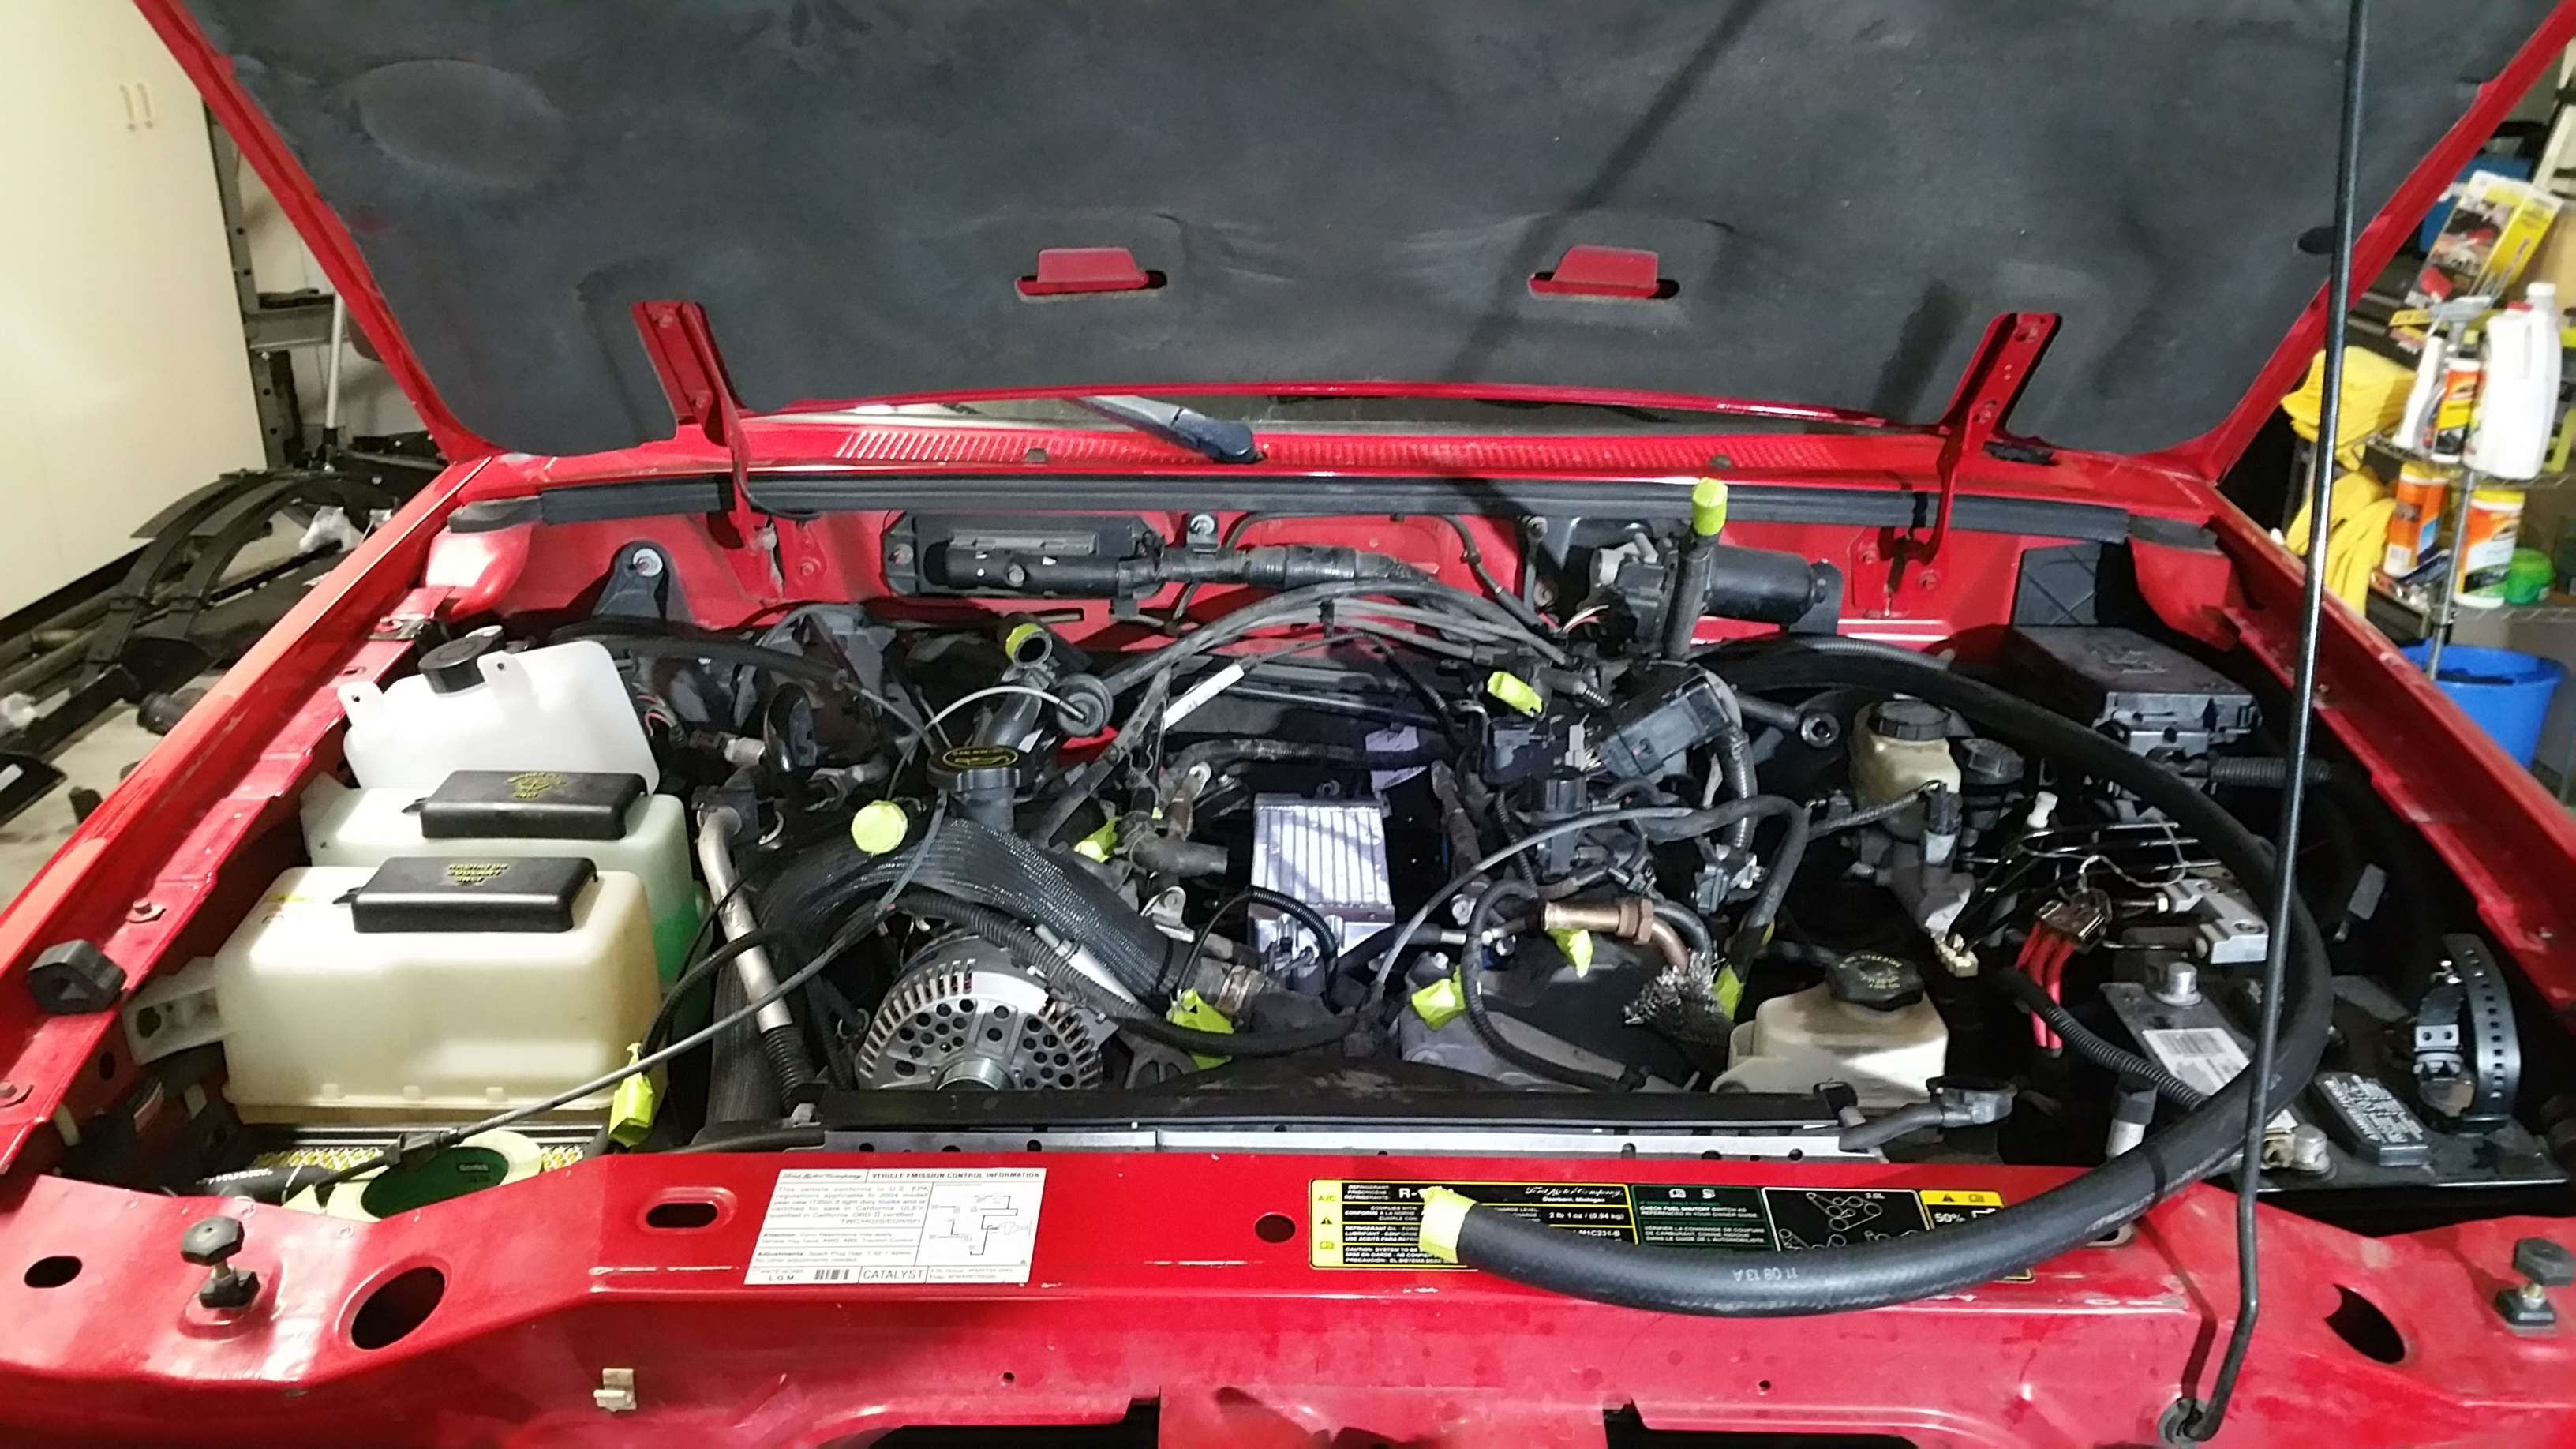
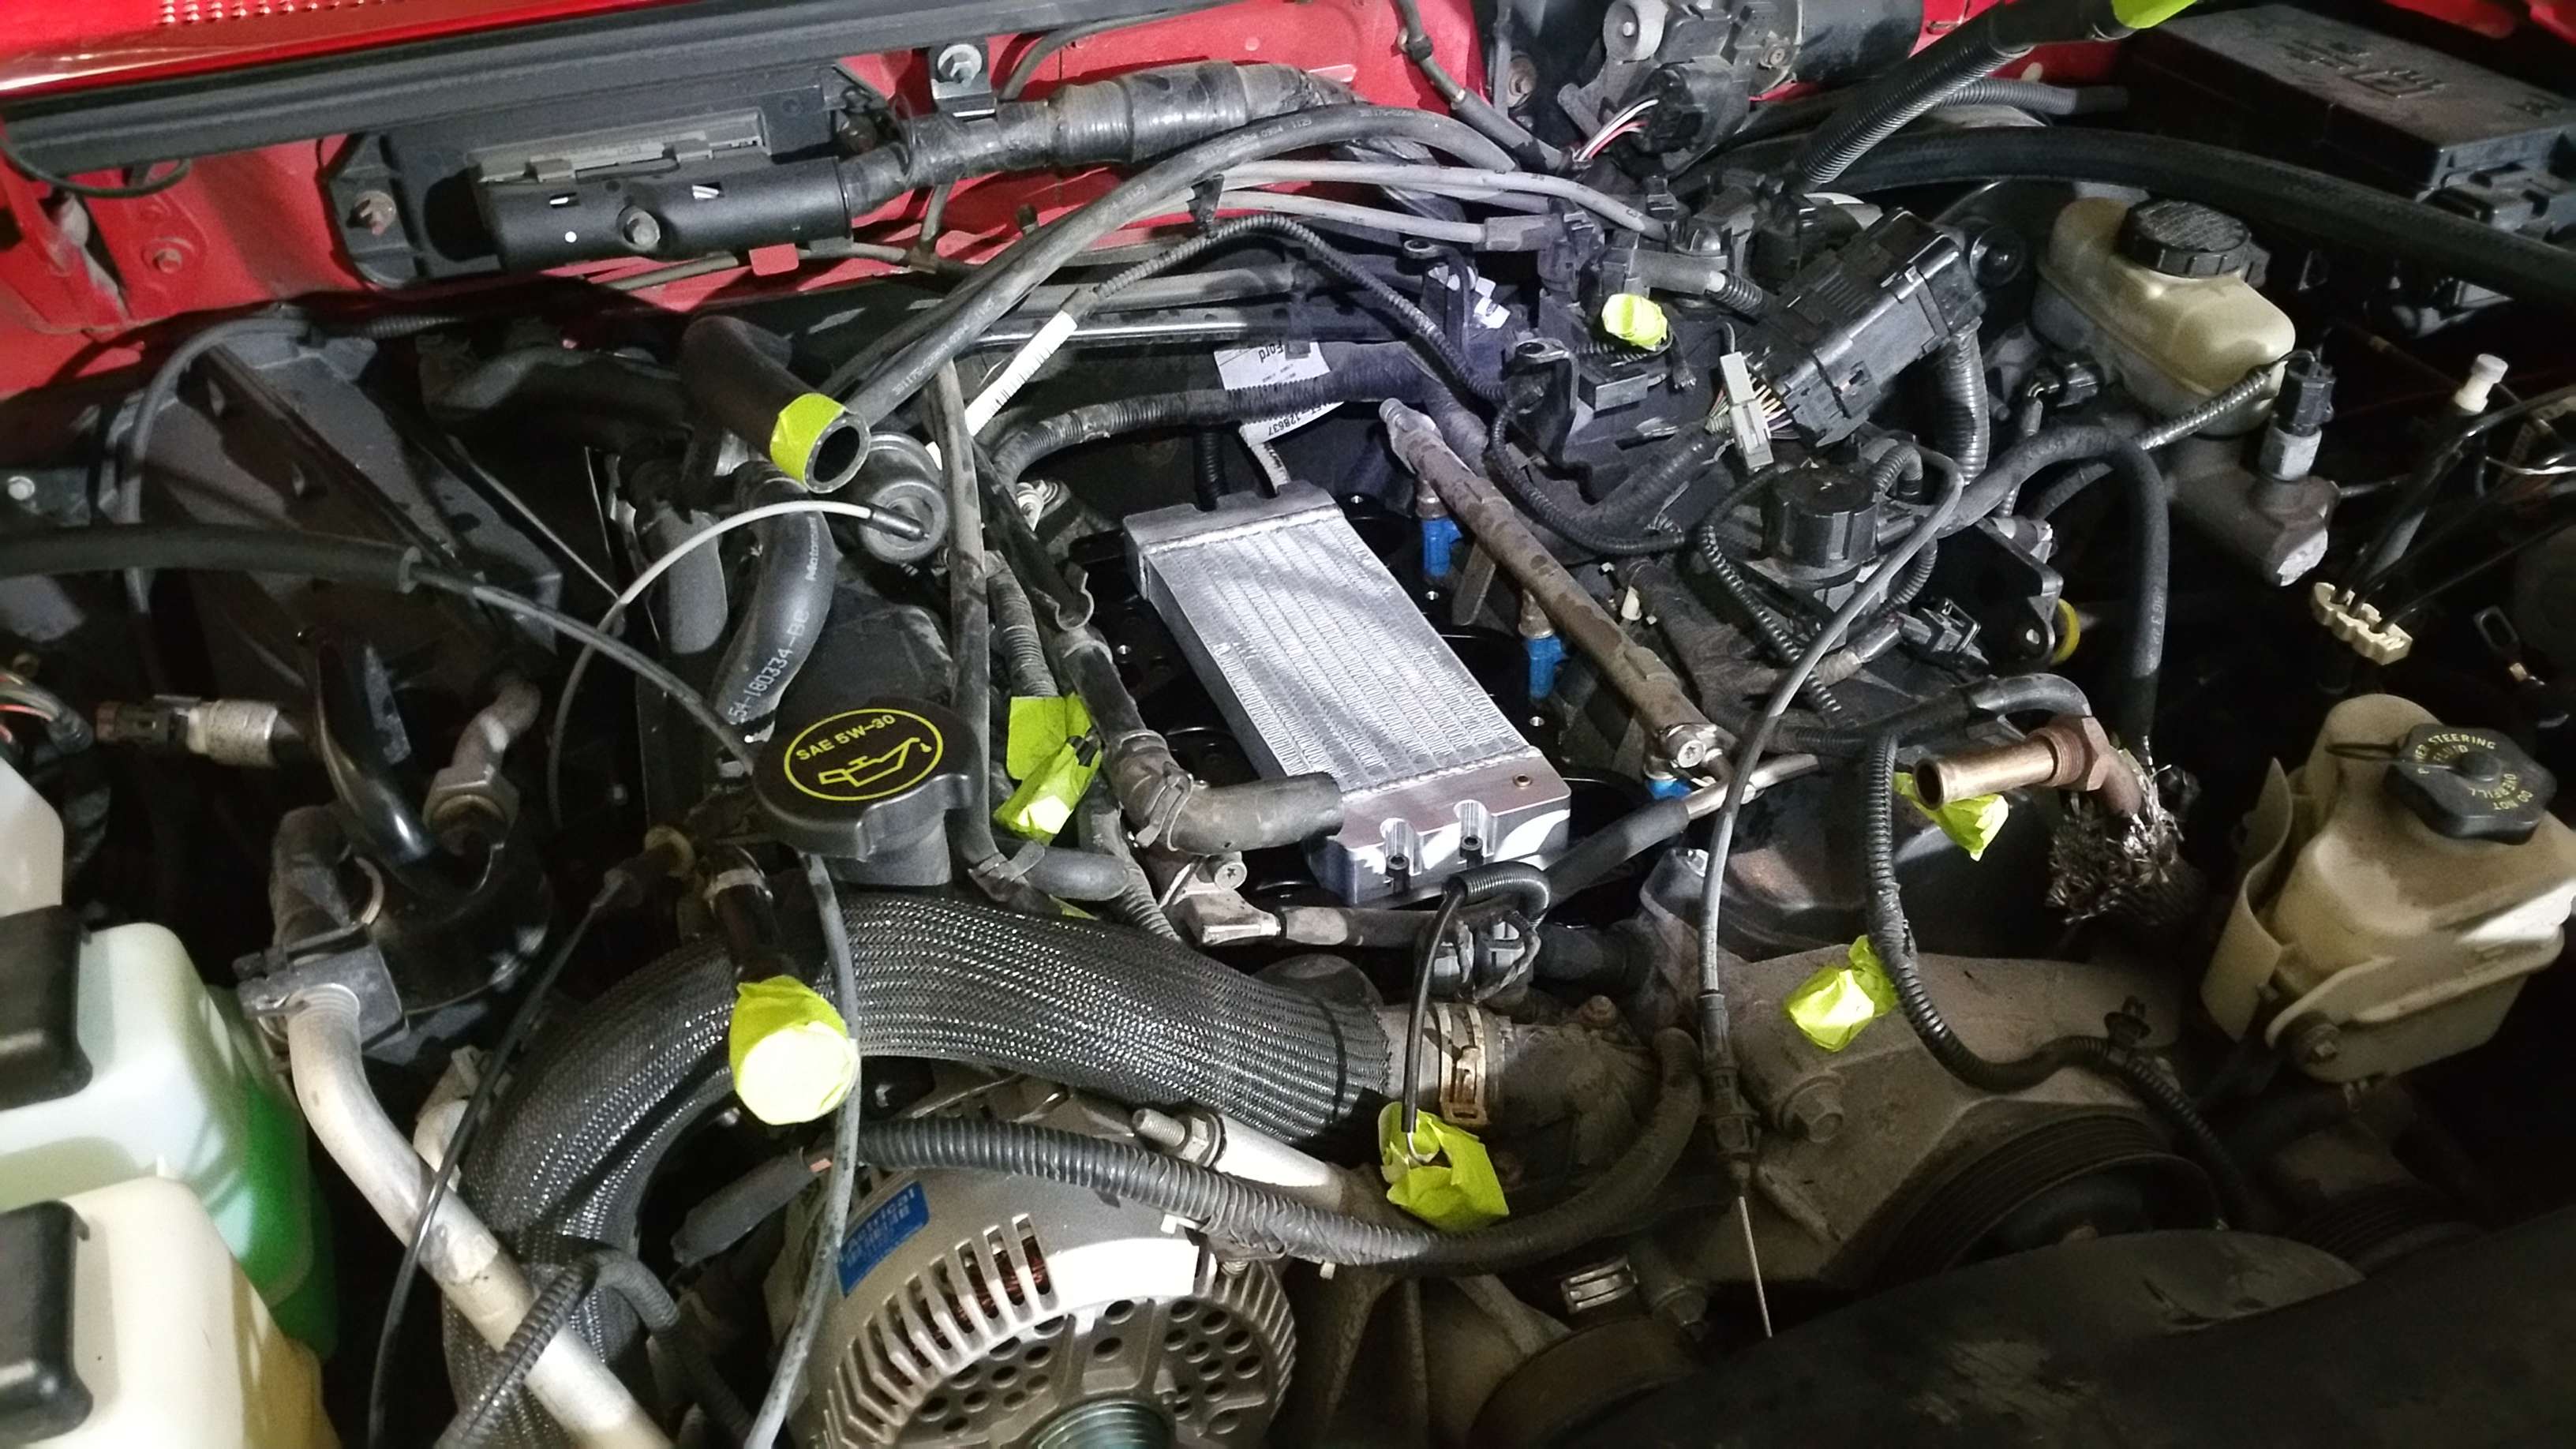
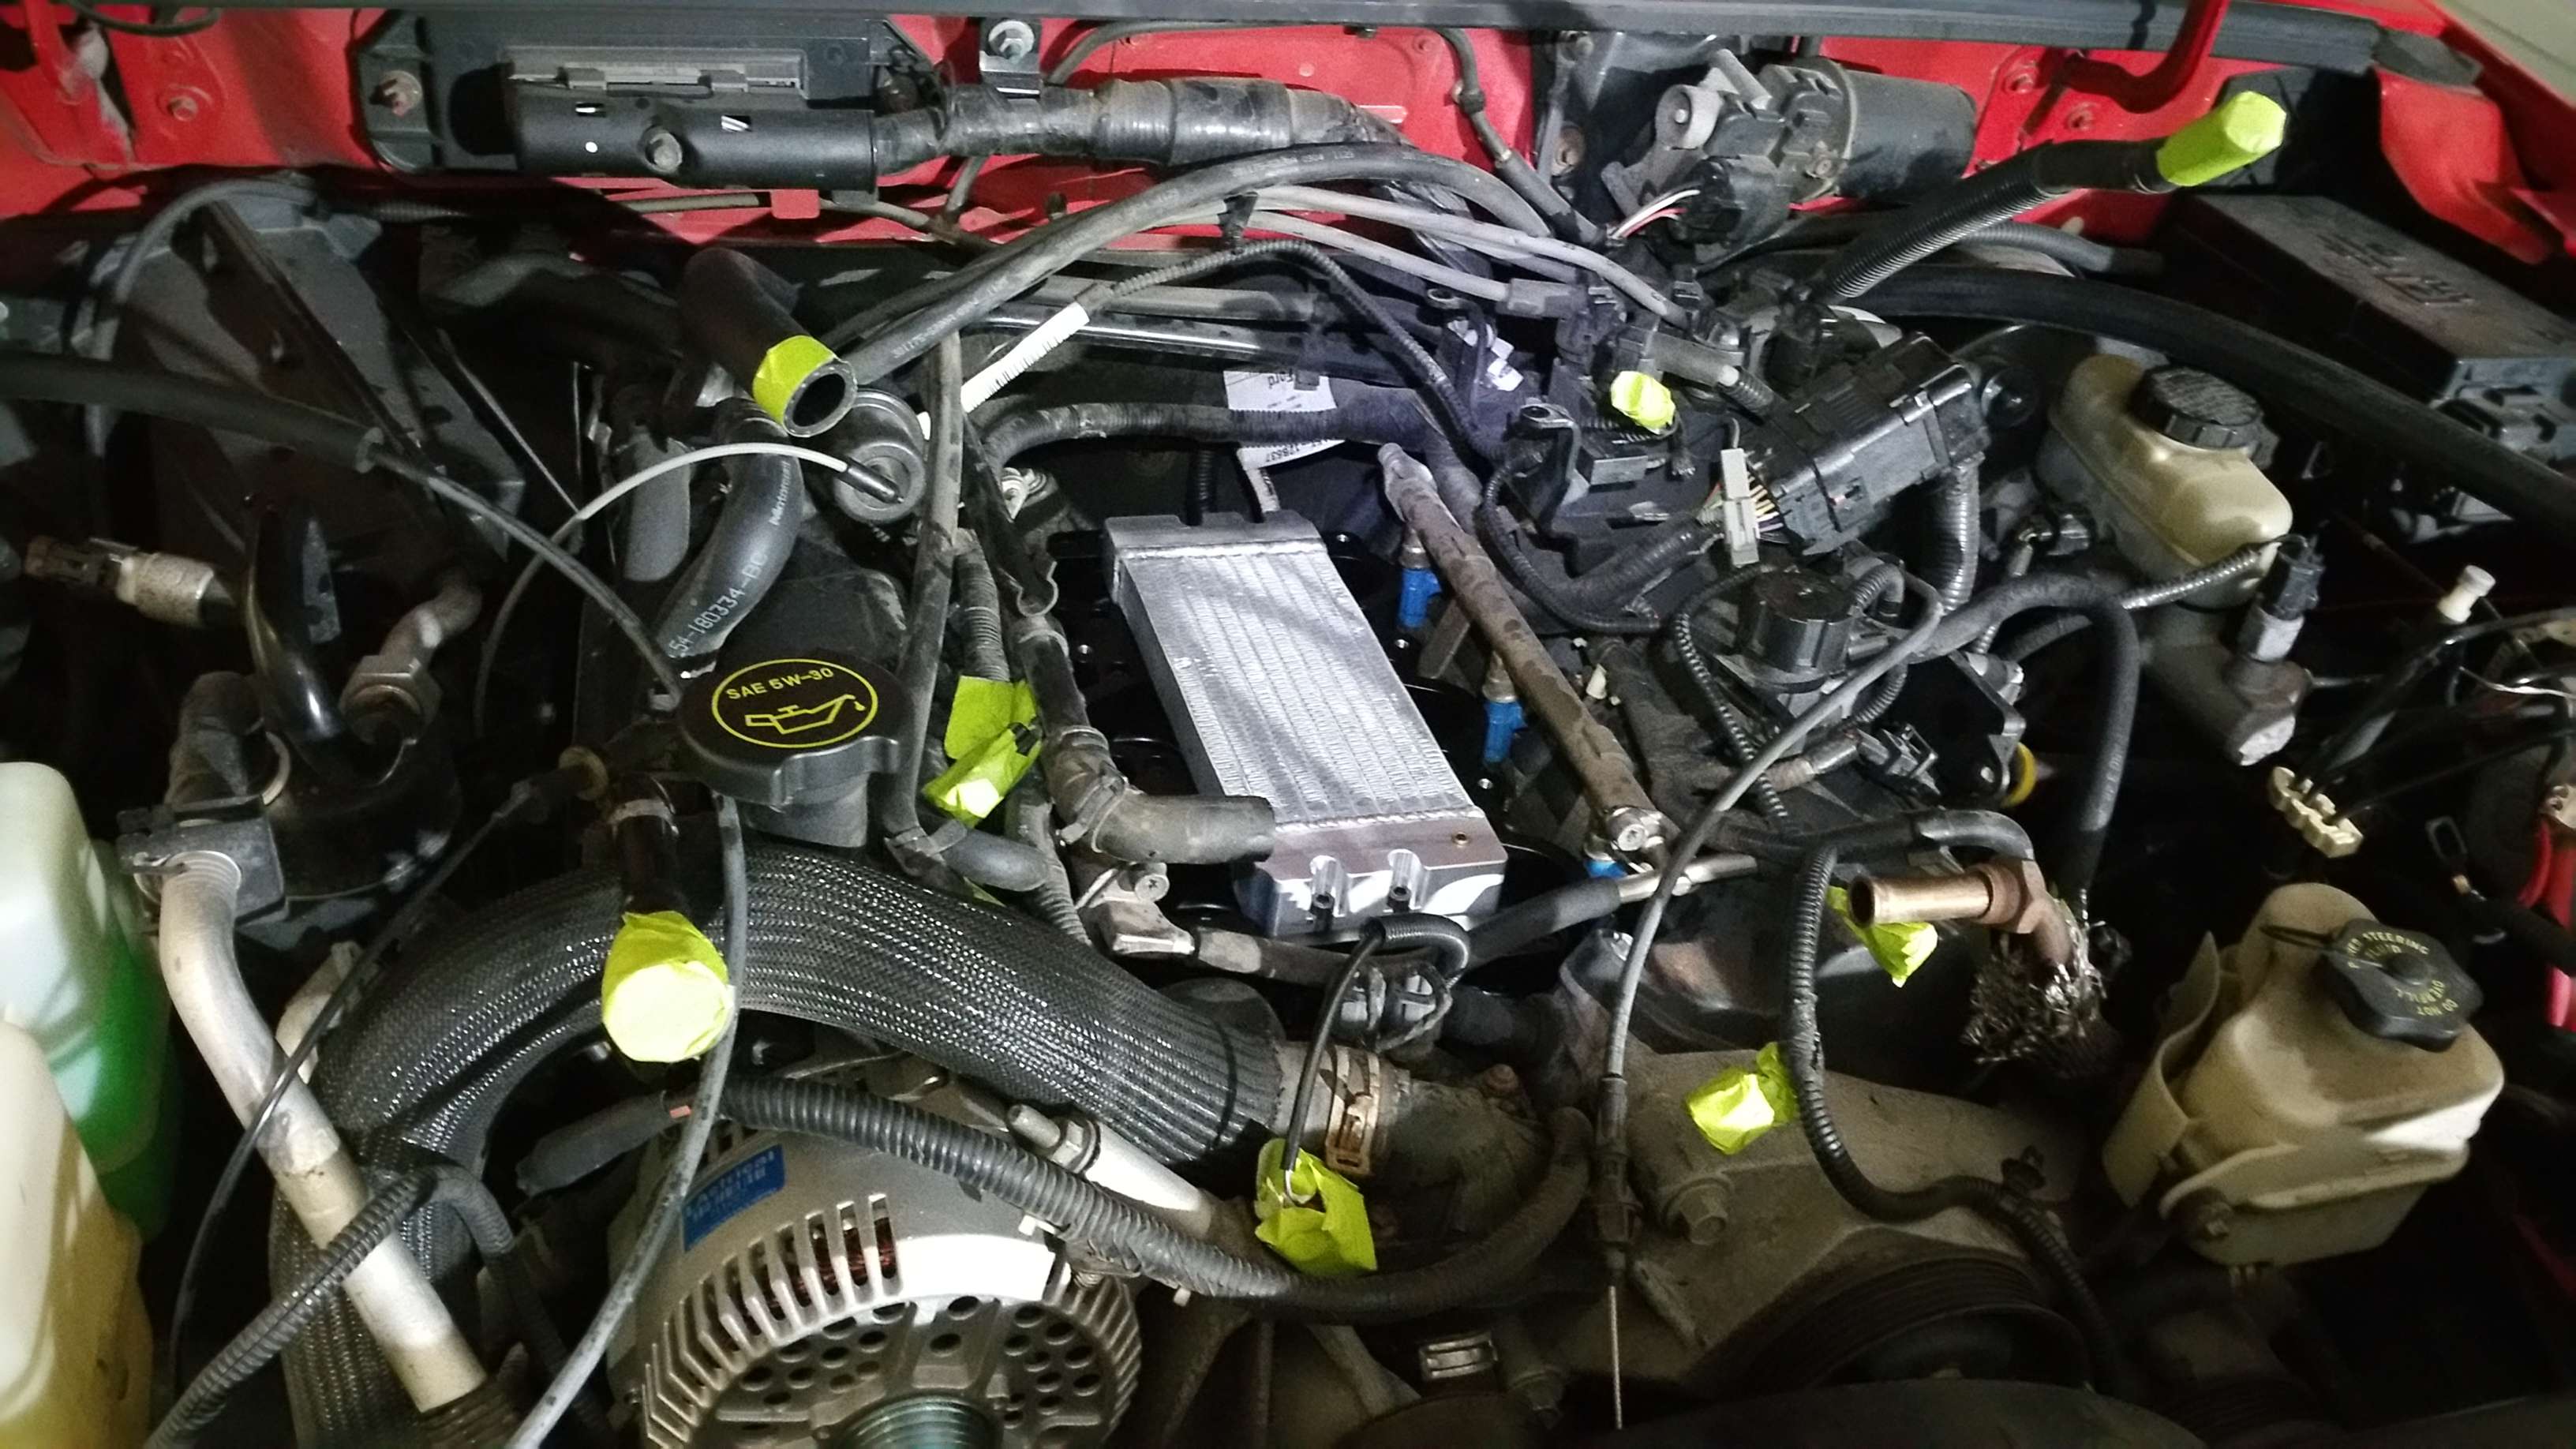


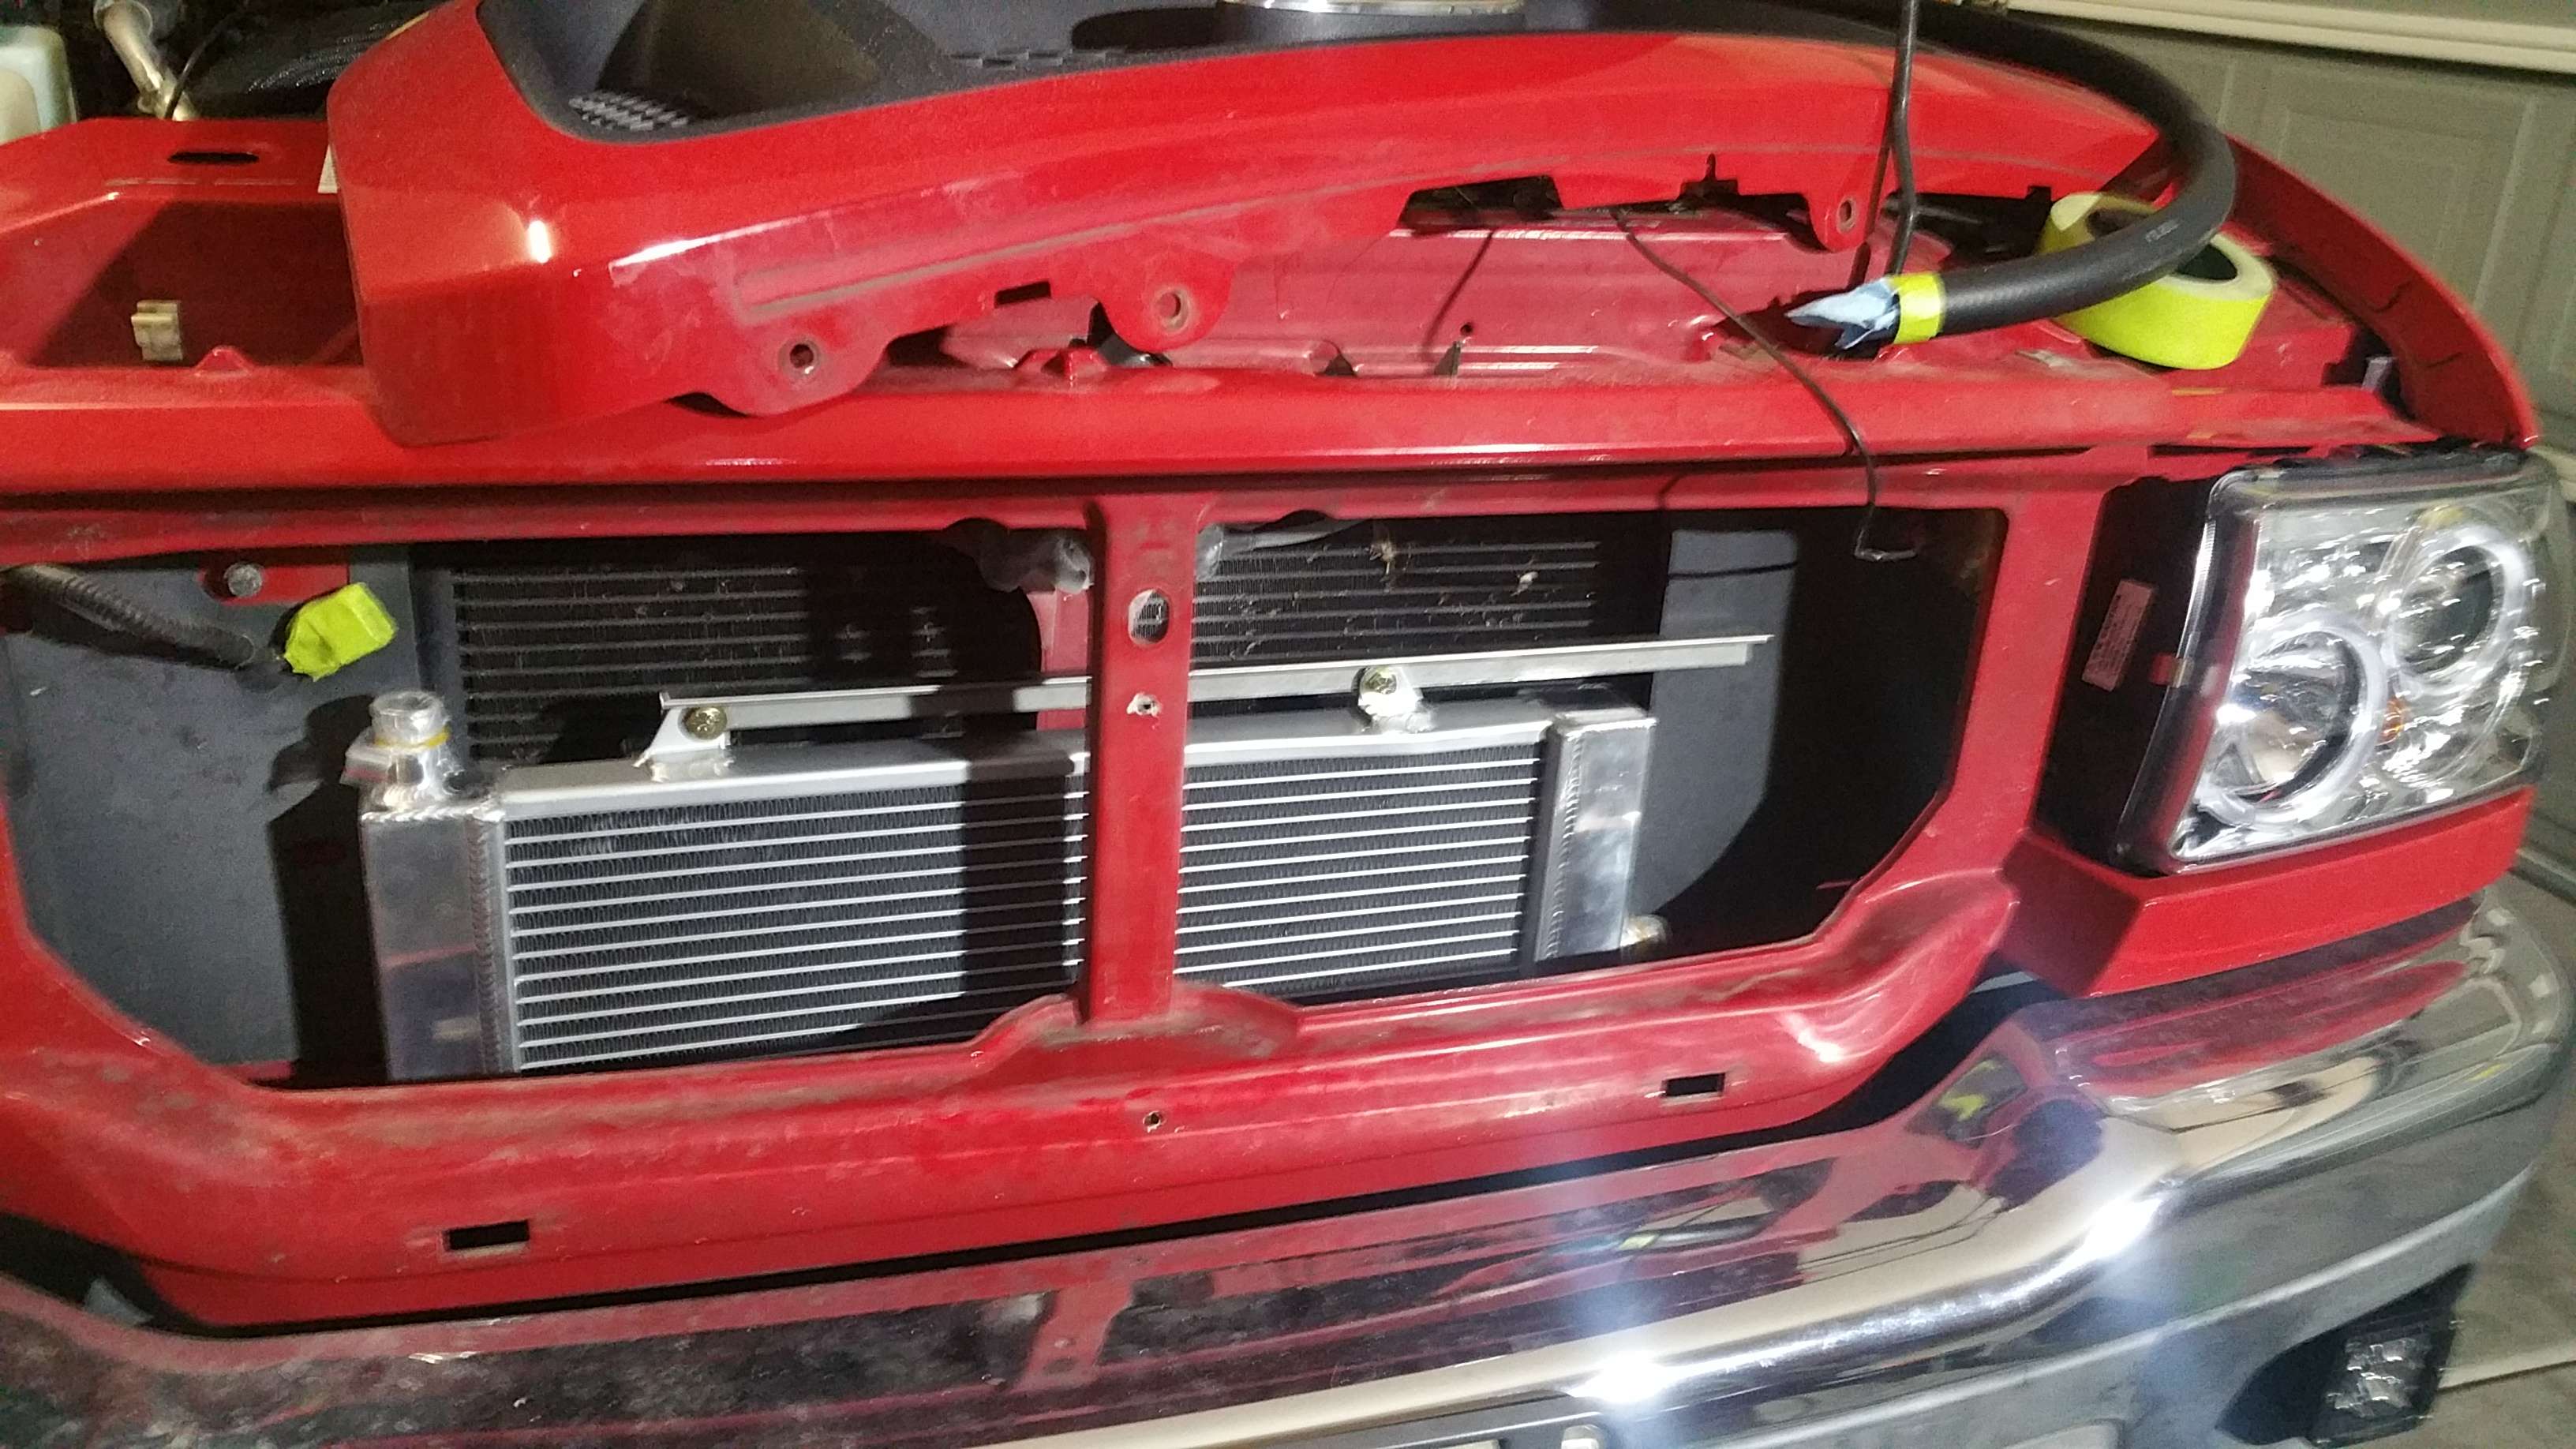

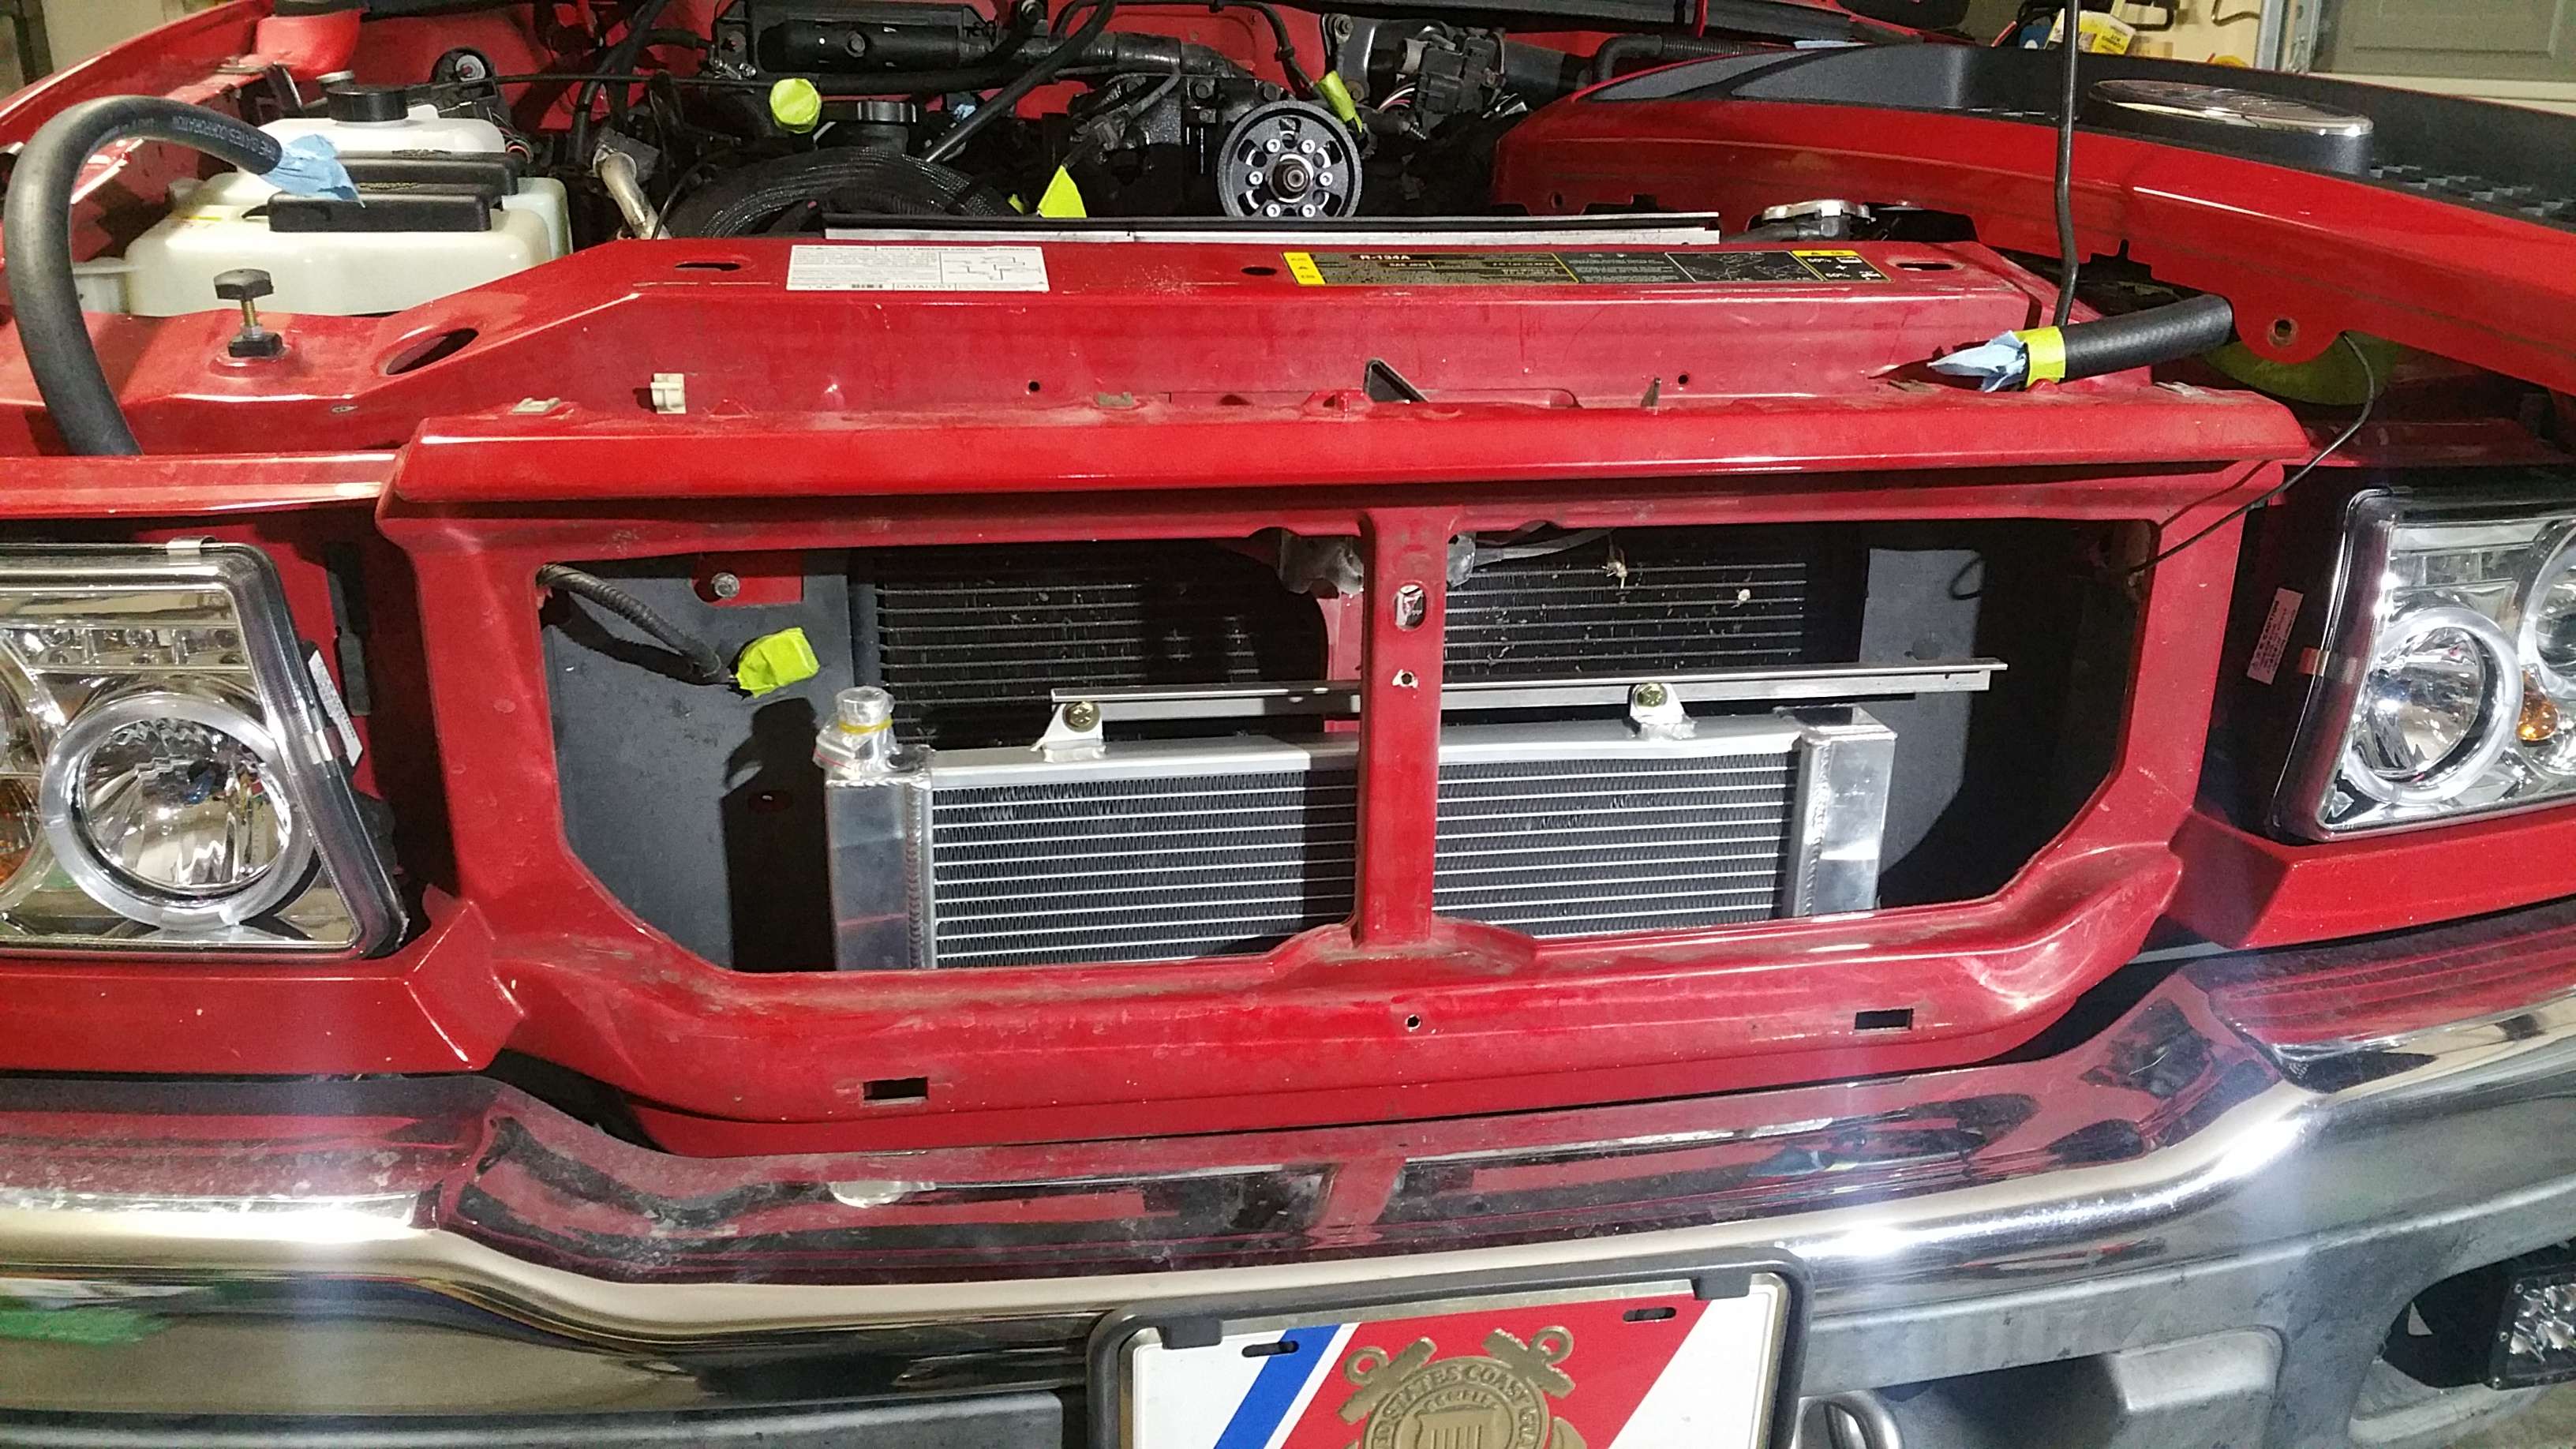
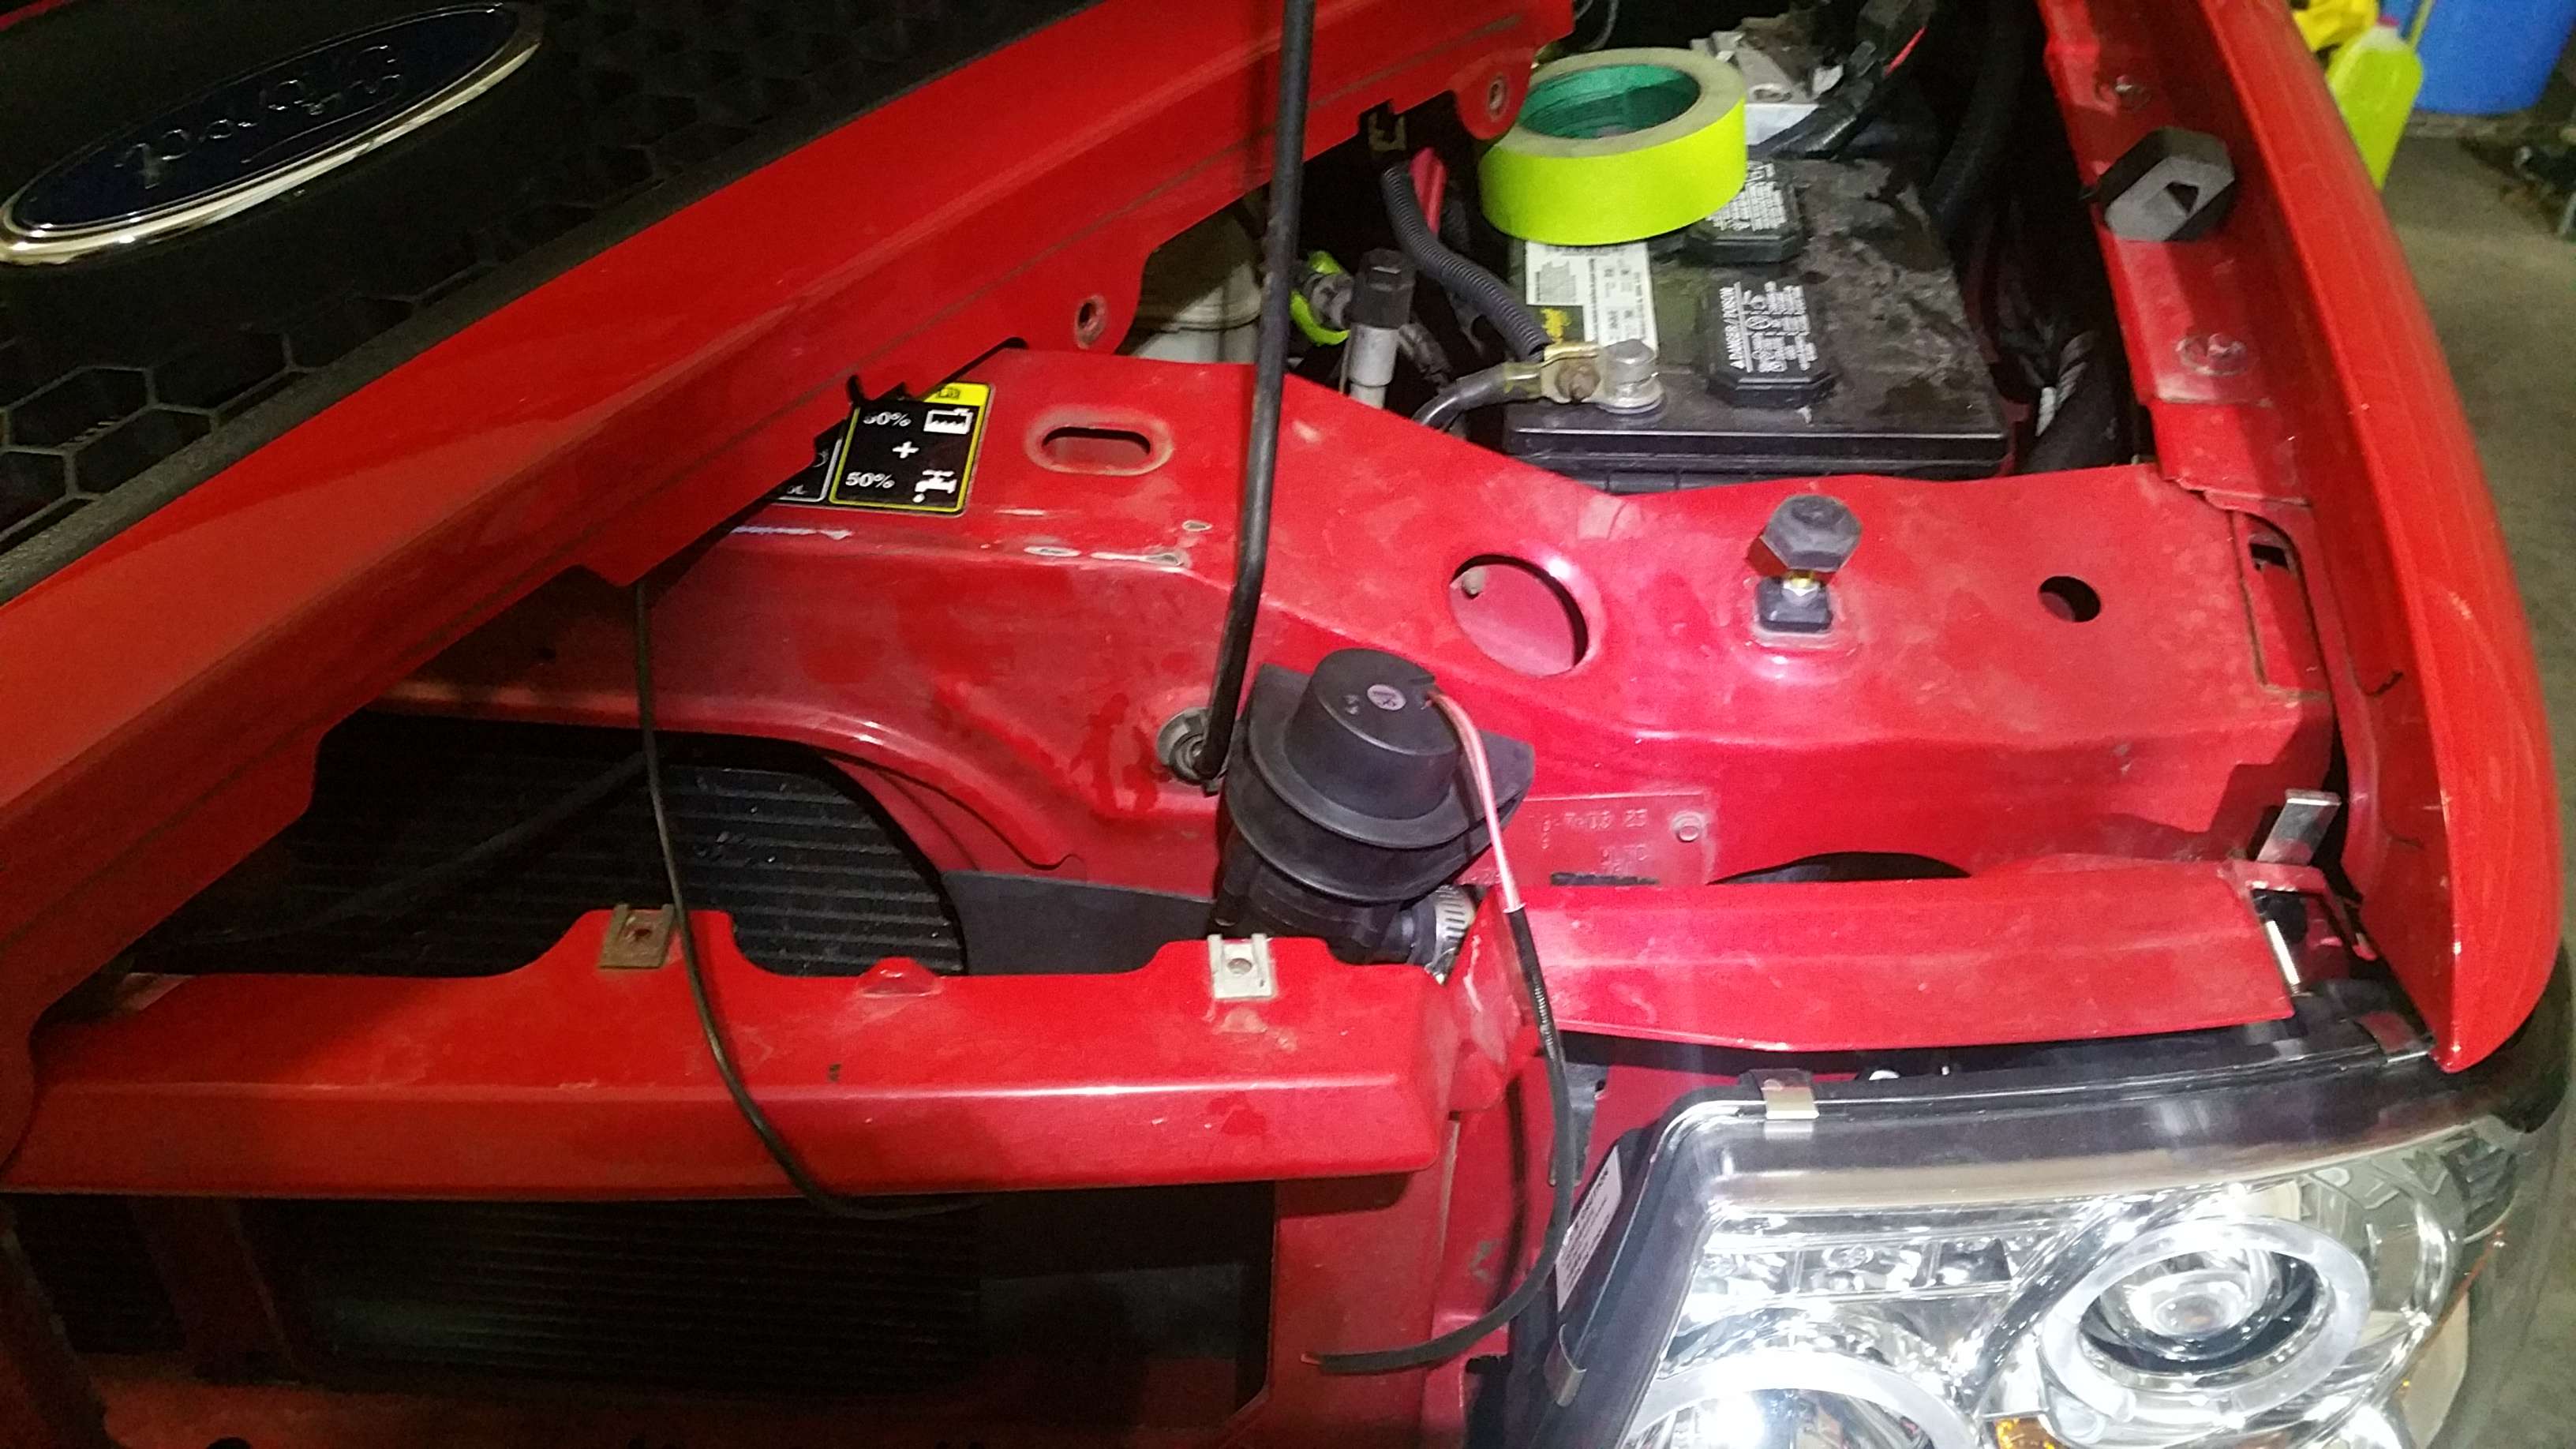
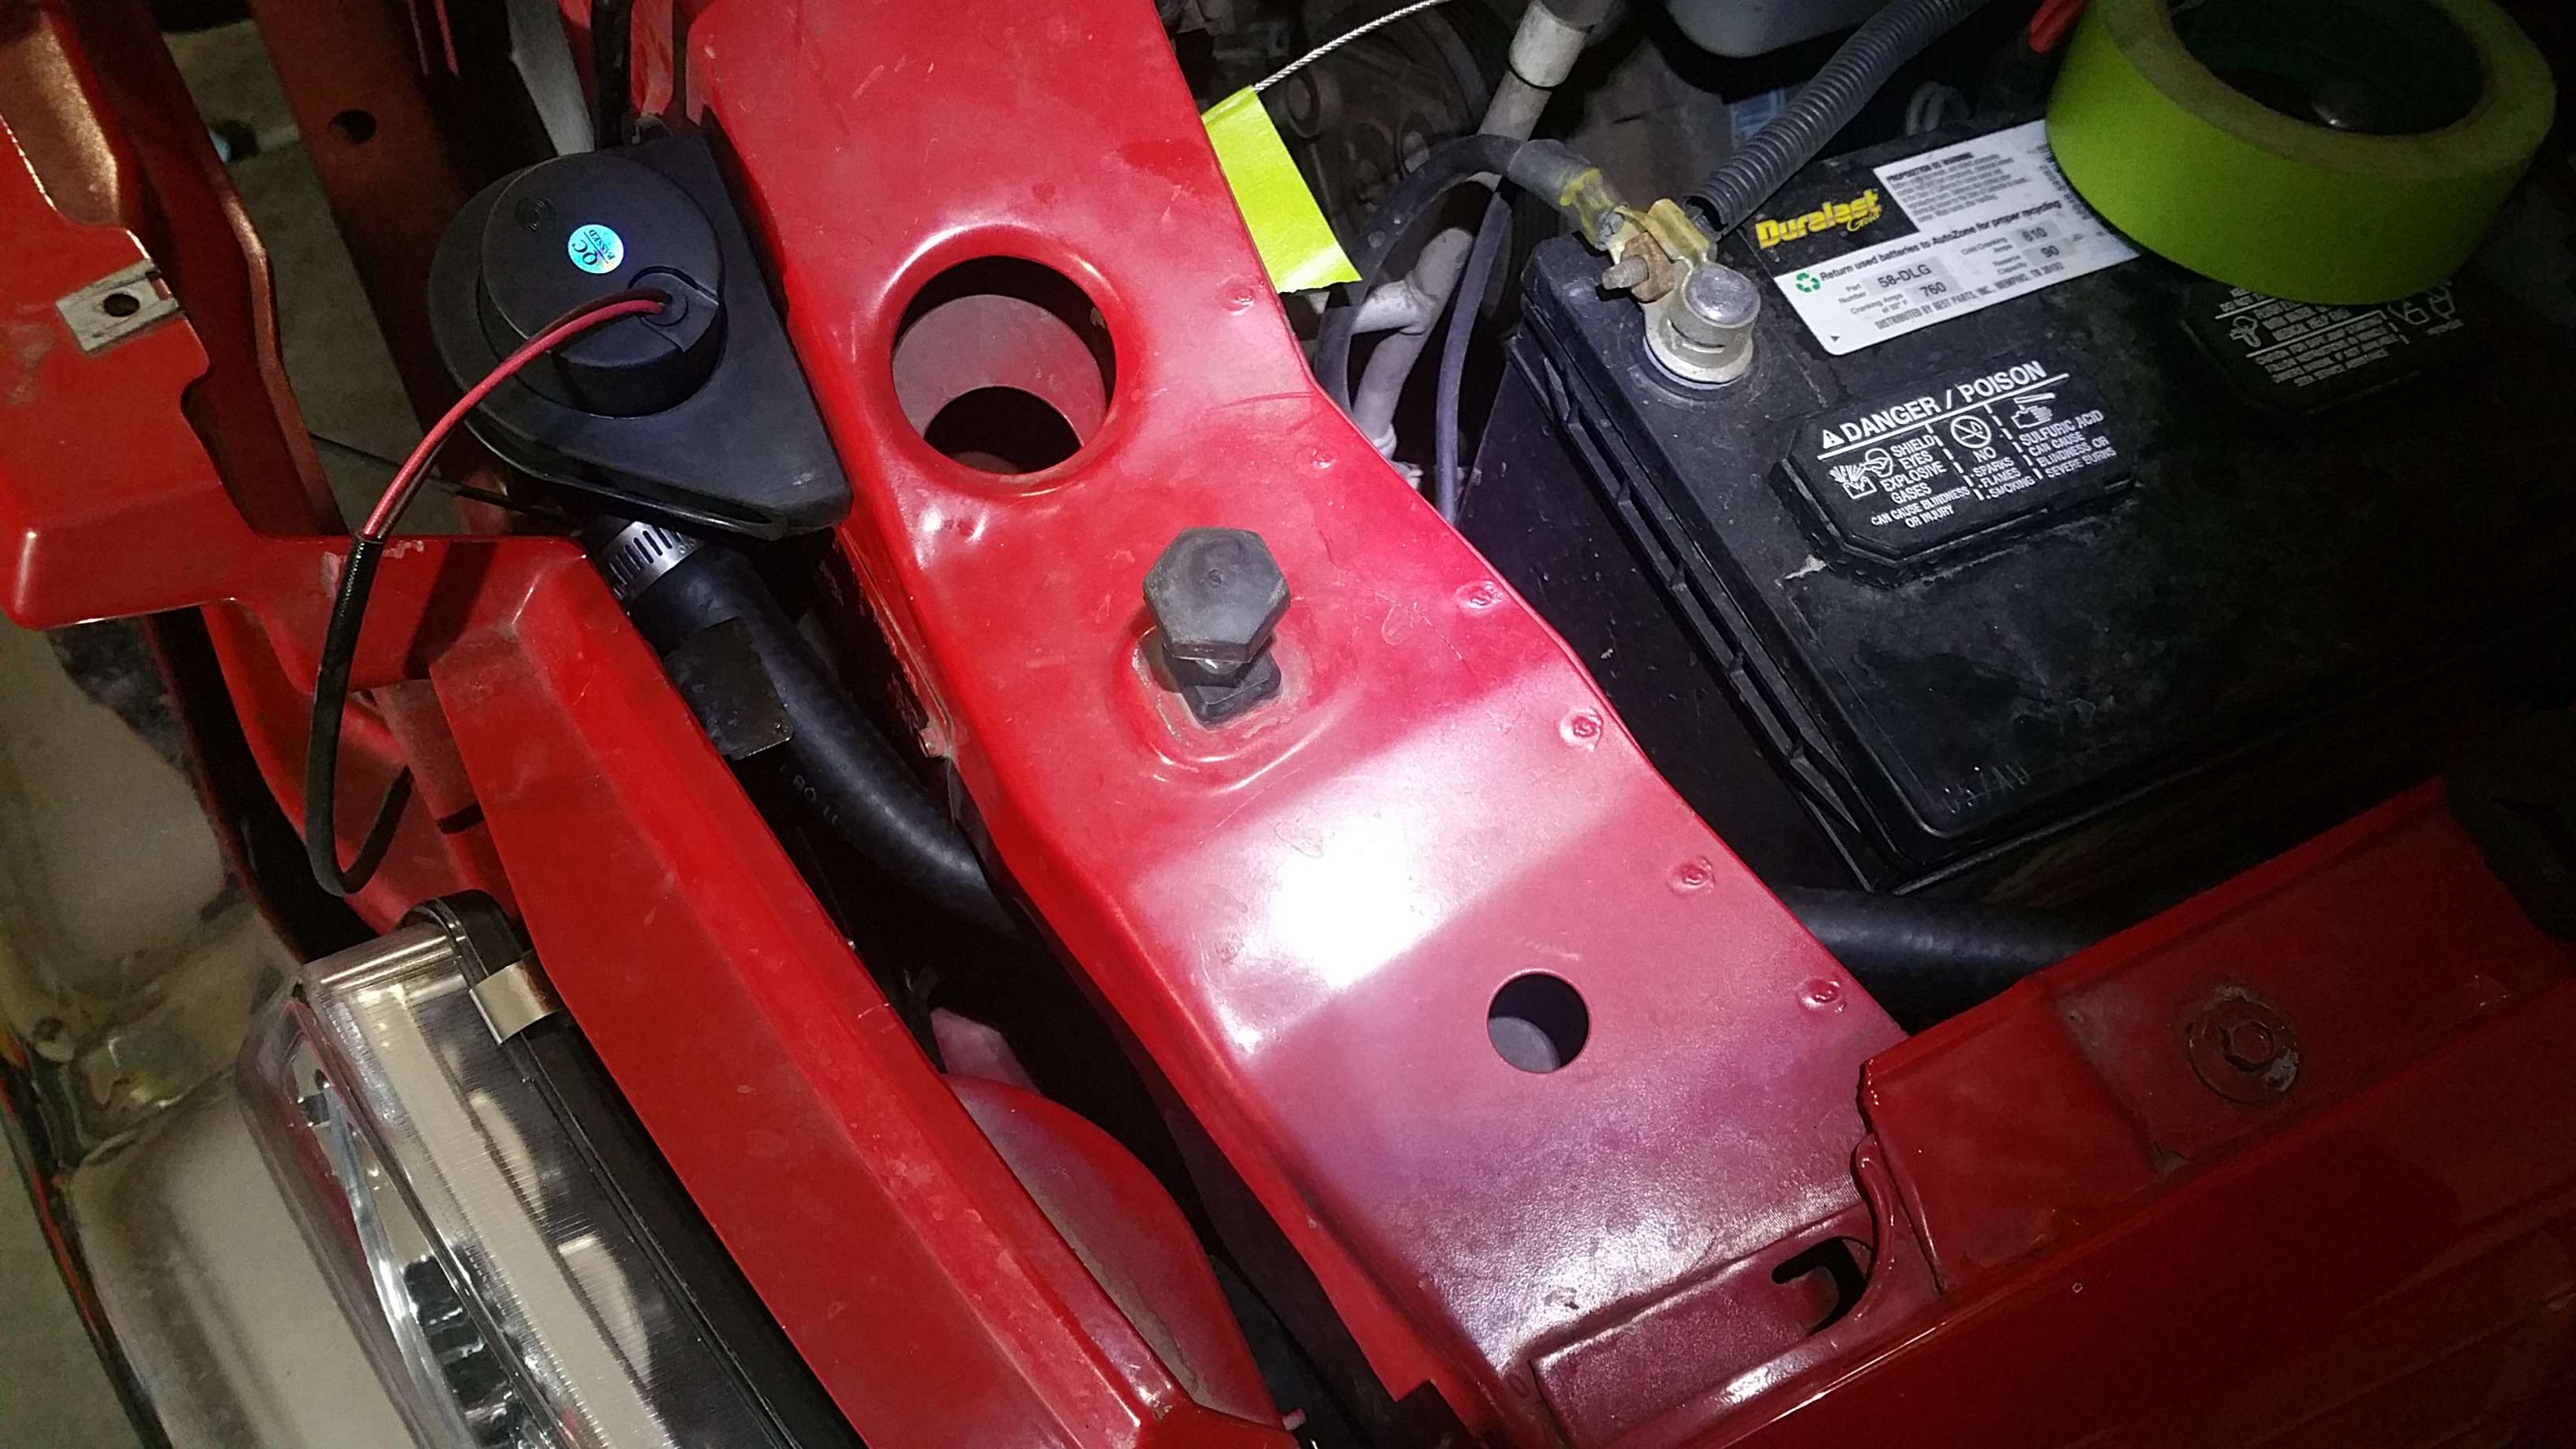
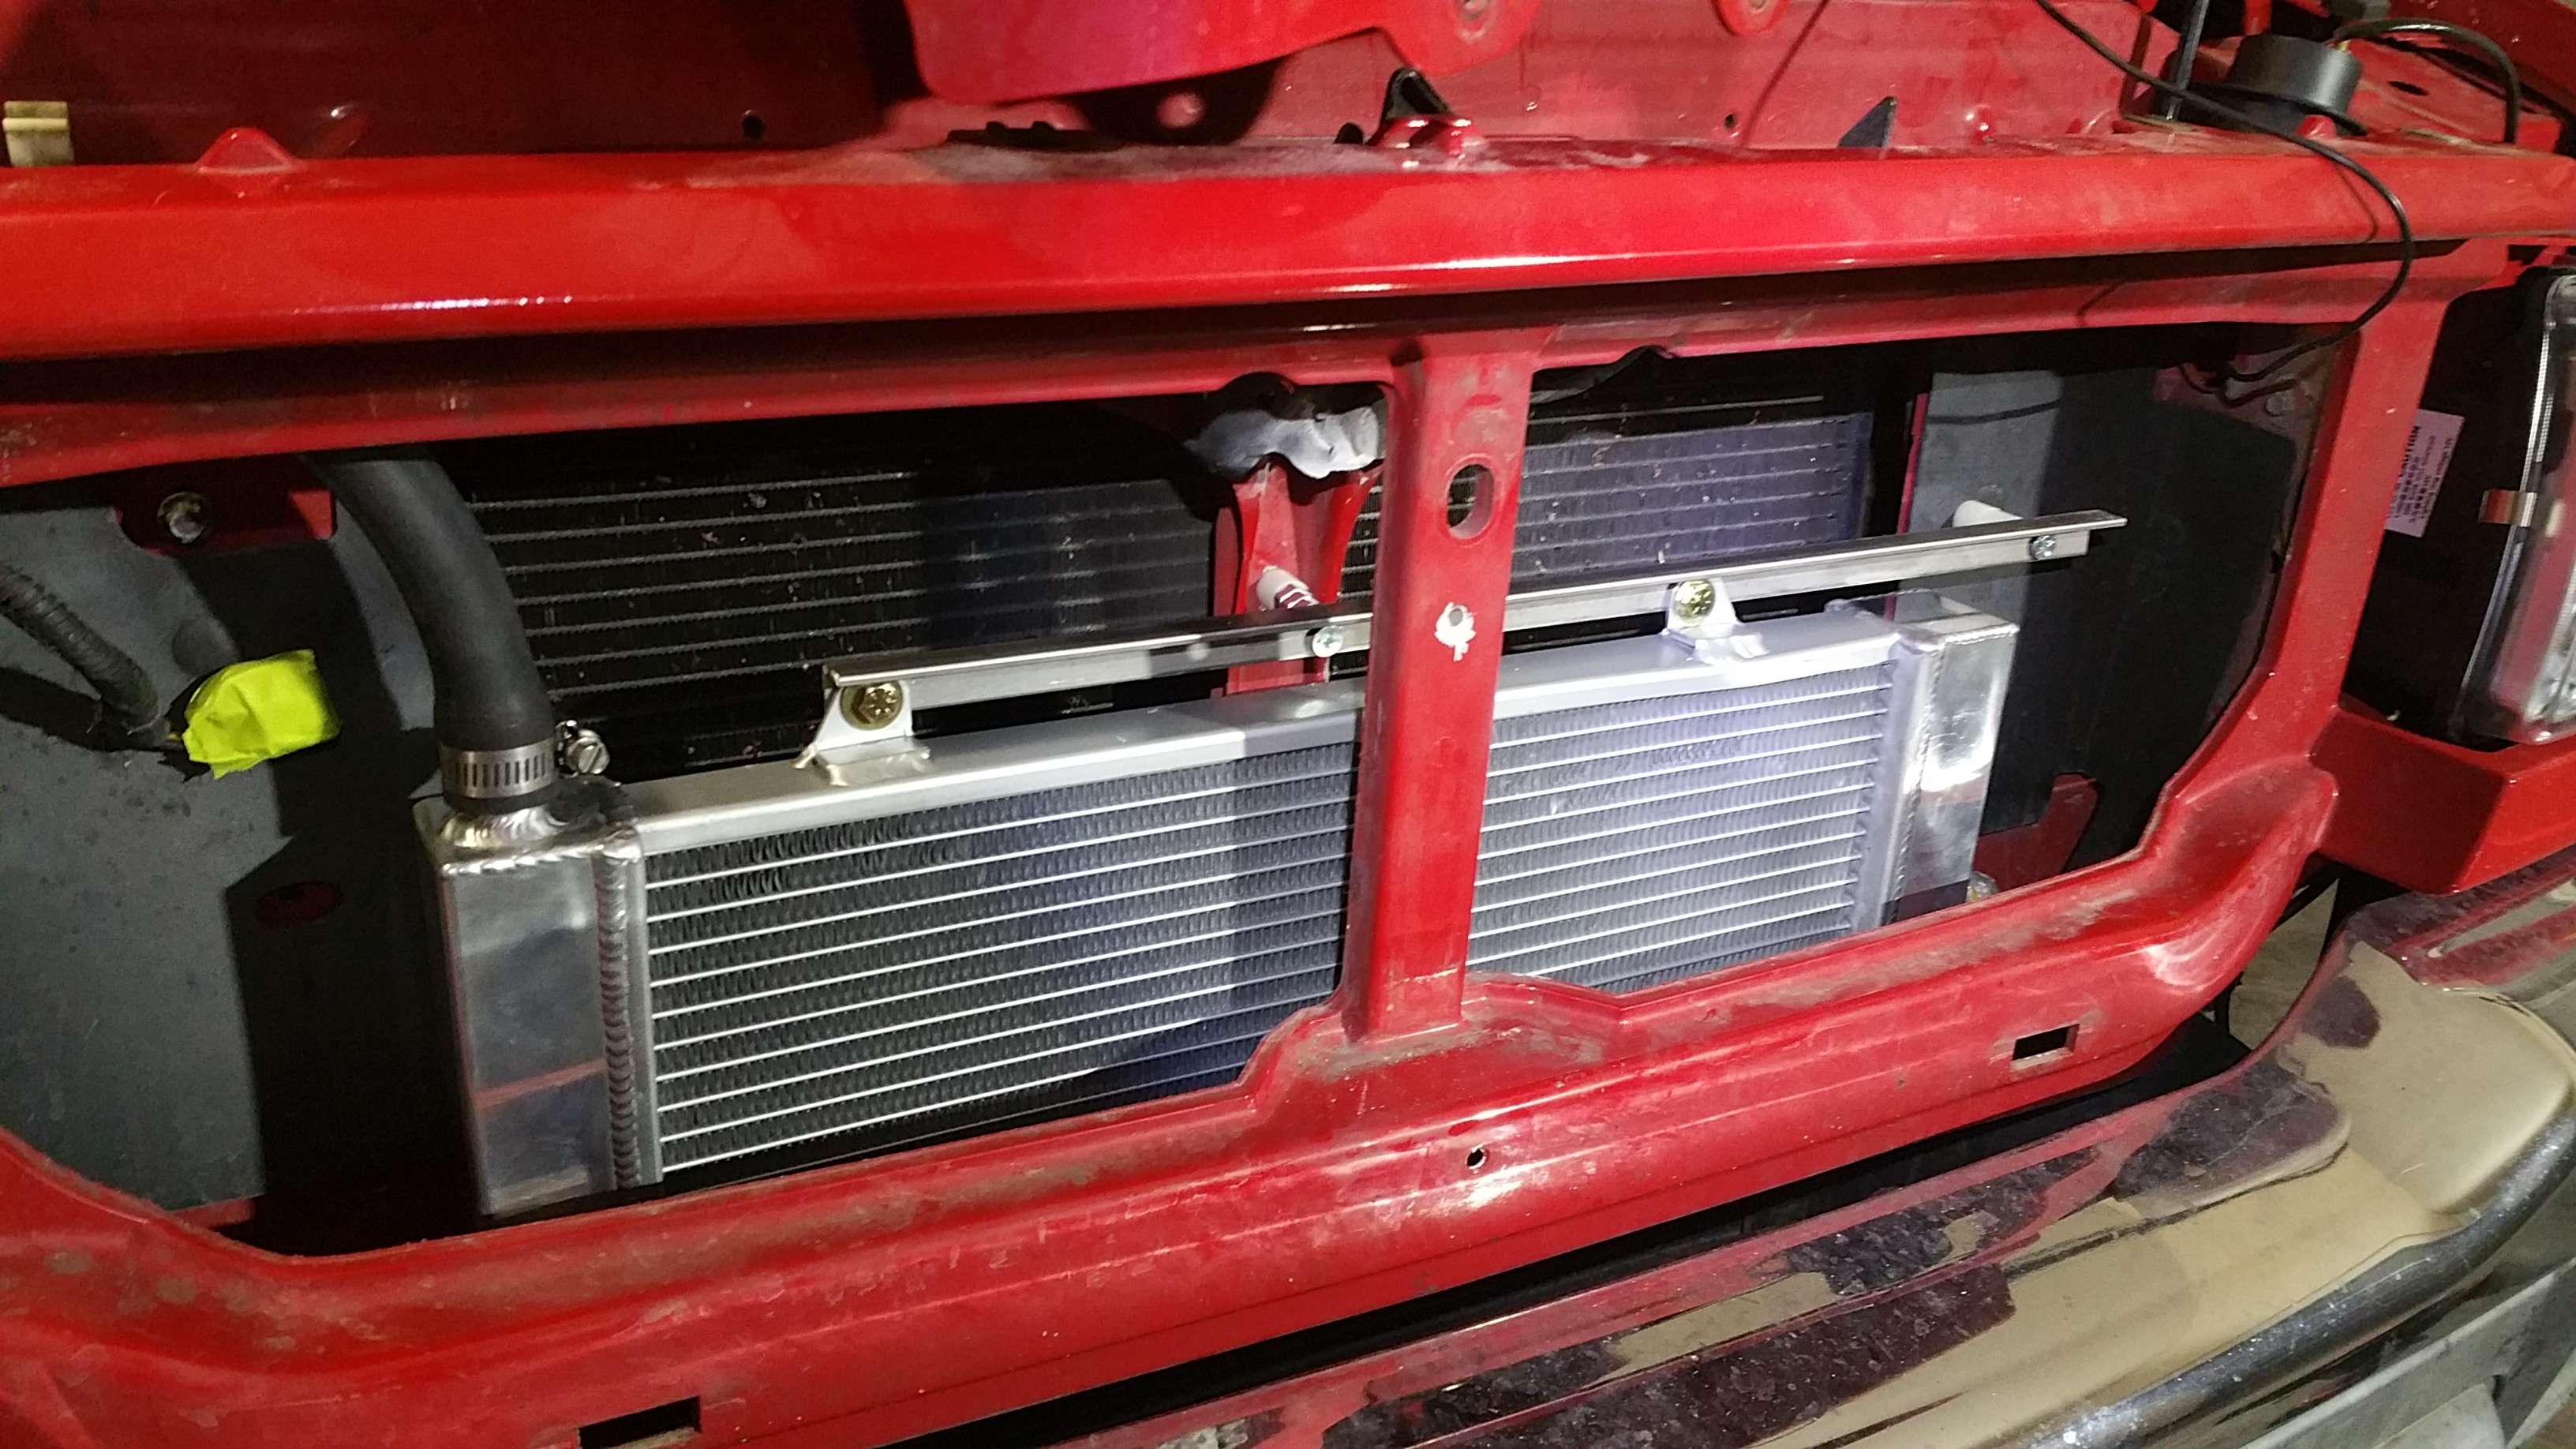
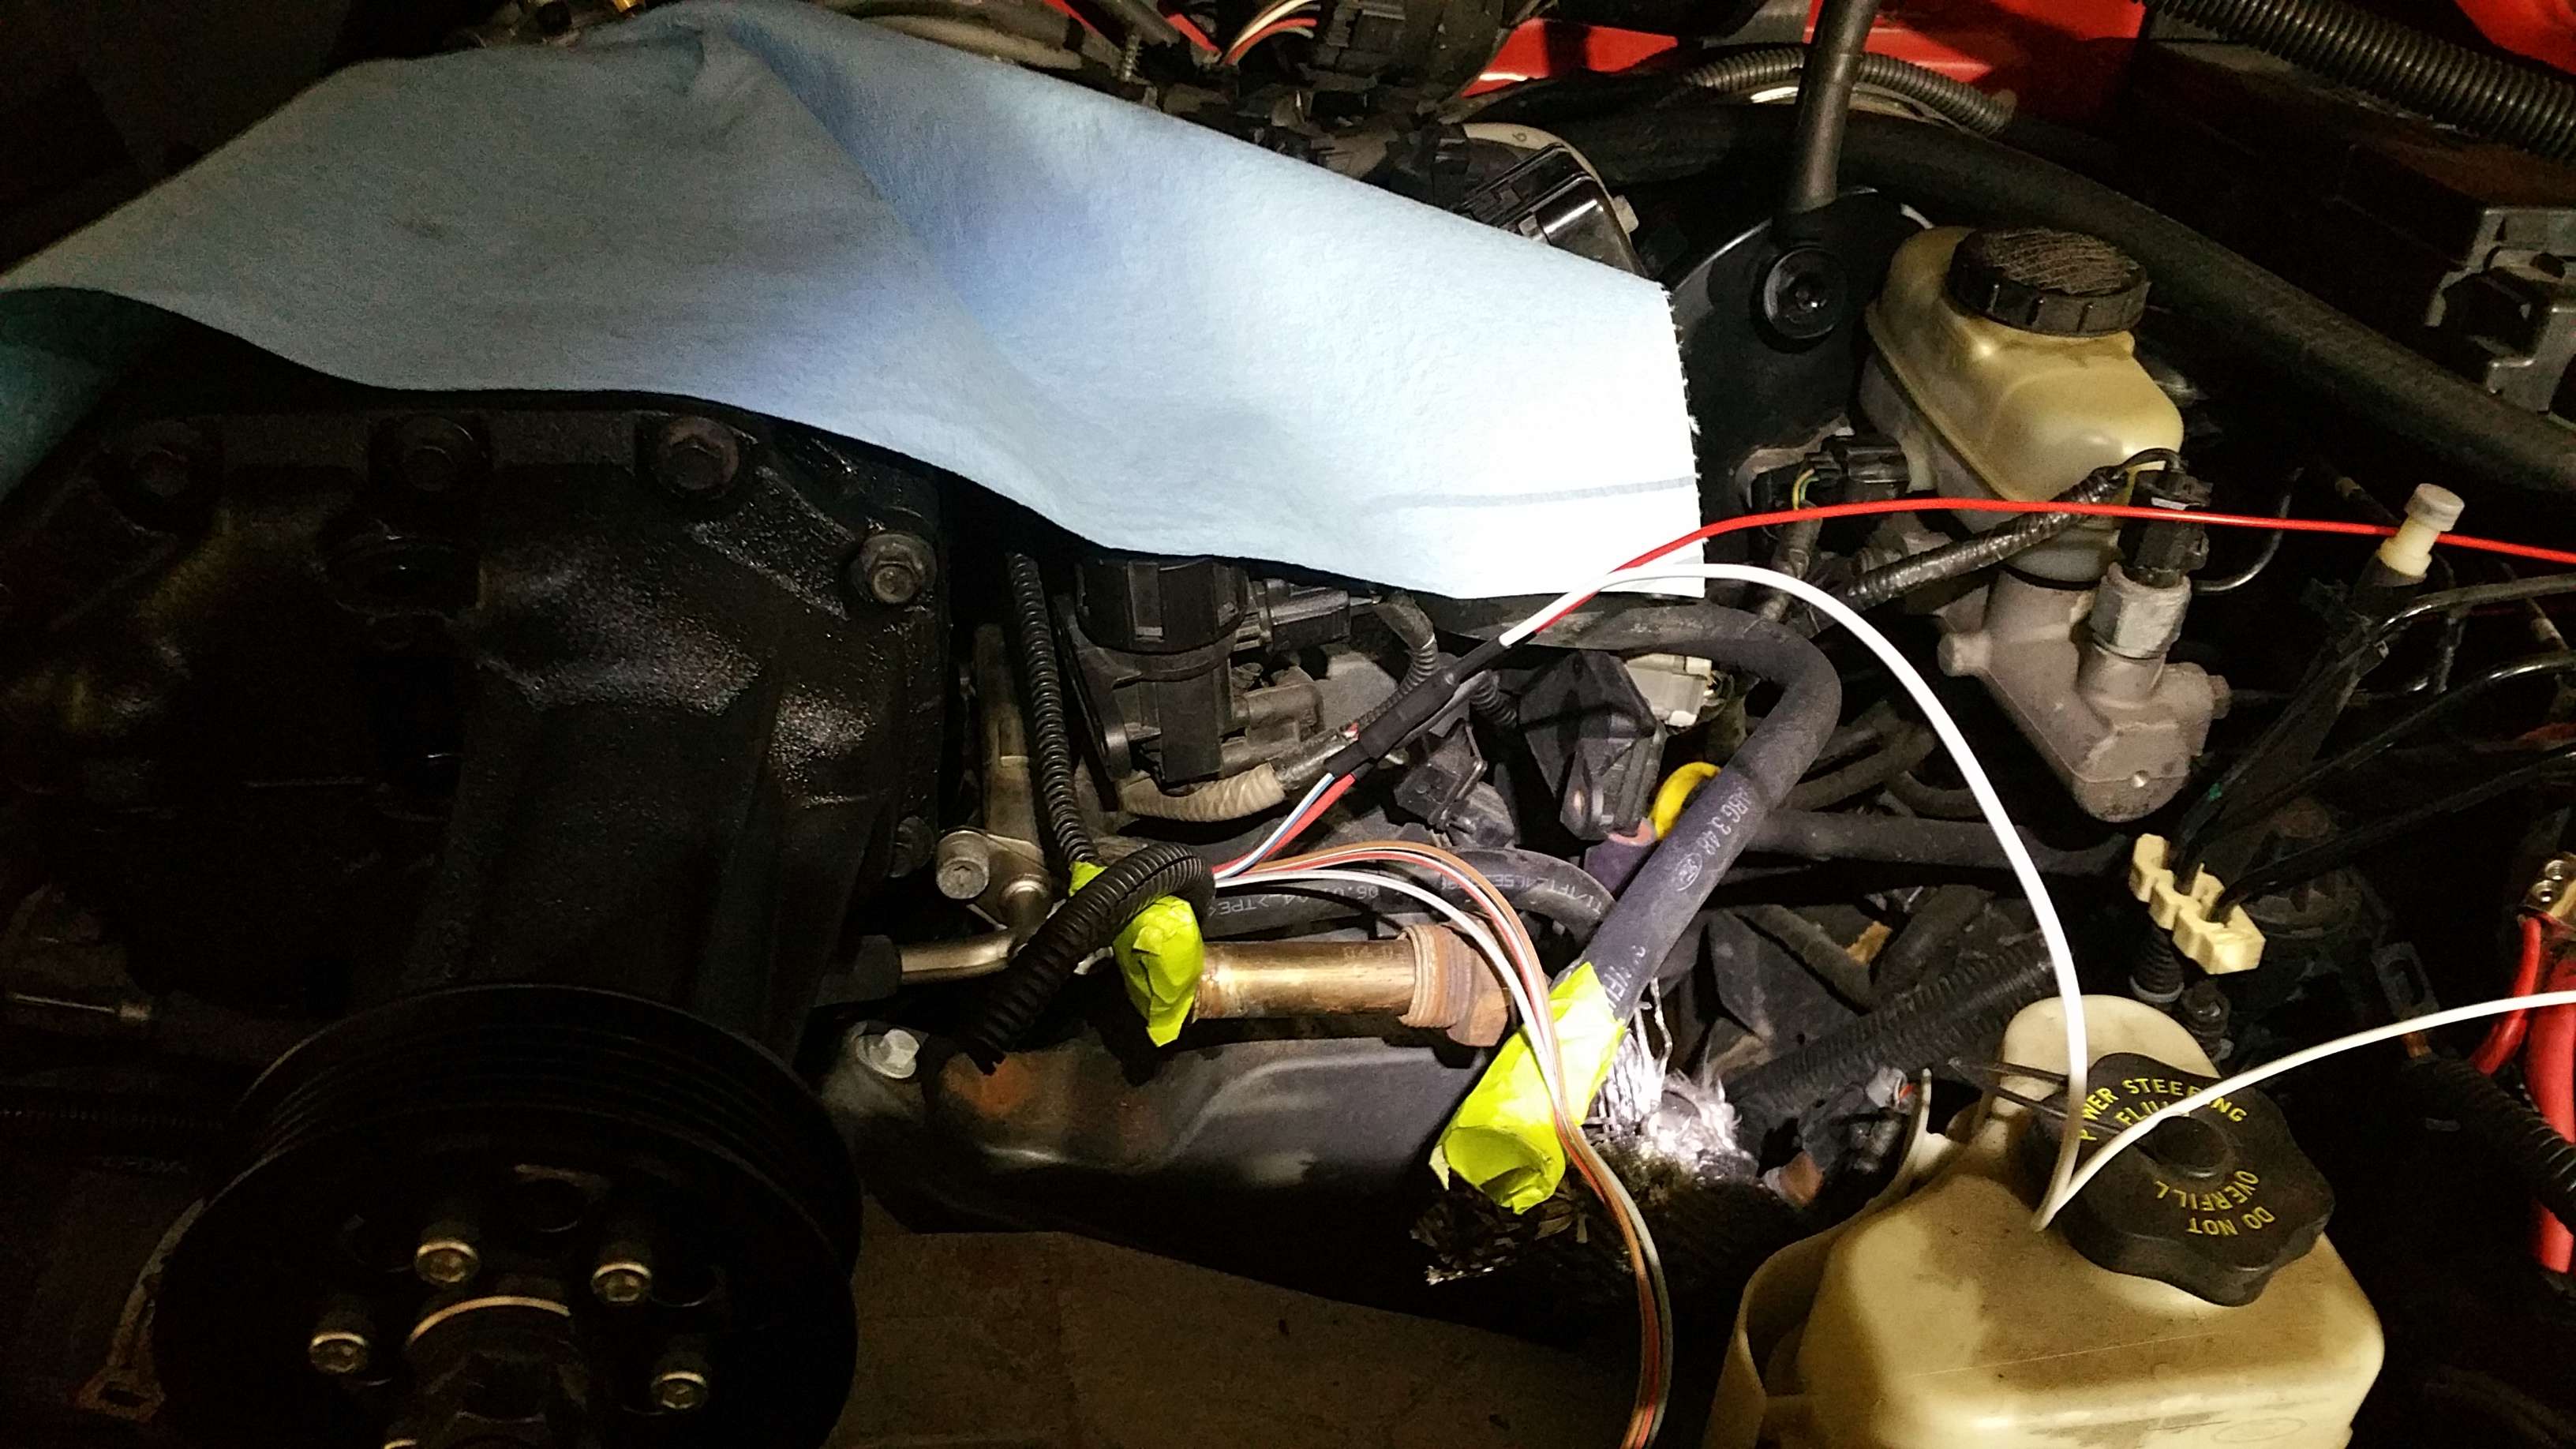
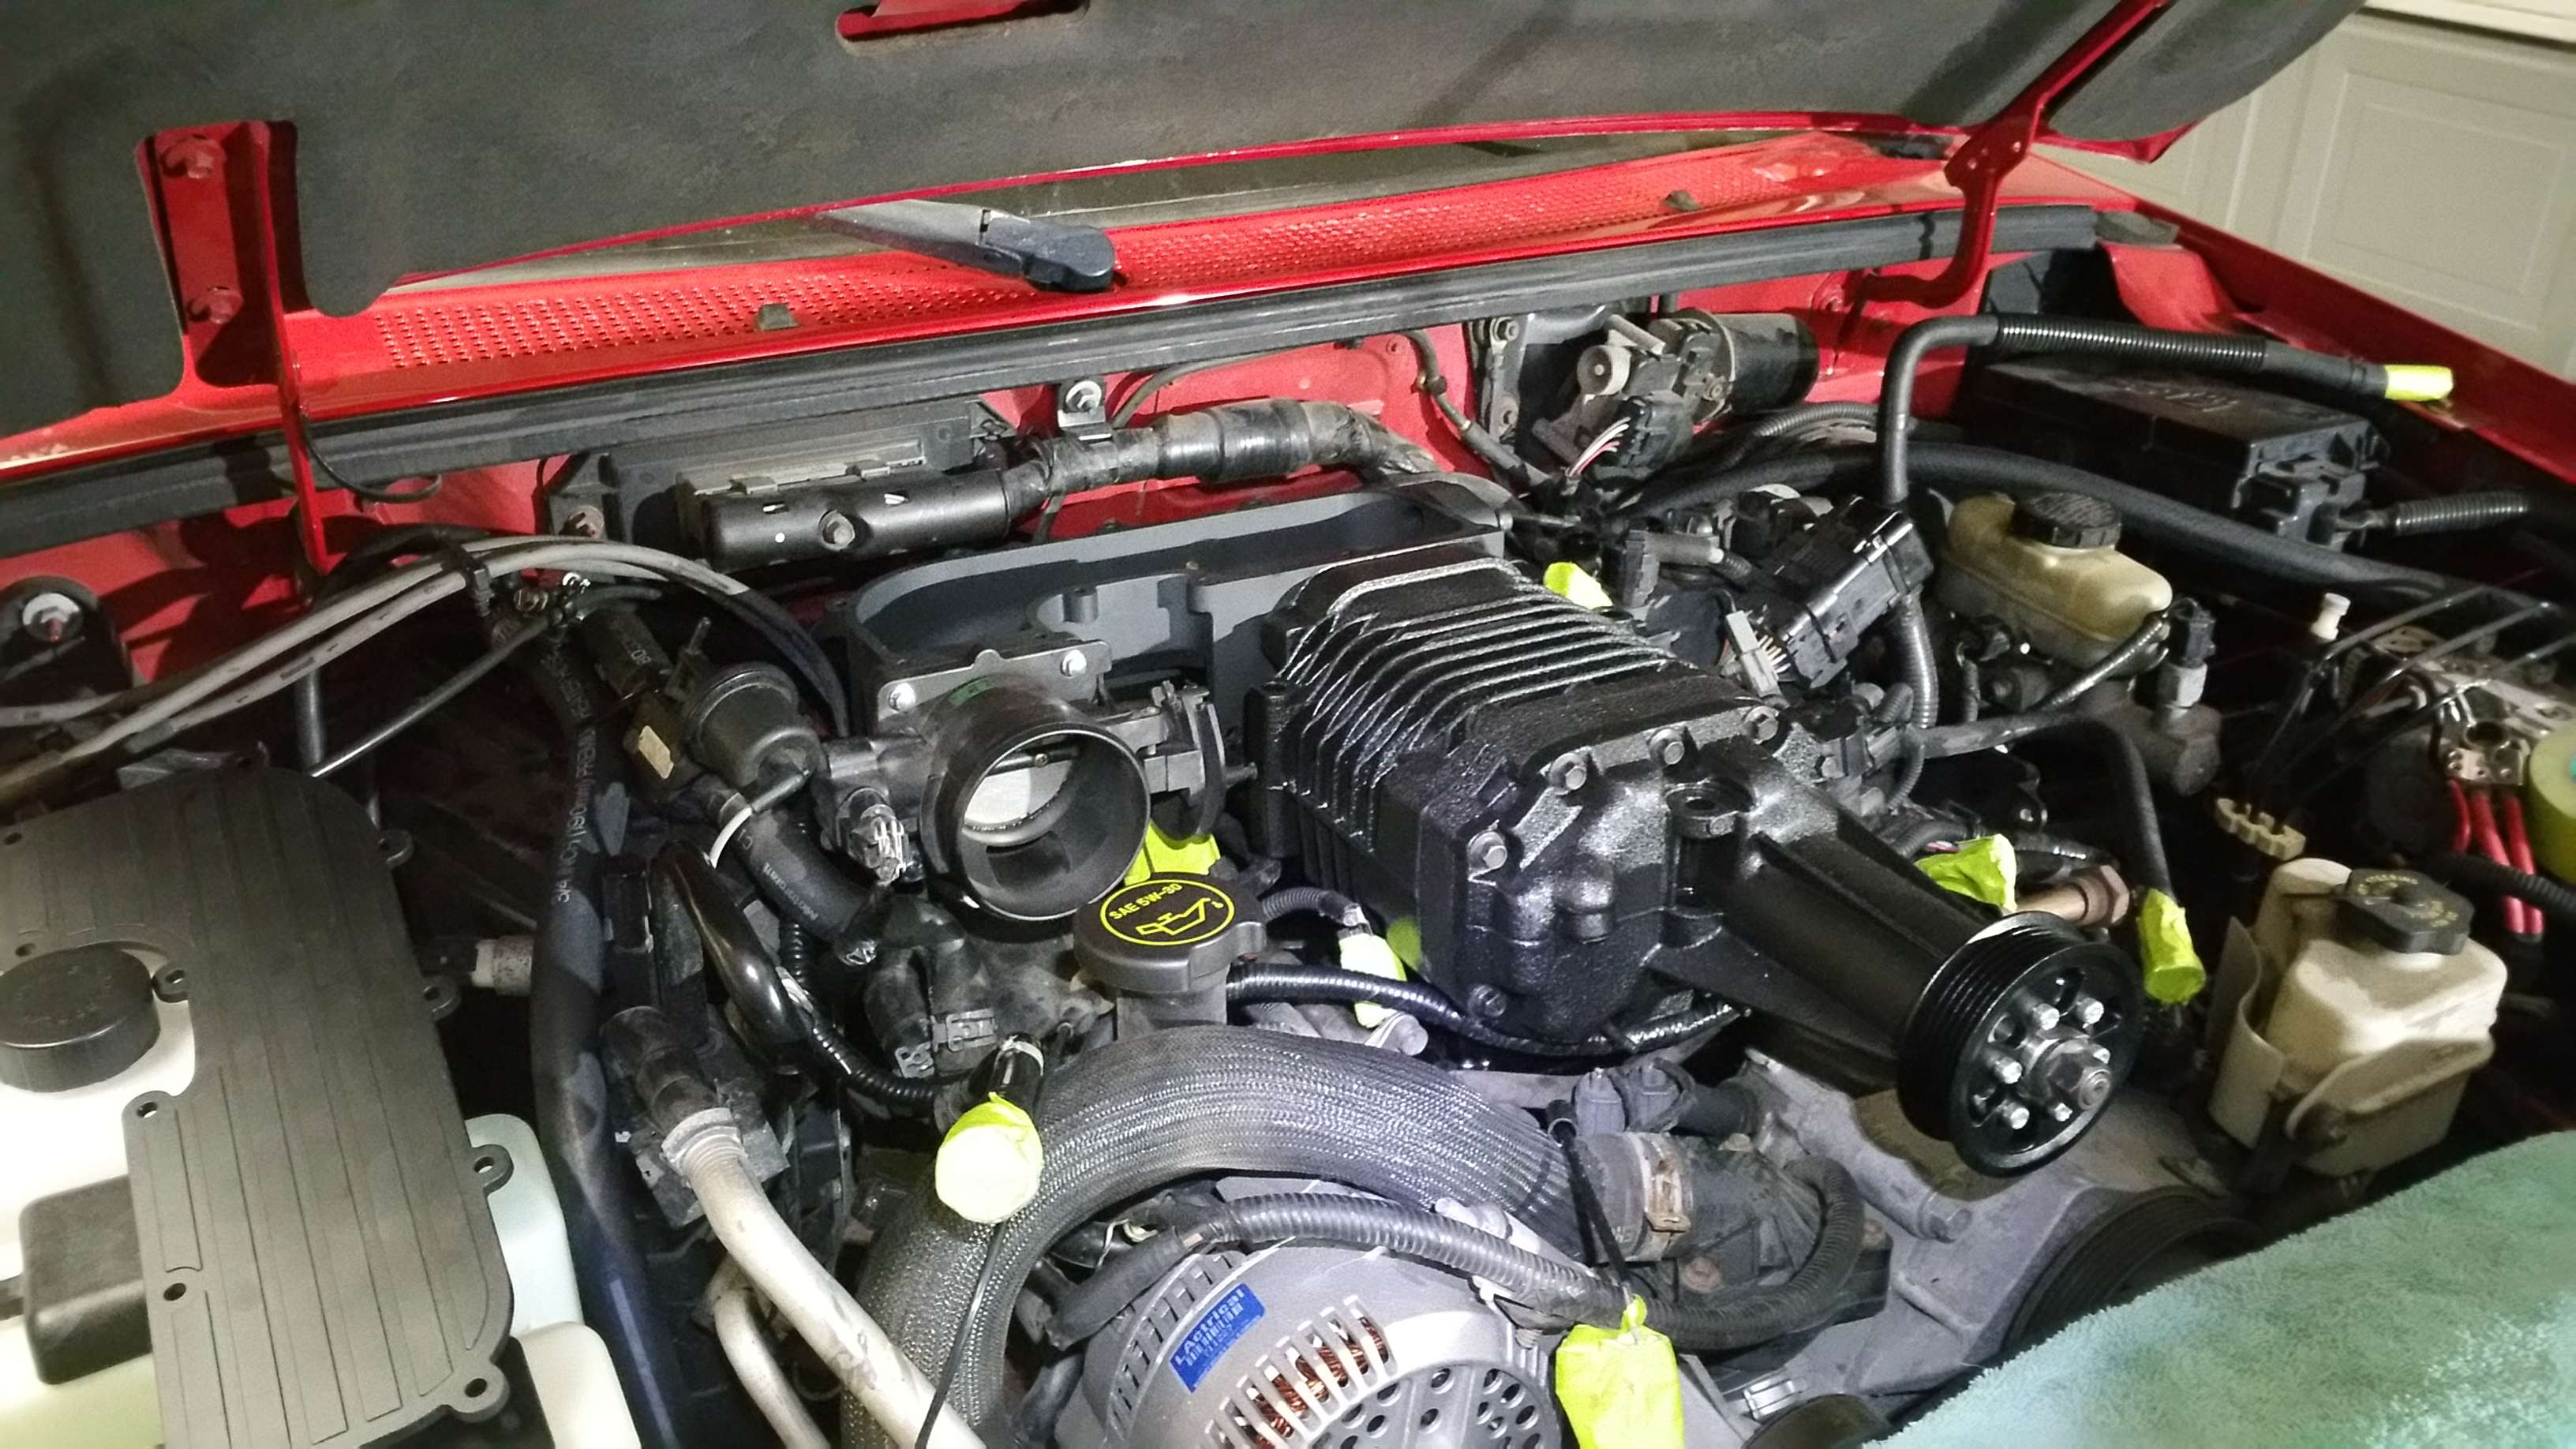
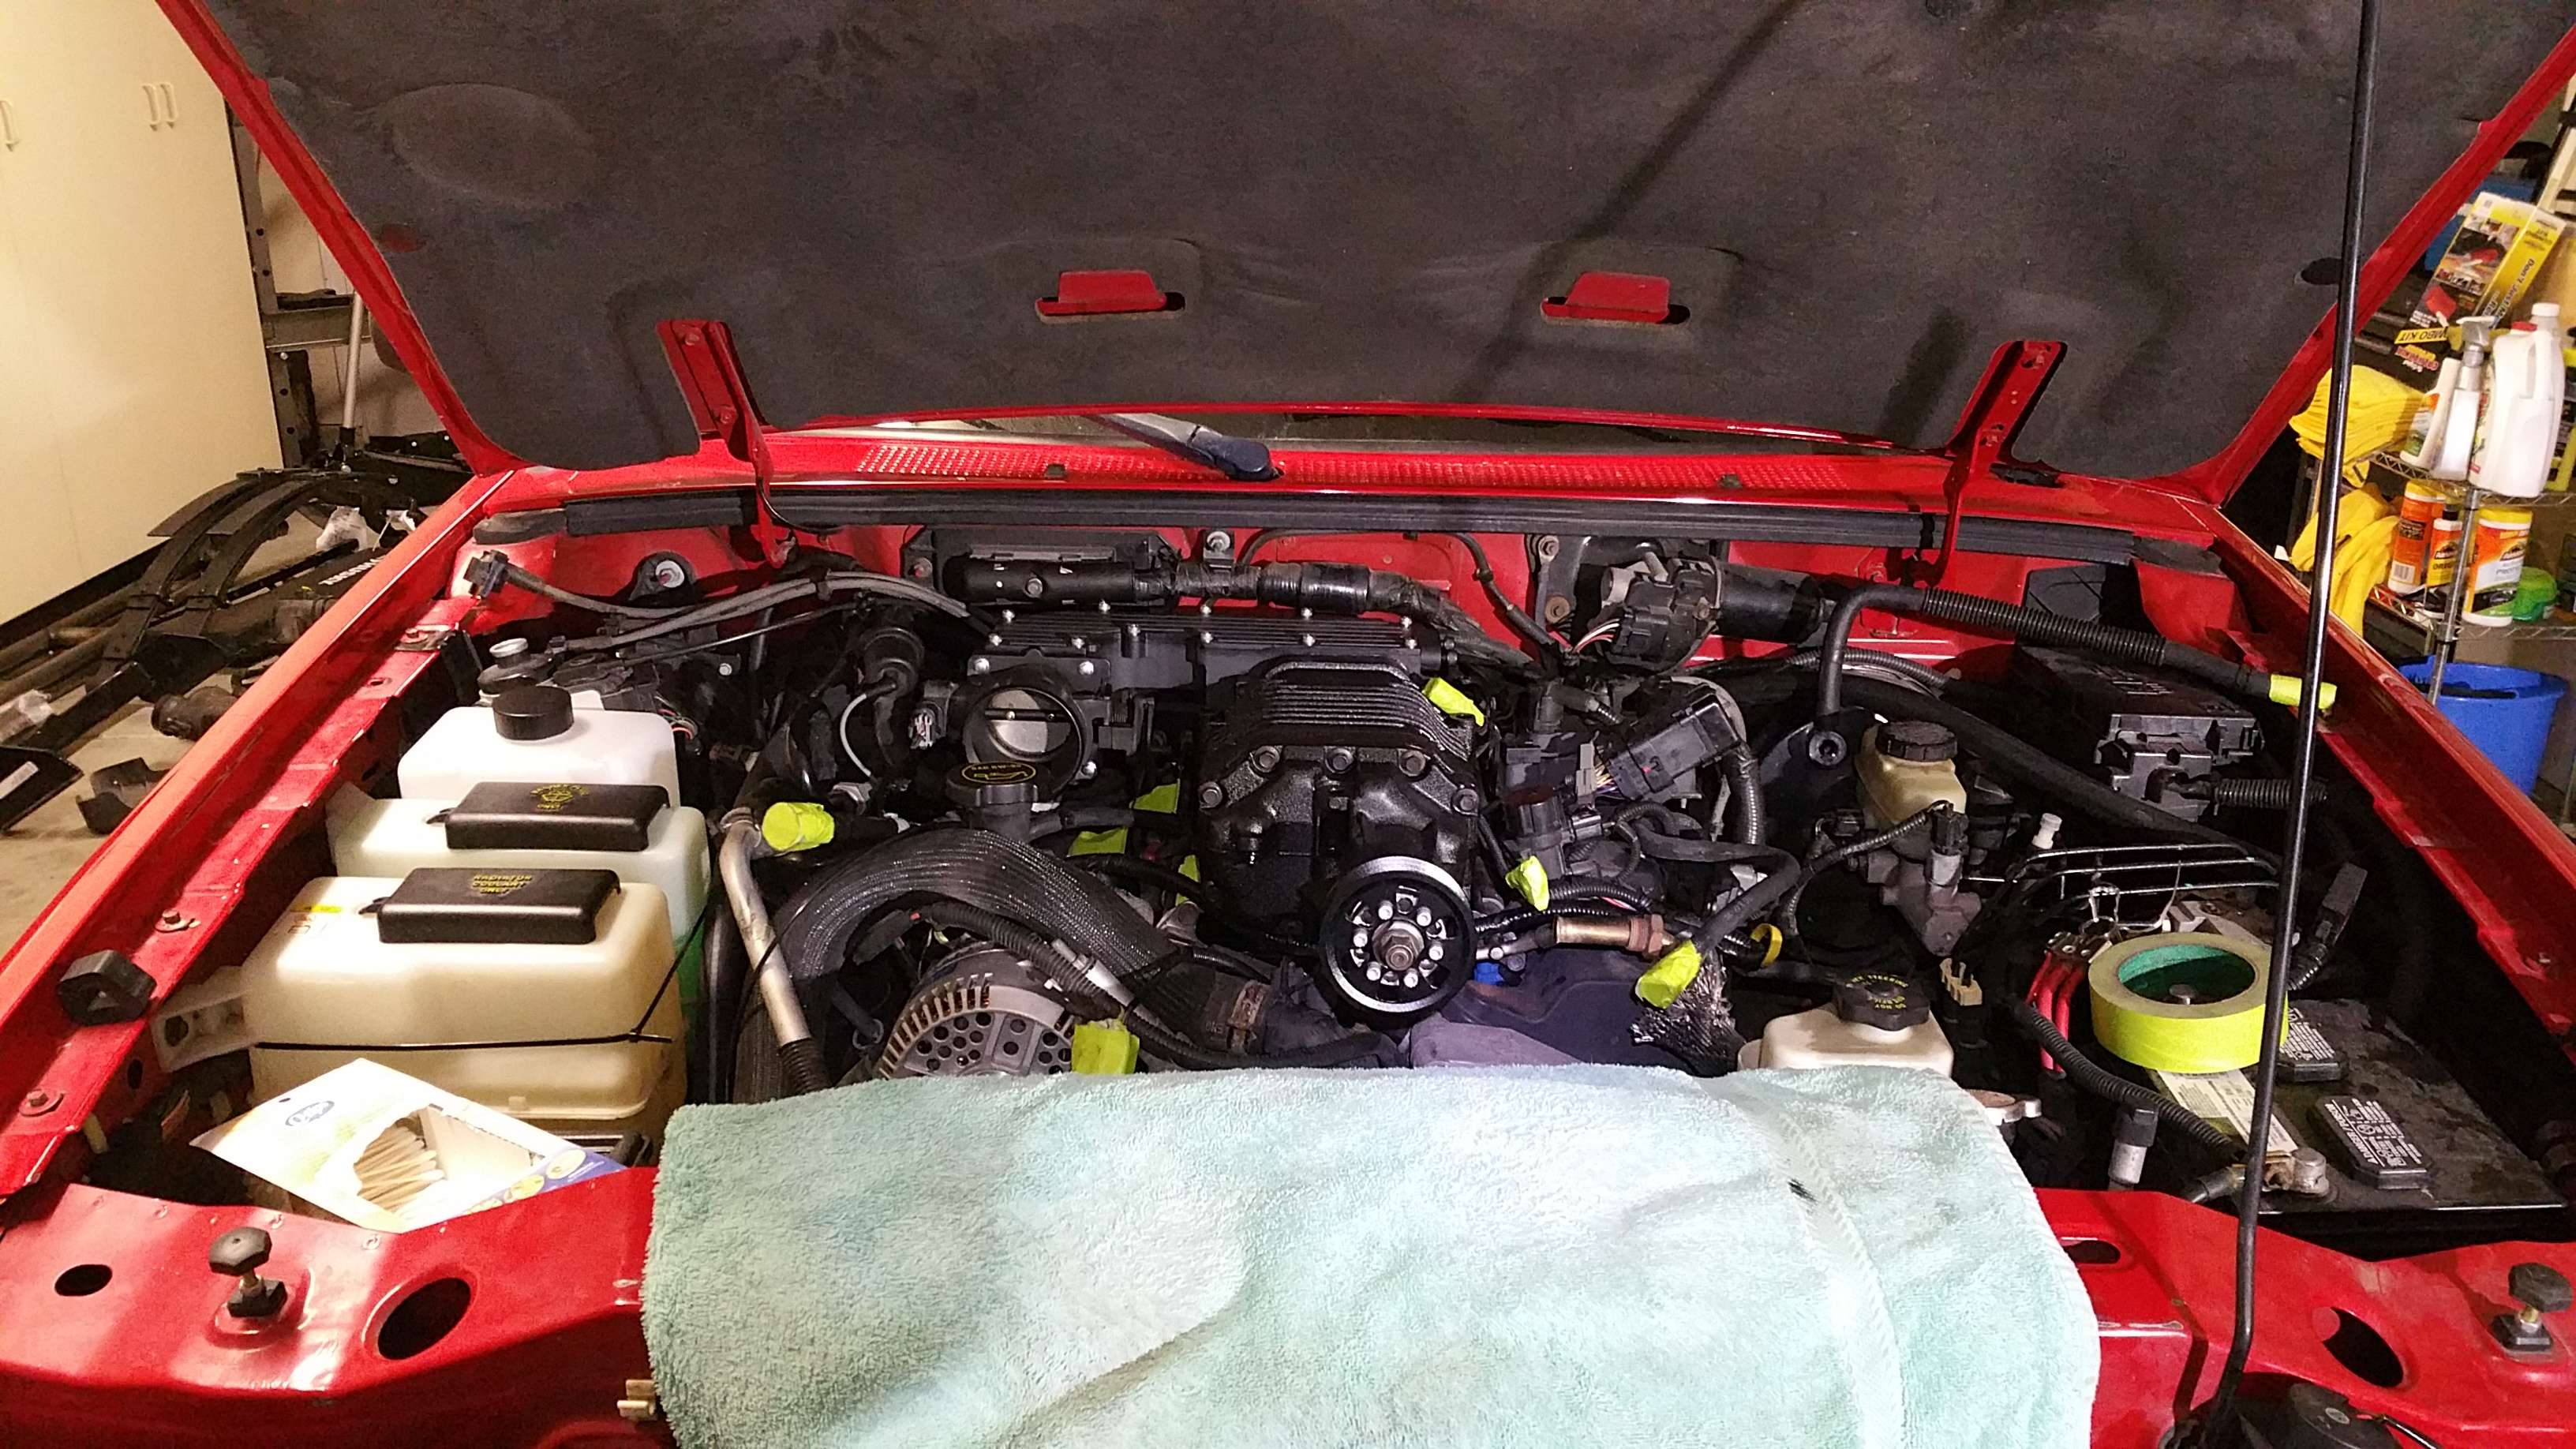
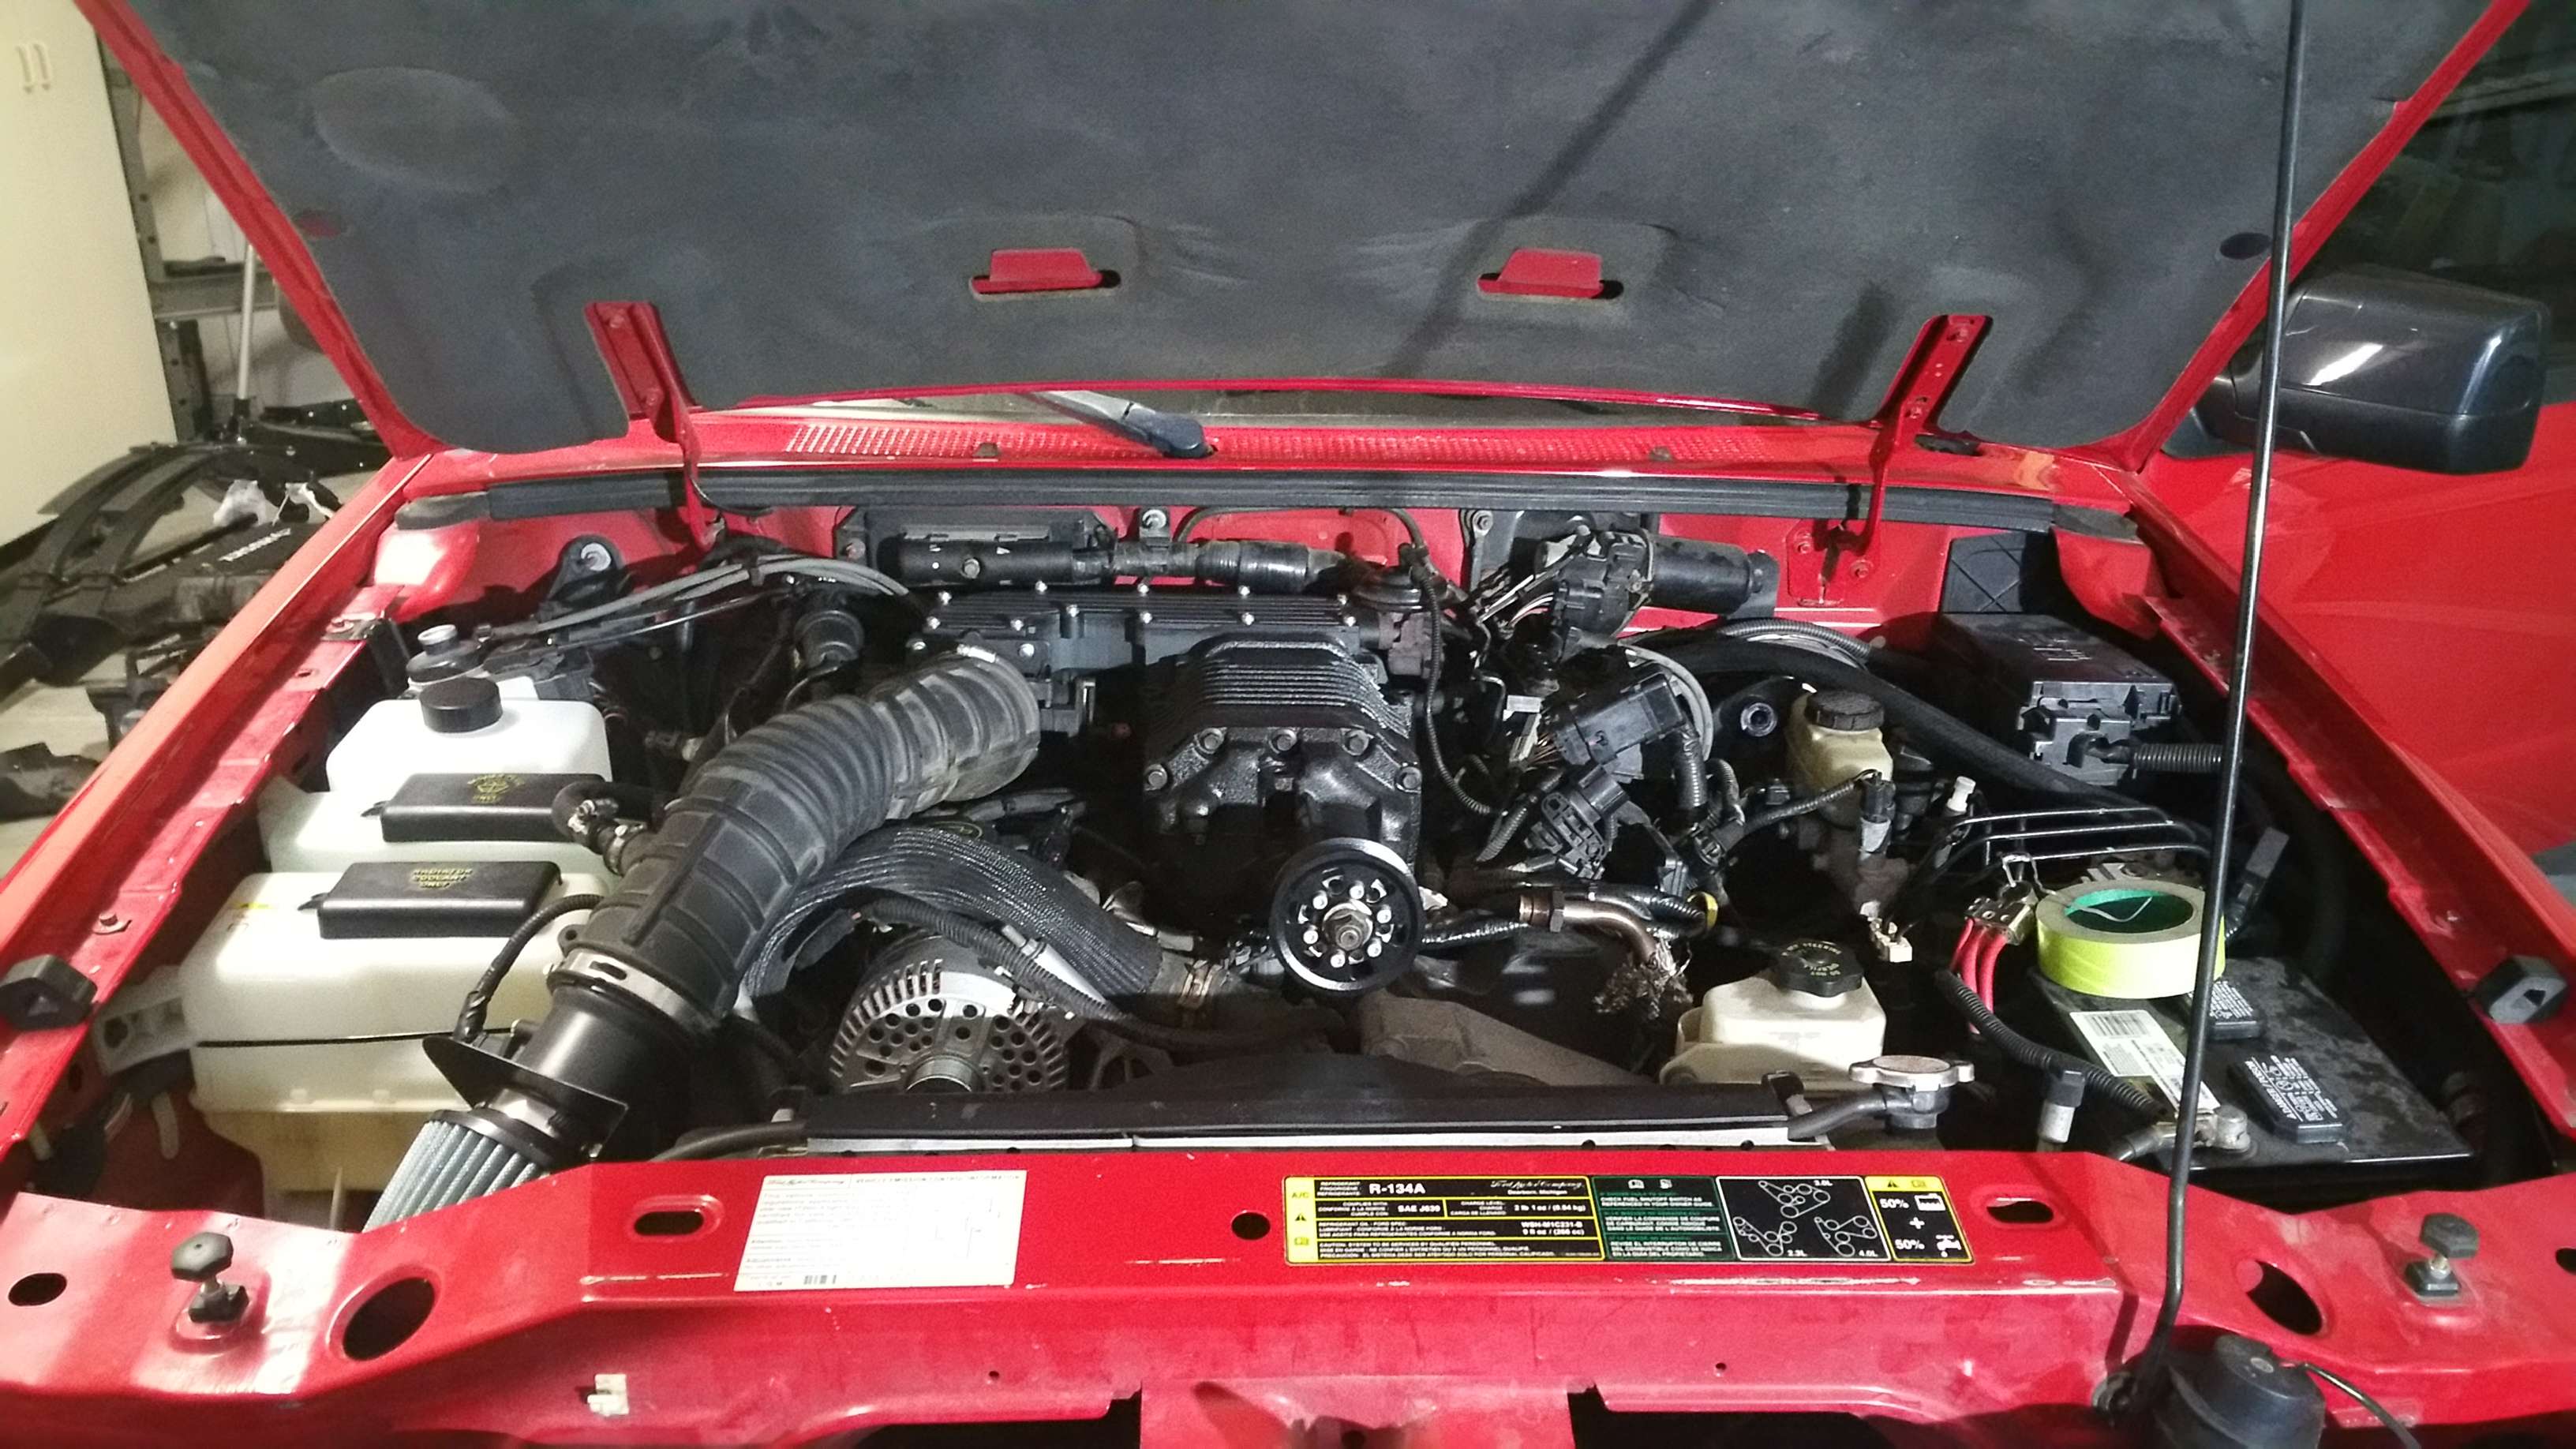
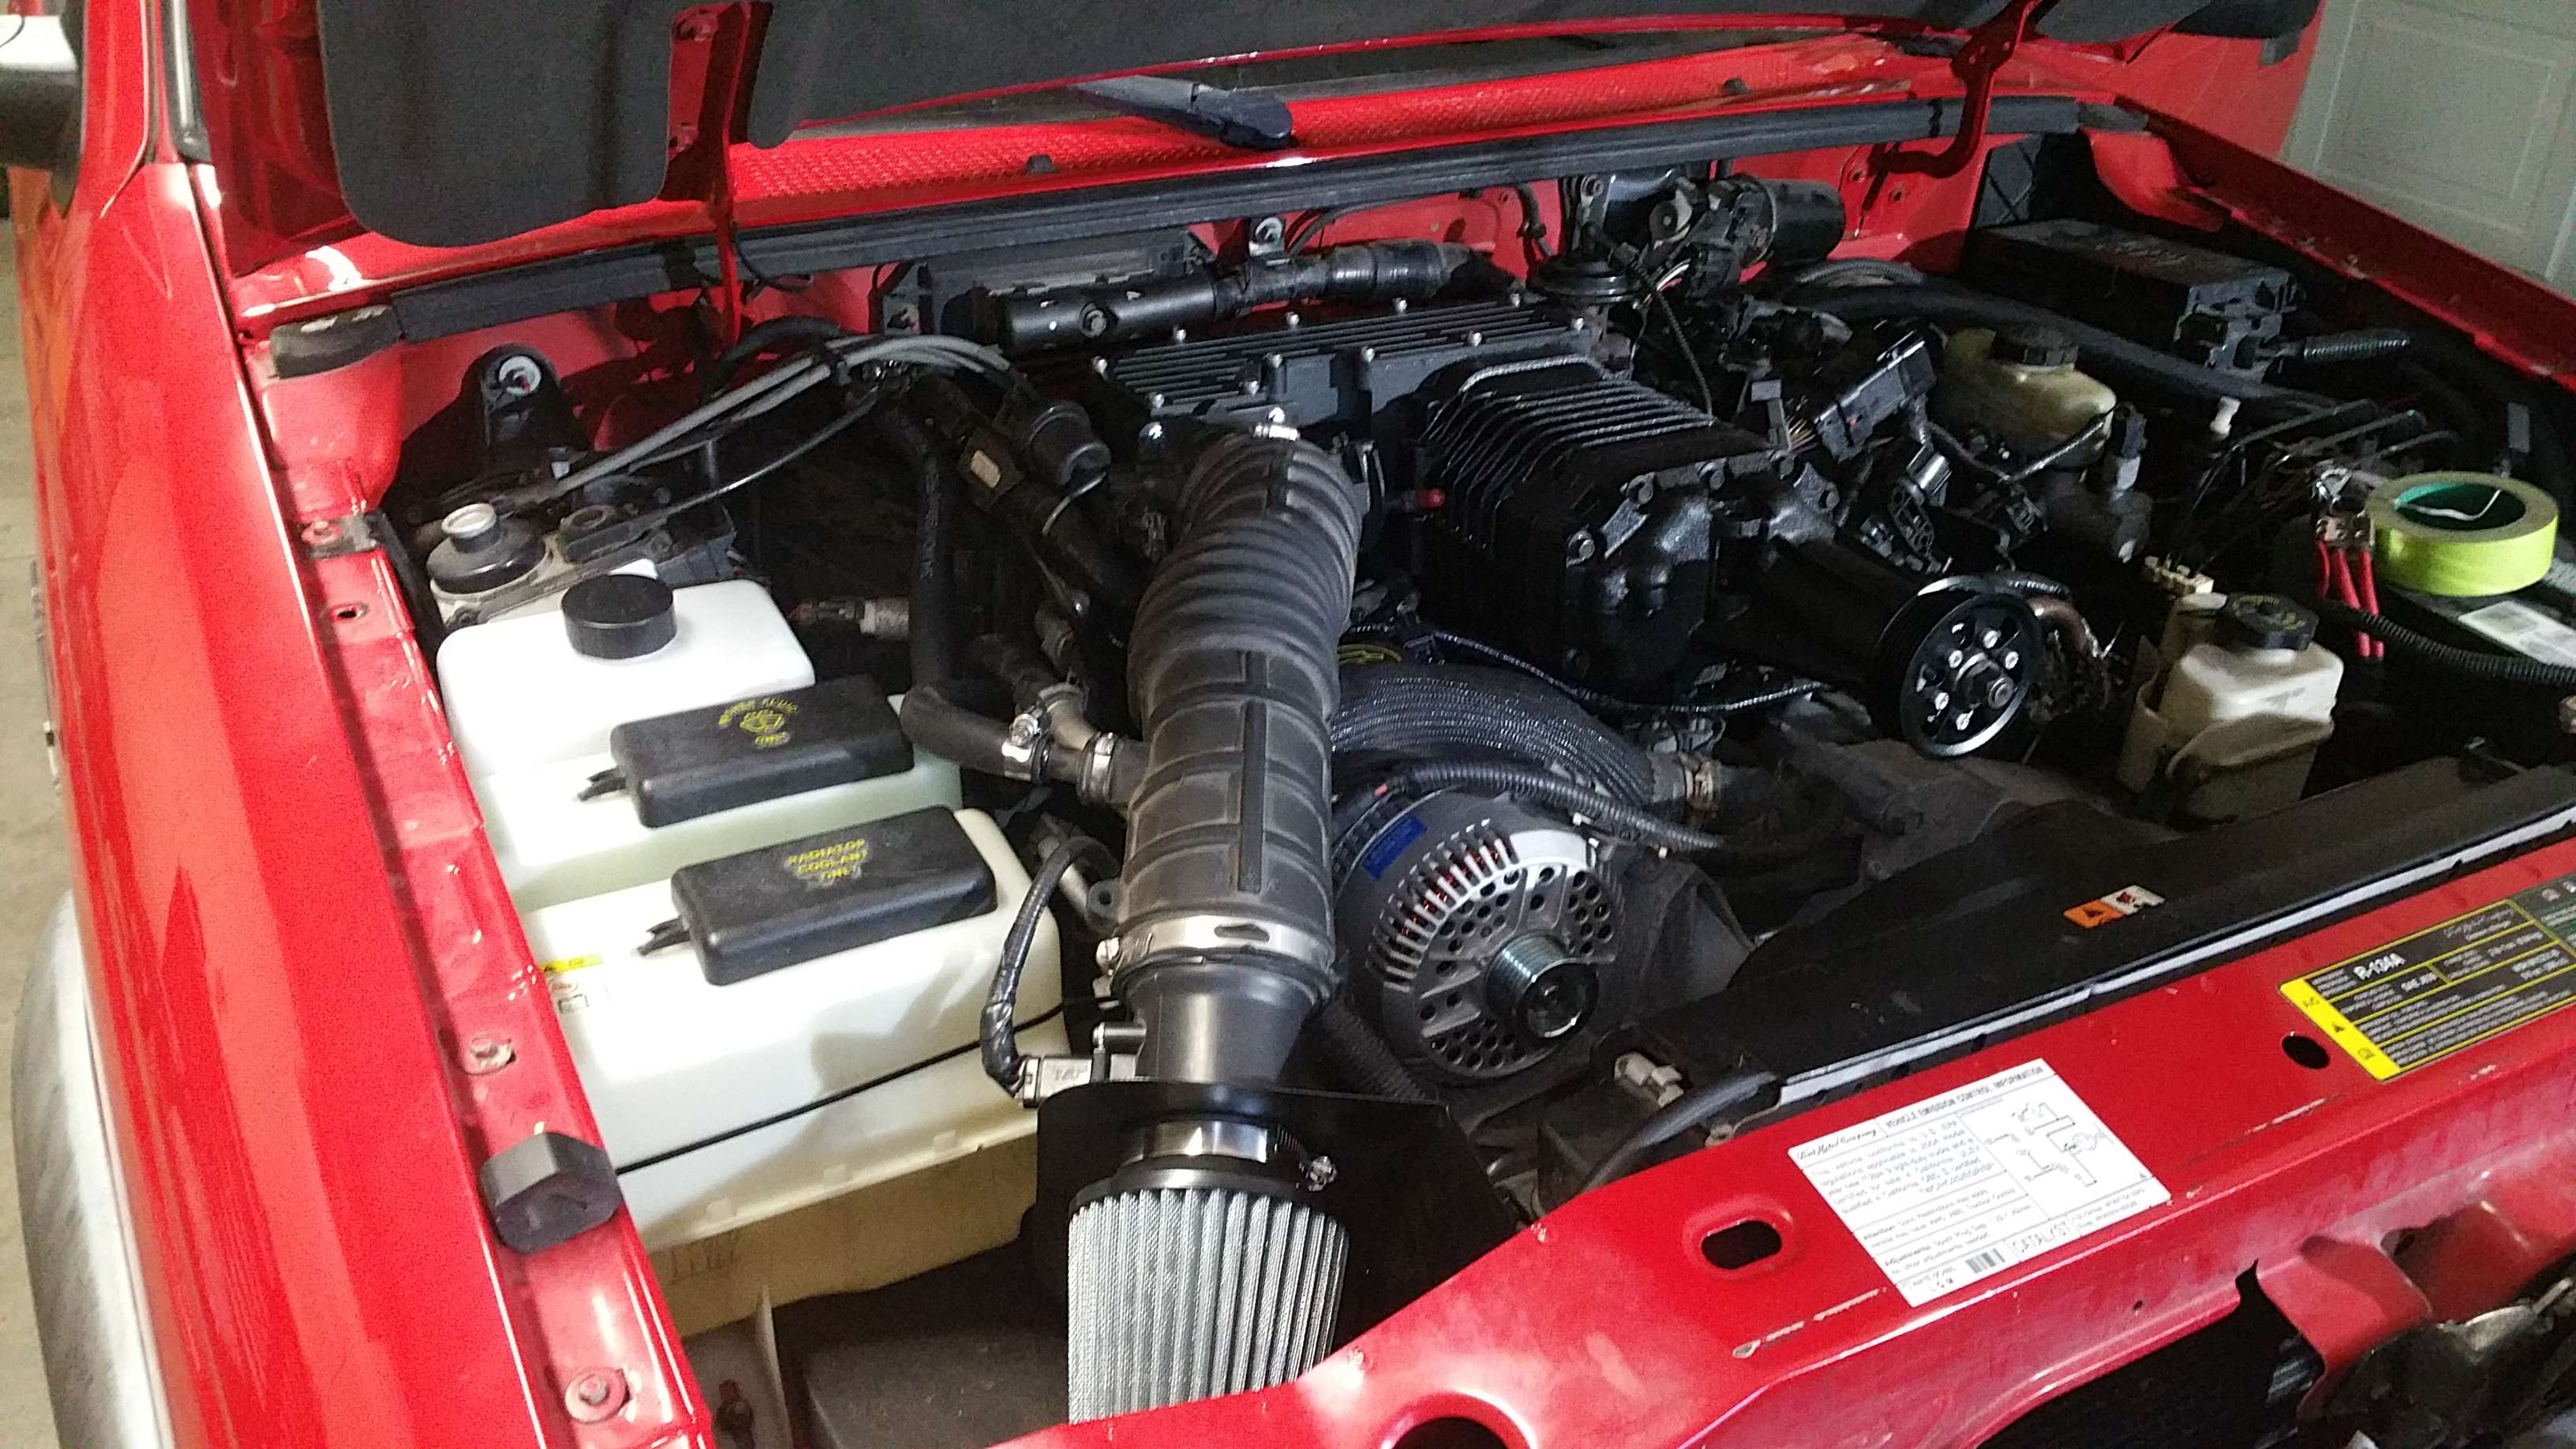

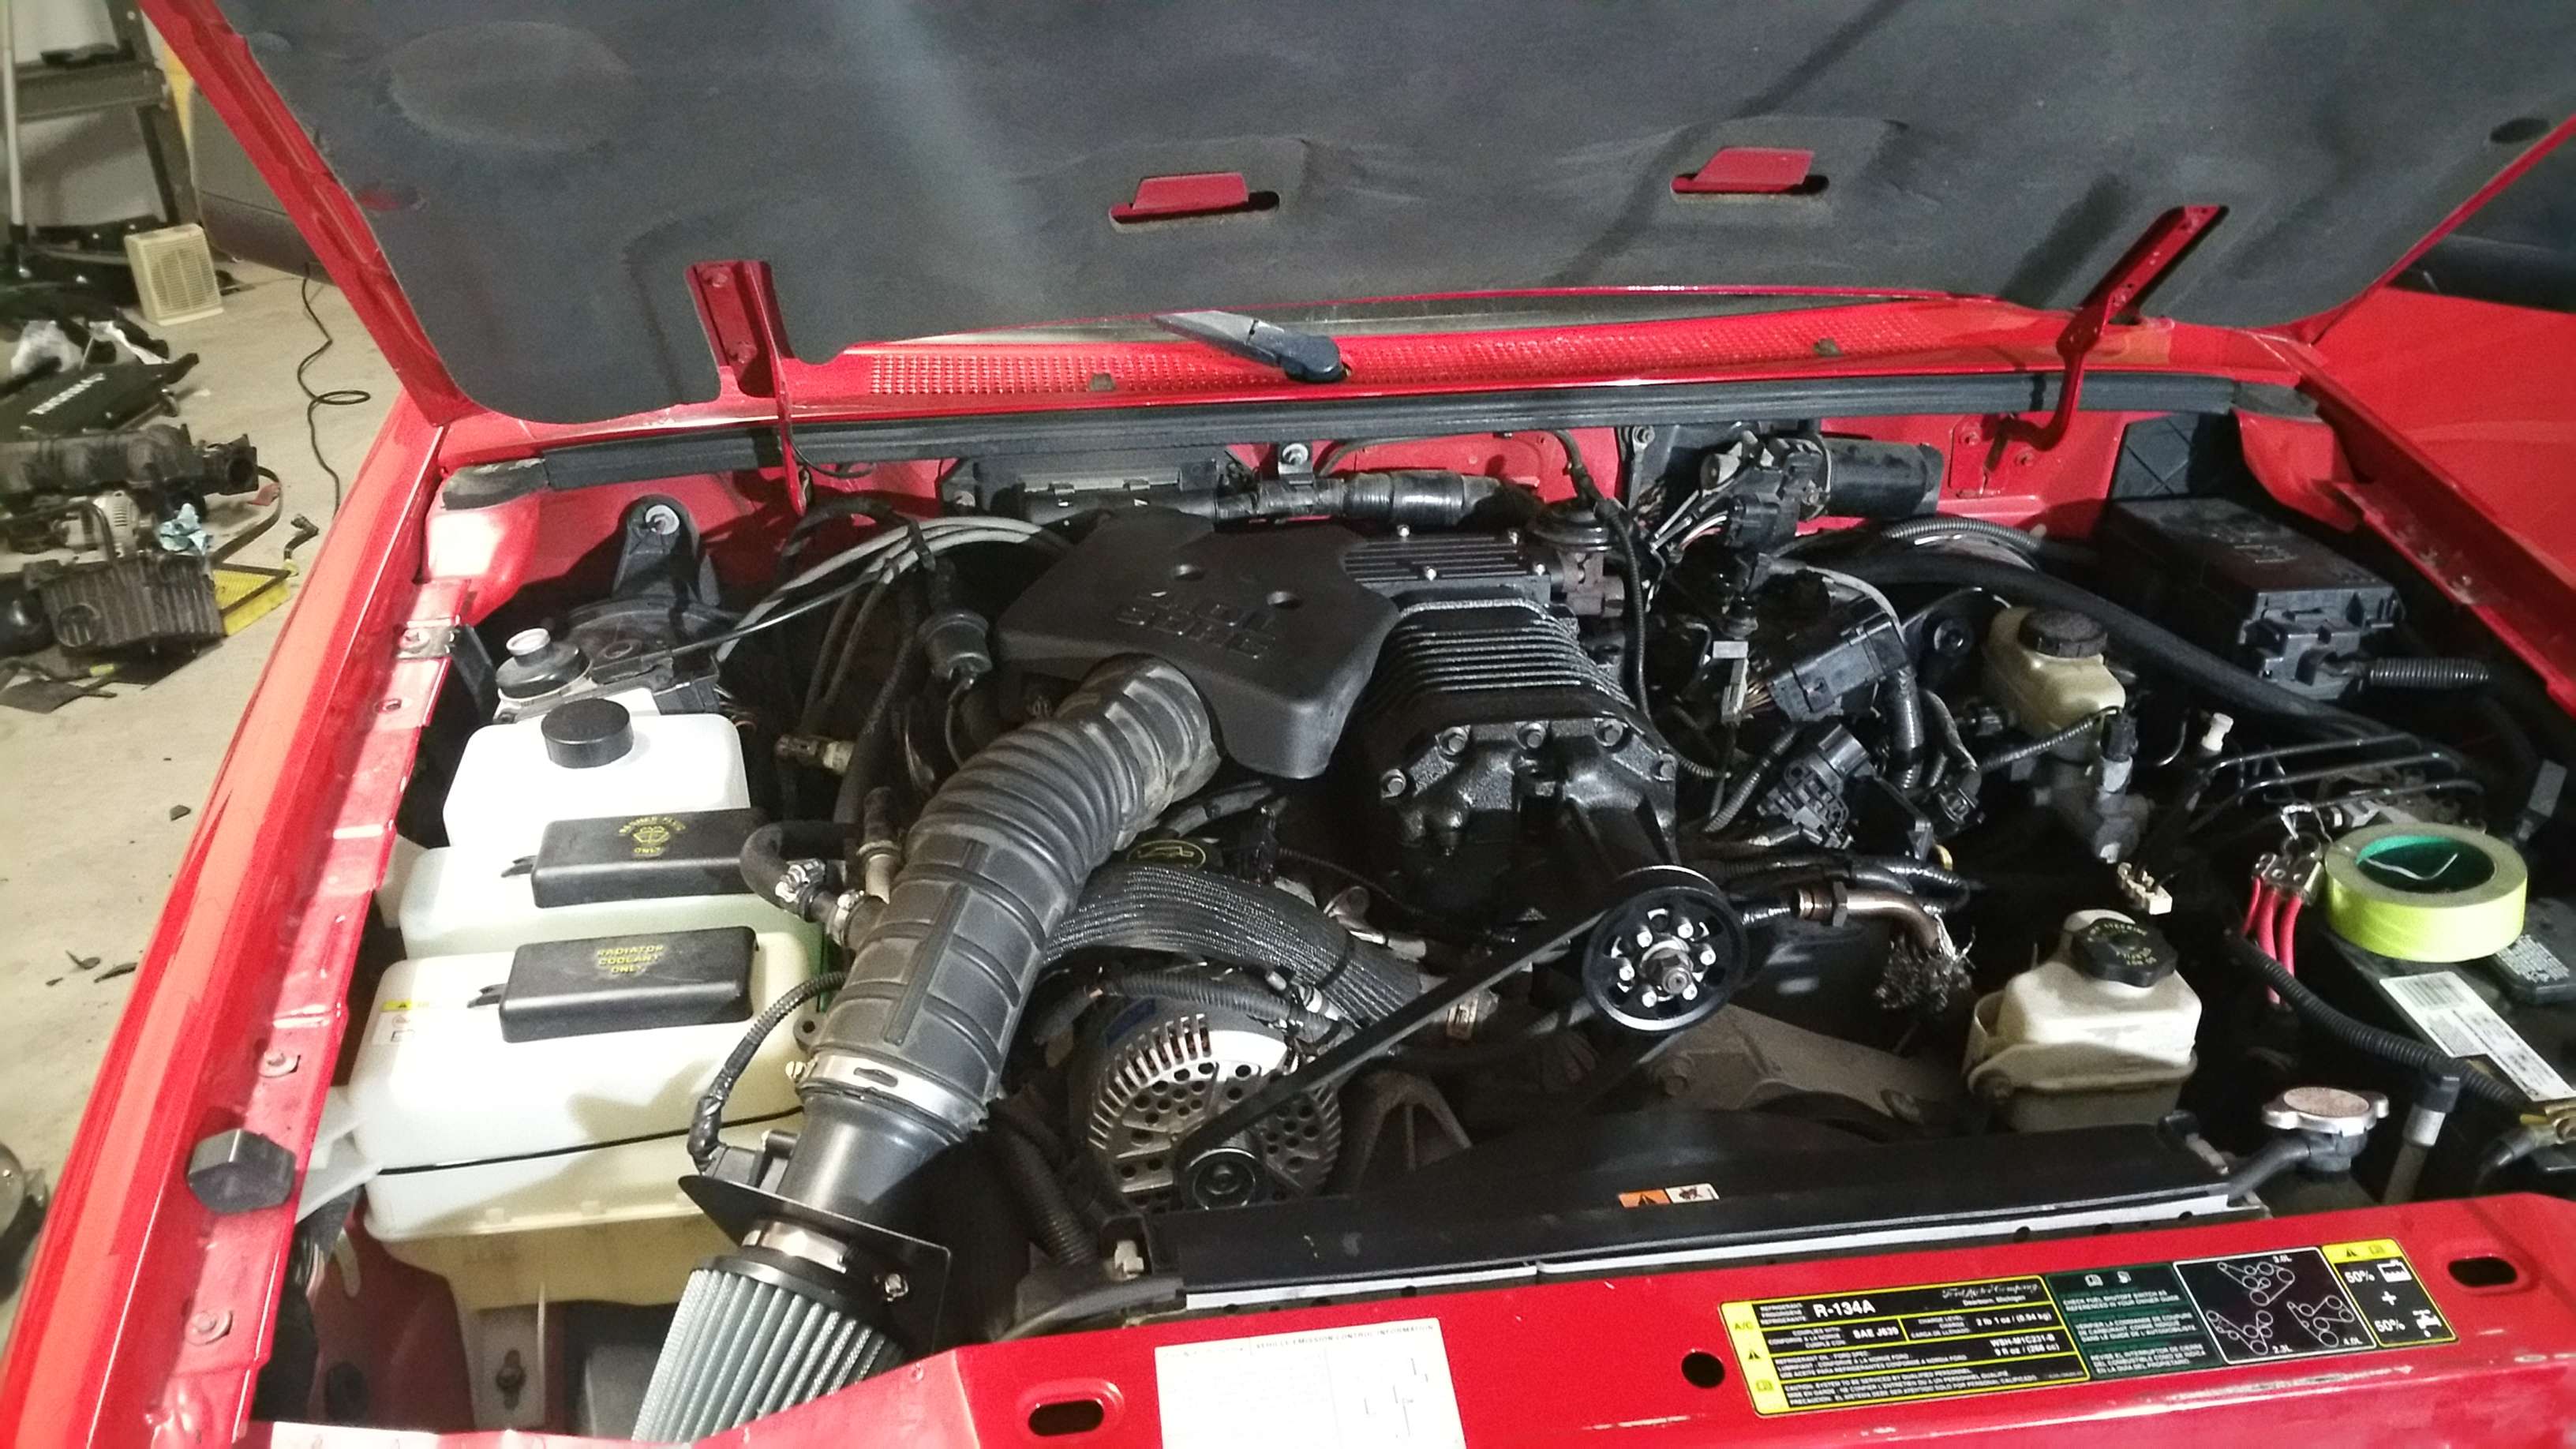
The only place I felt I skimped on the project was the intercooler. Moddbox provides very general/vague instructions for the intercooler kit, whereas their supercharger instructions were spot on. You have to come up with your own tubing or piping, your own location for the reservoir, and your own mounting location for the outer radiator. I made a solid mount for the radiator. I moved the cruise control module a bit and squeezed the reservoir next to it. LOL it is only in place with a ziptie, but really has nowhere to go. I have yet to make a proper solution for it. The tubing location came out fine. I used radiator hose, and pvc fittings. The pump location is between the battery and the front headlight. It is mounted solid, and there are no turns too sharp in the tubing. I spent a fair amount of time deciding where to wire the intercooler pump into. I decided to wire it into the fuel pump circuit. I used a relay. Basically, when the fuel pump circuit is on (whenever the truck is running, or the key is in the ignition spot with the truck off) the relay is activated and allows the pump to draw current directly from the battery. This way there is a minimal load on the fuel pump circuit, and the pump isnt running when I have the truck key on "accessory".
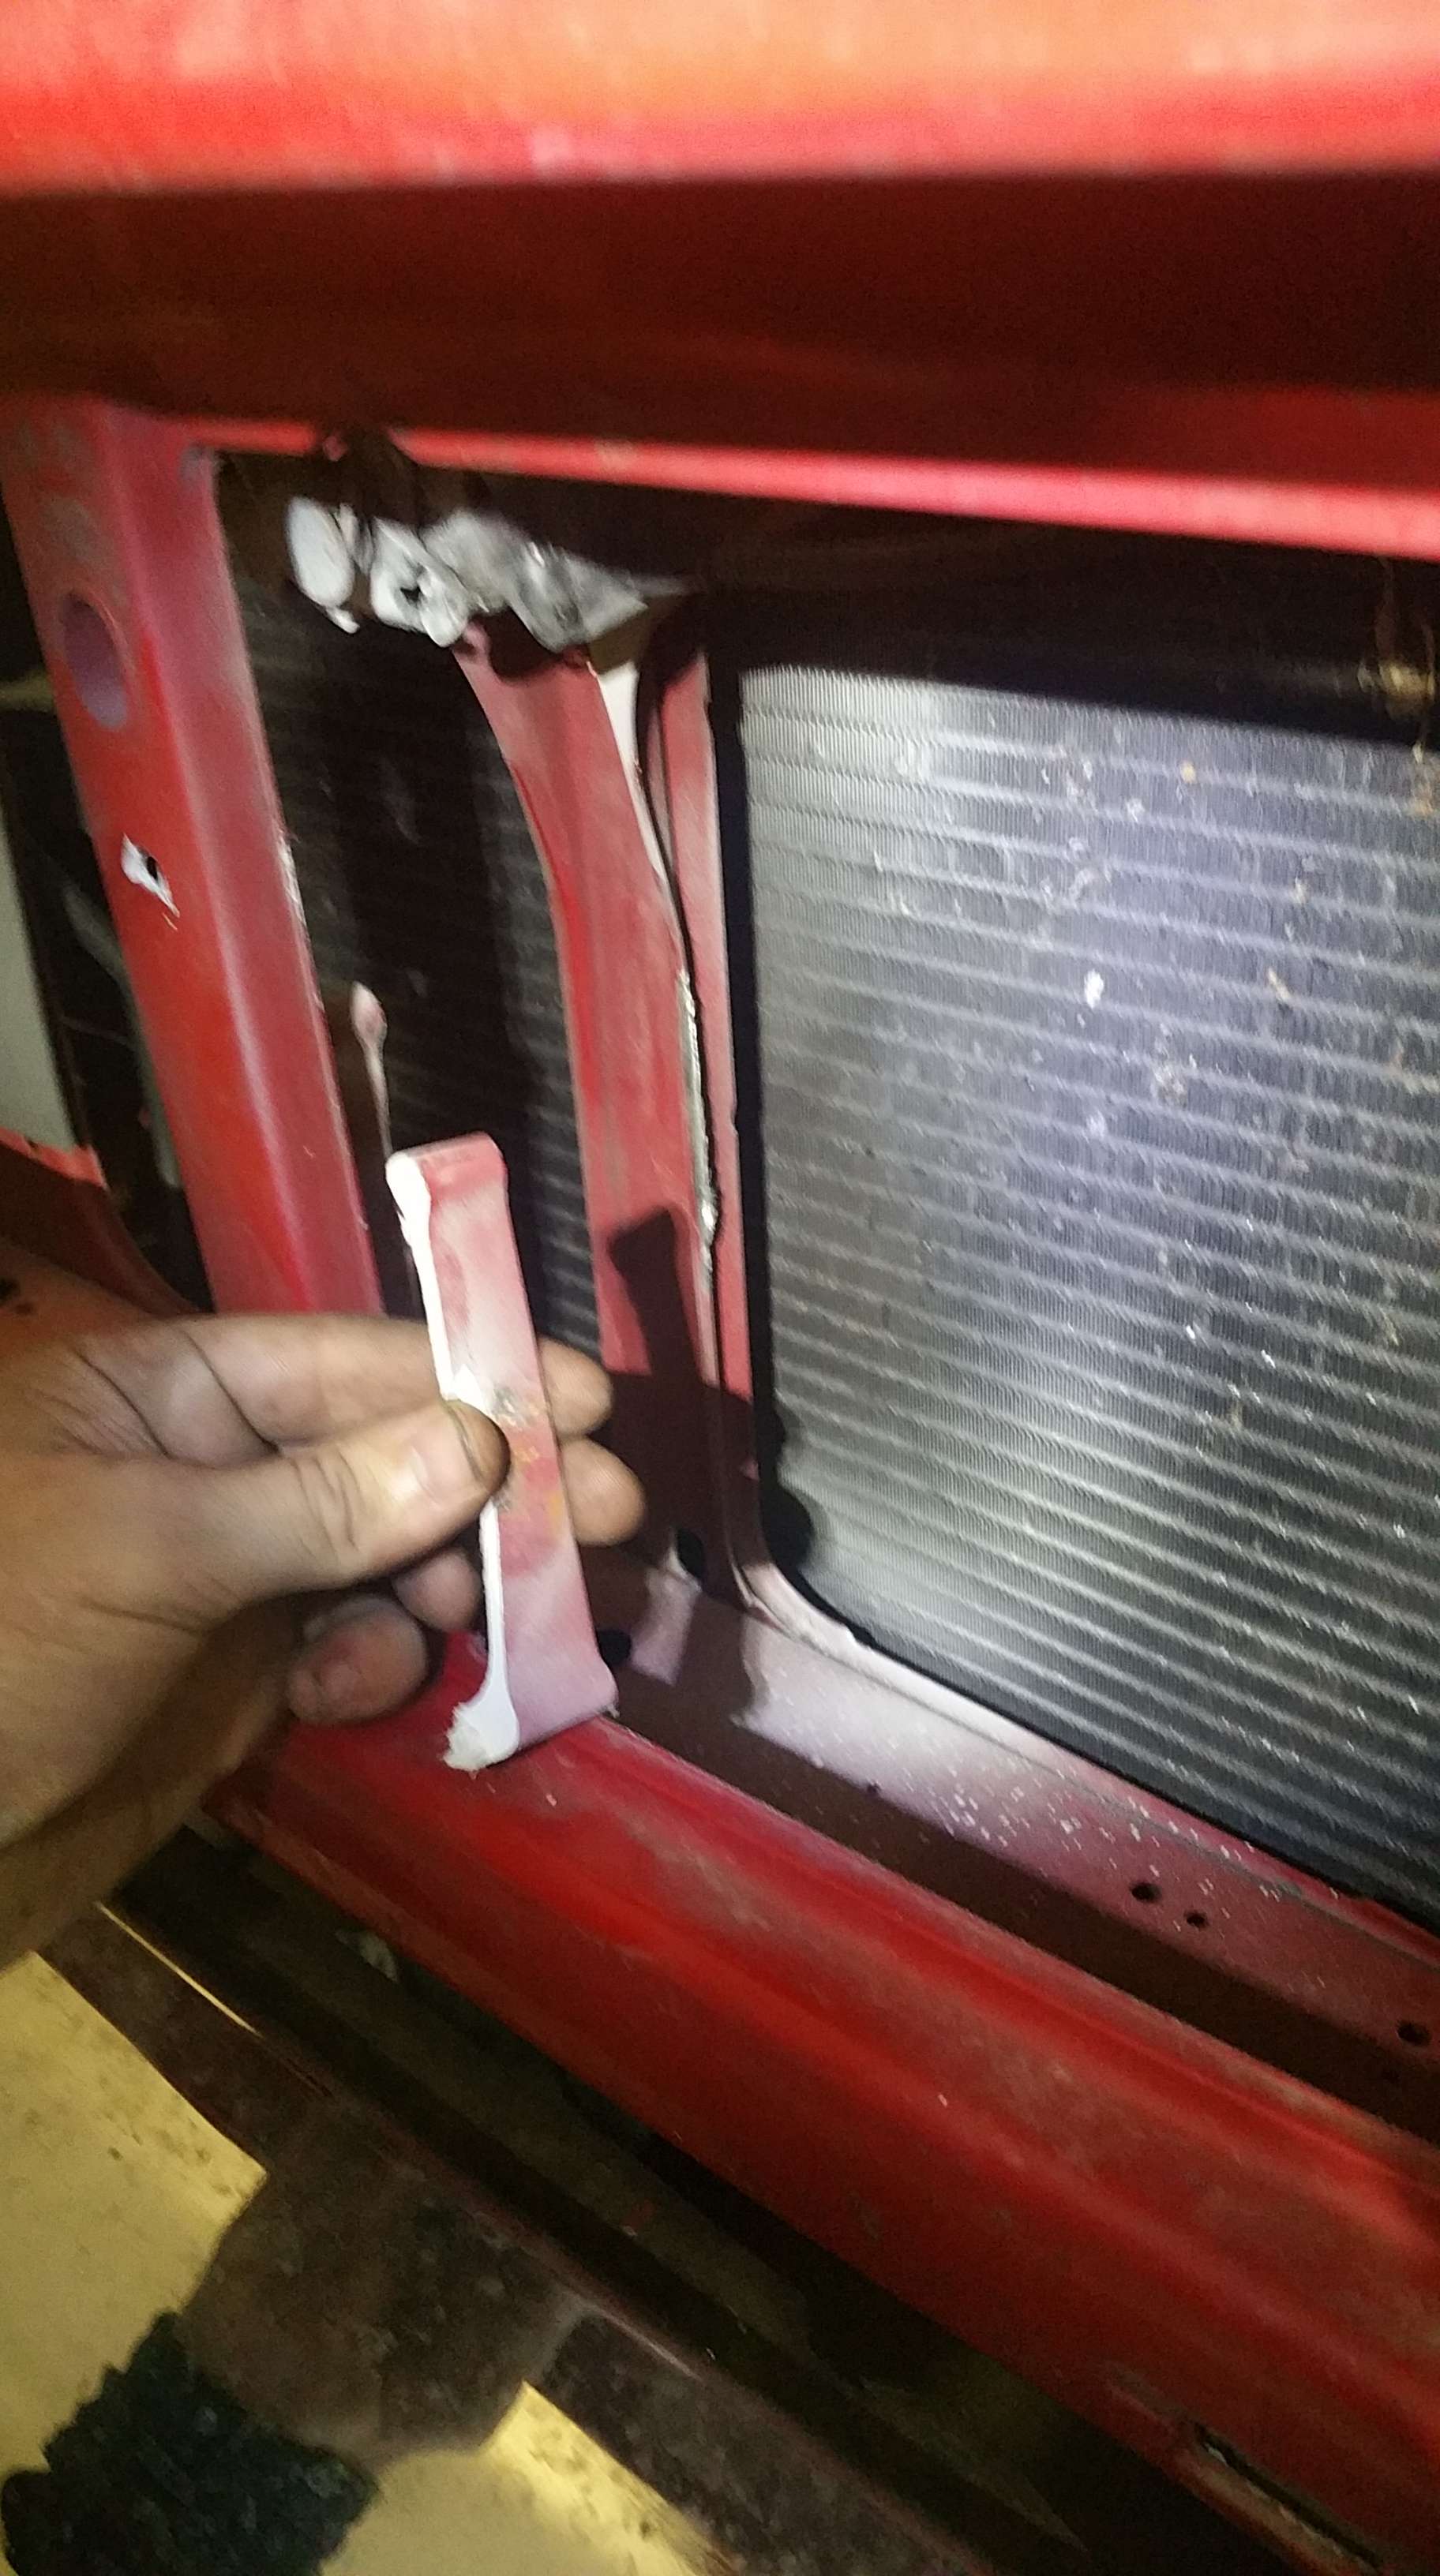
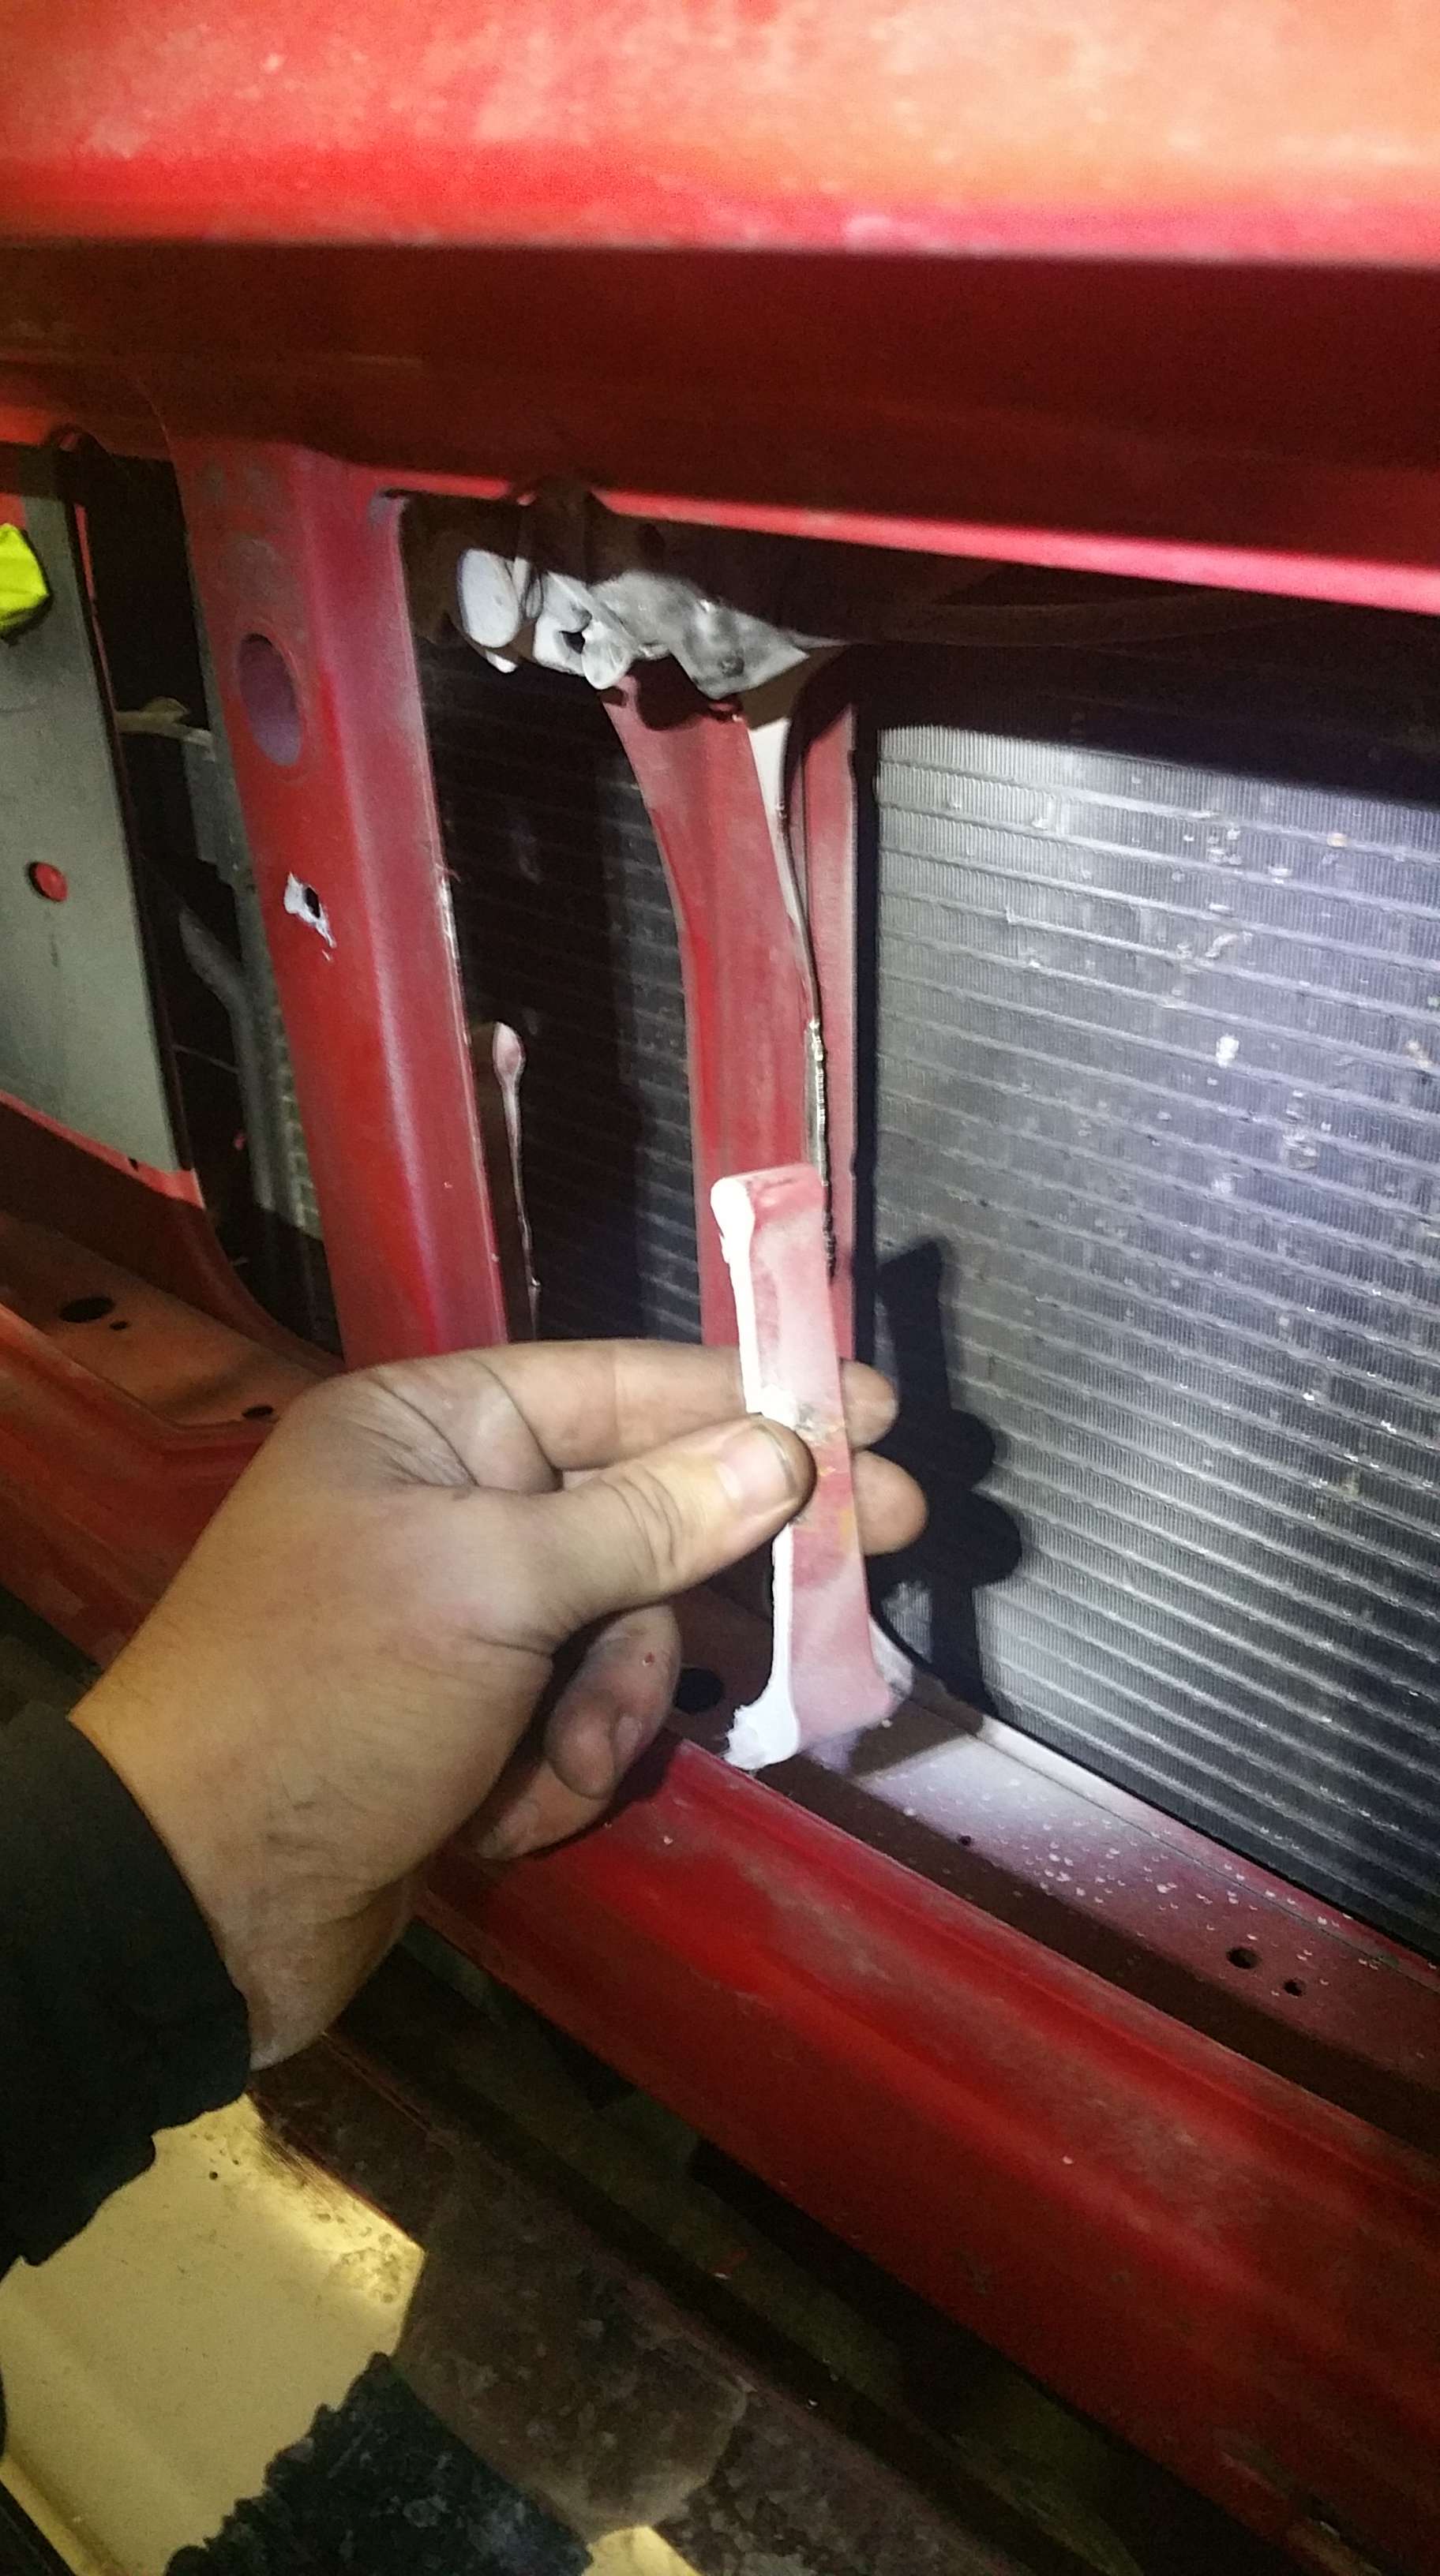
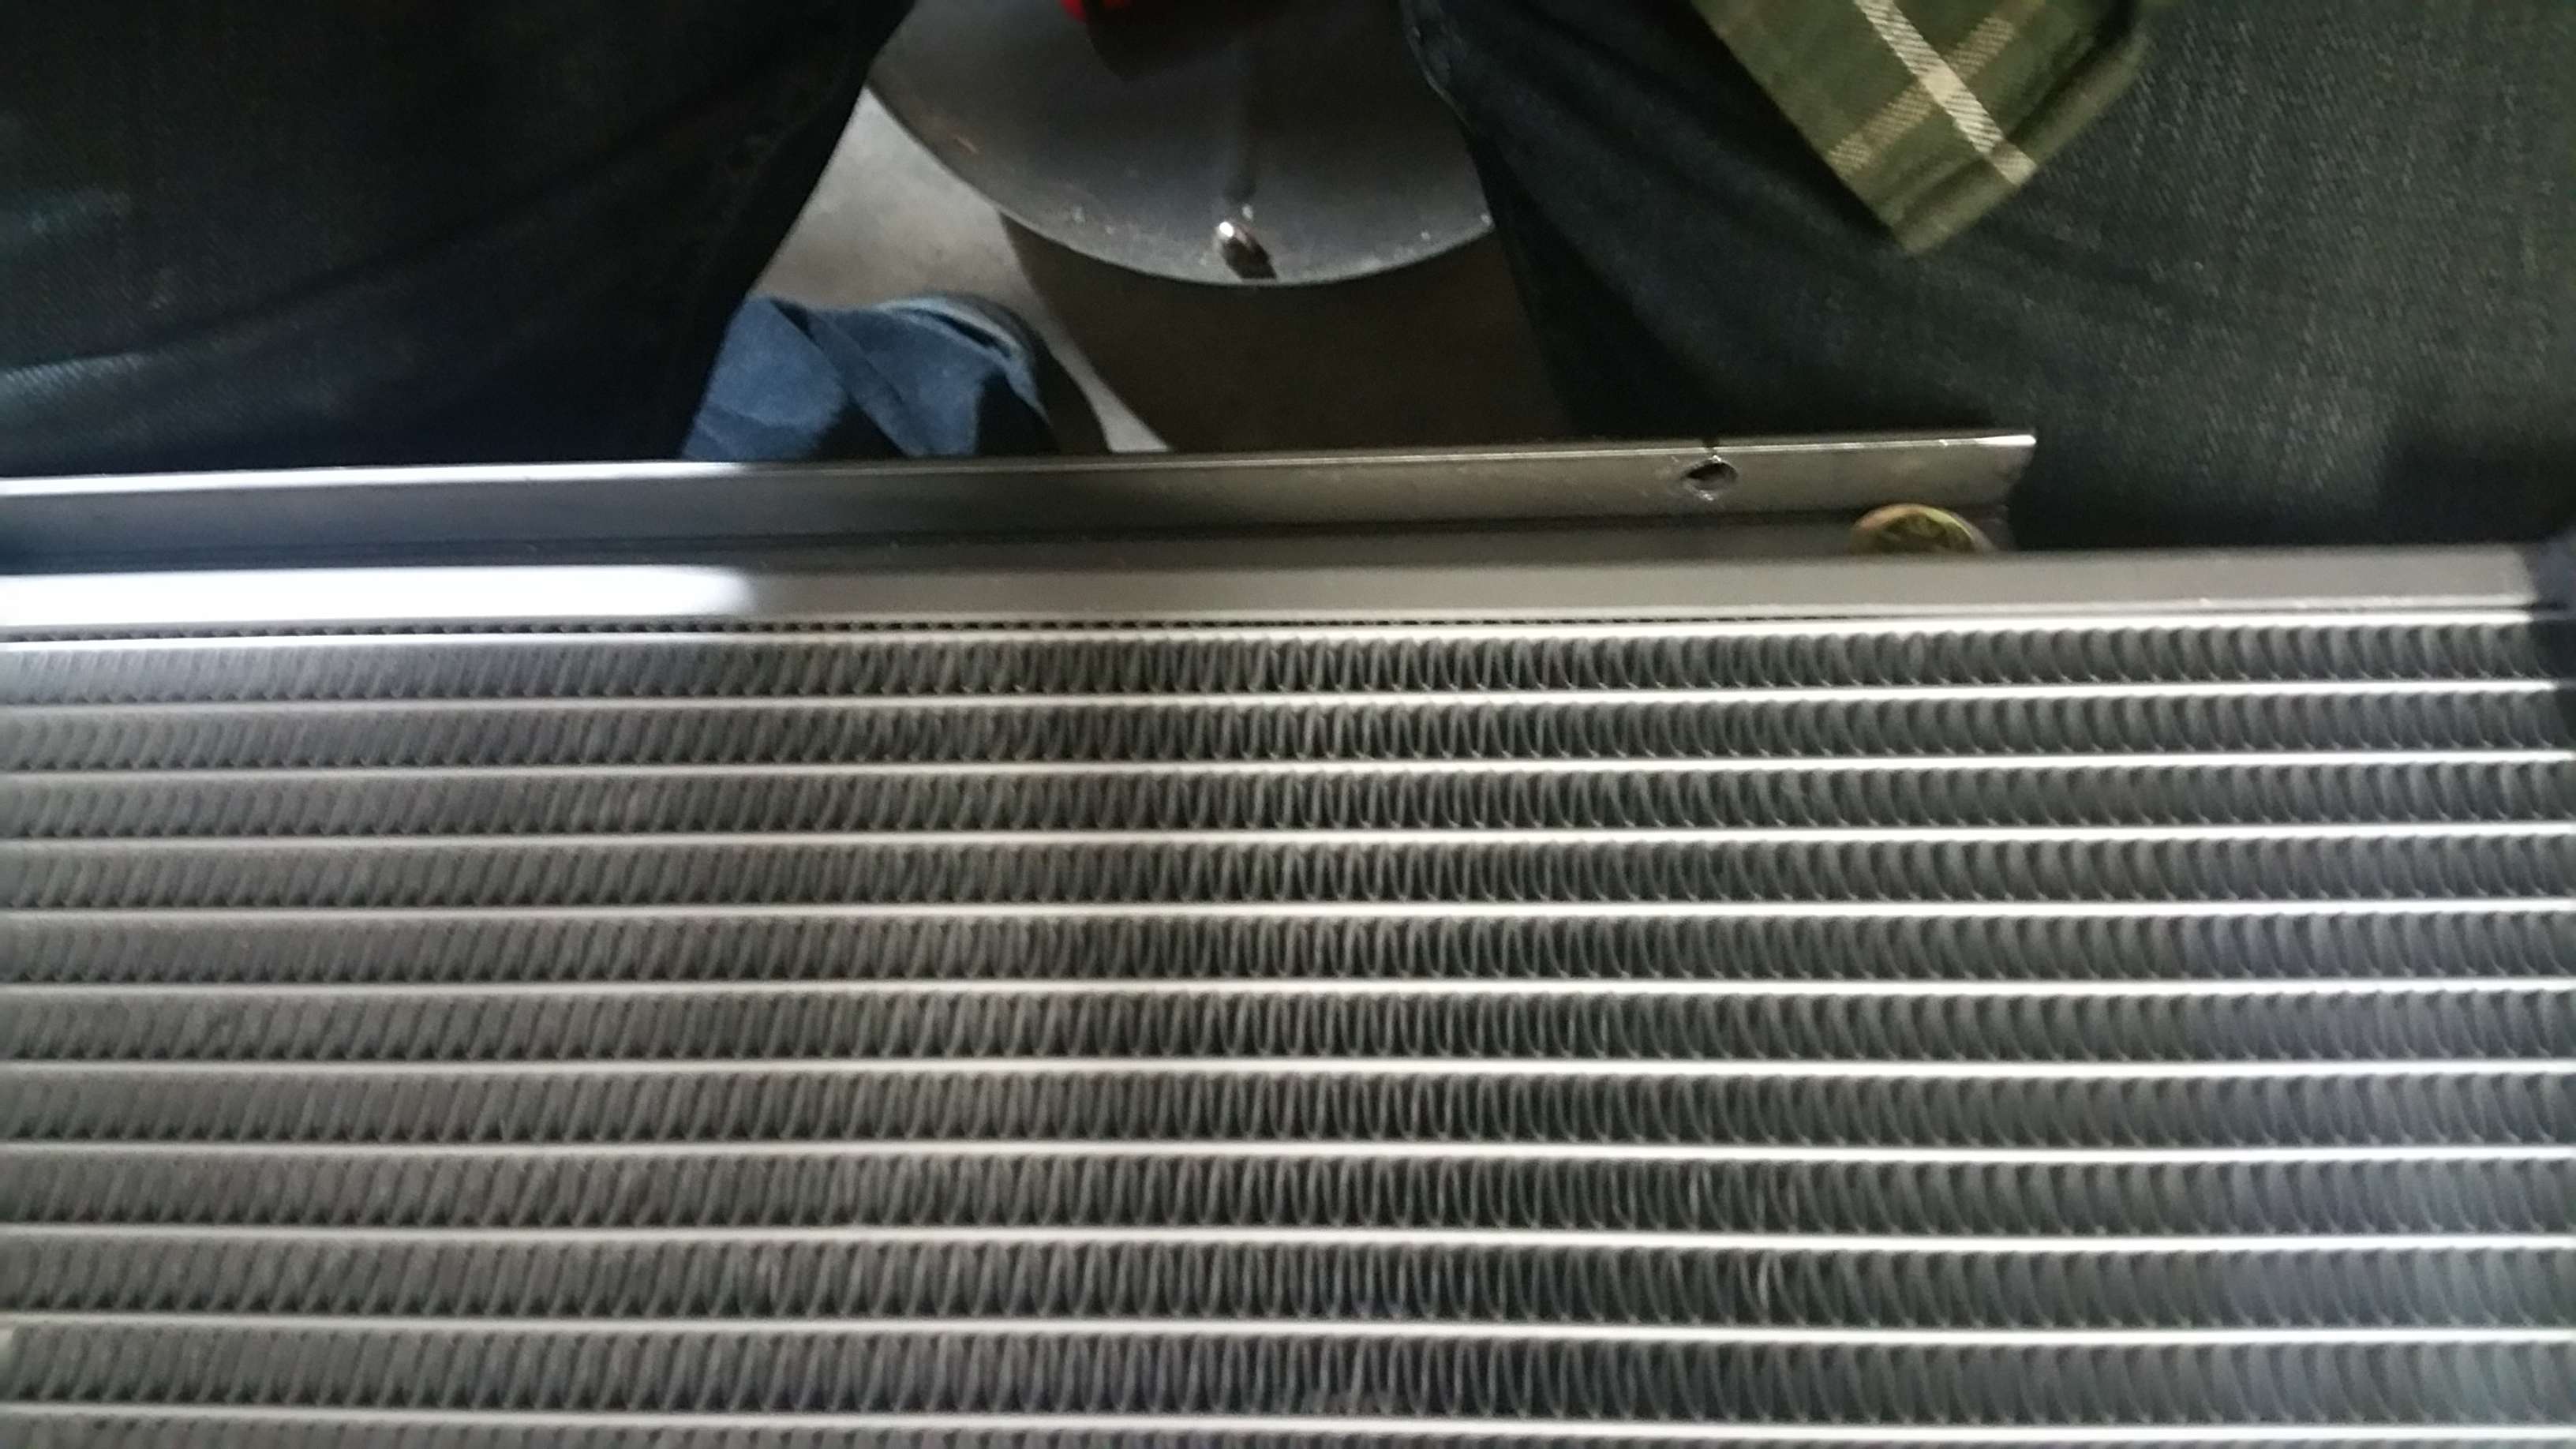
Where I skimped was the mounting of the reservoir, and the bleeding of the system. I didn't realize that I needed to bleed the upper intercooler radiator while it was exposed, so air didn't get trapped up there. I was on a schedule to get it finished, since I had to still do the lift and coilover conversion before school started up again. I finished the supercharger install, and then filled the intercooler system and bled it as best as I could, and continued bleeding it for a couple weeks, while on steep hills up and down and sideways. I would shake the truck and try to get as much as out as I could. What I should have done was finished the intercooler system completely, before I installed the supercharger on top of the exposed upper radiator. Then I could have filled the system right then and bled the air directly out of the the now inaccessible radiator. I fear I might have burned up the pump some since It was running with large air pockets in the system for some time. It is on the to do list still to check its function and continue to bleed the system. lol.
Overall everything works just fine, and am sure that I have it atleast 90% bled. If the pump is burned up somewhat it still provides a large impact on the cooling. Since I changed plugs to the Tr36's with a smaller gap, and am only running 3.5 psi, It seems to be just fine. I haven't thrown a single code.
Later this year when I up it to 7.5 psi, I will be properly bleeding the intercooler, replacing the pump, adding injectors and a tune, and likely a sensor or two. Then it will be a rock solid powerhouse. The truck is at 125000 miles, if it lasts until 180000 plus miles, I will likely just do an engine rebuild then, and add provisions during the rebuild to run 7.5 psi or maybe even 9 psi safely and reliably. This truck is my baby, and I never intend to sell it, hence the investment.
First on the list was to get the supercharger installed. Off comes the bed to get to the fuel pump. Moddbox provides a quality high performance fuel pump for their install kit. It is nice as is provides insurance, and is ready to supply fuel for down the road when I want to up the boost and fuel injectors. The fuel pump wasn't too hard.
Now with the fuel pump done, I move to the front of the truck. I have to many pictures to comment of individually, so I will just throw them all in together. The moddbox kit is very high quality. They provide a well thought out solution for supercharging a 4.0 SOHC. It has provisions for sensors, both supercharger port types, an optional intercooler etc... At no point did I have second thoughts about adding allthis new equipment to my truck, or question its durability. I am a studying mechanical engineer, and have tinkered with things all my life, looking for the better ways to build, assemble, design, etc... This is a quality piece of kit. Of course, it is only as good as how you install it. I took my time, and it came out excellent. I did not install any sensors, but wqhen I make the jump to 7.5 psi, I will likely install a few since I have to get to the injectors anyways.
The only place I felt I skimped on the project was the intercooler. Moddbox provides very general/vague instructions for the intercooler kit, whereas their supercharger instructions were spot on. You have to come up with your own tubing or piping, your own location for the reservoir, and your own mounting location for the outer radiator. I made a solid mount for the radiator. I moved the cruise control module a bit and squeezed the reservoir next to it. LOL it is only in place with a ziptie, but really has nowhere to go. I have yet to make a proper solution for it. The tubing location came out fine. I used radiator hose, and pvc fittings. The pump location is between the battery and the front headlight. It is mounted solid, and there are no turns too sharp in the tubing. I spent a fair amount of time deciding where to wire the intercooler pump into. I decided to wire it into the fuel pump circuit. I used a relay. Basically, when the fuel pump circuit is on (whenever the truck is running, or the key is in the ignition spot with the truck off) the relay is activated and allows the pump to draw current directly from the battery. This way there is a minimal load on the fuel pump circuit, and the pump isnt running when I have the truck key on "accessory".
Where I skimped was the mounting of the reservoir, and the bleeding of the system. I didn't realize that I needed to bleed the upper intercooler radiator while it was exposed, so air didn't get trapped up there. I was on a schedule to get it finished, since I had to still do the lift and coilover conversion before school started up again. I finished the supercharger install, and then filled the intercooler system and bled it as best as I could, and continued bleeding it for a couple weeks, while on steep hills up and down and sideways. I would shake the truck and try to get as much as out as I could. What I should have done was finished the intercooler system completely, before I installed the supercharger on top of the exposed upper radiator. Then I could have filled the system right then and bled the air directly out of the the now inaccessible radiator. I fear I might have burned up the pump some since It was running with large air pockets in the system for some time. It is on the to do list still to check its function and continue to bleed the system. lol.
Overall everything works just fine, and am sure that I have it atleast 90% bled. If the pump is burned up somewhat it still provides a large impact on the cooling. Since I changed plugs to the Tr36's with a smaller gap, and am only running 3.5 psi, It seems to be just fine. I haven't thrown a single code.
Later this year when I up it to 7.5 psi, I will be properly bleeding the intercooler, replacing the pump, adding injectors and a tune, and likely a sensor or two. Then it will be a rock solid powerhouse. The truck is at 125000 miles, if it lasts until 180000 plus miles, I will likely just do an engine rebuild then, and add provisions during the rebuild to run 7.5 psi or maybe even 9 psi safely and reliably. This truck is my baby, and I never intend to sell it, hence the investment.
#11
10-28-2016
Join Date: Jul 2015
Location: Reno, Nevada
Posts: 52
Likes: 0
Received 0 Likes
on
0 Posts
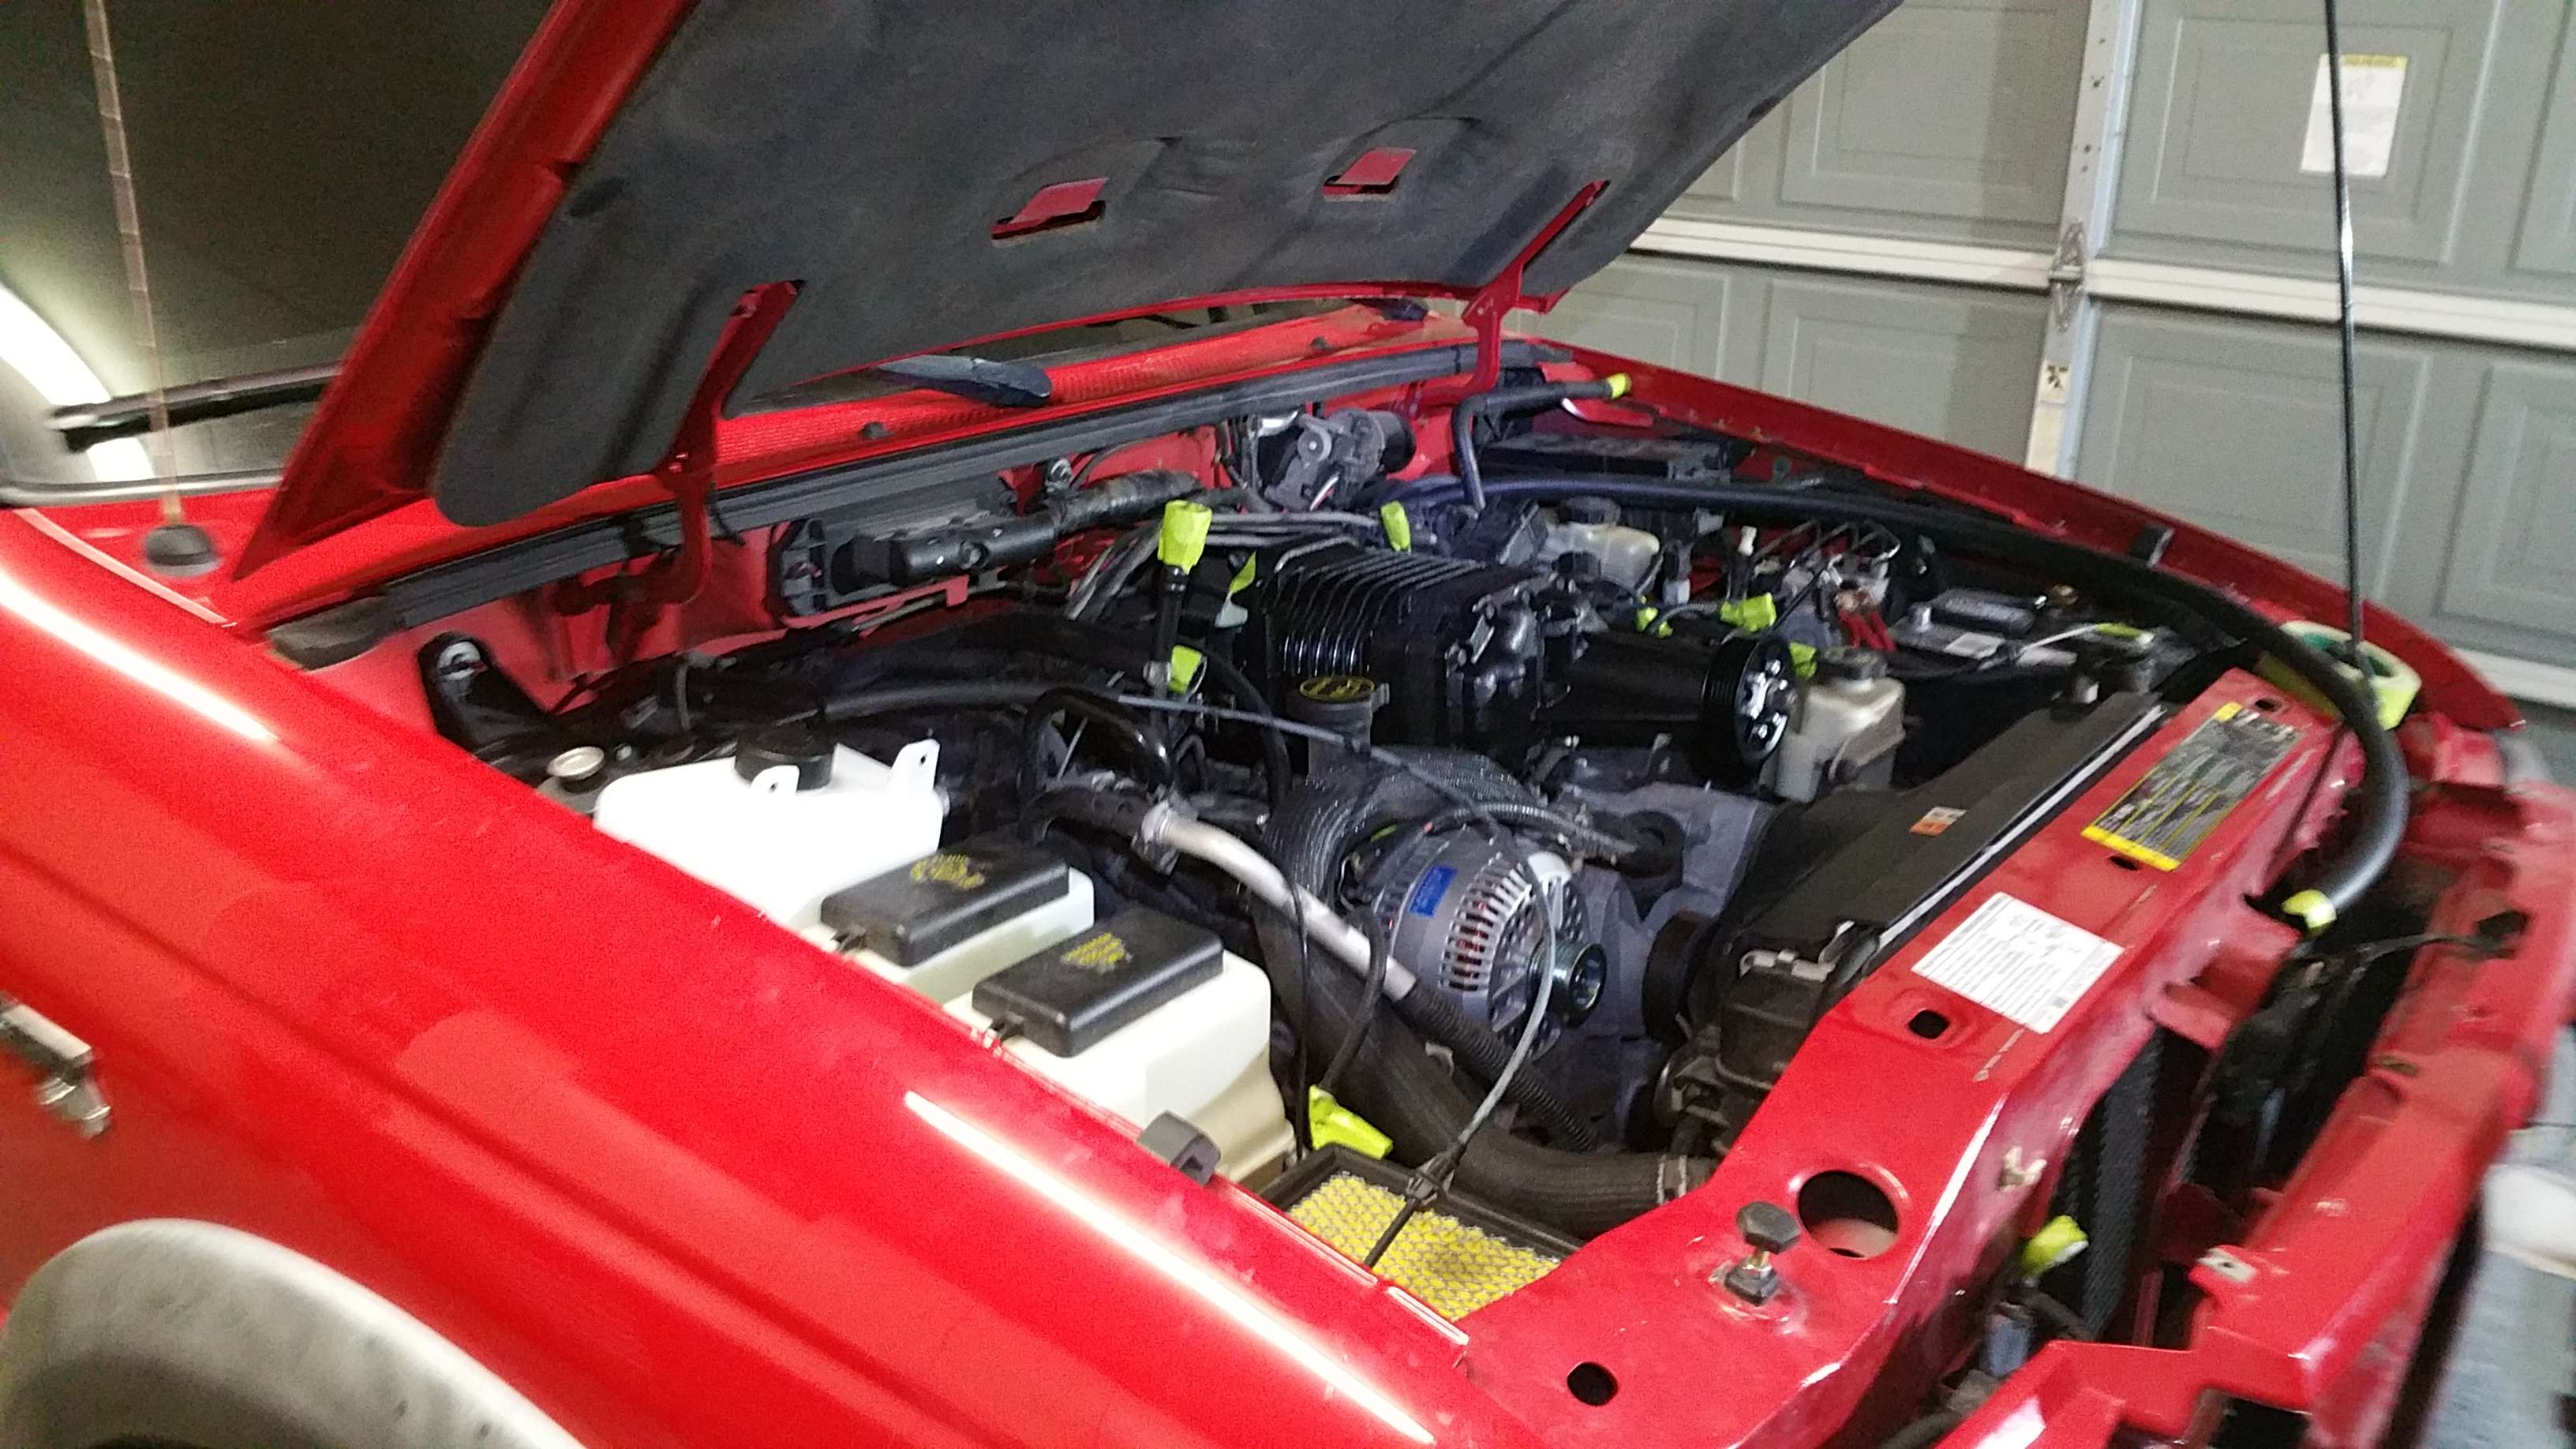
So, the supercharger/intercooler is finished and running perfect. The thing is effing awesome. It puts a smile on my face everytime I hop into the truck after a long/bad day, put my foot into it, and hear that legendary supercharger whine. I really can't describe how awesome it is.
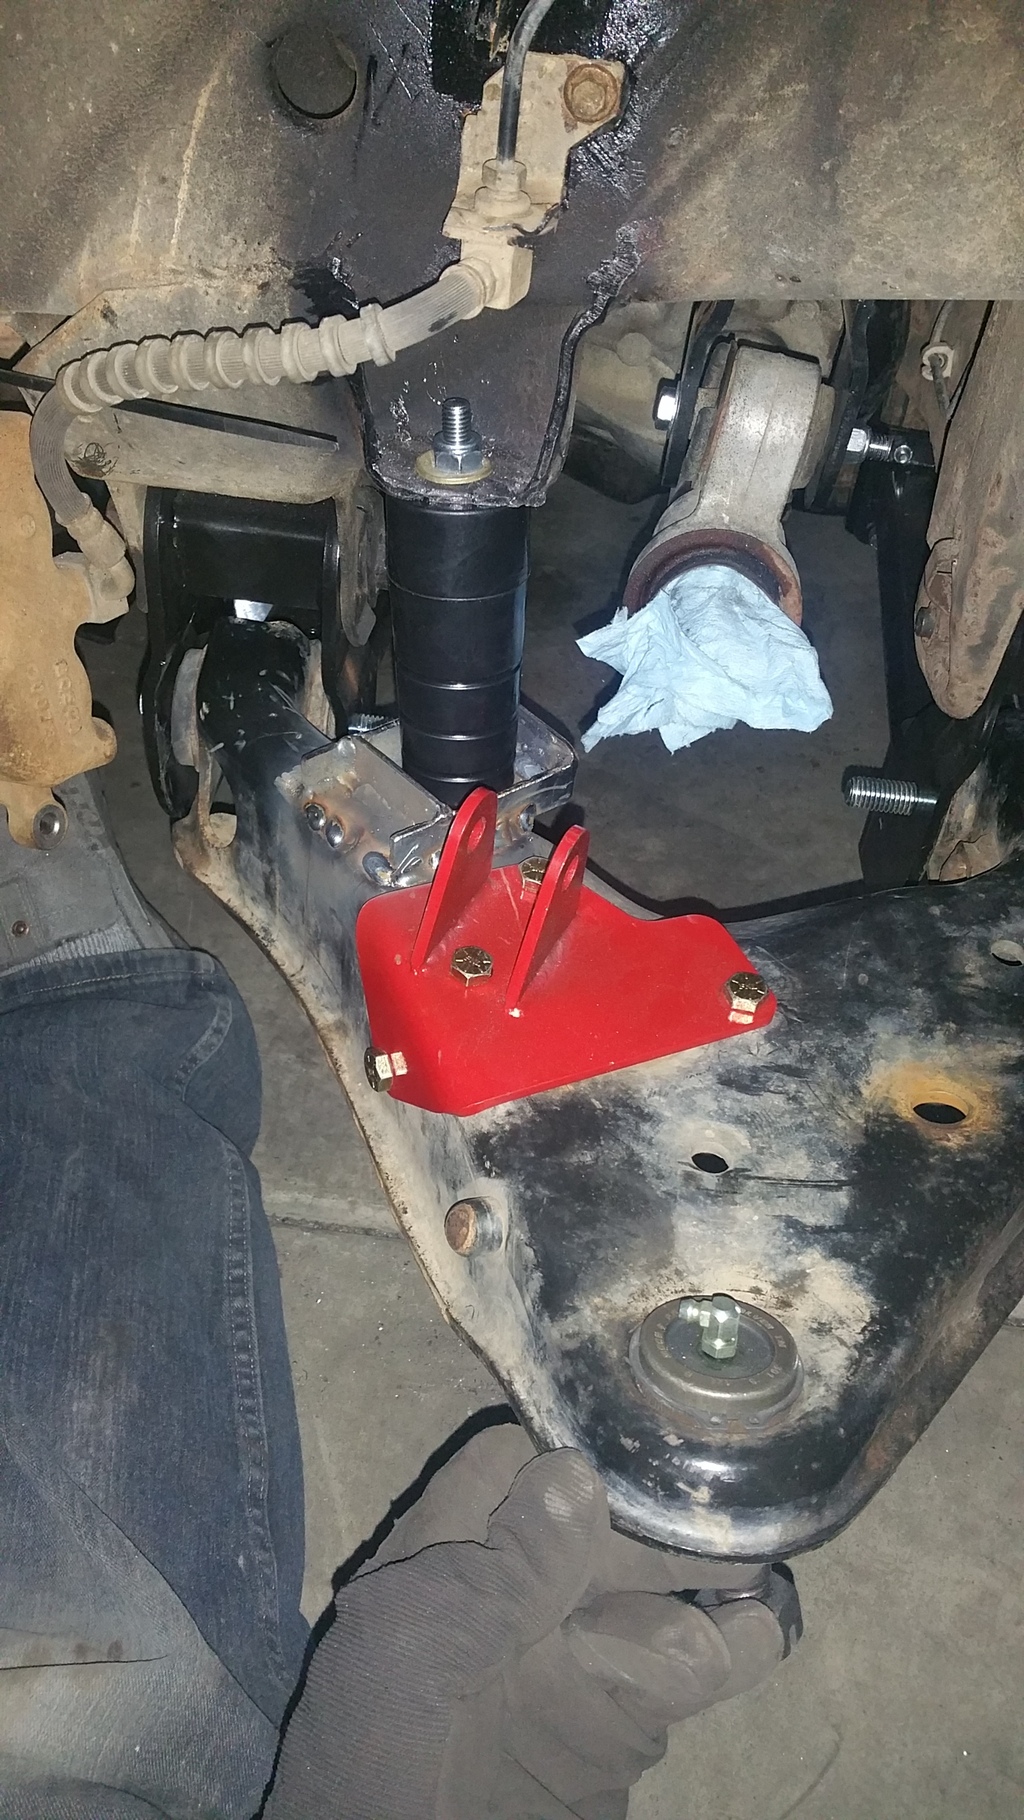
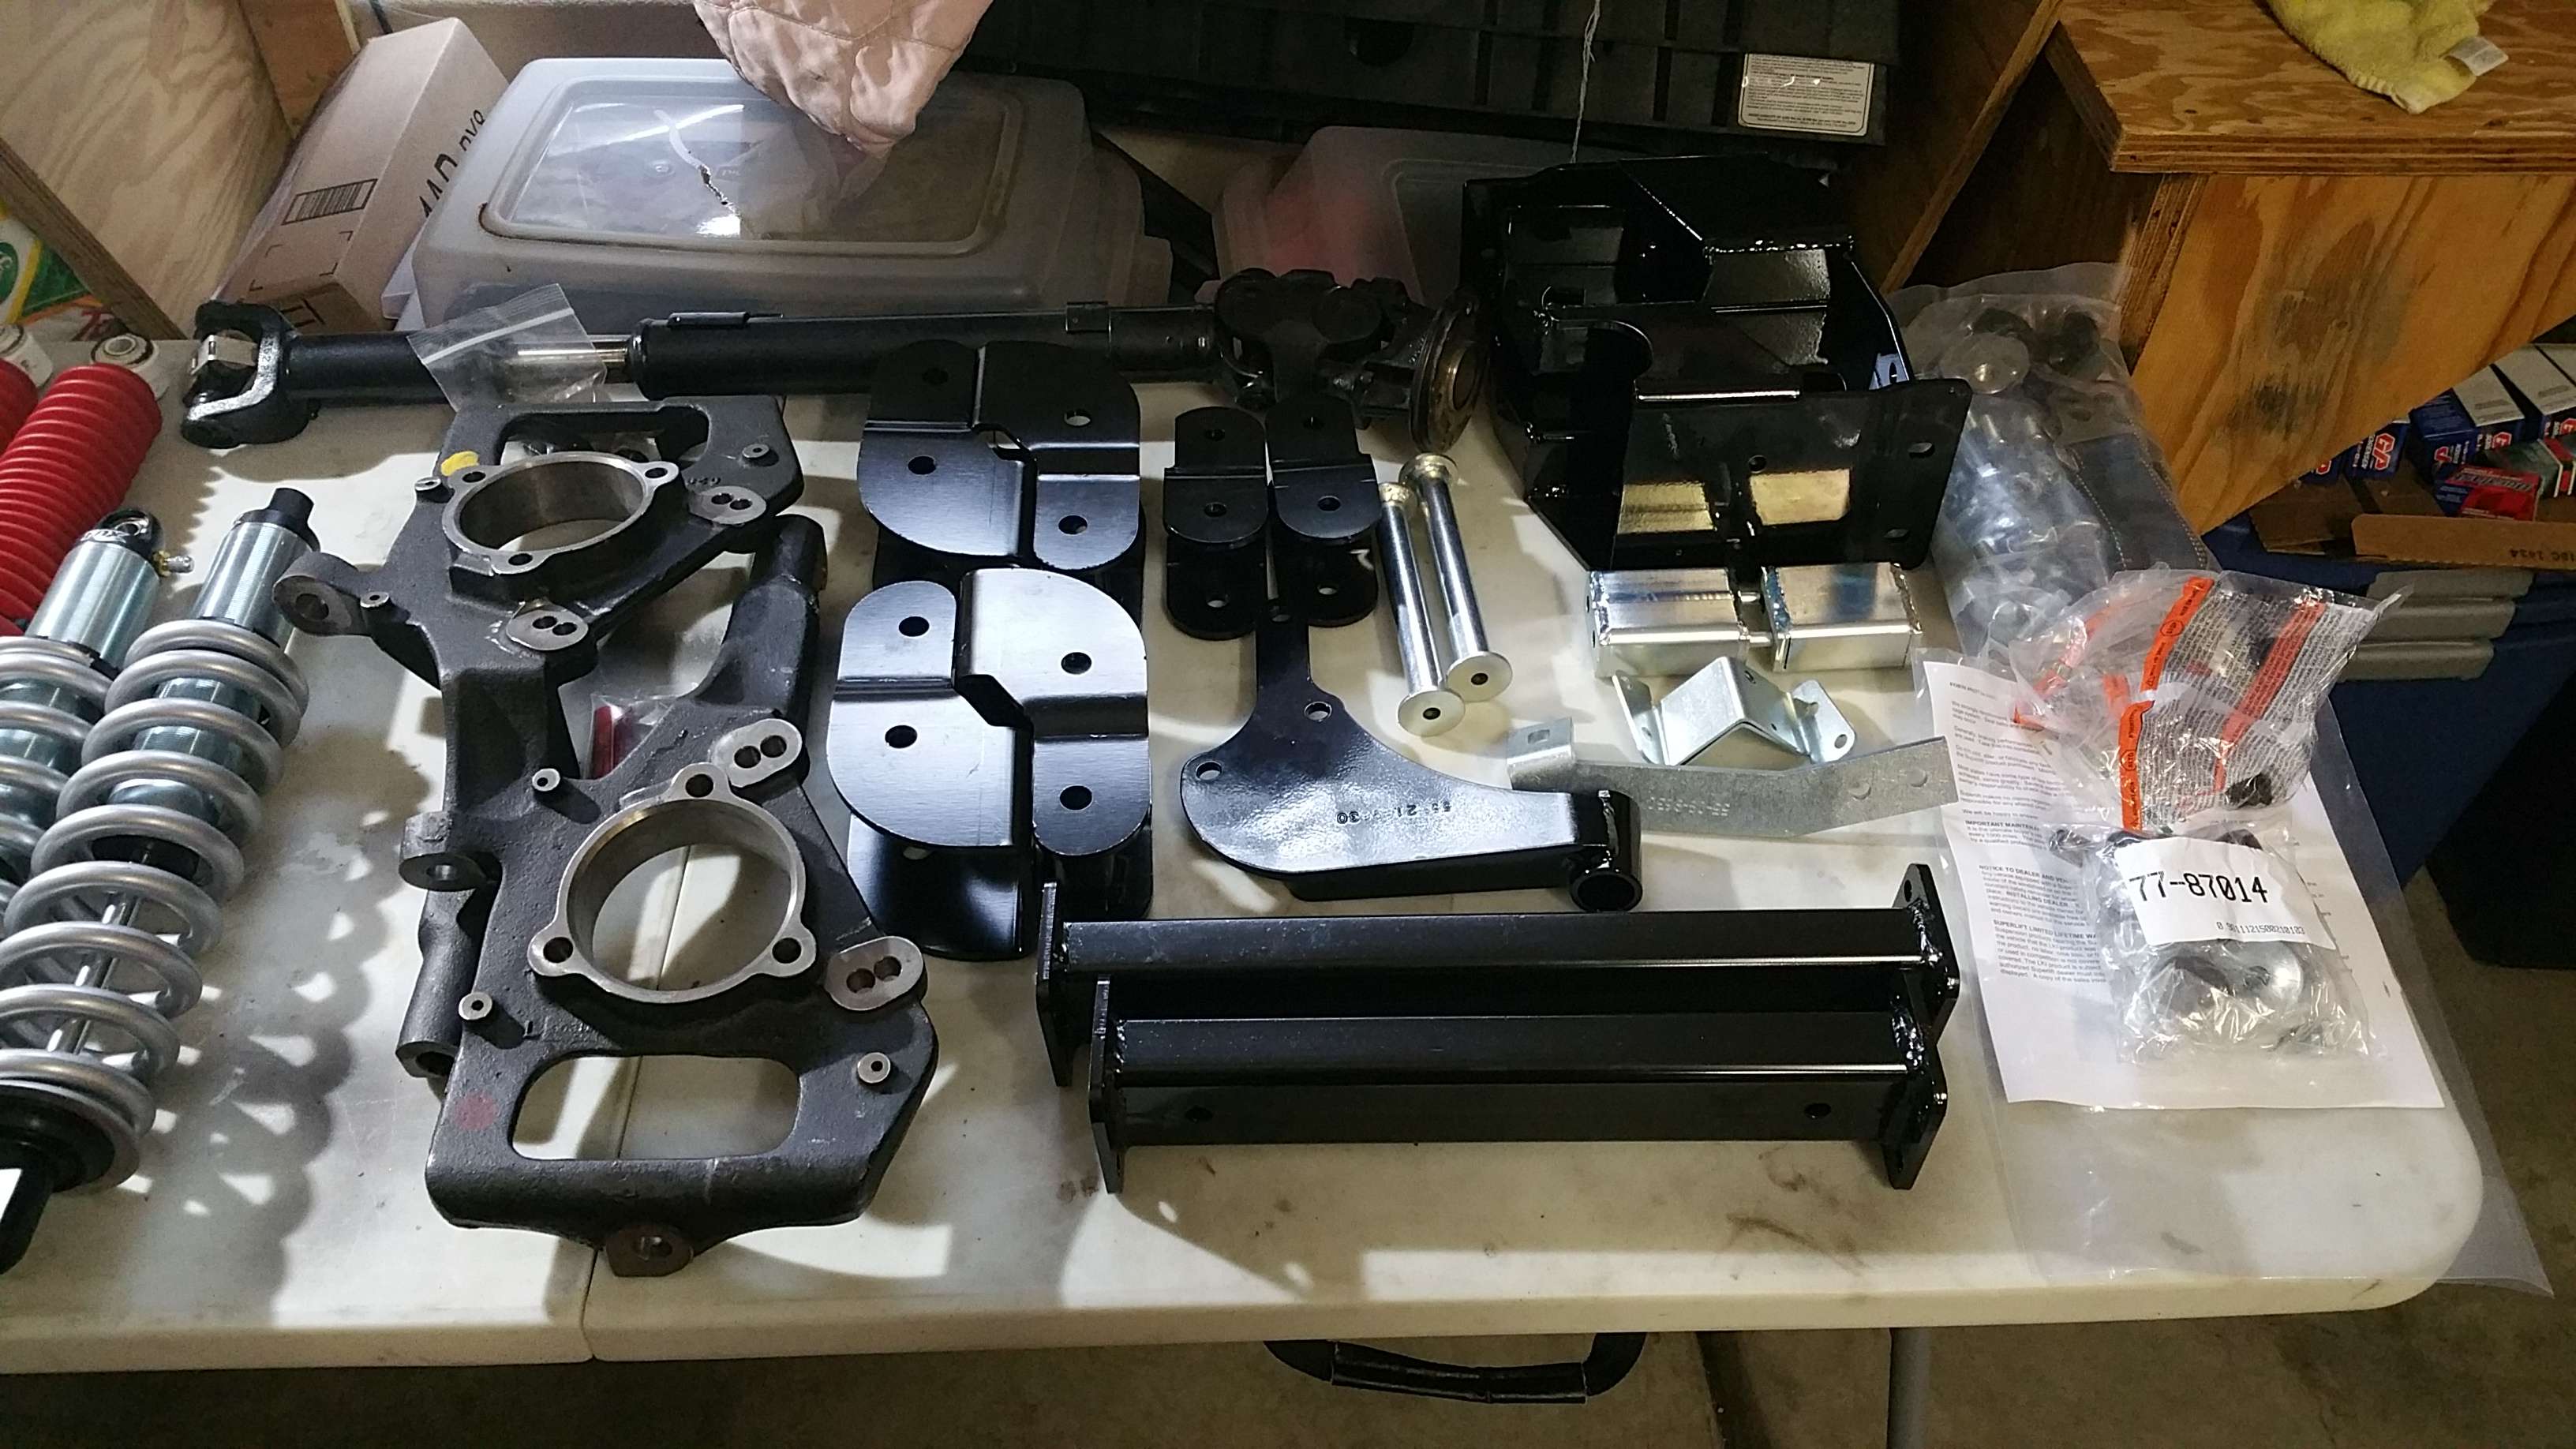
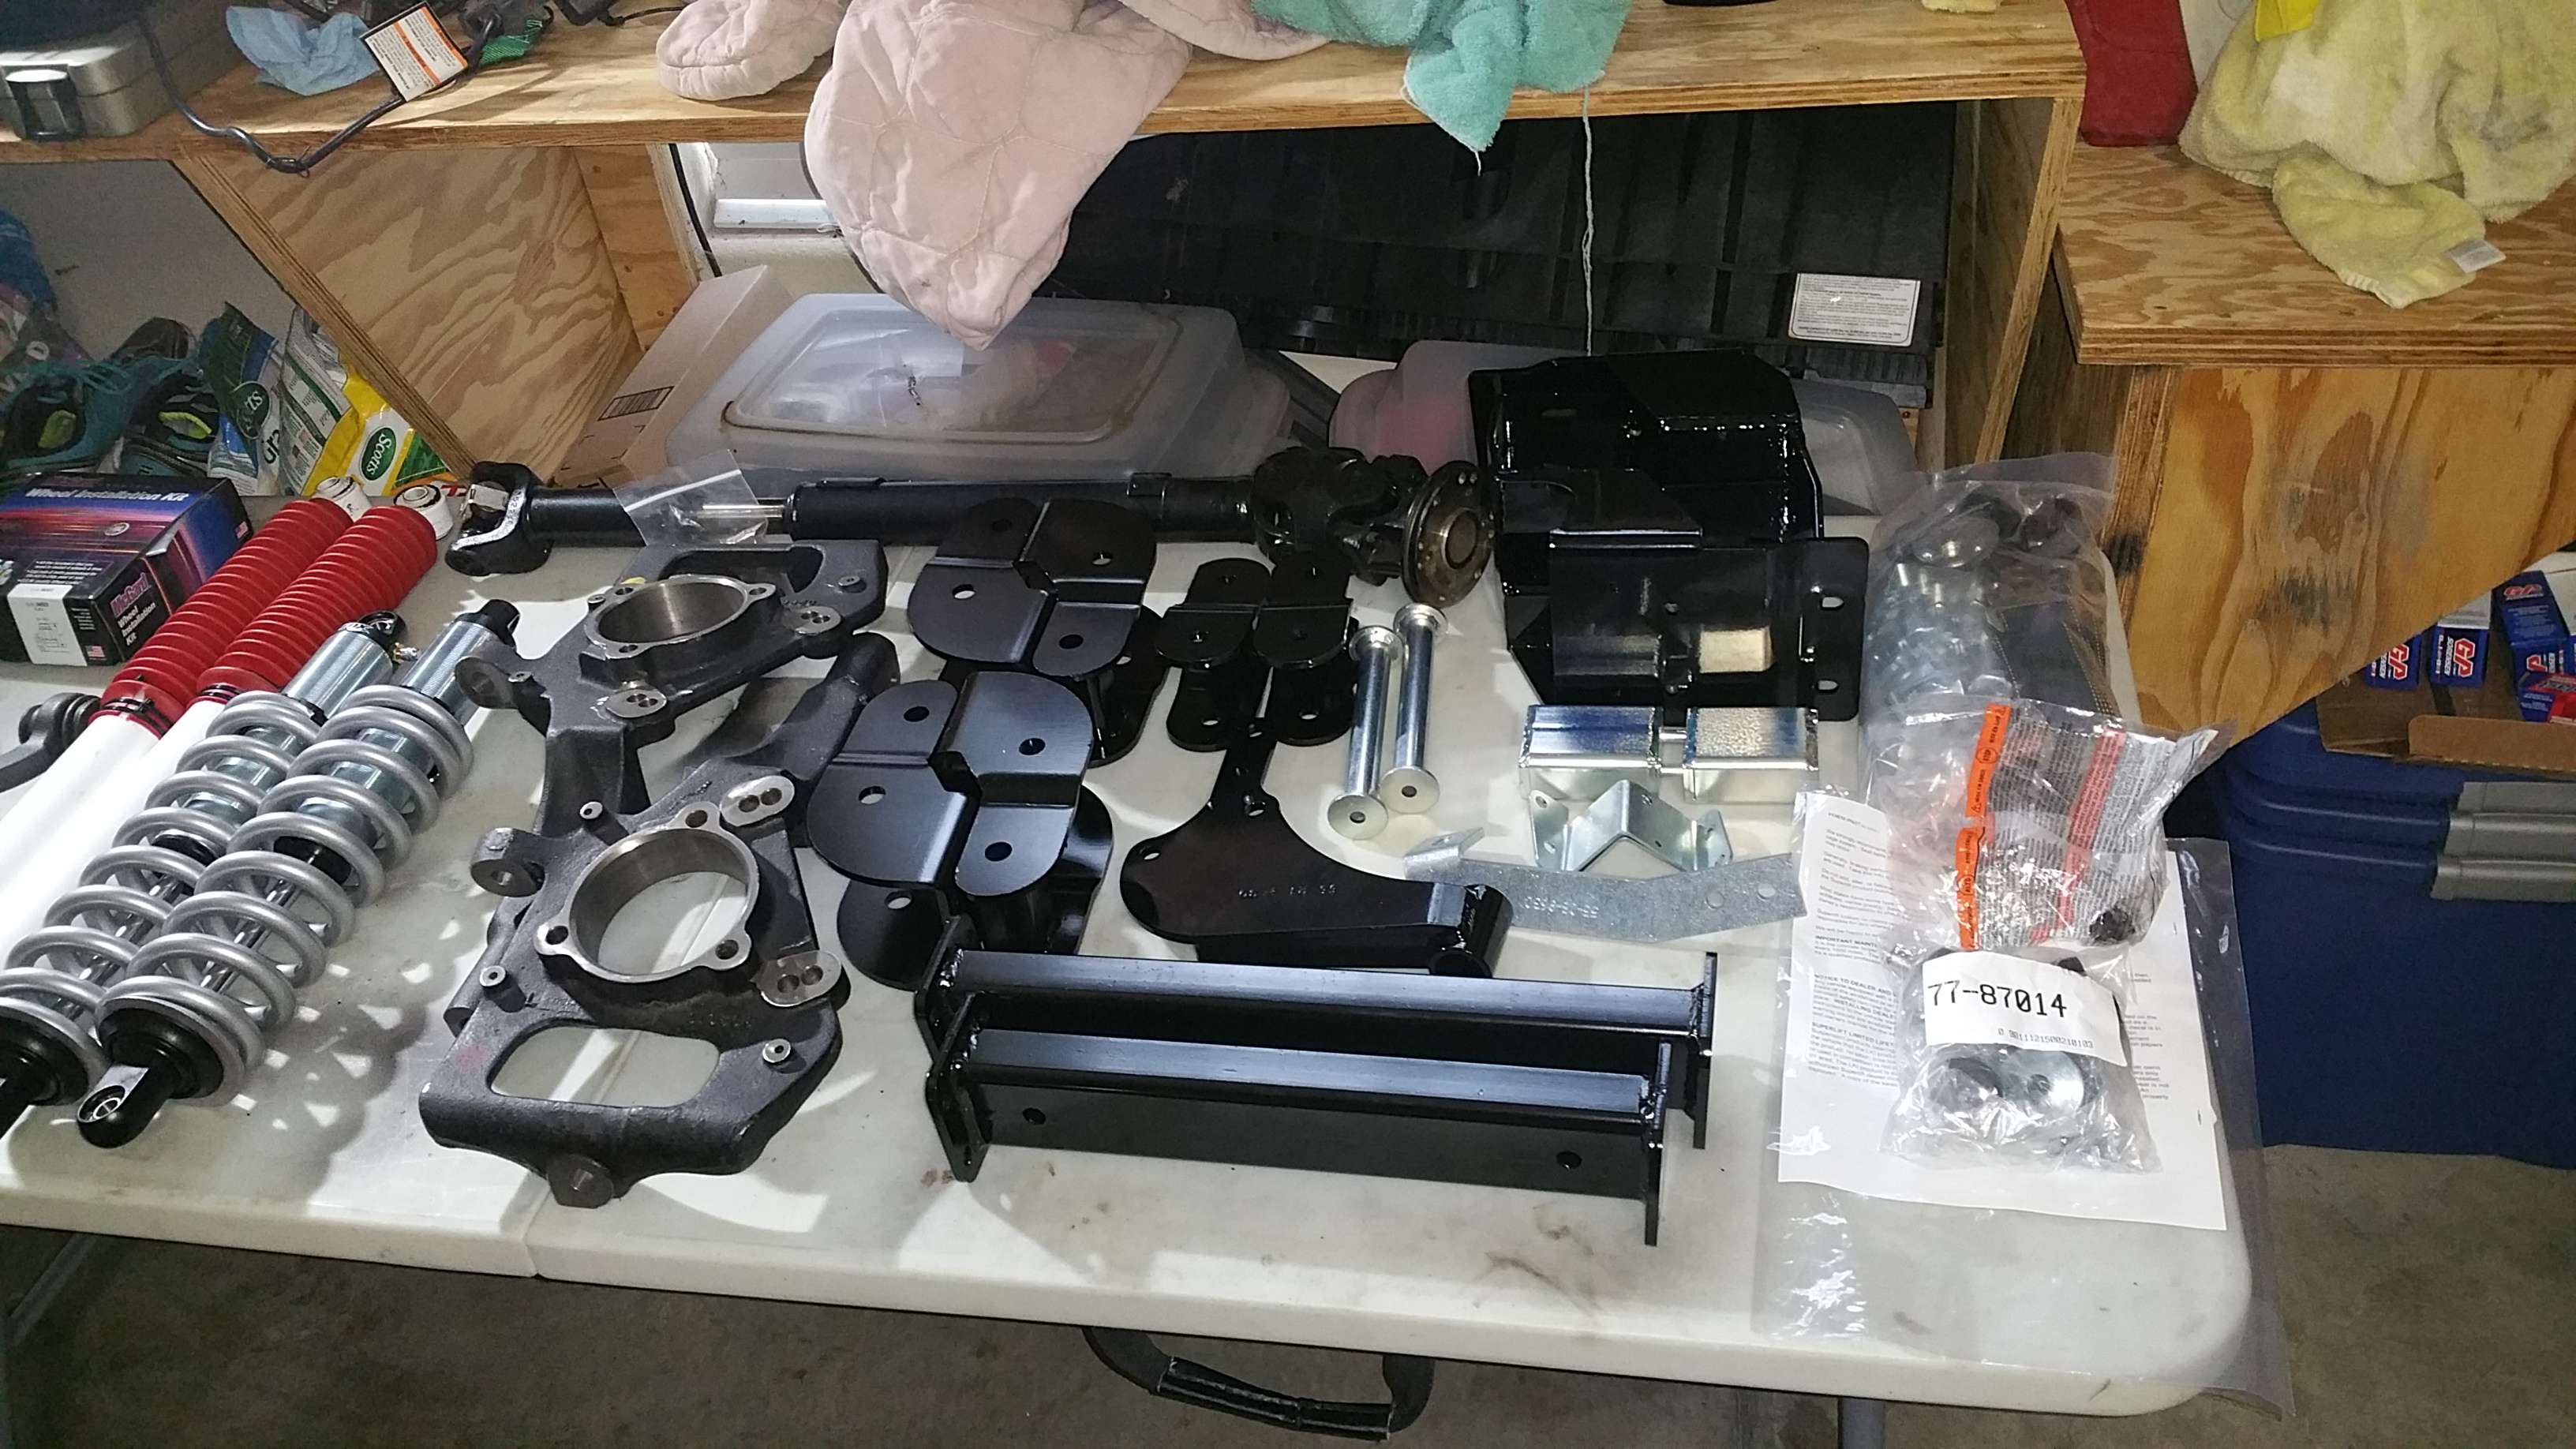
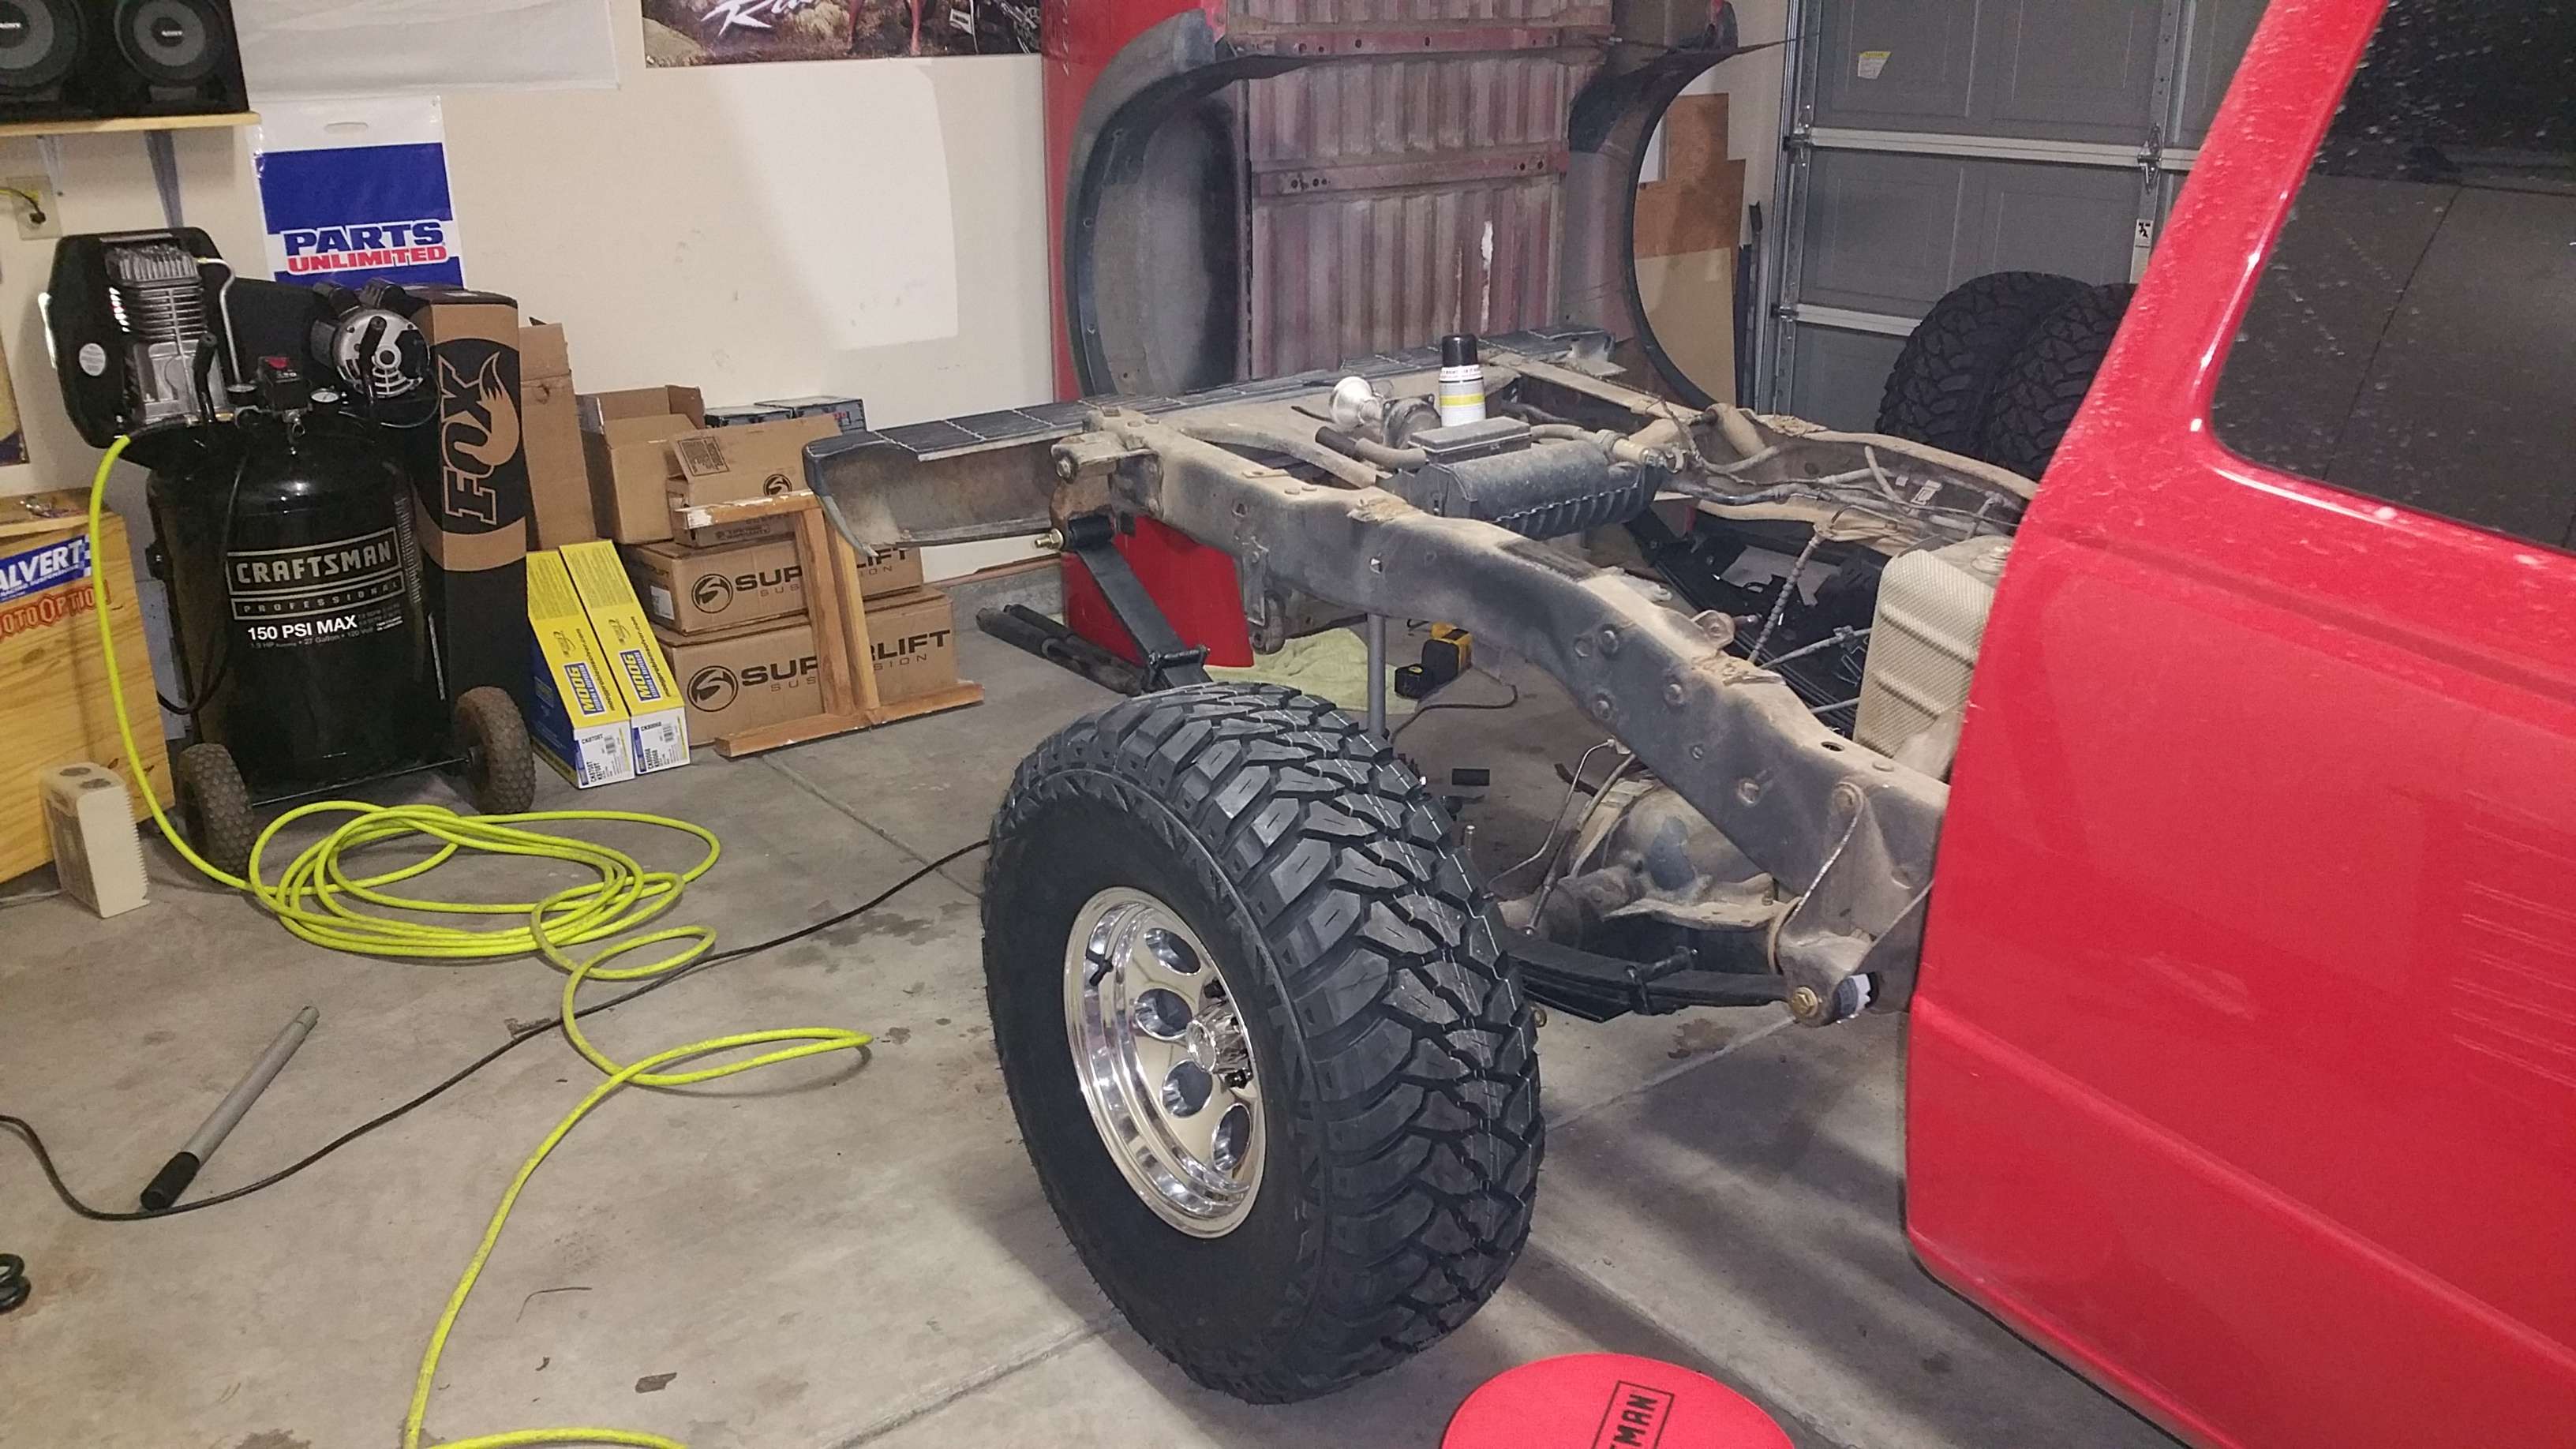
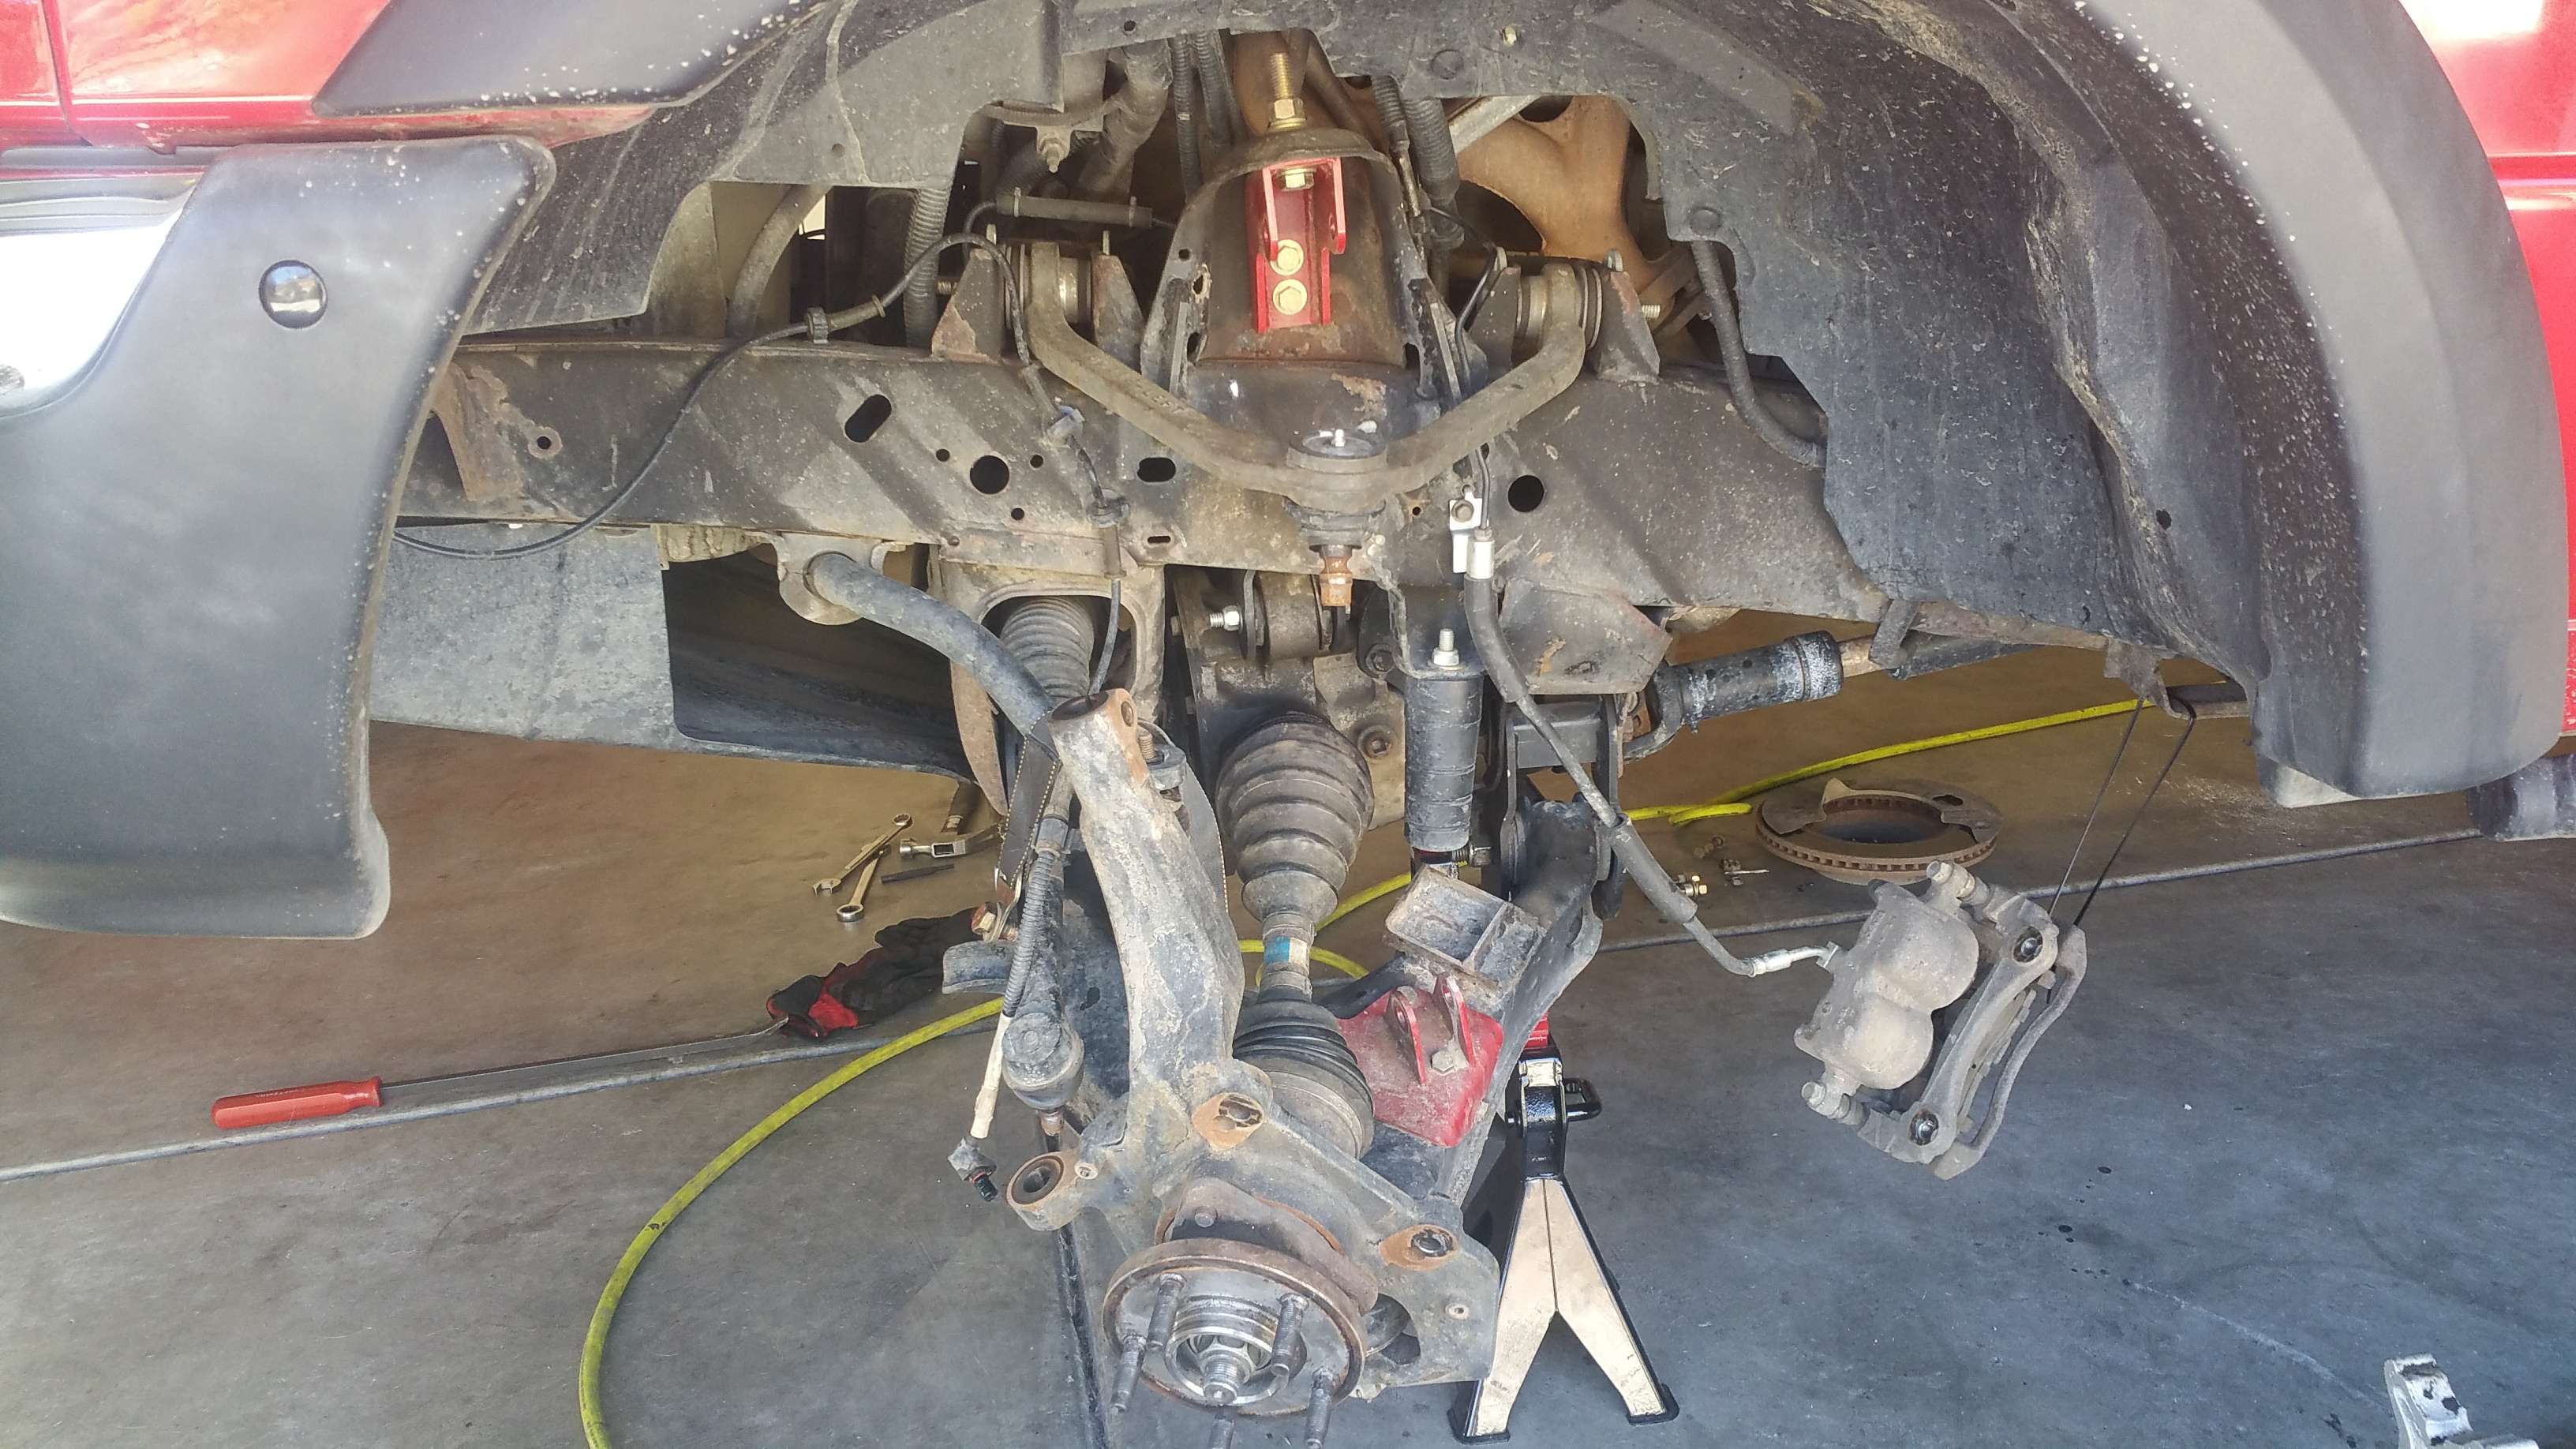
Moving on. Up comes a few random installs and the superlift/coilover conversion.
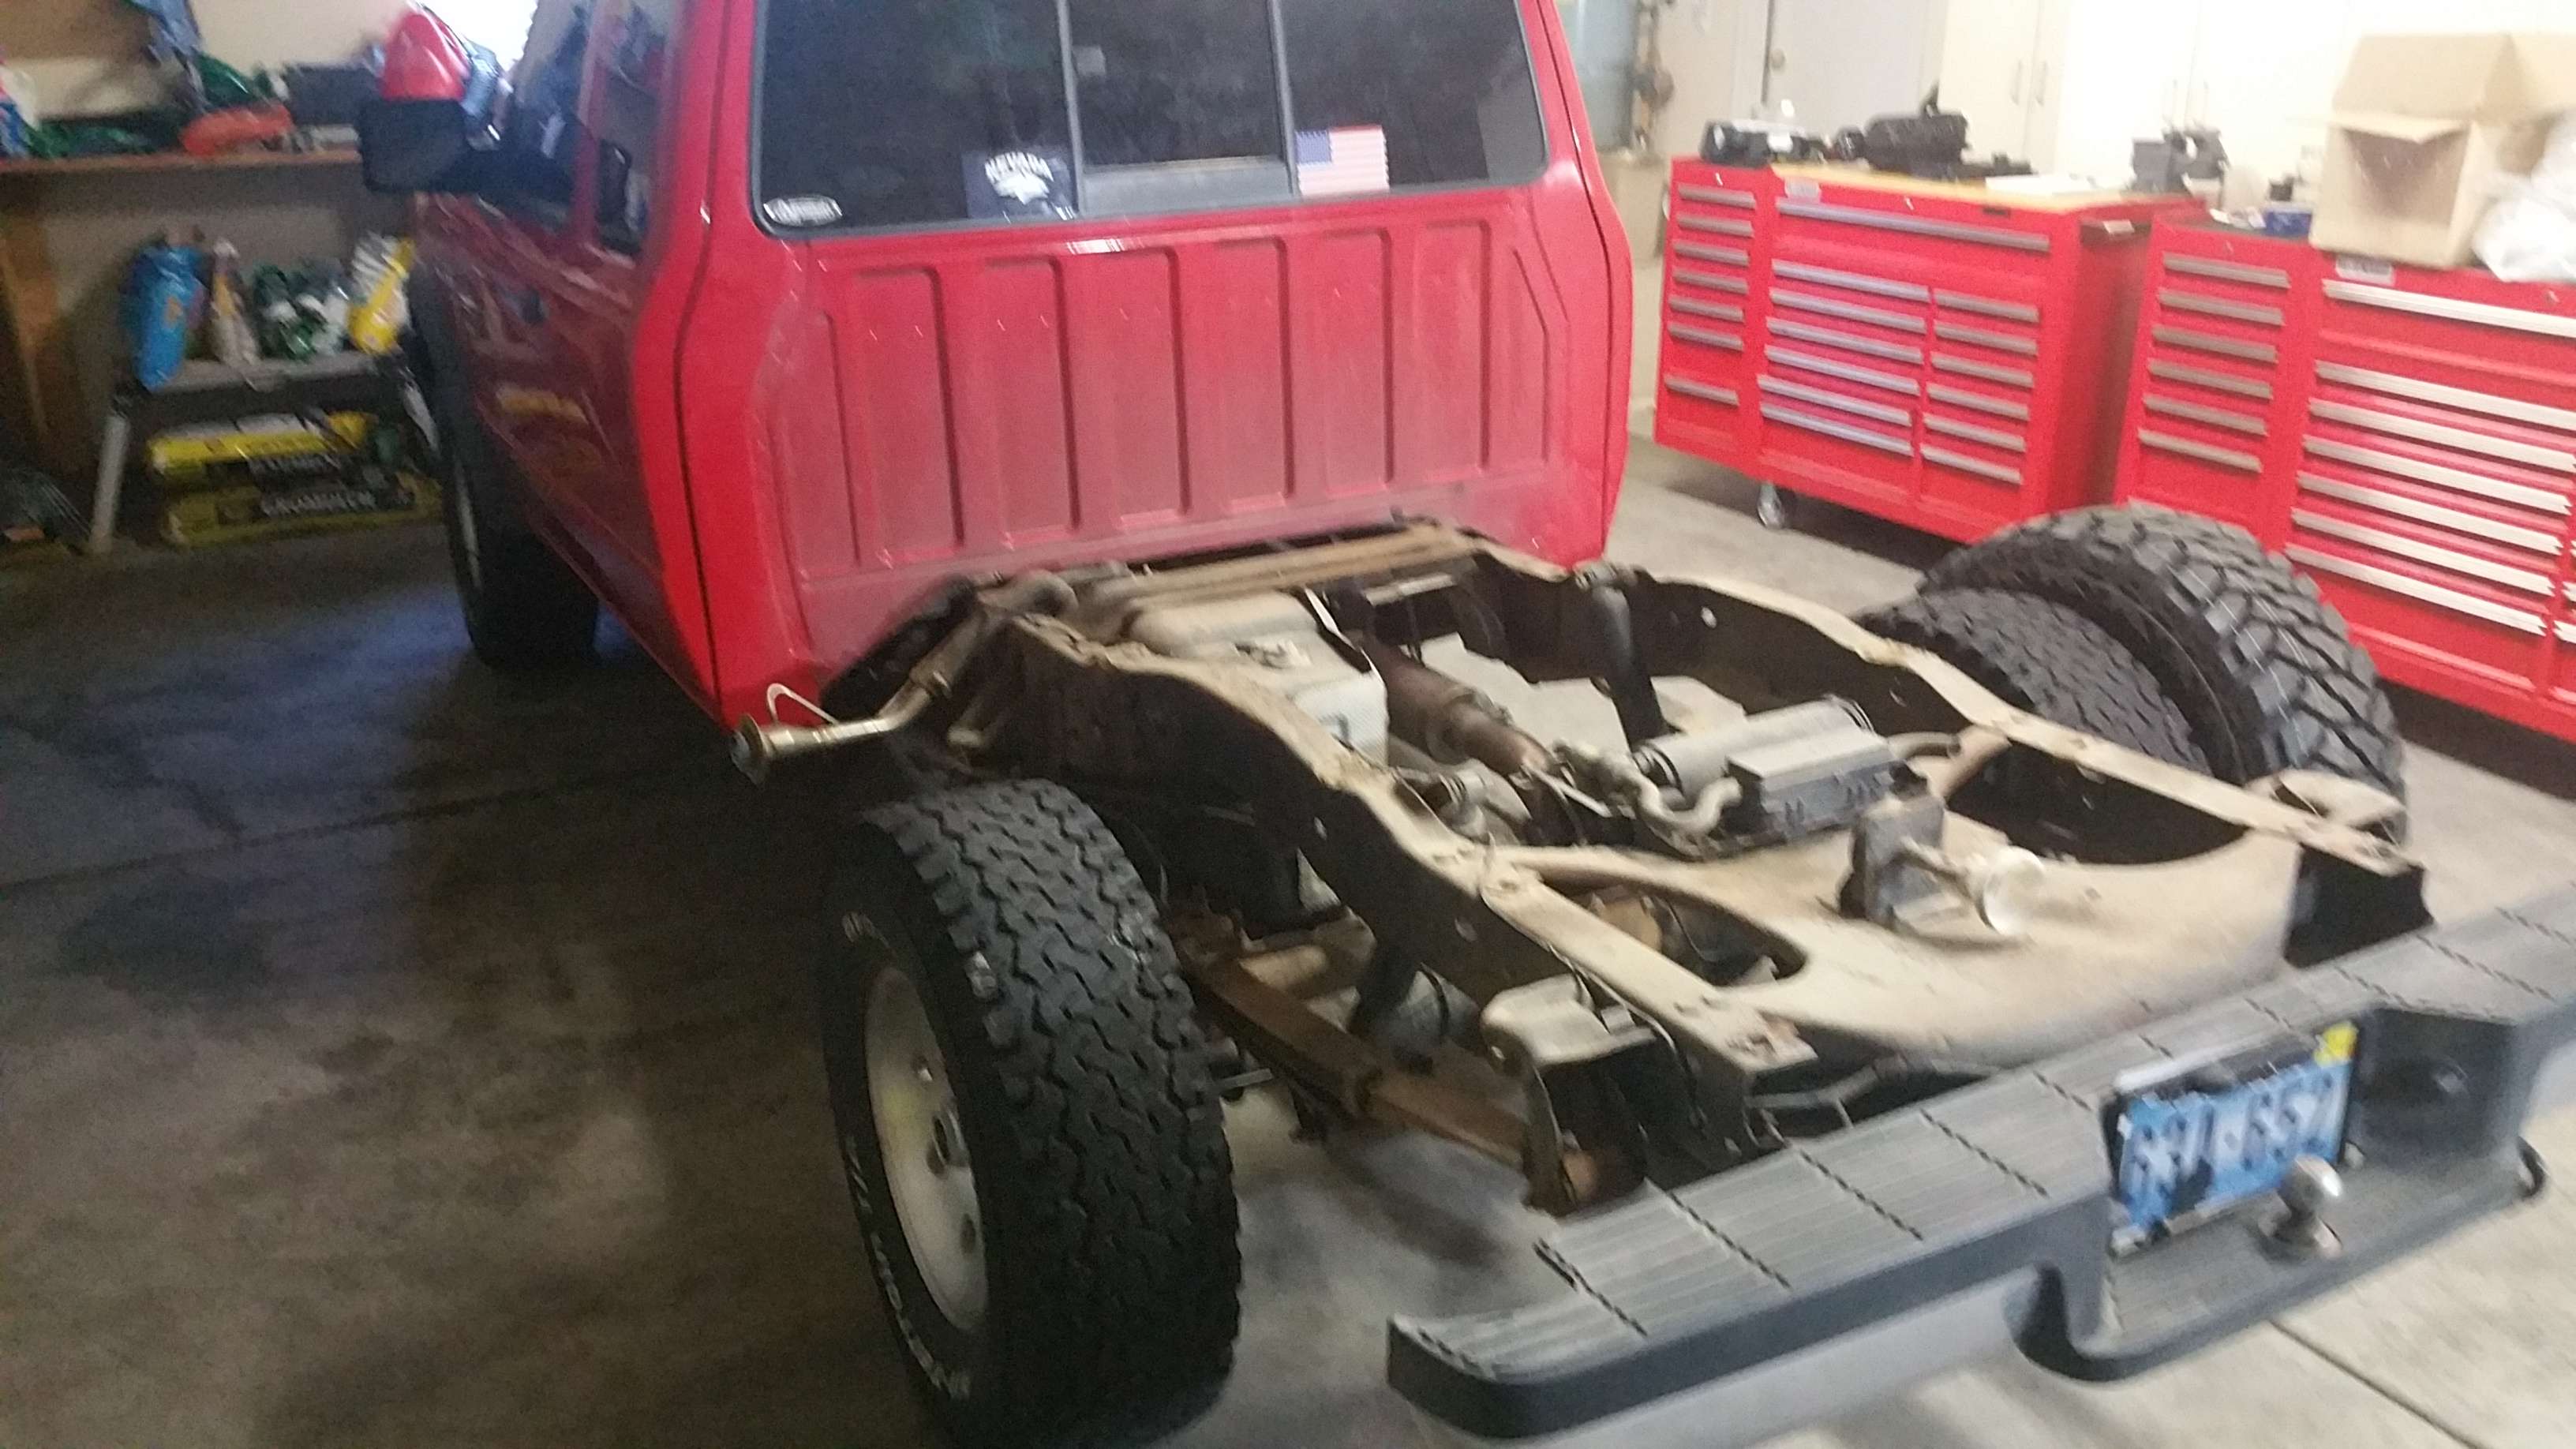
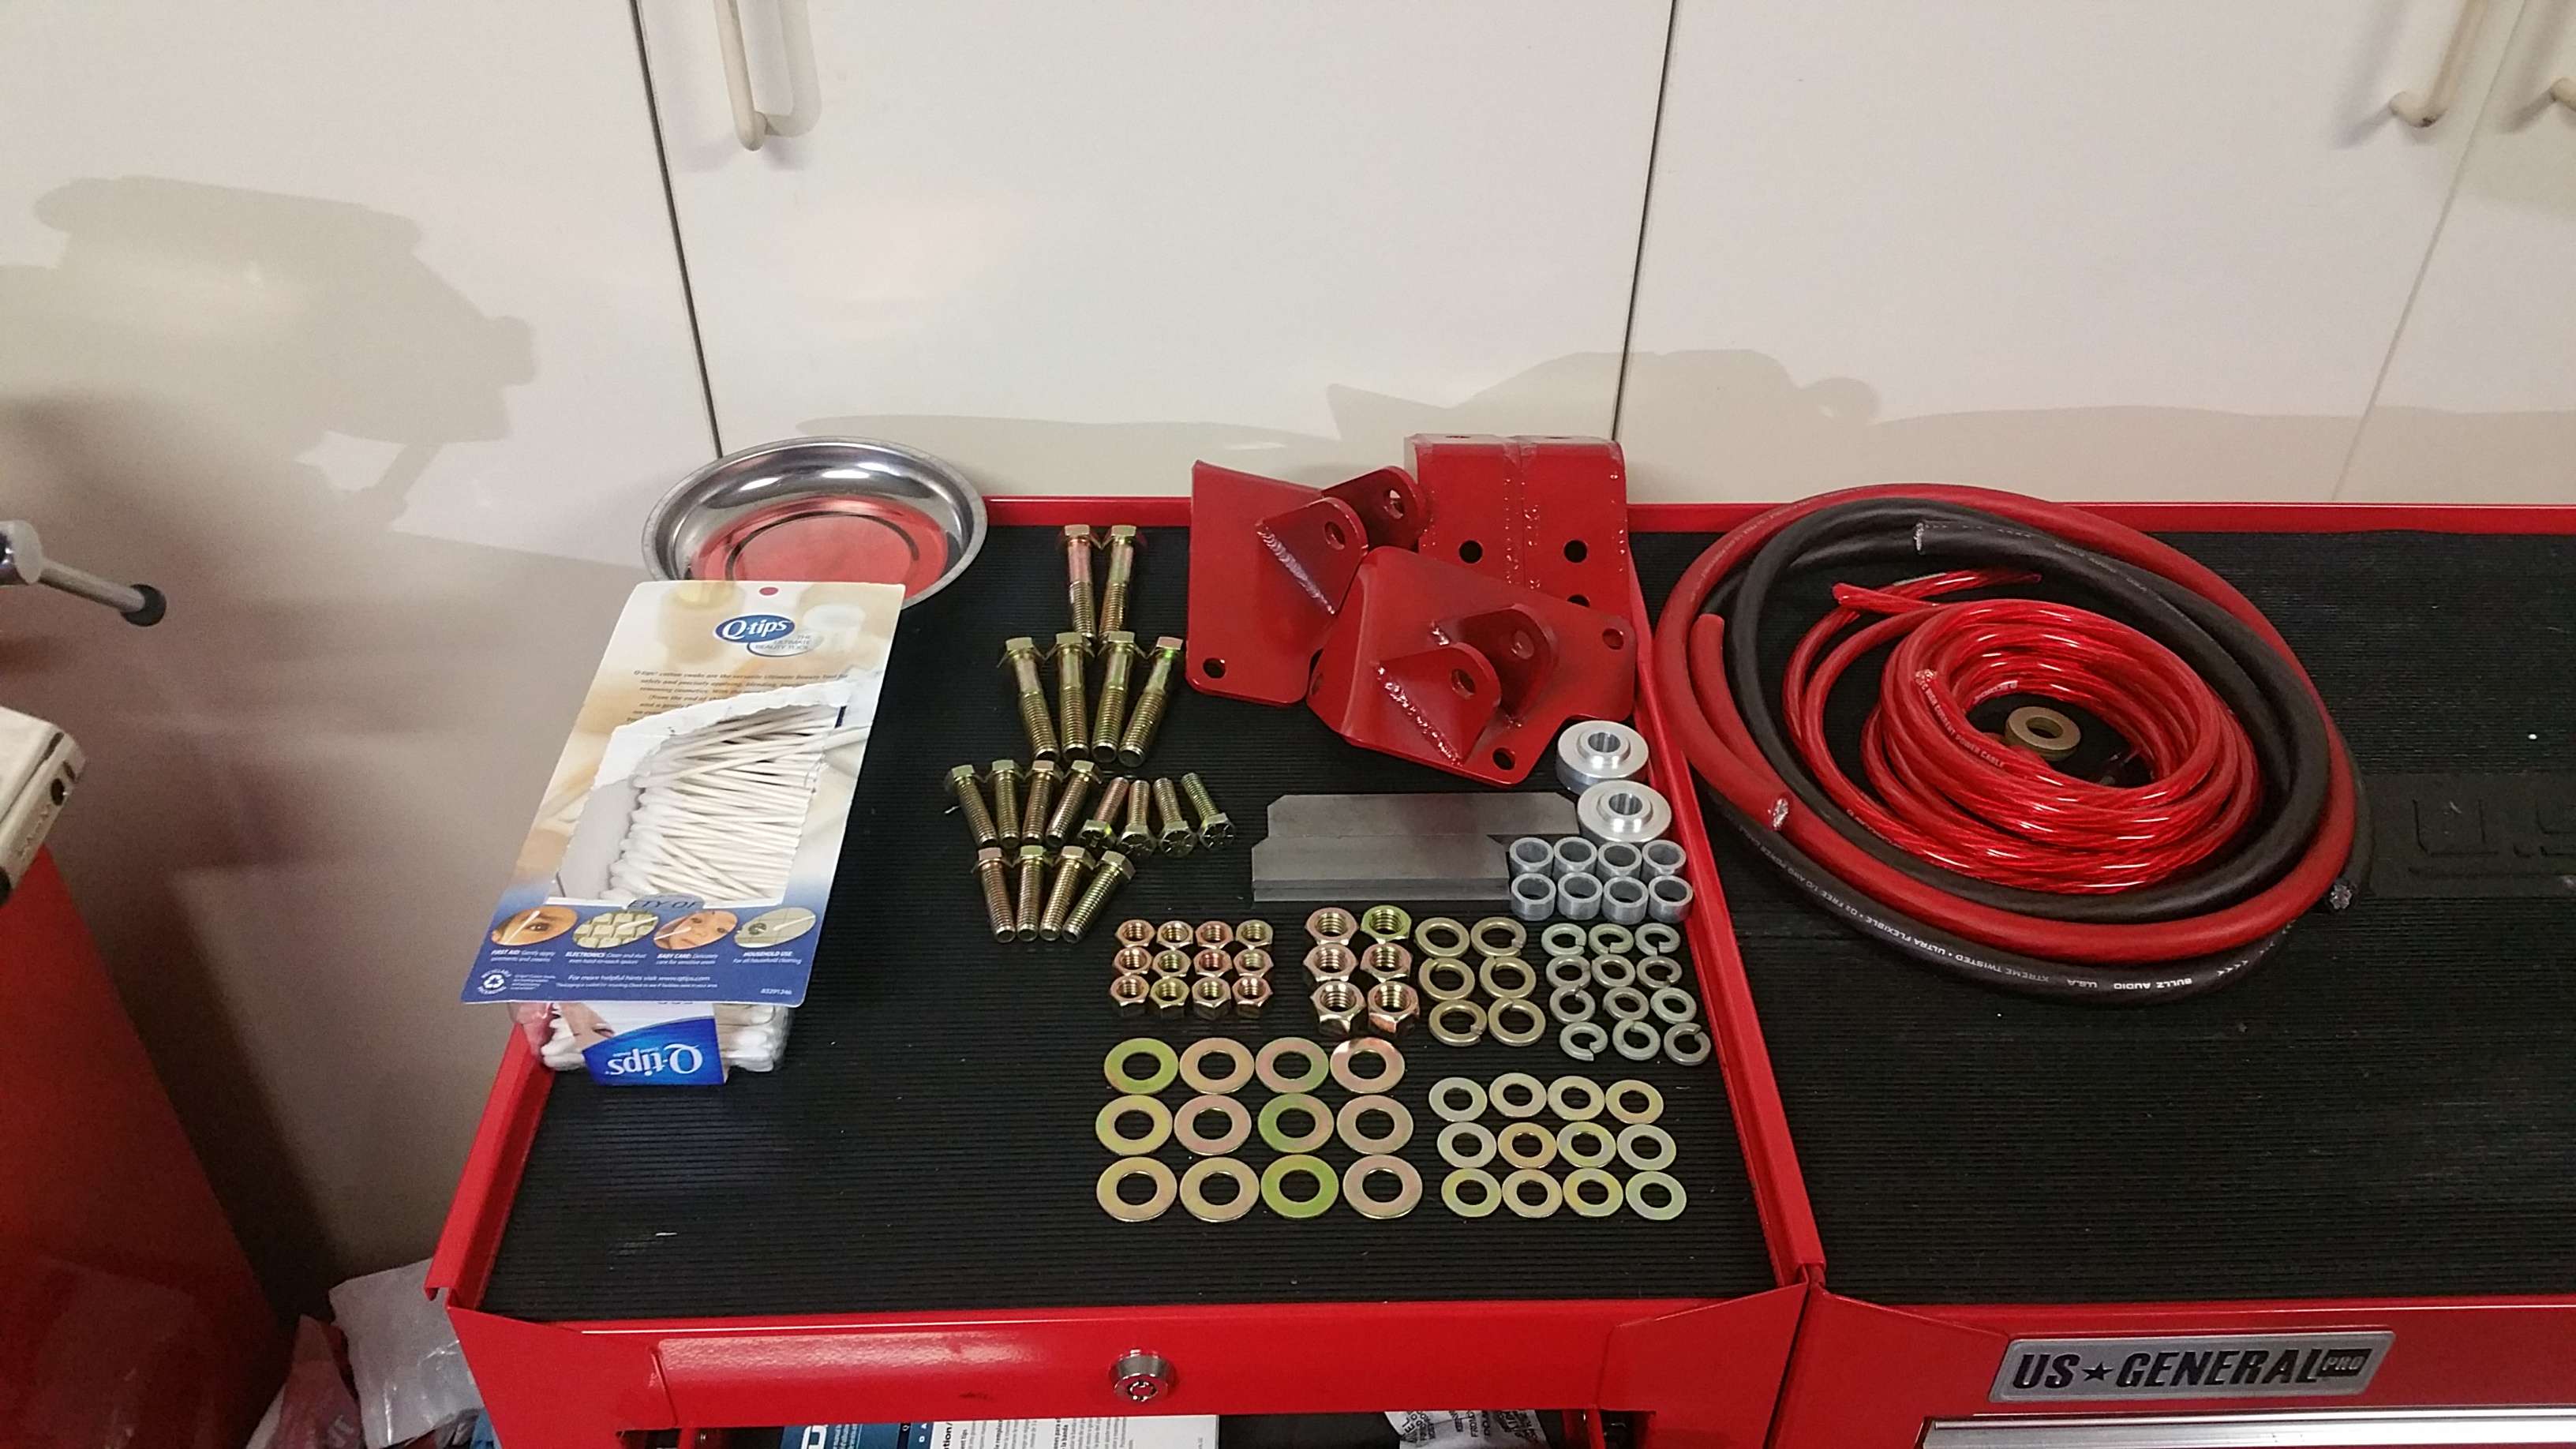
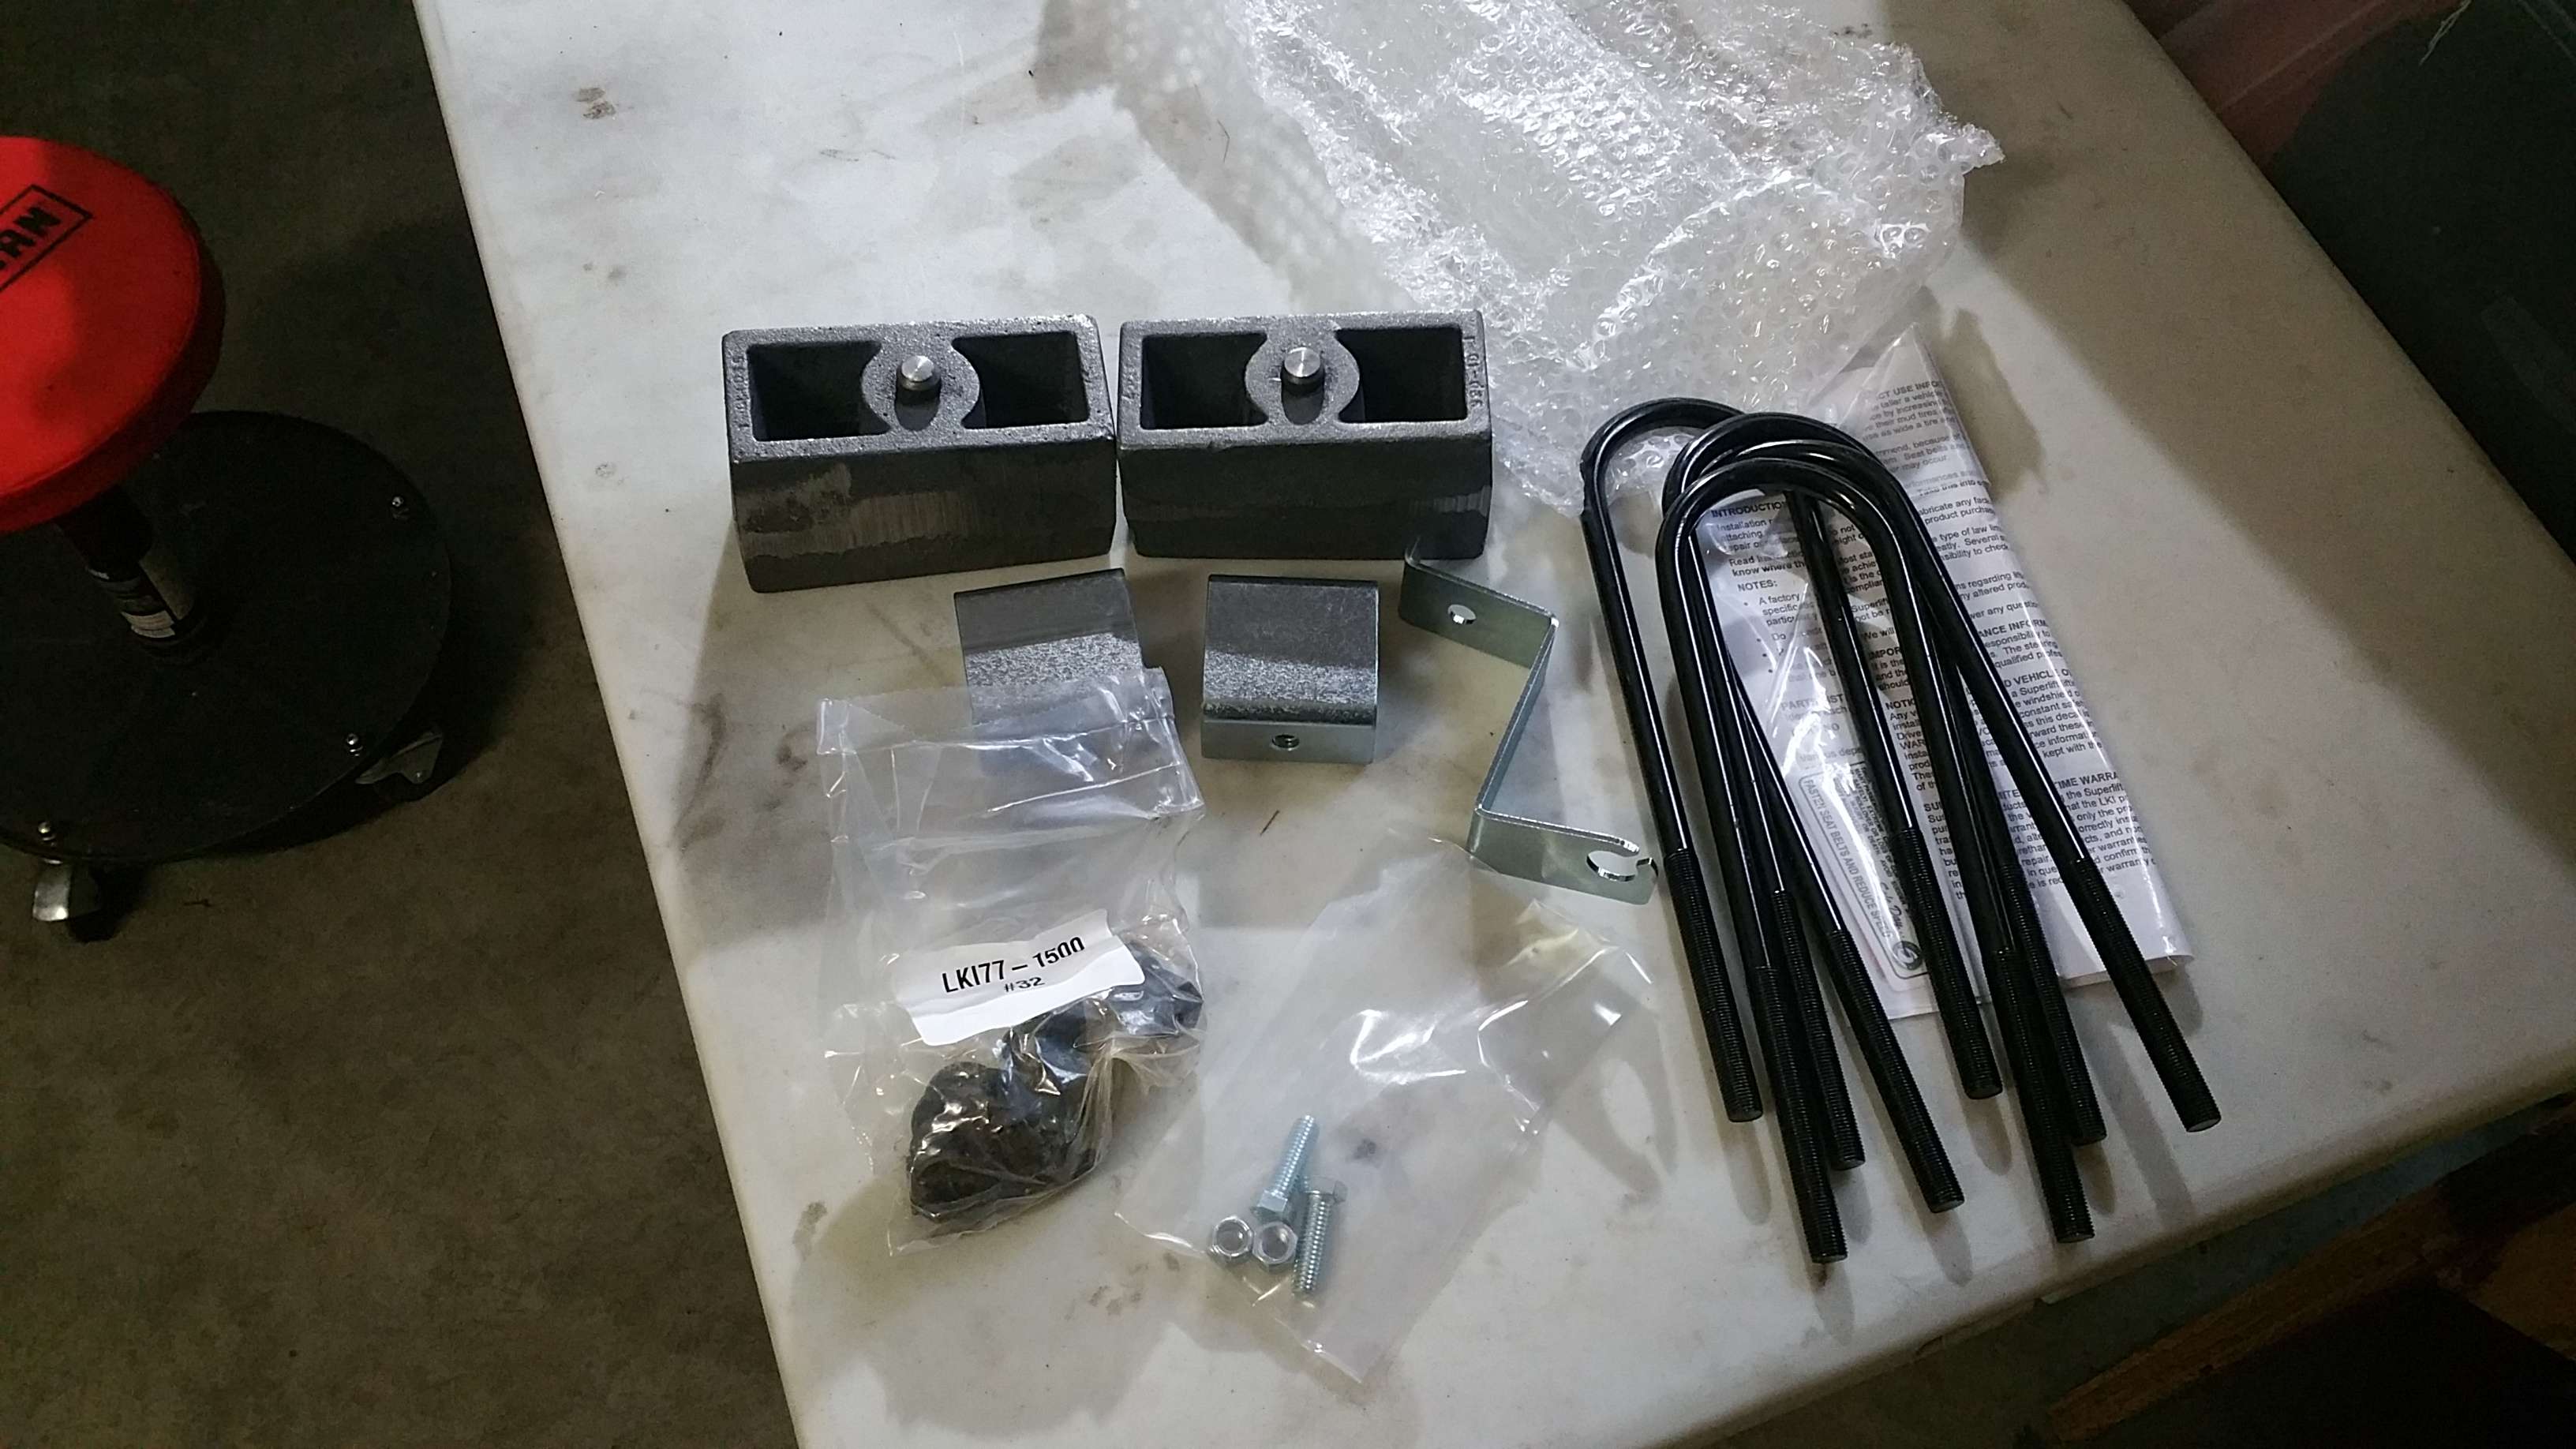
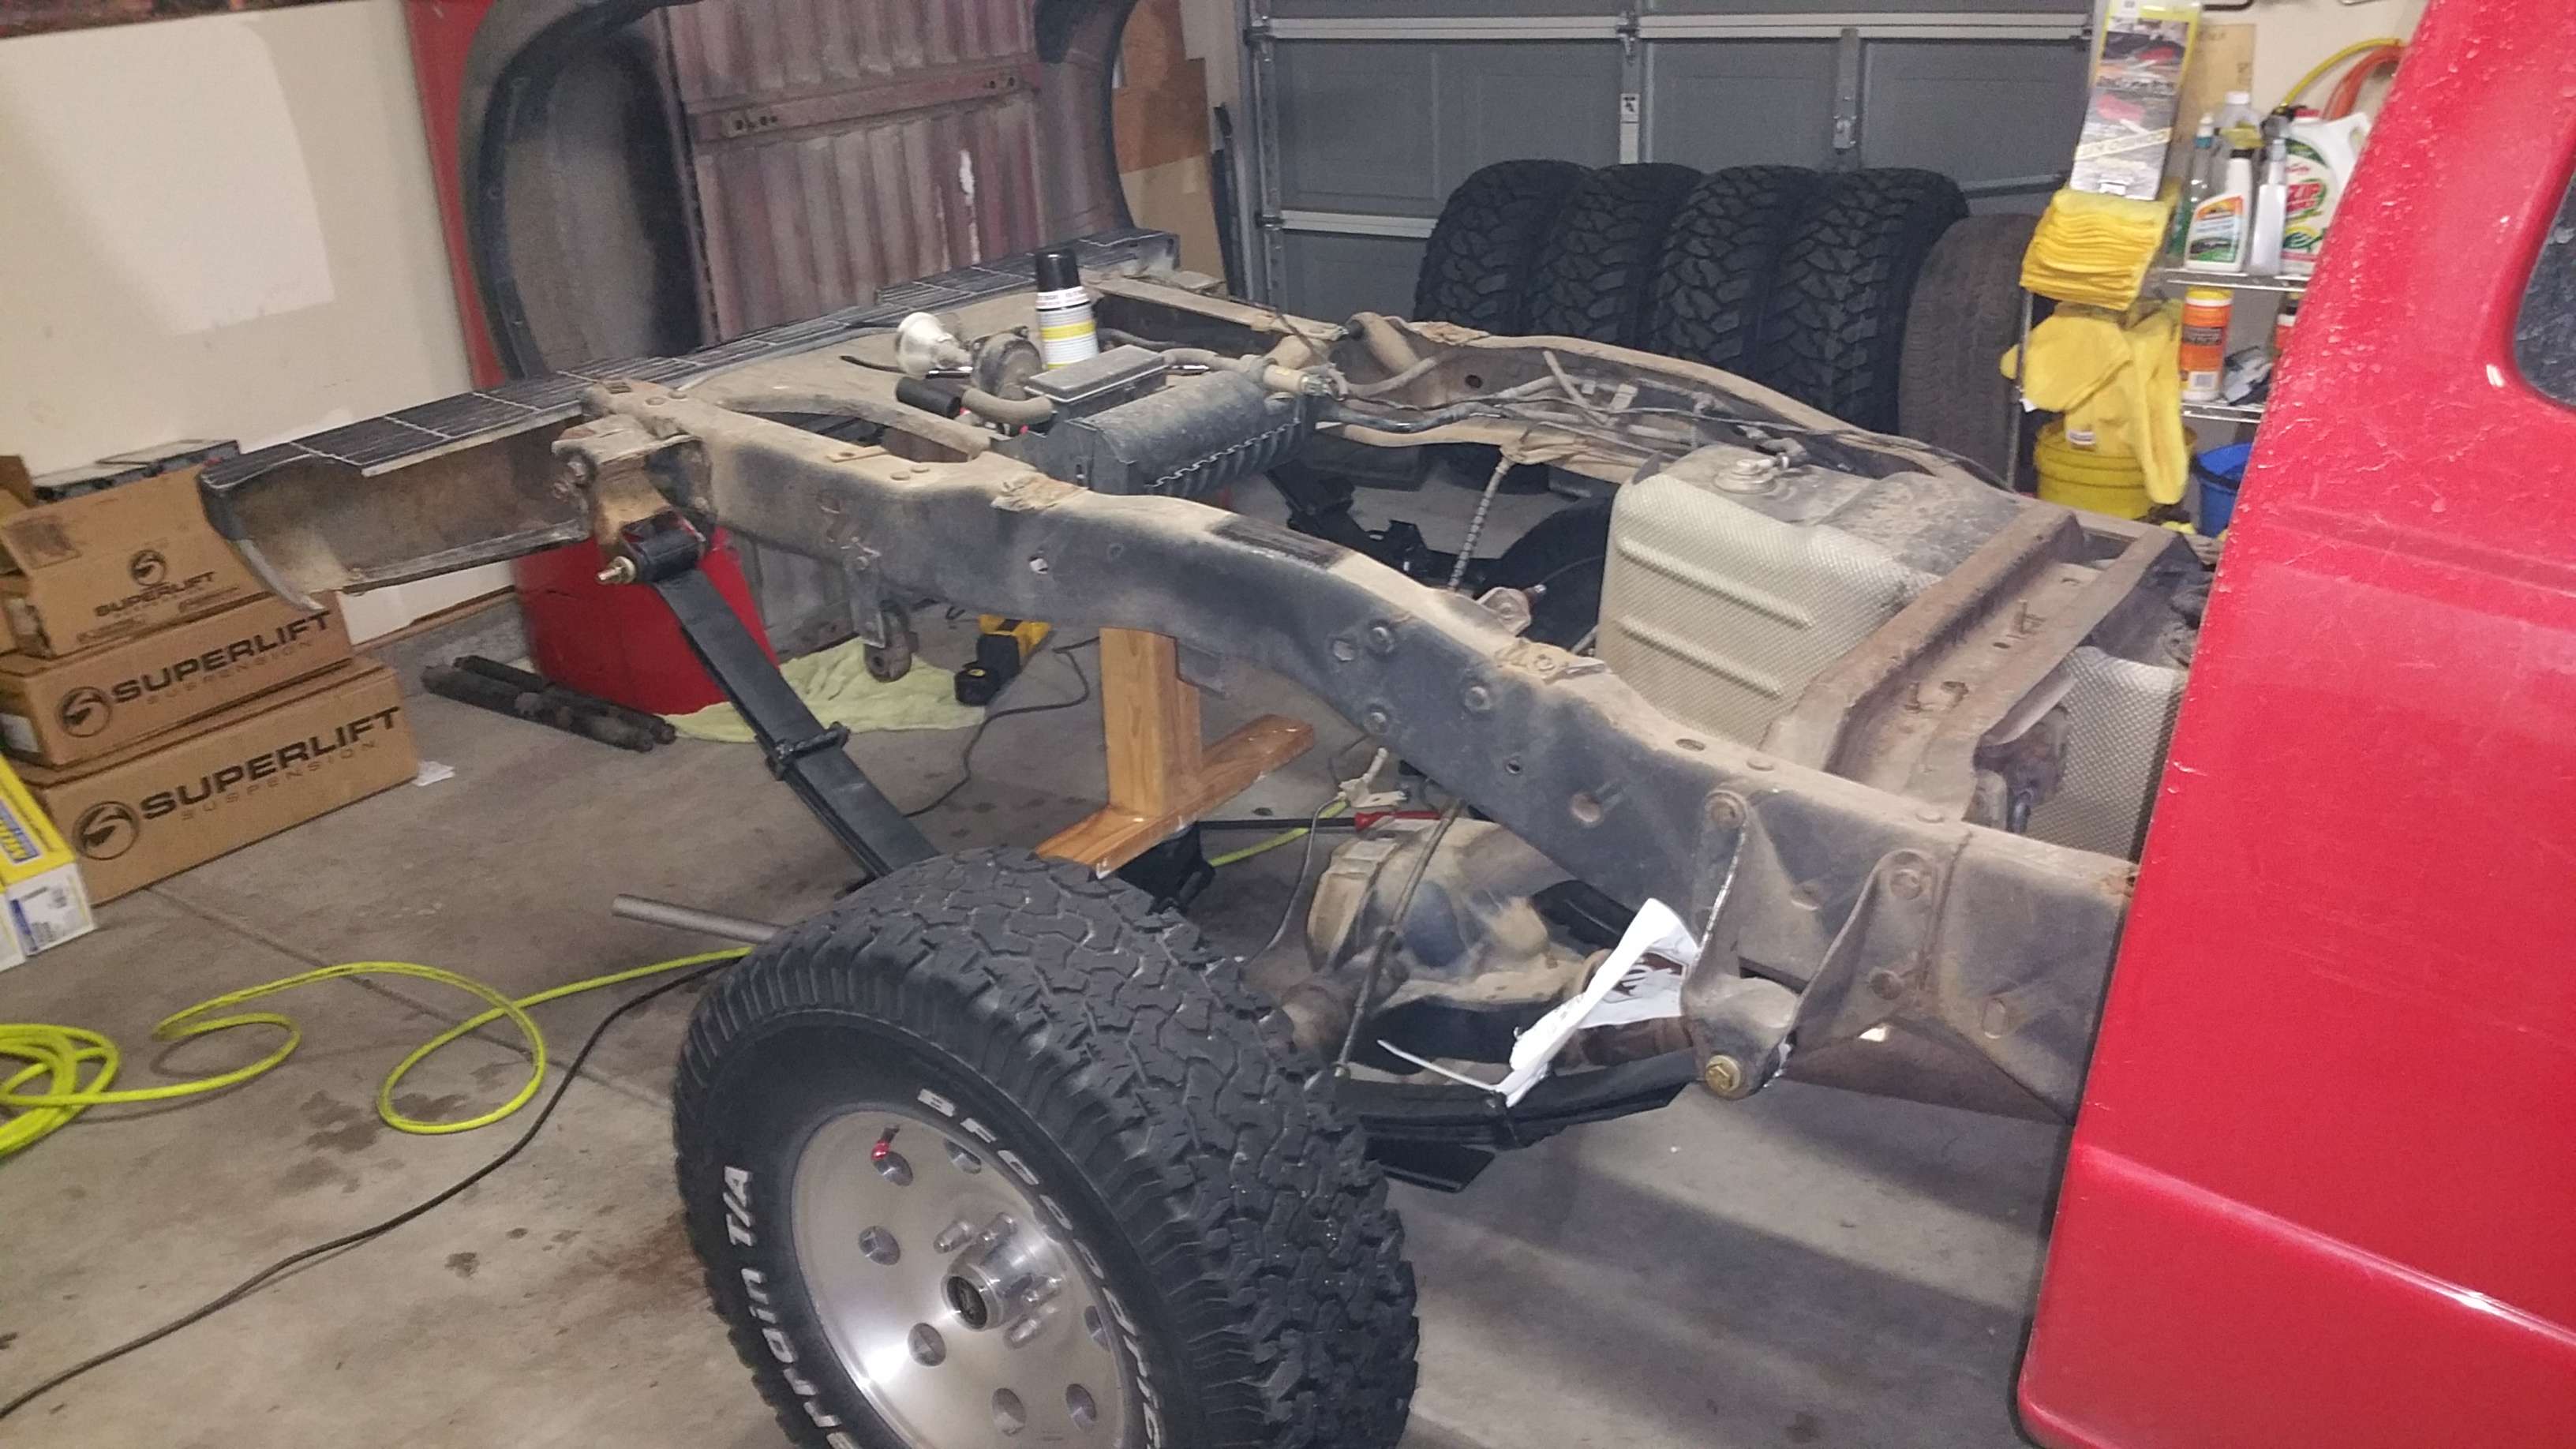
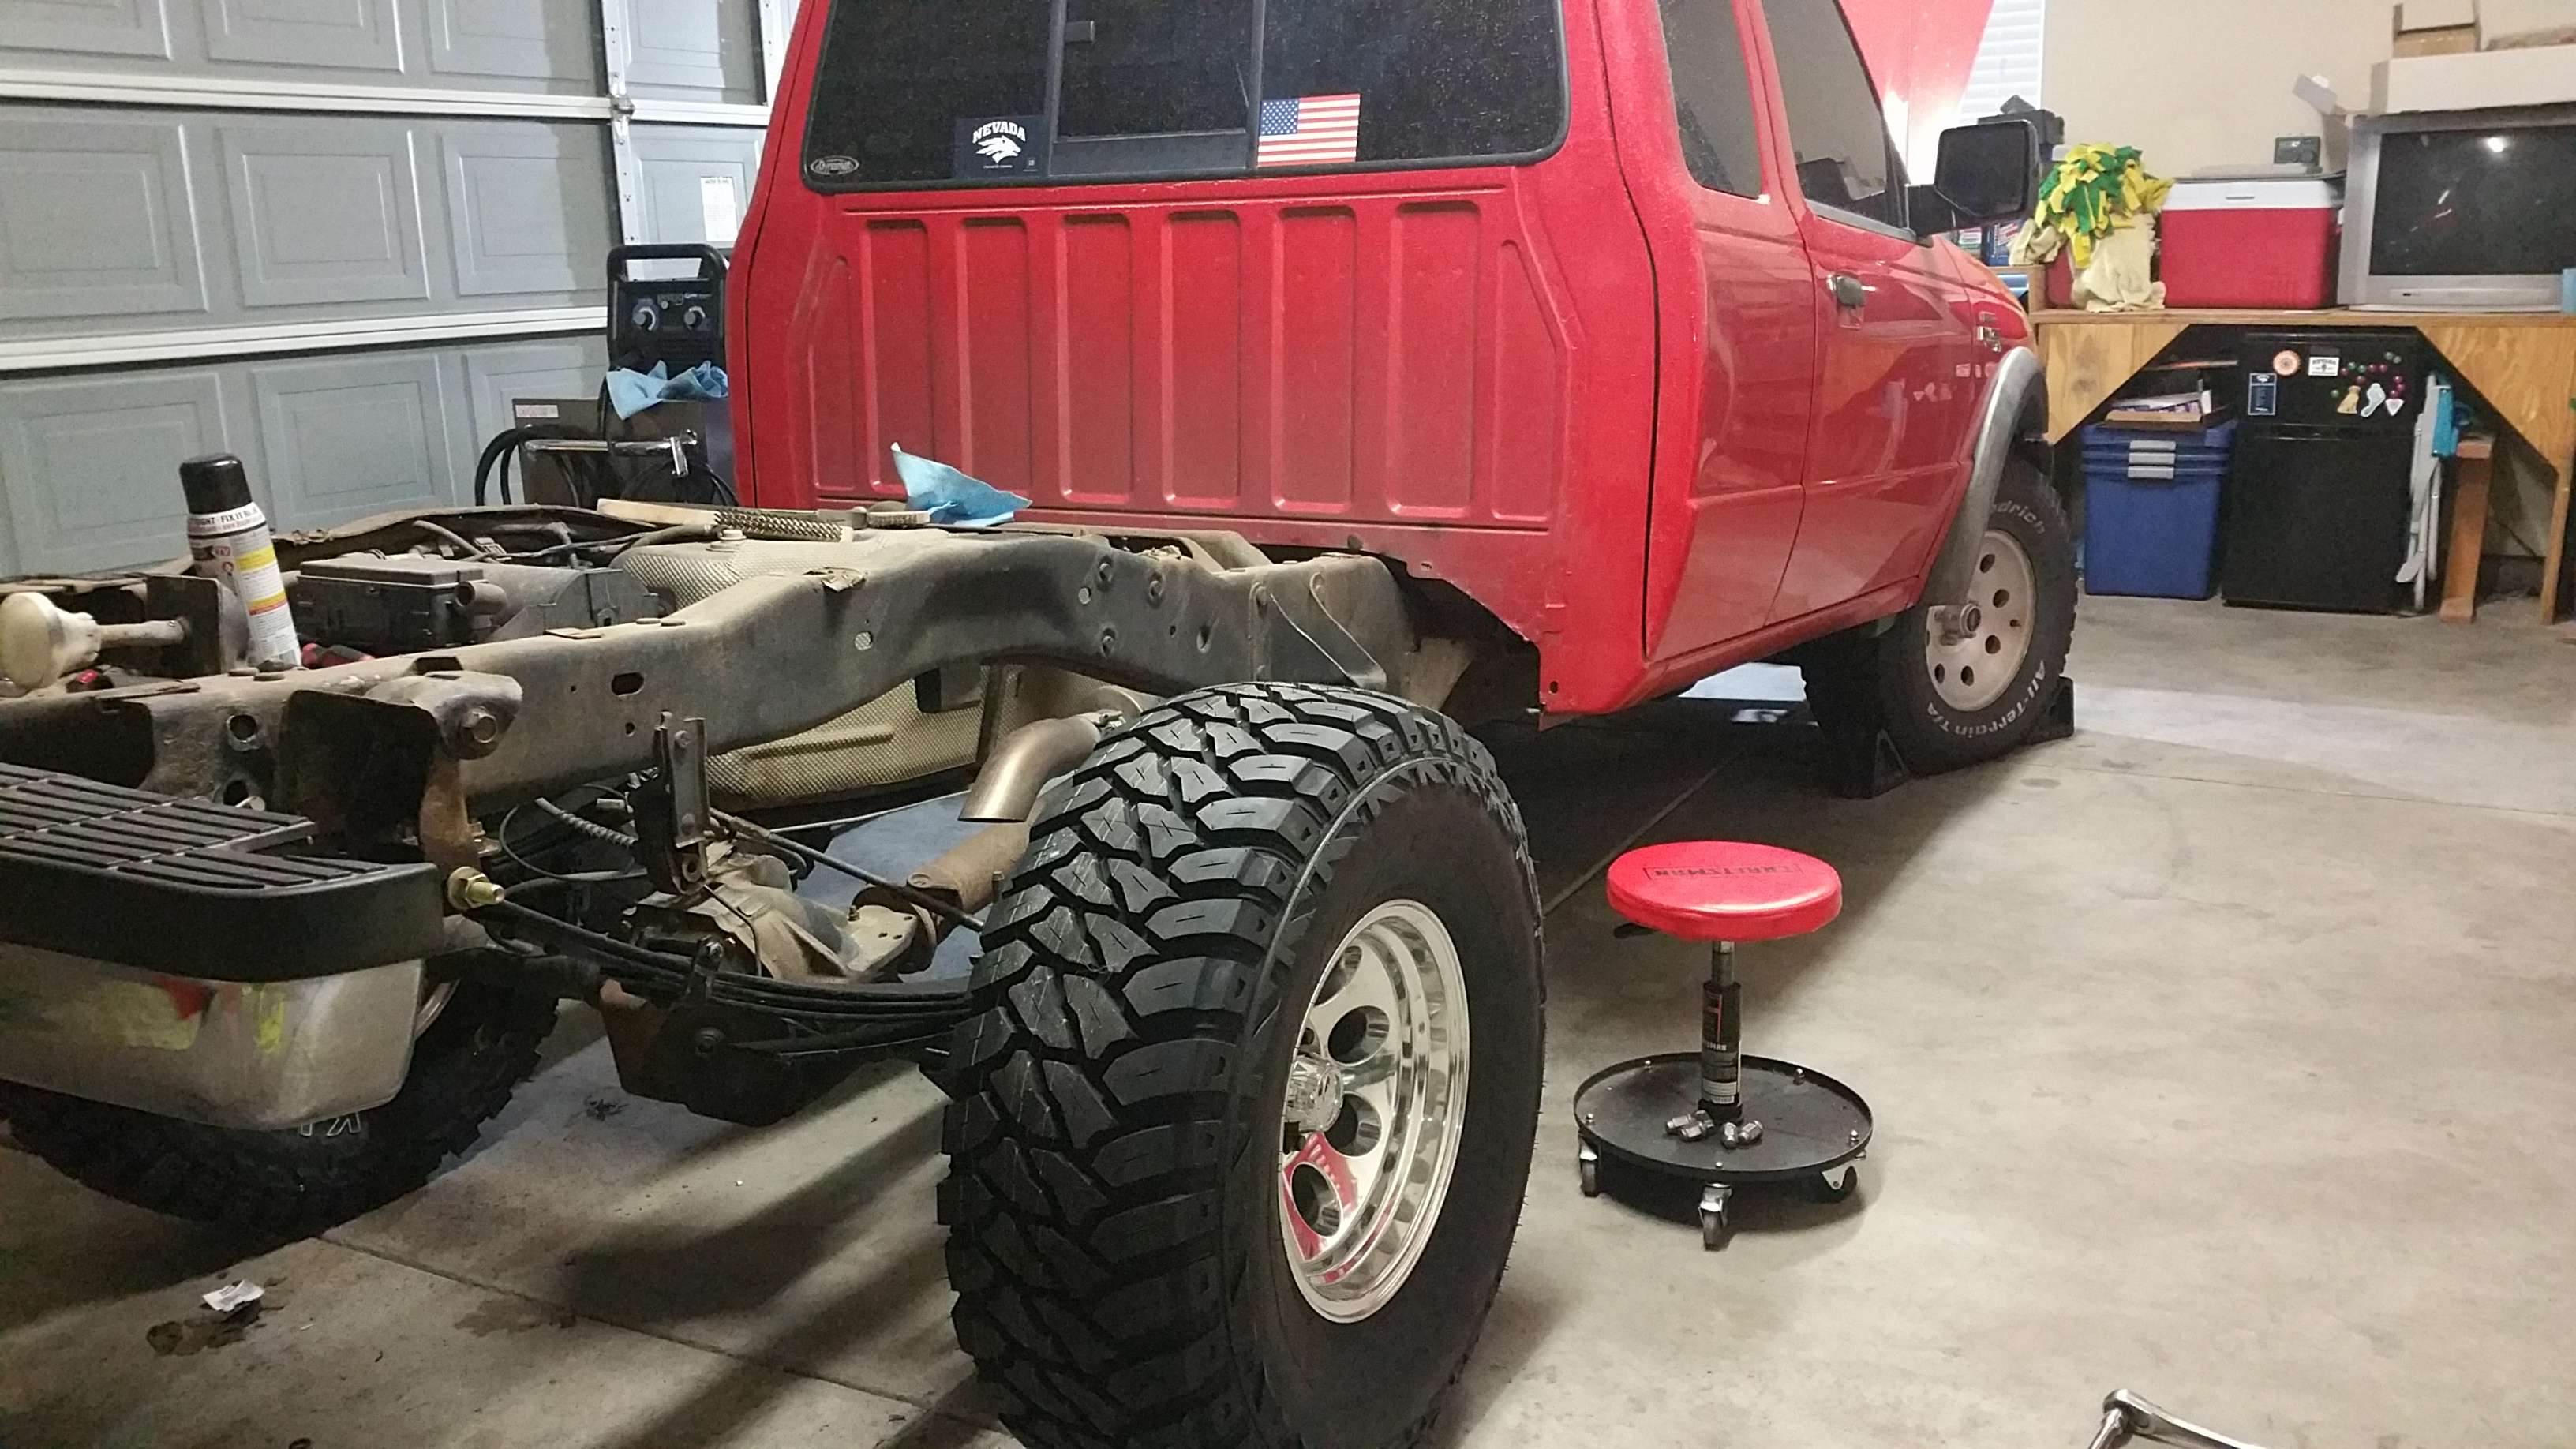
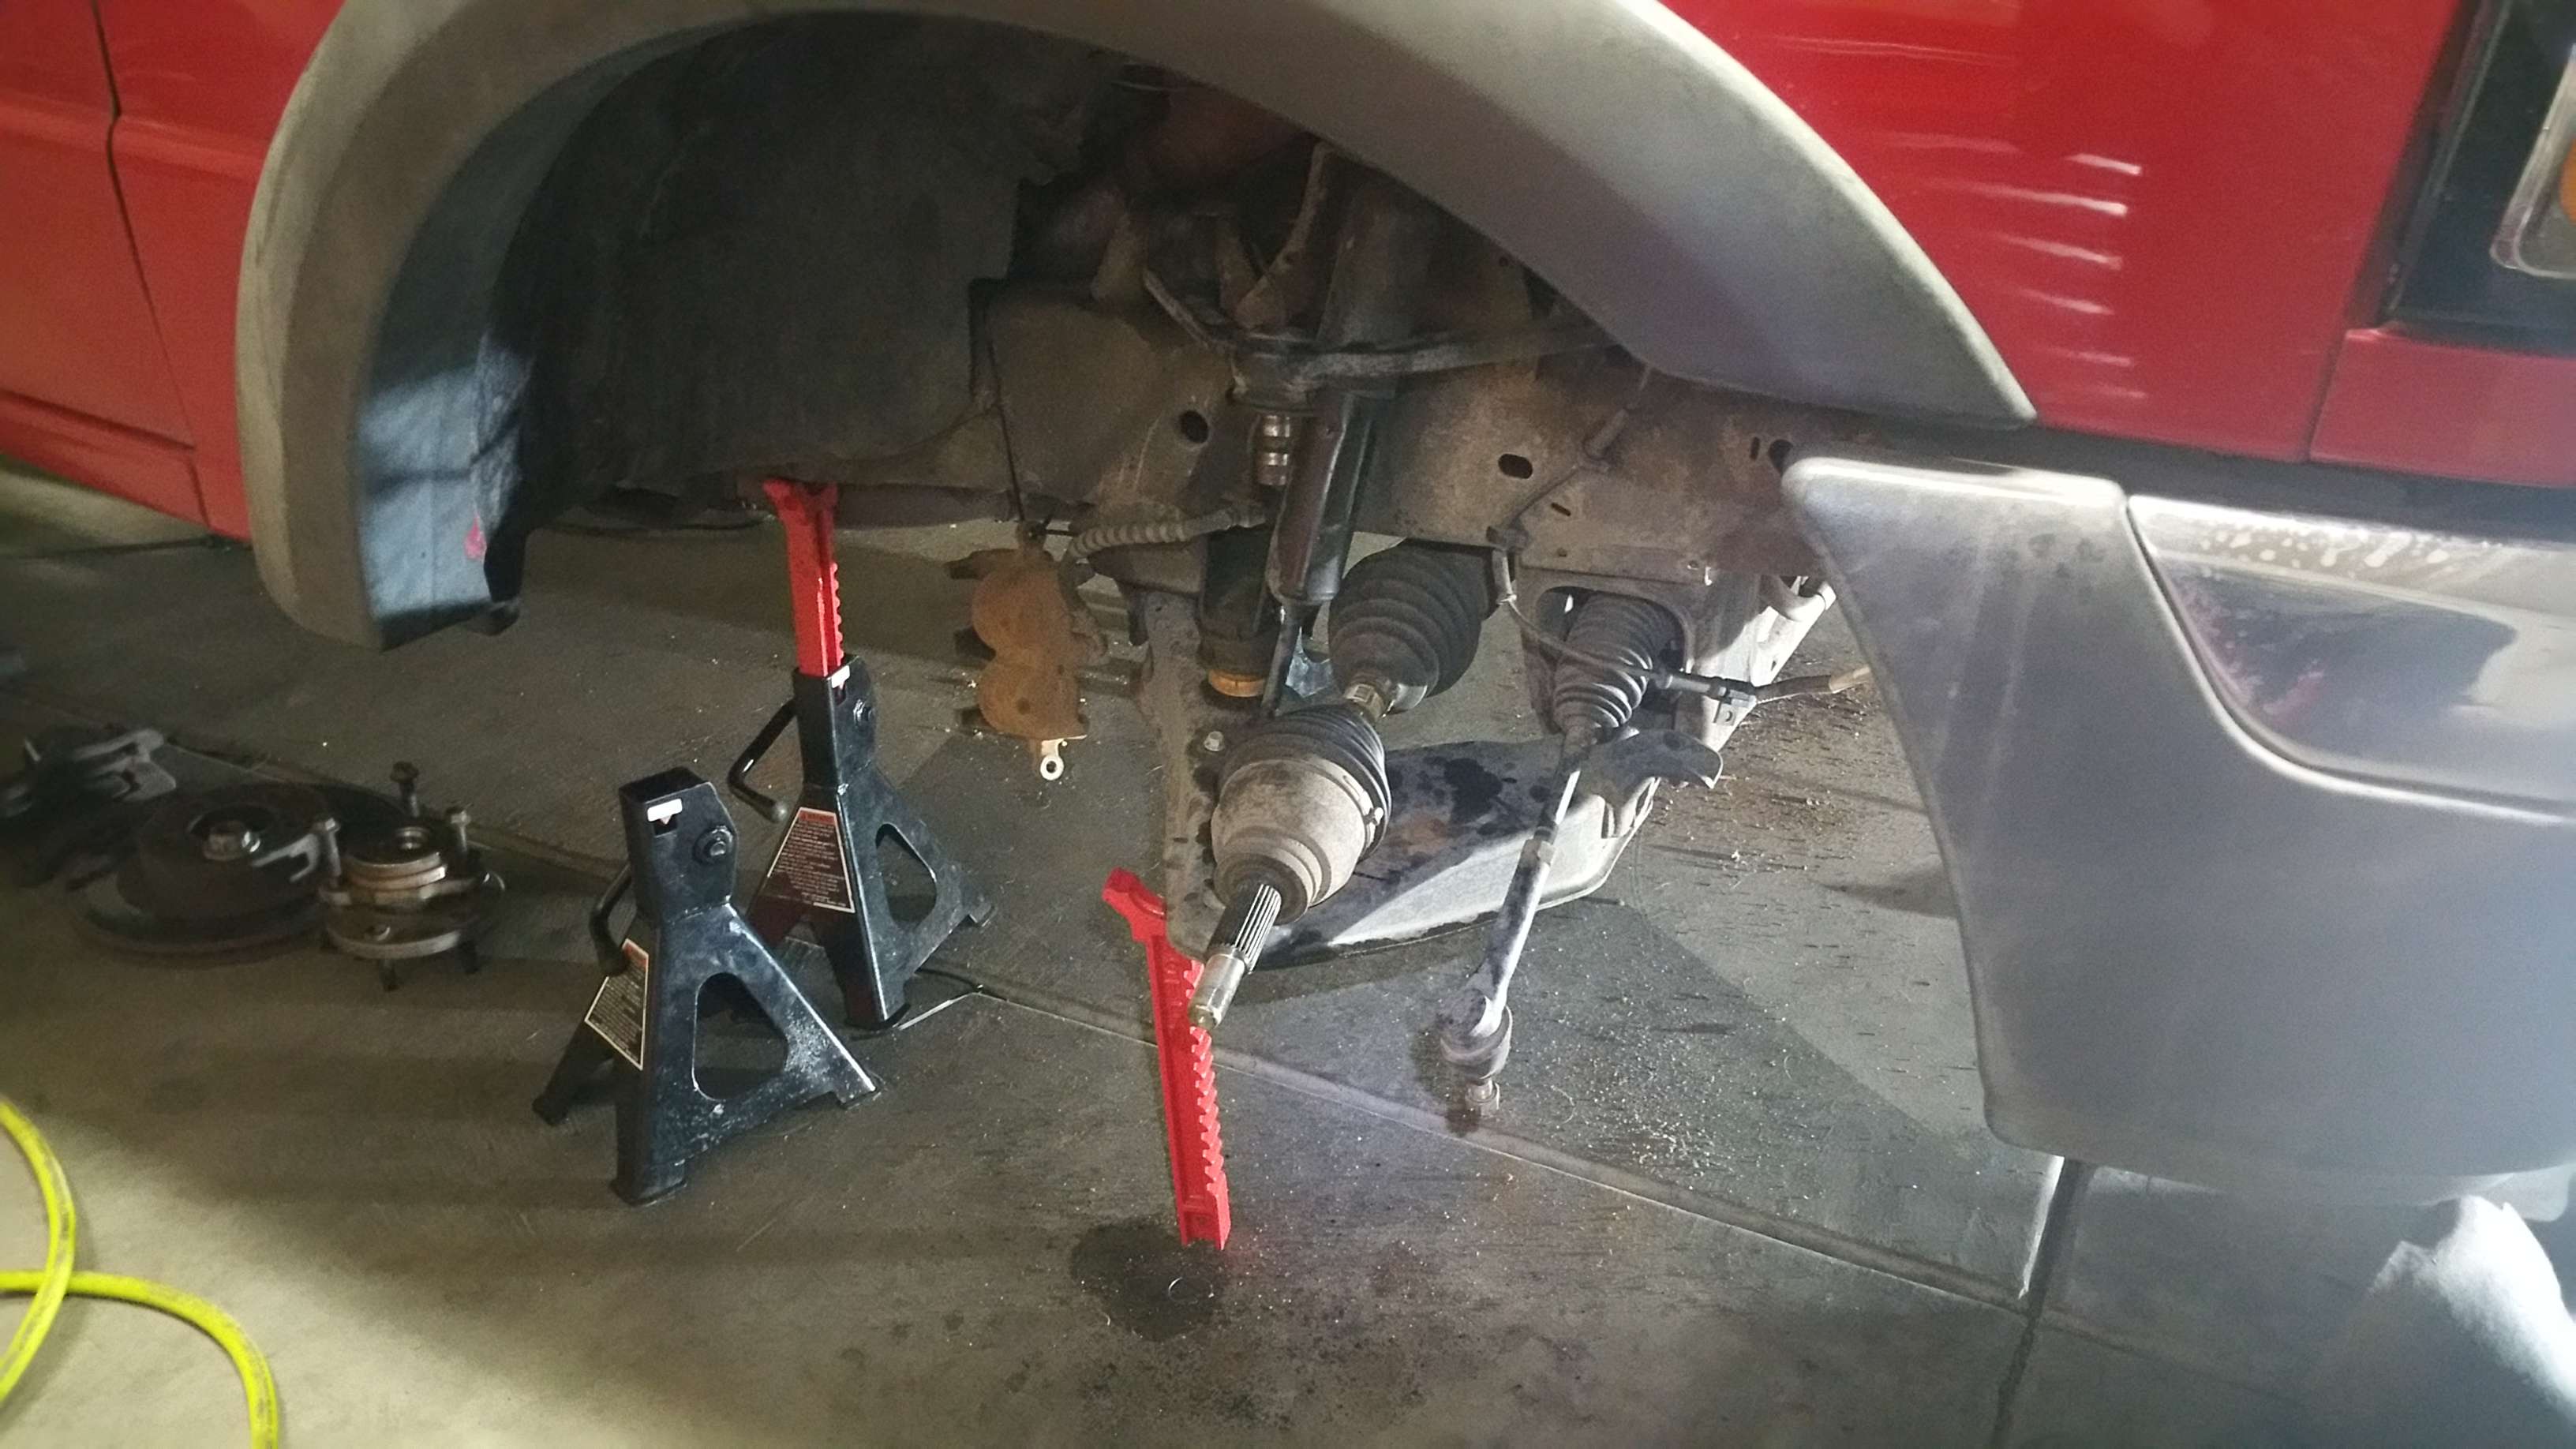
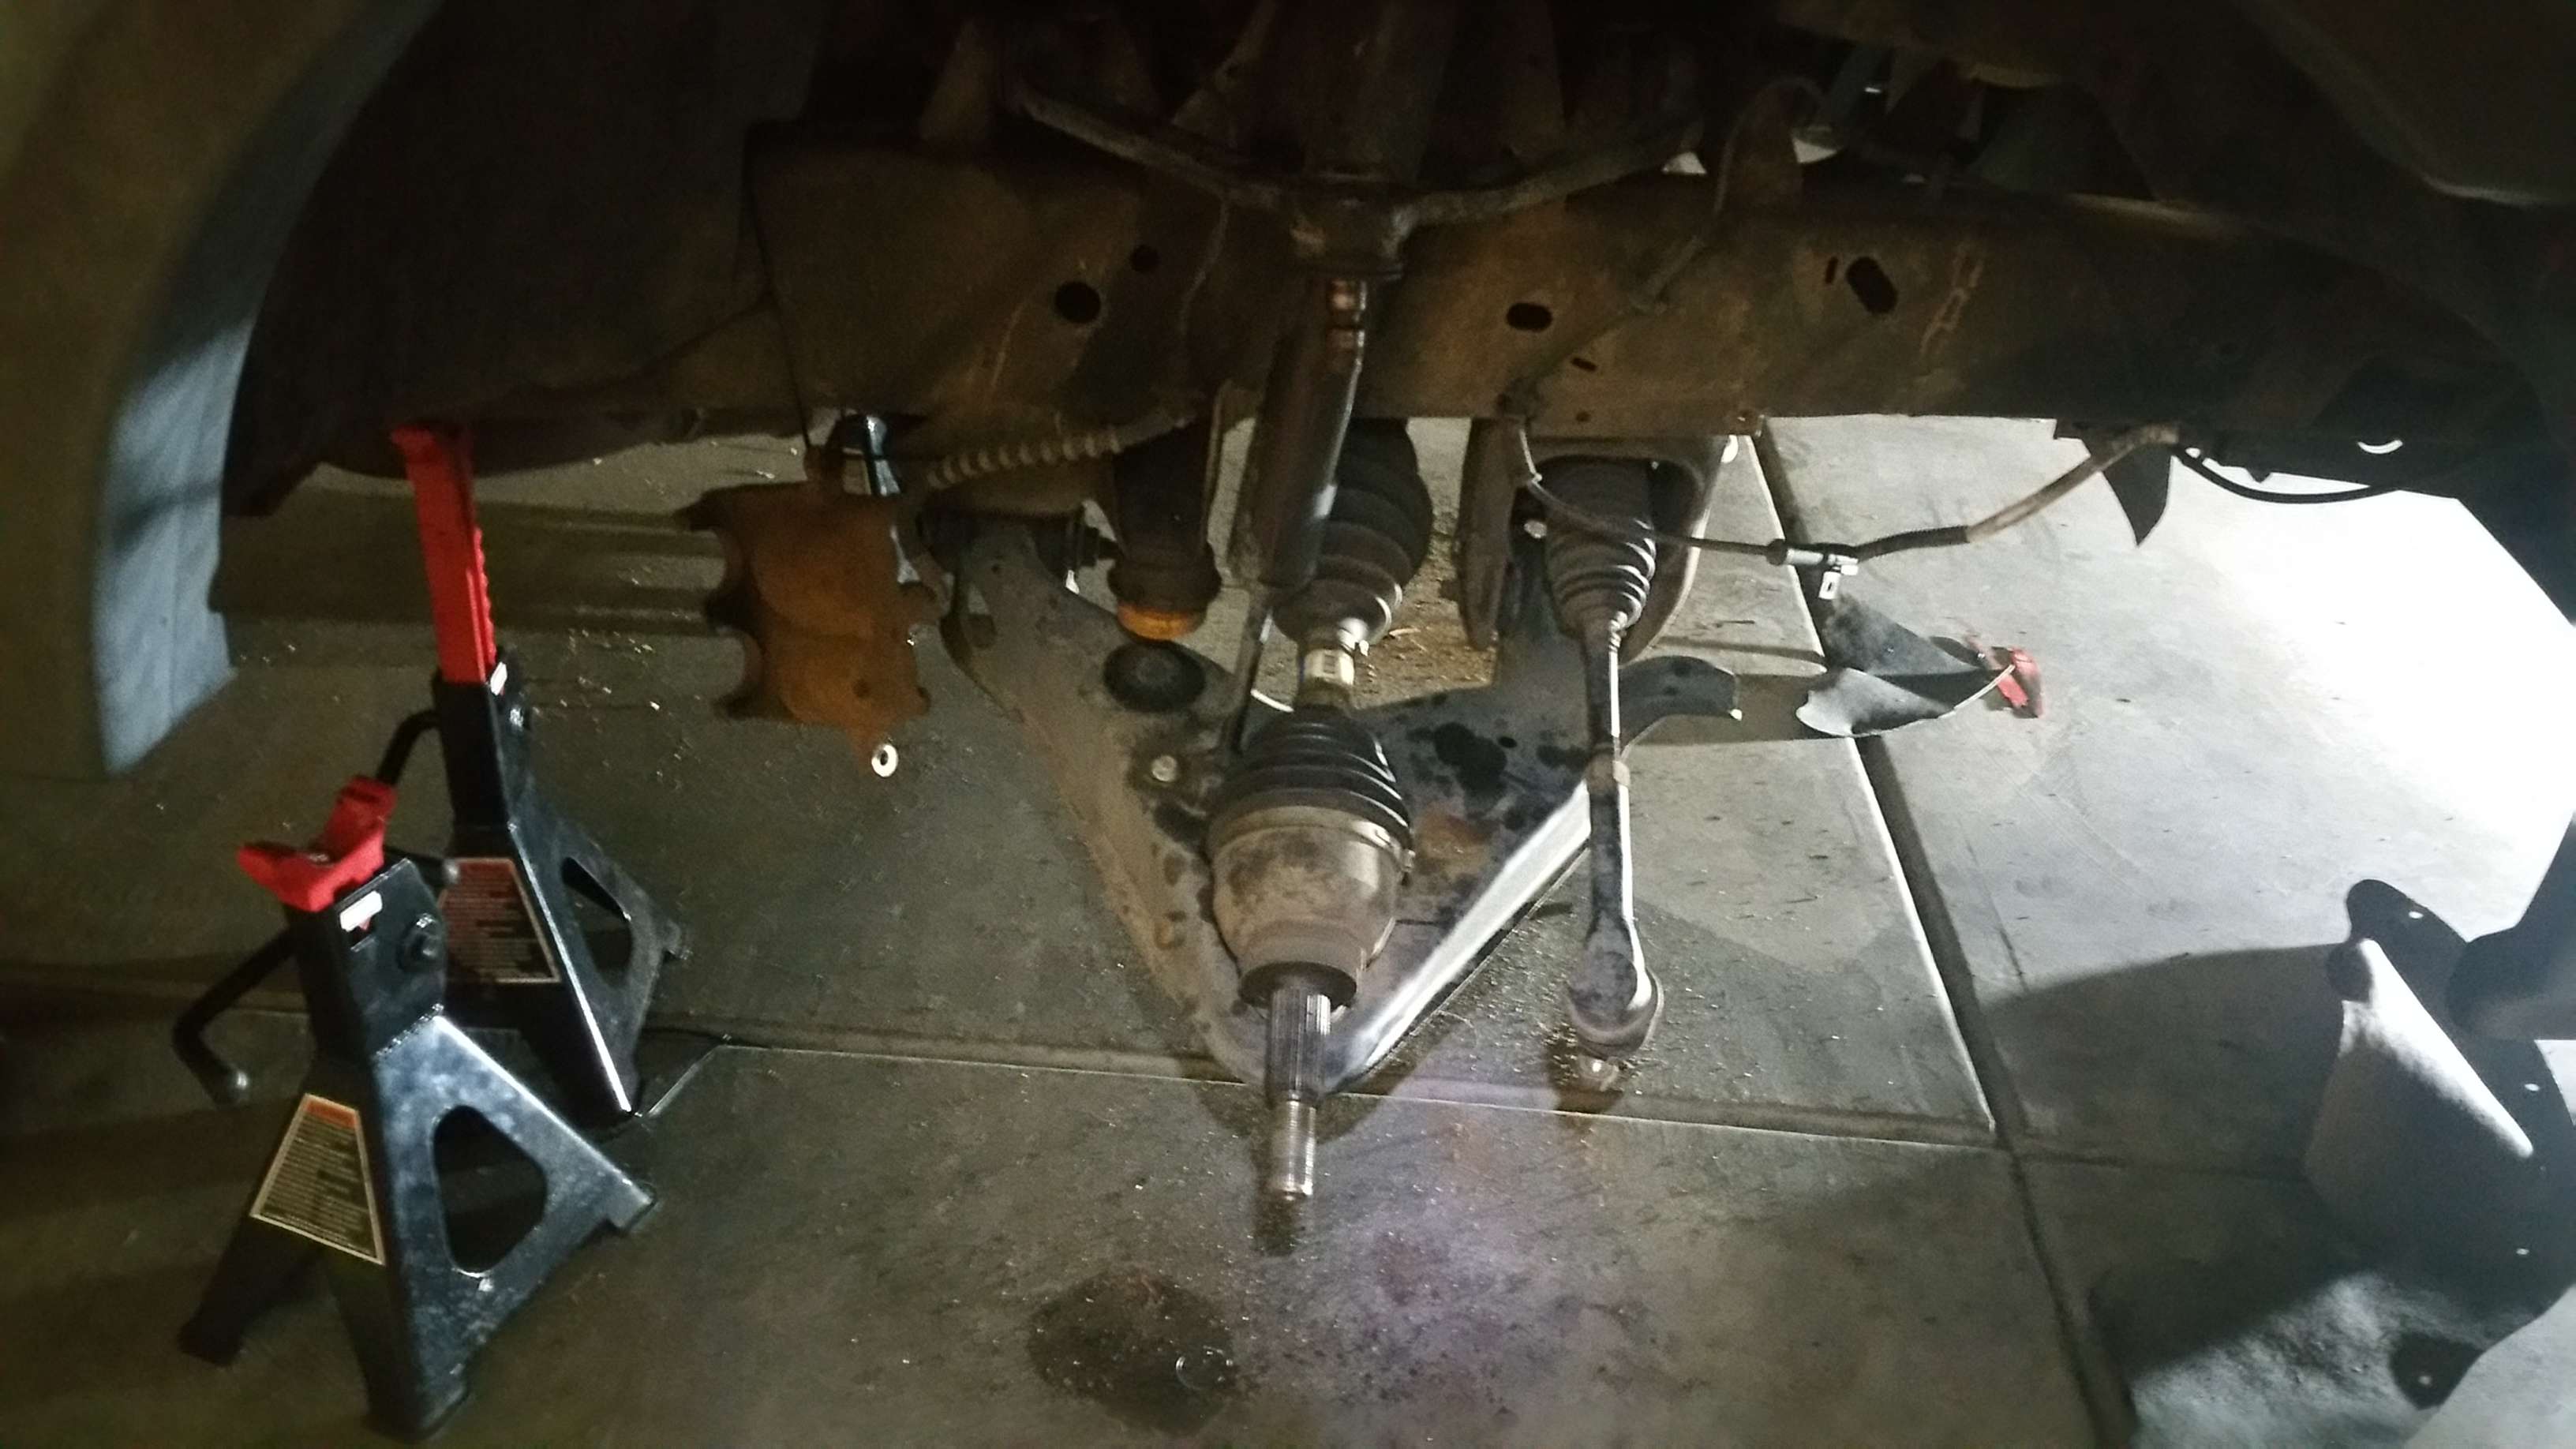
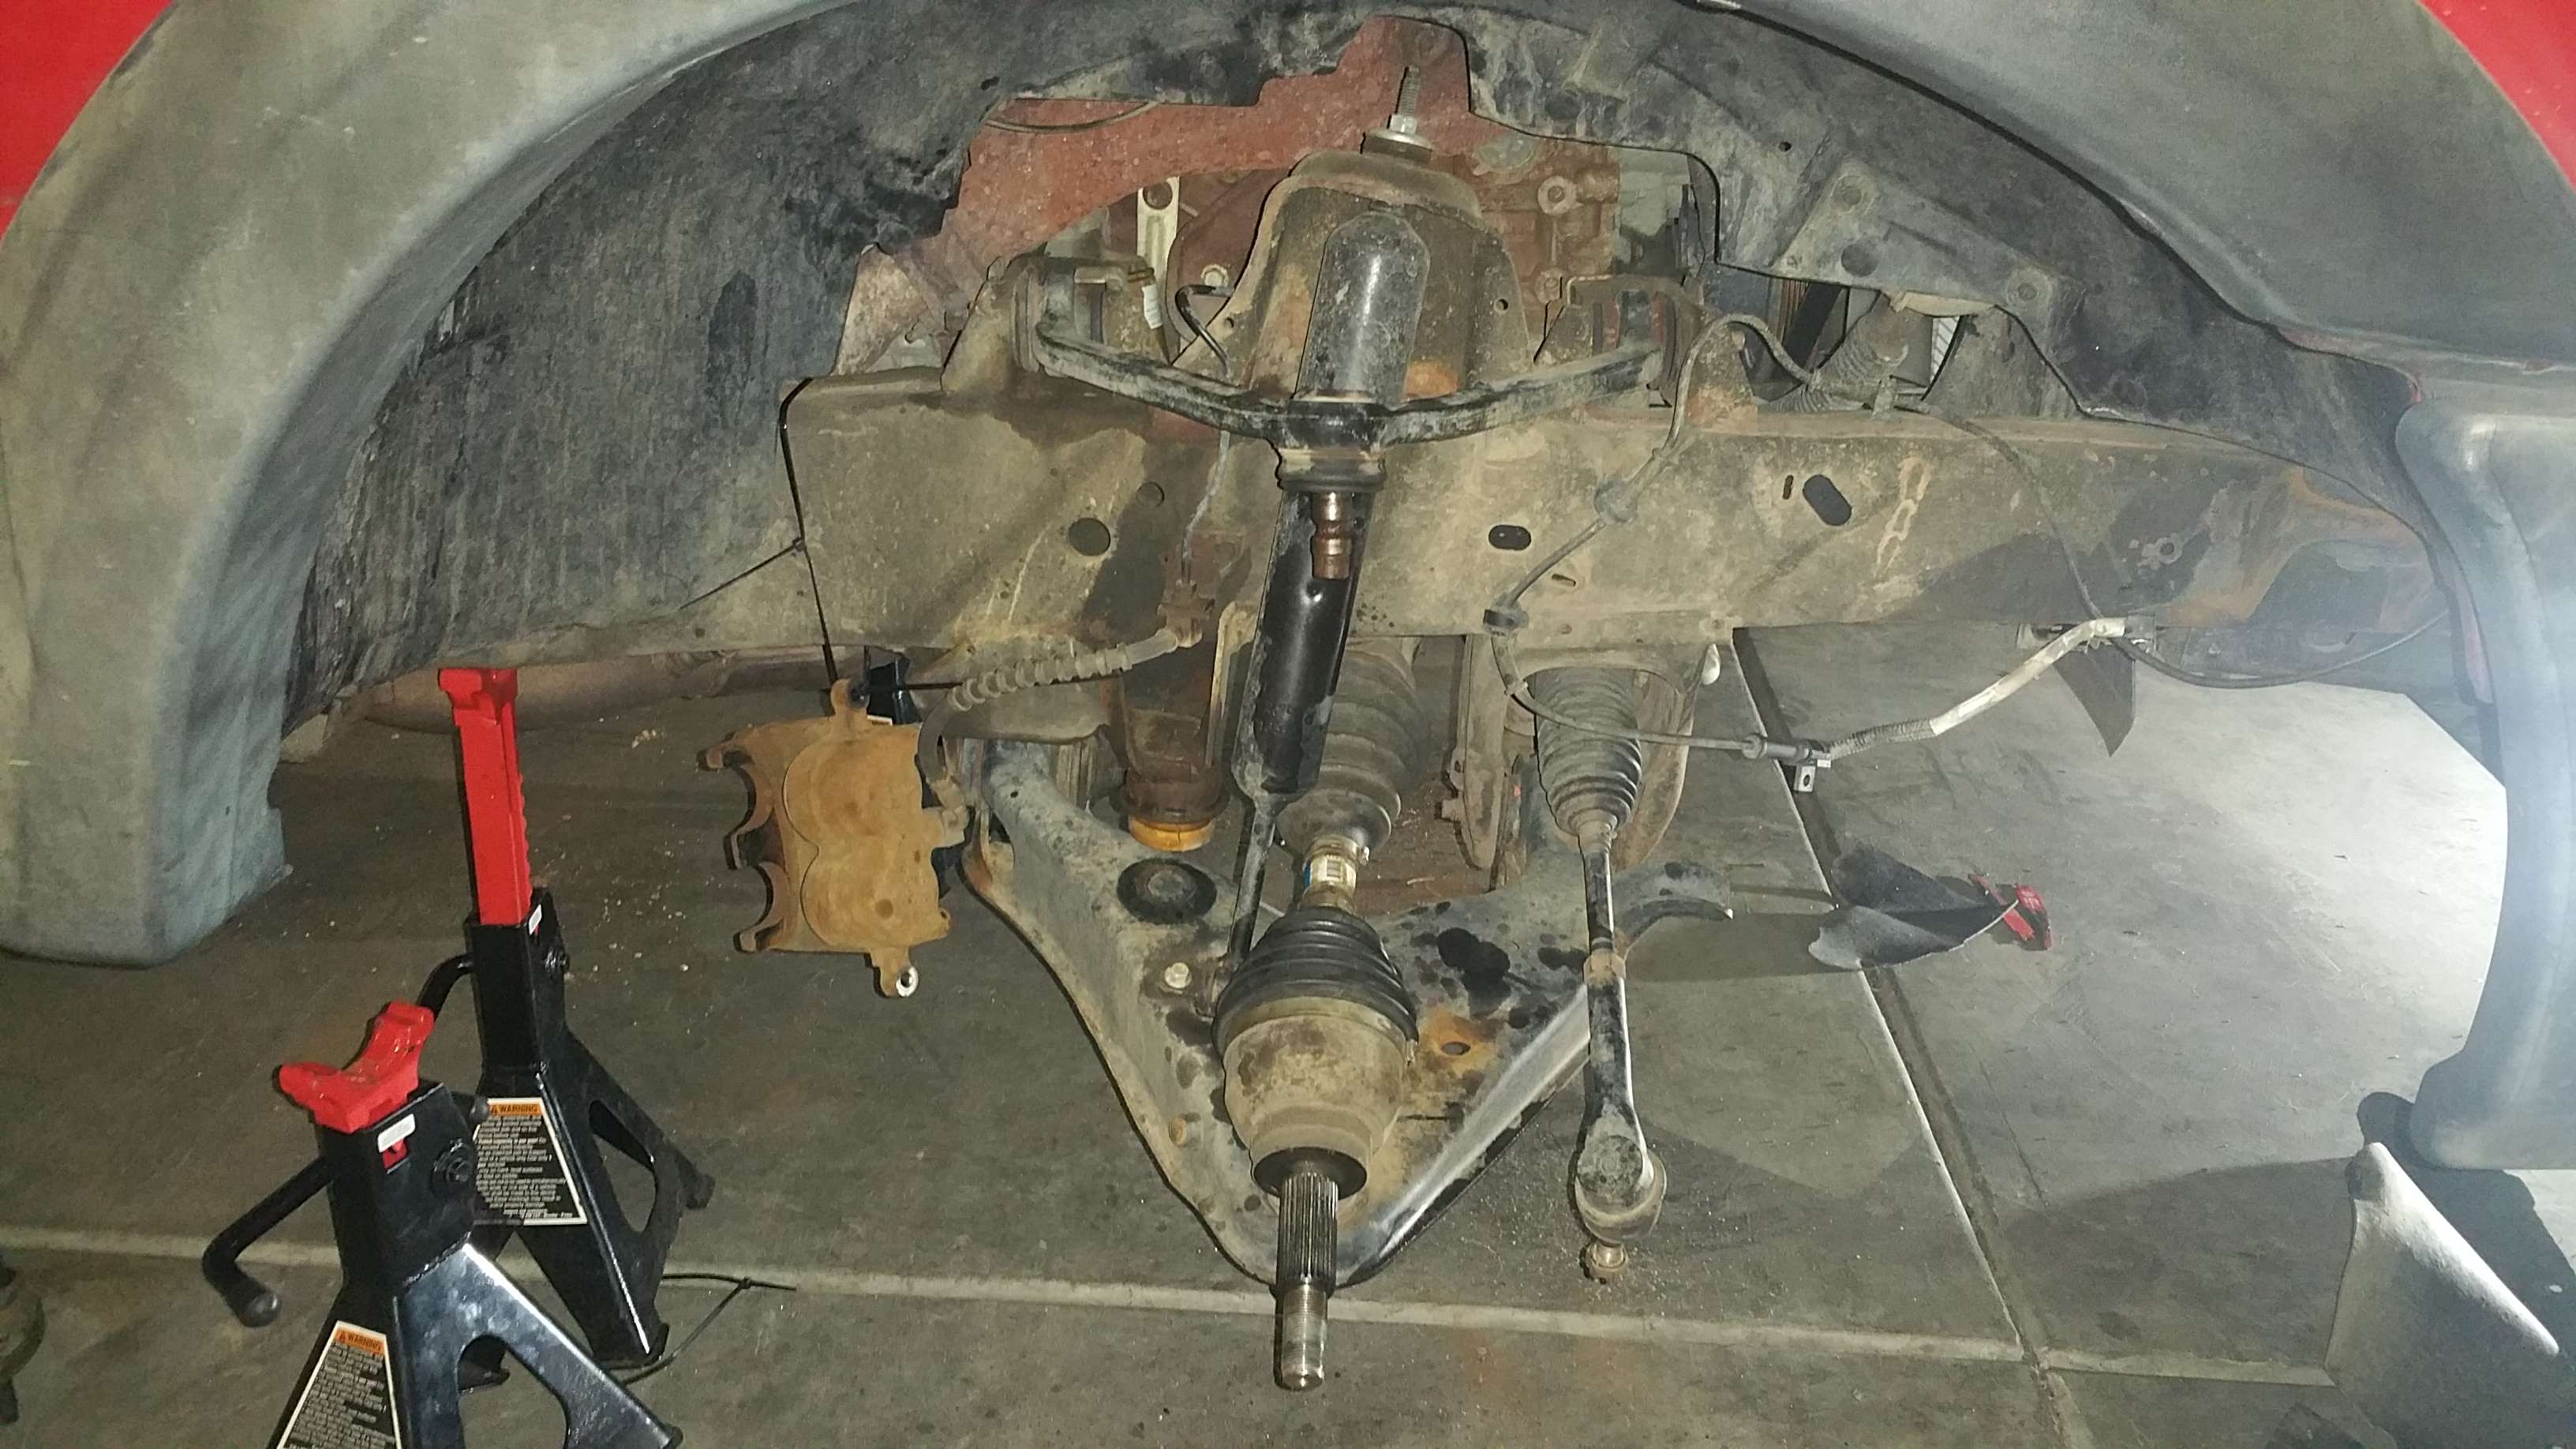
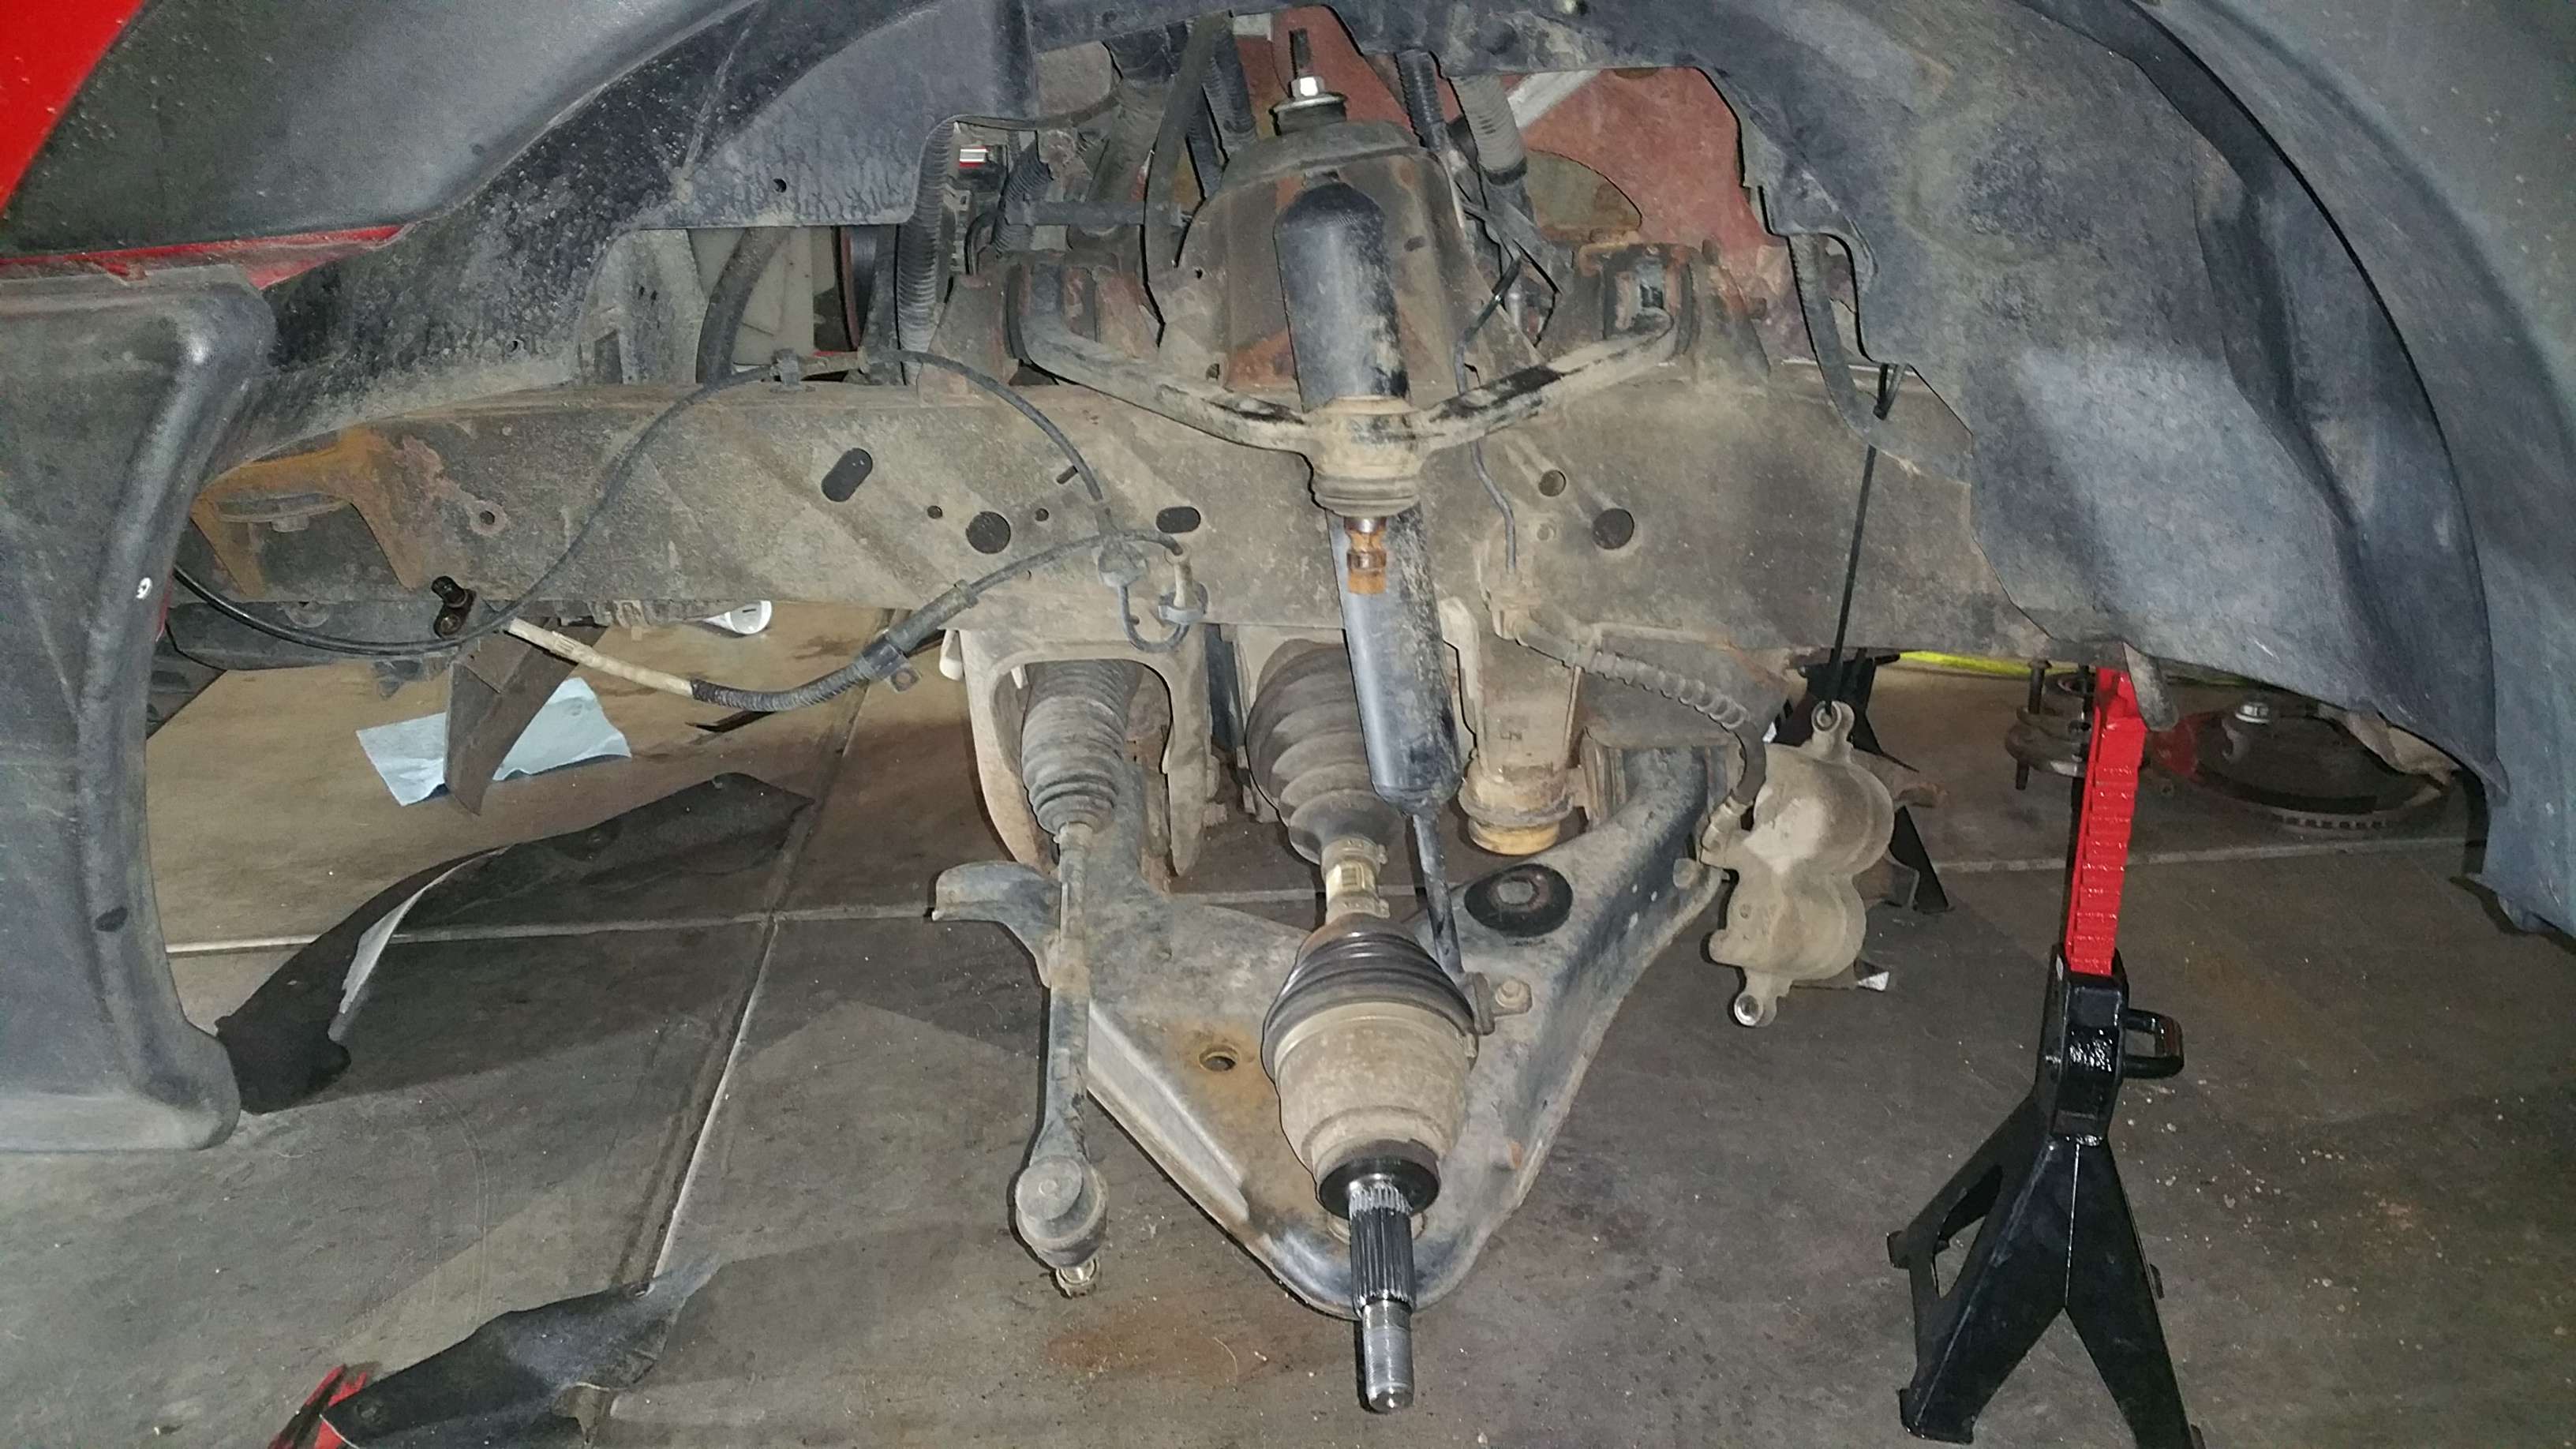
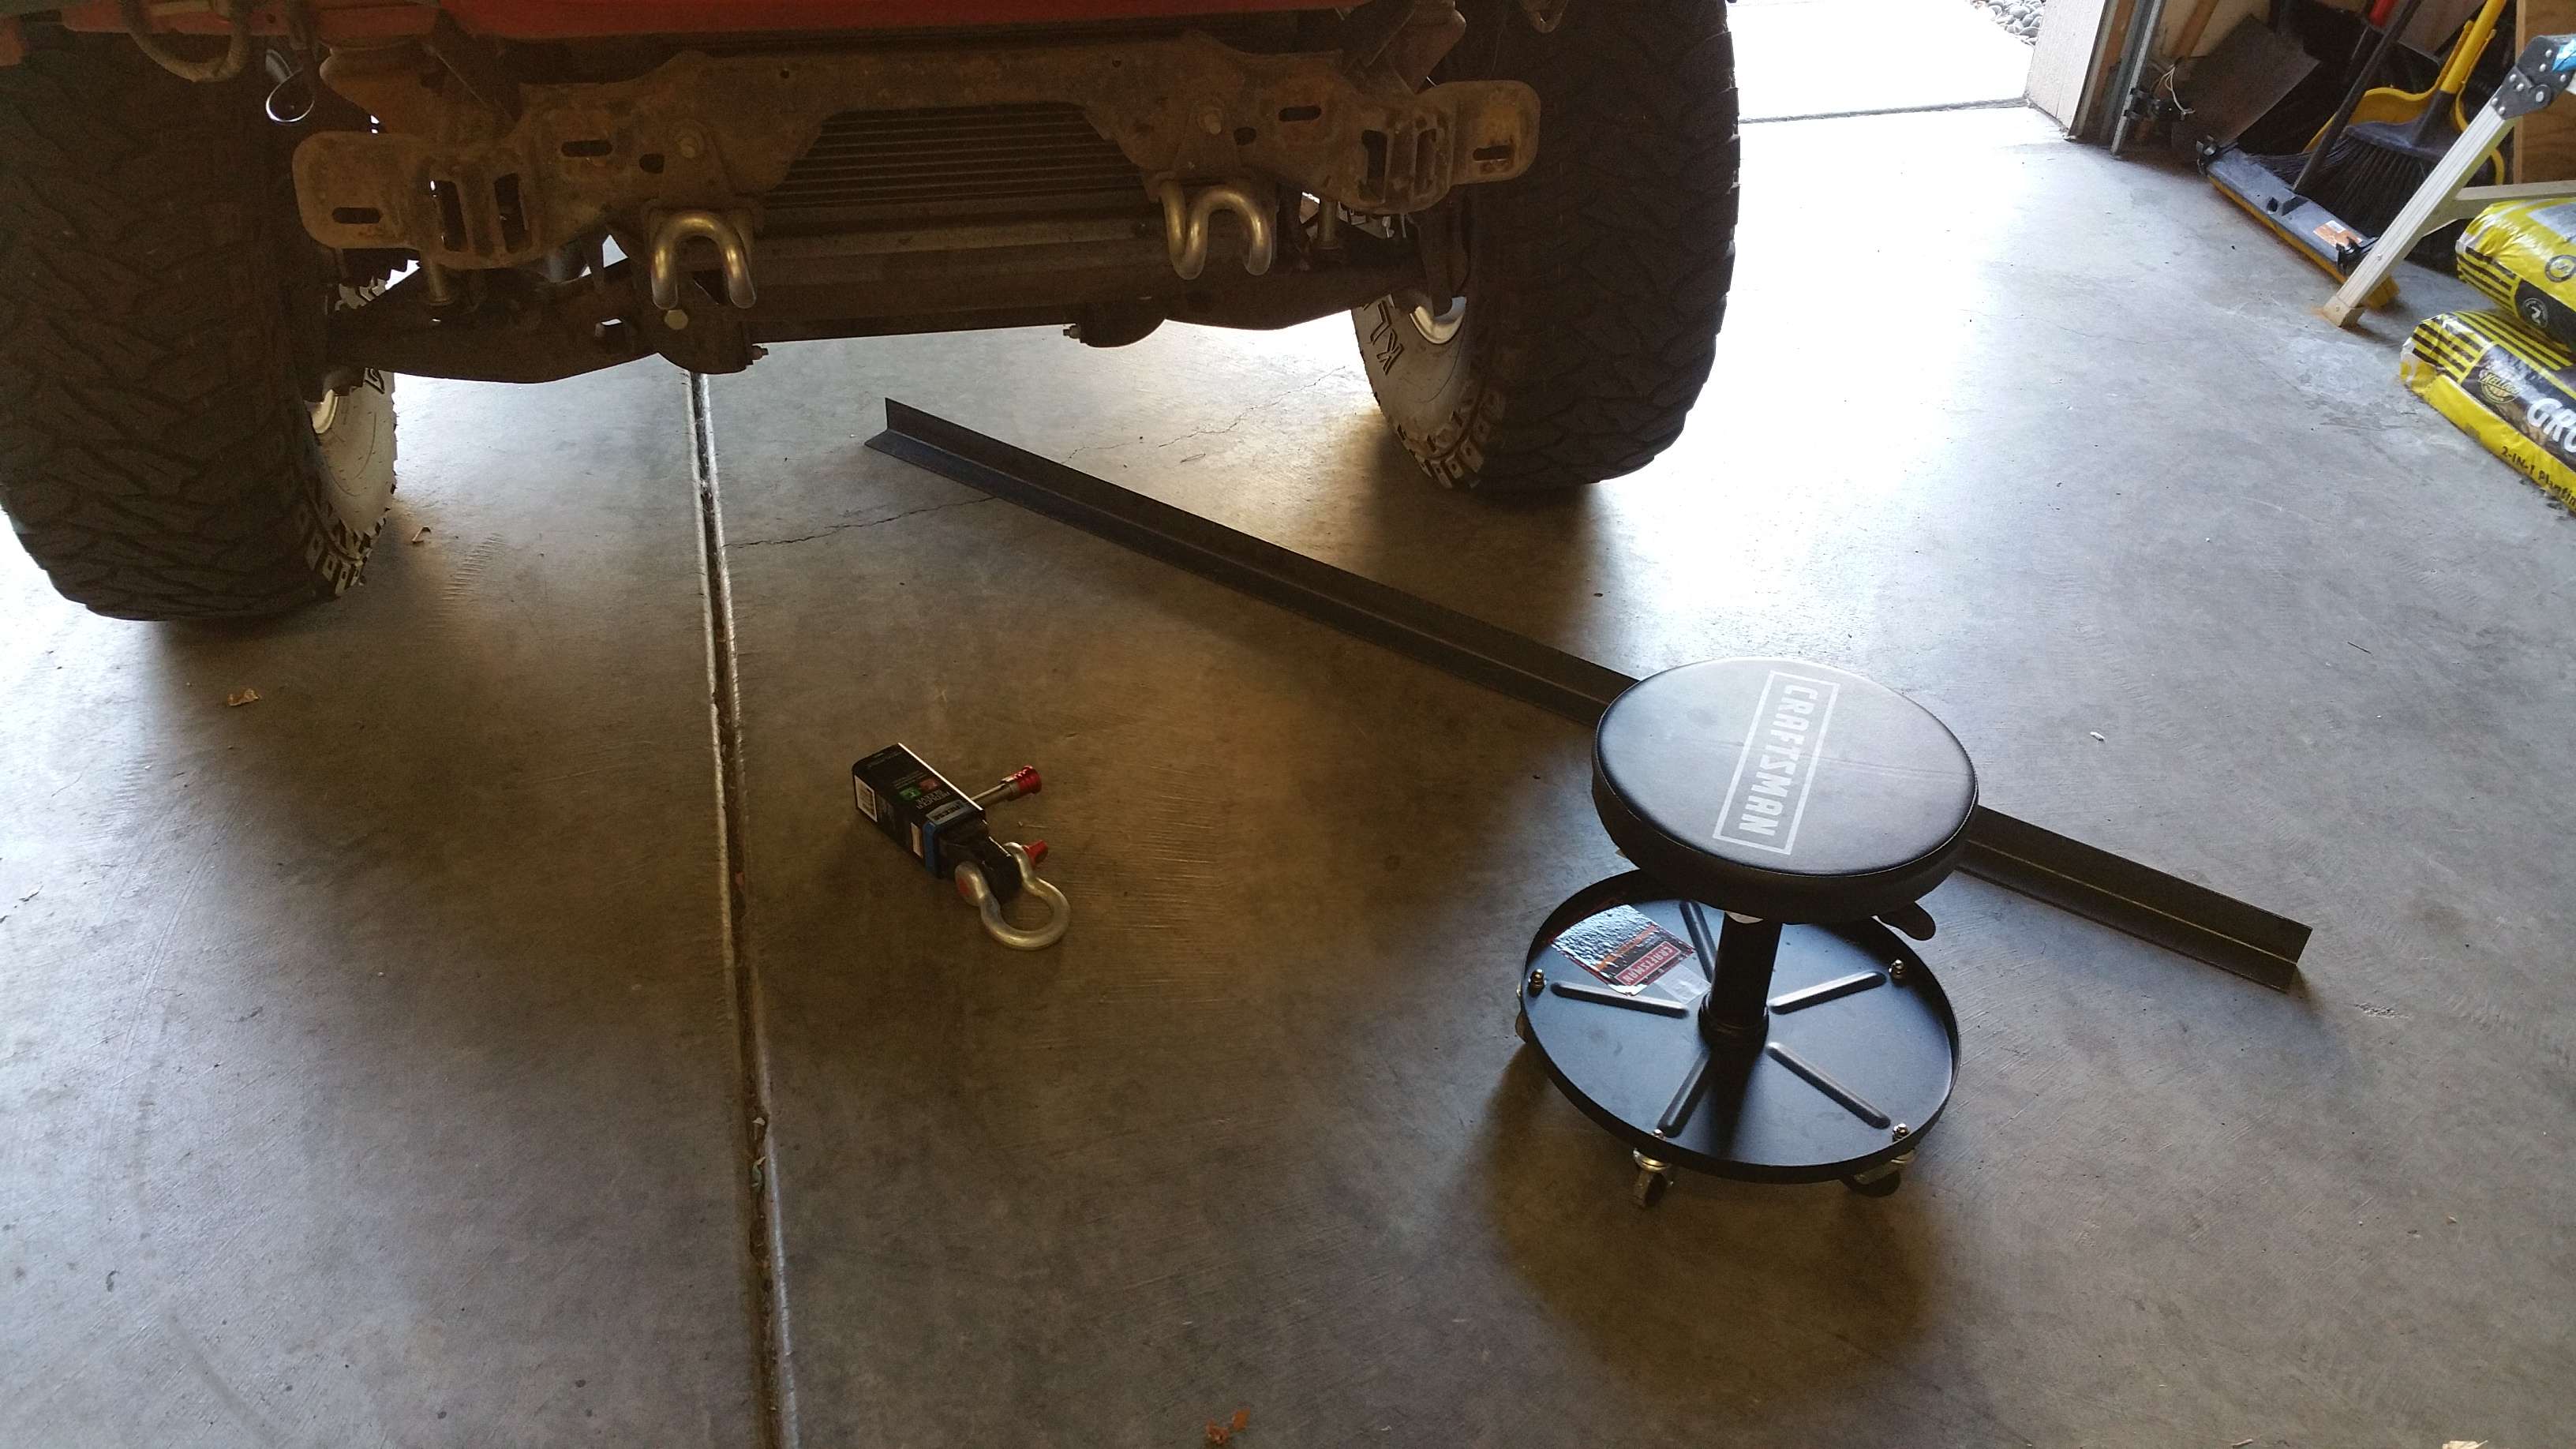
Here is most of the rear lift installed. I added a hidden Reese hitch. I also used skyjacker fr36 leaf springs instead of the shitty solution superlift provides for the rear. Their lift is cost effective, but it is a crappy solution. The fr36's allow me the lift I want, better flex, and way less axle wrap. I don't have to worry about 5" of lift block popping out when I jam on it.
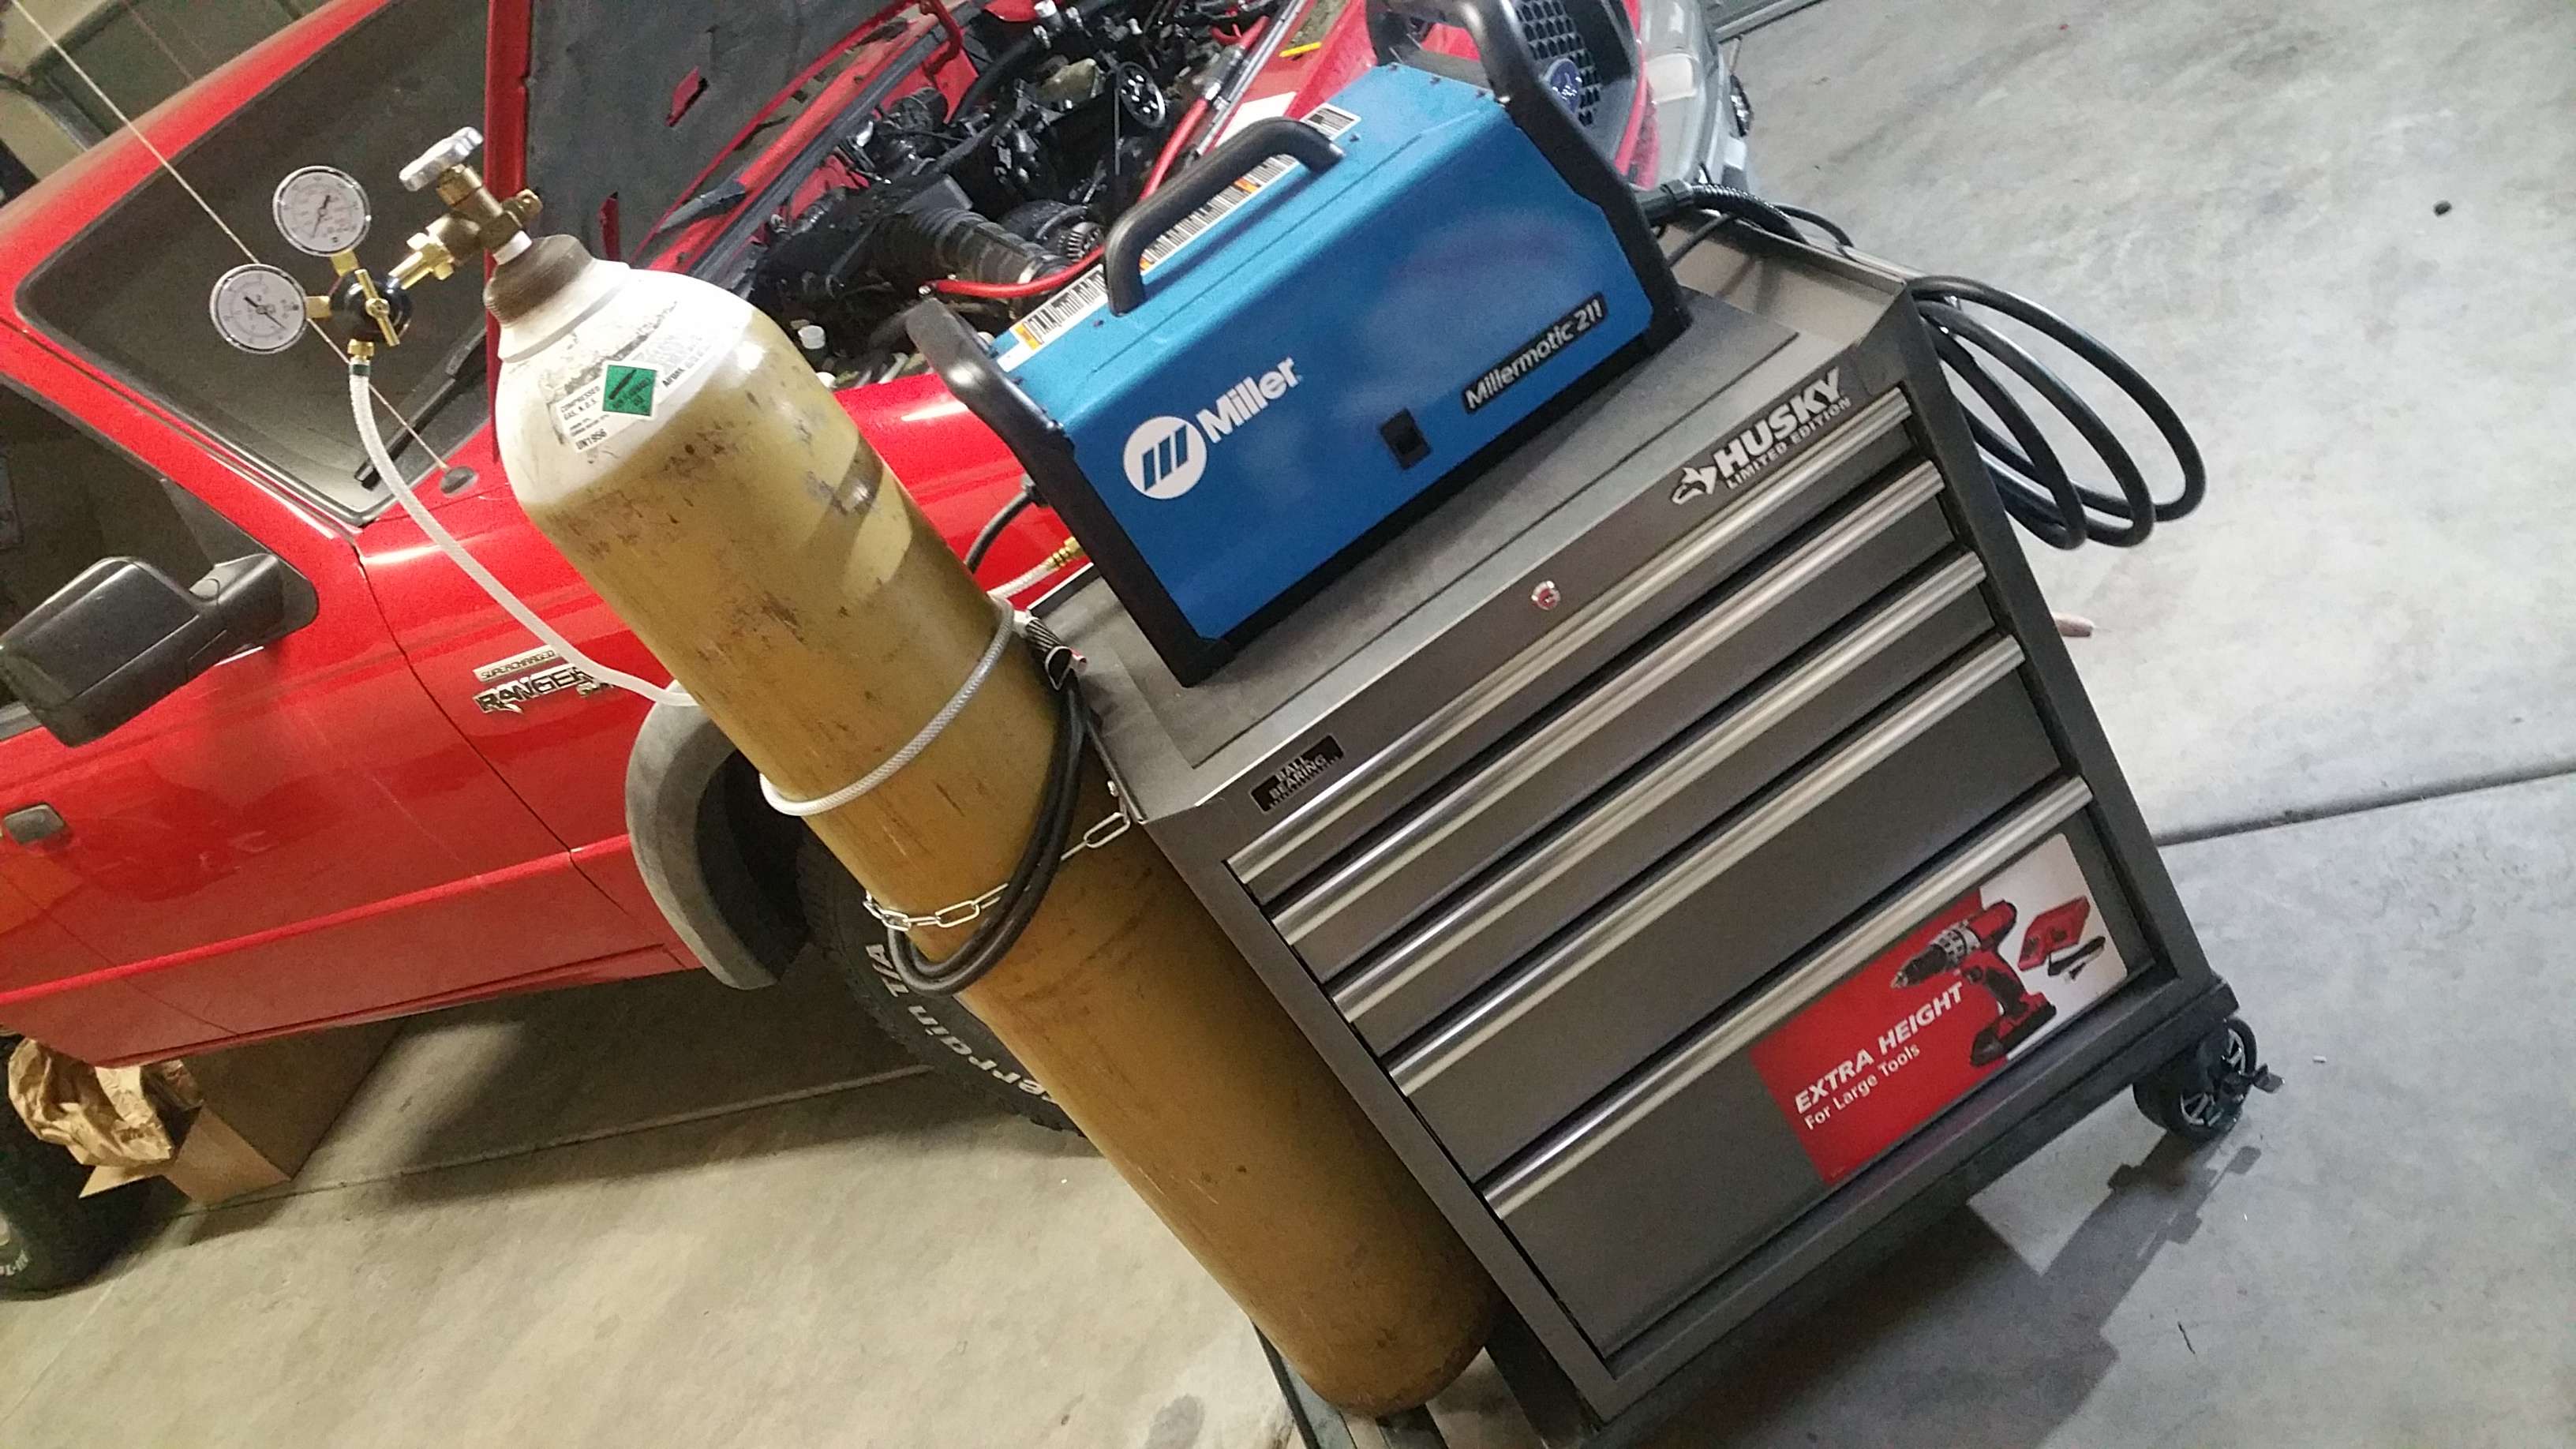
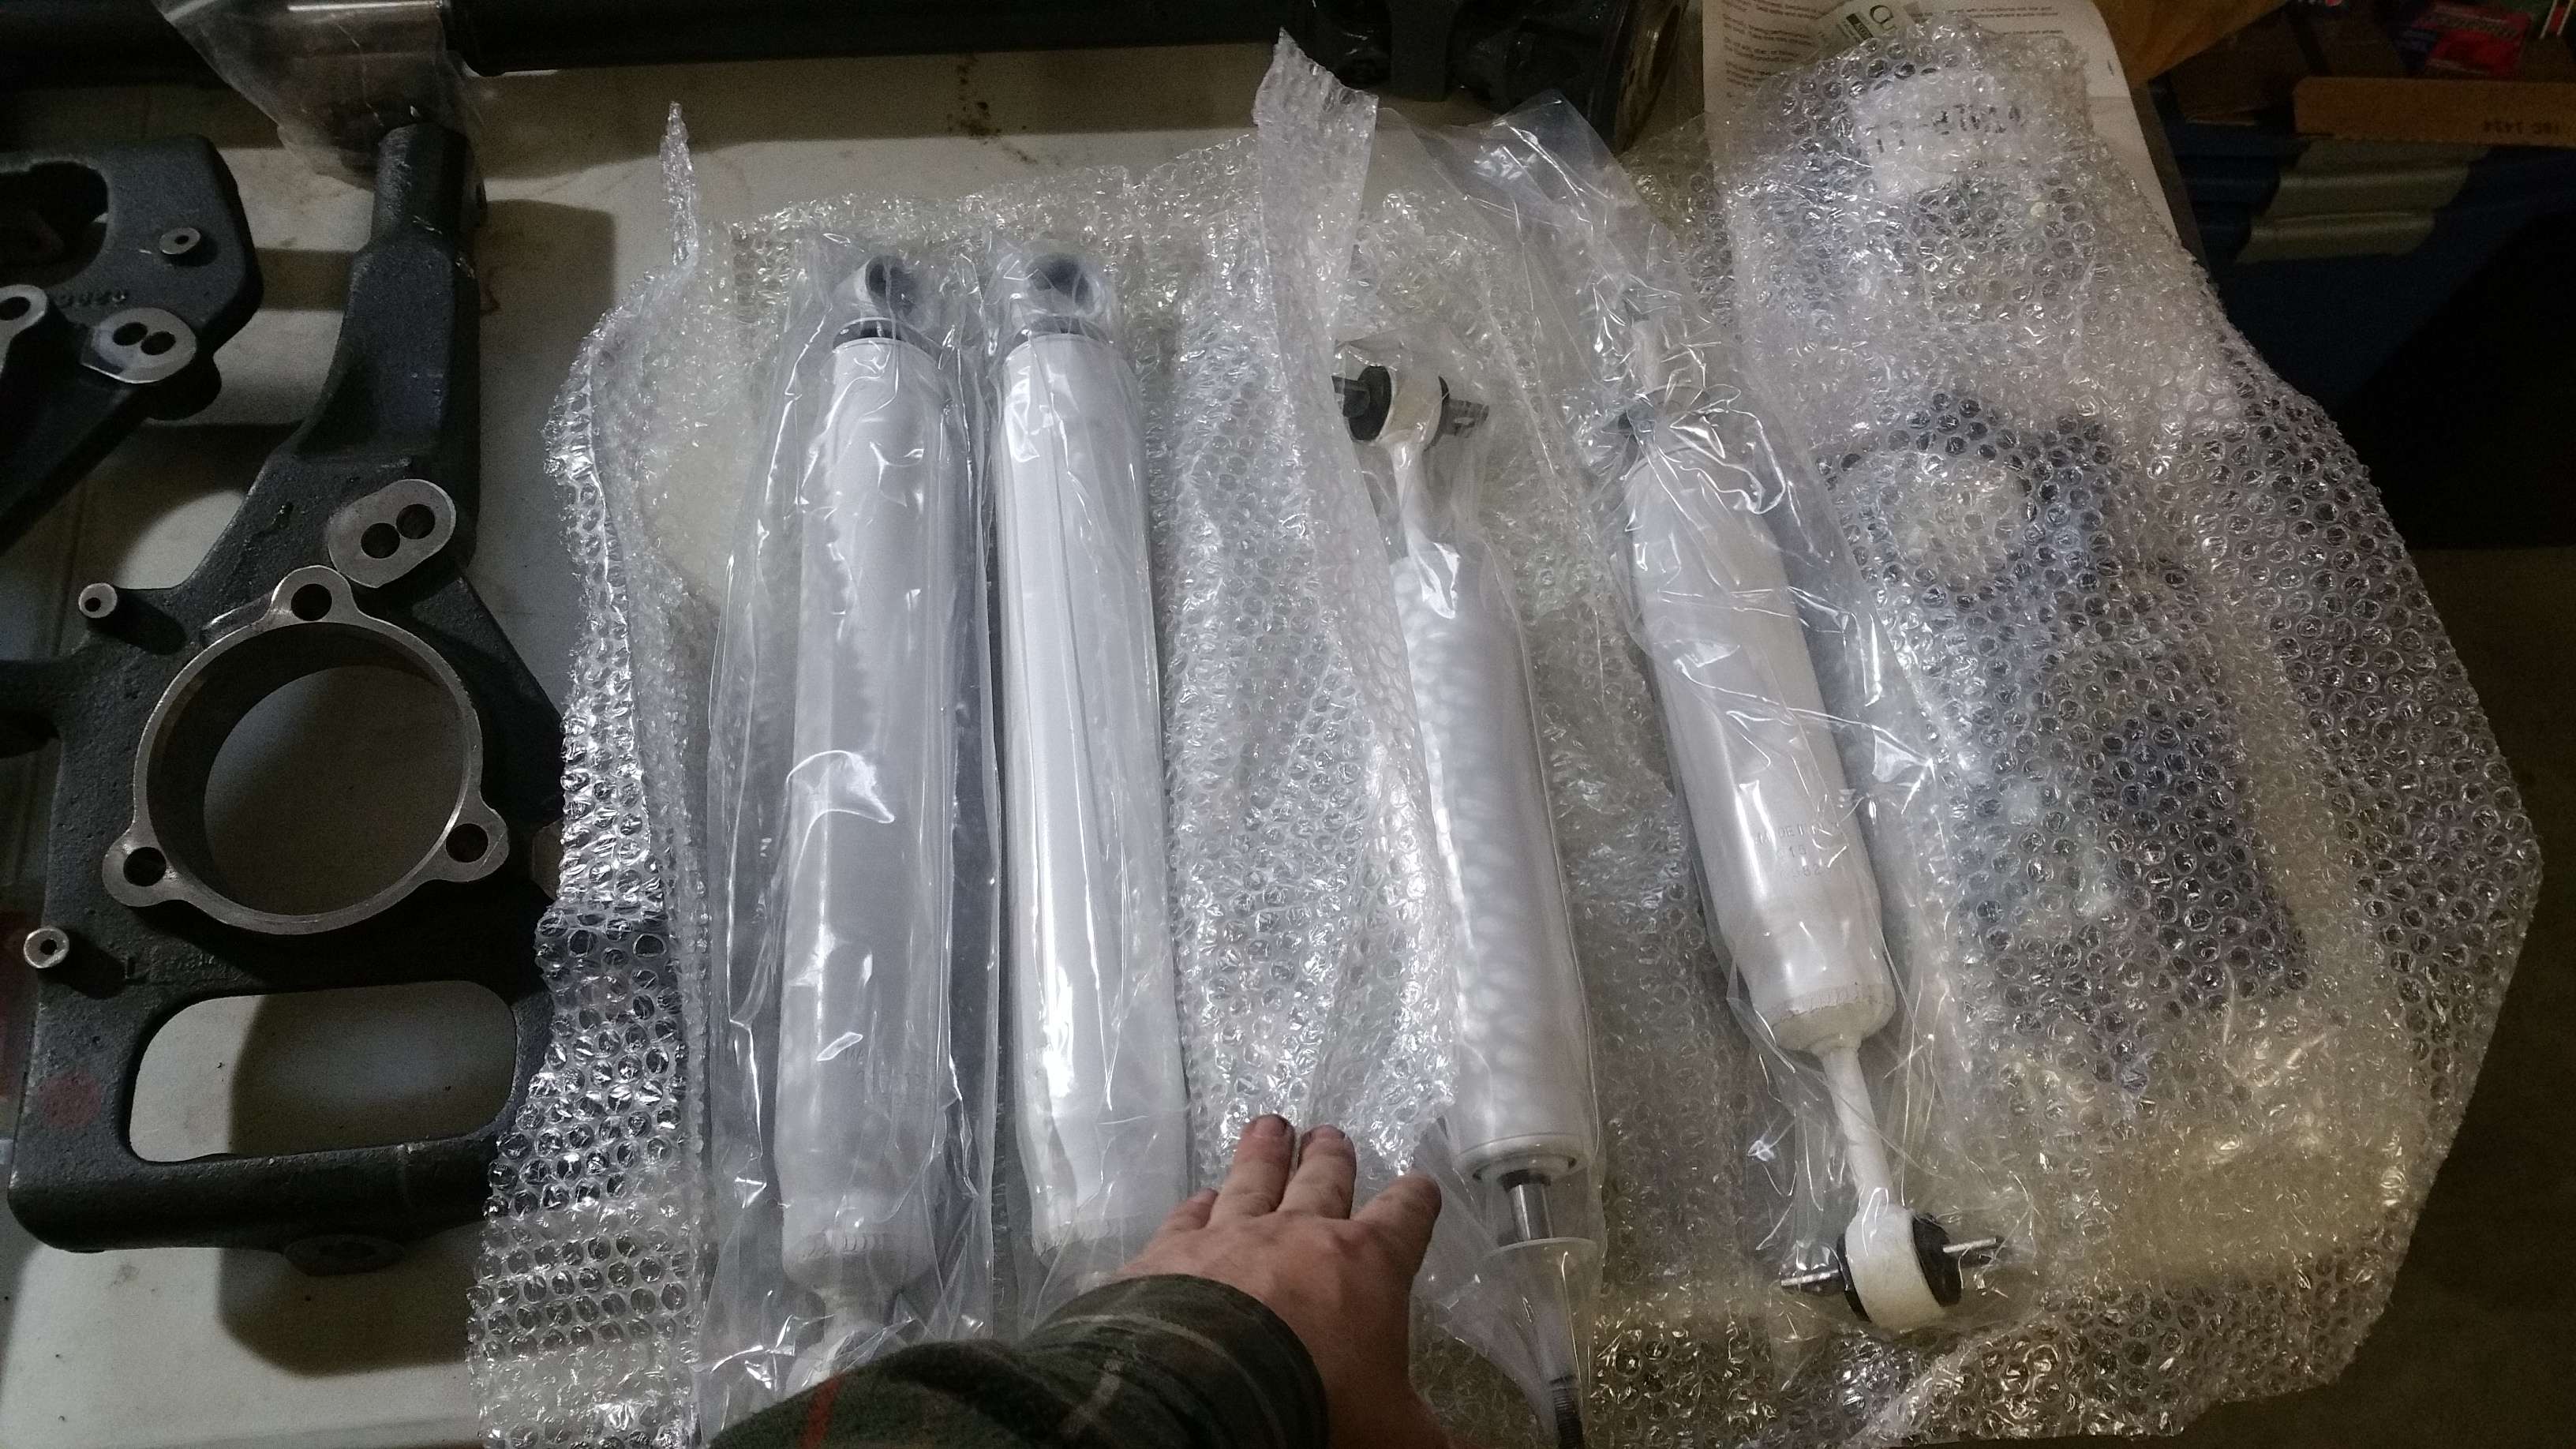
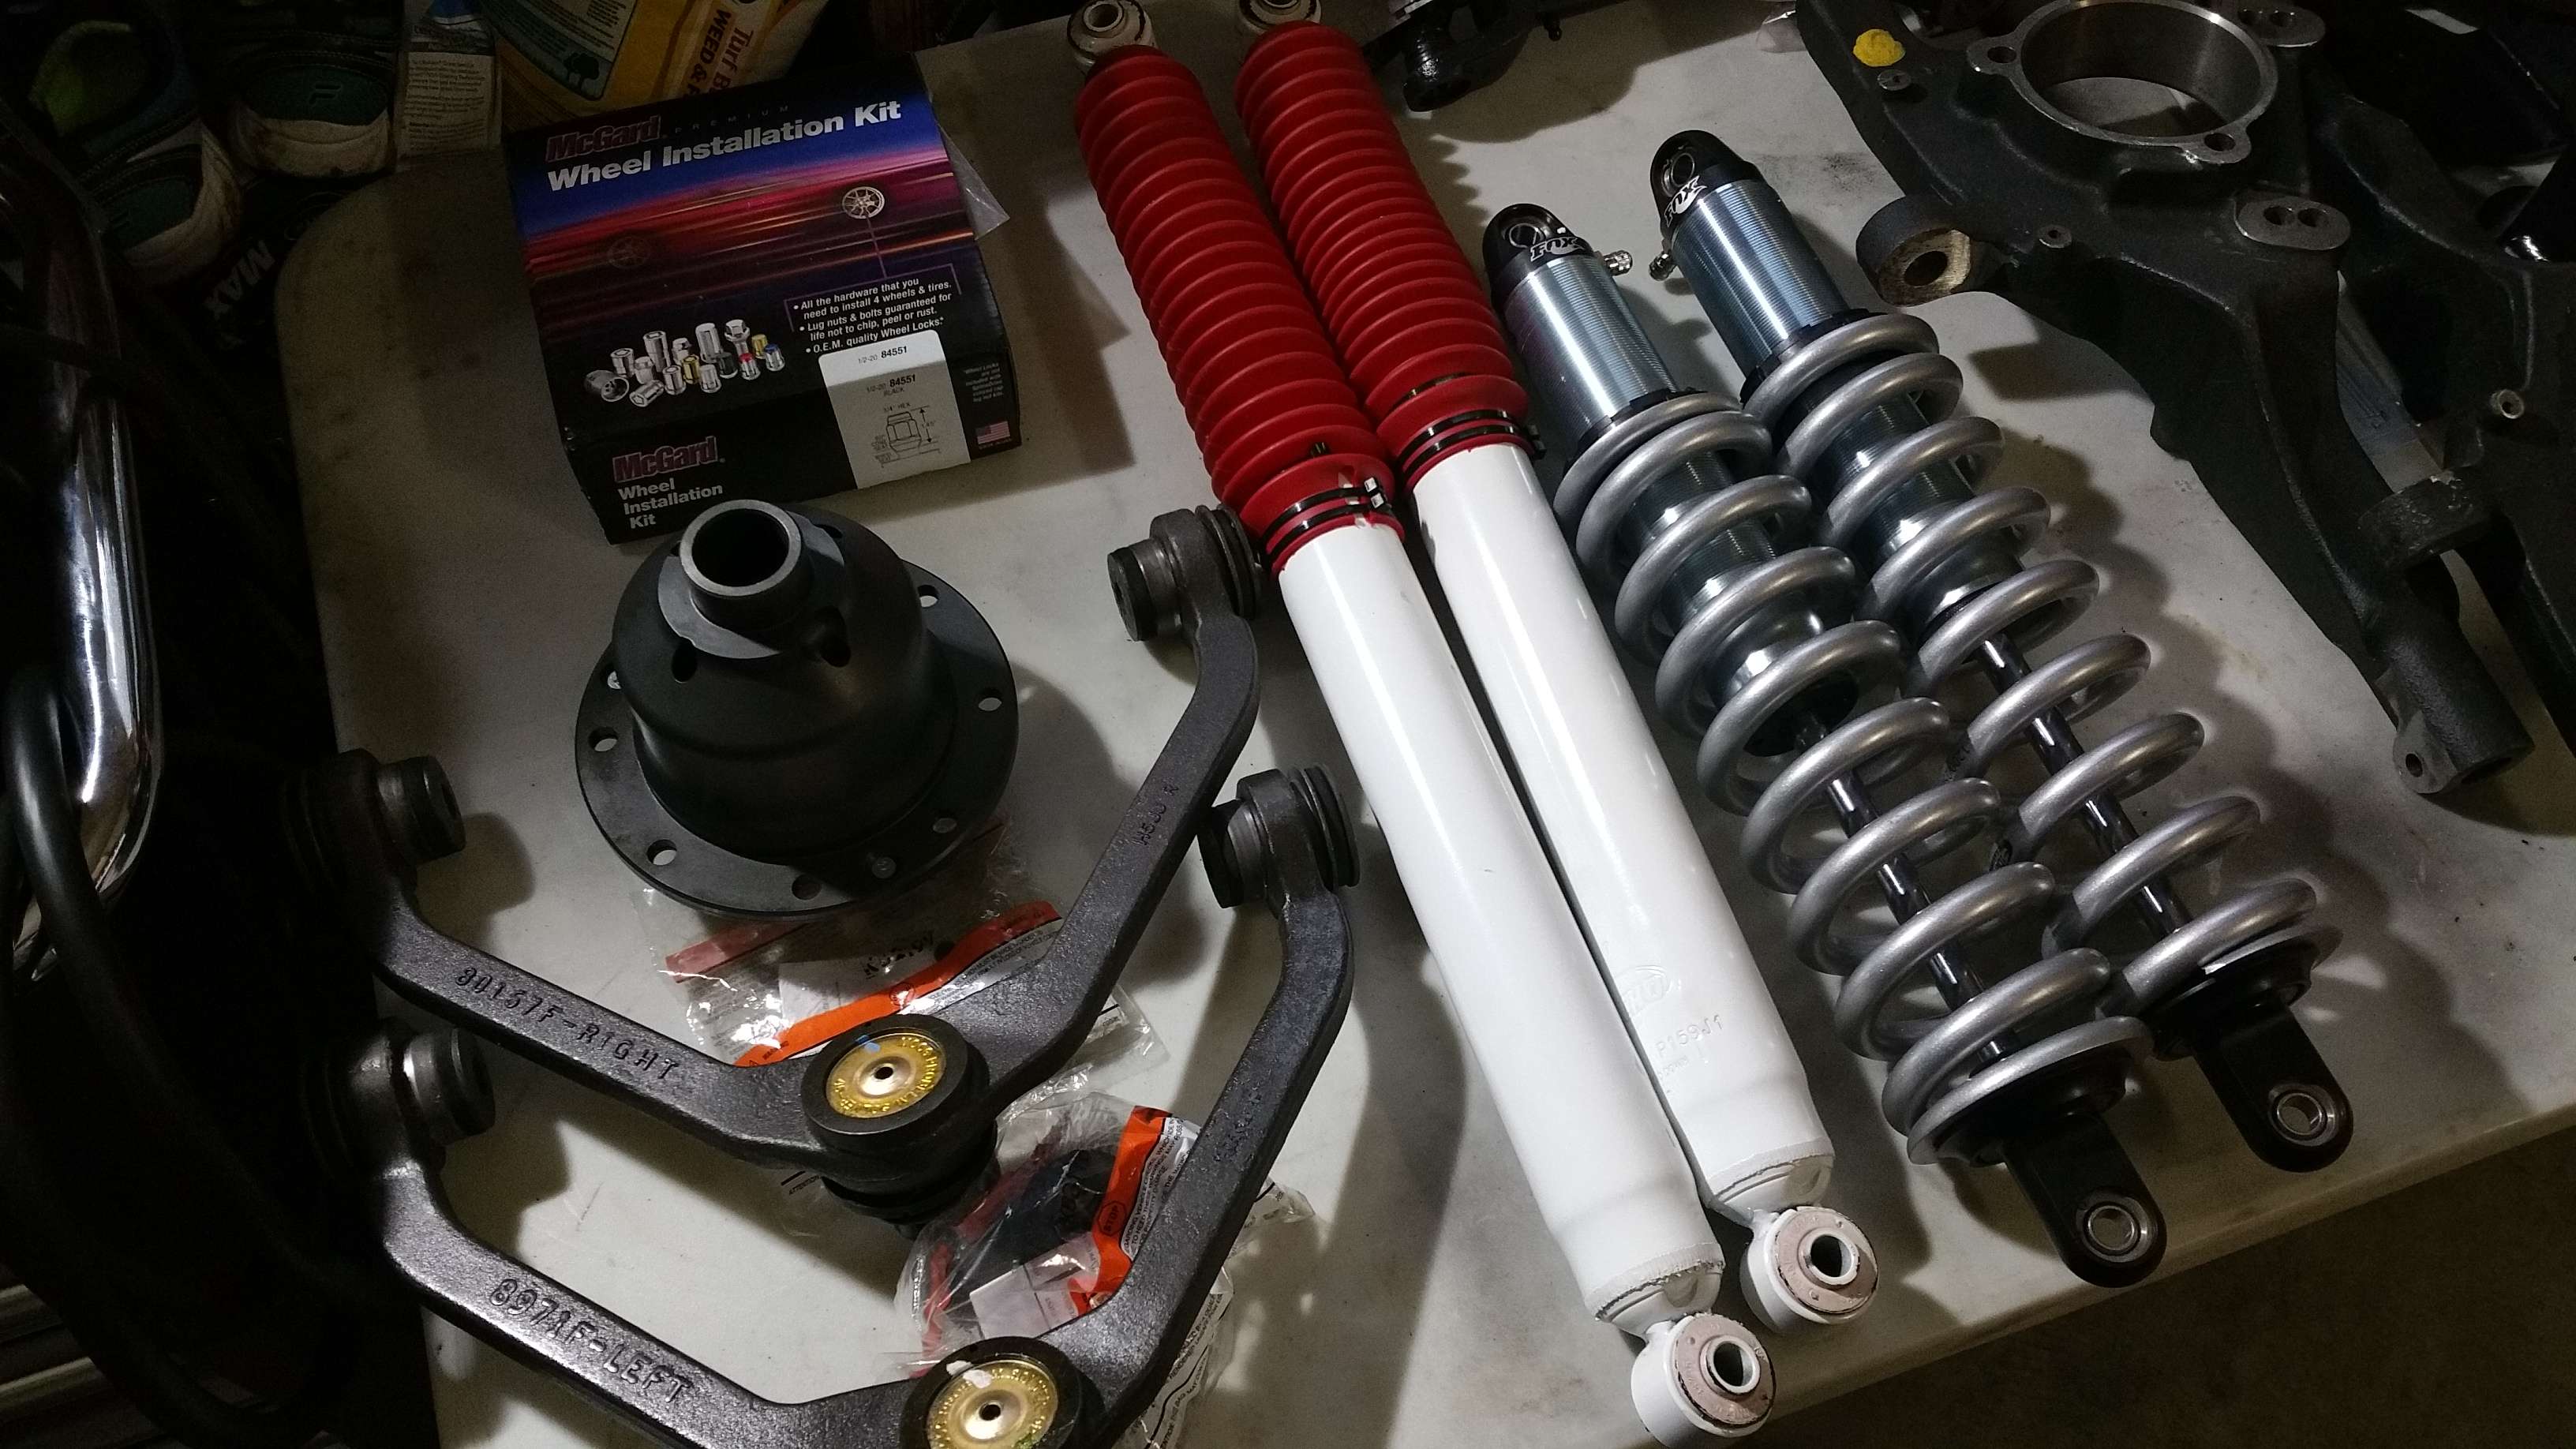
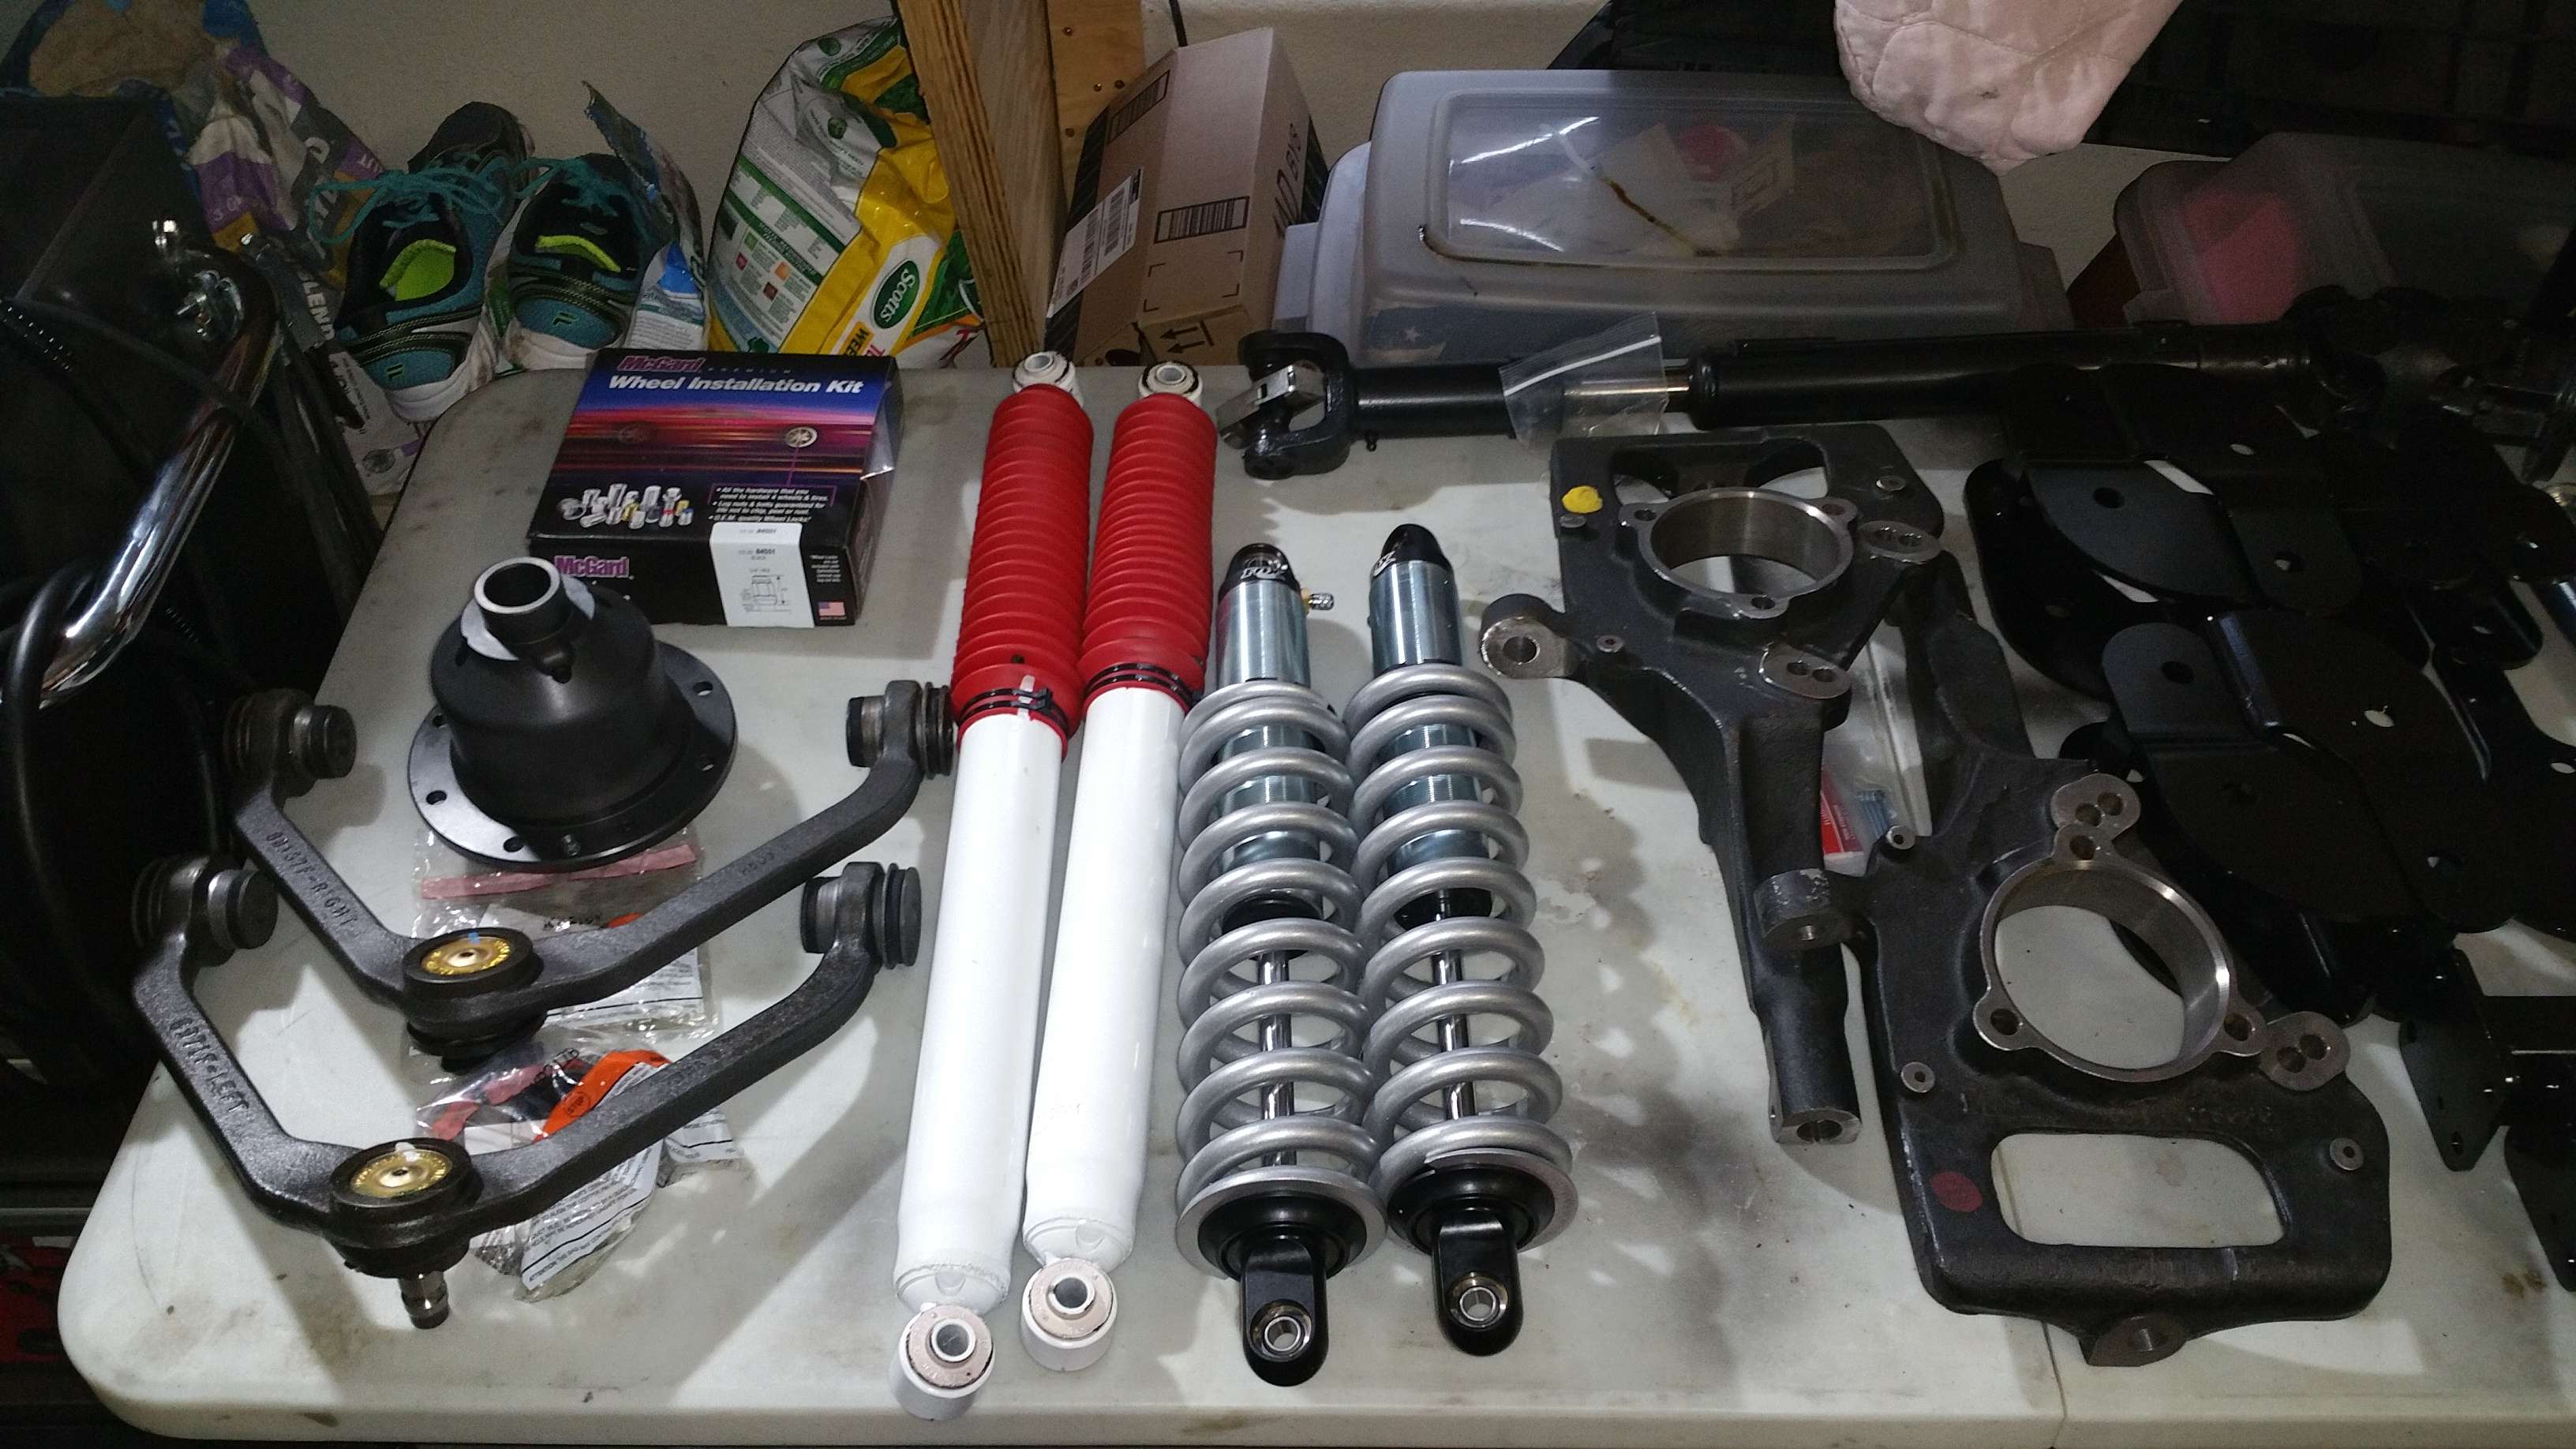
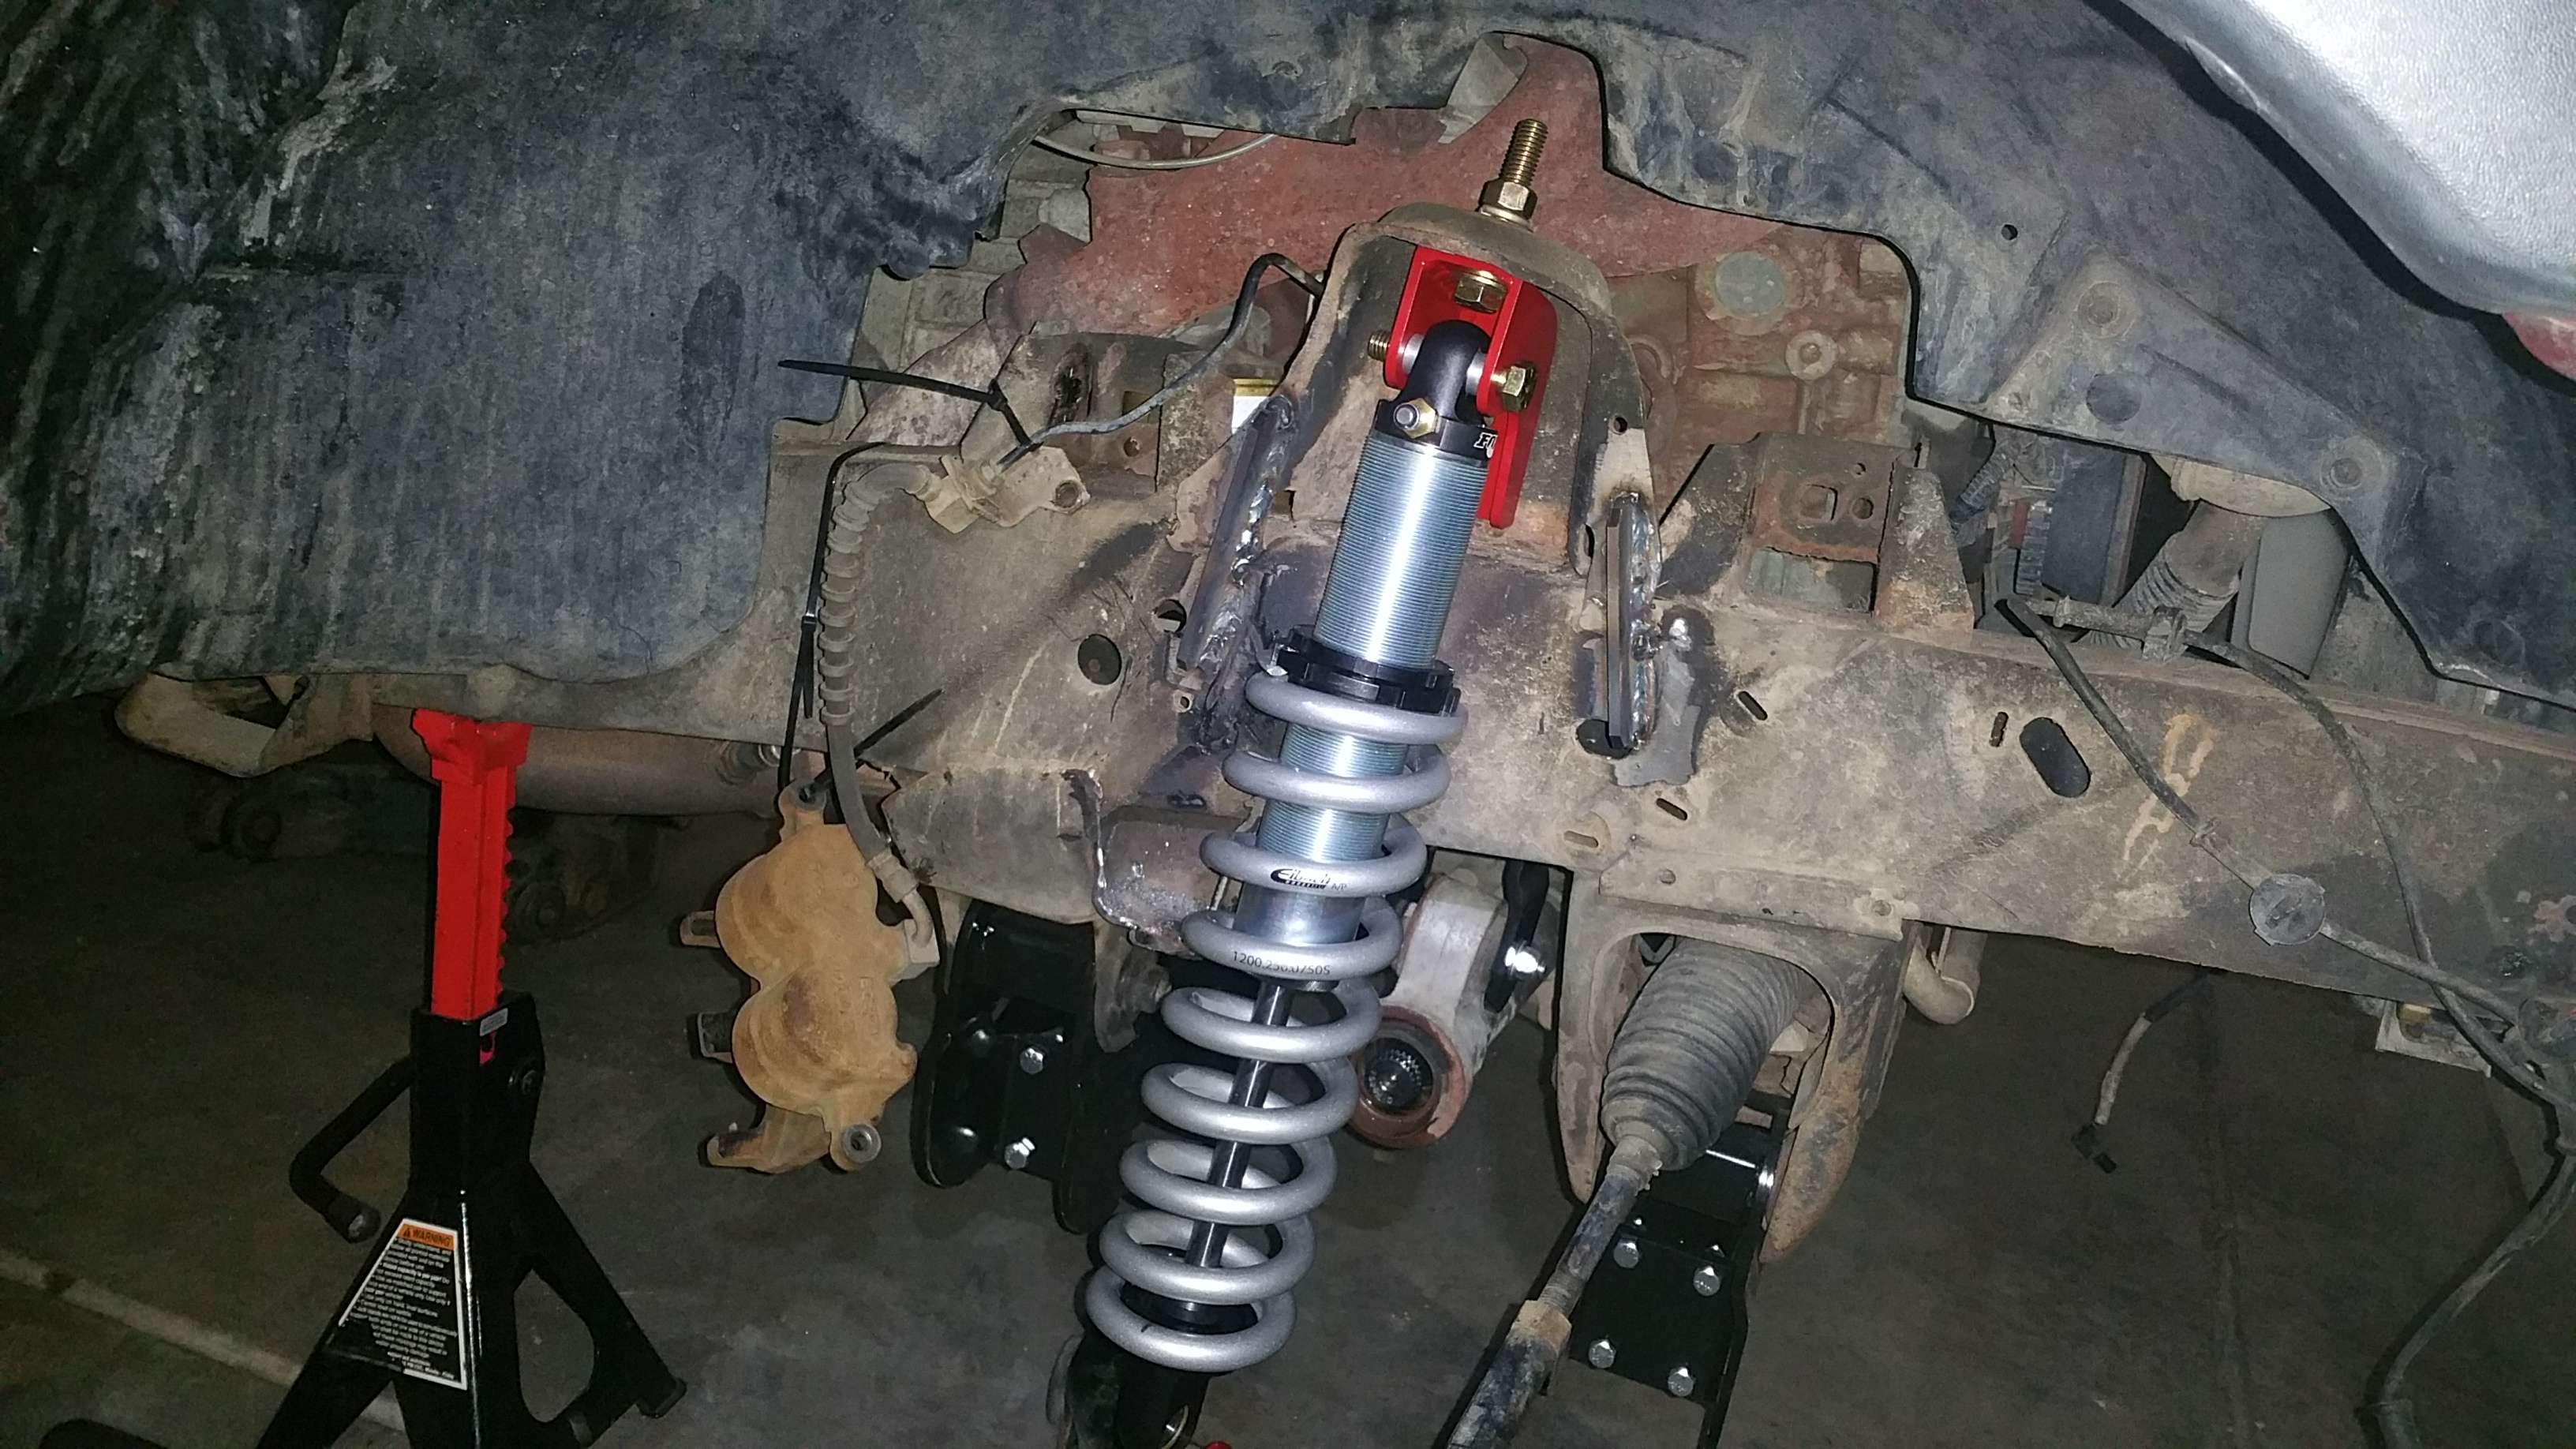
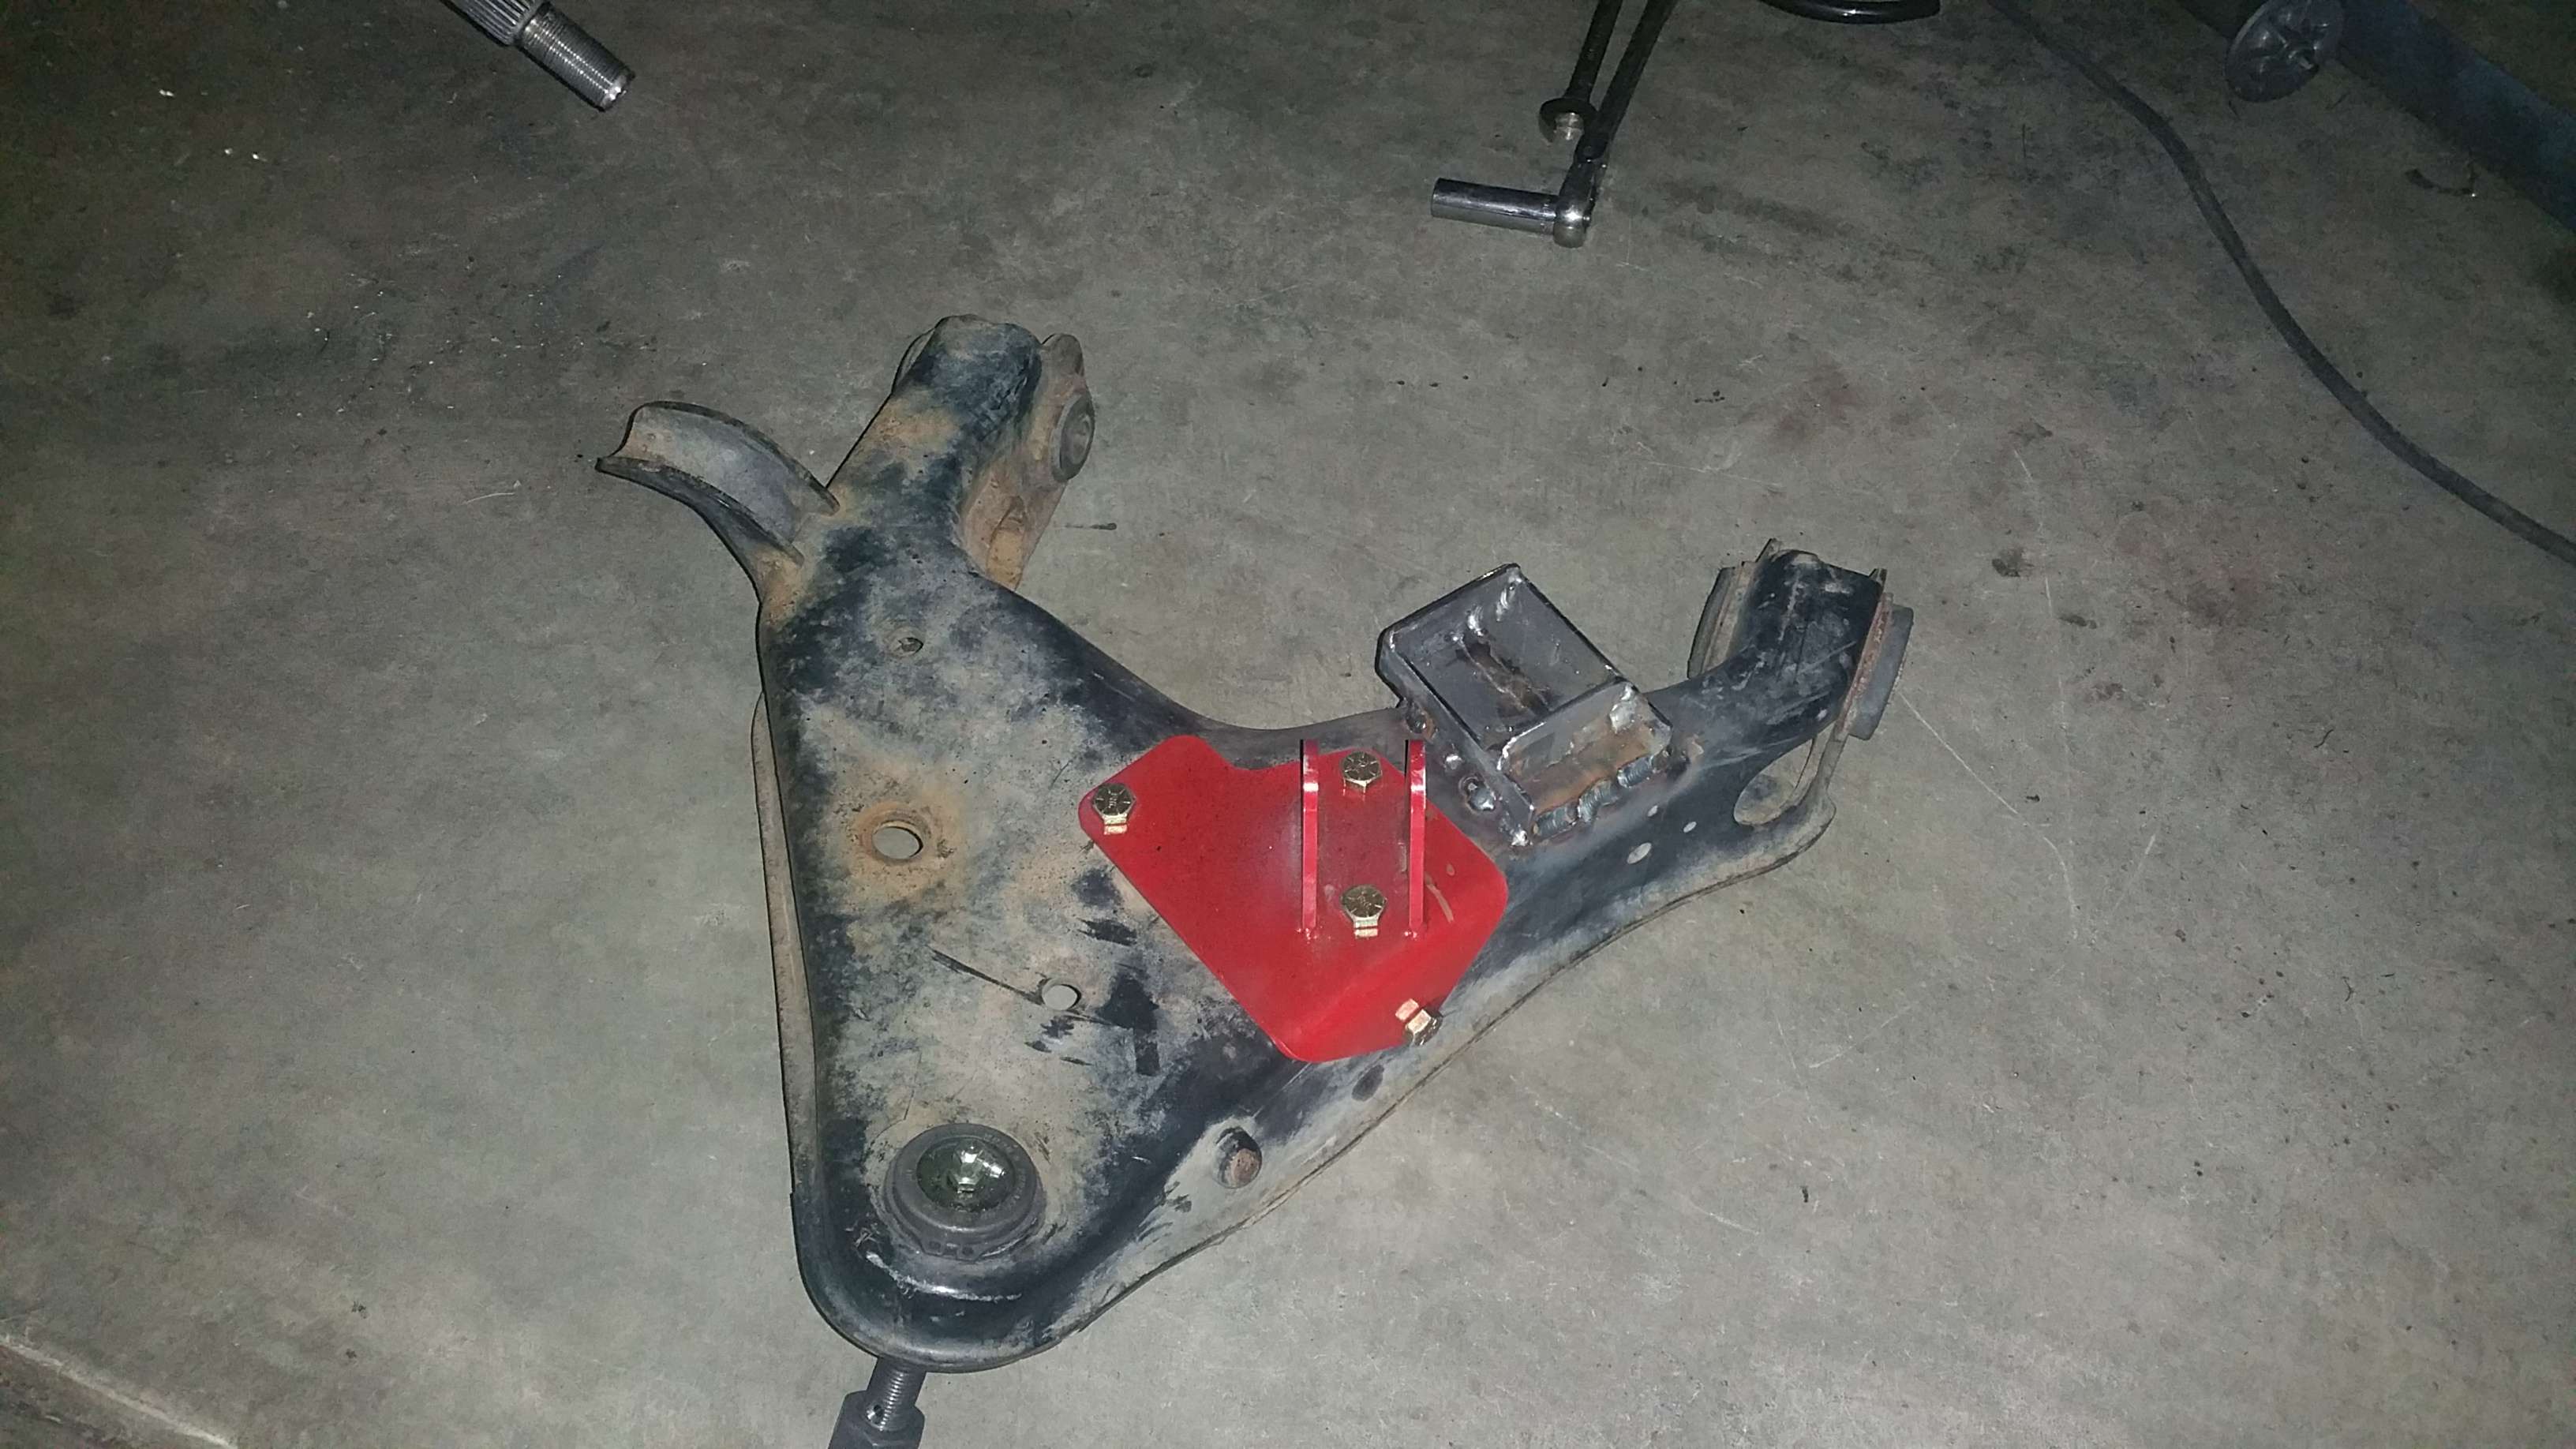
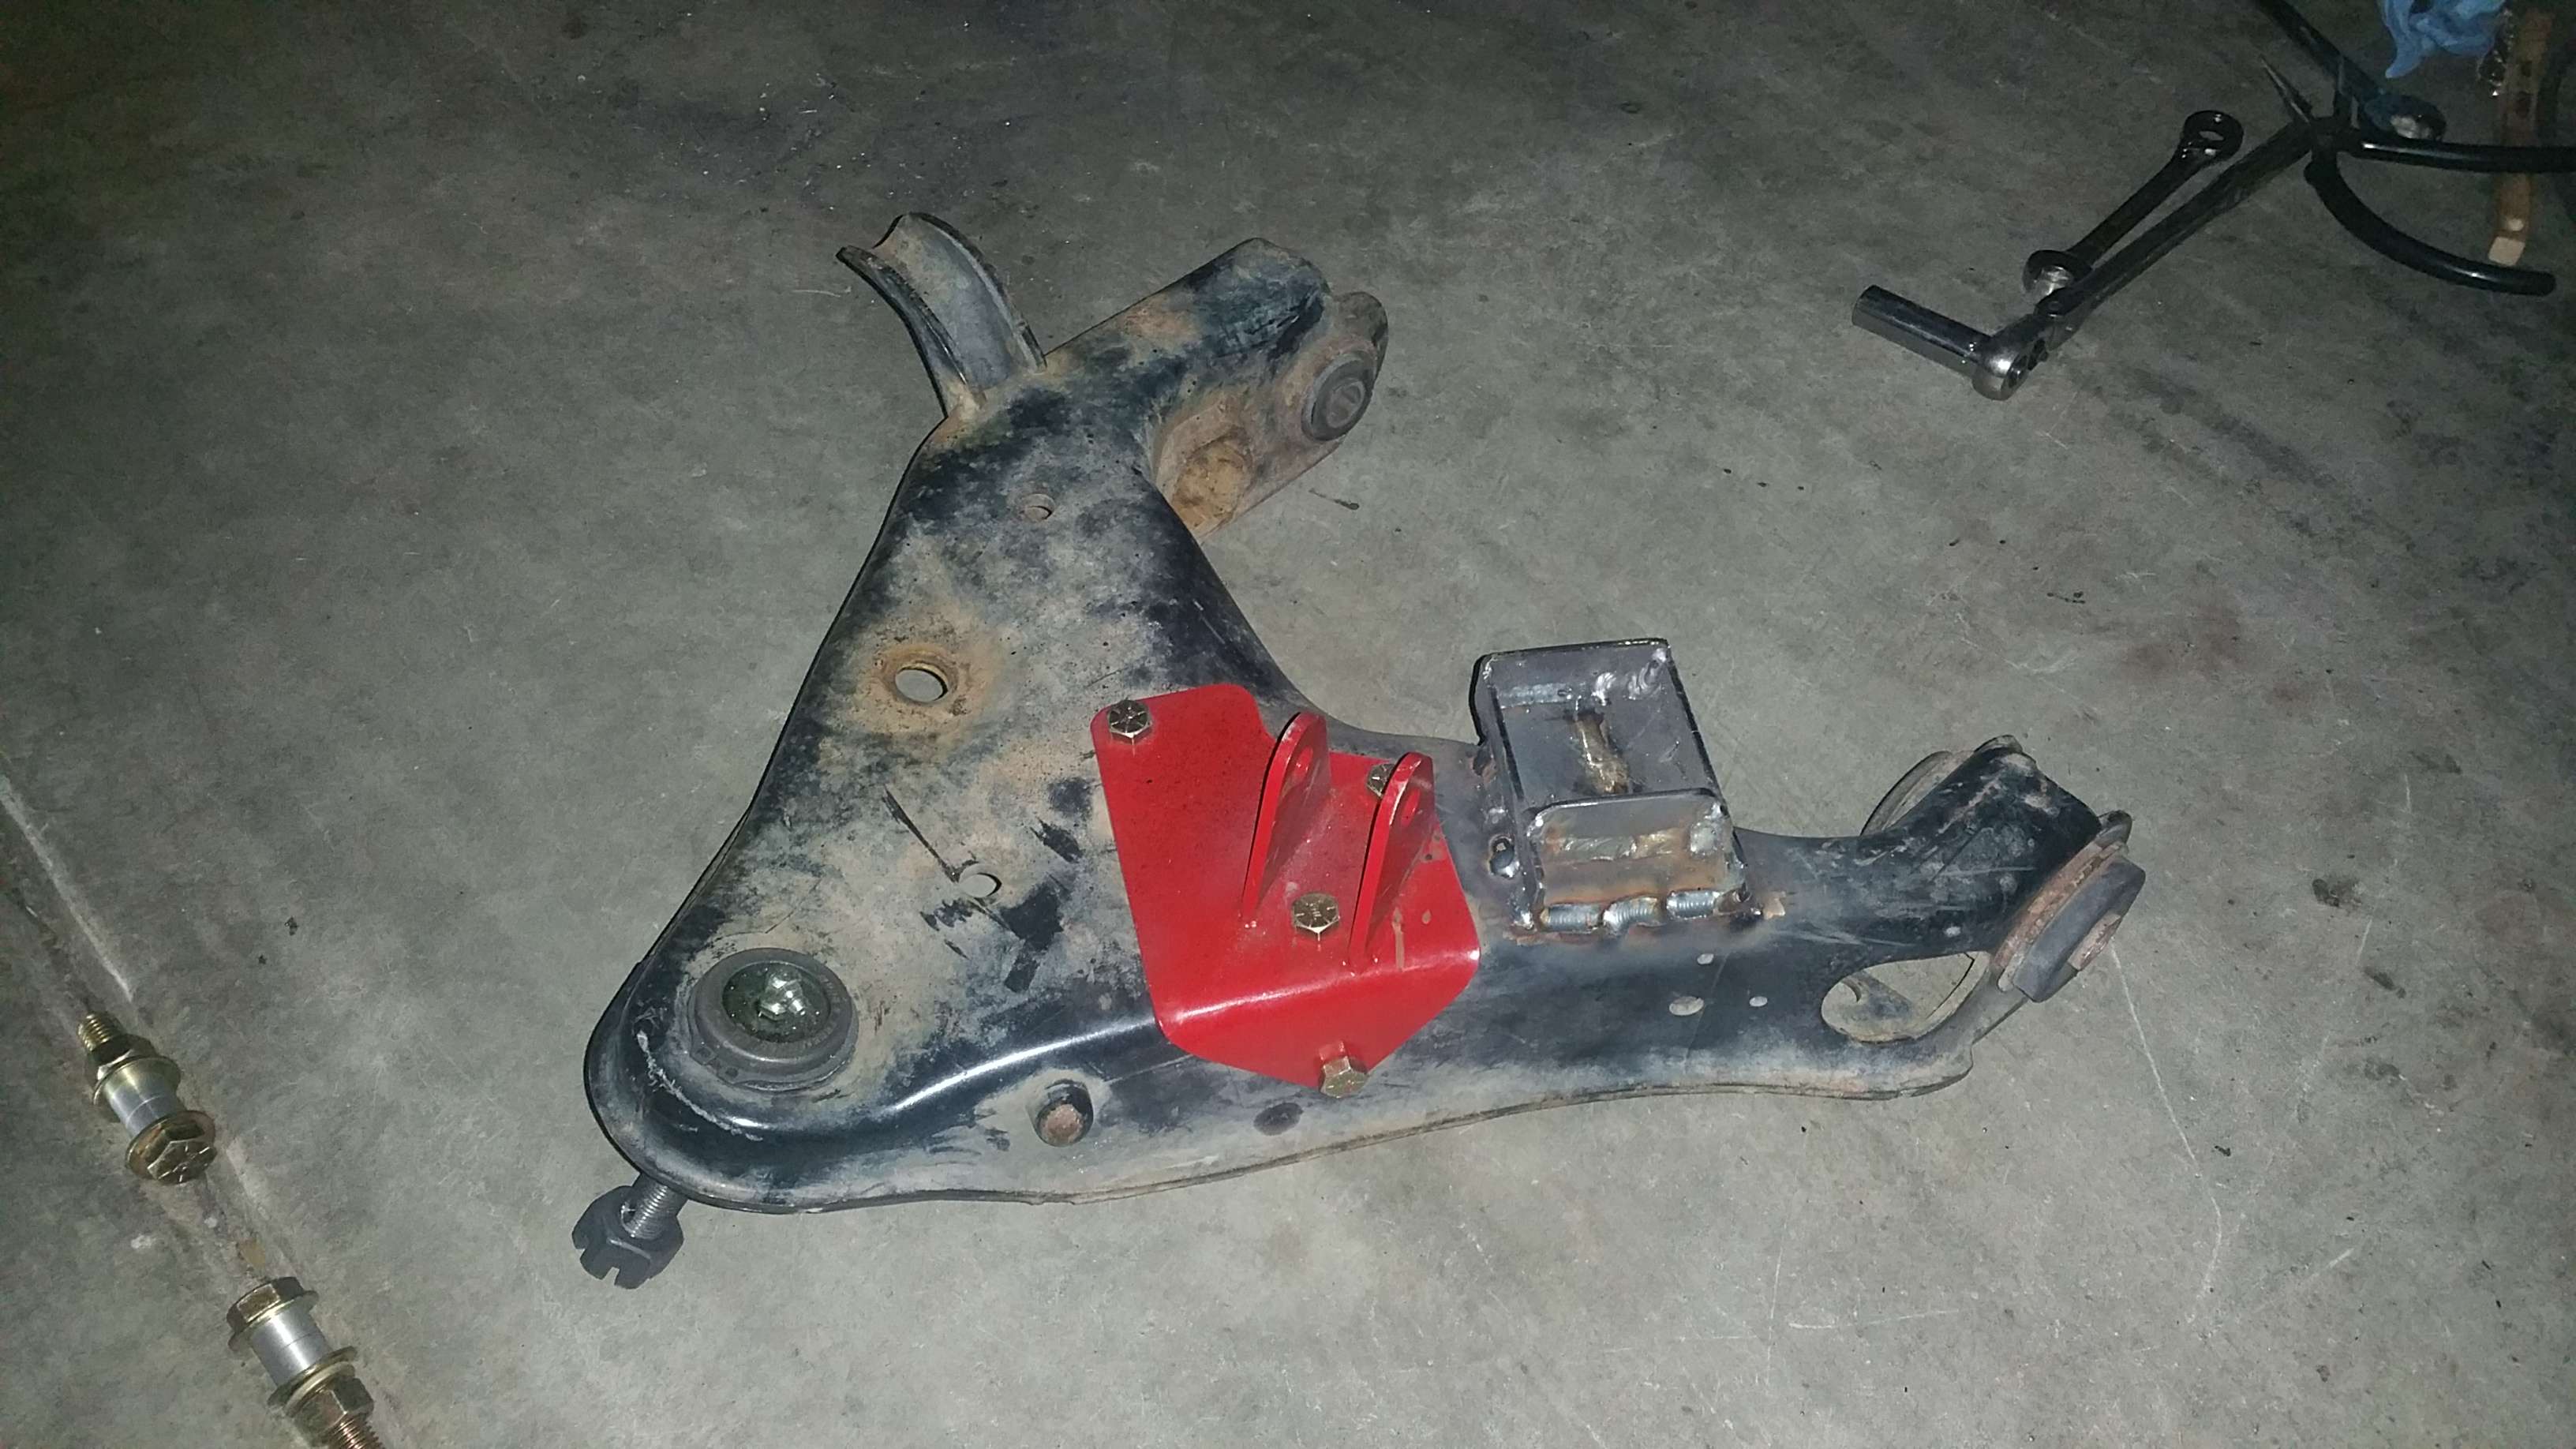
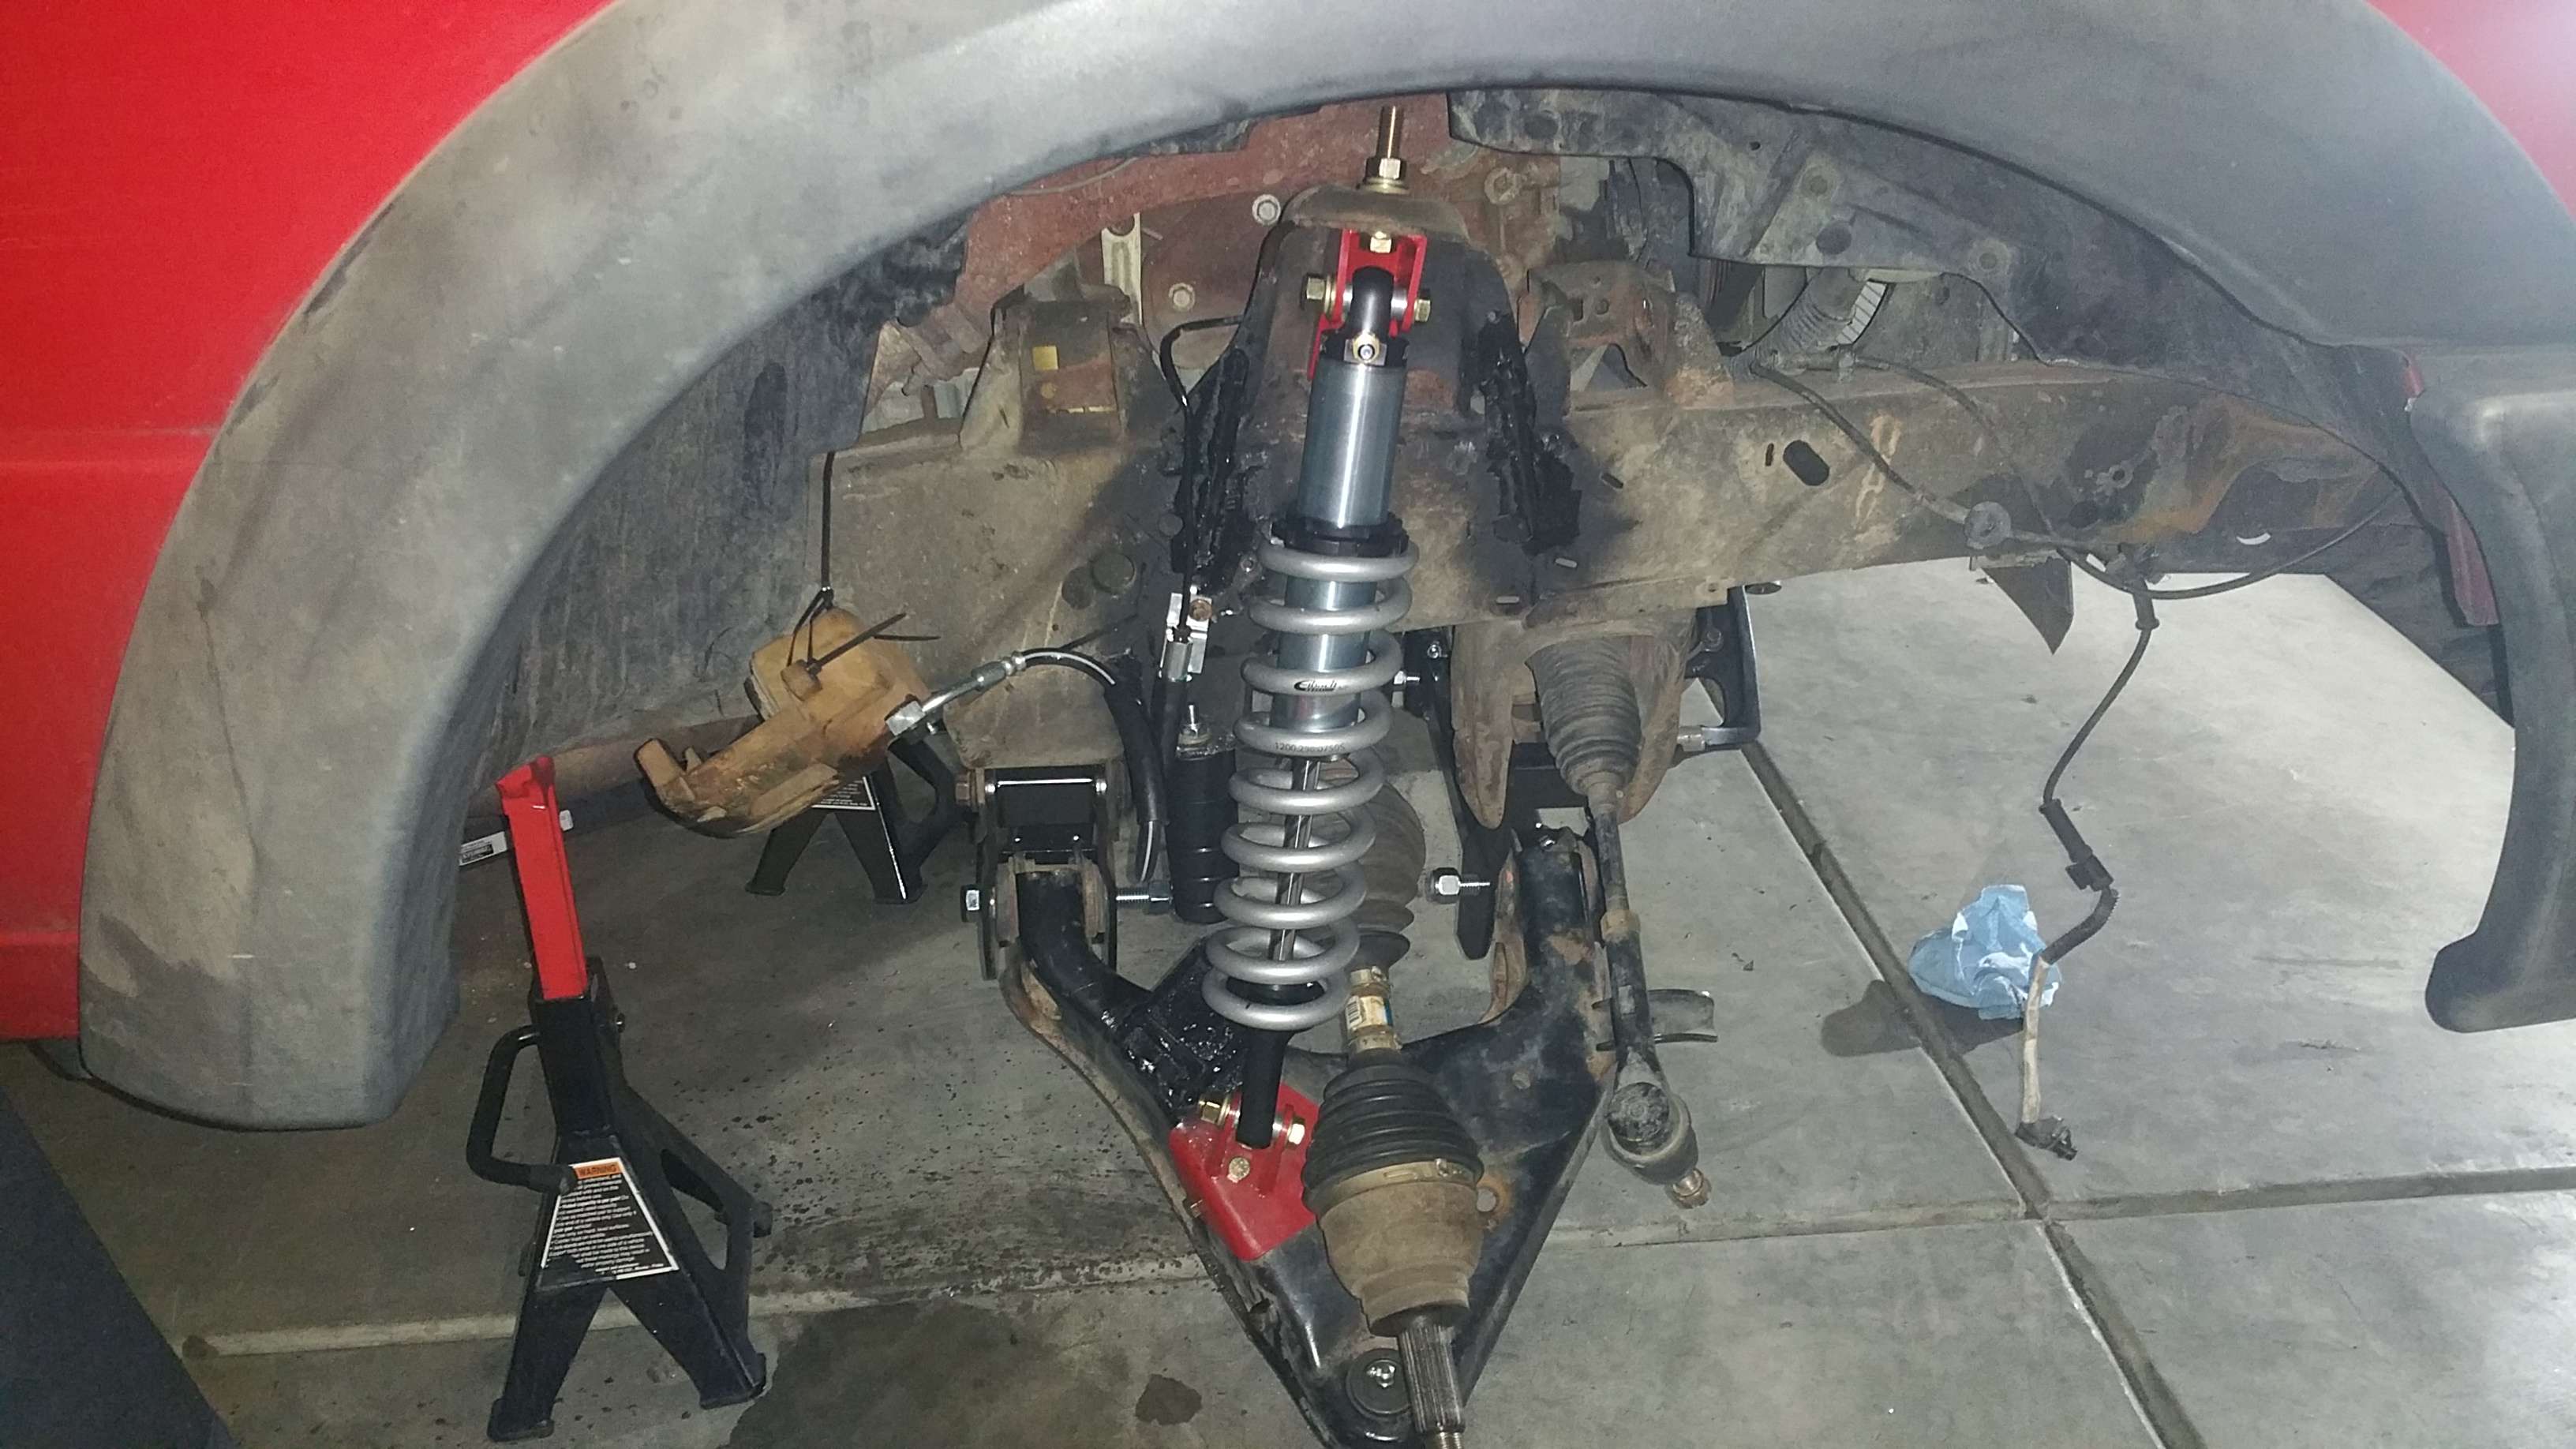
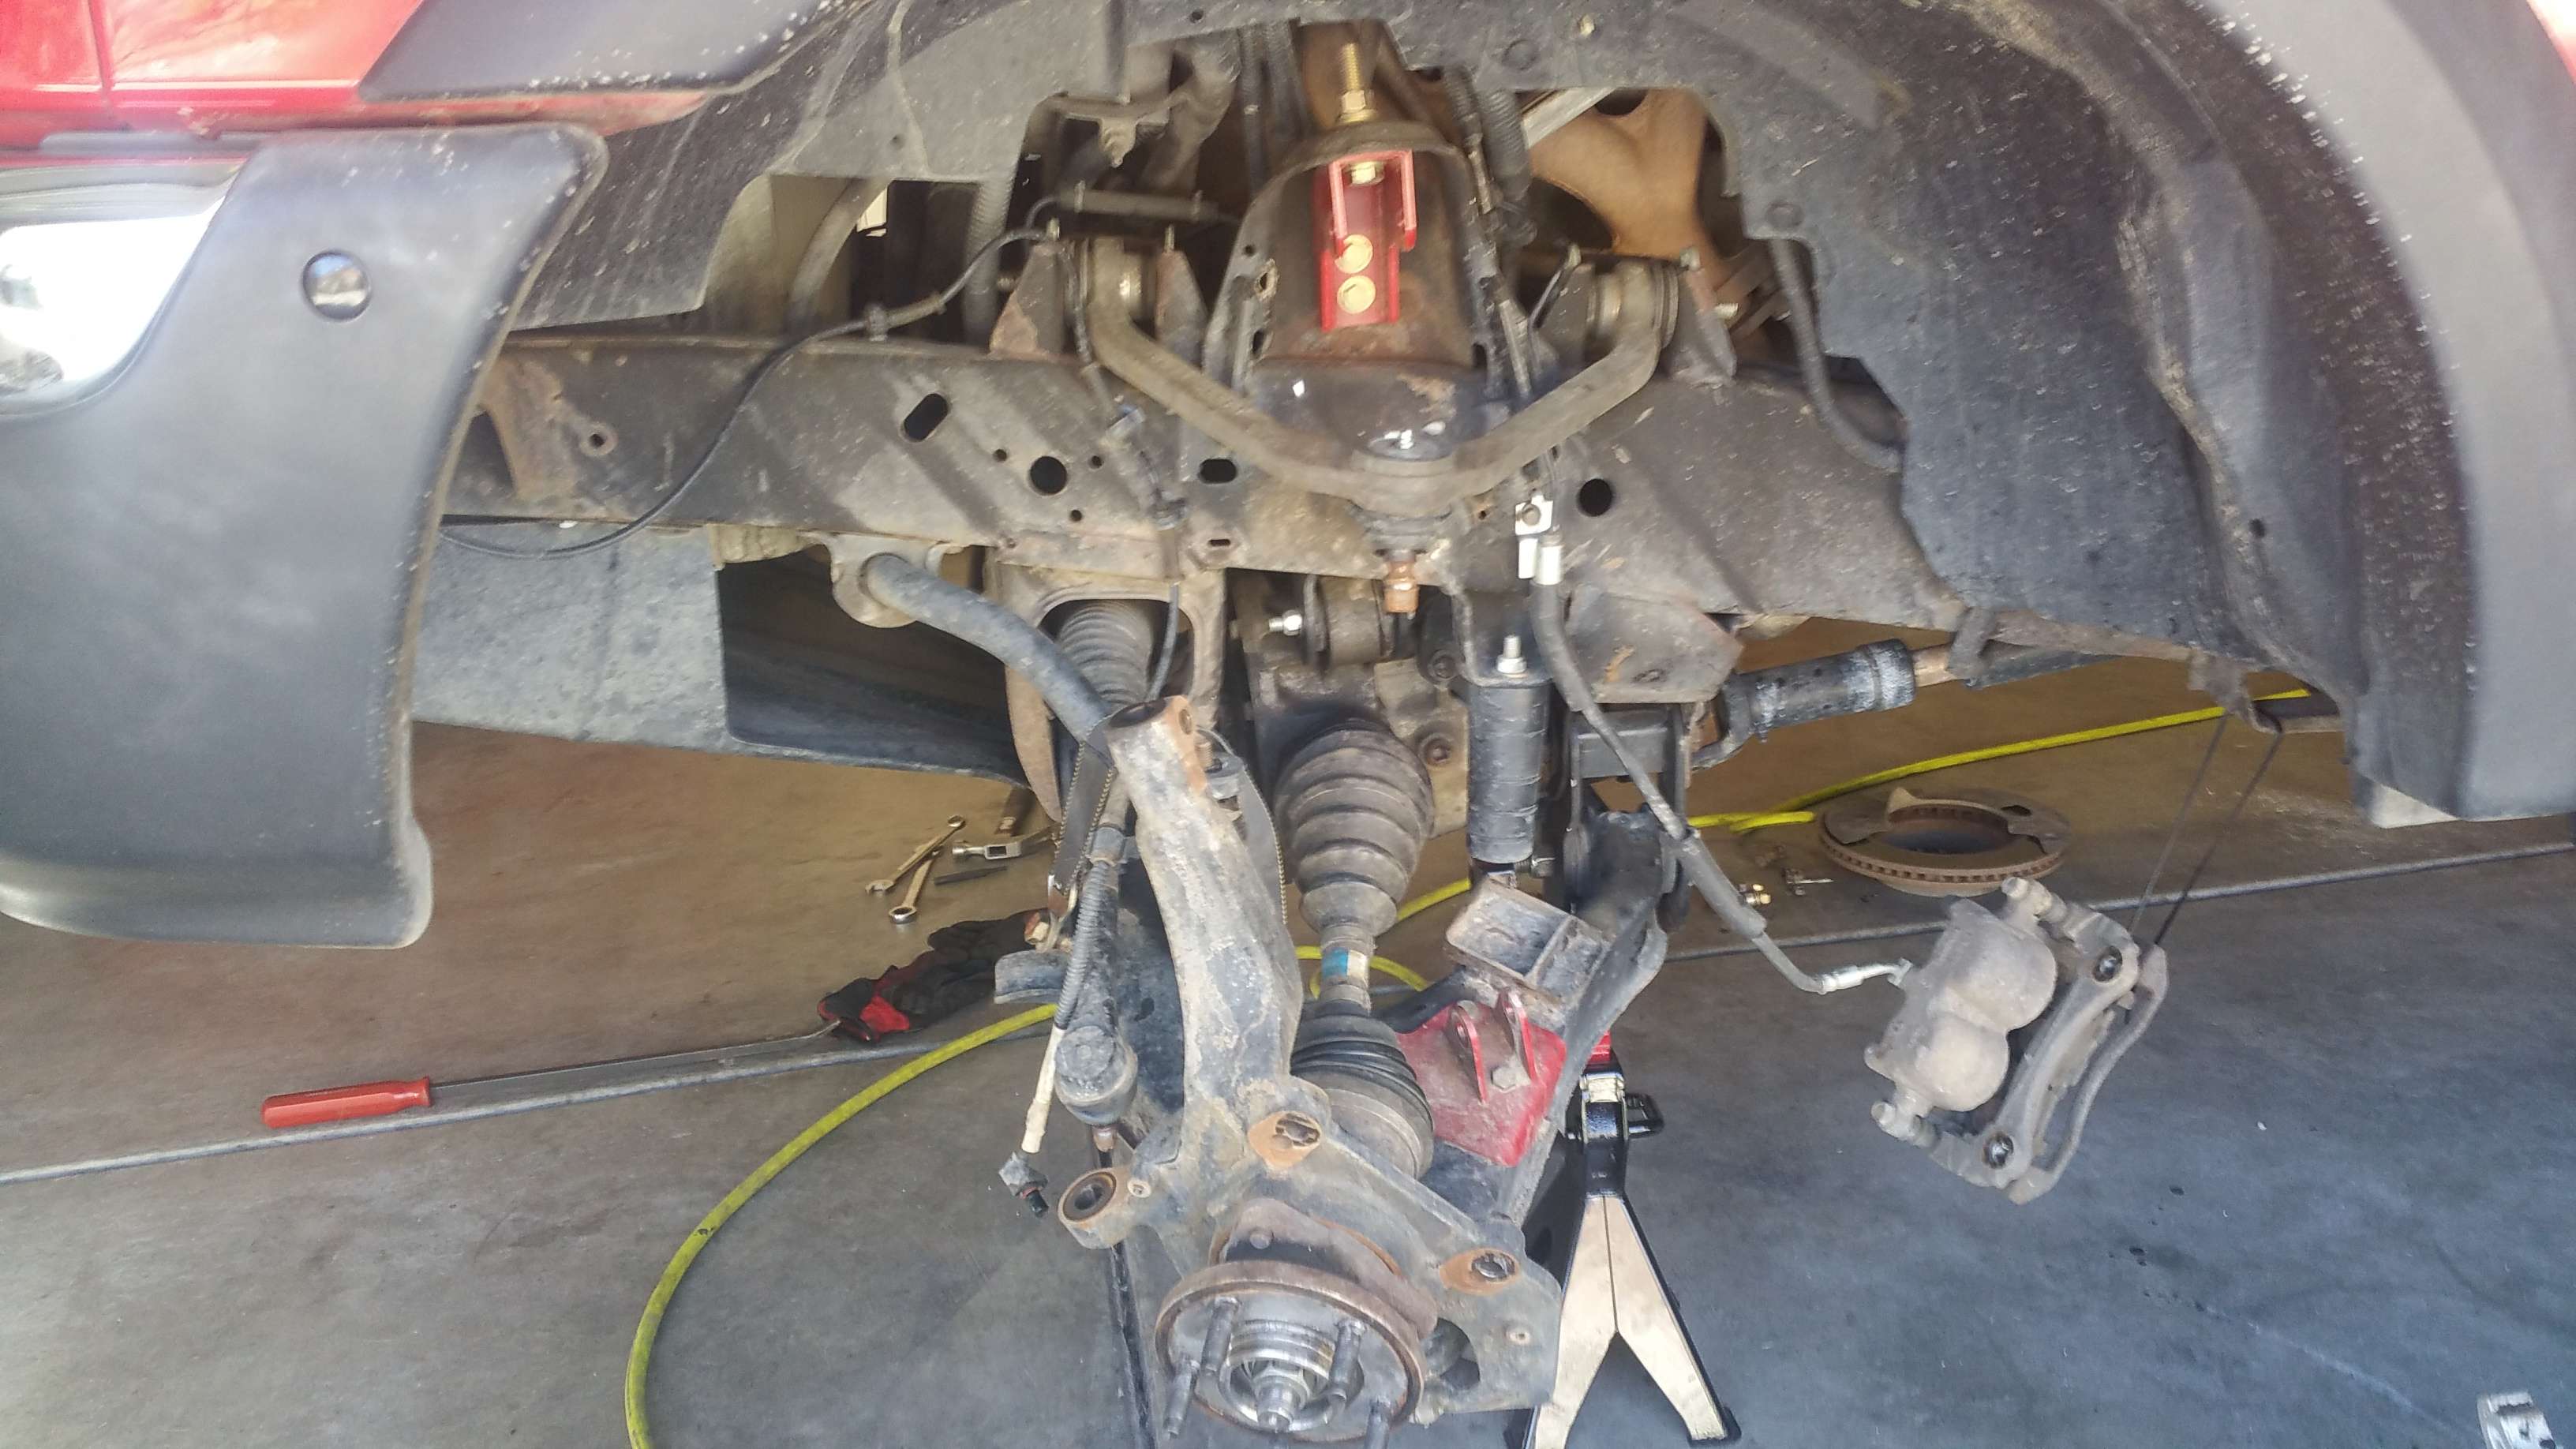
Also are some pictures of the coilover kit provided by ME00Stepside. The kit is awesome. I bought myself a welder for christmas with some of the funds from selling that 69 Camaro. I love that miller welder. It kicks ***. Also below are pictures of the front lift (not all the parts were used), the front Torsen LSD, the coilovers, and some other random parts.


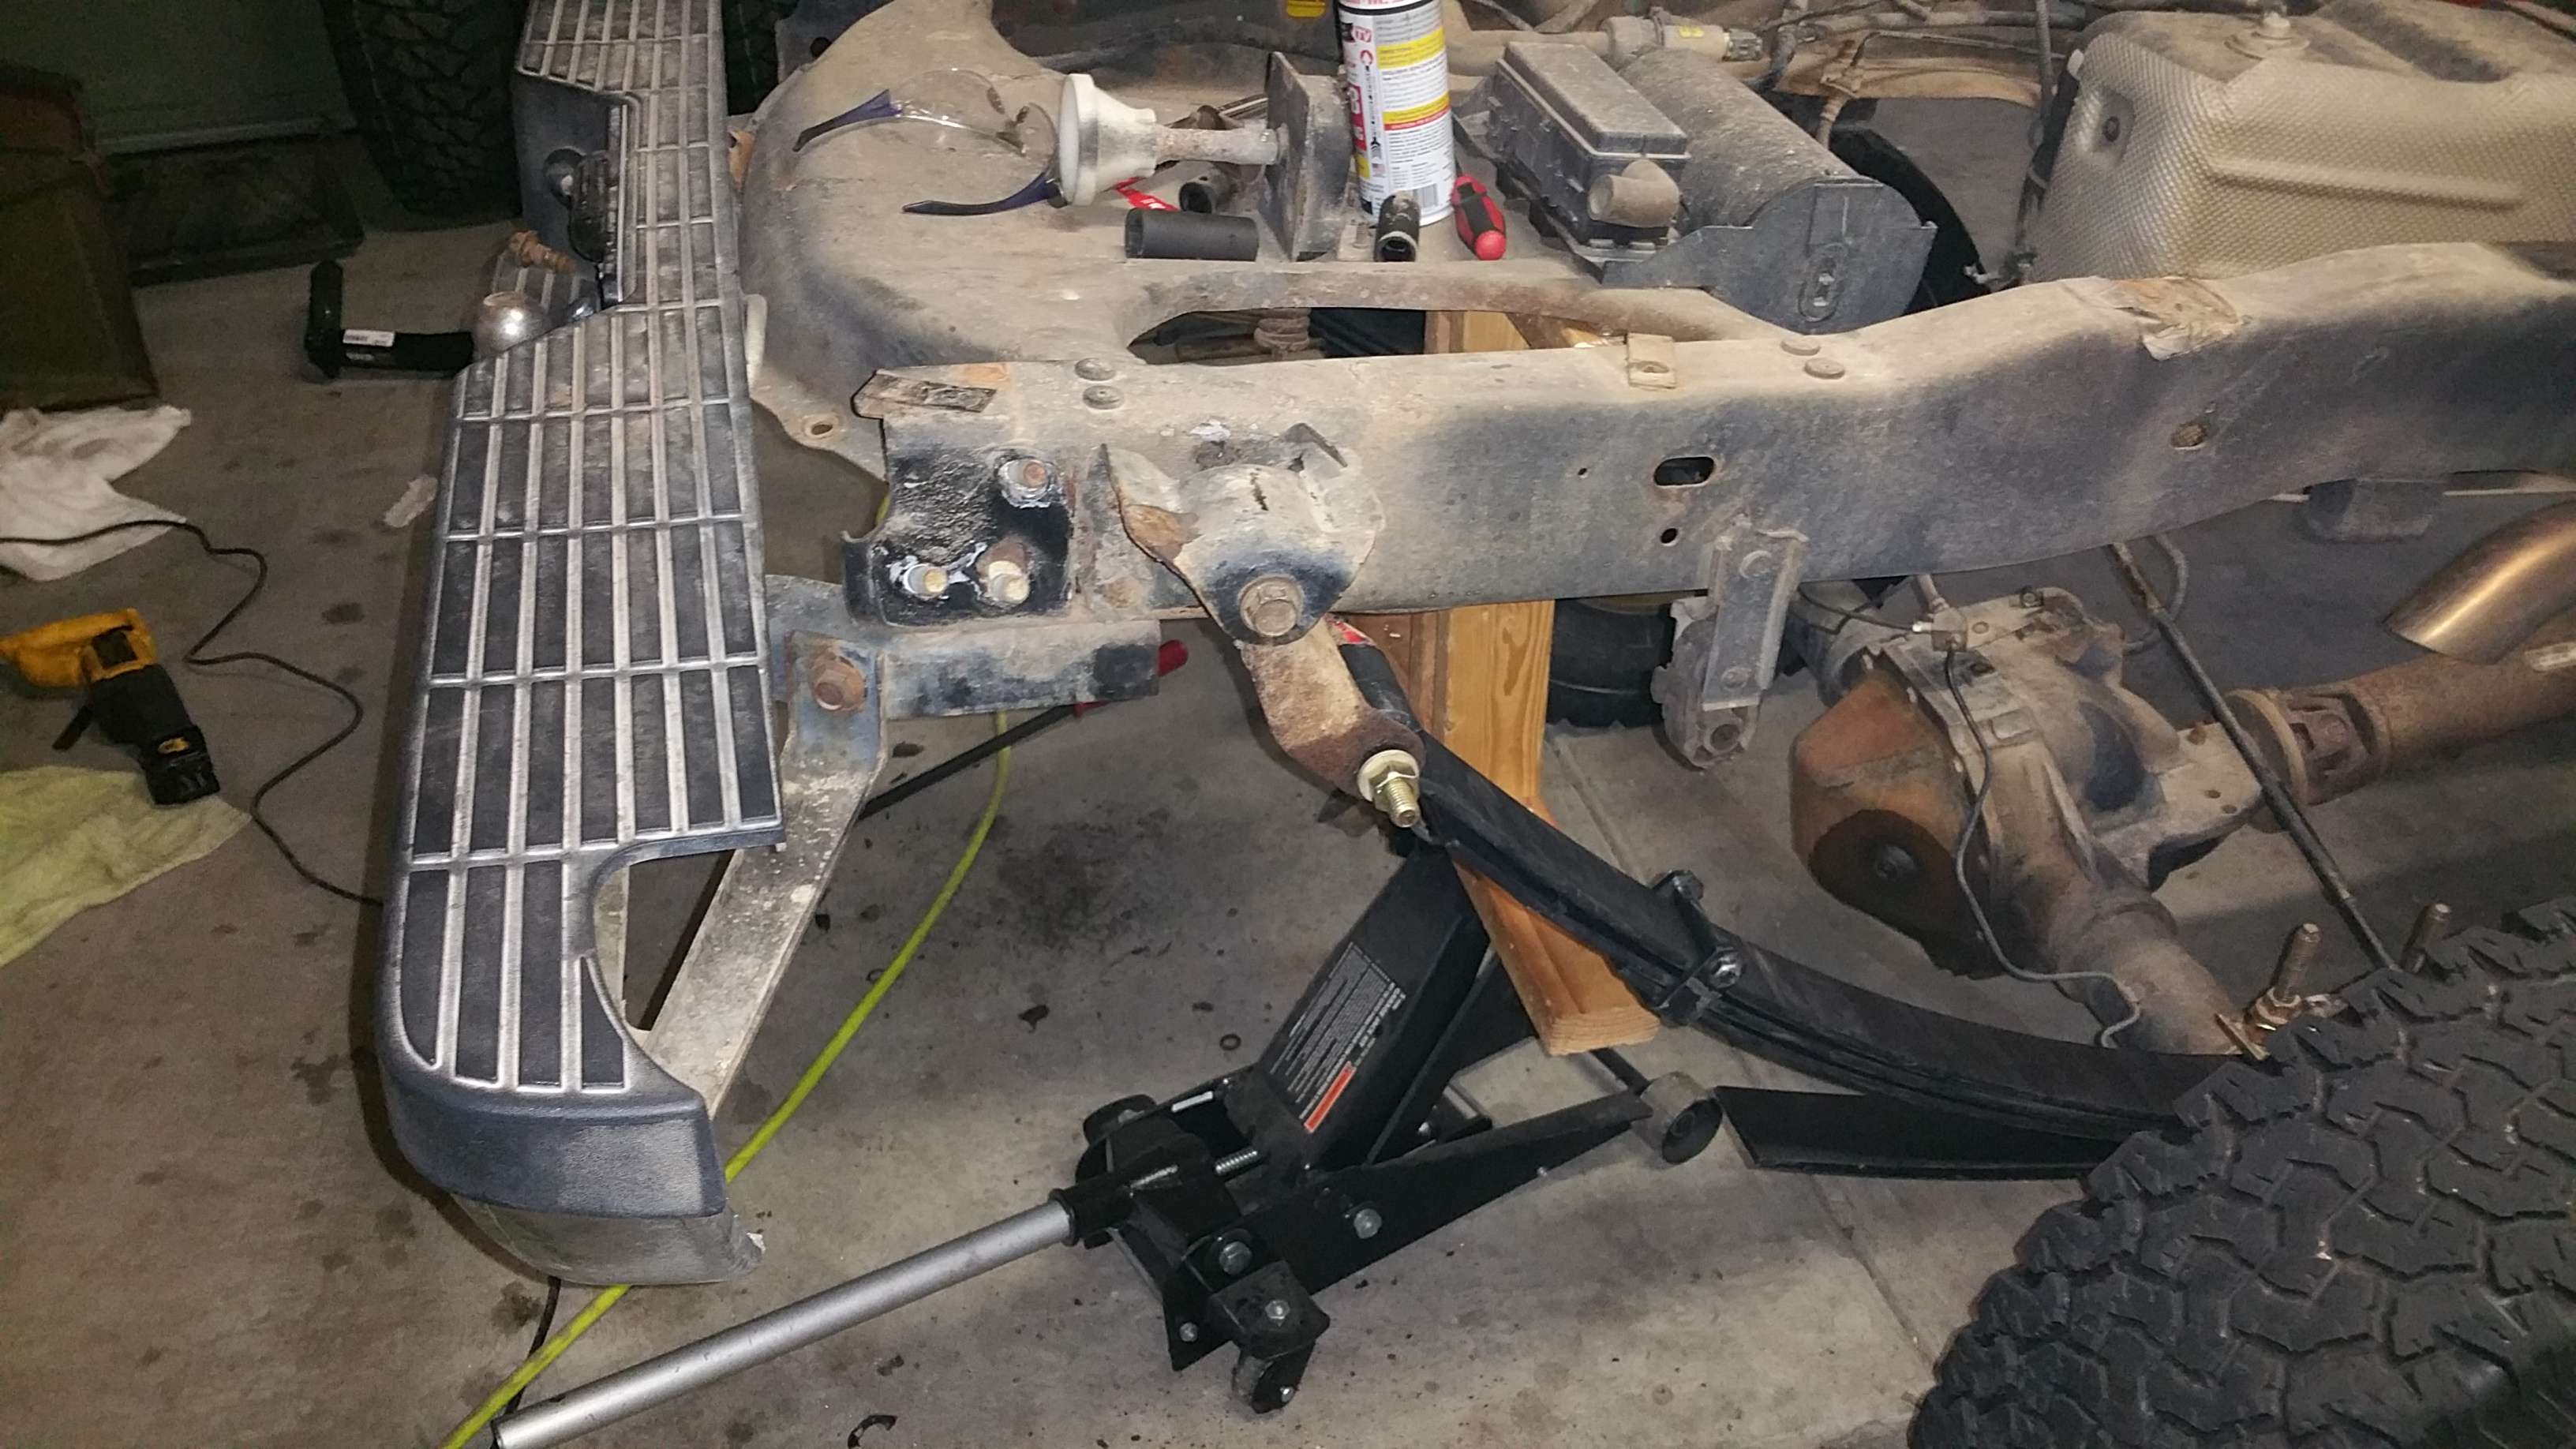
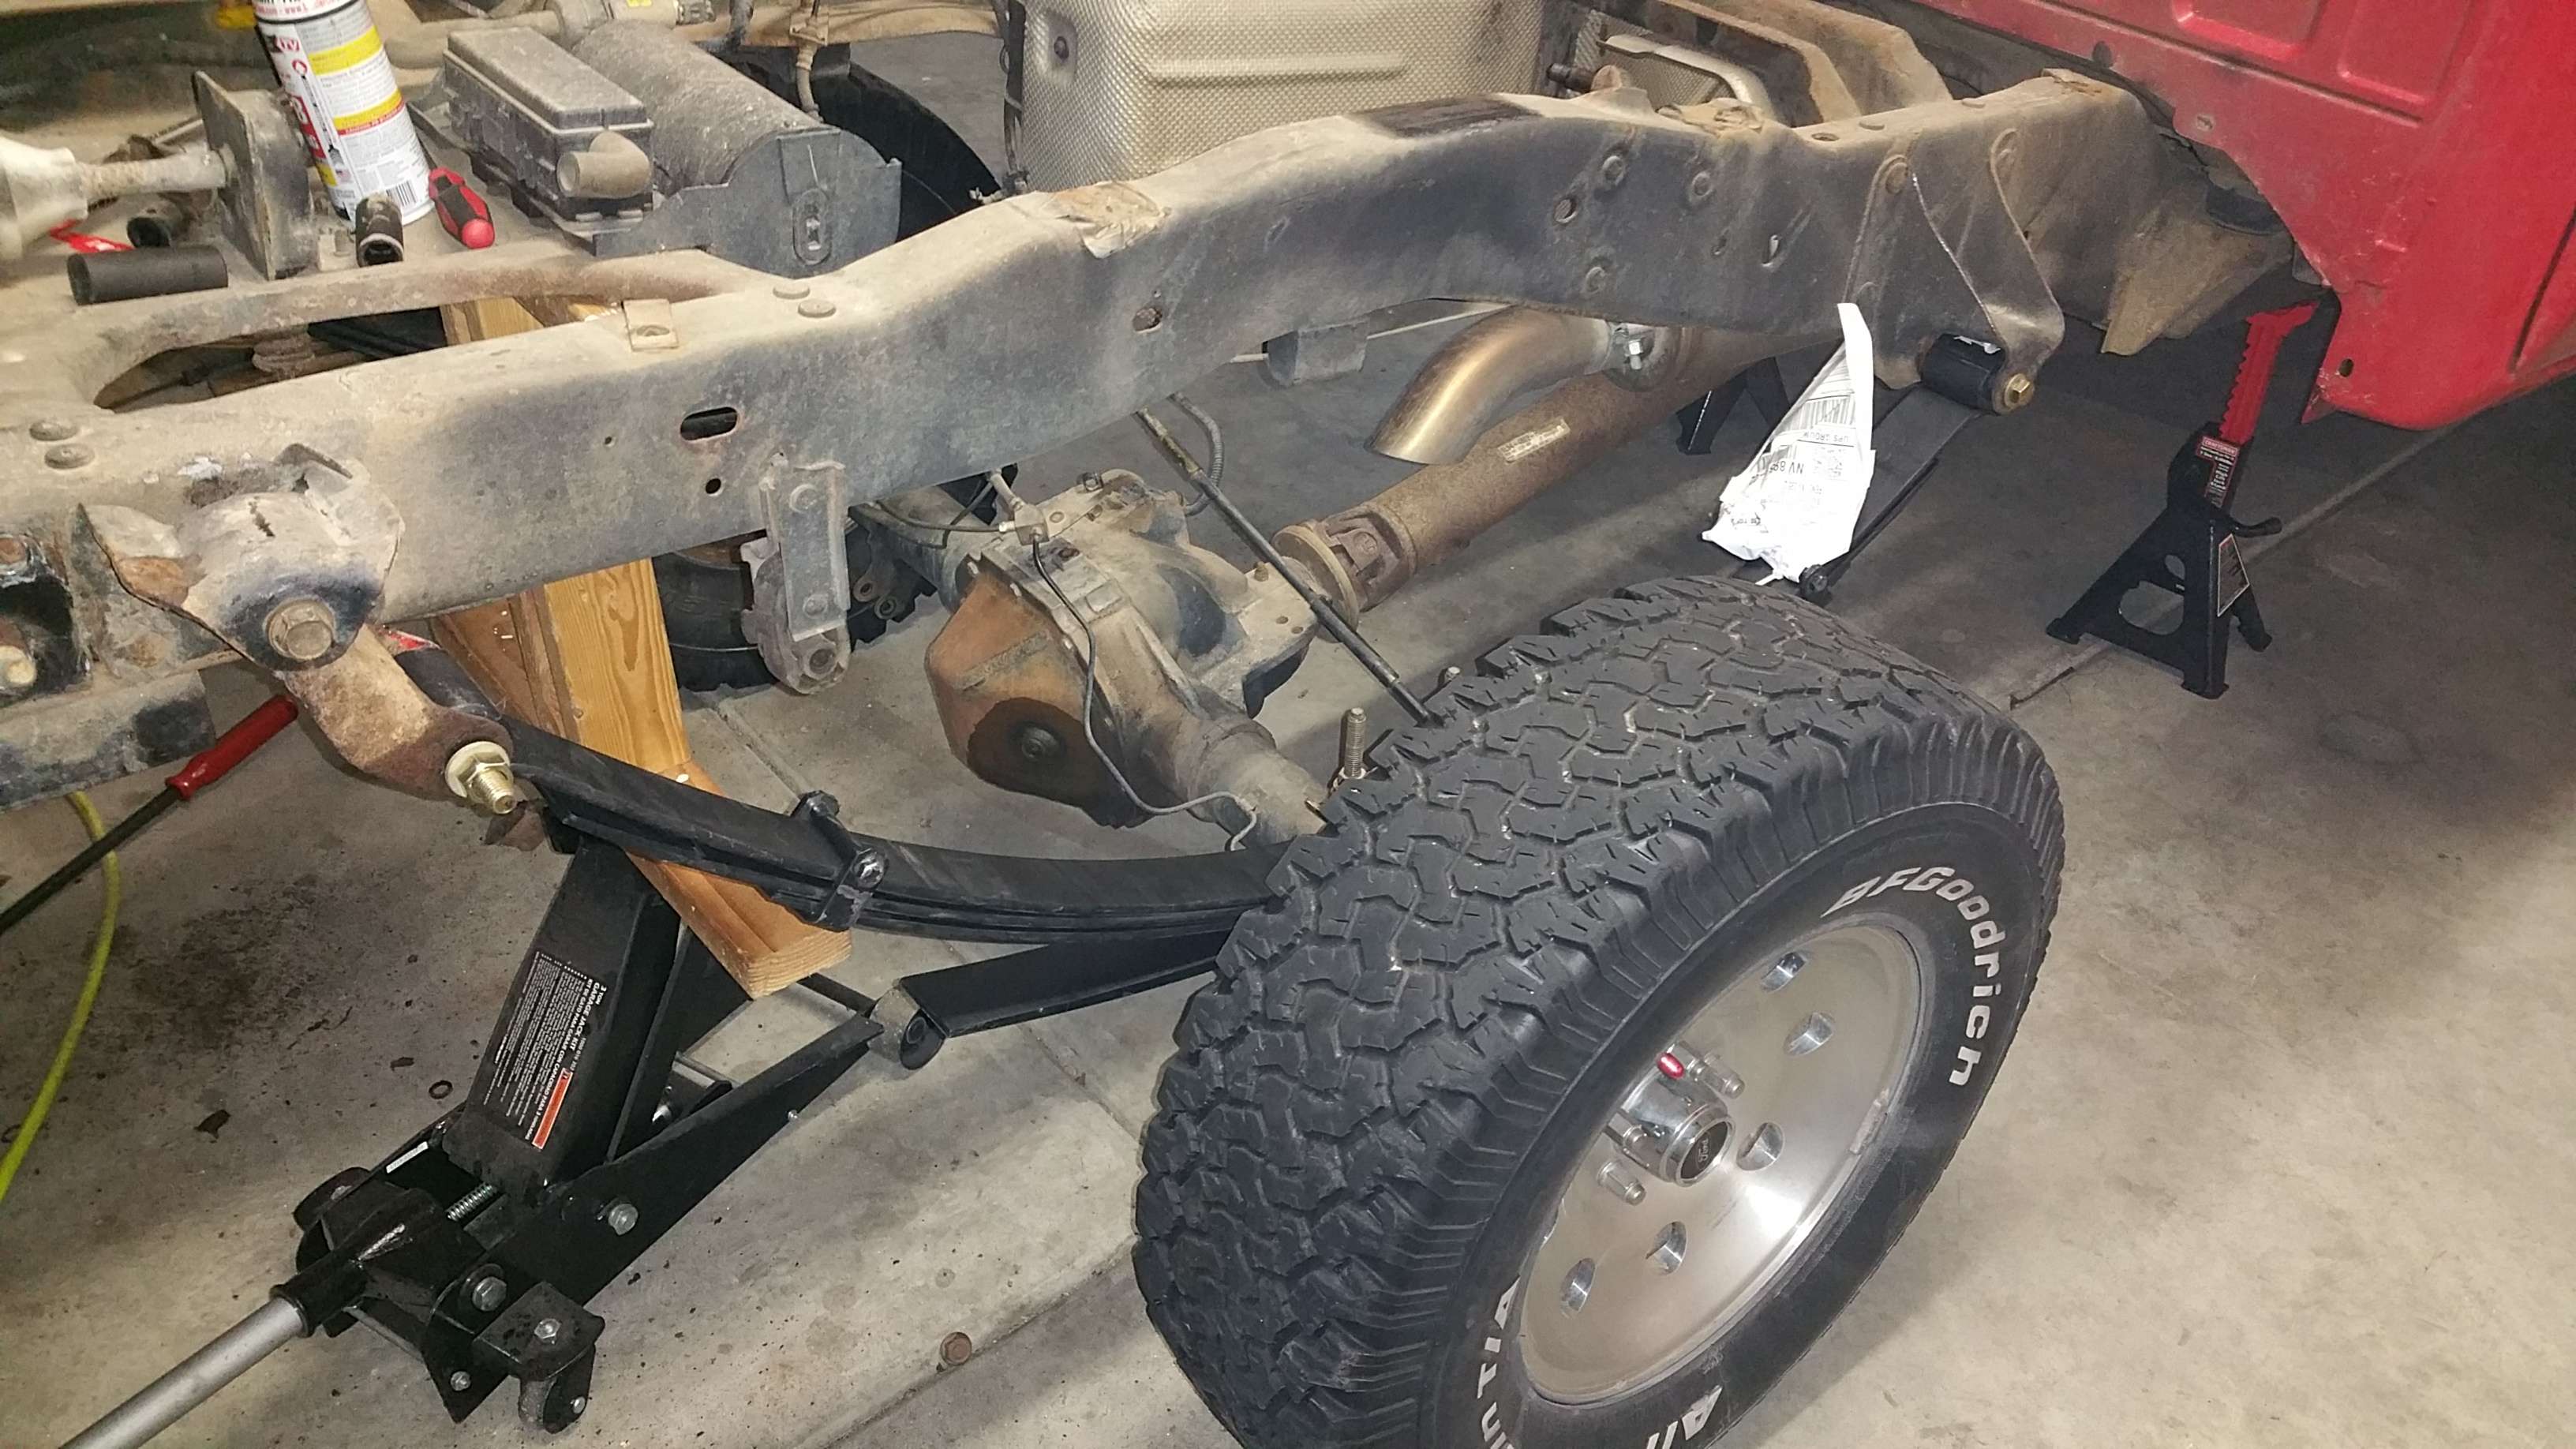
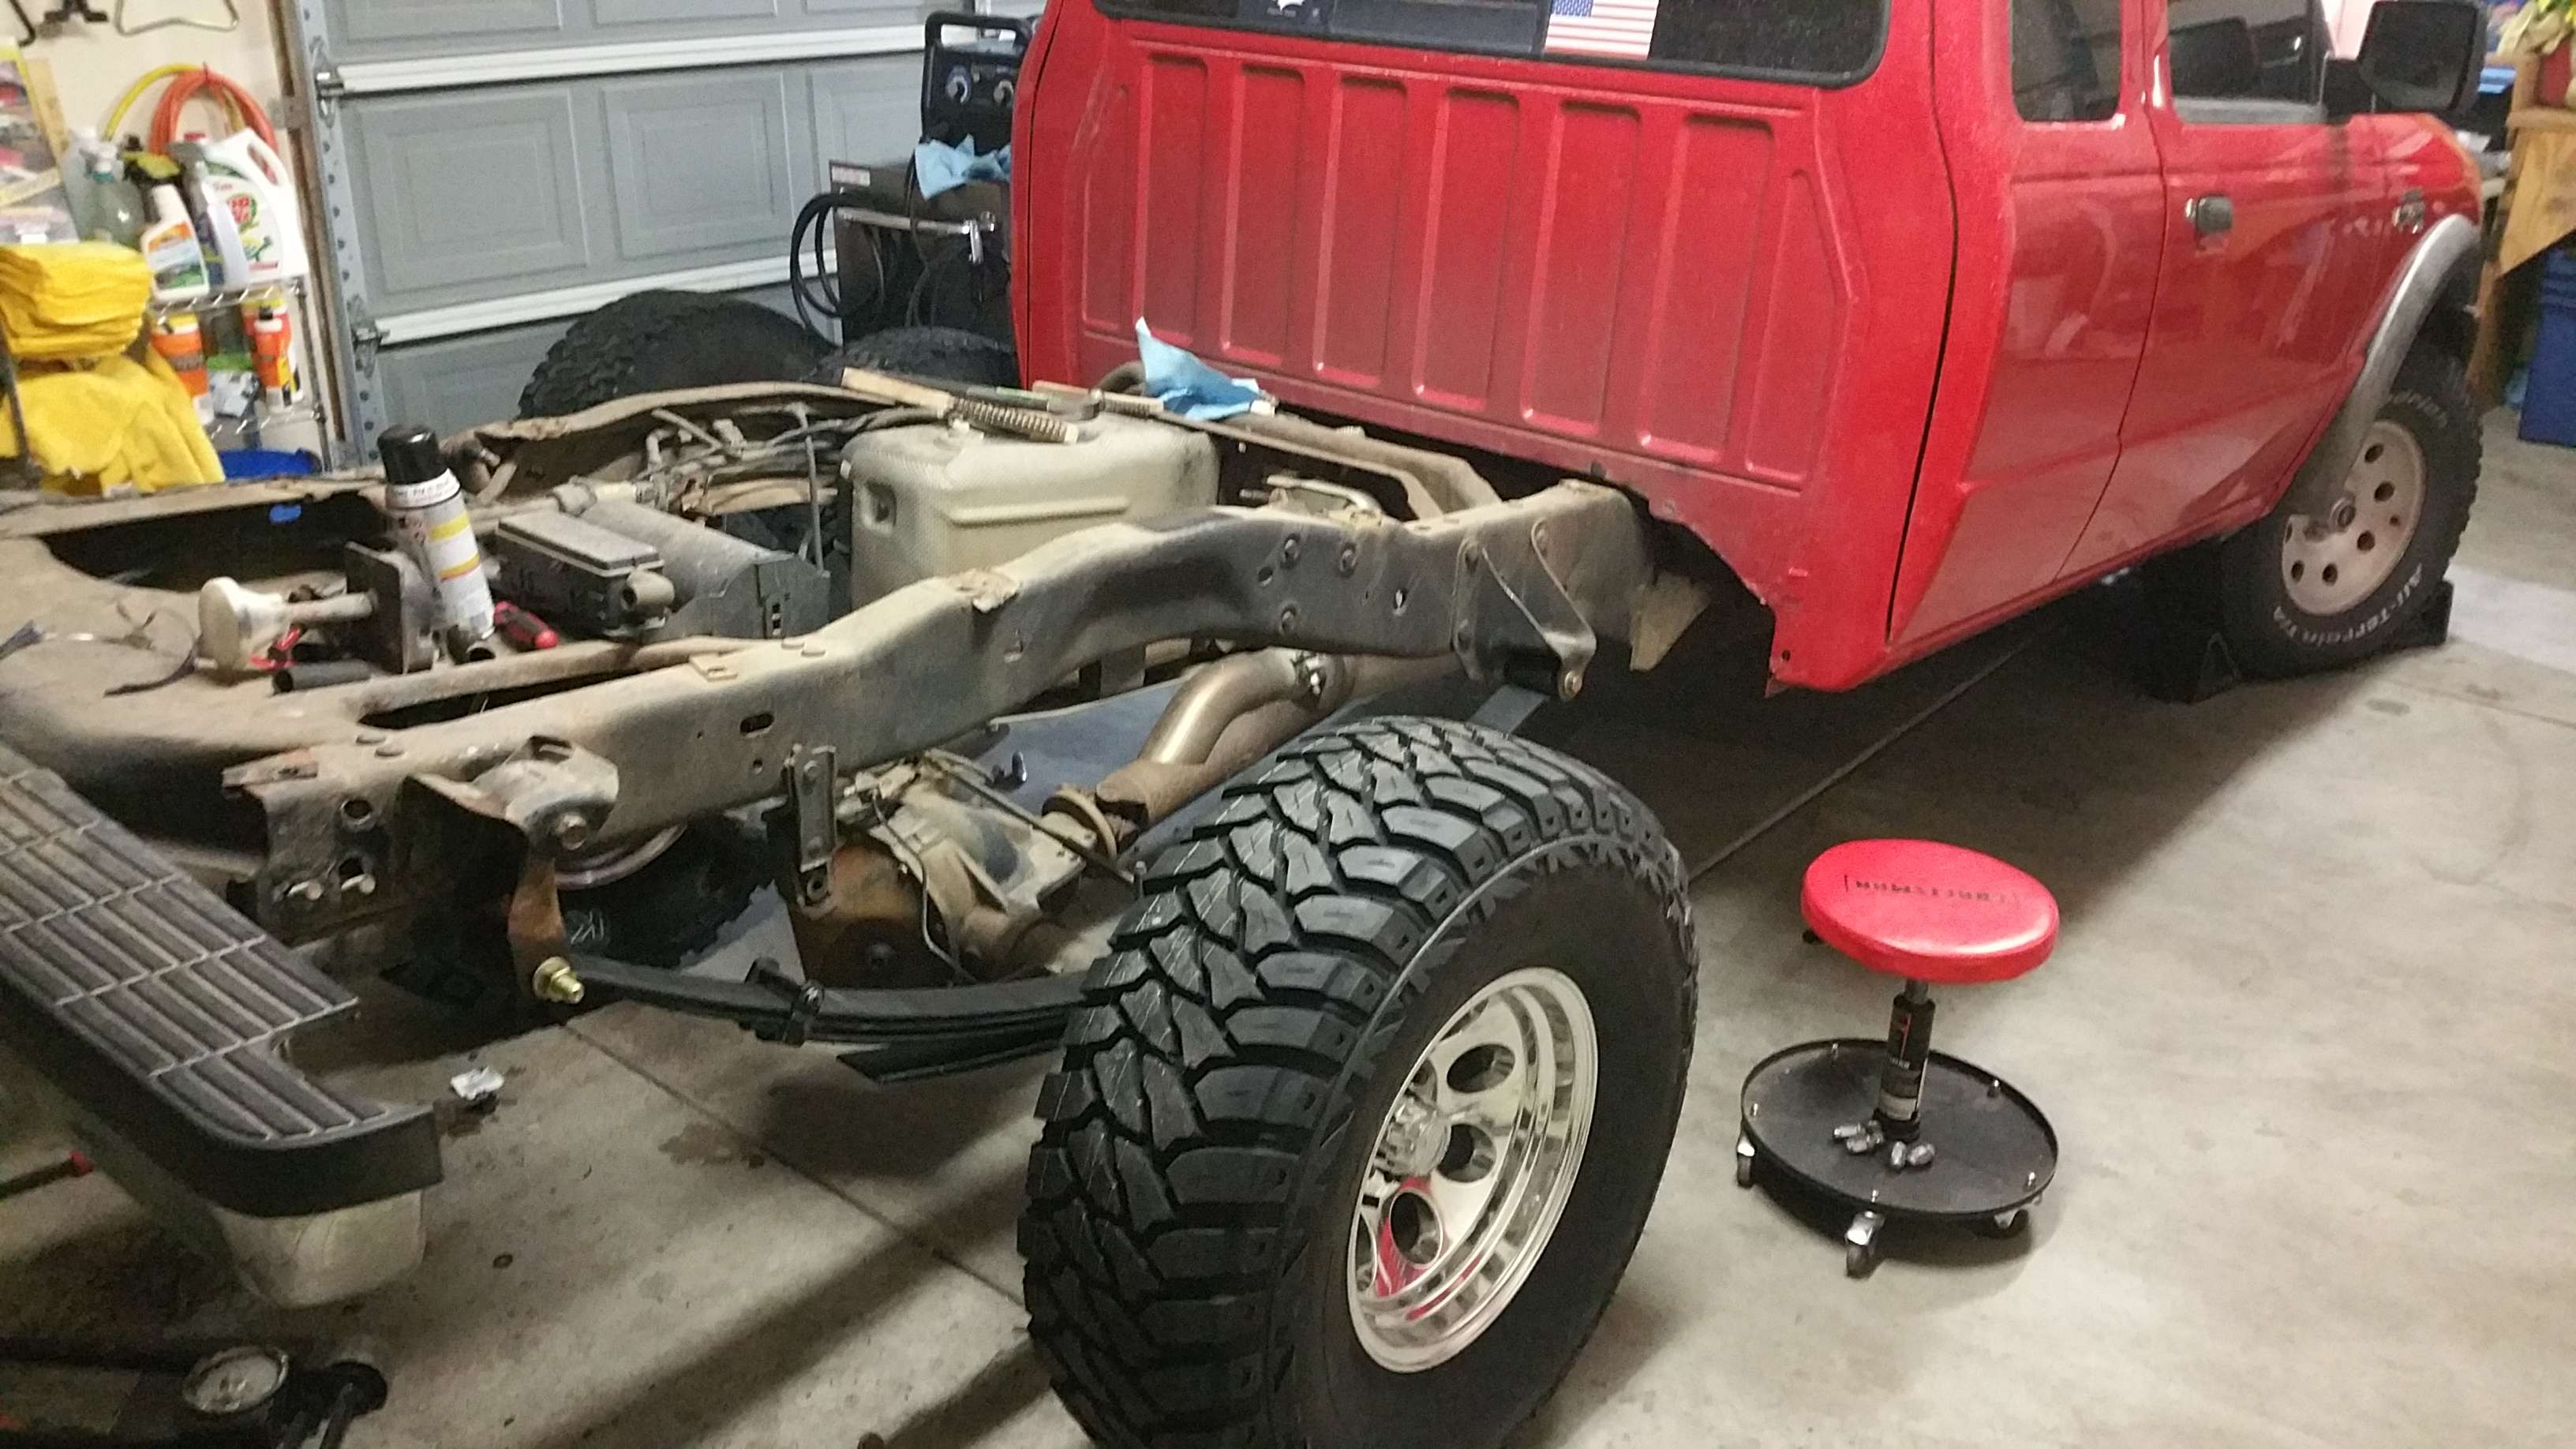
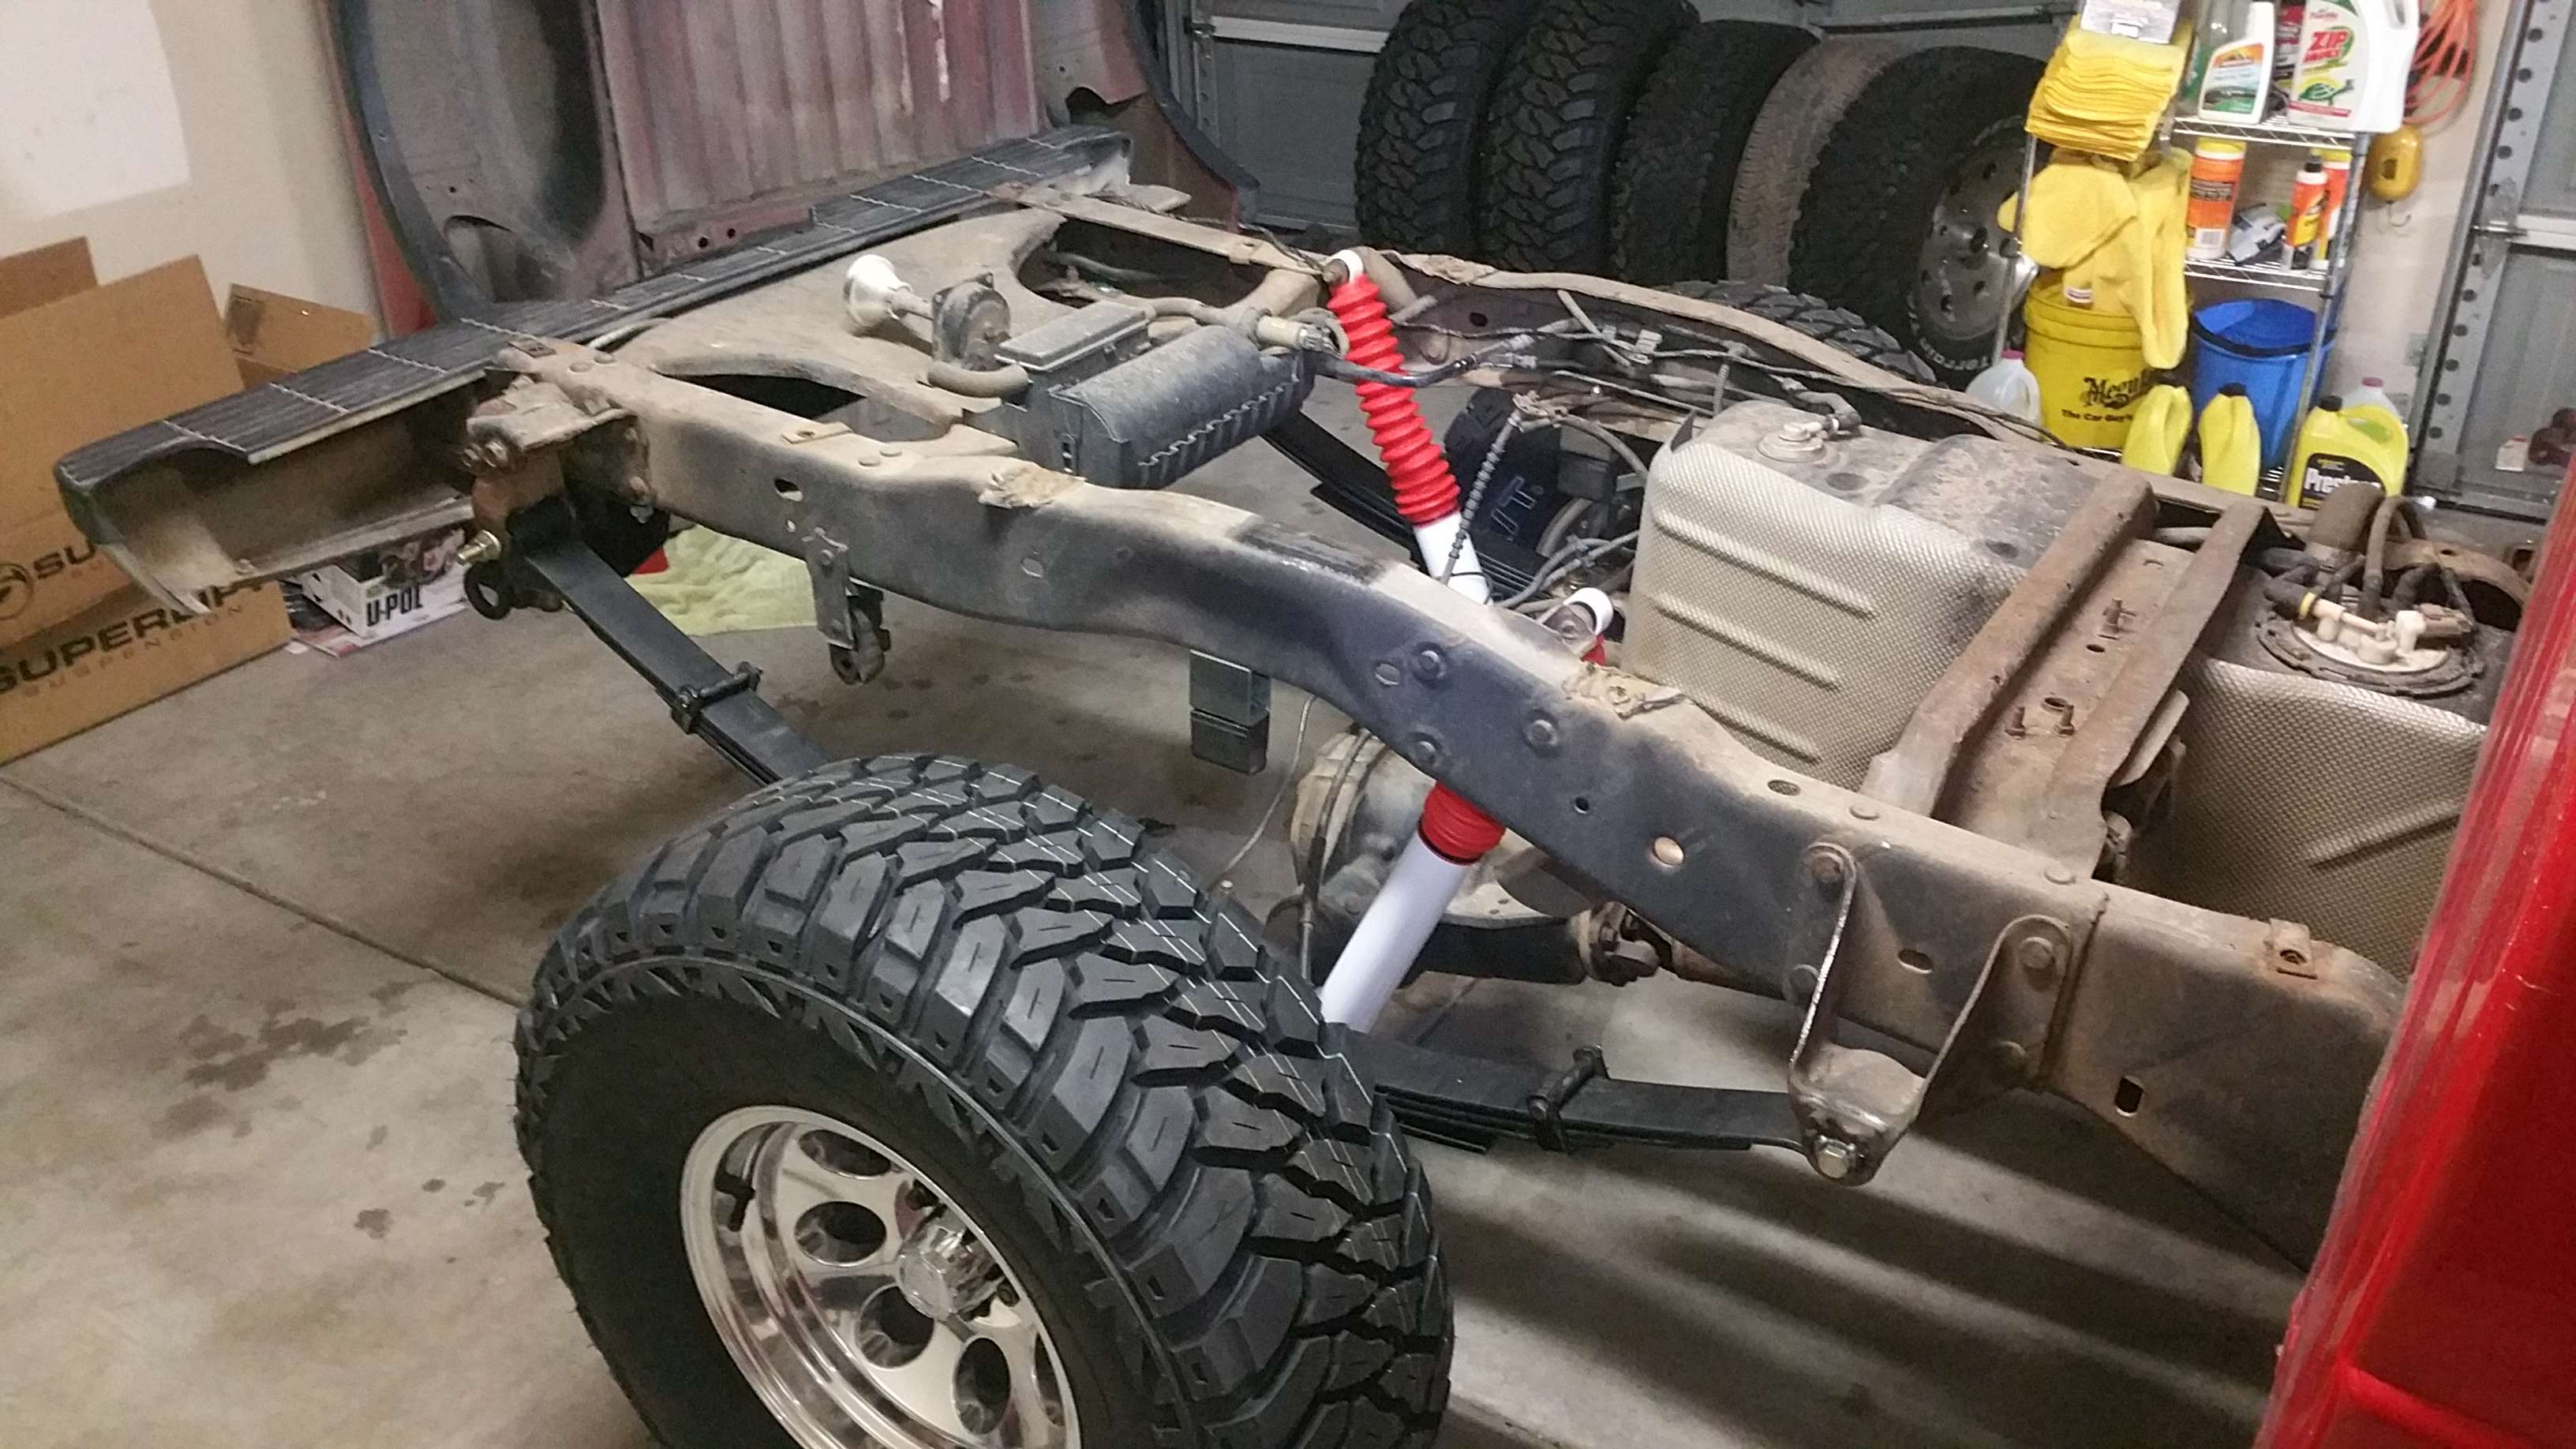

Lessons learned: DO NOT TIGHTEN DOWN THE LEAF SPRING BOLTS!!!!! I was a tard and tightened the crap out of the shackle to leaf spring bolts. It made the ride horrible stiff. It took me a few months wondering if it was my shocks or leafs that were the problem, until I finally realized the shackles were just tightened too much. A drive to home depot to get lock nuts so I could loosen the bolts a little without worrying about then coming off fixed the entire problem. It is much smoother, but still a little too rough for my tastes with the crappy superlift shocks. I am saving to get some nice Fox racing rear shocks in there.
Now to the front lift.
Moving on. Up comes a few random installs and the superlift/coilover conversion.
Here is most of the rear lift installed. I added a hidden Reese hitch. I also used skyjacker fr36 leaf springs instead of the shitty solution superlift provides for the rear. Their lift is cost effective, but it is a crappy solution. The fr36's allow me the lift I want, better flex, and way less axle wrap. I don't have to worry about 5" of lift block popping out when I jam on it.
Also are some pictures of the coilover kit provided by ME00Stepside. The kit is awesome. I bought myself a welder for christmas with some of the funds from selling that 69 Camaro. I love that miller welder. It kicks ***. Also below are pictures of the front lift (not all the parts were used), the front Torsen LSD, the coilovers, and some other random parts.
Lessons learned: DO NOT TIGHTEN DOWN THE LEAF SPRING BOLTS!!!!! I was a tard and tightened the crap out of the shackle to leaf spring bolts. It made the ride horrible stiff. It took me a few months wondering if it was my shocks or leafs that were the problem, until I finally realized the shackles were just tightened too much. A drive to home depot to get lock nuts so I could loosen the bolts a little without worrying about then coming off fixed the entire problem. It is much smoother, but still a little too rough for my tastes with the crappy superlift shocks. I am saving to get some nice Fox racing rear shocks in there.
Now to the front lift.
#13
10-28-2016
Join Date: Jul 2015
Location: Reno, Nevada
Posts: 52
Likes: 0
Received 0 Likes
on
0 Posts
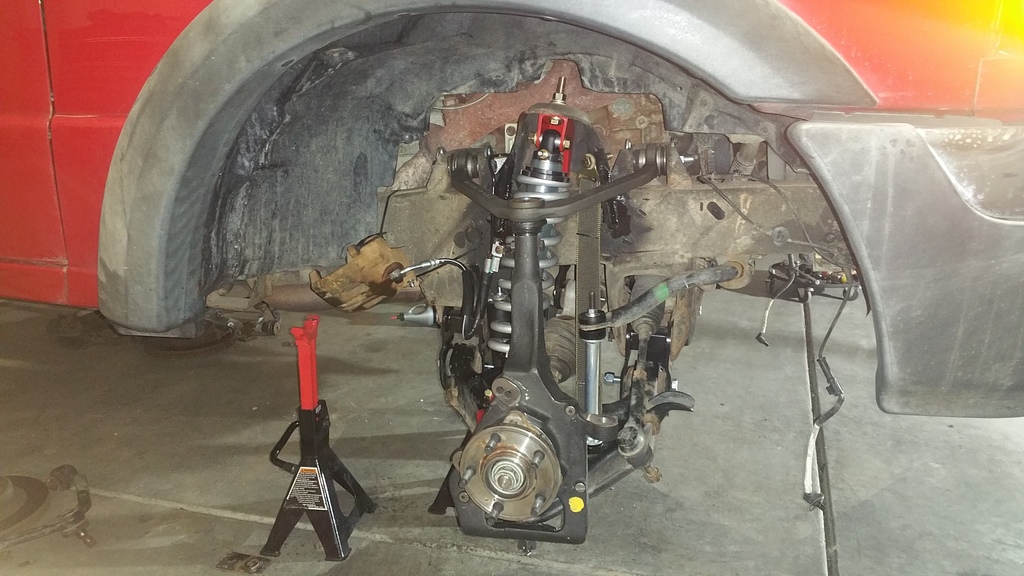
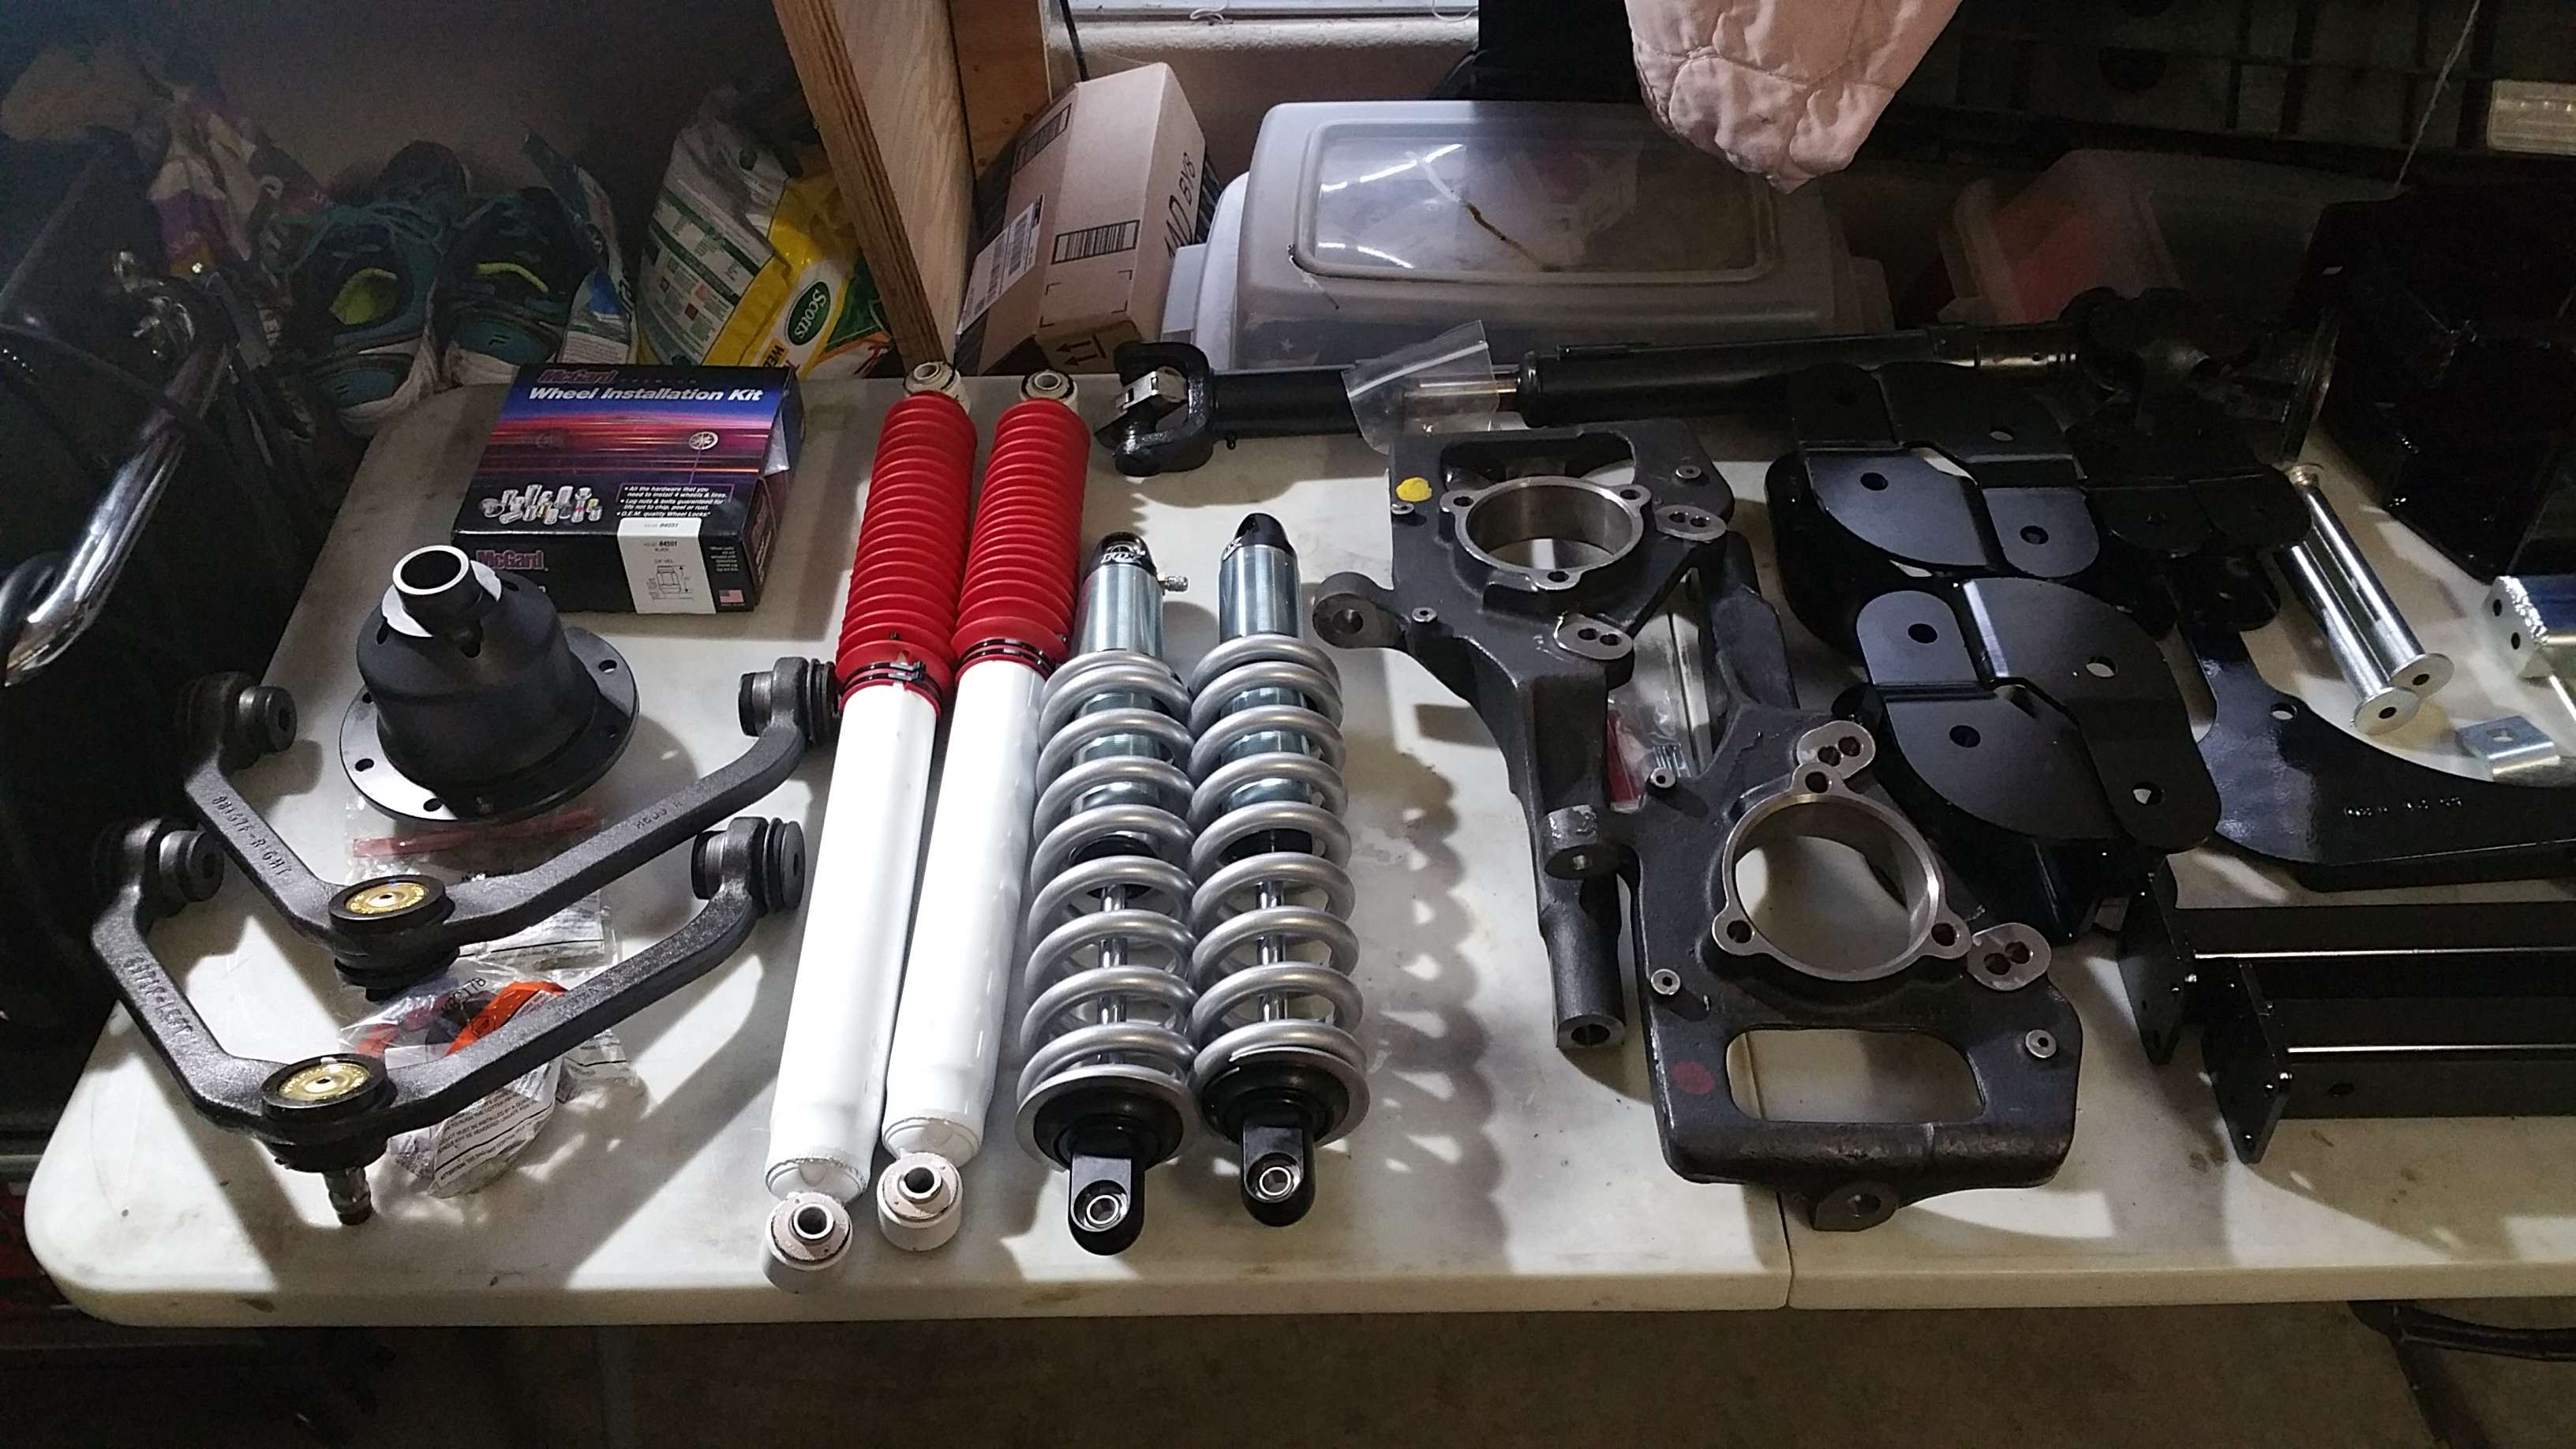
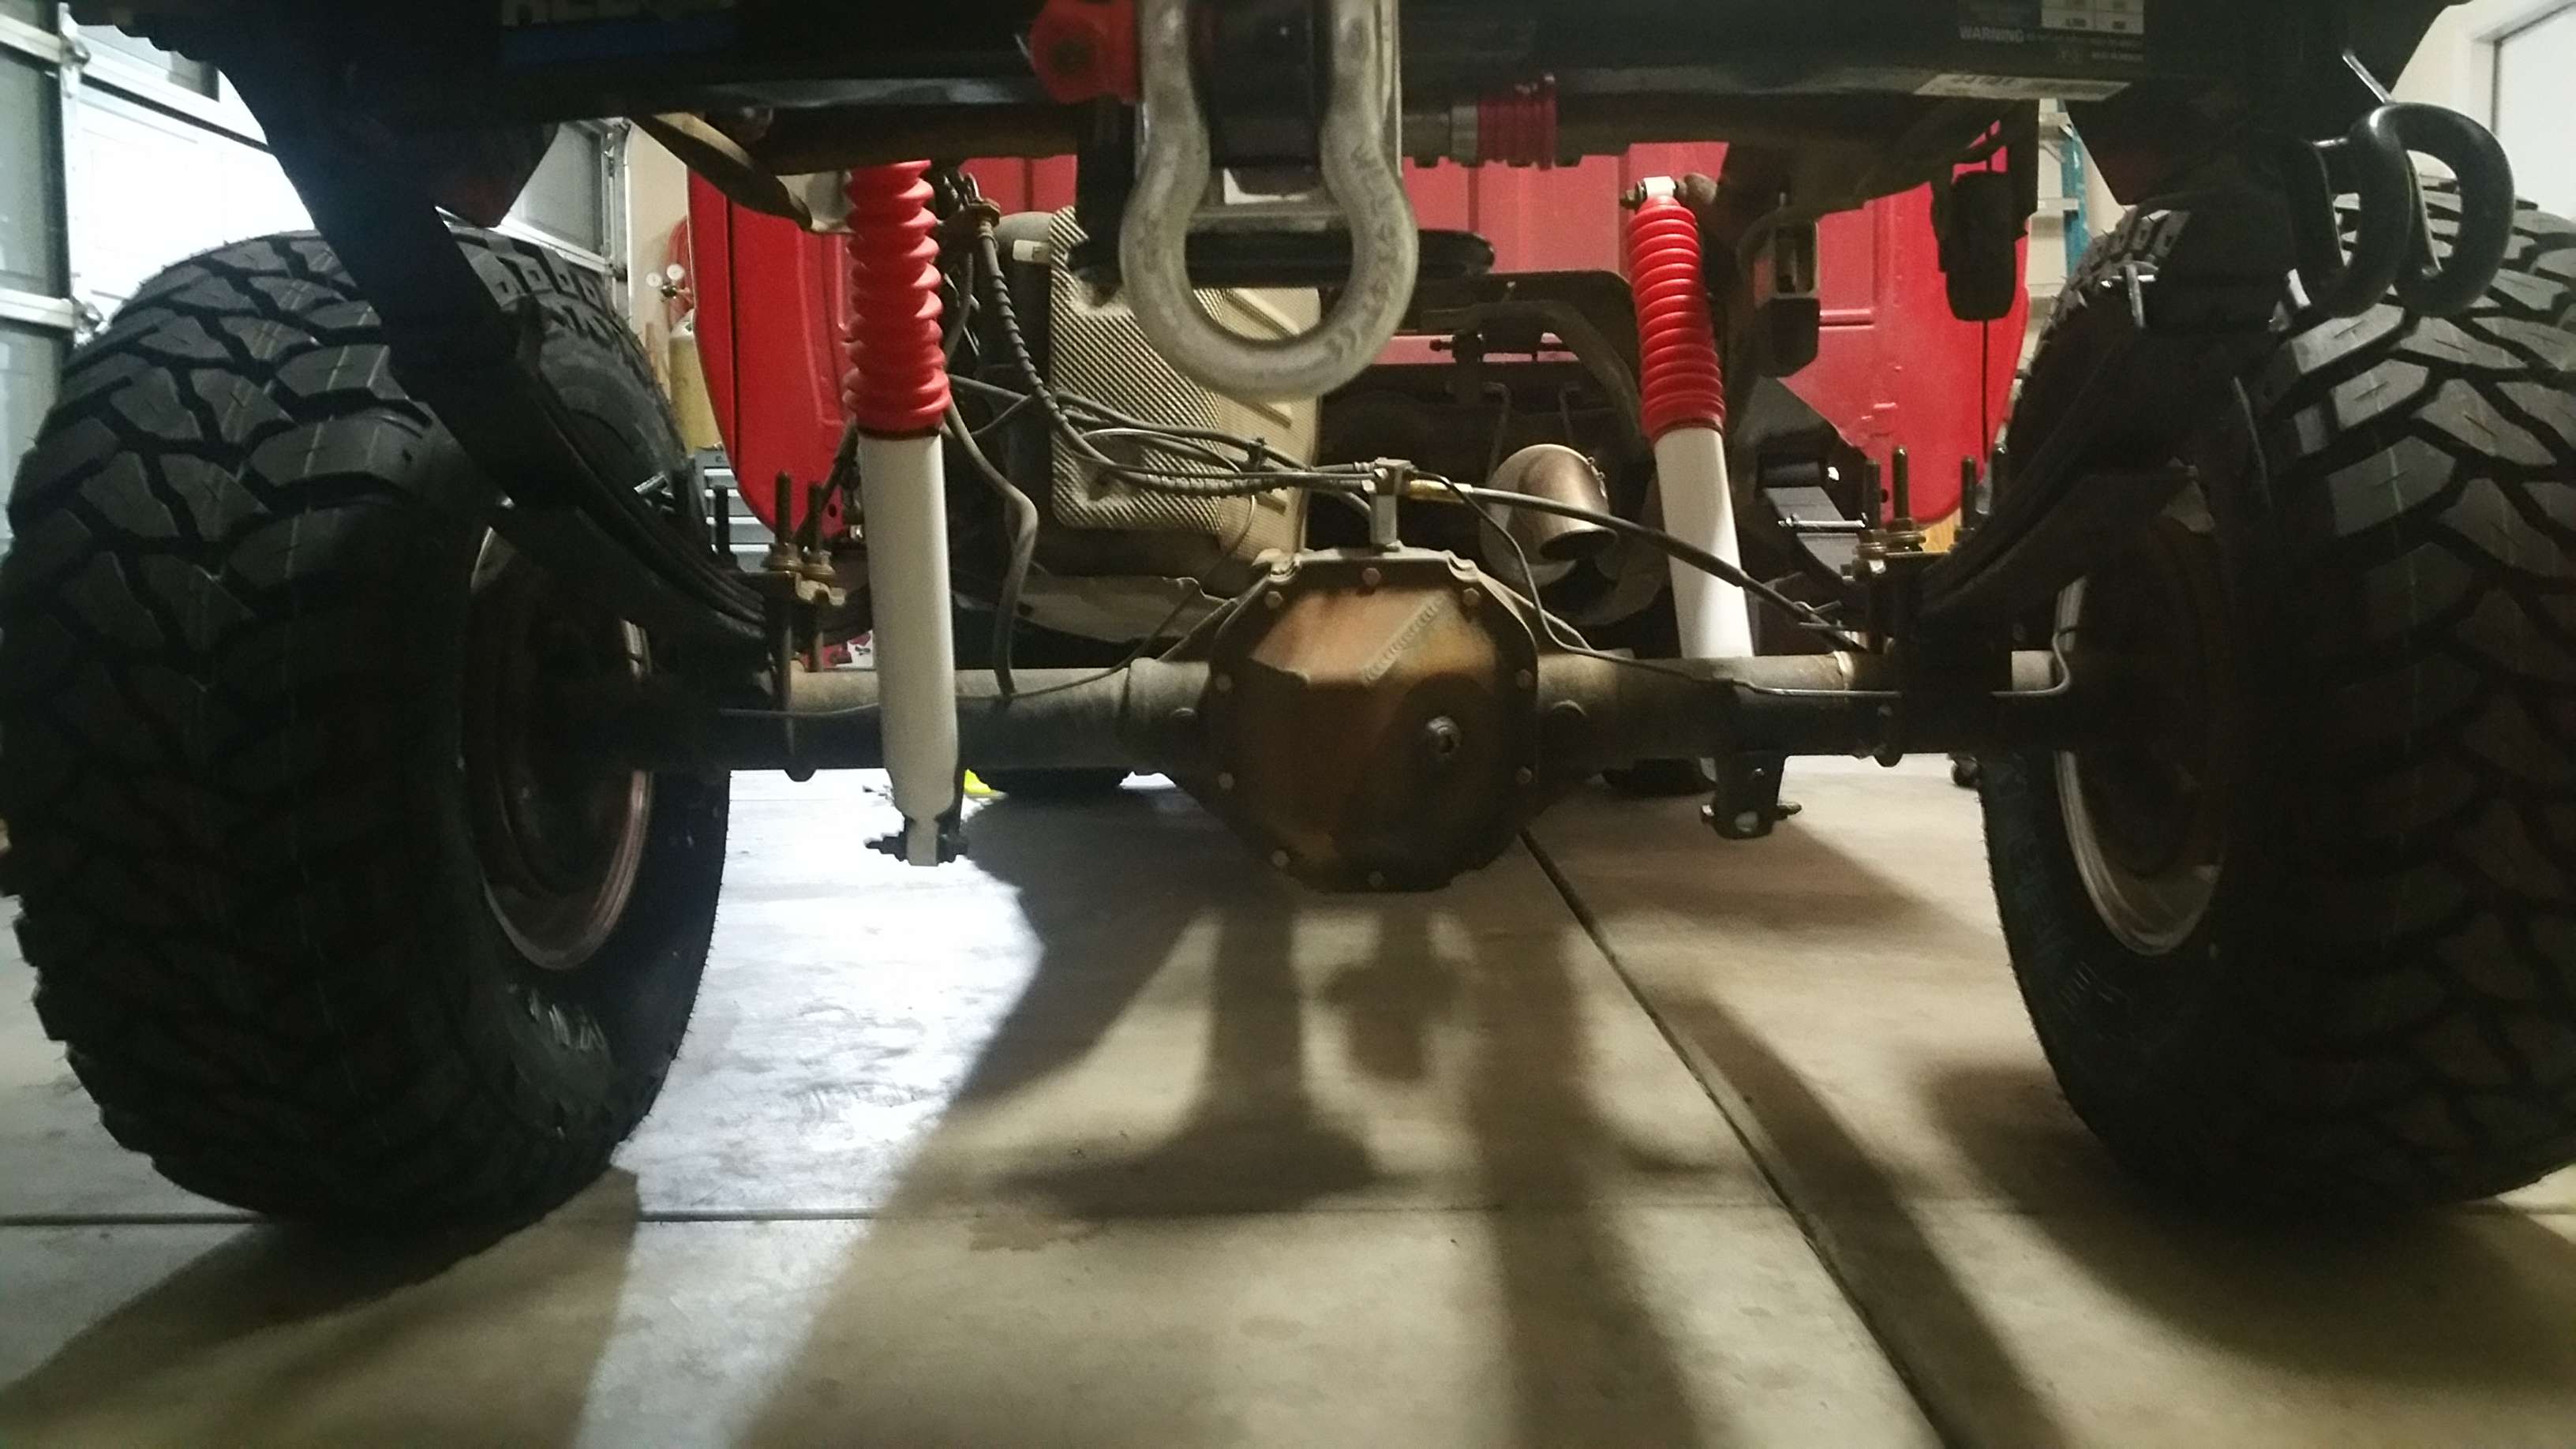
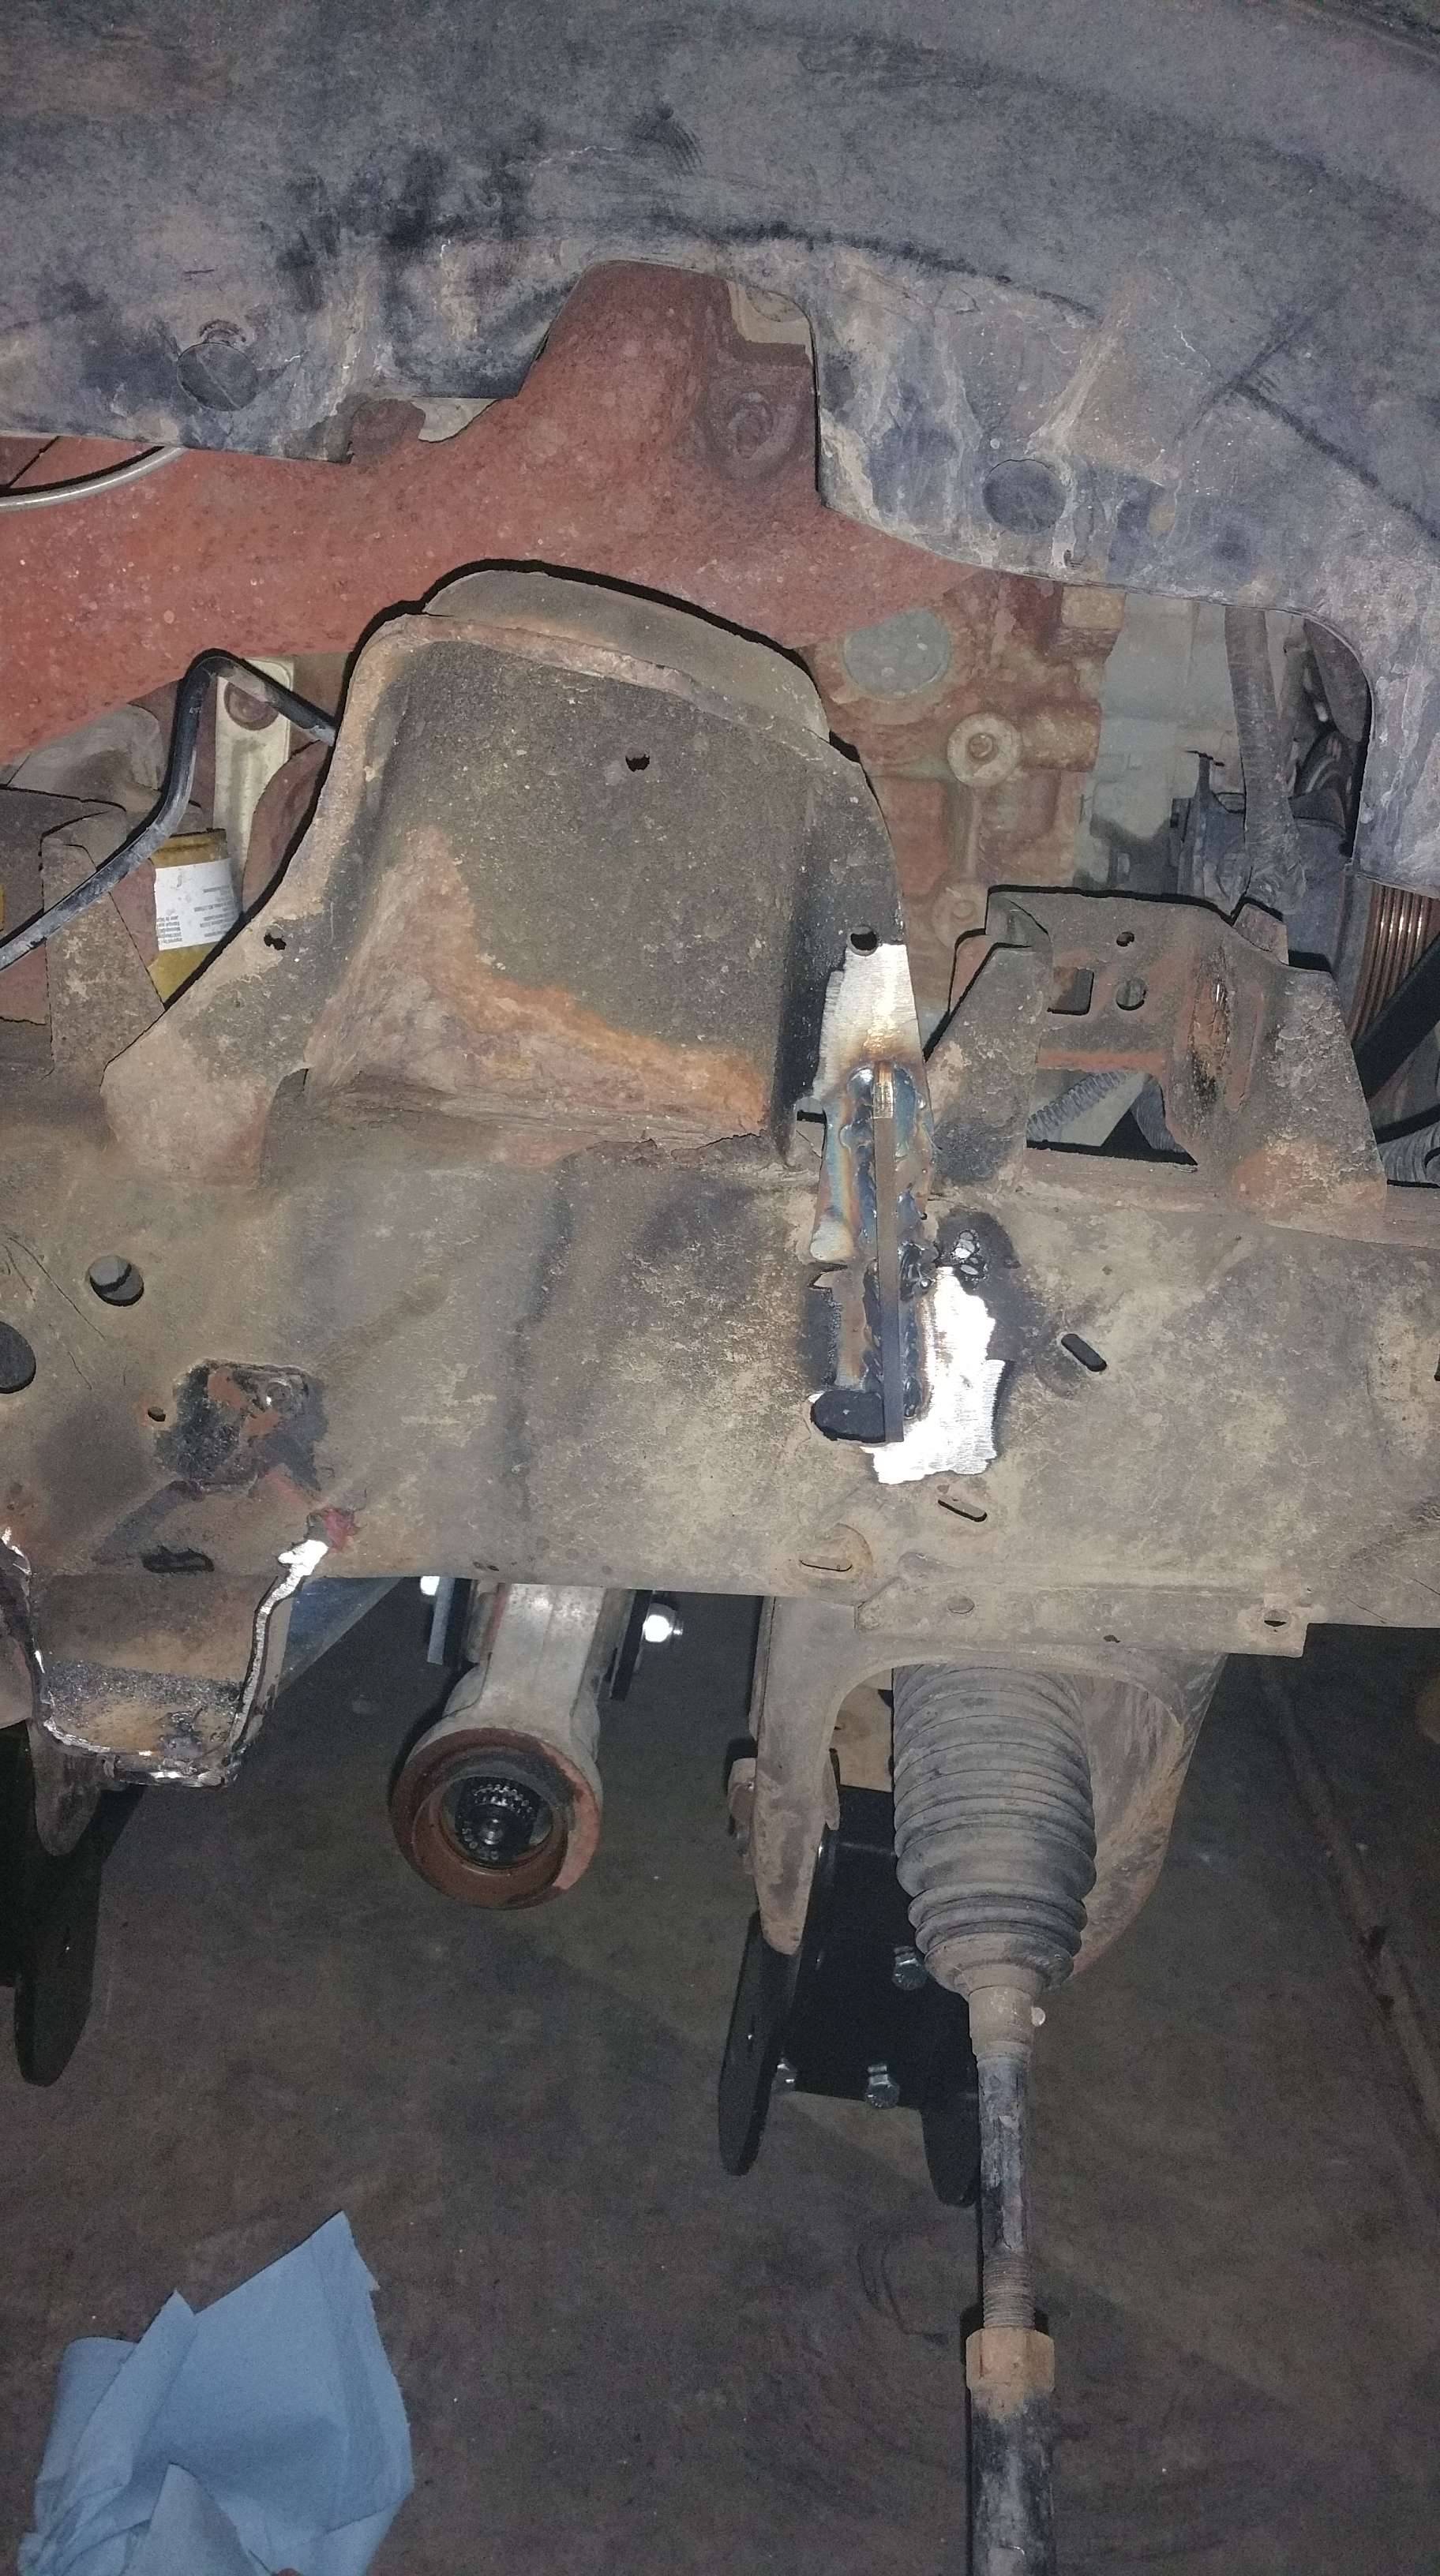
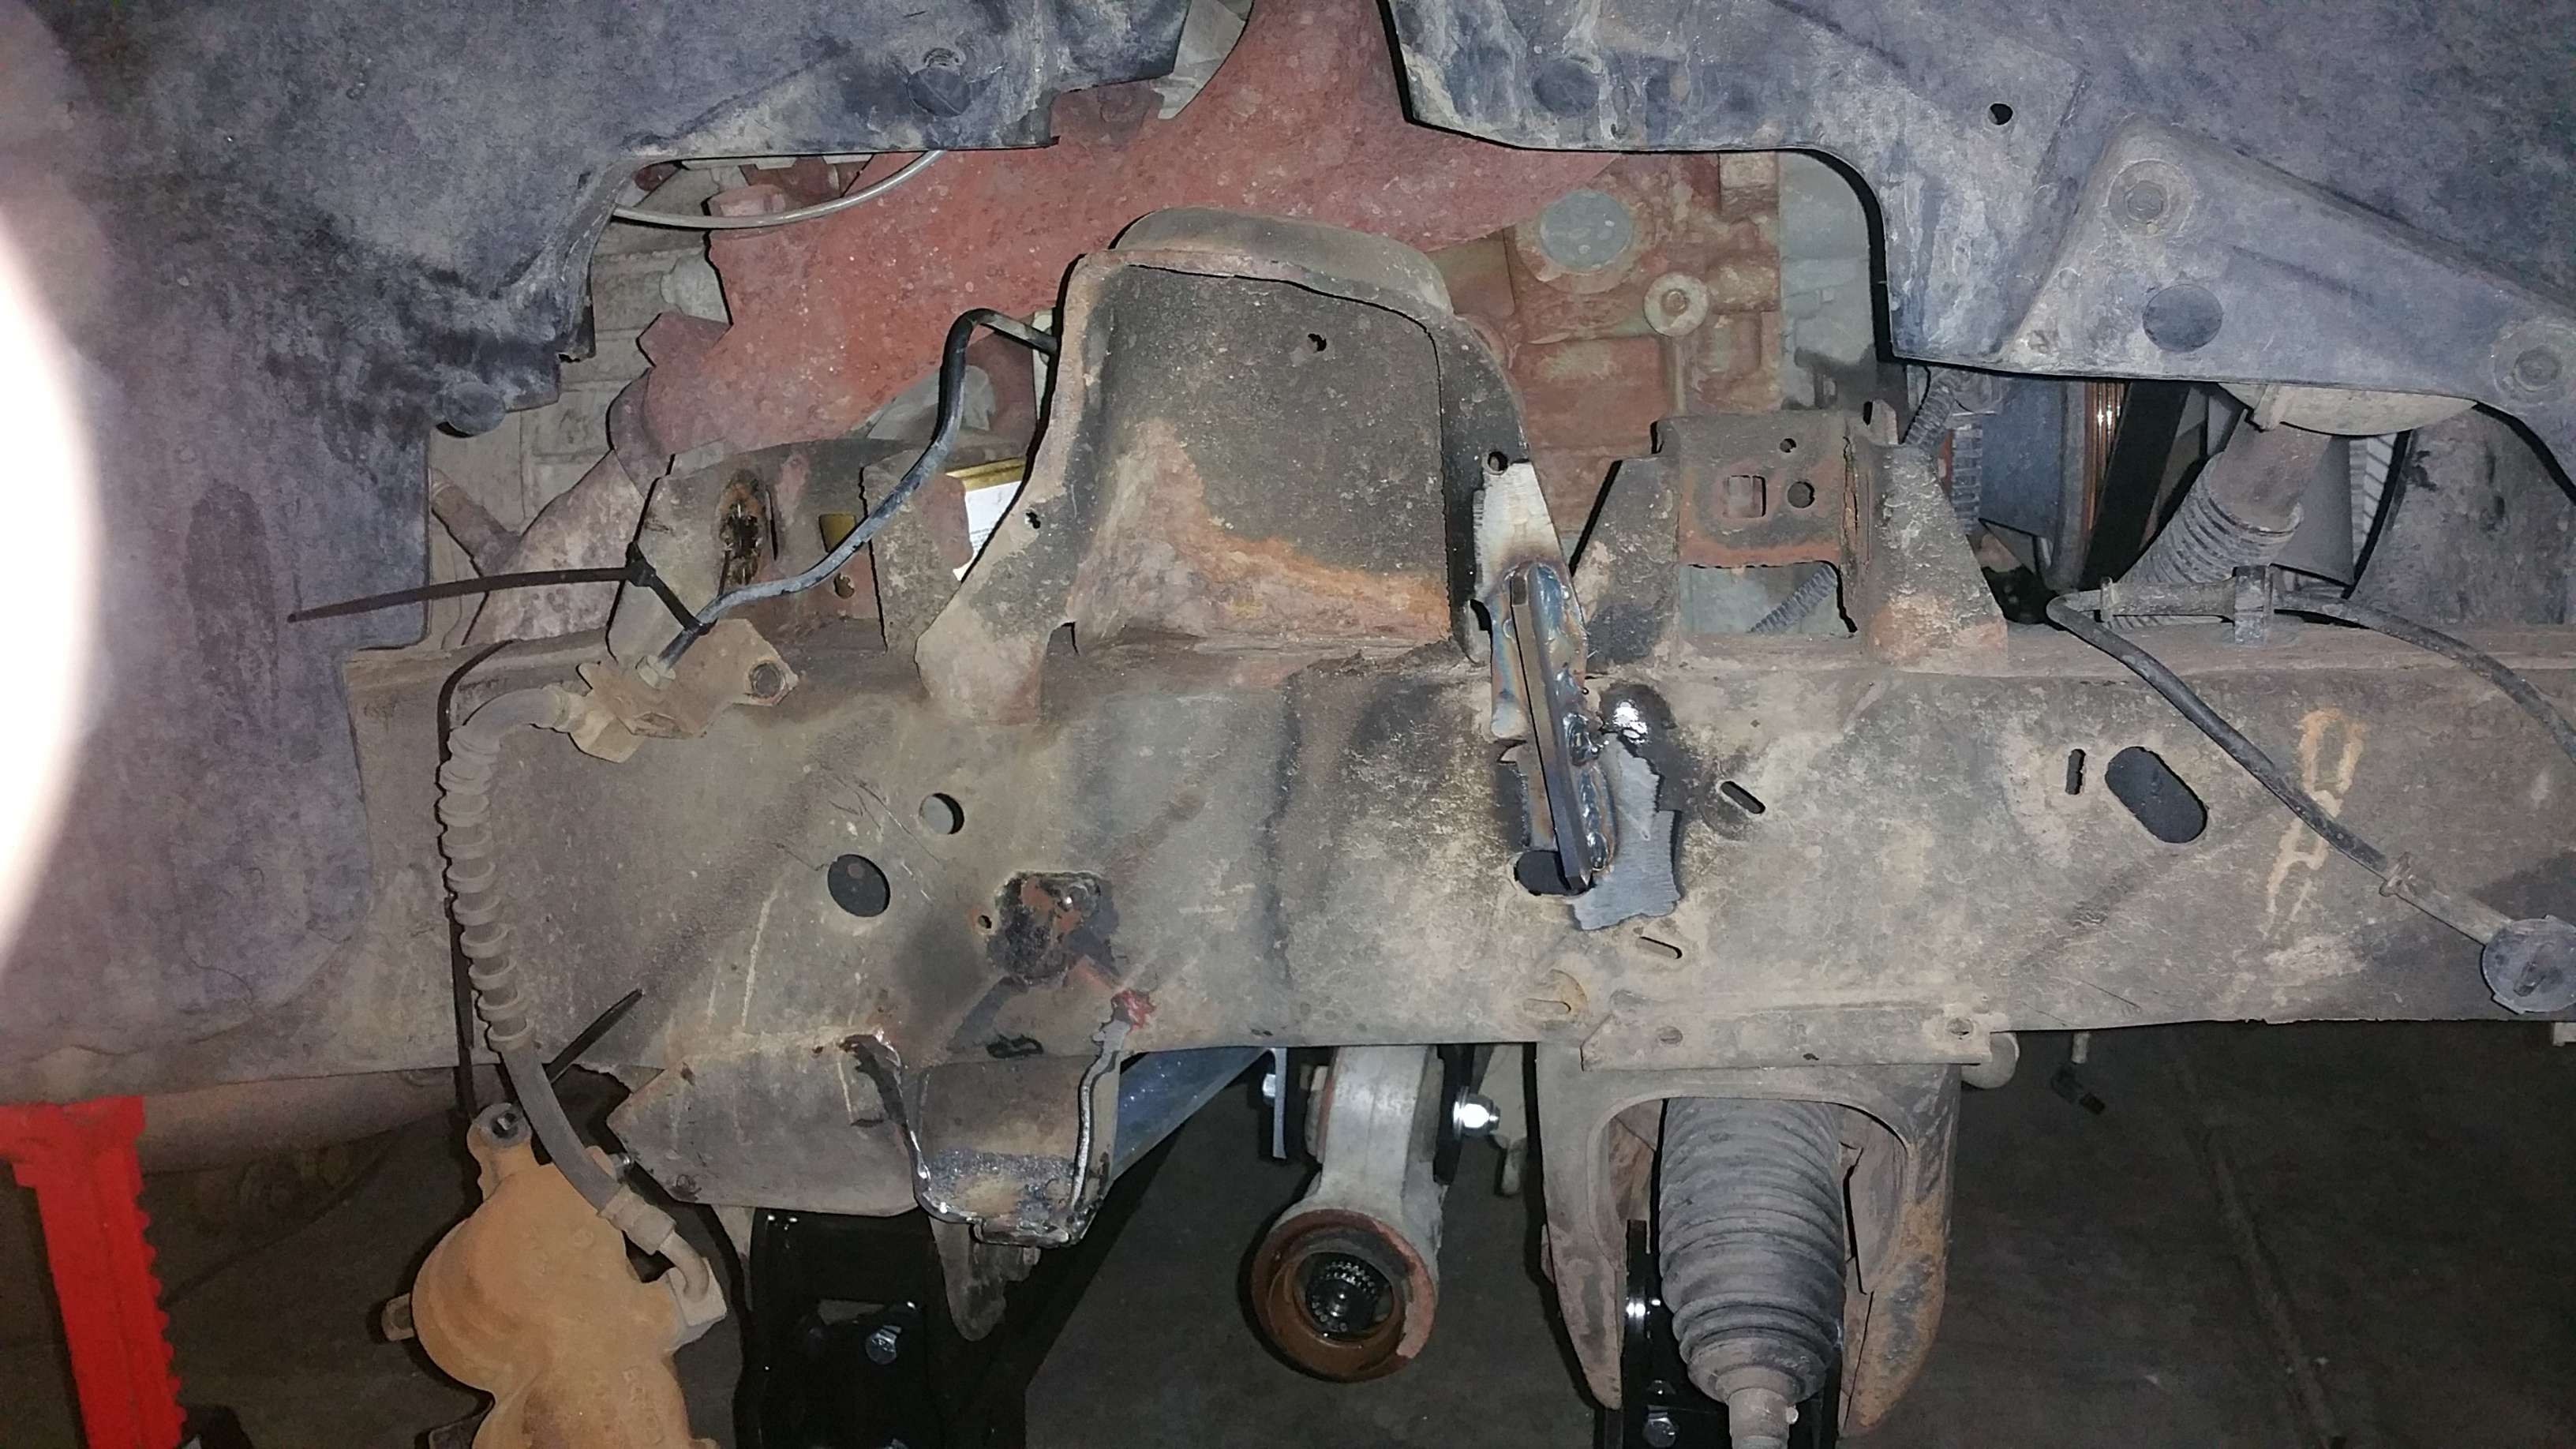
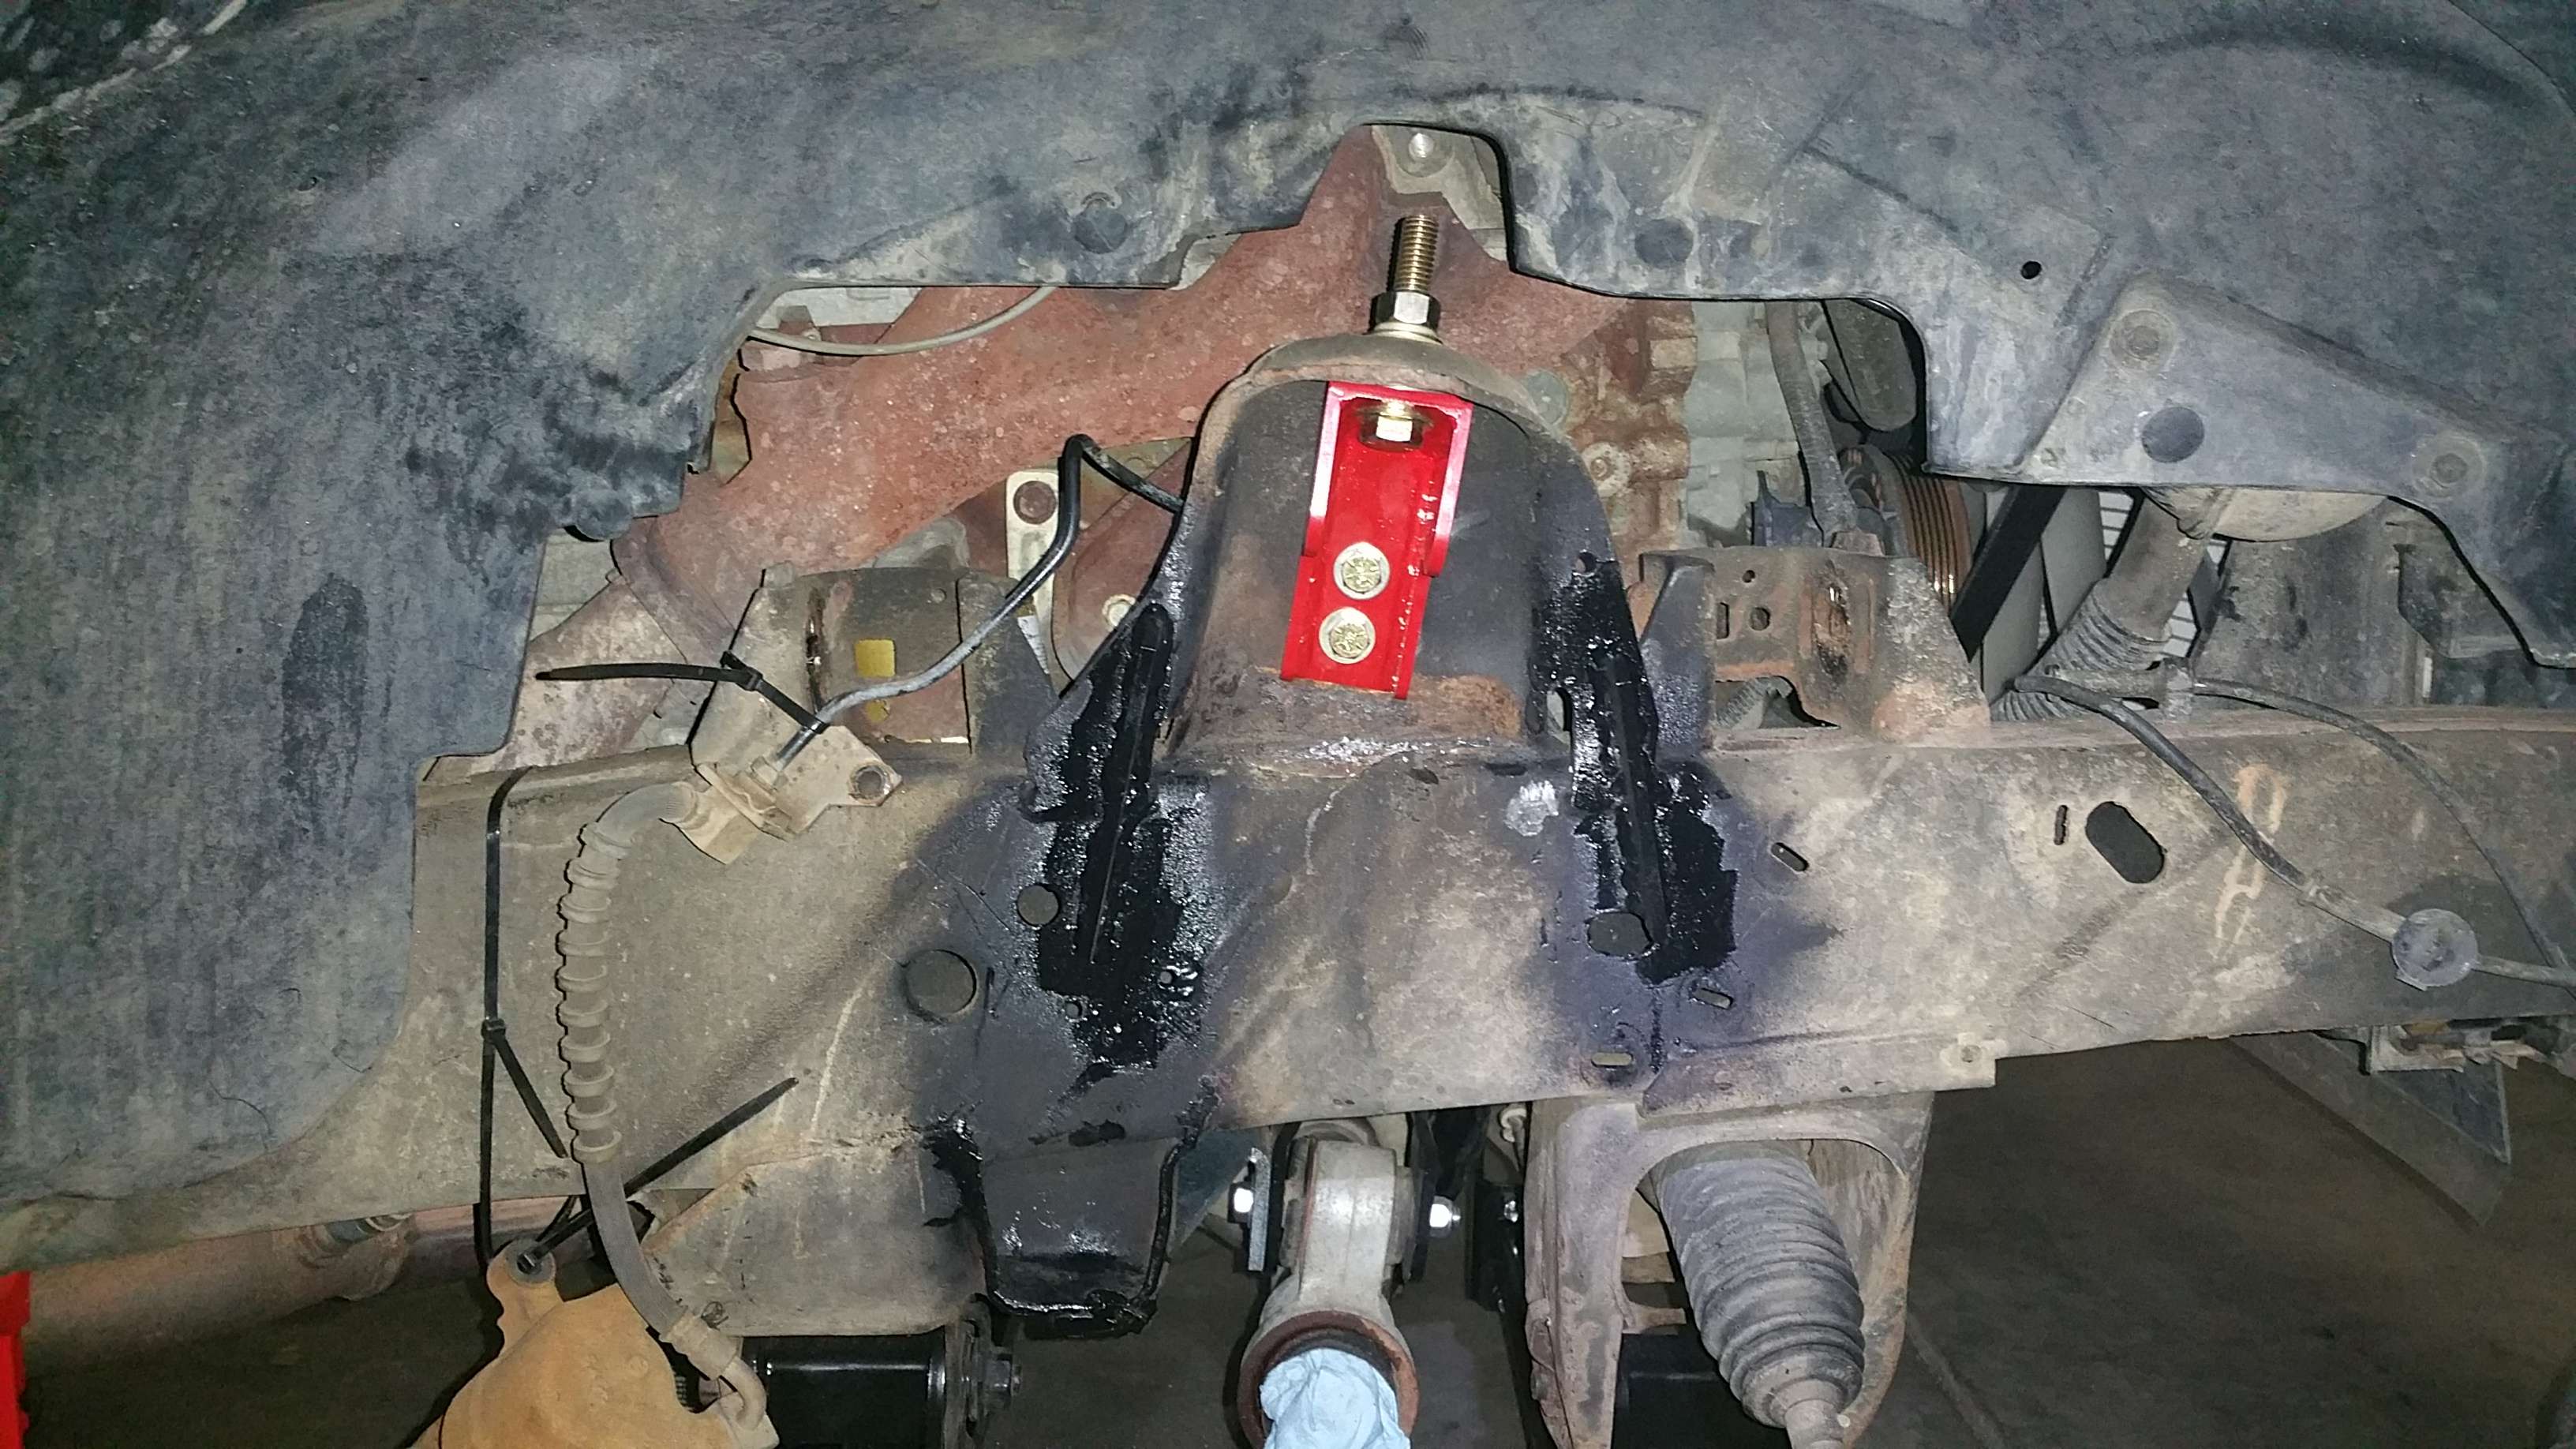
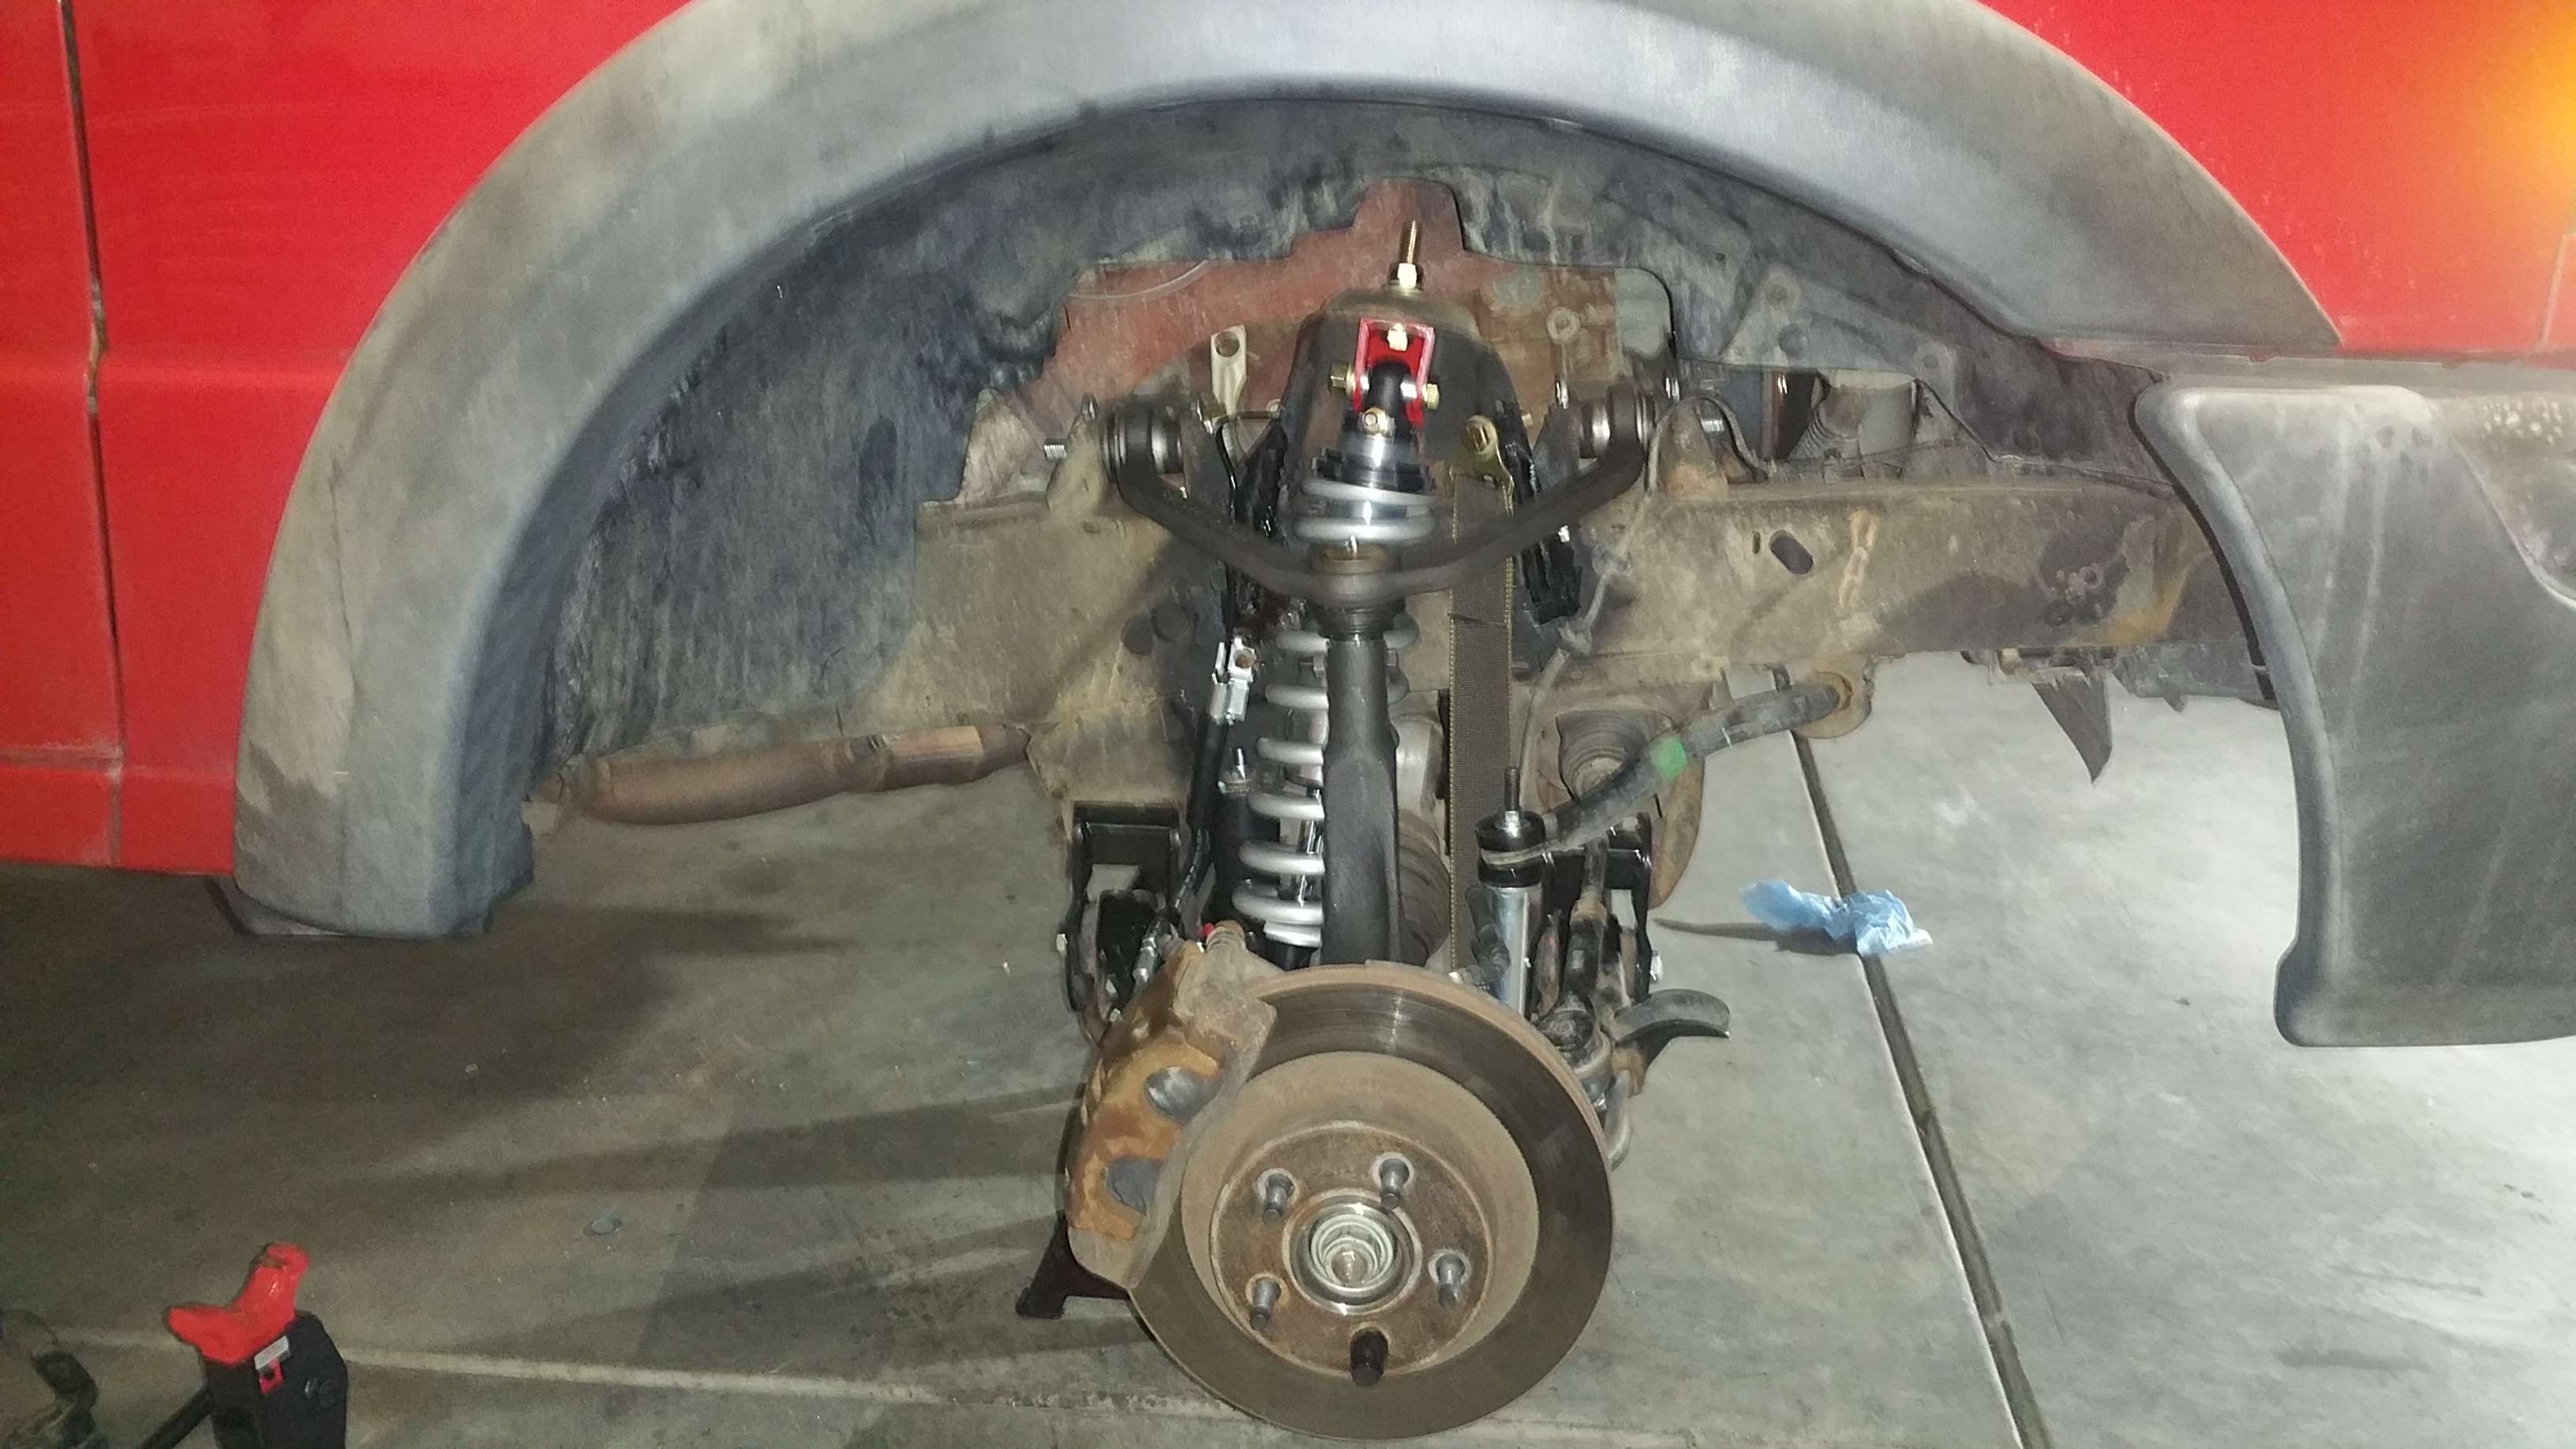
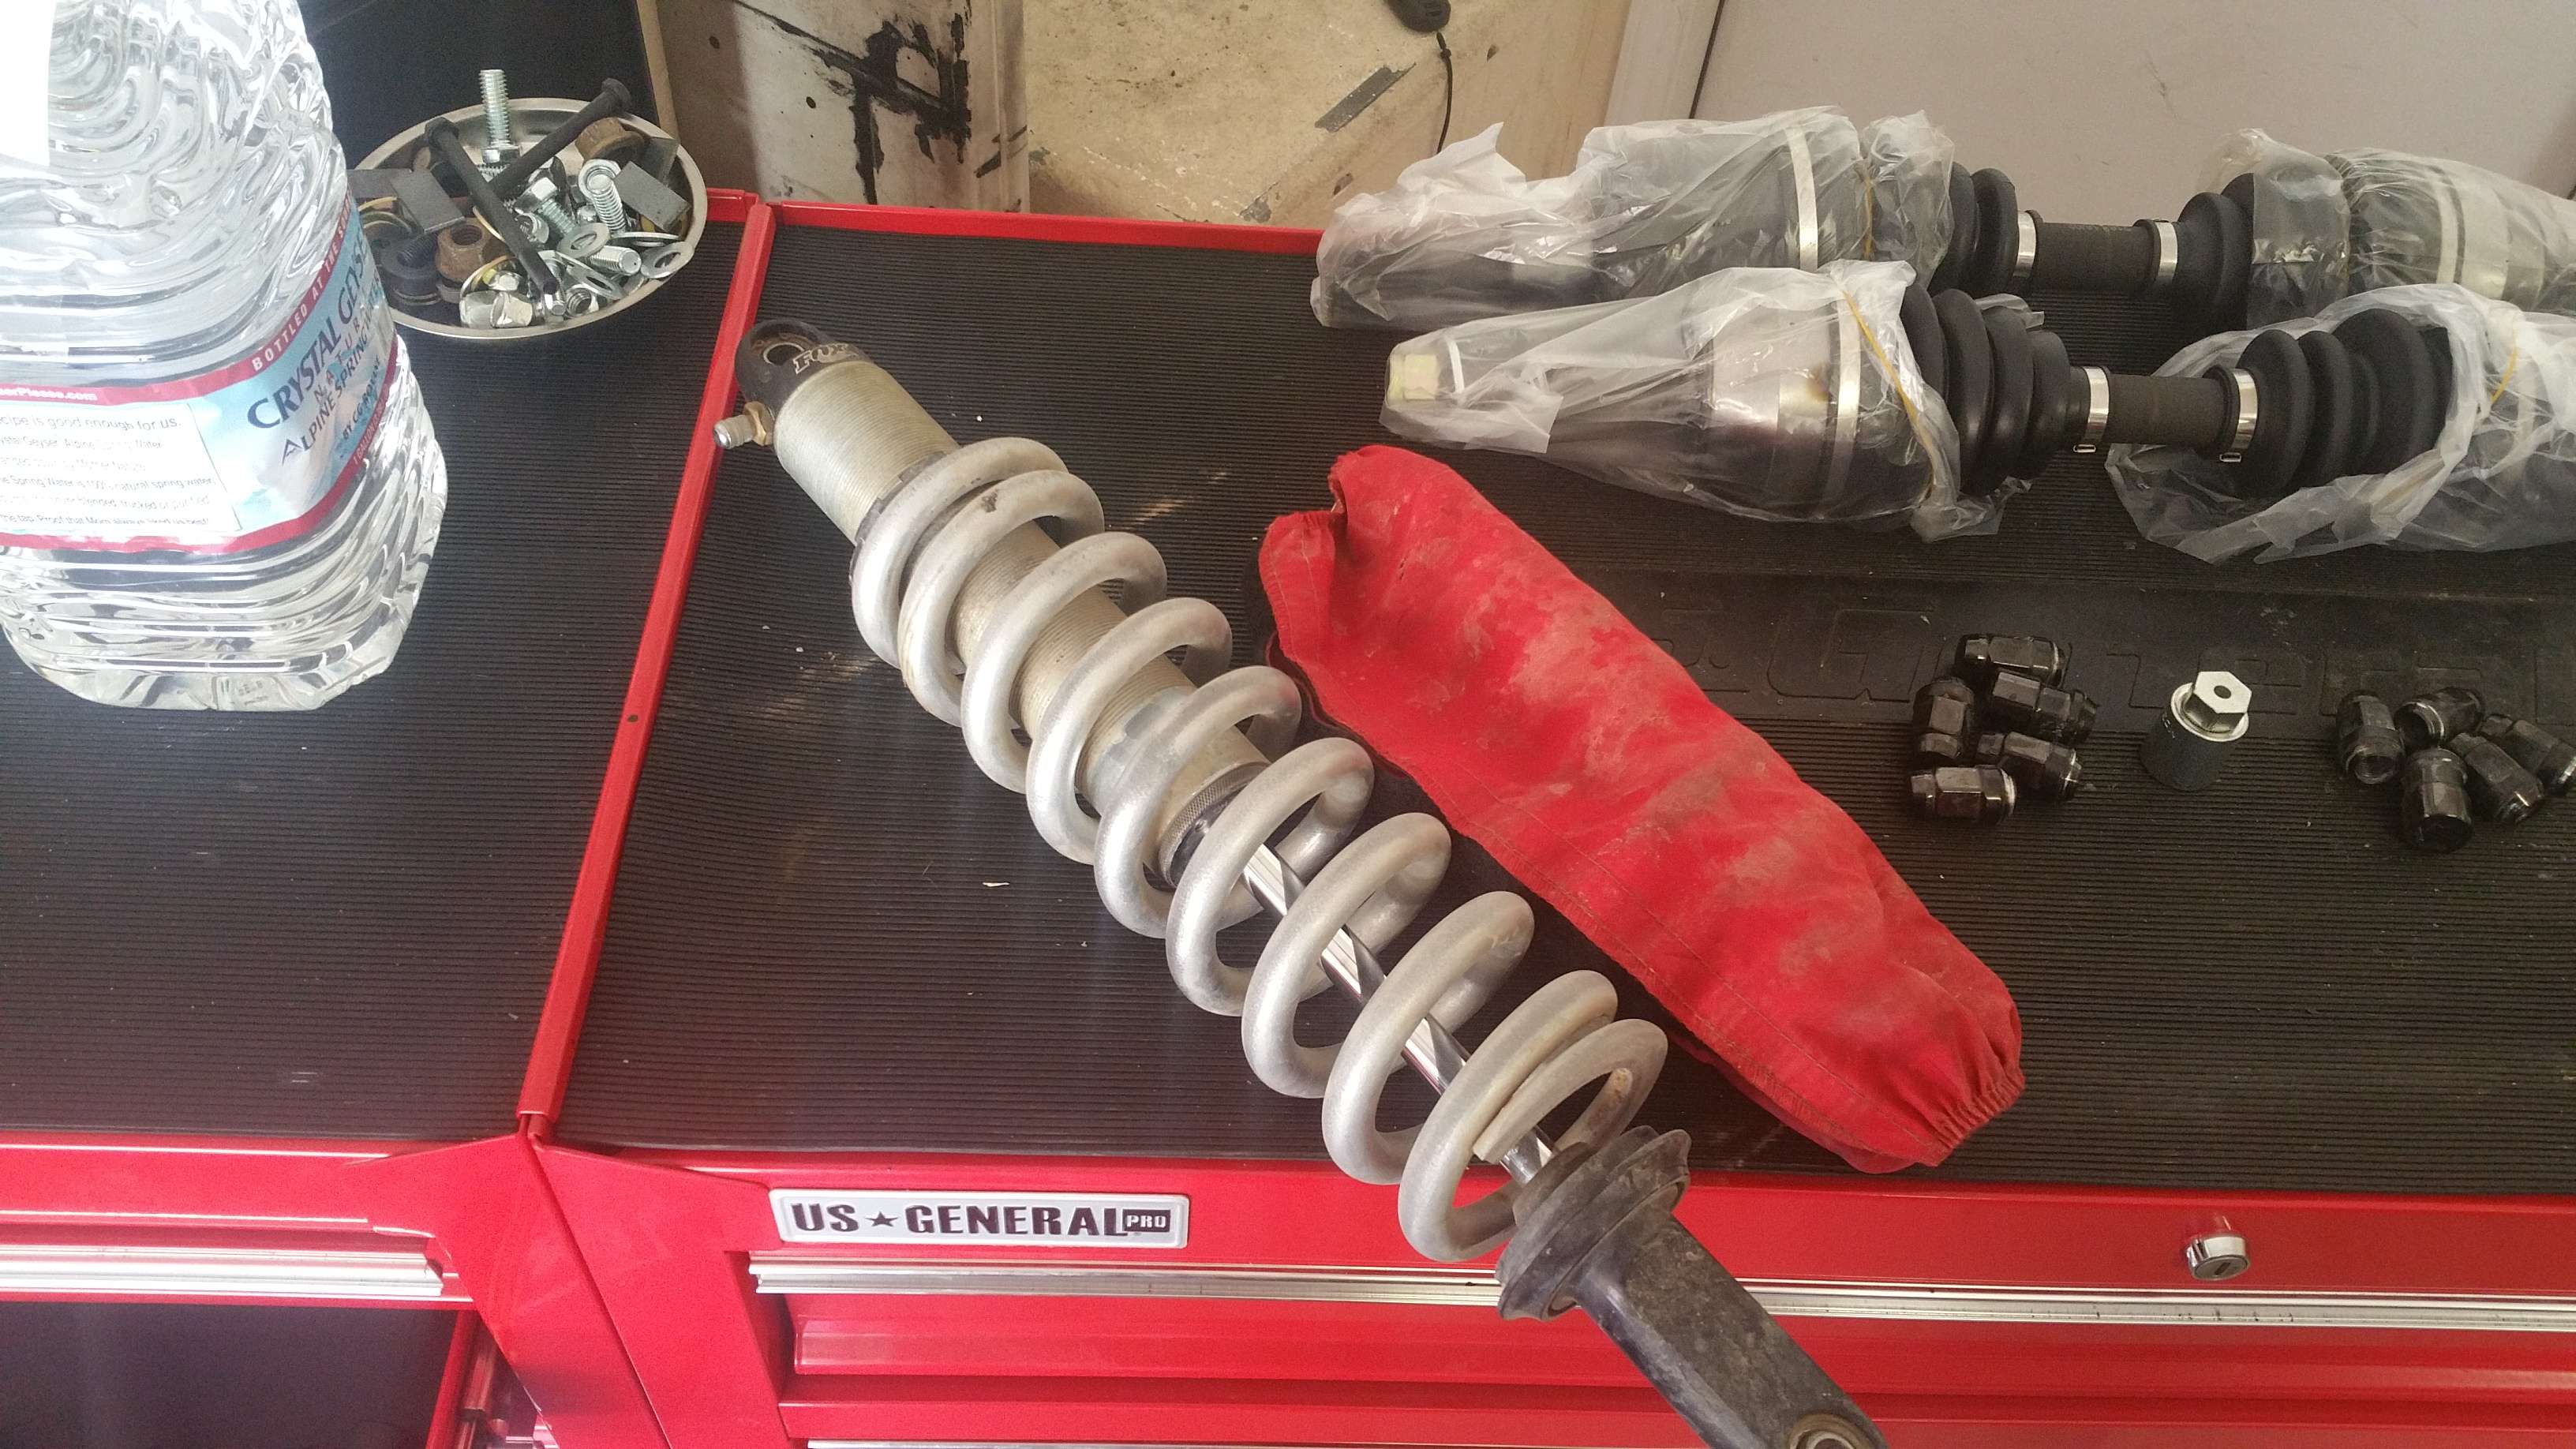
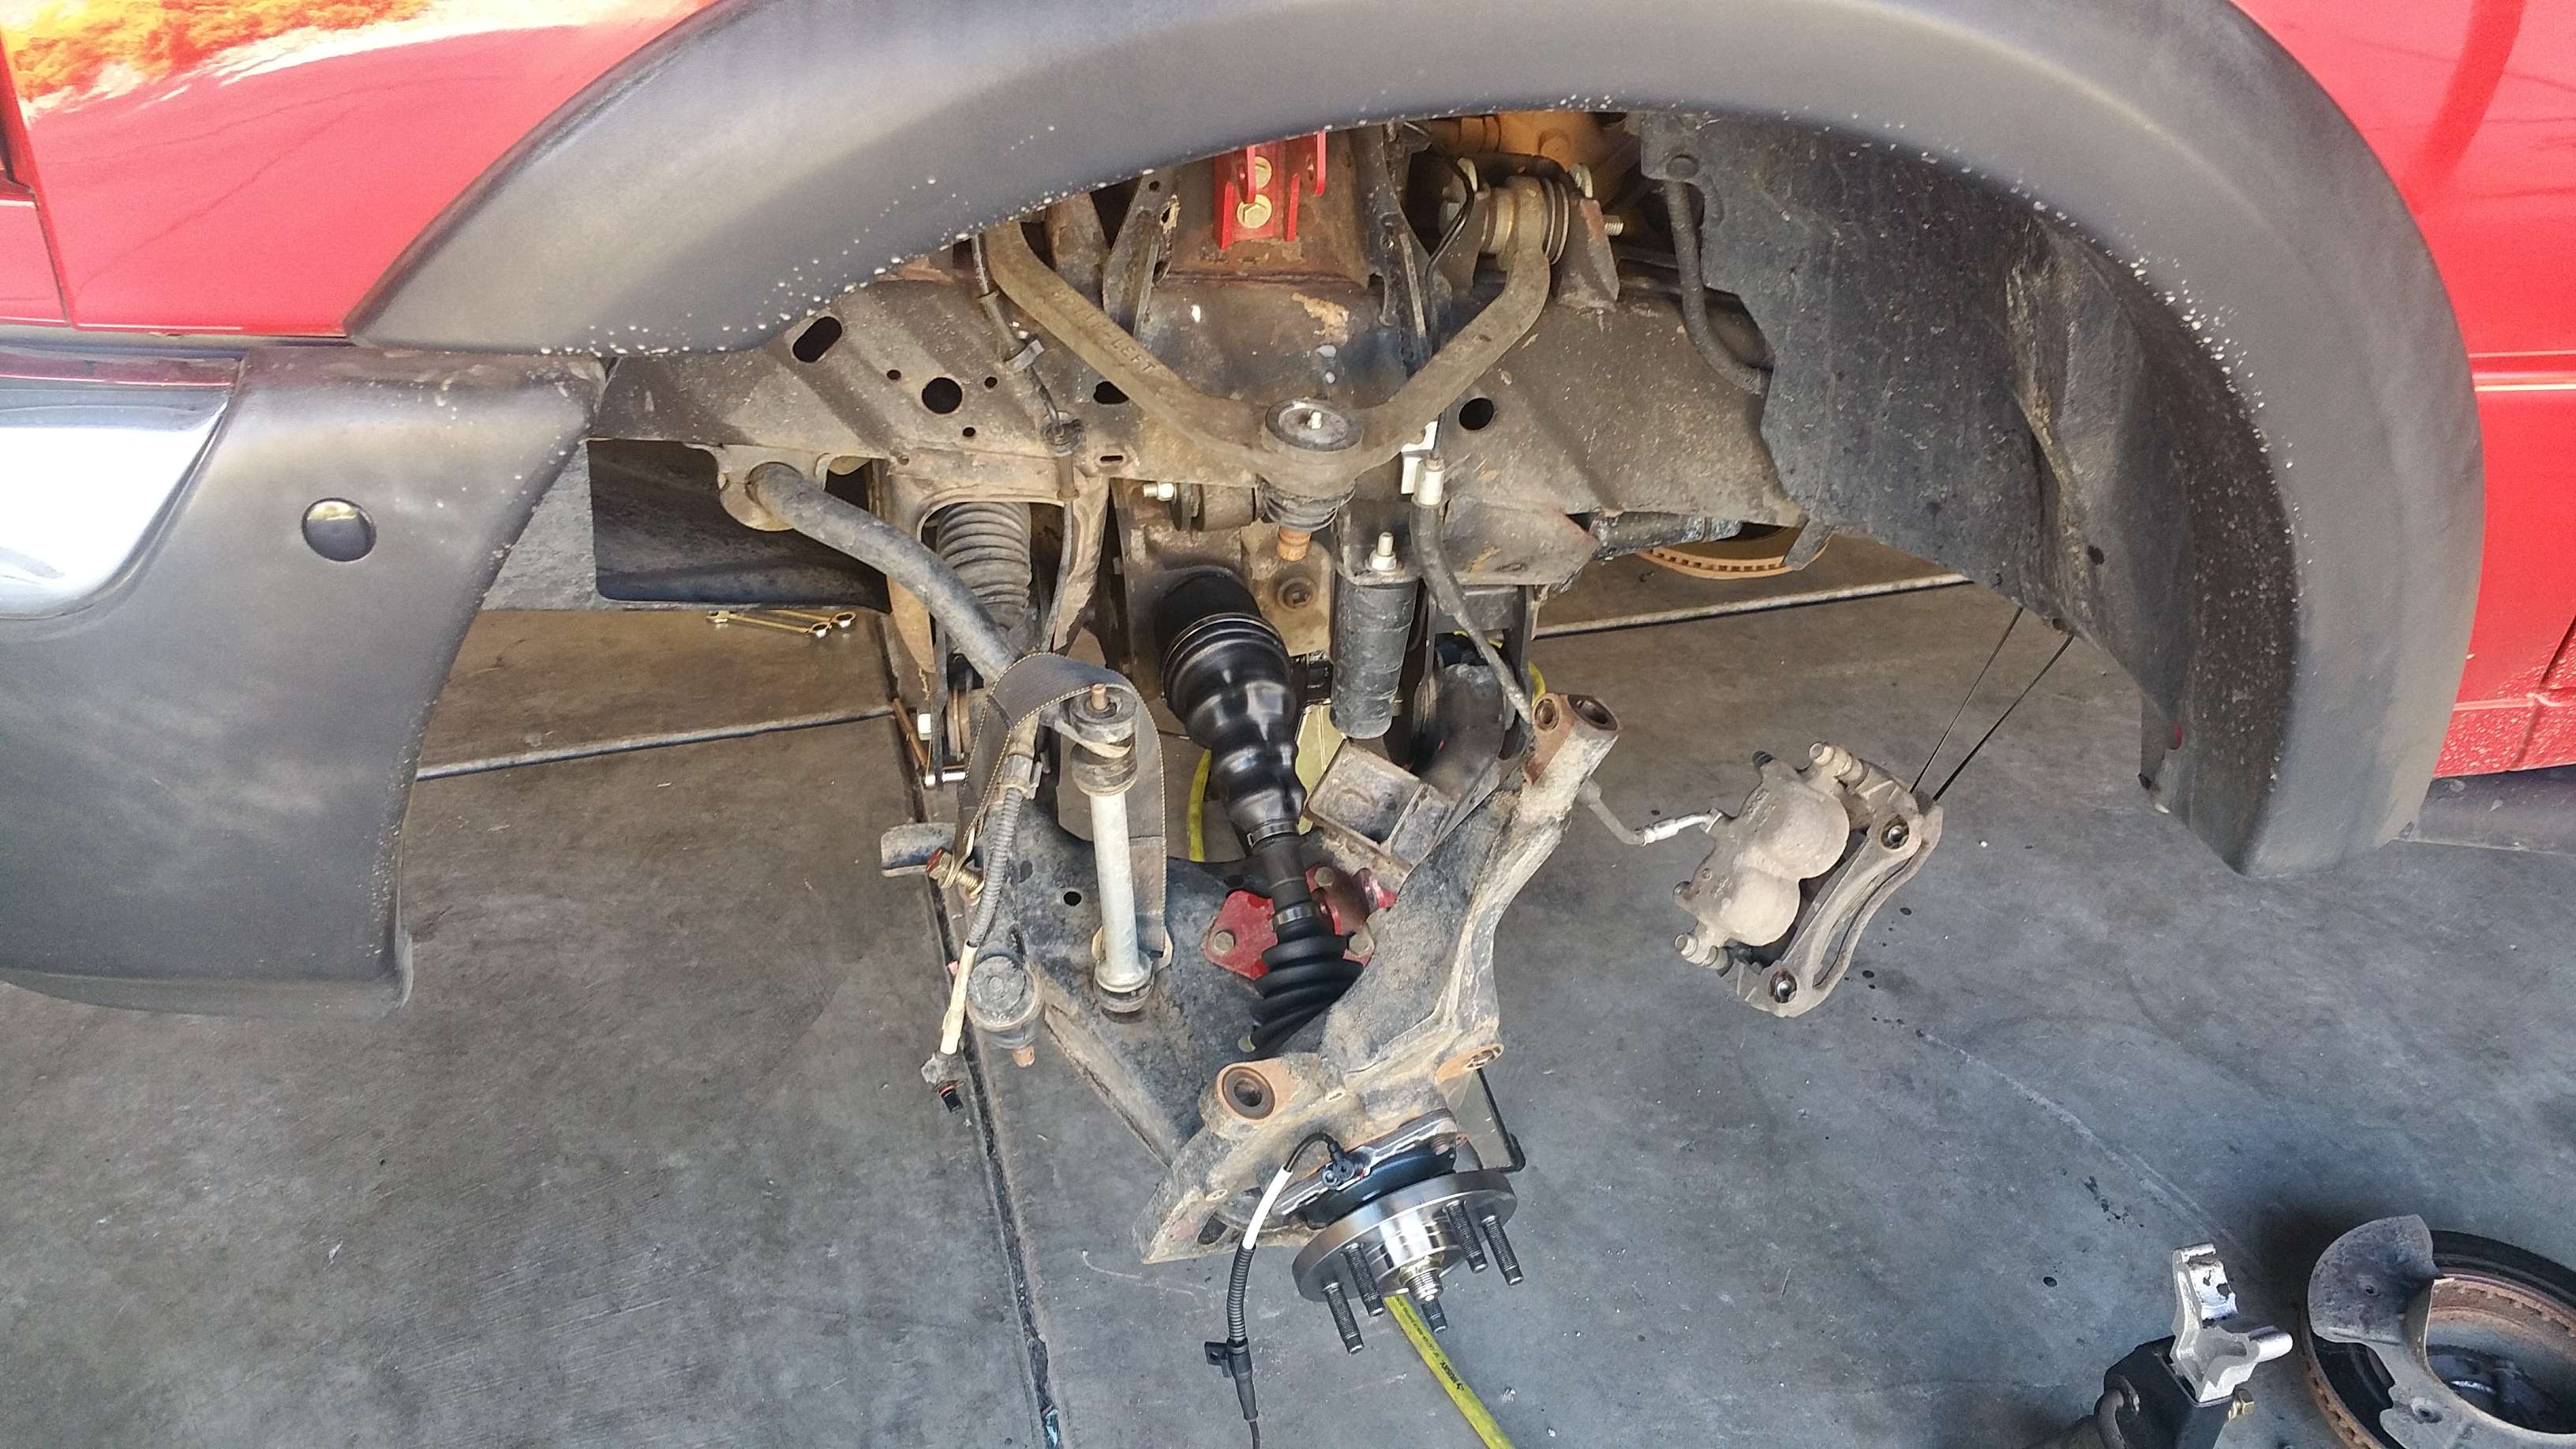
Here comes the front lift.
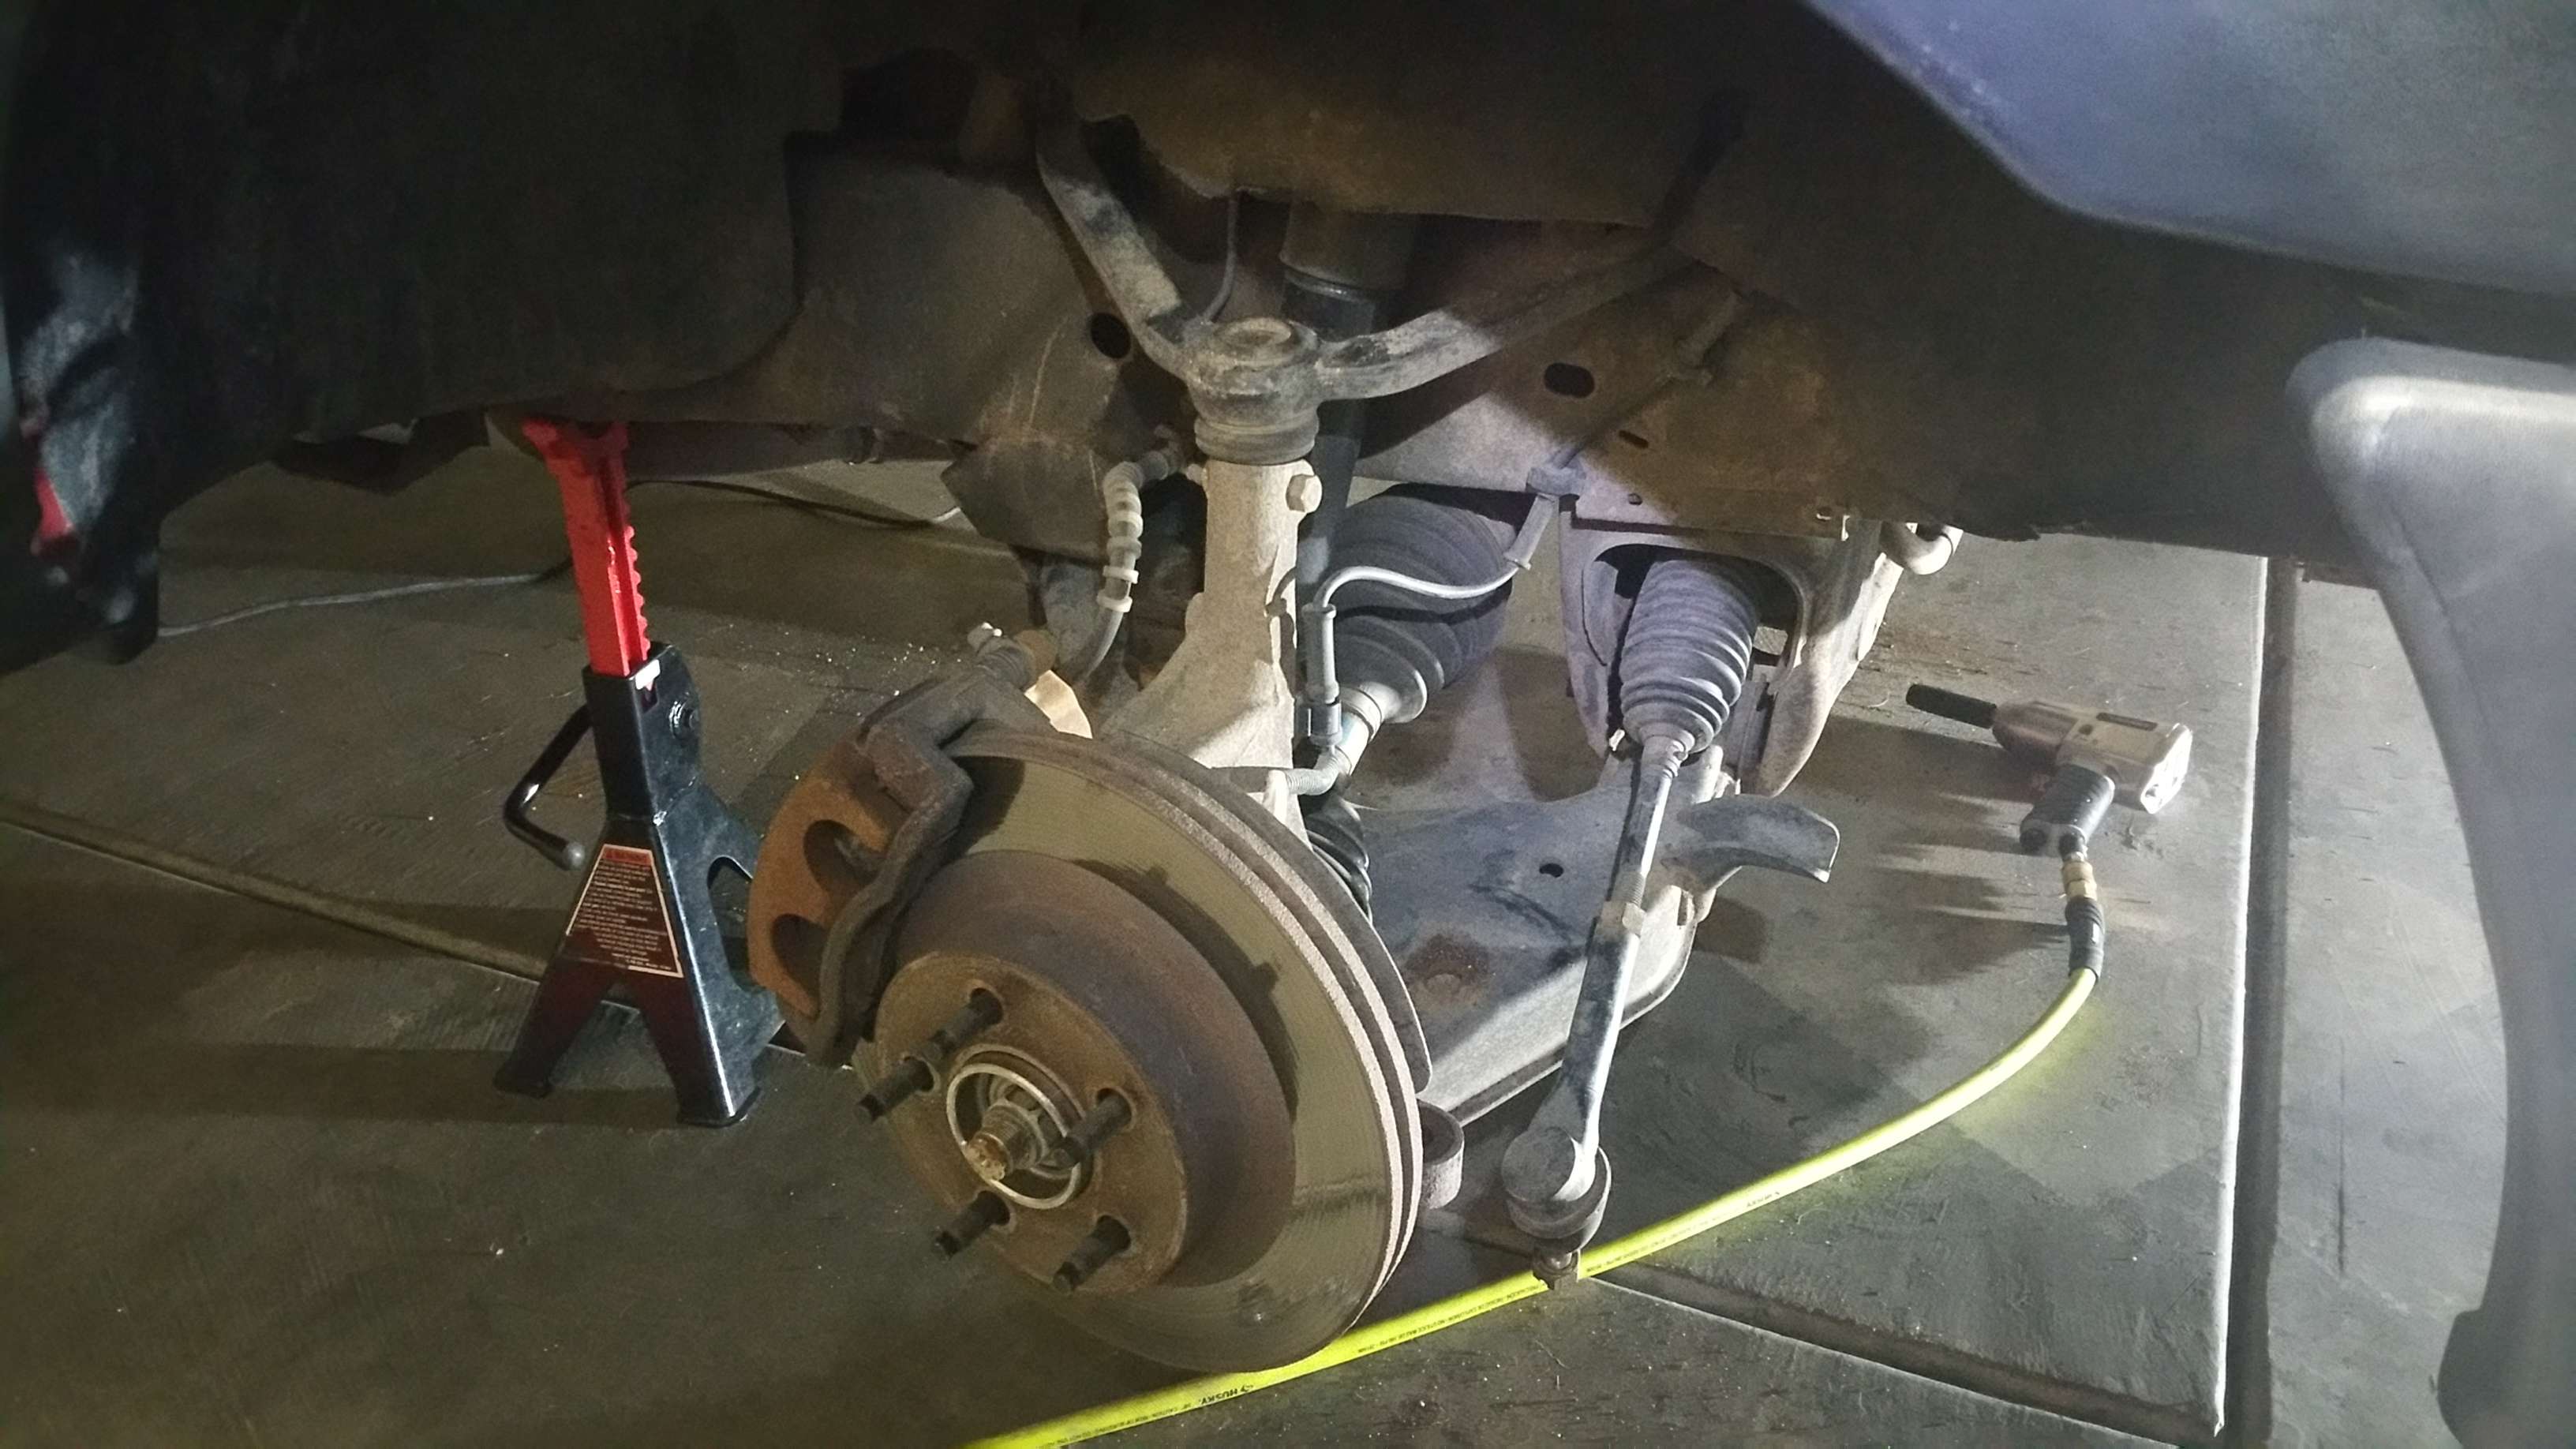
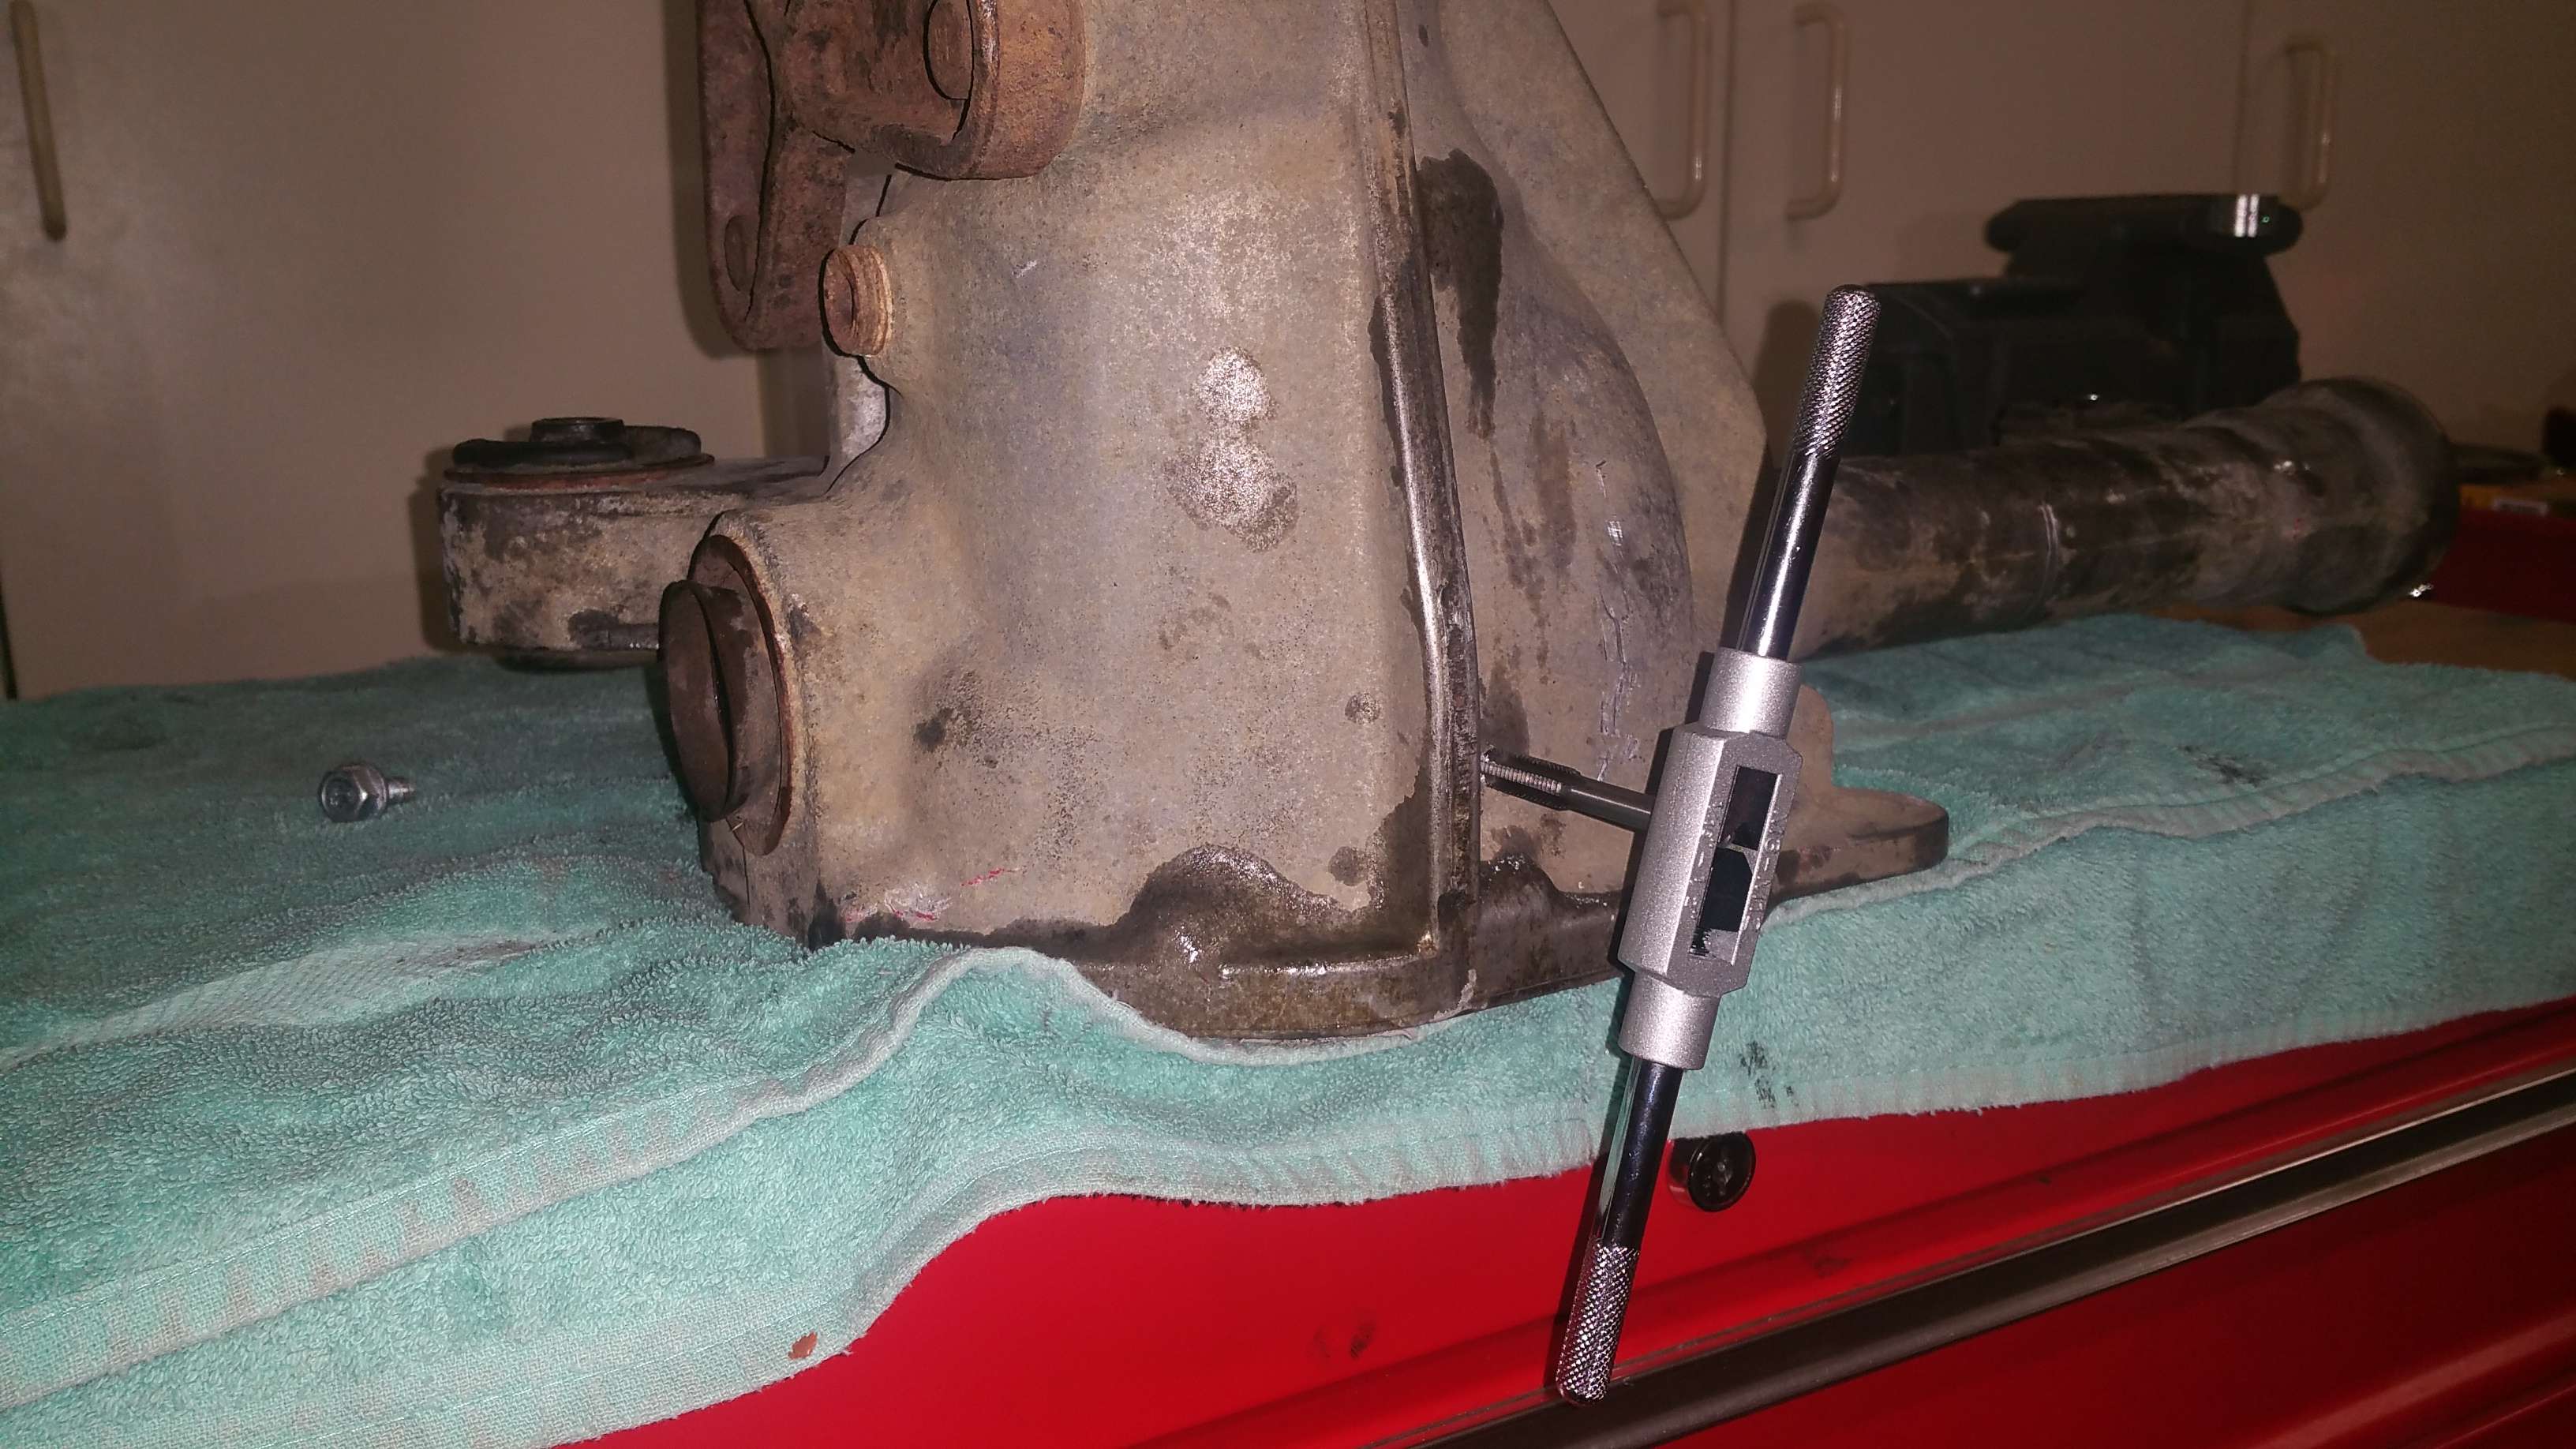
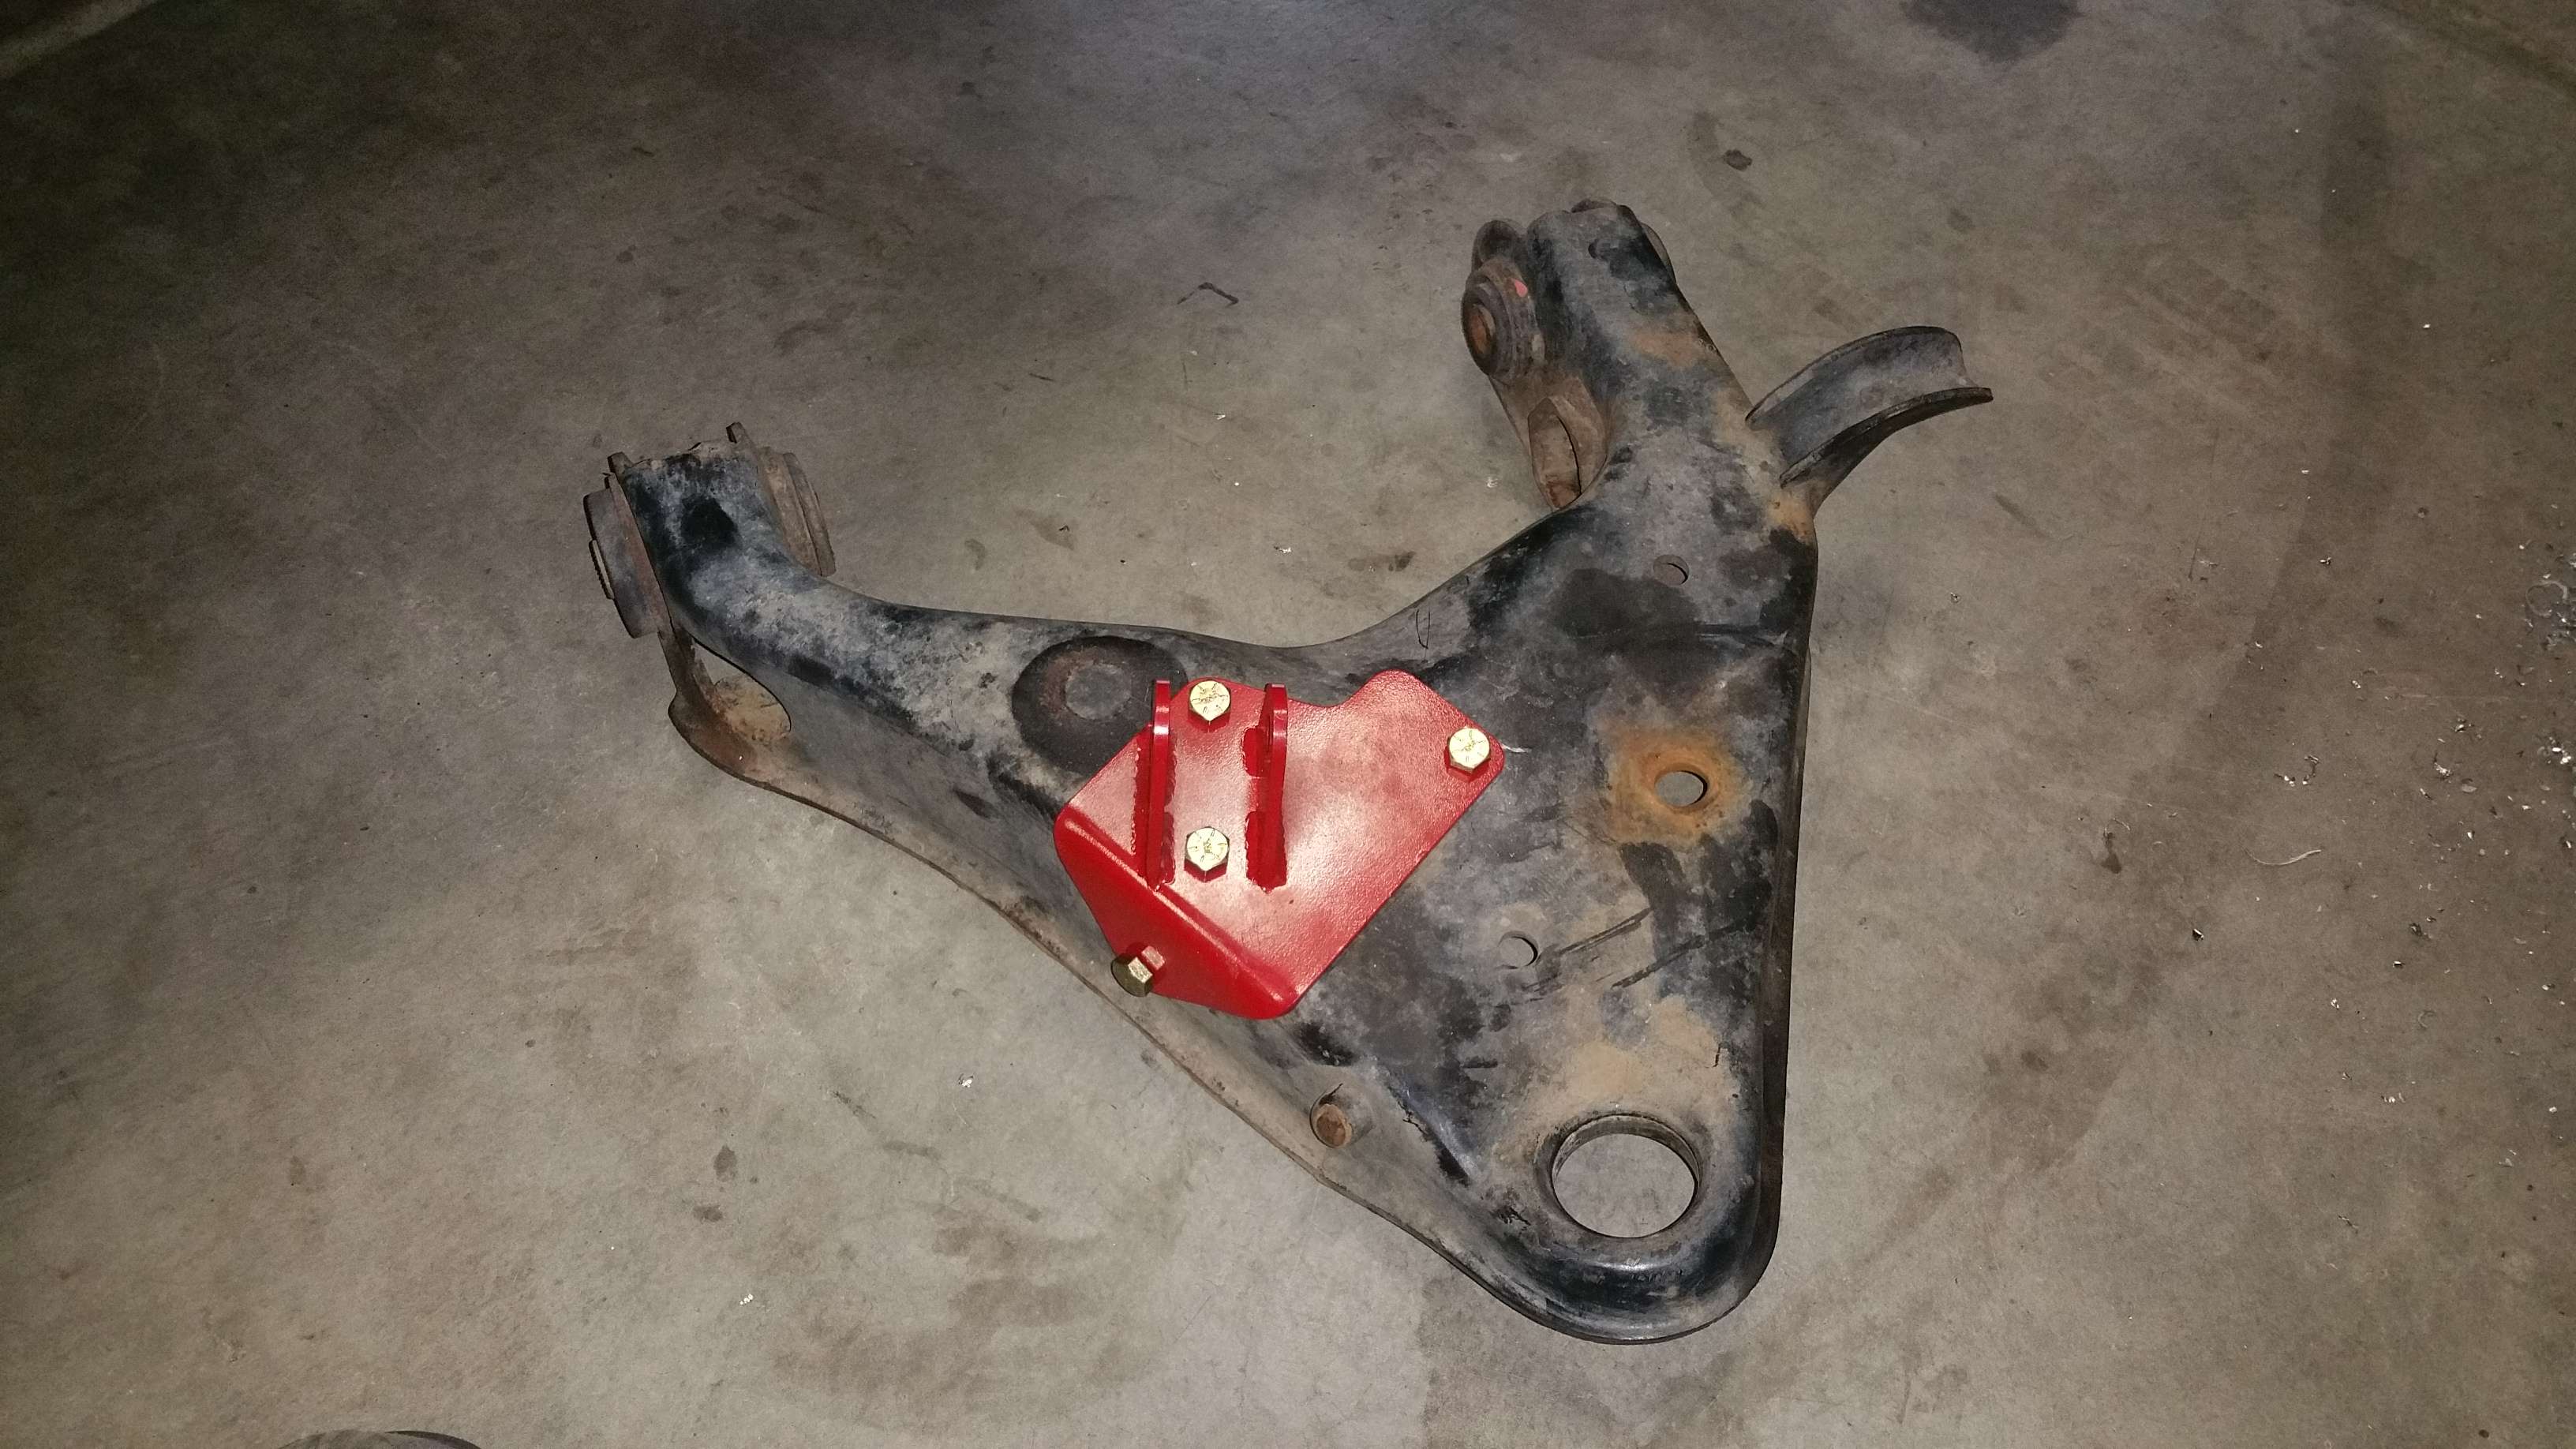
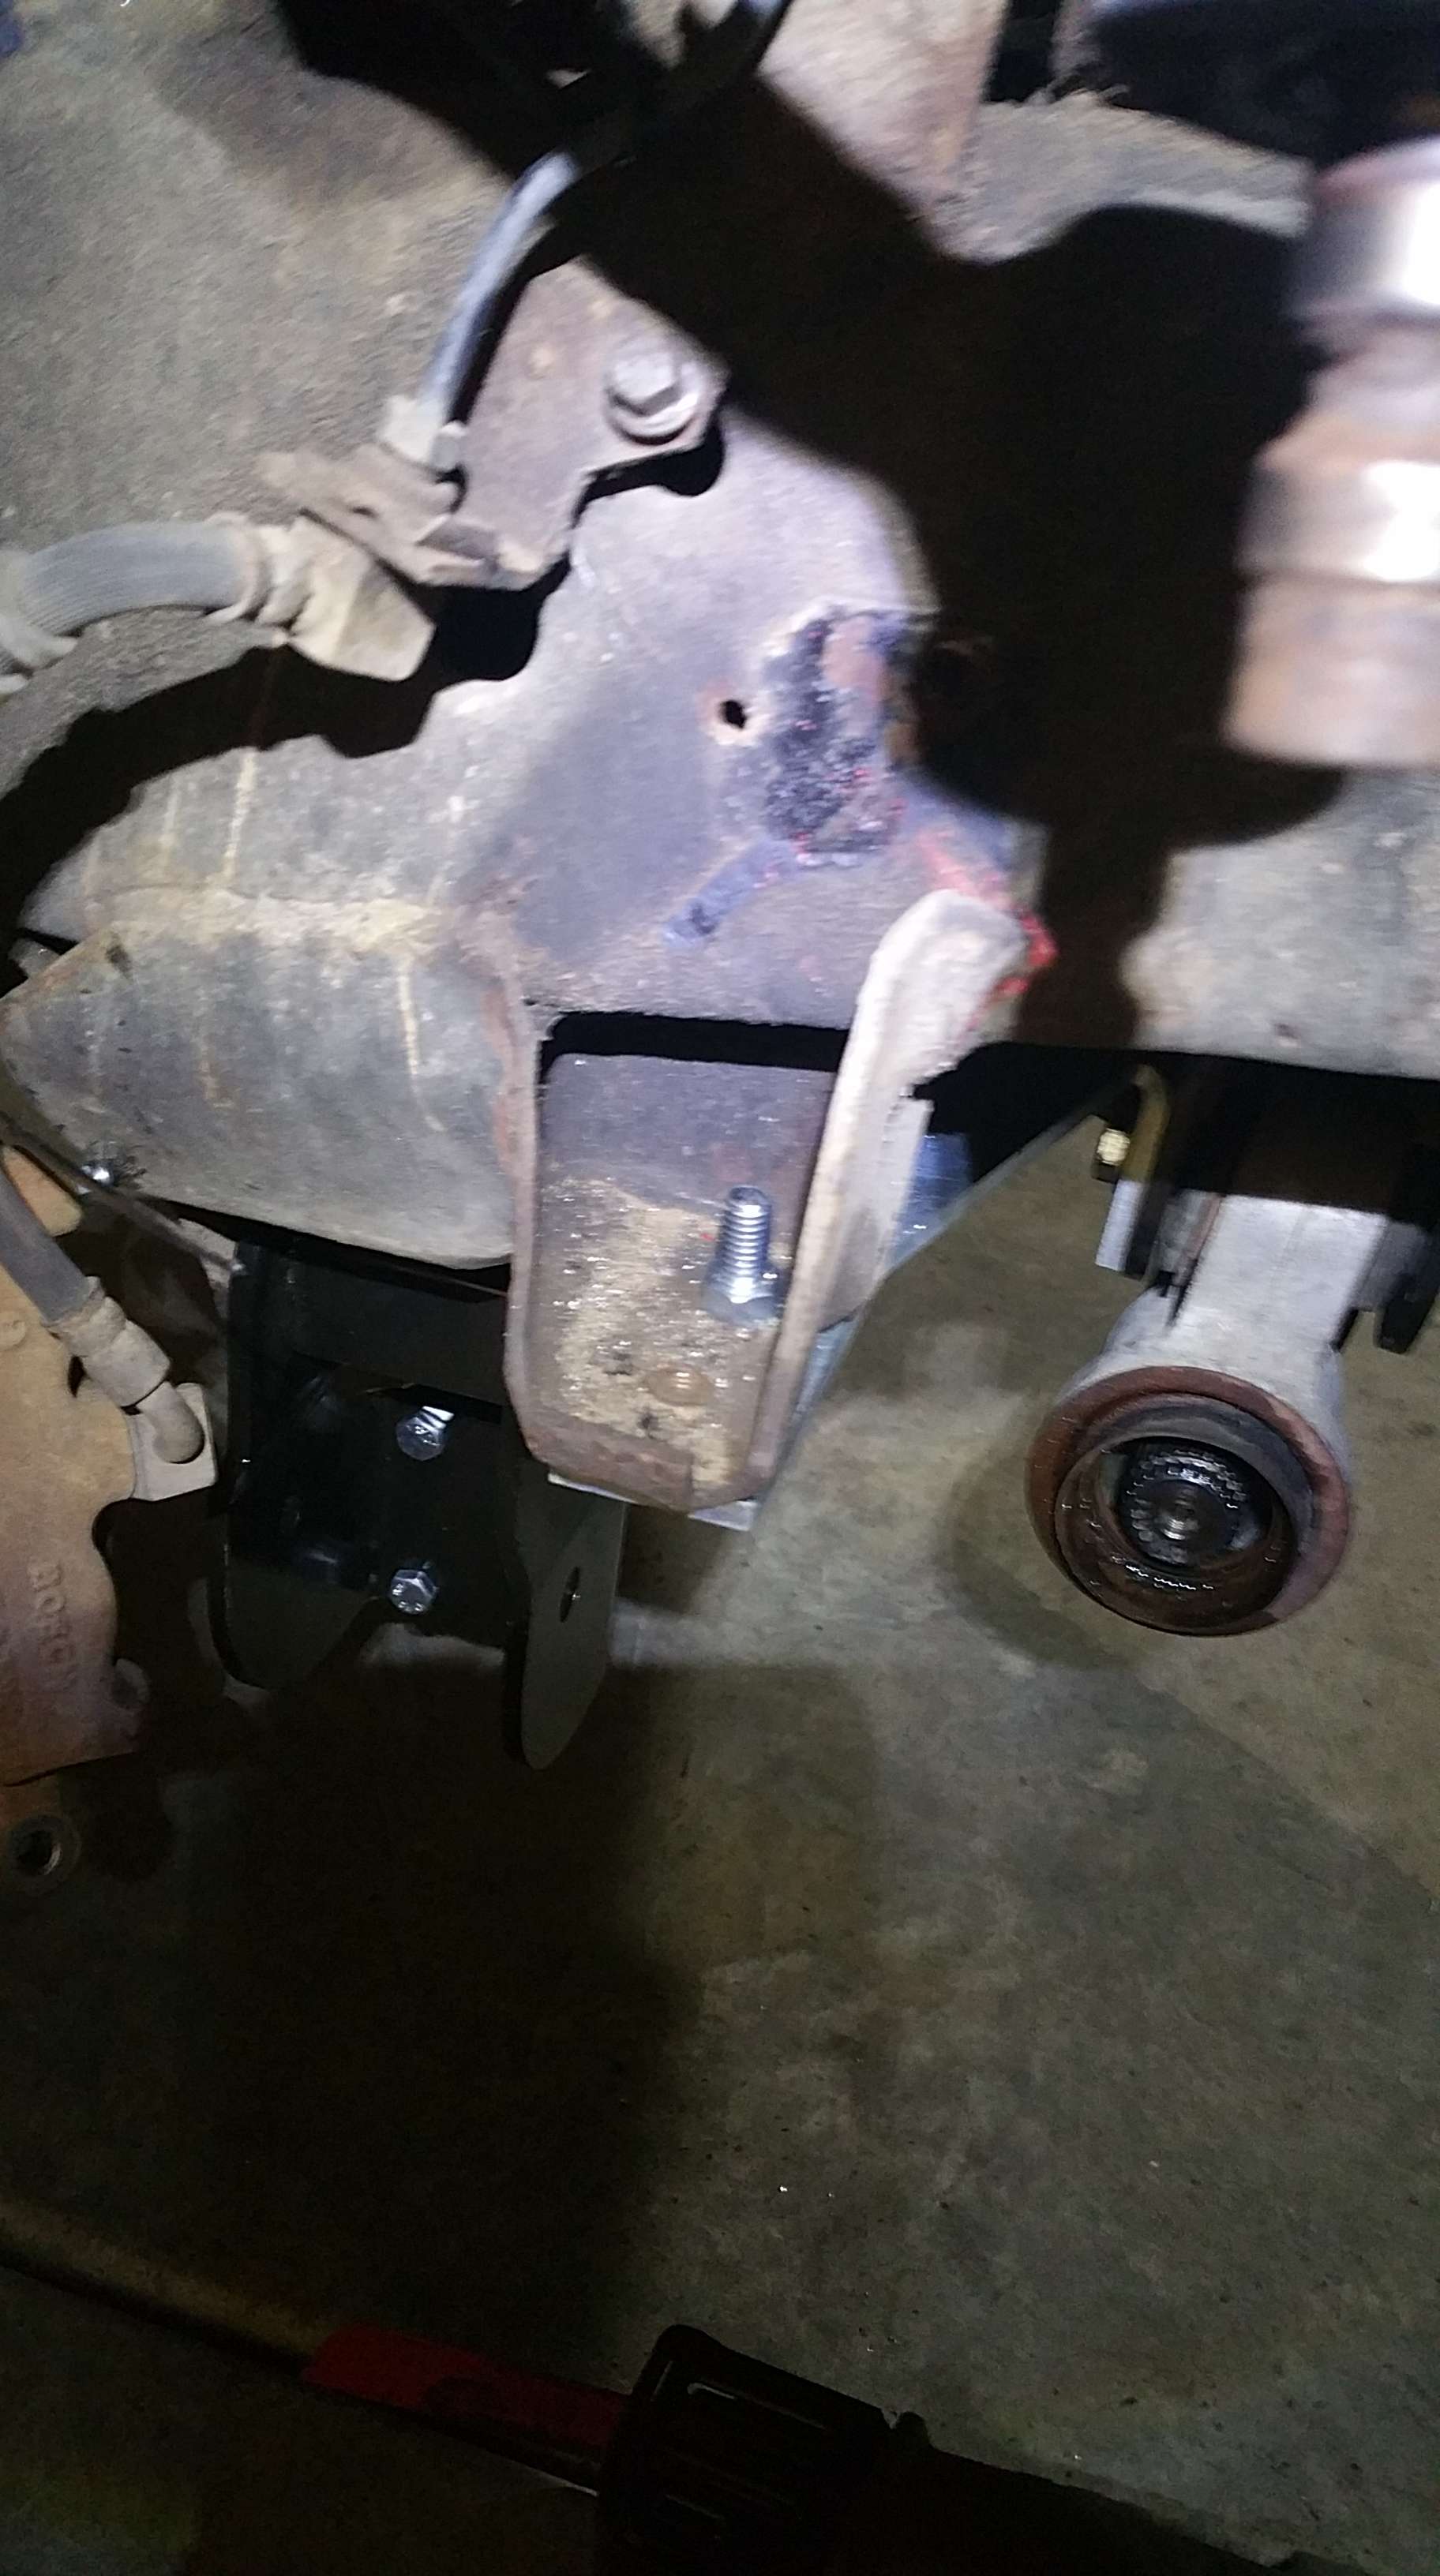
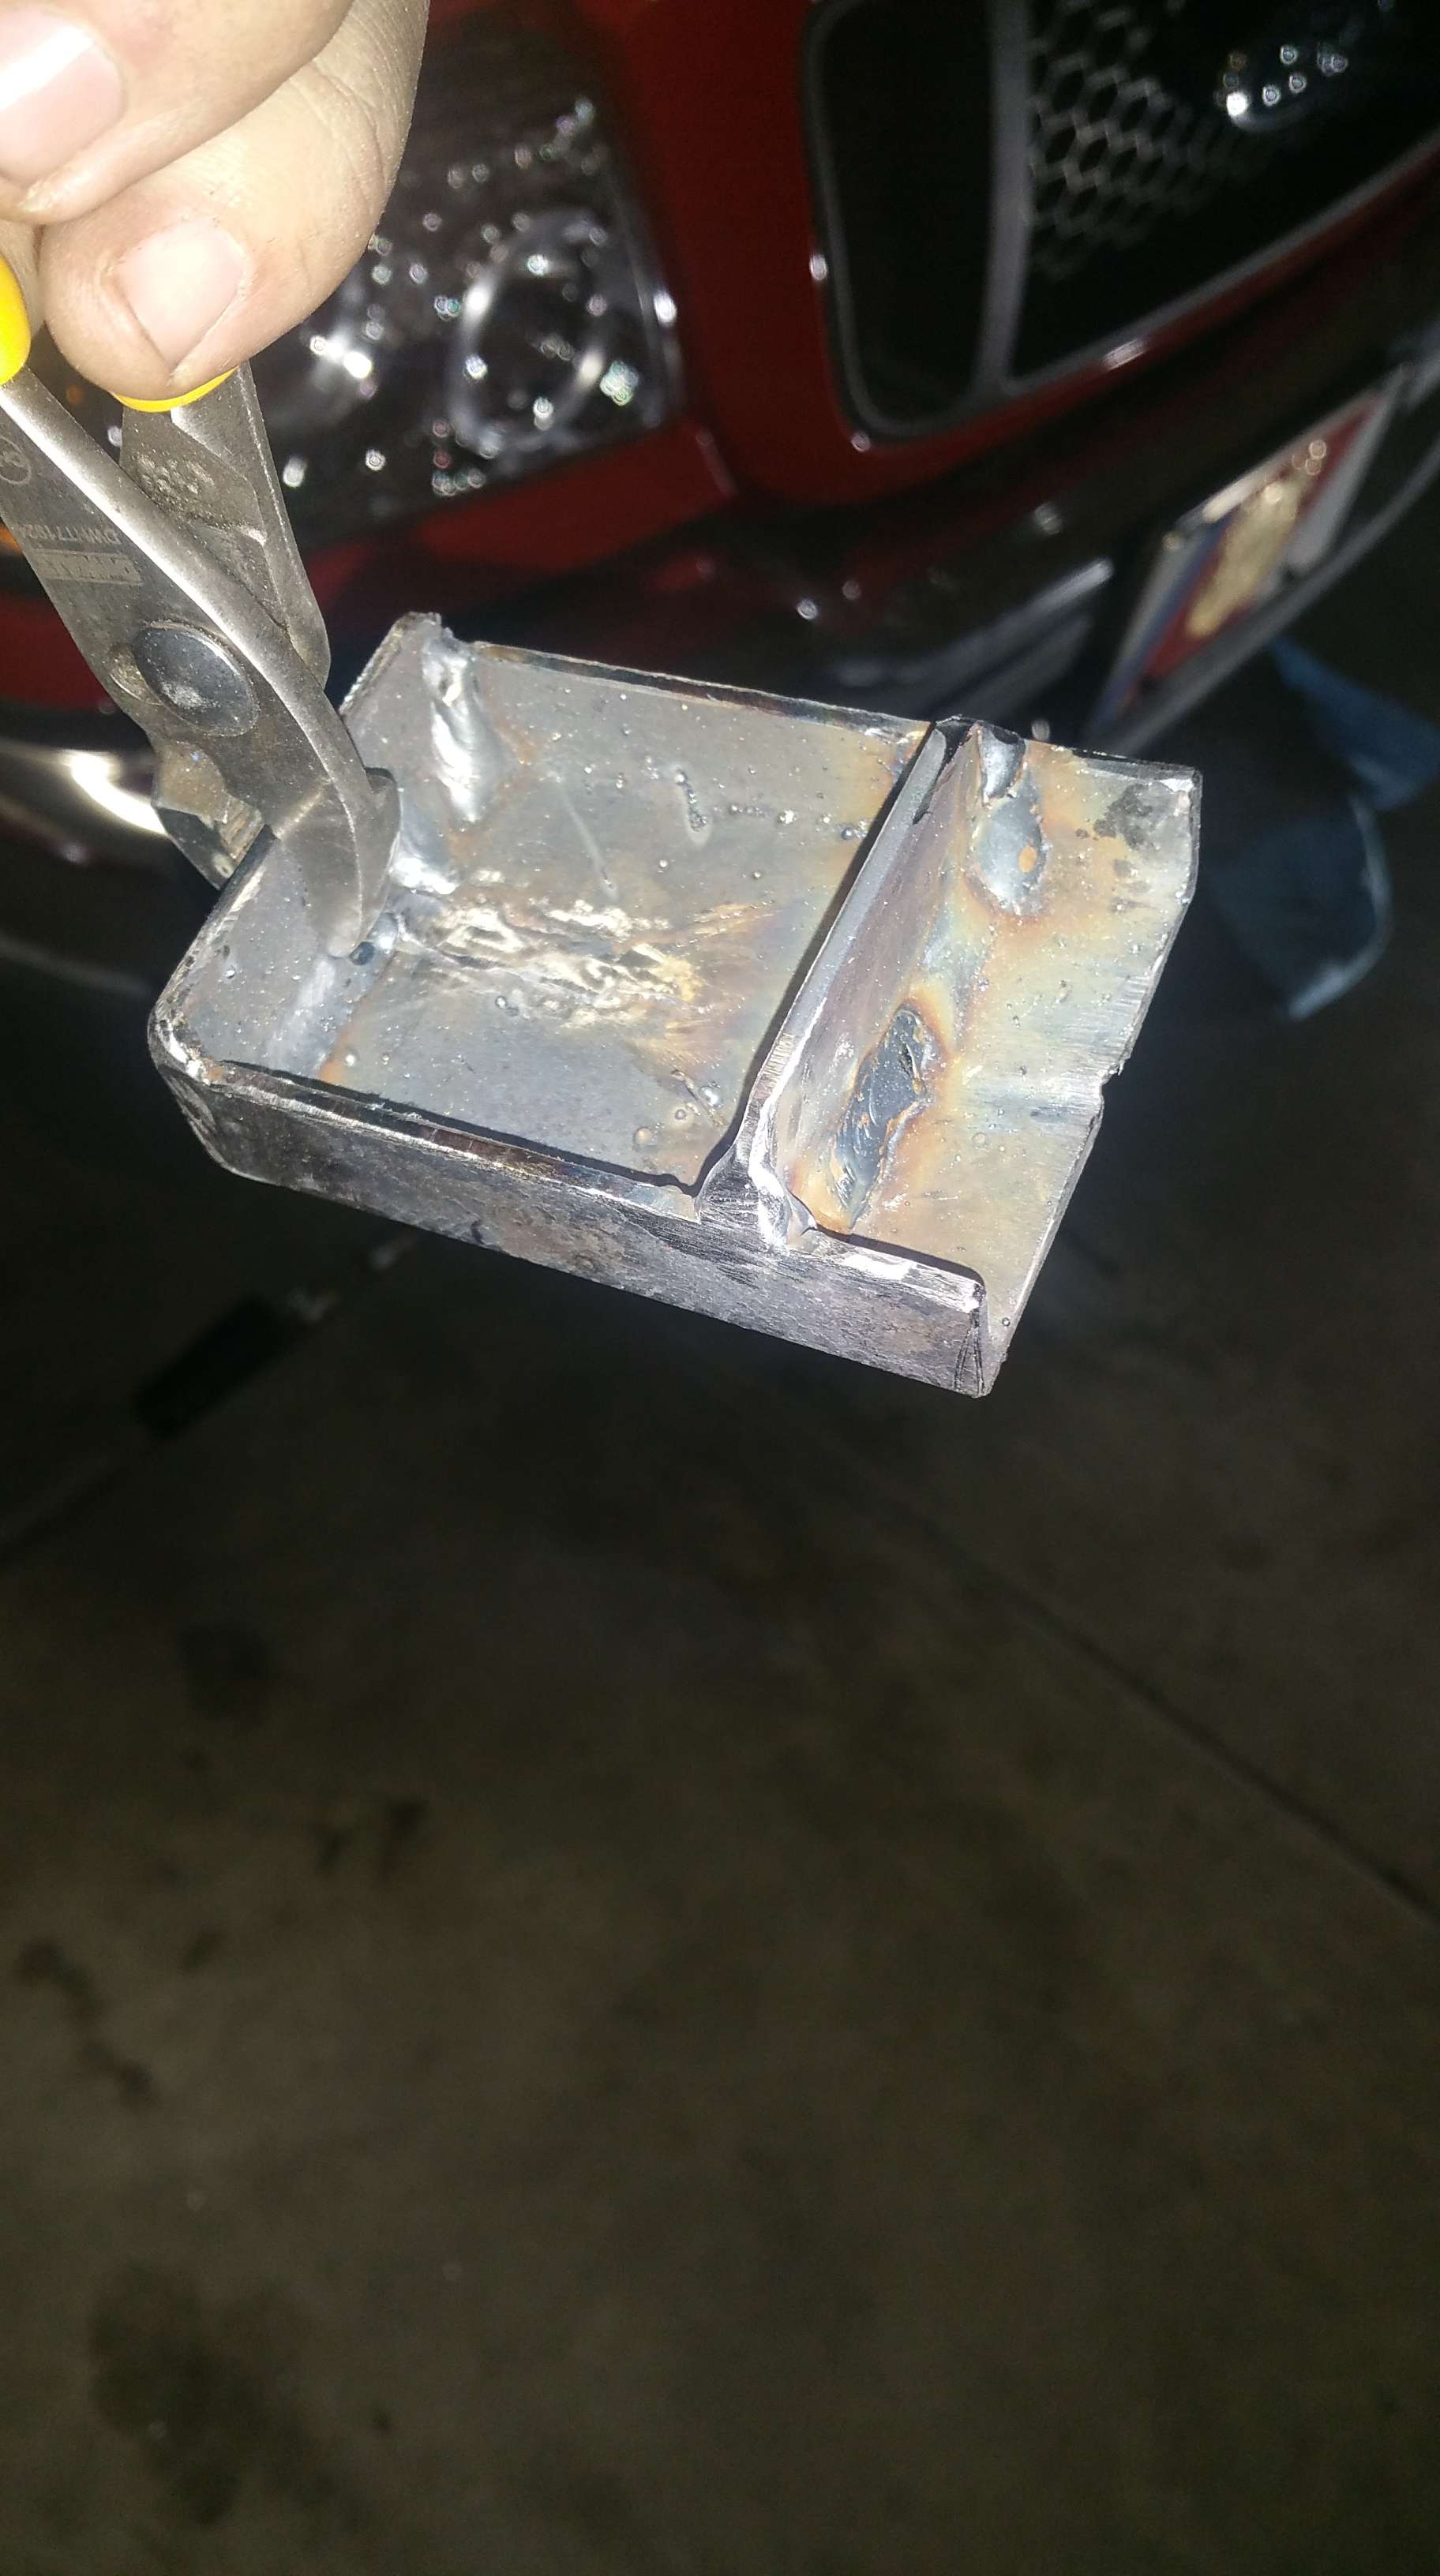
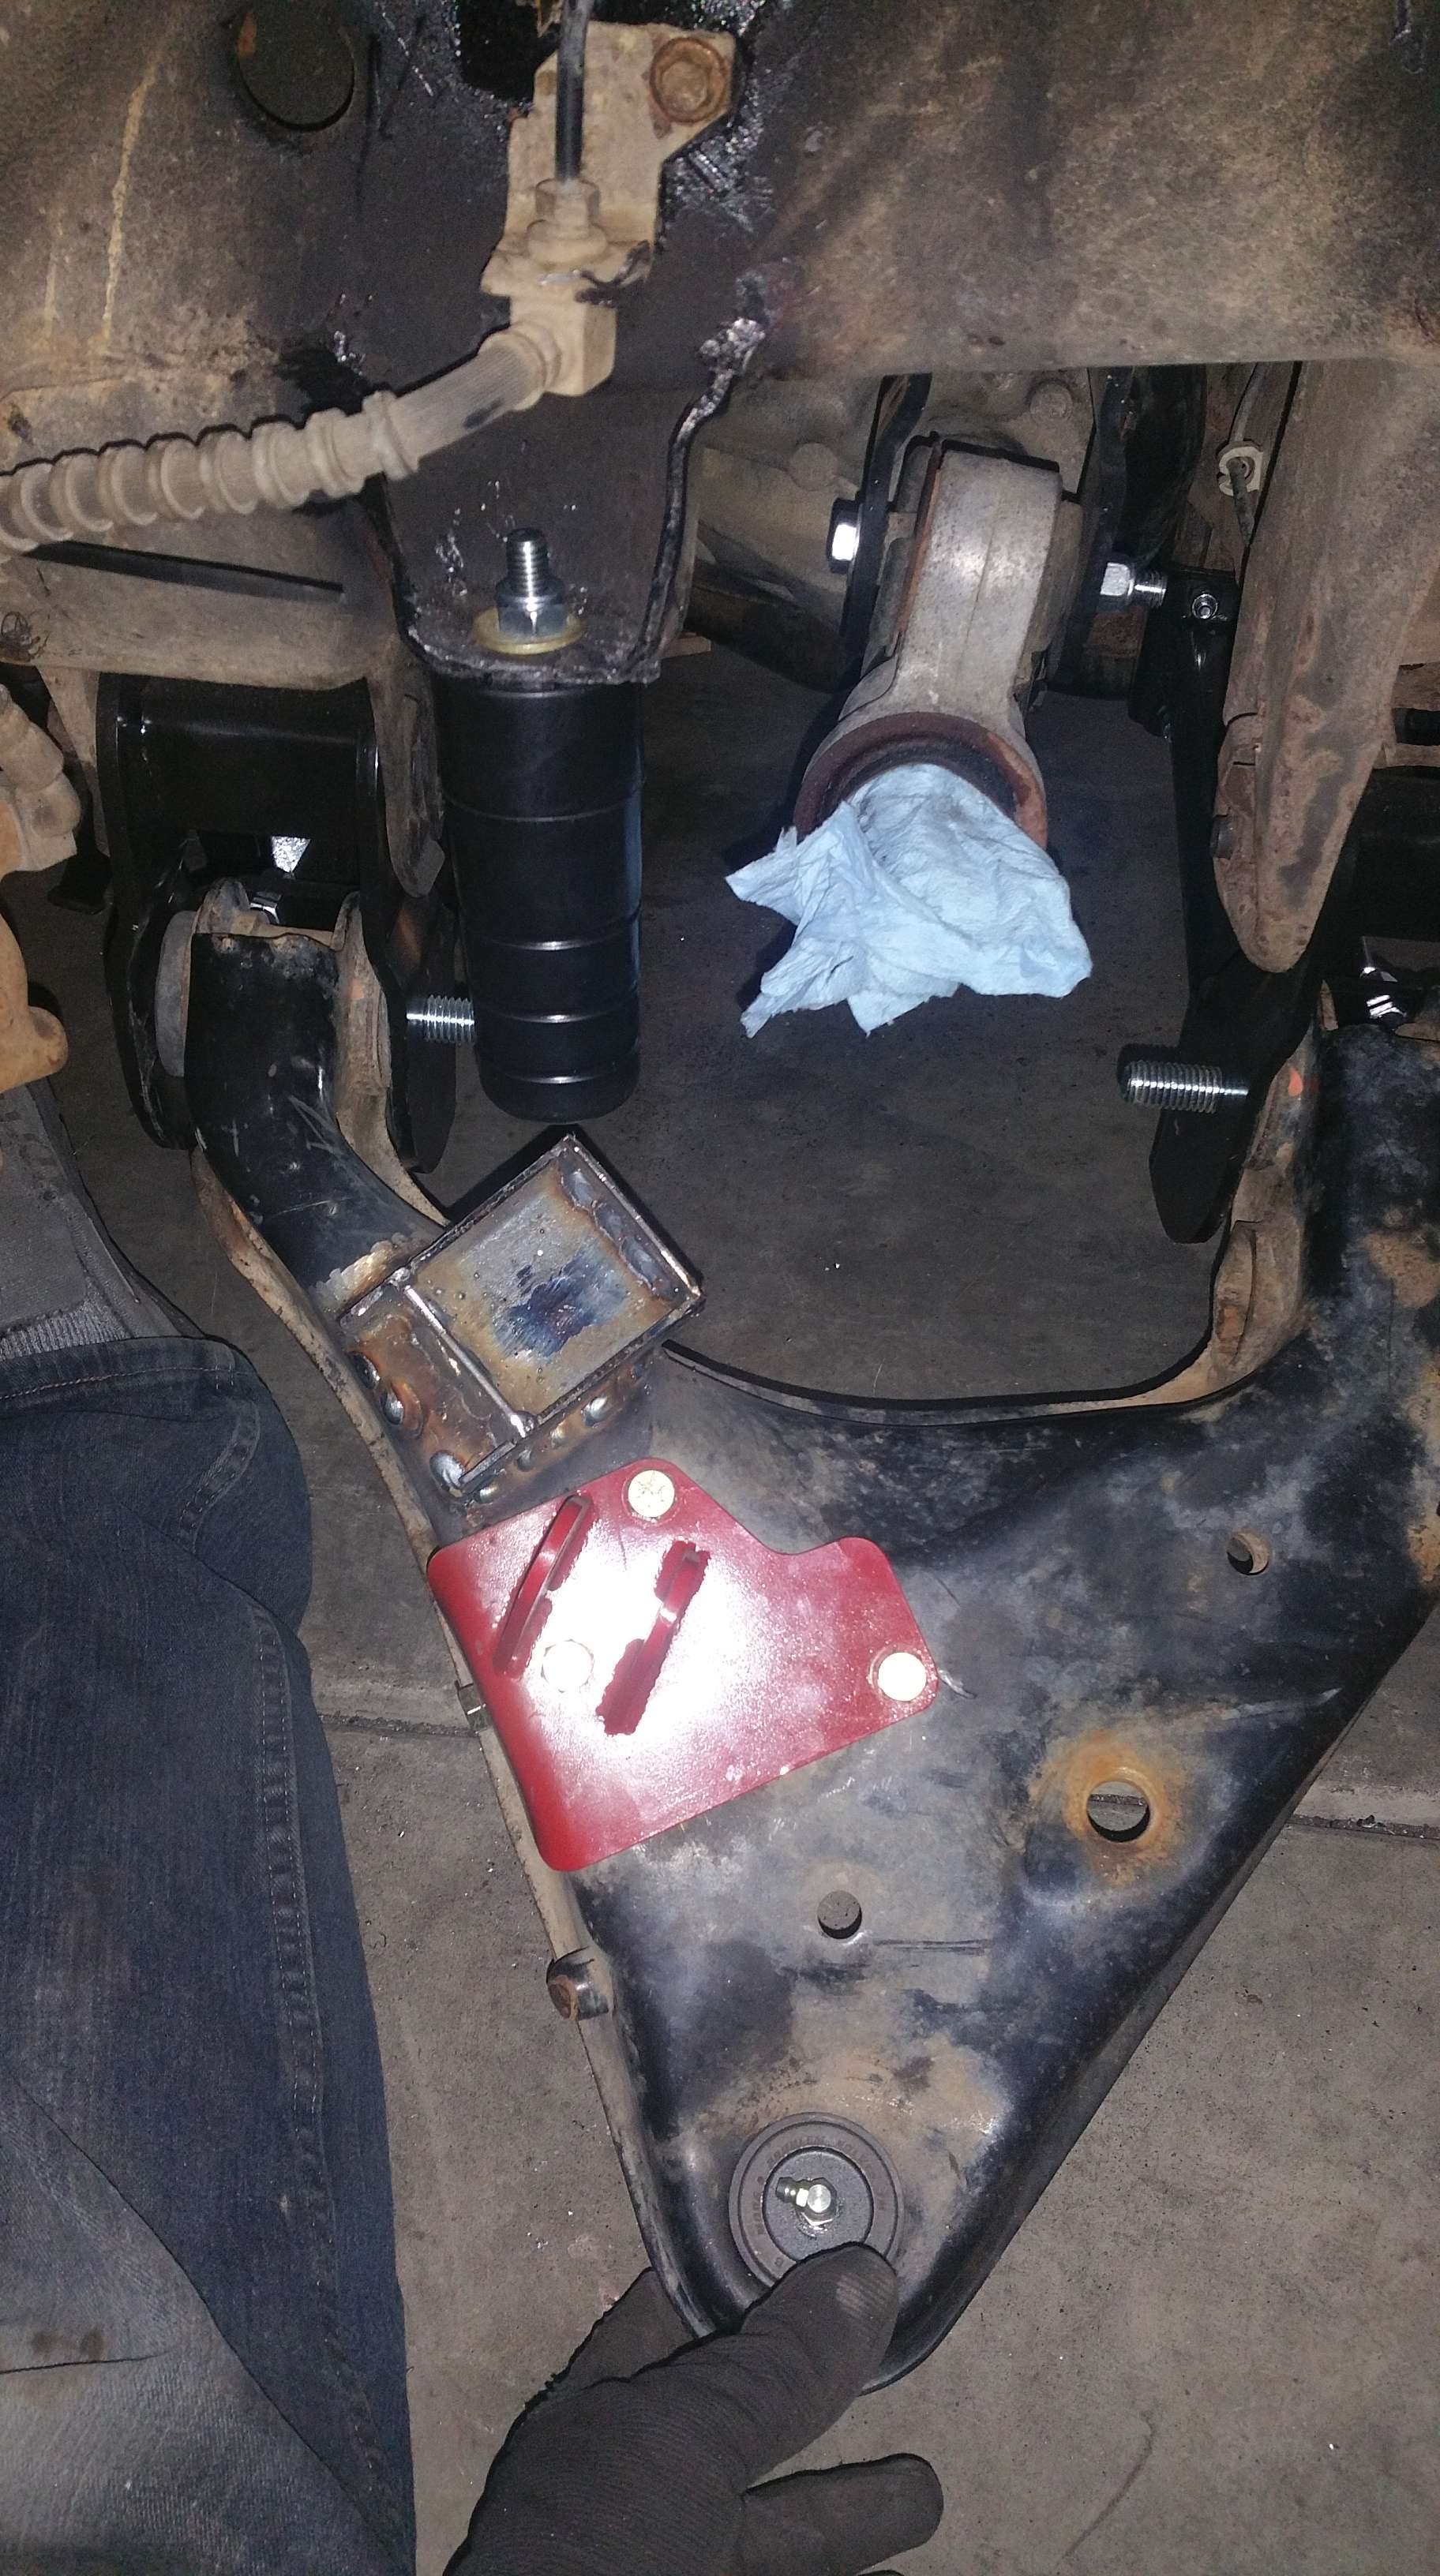
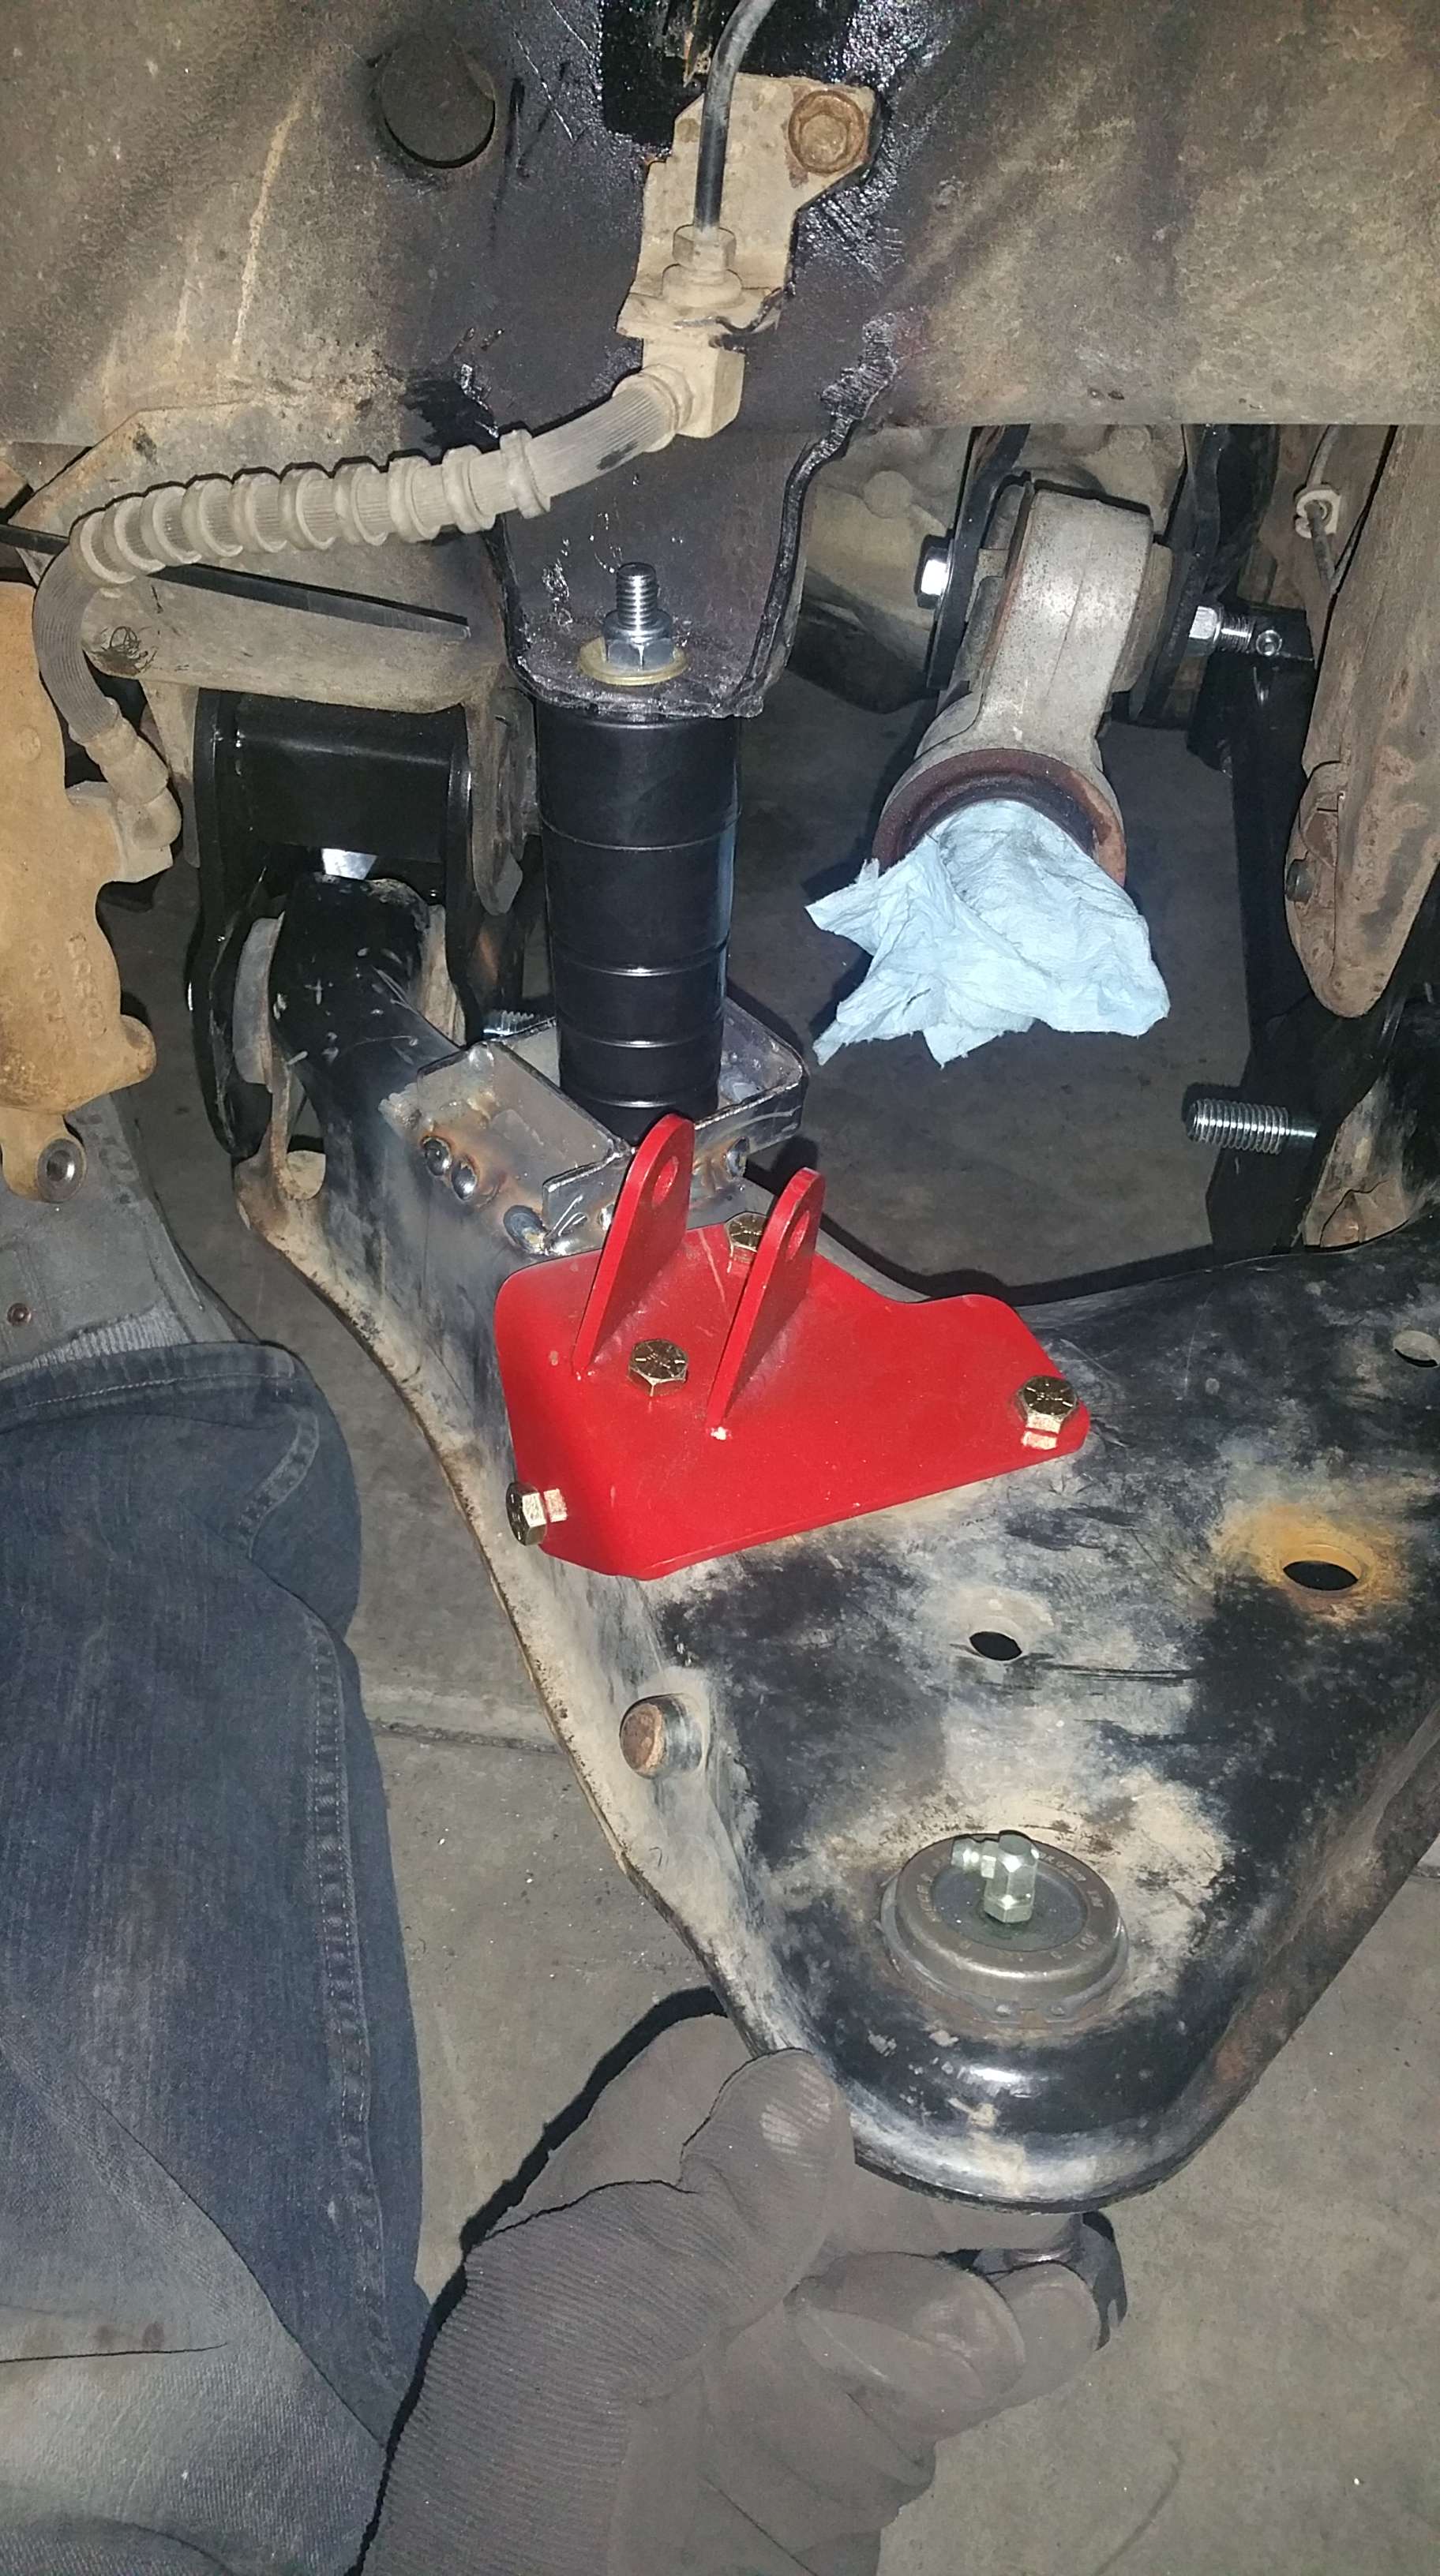
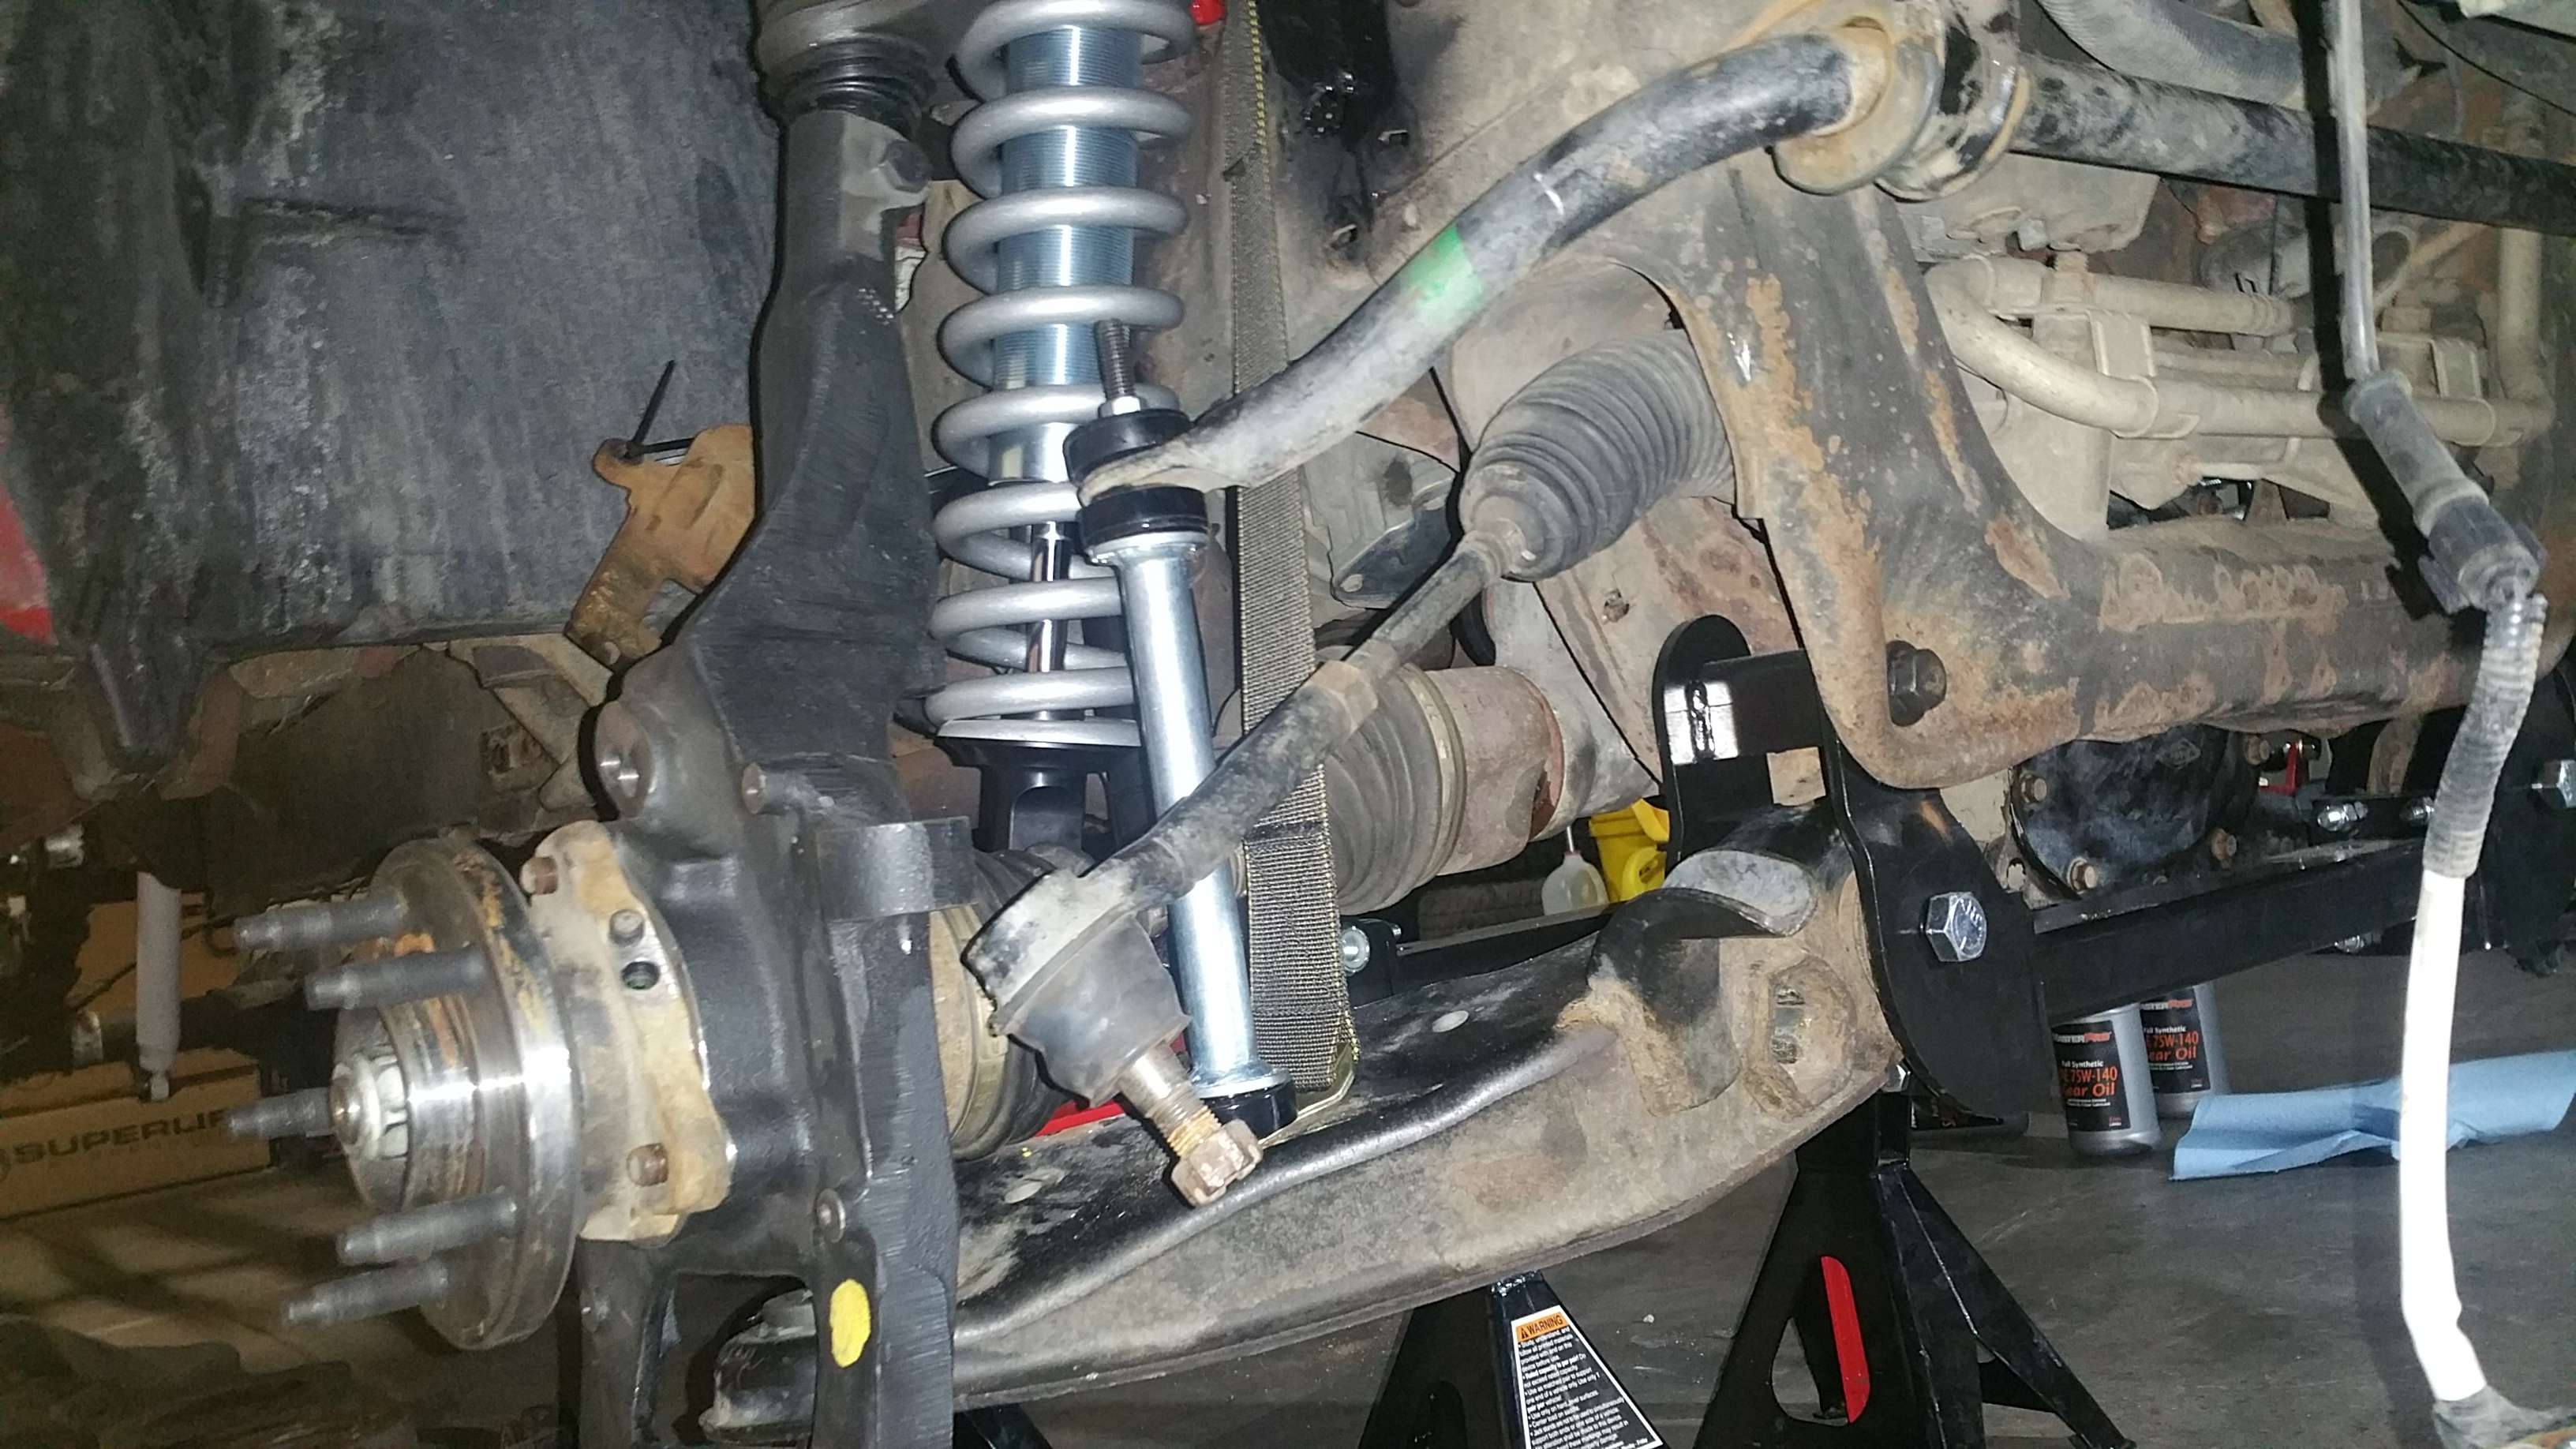
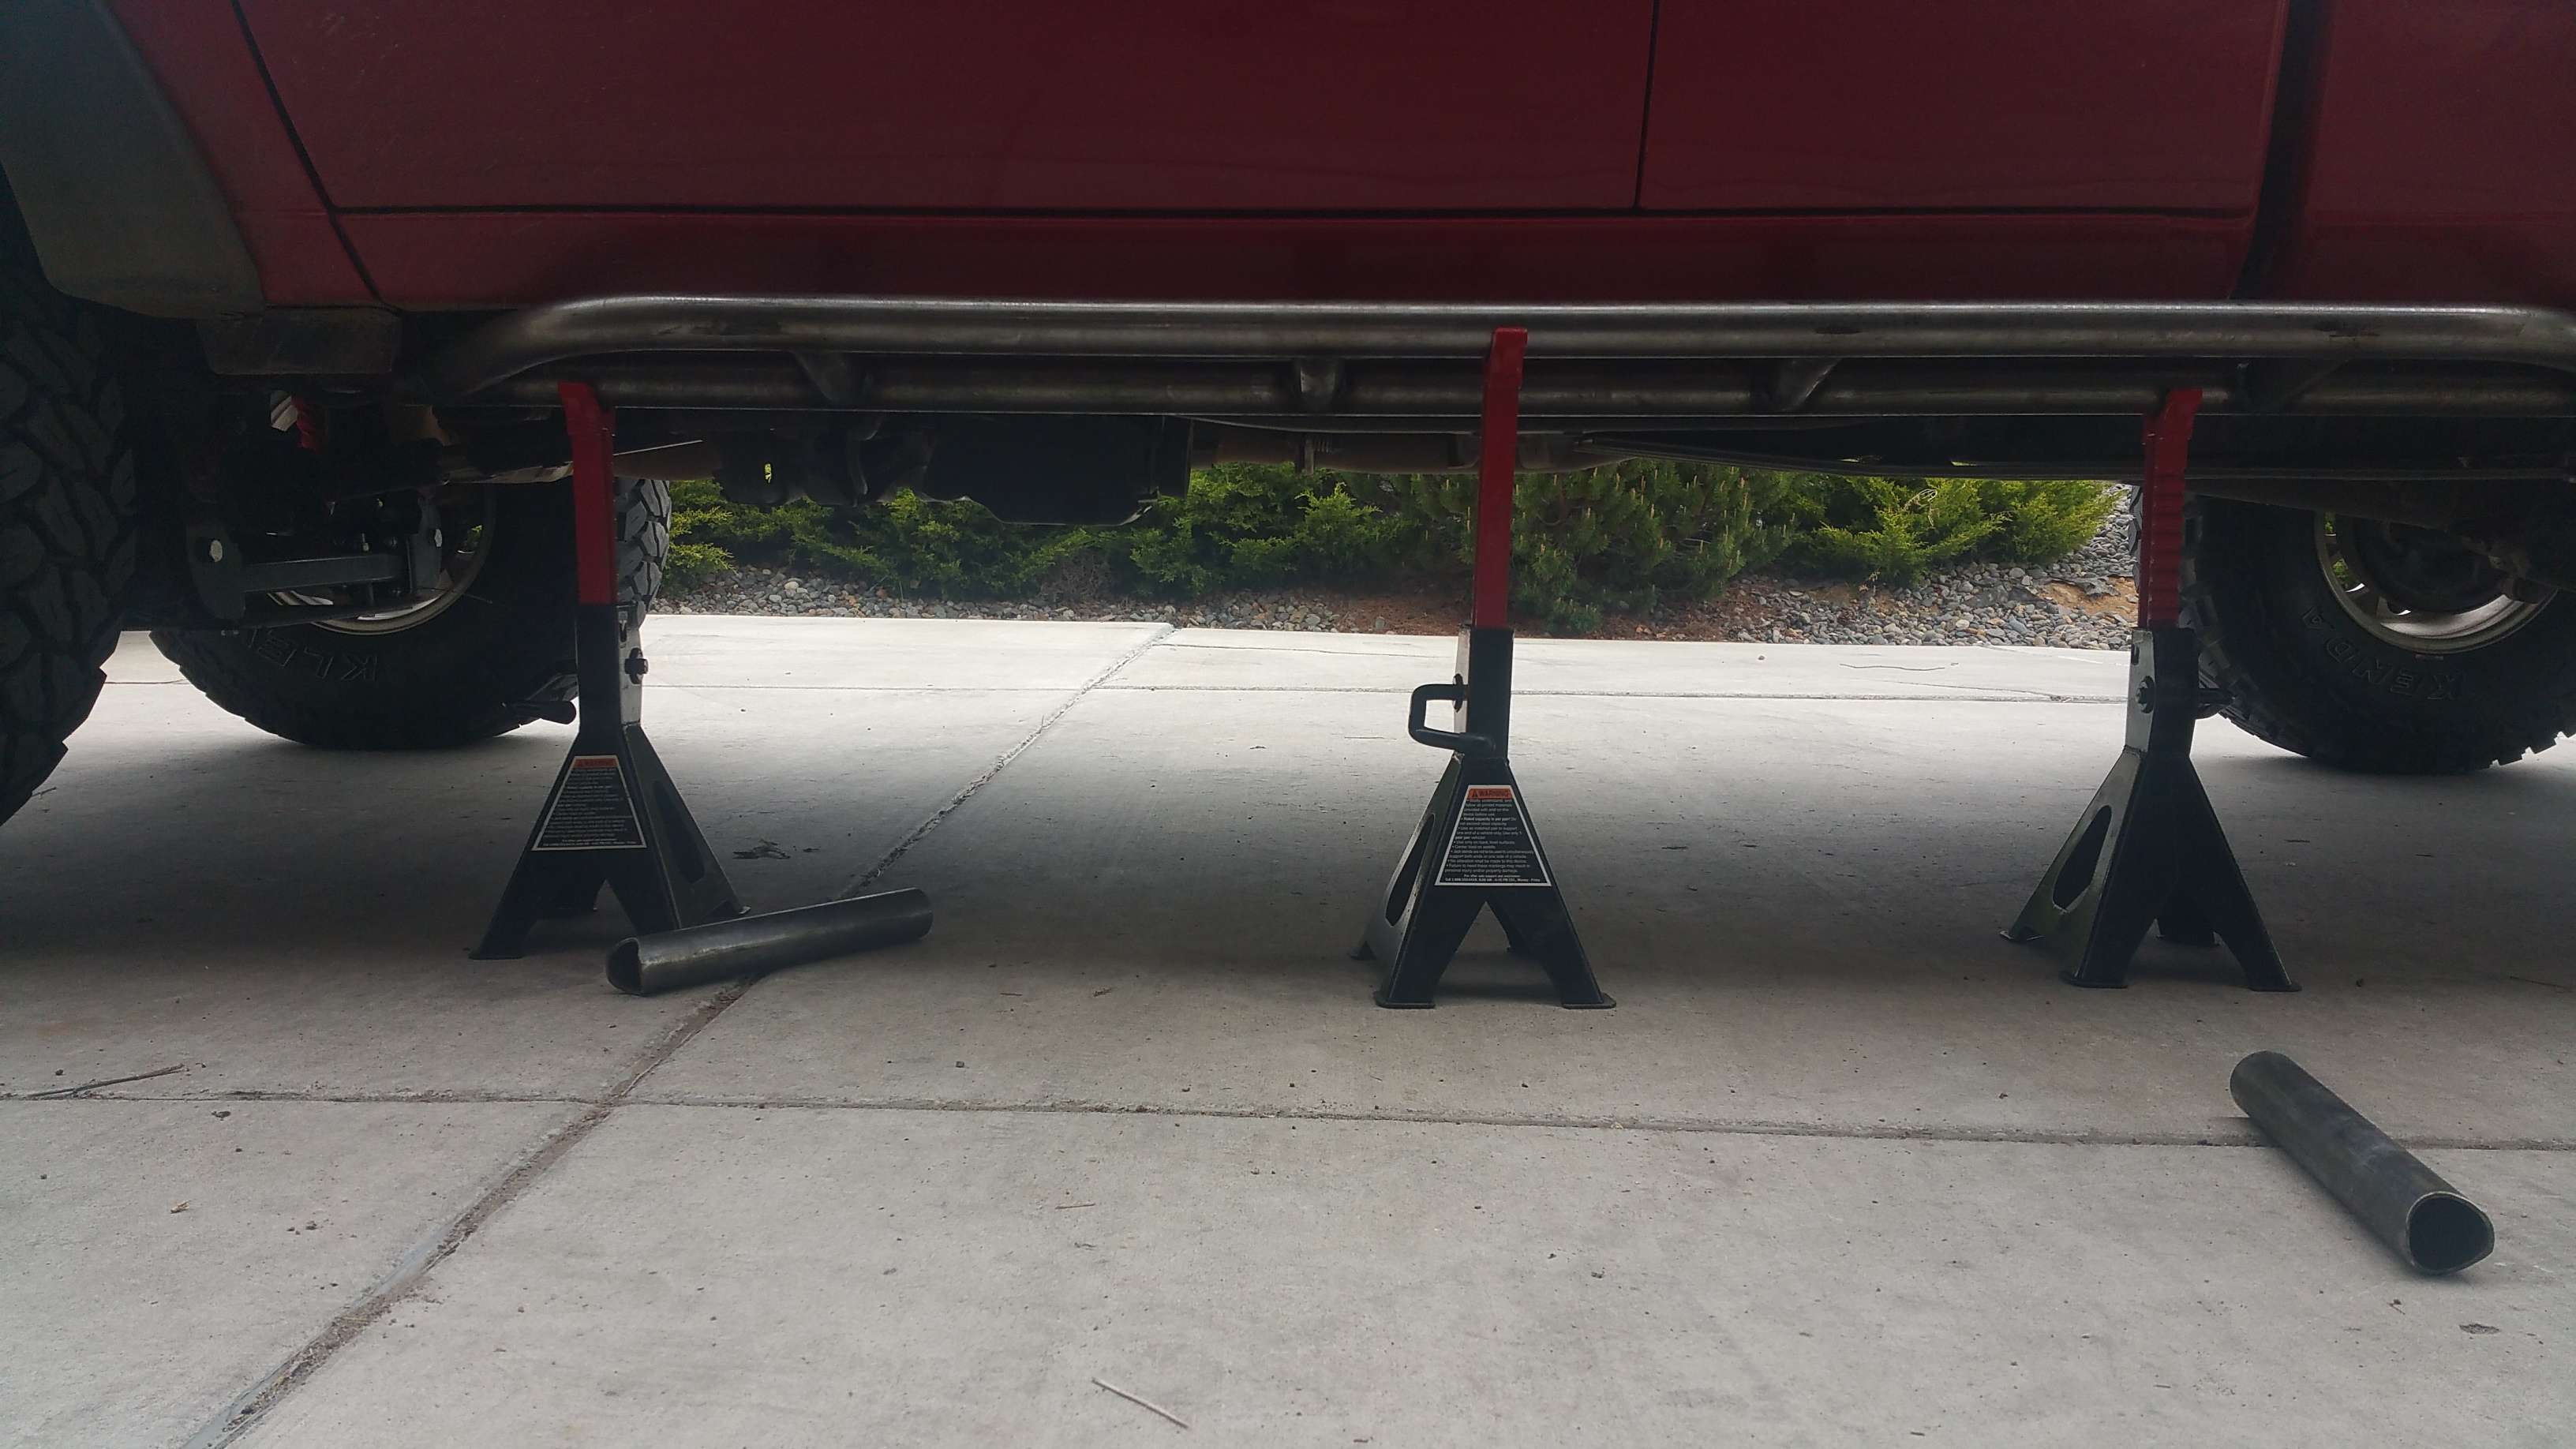
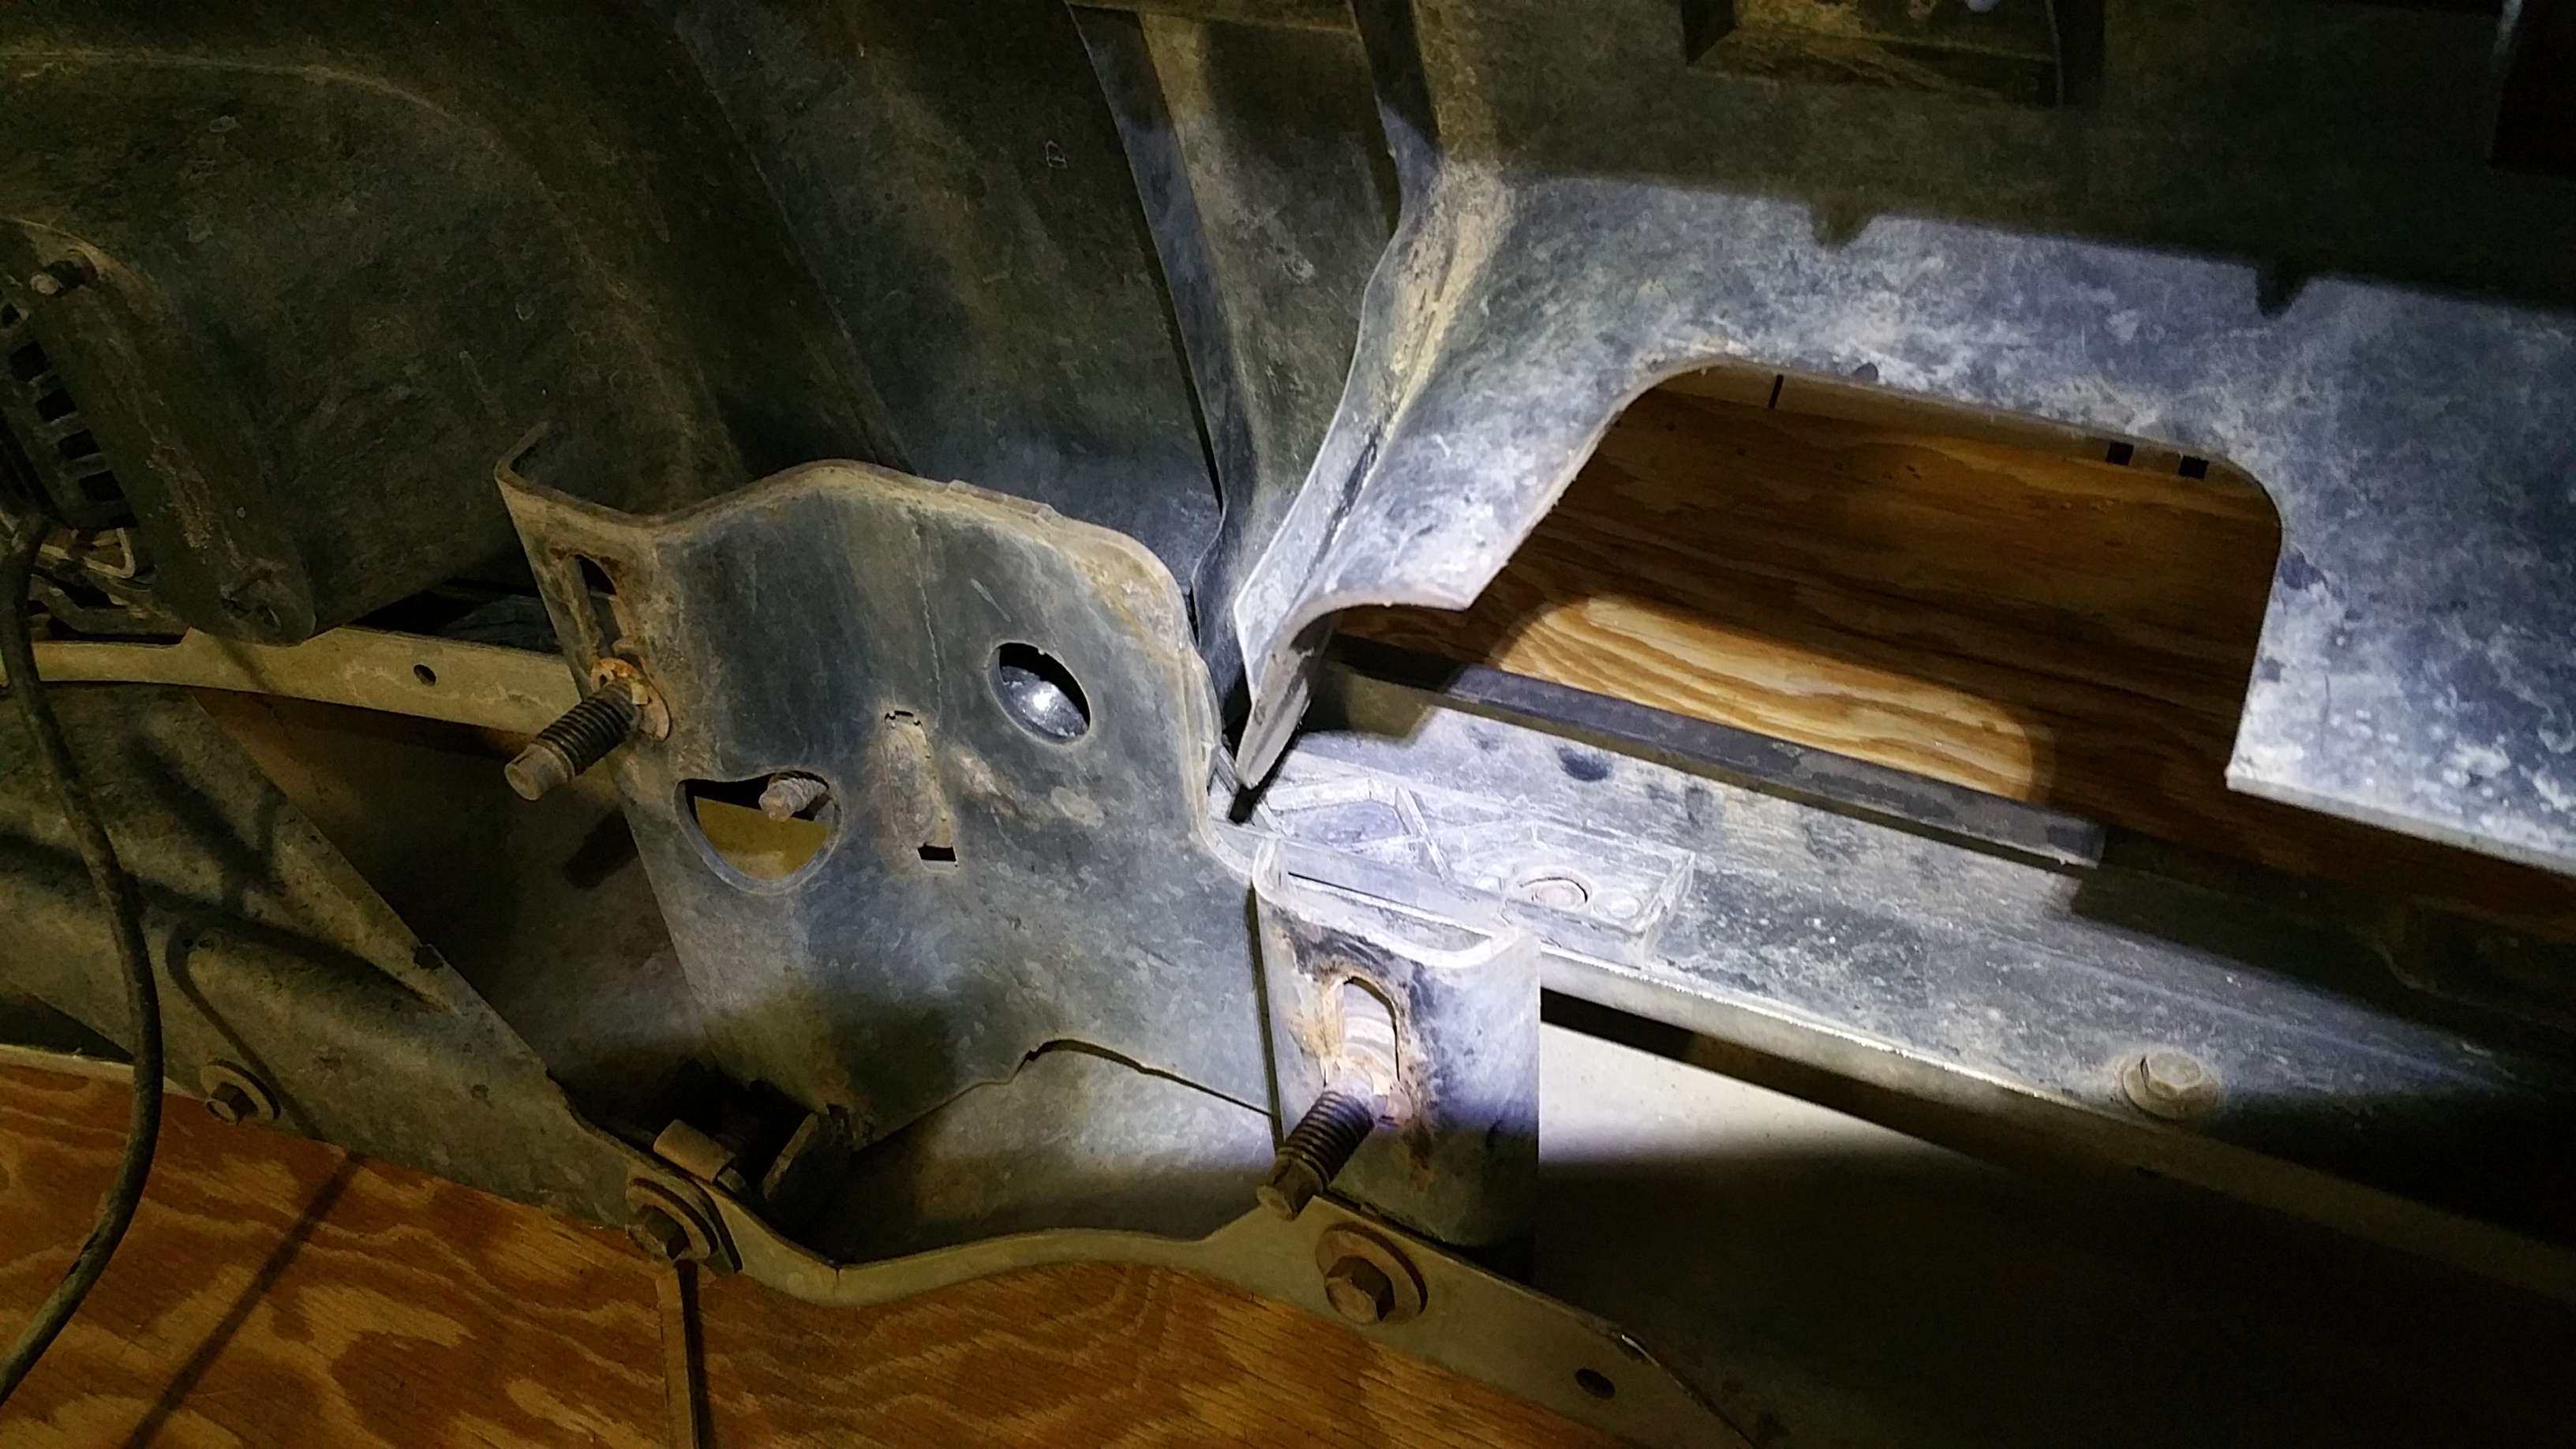
So, Along with installing parts of the superlift, the Coilover conversion was pretty straightforward. I did the welding of the gussets, and also made some cups and welded them to the lower arms. I read of a few incidents of the extended bumpstops people were using deflecting under a high load, causing the cv's to bind. These cups were my cost effective solution to the problem. So long as they don't get hardpacked with mud (they don't I've checked several times) they prevent the bumpstops from deflecting, so I feel better about my trucks reliability.
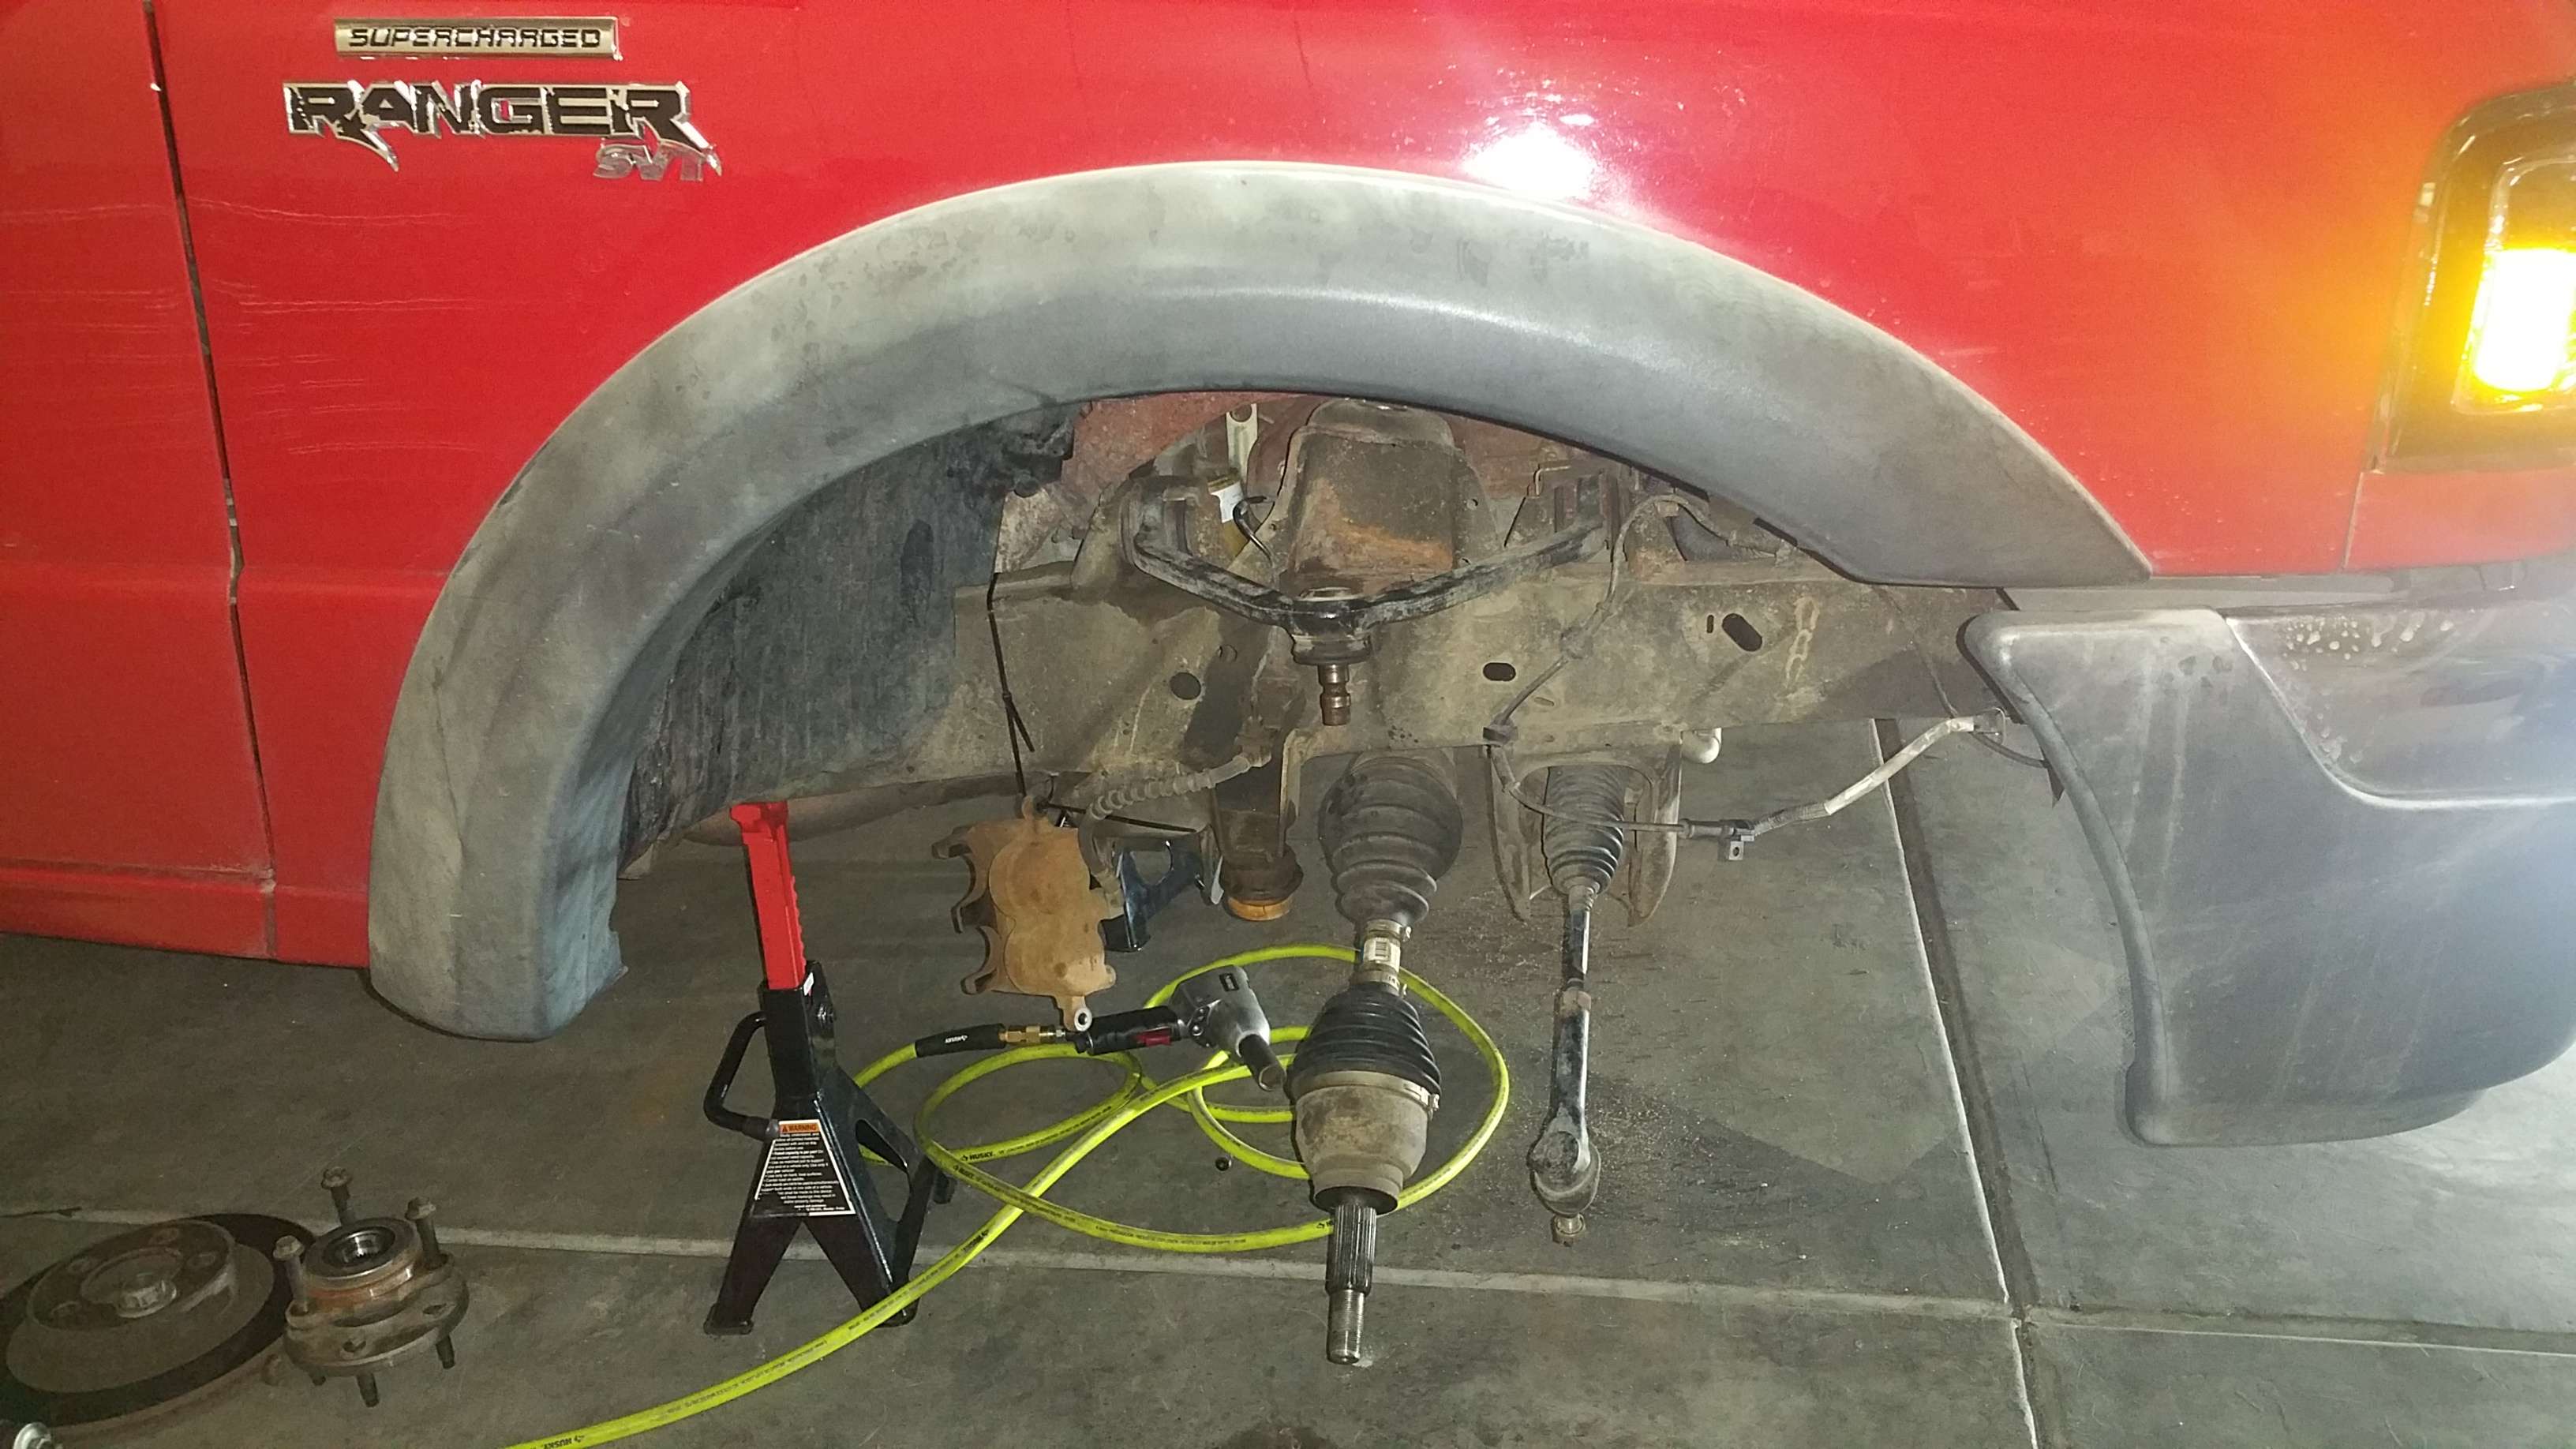
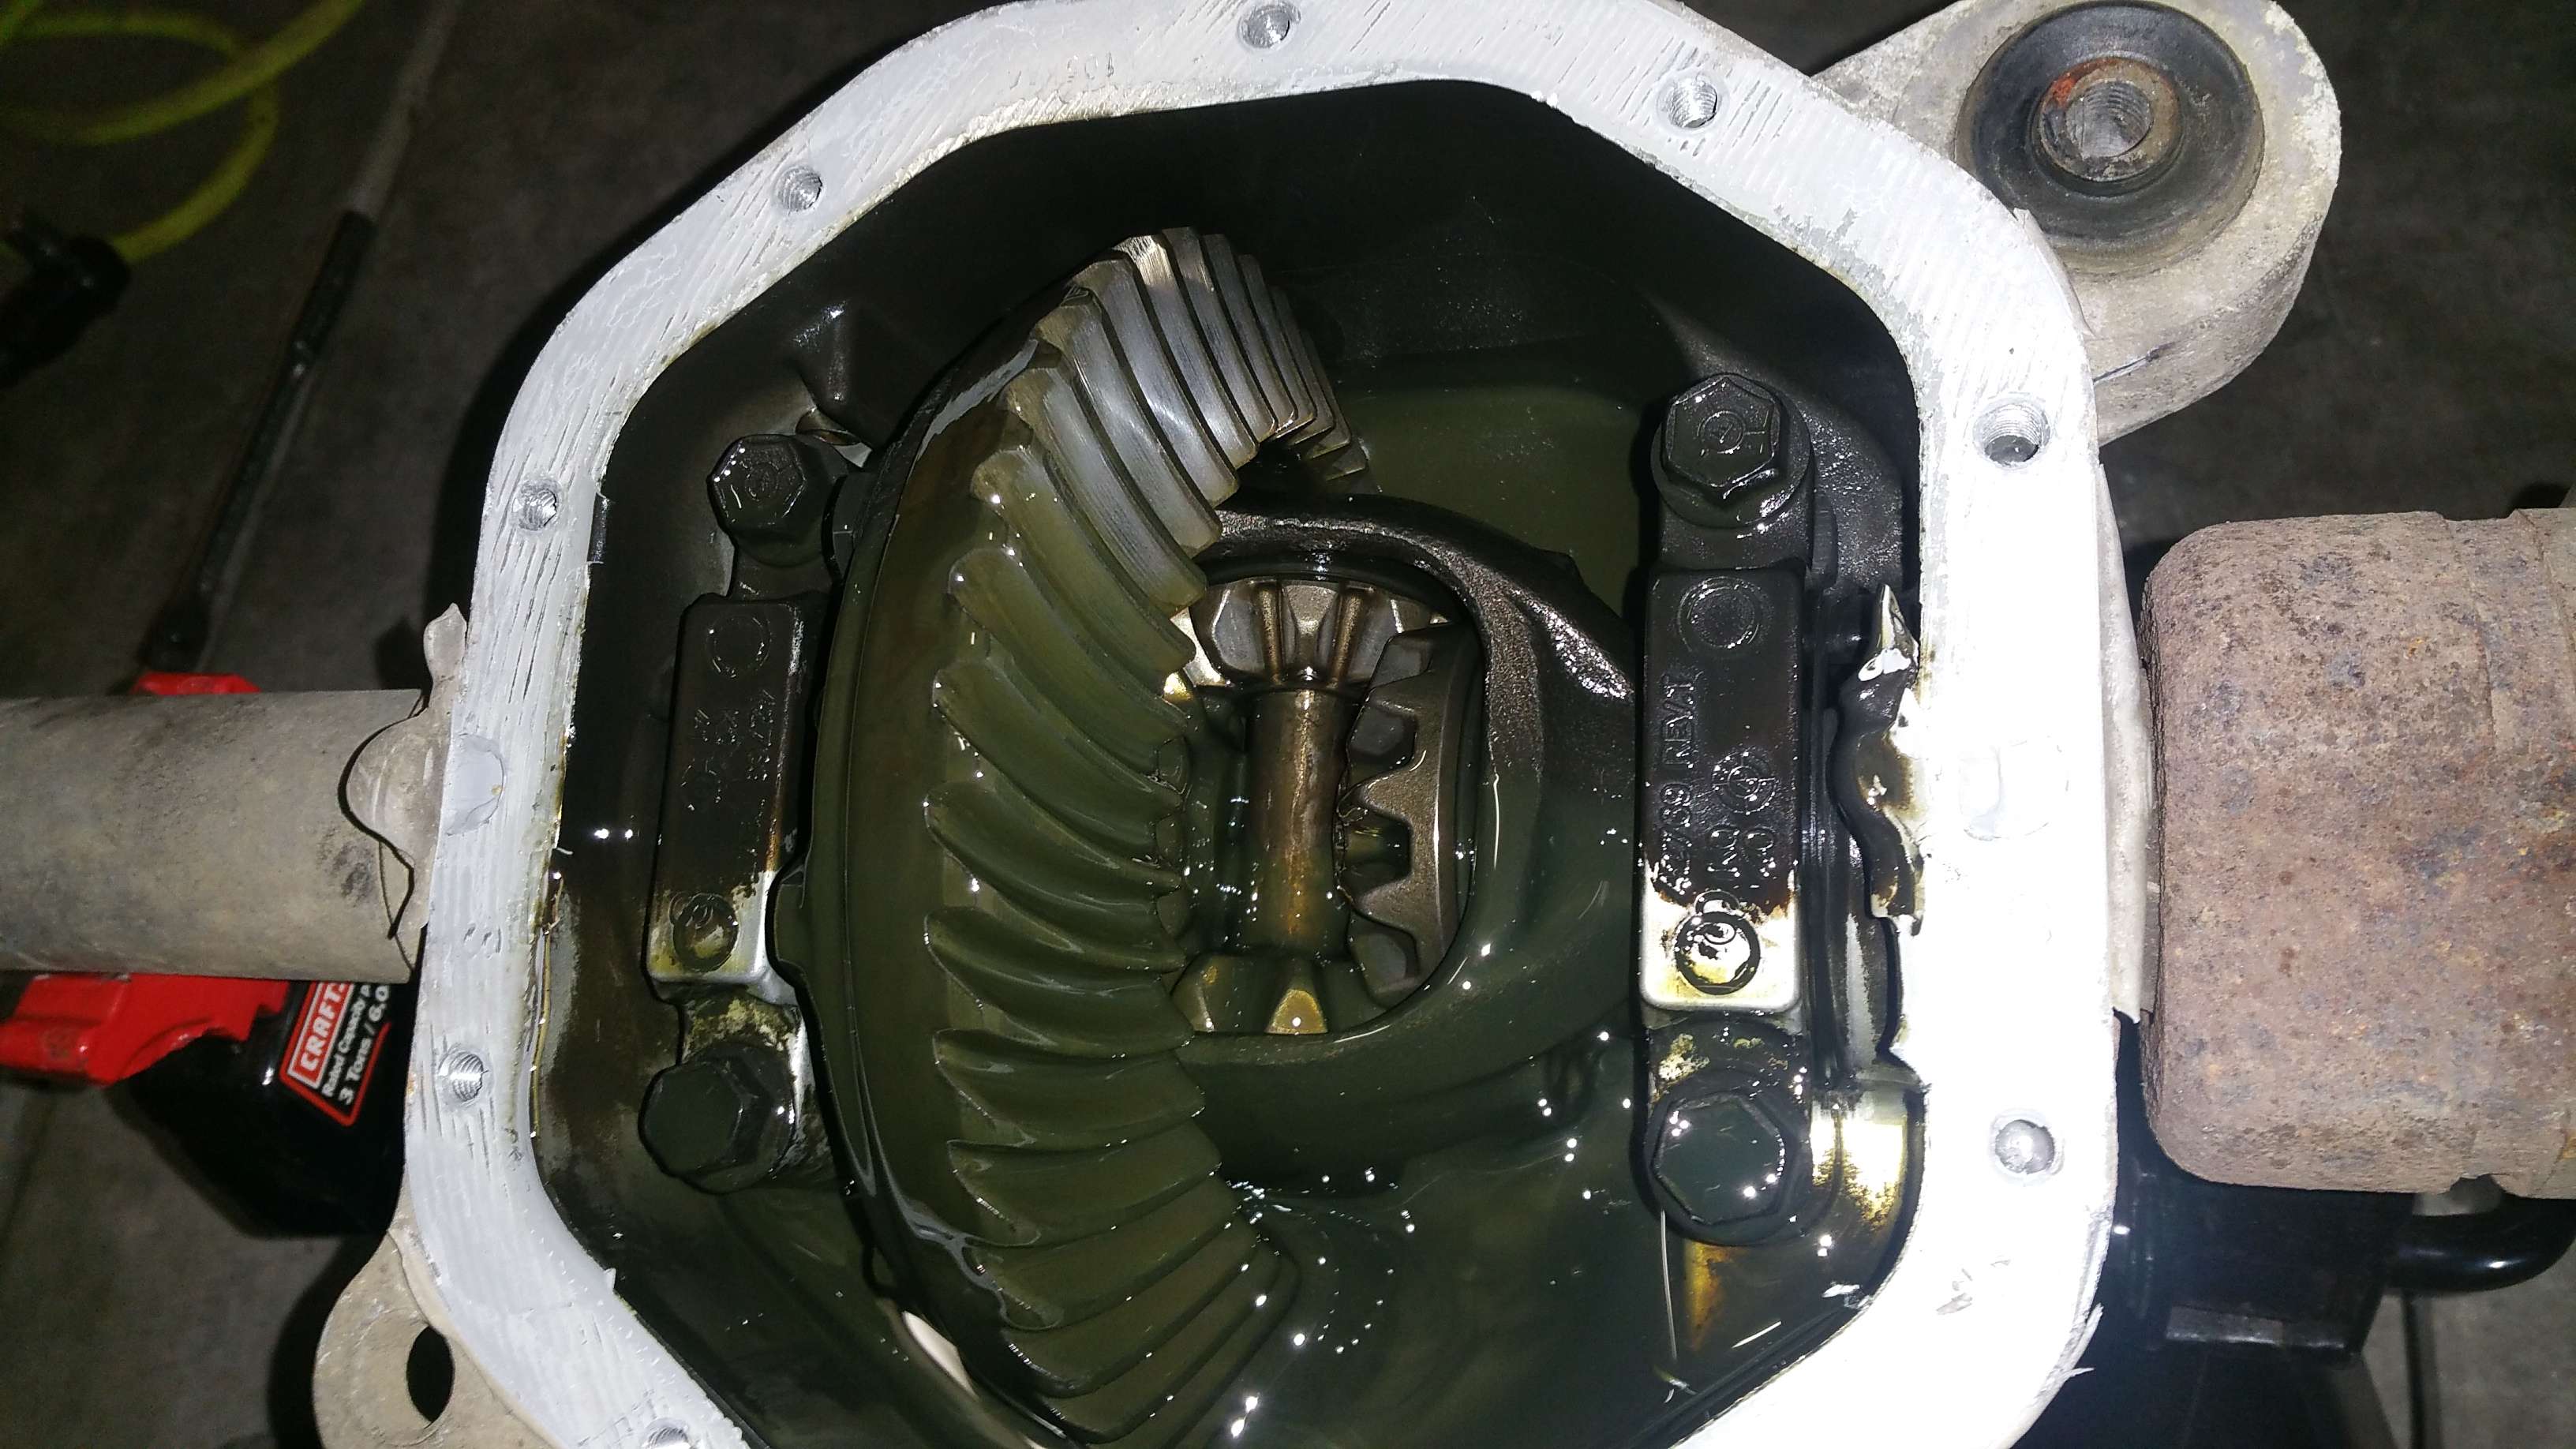
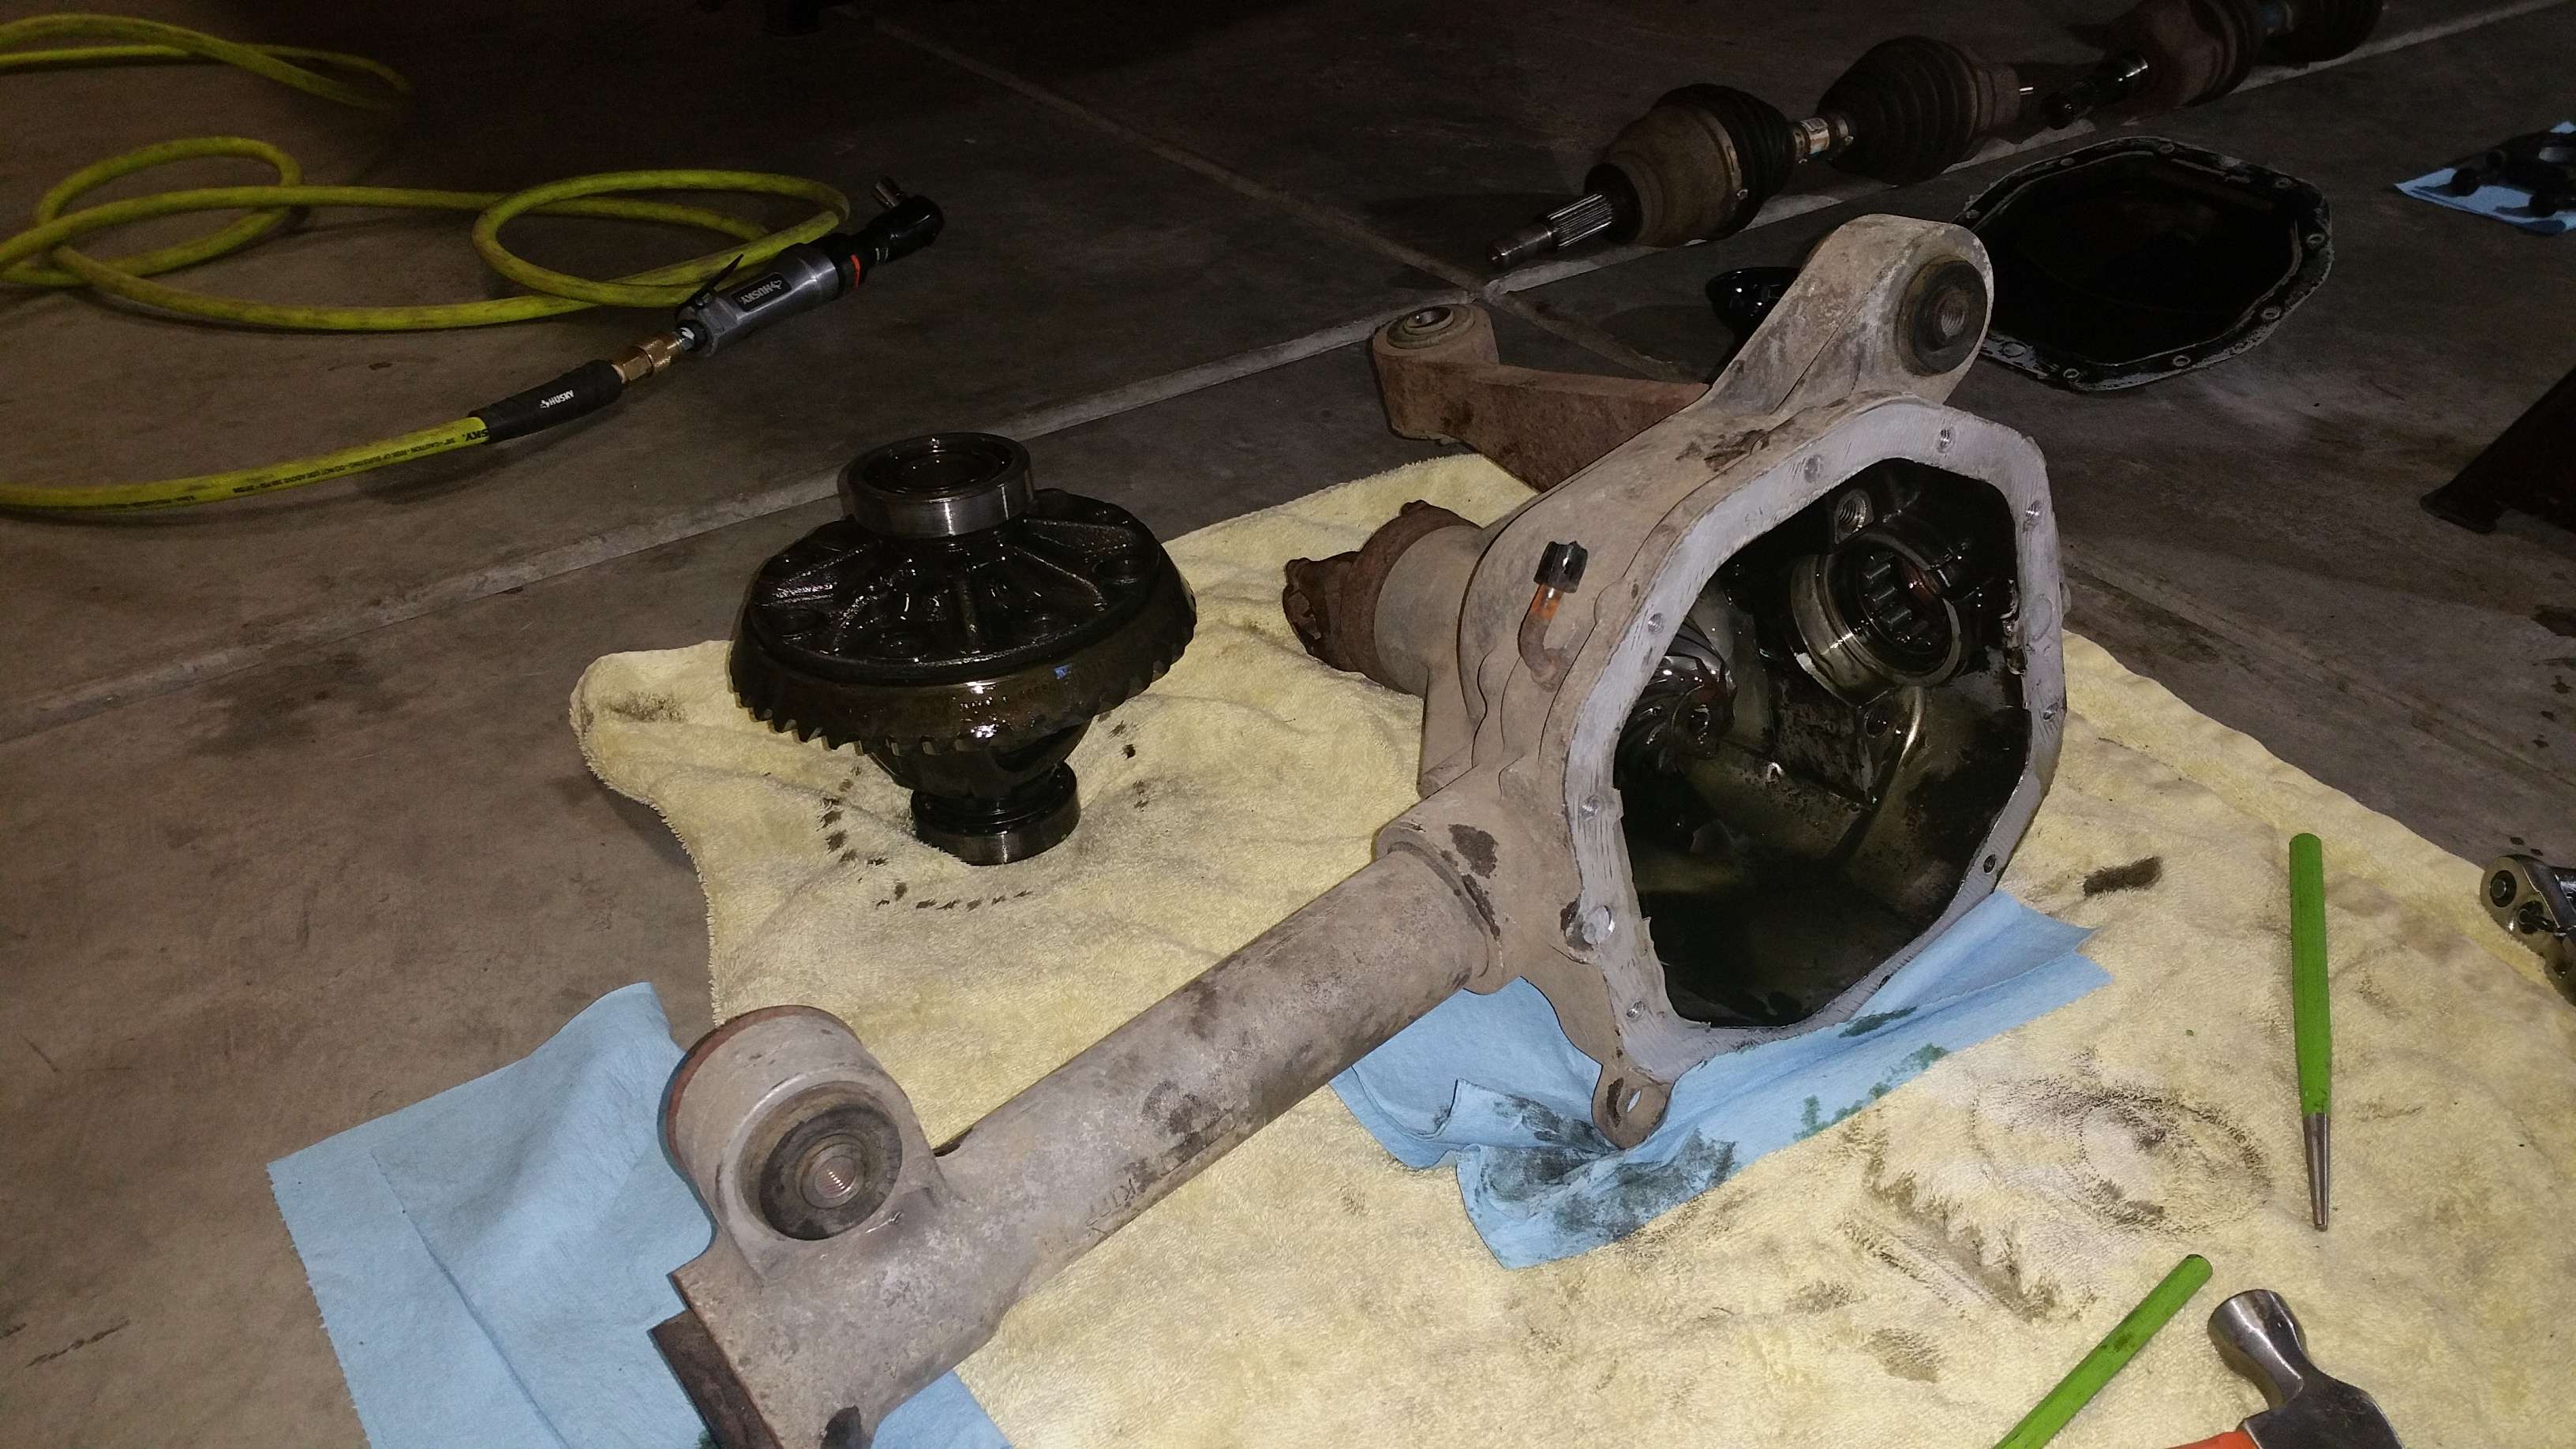
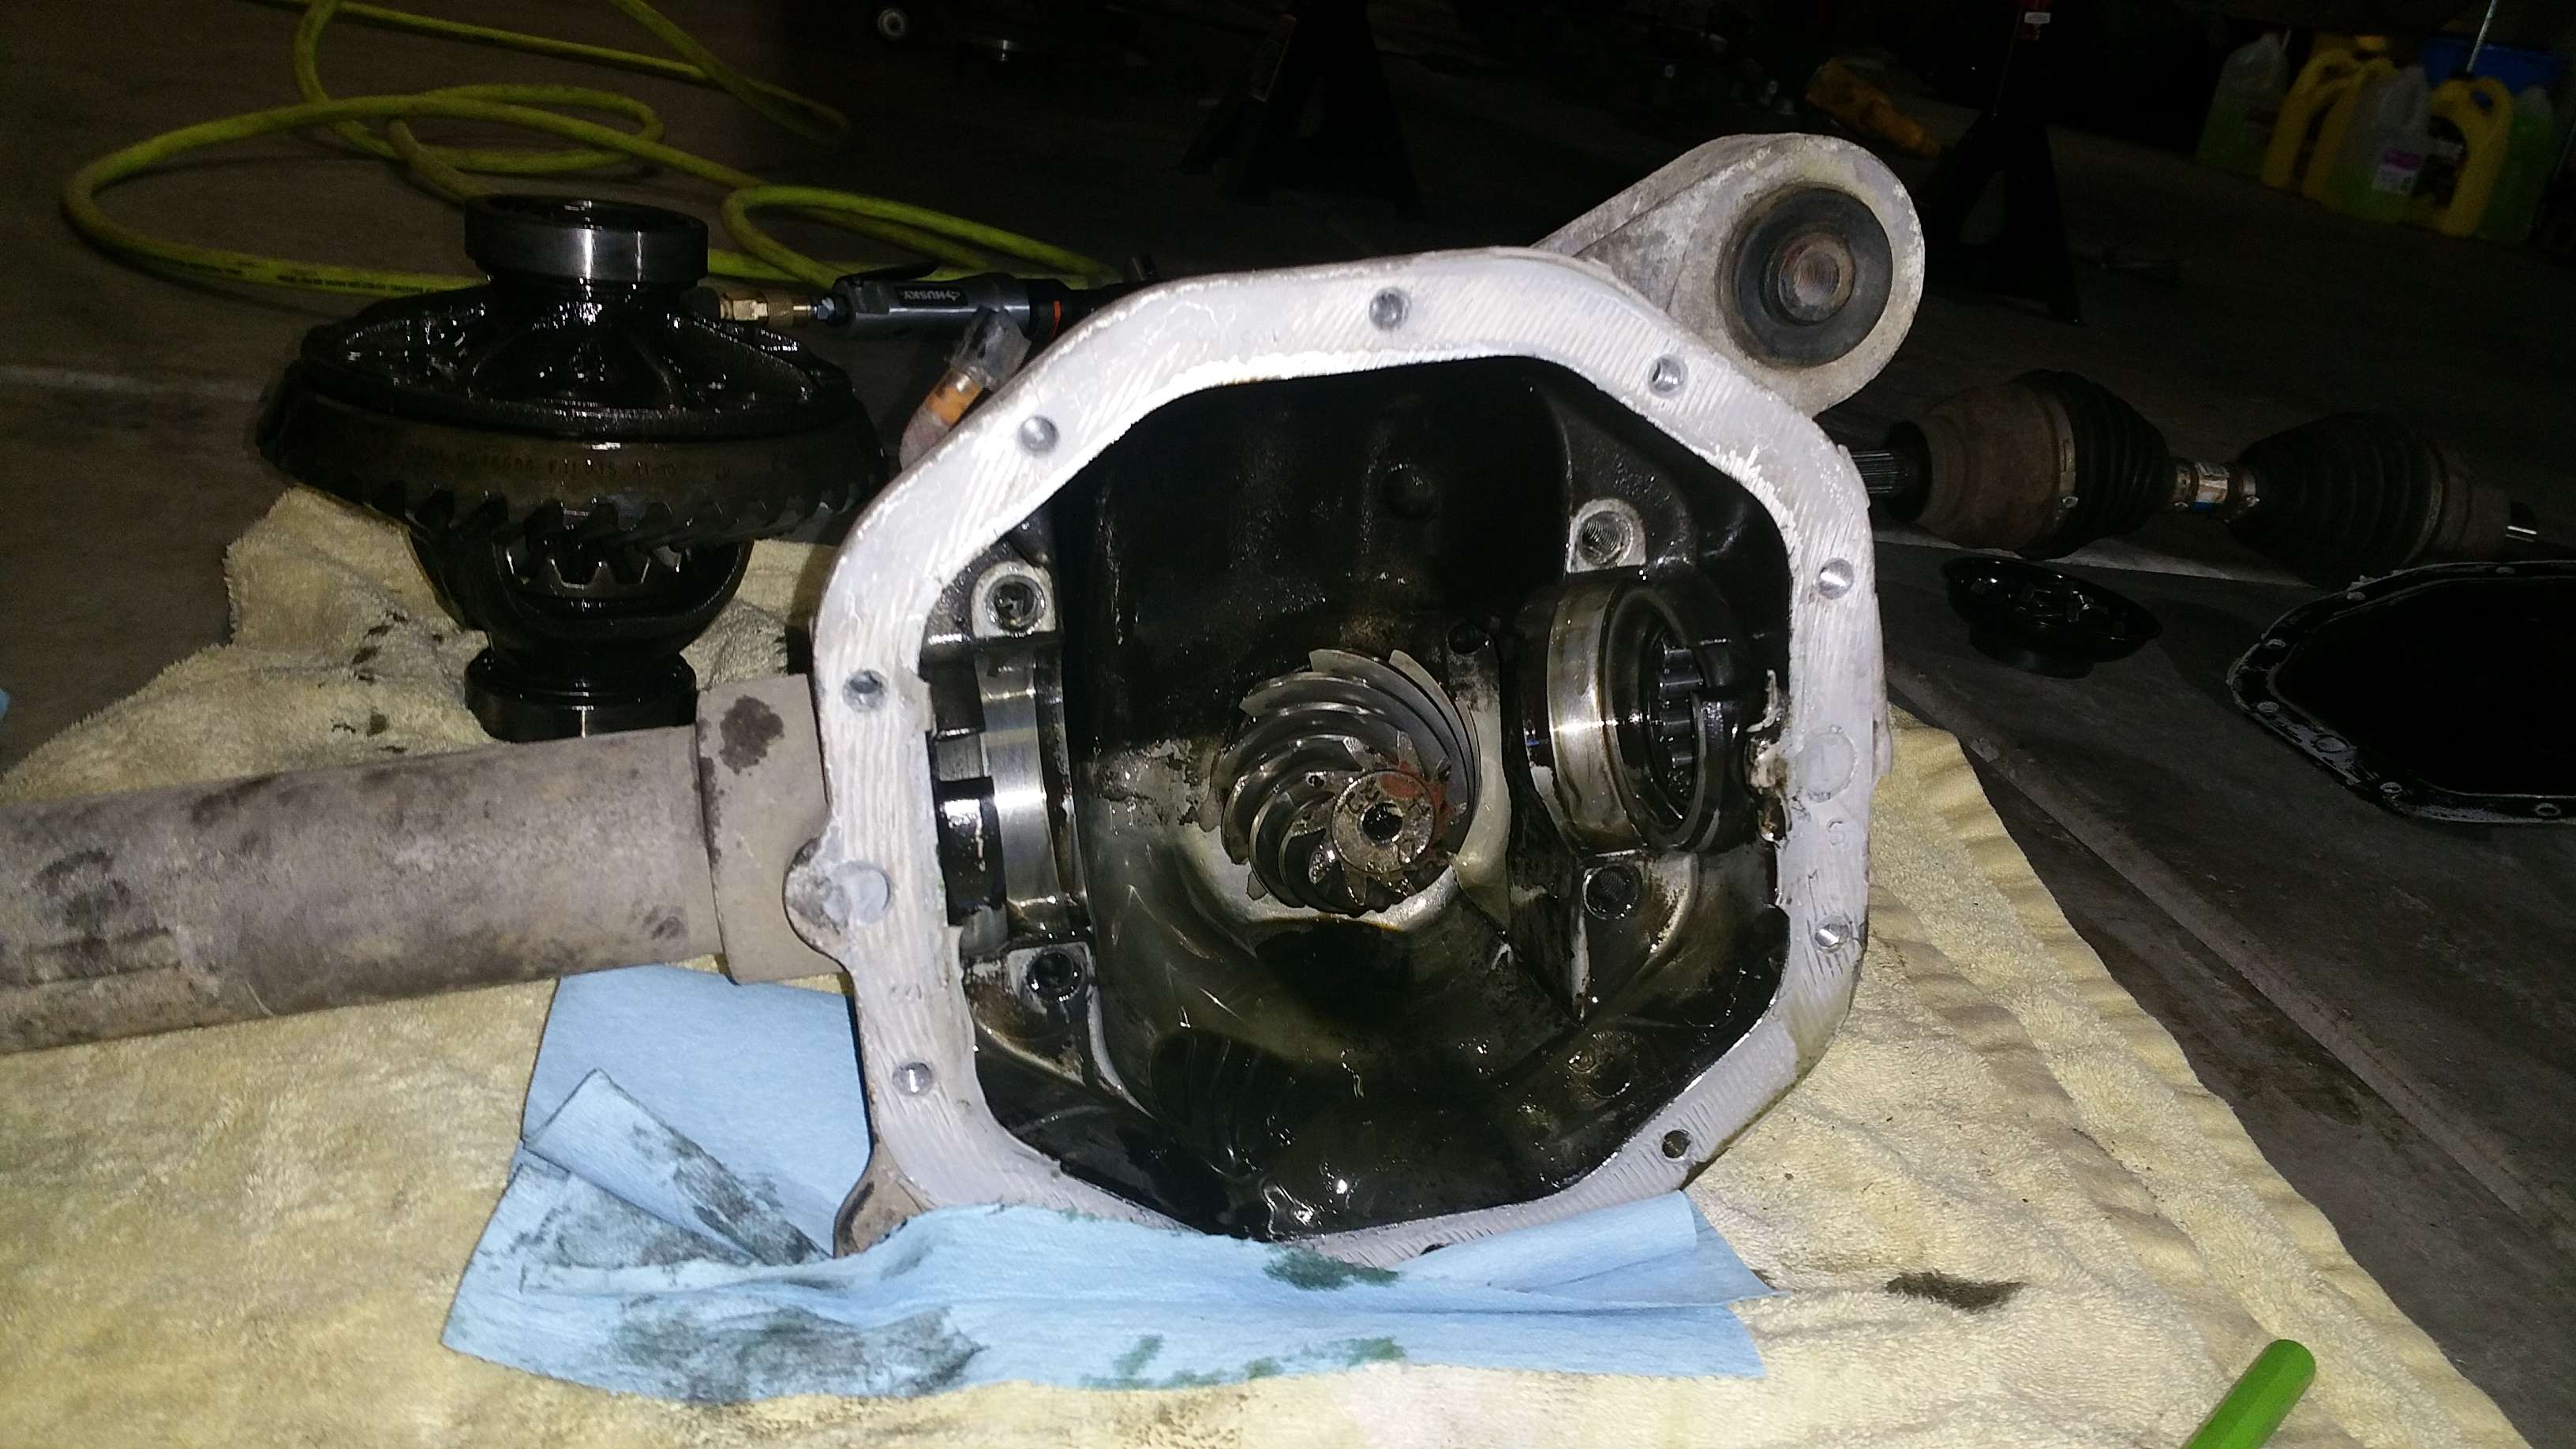
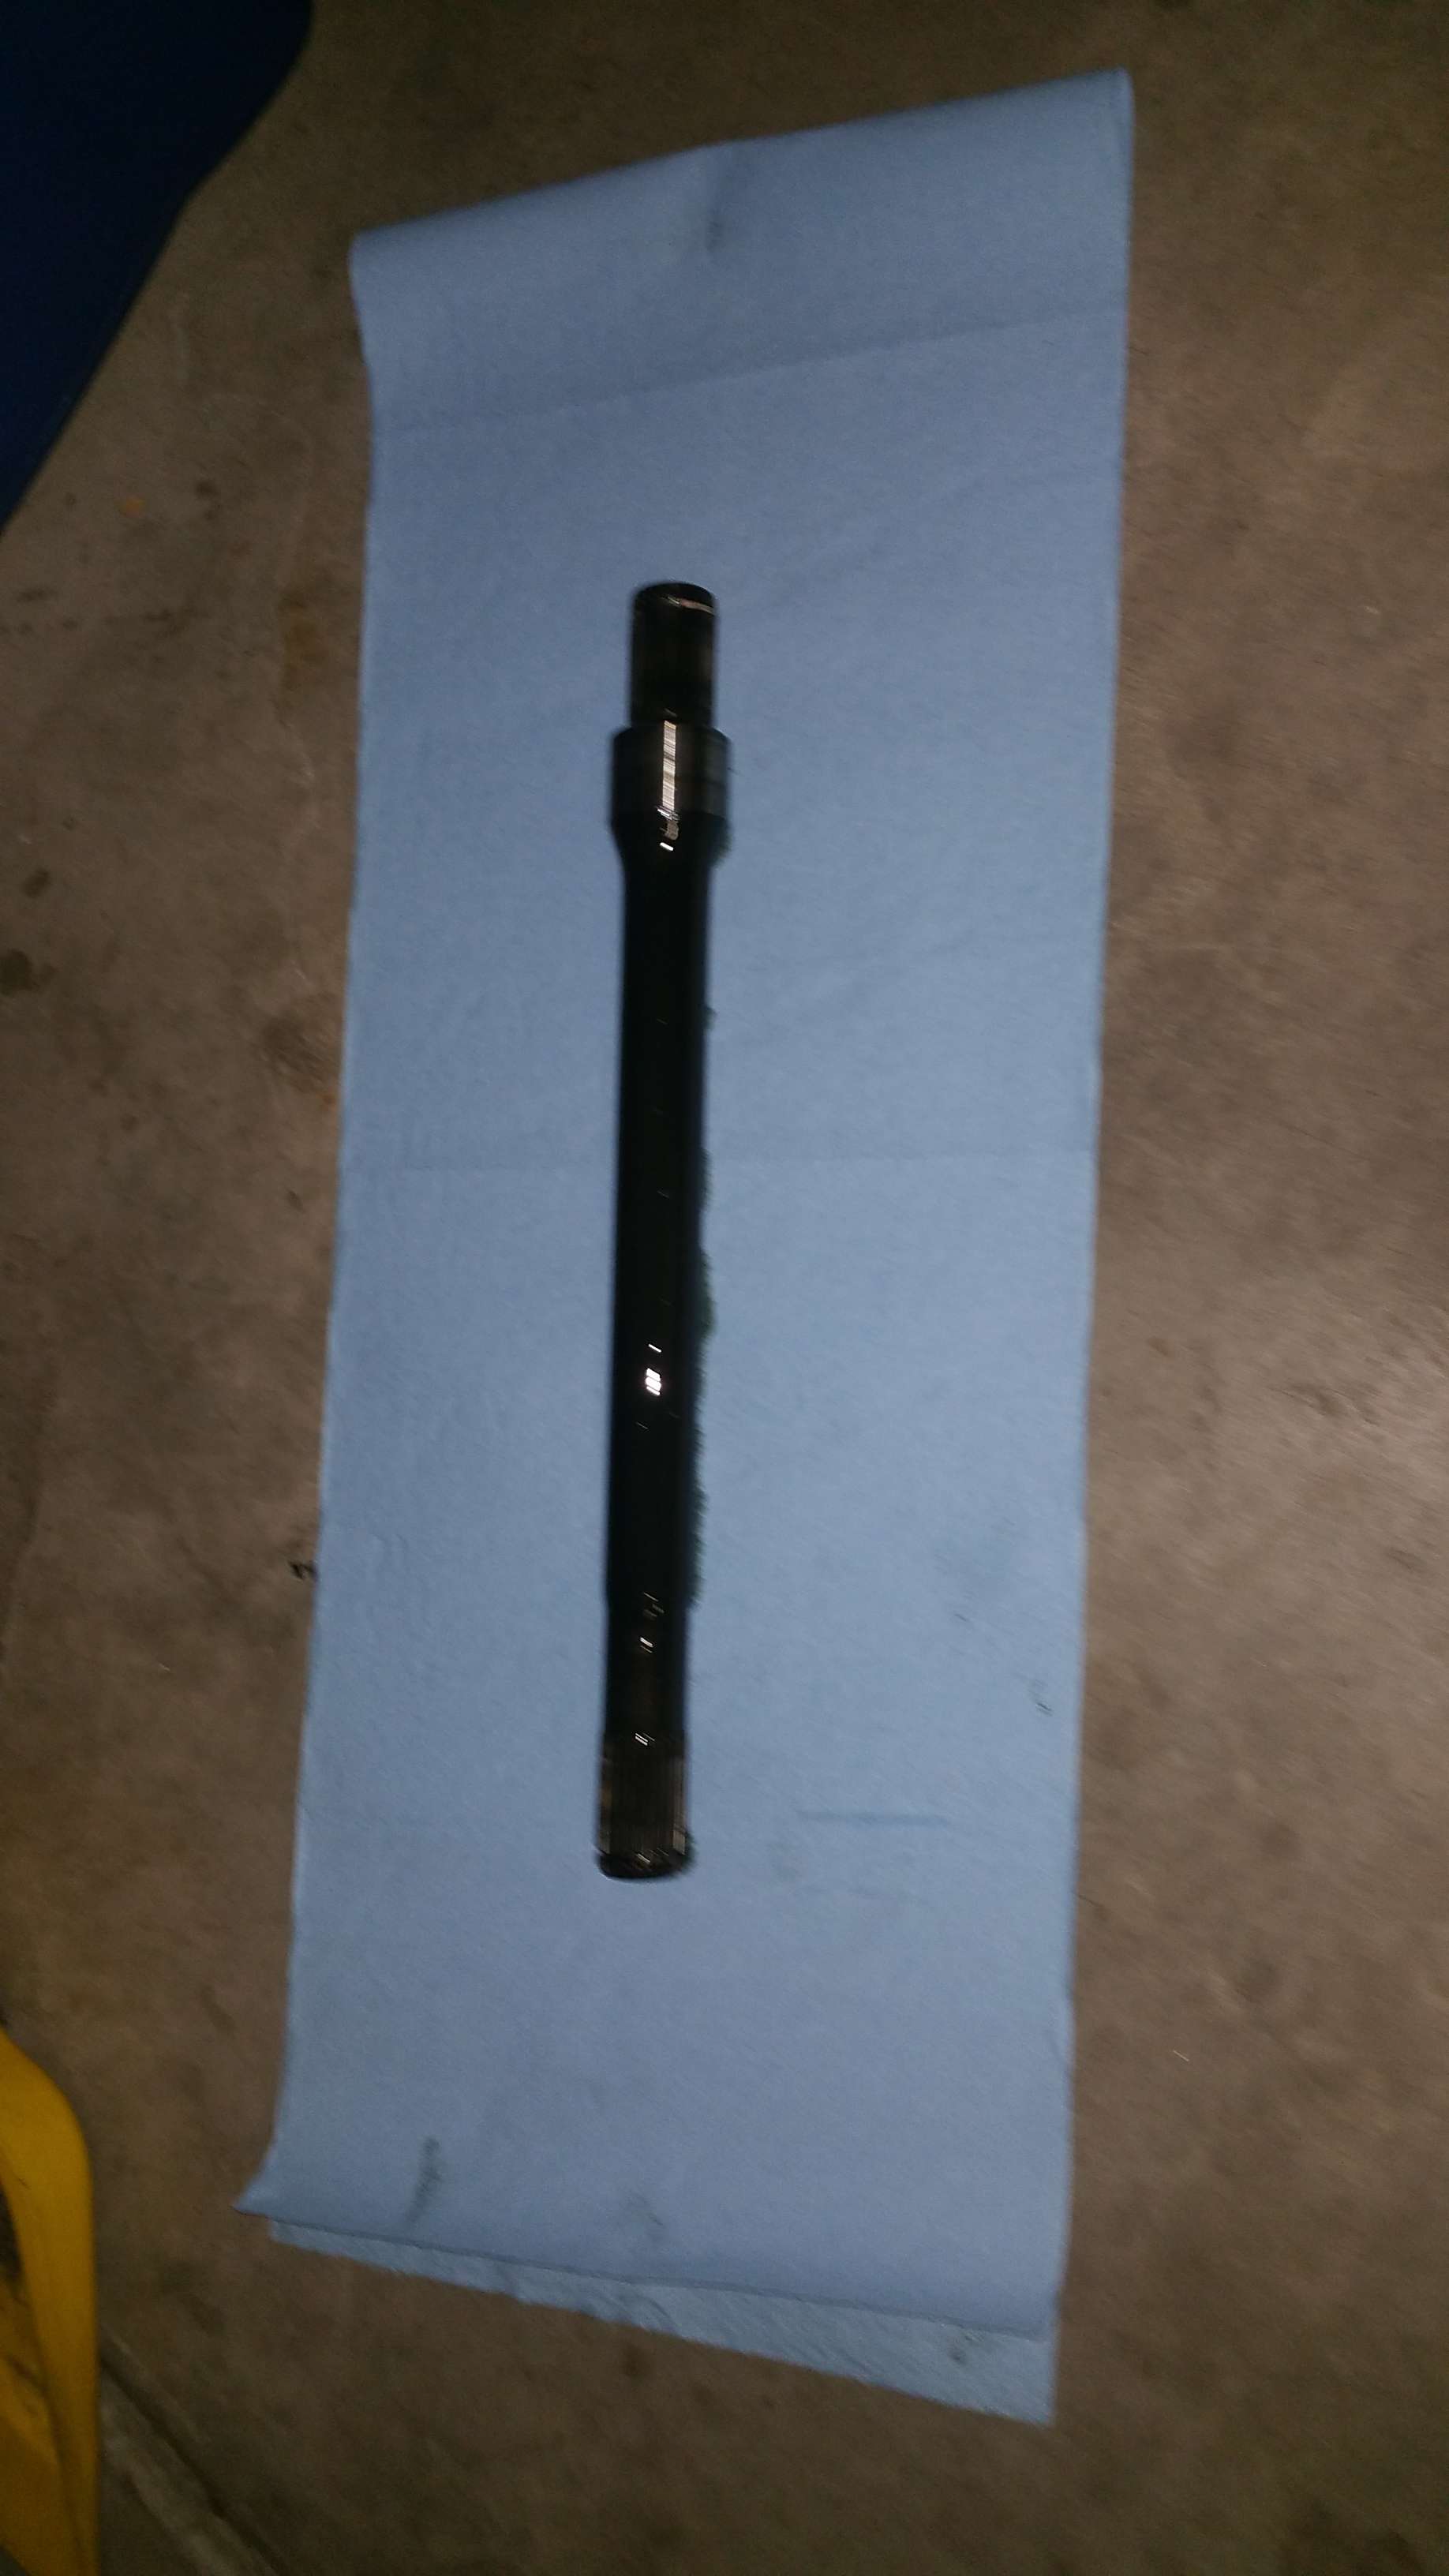
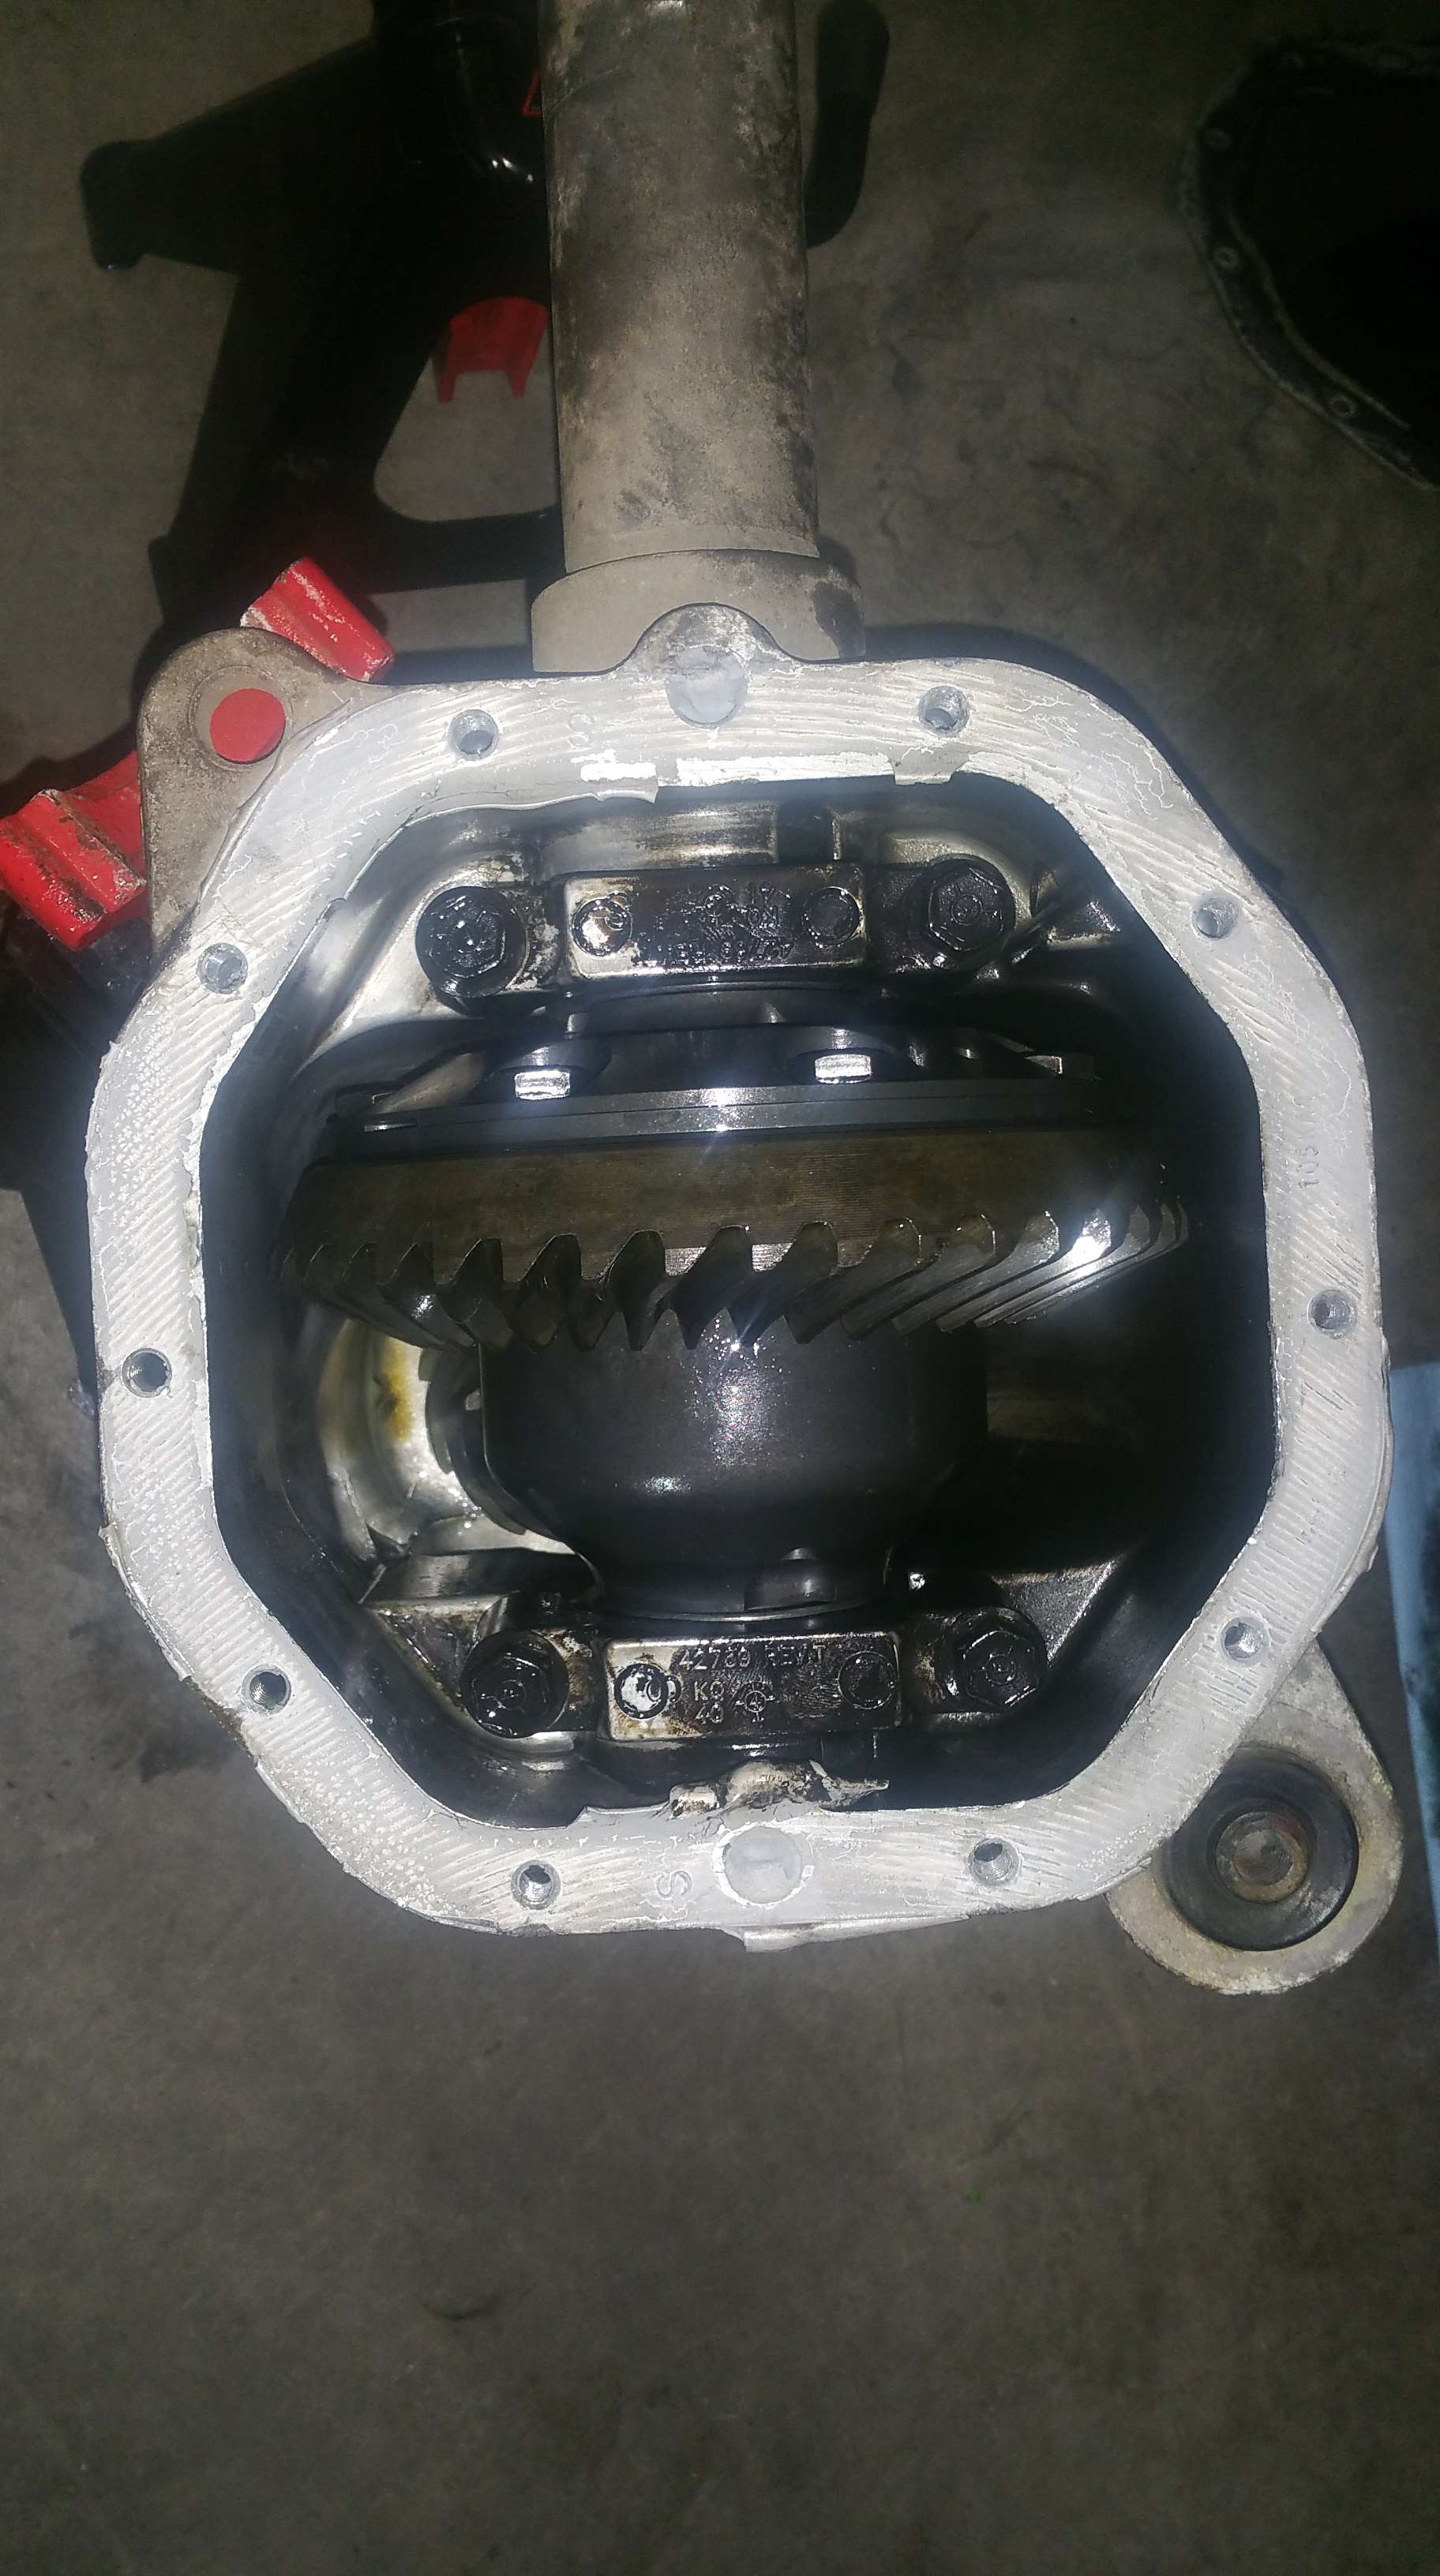
The front Torsen I got for $550. It is effing awesome. My truck has yet to get stuck, and I have done some pretty scary **** with it. I tried setting the backlash myself, but ended up having a pro do it. I also tapped the bottom of the housing for an oil drain so I can service it without removing the whole thing (thanks Ford).
The fox shocks were tuned 40/60 from the factory, and after 6 months of driving, I decided they were way to stiff, so I eventually had them tuned for $50 down to 30/60 and it feels way better. Smooth on the road, but still stiff enough to make very hard impacts off road smooth also. I replaced the cv's and front wheel bearings at the same time, and then had it re-aligned. Where I screwed up was not allowing the coils to settle before getting it initially aligned. They sagged after a few weeks (750lbs Eibachs) and my wheels were off for several months before I dug back in to tune the shocks and replace some stuff, adjusted the ride height and got it realigned. It seems to be fine now.
Some of my welds, particularly on the bumpstop cups, were acceptable but look like ****. I was running the welder off of 120V because I had not yet made a 240V extension cord so I could plug it into the dryer outlet in the house. The welder kept tripping the breaker after about 5-10 seconds of welding, so I had to do short bursts everywhere. The gusset welds came out just fine. I just had the power cranked up on the cup welds since those lower arms are so thick. They aren't going anywhere though.


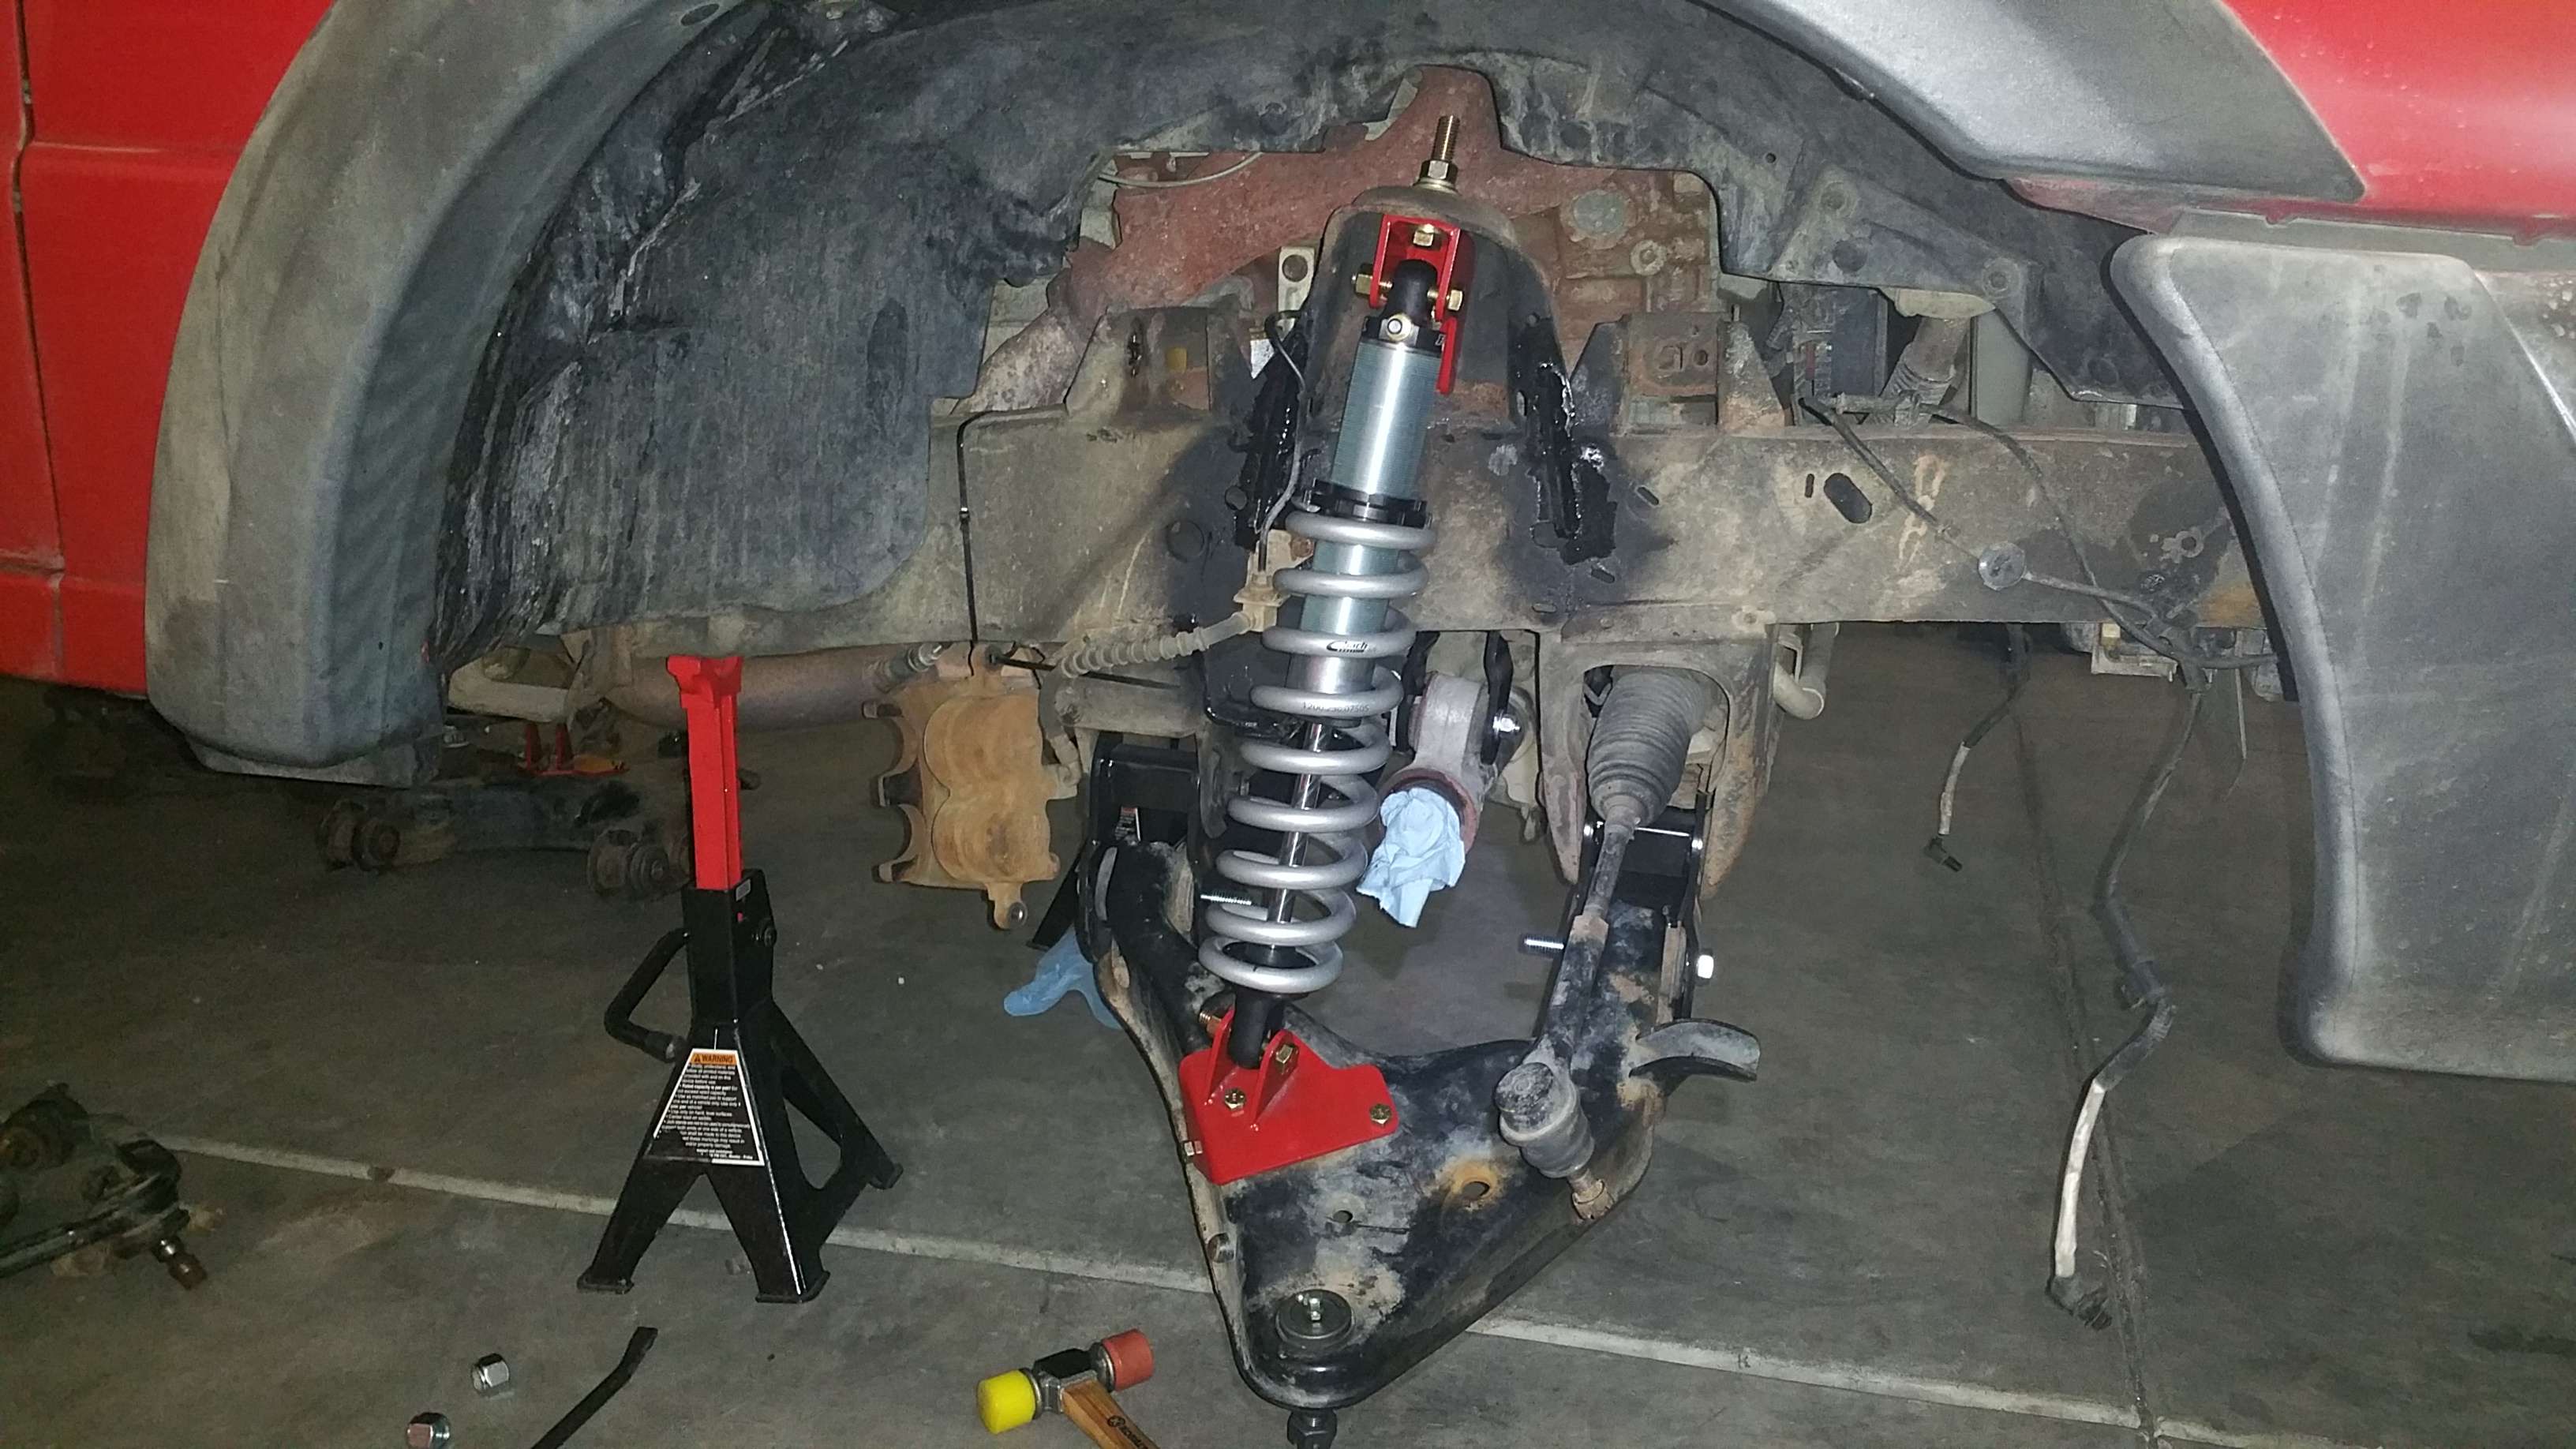
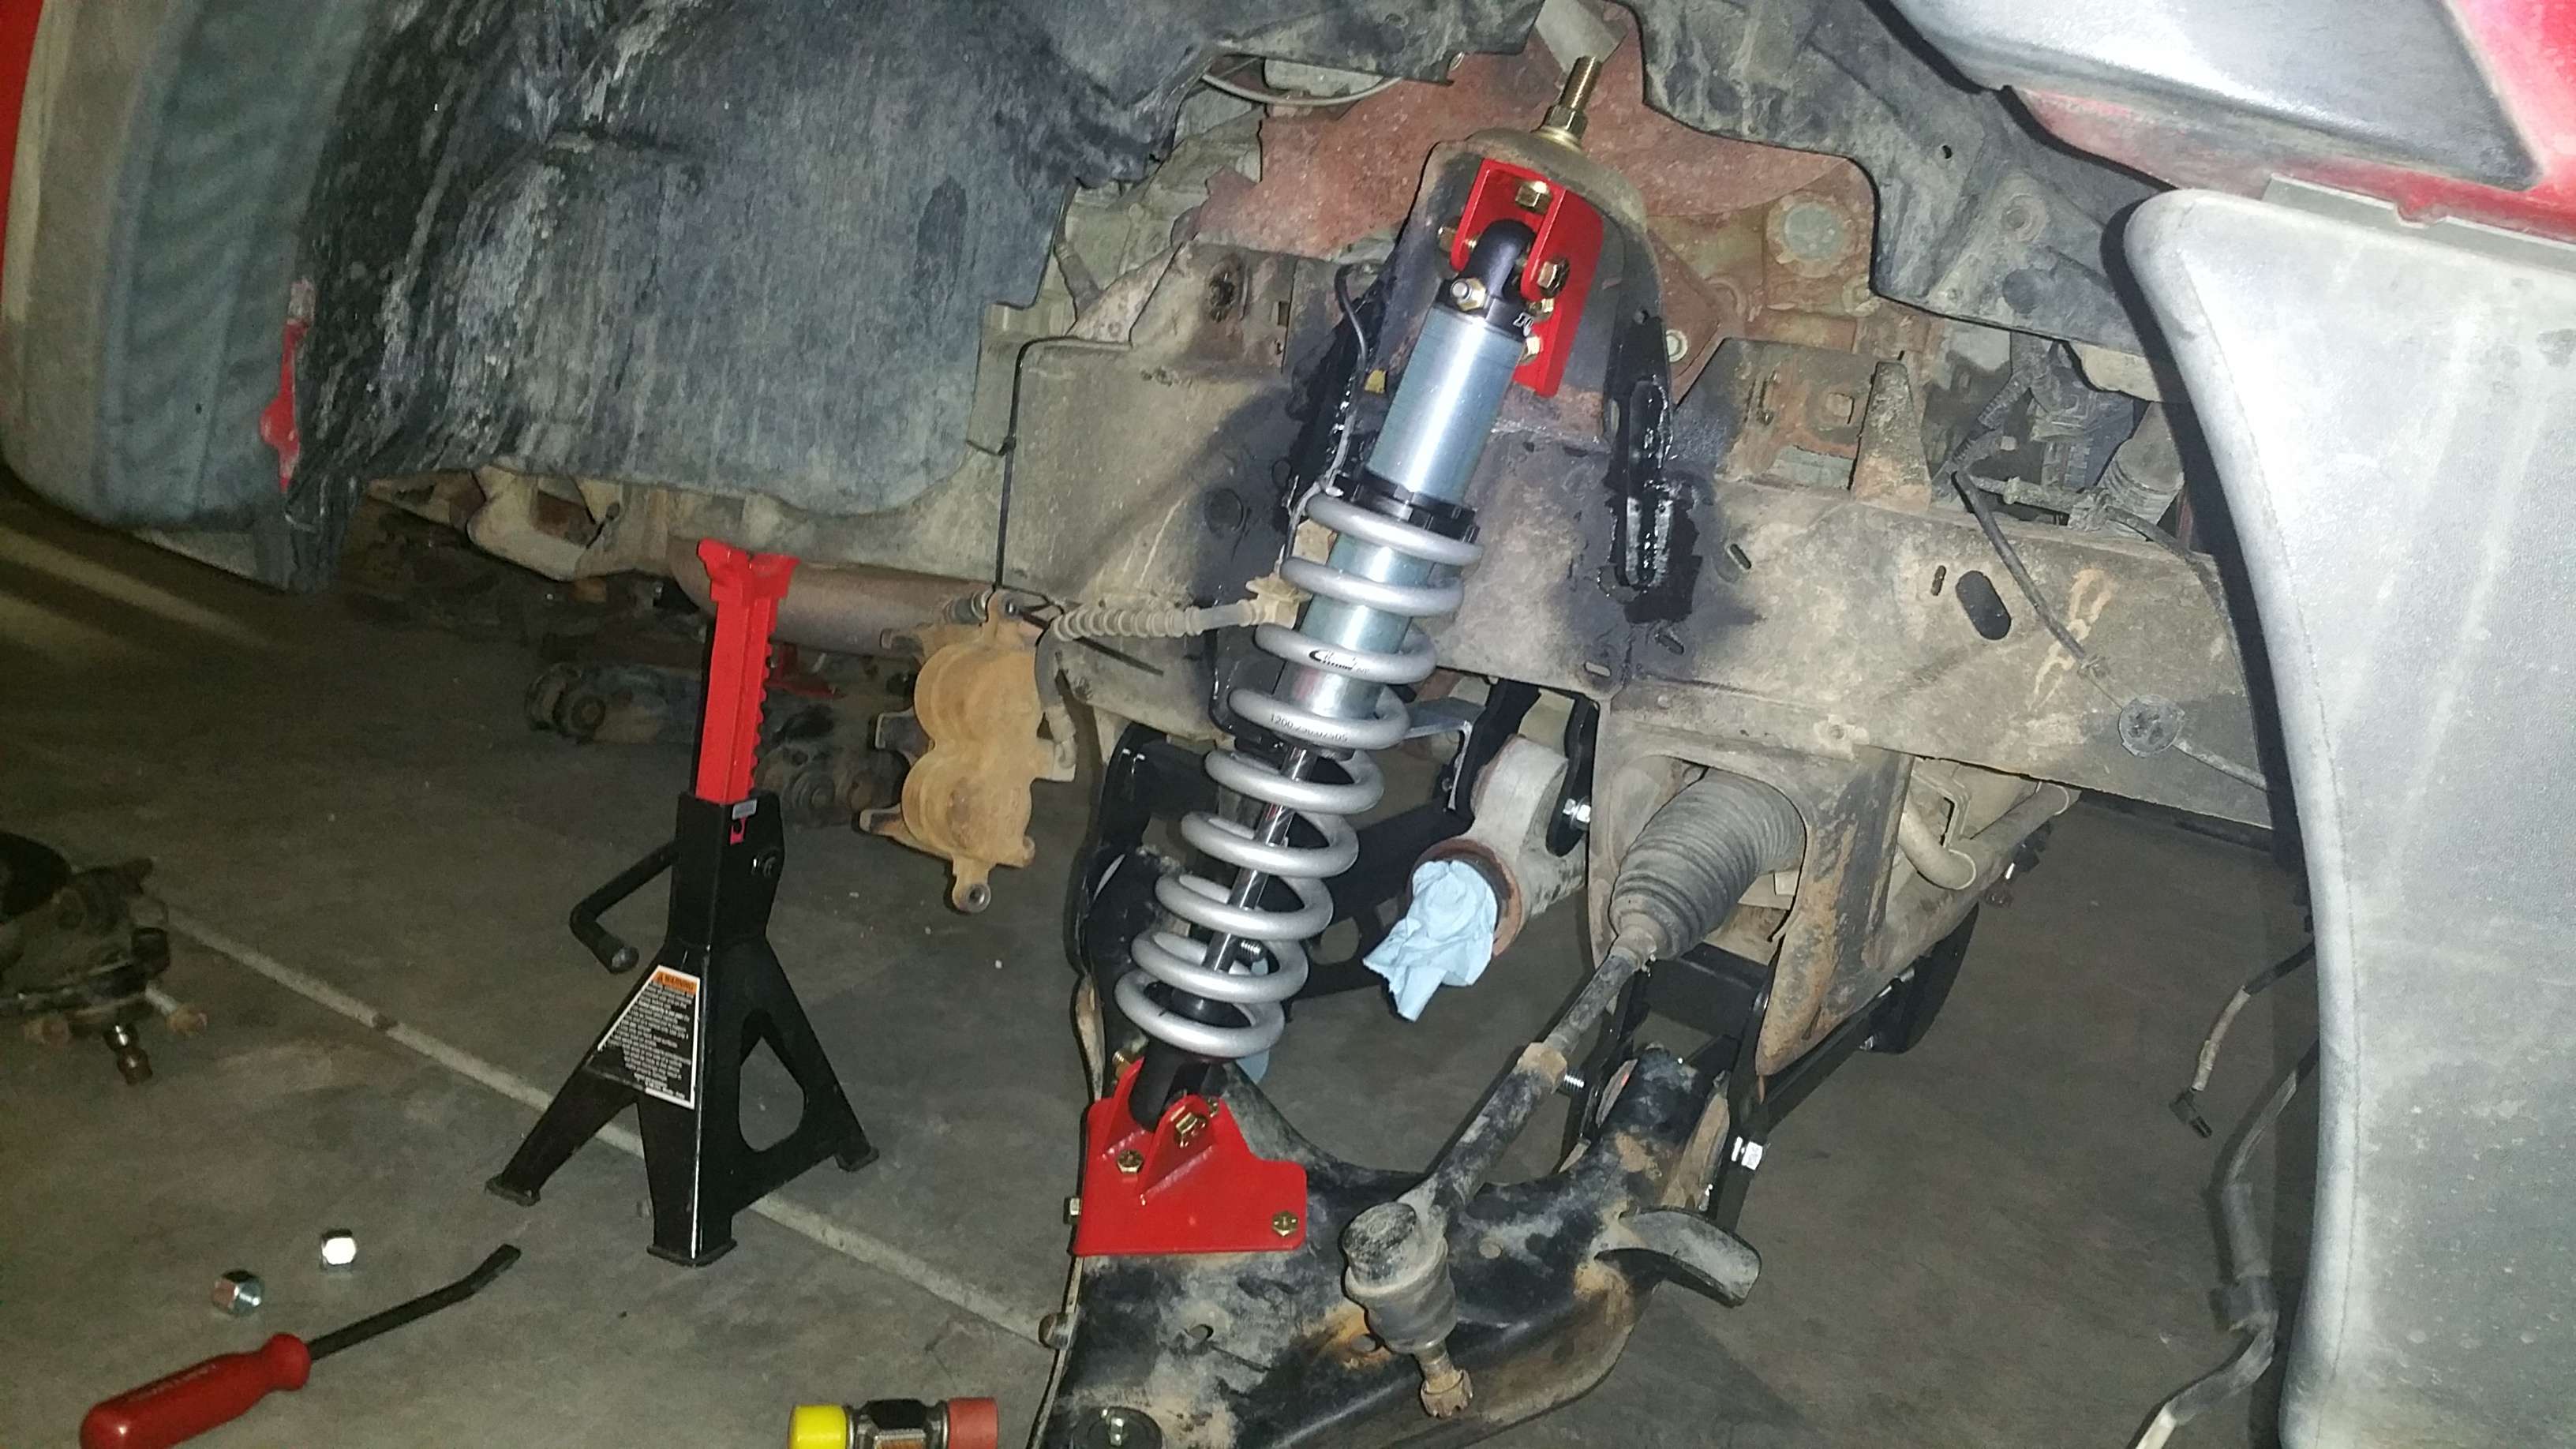
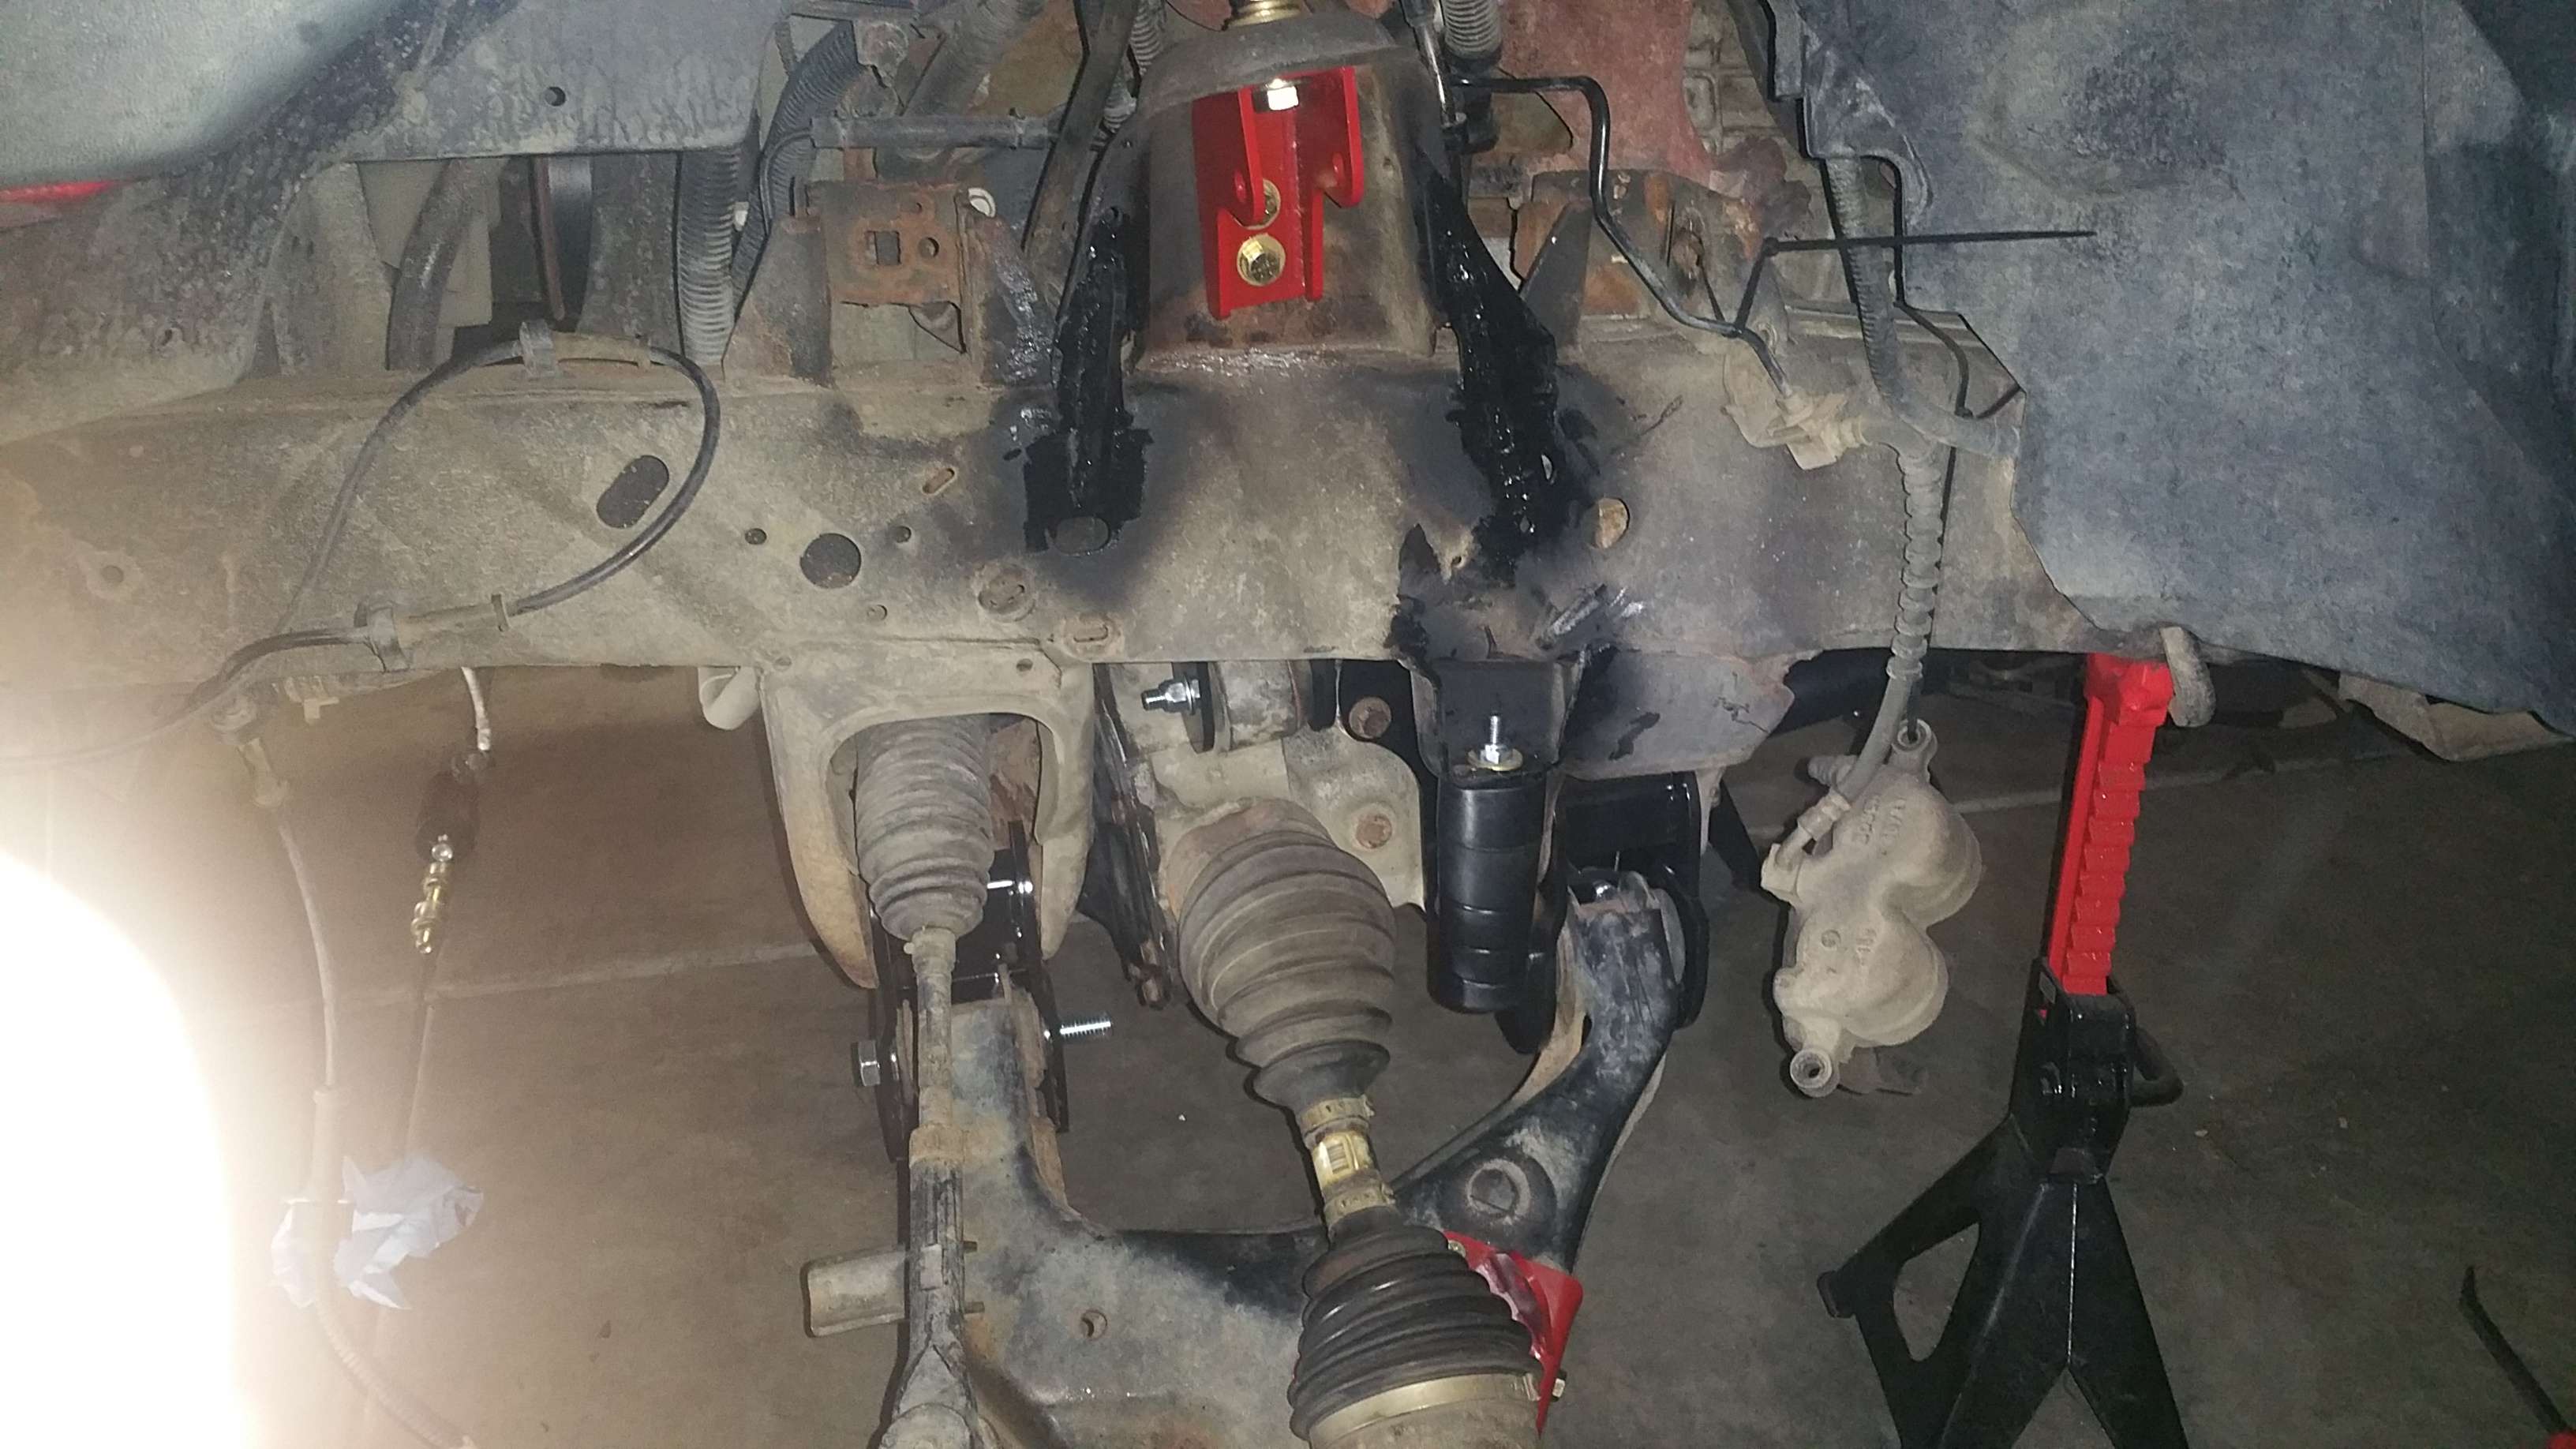
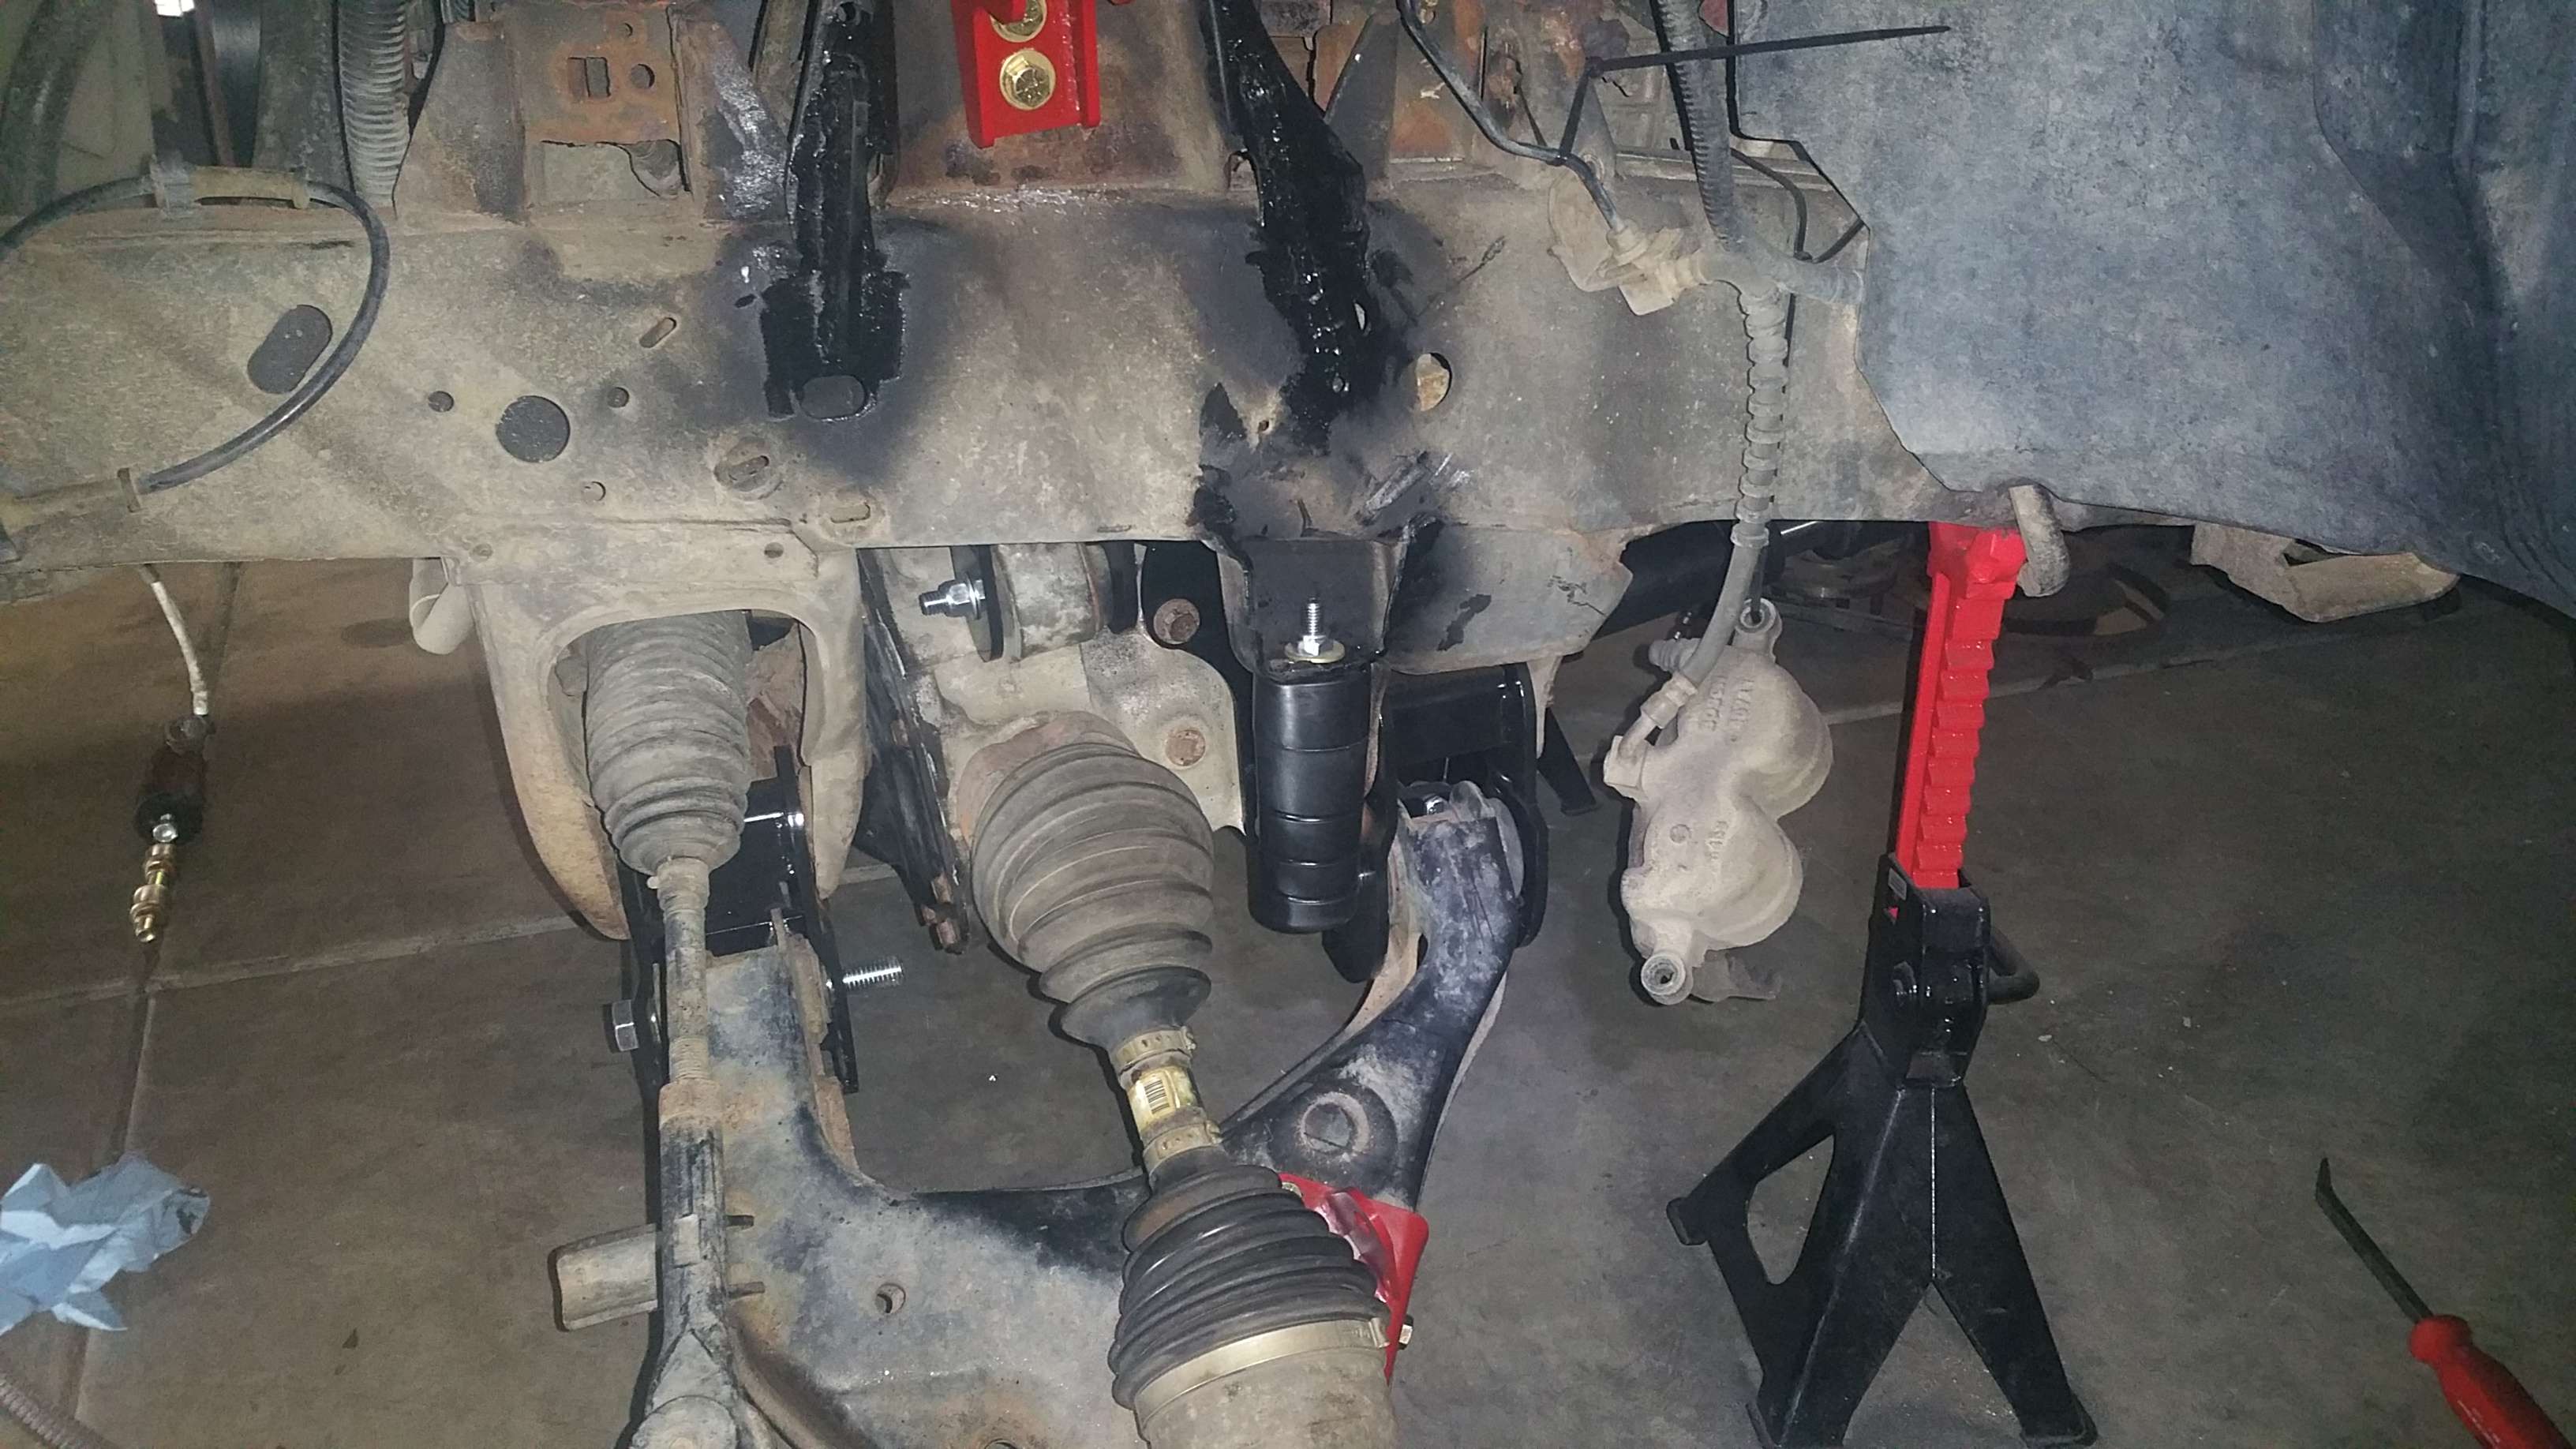
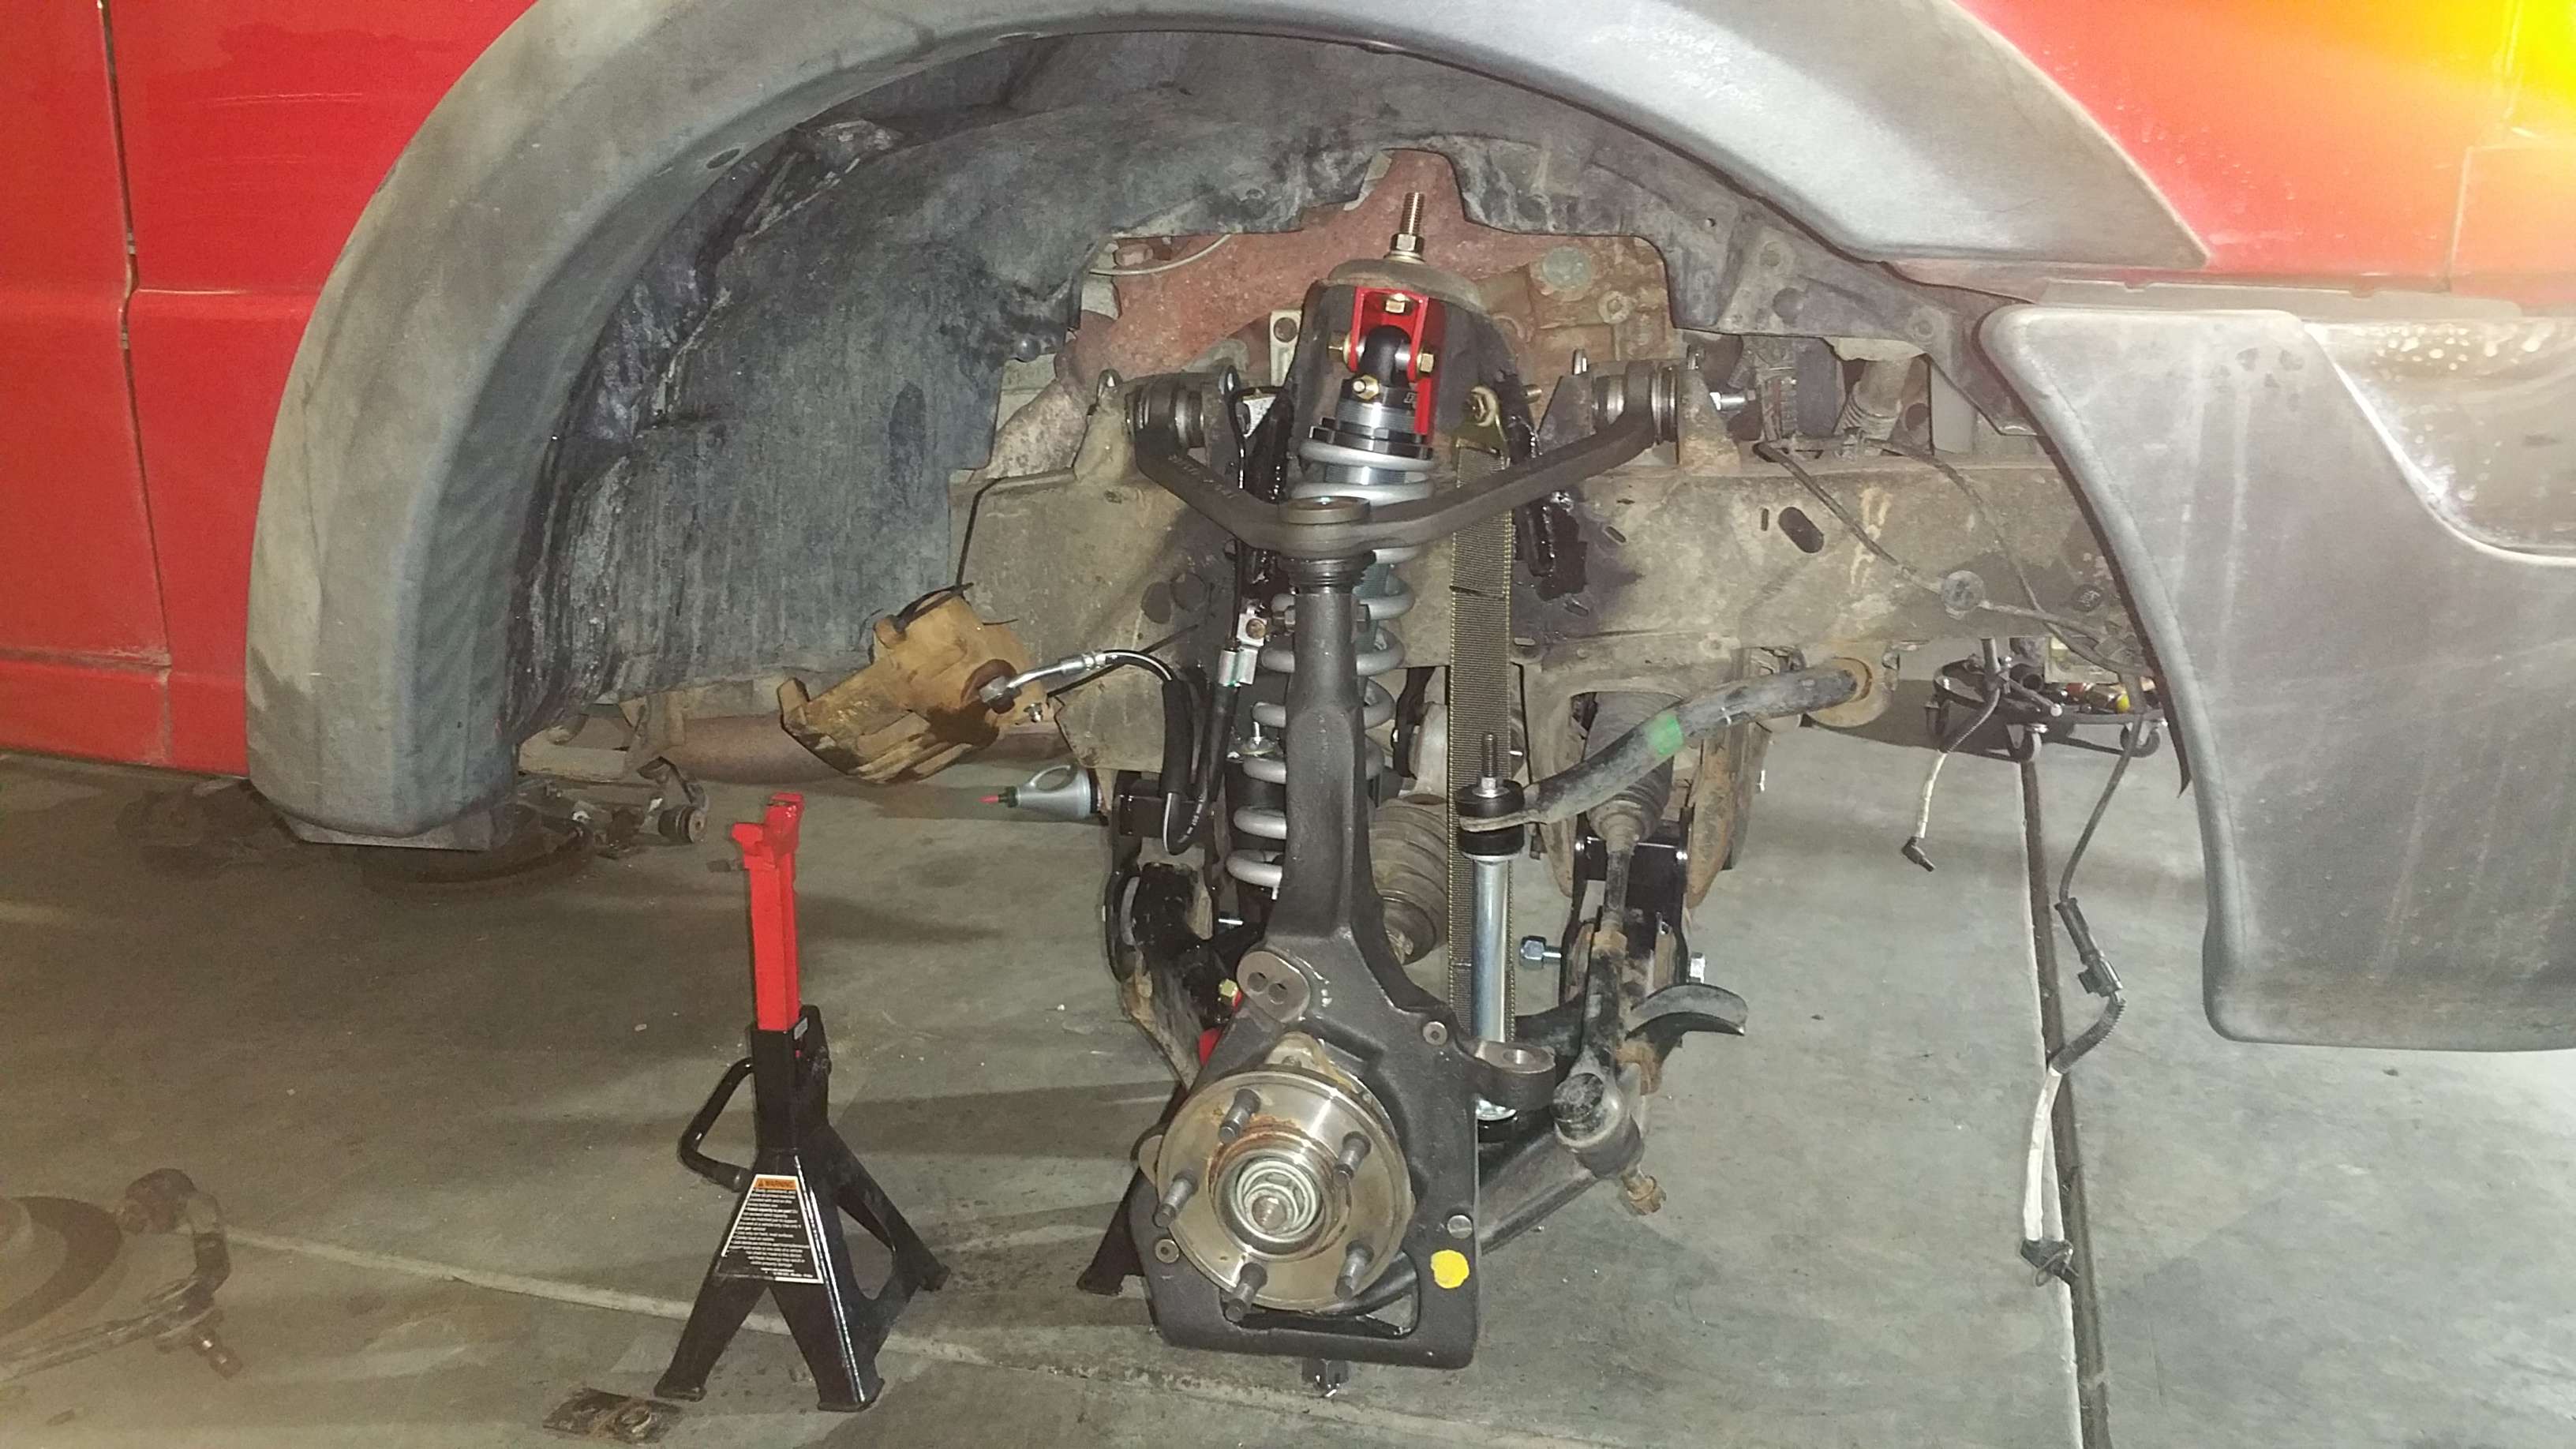
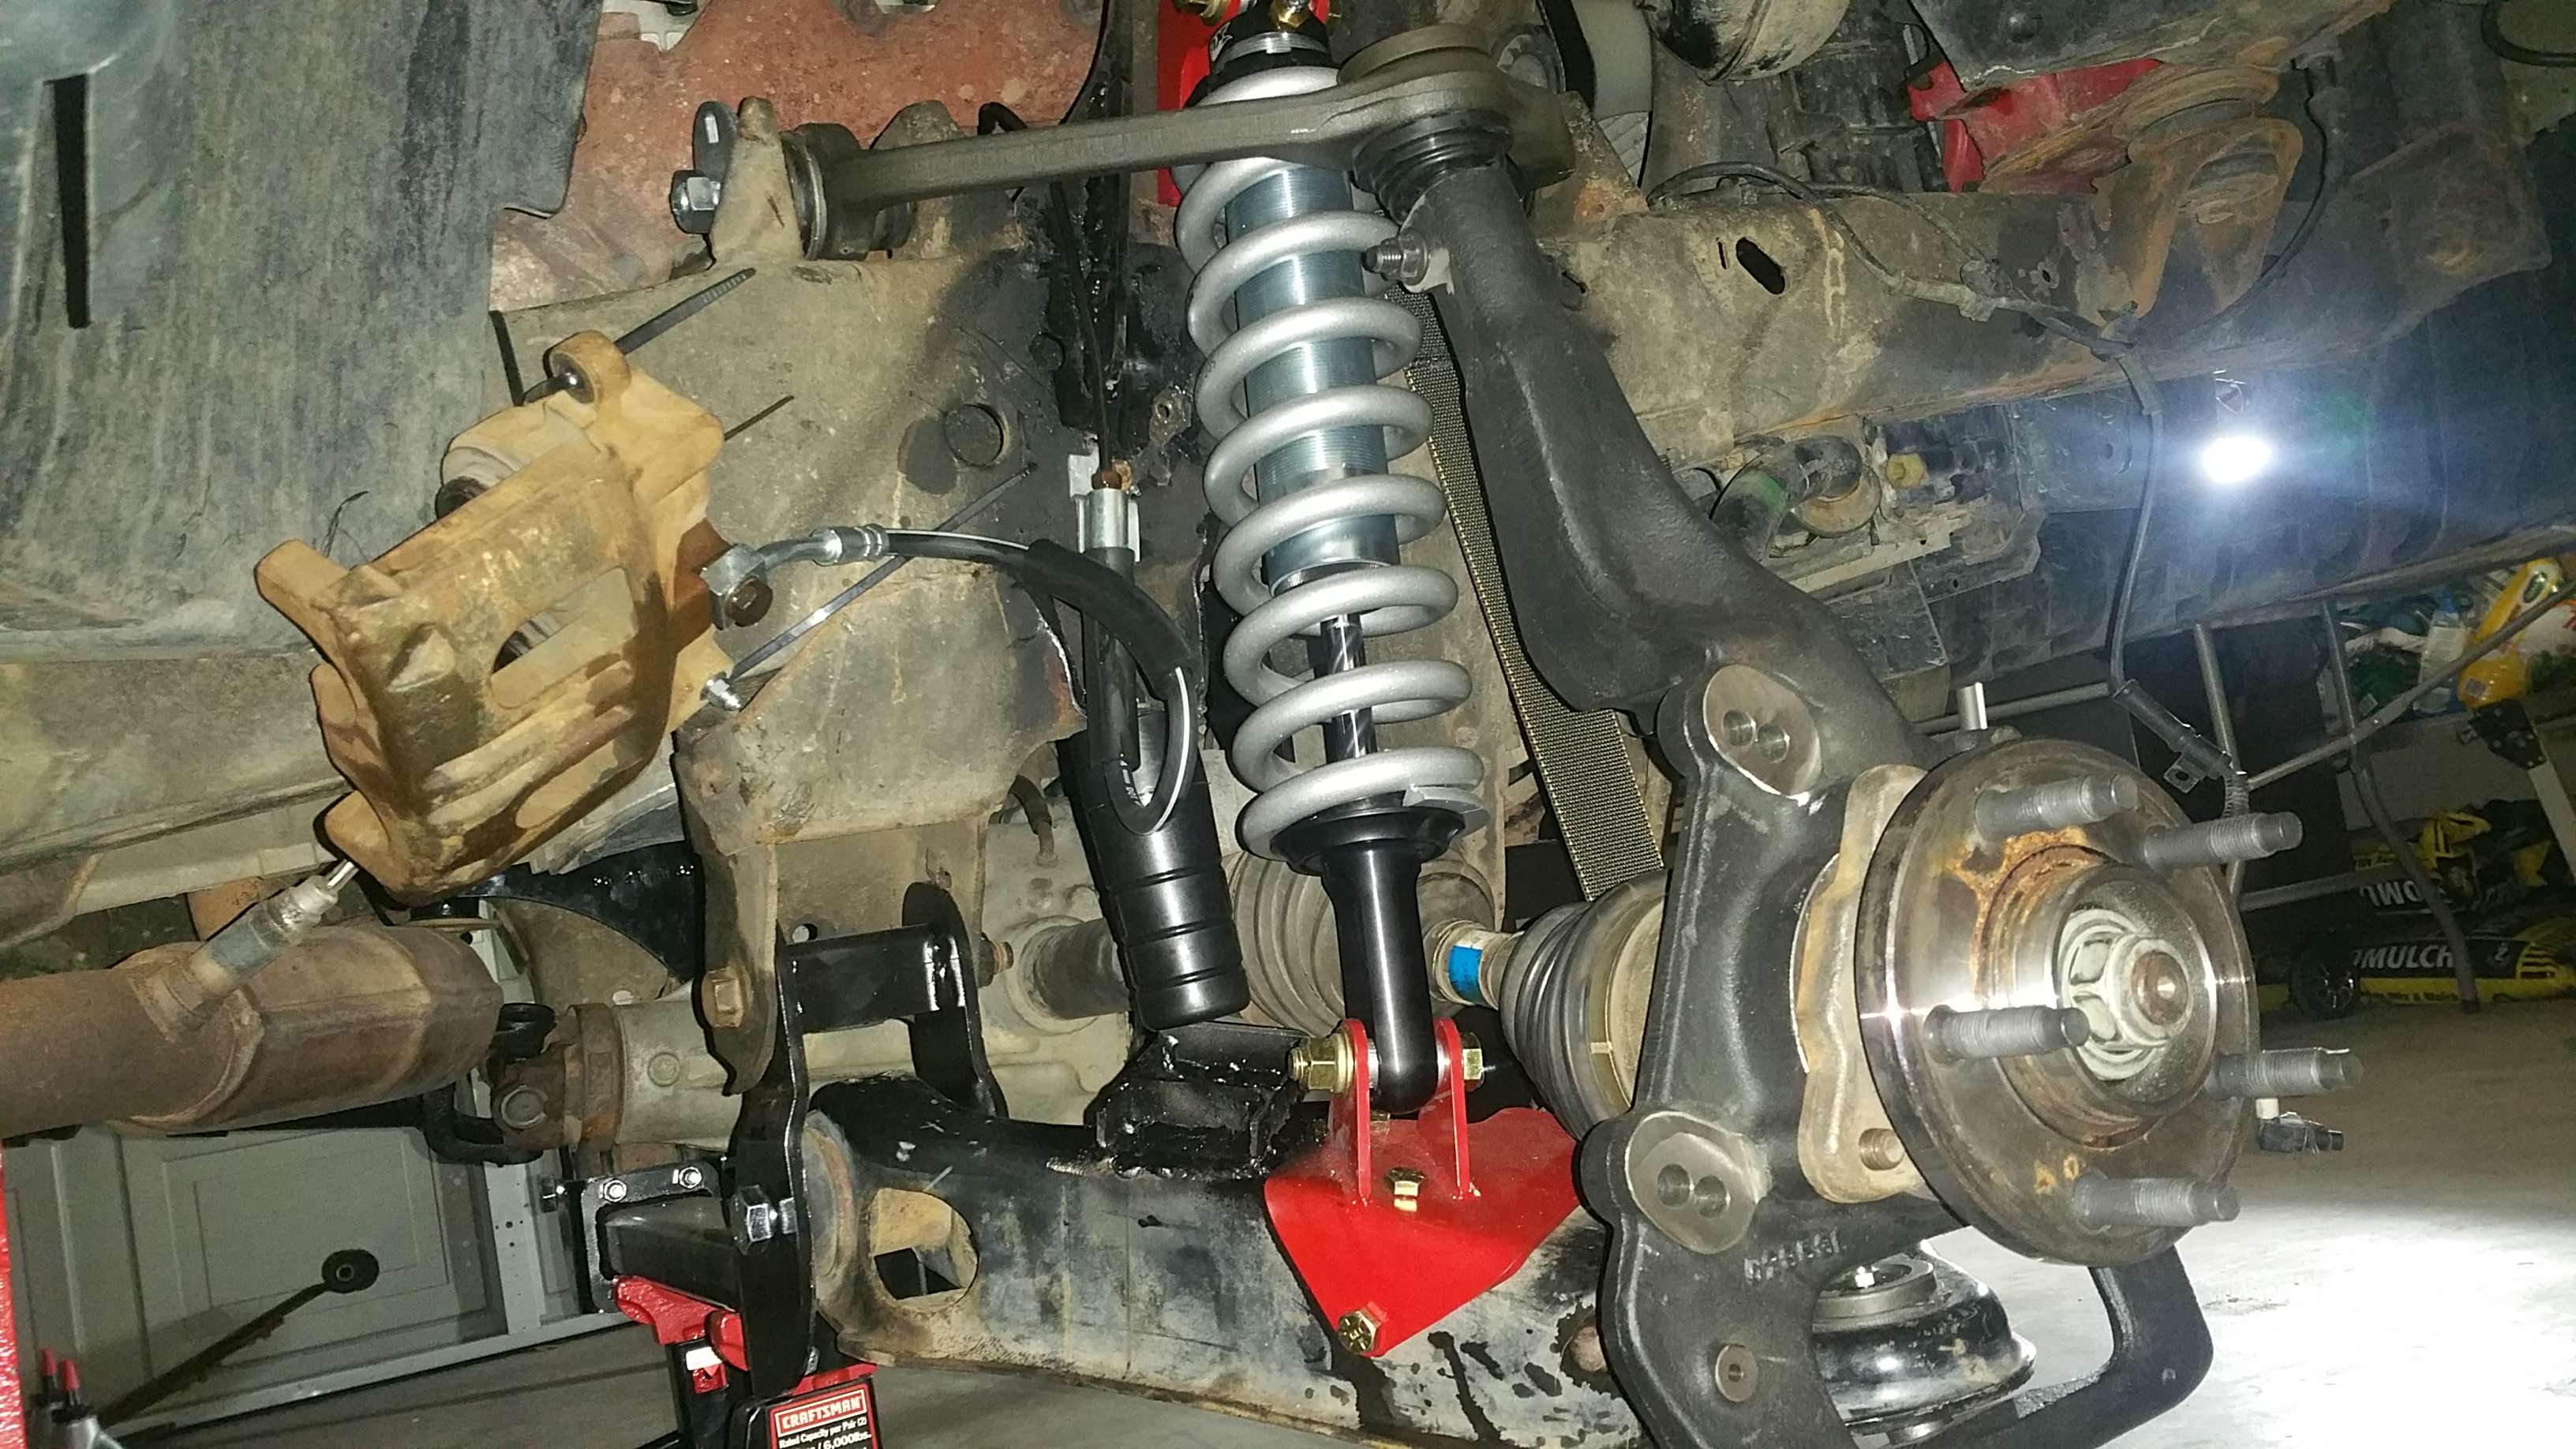

Front lift complete. Since then, I have made small adjustments and inspections, but everything is working as intended. I effing love this truck.
So, Along with installing parts of the superlift, the Coilover conversion was pretty straightforward. I did the welding of the gussets, and also made some cups and welded them to the lower arms. I read of a few incidents of the extended bumpstops people were using deflecting under a high load, causing the cv's to bind. These cups were my cost effective solution to the problem. So long as they don't get hardpacked with mud (they don't I've checked several times) they prevent the bumpstops from deflecting, so I feel better about my trucks reliability.
The front Torsen I got for $550. It is effing awesome. My truck has yet to get stuck, and I have done some pretty scary **** with it. I tried setting the backlash myself, but ended up having a pro do it. I also tapped the bottom of the housing for an oil drain so I can service it without removing the whole thing (thanks Ford).
The fox shocks were tuned 40/60 from the factory, and after 6 months of driving, I decided they were way to stiff, so I eventually had them tuned for $50 down to 30/60 and it feels way better. Smooth on the road, but still stiff enough to make very hard impacts off road smooth also. I replaced the cv's and front wheel bearings at the same time, and then had it re-aligned. Where I screwed up was not allowing the coils to settle before getting it initially aligned. They sagged after a few weeks (750lbs Eibachs) and my wheels were off for several months before I dug back in to tune the shocks and replace some stuff, adjusted the ride height and got it realigned. It seems to be fine now.
Some of my welds, particularly on the bumpstop cups, were acceptable but look like ****. I was running the welder off of 120V because I had not yet made a 240V extension cord so I could plug it into the dryer outlet in the house. The welder kept tripping the breaker after about 5-10 seconds of welding, so I had to do short bursts everywhere. The gusset welds came out just fine. I just had the power cranked up on the cup welds since those lower arms are so thick. They aren't going anywhere though.
Front lift complete. Since then, I have made small adjustments and inspections, but everything is working as intended. I effing love this truck.


#15
10-28-2016
Join Date: Jul 2015
Location: Reno, Nevada
Posts: 52
Likes: 0
Received 0 Likes
on
0 Posts
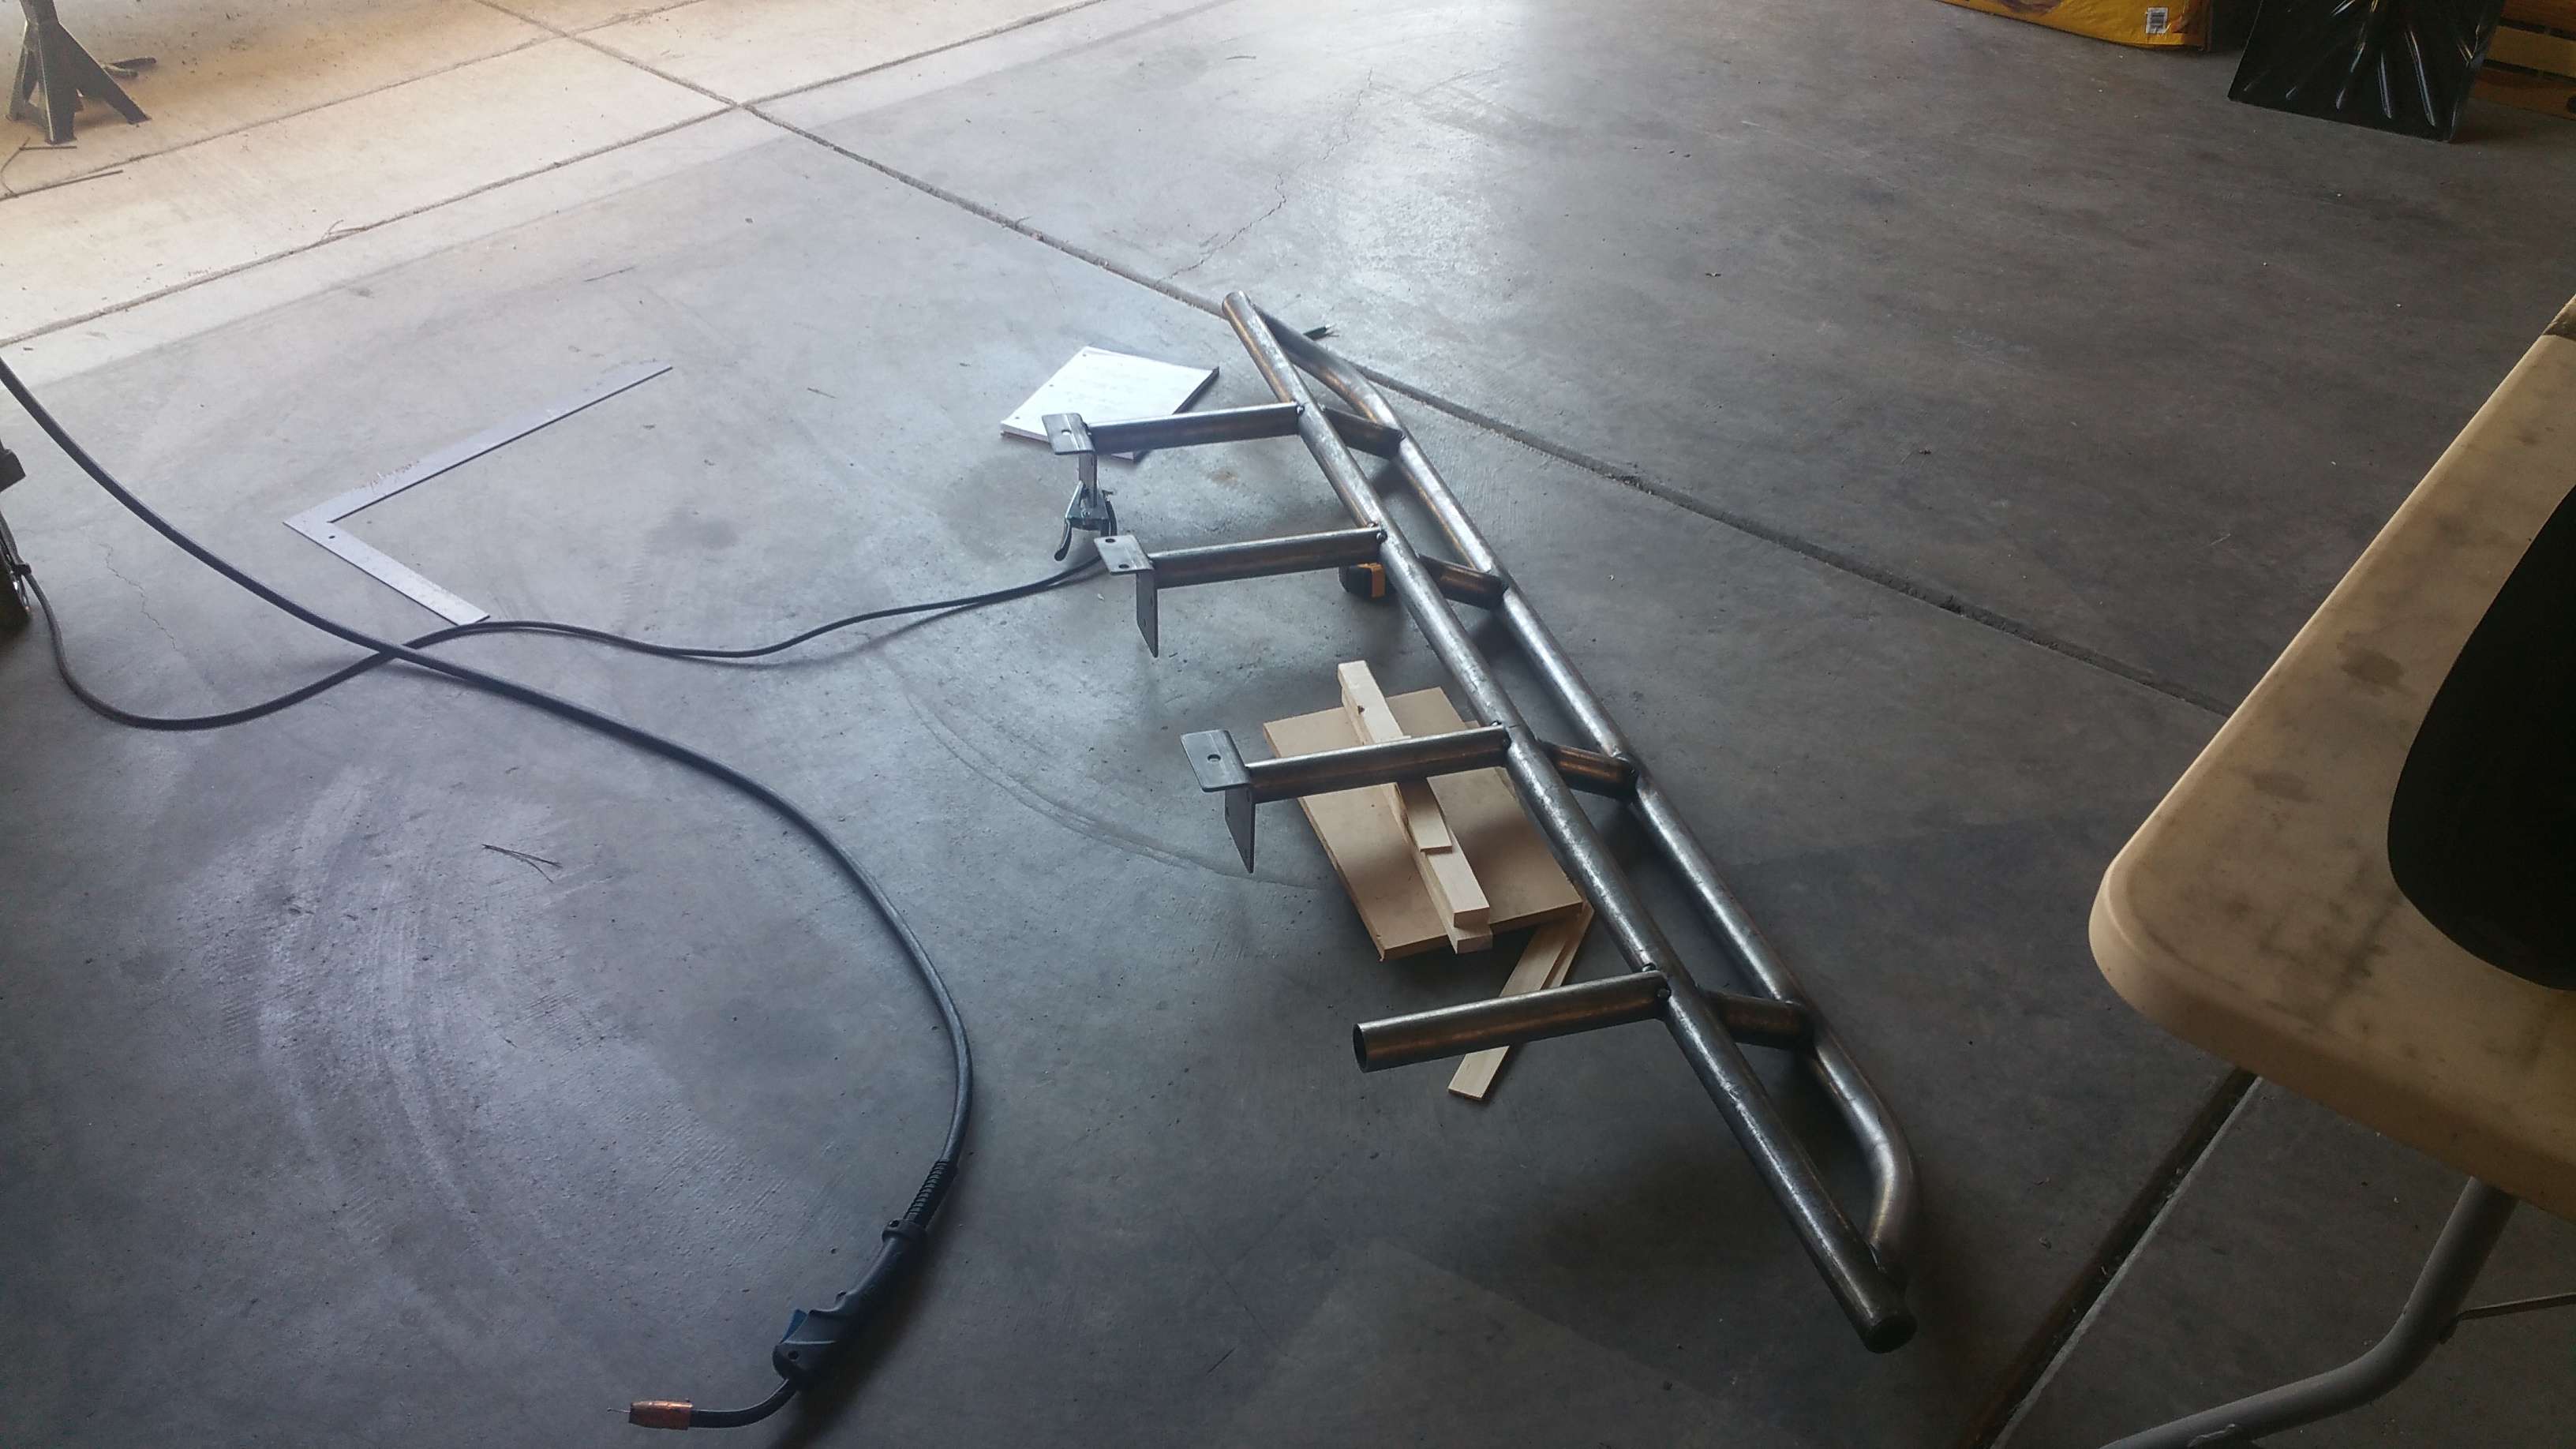
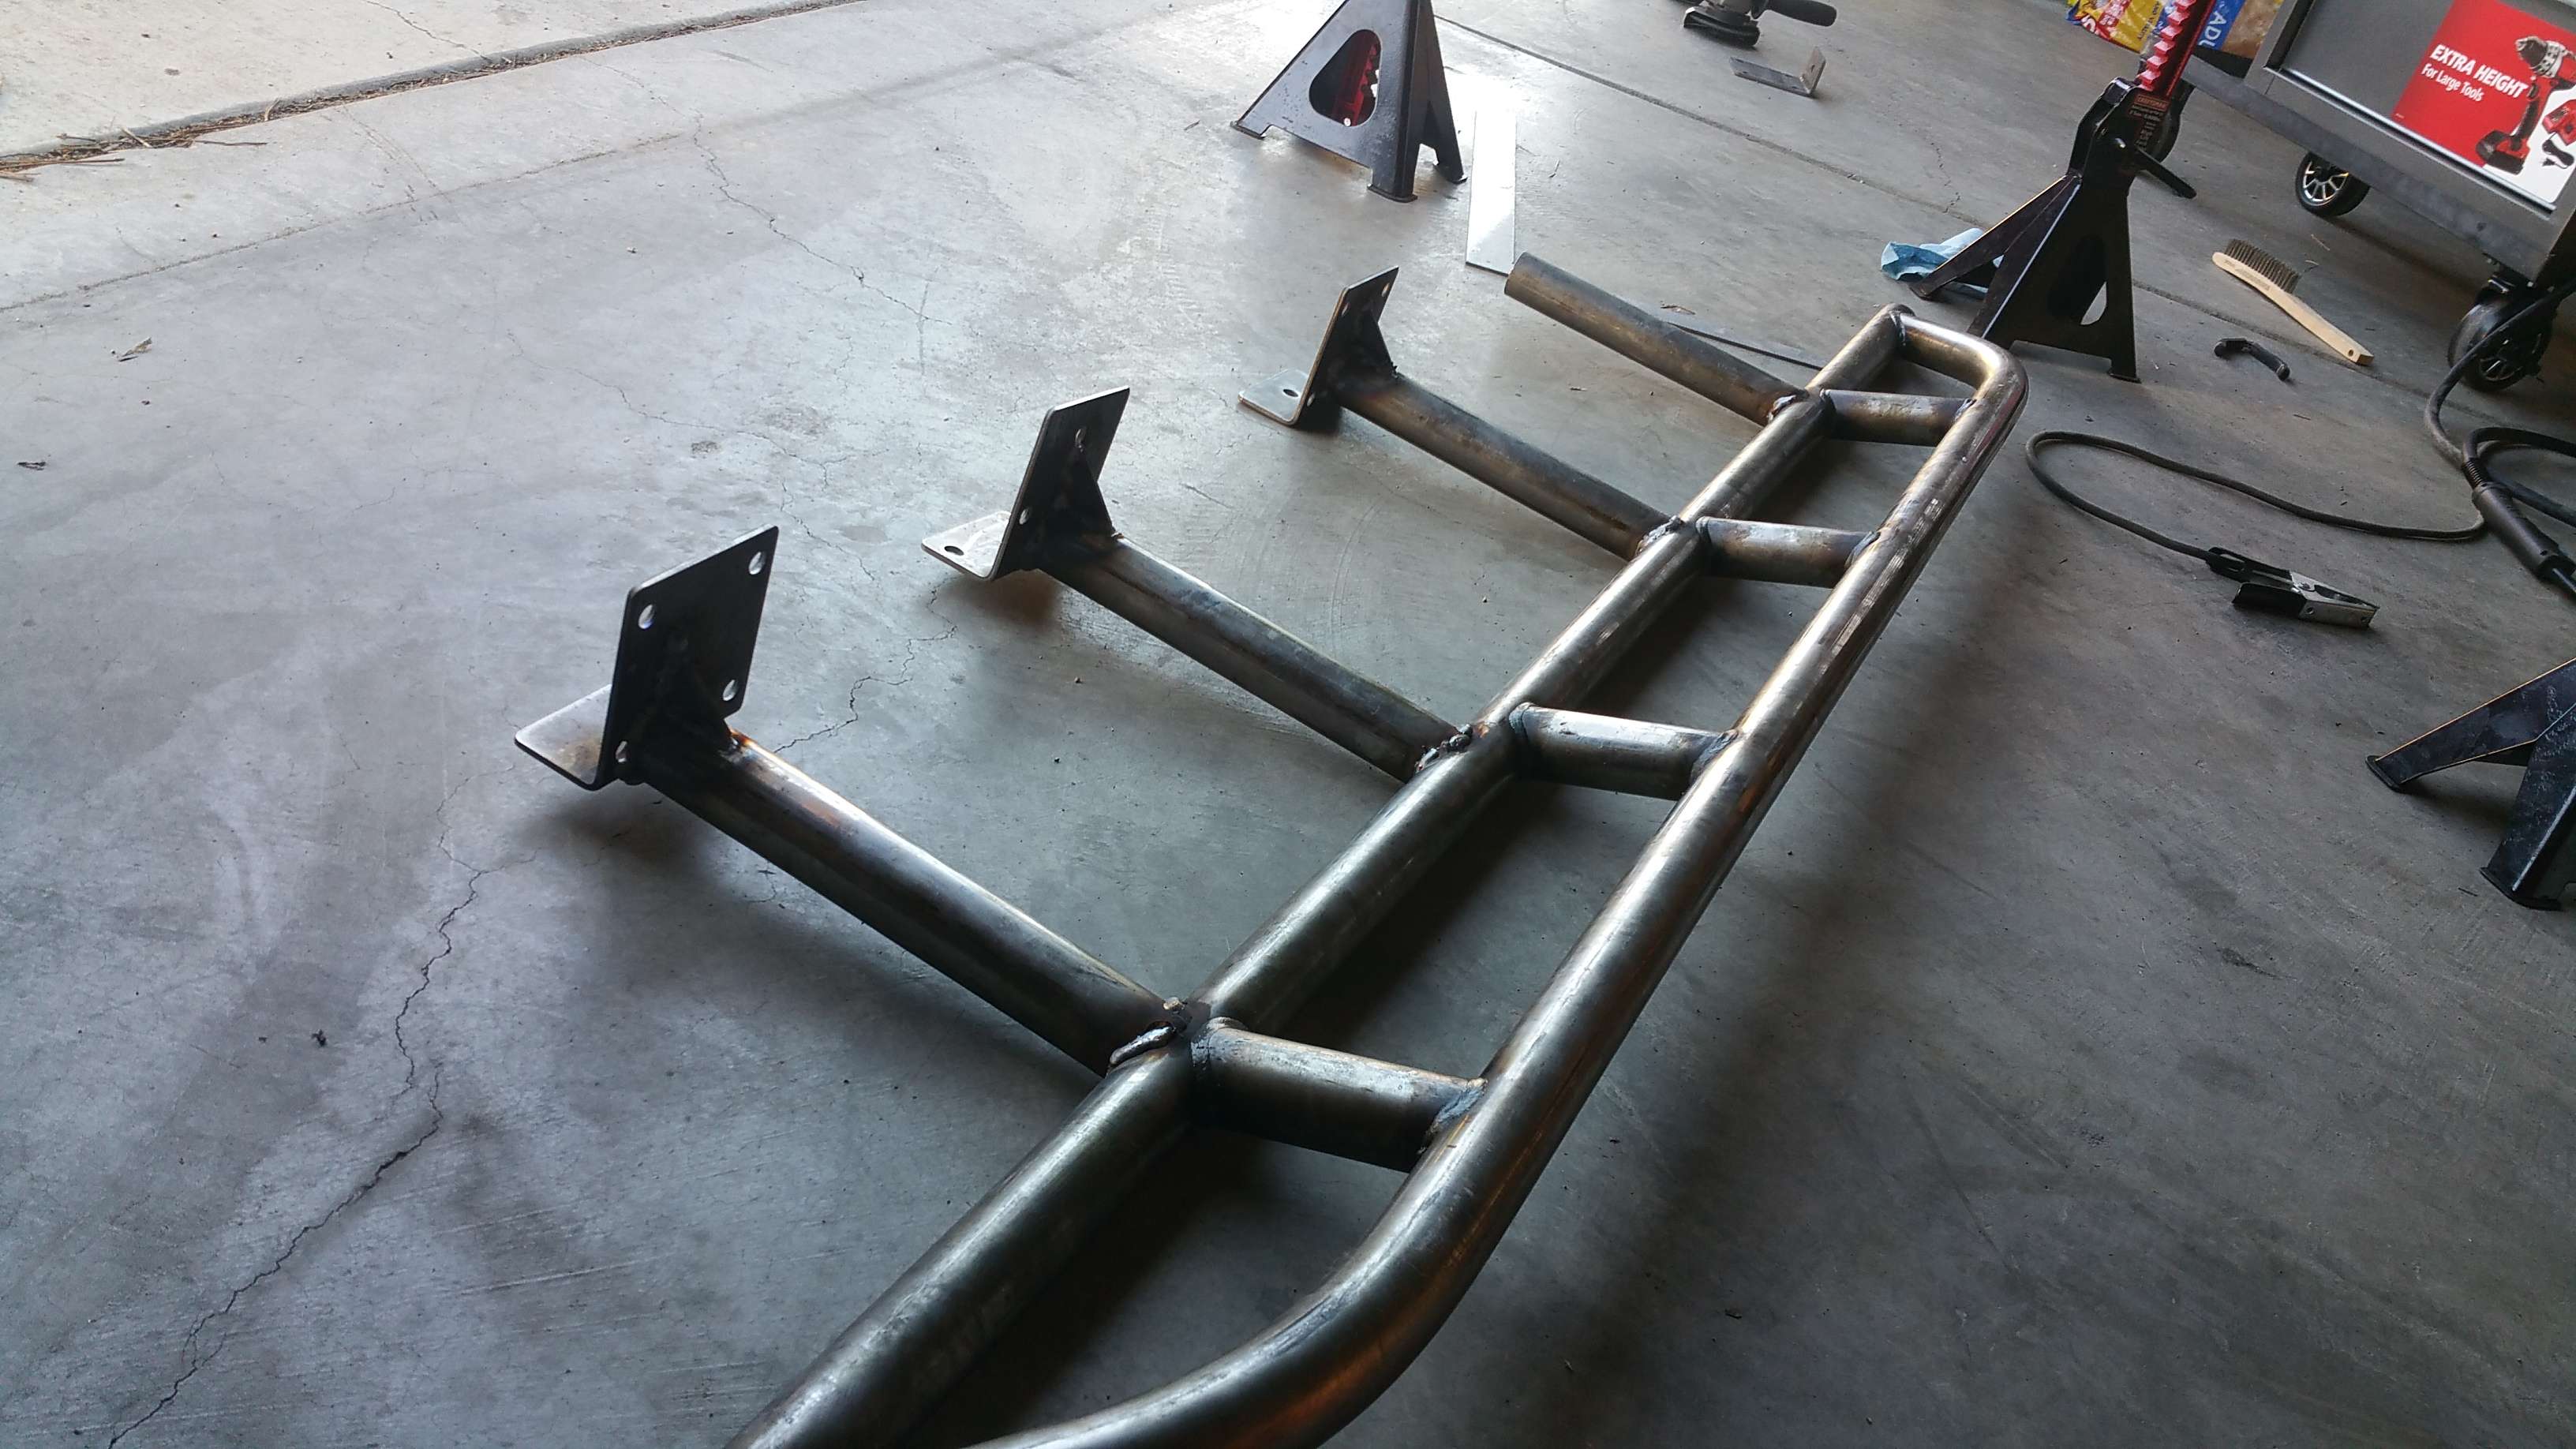
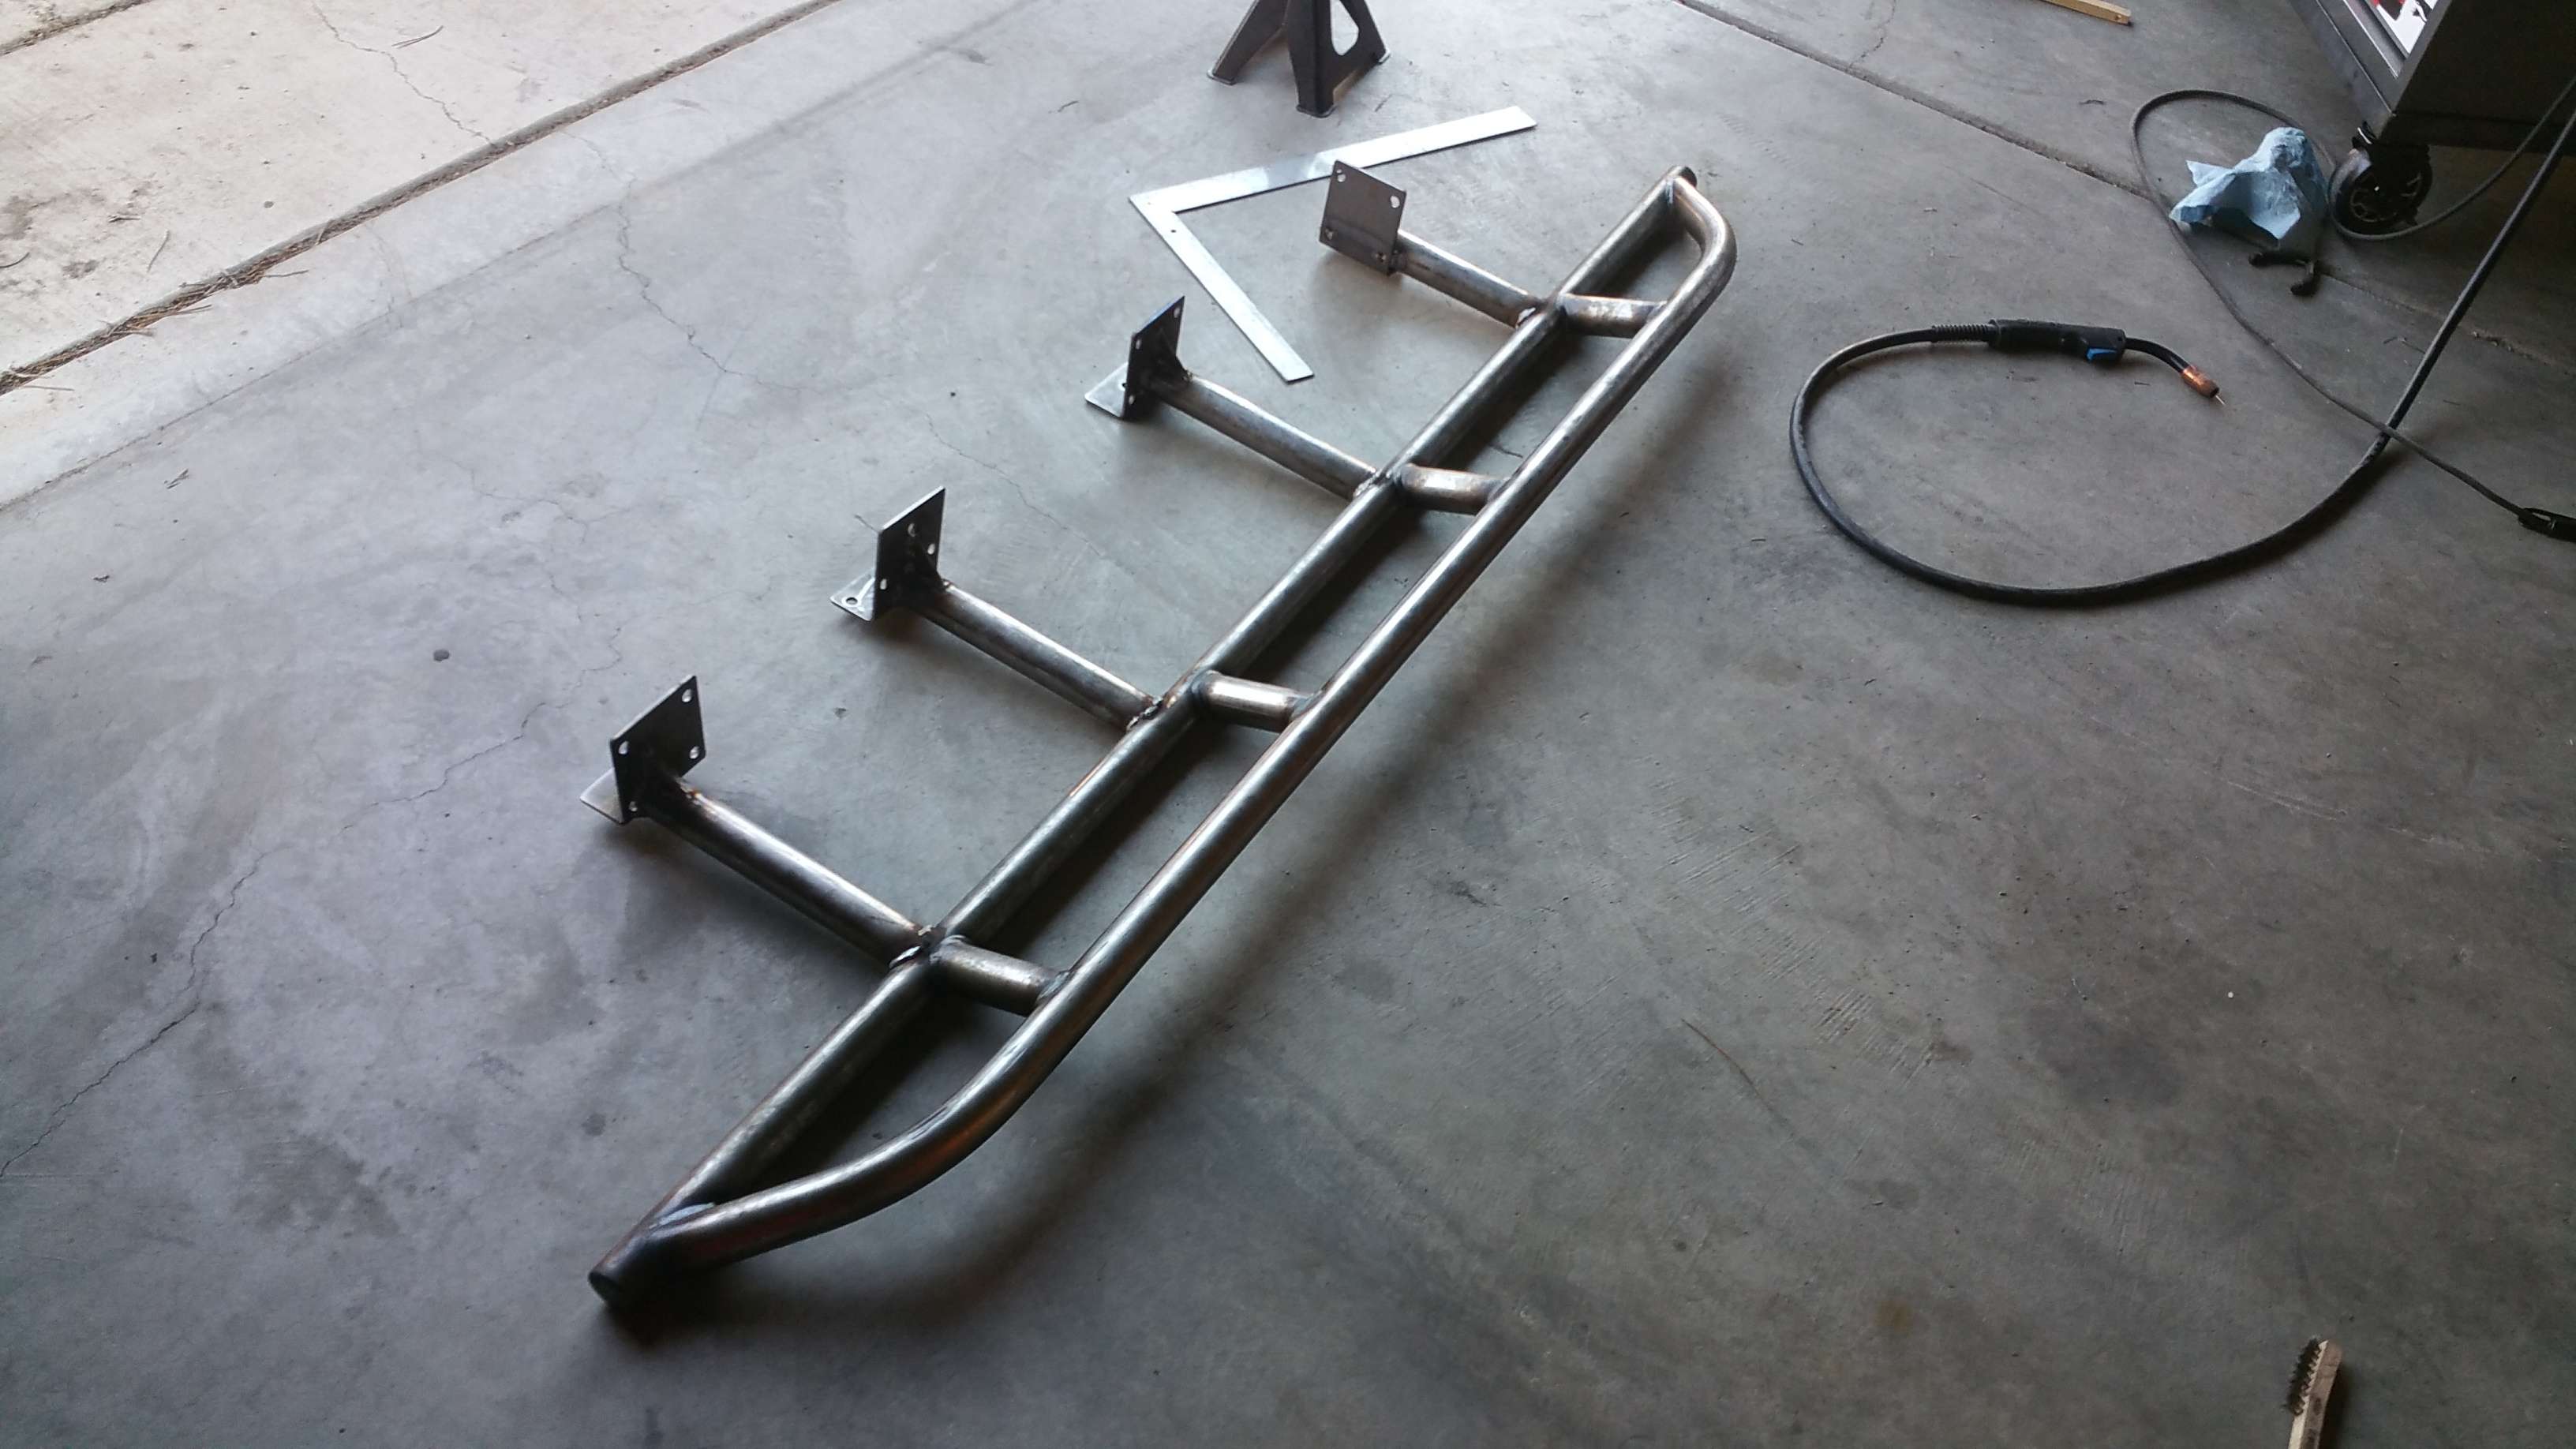
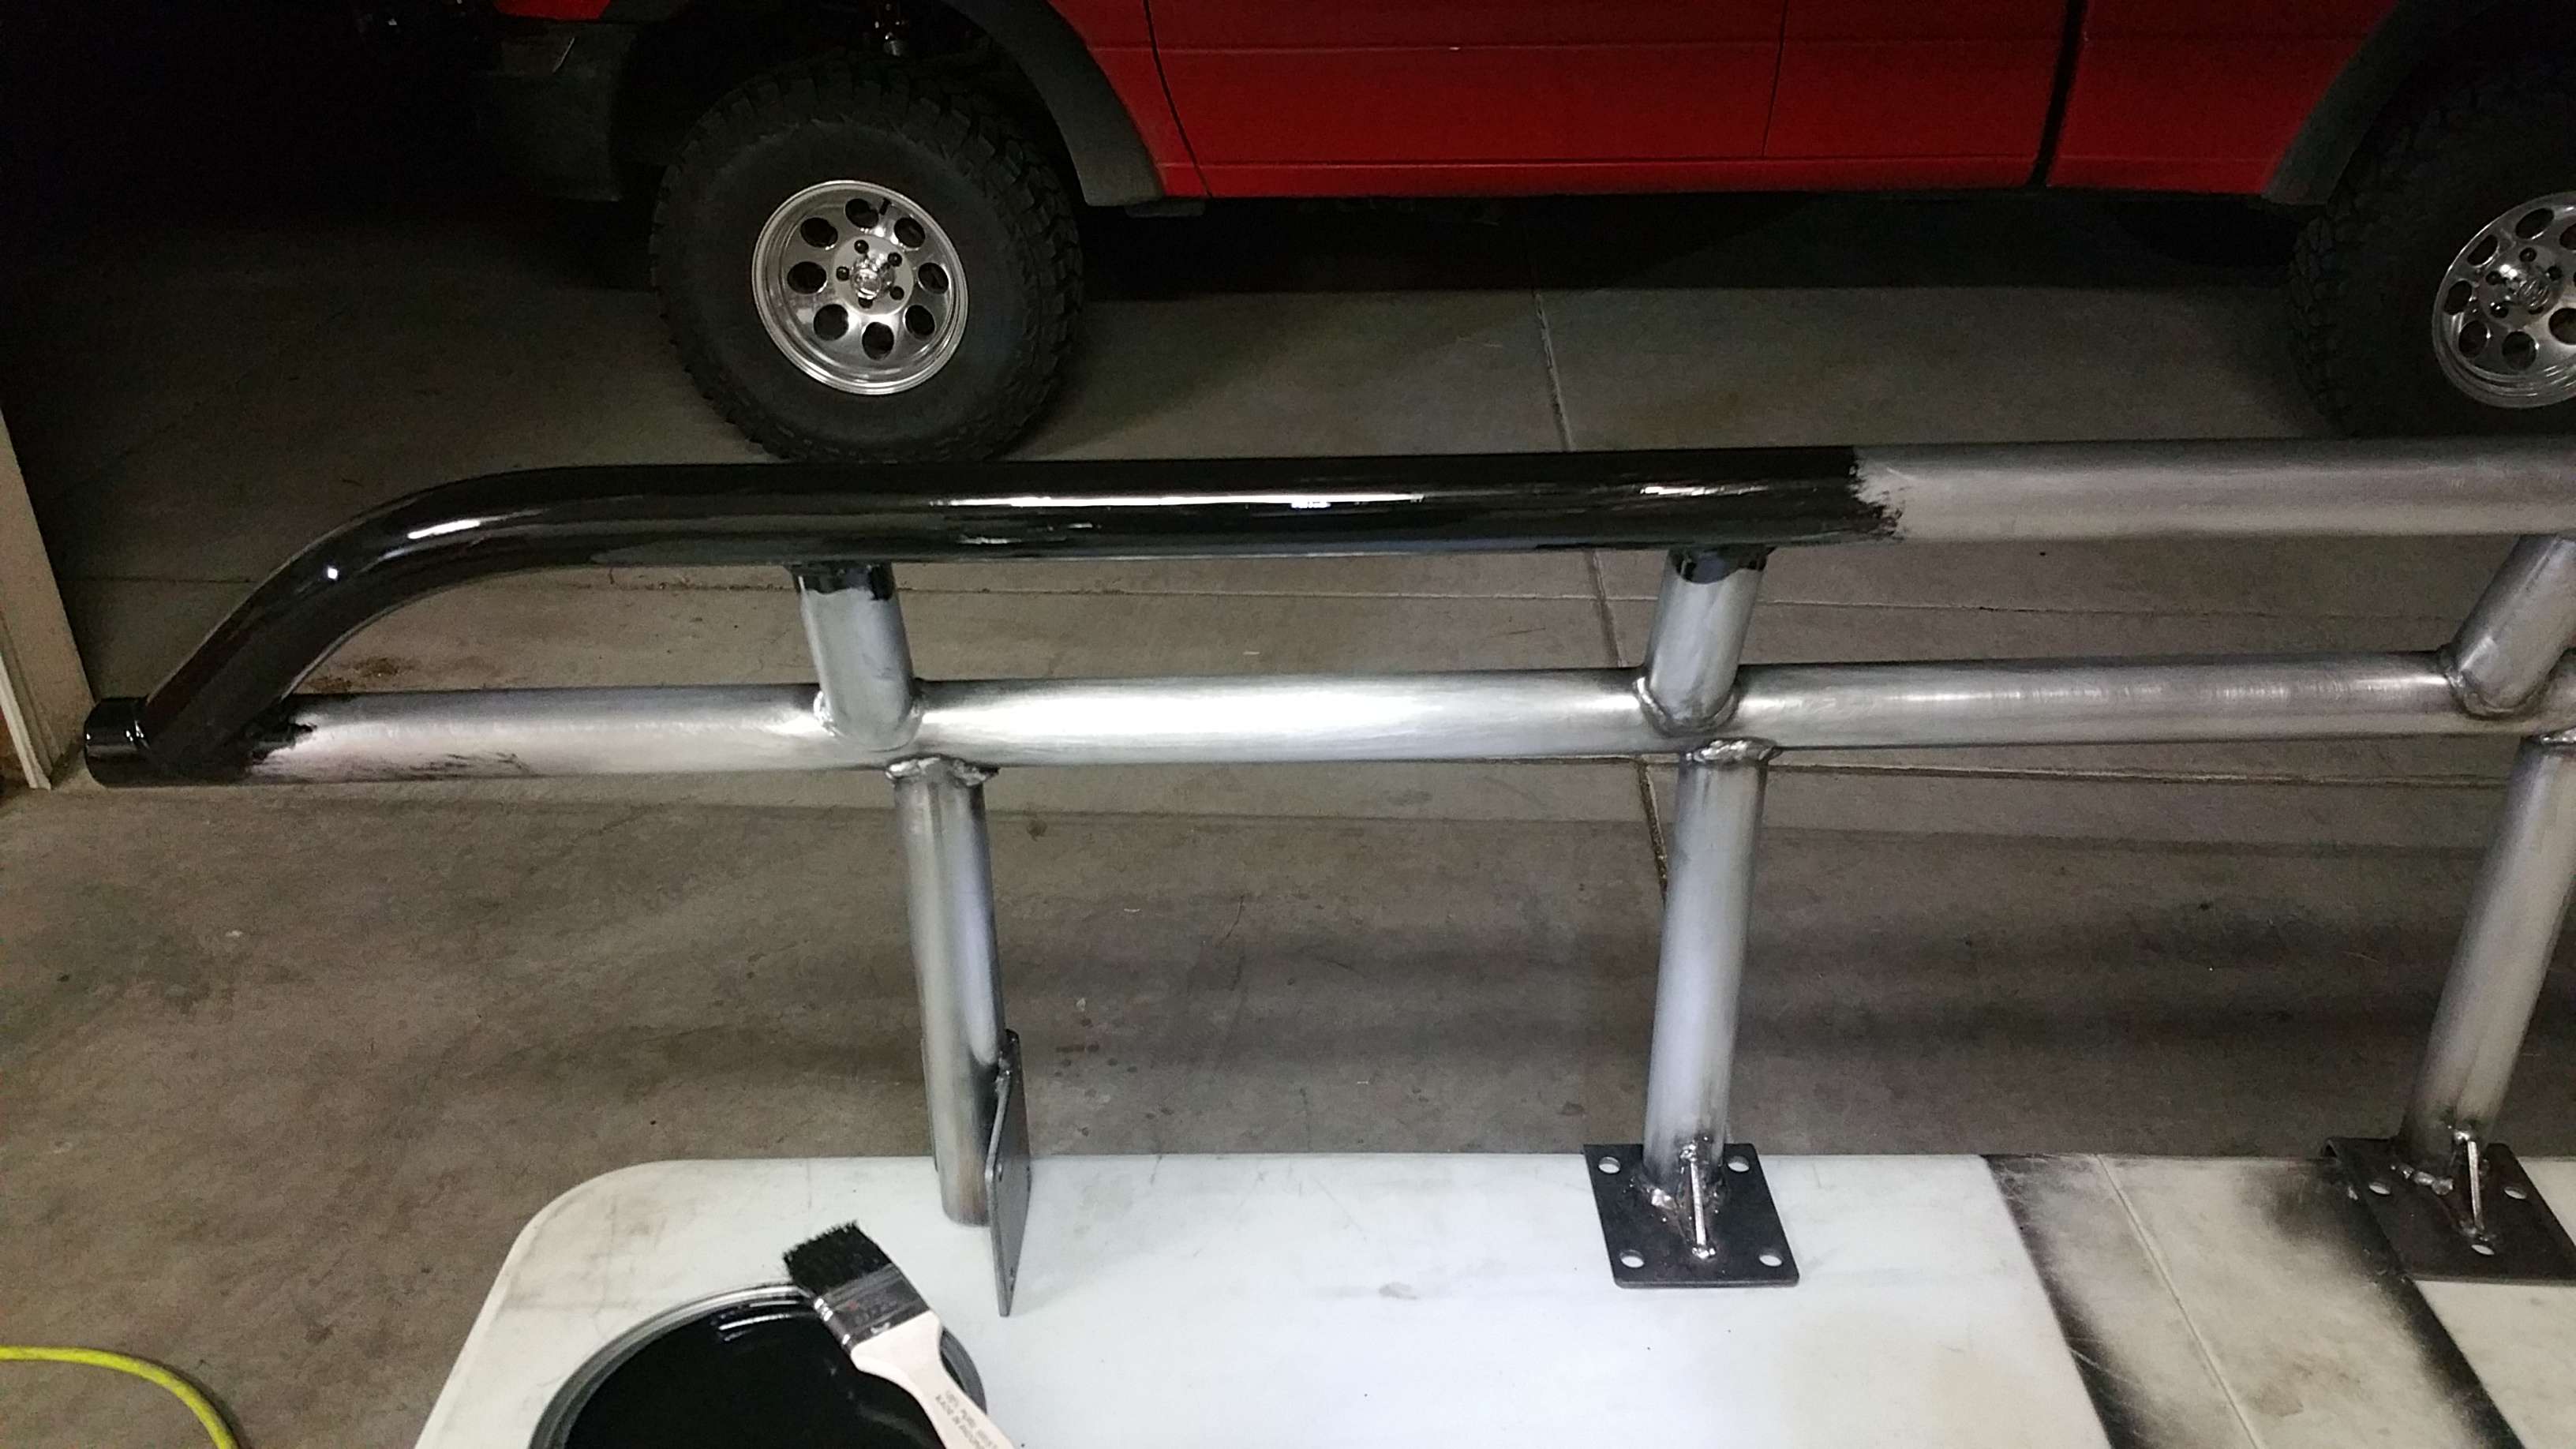
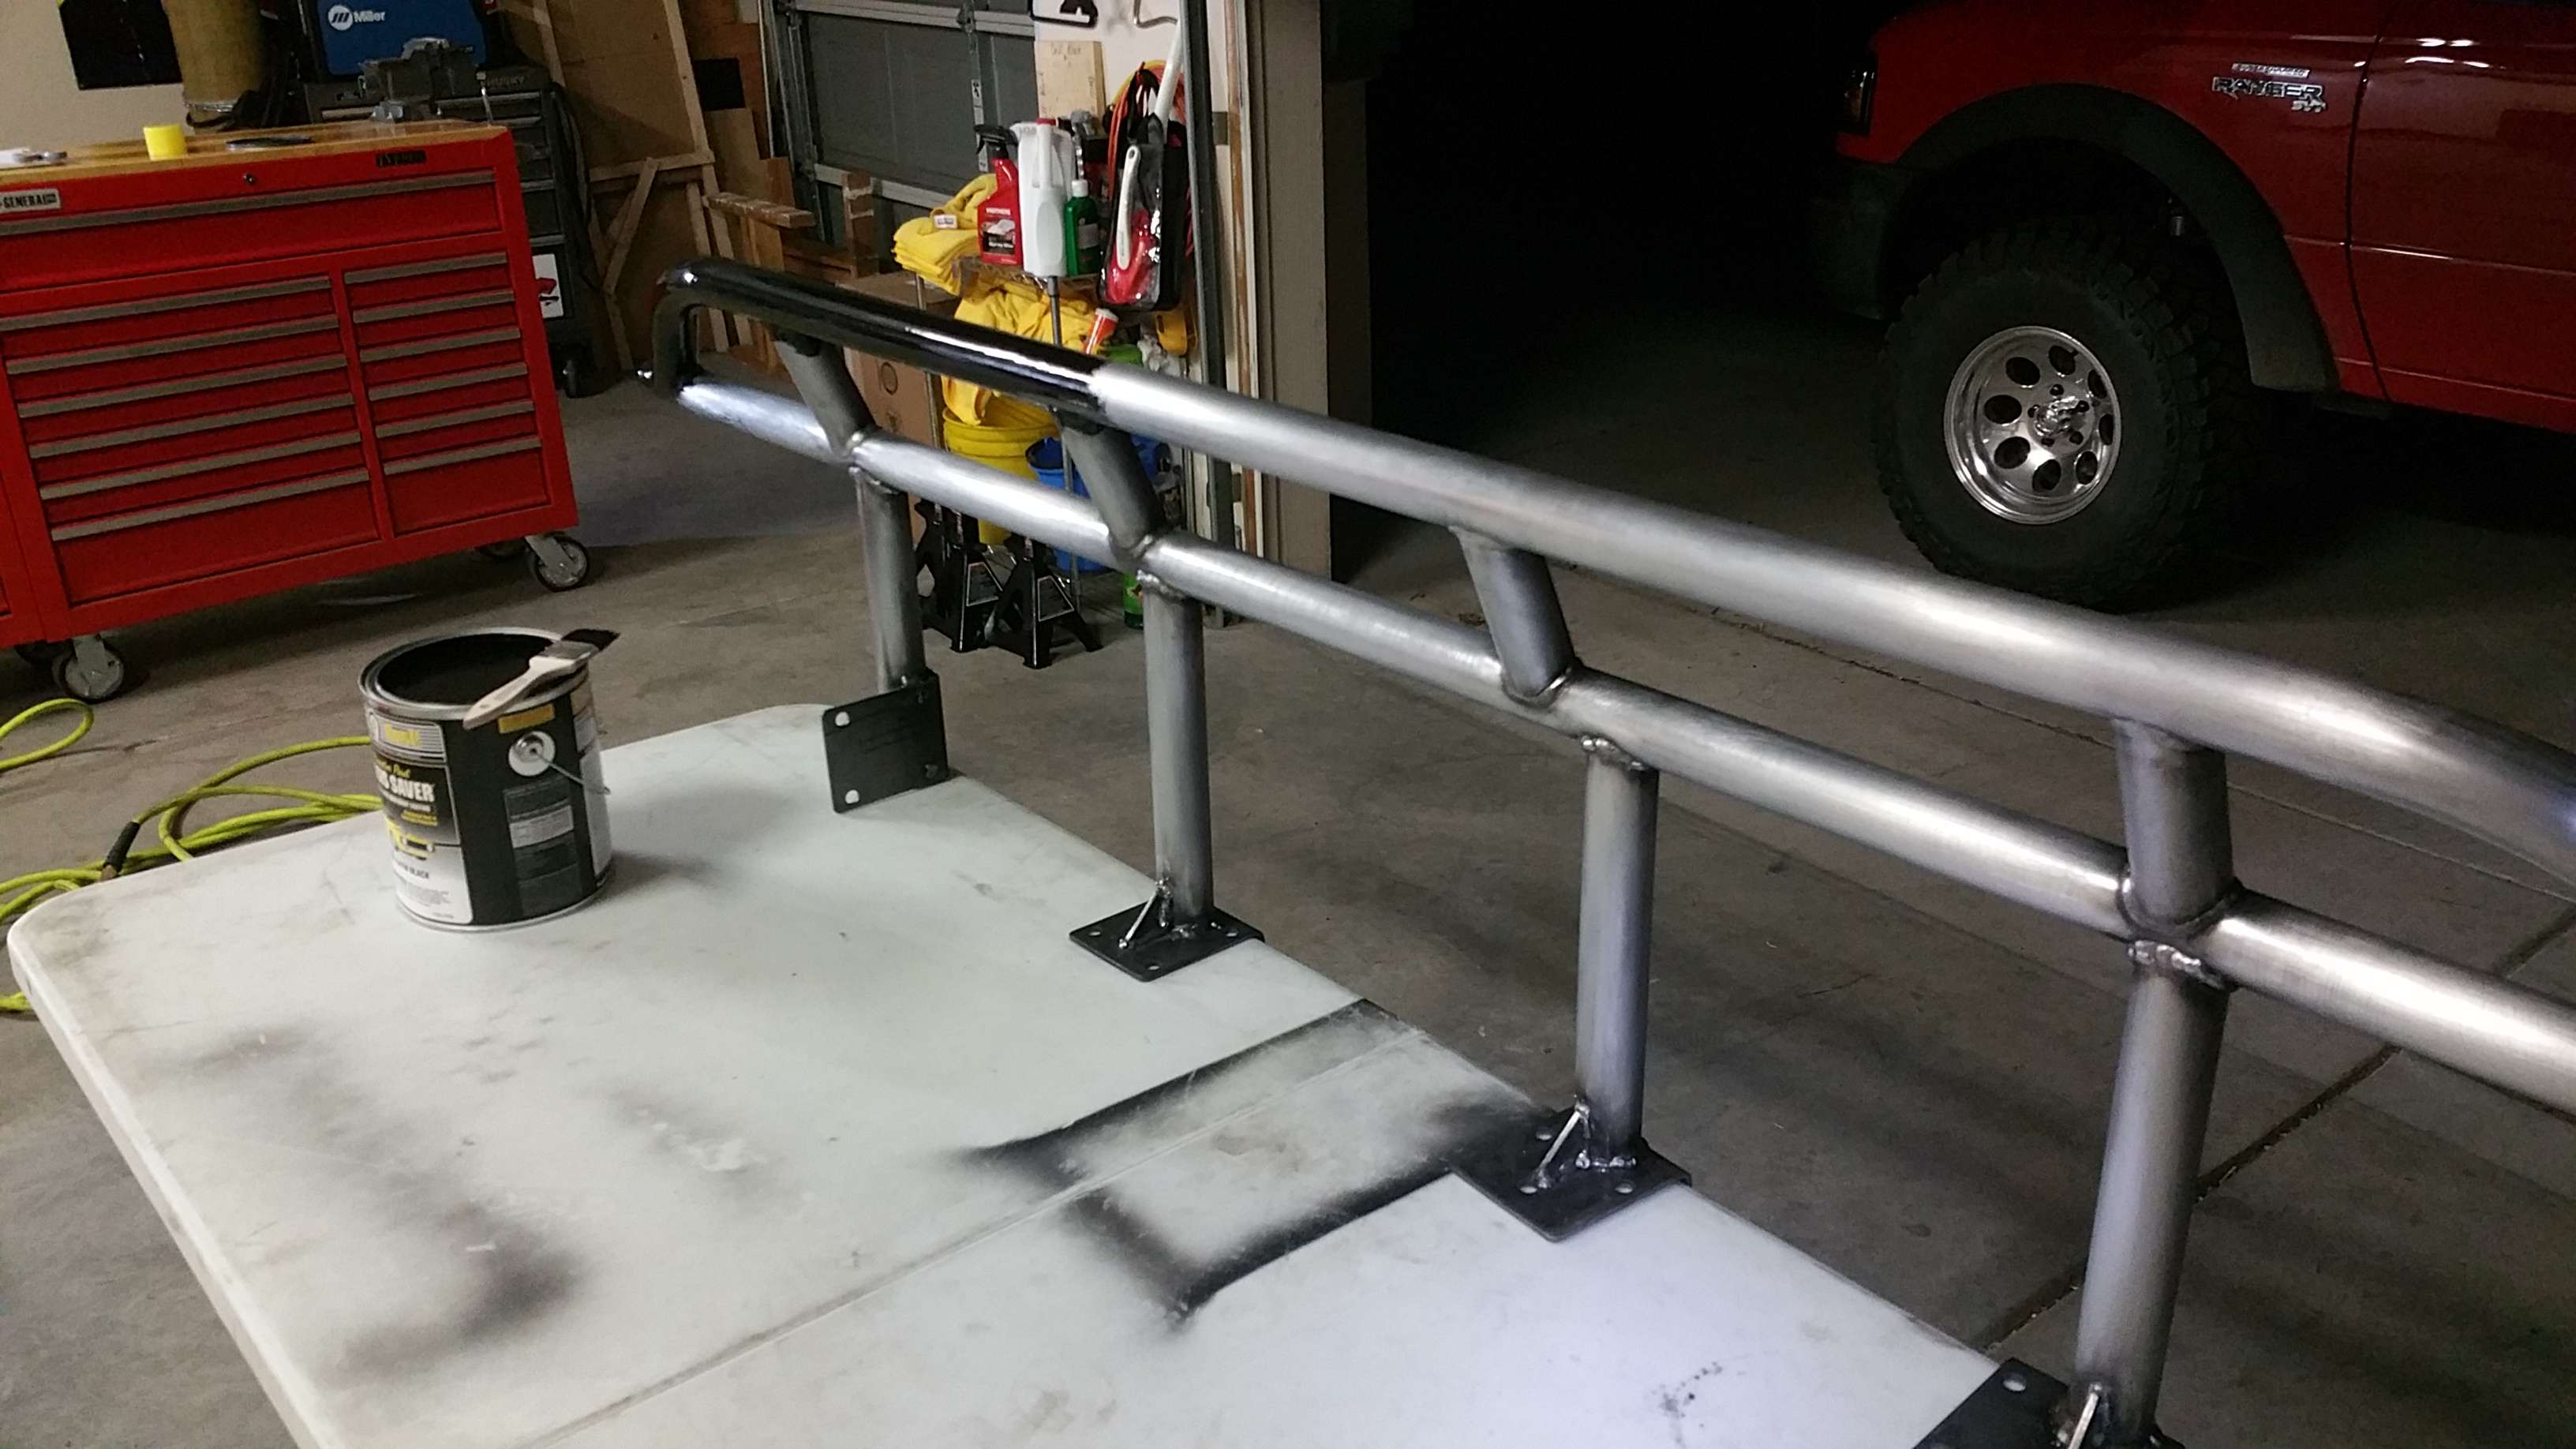
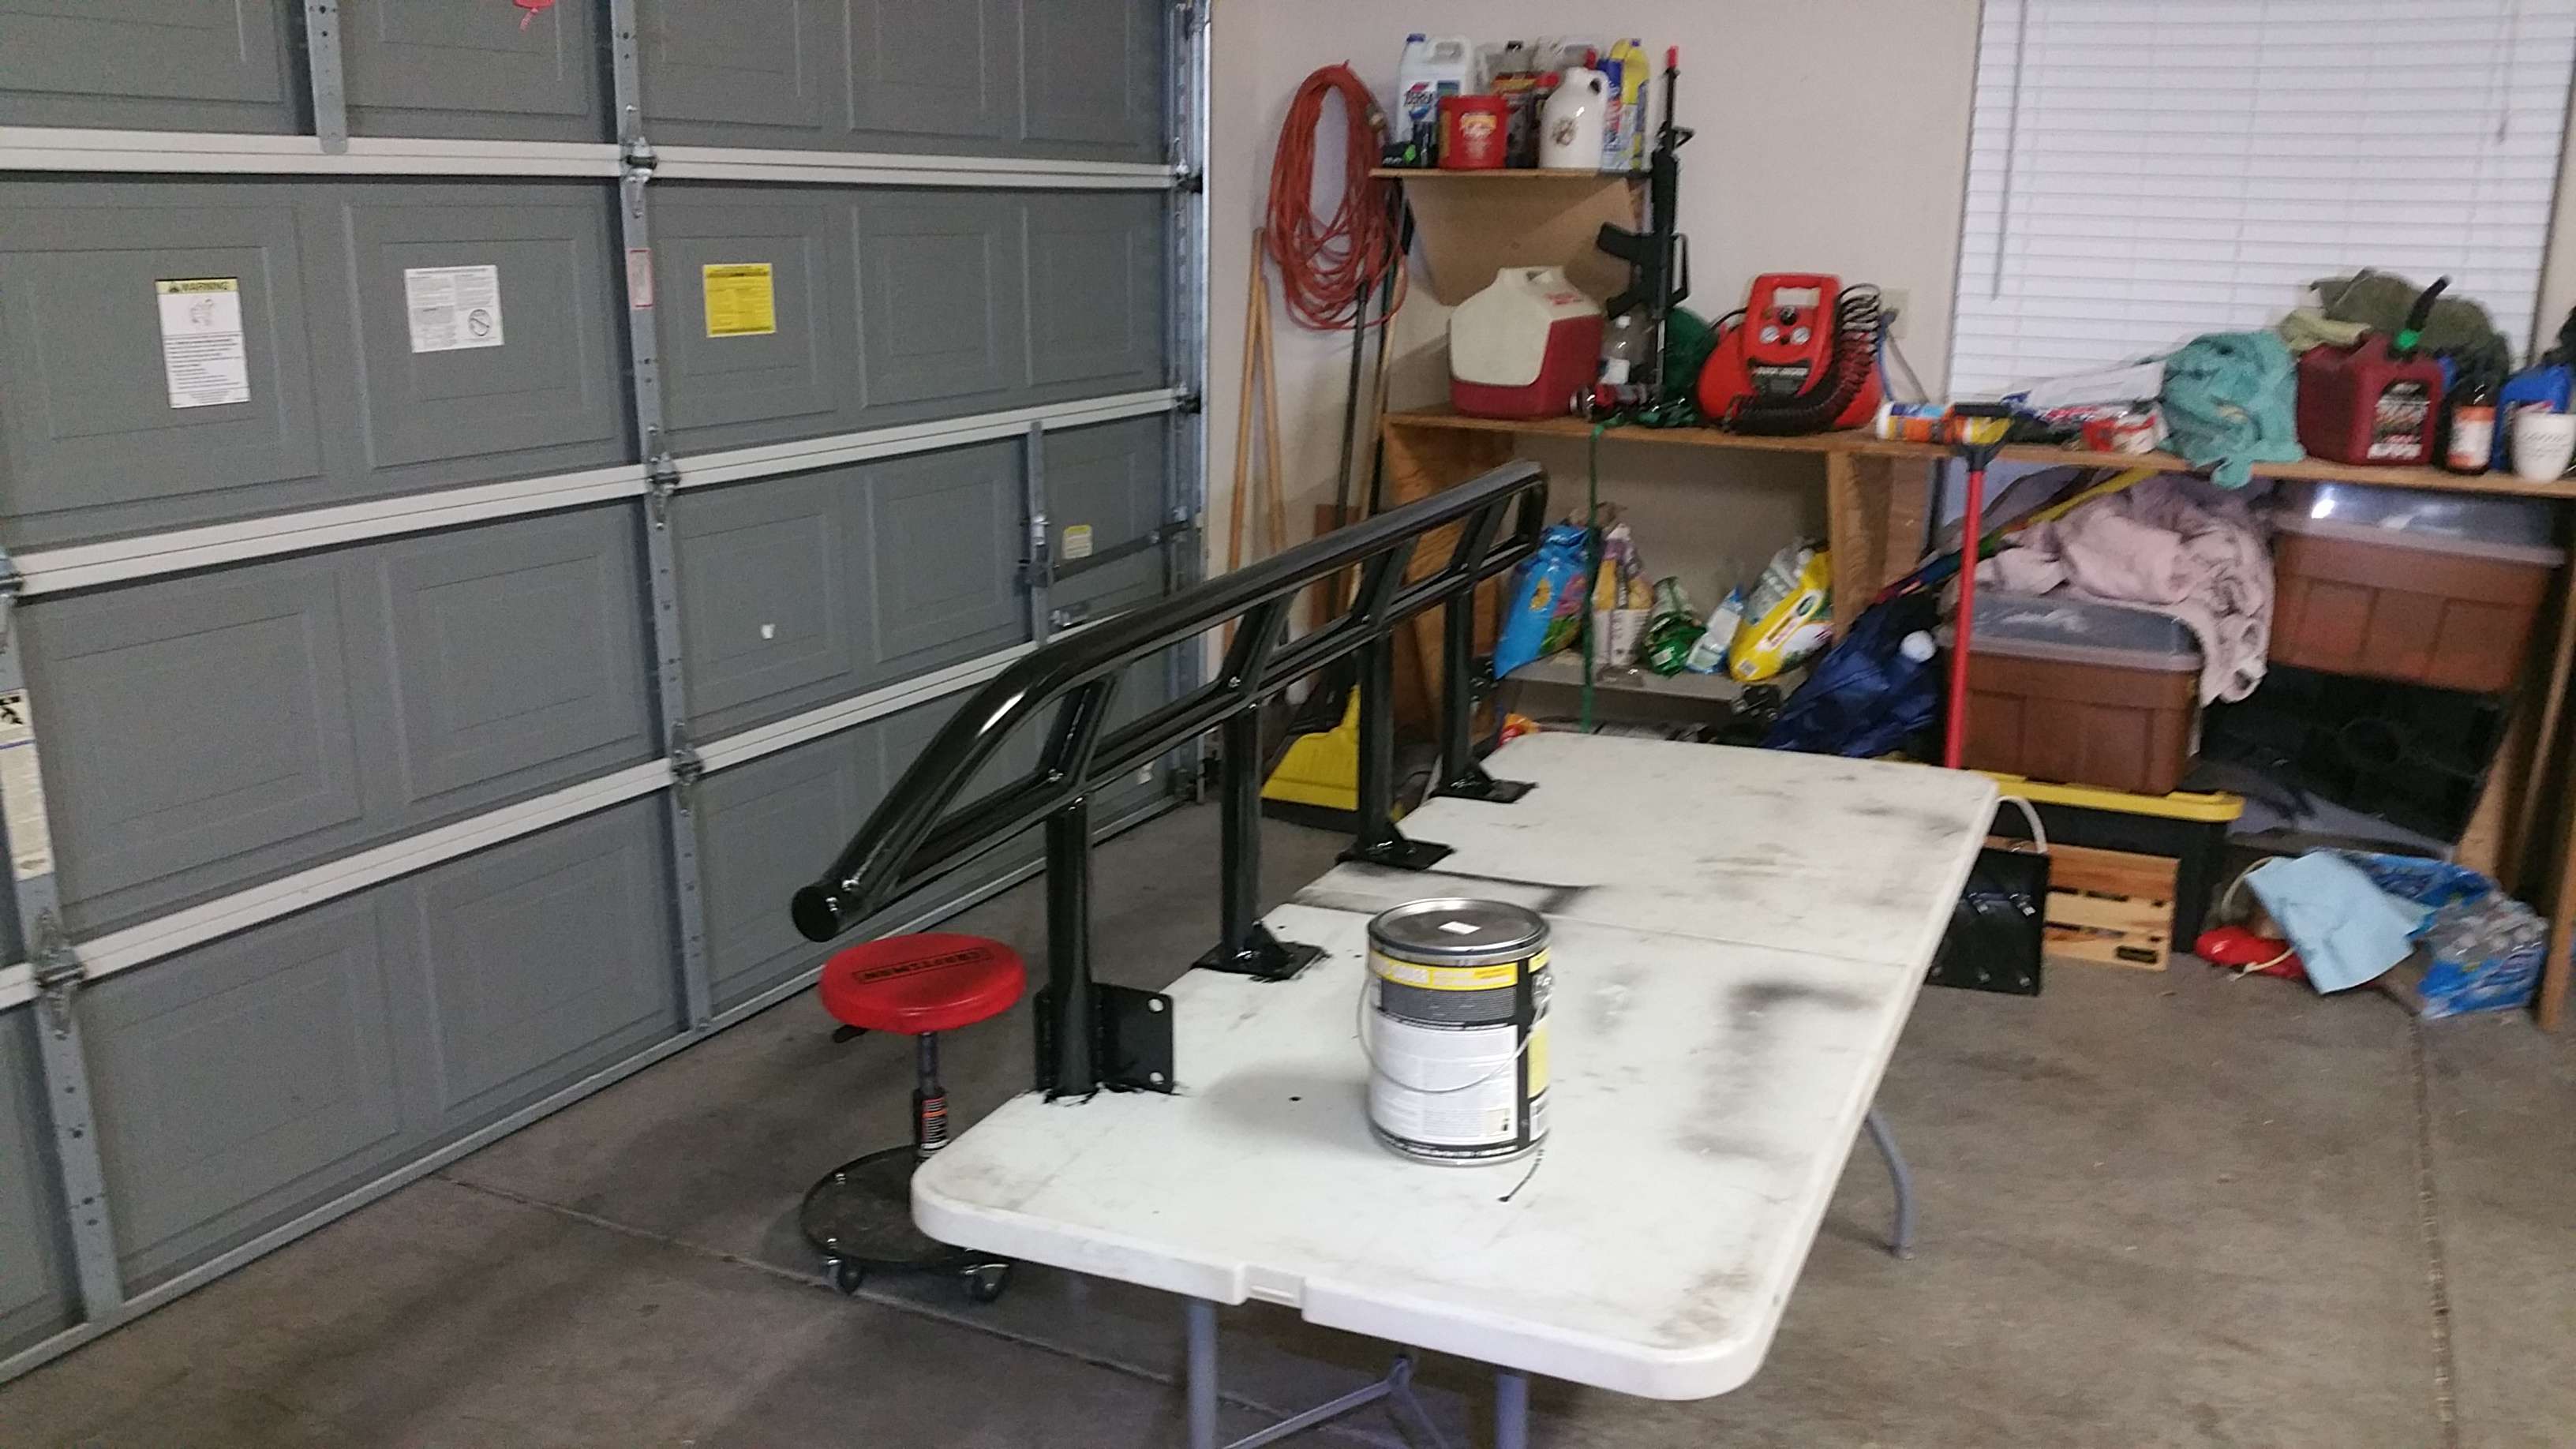
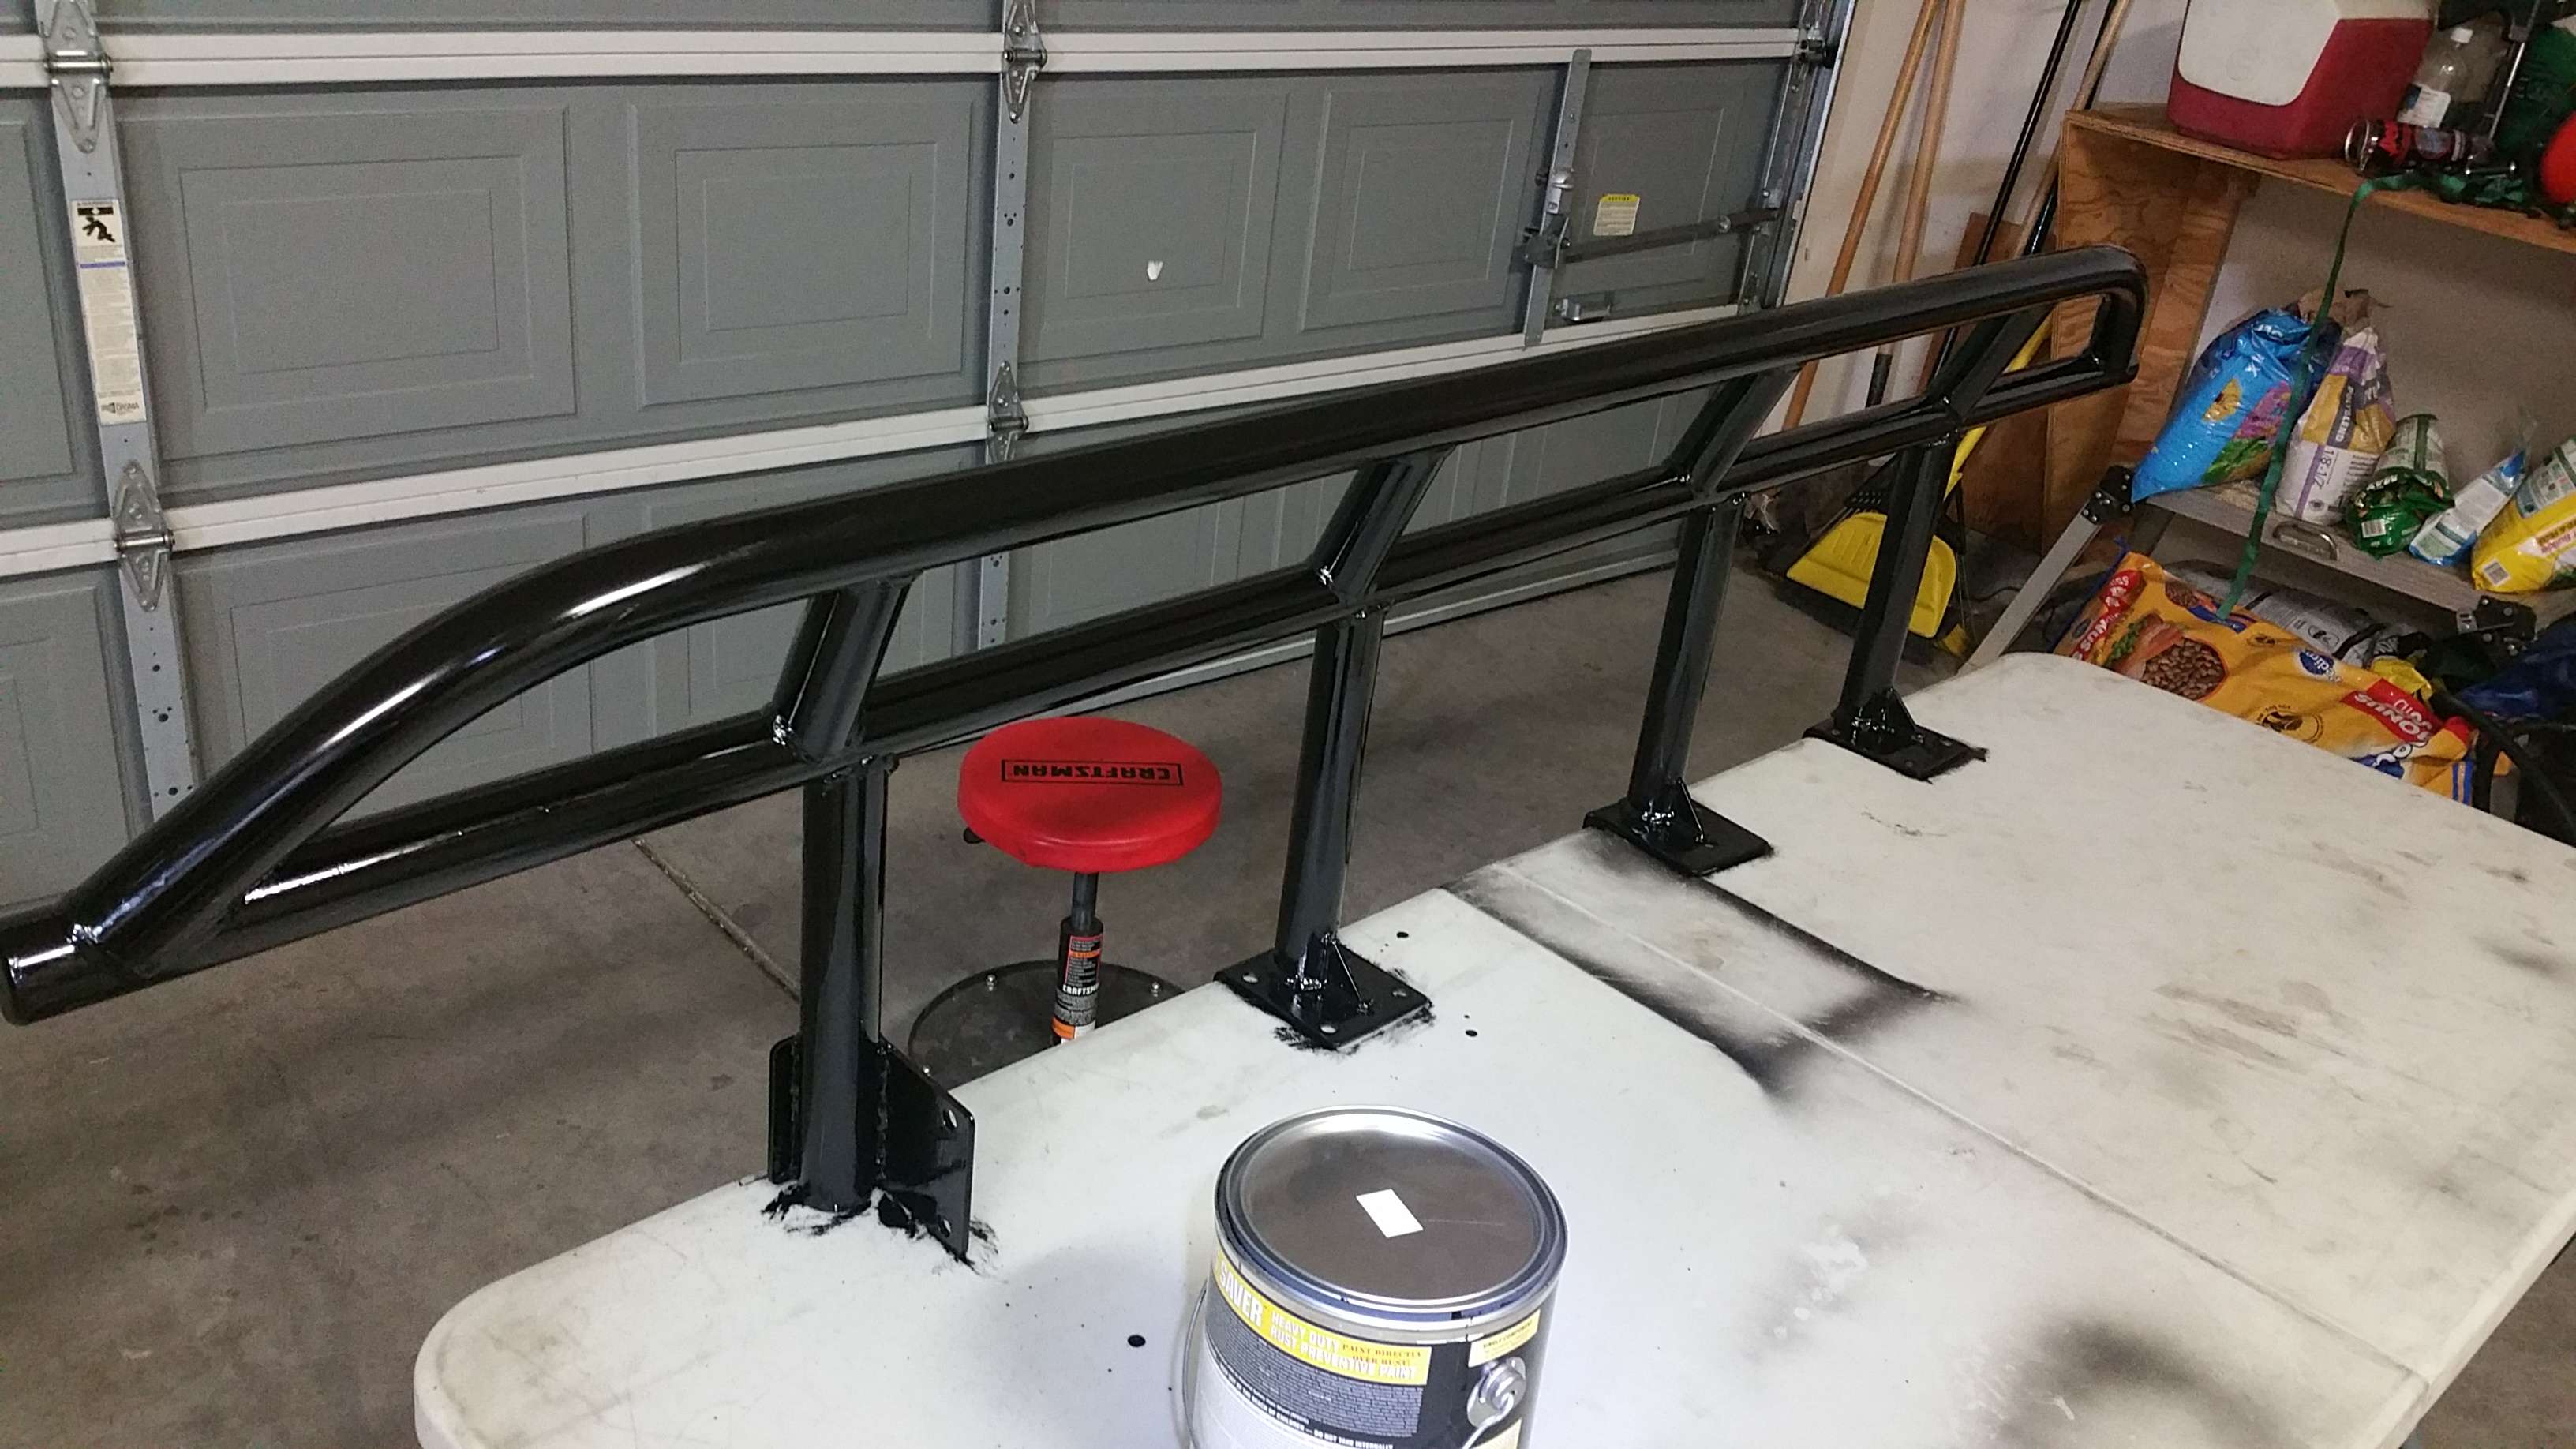
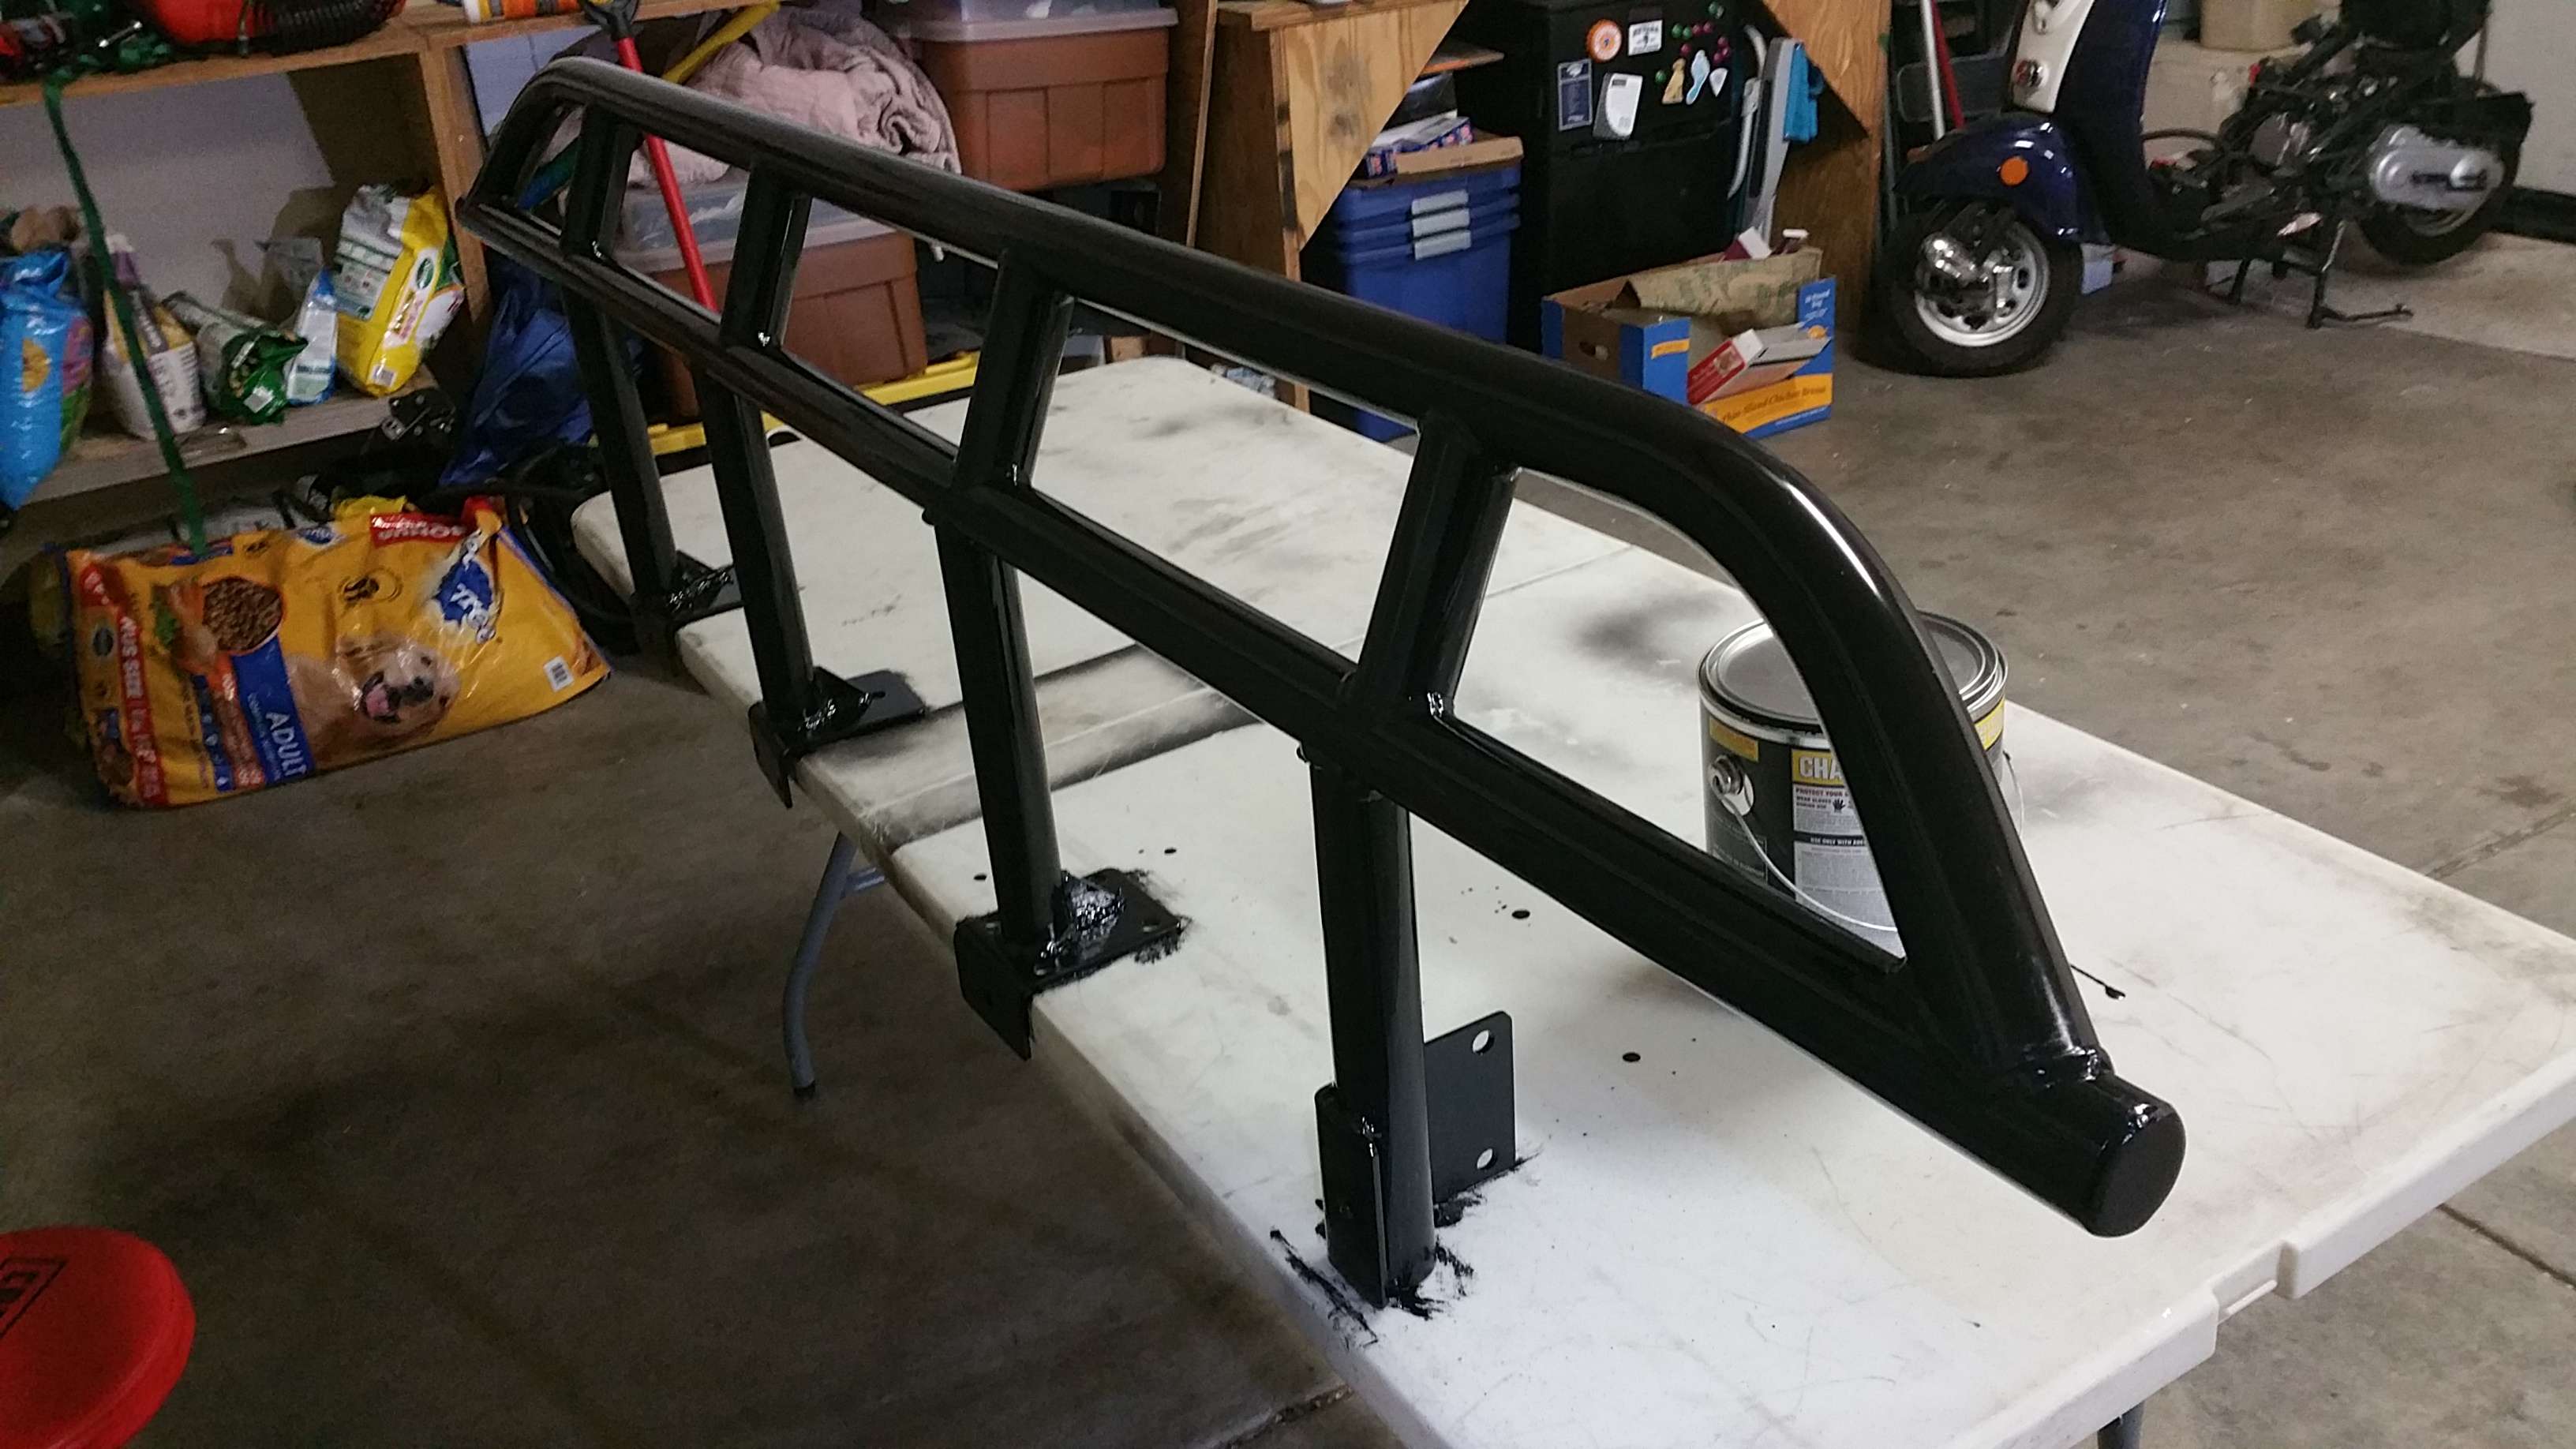
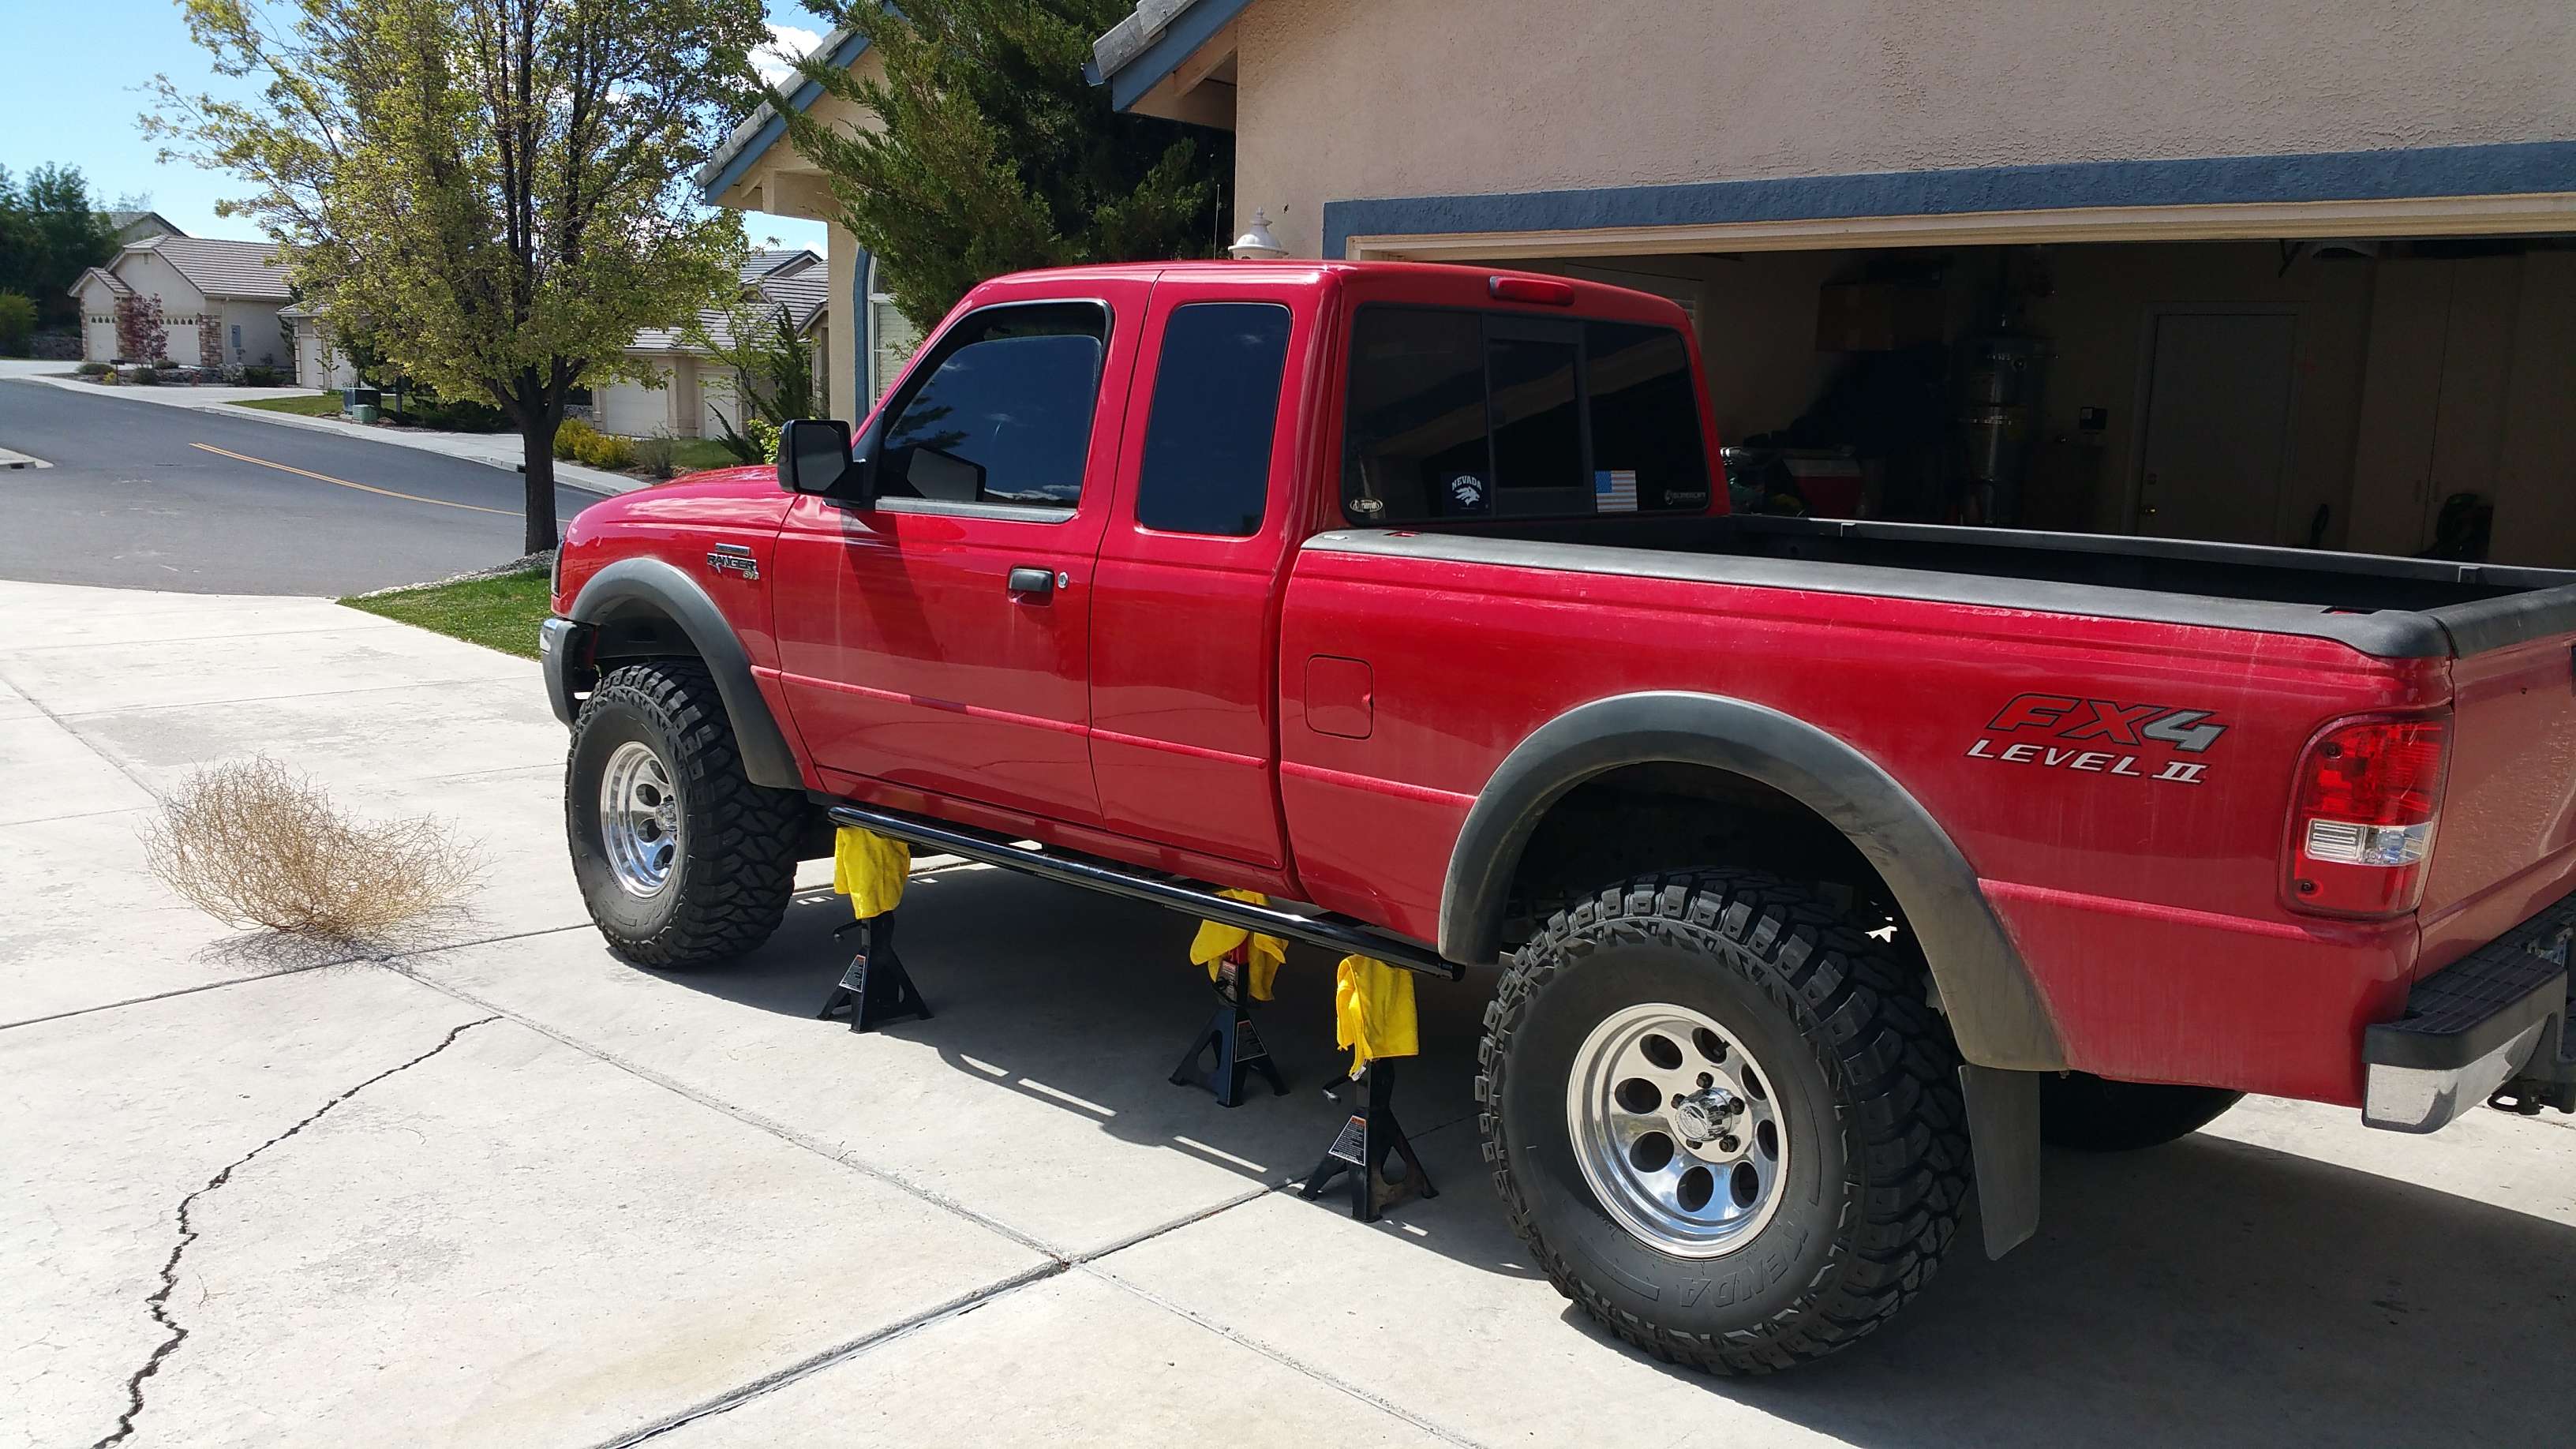
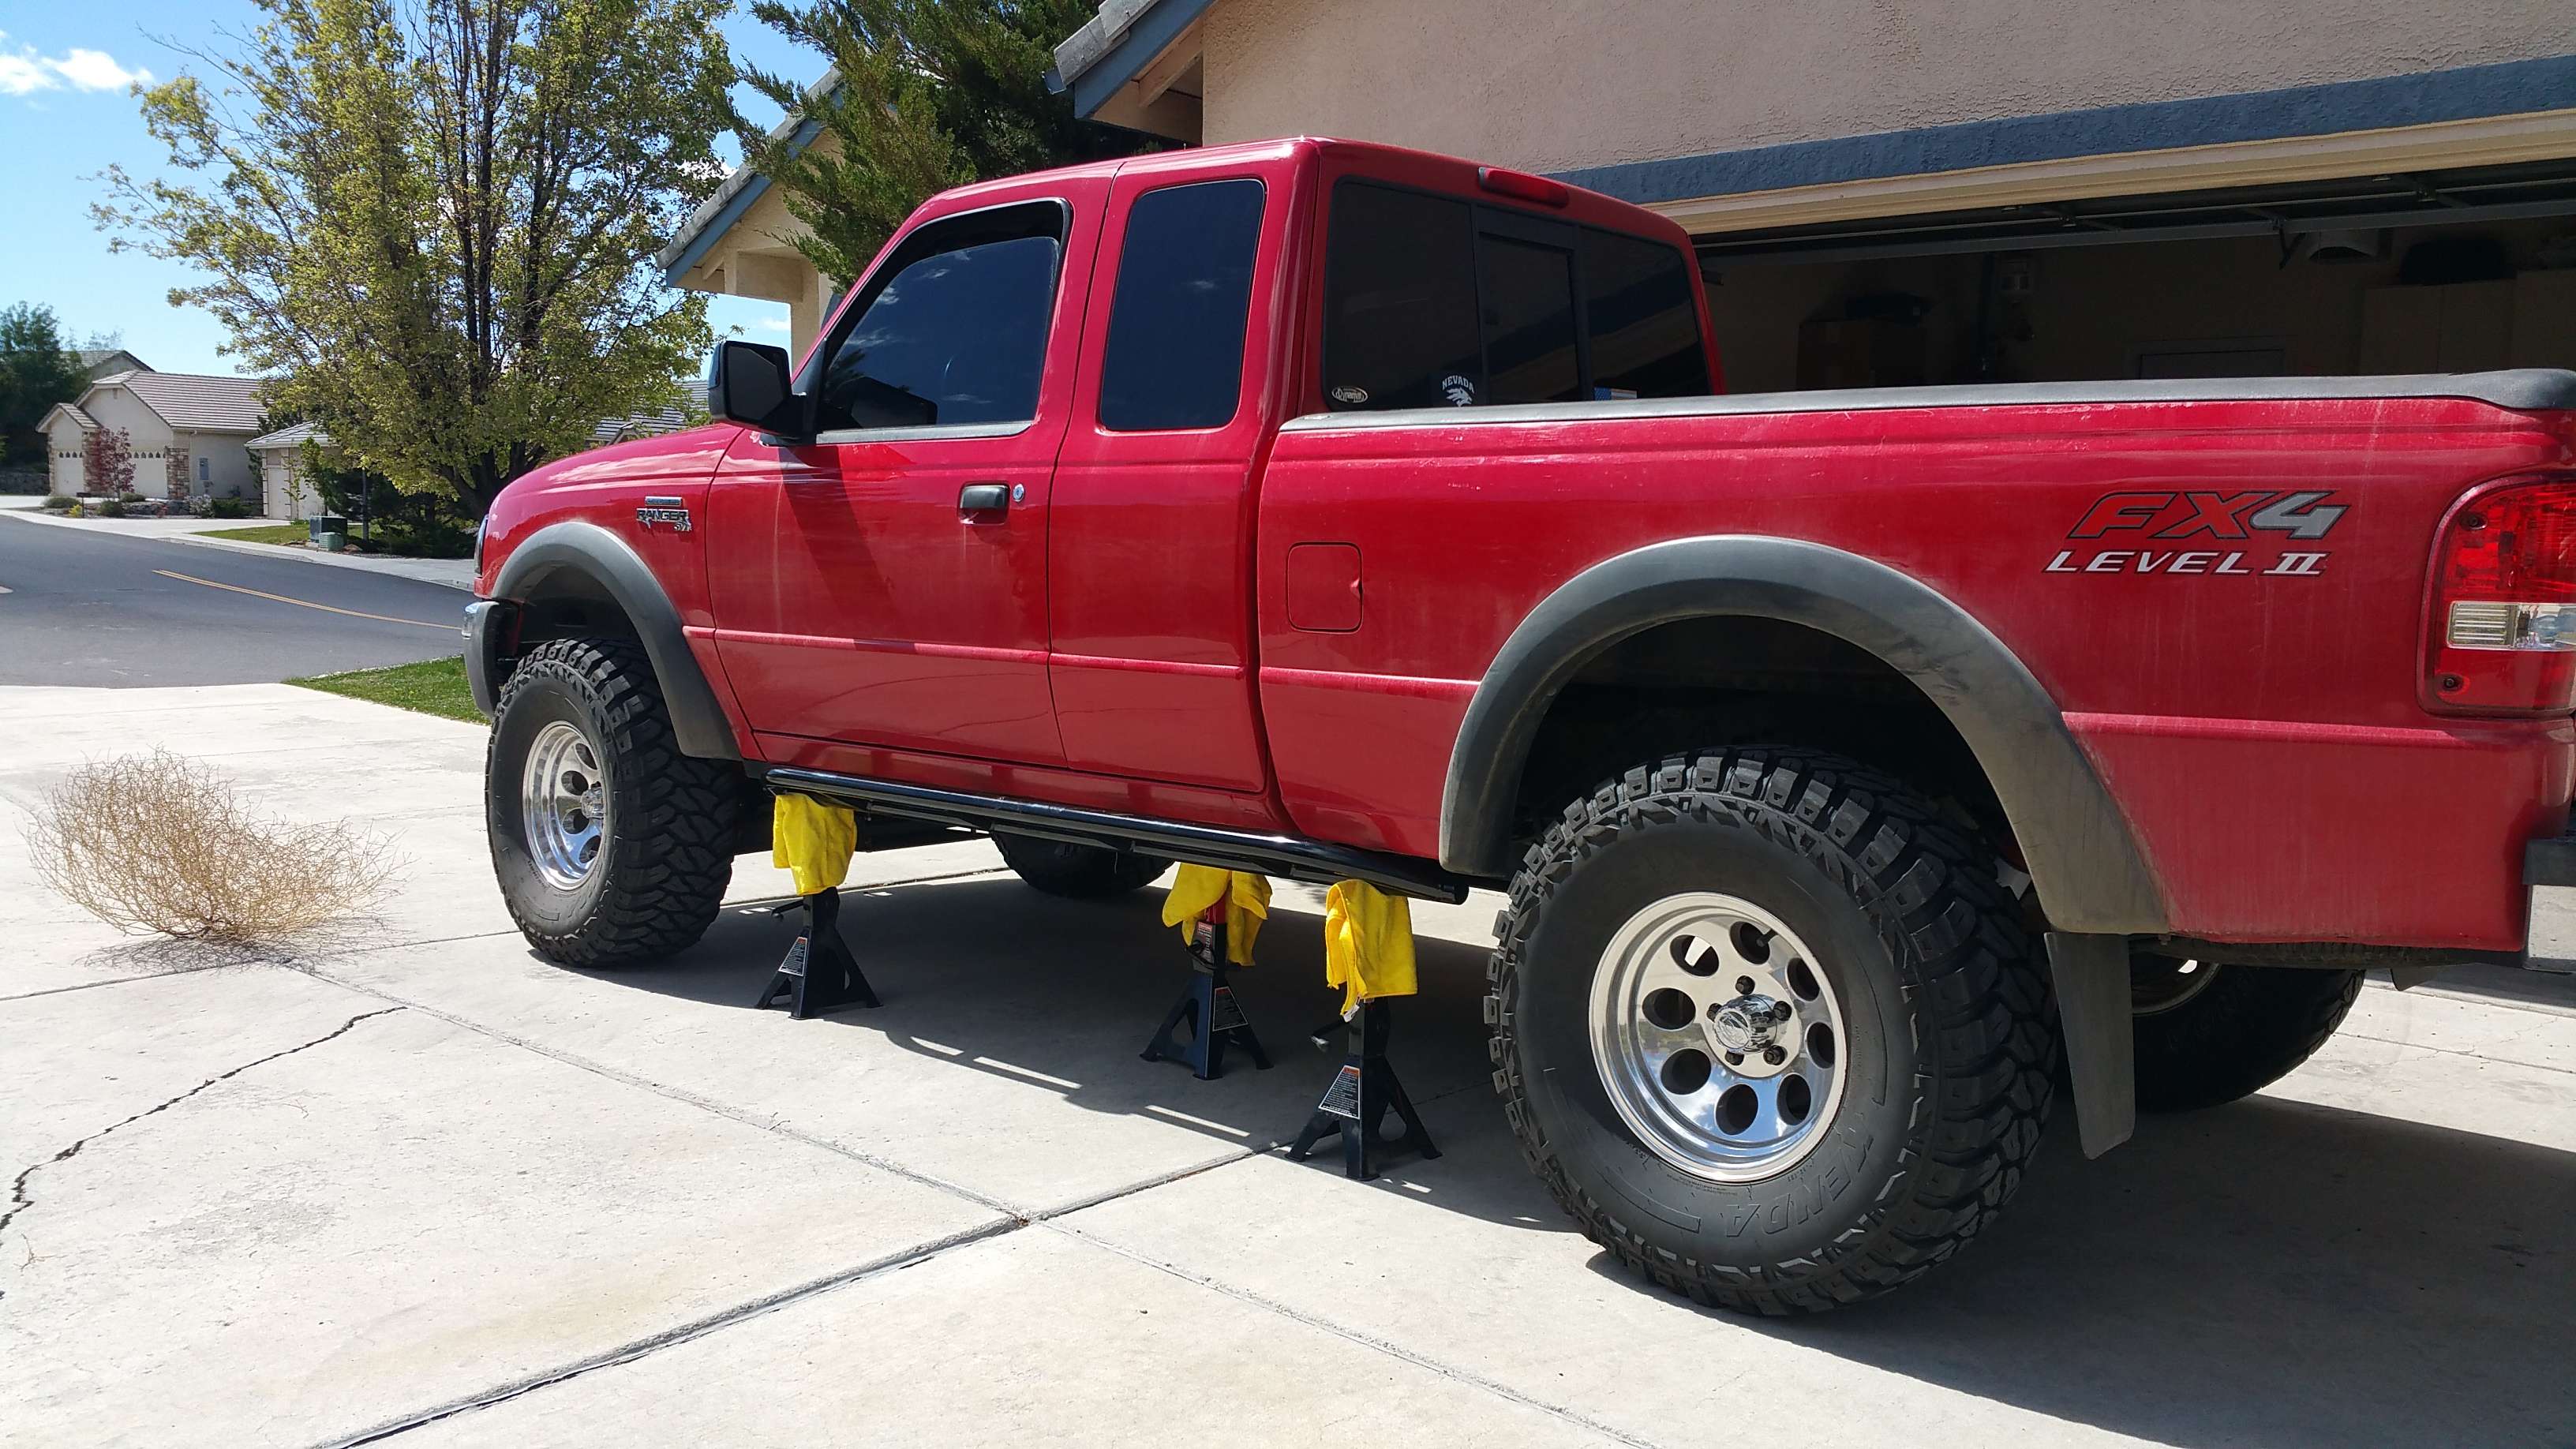
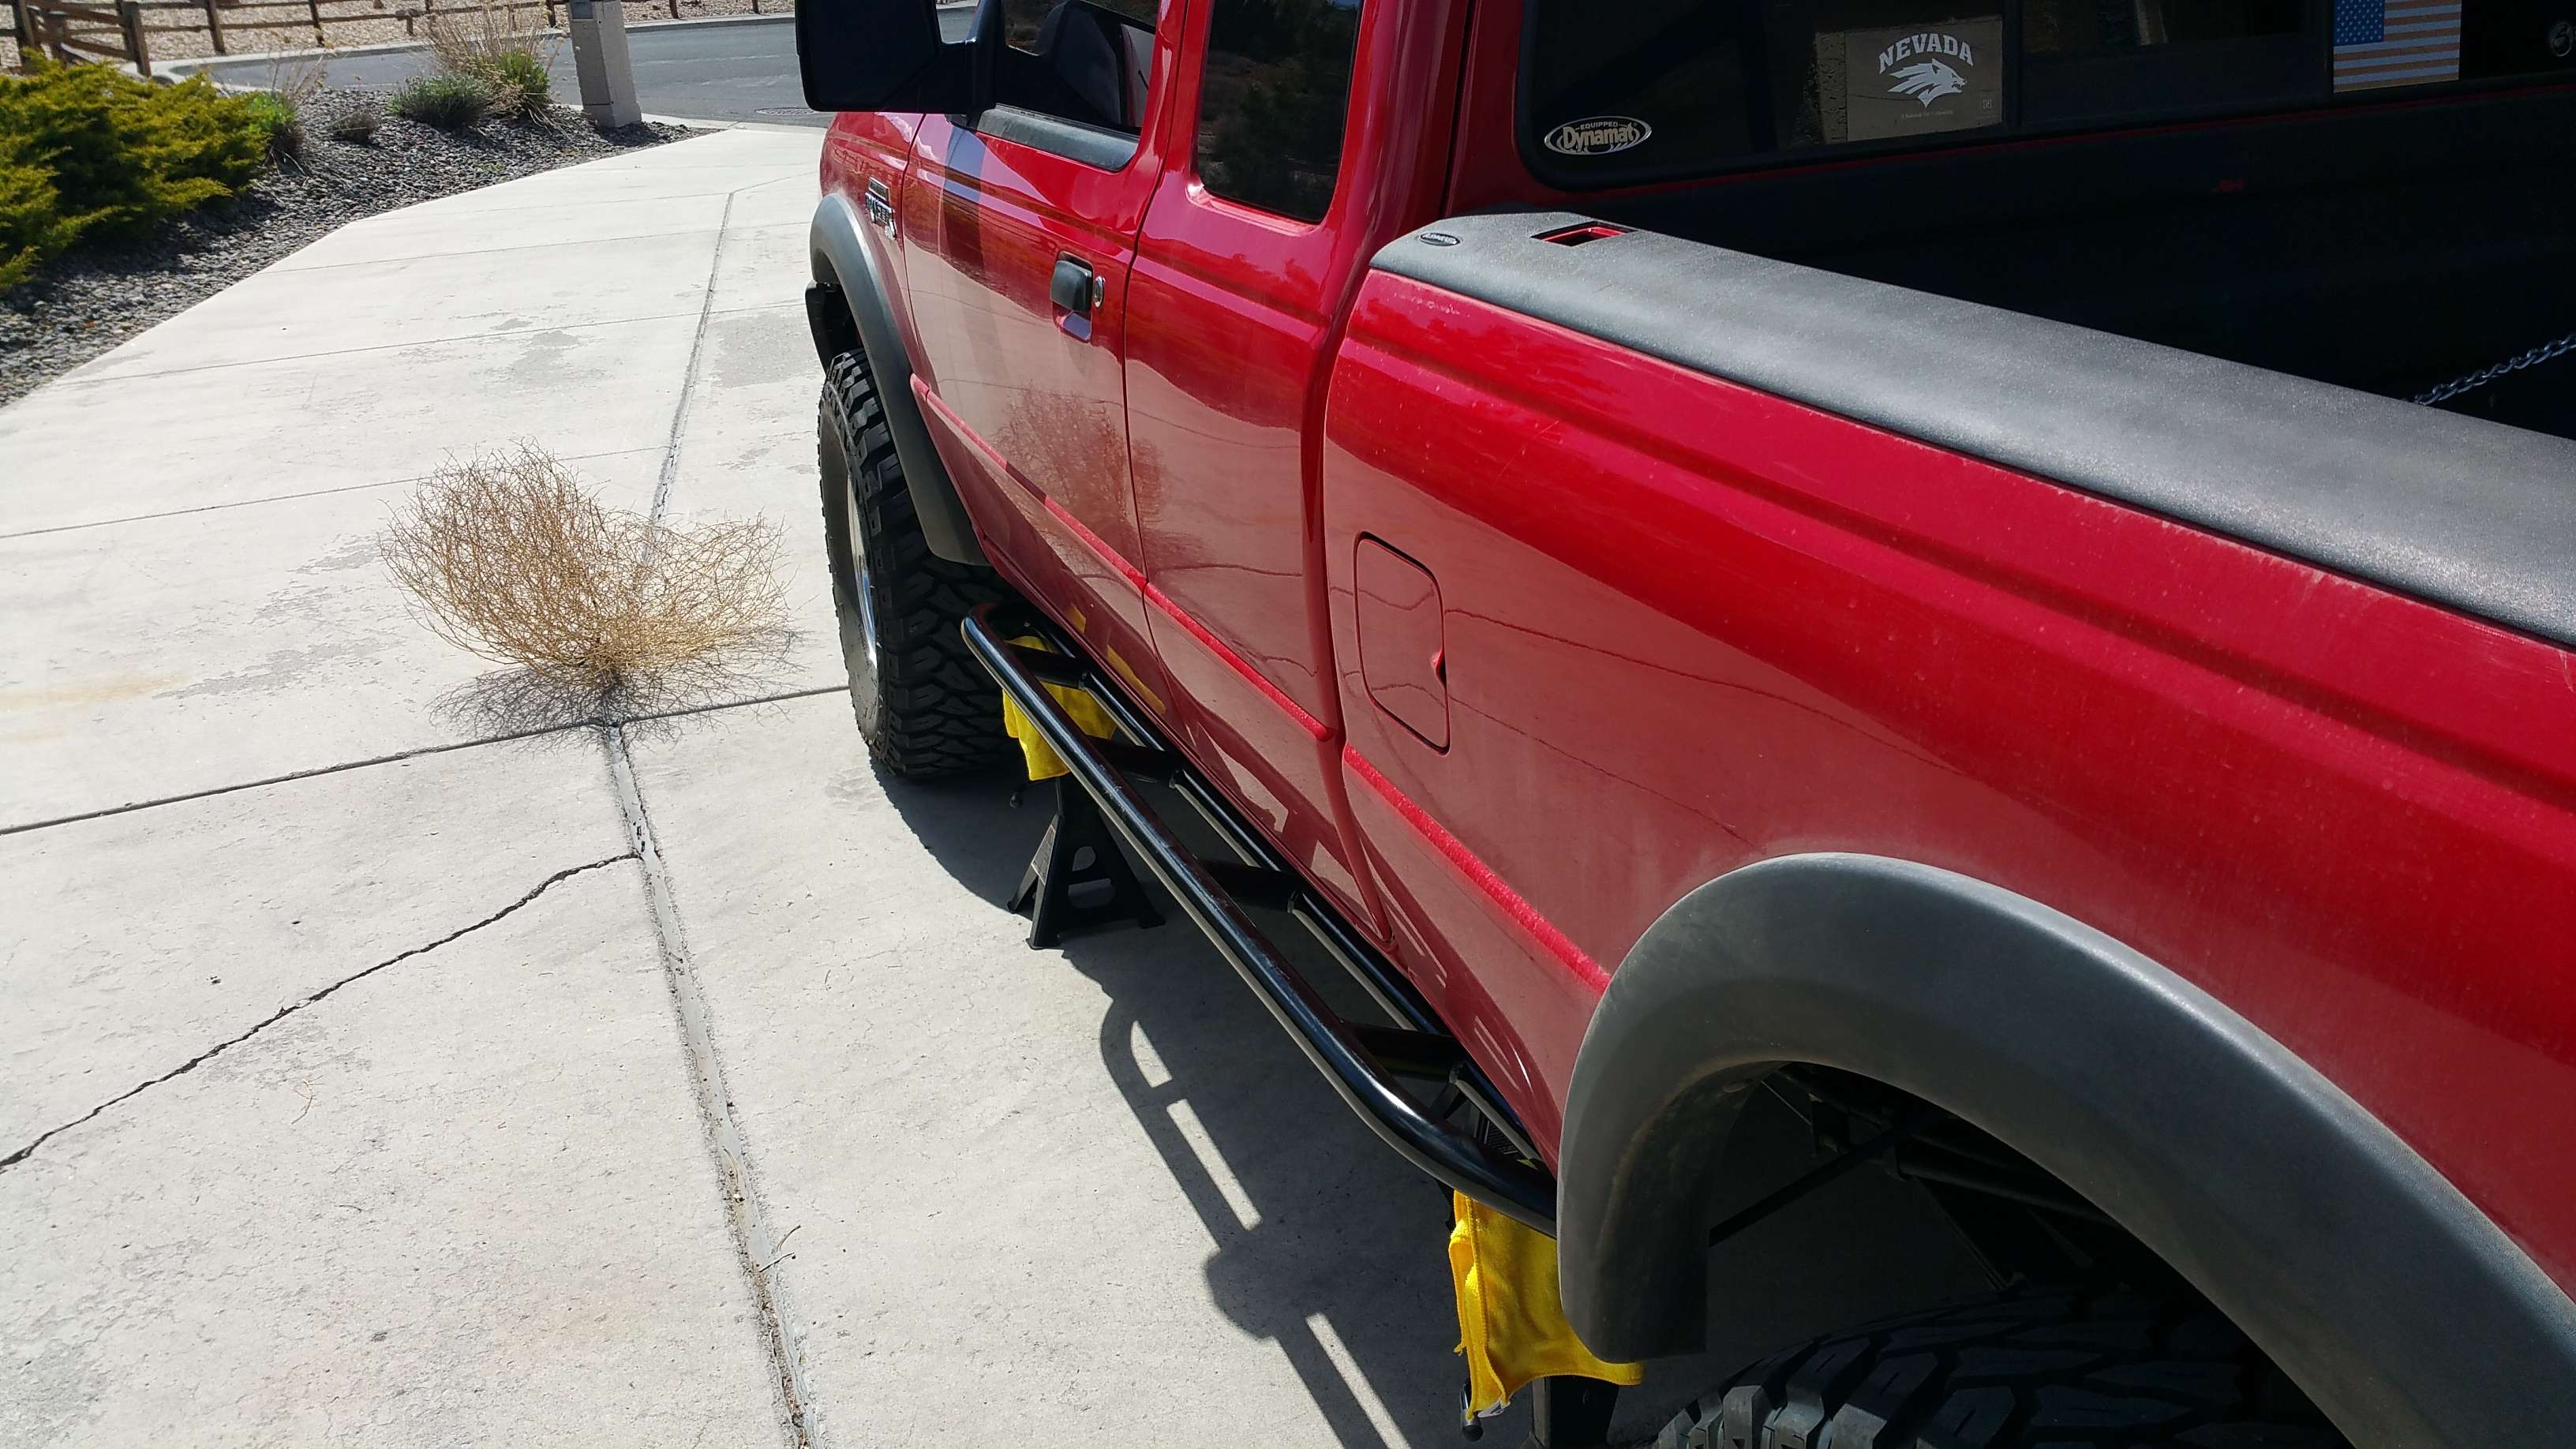
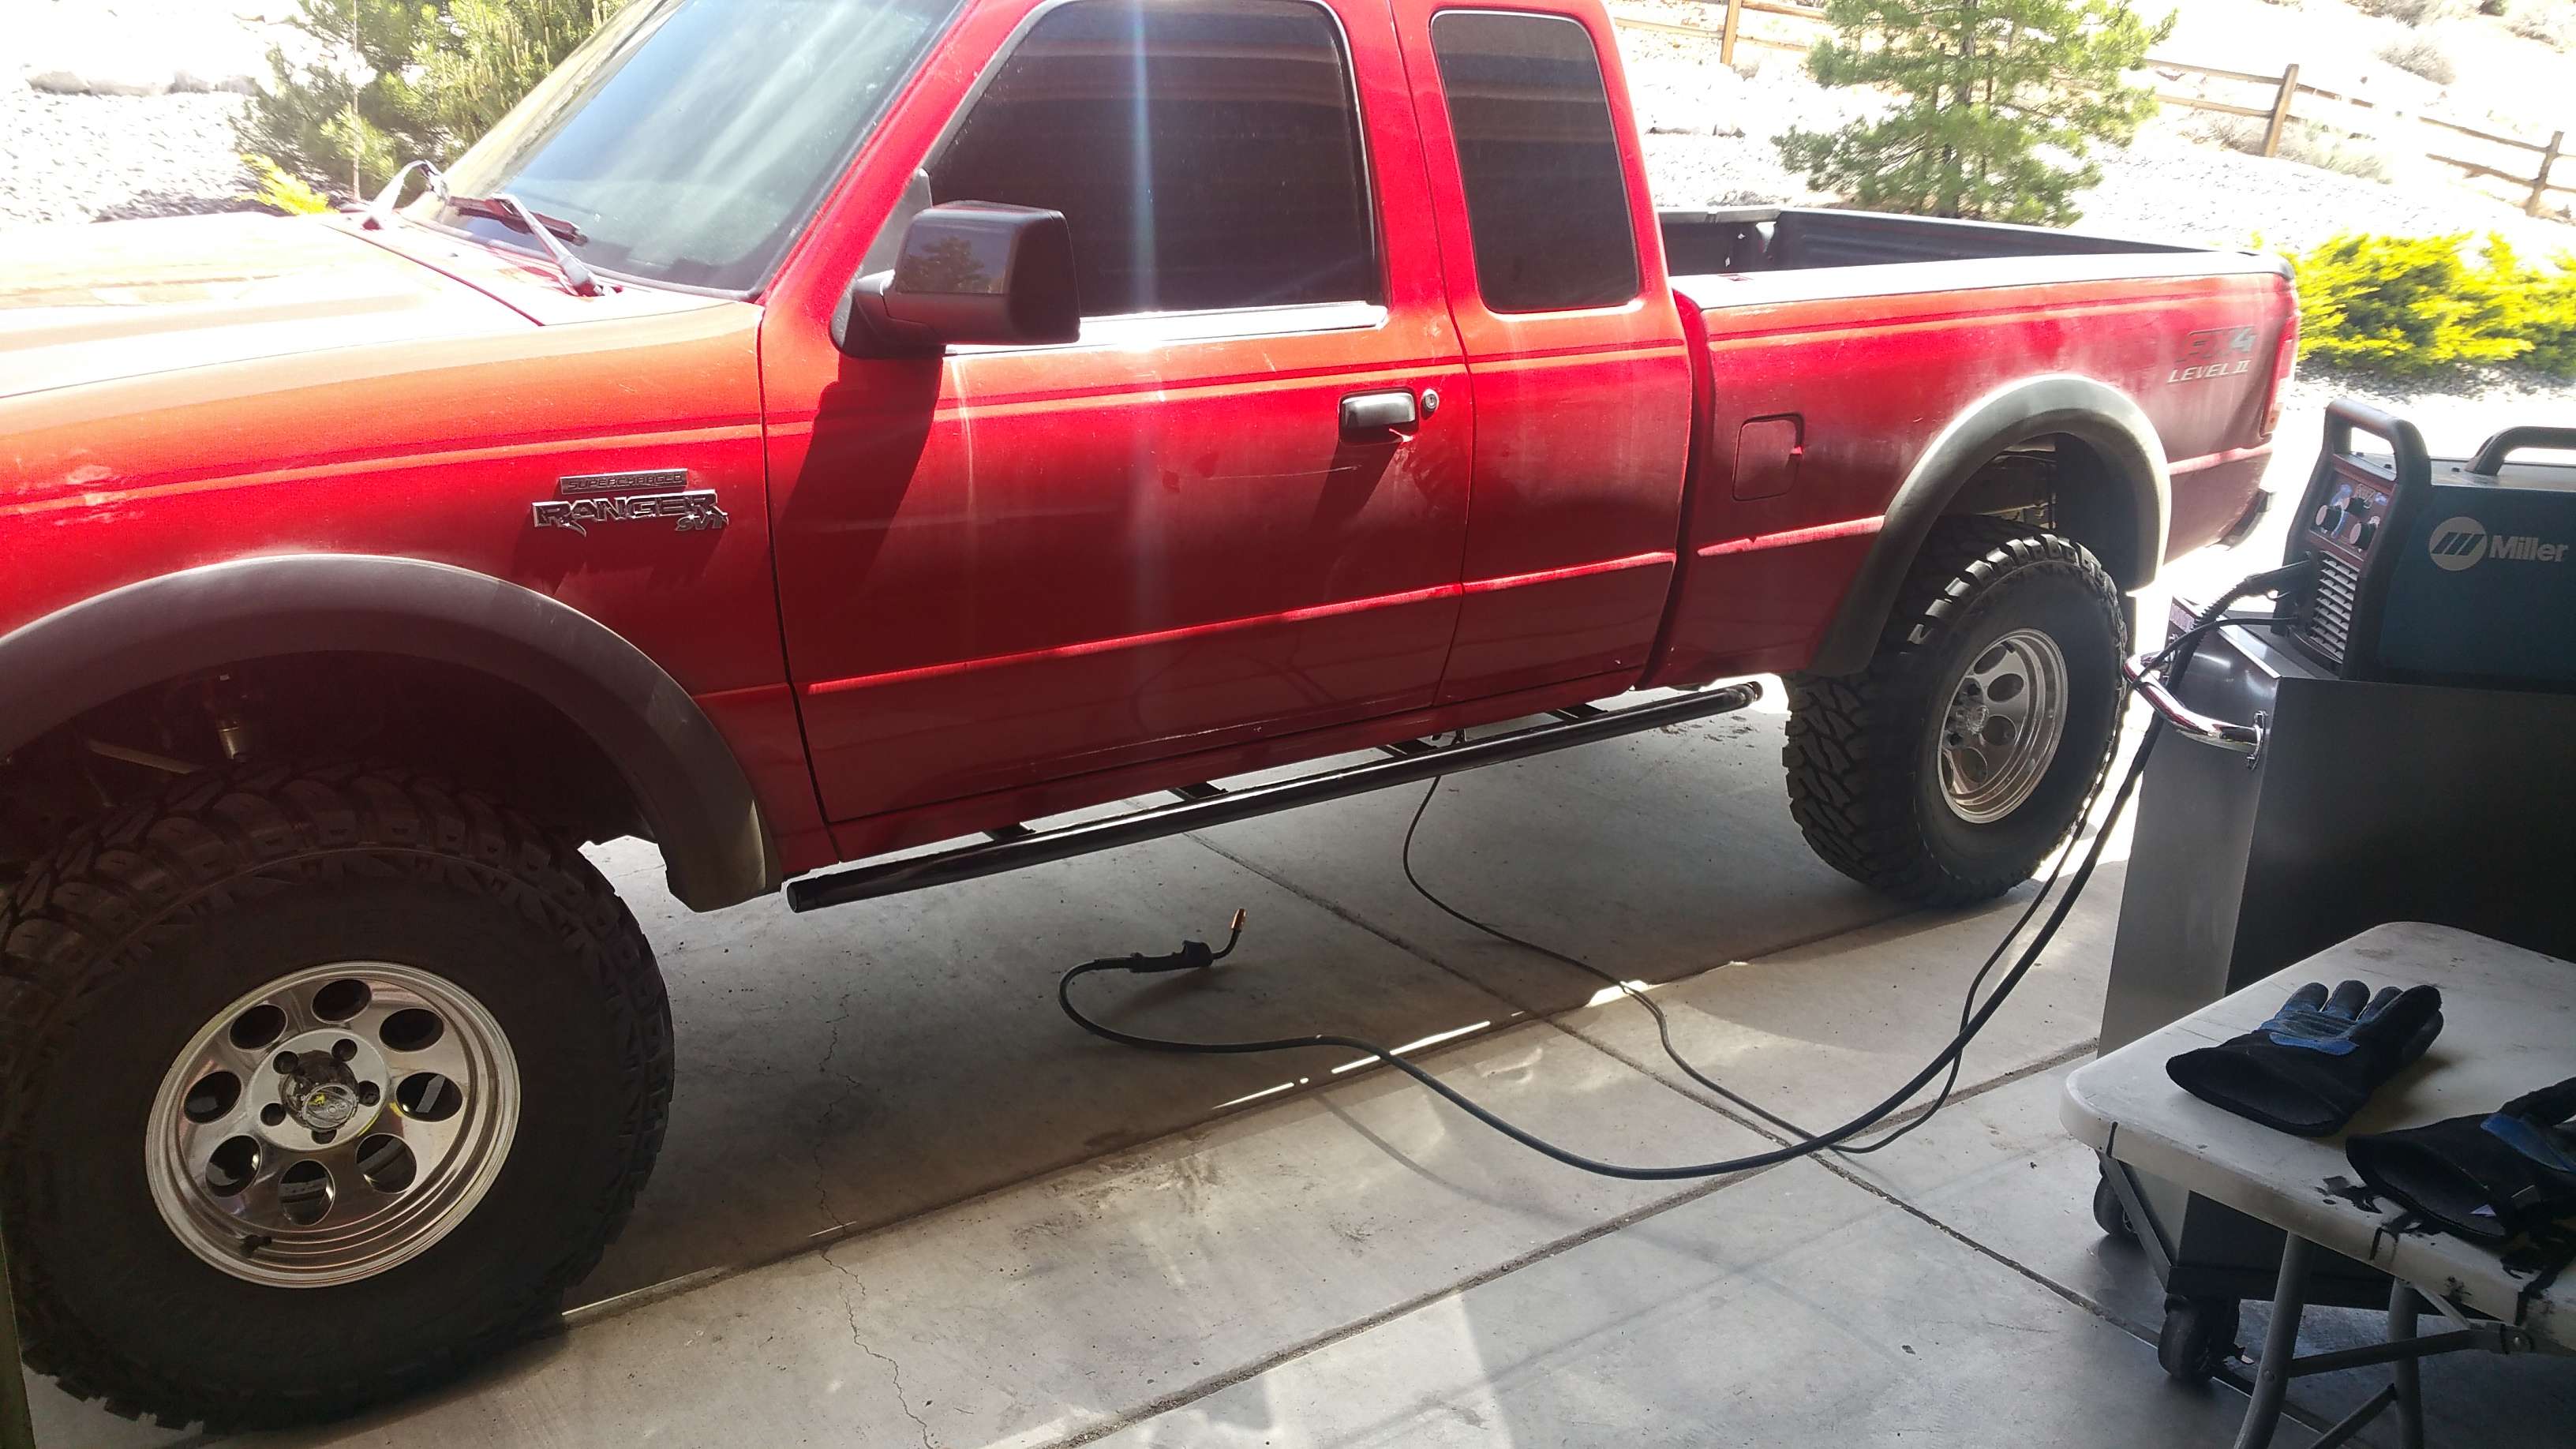
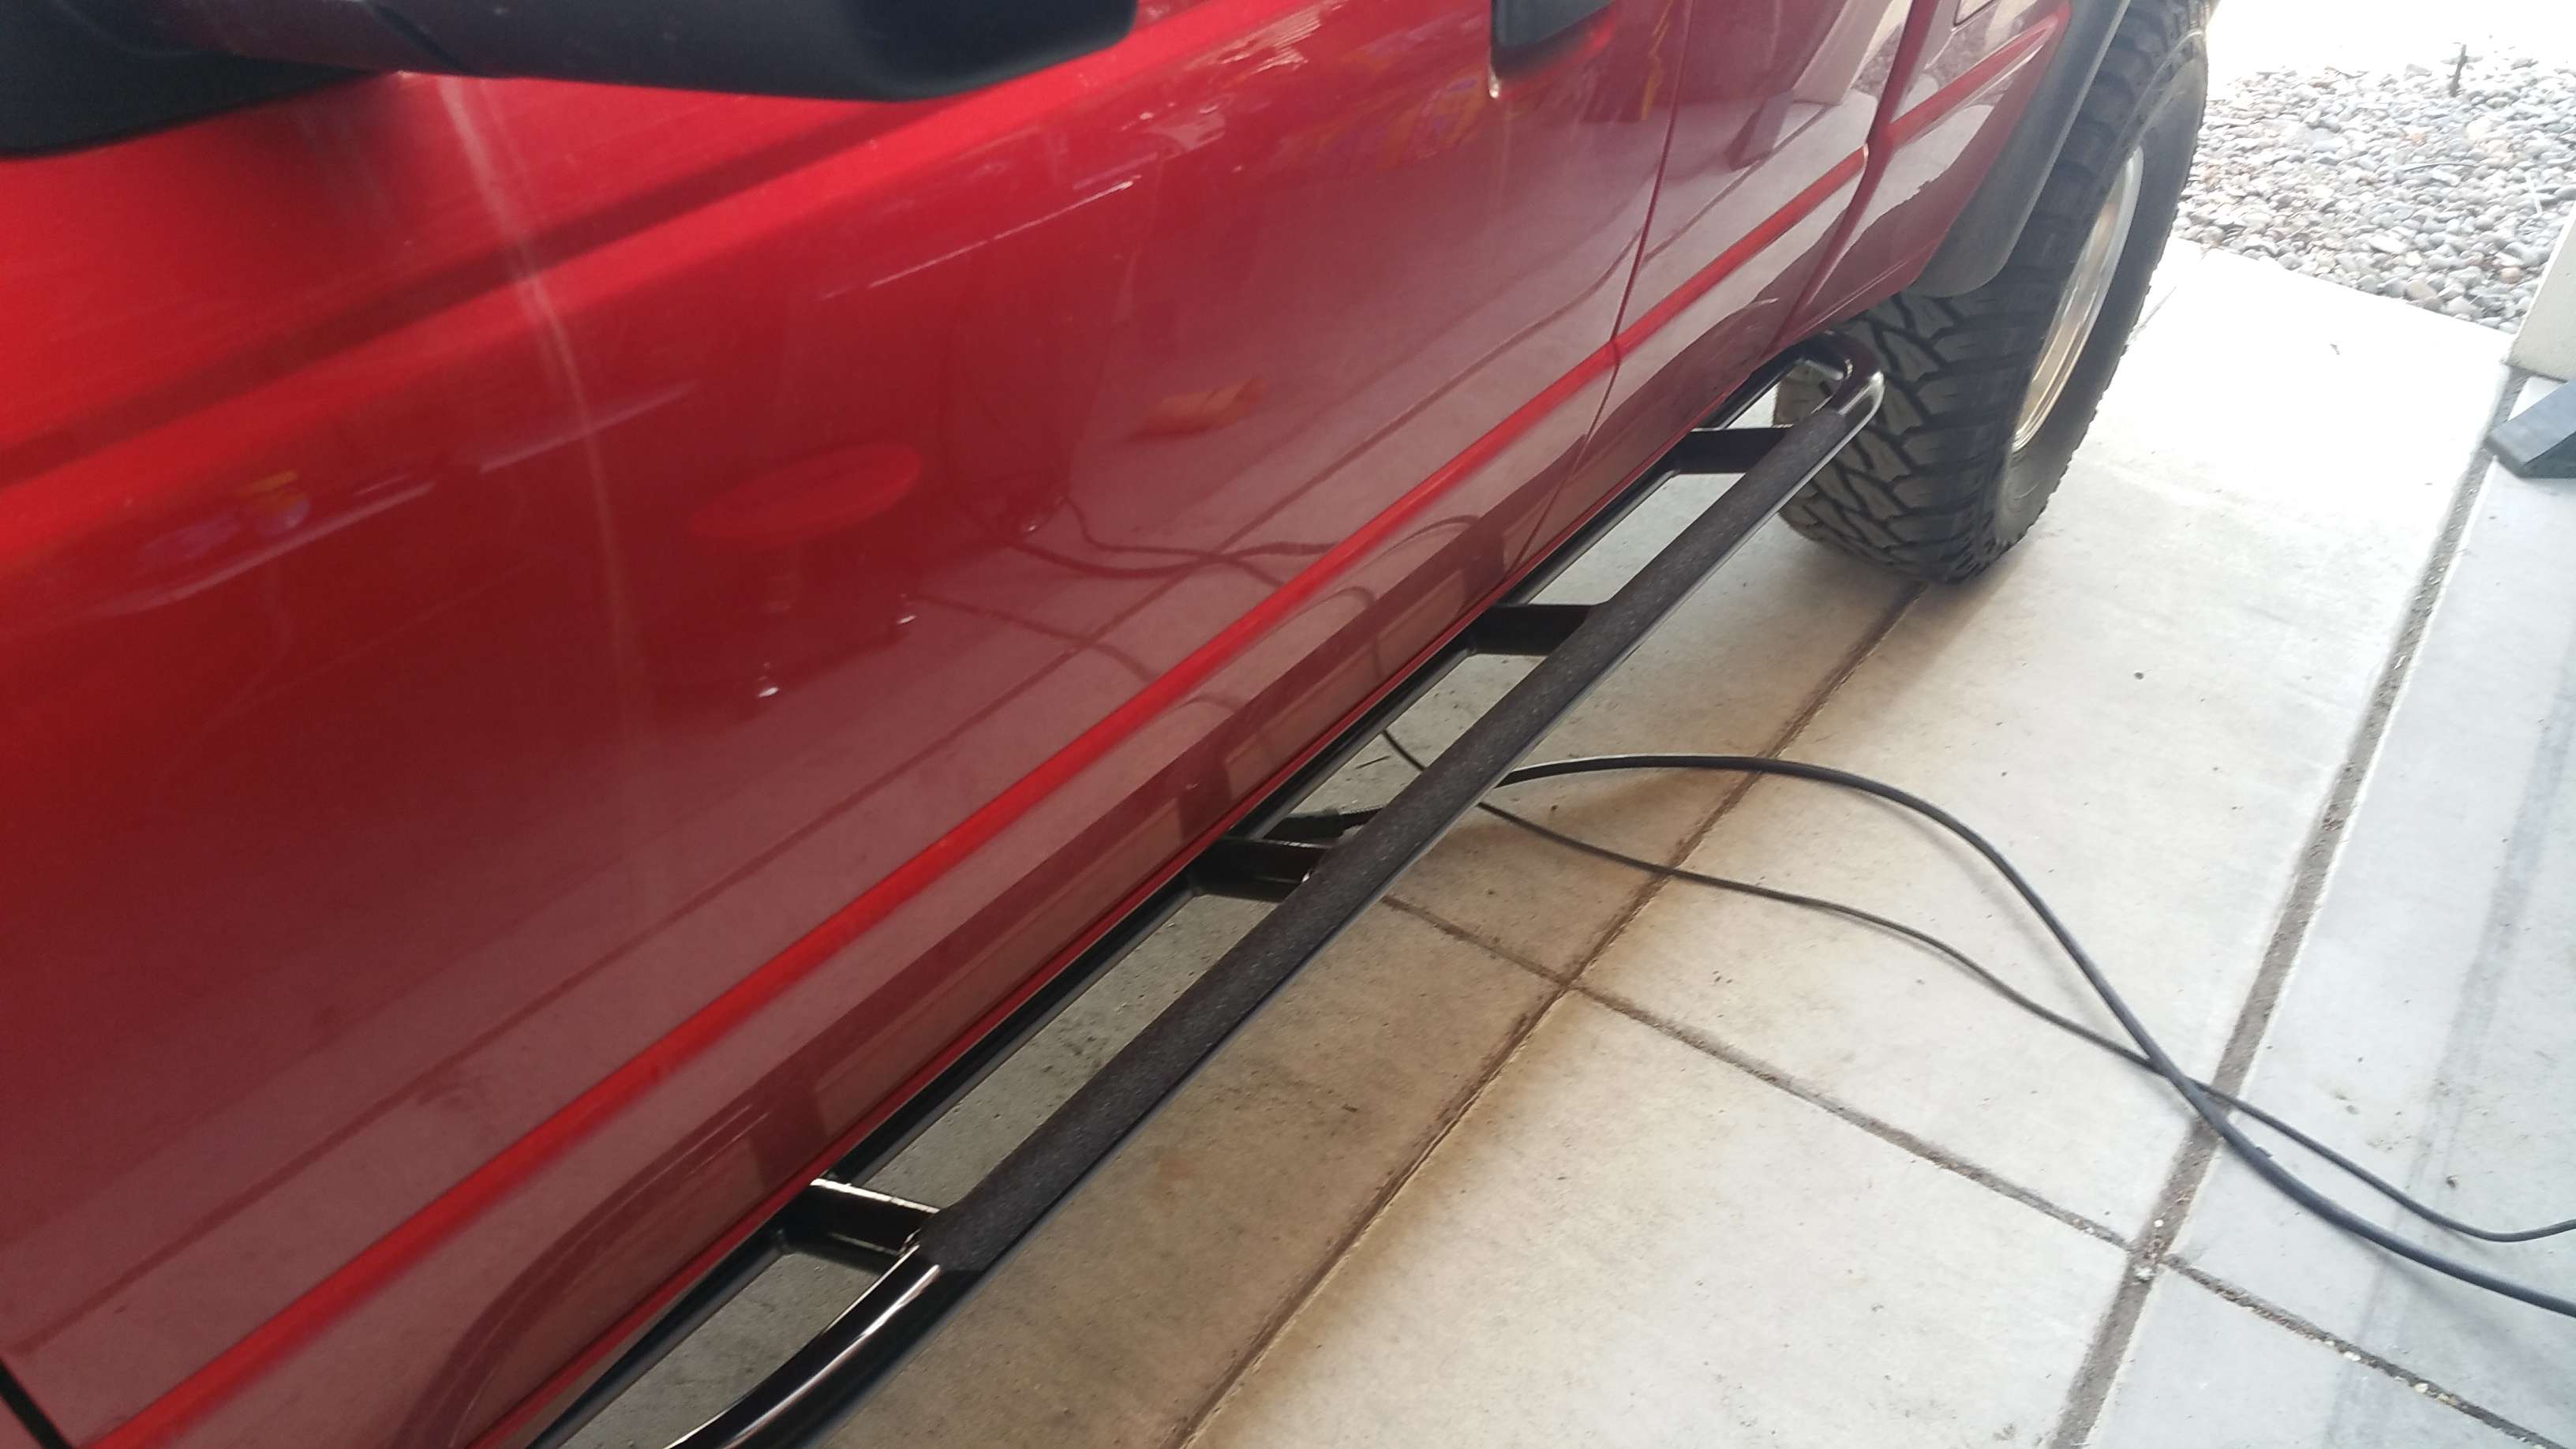
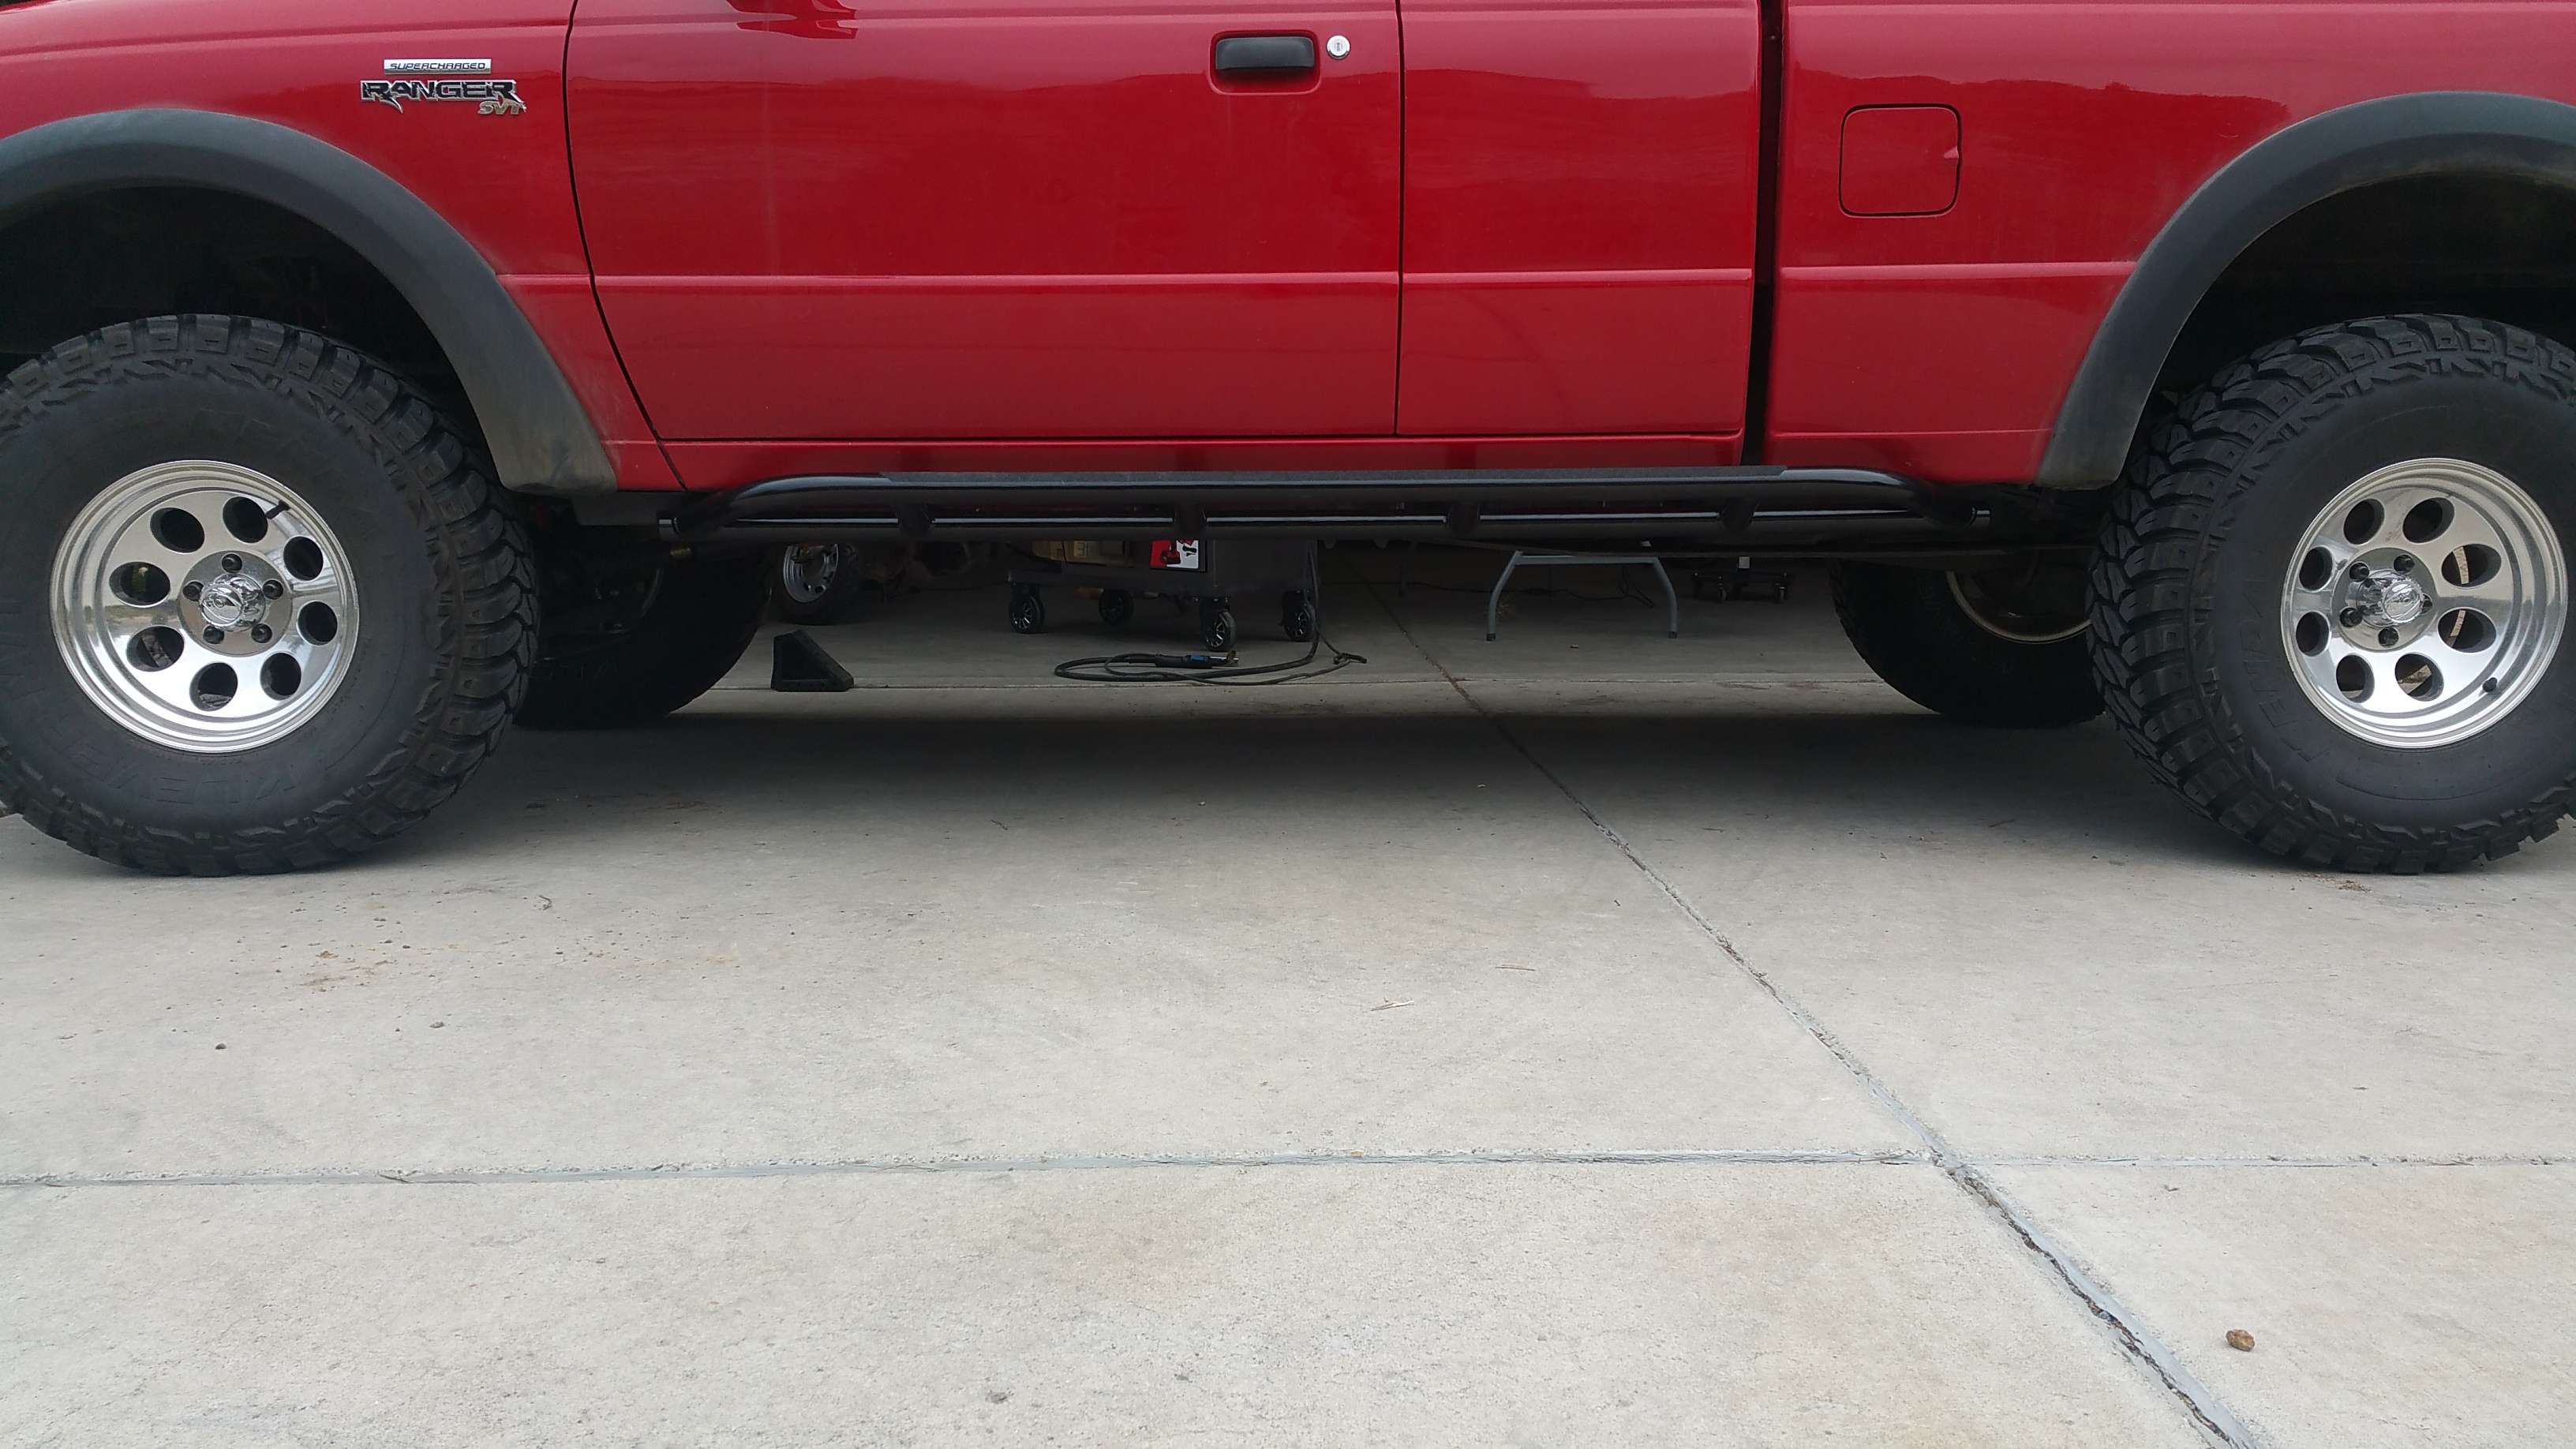
Up next: Rock sliders.
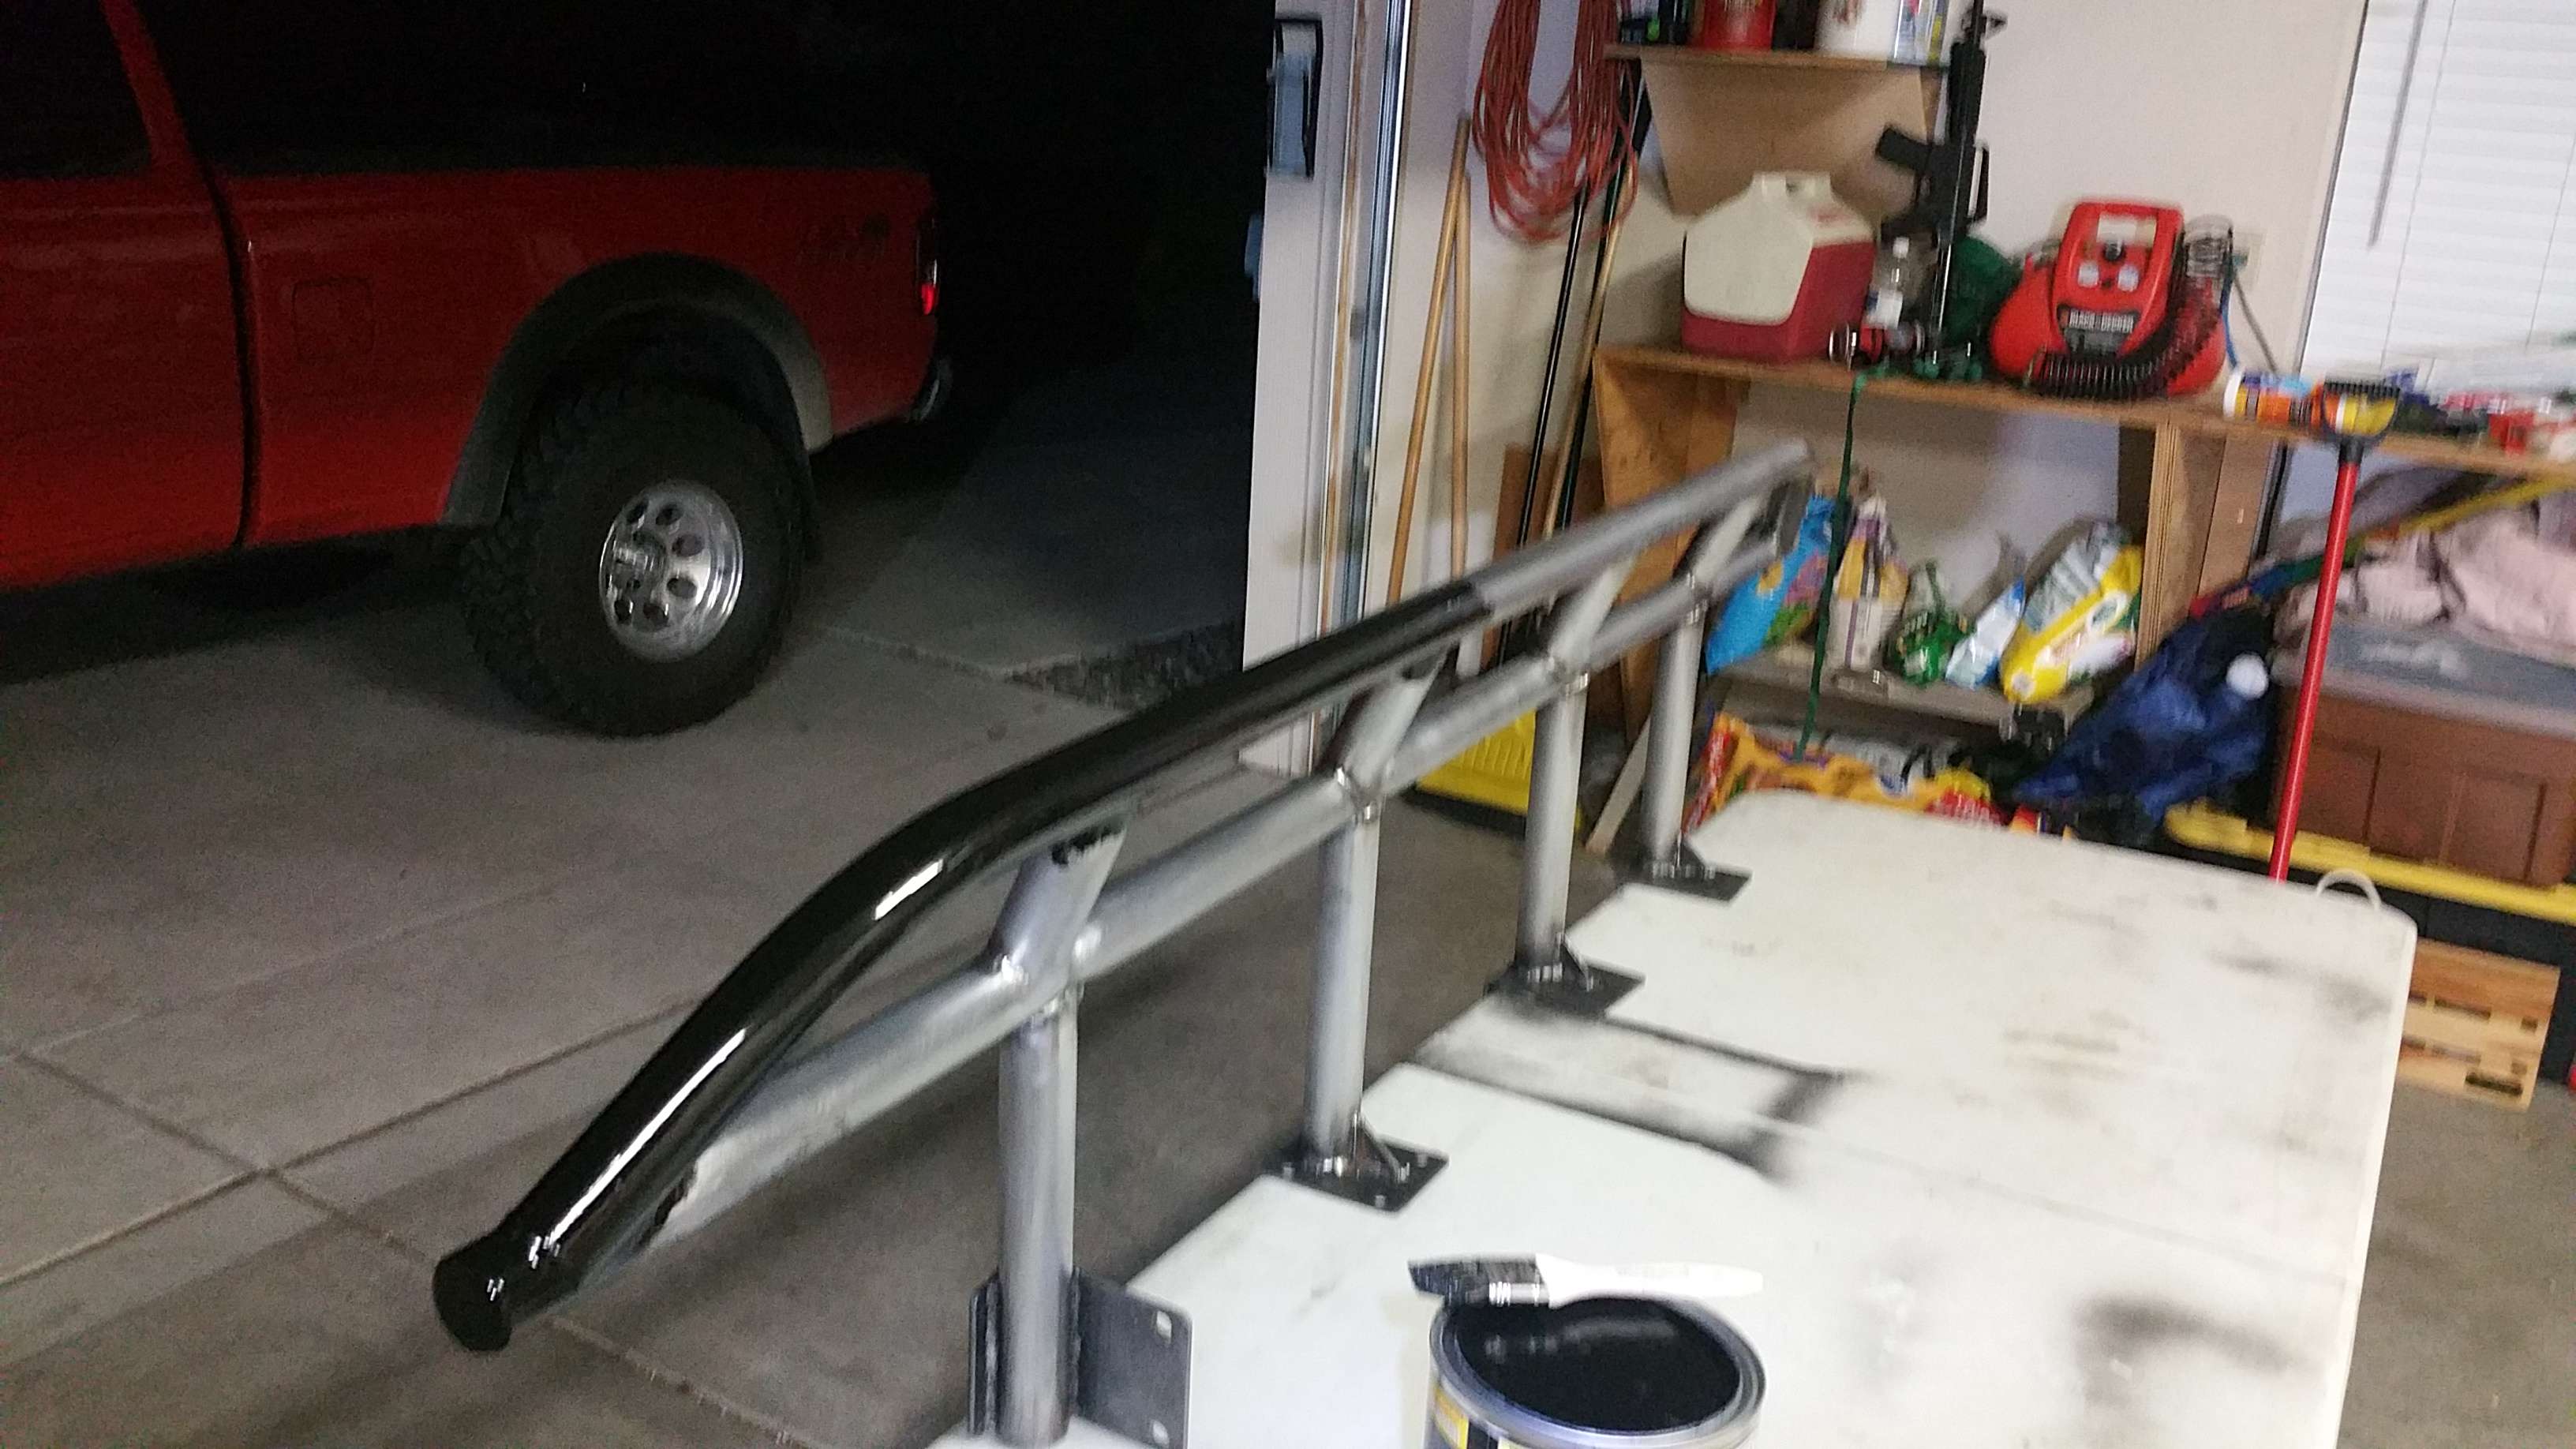
I do not intend on sliding across rocks, but Westin bars are just dumb. They are hilariously expensive, attach to the body, flex, and are made of thin crappy metal. The sliders I got from Trail Gear cost much less, are as solid as you can get, heavy duty, well designed, and go directly to the frame. I spent quit a few hours measuring and planning how to attach them. Eventually I got each attachment point and tube welded together so that each connection and weld to the frame was rock solid (pun intended). I got them level, equidistant, and exactly where I wanted them. They tuck up nice, but have enough room to step on. They have grip tape on the top, and are painted with chassis saver (which is awesome stuff by the way). All the welds came out awesome, since by now I had made my 240V extension cord for my welder, so I could make nice thick continuous welds.
Each plate and gusset is positioned so it sits against the frame near perfectly, so don't think they are crooked for no reason. The sliders have about 3/8" to 1/2" clearance from the body all the way around, and have ZERO flex in them, so they came out great.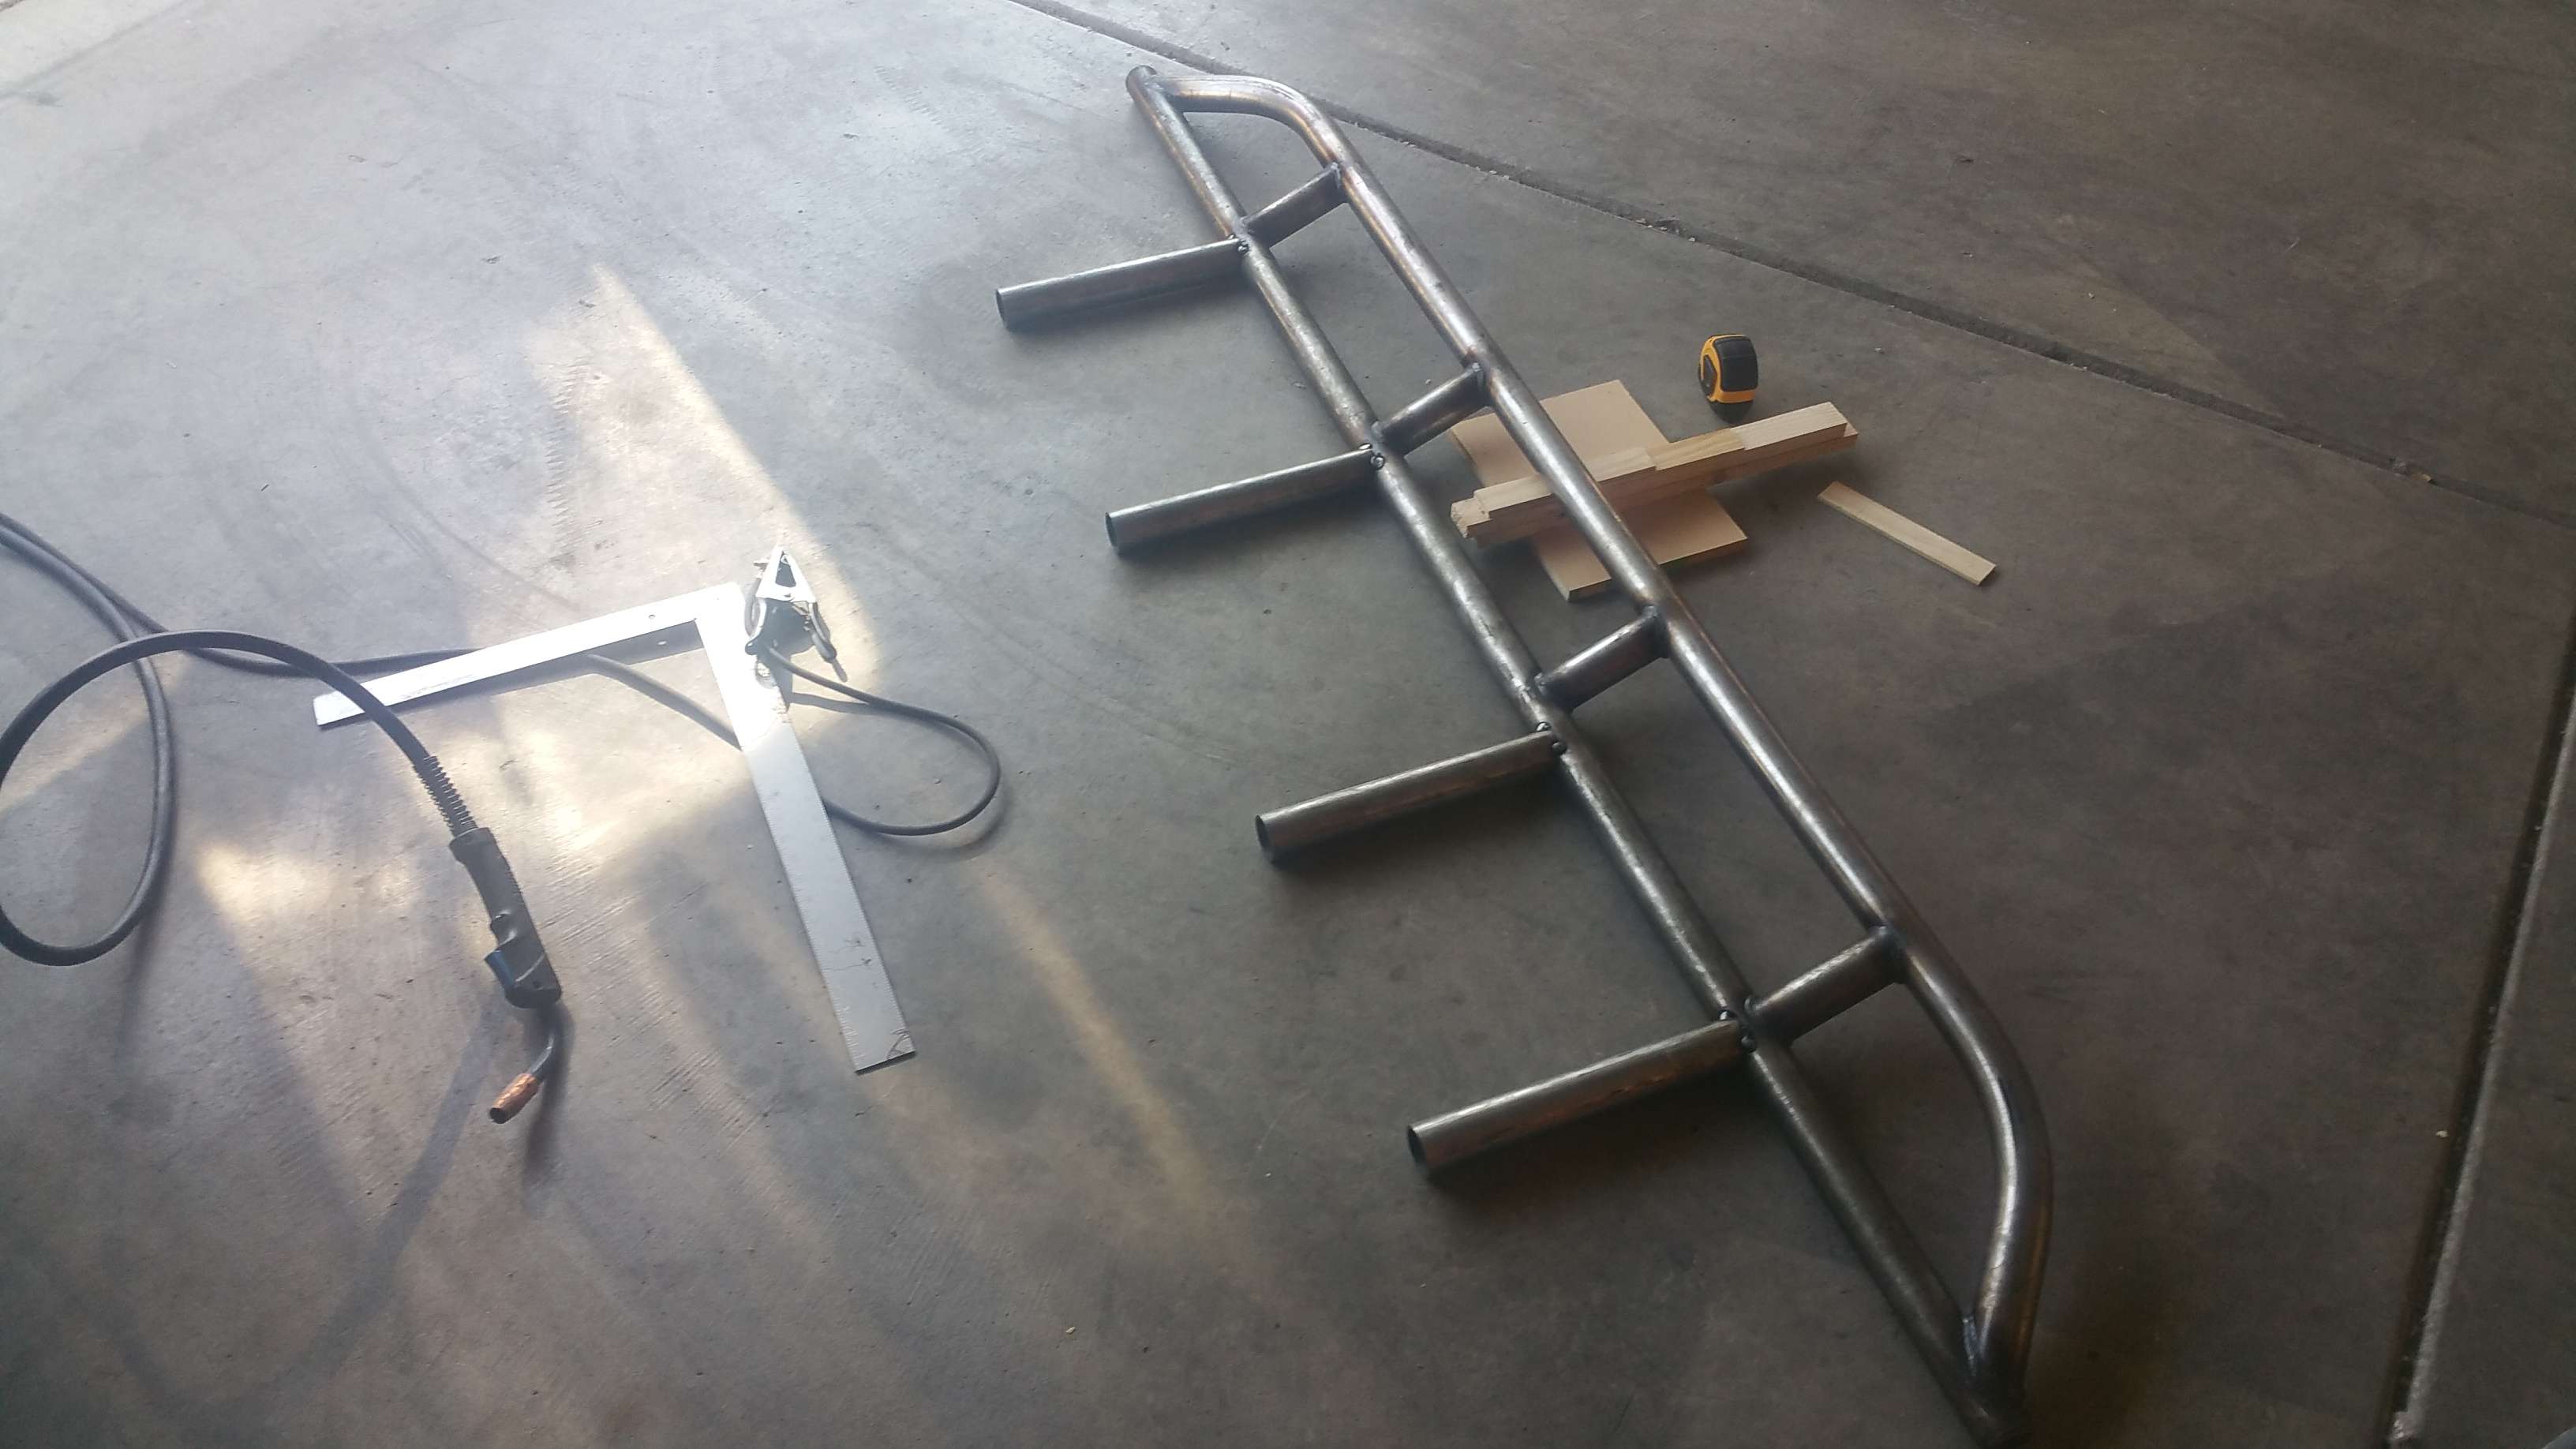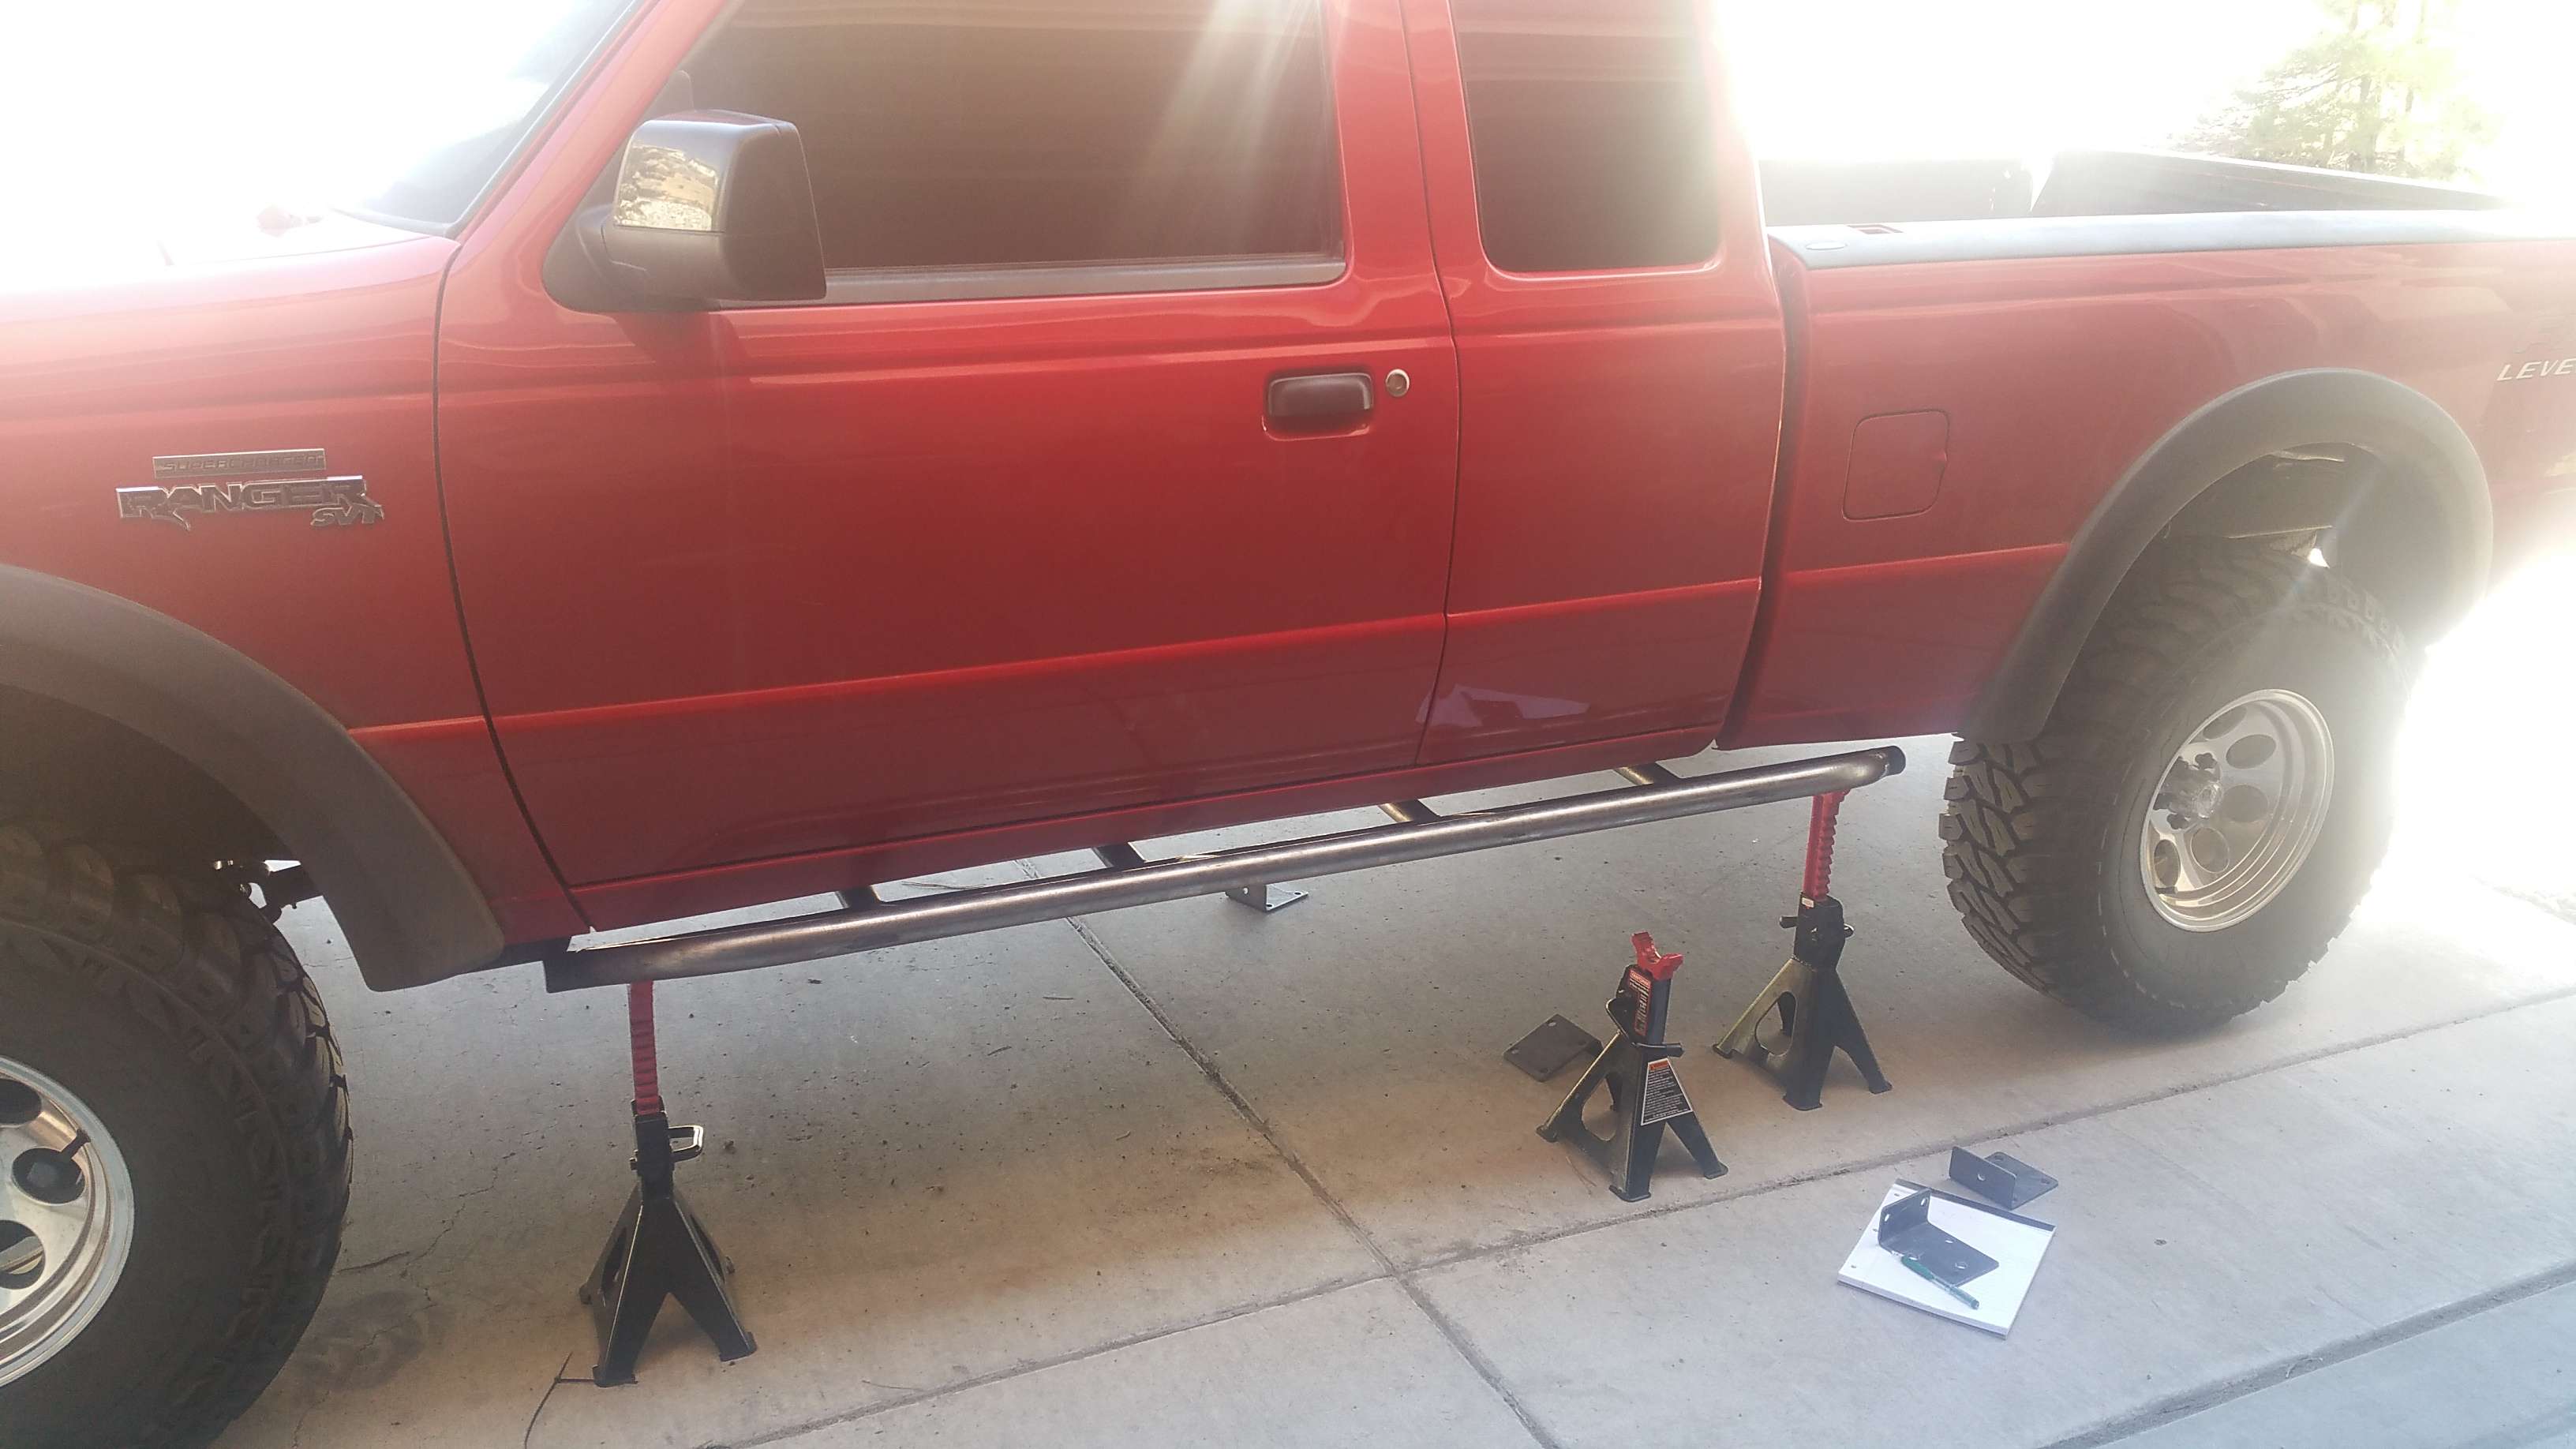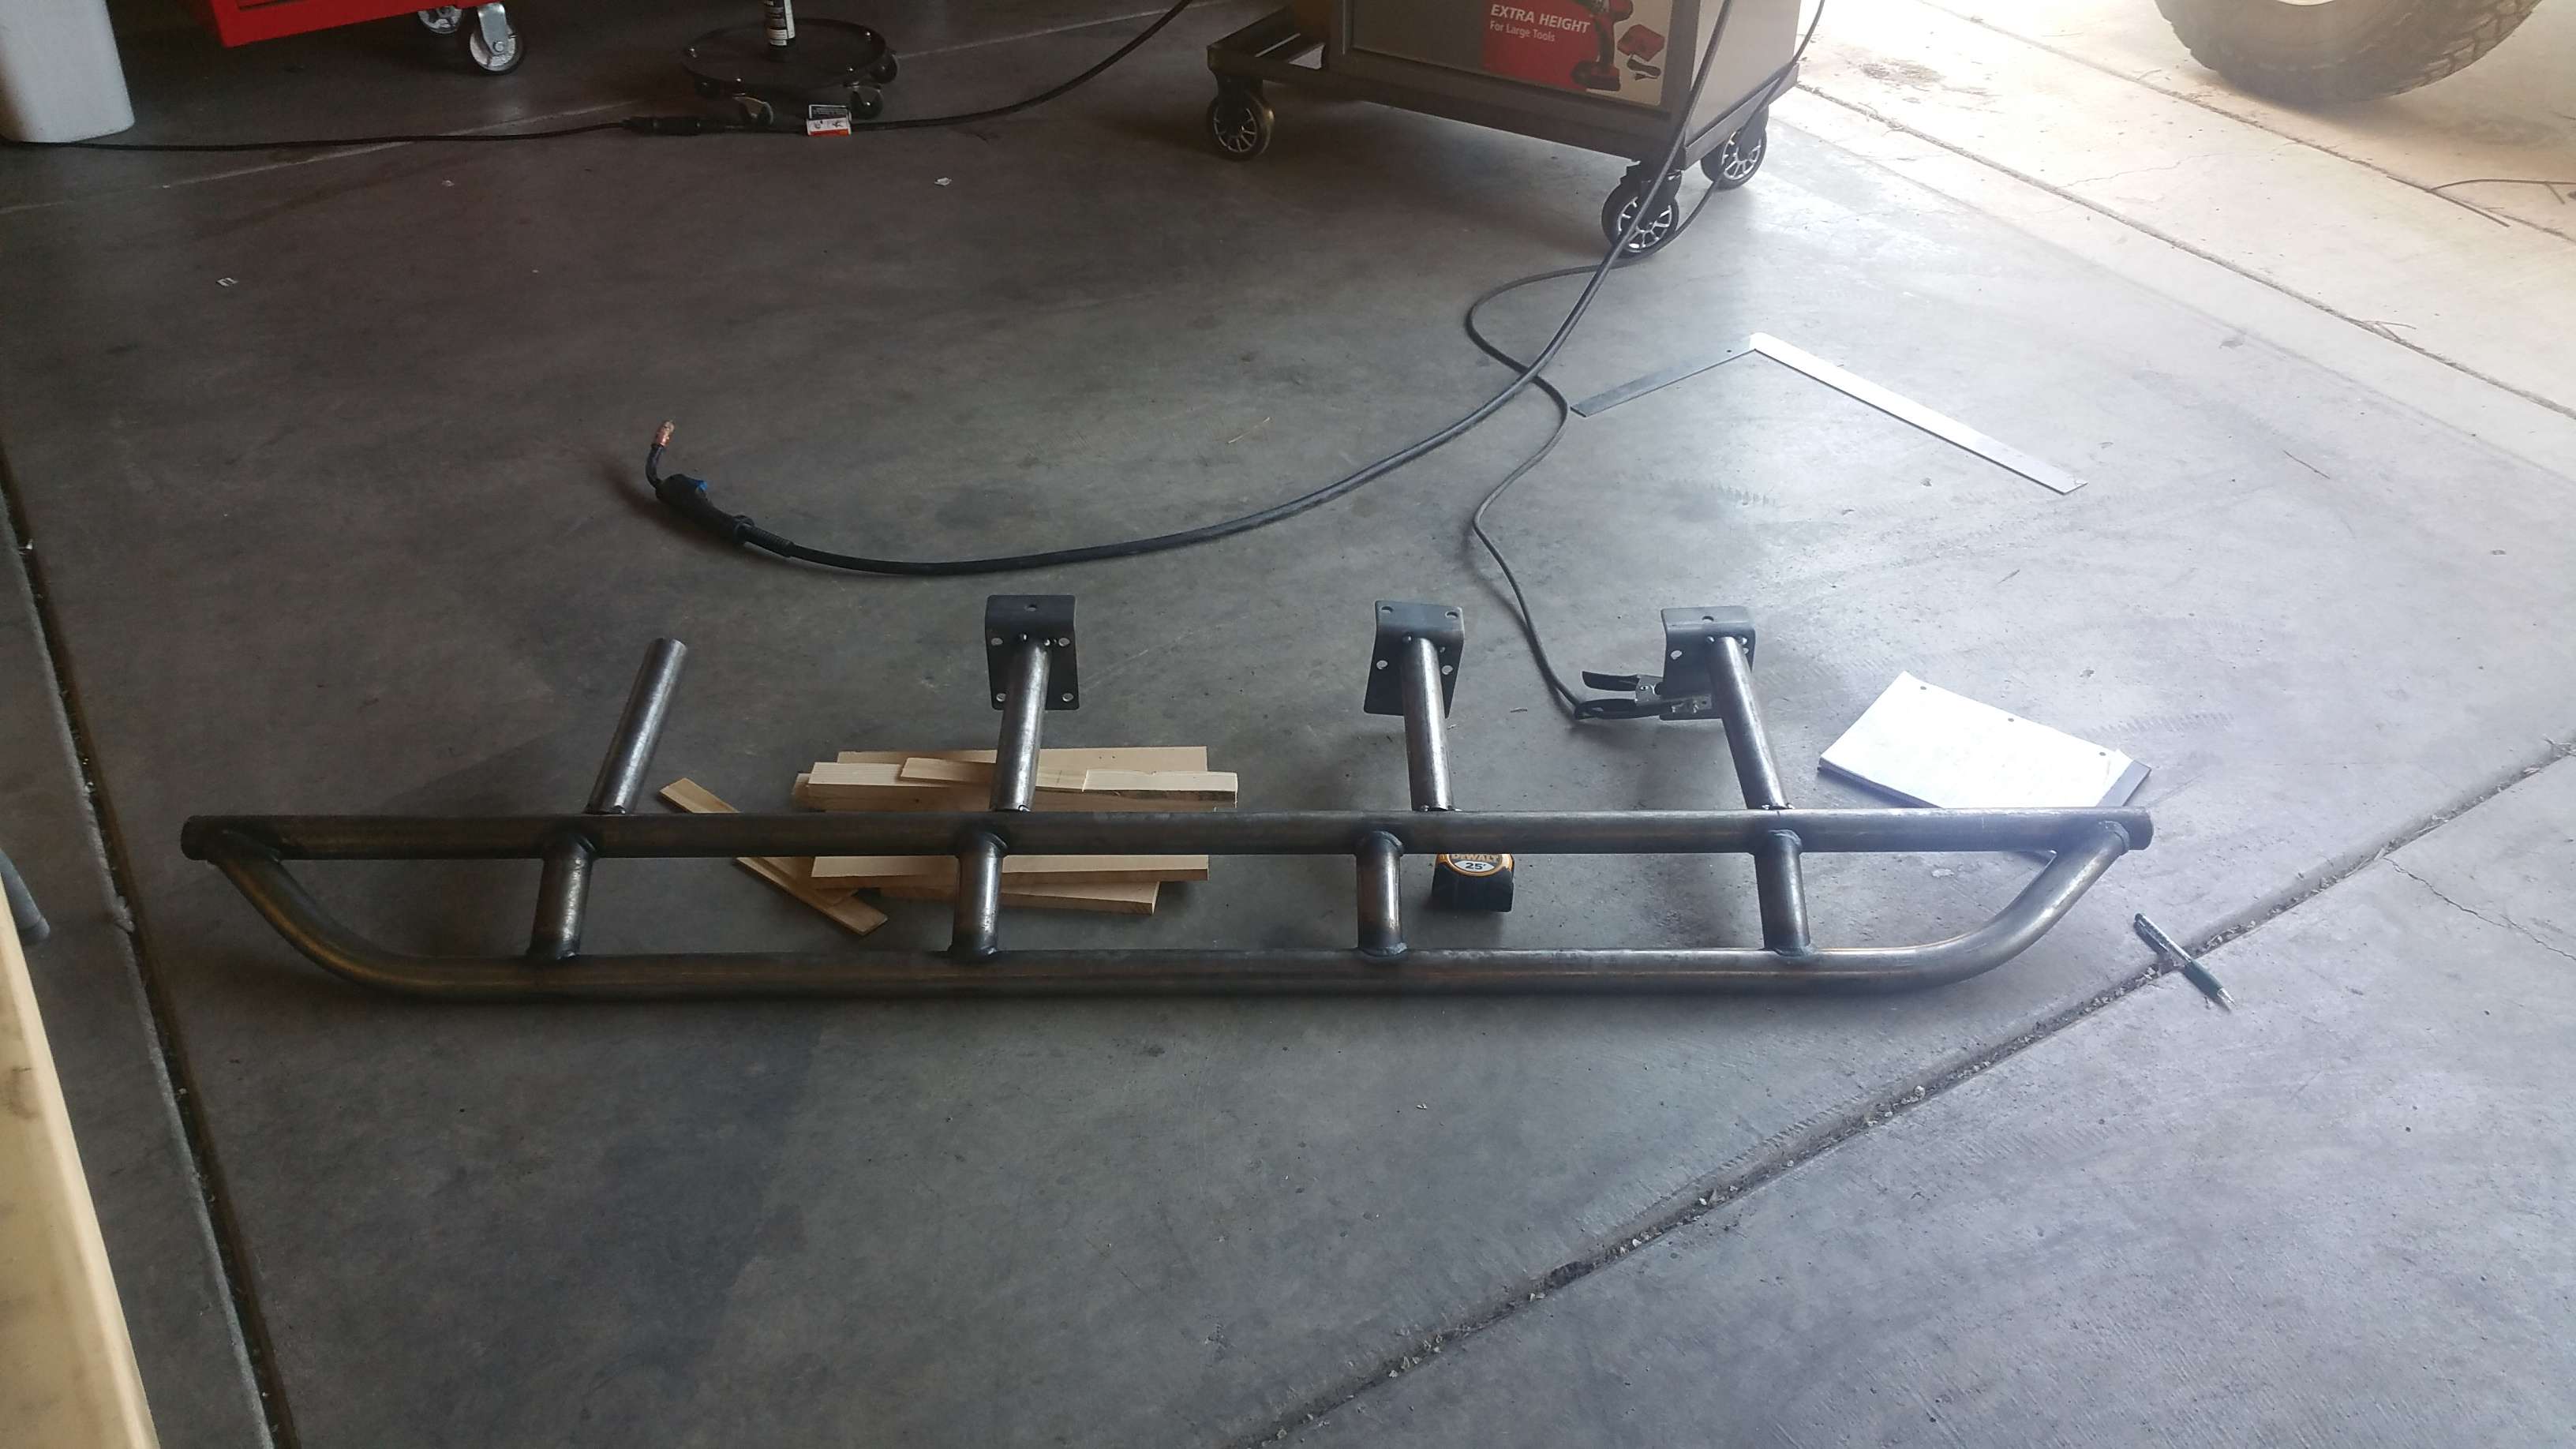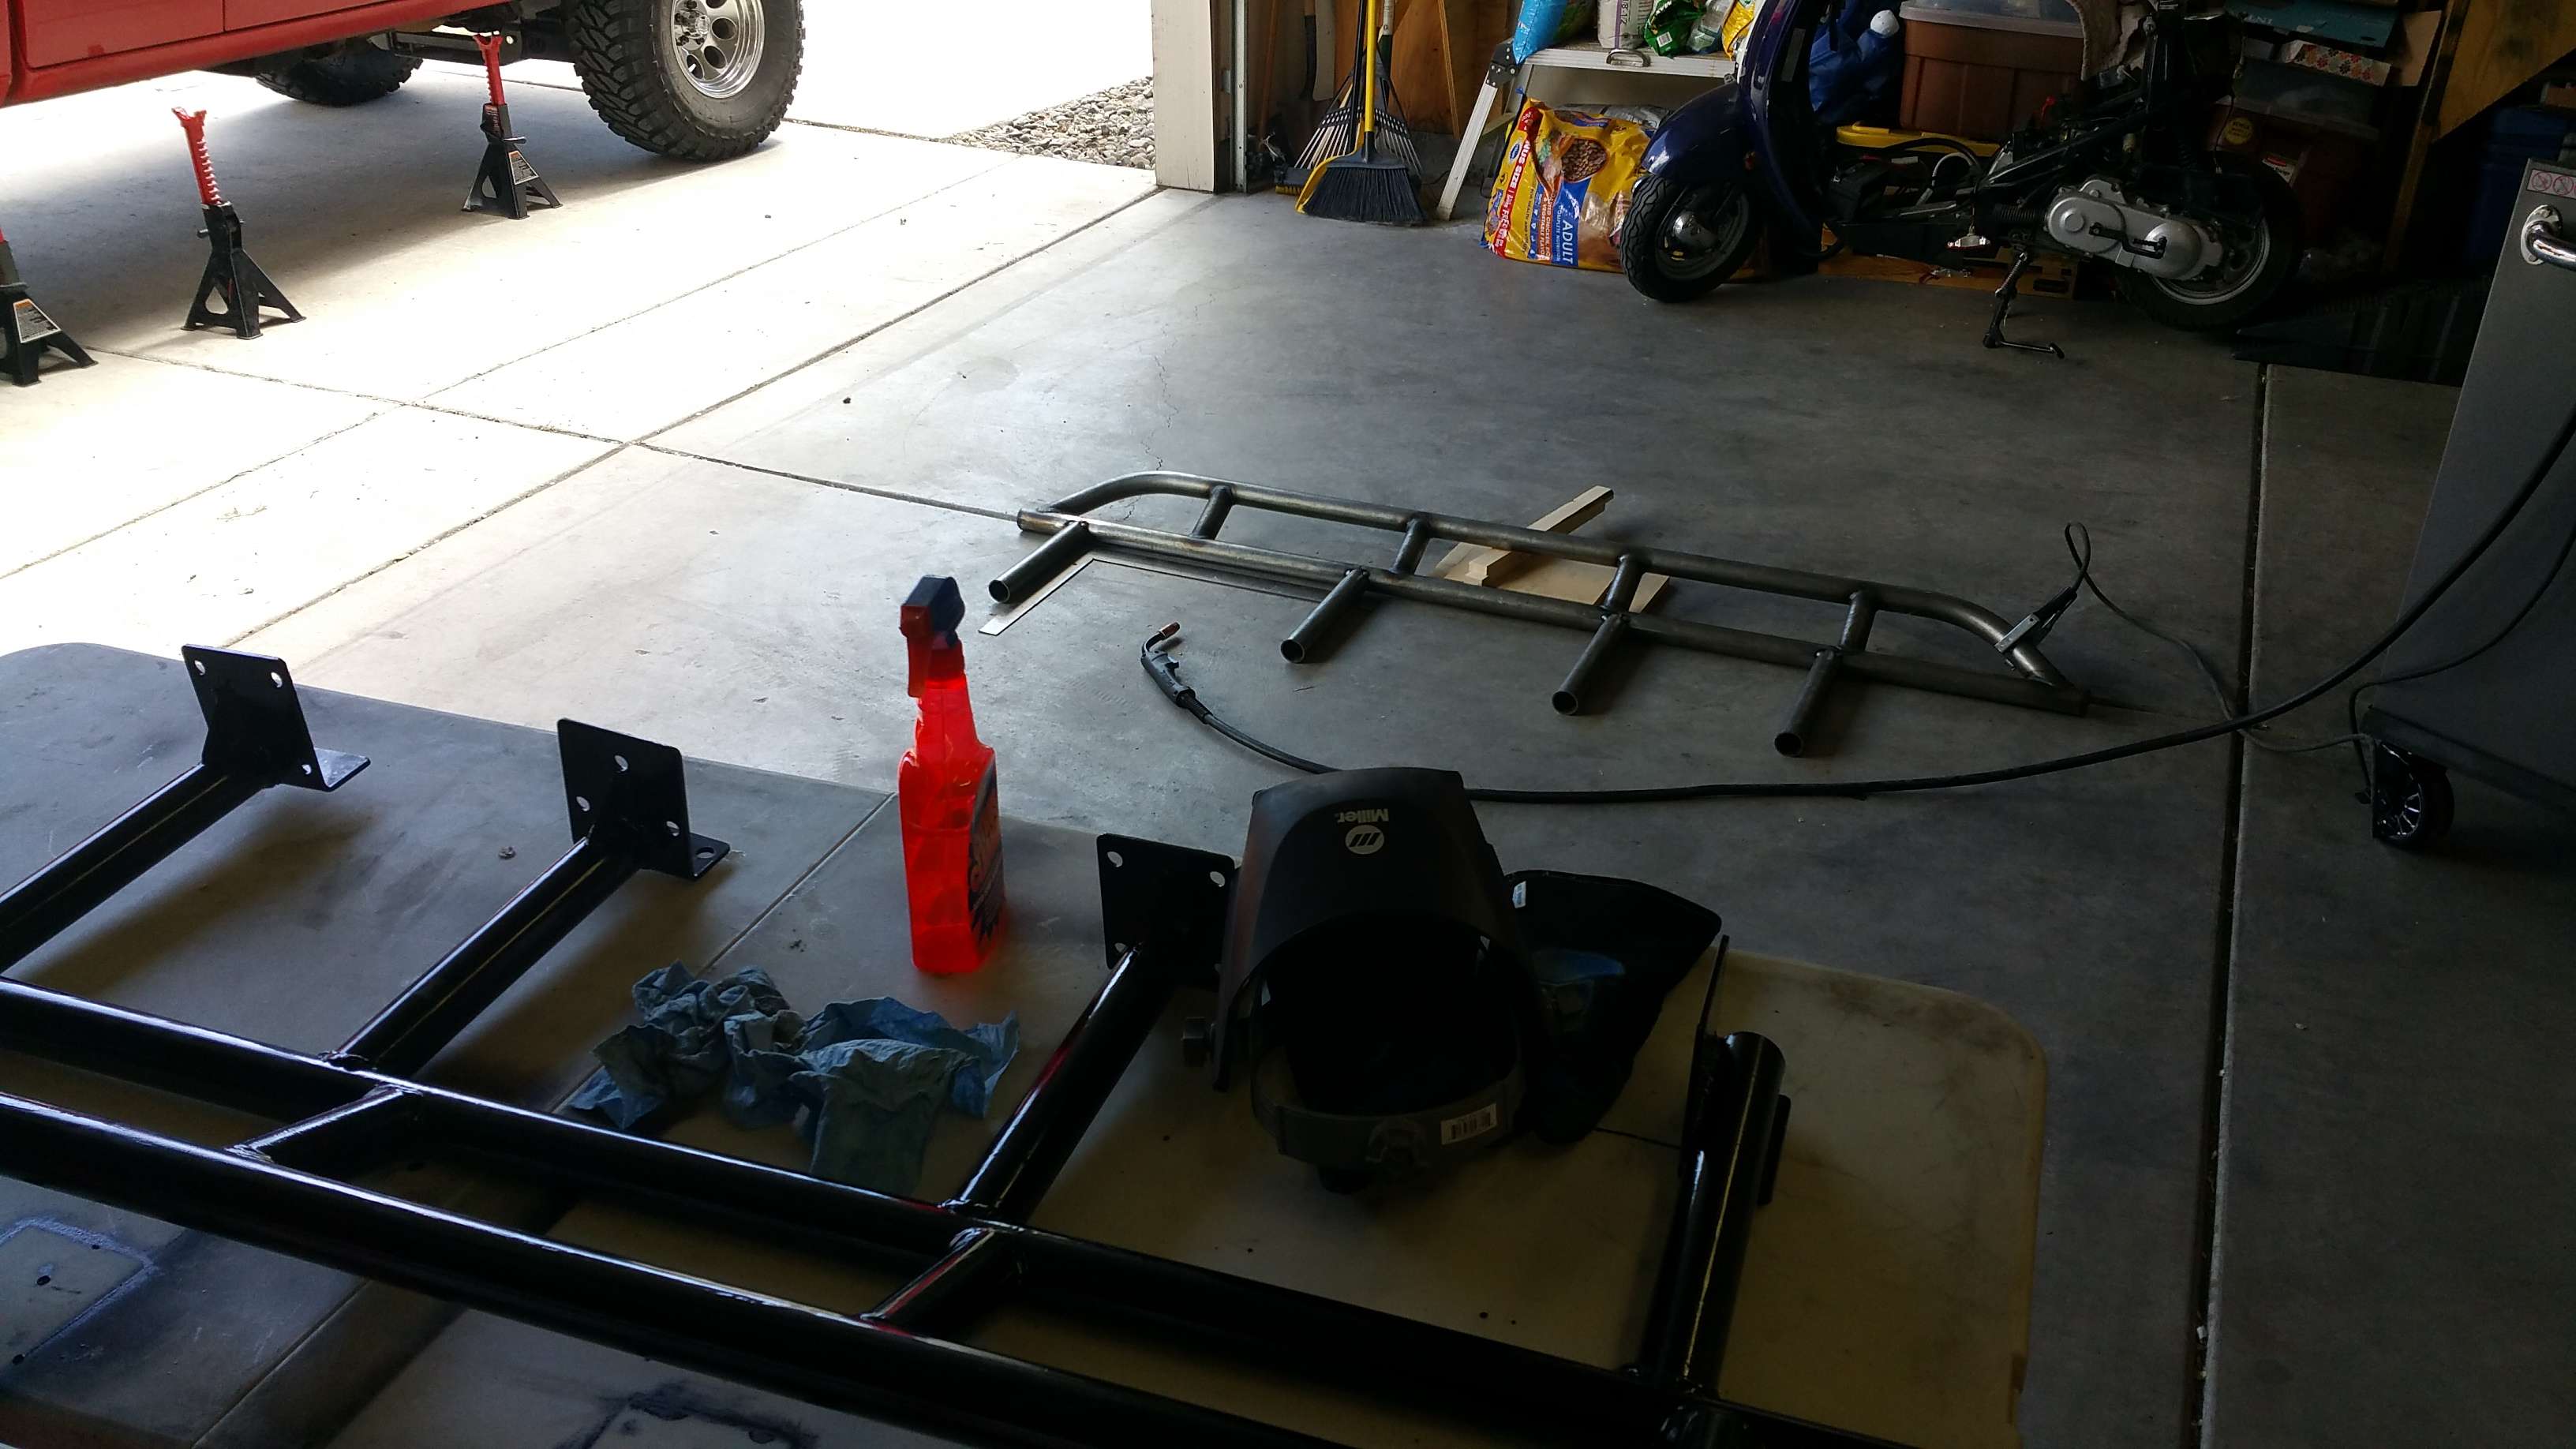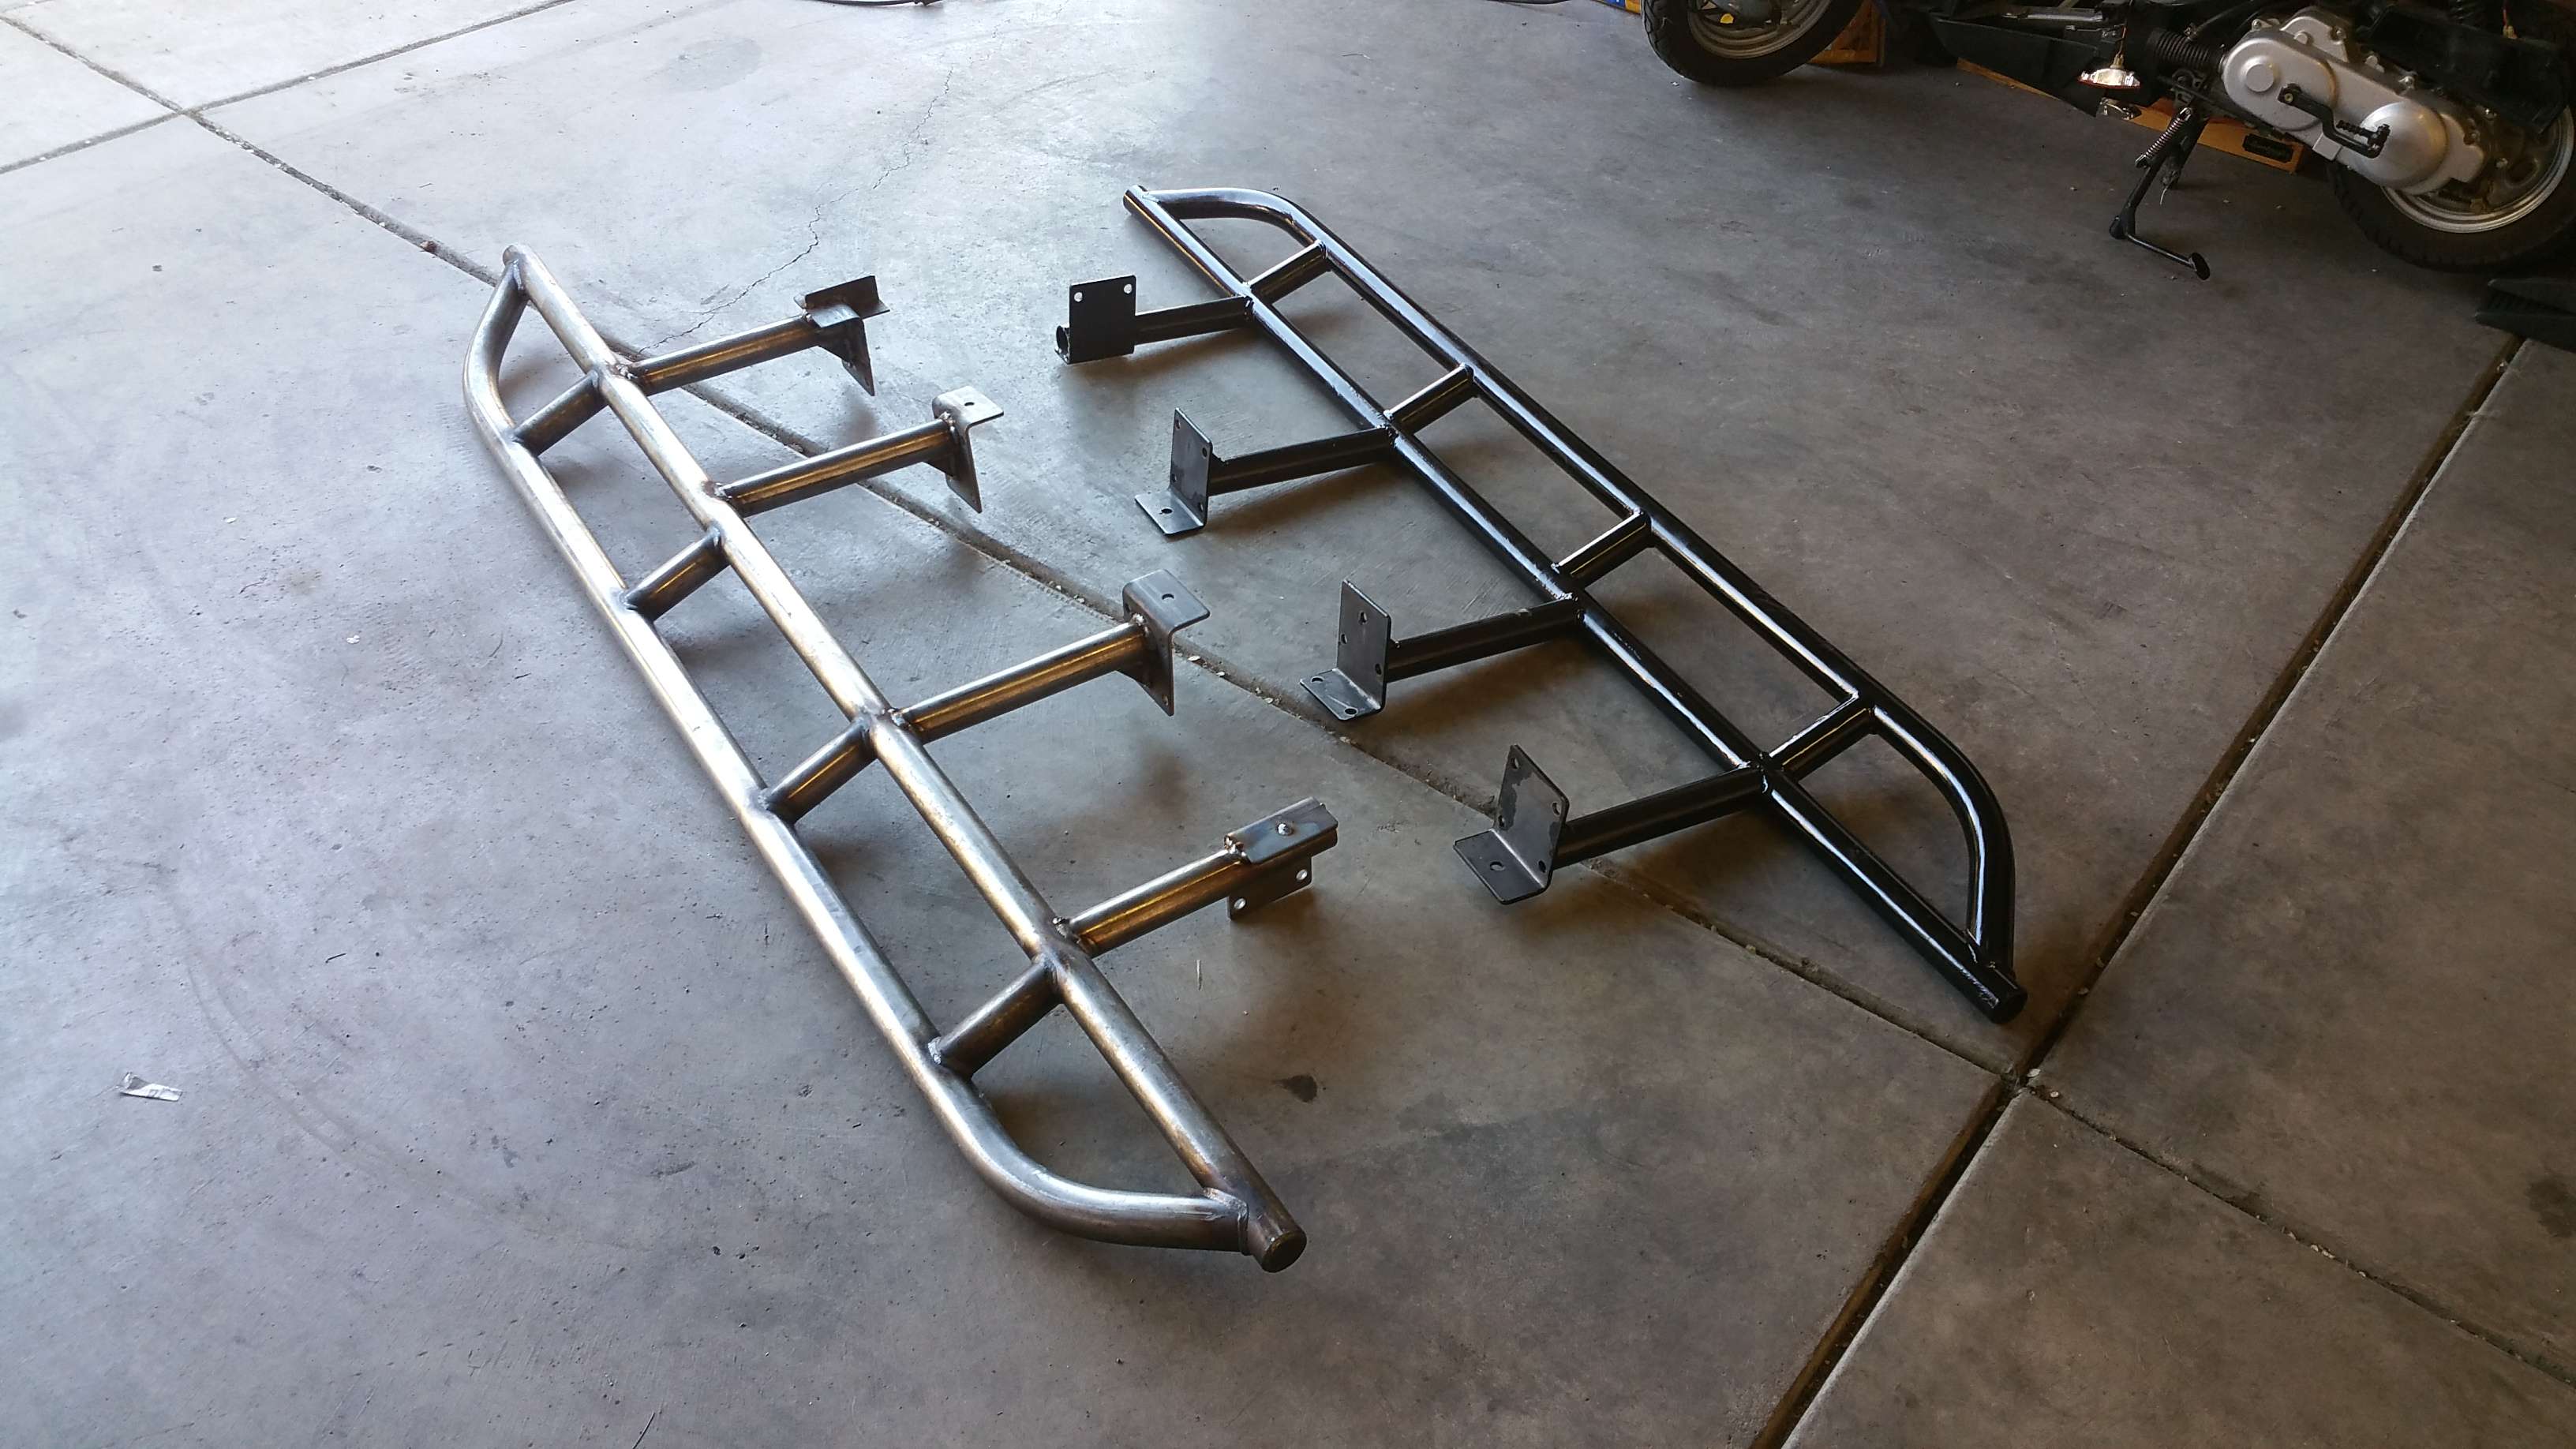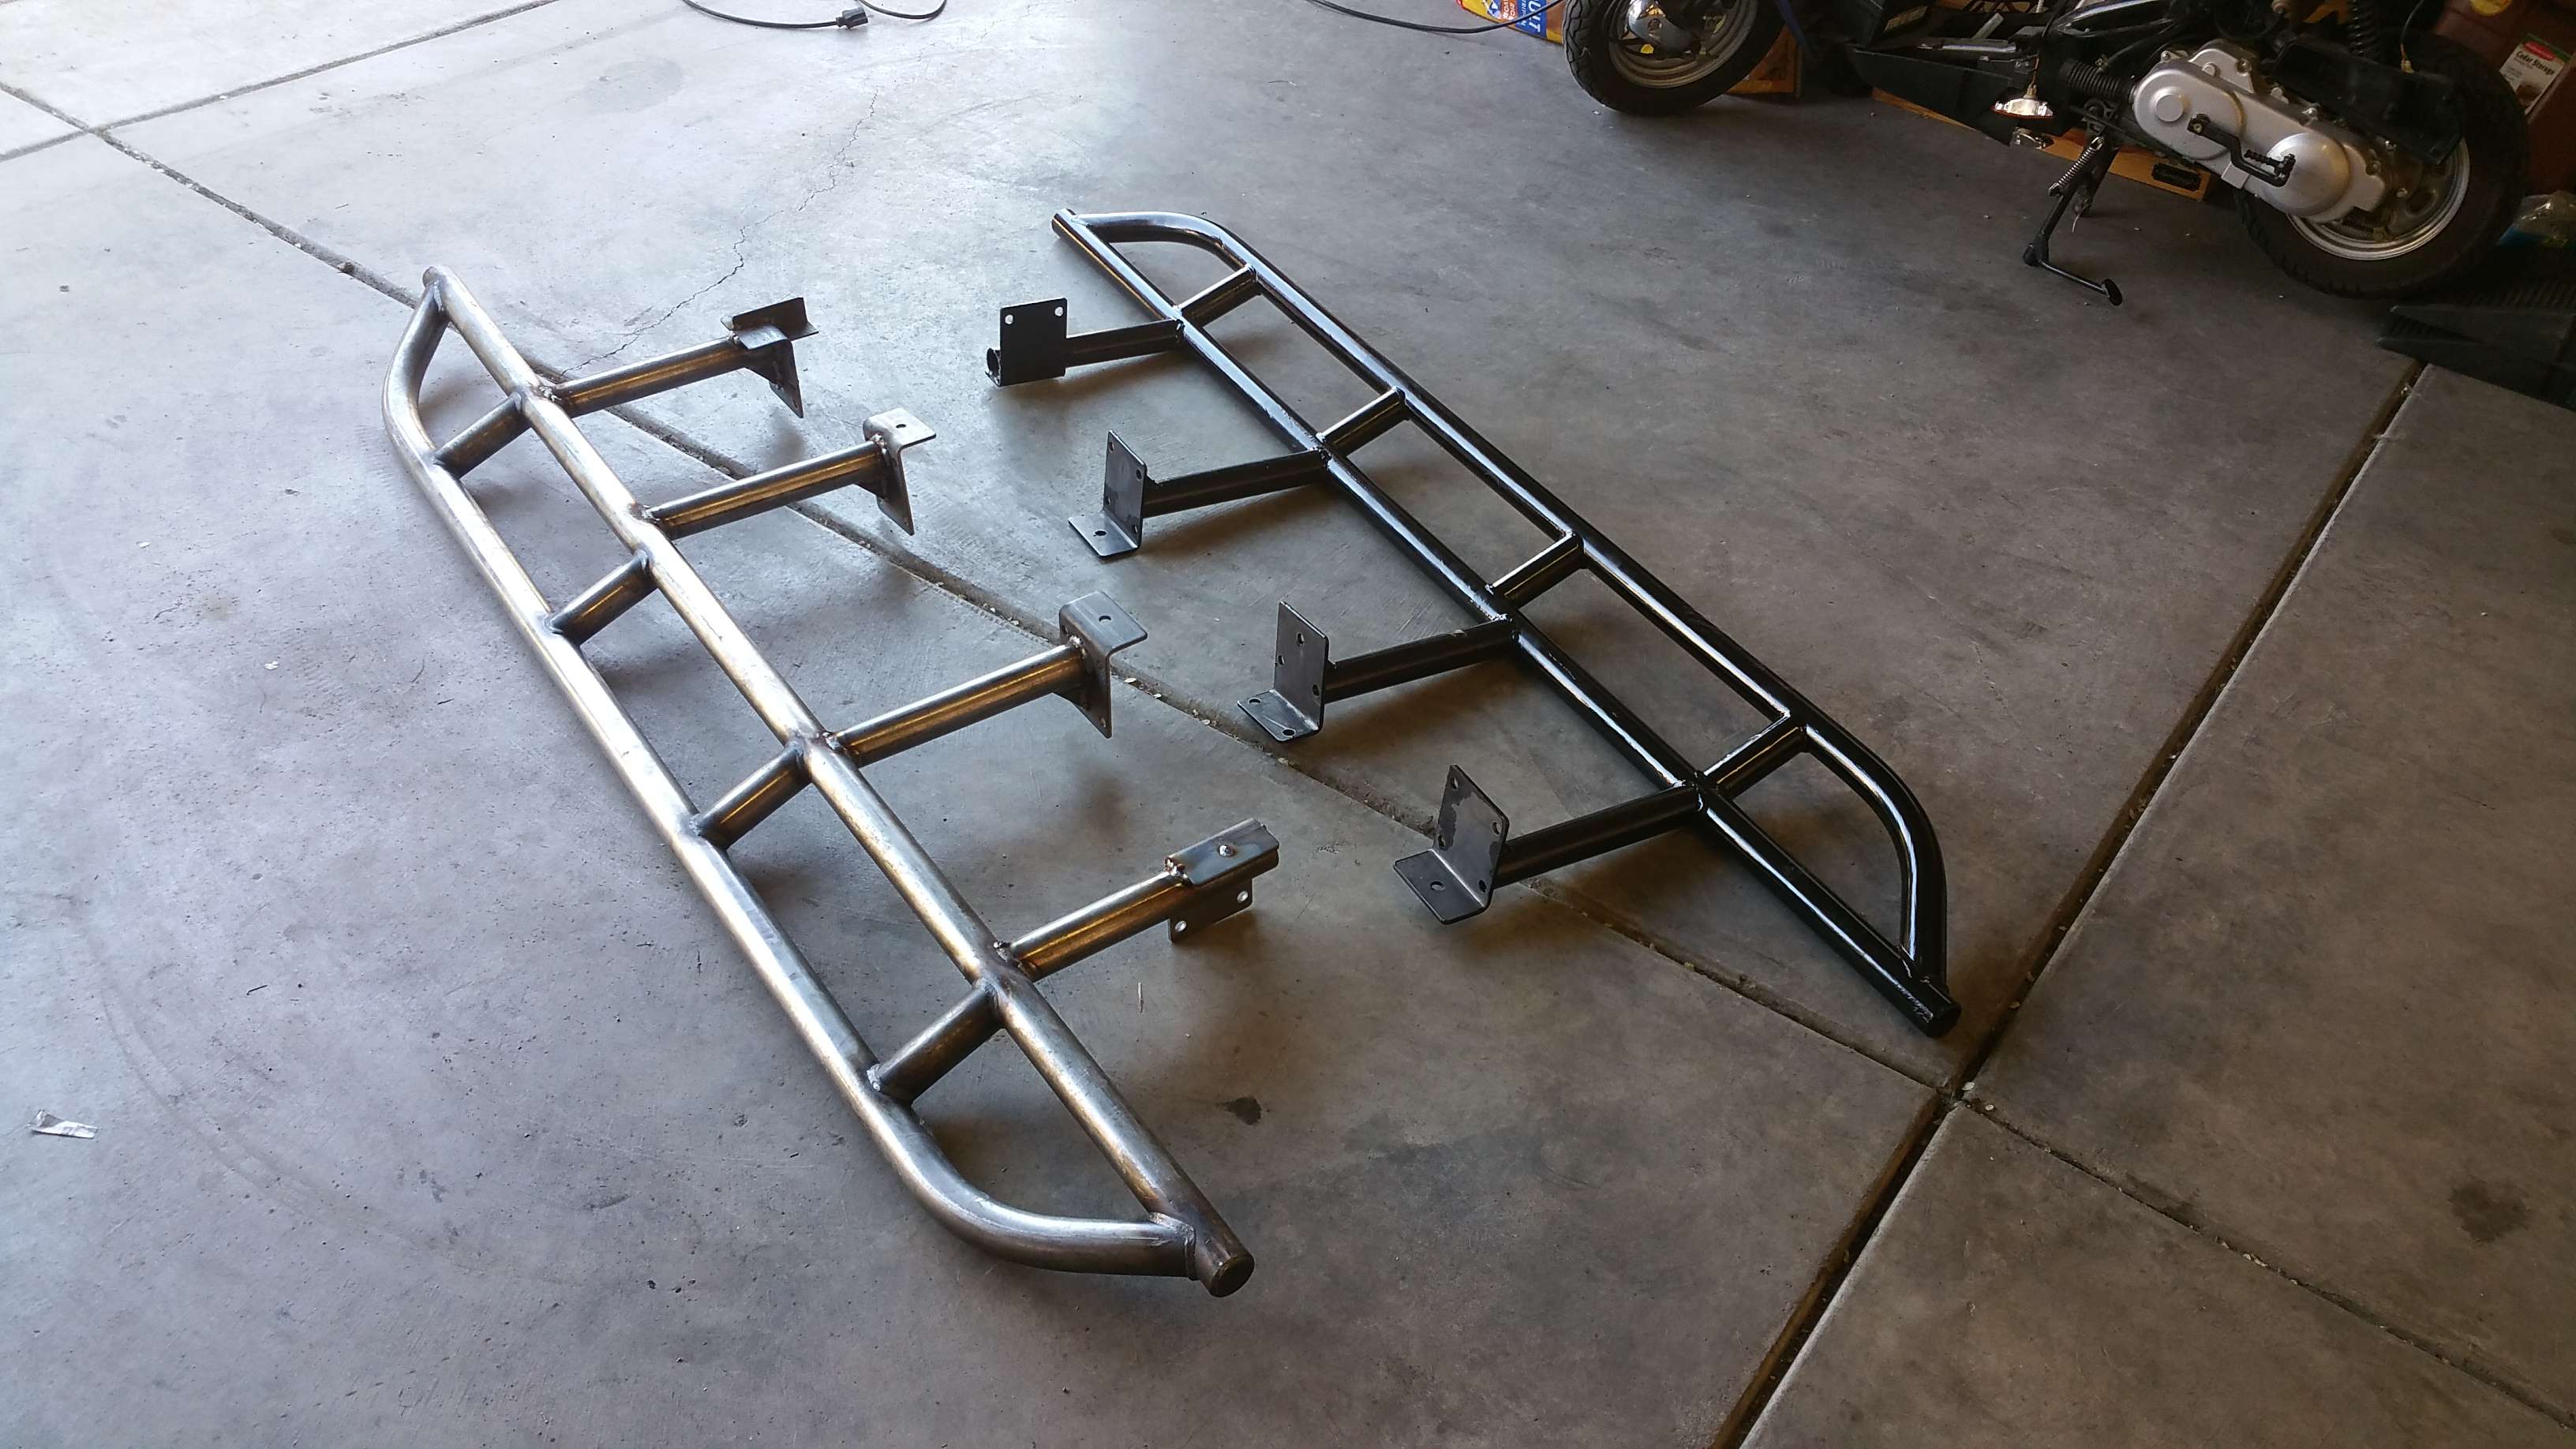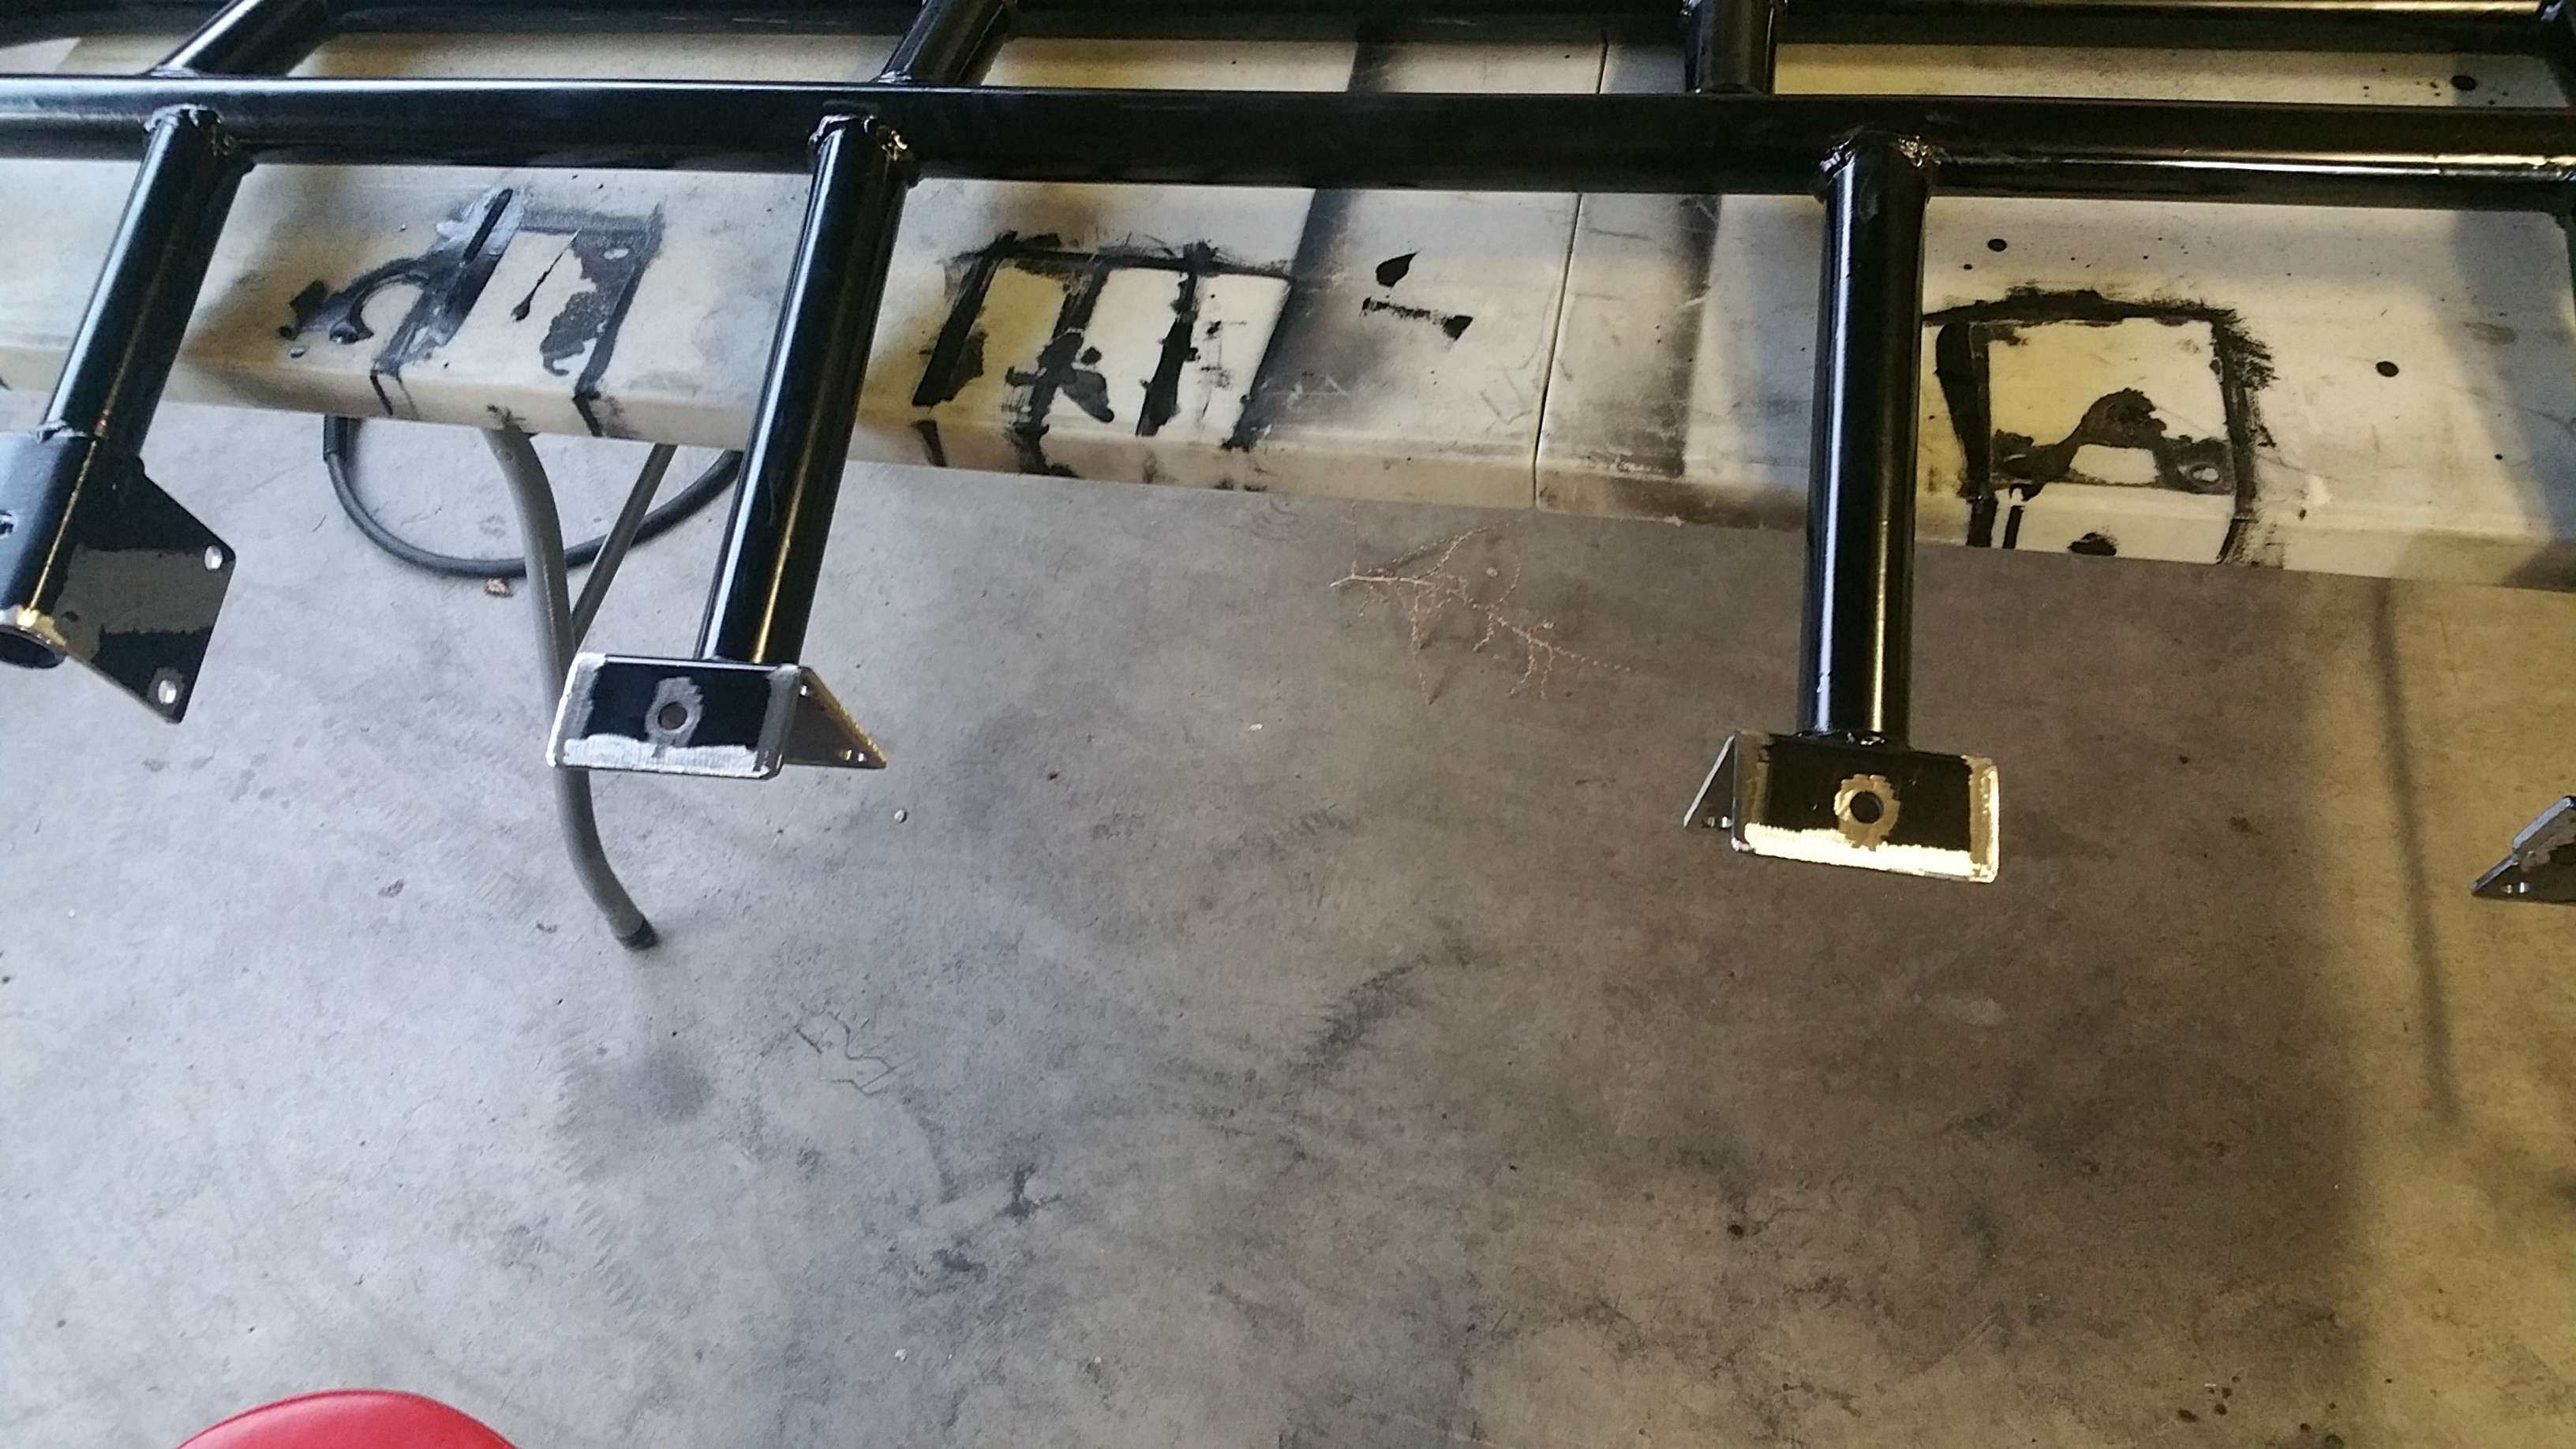
#16
10-28-2016
Join Date: Jul 2015
Location: Reno, Nevada
Posts: 52
Likes: 0
Received 0 Likes
on
0 Posts
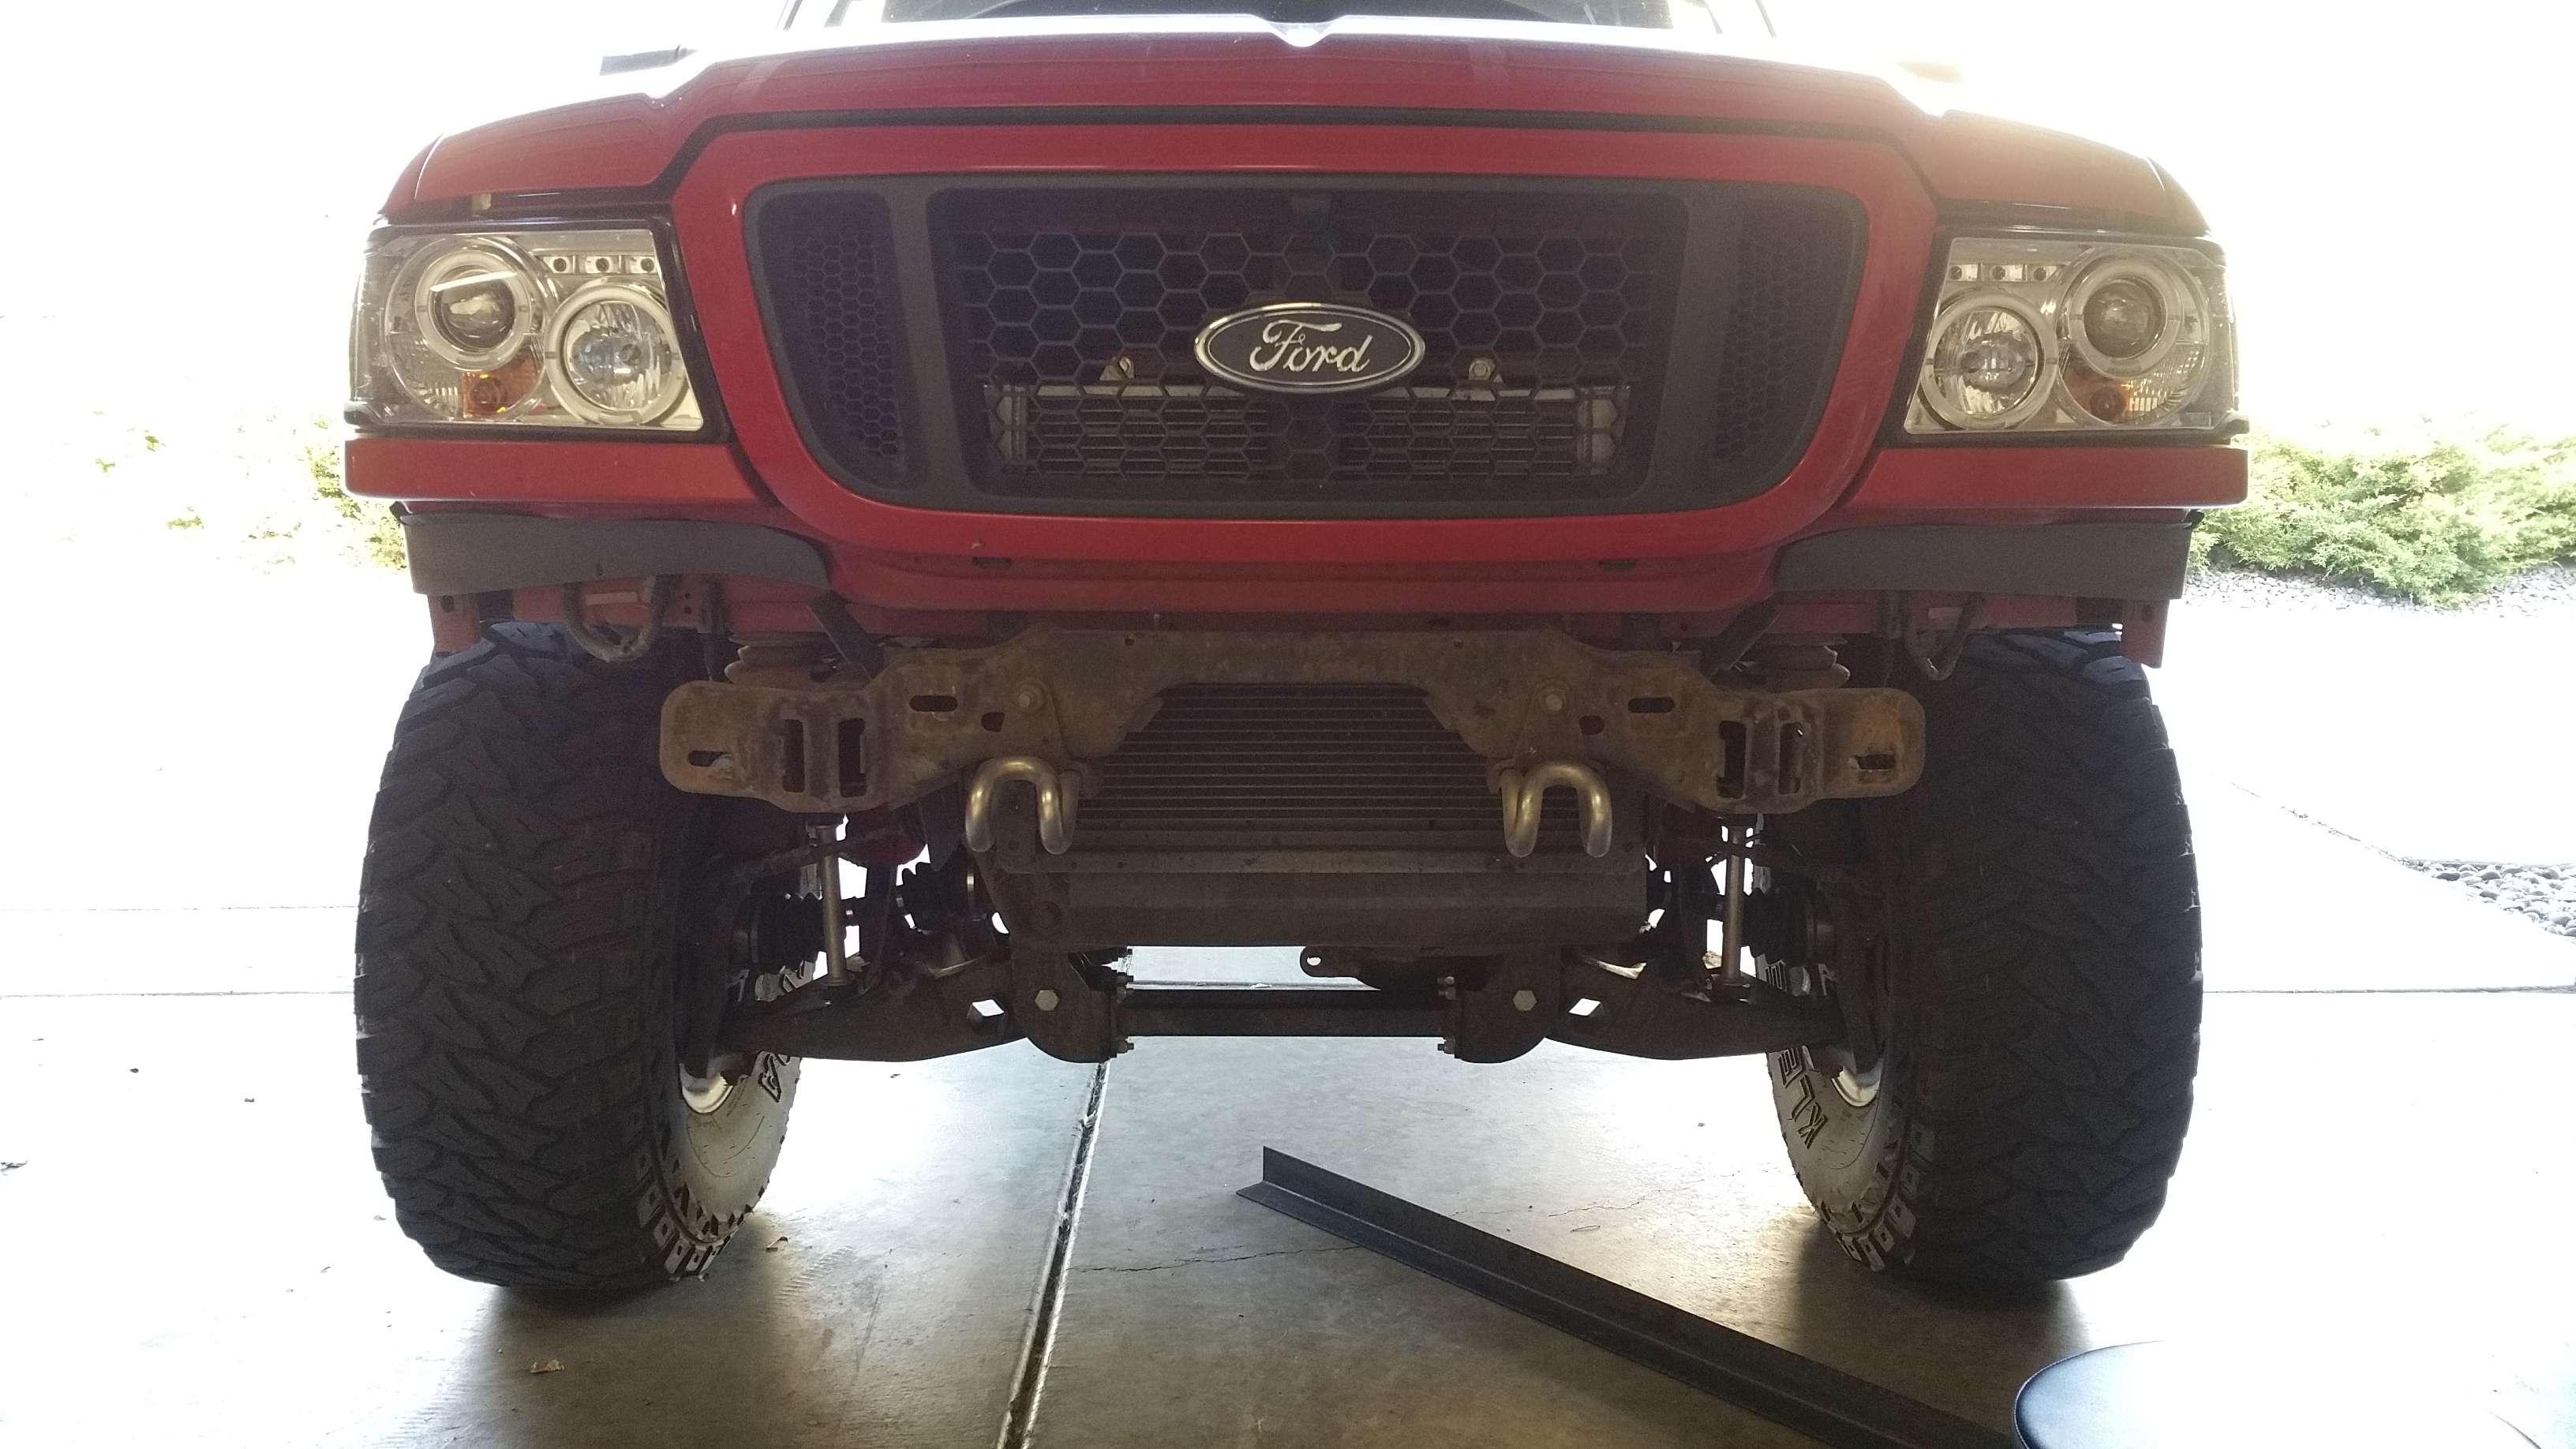
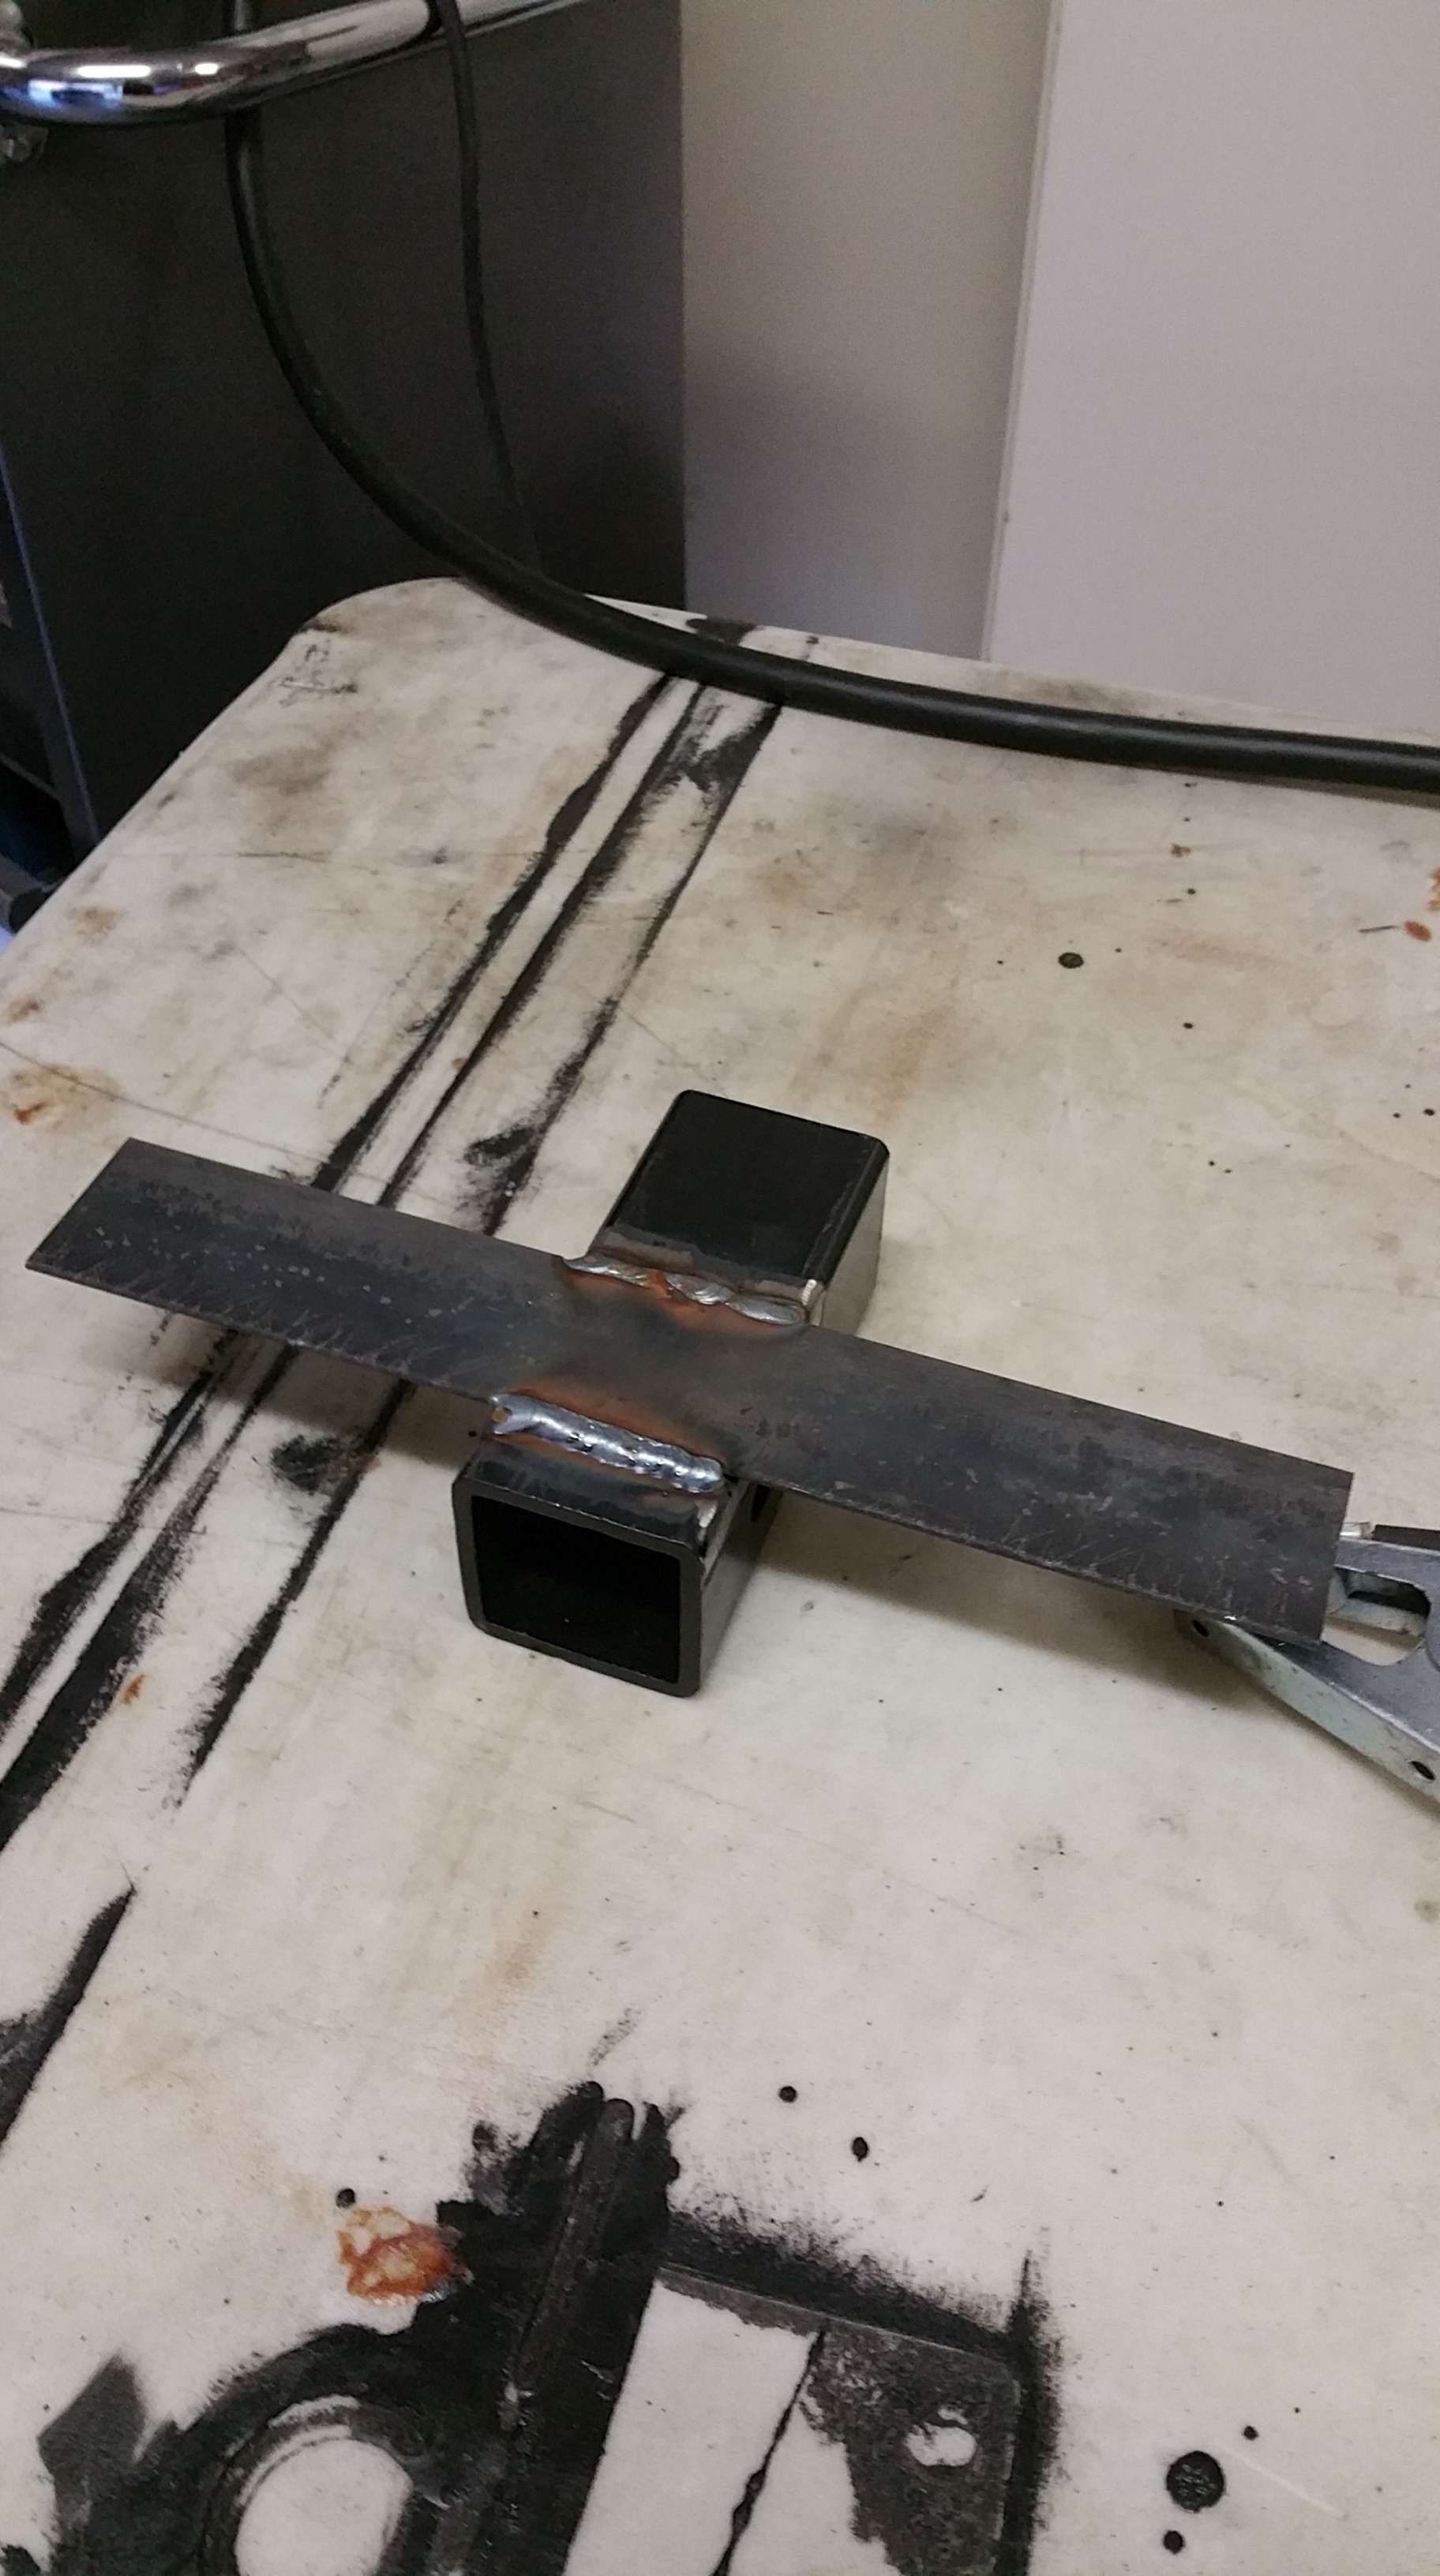
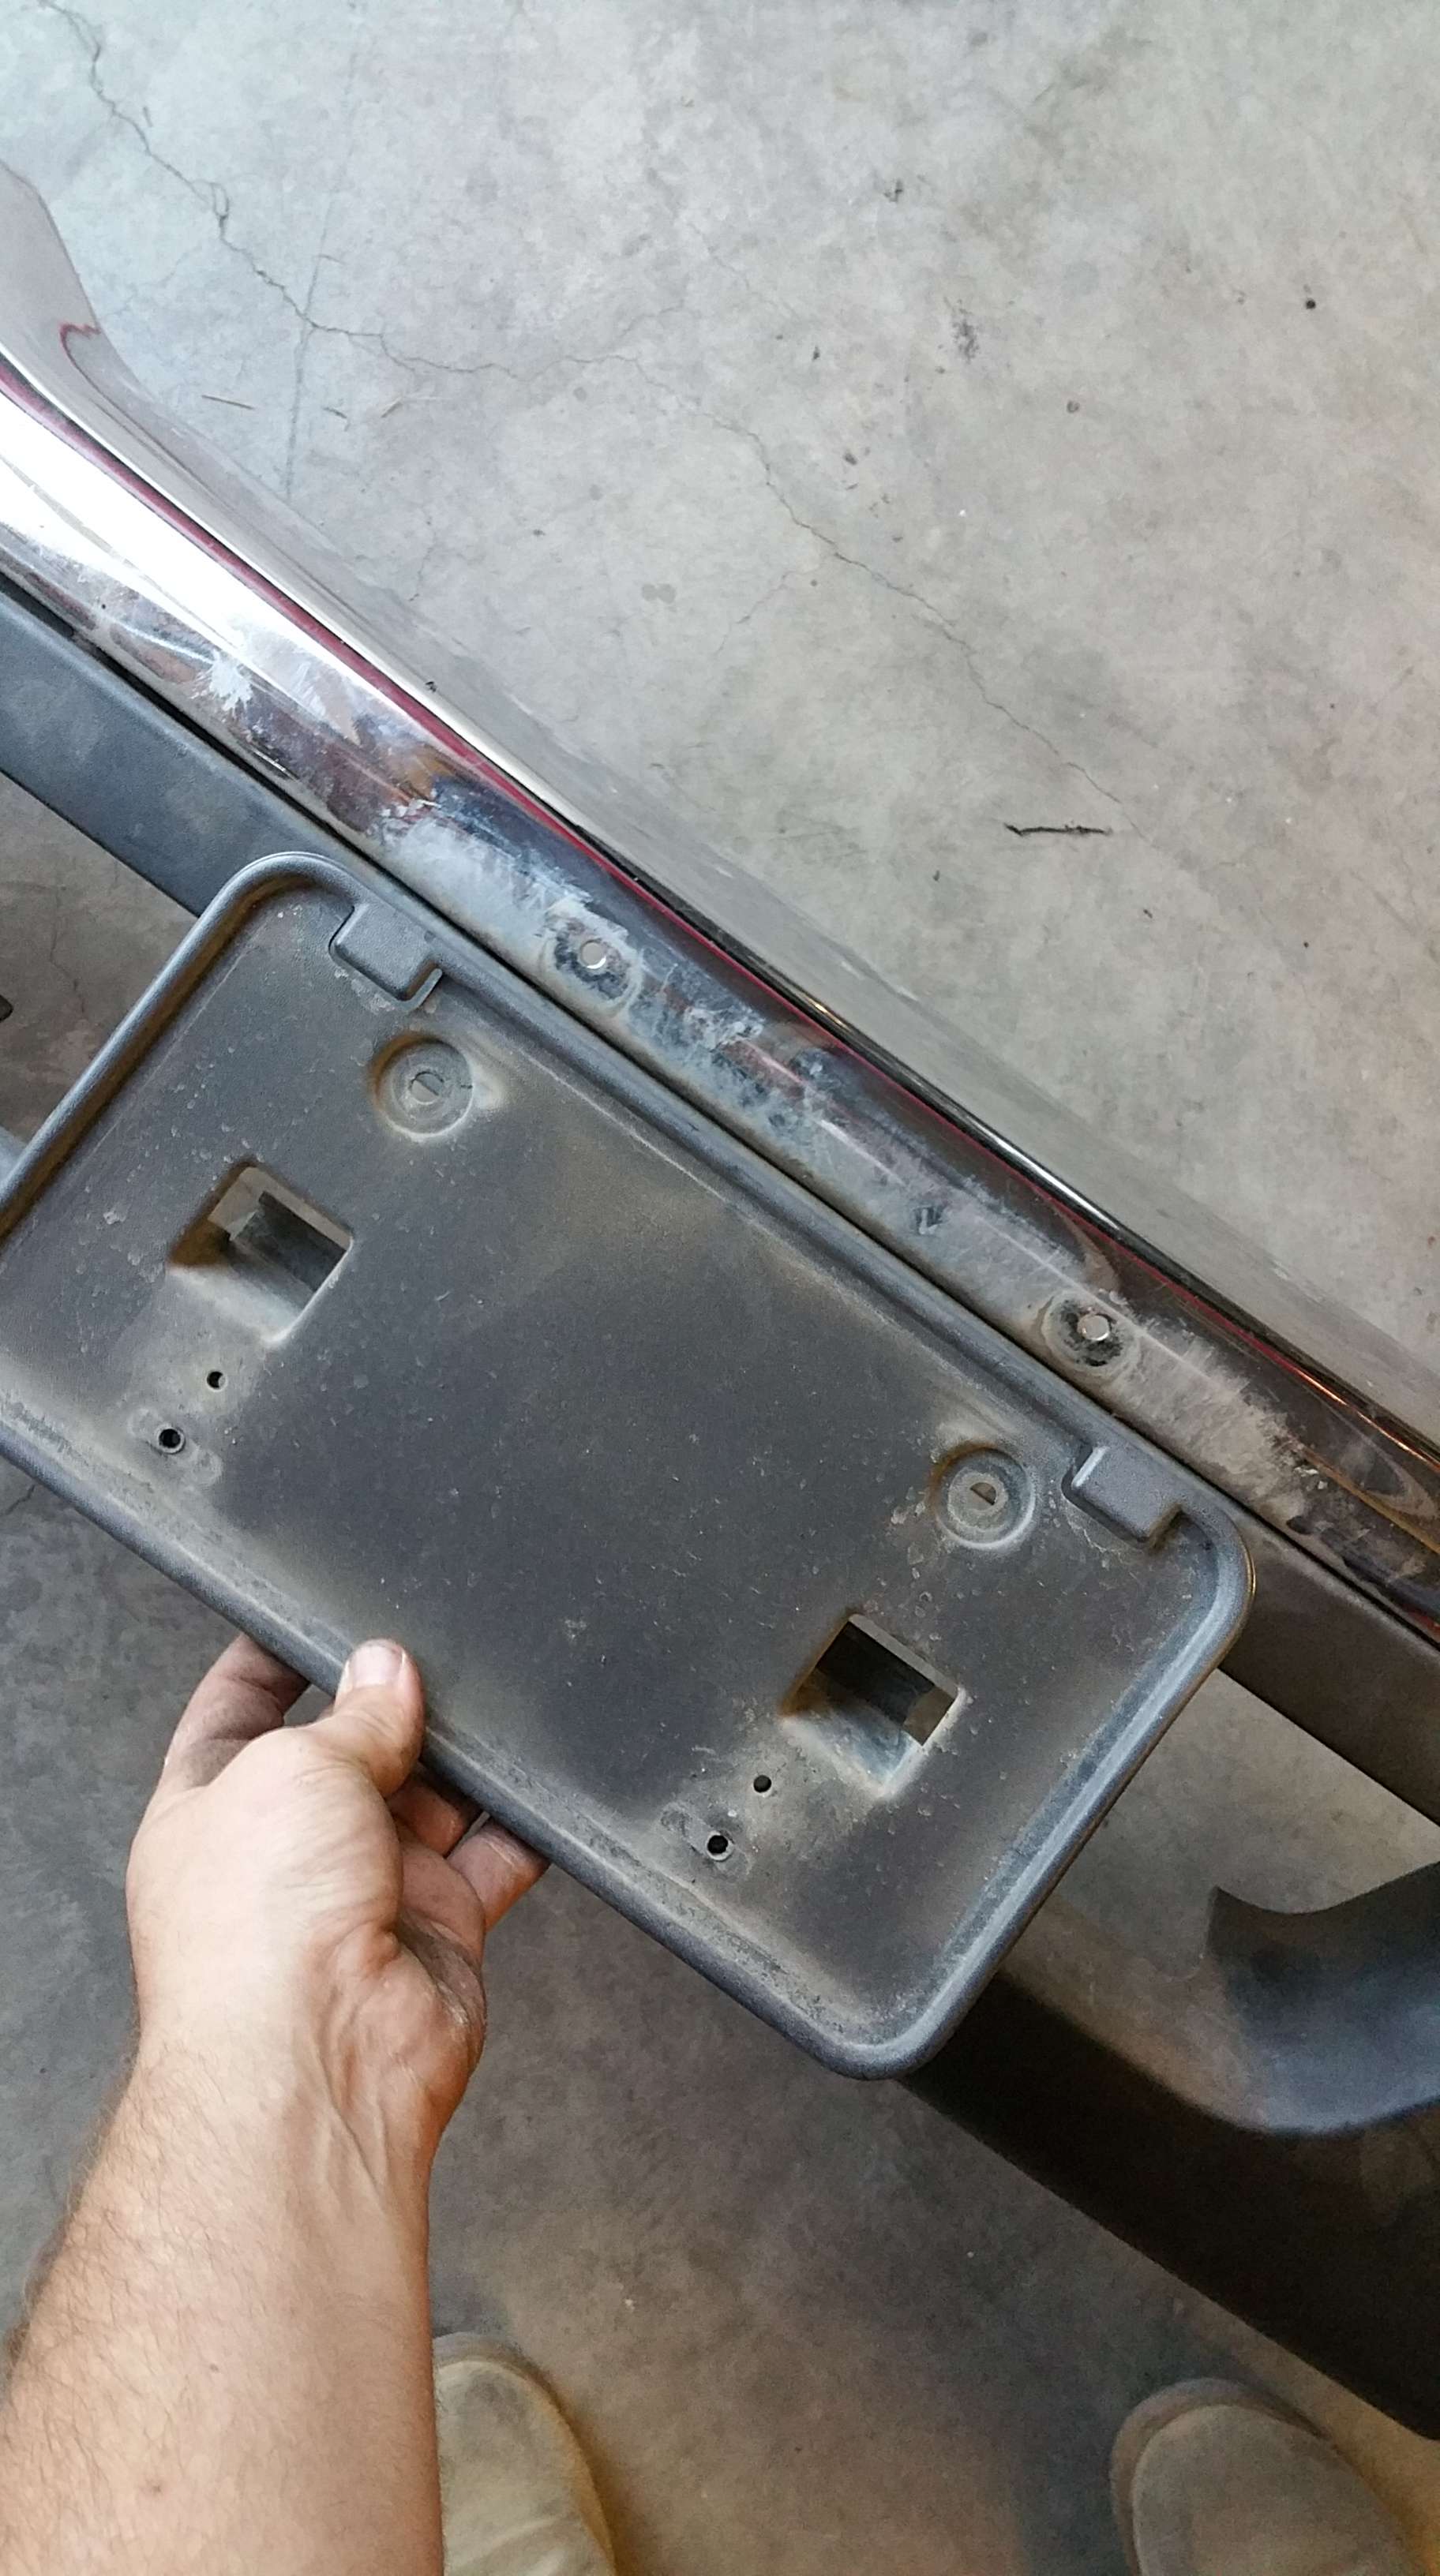
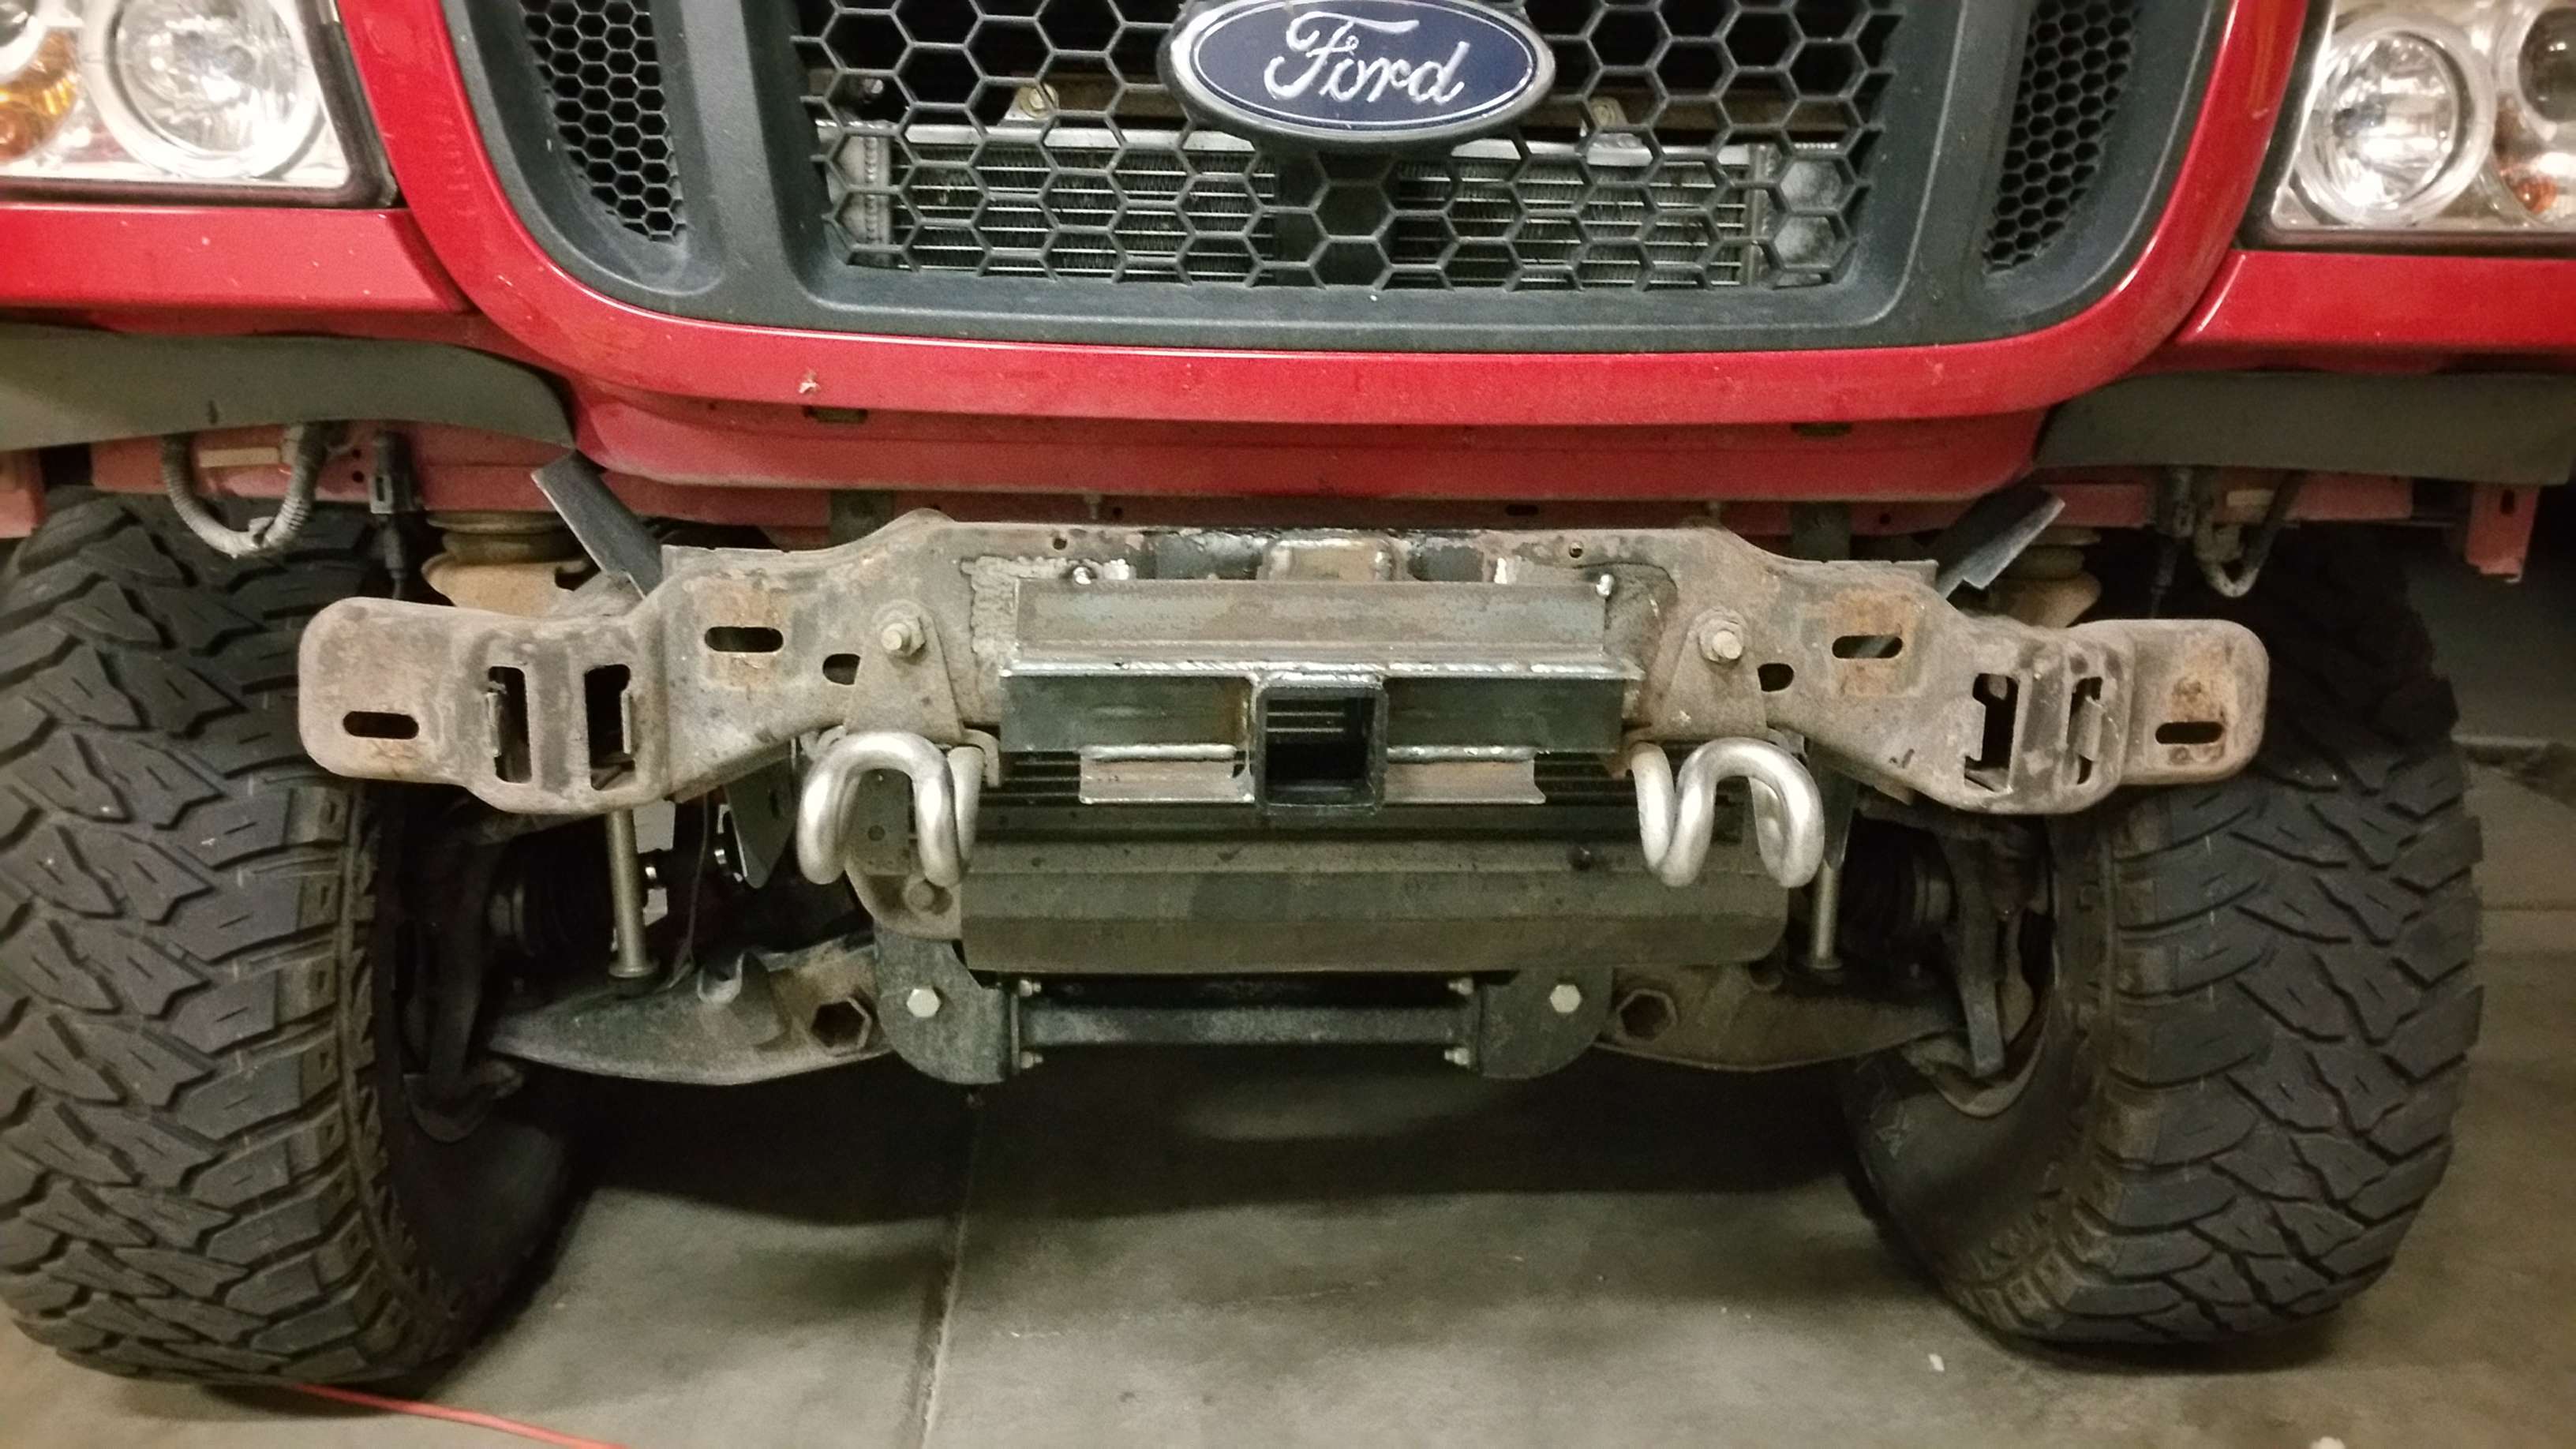
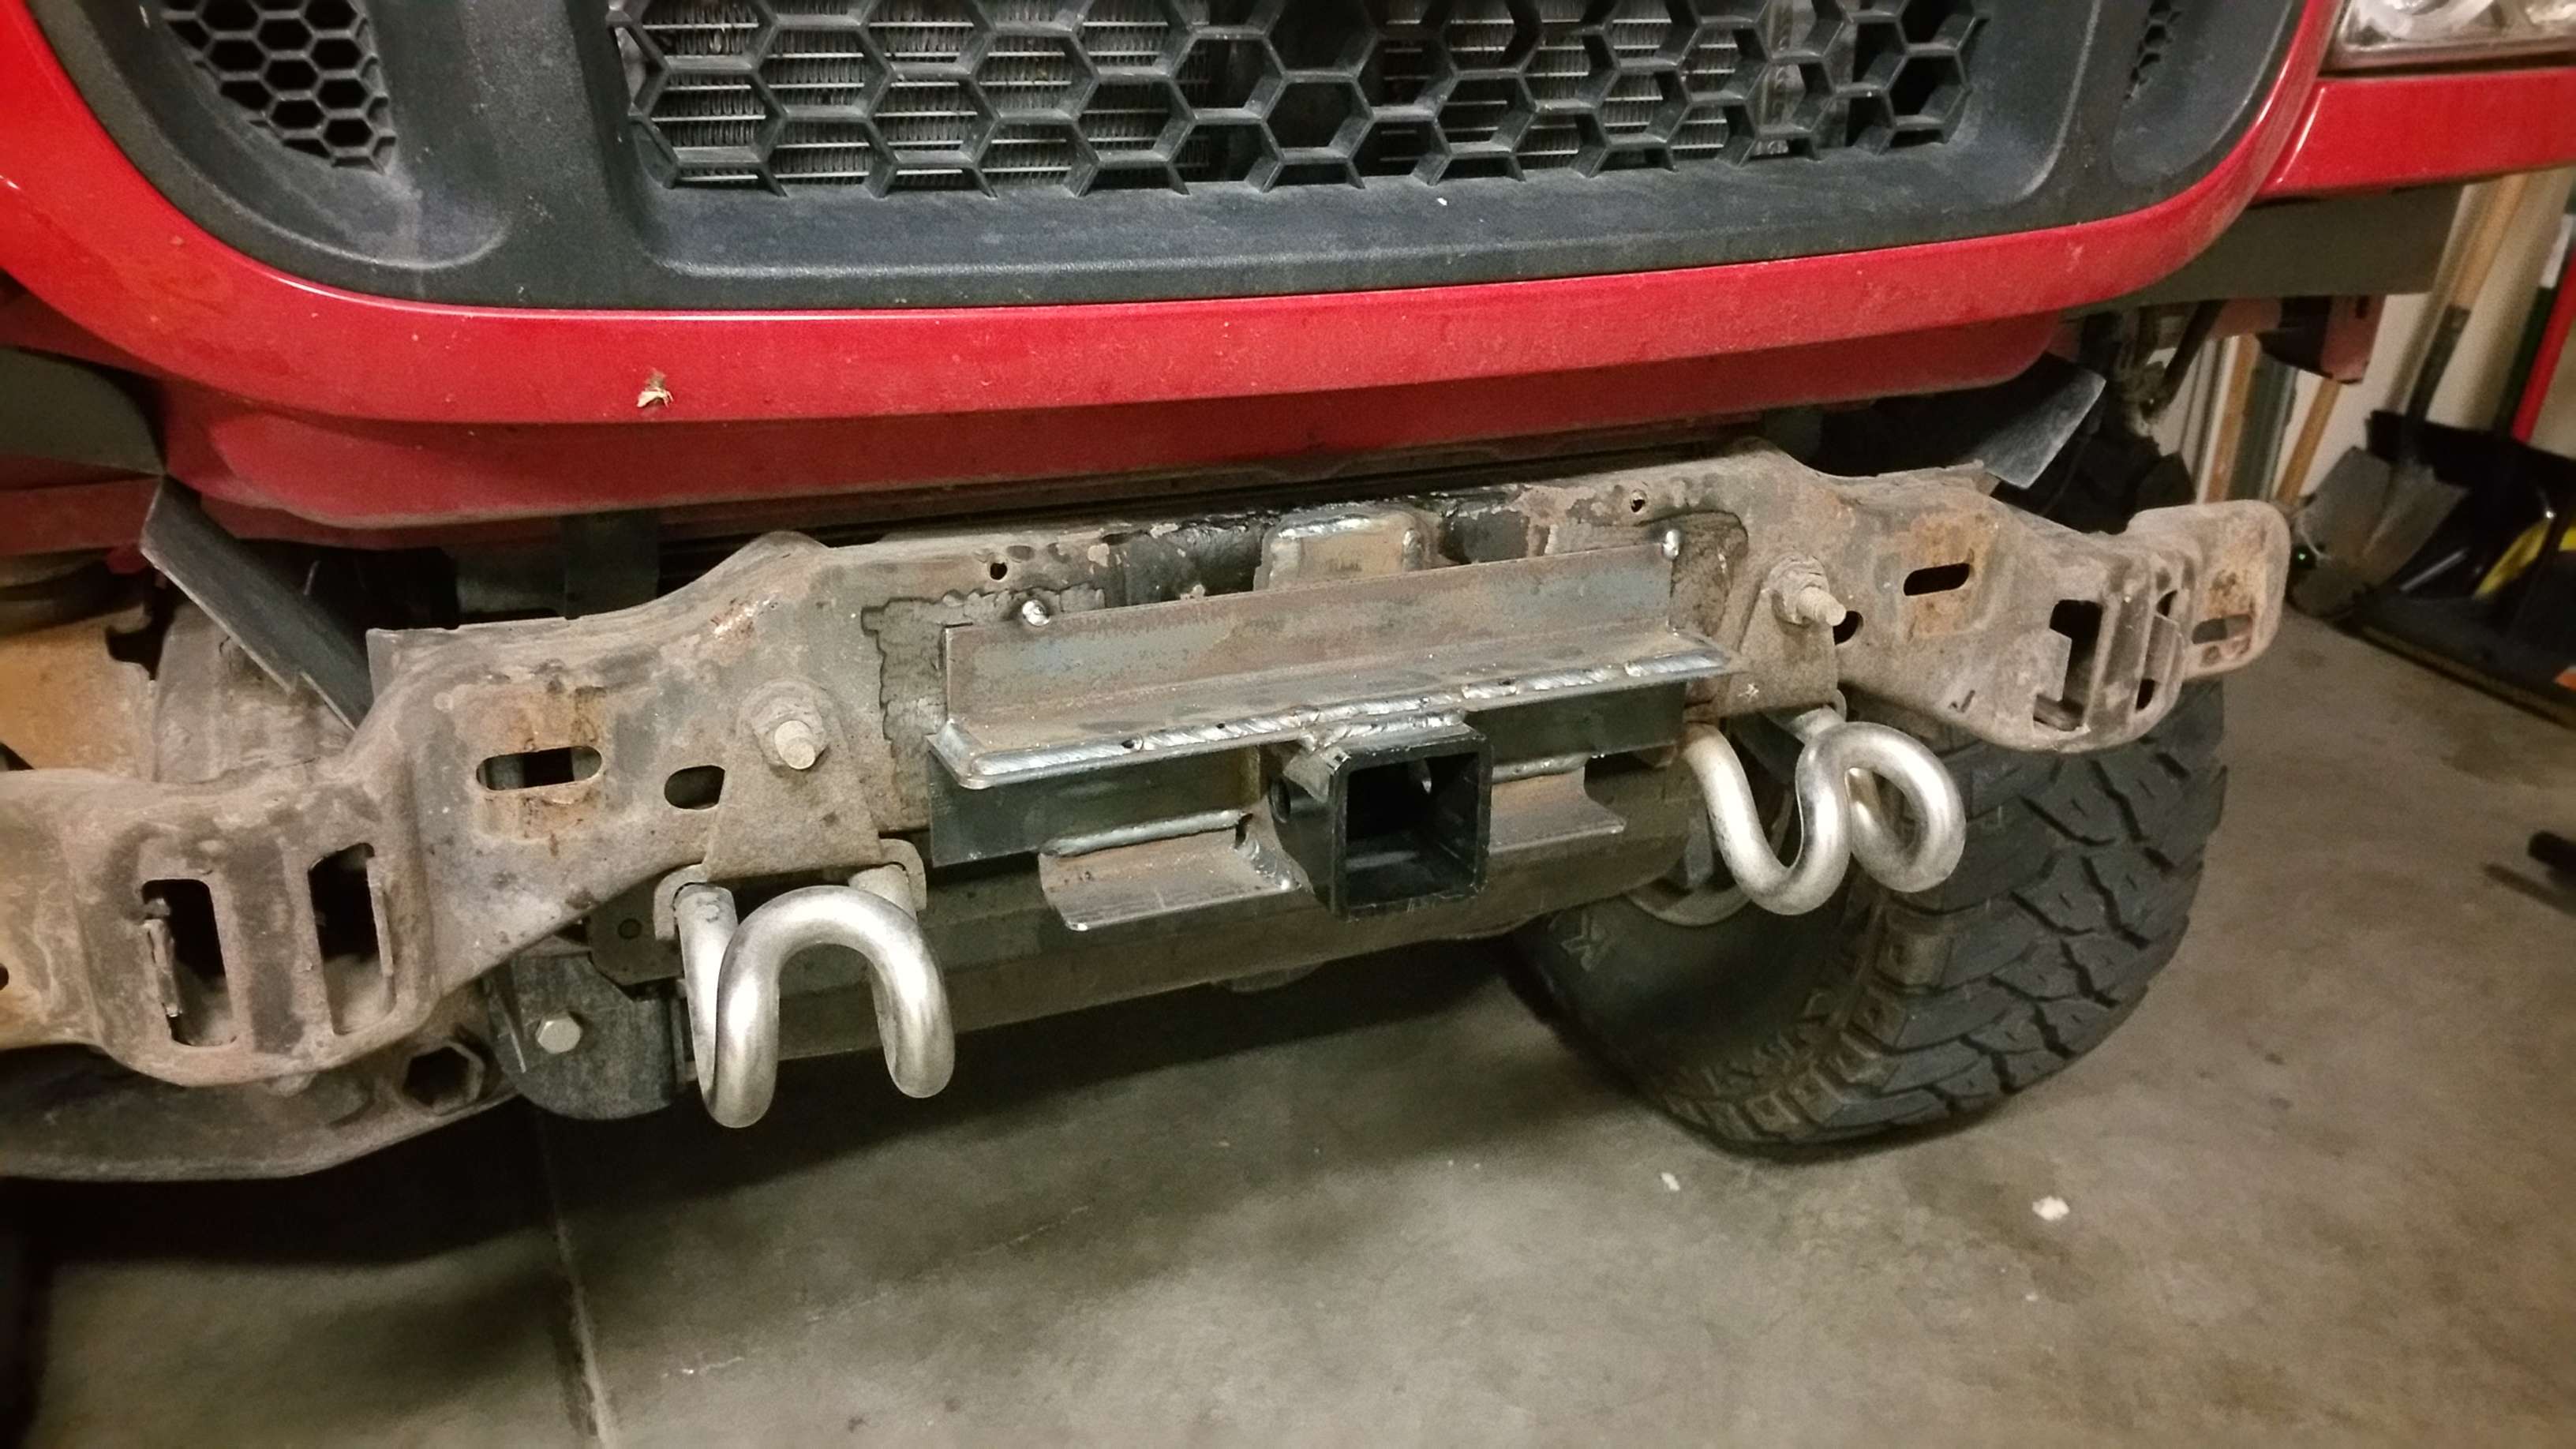
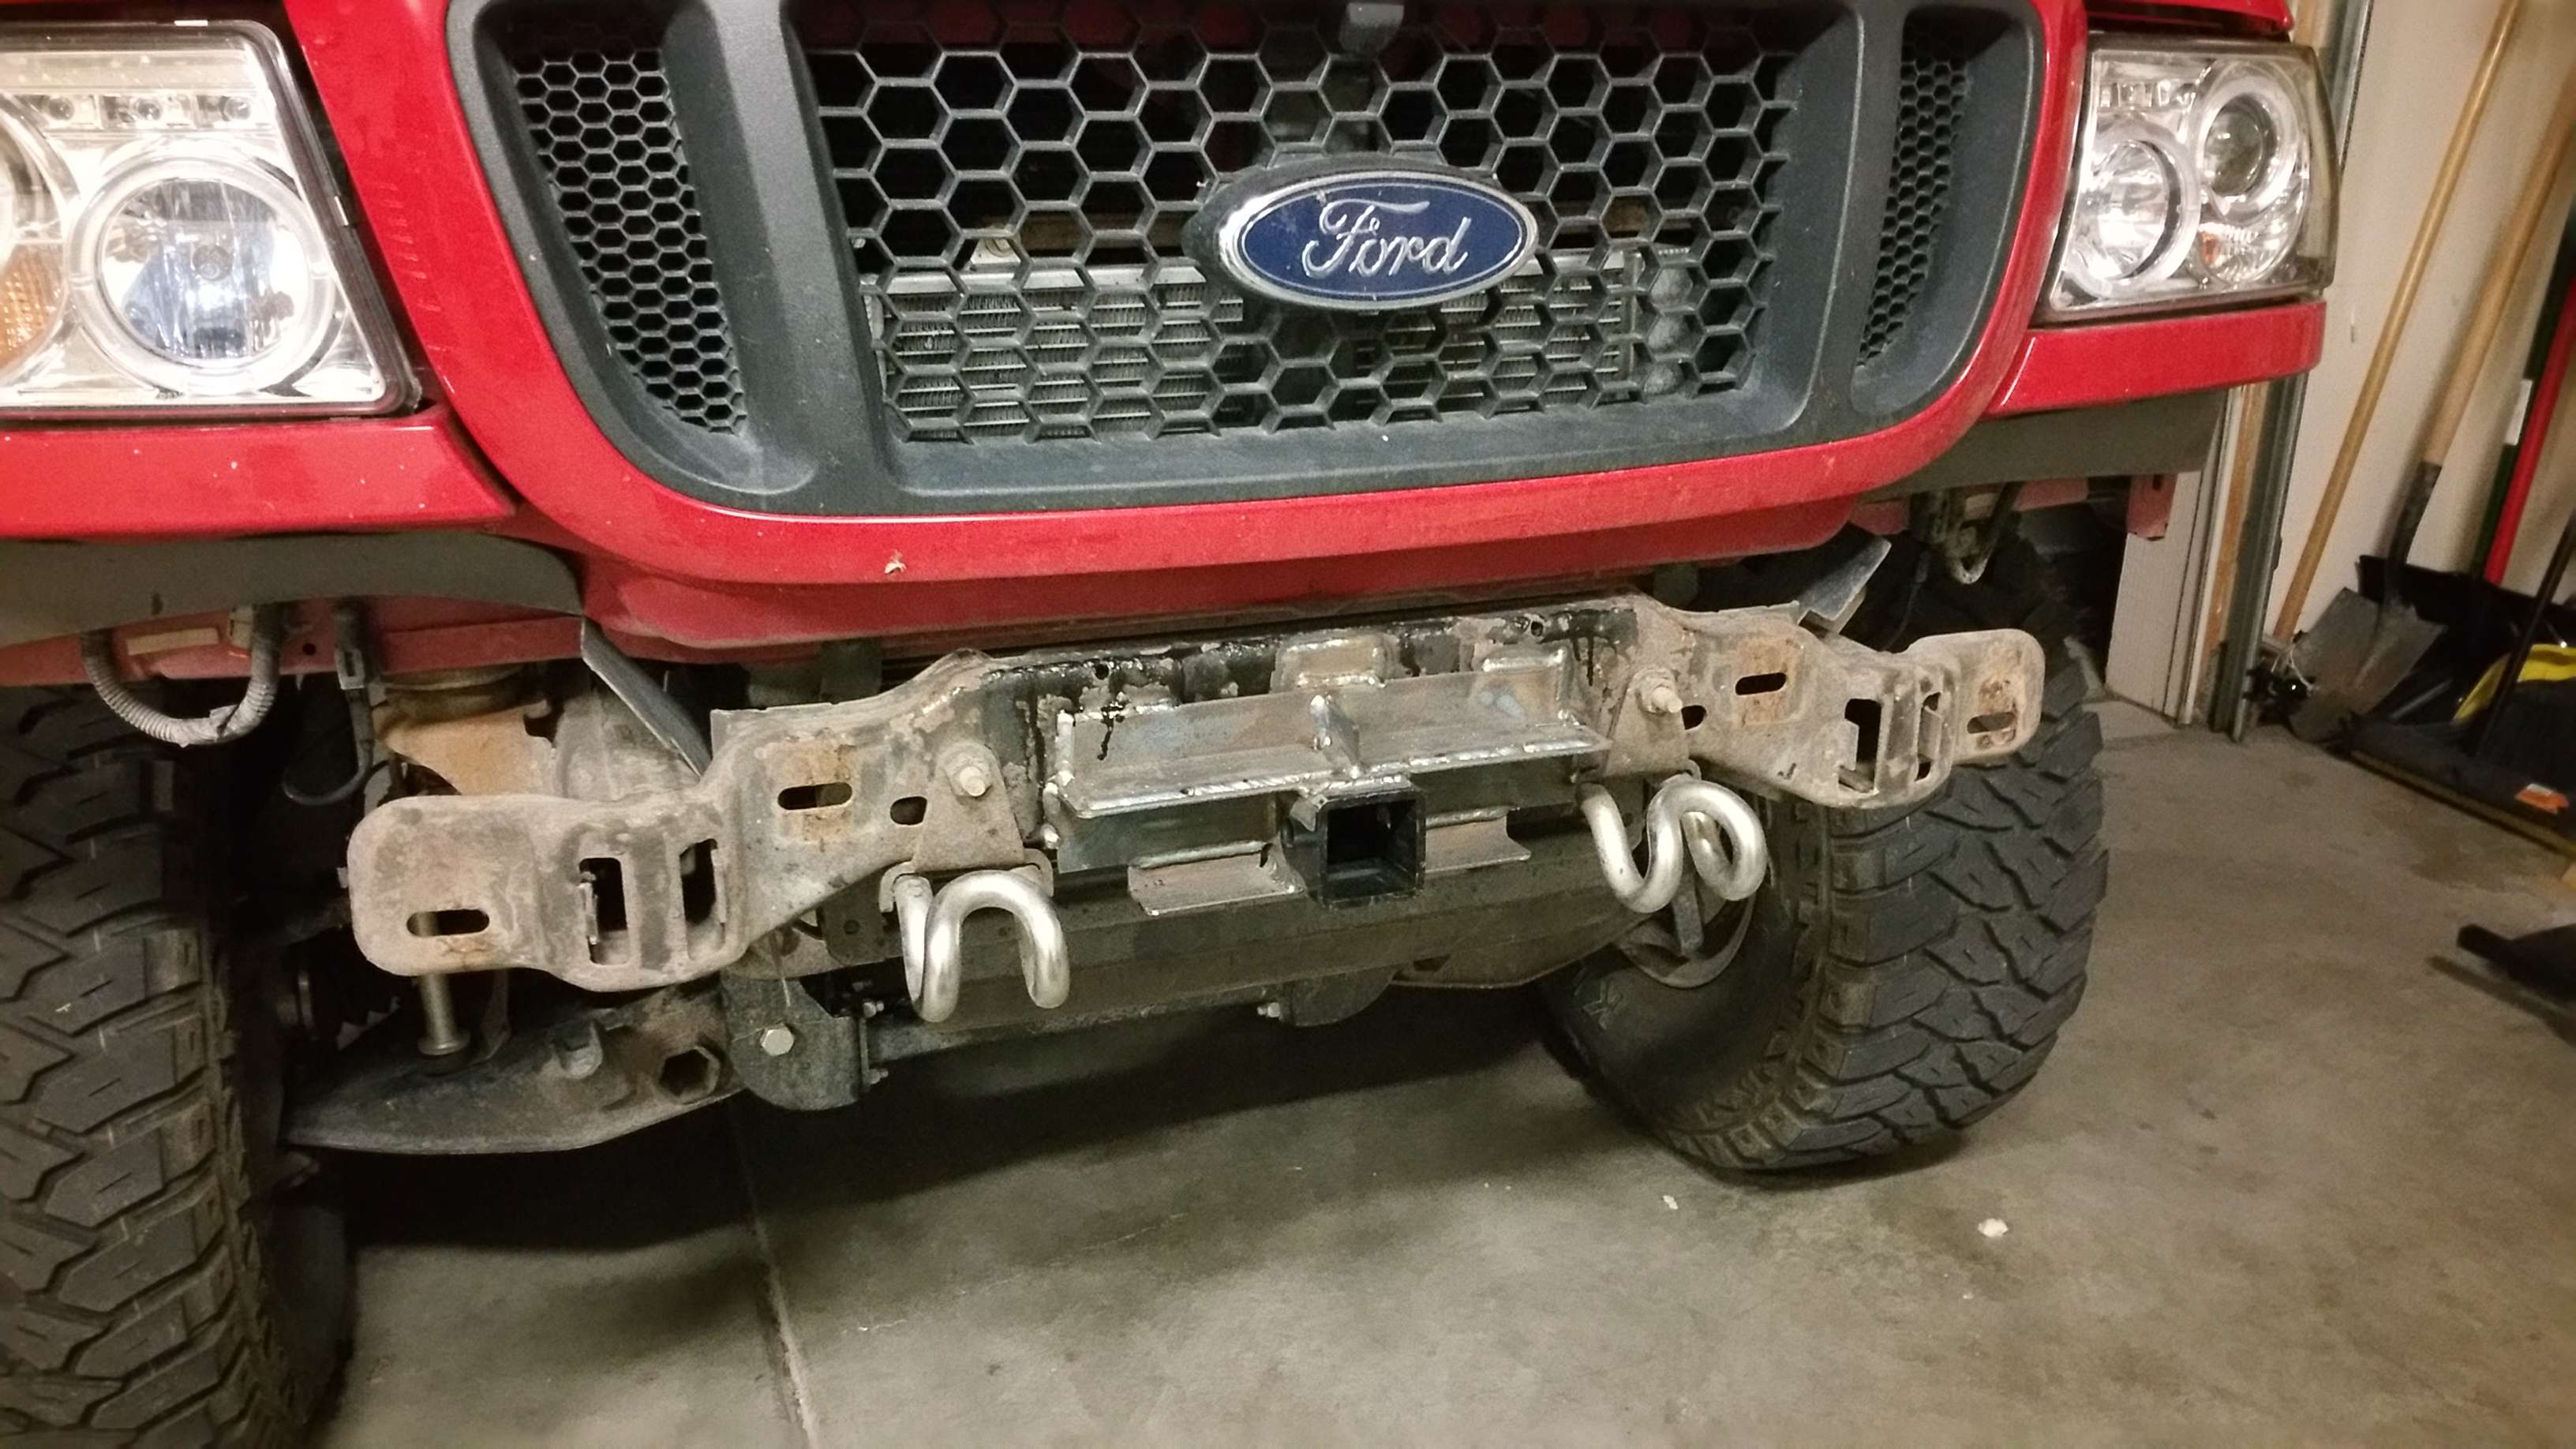
Up next is very recent, as in a few weeks ago. I pulled out my shocks to get tuned (previously mentioned), replaced the front CV's, front wheel bearings, and checked everything. Then I got it realigned. Then I started on the front hitch receiver I have been wanting to build. I repaired the front plastic bumper valence which had been slightly broke since the day I bought it. Then I bought a 6" long 2" hitch receiver for $12. Yup, $12 bucks. I built the rest of it out of 1/8"x2"x2" angle iron. It is welded at every seam, and then welded to the front crossmember. I wouldn't say I could yank another truck out with it at the moment though. It is welded along the front pretty strong, with a support in the center, and then also welded on the rear where you cant see. I would like to add an additional bar across the back where you can't see, but it is tough to get up there since it is already one. I highly doubt it is going anywhere. If it does, I am out a plastic bumper valence, and $12, and will just make it stronger. I will use the LVL II tow hooks to yank things out anyways.

#17
10-28-2016
Join Date: Jul 2015
Location: Reno, Nevada
Posts: 52
Likes: 0
Received 0 Likes
on
0 Posts
Overall, I do not regret a single cent I have put into this truck. It is a beast. I may or may not have some extra parts laying around, for all those near the Reno, NV area (hint hint).
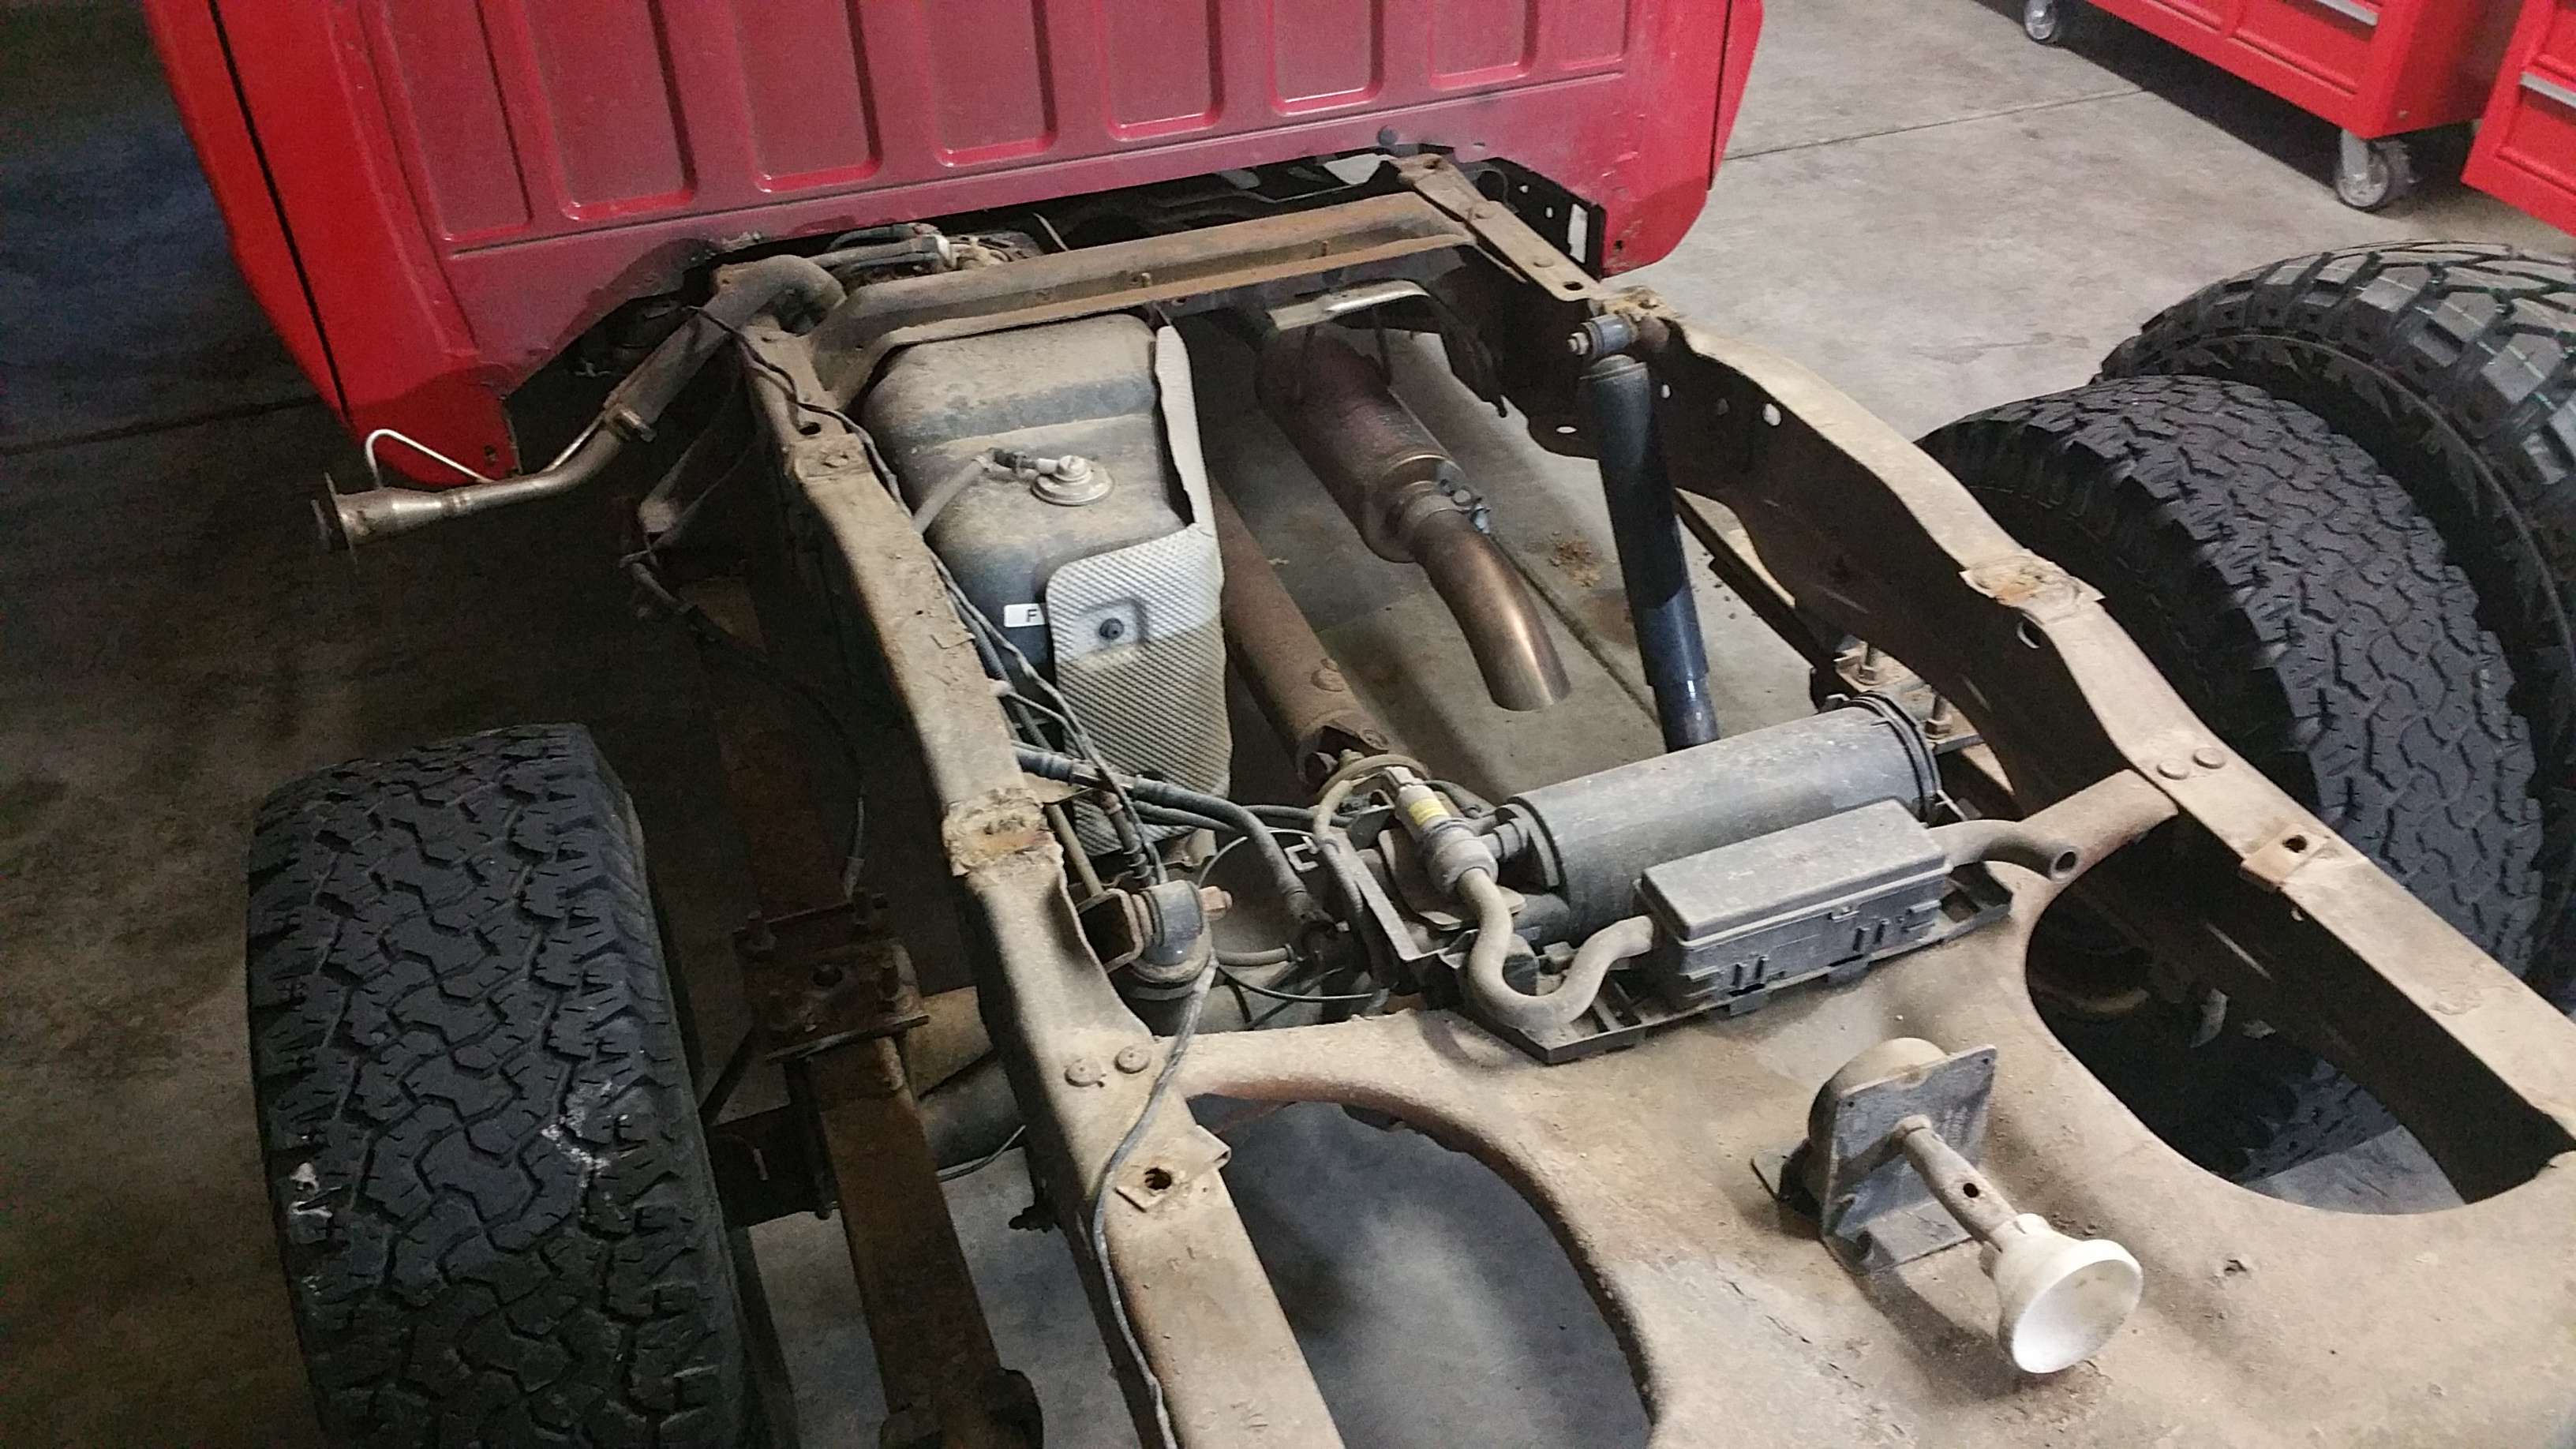
Since the truck is supercharged, I decided to swap out the Magnaflow muffler for a SLP Loudmouth resonator. It sounds very good. Still nice and deep like the magnaflow, but it has the cammed crackle and sounds excellent when you rev it.
Well, that is all for now. I'll bookmark this thread and answer any questions anyone has. Enjoy!

#19
10-31-2016
Join Date: Jul 2015
Location: Reno, Nevada
Posts: 52
Likes: 0
Received 0 Likes
on
0 Posts
#23
11-02-2016
Join Date: Jul 2015
Location: Reno, Nevada
Posts: 52
Likes: 0
Received 0 Likes
on
0 Posts
Thanks for the comments. I have more stuff in the works. Waiting on some parts to re-do my limit straps with a proper setup. I feel the superlift limit straps are inadequate, in thickness, and in how they mount. I have a Trail Gear stuff coming that will weld up rock solid. I am also designing a DIY sway bar disconnect that only requires 2 or so pins to be pulled, and it disconnects towards the center of the bar, not at the extensions. Plenty of other ideas to come in the next year also.

#25
05-14-2017
very nice build! well thought out and executed. and like Casey Said nice to see some one take the time to do it right.
if you have questions on limit straps as you get those set up let me know.
might consider a few cans of Krylon fusion satin black for your fender flares and bumper valence.
keep up the great work!
if you have questions on limit straps as you get those set up let me know.
might consider a few cans of Krylon fusion satin black for your fender flares and bumper valence.
keep up the great work!


