When you click on links to various merchants on this site and make a purchase, this can result in this site earning a commission. Affiliate programs and affiliations include, but are not limited to, the eBay Partner Network.
If you're having a rough idle, truck seems like it wants to shut off going into a different gear from a stop, etc, you may want to clean or replace your IAC. Its really simple to do. This how-to was done on a 2004 4.0L SOHC Ranger.
It may be a good idea to clean your throttle body while you're at it.
Required:
-CRC Throttle Body Cleaner spray (I got 2 cans because I did my throttle body as well)
-1/4" ratchet
-5/16" socket
-7mm socket
-Qtips
-Rags/paper towels
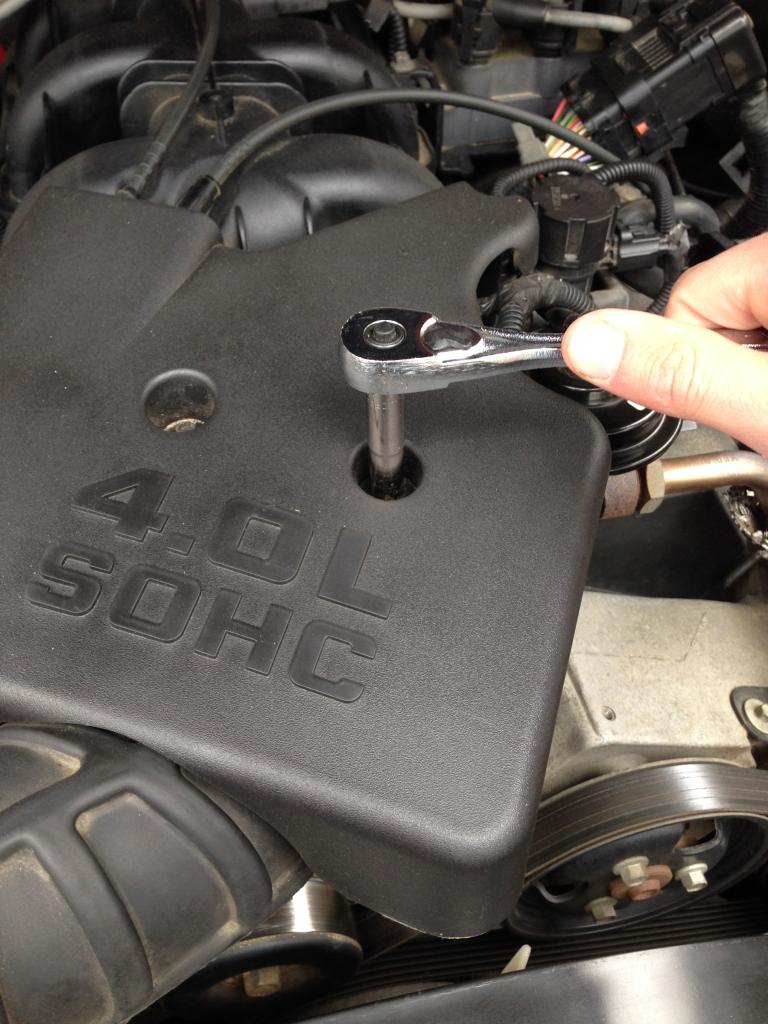
First, Remove your throttle body plastic cover with the 7mm socket and 1/4" ratchet. There are 3 of them holding it on.
Locate the IAC
Next, disconnect the pigtail on the back of the IAC
Remove the 2 5/16" screws holding the IAC down.
You can see its really dirty
Spray the heck out of the inside with the throttle body cleaner spray. Use Qtips to get in the tight areas and get it as clean as you can.
Reverse order, done. (dont mind the throttle body missing. i was cleaning that as well, in another how-to)
The PCM computer controls StartingFlare RPMs via this IACValve, depending on SetScrew adjustment, targeting specific WarmUp RPMs.
The soft rubber FactorySeal over the SetScrew may be removed with a knife for adjustment; use RTV as new seal once adjustment is done.
As you've detailed above, periodic removal+cleaning of the IACV with spray CarbCleaner & a soft bristle brush is recommended;
also inspect+lube the Figure8 ORing & replace as needed. The flange MountingBolts are 8mmHexHeads; the SetScrew is a 5mmAllenHead.
Listed below are my own IACValve SetScrew adjustments which lowered engine StartingFlare by approximately 500rpms;
this was done in an effort to generally minmize engine wear during starts, specificly to reduce wear on TimingChain+Guide components.
Thanks for the post and pics.
Where is the set screw located?
What was your starting point for the listed number of turns? i.e. Did you run it all-the-way down or all-the-way out?
Also, is the set screw captured or can you run it out and drop it? This is what I'd do.
Sorry for the specific queries.
I cleaned my IACValve upon locating a replacement "figure 8" gasket. 'Twas $2.37 I didn't need to spend as the old one didn't stick, break nor had it dried out.
What should I have lubed it with? Is a light smear of silicone grease good?
My valve was just a little stained. I used carb cleaner and barely got any to move onto the white rag. That's good I guess.
Last edited by Georgeandkira; Dec 26, 2020 at 10:05 AM.
...Where is the set screw located?
...starting point for the listed number of turns? i.e. Did you run it all-the-way down or all-the-way out?
...is the set screw captured or can you run it out and drop it?
...smear of silicone grease good?
...used carb cleaner and barely got any to move onto the white rag. That's good I guess.
The AdjustmentSetScrew (mine was AllenHead, some are PhillipsHead) at the end of the actuator cylinder
under the round Black\Factory rubber plug on the back part of electrical socket. Use an Exacto to carefully dig it out.
When done with the tune, re-fill\cover the SetScrew with fresh RTV, your choice of color, just as a vacuum seal.
Start this tune by turning the SetScrew FullClockWise\FCW inward until it hit hard stop,
while counting turns from Factory setting, so you can go back there if needed; mine was 3.33 FullClockWise to hard stop then back\minus CounterClockWise
I never fully loosened the SetScrew CounterClockWise\CCW, so don't know if it will fall out?
SilconeGrease or Vaseline should be fine for lube on the Figure8 ORing.
I CarbSpray soaked for about an hour on the bench, then cleaned with a gunbarrel brush, followed by a little SiliconeSpray before re-install.