How-To: Replace Thermostat
#1
 05-14-2012


How-To: Replace Thermostat
IMPORTANT:
Ranger-Forums or its staff does not endorse the safety, accuracy, or reliability of any How-To or DIY article.
Any How-To or DIY article is attempted and/or completed at your own risk.
The How-To threads are for questions regarding that specific How-To. If you have off topic comments or questions start a thread in the section that pertains to that question. (ie. Interior Section, Suspension Section) All off topic posts will be deleted to keep the How-To's clean and informative.
--------------------------------------------------------------------------
Now for the thread:
This exact process is for a 2000 3.0, however the idea is the same across all platforms; albeit the parts may be in other locations.
NEEDED:
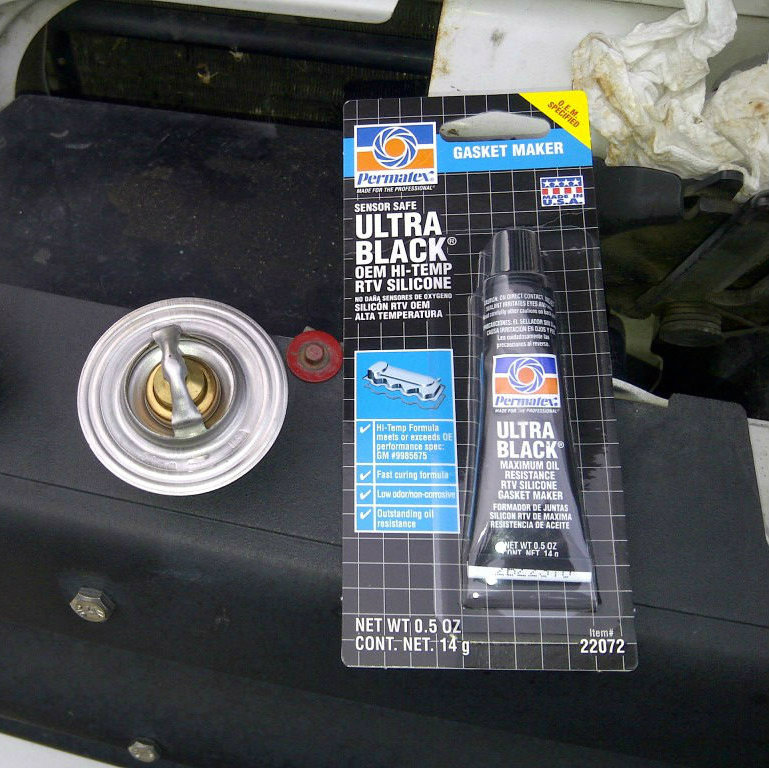
Thermostat (I purchased a 195degree OEM unit, however other temperatures are available)
RTV gasket maker / sealant (the black stuff, a small tube did me fine)
- perform this preferably in the later afternoon/night, and with a cold engine, because the RTV will need time to solidify overnight -
Process:
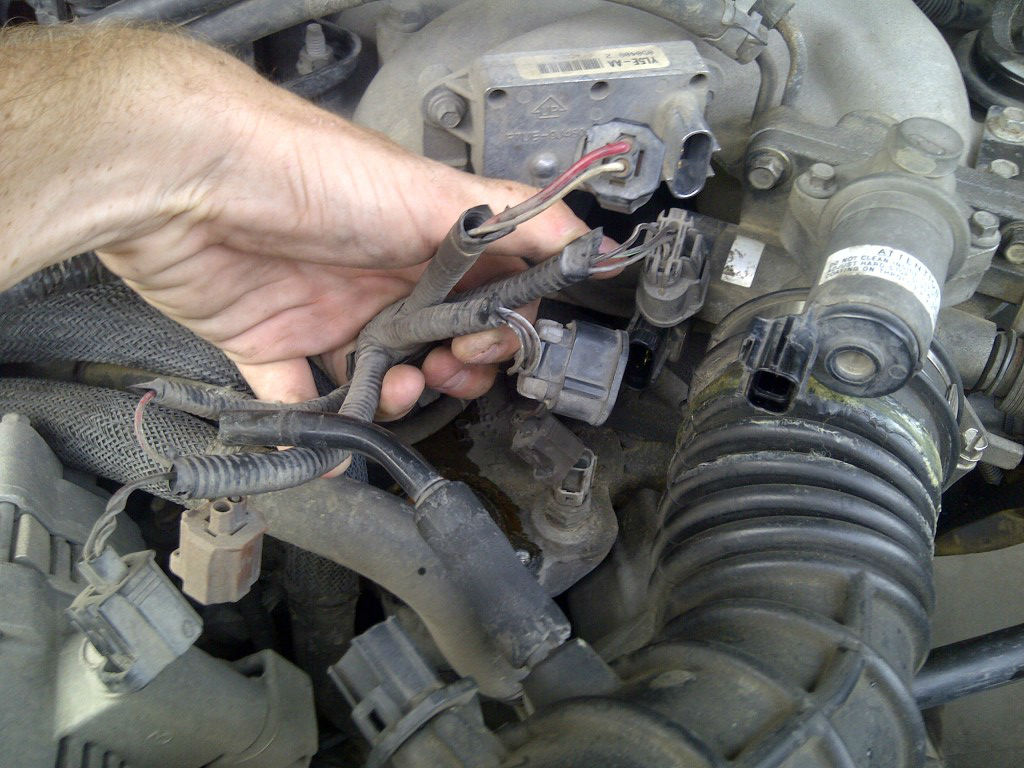
First disconnect the negative battery cable, remove the airbox top and bottom and filter, air intake tube, disconnect MAF plug, and disconnect the 6 plugs near the throttle body, (1 on the intake tube, rest around the radiator hose and throttle body area) zip tie these out of the way
Drain the radiator: unscrew cap on top, then unscrew or remove petcock on lower passenger, engine bay side of the radiator.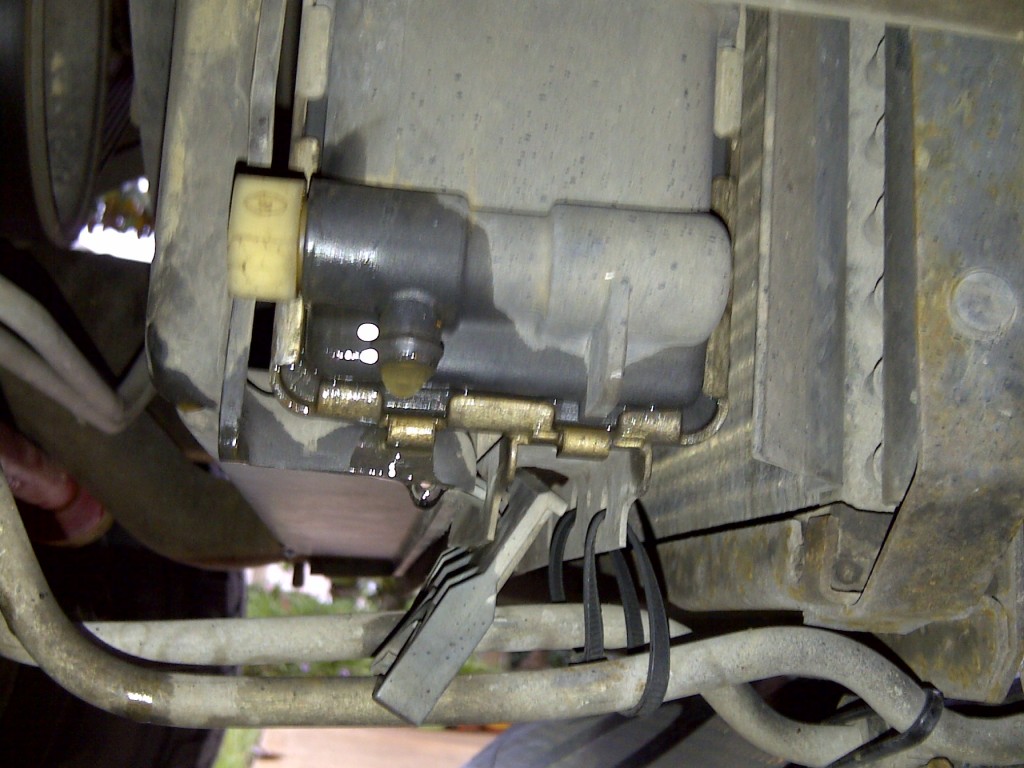
Its a white hex nut (BE CAREFUL ITS PLASTIC, does not need much force)
Now collect the fluid, keep if its good, pour out back if bad. (99% of the time youll want to replace. Remember to use proper amounts of antifreeze according to your environment. Its relatively cheap.)
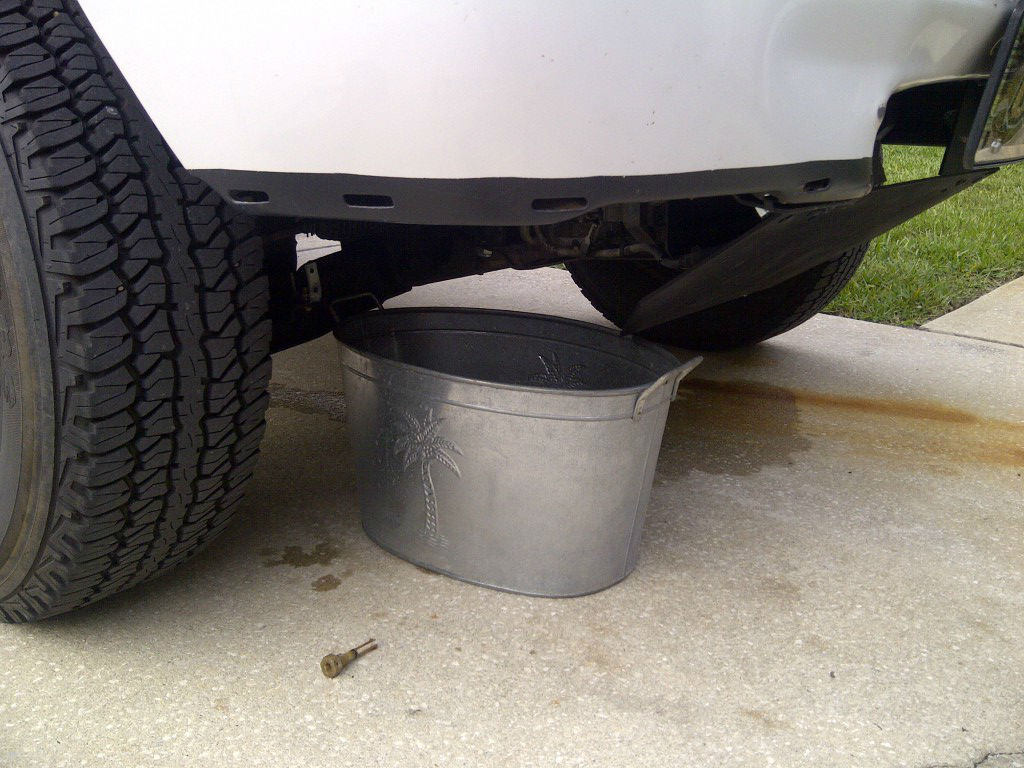
Now that the radiator is free of water, I usually spray the garden hose in it a few times after it has gravity drained to push out any residual fluid/debris)
If your radiator hoses are any bit of old, youll want to be very careful here... you dont HAVE to remove the large upper radiator hose that runs from the engine bay, passenger side of the radiator to the top of the motor, but it makes the job 10X as easy
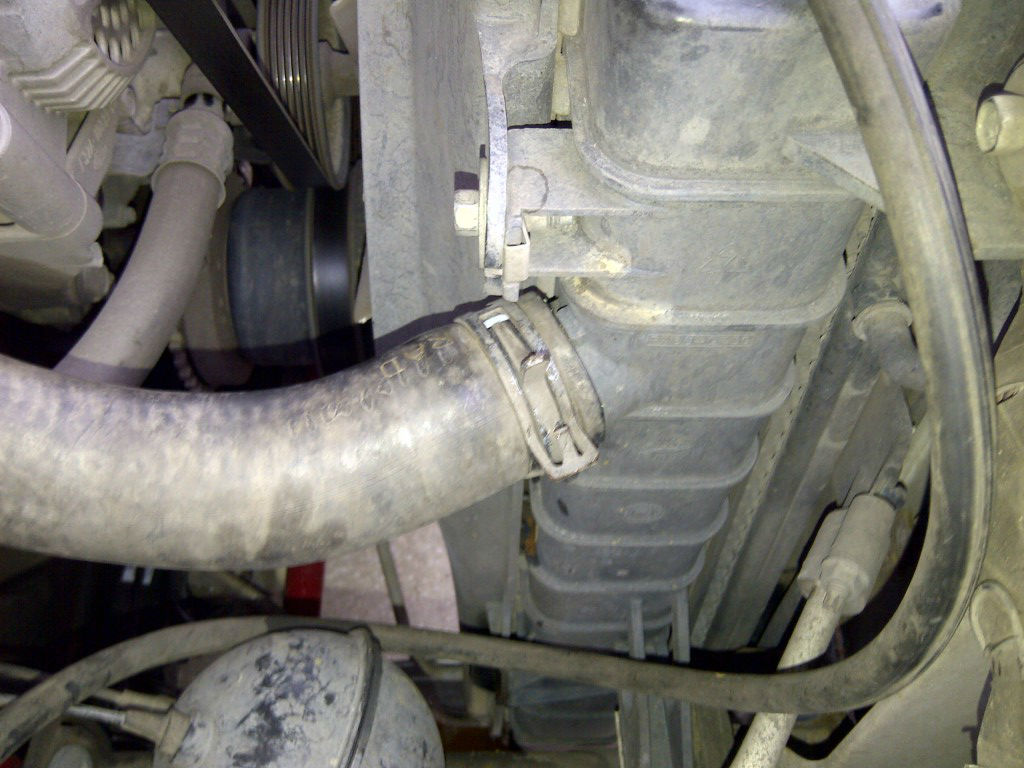
Squeeze the ring fingers together and wiggle it off. Hoses arent all too cheap so try your hardest not to rip or cut them.
Next unbolt the two (on my year) 10mm bolts holding the water neck to the block.
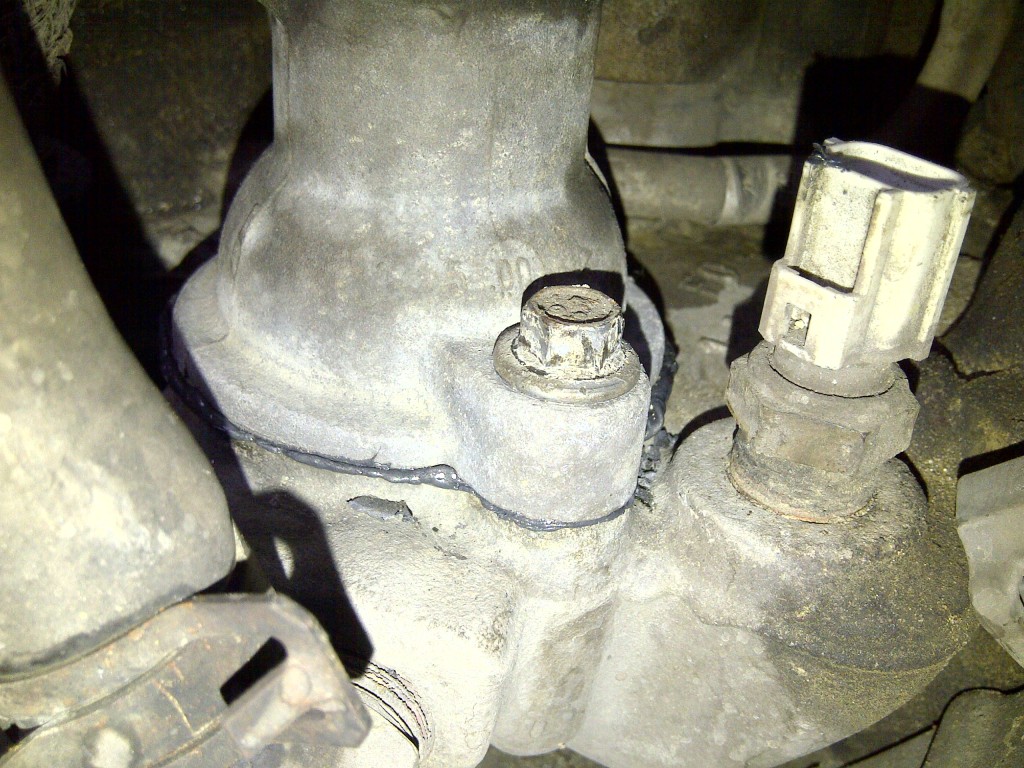
(they will have been 'cooked' over the years so expect resistance, use steady strong force, no ballistic pulls or I'd imagine the bolts would snap. Just my .02cents)
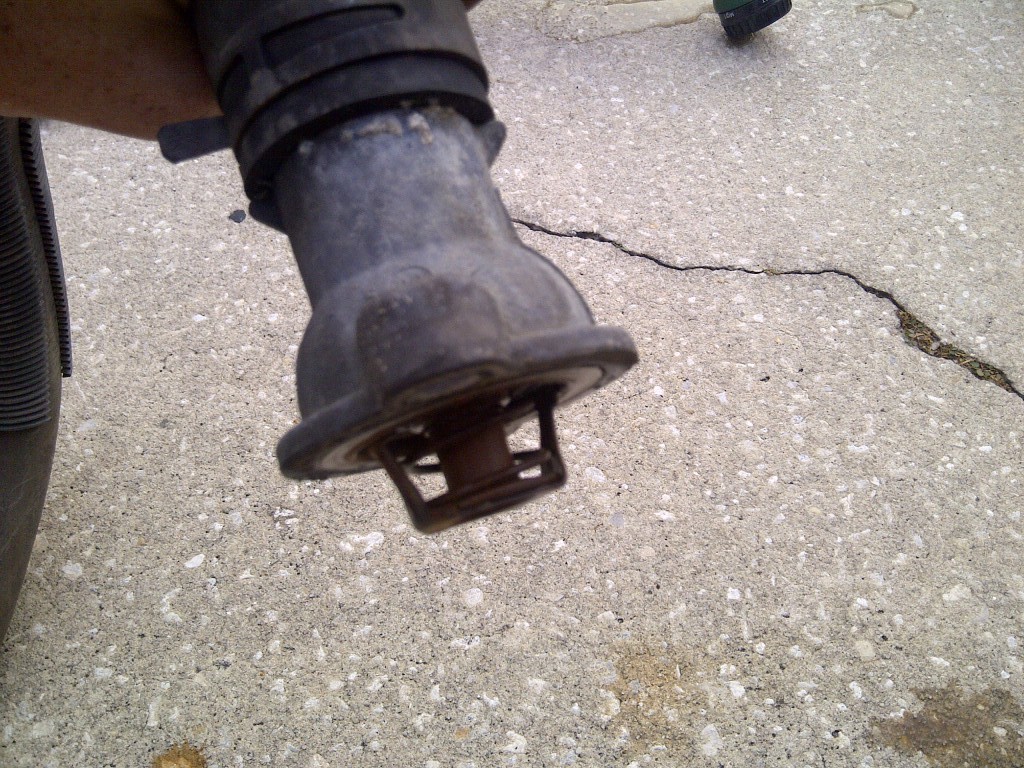
Now the upper radiator hose is free. (Pat yourself on back ) Clean the hose thoroughly. The thermostat may have come with the hose as mine did, just pop it out.
Next step is to remove any gasket material from the bottom of the water neck or from the block. Its black and mine was clearly rotten.
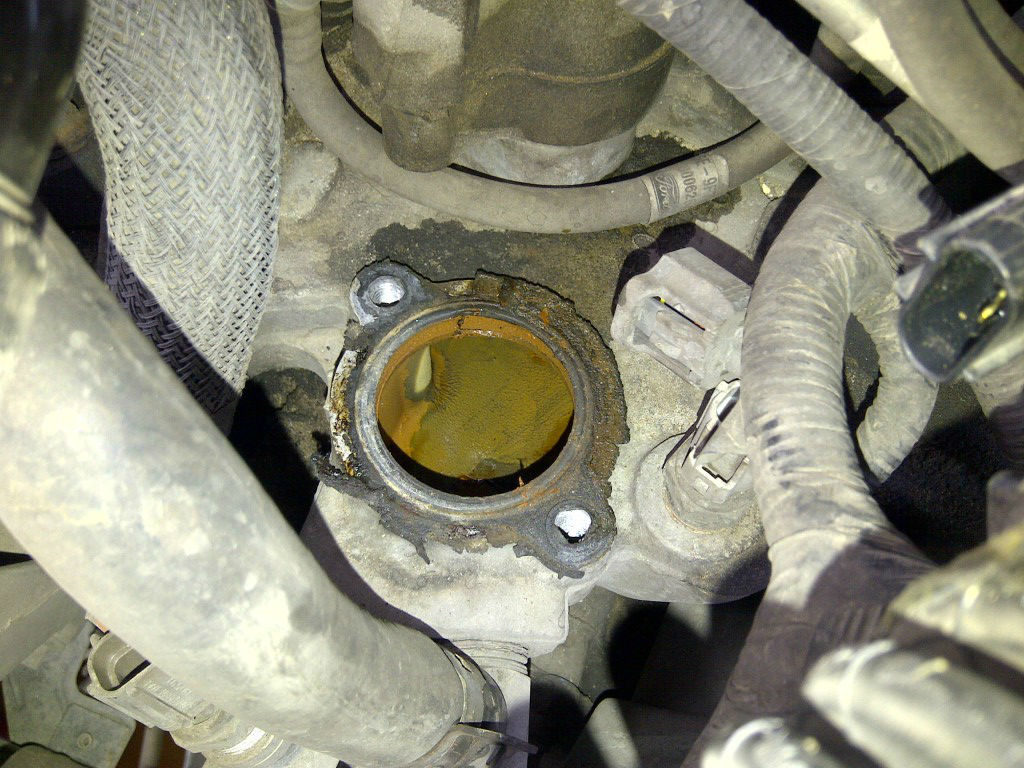
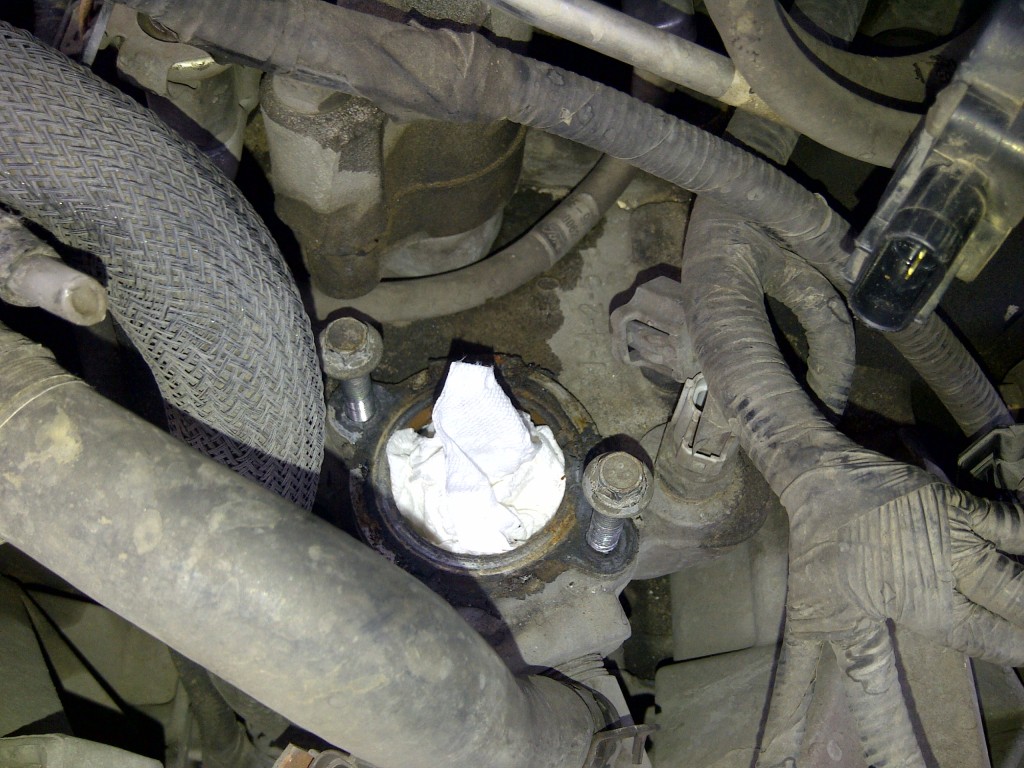
You'll want to scrap with a razor blade till you see bare metal. Use a paper towel/rag and stuff it in the hole in the block with an ear sticking up so nothing can fall in, periodically whip the rag out quickly to clear debris, if anything manages to fall in simply vacuum.

^ That last step is definitely the most tedious and time consuming and its all down hill form here. ^ Now that you have smooth, bare metal surfaces on both the hole on the block and the water neck its time to install the new thermo.
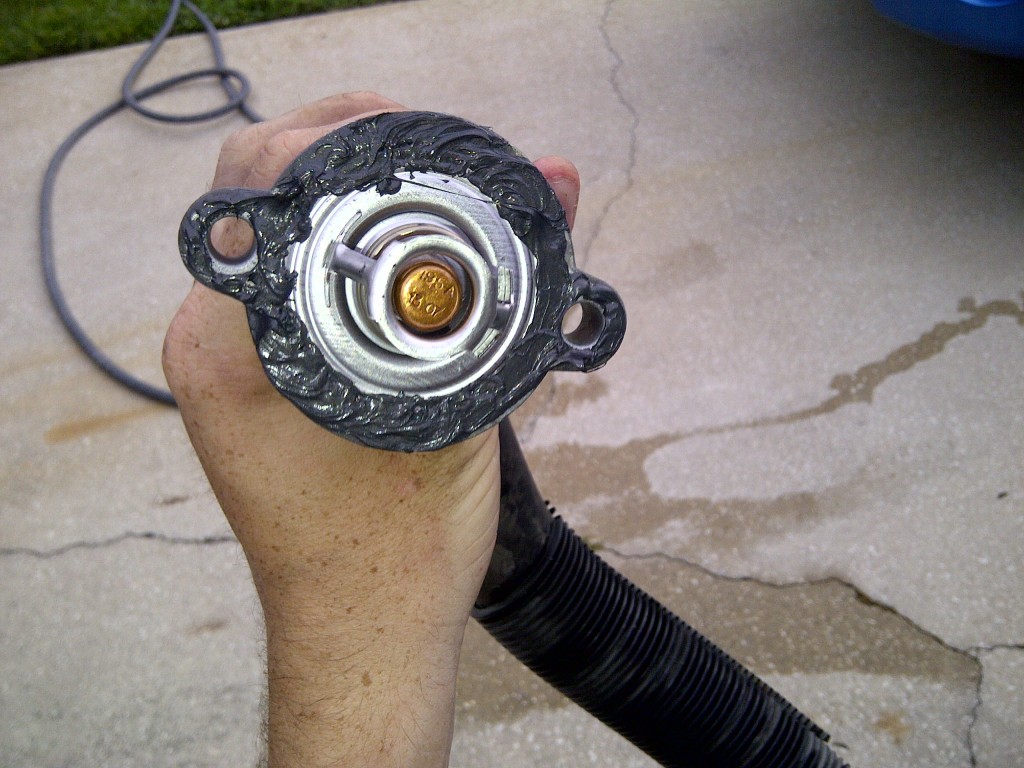
Use a decent amount of RTV, keep it off the main parts of the thermo itself (you can apply it to the metal disc around the outside as shown), the threads of the screws or screw holes, inside the block, or on any sensors and you should be good. Apply uniformly, not paper thin but dont overdo it here. !!!!BUT REMEMBER, THE SPRING ON THERMO GOES DOWN!!!! That is critical.
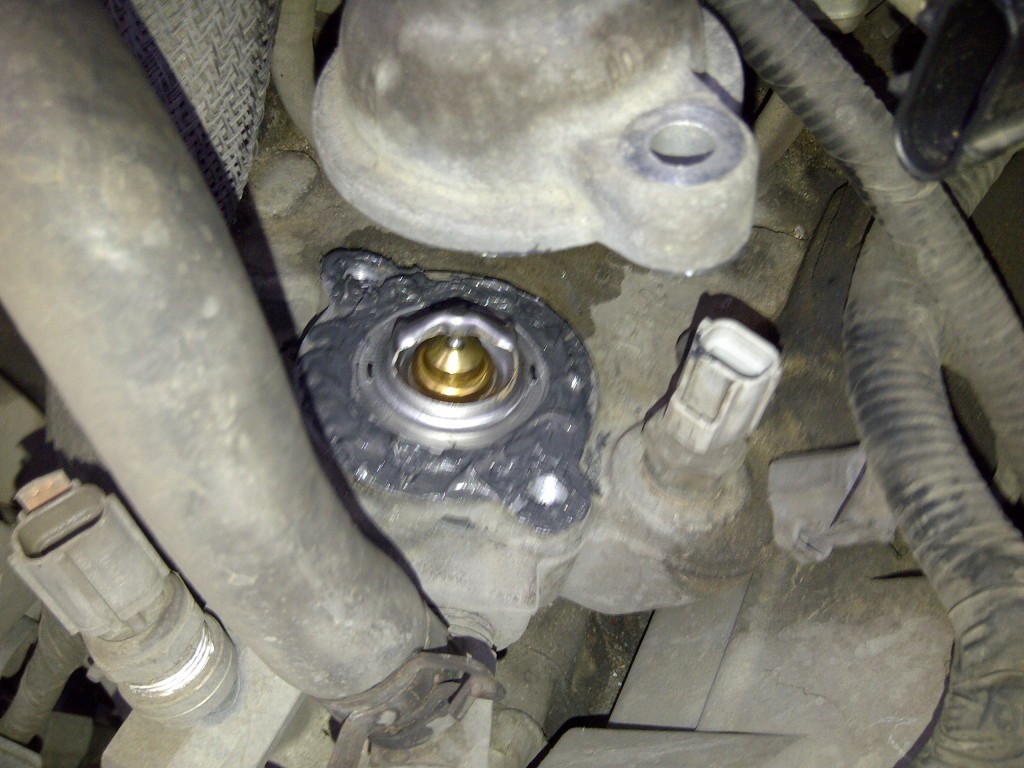
(at first I tried sticking the thermo in the tube and installing but gravity rides everything and it kept falling out so I had to remove the thermo from the tube and place it in the block, and re-RTV everything, much easier this way)
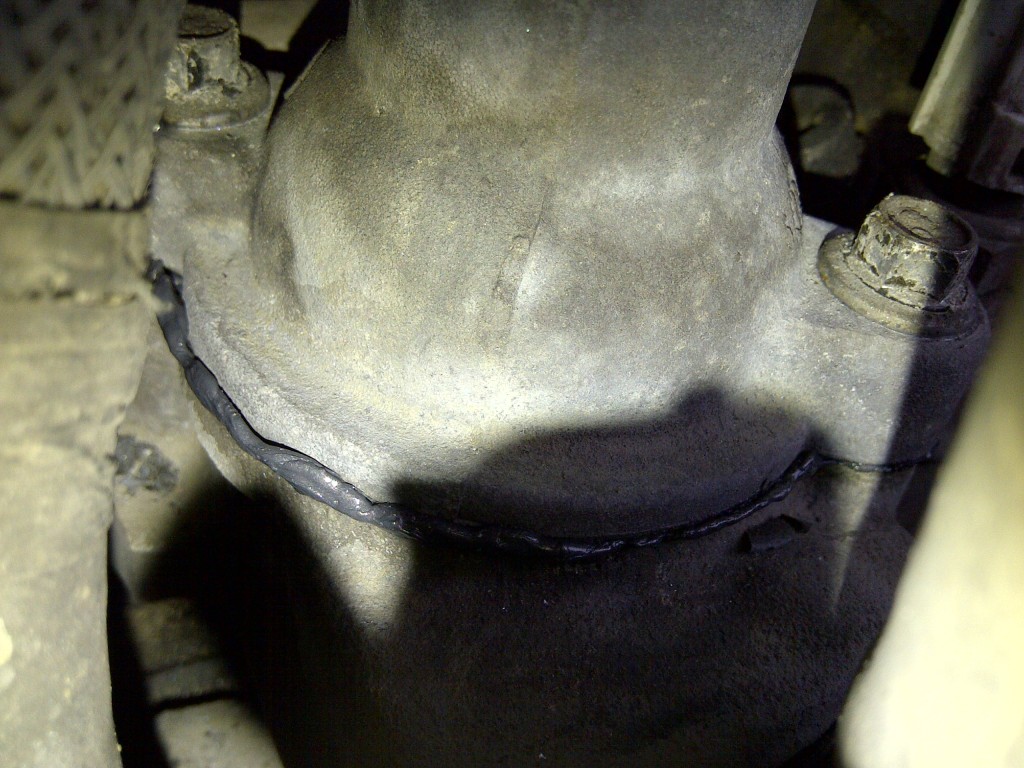
Bolt the water neck down and give her a decent amount of torque, dont hulk it. The sealant should squeeze out a bit and thats a very good sign.
Reattach the other end of the radiator hose back to the main radiator. Make sure its snug and on where it was when you removed it.
Re-insert the petcock into the lower end of the radiator, screw till tight...again its plastic, be careful.
Fill the radiator up with water and coolant mix.
Screw radiator cap on.
Re-install air intake tube/air box.
Re-connect sensors (MAF, TPS, IAC etc).
And let her sit over night. Make sure the reservoir tank has plenty of fluid because by doing this you did introduce air into the system and the water will have to be brought in to replace it. Let the RTV cure, wake up in the morning and reconnect the negative terminal and let the truck idle for about 7 minutes and you sir have just changed a thermostat

Ranger-Forums or its staff does not endorse the safety, accuracy, or reliability of any How-To or DIY article.
Any How-To or DIY article is attempted and/or completed at your own risk.
The How-To threads are for questions regarding that specific How-To. If you have off topic comments or questions start a thread in the section that pertains to that question. (ie. Interior Section, Suspension Section) All off topic posts will be deleted to keep the How-To's clean and informative.
--------------------------------------------------------------------------
Now for the thread:
This exact process is for a 2000 3.0, however the idea is the same across all platforms; albeit the parts may be in other locations.
NEEDED:
Thermostat (I purchased a 195degree OEM unit, however other temperatures are available)
RTV gasket maker / sealant (the black stuff, a small tube did me fine)
- perform this preferably in the later afternoon/night, and with a cold engine, because the RTV will need time to solidify overnight -
Process:
First disconnect the negative battery cable, remove the airbox top and bottom and filter, air intake tube, disconnect MAF plug, and disconnect the 6 plugs near the throttle body, (1 on the intake tube, rest around the radiator hose and throttle body area) zip tie these out of the way
Drain the radiator: unscrew cap on top, then unscrew or remove petcock on lower passenger, engine bay side of the radiator.
Its a white hex nut (BE CAREFUL ITS PLASTIC, does not need much force)
Now collect the fluid, keep if its good, pour out back if bad. (99% of the time youll want to replace. Remember to use proper amounts of antifreeze according to your environment. Its relatively cheap.)
Now that the radiator is free of water, I usually spray the garden hose in it a few times after it has gravity drained to push out any residual fluid/debris)
If your radiator hoses are any bit of old, youll want to be very careful here... you dont HAVE to remove the large upper radiator hose that runs from the engine bay, passenger side of the radiator to the top of the motor, but it makes the job 10X as easy
Squeeze the ring fingers together and wiggle it off. Hoses arent all too cheap so try your hardest not to rip or cut them.
Next unbolt the two (on my year) 10mm bolts holding the water neck to the block.
(they will have been 'cooked' over the years so expect resistance, use steady strong force, no ballistic pulls or I'd imagine the bolts would snap. Just my .02cents)
Now the upper radiator hose is free. (Pat yourself on back
) Clean the hose thoroughly. The thermostat may have come with the hose as mine did, just pop it out. Next step is to remove any gasket material from the bottom of the water neck or from the block. Its black and mine was clearly rotten.
You'll want to scrap with a razor blade till you see bare metal. Use a paper towel/rag and stuff it in the hole in the block with an ear sticking up so nothing can fall in, periodically whip the rag out quickly to clear debris, if anything manages to fall in simply vacuum.
^ That last step is definitely the most tedious and time consuming and its all down hill form here. ^ Now that you have smooth, bare metal surfaces on both the hole on the block and the water neck its time to install the new thermo.
Use a decent amount of RTV, keep it off the main parts of the thermo itself (you can apply it to the metal disc around the outside as shown), the threads of the screws or screw holes, inside the block, or on any sensors and you should be good. Apply uniformly, not paper thin but dont overdo it here. !!!!BUT REMEMBER, THE SPRING ON THERMO GOES DOWN!!!! That is critical.
(at first I tried sticking the thermo in the tube and installing but gravity rides everything and it kept falling out so I had to remove the thermo from the tube and place it in the block, and re-RTV everything, much easier this way)
Bolt the water neck down and give her a decent amount of torque, dont hulk it. The sealant should squeeze out a bit and thats a very good sign.
Reattach the other end of the radiator hose back to the main radiator. Make sure its snug and on where it was when you removed it.
Re-insert the petcock into the lower end of the radiator, screw till tight...again its plastic, be careful.
Fill the radiator up with water and coolant mix.
Screw radiator cap on.
Re-install air intake tube/air box.
Re-connect sensors (MAF, TPS, IAC etc).
And let her sit over night. Make sure the reservoir tank has plenty of fluid because by doing this you did introduce air into the system and the water will have to be brought in to replace it. Let the RTV cure, wake up in the morning and reconnect the negative terminal and let the truck idle for about 7 minutes and you sir have just changed a thermostat
Last edited by rangerrunner11; 05-16-2012 at 02:10 PM.
#2
05-16-2012

Thread
Thread Starter
Forum
Replies
Last Post


