How-To: Change your Odometer when doing a gauge swap...95-03 trucks ONLY
#1
How-To: Change your Odometer when doing a gauge swap...95-03 trucks ONLY
How-To author: Fx4wannabe01
Original thread: https://www.ranger-forums.com/f59/ho...-trucks-74062/
Let the modding Begin!!
_________________________
'03 and older gauge swappers: How to change your odometer
This how-to shows how to swap your current odometer gauge into your new gauge cluster on 95-03 Ford Ranger/B-series as well as the Explorer Counterparts(’01 and older Explorer, . OR how-to roll your new-to-you cluster’s odometer to your current odometer reading. The same technique could probably be used on older models as well...though i'm unsure.
Disclaimer: In this how-to, it shows you how to ‘roll your odometer’. In NO WAY shall it be used to illegally roll your odometer to show a lower mileage reading on your vehicle. Also, I cannot be held responsible for any mess-ups that could occur by the rolling of the odometer or swapping of the odometer/speedometer gauge, and also the disassembly of your clusters. I am not responsible for someone’s ignorance for not being careful.
I’m doing it in reverse as to what others would do, but all this applies to this swap. I am taking the odometer/speedo gauge from an Explorer Sport Trac cluster, and carrying it over to a stock Ranger cluster.
The awesome Sport Trac cluster i will be working on courtesy of Mr. Beard...
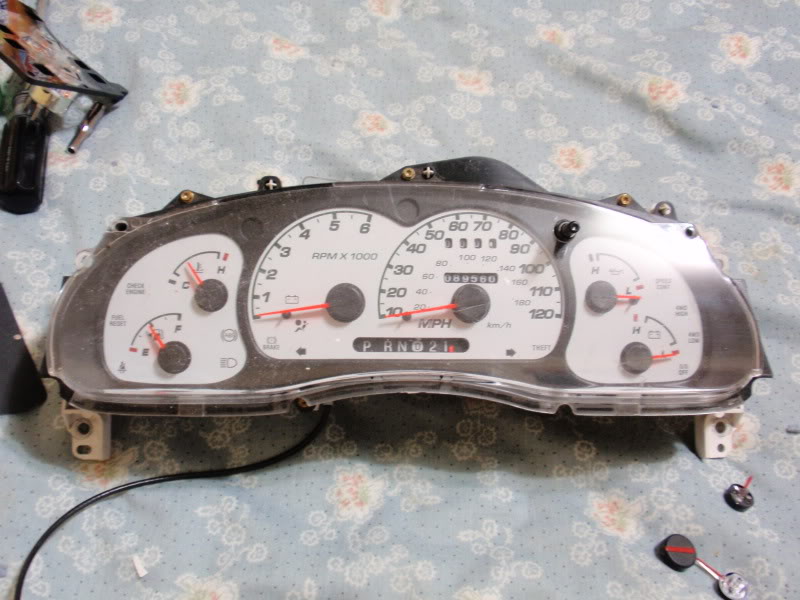
You must first remove the plastic lense/cover from the cluster using a T15 torx on the 7 screws in which hold it on..
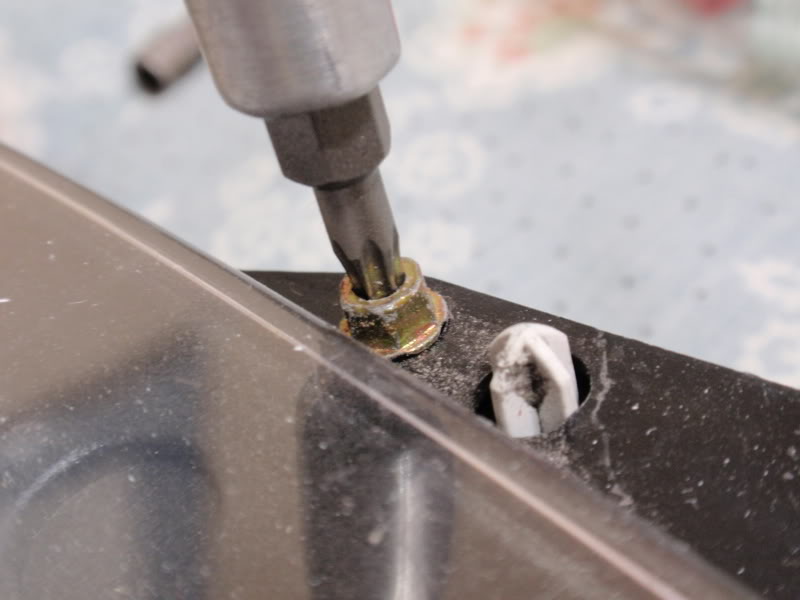
Cover removed…
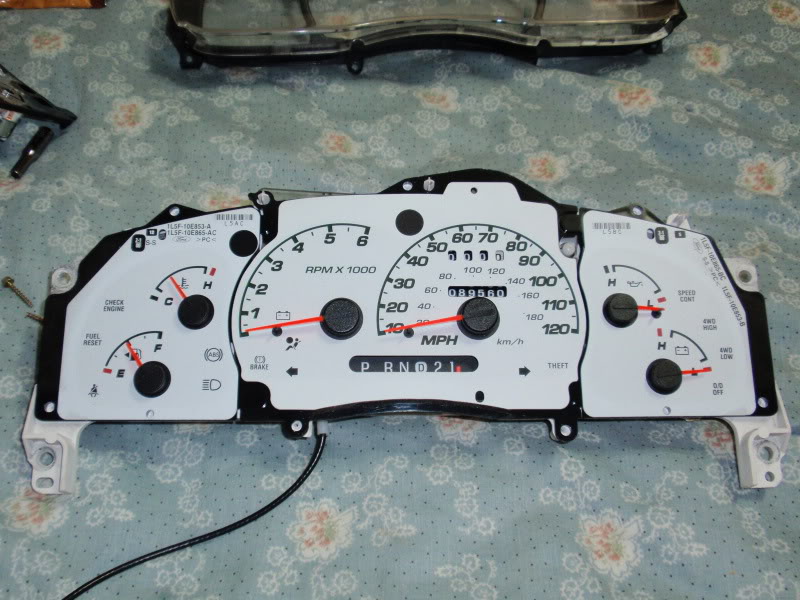
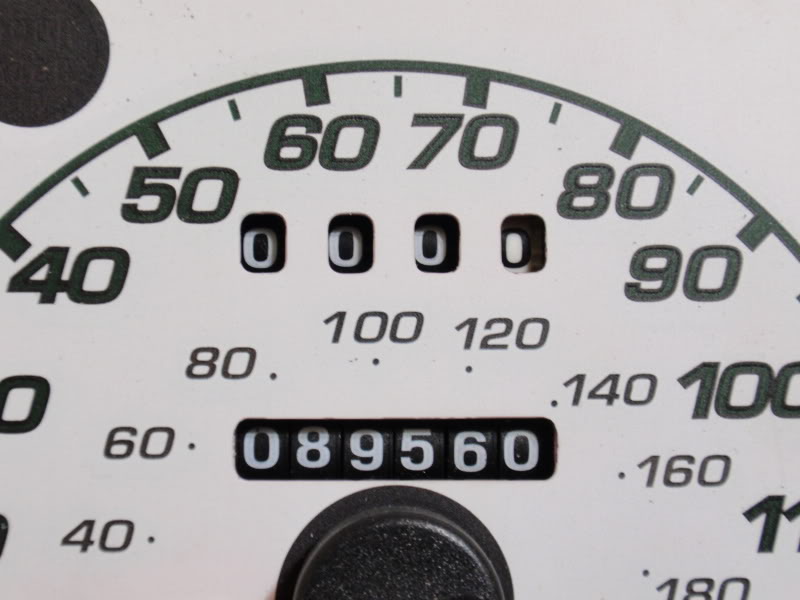
Beginning mileage is 89650…
Outer gauges must first be removed. I like to pull up the top section, and it’ll just pop right on out of there.
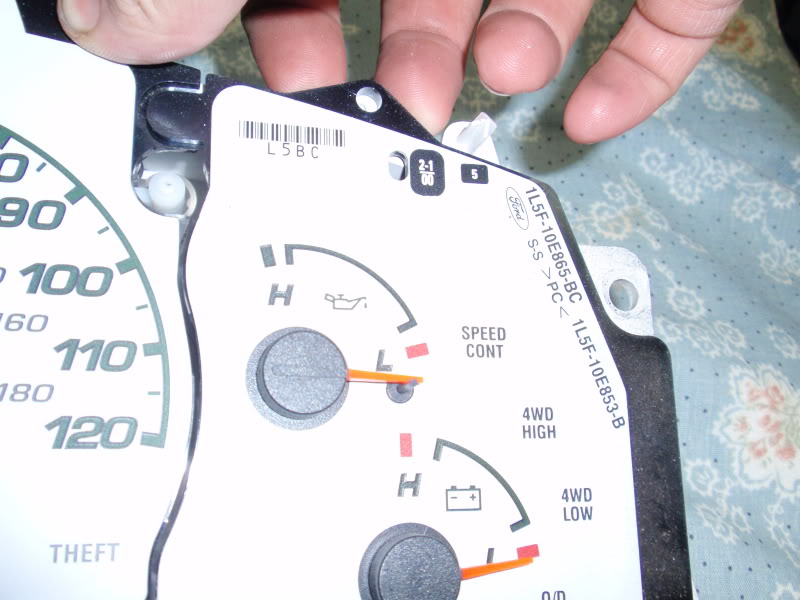
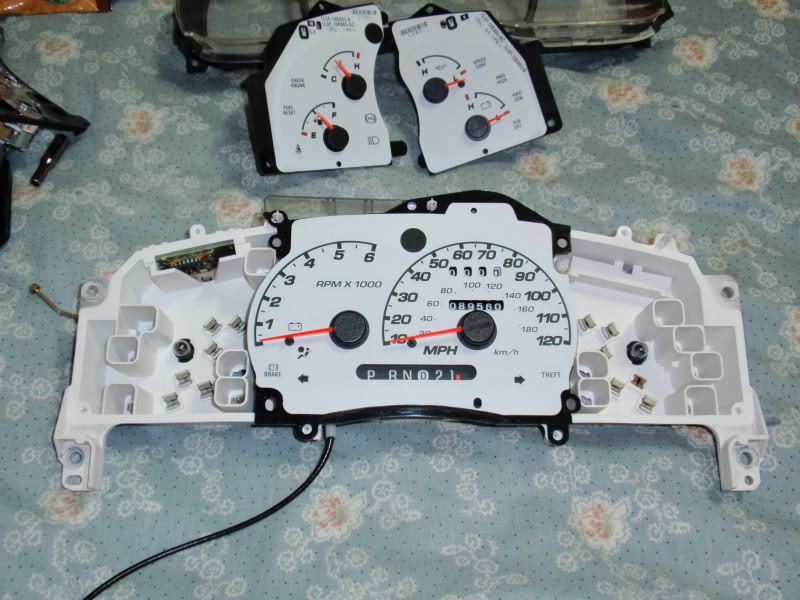
Center section must come out next. I like to pull up on the right hand side…there’s solid plastic chunk which you will feel when you attempt it. I also like to pull up on the very top…wedge my finger nail between the center gauge chunk and the cluster ‘housing’.
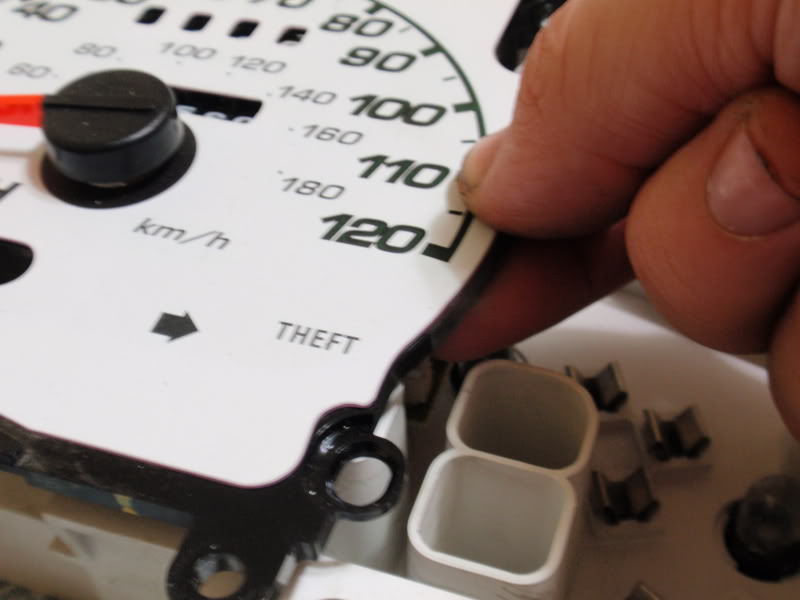
All three removed…
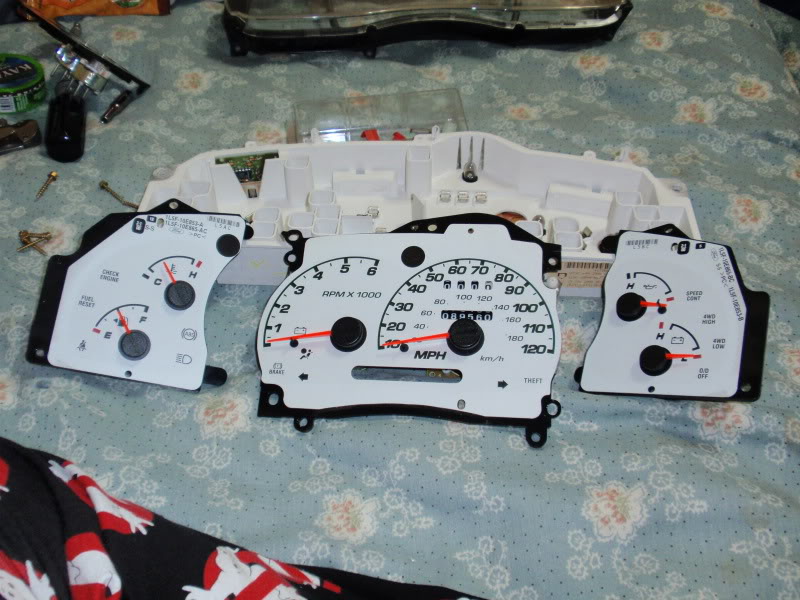
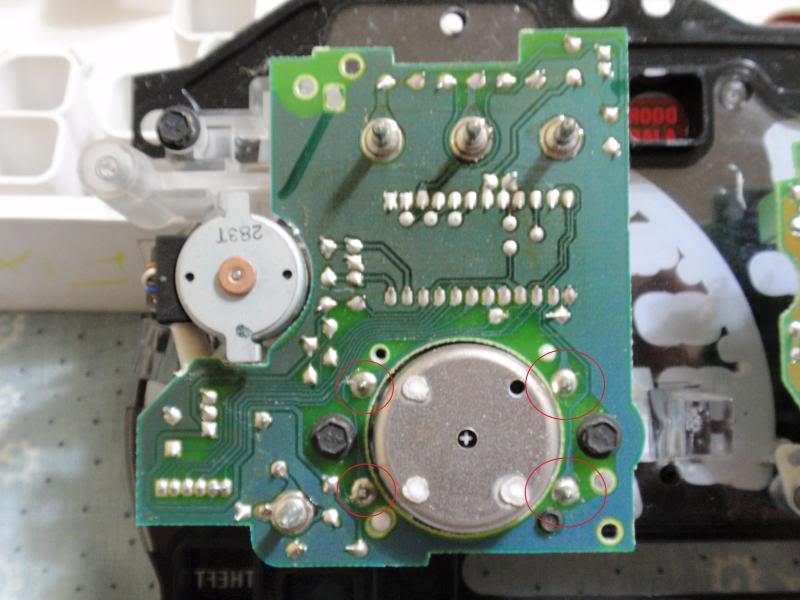
Now flip the center section over. Here, you’ll see the electric motor which drives the speedometer needle(silver round thingy towards the bottom right). Circled, are the solder studs which we’ll talk about later…
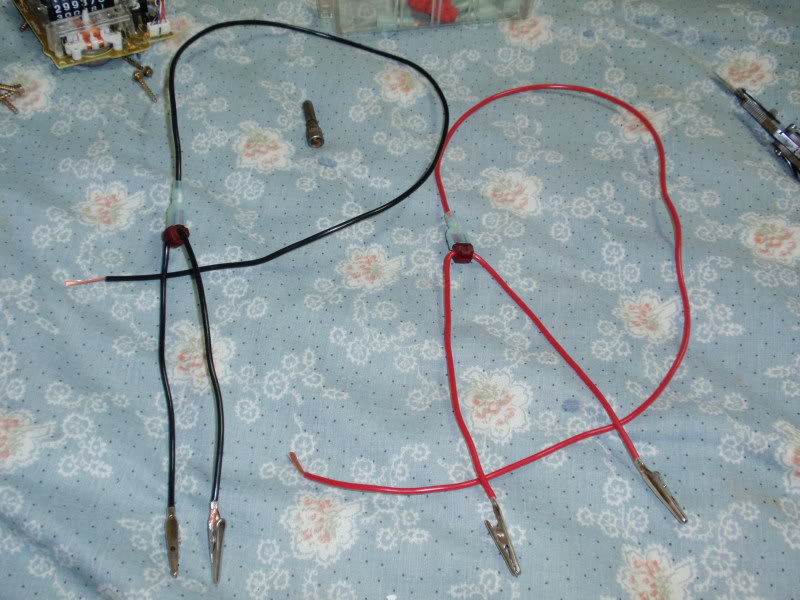
In order to take the odometer/speedo gauge out, you must remove the needle. BUT in order to make sure you place the needle properly in the correct orientation on the needle, you must first calibrate the speedometer. We do this with a little bit of wire, alligator clips/roach clips, and a new AA battery. Make your wires look like the pic below. You need to pretty much make a ‘ Y ‘ out of them. Top of the ‘ Y ‘ shall have the roach clips, bottom of the ‘ Y ‘ shall be a long stripped section of bare wire. I made the bottom portion of the ‘ Y ‘ long to make it easier to make the vids seen later in this post.
Now….those circled solder studs talked about above…they come into play here. Place an alligator clip on each stud, as following diagram. Make sure the roach clips are not touching each other OR the motor. I like to lean the Tach/Speedo gauge up against the cluster ‘housing’..makes it easy and it stays put. Red = + pos. Black = - Neg.
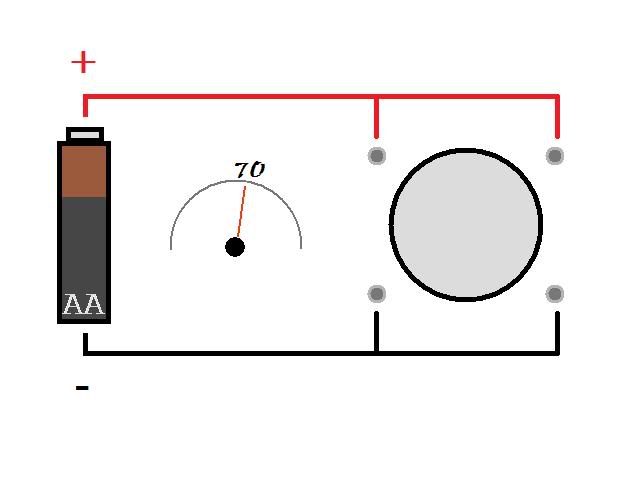
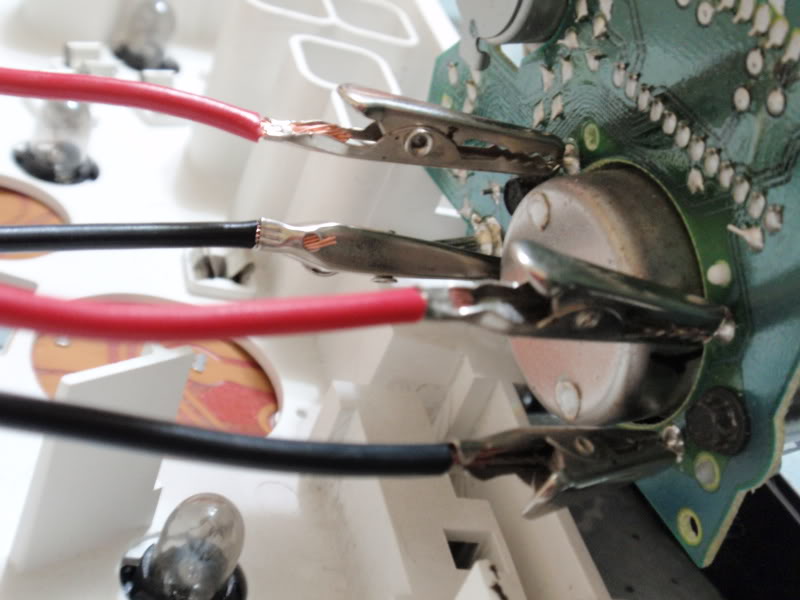
Now…place the bottom of the ‘ Y ‘s stripped section onto their respective ends of a new AA battery. I did the wires in cooresponding colors…Red = pos. Black = Neg. So it makes it easy. While you do this, watch the speedometer needle. It should move and hold still on a number, in this case, it was approx 70mph.
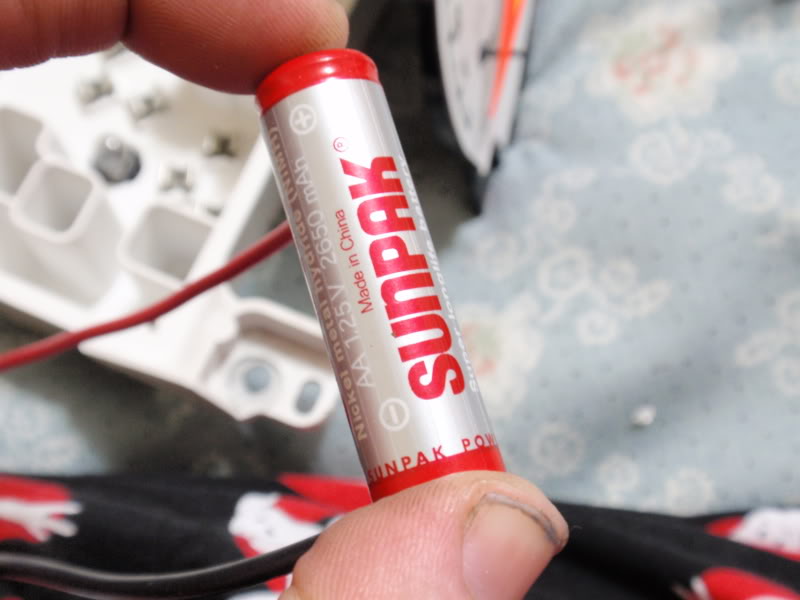
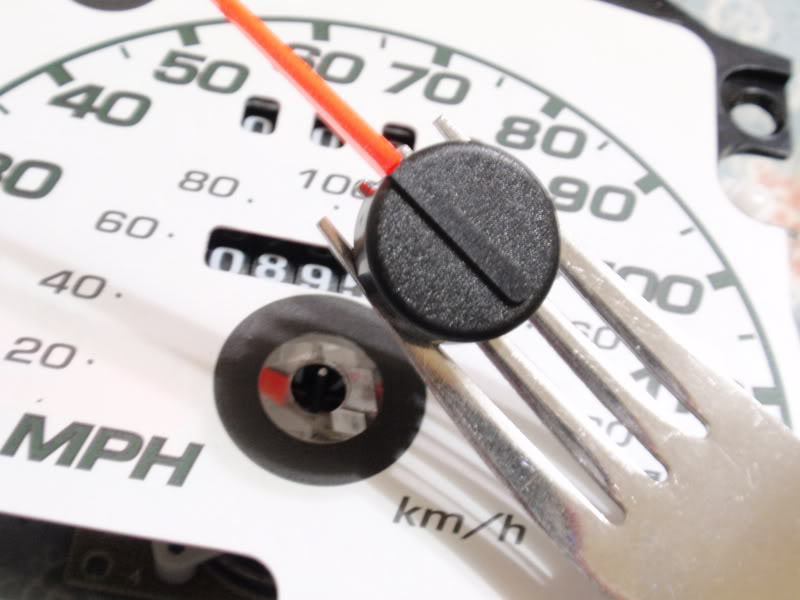
Go ahead and do the AA test a few times to create an accurate speed reading. Write that reading down or take a mental note. Now you are ready to remove the speedo needle. This is best done I find, by rotating the needle up off the stop, and taking a fork to it. Sometimes though, the needle is set in so far, a fork will not fit. In that case, I like to take my box cutter and pull it up a little bit…enough to get the fork in. Get the fork in there, and pull straight up, strongly yet gently. Now the needle should be removed.
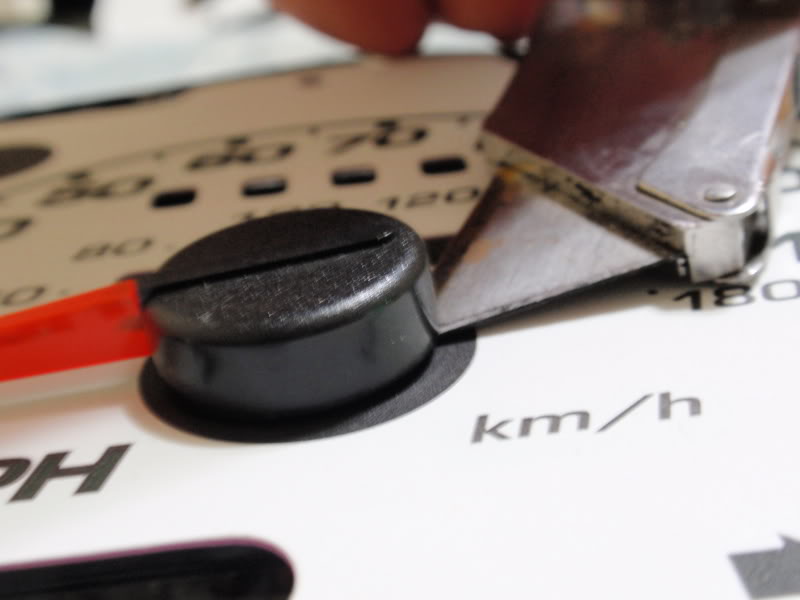
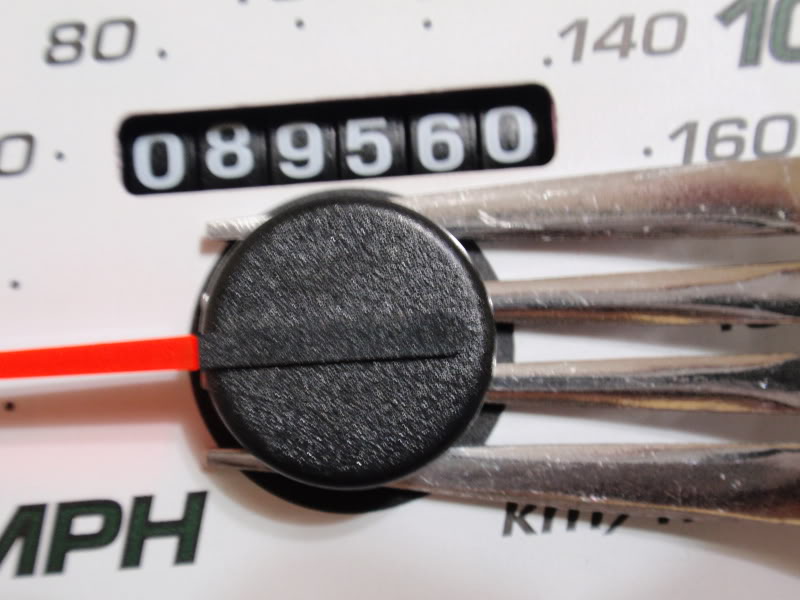
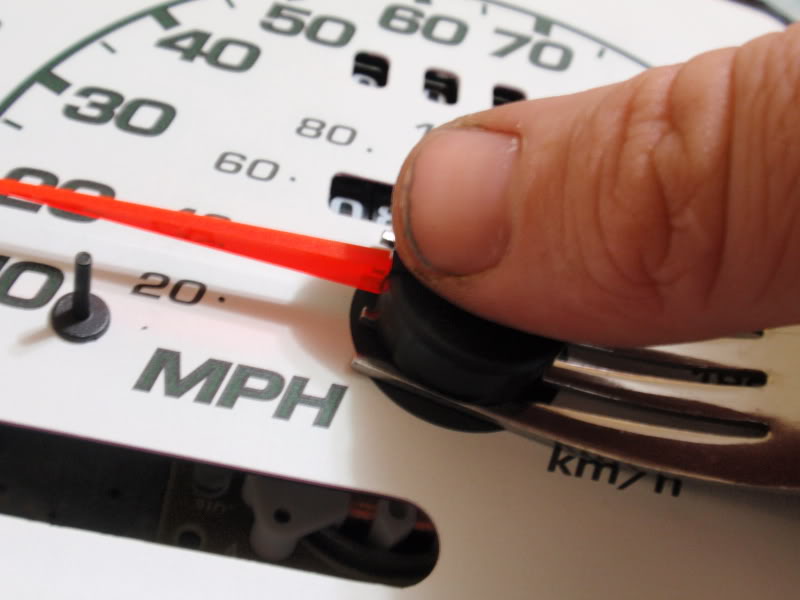
Now we are ready to remove the speedo/odometer gauge from the gauge face. It’s held on by three screws which take ¼” socket or a 5mm socket.
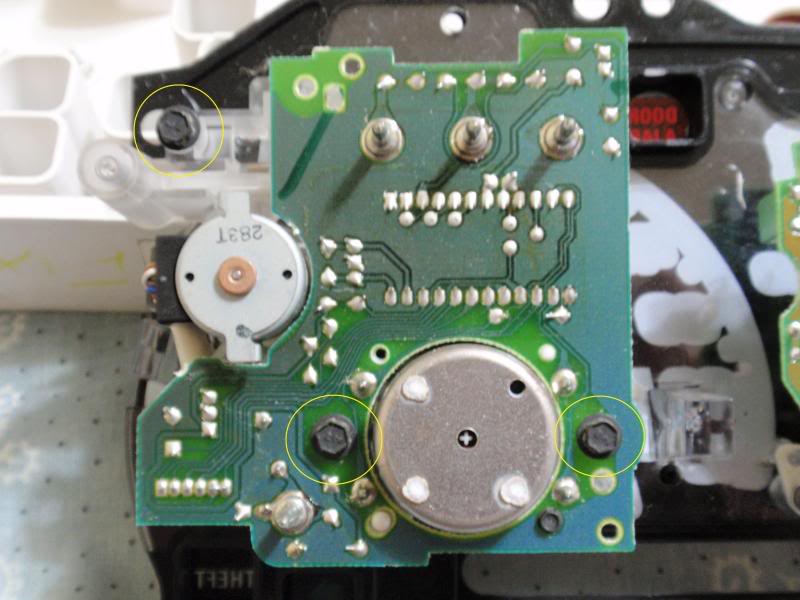
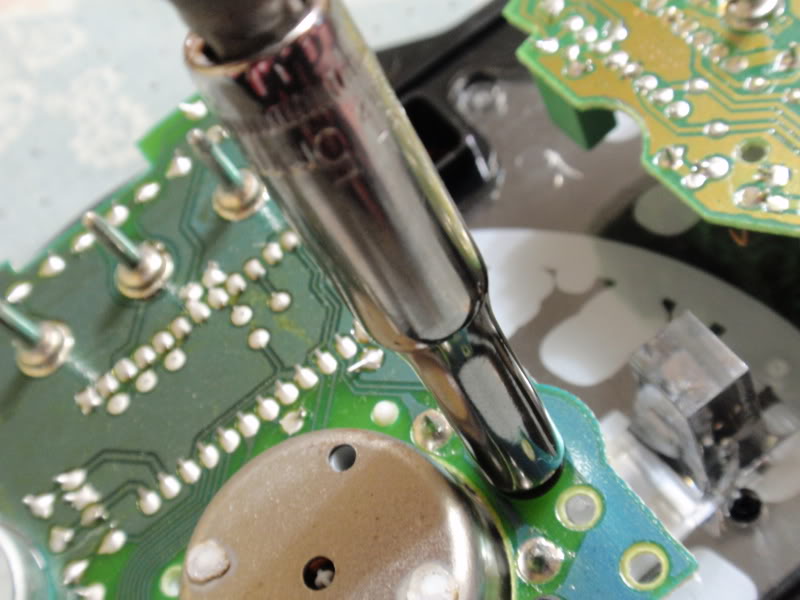
If you are just swapping your existing odometer to your new cluster, you can skip down towards the bottom where we re-install it into the new cluster.
Here’s a vid which compiles all these steps together…makes a nice visual to learn I think…
Here we get to the nitty gritty.
DISCLAIMER: IT IS UNLAWFUL TO ILLEGALLY ROLL YOUR ODOMETER TO A LOWER READING OR EVEN A DIFFERENT READING AS FAR AS I KNOW. THIS SHOWS YOU HOW TO ROLL YOUR NEW CLUSTERS ODOMETER TO YOUR CURRENT ODOMETER READING. IN NO WAY SHALL THIS HOW-TO BE USED FOR ANY UNLAYFULL DOINGS.
You must separate the two sections by carefully twisting off the ‘pinion gear motor’ off the gears for the odo/trip meter. I like to do this by twisting on the plastic electrical connector, and while I’m doing that, I’d be pushing on the plastic retaining clip which holds the motor in place.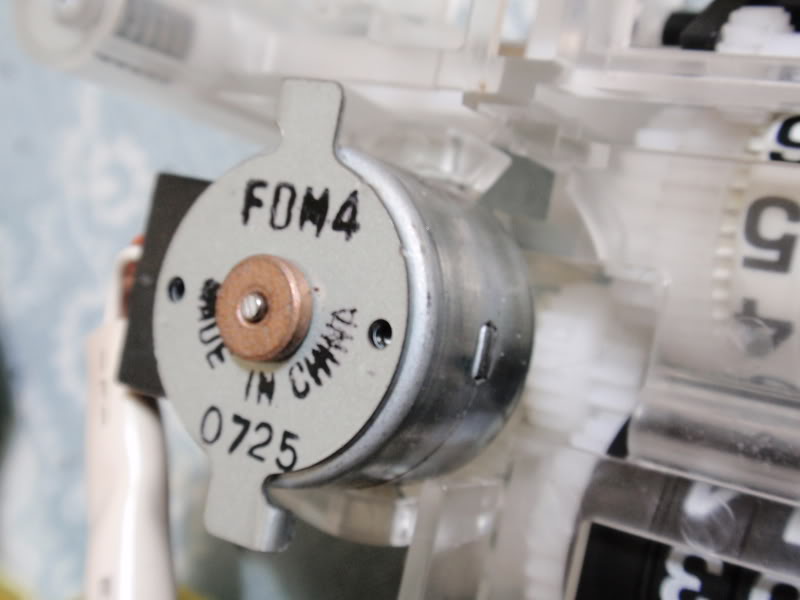
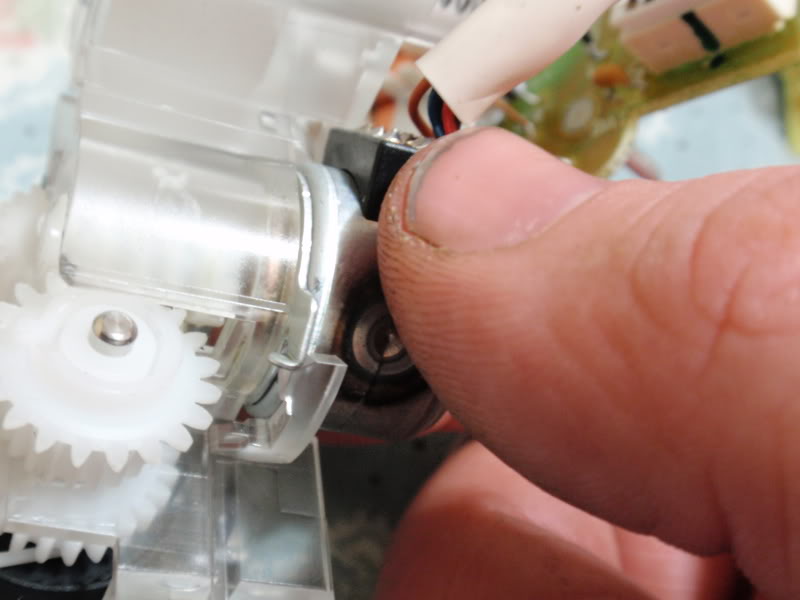
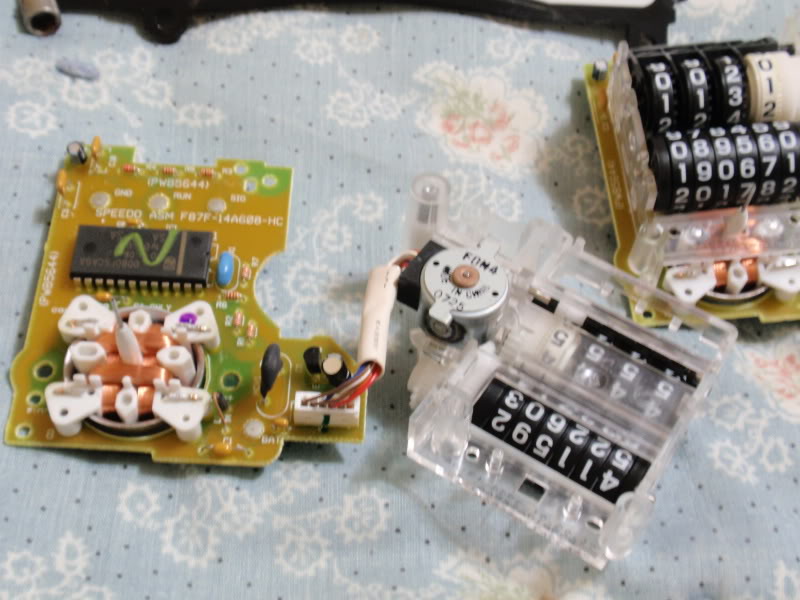
Now, be careful with this part…you CAN break one of the retaining clips and the odometer will not function properly if you do. I happened to do this when taking these pics…
Good..
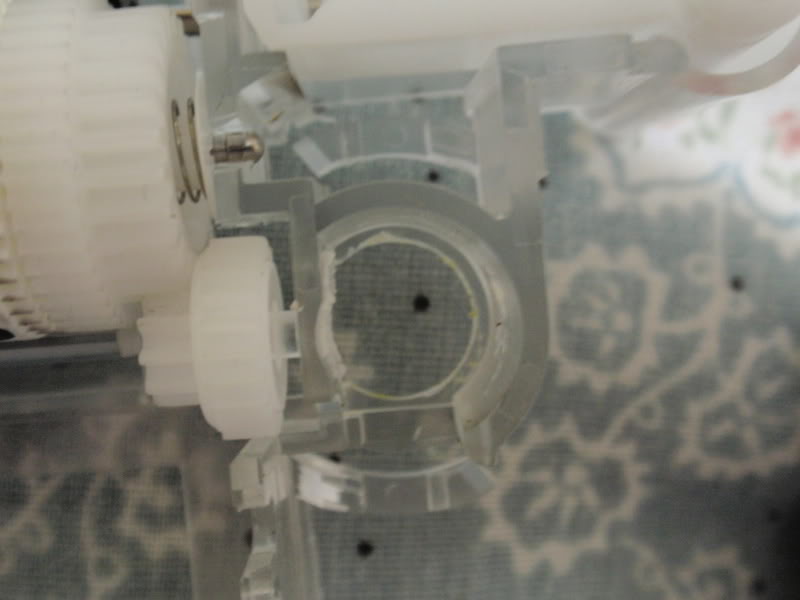
Bad..
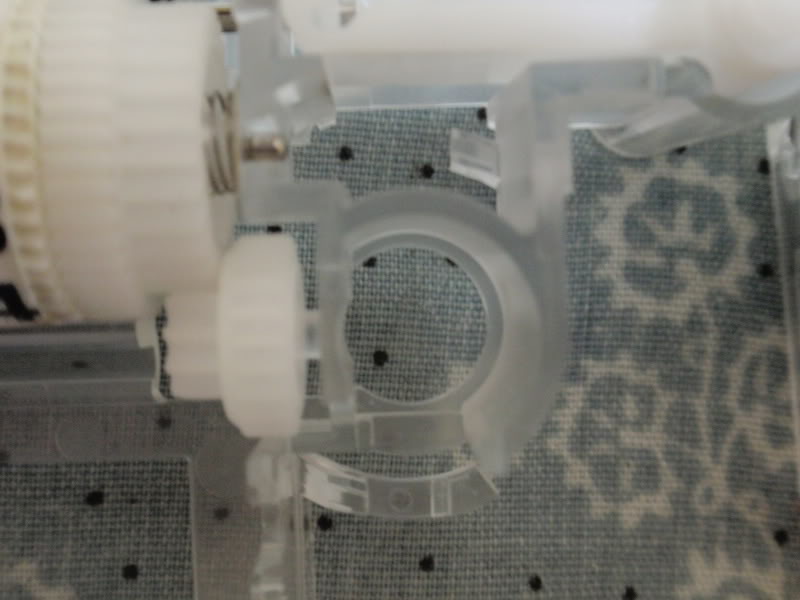
And…the metal ears…they are sharp, so be cautious…

Now you are ready to remove the odometer. It’s press fit into the plastic frame. I like to turn it down, and shove on the left side of the shaft with my finger nail. Then, on the pinion gear side, I like to either pull up or push down on the outer ‘ring gear’. Now the shaft containing the odometer should be removed. Once removed, you can slide the ‘ring gear’ off the shaft.
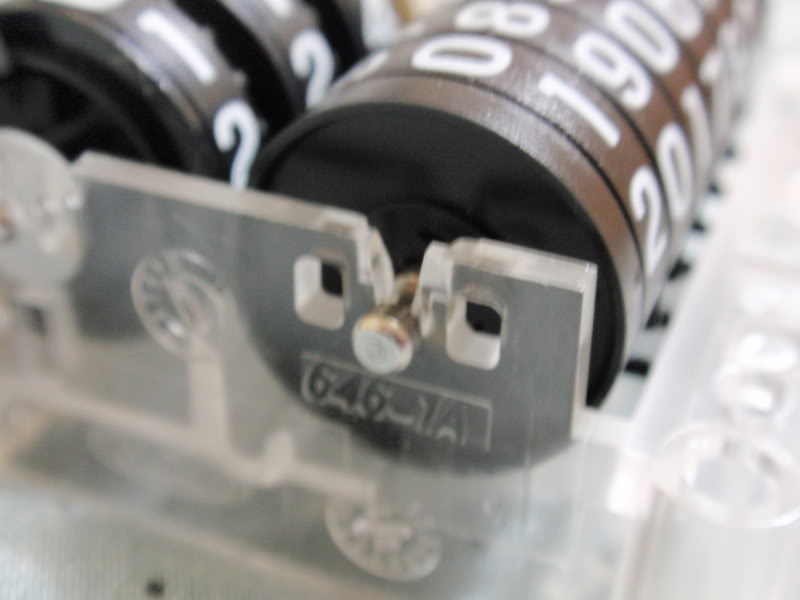
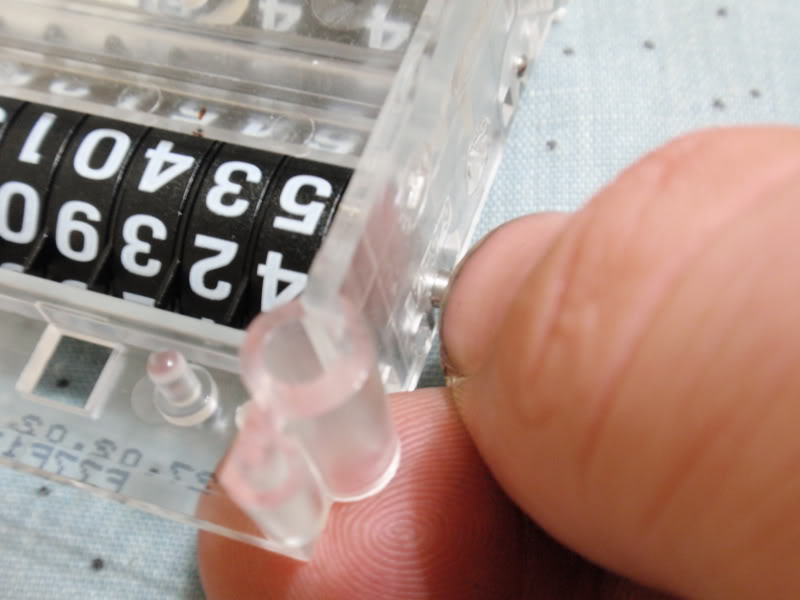
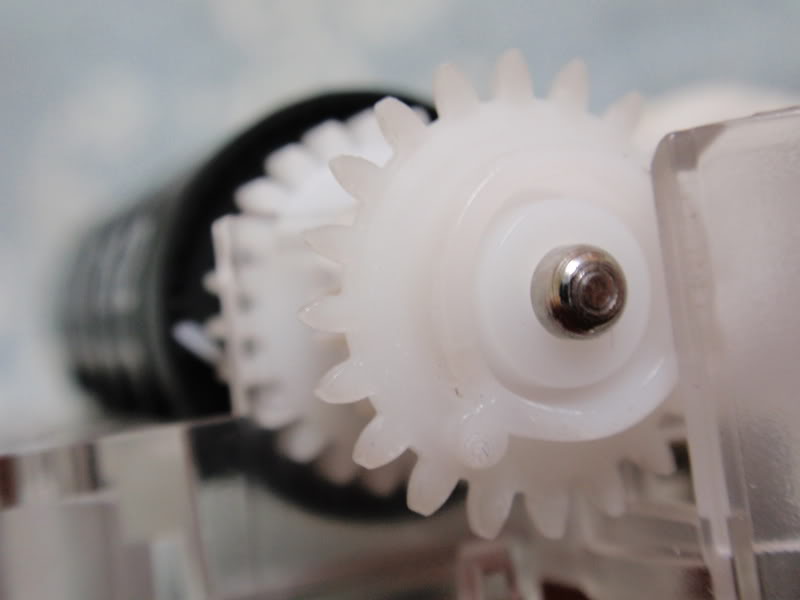
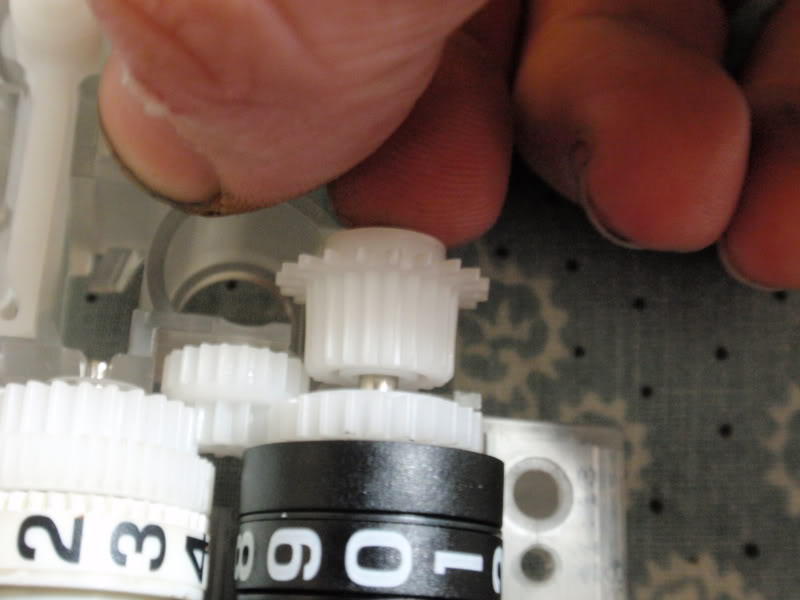
You paid attention to the odometers orientation in the plastic frame right? Anyway…this is how it is placed in the frame…
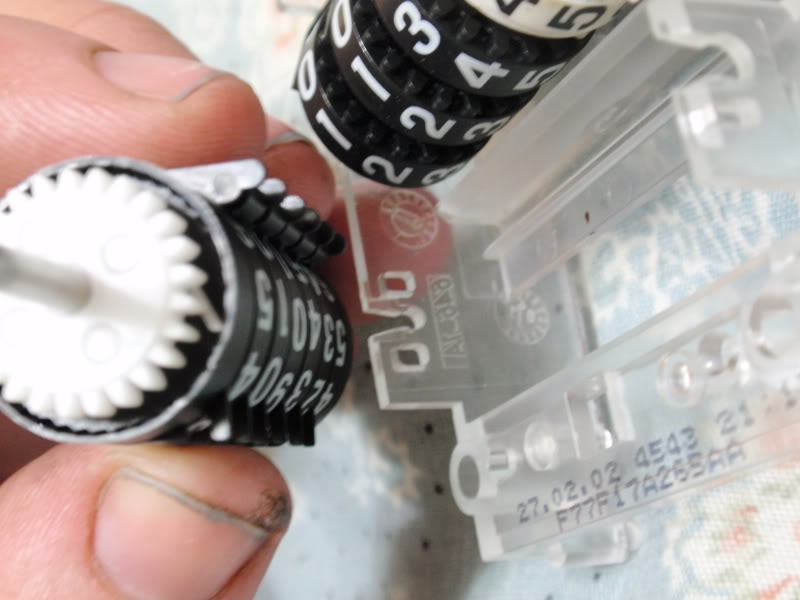
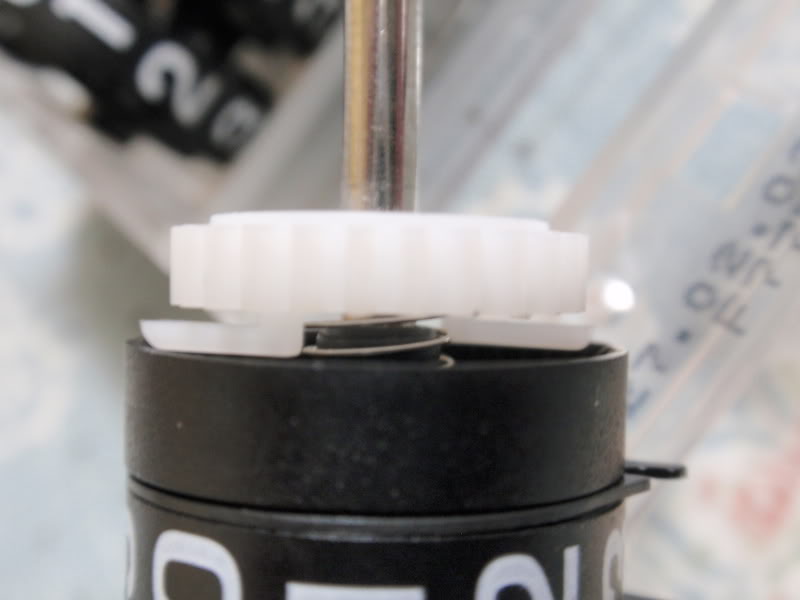
Here is the ring gear side of the odometer. This piece must be spaced away from the number columns. I use my trusty box cutter again for this. You see those little plastic ‘ears’ ? You’ll want to pry up on that gear 90 degrees from those ‘ears’. It should only move a small amount, but that small amount is perfect.
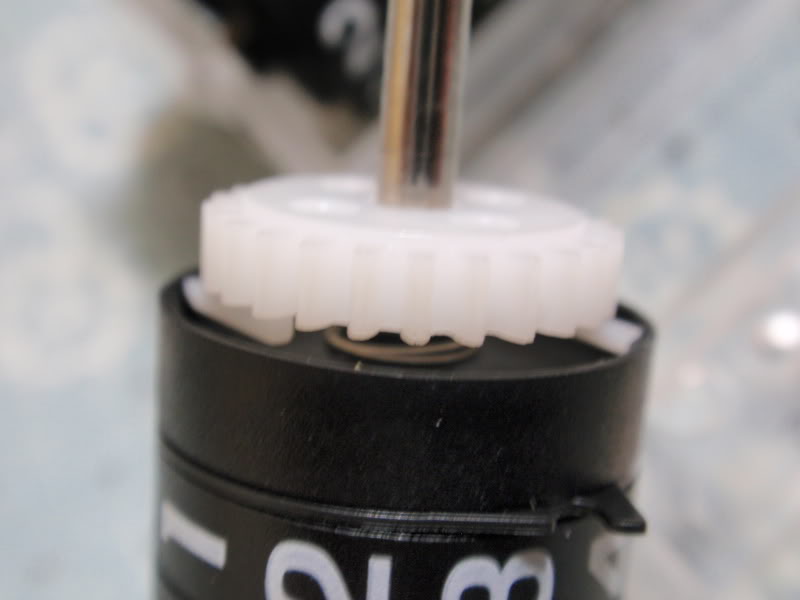
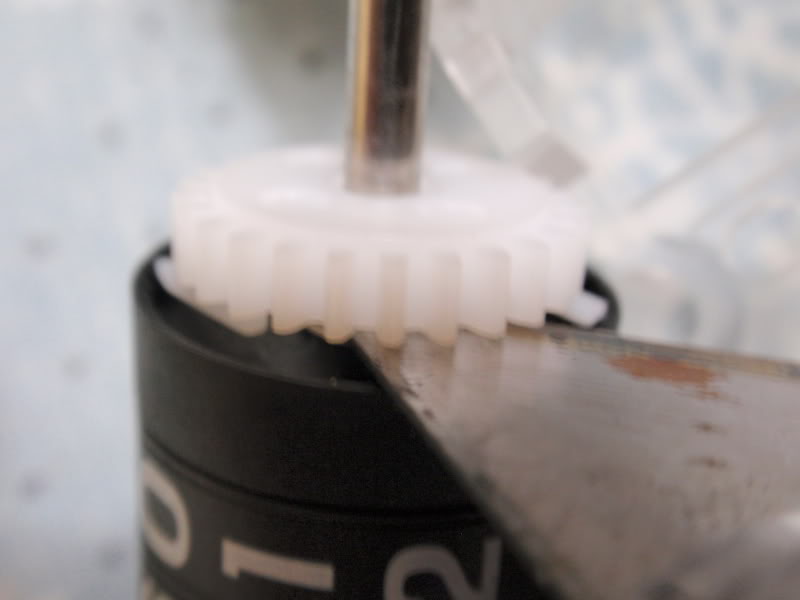
Once proper clearance is made, you are now ready to start rollin’. Pic below shows you the ‘ears’ I move over in order to roll a column. While rolling, you must keep in mind what set of numbers your goal is to move. In this case, it was 89560. My target odo reading is whatever…no target for this how-to, but in real life you’d have a target, and that target should be approx 20miles under what your old odometer reads for testing purposes. You must keep the numbers in line with each other or your numbers could be not in line with each other, or you could roll your ‘target number row’ past the proper location leading to an odd appearance in your cluster. I cannot really put onto ‘virtual paper’ how to do this…the vid does most the talkin’…
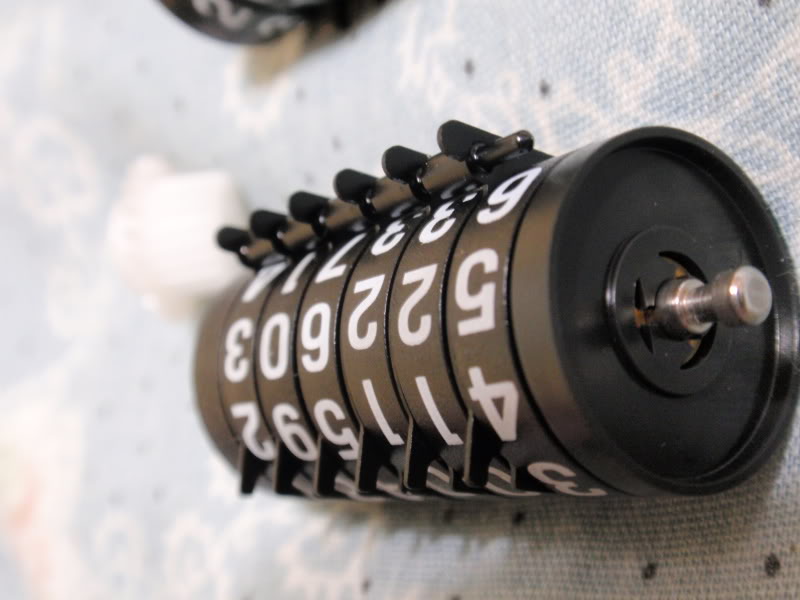
Once your ‘target odometer reading’ is met, make sure everything is good to go and lined up propery. Now you are ready to test your odometer. You can shove all the number columns over towards that ring gear you slid out earlier, hold onto the 100,000 column and the 1,000 column, and rotate the shaft away from you(righty tighty) and make sure everything is working properly. Say the odometer reads 90001. When the 1 rolls to 9, make sure it also rolls the 0 to a 1. I like to add 20miles by hand.
Now, go ahead and push all the number columns towards the left, and push that ring gear down the shaft towards the number columns. Test to see if you can spin the shaft by holding onto the number columns and twisting the shaft away from you. If you can’t, that means the ring gear is shoved too close to the columns. Take that trusty box cutter to spread the gap a tiny bit. Test again. The shaft should spin freely without any resistance.
Slide that gear back onto the shaft, push/click in the odometer display back into its holes on the frame. Remember how those things sticking out are located in the frame before you snap it in. Reinstall the motor into the frame by twisting it into its clips. Remember that the electrical connector faces outside of the odometer frame.
Here is where you just gauge swappers come back into play again…
Install your odometer/speedometer gauge into your new cluster using the screws you removed earlier. The stud that the needle slides onto goes through a hole in the gauge face, just keep that in mind.
Remember the AA battery trick from earlier?? Time to do it again! Set it all up and make sure the alligator clips are not touching anything, and hold those leads on the battery. Very gently, slide your needle onto the shaft while ‘power’ is being applied via the AA battery. Now let go of power and let the needle hit the stop. Apply power again. Adjust as necessary until you have multiple tests showing that number you got when you last did this test. In this case, approx 70mph.
Vid time…
Put everything back together, install in truck…DONE!
Any questions/concerns, feel free to post in this thread or shoot me a PM.
**I'll probably be going back though it and making small edits here and there**
Original thread: https://www.ranger-forums.com/f59/ho...-trucks-74062/
Let the modding Begin!!
_________________________
'03 and older gauge swappers: How to change your odometer
This how-to shows how to swap your current odometer gauge into your new gauge cluster on 95-03 Ford Ranger/B-series as well as the Explorer Counterparts(’01 and older Explorer, . OR how-to roll your new-to-you cluster’s odometer to your current odometer reading. The same technique could probably be used on older models as well...though i'm unsure.
Disclaimer: In this how-to, it shows you how to ‘roll your odometer’. In NO WAY shall it be used to illegally roll your odometer to show a lower mileage reading on your vehicle. Also, I cannot be held responsible for any mess-ups that could occur by the rolling of the odometer or swapping of the odometer/speedometer gauge, and also the disassembly of your clusters. I am not responsible for someone’s ignorance for not being careful.
I’m doing it in reverse as to what others would do, but all this applies to this swap. I am taking the odometer/speedo gauge from an Explorer Sport Trac cluster, and carrying it over to a stock Ranger cluster.
The awesome Sport Trac cluster i will be working on courtesy of Mr. Beard...

You must first remove the plastic lense/cover from the cluster using a T15 torx on the 7 screws in which hold it on..

Cover removed…

Beginning mileage is 89650…

Outer gauges must first be removed. I like to pull up the top section, and it’ll just pop right on out of there.


Center section must come out next. I like to pull up on the right hand side…there’s solid plastic chunk which you will feel when you attempt it. I also like to pull up on the very top…wedge my finger nail between the center gauge chunk and the cluster ‘housing’.

All three removed…

Now flip the center section over. Here, you’ll see the electric motor which drives the speedometer needle(silver round thingy towards the bottom right). Circled, are the solder studs which we’ll talk about later…

In order to take the odometer/speedo gauge out, you must remove the needle. BUT in order to make sure you place the needle properly in the correct orientation on the needle, you must first calibrate the speedometer. We do this with a little bit of wire, alligator clips/roach clips, and a new AA battery. Make your wires look like the pic below. You need to pretty much make a ‘ Y ‘ out of them. Top of the ‘ Y ‘ shall have the roach clips, bottom of the ‘ Y ‘ shall be a long stripped section of bare wire. I made the bottom portion of the ‘ Y ‘ long to make it easier to make the vids seen later in this post.

Now….those circled solder studs talked about above…they come into play here. Place an alligator clip on each stud, as following diagram. Make sure the roach clips are not touching each other OR the motor. I like to lean the Tach/Speedo gauge up against the cluster ‘housing’..makes it easy and it stays put. Red = + pos. Black = - Neg.


Now…place the bottom of the ‘ Y ‘s stripped section onto their respective ends of a new AA battery. I did the wires in cooresponding colors…Red = pos. Black = Neg. So it makes it easy. While you do this, watch the speedometer needle. It should move and hold still on a number, in this case, it was approx 70mph.

Go ahead and do the AA test a few times to create an accurate speed reading. Write that reading down or take a mental note. Now you are ready to remove the speedo needle. This is best done I find, by rotating the needle up off the stop, and taking a fork to it. Sometimes though, the needle is set in so far, a fork will not fit. In that case, I like to take my box cutter and pull it up a little bit…enough to get the fork in. Get the fork in there, and pull straight up, strongly yet gently. Now the needle should be removed.


Now we are ready to remove the speedo/odometer gauge from the gauge face. It’s held on by three screws which take ¼” socket or a 5mm socket.


If you are just swapping your existing odometer to your new cluster, you can skip down towards the bottom where we re-install it into the new cluster.
Here’s a vid which compiles all these steps together…makes a nice visual to learn I think…

Here we get to the nitty gritty.
DISCLAIMER: IT IS UNLAWFUL TO ILLEGALLY ROLL YOUR ODOMETER TO A LOWER READING OR EVEN A DIFFERENT READING AS FAR AS I KNOW. THIS SHOWS YOU HOW TO ROLL YOUR NEW CLUSTERS ODOMETER TO YOUR CURRENT ODOMETER READING. IN NO WAY SHALL THIS HOW-TO BE USED FOR ANY UNLAYFULL DOINGS.
You must separate the two sections by carefully twisting off the ‘pinion gear motor’ off the gears for the odo/trip meter. I like to do this by twisting on the plastic electrical connector, and while I’m doing that, I’d be pushing on the plastic retaining clip which holds the motor in place.


Now, be careful with this part…you CAN break one of the retaining clips and the odometer will not function properly if you do. I happened to do this when taking these pics…
Good..

Bad..

And…the metal ears…they are sharp, so be cautious…

Now you are ready to remove the odometer. It’s press fit into the plastic frame. I like to turn it down, and shove on the left side of the shaft with my finger nail. Then, on the pinion gear side, I like to either pull up or push down on the outer ‘ring gear’. Now the shaft containing the odometer should be removed. Once removed, you can slide the ‘ring gear’ off the shaft.


You paid attention to the odometers orientation in the plastic frame right? Anyway…this is how it is placed in the frame…

Here is the ring gear side of the odometer. This piece must be spaced away from the number columns. I use my trusty box cutter again for this. You see those little plastic ‘ears’ ? You’ll want to pry up on that gear 90 degrees from those ‘ears’. It should only move a small amount, but that small amount is perfect.


Once proper clearance is made, you are now ready to start rollin’. Pic below shows you the ‘ears’ I move over in order to roll a column. While rolling, you must keep in mind what set of numbers your goal is to move. In this case, it was 89560. My target odo reading is whatever…no target for this how-to, but in real life you’d have a target, and that target should be approx 20miles under what your old odometer reads for testing purposes. You must keep the numbers in line with each other or your numbers could be not in line with each other, or you could roll your ‘target number row’ past the proper location leading to an odd appearance in your cluster. I cannot really put onto ‘virtual paper’ how to do this…the vid does most the talkin’…


Once your ‘target odometer reading’ is met, make sure everything is good to go and lined up propery. Now you are ready to test your odometer. You can shove all the number columns over towards that ring gear you slid out earlier, hold onto the 100,000 column and the 1,000 column, and rotate the shaft away from you(righty tighty) and make sure everything is working properly. Say the odometer reads 90001. When the 1 rolls to 9, make sure it also rolls the 0 to a 1. I like to add 20miles by hand.
Now, go ahead and push all the number columns towards the left, and push that ring gear down the shaft towards the number columns. Test to see if you can spin the shaft by holding onto the number columns and twisting the shaft away from you. If you can’t, that means the ring gear is shoved too close to the columns. Take that trusty box cutter to spread the gap a tiny bit. Test again. The shaft should spin freely without any resistance.
Slide that gear back onto the shaft, push/click in the odometer display back into its holes on the frame. Remember how those things sticking out are located in the frame before you snap it in. Reinstall the motor into the frame by twisting it into its clips. Remember that the electrical connector faces outside of the odometer frame.
Here is where you just gauge swappers come back into play again…
Install your odometer/speedometer gauge into your new cluster using the screws you removed earlier. The stud that the needle slides onto goes through a hole in the gauge face, just keep that in mind.
Remember the AA battery trick from earlier?? Time to do it again! Set it all up and make sure the alligator clips are not touching anything, and hold those leads on the battery. Very gently, slide your needle onto the shaft while ‘power’ is being applied via the AA battery. Now let go of power and let the needle hit the stop. Apply power again. Adjust as necessary until you have multiple tests showing that number you got when you last did this test. In this case, approx 70mph.
Vid time…

Put everything back together, install in truck…DONE!
Any questions/concerns, feel free to post in this thread or shoot me a PM.
**I'll probably be going back though it and making small edits here and there**
Last edited by 98liftedranger; 11-27-2011 at 09:51 PM.
#3
Help...
Ok, so I followed these wonderful instructions and it turned out beautifully. However my Speedo and odometer work as they should. But now my temp guage goes way up. I put the old guage cluster in and nothing in usual happened. So my assumption is I need to set the temp guage. But I have no clue how to do that. I realize this is an old post but I'm desperate.
#4
Hmm... I know this has been discussed elsewhere. Something about temp gauge spiking with the different gauge cluster. I'll do some searching.
Edit - what year is your truck, and what did the cluster come from?
Edit 2 - assuming the cluster is newer than your truck, buy a temperature sender for the year of the gauge cluster. That should solve your problem.
Cluster swap, high temp readings? - The Ranger Station Forums
Edit - what year is your truck, and what did the cluster come from?
Edit 2 - assuming the cluster is newer than your truck, buy a temperature sender for the year of the gauge cluster. That should solve your problem.
Cluster swap, high temp readings? - The Ranger Station Forums
#8
Sorry, I meant to say '96 like your Ranger, not specifically '96 Ranger. That's really odd. I believe you can swap the actual gauge from your old cluster into the new one, retaining new the face plate. Alternatively, it might be worth verifying part numbers for the gauge sender between a '96 Ranger and Explorer.
#10
Thanks to Fx4wannabe01, I haven't needed this How-To until now, looks straight forward.
I will post my results when I get there.
I really am in the decision mode, "Do I take my Speed-O apart and attempt this procedure for 8500 miles.
I looked at the '00 Cluster, it has 3600 miles on it, mine has 96,5xx... smoke pouring out of ear !
I will post my results when I get there.
I really am in the decision mode, "Do I take my Speed-O apart and attempt this procedure for 8500 miles.
I looked at the '00 Cluster, it has 3600 miles on it, mine has 96,5xx... smoke pouring out of ear !
Thread
Thread Starter
Forum
Replies
Last Post


