
How-To: Install a HID Conversion Kit


Joined: Jun 2004
Posts: 24,936
Likes: 11
From: usa
How-To: Install a HID Conversion Kit
How-To author: Fx4wannabe01
Let the modding Begin!!
_________________________
How To Install a HID kit
Still kind of a work in progress...I hope to add different colors to this thread to show the different "K" levels that are out there.....
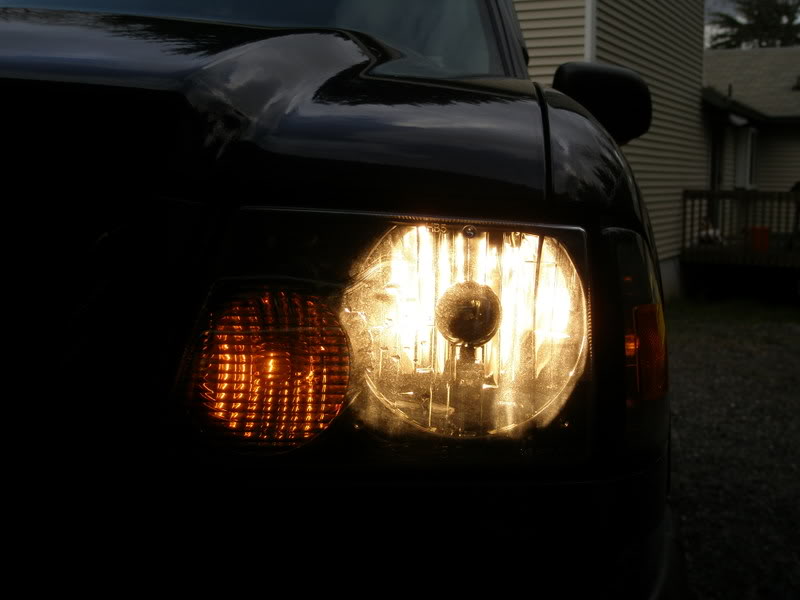
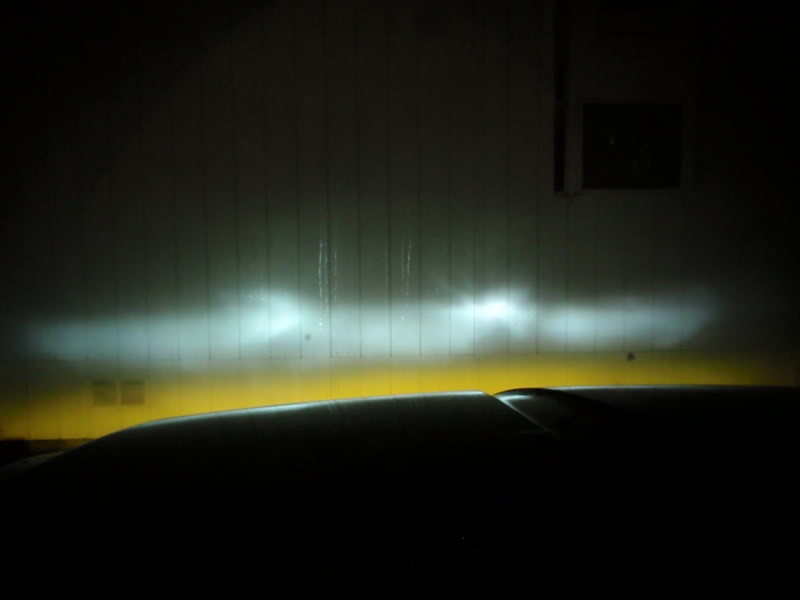
Are you tired of seeing this??

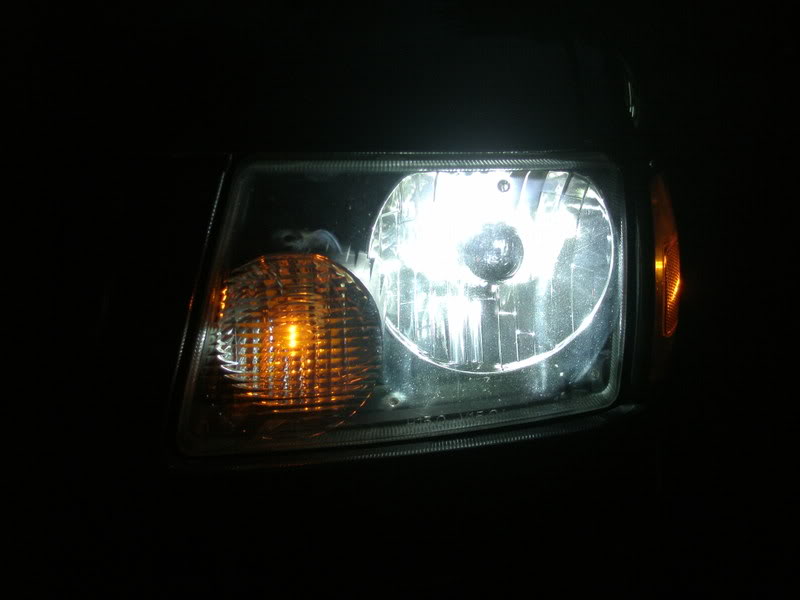
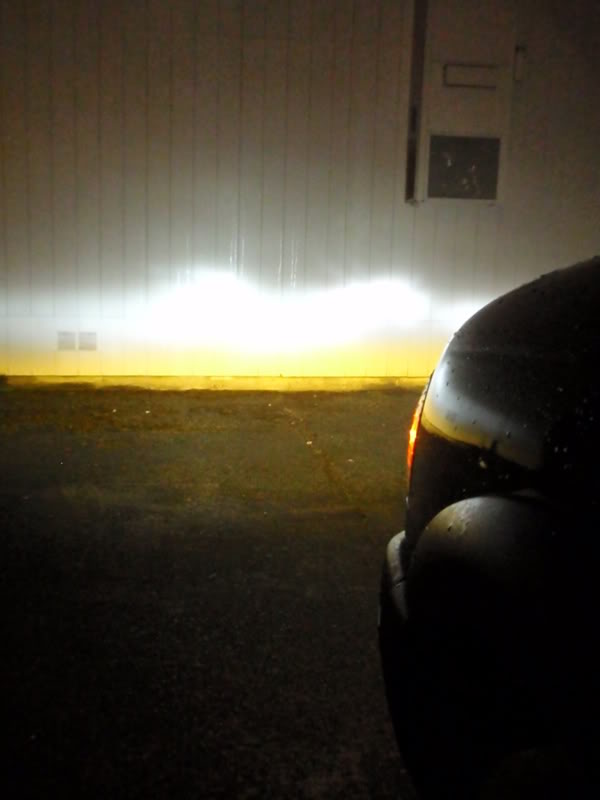
But want this??
Then this mod is for you! HID kits are very easy to install�it�s simply plug and play! No cutting or splicing needed.
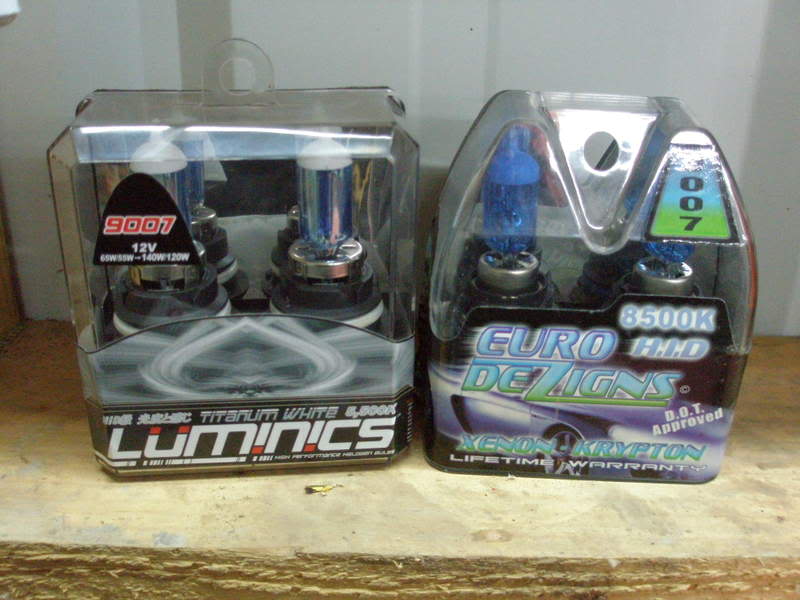
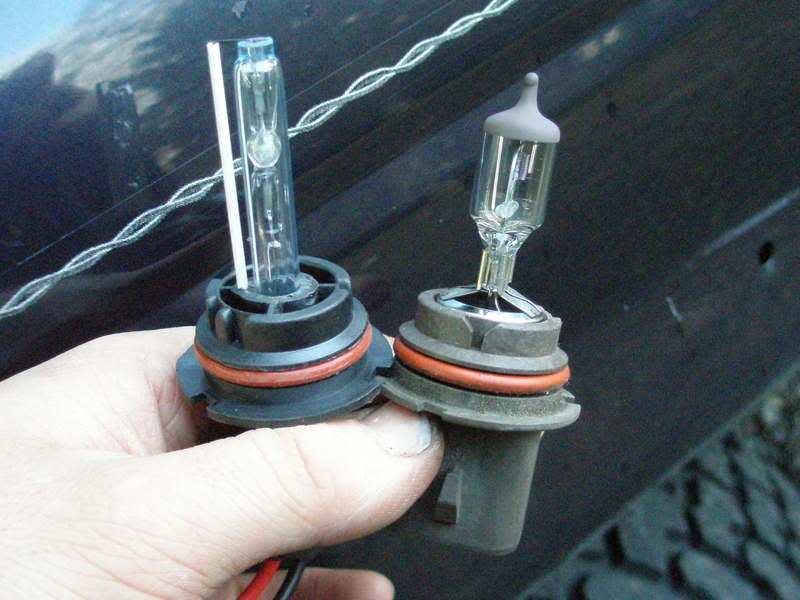
First, let�s get something straight�.THESE ARE NOT HIDs!!! These are simply colored Halogen replacement bulbs. If you search on eBay the term �hid�, it is gaurenteed that halogen bulbs will show up with HID on the package. DO NOT THINK that these are HIDs, because they aren�t!
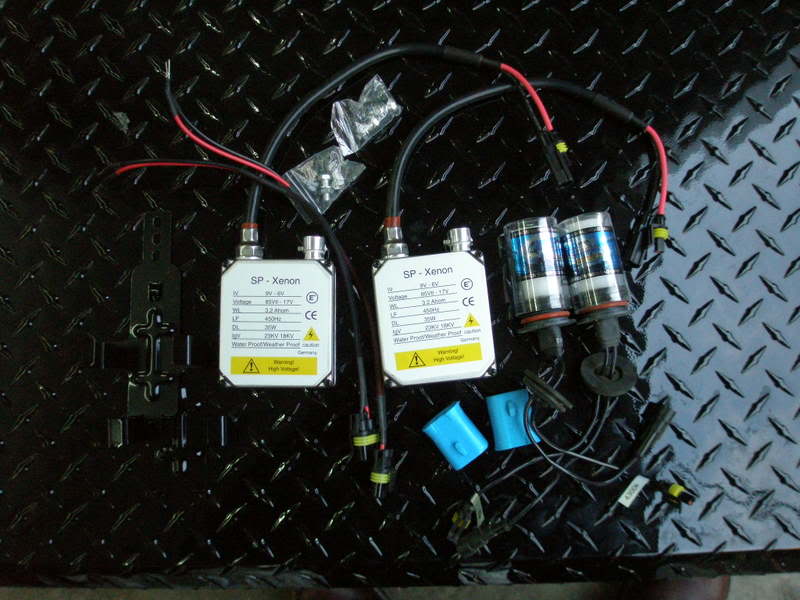
This is your typical TRUE HID kit. Consists of 2 Ballasts, 2 Ballast brackets, 2 HID bulbs, ballast to bulb wire harness, stock bulb plug to ballast wire harness, 2 sets of screws/bolts for mounting Ballast bracket.
Here�s a comparison shot between a HID bulb vs. Halogen Bulb.
To install, it is suggested that you unhook the ground cable from the battery.
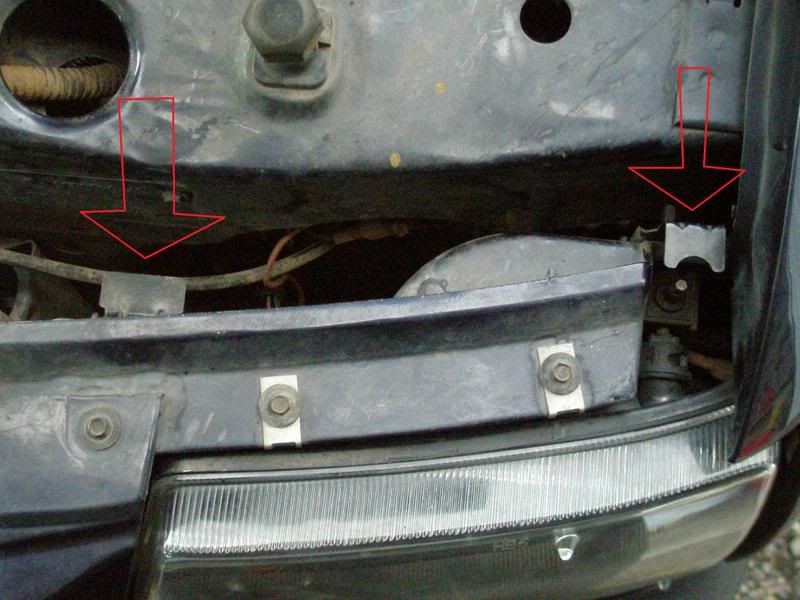
Then remove headlamps. To remove headlamps, pop your hood and you need to locate the headlamp mounting tabs(look at the arrows). Simply pull up on those two tabs, the headlamp will be loose, and while your pulling out the housing, you to wiggle up and down on those tabs. Then your lamp should be out. You might have some plastic covers mounted to the headerpanel, you�ll have to remove those. Mine have been off for a long time, so they aren�t shown. But if you have them, it takes a 7/32� socket to unscrew them.
Now you need to unplug the turnsignal and headlight plugs from the bulbs. You don�t have to do this, but I think it�s easiest to do it this way. Then pull the headlamps out.

Take out your halogen bulb by twisting counterclockwise on the holder, and replace it with the HID bulb. The HID bulb comes with a grommet that won�t work properly with our headlamp twist-on holders�so simply fish the grommet through the holder and don�t worry about it�.
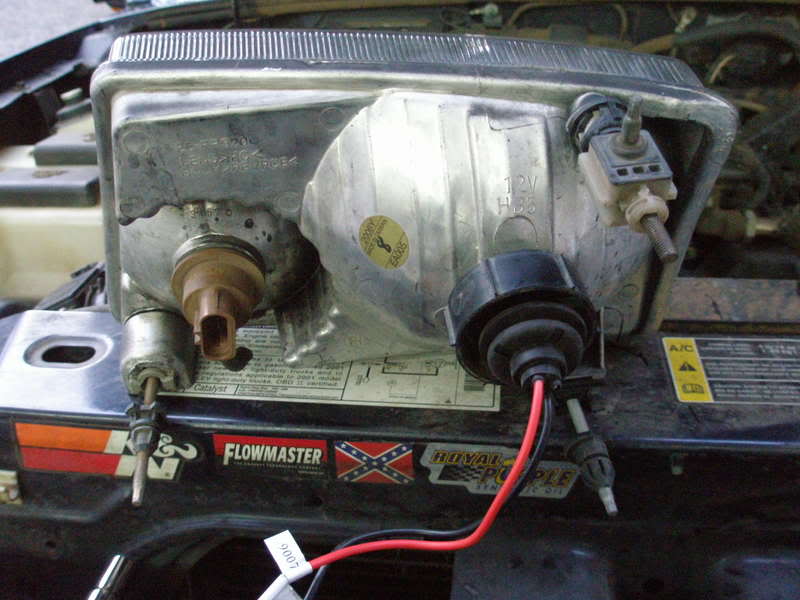
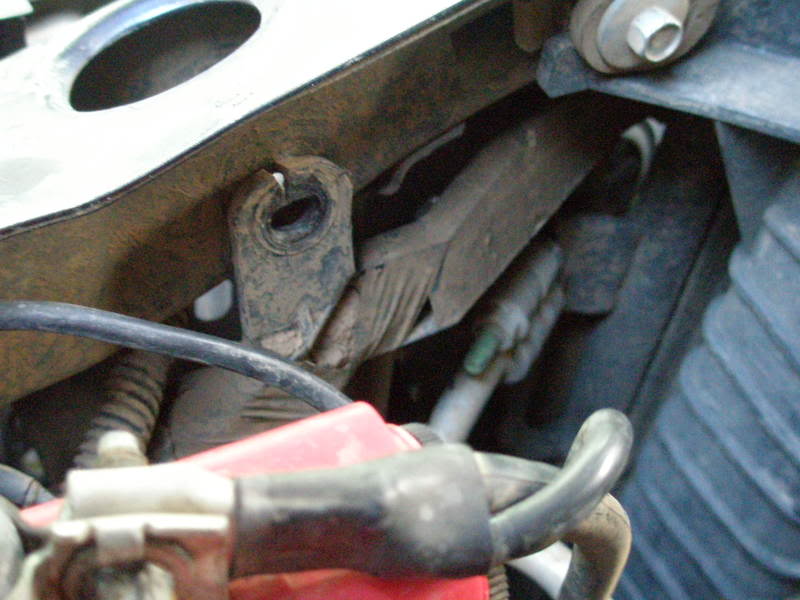
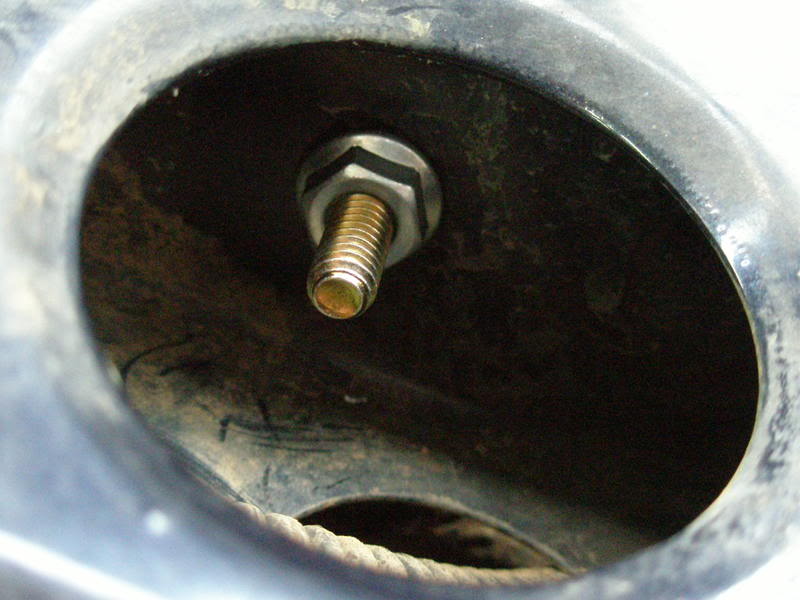
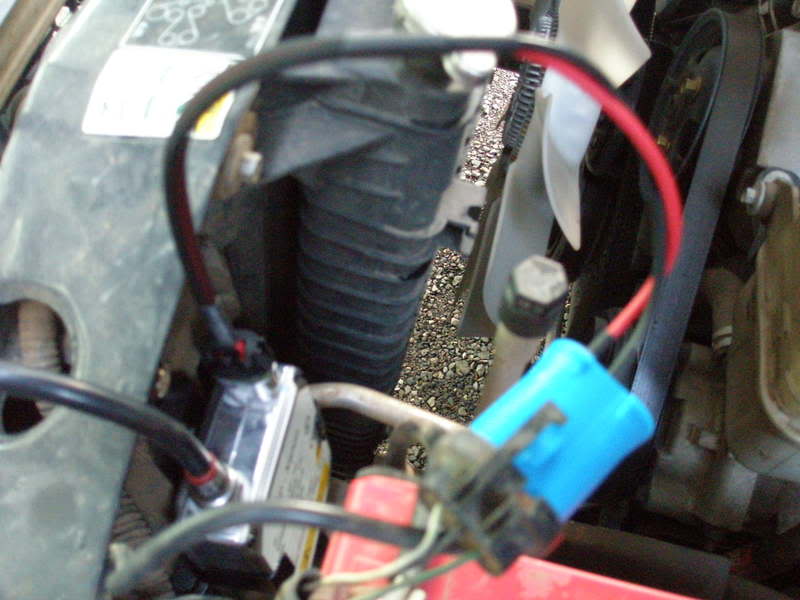
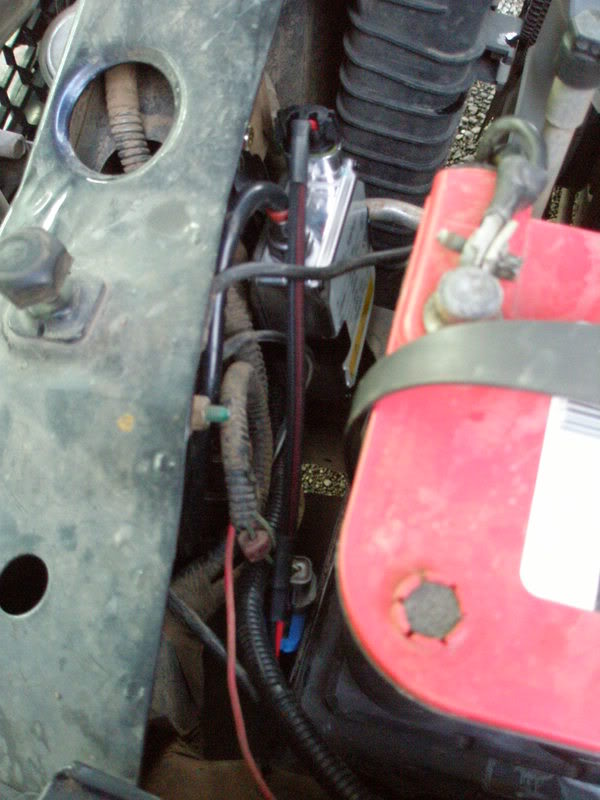
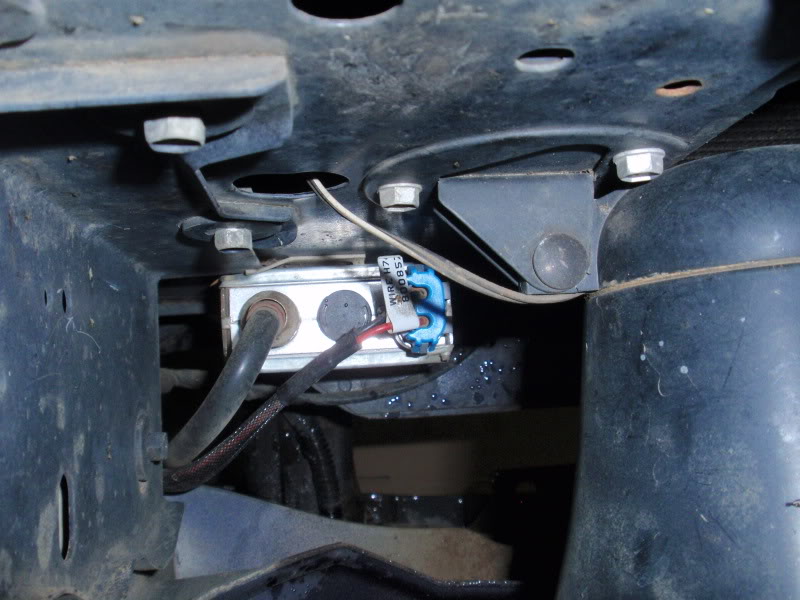
Now find a location for your ballast. I used and existing bolt hole on the radiator core support that holds part of the wiring harness. I replaced the metric bolt and used a ��x1� flange bolt and nut. Mount your ballast to your ballast bracket, then mount the bracket/ballast combo to that location.

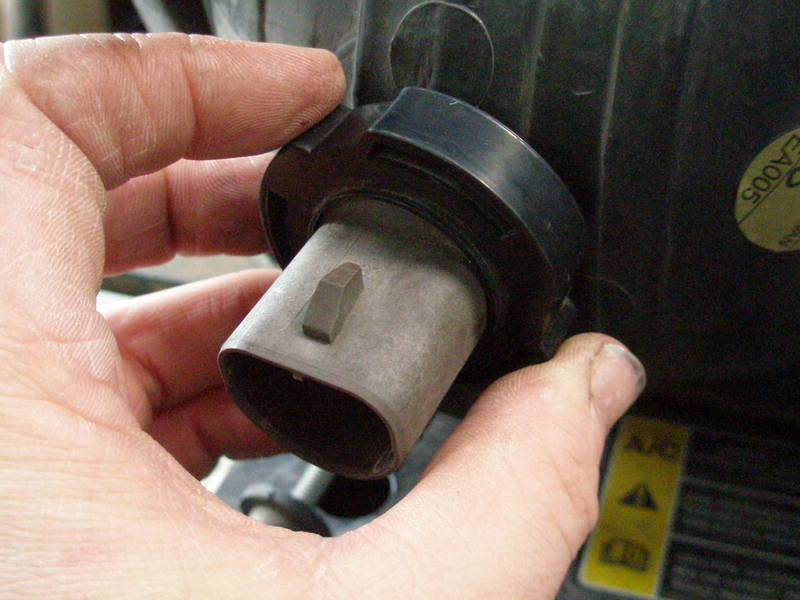
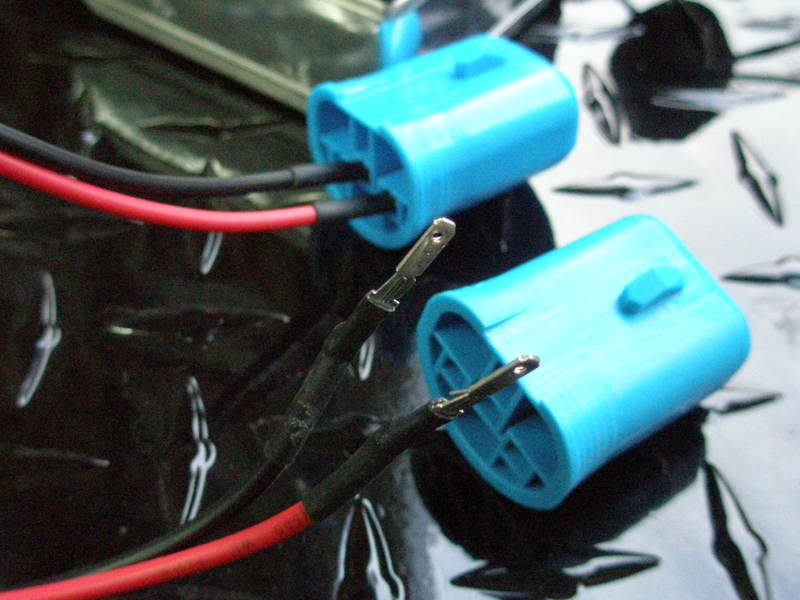
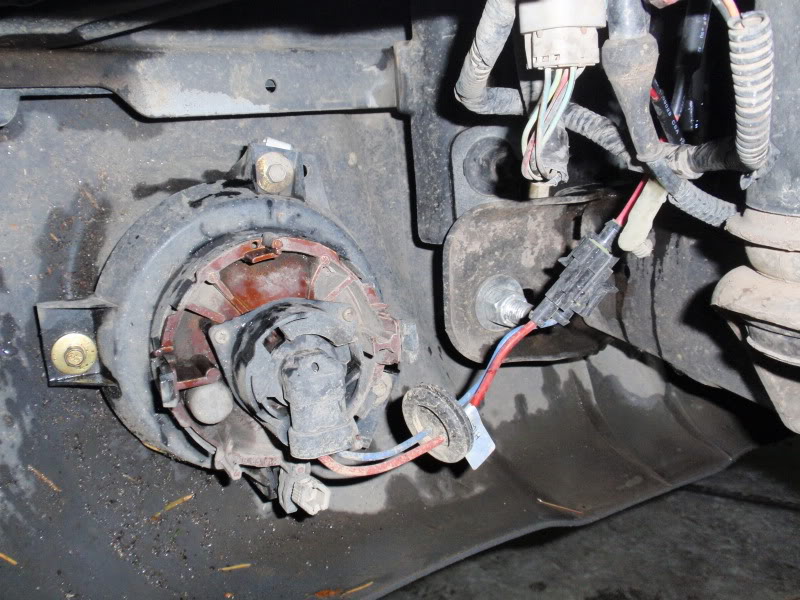
Plug in your wires into the headlamp clip. Black goes into the middle hole, red goes into the right. This is the proper way to do it. If you put the red in the wrong hole, your HID�s will only work when your switch is is the high beam position. No matter what, black is in the middle hole.
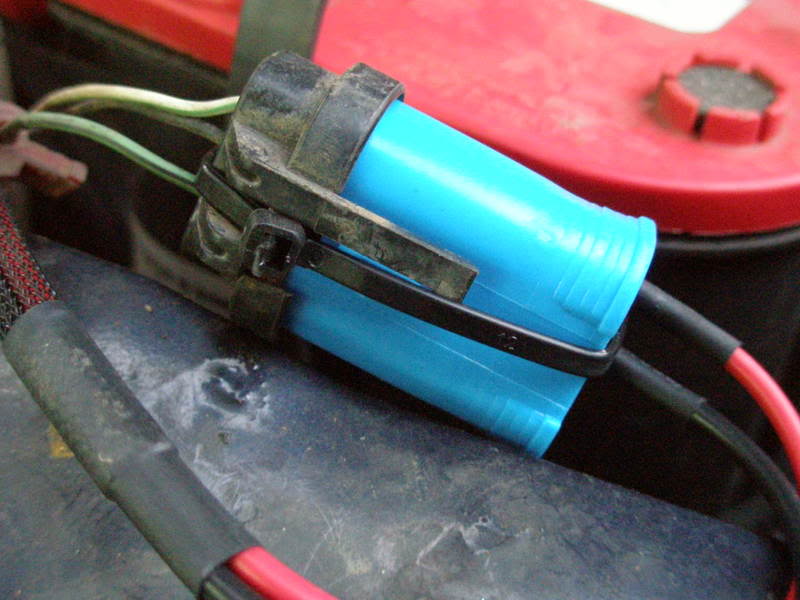
Pull your stock headlamp plug out of the headlamp �bucket�, to make it easier to route what your going to do next� Plug in your blue plug into your stock harness, the other end into your ballast.
My stock plugs are missing their "clips", so I always add a zip tie to keep them together...
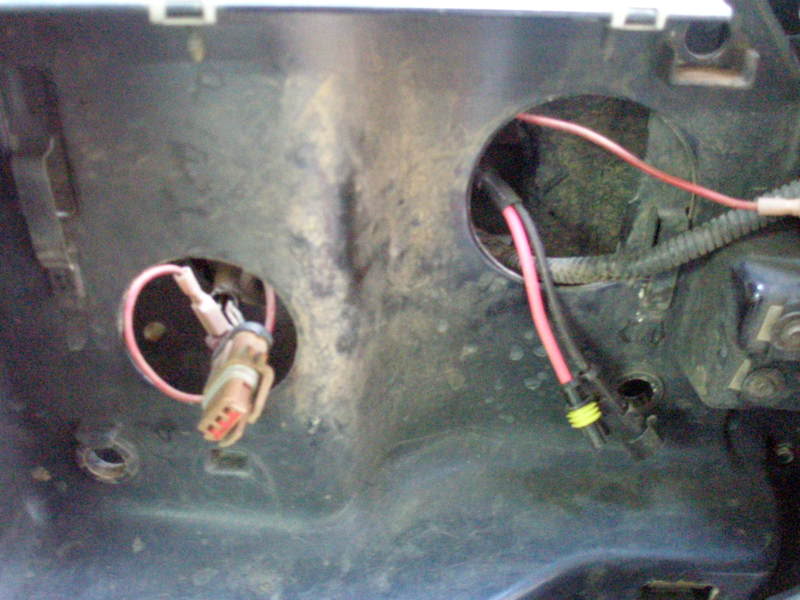
Route your �ballast to bulb� harness so it�s popping out where your stock plug was.
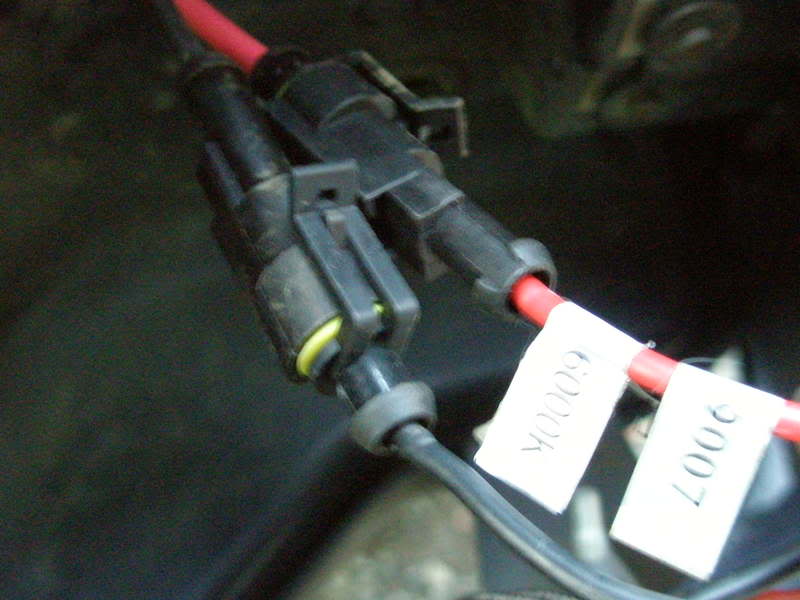
Now your ready to install your headlamp w/ the new HID bulb. Plug in your bulb. There�s no wrong way to do this�.the female goes onto the male, and the male goes into the female. Red to red, black to black. No way you can mess this up.
Plug in your turnsignal bulb, and install your headlamp. Sometimes there�s a wiggle with the headlamp and pushing down on the holder down sliders.
Here's the completed Driver's Side...
Do that to both sides. And start your truck. Now turn your headlamps on. Let them stay on for about 10 minutes. This allows proper break-in time for the bulbs. Both should come on at the same time. If they don�t, you need to look at your stock plug to see if there�s any damage. If your stock plug is good, you may want to look into a relay harness. This ties both lamps together, and adds protection via a relay. Takes power from your battery to power the headlamps, not your stock plug like that of the kit I installed. There will be an update to this how-to when I install my relay kit.
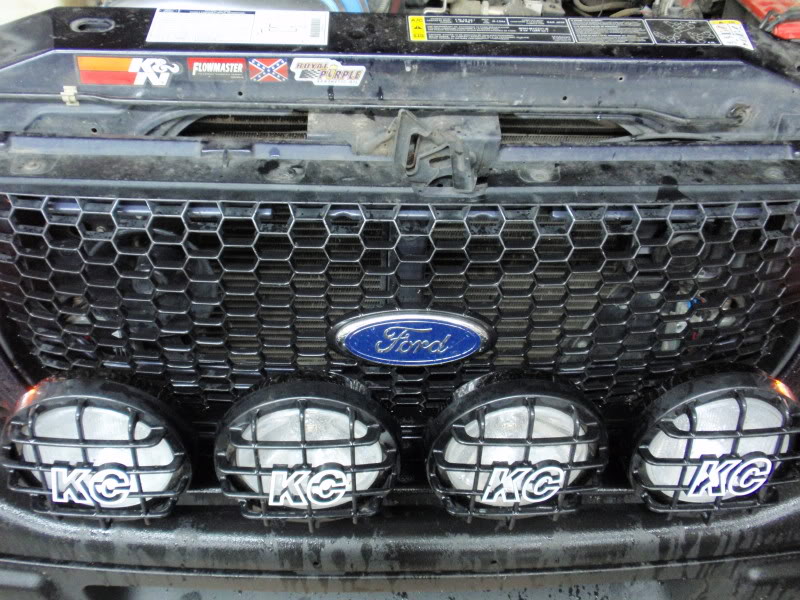
FOG LAMPS:
The How-To for fog lamps is generally the exact same as above. With the exception of tieing into you stock fog lamp harness.
I used a 3000k 9145 kit. 9145 is the direct fit bulb for(to my knowledge) ALL 01+ fog lamps. 9005 fits...but with a strange wiggle that I didn't not want to deal with anymore.
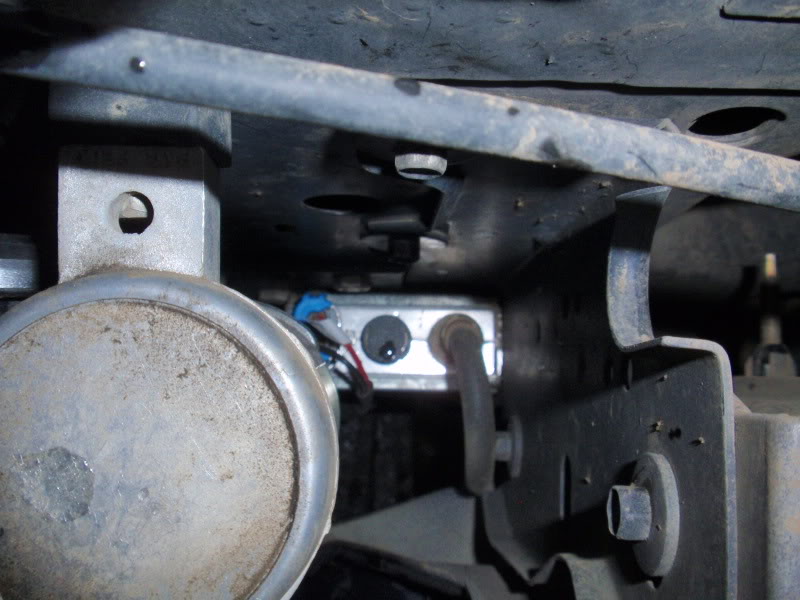
Ballast location depends on your kits wire lengths. Mine I had to mount somewhat close to the fogs. TrePaul86 had enough wire length to place his ballasts by the air filter and battery(inside the engine pay pretty much). I mounted mine via 3M double side sticky padded tape to the header panel. I have ran them in that same location since April 08 and it's now Nov 08 with no adverse effects due to being exposed to weather/rain/wind/hail/etc.
Driver Side:
Passenger Side:
The 3000k 9145 Kit I purchased didn't come with the proper plug to plug into the stock fog harness to trigger and/or take power to power the ballast. SO....you must figure out which wire is positive and which is negative(use a test light), then snip the factory pigtail/plug from the trucks harness, and either use butt connectors or those male/female disconnects like i used...
The pretty psychodelic coated 4300k bulb also known as a 3000k HID bulb...

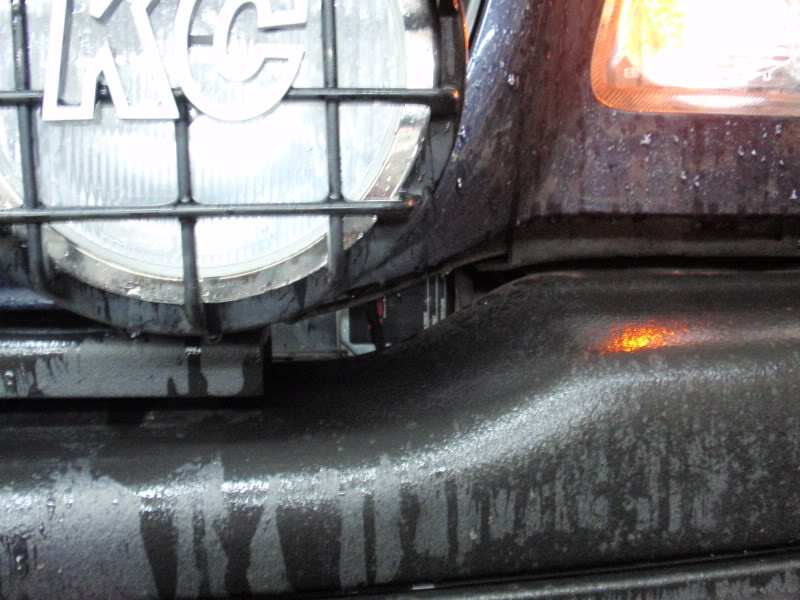
And the assembled fog lamp hid's...
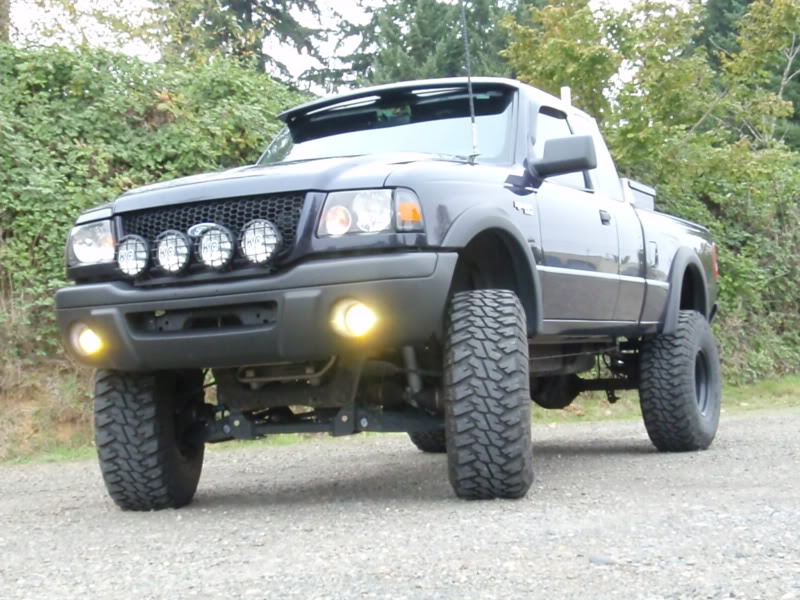
Before & After shots:
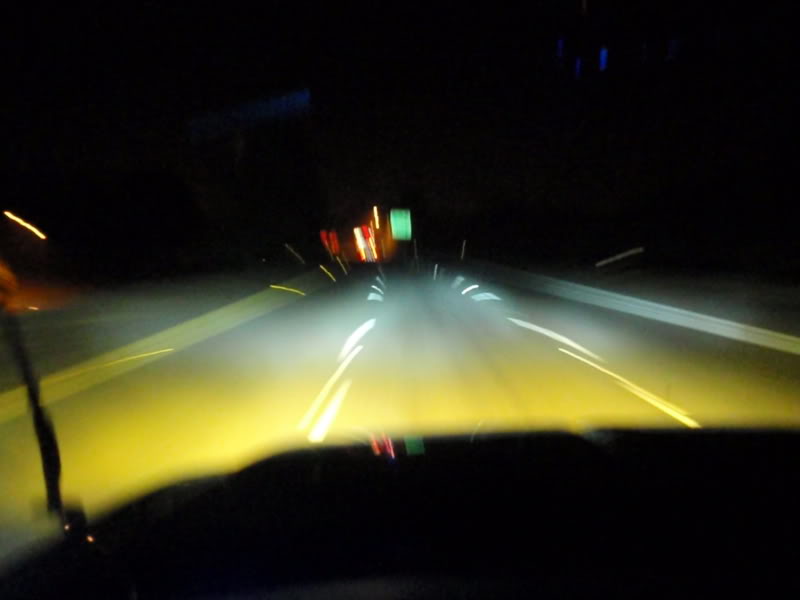
VIDEO!!
Here's some behind the wheel driving shots.....
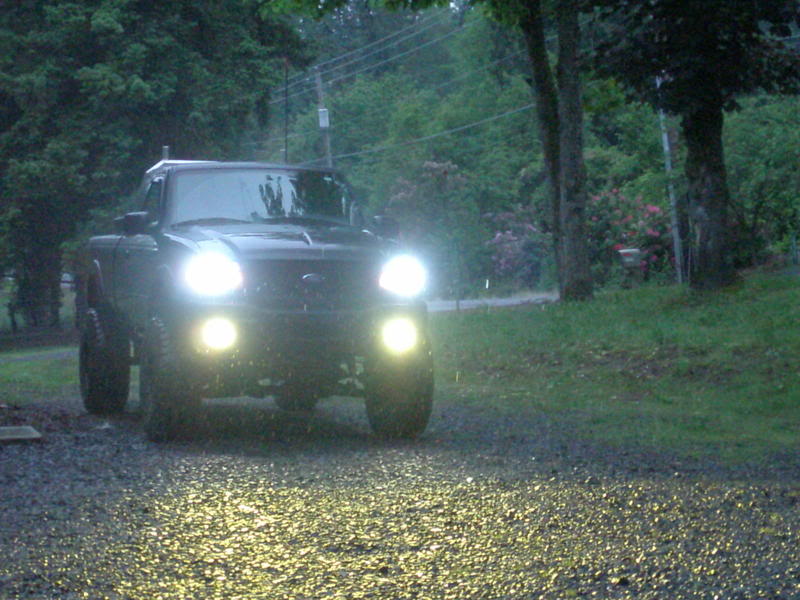
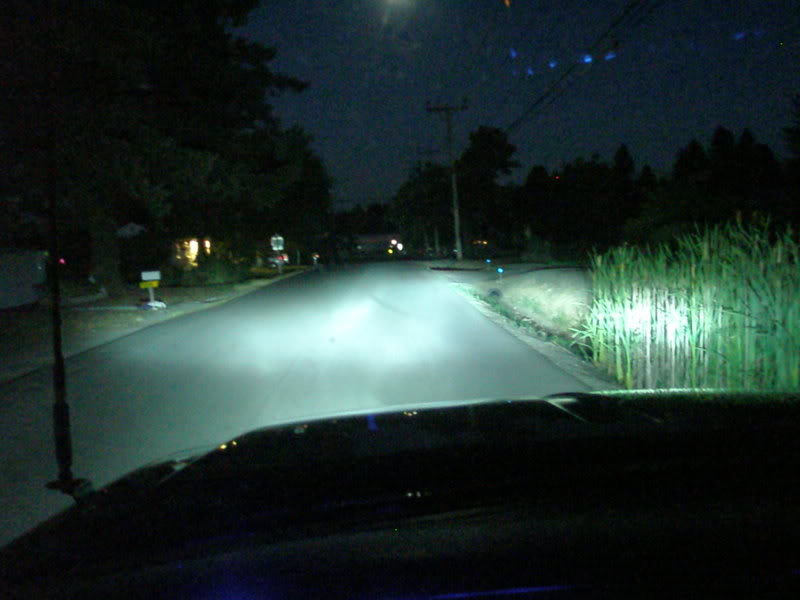
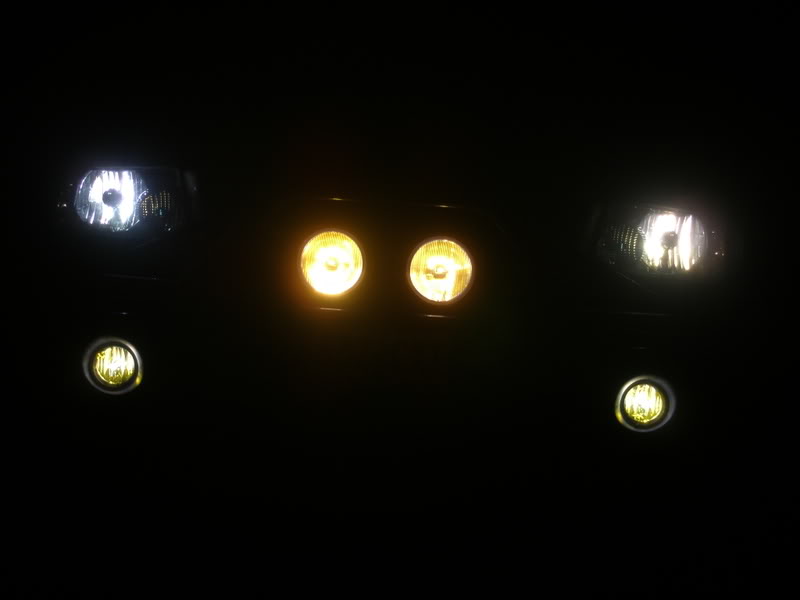
JUST 6000k headlamps...
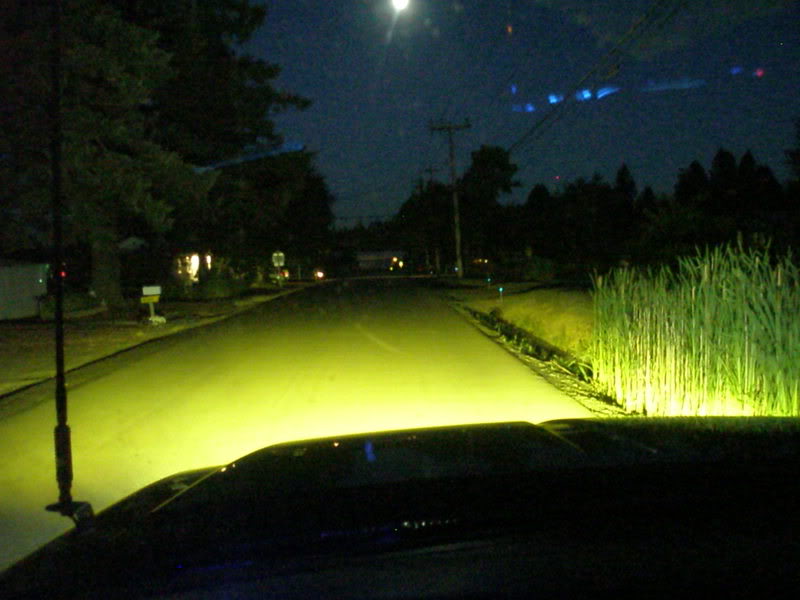
JUST 3000k foglamps...
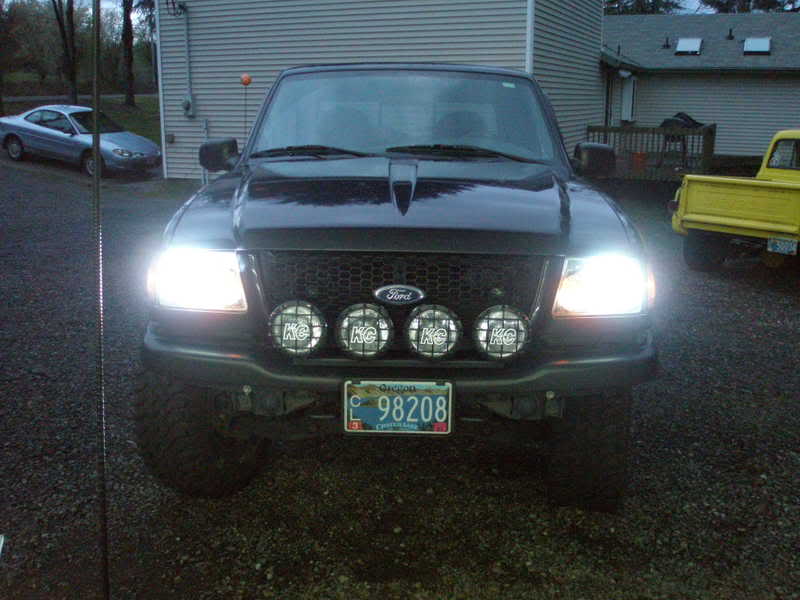
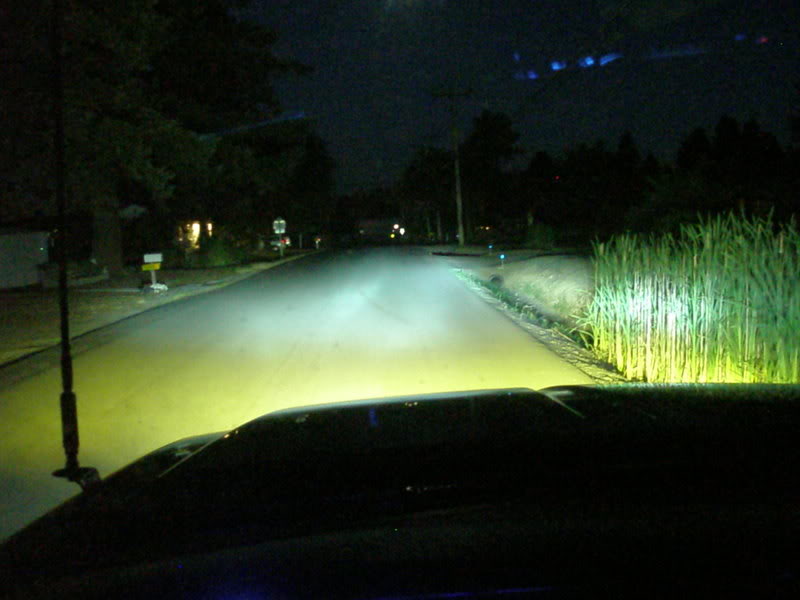
BOTH 6000k headlamps AND 3000k foglamps...
__________________________________________________ ____________________________
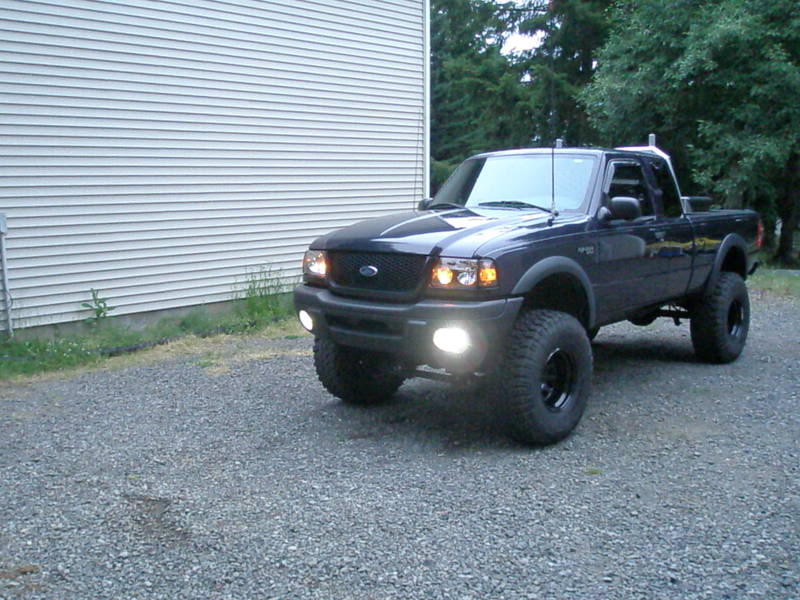
Temperature colors...
Driver side: 4300k headlamp, 3000k foglamp
Pass. side: 6000k headlamp, 3000k foglamp
More to be added later....
Let the modding Begin!!
_________________________
How To Install a HID kit
Still kind of a work in progress...I hope to add different colors to this thread to show the different "K" levels that are out there.....
Are you tired of seeing this??
But want this??
Then this mod is for you! HID kits are very easy to install�it�s simply plug and play! No cutting or splicing needed.
First, let�s get something straight�.THESE ARE NOT HIDs!!! These are simply colored Halogen replacement bulbs. If you search on eBay the term �hid�, it is gaurenteed that halogen bulbs will show up with HID on the package. DO NOT THINK that these are HIDs, because they aren�t!
This is your typical TRUE HID kit. Consists of 2 Ballasts, 2 Ballast brackets, 2 HID bulbs, ballast to bulb wire harness, stock bulb plug to ballast wire harness, 2 sets of screws/bolts for mounting Ballast bracket.
Here�s a comparison shot between a HID bulb vs. Halogen Bulb.
To install, it is suggested that you unhook the ground cable from the battery.
Then remove headlamps. To remove headlamps, pop your hood and you need to locate the headlamp mounting tabs(look at the arrows). Simply pull up on those two tabs, the headlamp will be loose, and while your pulling out the housing, you to wiggle up and down on those tabs. Then your lamp should be out. You might have some plastic covers mounted to the headerpanel, you�ll have to remove those. Mine have been off for a long time, so they aren�t shown. But if you have them, it takes a 7/32� socket to unscrew them.
Now you need to unplug the turnsignal and headlight plugs from the bulbs. You don�t have to do this, but I think it�s easiest to do it this way. Then pull the headlamps out.
Take out your halogen bulb by twisting counterclockwise on the holder, and replace it with the HID bulb. The HID bulb comes with a grommet that won�t work properly with our headlamp twist-on holders�so simply fish the grommet through the holder and don�t worry about it�.
Now find a location for your ballast. I used and existing bolt hole on the radiator core support that holds part of the wiring harness. I replaced the metric bolt and used a ��x1� flange bolt and nut. Mount your ballast to your ballast bracket, then mount the bracket/ballast combo to that location.
Plug in your wires into the headlamp clip. Black goes into the middle hole, red goes into the right. This is the proper way to do it. If you put the red in the wrong hole, your HID�s will only work when your switch is is the high beam position. No matter what, black is in the middle hole.
Pull your stock headlamp plug out of the headlamp �bucket�, to make it easier to route what your going to do next� Plug in your blue plug into your stock harness, the other end into your ballast.
My stock plugs are missing their "clips", so I always add a zip tie to keep them together...
Route your �ballast to bulb� harness so it�s popping out where your stock plug was.
Now your ready to install your headlamp w/ the new HID bulb. Plug in your bulb. There�s no wrong way to do this�.the female goes onto the male, and the male goes into the female. Red to red, black to black. No way you can mess this up.
Plug in your turnsignal bulb, and install your headlamp. Sometimes there�s a wiggle with the headlamp and pushing down on the holder down sliders.
Here's the completed Driver's Side...
Do that to both sides. And start your truck. Now turn your headlamps on. Let them stay on for about 10 minutes. This allows proper break-in time for the bulbs. Both should come on at the same time. If they don�t, you need to look at your stock plug to see if there�s any damage. If your stock plug is good, you may want to look into a relay harness. This ties both lamps together, and adds protection via a relay. Takes power from your battery to power the headlamps, not your stock plug like that of the kit I installed. There will be an update to this how-to when I install my relay kit.
FOG LAMPS:
The How-To for fog lamps is generally the exact same as above. With the exception of tieing into you stock fog lamp harness.
I used a 3000k 9145 kit. 9145 is the direct fit bulb for(to my knowledge) ALL 01+ fog lamps. 9005 fits...but with a strange wiggle that I didn't not want to deal with anymore.
Ballast location depends on your kits wire lengths. Mine I had to mount somewhat close to the fogs. TrePaul86 had enough wire length to place his ballasts by the air filter and battery(inside the engine pay pretty much). I mounted mine via 3M double side sticky padded tape to the header panel. I have ran them in that same location since April 08 and it's now Nov 08 with no adverse effects due to being exposed to weather/rain/wind/hail/etc.
Driver Side:
Passenger Side:
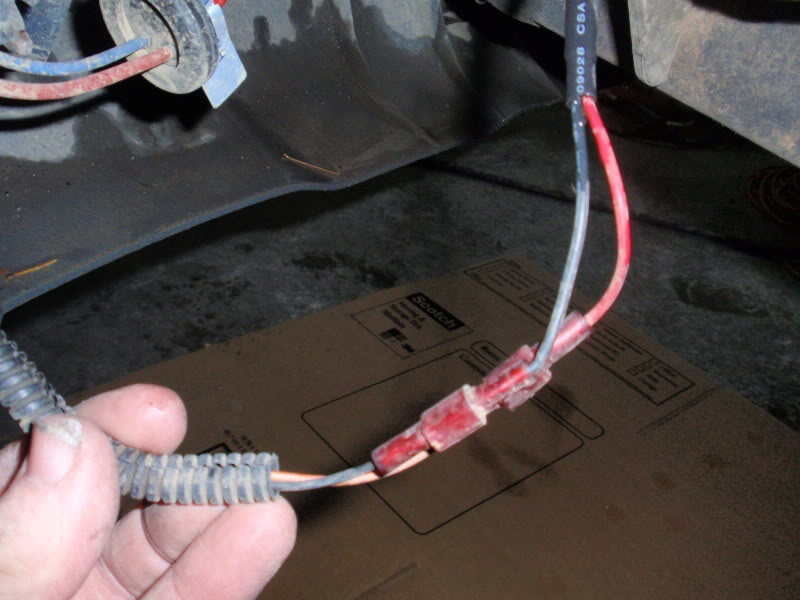
The 3000k 9145 Kit I purchased didn't come with the proper plug to plug into the stock fog harness to trigger and/or take power to power the ballast. SO....you must figure out which wire is positive and which is negative(use a test light), then snip the factory pigtail/plug from the trucks harness, and either use butt connectors or those male/female disconnects like i used...
The pretty psychodelic coated 4300k bulb also known as a 3000k HID bulb...
And the assembled fog lamp hid's...
Before & After shots:
VIDEO!!
Here's some behind the wheel driving shots.....
JUST 6000k headlamps...
JUST 3000k foglamps...
BOTH 6000k headlamps AND 3000k foglamps...
__________________________________________________ ____________________________
Temperature colors...
Driver side: 4300k headlamp, 3000k foglamp
Pass. side: 6000k headlamp, 3000k foglamp
More to be added later....
Last edited by 98liftedranger; Dec 7, 2011 at 10:51 AM.


Member

Joined: Mar 2011
Posts: 209
Likes: 0
From: Elm Grove, Wisconsin
Just random point I want to say:
I installed some HID Xenon fueled headlights into my stock headlight mounts, for $50.00 for a pair, and they work great. I don't know the k rating, but I do know that they run 15 watts on regular light mode, and 55 watts on bright mode, and they have a blue tip, but with the reflector from the original light, they look white still
I installed some HID Xenon fueled headlights into my stock headlight mounts, for $50.00 for a pair, and they work great. I don't know the k rating, but I do know that they run 15 watts on regular light mode, and 55 watts on bright mode, and they have a blue tip, but with the reflector from the original light, they look white still


There is also HID lowbeam and halogen high beam option in some HID kits. I have that option, and plan to add on auxiliary driving lights which will turn on when the high beams are on.
I had retrofitted projectors in my old civic (that I don't own anymore), and never have been harassed for them, even with an obnoxiously loud muffler and slammed suspension.


Member
Joined: Feb 2015
Posts: 4
Likes: 0
From: Keizer, OR
Good write up. It is worth pointing out that putting HID's in halogen housings usually makes for a lot of scatter. You get a lot of bright light but you also often end up blinding other drivers because you don't have a projector to focus the beam. I can't stand being in front of people who had HID retro kits because of this 

Member
Joined: Aug 2016
Posts: 9
Likes: 0
From: Tallahassee, Florida

Good write up. It is worth pointing out that putting HID's in halogen housings usually makes for a lot of scatter. You get a lot of bright light but you also often end up blinding other drivers because you don't have a projector to focus the beam. I can't stand being in front of people who had HID retro kits because of this
Agreed, if you blind John D Law, he might to give you an impromptu safety inspection.
Cheaper and more legal to use an ambulance relay harness and some very good bulbs.
Whatever you do check your charging system, the additional draw by high powered bulbs will expose a weak alternator.


Thread
Thread Starter
Forum
Replies
Last Post
Want to Buy: 9005 HID kit and 9007 HID kit
Police Interceptor
OLD - Interior, Exterior, Electrical, & Misc.
0
Dec 14, 2010 02:04 PM
LiftKitRanger
General Ford Ranger Discussion
12
Mar 22, 2010 10:10 AM


