How-To: Install a Probox loaded universal enclosure
#1
 03-31-2010


How-To: Install a Probox loaded universal enclosure
How-To author: Korey89
Original thread: https://www.ranger-forums.com/f59/ho...losure-100859/
Let the modding Begin!!
_________________________
Here is how to install a loaded 10" Probox SuperBass enclosure.
I see a lot of people who just take loaded prefabbed enclosures and throw them on the floor and are done with it, they usually don't sit flat on the floor because of the center hump and it just looks horrible. What I am going to show you how to do is in my opinion the right way of how to take a universal enclosure and make it fit better.
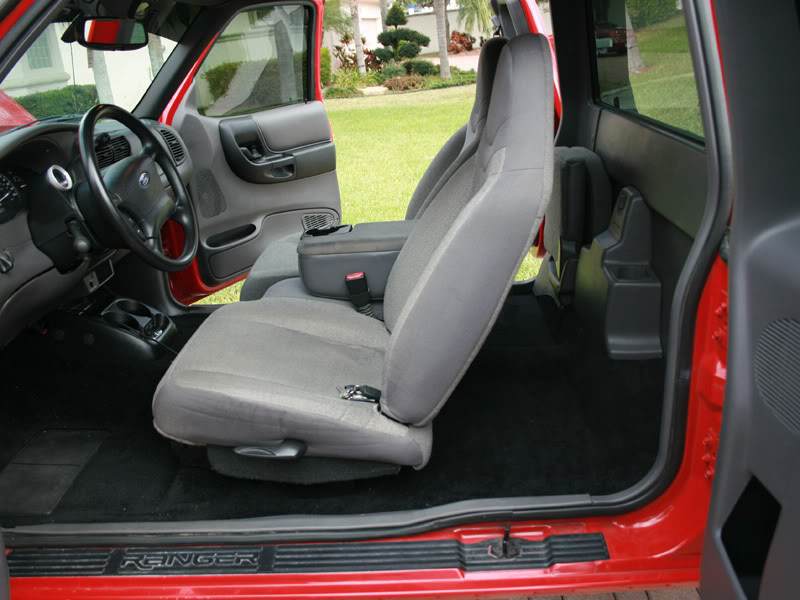
The rear jump seat I found to be useless so I had already removed it, I am too tall to be able to drive with someone sitting behind me. If you still have yours you will want to remove it.
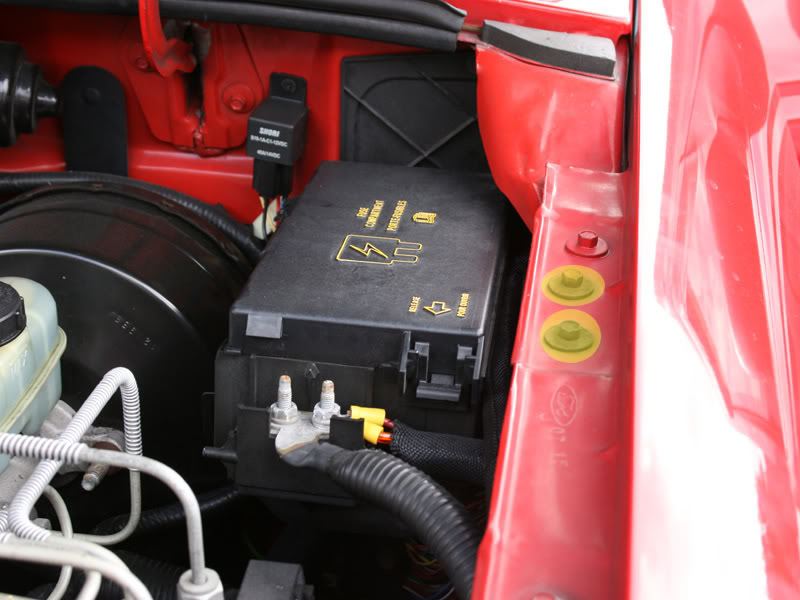
Now we are going to need a way to get power to the amplifier. We are going to need to drill a hole in the firewall for this, remove the fuse box pictured and you will be able to see where you can safely drill a hole.
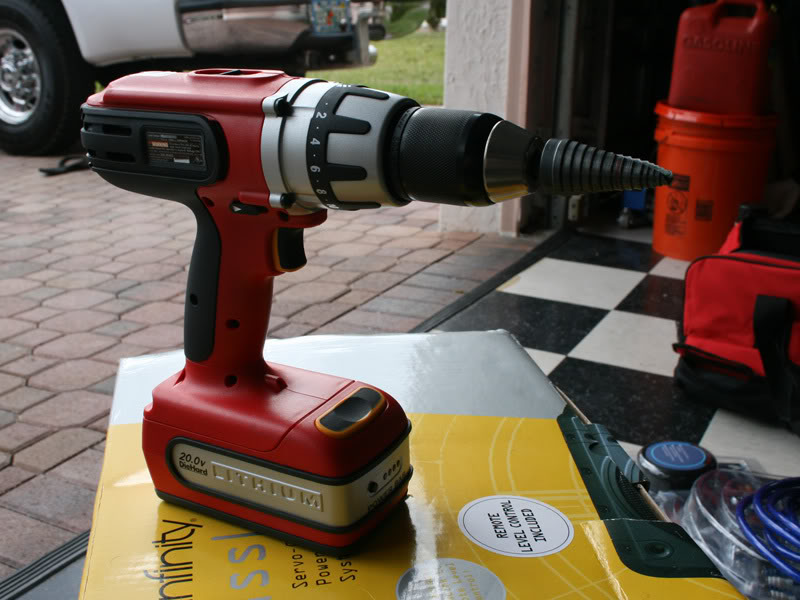
To drill the hole use a step drill bit, it will drill through it like butter. You can use tape or a marker to mark the bit so you know when to stop.
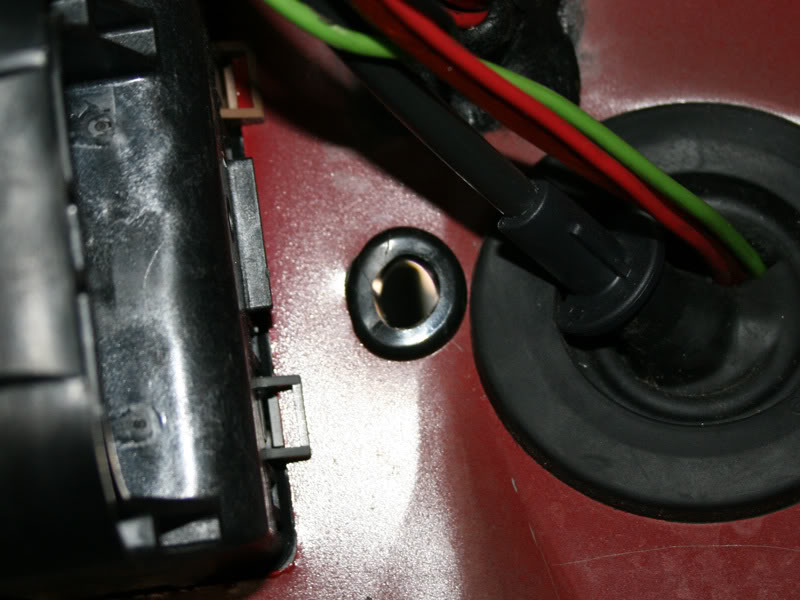
The hole is drilled, do not forget to use a rubber grommet. If you don't use one your wire will chafe and short. You can pick up a small box for a few bucks at a local hardware store.
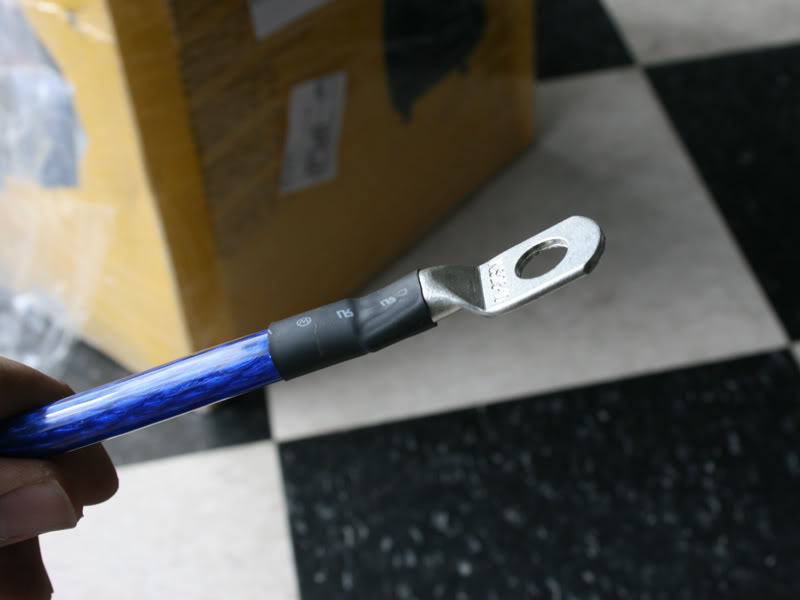
Before you run your wire you will need to add a ring terminal to the end of it. Strip the wire with a sharp razor blade, slide a piece of shrink tubing over the wire, slide the terminal on, then use a chisel and a hammer to crimp it. There are other methods you can use but this is the one I prefer, just put the chisel on the terminal and give it a few good whacks. Then slide the heat shrink over it and shrink it.
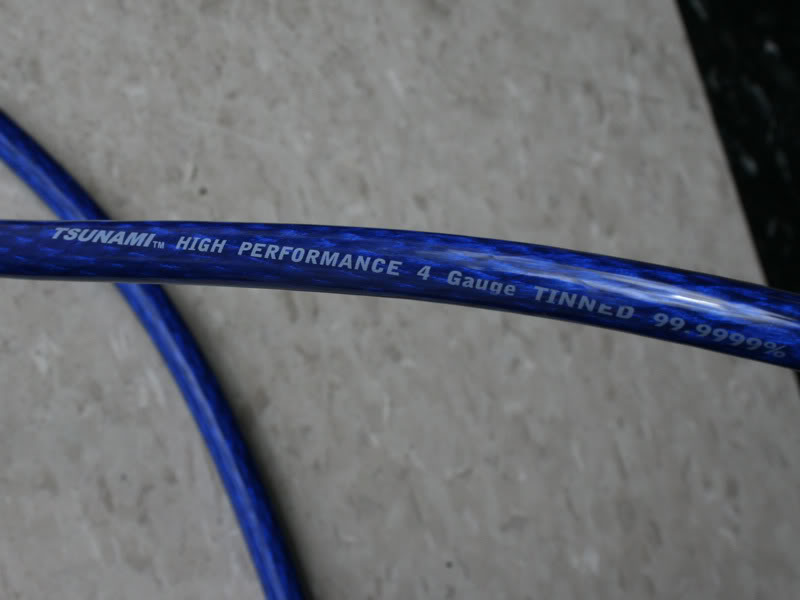
Use a quality wiring kit, I used a Tsunami dual amp kit since I plan on later adding another amp and the kit came with everything I need.
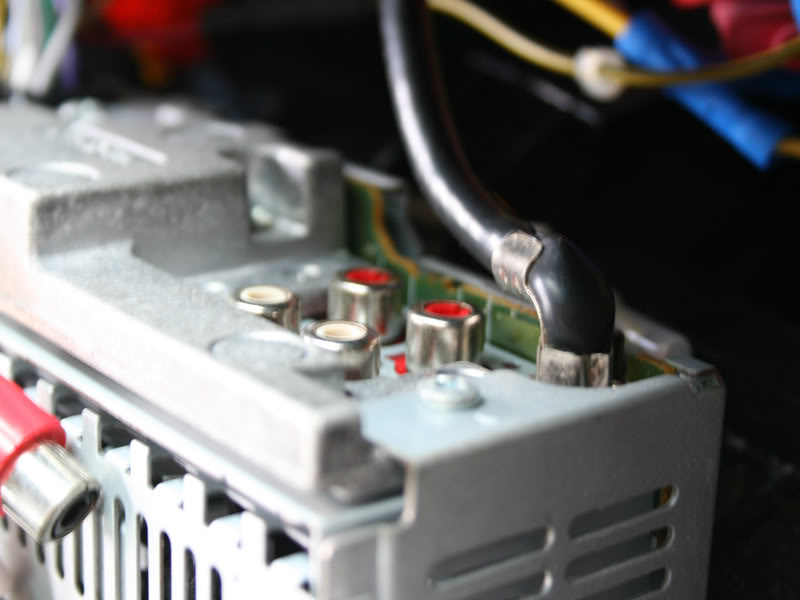
It is time to run signal wires. Most aftermarket stereos will have RCA subwoofer outputs on the back as pictured here.
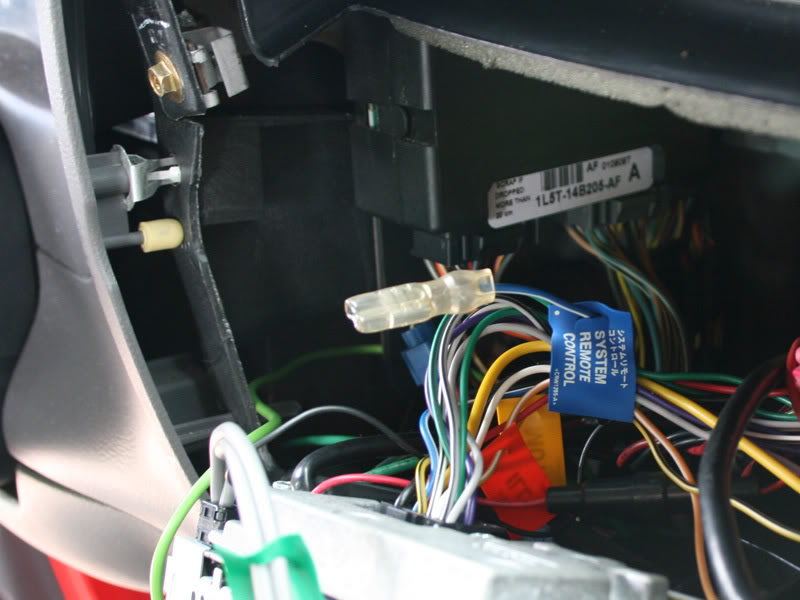
The unit also has to know when to turn on, the remote wire will take care of this.
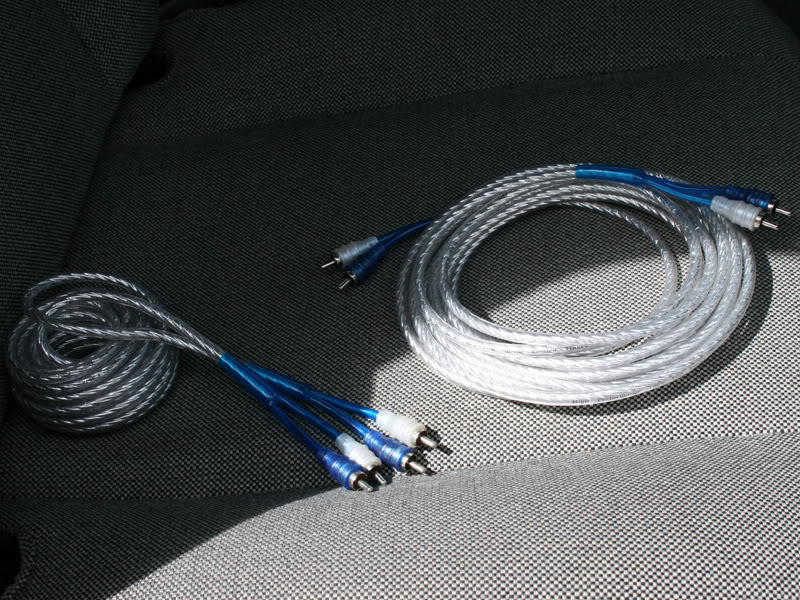
Again, use a quality cable. These are shielded cables that came with the Tsunami kit, only one cable will be needed.
The kit also comes with a remote turn on wire, you can use a butt connector for this but I used a different male one since my remote output had a female connector on it already.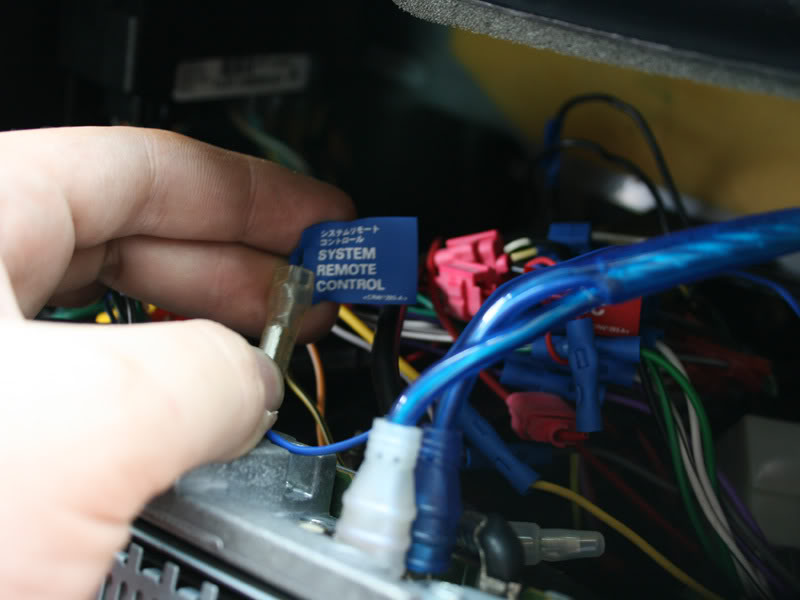
Connect the wires.
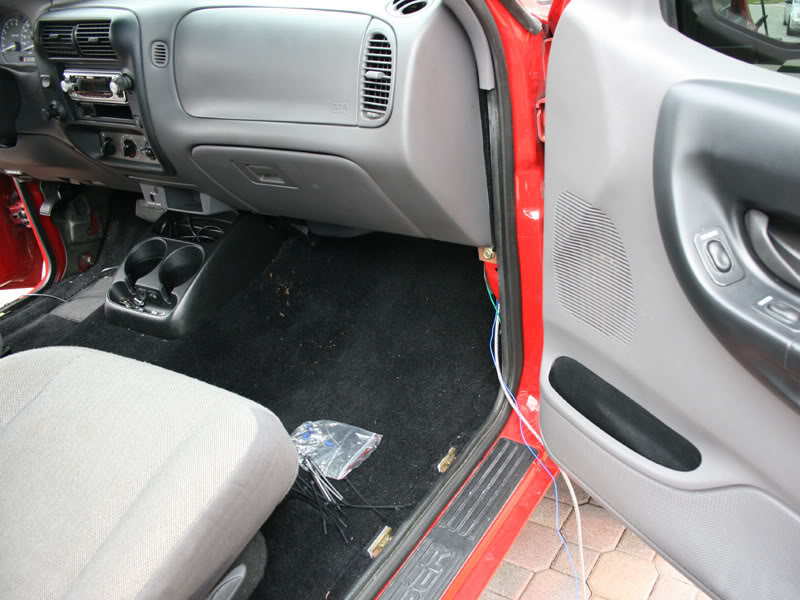
Always run the signal wire(s) down the opposite side as the power cable. Remove the trim panels and run the wire.
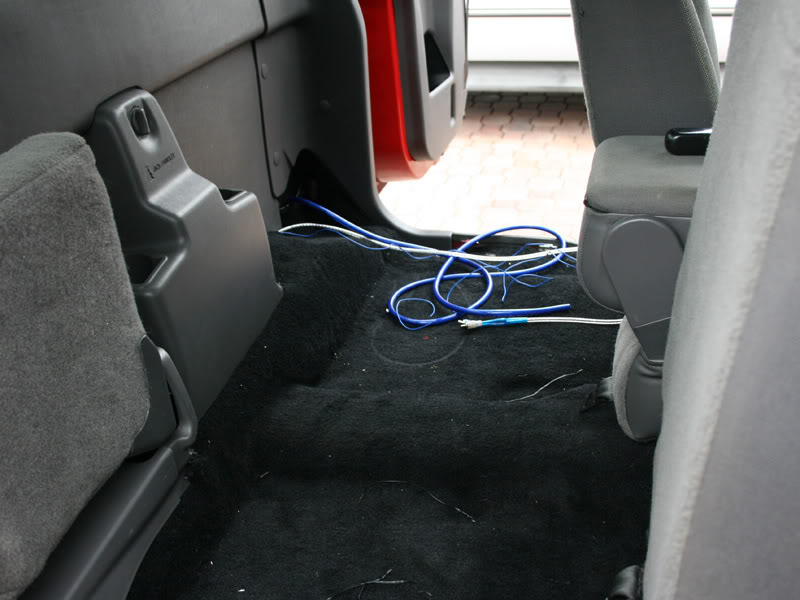
Keep running the wire back under the carpet until you get to the spot where the mount is.
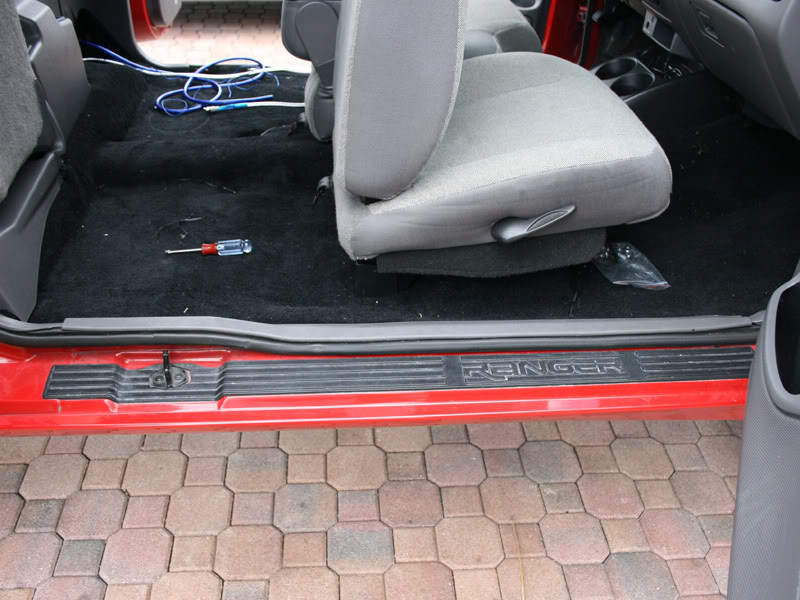
Reinstall trim.
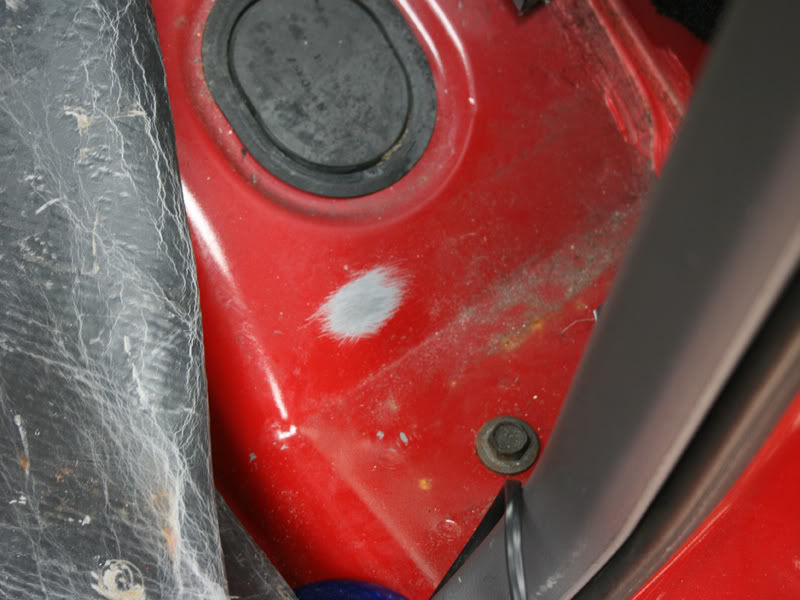
Your going to need a ground too, use some sandpaper to remove the paint in the spot where you want your ground to be.
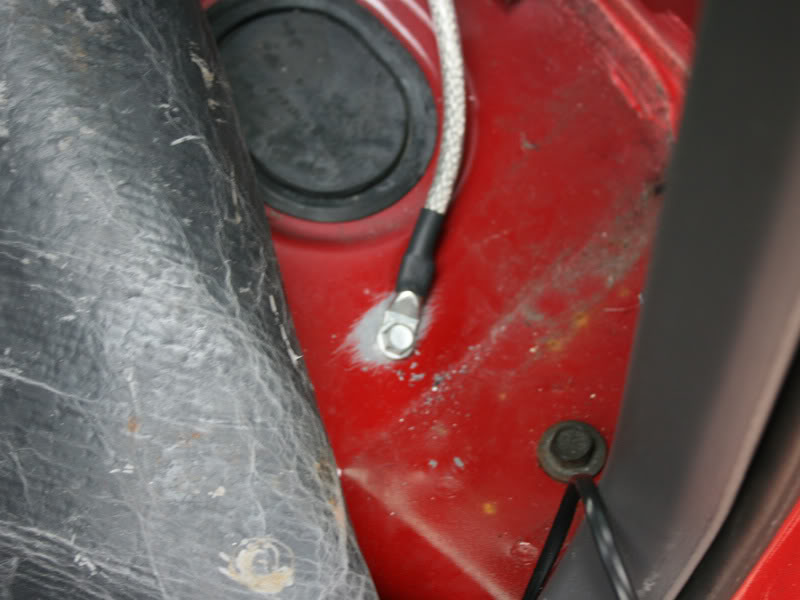
I used a self cutting/tapping screw to secure the terminal.
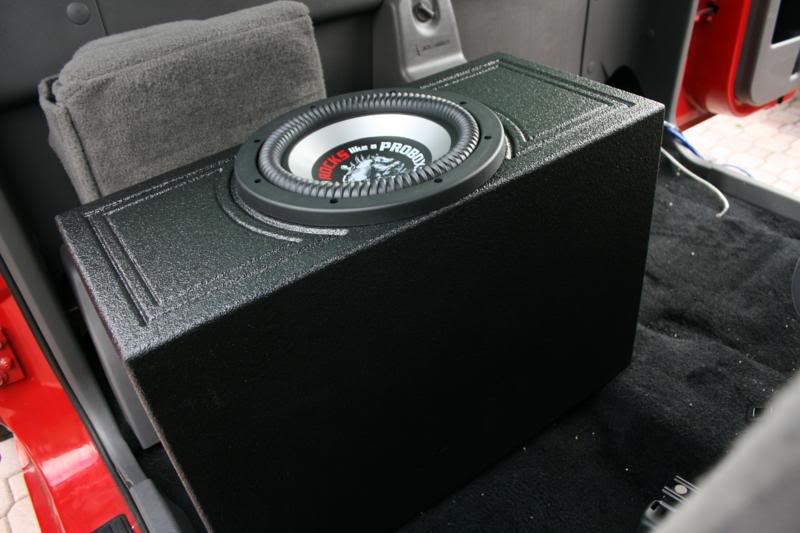
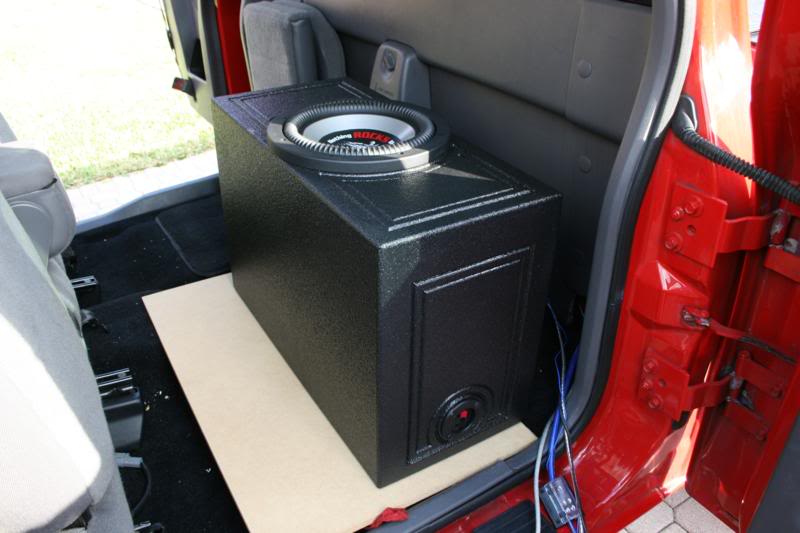
Here is the Probox enclosure that we are going to be installing.

It is a single 10" woofer prewired for a 2 ohm load in this case.
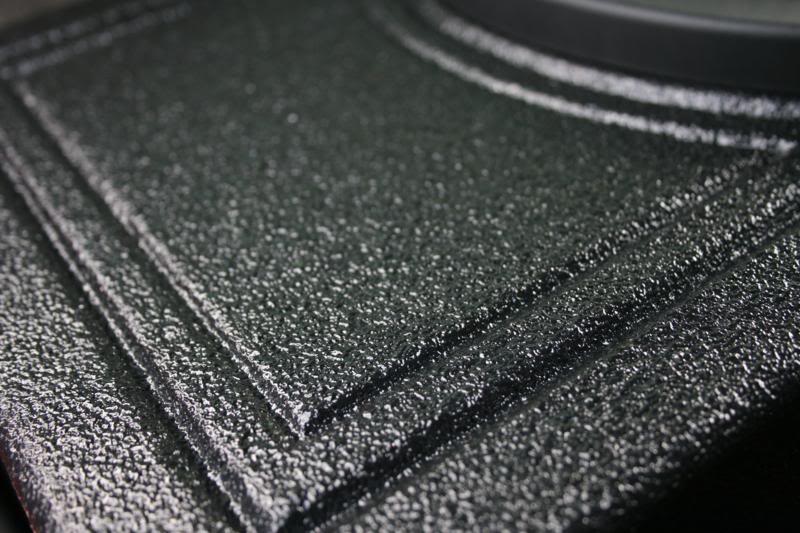
The box is coated in a spray on bedliner coating so we don't have to cover it or do anything.
Since this box is ported and the port is on one side we want to make sure that is blows into the middle of the truck for optimum sound.
With the wiring in place we need to take some measurements of the area and how big of a piece of MDF we need to mount it to.
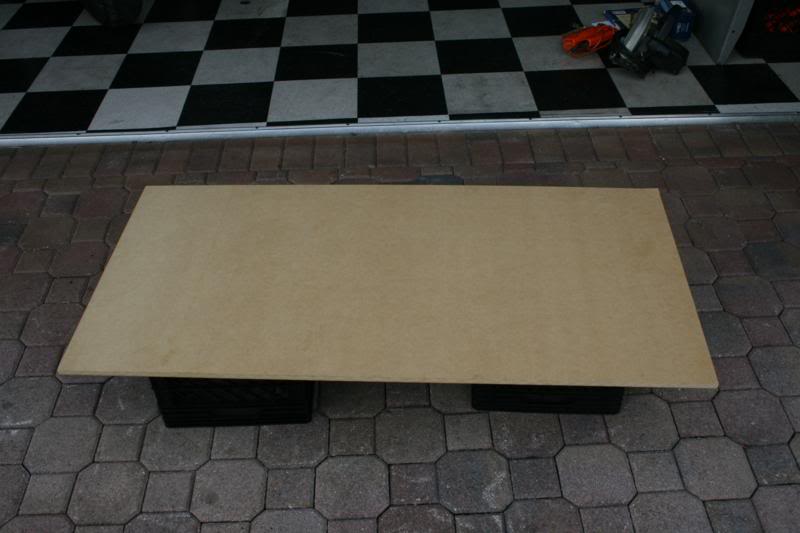
My measurements were roughy 11" by 28" so we didn't need a full sheet of MDF. Use a circular saw to cut the MDF after drawing your lines.
Mock it up and make sure everything is clear and works. In my case I had to recut the MDF a little less deep, when sliding the seat back it would come in contact with the MDF. This is why we are mocking it up first.
Next you need to make little feet for the end of the MDF to make it sit level. After attaching those I covered everything with some black vinyl I got from the fabric store.
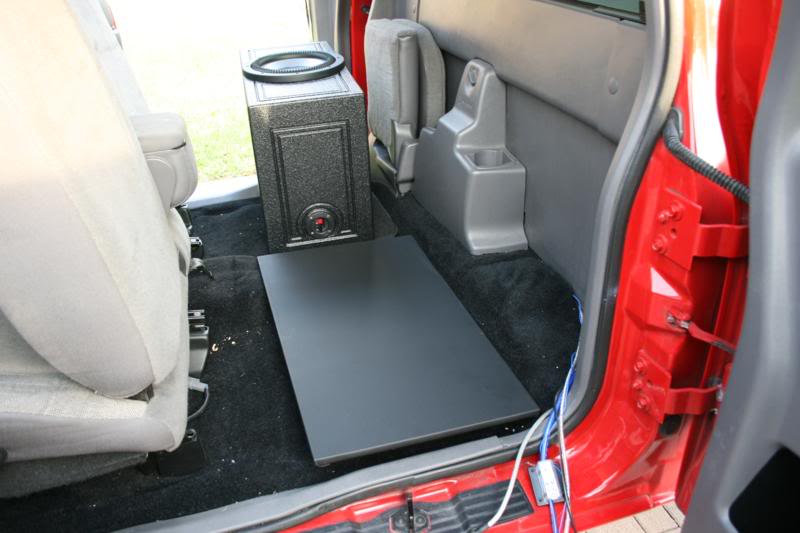
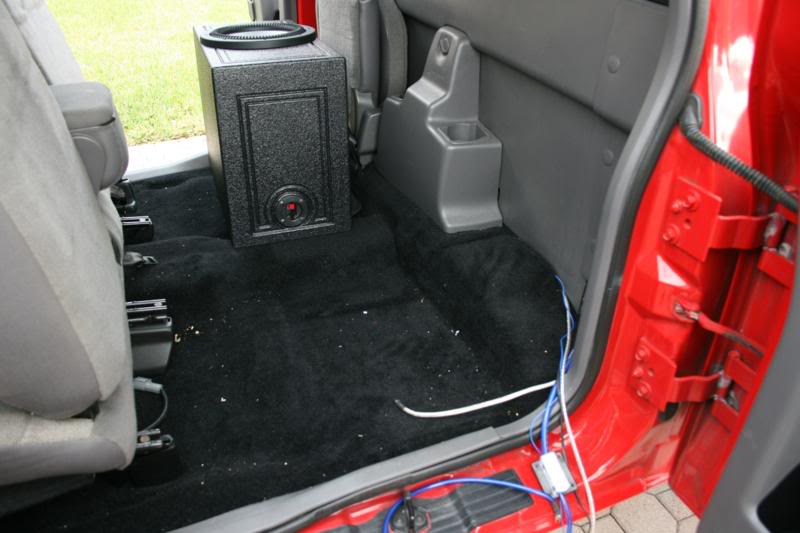
Platform is in place and it fits great.
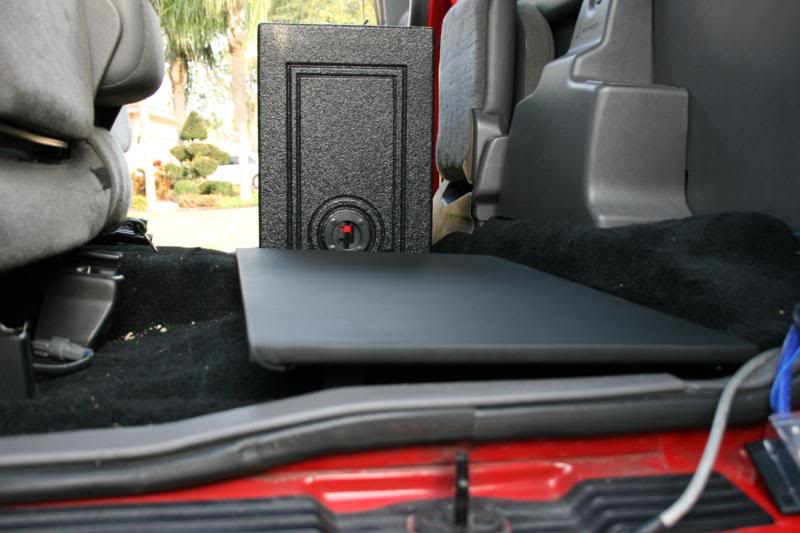
Sits level.
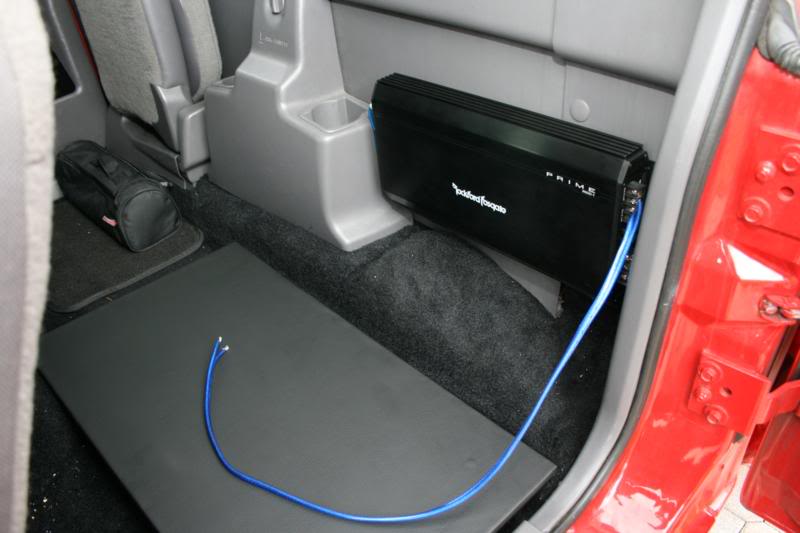
Now that the platform is taken care of it is time to mount the amp. I chose to mount mine directly to the back wall. Once you do that, connect your wires.
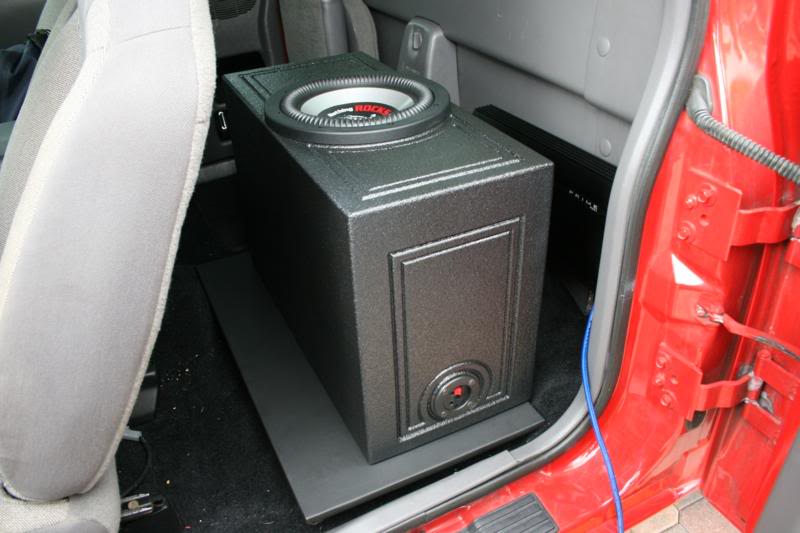
Now put your box in place. You can secure the box to the platform with L brackets from any hardware store.
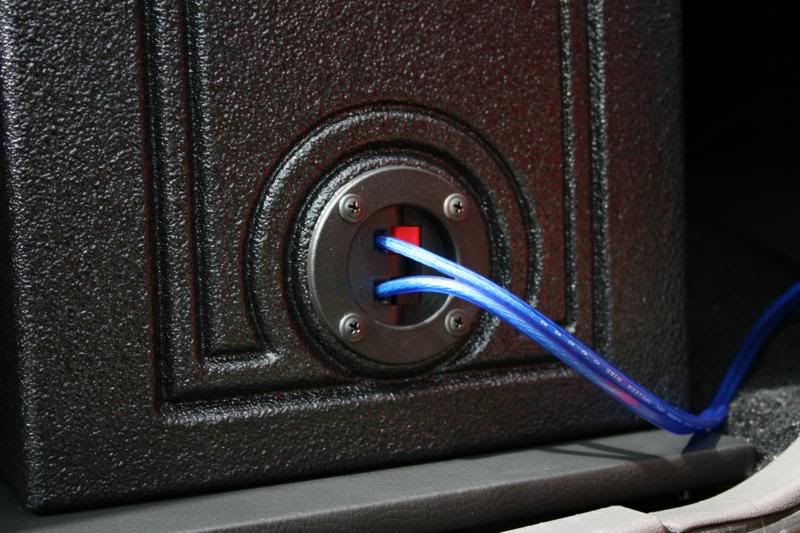
Connect the wires, taking note of polarity.
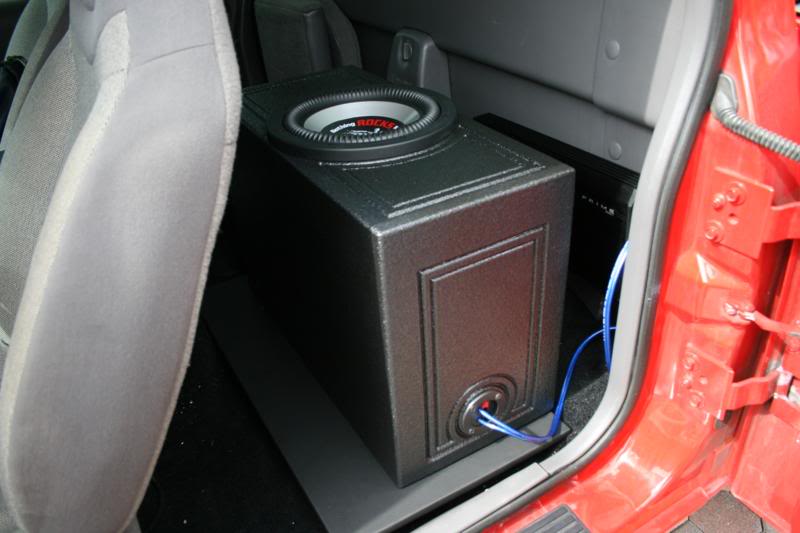
Wires connected.
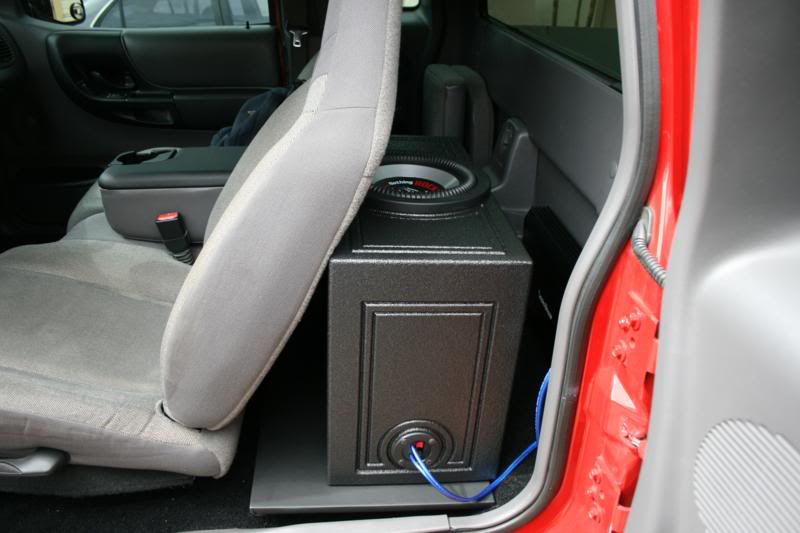
As you can see the seat slides most of the way back still.
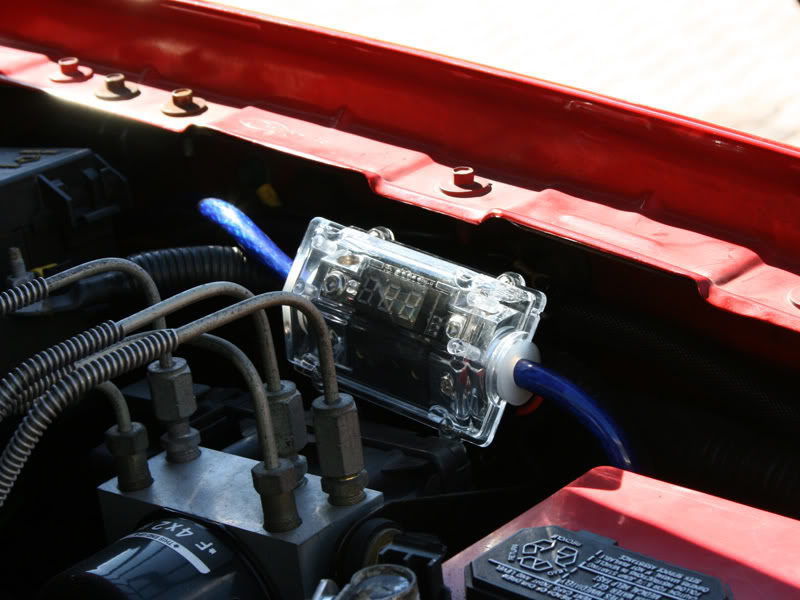
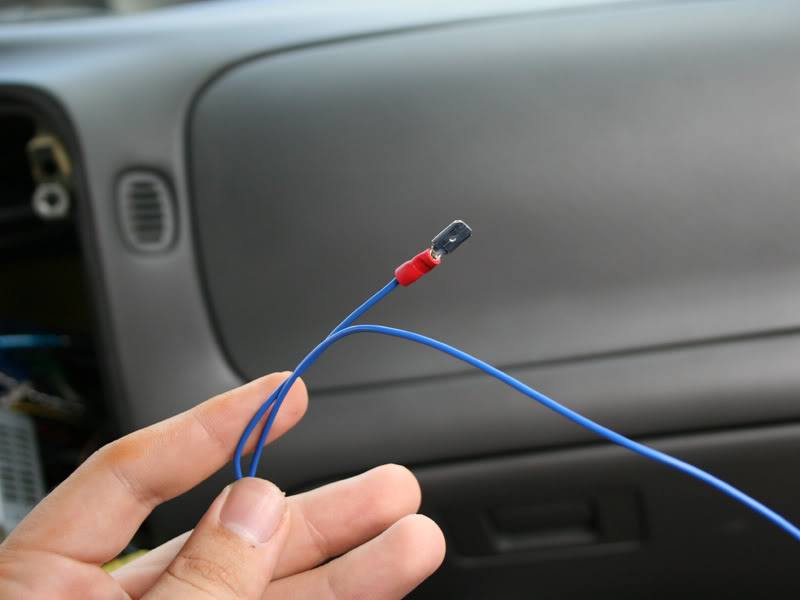
Now install your inline fuse, install it as close to the battery as possible. Any wire before the fuse is unprotected. This fuse also displays volts, some may like this but I chose to swap it out for a plain fuse holder shortly after installing it.
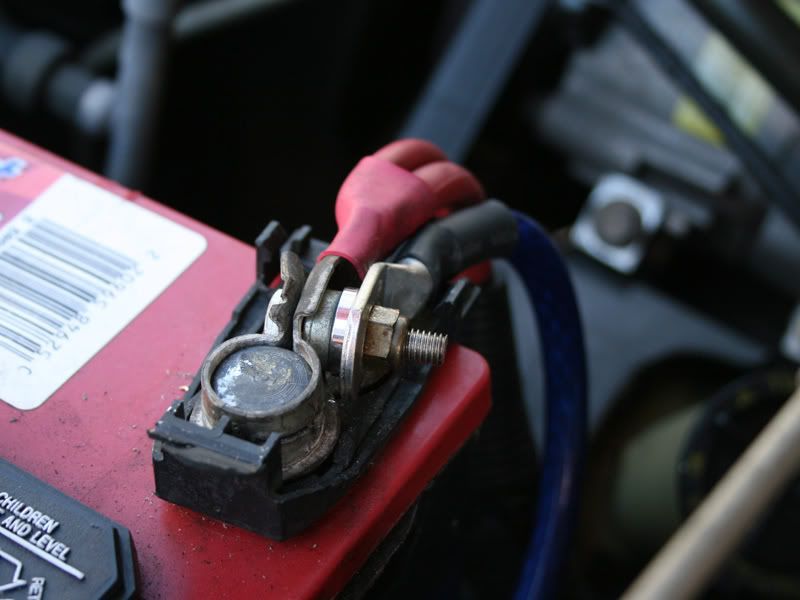
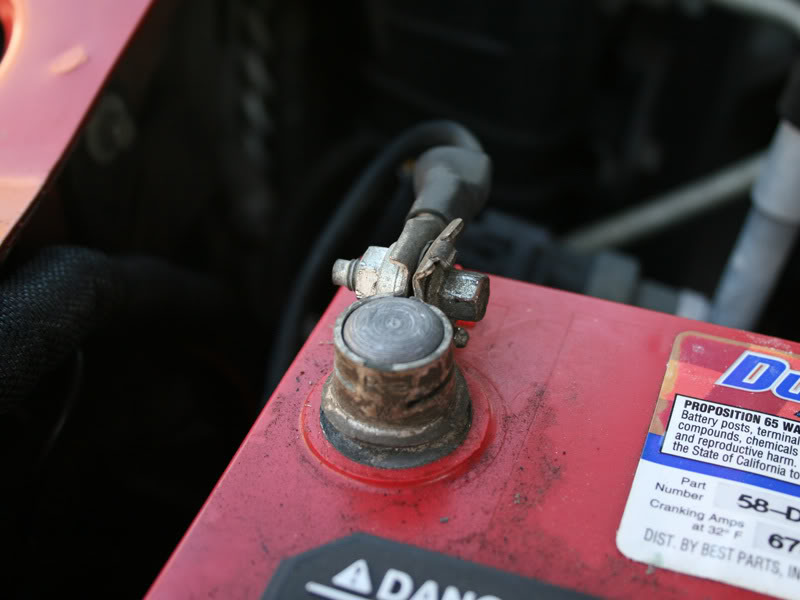
Connect power and ground on the battery and you are almost done!
Now, for the Probox it is designed to be used with an amplified that has a bass boost at 45hz. The way they say to set it up is to run full bass boost and only about 1/8th gain. This sounds great for heavy hitting rap and really slams. Or if you don't want as much bass but want it to sound better for things other than rap you can turn the bass boost down and the gain up. Follow the instructions on the amplifier for setting them. Crossover should be at 90hz. Done!
Original thread: https://www.ranger-forums.com/f59/ho...losure-100859/
Let the modding Begin!!
_________________________
Here is how to install a loaded 10" Probox SuperBass enclosure.
I see a lot of people who just take loaded prefabbed enclosures and throw them on the floor and are done with it, they usually don't sit flat on the floor because of the center hump and it just looks horrible. What I am going to show you how to do is in my opinion the right way of how to take a universal enclosure and make it fit better.
The rear jump seat I found to be useless so I had already removed it, I am too tall to be able to drive with someone sitting behind me. If you still have yours you will want to remove it.
Now we are going to need a way to get power to the amplifier. We are going to need to drill a hole in the firewall for this, remove the fuse box pictured and you will be able to see where you can safely drill a hole.
To drill the hole use a step drill bit, it will drill through it like butter. You can use tape or a marker to mark the bit so you know when to stop.
The hole is drilled, do not forget to use a rubber grommet. If you don't use one your wire will chafe and short. You can pick up a small box for a few bucks at a local hardware store.
Before you run your wire you will need to add a ring terminal to the end of it. Strip the wire with a sharp razor blade, slide a piece of shrink tubing over the wire, slide the terminal on, then use a chisel and a hammer to crimp it. There are other methods you can use but this is the one I prefer, just put the chisel on the terminal and give it a few good whacks. Then slide the heat shrink over it and shrink it.
Use a quality wiring kit, I used a Tsunami dual amp kit since I plan on later adding another amp and the kit came with everything I need.
It is time to run signal wires. Most aftermarket stereos will have RCA subwoofer outputs on the back as pictured here.
The unit also has to know when to turn on, the remote wire will take care of this.
Again, use a quality cable. These are shielded cables that came with the Tsunami kit, only one cable will be needed.
The kit also comes with a remote turn on wire, you can use a butt connector for this but I used a different male one since my remote output had a female connector on it already.
Connect the wires.
Always run the signal wire(s) down the opposite side as the power cable. Remove the trim panels and run the wire.
Keep running the wire back under the carpet until you get to the spot where the mount is.
Reinstall trim.
Your going to need a ground too, use some sandpaper to remove the paint in the spot where you want your ground to be.
I used a self cutting/tapping screw to secure the terminal.
Here is the Probox enclosure that we are going to be installing.
It is a single 10" woofer prewired for a 2 ohm load in this case.
The box is coated in a spray on bedliner coating so we don't have to cover it or do anything.
Since this box is ported and the port is on one side we want to make sure that is blows into the middle of the truck for optimum sound.
With the wiring in place we need to take some measurements of the area and how big of a piece of MDF we need to mount it to.
My measurements were roughy 11" by 28" so we didn't need a full sheet of MDF. Use a circular saw to cut the MDF after drawing your lines.
Mock it up and make sure everything is clear and works. In my case I had to recut the MDF a little less deep, when sliding the seat back it would come in contact with the MDF. This is why we are mocking it up first.
Next you need to make little feet for the end of the MDF to make it sit level. After attaching those I covered everything with some black vinyl I got from the fabric store.
Platform is in place and it fits great.
Sits level.
Now that the platform is taken care of it is time to mount the amp. I chose to mount mine directly to the back wall. Once you do that, connect your wires.
Now put your box in place. You can secure the box to the platform with L brackets from any hardware store.
Connect the wires, taking note of polarity.
Wires connected.
As you can see the seat slides most of the way back still.
Now install your inline fuse, install it as close to the battery as possible. Any wire before the fuse is unprotected. This fuse also displays volts, some may like this but I chose to swap it out for a plain fuse holder shortly after installing it.
Connect power and ground on the battery and you are almost done!
Now, for the Probox it is designed to be used with an amplified that has a bass boost at 45hz. The way they say to set it up is to run full bass boost and only about 1/8th gain. This sounds great for heavy hitting rap and really slams. Or if you don't want as much bass but want it to sound better for things other than rap you can turn the bass boost down and the gain up. Follow the instructions on the amplifier for setting them. Crossover should be at 90hz. Done!
Last edited by 98liftedranger; 11-27-2011 at 09:39 PM.

Thread
Thread Starter
Forum
Replies
Last Post
wydopnthrtl
OLD - Ranger Based Vehicles
2
04-12-2009 05:47 AM
Type_Ranger
Interior, Exterior, & Electrical
0
02-09-2006 03:04 PM


