Radio Bezel Mod
#1
 05-22-2010

Radio Bezel Mod
I've been thinking... and that's never a good thing.
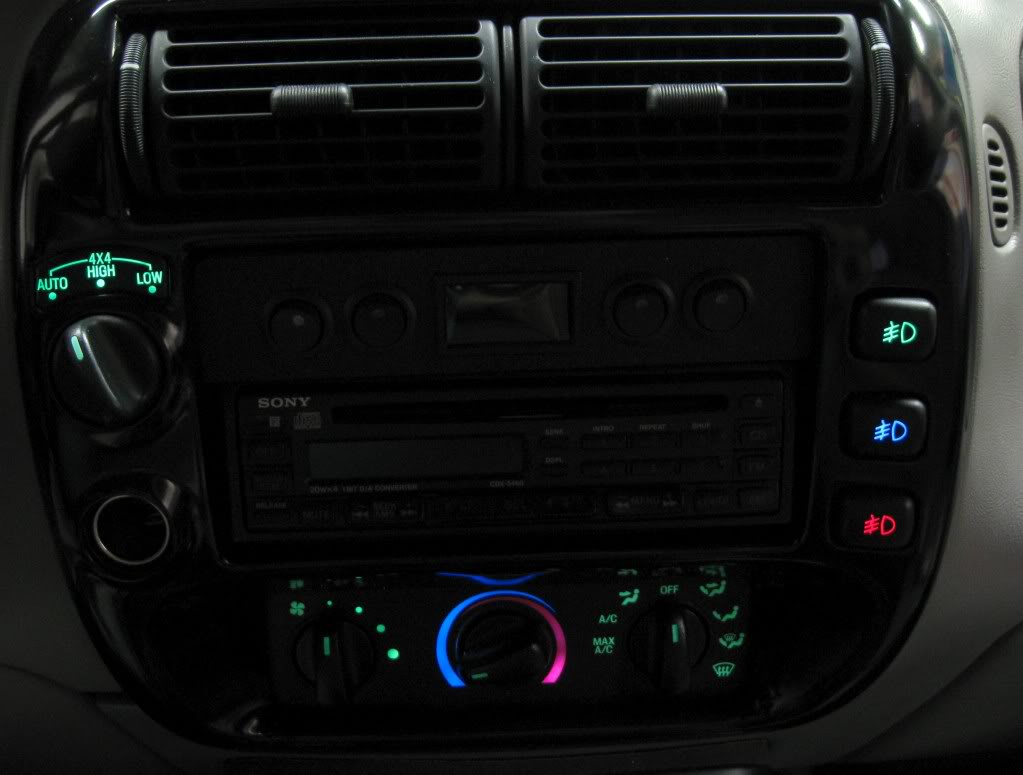
Has anyone modified their radio bezel (either from the Ranger or an Explorer) to fit 3 OEM fog light switches on the right side?
I've seen a few with 2 fog switches & a 12v outlet replacing the rear wiper button, but I haven't seen any with 3 OEM fog switches.
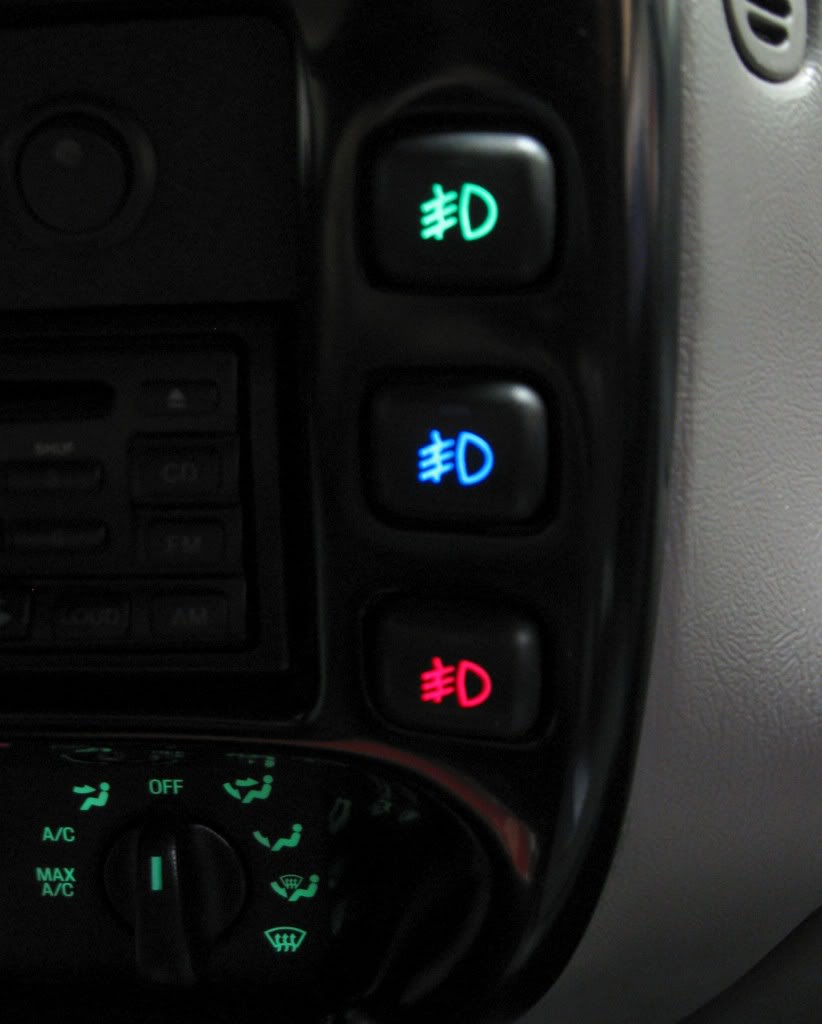
I have a couple OEM fog switches that I'm going to mod with different color LED's; green for OEM fog lights, blue for fog lights behind the grill & I thought why not add another fog switch for my backup lights while I'm at it.
Could I simply sand down the rear wiper button "bump" & "curved slot" and fill it in with bondo and shape everything to blend in & cut a square hole for an OEM fog switch?
Would something like bondo stick to the plastic bezel?
How could I get a 3rd switch mounted to the black plastic bracket that holds the OEM fog/defrost/rear wiper assembly on the back of the bezel?
Has anyone modified their radio bezel (either from the Ranger or an Explorer) to fit 3 OEM fog light switches on the right side?
I've seen a few with 2 fog switches & a 12v outlet replacing the rear wiper button, but I haven't seen any with 3 OEM fog switches.
I have a couple OEM fog switches that I'm going to mod with different color LED's; green for OEM fog lights, blue for fog lights behind the grill & I thought why not add another fog switch for my backup lights while I'm at it.
Could I simply sand down the rear wiper button "bump" & "curved slot" and fill it in with bondo and shape everything to blend in & cut a square hole for an OEM fog switch?
Would something like bondo stick to the plastic bezel?
How could I get a 3rd switch mounted to the black plastic bracket that holds the OEM fog/defrost/rear wiper assembly on the back of the bezel?
#3
05-26-2010

Join Date: Jan 2009
Location: Haddon Heights, NJ
Posts: 314
Likes: 0
Received 0 Likes
on
0 Posts
#4
05-26-2010

#5
06-04-2010
Well, I've been doing a little work to the bezel & I now have 3 holes for fog light switches (pics to come).
The hard part is going to be getting the bracket modified to hold the top switch in place.
I've added some JB weld type epoxy material to make "rails" for the switch, but I'm stumped as to how to fasten the switch in place & still be able to remove it if I need to change the LED.
My first thought was to put some epoxy on the insides of the bracket, drill & tap them for some small screws to press against the actual switch casing.
Any ideas here?
#6
06-05-2010
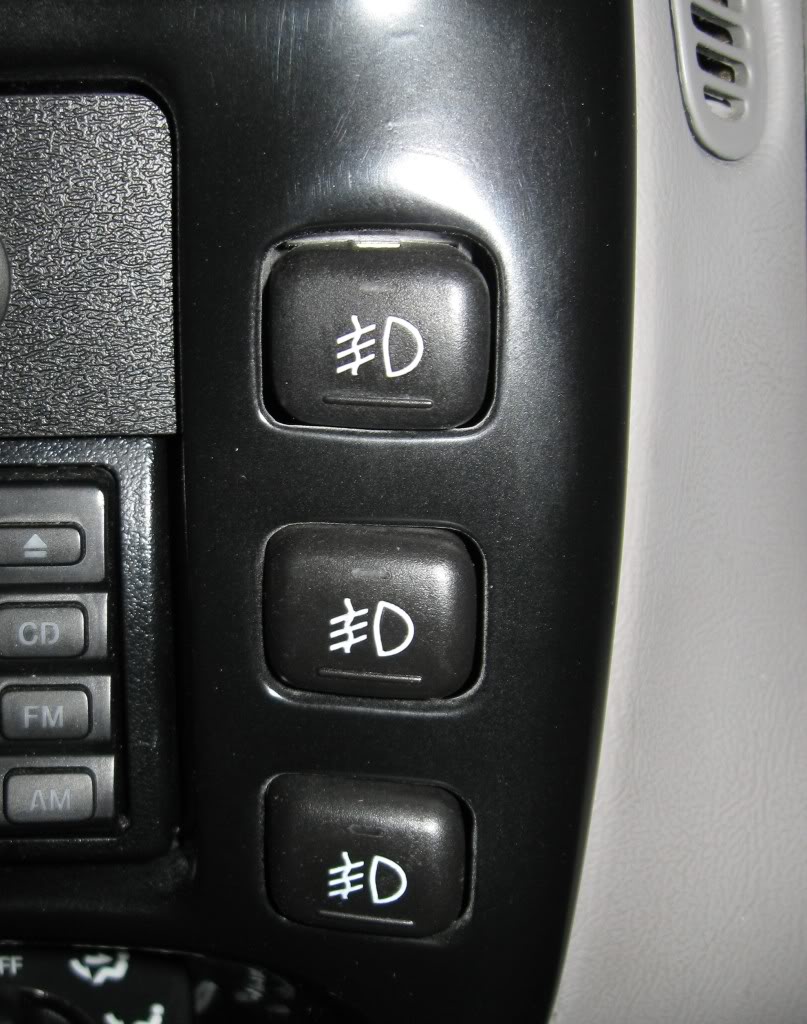
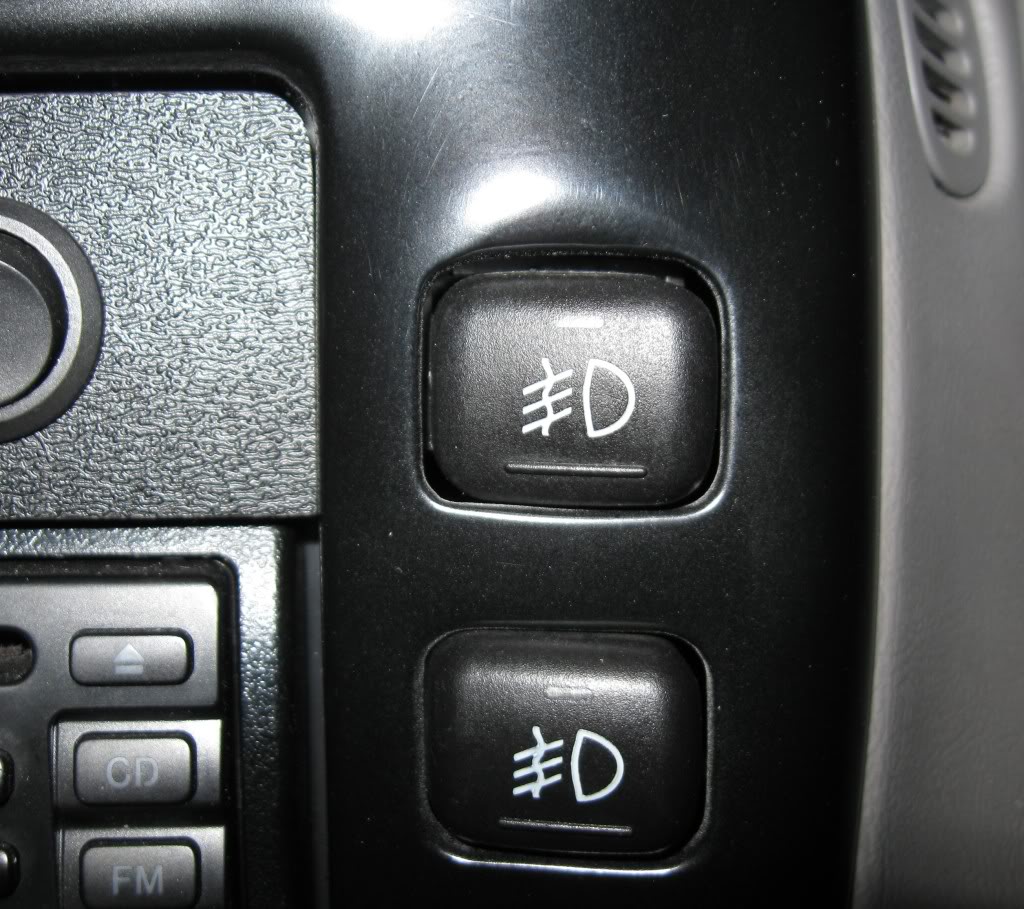
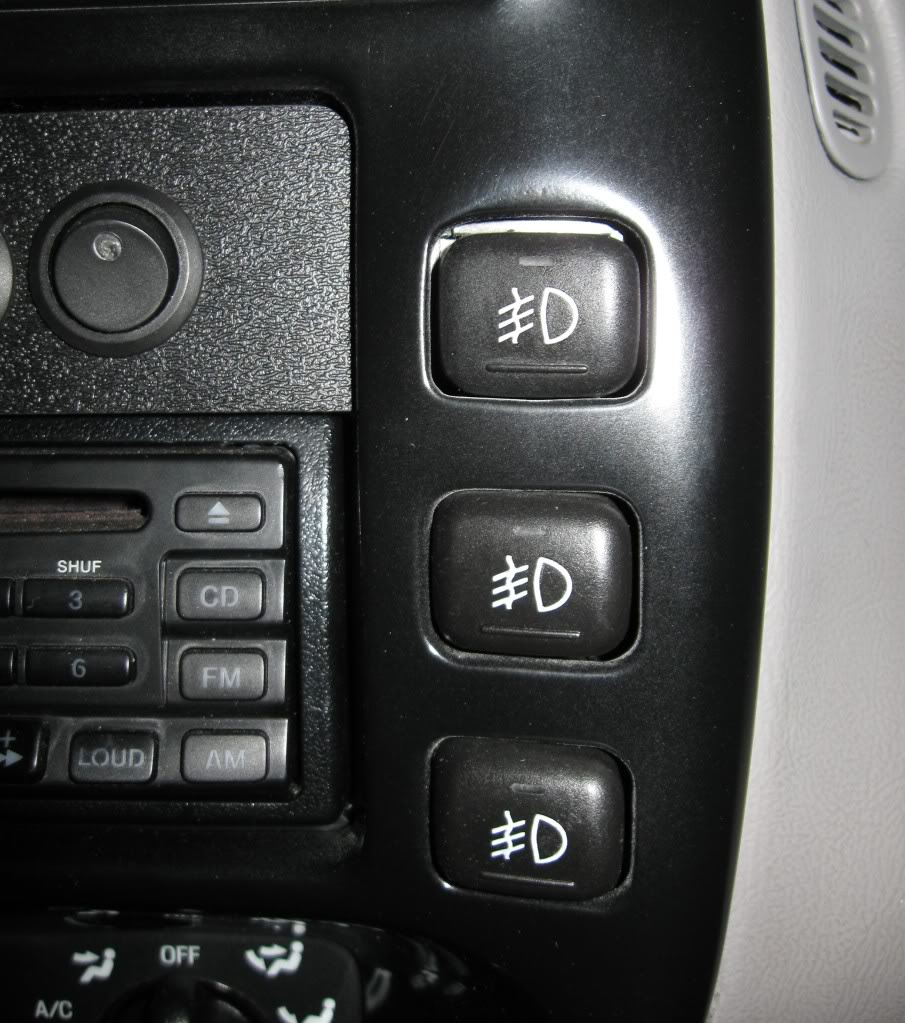
Here's a few pics of the work in progress...


(c)2010 buggman I believe this is the first triple OEM fog light switch bezel mod.


In progress... the bezel/switch mounting bracket mod.


(c) 2010 buggman
I believe another first, a lighted 12v lighter socket in the bezel (still in progress)


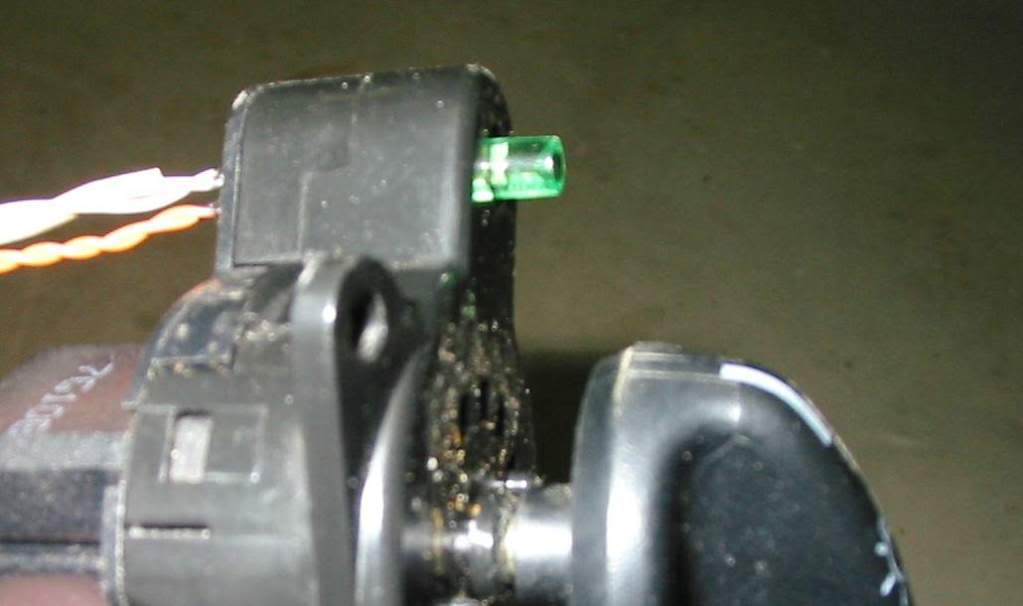
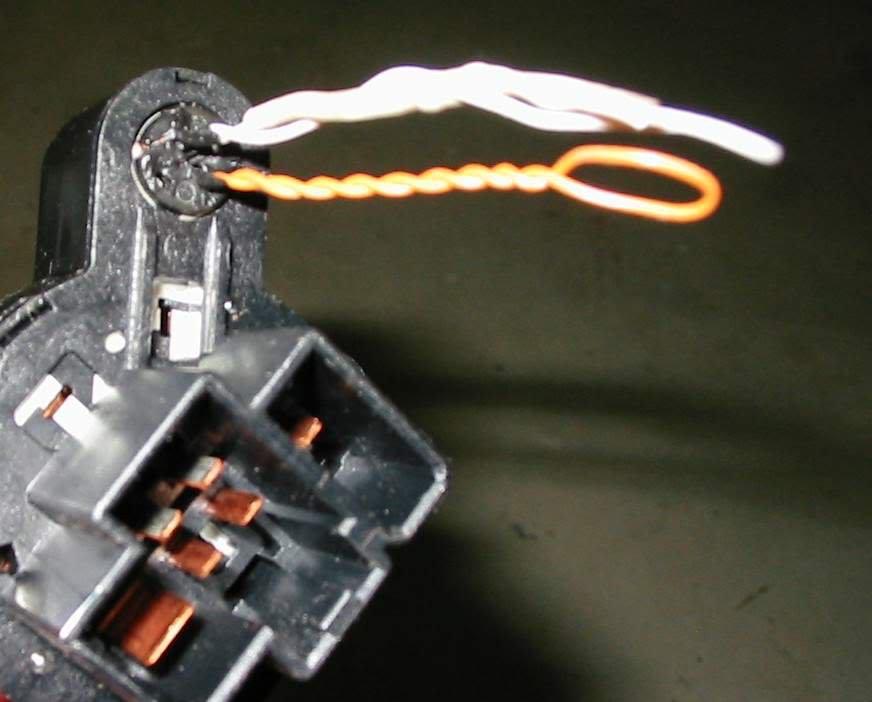
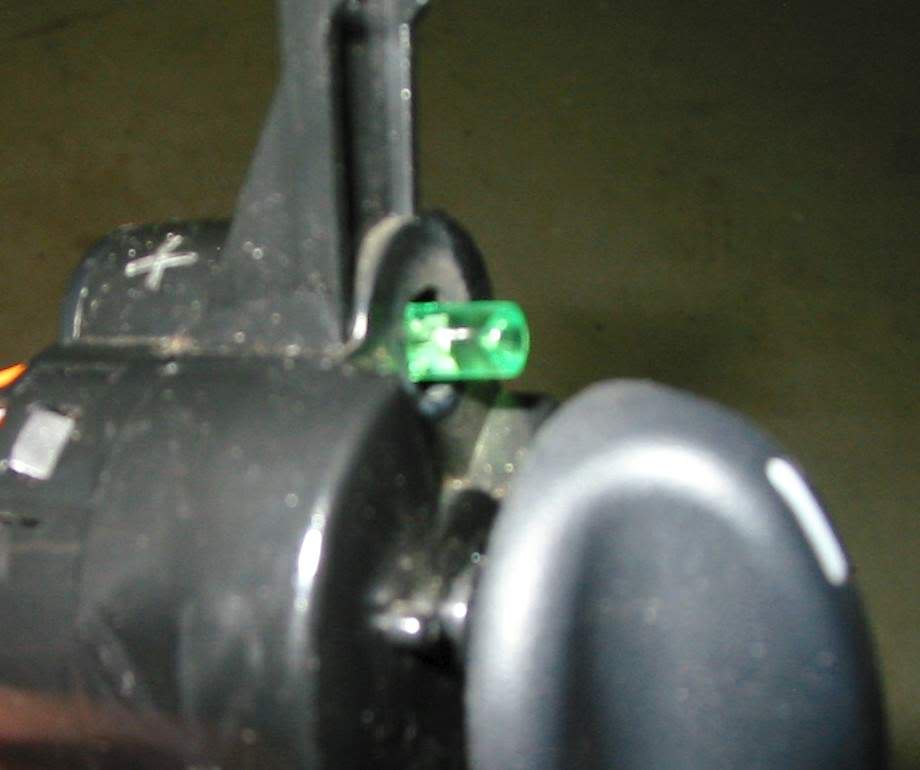
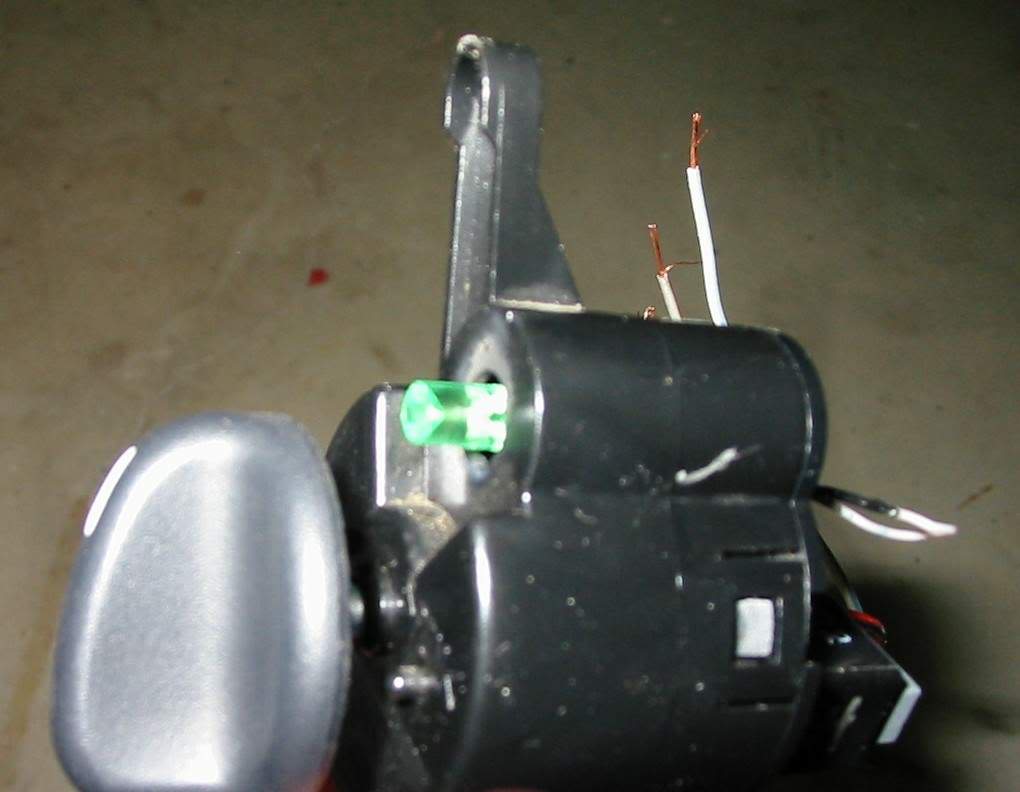
My version of the fog light LED mod. I used some liquid electrical tape to hold the wires & led down to the switch housing.


(c) 2010
Yet another first, rear wiper indicator insert with Ford logo (my first attempt, this is only a test)
A few other switches modded with LED's.
I'm still working on all this stuff & there's a lot more sanding to be done to the bezel before it's ready for paint.
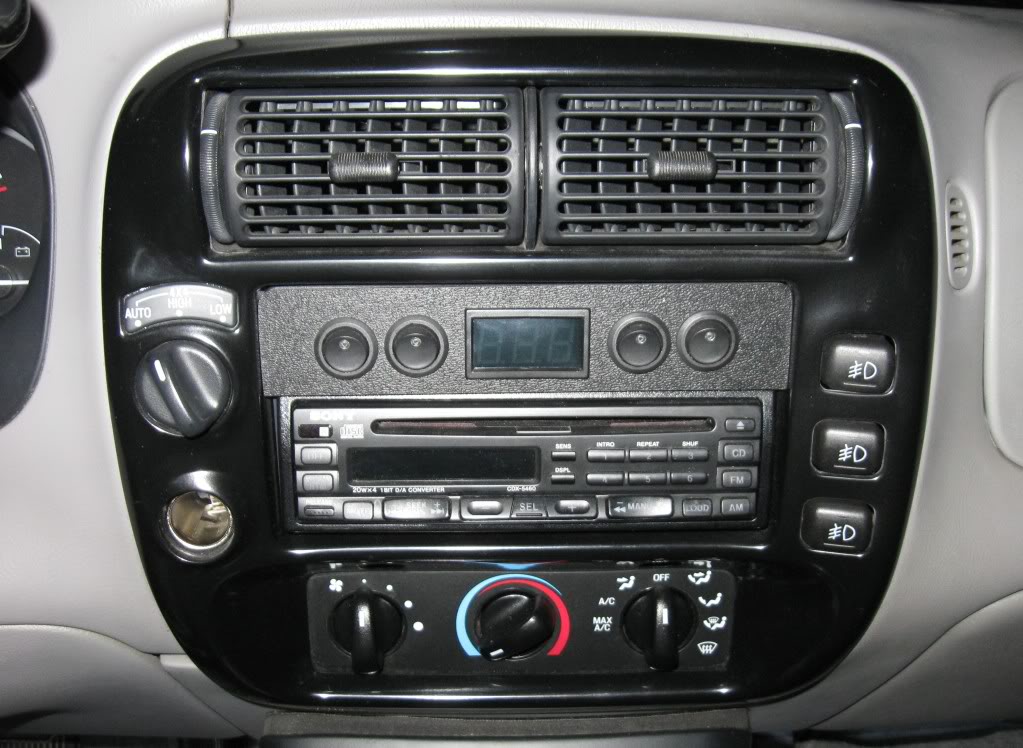
I filled in the entire rear wiper hole area with bondo. Sanded flat and shaped, more bondo, more sanding, then cut out the hole for the top fog light switch, sanded & molded... test fitted the switch & bracket until everything lined up & fit well.
Looks pretty good if I did mod it myself.
The indicator is just a clear laser label I tested on the insert.
I'm probably going to get flack for this, but I didn't have any green high intensity LED's when I started modding the switches and all I had were some strings of LED Christmas lights... I made due with what I had but the inverted cone LED's really light up nicely. I added a resistor to the negative
side of the LED (I forget the value I used, sorry).
The bezel bracket has been modded... the top section where the rear wiper ***'y went got several layers of quick steel (sort of like JB weld) that were sanded & shaped to hold the fog light switch securely & centered in the new opening. I still need to tap the side of the bracket & add a screw to keep the switch from sliding outwards.
I also had to trim some of the top areas where each switch clips into the bezel bracket to clear the wiring of my LED mod. I just used some wire cutters & a utility knife to remove the plastic that might come in contact with the wires or LED.
(c)2010 buggman I believe this is the first triple OEM fog light switch bezel mod.
In progress... the bezel/switch mounting bracket mod.
(c) 2010 buggman
I believe another first, a lighted 12v lighter socket in the bezel (still in progress)
My version of the fog light LED mod. I used some liquid electrical tape to hold the wires & led down to the switch housing.
(c) 2010
Yet another first, rear wiper indicator insert with Ford logo (my first attempt, this is only a test)
A few other switches modded with LED's.
I'm still working on all this stuff & there's a lot more sanding to be done to the bezel before it's ready for paint.
I filled in the entire rear wiper hole area with bondo. Sanded flat and shaped, more bondo, more sanding, then cut out the hole for the top fog light switch, sanded & molded... test fitted the switch & bracket until everything lined up & fit well.
Looks pretty good if I did mod it myself.
The
indicator is just a clear laser label I tested on the insert.I'm probably going to get flack for this, but I didn't have any green high intensity LED's when I started modding the switches and all I had were some strings of LED Christmas lights... I made due with what I had but the inverted cone LED's really light up nicely. I added a resistor to the negative
side of the LED (I forget the value I used, sorry).
The bezel bracket has been modded... the top section where the rear wiper ***'y went got several layers of quick steel (sort of like JB weld) that were sanded & shaped to hold the fog light switch securely & centered in the new opening. I still need to tap the side of the bracket & add a screw to keep the switch from sliding outwards.
I also had to trim some of the top areas where each switch clips into the bezel bracket to clear the wiring of my LED mod. I just used some wire cutters & a utility knife to remove the plastic that might come in contact with the wires or LED.

#8
06-12-2010


#13
06-19-2010
Here's a quick template I designed after my triple fog switch mod:

Your results may vary, but this should be a good starting point for anyone interested in trying this.
Try to print it out & check the measurements a few times before you even think about cutting. I'd suggest covering the bezel with masking tape then taping the template on the bezel. Slide some carbon paper between the template & the bezel & trace the outlines.
You could also just use some spray adhesive on the back of the template to hold directly on the bezel, but it will be a mess getting it cleaned off the bezel.
If your bezel only has one or two switch openings, you can align whichever opening you have with the template to center it and keep things lined up with the radio opening.
I made my openings slightly larger so I would have a little adjustment.
In my case, my bezel had a rear wiper button/switch on the top right side. I first had to fill the entire area front & back with bondo... then sand & shape before I could work on making the 3rd opening.
The bondo I used (lightweight) is much softer than the plastic & it's much easier to cut away than the plastic.
The real fun part is getting the new top switch mounted so that it is plumb with the other switches AND is located in your new hole so that it doesn't hit or rub on the hole.
Patience is your friend here. I spent the better part of two days mixing the epoxy, molding it, shaping it, re-filling, etc. before I got the top switch where I wanted it.
#16
07-10-2010

#18
07-11-2010
Join Date: Apr 2010
Location: Powell,Tn
Posts: 23
Likes: 0
Received 0 Likes
on
0 Posts
#19
07-11-2010
I made up a template in my image editing program to make the normally blue areas clear & the normally chrome/silver areas black.
It didn't look too bad, but the edges of the label don't stick very well around the curves of the insert.
I'm working on a similar version where I cut the oval out of the label, apply it to the insert, mask the oval off & paint the surrounding area satin black. Not sure how this will work out, but I'm still experimenting.
I'd like to make it backlit with a LED so it glows blue or green when the other dash lights are on.
#20
07-12-2010
Join Date: Jan 2008
Location: spindale, NC
Posts: 1,444
Likes: 0
Received 0 Likes
on
0 Posts
#21
07-12-2010
#22
08-11-2010
UPDATE:
Took these pics the other day, still need to get some good, bright pics to show the details better...

The bezel is basically done now, except I'll be installing my new head unit as soon as it arrives... and I'll be replacing the voltmeter/switch panel with a new one that holds the voltmeter & a digital PC thermometer.
It turned out much better than expected, especially since I decided to fill in the wiper button & insert areas.
If anyone wants the old panel, let me know.... I might consider selling it AS IS with voltmeter & switches. All you need is some double sided foam tape to install it & a little time to wire up the voltmeter & switches.
Took these pics the other day, still need to get some good, bright pics to show the details better...
The bezel is basically done now, except I'll be installing my new head unit as soon as it arrives... and I'll be replacing the voltmeter/switch panel with a new one that holds the voltmeter & a digital PC thermometer.
It turned out much better than expected, especially since I decided to fill in the wiper button & insert areas.
If anyone wants the old panel, let me know.... I might consider selling it AS IS with voltmeter & switches. All you need is some double sided foam tape to install it & a little time to wire up the voltmeter & switches.
#23
08-11-2010


#24
08-12-2010

Join Date: Aug 2010
Location: Welland, ON
Posts: 186
Likes: 0
Received 0 Likes
on
0 Posts

Thread
Thread Starter
Forum
Replies
Last Post
Want to Trade: Explorer Radio Bezel for Ranger Radio Bezel - ON
platinum6316
OLD - Interior, Exterior, Electrical, & Misc.
0
11-26-2011 06:02 AM
jordanvw
Interior Semi-Tech
7
05-24-2011 08:37 AM
Redneckstone
Interior, Exterior, & Electrical
0
03-31-2010 10:18 PM


