How-to Paint Plastic Interior Factory Color
#1
 05-31-2010


I decided to paint the plastic interior pieces in my Ranger the factory color (Toreador Red).
Supplies Needed:
-1 can of Plastic Primer
-2 cans of Dupli-Color Factory Paint (Got mine at meijer, autozone carries this too)
-2 cans of Dupli-Color Acrylic Enamel Clear Coat
-Fine grit sandpaper
-Rubbing Alcohol (Maybe warm water and soap)
The tricky part about this mod is the fact that the factory color paint is a lacquer and is not meant for plastics. As for any type of painting, prep is everything. Especially for this type of painting. Make sure that you paint in a low-humidity area thats clean and free from dust. I used a blow dryer to warm up my cans a bit so that the paint was thinner and sprayed evenly.
Step One:
Remove the plastic interior pieces. (Note: In some Rangers, the plastic that surrounds the stereo has a rubber coating that will need to be completely removed. I don't attempt to do that piece in this How-to.
Step Two:
After removing the plastic interior pieces, use your fine grit sandpaper to roughen the surface so that the primer will stick. Then use rubbing alcohol or warm soap and water to clean the surface. Let everything air dry and try not to touch the surface with your hands because the oil thats on your skin causes the paint not to stick as well.
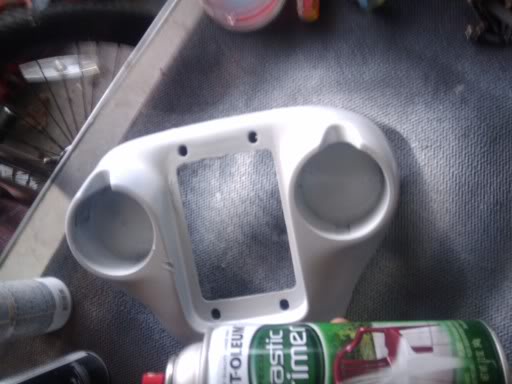
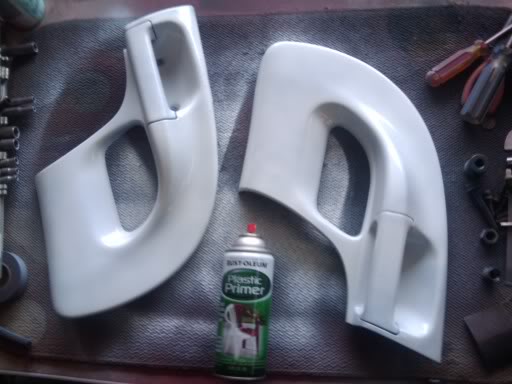
Step Three:
Now that you've completed all of your prep work, it's time to do some painting. Apply ONE light coat evenly on the surface. My coat was just enough to cover all the black on the piece.
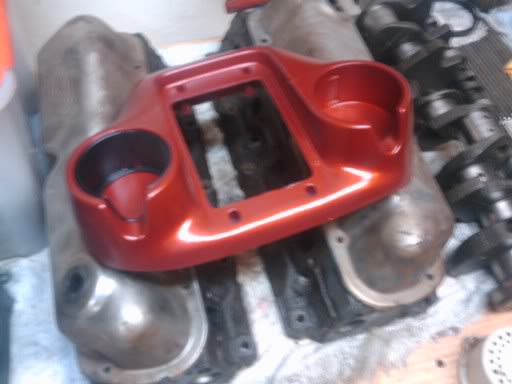
Step Four:
I allowed the primer to dry for 5 hours before this step. Apply your first coat of factory paint and allow to dry until it is dry to touch. Repeat this step until color is as dark as desired. This is mine after my fourth coat.

Step Five:
Clear coating took a lot of patience and time for me. The clear coat drys fairly quick so it doesn't take long. Be sure to spray evenly all over the piece with nice coats. After each coat, hold under a light to check for dull spots.
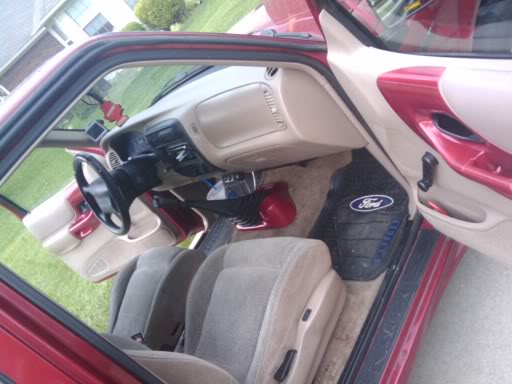
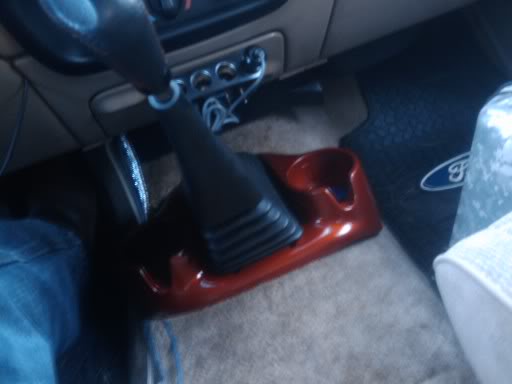
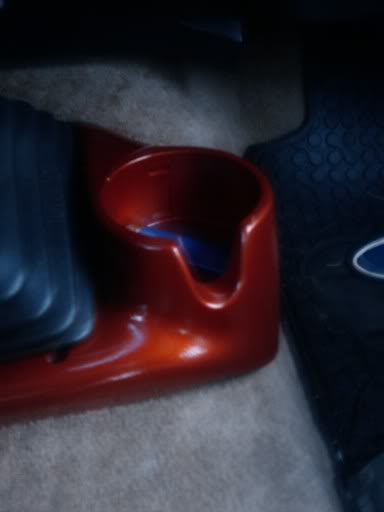
Step Six:
Allow to sit and dry as long as you can handle before reinstalling your pieces. After you have installed them, be careful with things coming in contact with them like rain for about a week. Here are my finished photos.
Supplies Needed:
-1 can of Plastic Primer
-2 cans of Dupli-Color Factory Paint (Got mine at meijer, autozone carries this too)
-2 cans of Dupli-Color Acrylic Enamel Clear Coat
-Fine grit sandpaper
-Rubbing Alcohol (Maybe warm water and soap)
The tricky part about this mod is the fact that the factory color paint is a lacquer and is not meant for plastics. As for any type of painting, prep is everything. Especially for this type of painting. Make sure that you paint in a low-humidity area thats clean and free from dust. I used a blow dryer to warm up my cans a bit so that the paint was thinner and sprayed evenly.
Step One:
Remove the plastic interior pieces. (Note: In some Rangers, the plastic that surrounds the stereo has a rubber coating that will need to be completely removed. I don't attempt to do that piece in this How-to.
Step Two:
After removing the plastic interior pieces, use your fine grit sandpaper to roughen the surface so that the primer will stick. Then use rubbing alcohol or warm soap and water to clean the surface. Let everything air dry and try not to touch the surface with your hands because the oil thats on your skin causes the paint not to stick as well.
Step Three:
Now that you've completed all of your prep work, it's time to do some painting. Apply ONE light coat evenly on the surface. My coat was just enough to cover all the black on the piece.
Step Four:
I allowed the primer to dry for 5 hours before this step. Apply your first coat of factory paint and allow to dry until it is dry to touch. Repeat this step until color is as dark as desired. This is mine after my fourth coat.
Step Five:
Clear coating took a lot of patience and time for me. The clear coat drys fairly quick so it doesn't take long. Be sure to spray evenly all over the piece with nice coats. After each coat, hold under a light to check for dull spots.
Step Six:
Allow to sit and dry as long as you can handle before reinstalling your pieces. After you have installed them, be careful with things coming in contact with them like rain for about a week. Here are my finished photos.
#2
06-03-2010
Join Date: Mar 2010
Location: Fort Bragg, NC
Posts: 14
Likes: 0
Received 0 Likes
on
0 Posts
#3
06-03-2010


#6
06-04-2010
Join Date: Mar 2010
Location: Fort Bragg, NC
Posts: 14
Likes: 0
Received 0 Likes
on
0 Posts

Thread
Thread Starter
Forum
Replies
Last Post


