Another led mod??
#1
 06-18-2009


#4
06-18-2009
the cluster got put on hold for a little while because I was undecided on red or blue, but I am going to go with red to do something a little different than everybody else and to match the rest of the truck. Went ahead and ordered all the 360 components necessary to do the whole dash (plus a few extras) as well as the 3157's for the tail lights. Was going to order LED replacements for everything like the plate, rev., dome, ambers, but once I added them all to the cart i decided i would wait and do another order later on.. $$$
#5
06-18-2009
I'm thinking of redoing mine in ultra violet.
Remember....wetsanding is the best method of getting rid of the color off the overlays.
What LED's are you using for the cluster? link?
Can't bake the lense apart..it's not a soft glue like the headlamps. Gotta Cut. Jp7 has a thread with his third using a Lexus third lamp...cutting is required. I like my 5w 14msmt plug in in my third.
#6
06-18-2009


#8
06-18-2009
I know, Ive been busy and have too many projects on the go at once!! The led tail light should be quick tho,, I just had some technical questions about cutting down the length of the circuit i am waiting to hear back about before i can go on. I need to cut it down because it it too long and wont fit. So i have to cut 3 led's off either side and reduce the number of them from 20 to 16 and am not sure if this will effect how the circuit works of if i will need to add some resistors or modify it in any other way to account for removing 6 bulbs.
#9
06-18-2009
I can supposedly just cut off the ends and eliminate the led's but will put extra load on the remaining ones and cause them to burn out faster. So I am debating if i should add them as a second row in the top center of the remaining strip and make the connections on the board i chopped with wire or just add resistors to the end of the strip where the bulbs used to be equivalent to the resistance of the bulbs i remove which would be more work but may not work as well as keeping the existing components in the circuit. I am going to have to start it and wing it and see how much room I have to work with once it all gets cut apart and if i dont have room to add a second row that will solve my problem.

#11
06-18-2009
#12
06-18-2009
#13
06-18-2009

Member
Join Date: May 2008
Location: Roseville, CA
Posts: 257
Likes: 0
Received 0 Likes
on
0 Posts
I'm tempted to do a LED mod on the third brake light as well on my truck. However my truck has the cargo light version so I'm looking to just put the LEDs in the Red middle brake part of the light. I haven't found the perfect size board to fit it in though. I would like to have it as big as possible.
So it will be interesting to see how yours turns out
So it will be interesting to see how yours turns out
#15
06-18-2009
Join Date: Apr 2009
Location: Owensboro, KY
Posts: 838
Likes: 0
Received 0 Likes
on
0 Posts
#16
06-18-2009
#17
06-18-2009
I'm not yet either. This is going to be a learning experience!! I have an idea what I am doing because i work autobody and have a bit of an electrical background so I am just going to wing it and see how it goes!! hahah I havn't figured out what I am going to do with the ac/fan ***** yet. i will cross that bridge when i get to it, after my cluster is finished and swapped. I am hoping i can just rip out that green insert and the red light from the led will do the rest. If not i will have to come up with a plan B!
#18
06-19-2009
Join Date: Apr 2009
Location: Owensboro, KY
Posts: 838
Likes: 0
Received 0 Likes
on
0 Posts
#19
06-19-2009
they are blue in color. they are the exact ***** that came on the blue dash rangers, and the same exact ***** as whats in all 98+ rangers...but only difference is the little dot that makes the color on the **** indicator. I've got the blue ones on my truck currently.
I've tried to pop them out before...and failed.
I've tried to pop them out before...and failed.
#20
06-20-2009
^^ well there goes my idea for the ac *****... I will have to get some aftermarket ones if i cant get the stock ones to glow red..
will these work?
04-06 Ford F 150 F150 Mustang Billet AC ***** 05 2005 on eBay.ca (item 350213657557 end time 21-Jun-09 15:21:03 EDT)
will these work?
04-06 Ford F 150 F150 Mustang Billet AC ***** 05 2005 on eBay.ca (item 350213657557 end time 21-Jun-09 15:21:03 EDT)
#21
06-20-2009
Just got back from Canadian Tire, picked up a few things for the mod's while I was there to make things a little easier.
All I need now is for my LED's to show up in the mail and pick up my resistors and I can get started on the console.
I am going to put my other 3'rd brake light on that is not nightshaded and and put back on my truck so i can my my tinted one to avoid having to do it again and start cutting it apart at work on monday, where i can use my cutting wheel and die grinder to make quicker and cleaner work out of it. I have it all planned out. Just have to get it done and find some flat plastic to build a backing behind where i mount the led's to help clean up the look and seal it up a little better, as most of the the black plastic where the lights currently plug in the bulbs will be cut away.
#22
06-20-2009
#23
06-20-2009
I guess you push, not pull. LOL...i was trying to pull.
http://www.cardomain.com/ride/296394/24
http://www.cardomain.com/ride/296394/24
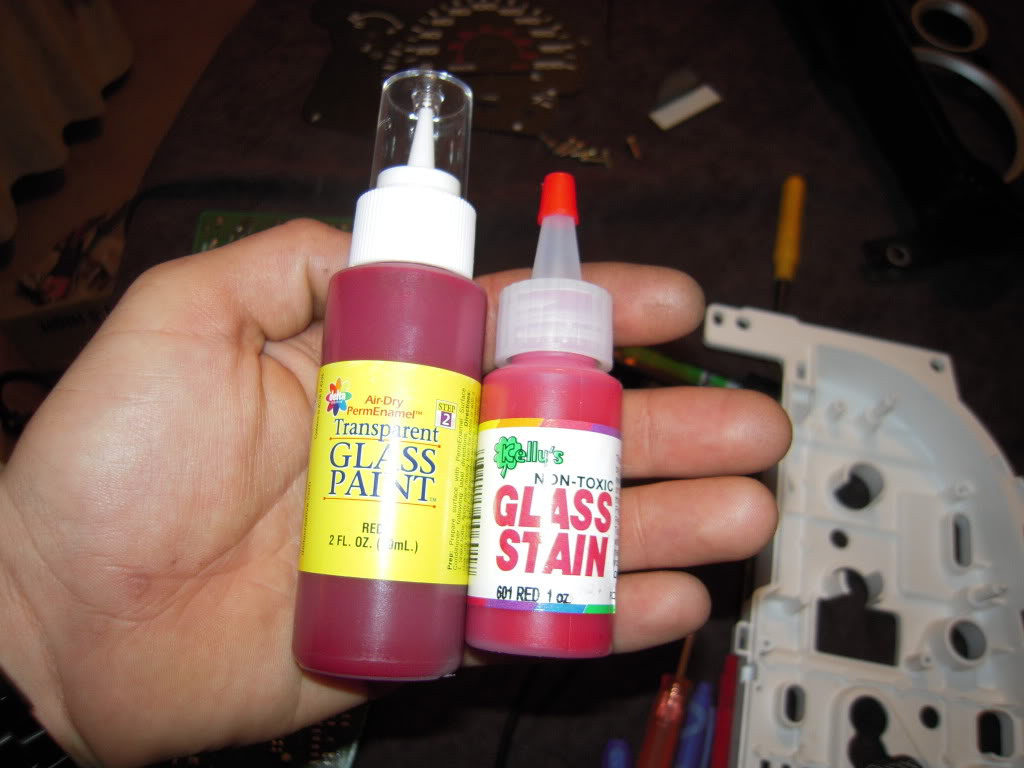
8. In my pictures, I had not yet done the ***** and Brent ($tone02) figured that out. Mine light blue now. Take out the *****, place them face up, and press out the small clear inserts inside them with a thin screwdriver, nail or whatever.
9. Use 1000 grit sandpaper to remove the layer of green and white paint on the top of the clear piece. Really fine sandpaper takes the thin layer off fairly quickly, but doesn't mar the plastic much or remove excess material.
10. Paint the top of the clear piece with your color choice for the **** pointer. When it's mostly dry you can paint white paint over that to retain a "stock" look by day, but show your color choice by night. Thin uniform coats are called for here because if you use too much, they'll be too dim. These you can always sand off and start again.
#24
06-20-2009
I found some more that supposedly fit rangers.
RANGER,F 350,F350,F 250,BILLET AC *****,A/C ***** on eBay.ca (item 350122741779 end time 06-Jul-09 17 04 EDT)
RANGER,F 350,F350,F 250,BILLET AC *****,A/C ***** on eBay.ca (item 350122741779 end time 06-Jul-09 17
04 EDT)


