CTF's single cab 1450 build
#1
 06-16-2010


Join Date: Jul 2009
Location: Albany, OR
Posts: 31
Likes: 0
Received 0 Likes
on
0 Posts
CTF's single cab 1450 build
I have been working on this thing for a couple months now and figured it was time to start a thread to document the progress. This is a truck I am building for myself to have fun in and possibly race at some point. I picked the truck up for $400 and went to work. The current plans are 6-8" over equal length beams up front with 2.5"x12" Radflo coil-overs, fully caged front bumper to rear bumper with 1.75" DOM, 33" Toyo MT's, prolly stay leafed in the rear till winter time then it will get 3 linked. The truck currently has a 2.3l but I plan to swap in a 4.0 ohv with a c4 trans equipped with a full manual valve body and art carr shifter.
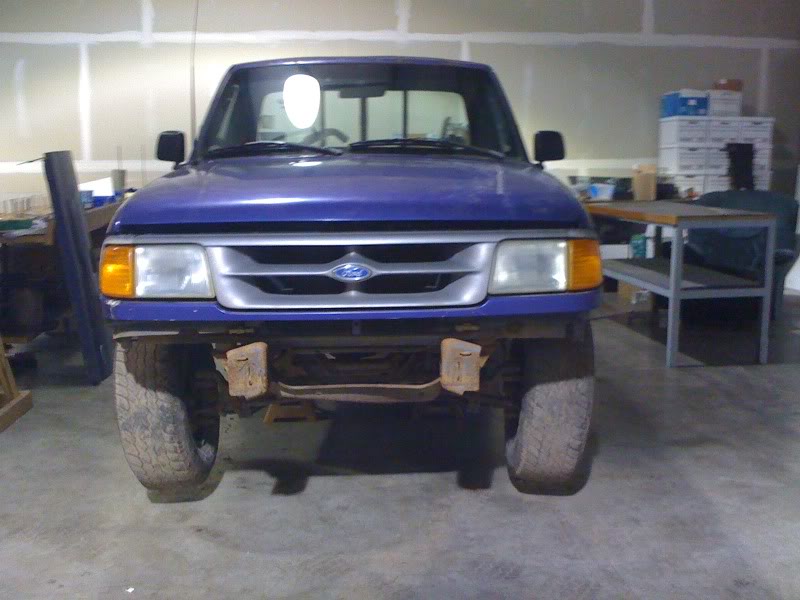
here is the truck when I picked it up
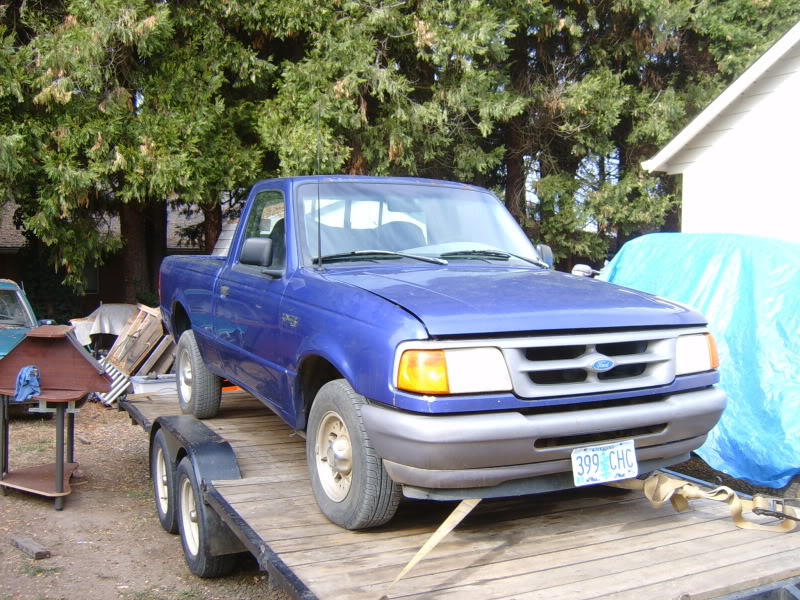
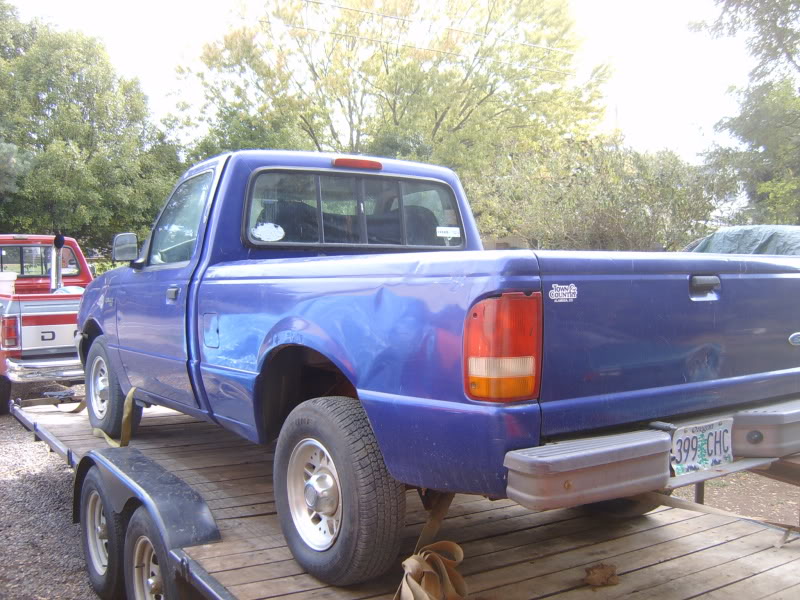
here is the truck when I picked it up
#2
06-16-2010
Join Date: Jul 2009
Location: Albany, OR
Posts: 31
Likes: 0
Received 0 Likes
on
0 Posts
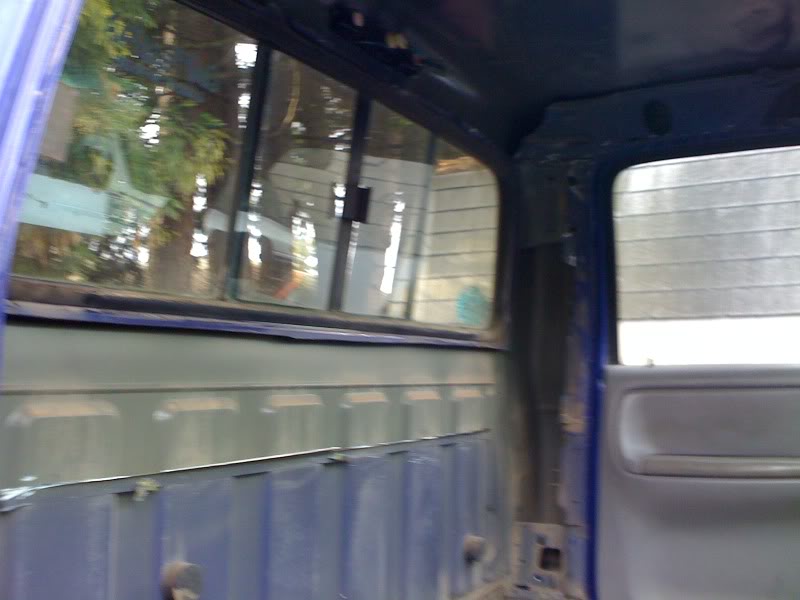
first thing I did was start tearing it down and getting the interior stripped for the cage.
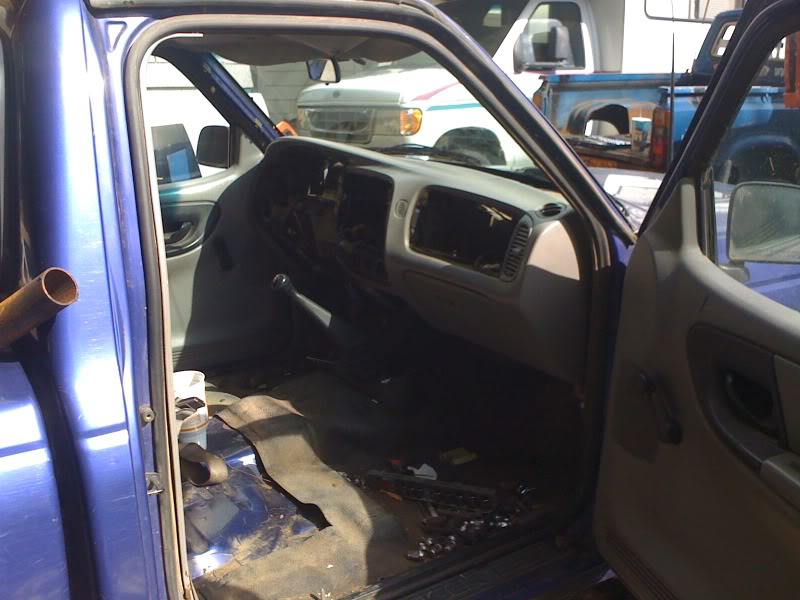


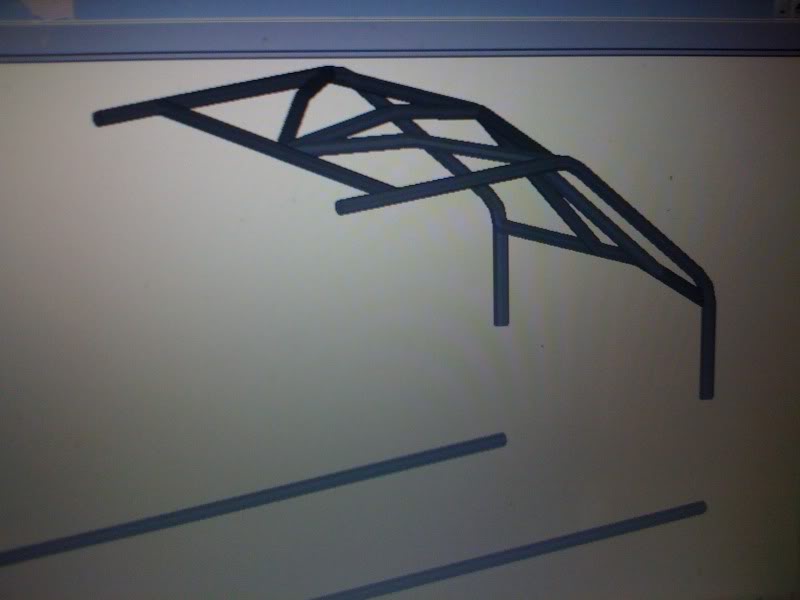
then I started figuring out how I wanted the cage using bend-tech
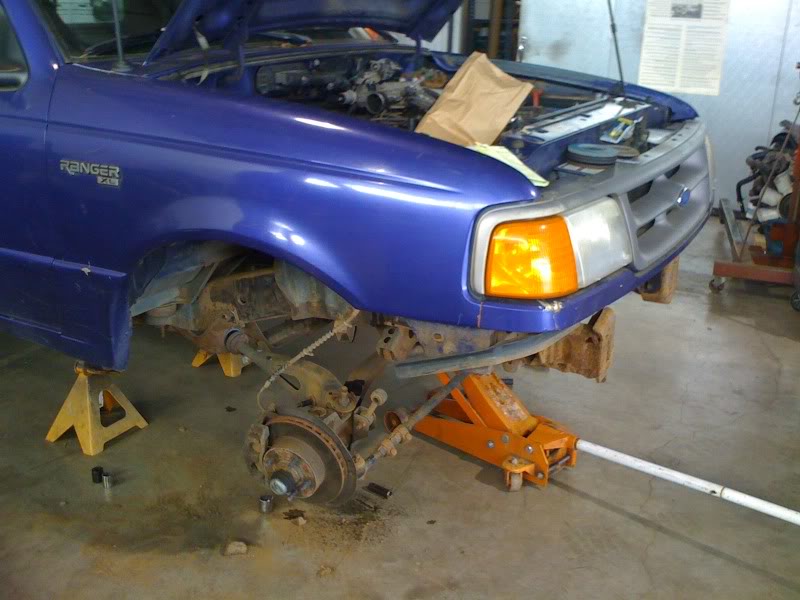
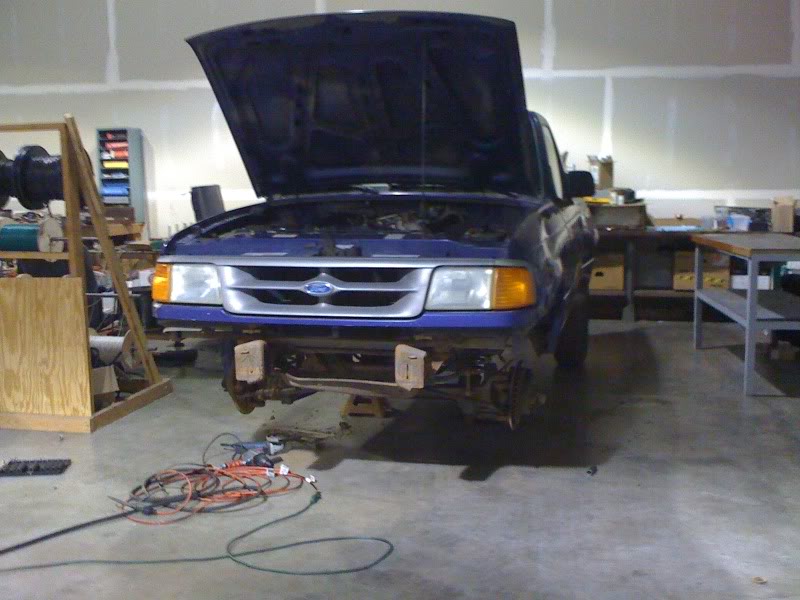
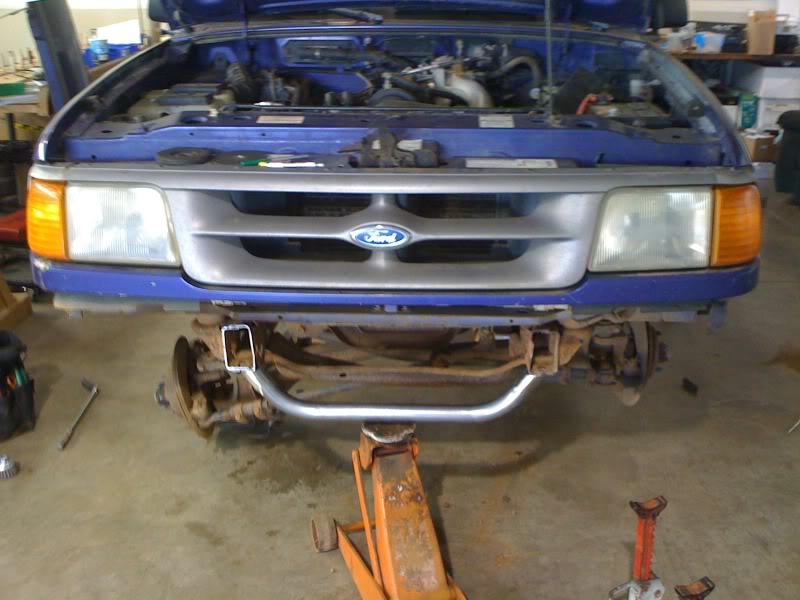
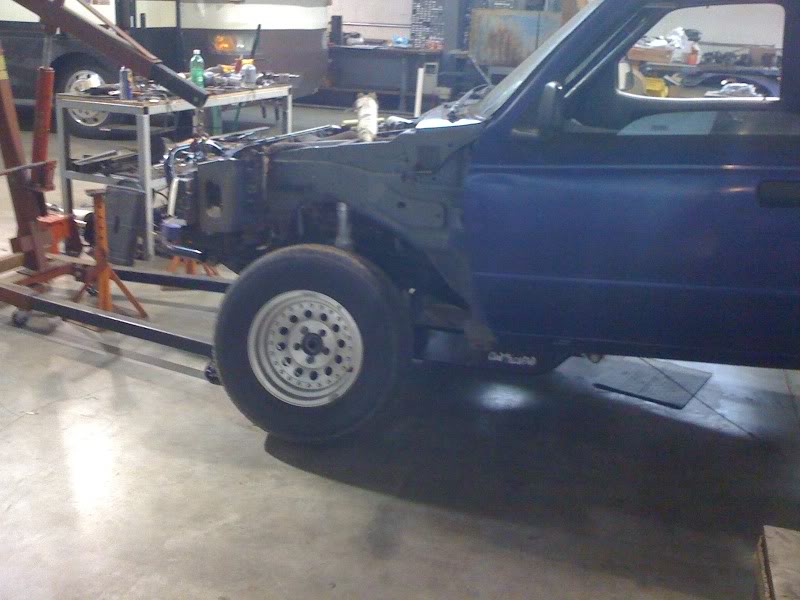
got her pulled in the shop and started tearing everything else down
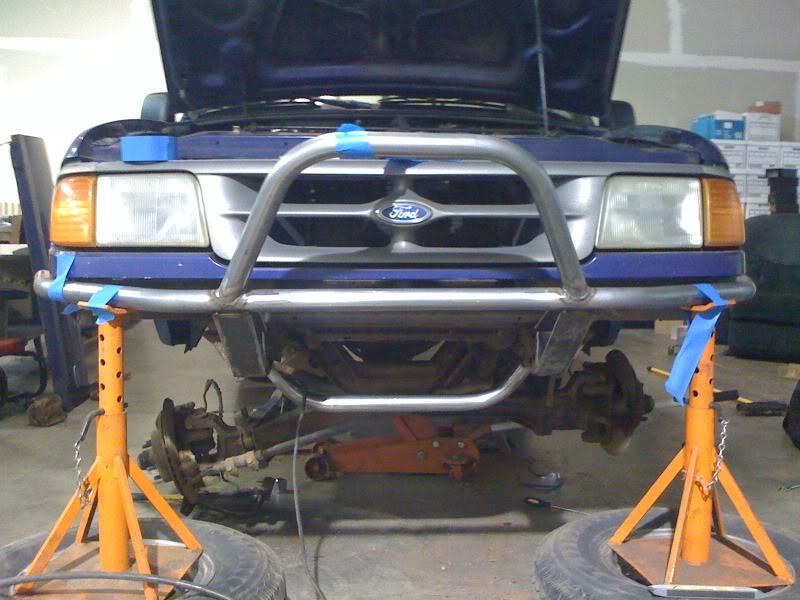
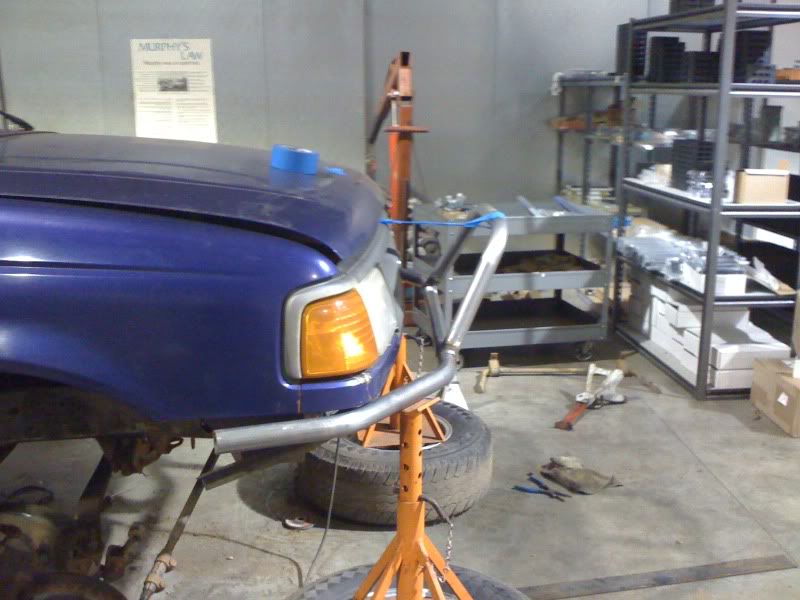
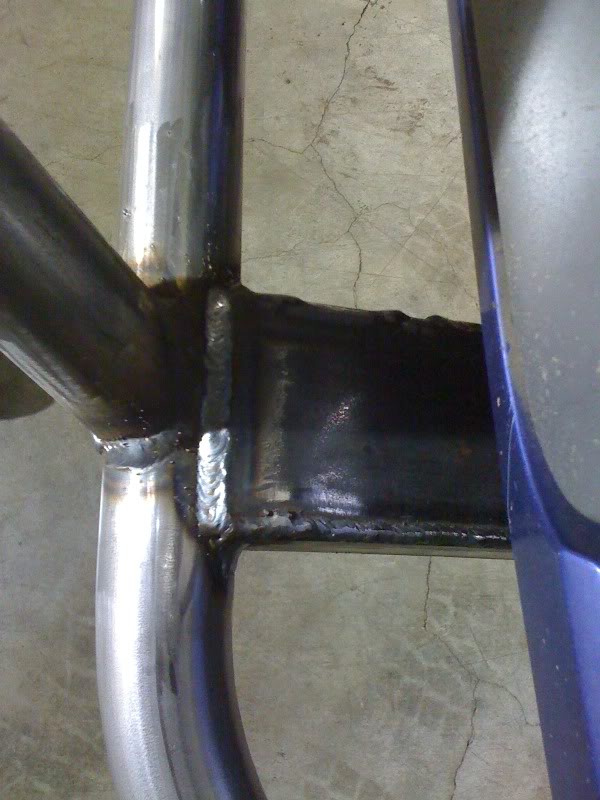
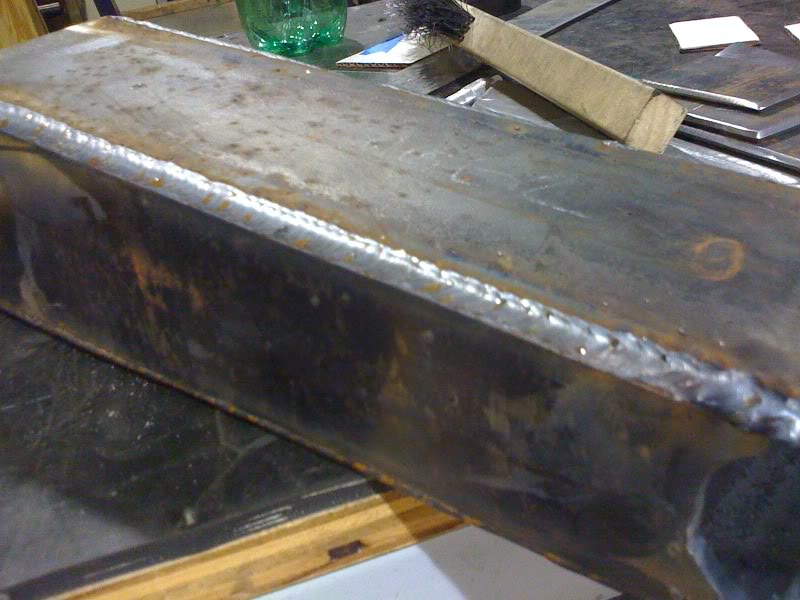
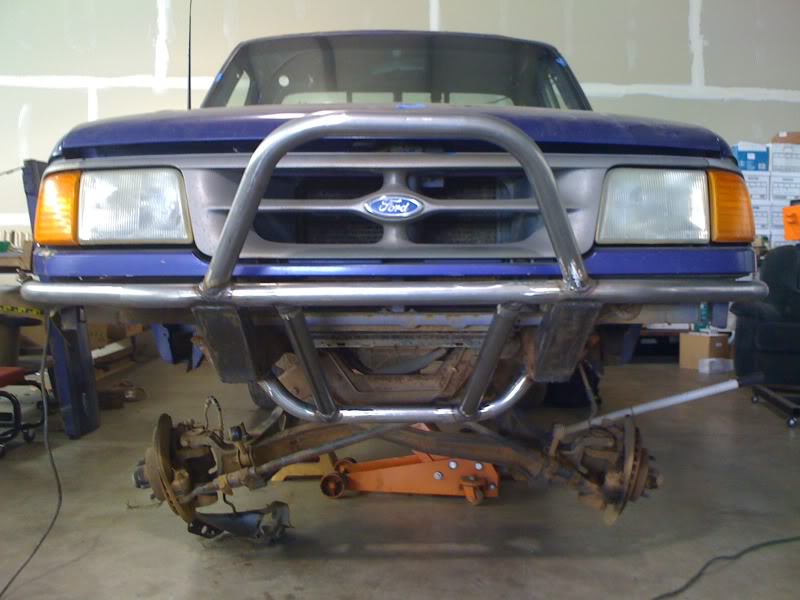
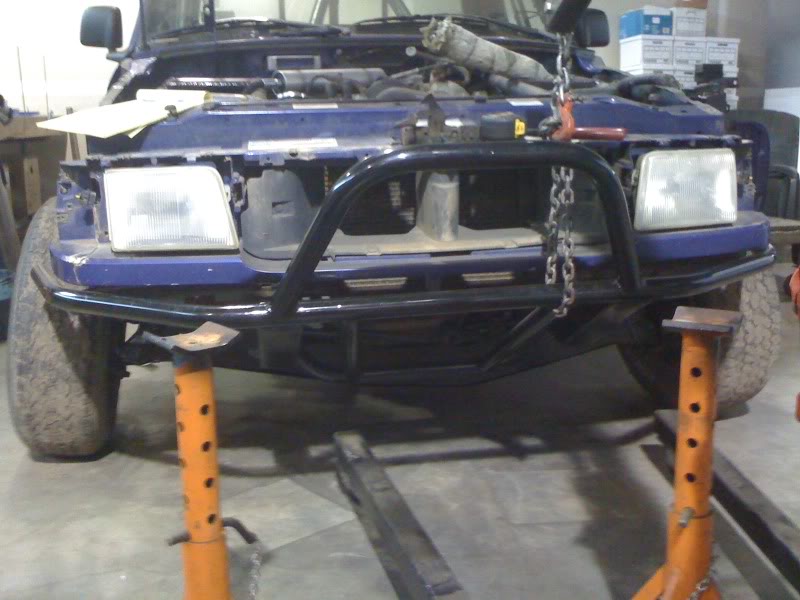
then I got started on the front bumper as I already had it designed and tubing here waiting to build it.
then I started figuring out how I wanted the cage using bend-tech
got her pulled in the shop and started tearing everything else down
then I got started on the front bumper as I already had it designed and tubing here waiting to build it.
#3
06-16-2010
Join Date: Jul 2009
Location: Albany, OR
Posts: 31
Likes: 0
Received 0 Likes
on
0 Posts
#4
06-16-2010
Join Date: Aug 2008
Location: pinckney,MI
Posts: 391
Likes: 0
Received 0 Likes
on
0 Posts
#6
06-16-2010
Join Date: Jul 2009
Location: Albany, OR
Posts: 31
Likes: 0
Received 0 Likes
on
0 Posts
Looks good when you build the cage could you please take a lot of pics as im going to cage my truck this summer hopefully and i like the bendtech design you have so far also pics of how it ties into the frame would be nice. Are you going to put the factory dash back in or fab your own?
#7
06-16-2010
Join Date: Jul 2009
Location: Albany, OR
Posts: 31
Likes: 0
Received 0 Likes
on
0 Posts
Moar pics!
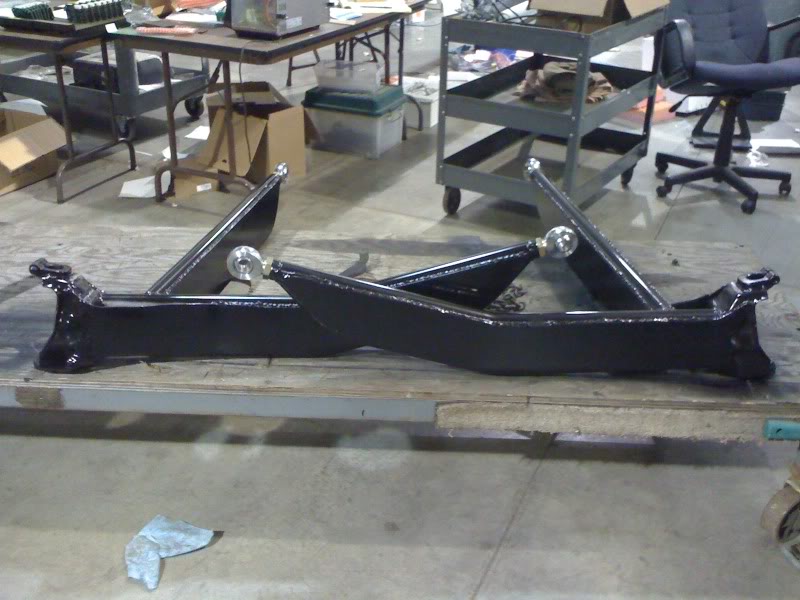
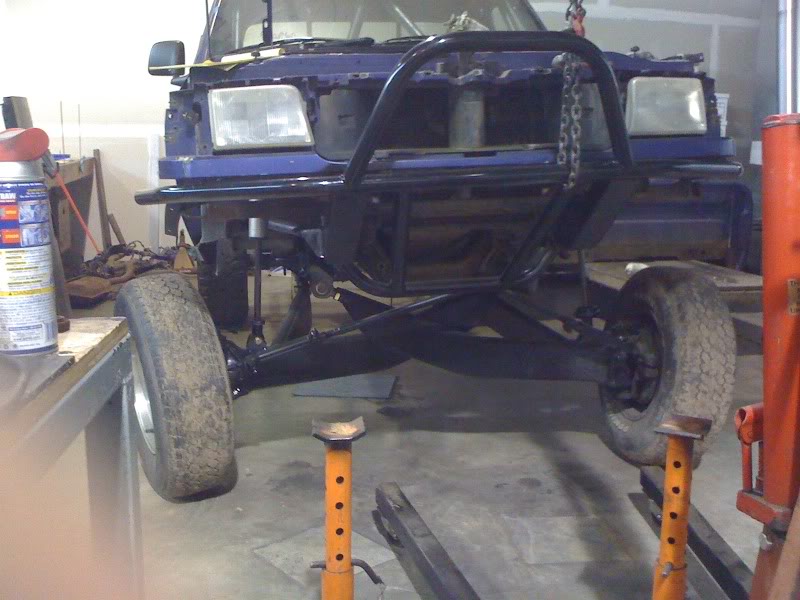
Suspension time!
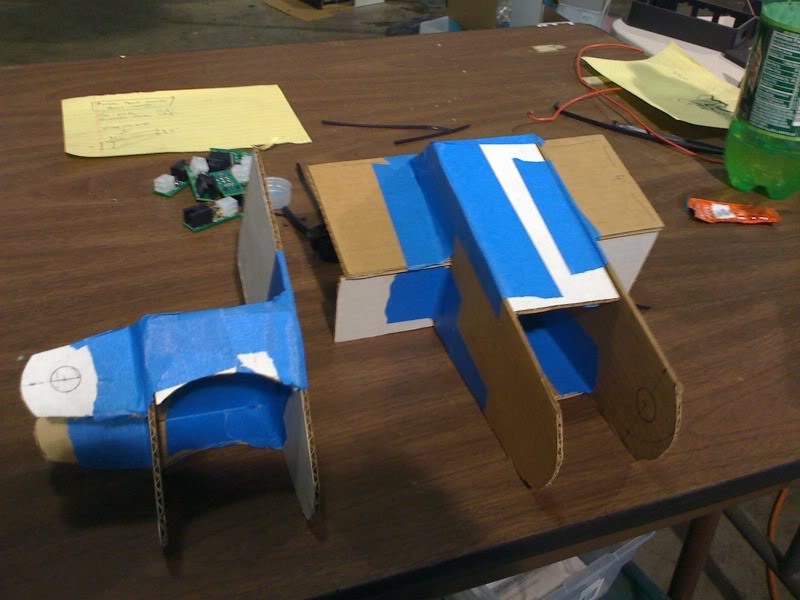
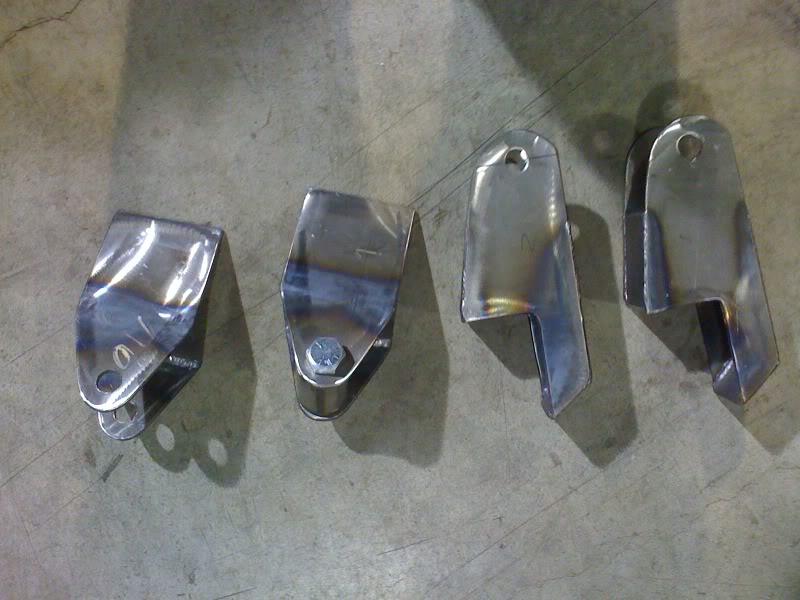
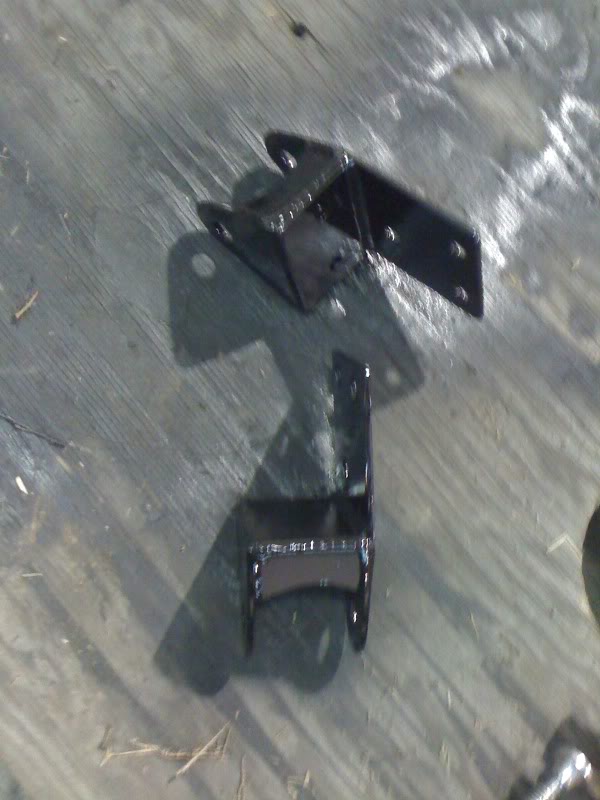
I built all my brackets out of cardboard first
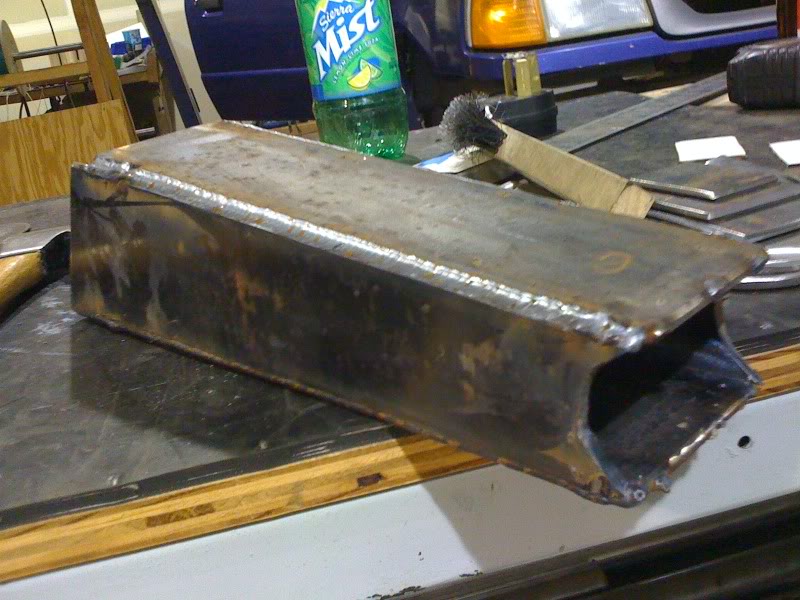
Then cut them from 3/16" cold rolled steel
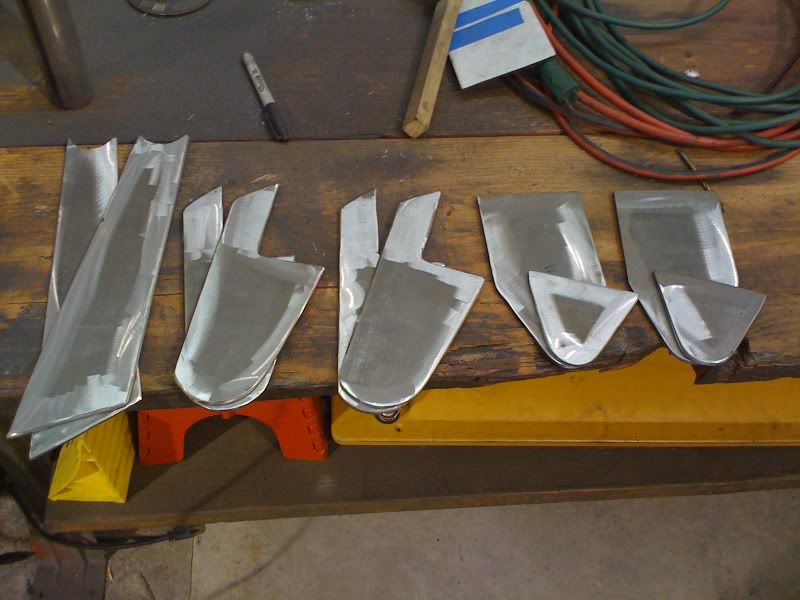
punched some holes in them and welded them up
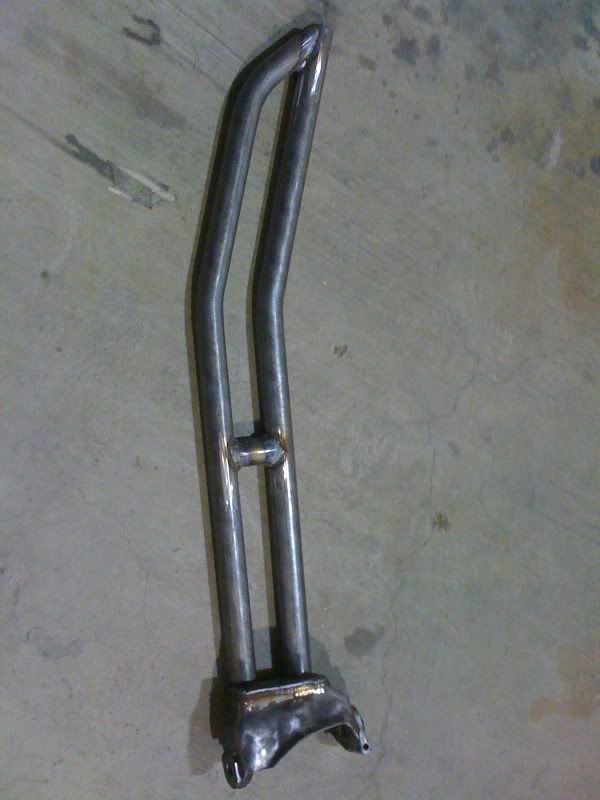
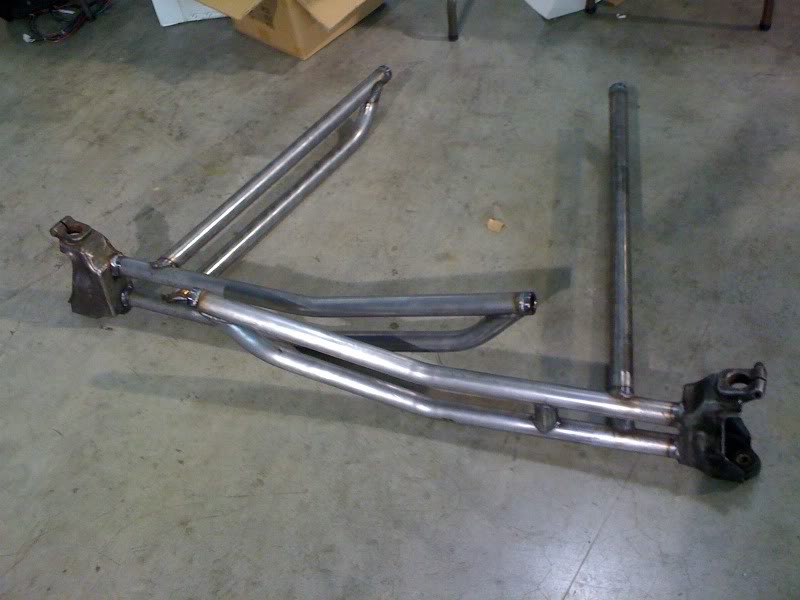
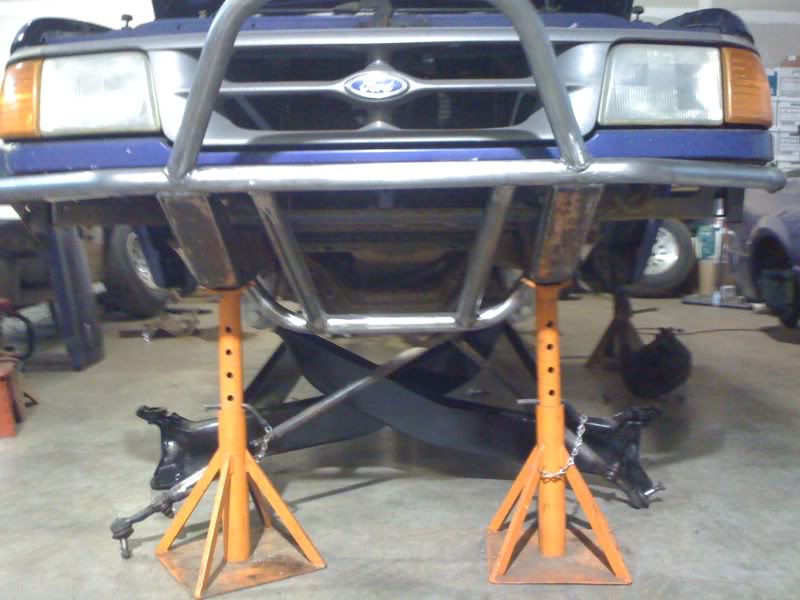
capped off my D35 beam ends and bent some tubes up for the beams (1 3/4" USA DOM)
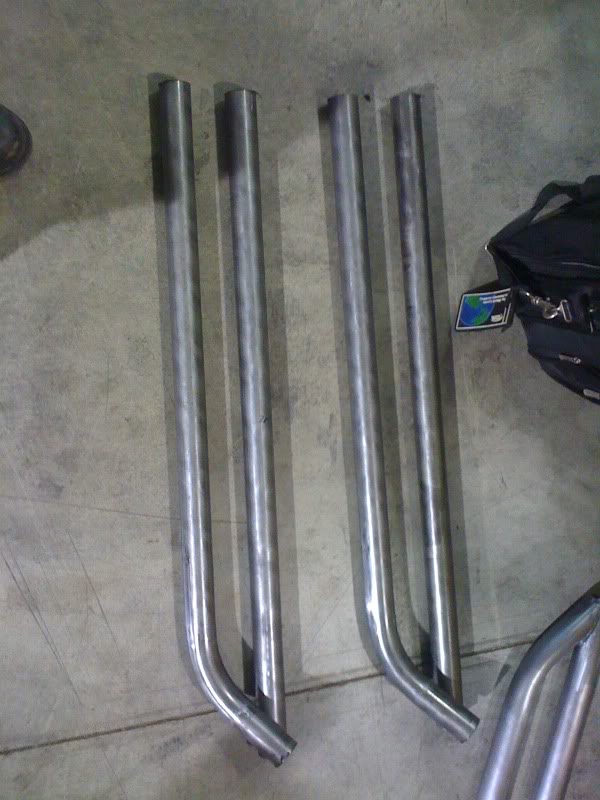
and whipped up some radius arms as well
the beams about ready for some plating
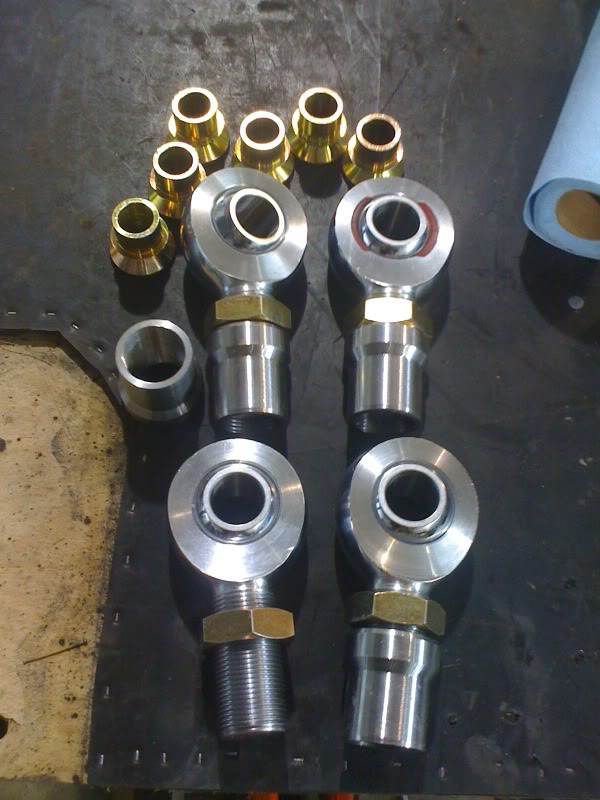
heims, tube adapters and mis-alignments showed up from ruff stuff
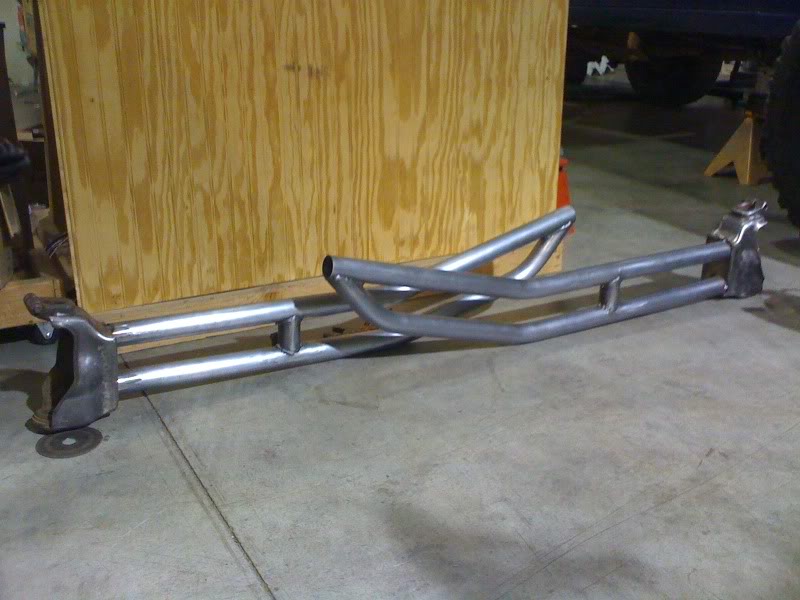
mocked everything up and got the radius arms tacked to the beams and caster set (j-beam setup)
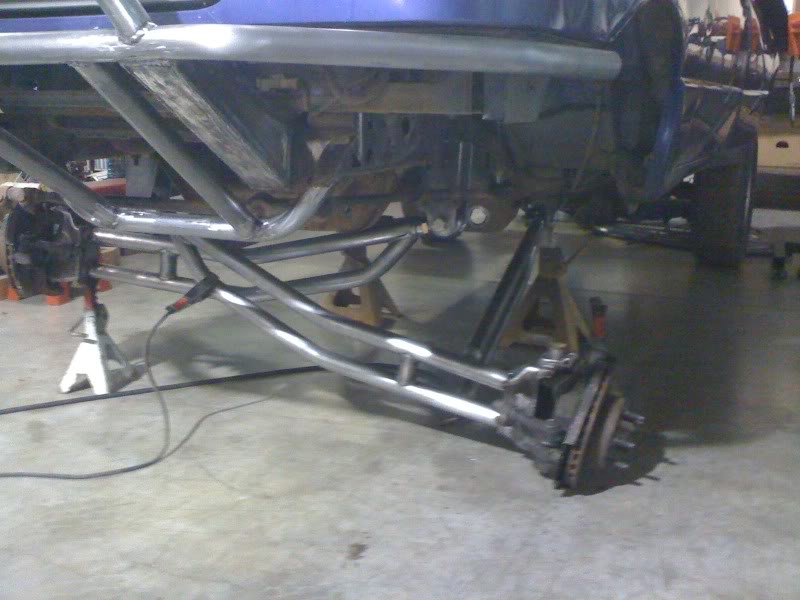
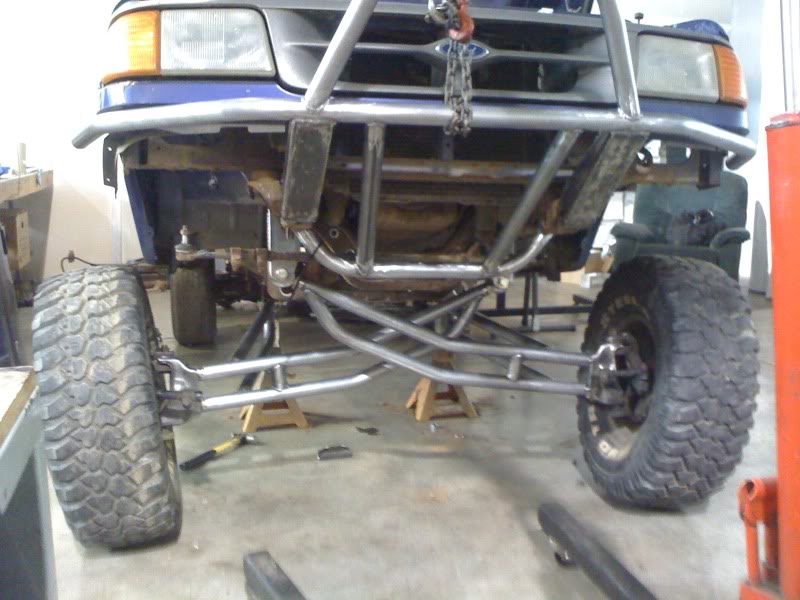
cycled it to check clearances

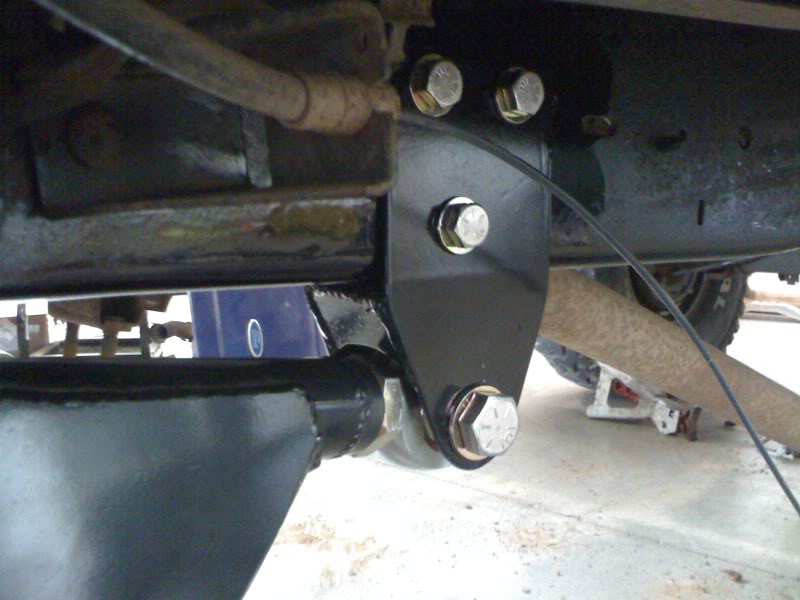
pulled everything back off to plate beams and get brackets welded to frame
Suspension time!
I built all my brackets out of cardboard first
Then cut them from 3/16" cold rolled steel
punched some holes in them and welded them up
capped off my D35 beam ends and bent some tubes up for the beams (1 3/4" USA DOM)
and whipped up some radius arms as well
the beams about ready for some plating
heims, tube adapters and mis-alignments showed up from ruff stuff
mocked everything up and got the radius arms tacked to the beams and caster set (j-beam setup)
cycled it to check clearances
pulled everything back off to plate beams and get brackets welded to frame


#9
06-16-2010
Join Date: Jul 2009
Location: Albany, OR
Posts: 31
Likes: 0
Received 0 Likes
on
0 Posts
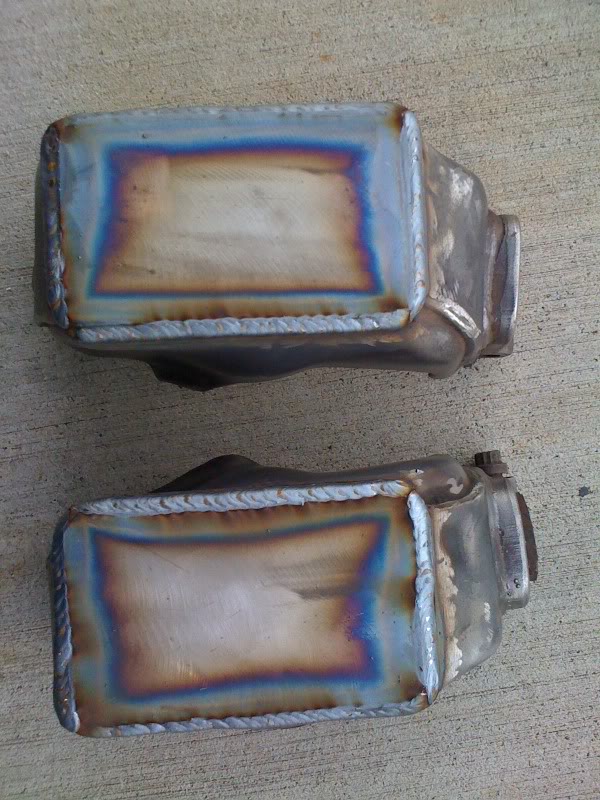
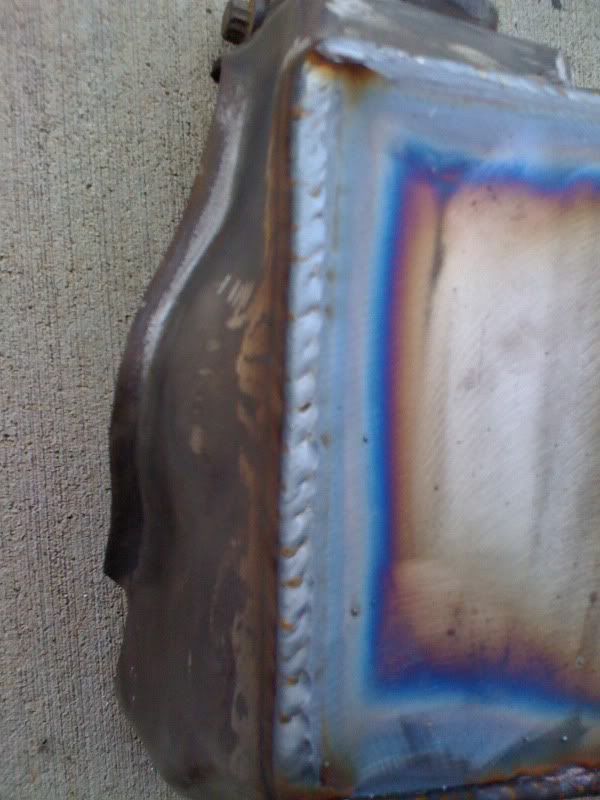
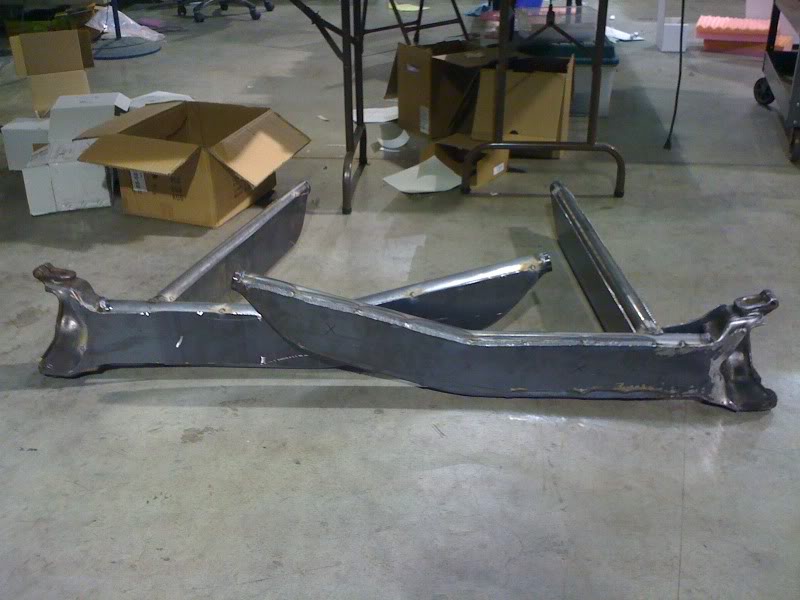
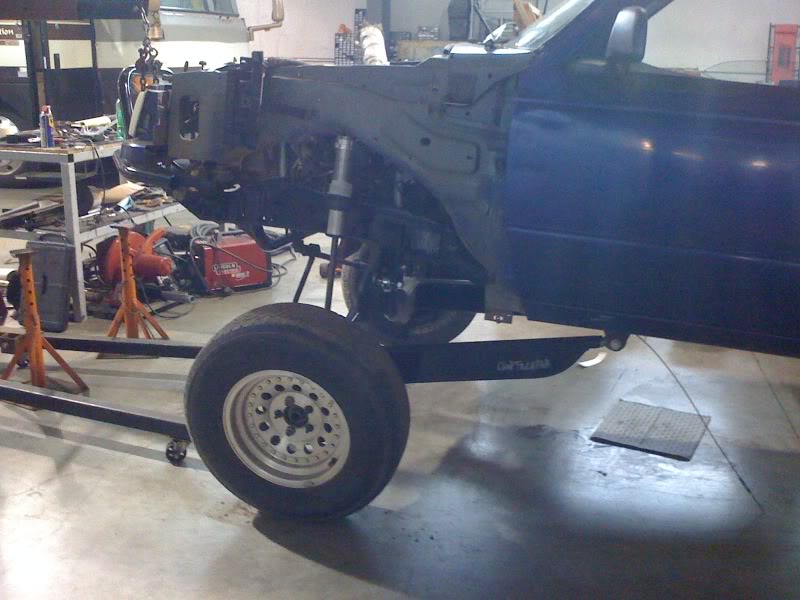
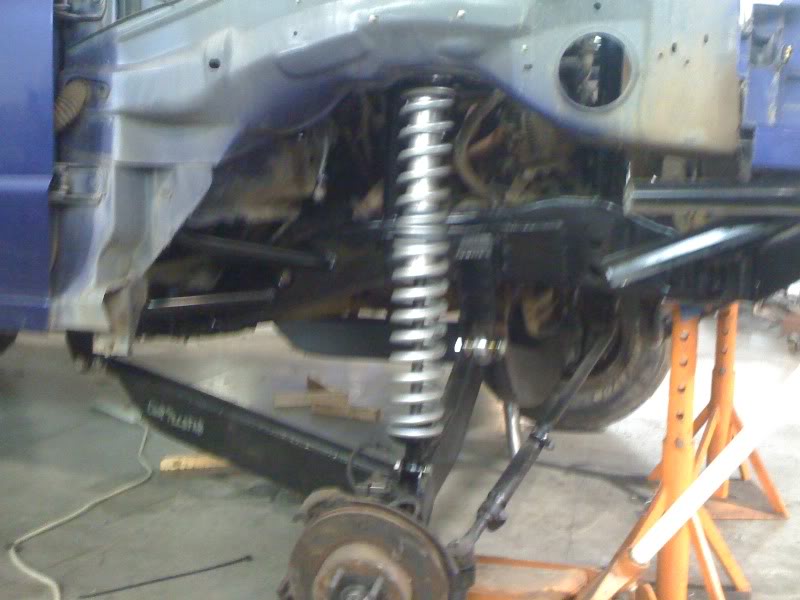
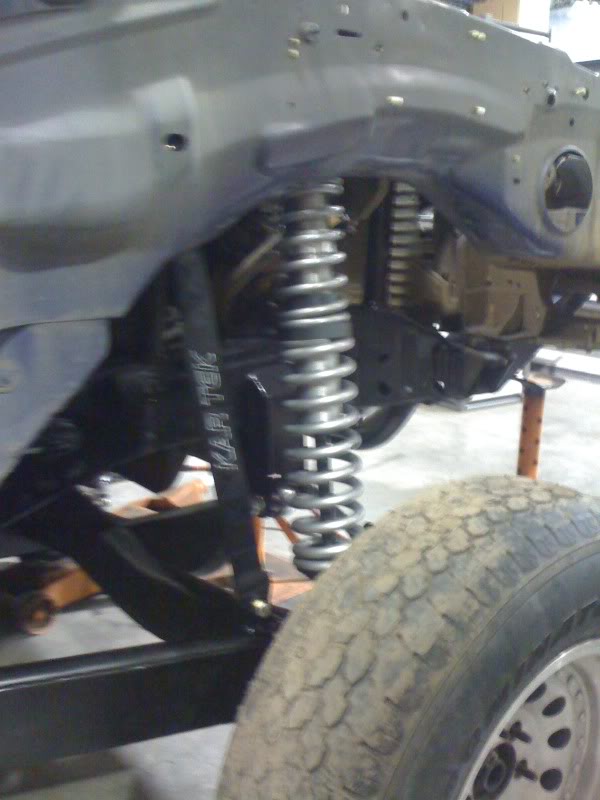
got the beams all plated and painted
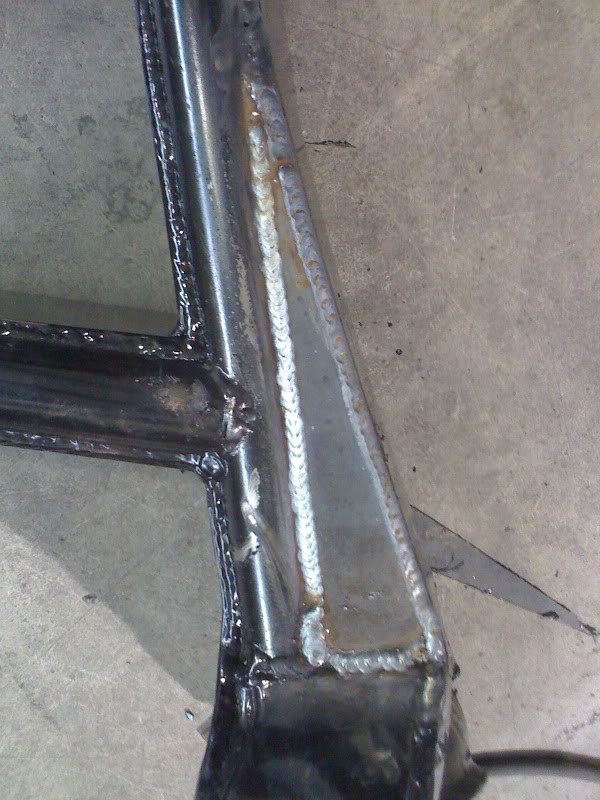
plated the frame with 3/16" cold rolled plate and welded the beam pivots on
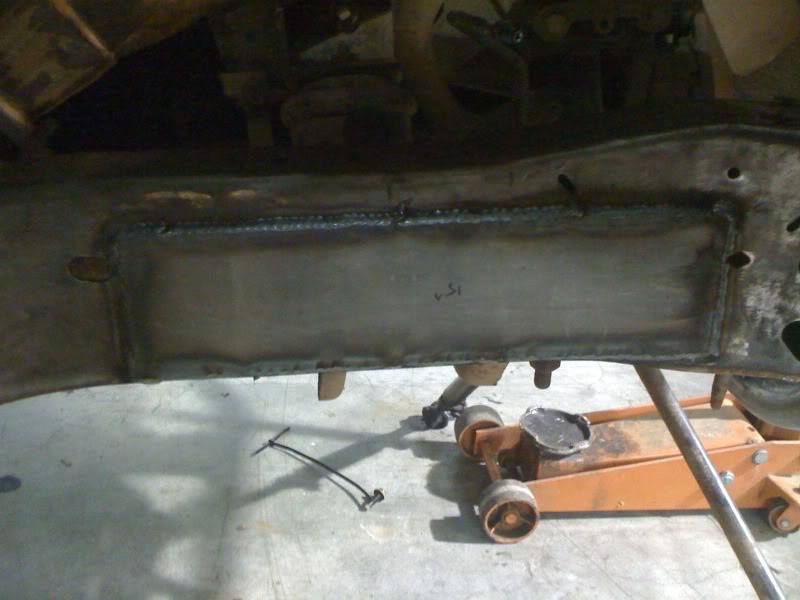
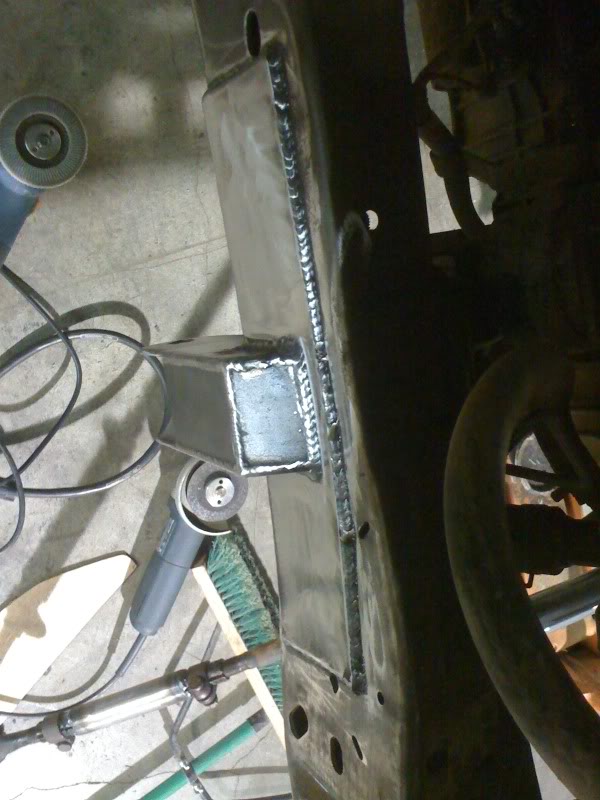
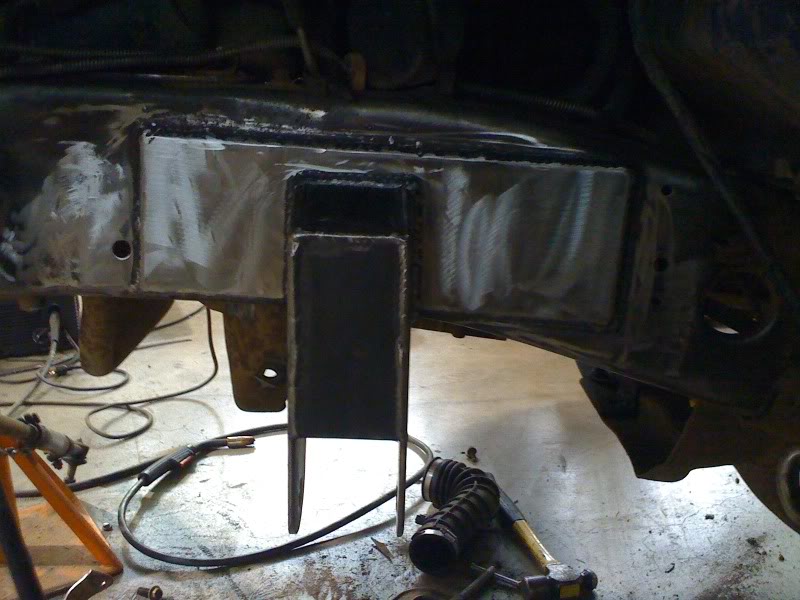
got everything bolted back up
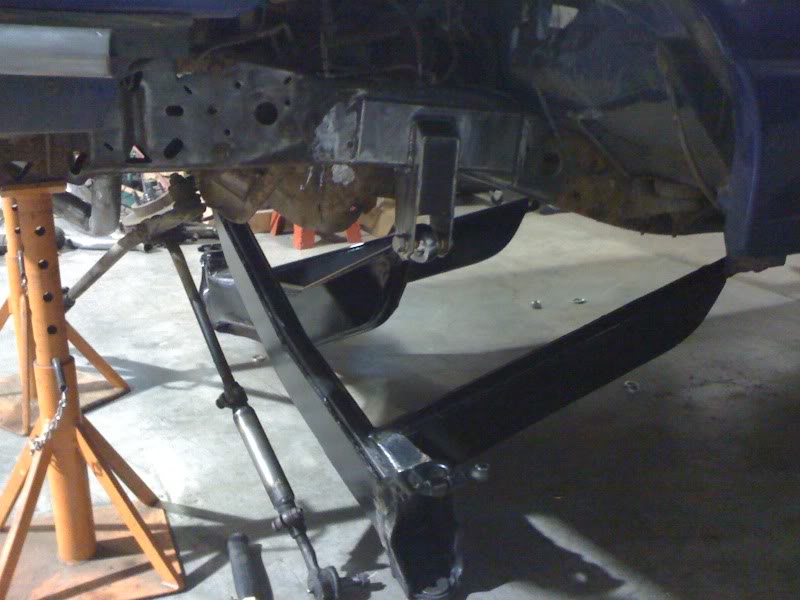
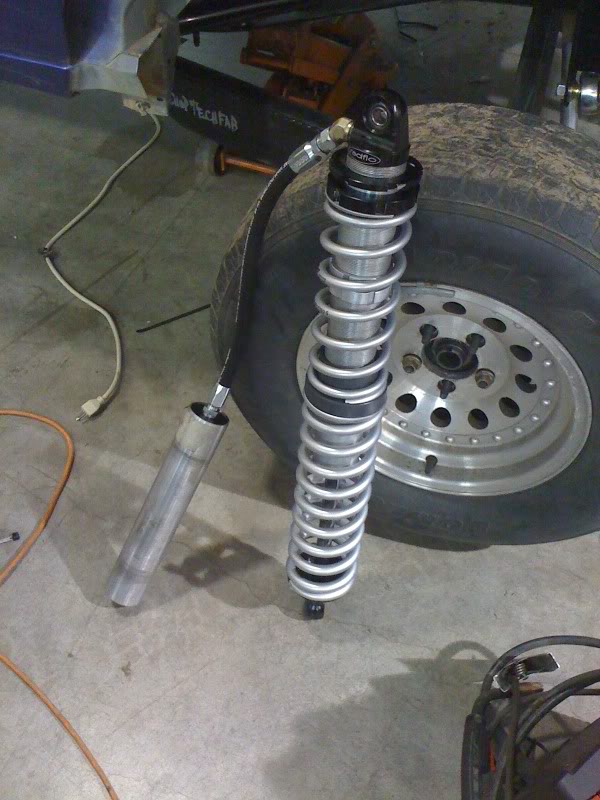
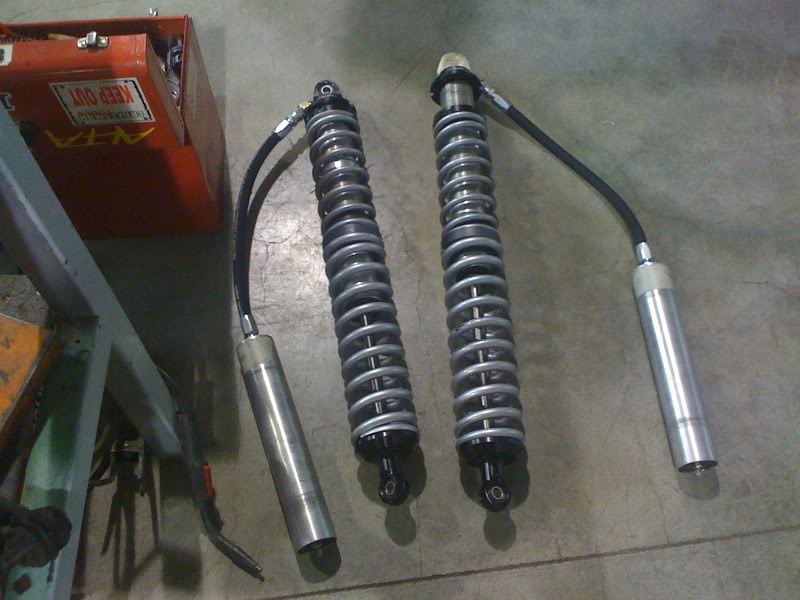
picked up a set of Radflo 2.5"x12" coil-overs
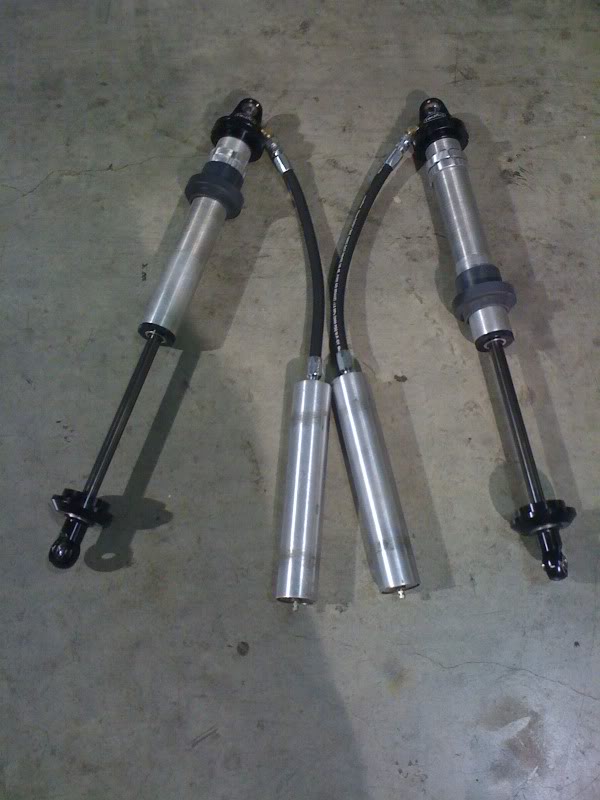
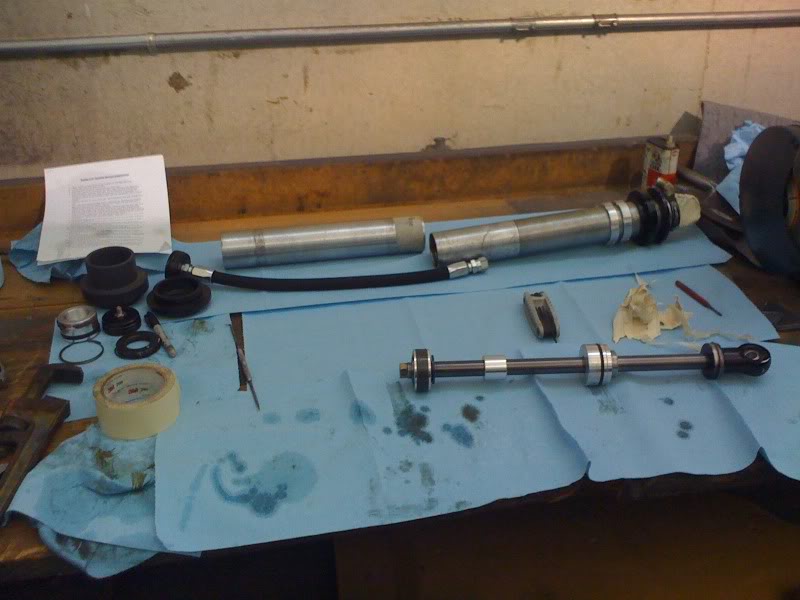
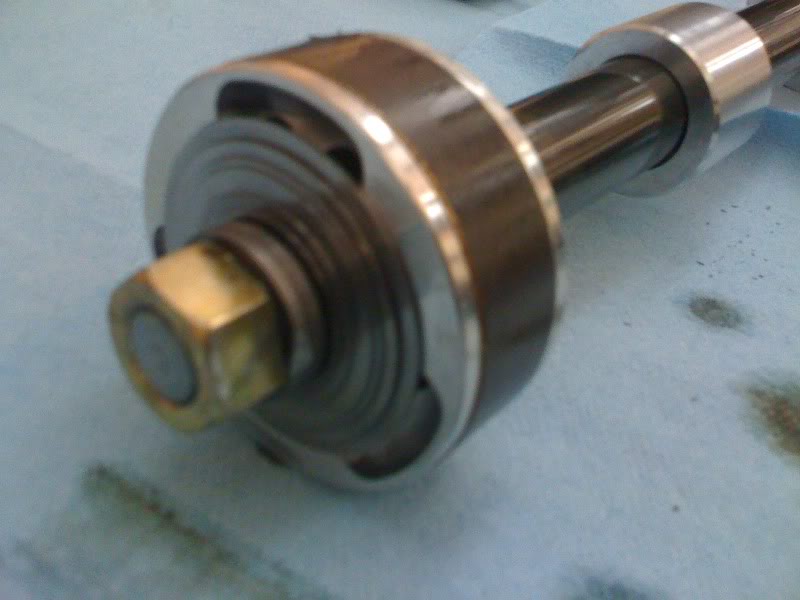
tore the shocks down to fix a leaky seal and replace oil
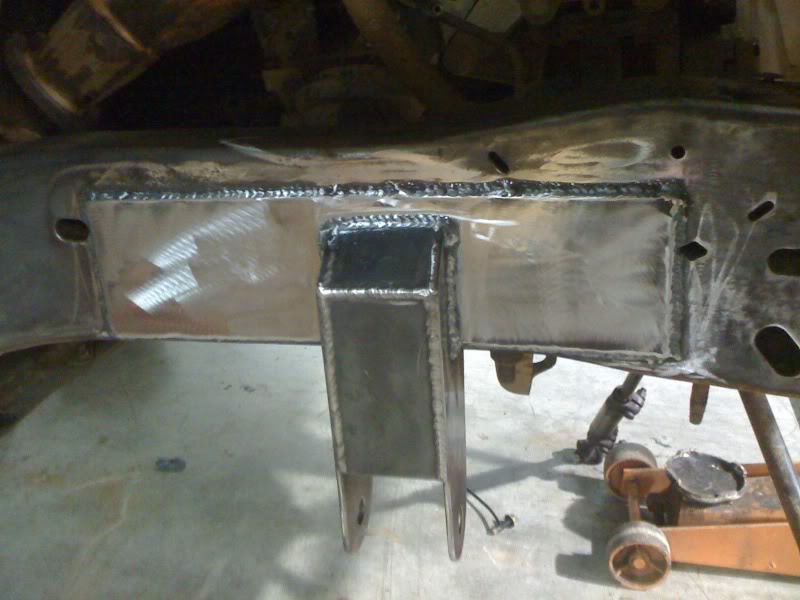
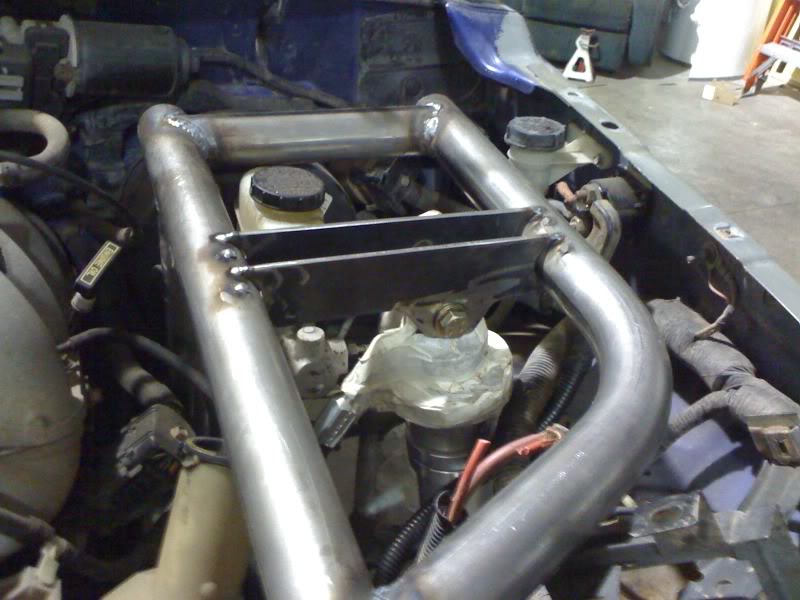
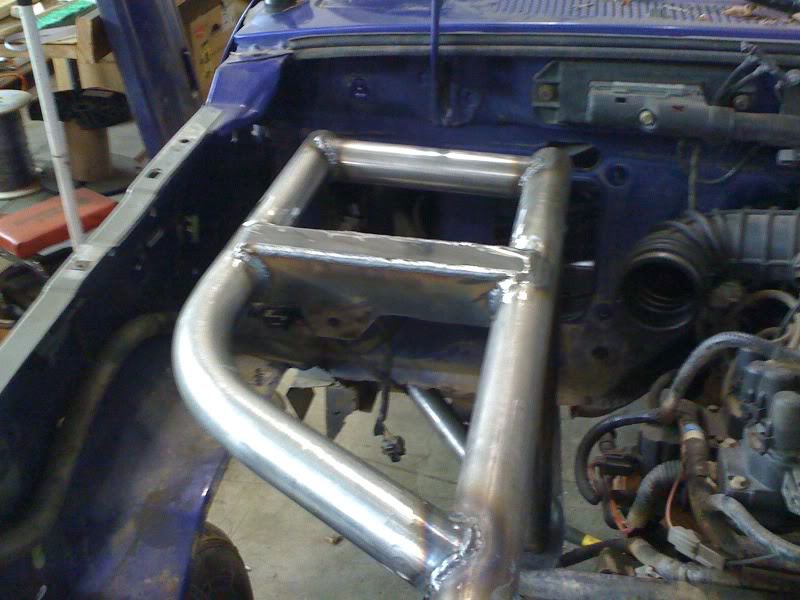
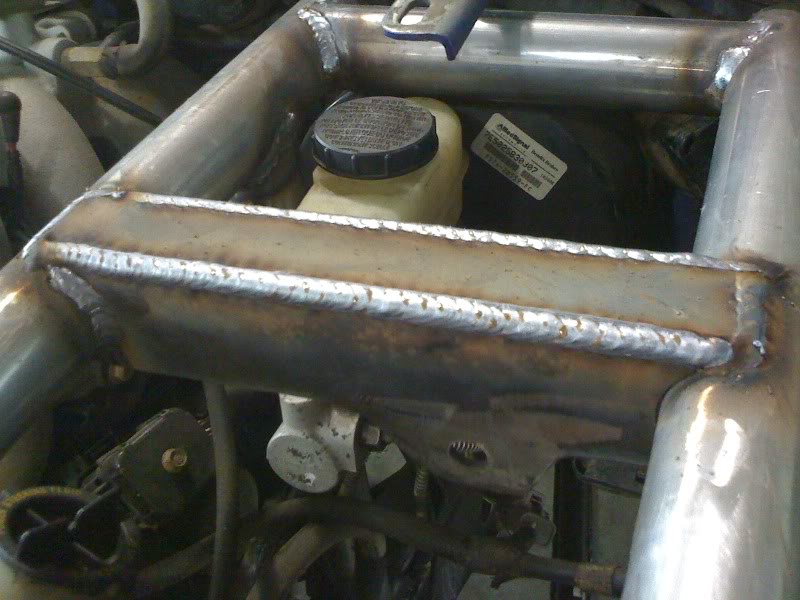
then I got started on the engine cage/shock mounts
got the shocks bolted up and cycled the suspension. (17.5" travel bumped and strapped)
plated the frame with 3/16" cold rolled plate and welded the beam pivots on
got everything bolted back up
picked up a set of Radflo 2.5"x12" coil-overs
tore the shocks down to fix a leaky seal and replace oil
then I got started on the engine cage/shock mounts
got the shocks bolted up and cycled the suspension. (17.5" travel bumped and strapped)
#10
06-16-2010
Join Date: Jul 2009
Location: Albany, OR
Posts: 31
Likes: 0
Received 0 Likes
on
0 Posts

#13
06-16-2010
Join Date: Jul 2009
Location: Albany, OR
Posts: 31
Likes: 0
Received 0 Likes
on
0 Posts

#15
06-16-2010
Join Date: Jan 2008
Location: La Habra CA
Posts: 1,100
Likes: 0
Received 0 Likes
on
0 Posts
#16
06-16-2010
Join Date: Jul 2009
Location: Albany, OR
Posts: 31
Likes: 0
Received 0 Likes
on
0 Posts
for one I got a good deal on the 12's and Radflo shocks have a slightly larger body than king, SAW etc. so if I would have went with a 14 I would have been much more limited on bump travel. as of now I am about 50% bump/droop travel which is where I wanted to be. it is strapped at 17.5" travel which should be plenty. and yes the truck will be running crossover steering soon.
#18
06-16-2010
Join Date: Jul 2009
Location: Albany, OR
Posts: 31
Likes: 0
Received 0 Likes
on
0 Posts

#19
06-16-2010
#20
06-16-2010
Join Date: Jul 2009
Location: Albany, OR
Posts: 31
Likes: 0
Received 0 Likes
on
0 Posts

#22
06-16-2010
Join Date: Jul 2009
Location: Albany, OR
Posts: 31
Likes: 0
Received 0 Likes
on
0 Posts
#23
06-16-2010
Join Date: Nov 2008
Location: san jose, Costa Rica
Posts: 1,319
Likes: 0
Received 0 Likes
on
0 Posts
#25
06-17-2010


