93 Street Splash, my summer build
#1
 10-06-2008


Join Date: Oct 2008
Location: Cottage Grove, OR
Posts: 77
Likes: 0
Received 0 Likes
on
0 Posts
93 Street Splash, my summer build
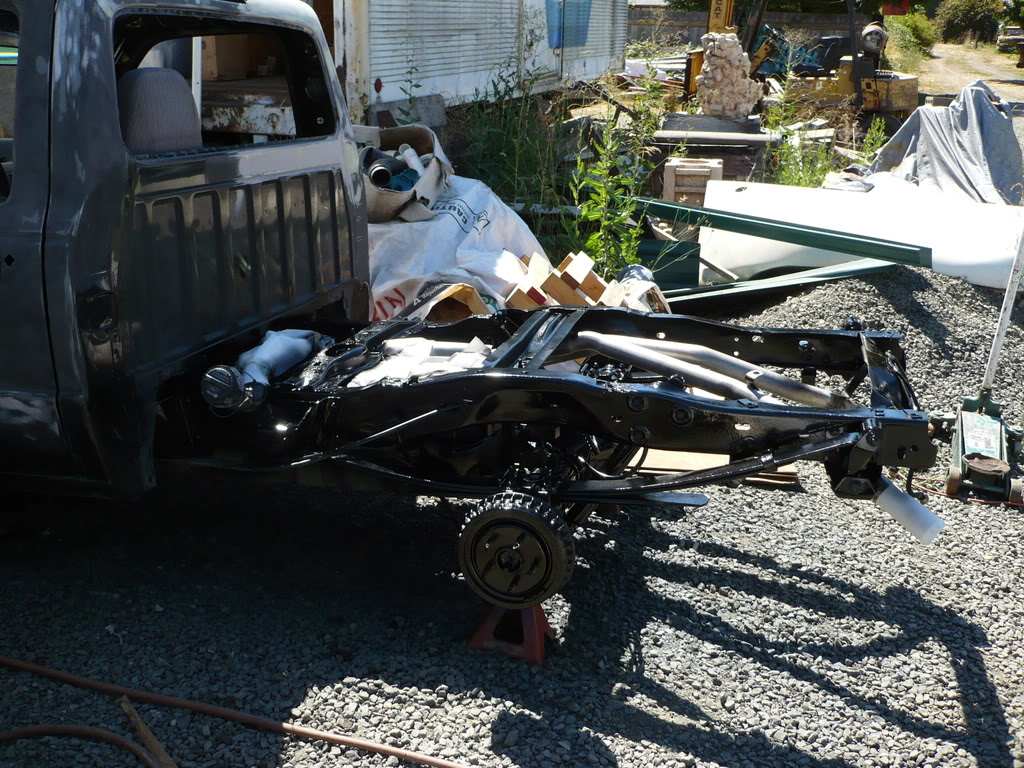
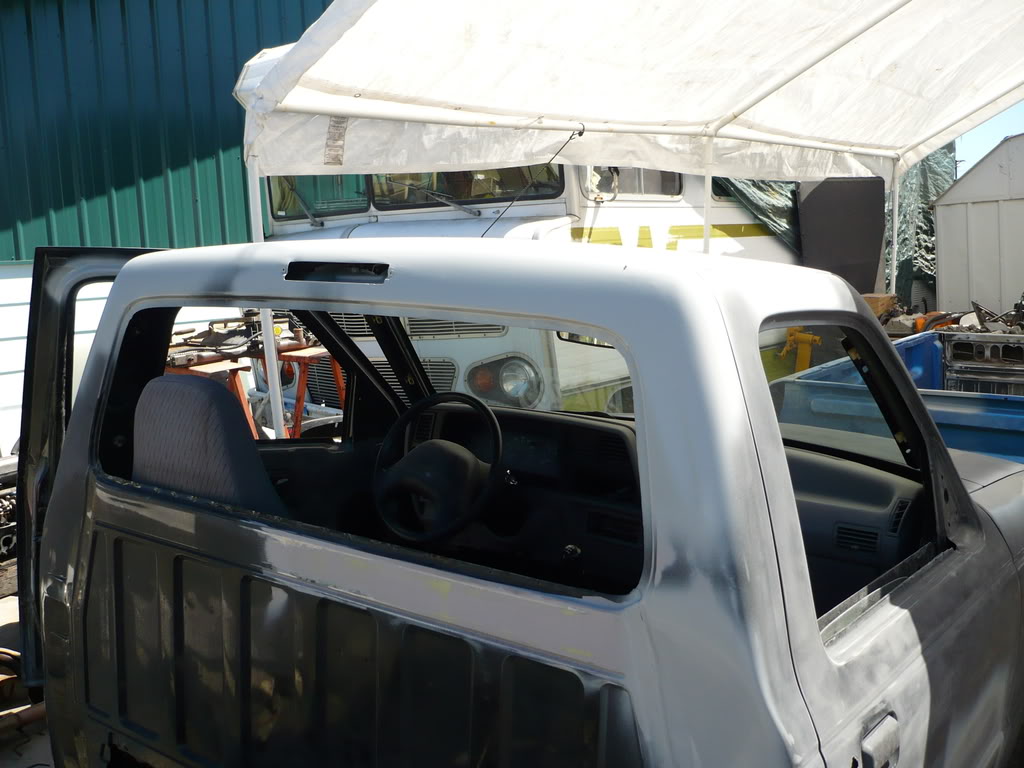
This is how my latest project rolled in on the trailer. It's a 93 splash 2wd with a 3.0 and 5 speed.
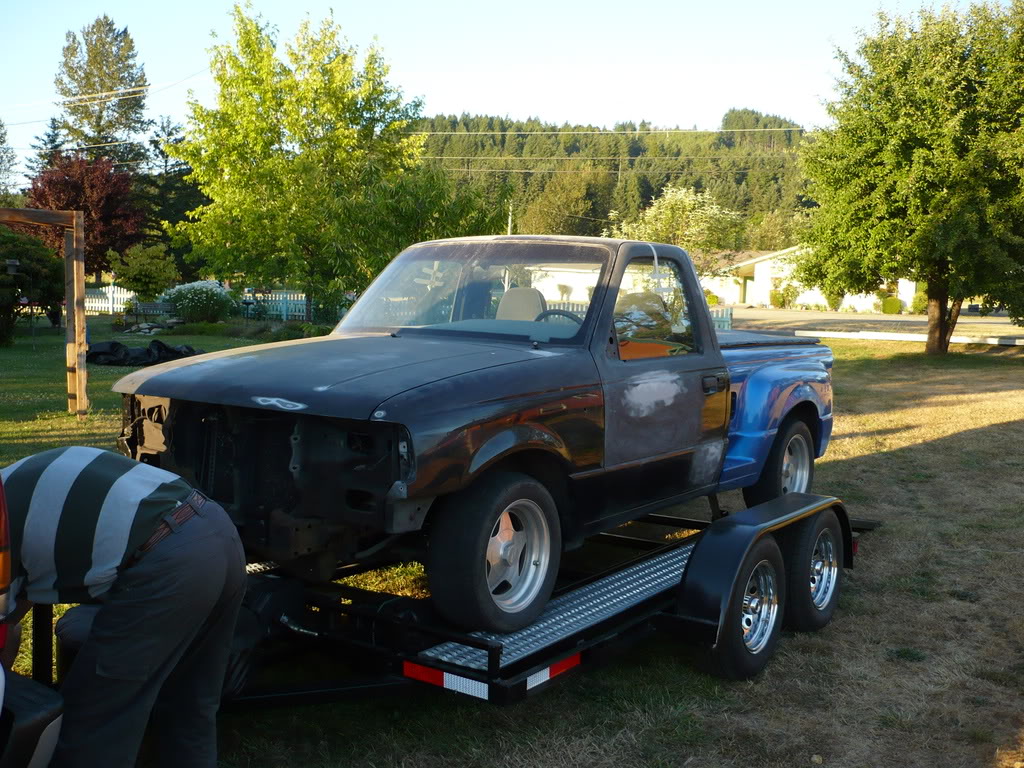
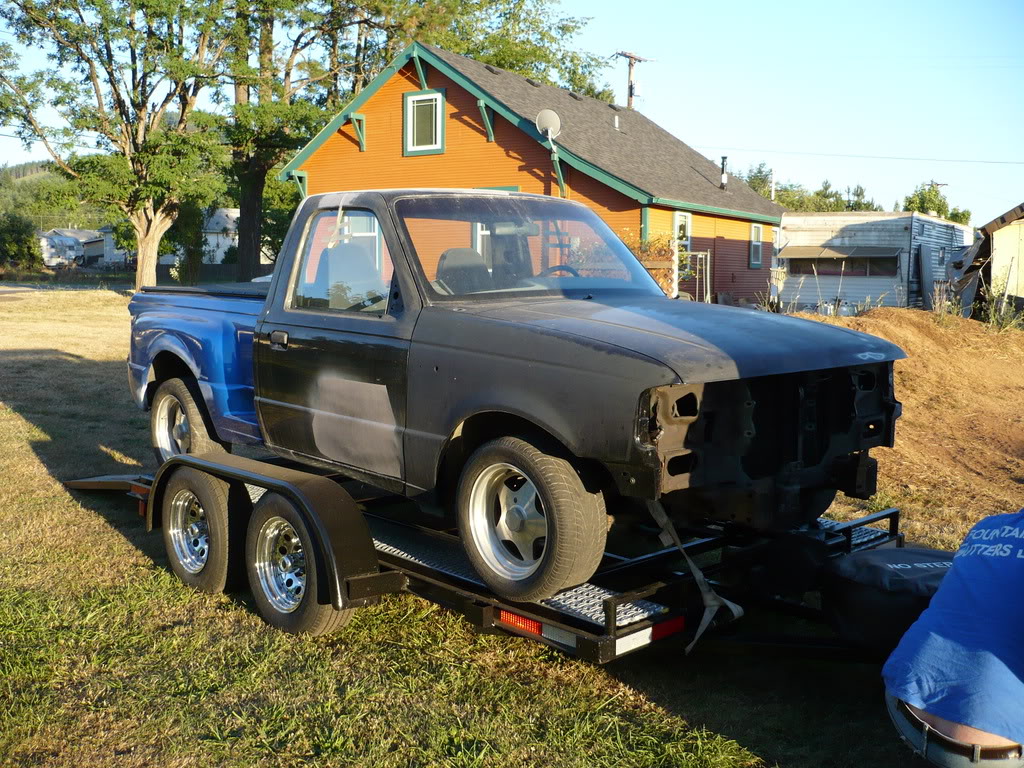

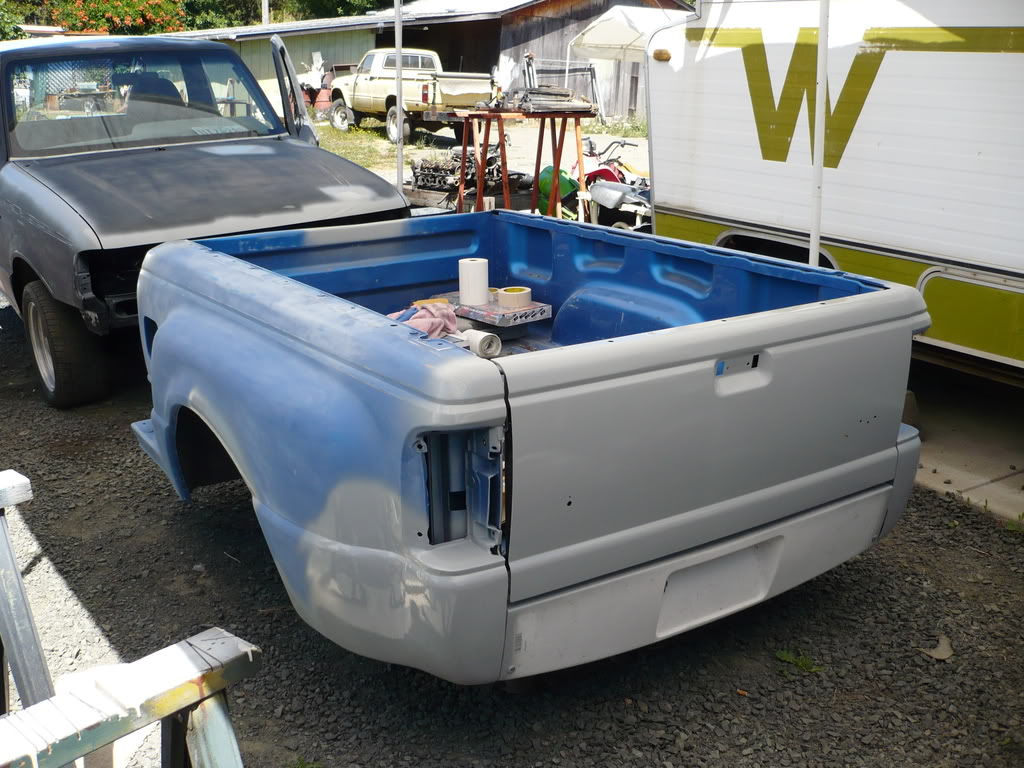
It runs and drives, but has a huge dent in the oil pan. It's got 15" boyds wheels, but the tires on them need replaced. 225/50's on a 15" don't fill the fenders enough at all, so I'm going with more sidewall when I get new ones. It is already lowered a little (2" I think?) with eibach lowering springs up front and a belltech shackle flip kit in the rear. A previous owner backed it through a barbed wire fence (still a clean title), so it had the bed replaced and lots of body work done before I got it. I just have to finish up what's left and get it painted. I got a gallon of black basecoat with the truck, and once I buy clear, it's spray time.
4/17/08:
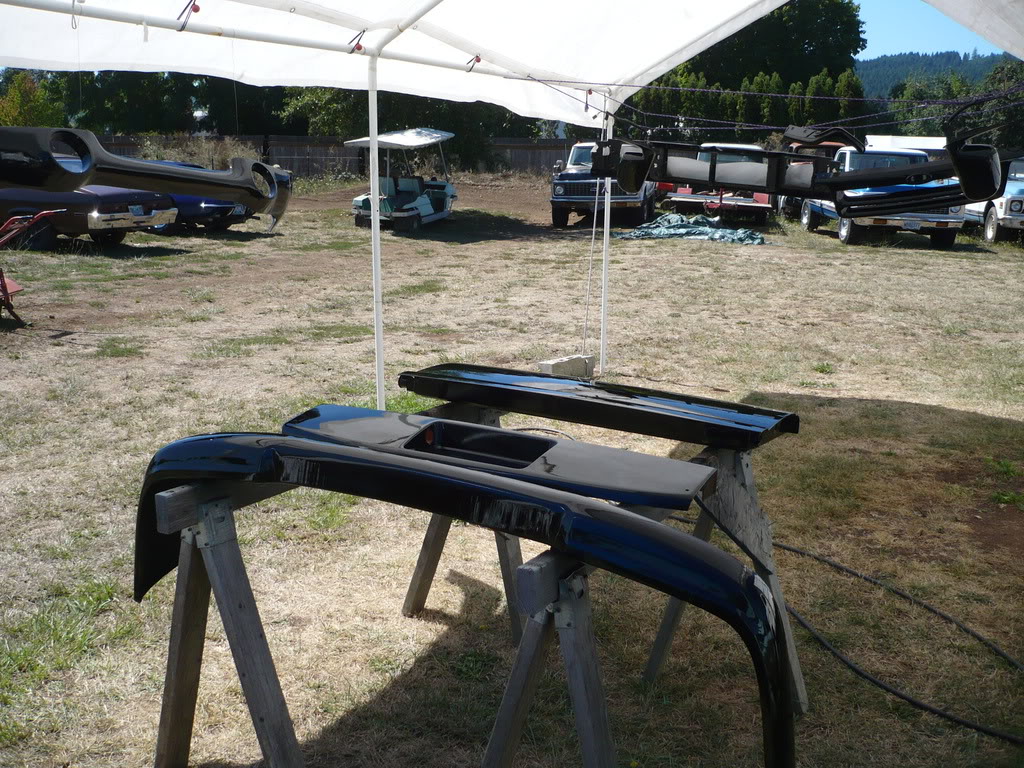
I did a little sanding today and mocked up the rollpan so I could shape the rear corners of the bed.

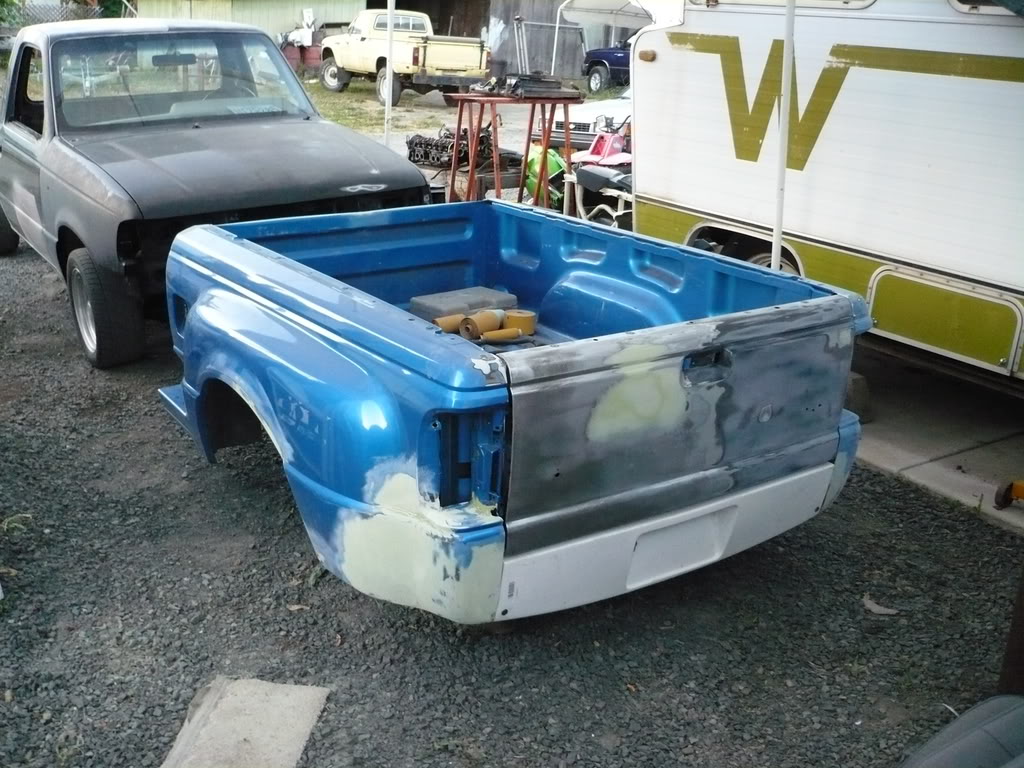
This was somebody's baby once upon a time. There's an alarm with sensors everywhere on this thing, and wires and holes from what was probably a nice stereo system. Apparently it also has under 50,000 miles, and the original paint and interior indicates truth to that statement, or at least a very well cared for 150,000.
7/30/08:
I got all the burned paint sanded off the tailgate and got one side primed, but the primer is not drying nearly as fast as it should.
I also sprayed the frame down with Ospho to destroy the rust. The difference is amazing. Rust is GONE.
And then painted it with some heavy duty urethane (semi-gloss black centari 5000) that was leftover from a big truck shop
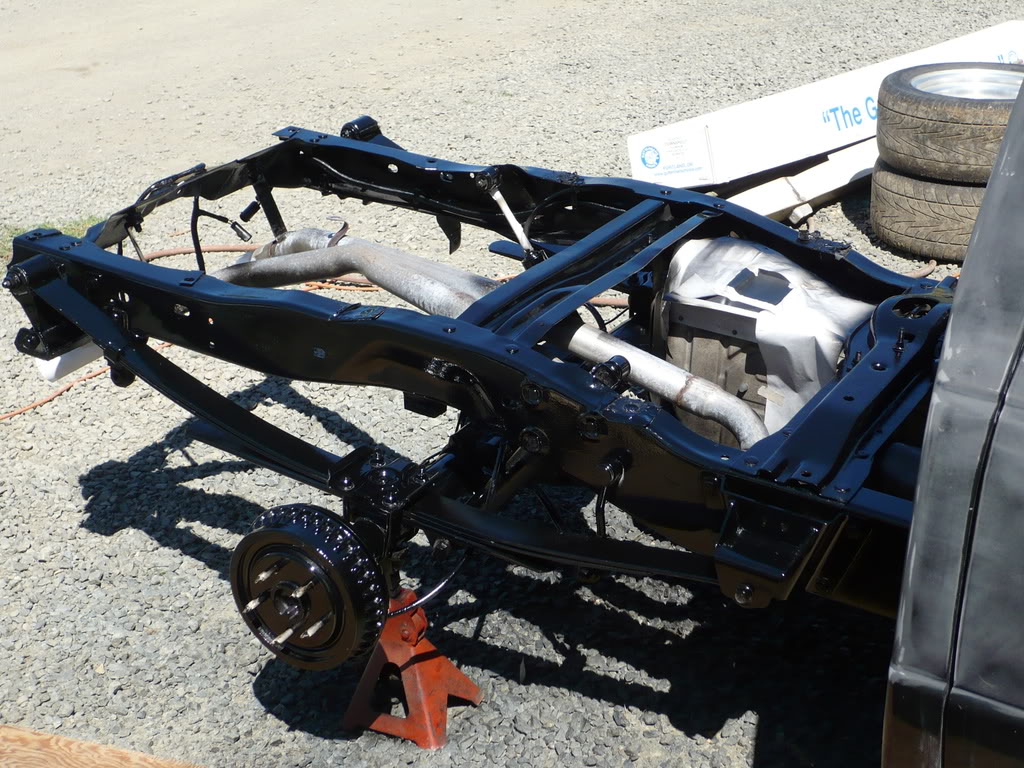
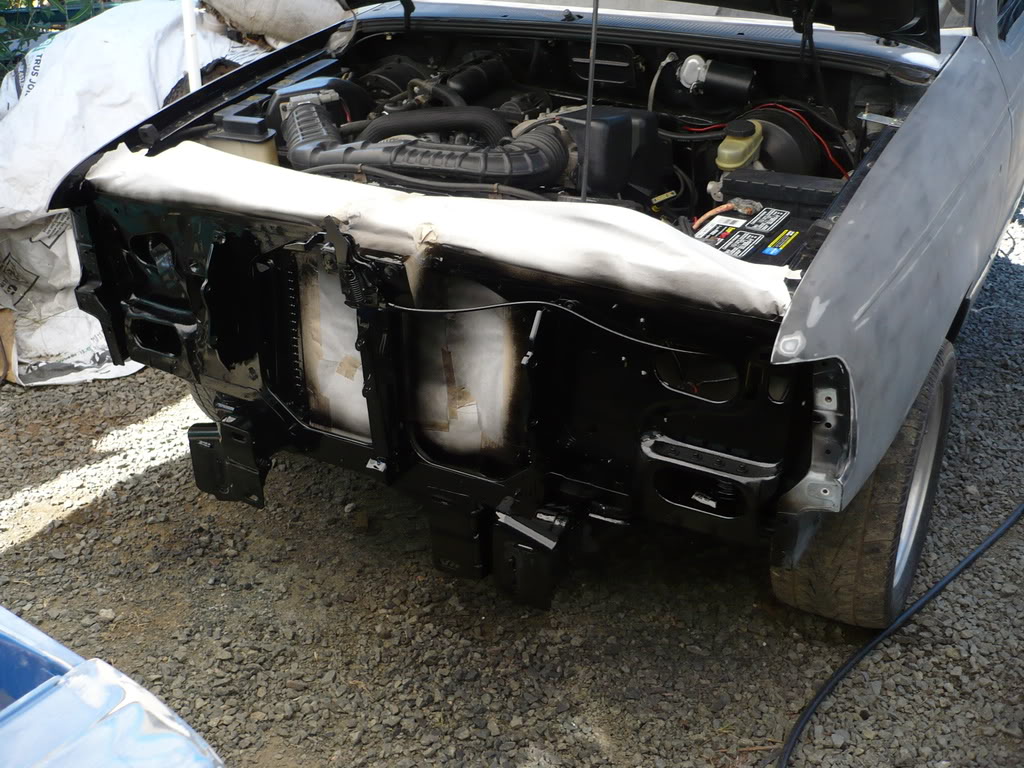
I also did the same to the front end while I was making the mess
Someday the front calipers are getting painted as well.
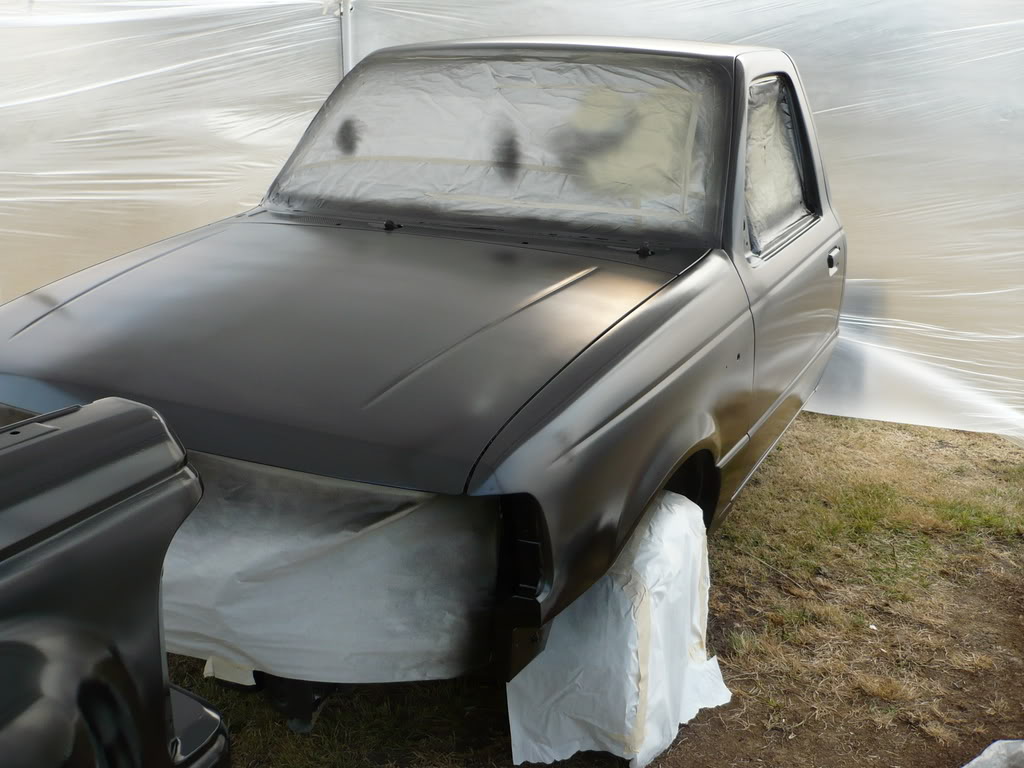
Dad is picking up some dx84 tonight to get the PPG dpu174 primer drying faster. One patch of body filler to work out (right in a body line at the rear of the bed, it sucks) and I can prime and block all the repaired areas. I also scored some chip guard thats going on the bumper, rockers, behind wheels, etc...
7/31/08:
Got primer on today. Next is hand blocking and hopefully a final sand for paint.
8/2/08:
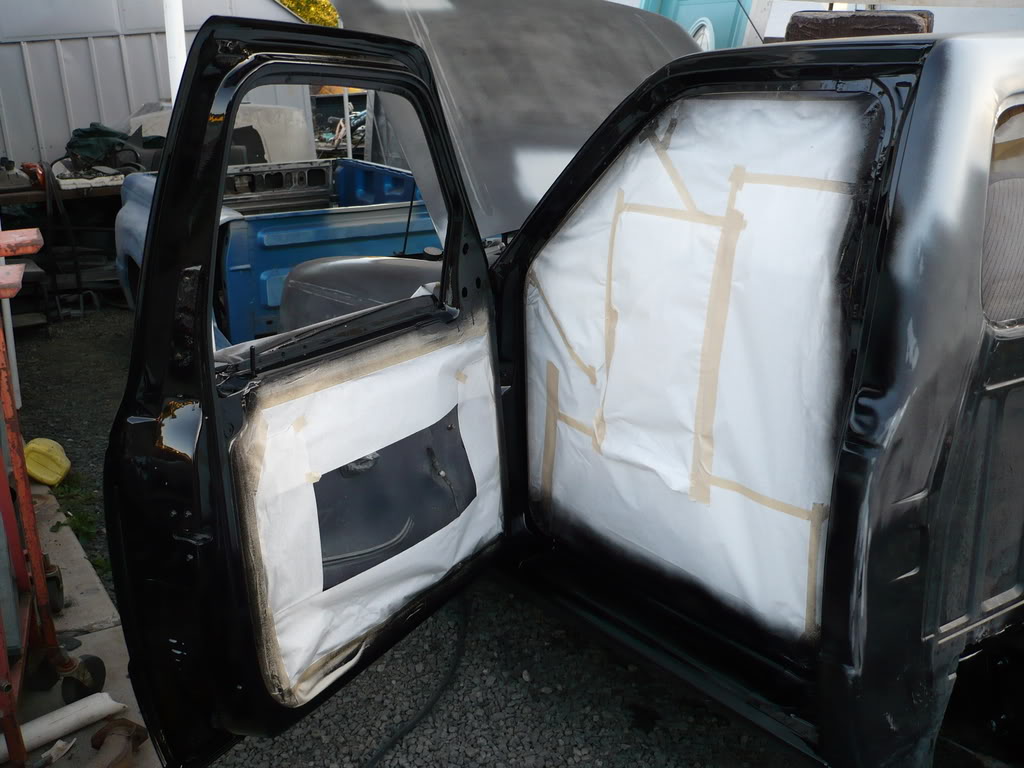
I got doorjambs done today.
If my repaired areas work out nice, I'm shooting for paint by tuesday. Gonna have a sweet new (well, fresh painted) truck soon.
8/7/08:
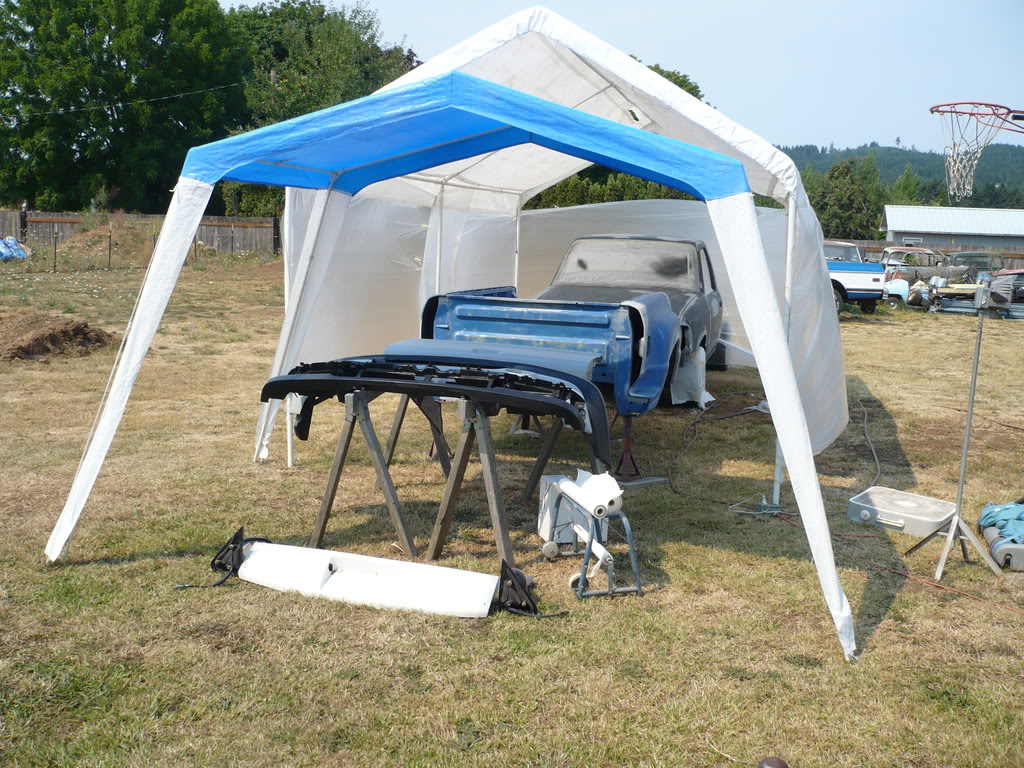
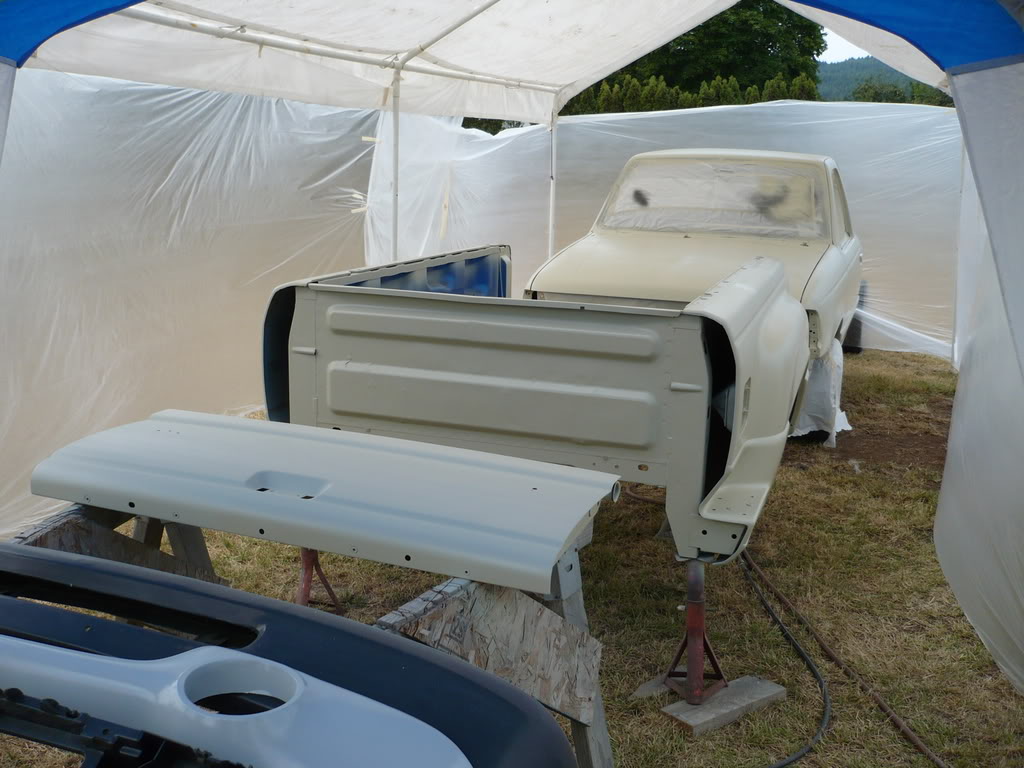
My job put me behind schedule on the truck, but more money buys more toys :E. I'm mid-process on painting now. I did the bed, cab, and tailgate today. All the other pieces are going to have to be done after the truck gets rolled out.
Redneck Spraybooth - I've seen better paintjobs done this way than some that come out of "professional" shops
Epoxy Sealer
Basecoat
Clear will be done very soon
8/8/08:
Well, after 8 hours sweating like a pig in my paint suit, my clear turned out like crap. It's glossy (looks great from about 50 feet), but its not smooth and I even got a little crazing in the second coat (I was most unhappy when I saw that). I went to the paint shop, and apparently I had too much time between coats, it was too hot to spray, and I needed more reducer. So I picked up some very slow reducer because the weather is only supposed to get hotter, and I need all the time I can get before it starts to dry. Now I get to sand it back down and respray the clear.
8/10/08:
I finally got clear sprayed this morning.

There's a really fine line between excessive orange peel and runs on this particular stuff. Not forgiving at all. I had my old man spray it this time, just because he has way more experience than I do, and he got several runs trying to get it to lay out smooth. Next is sanding out the mistakes and going after it with the buffer (the best part about base-clear, easy to fix).
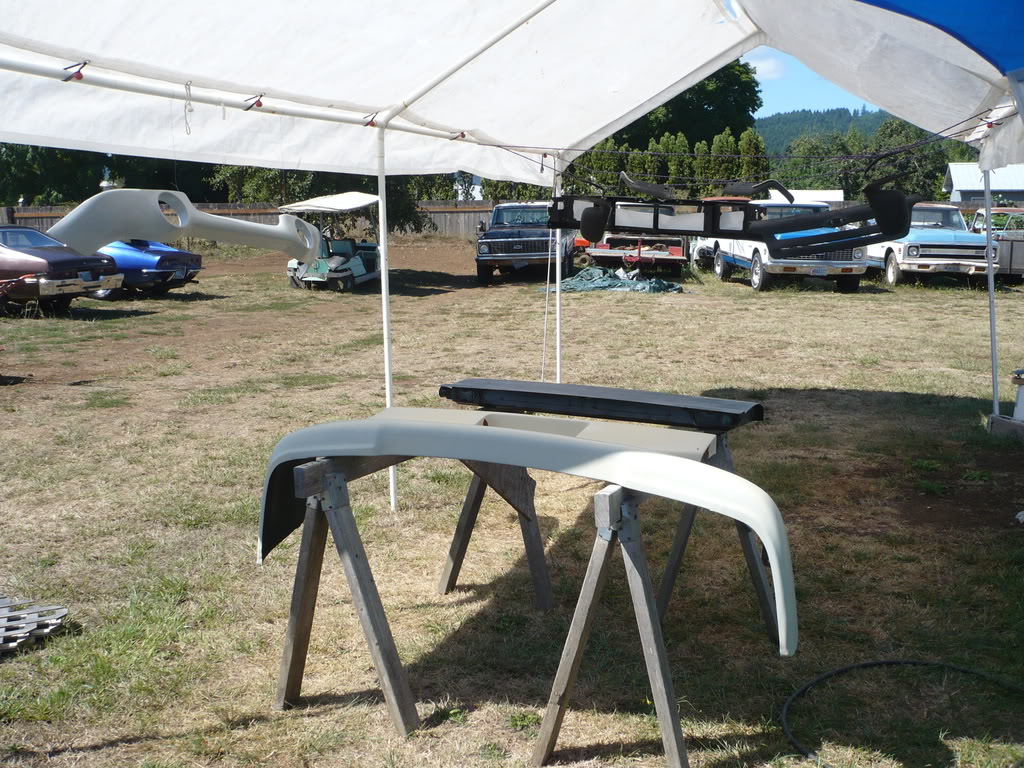
Now that the truck is out of the "spraybooth" I can get the smaller pieces in and sprayed, then it all starts going back together.
8/18/08:
Ok, I lied, the clear looks like crap. It looks good from across the street, but don't get close. I talked to dad about it, and he ended up bringing home a box of 1000 and 1500 grit paper, some rubbing compound, and swirl remover. Both of us HATE wetsanding and buffing, the only reason we have a buffer is my cousin's mistake (he thought he had a nice milwaukee grinder, until it turned way too slow :E so he gave it away). There are clears out there that can be sprayed and left alone and still look better than OEM. No more Omni clear is coming home, we've decided to buck up for better stuff if we do any more base-clear work.
I have a little work to do...
8/26/08:
More paint!!! I finally got all the smaller parts done. We used a Valspar clear on this stuff and it sprayed nice. Apparently people either love or hate Omni, and I'm in the hate crowd. It's going on the shelf and probably won't get used until all the other clear is gone.
Once I get the buffing done, the fun begins...
I didn't take this truck apart, so I don't know which bolts go where. All the bolts are in one tray, and none are labeled. A few are obvious, but the rest are going to be fun to figure out.
8/29/08:
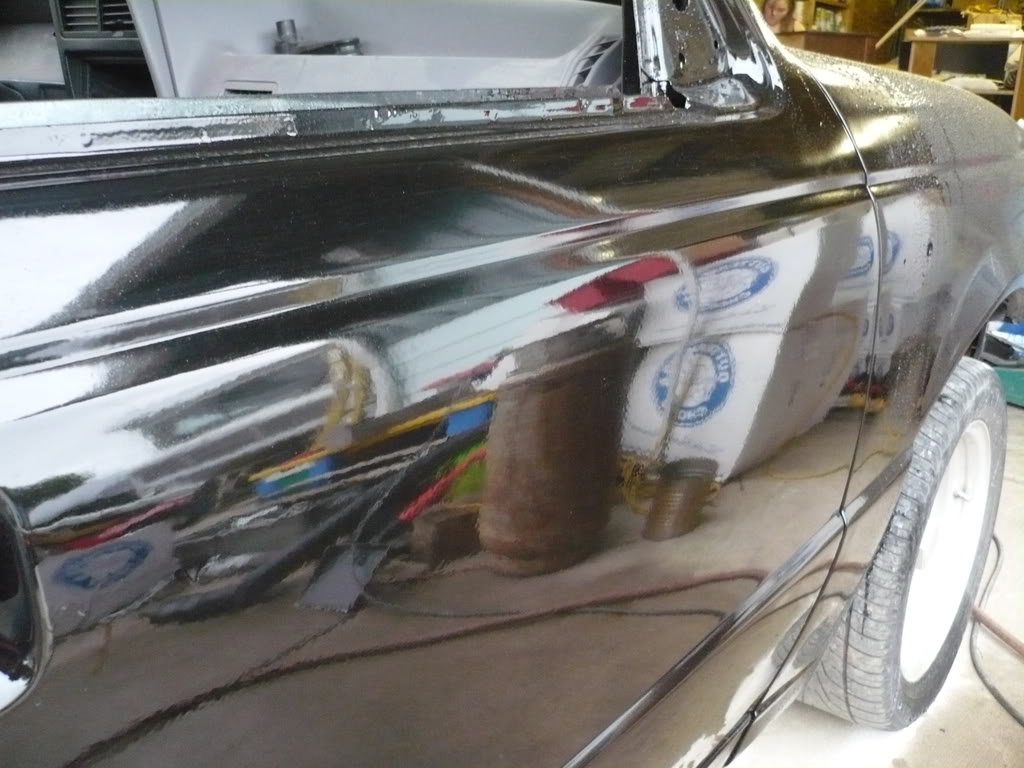
The whole cab is wet-sanded, and I got a good start on buffing today. I even got to put some of it back together.


Now I need to go buy headlight bulbs because I could only find one when I put the housings in. Probably going to pick up some silverstars if the price isn't way out of sight. And someday I need to find some lights for that lower valance. I'm thinkin' aircraft landing lights for those long, lonely night drives. And as for that insane wheel gap, I'm getting some almost new 235/70R15's. Parents want shorter tires for the 'vette, so I can get them for way cheap. I measured, and the gap should be about half of what it is now.
8/30/08:
It's starting to look like a truck again, but I still have a lot more buffing to do.
It looks like it's gonna need a little time on the frame rack now too. Too bad I didn't catch it before. I guess that explains why if a tire spun on me, it was always the right.
9/4/08:
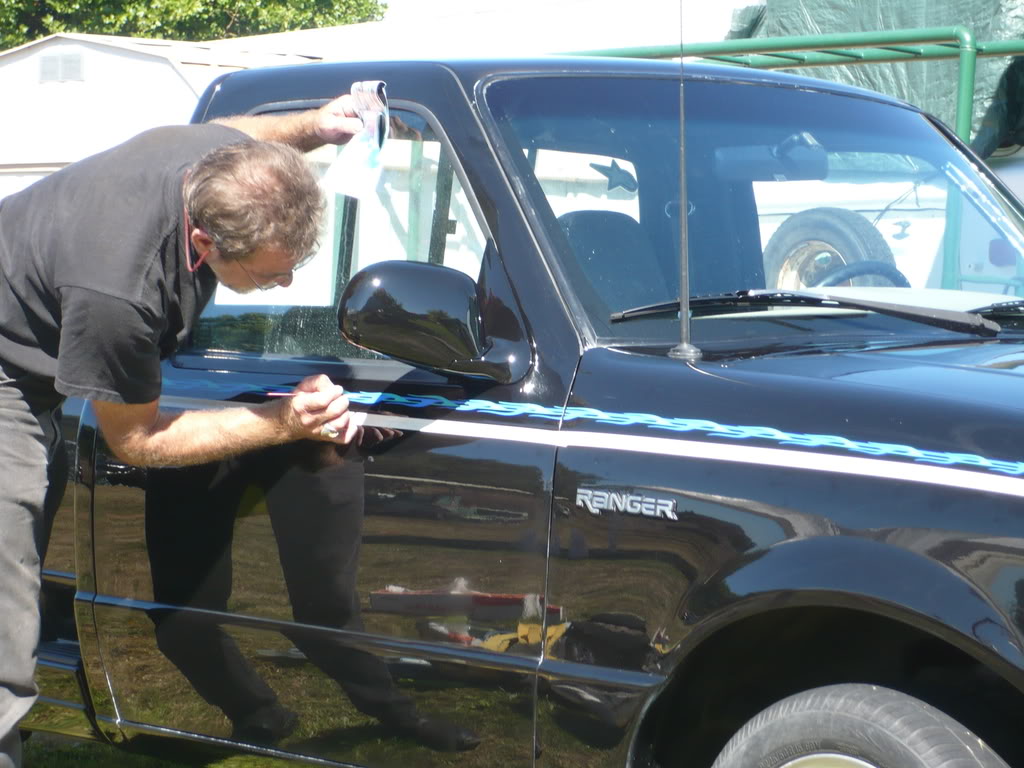
It's all buffed, cleaned, emblemed (if thats a word lol), striped, and lettered.

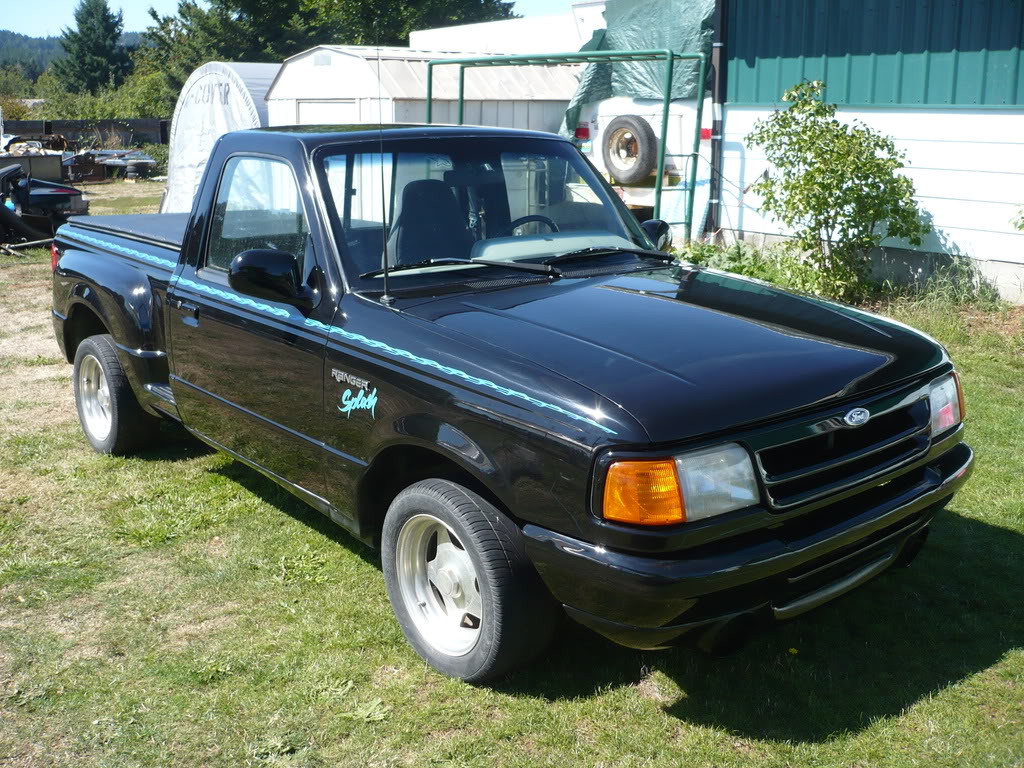
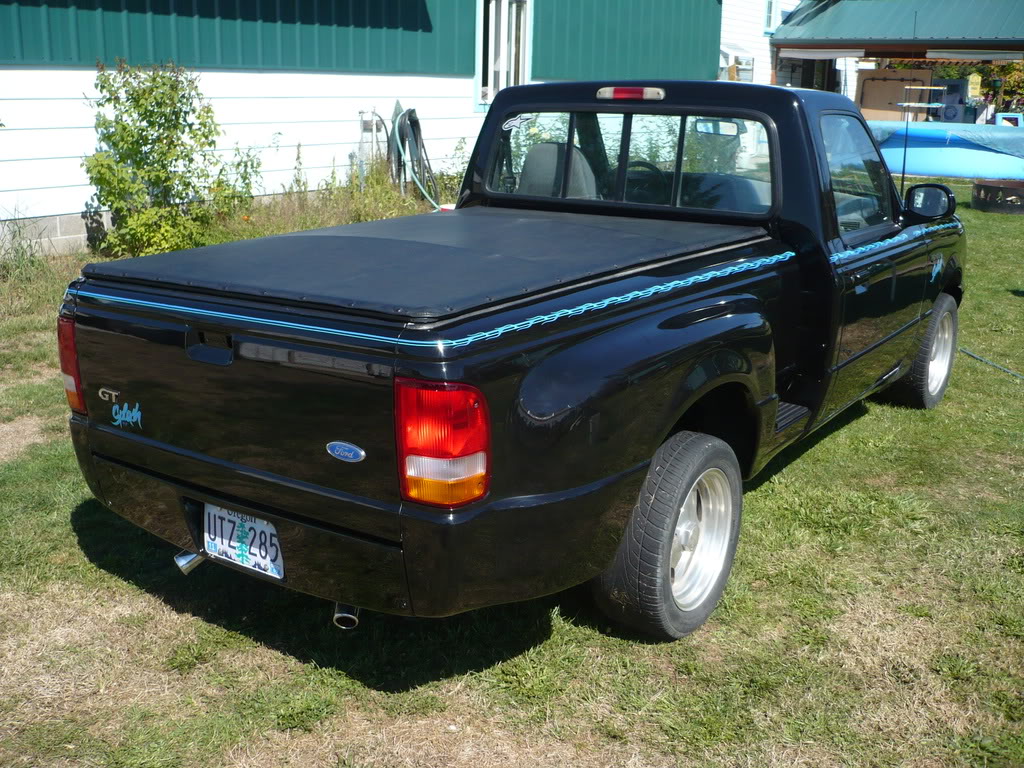
Next is foglights, bedliner, polish those rims and get some tires, and then I move on to the interior.
9/20/08:
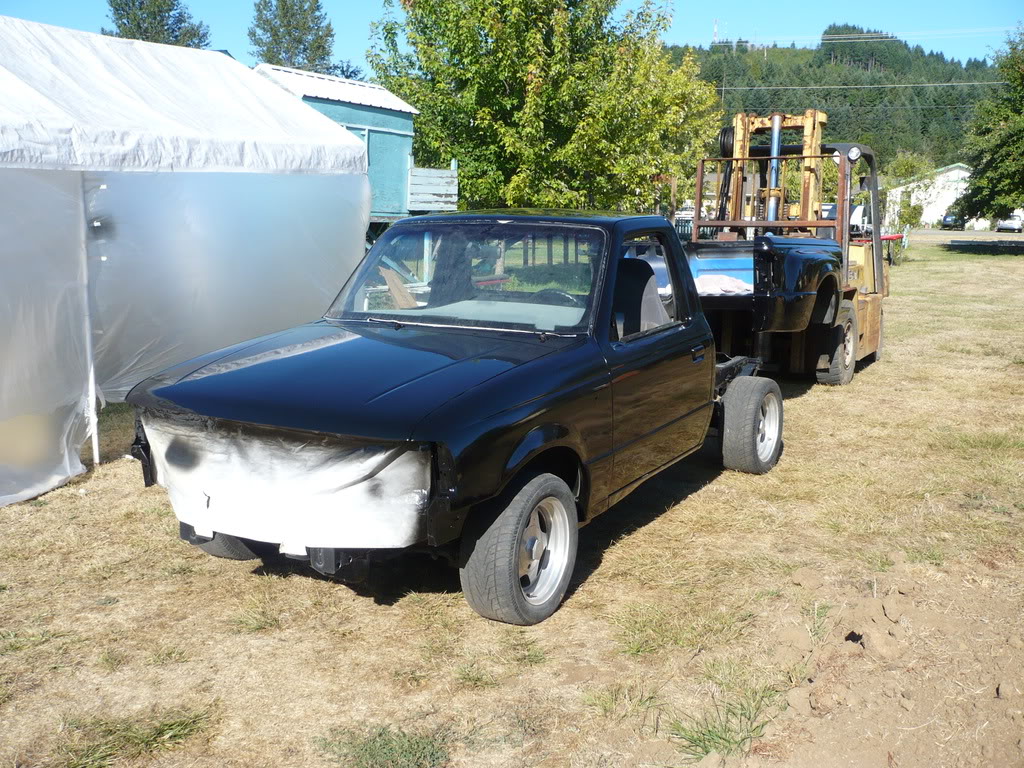
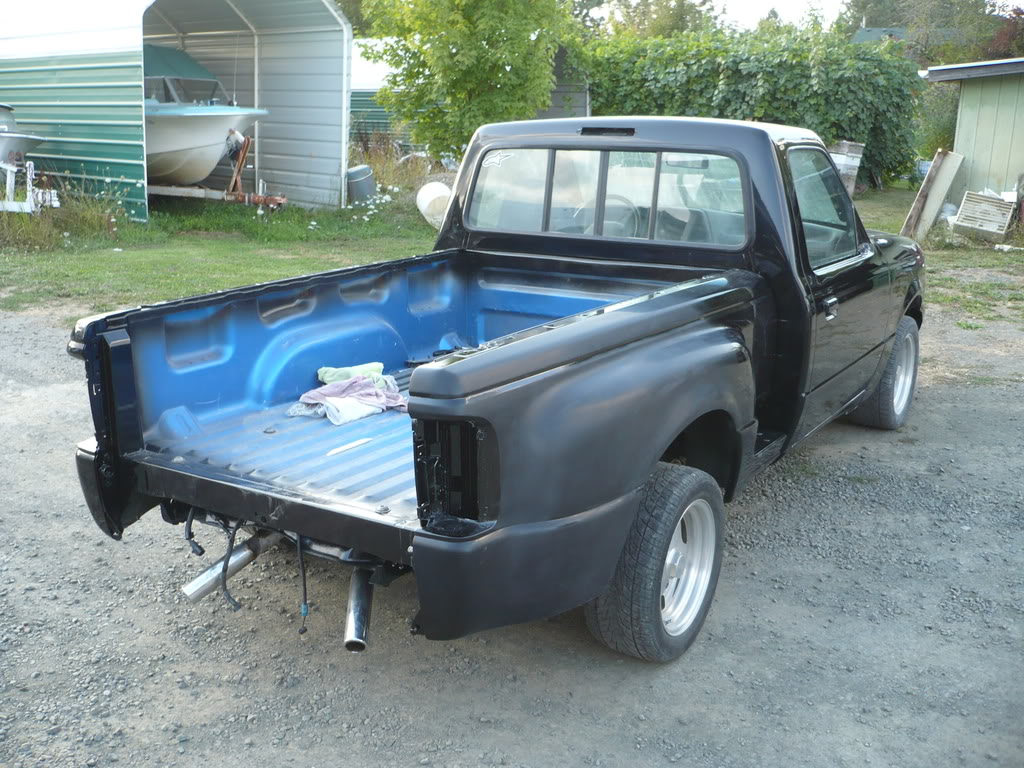
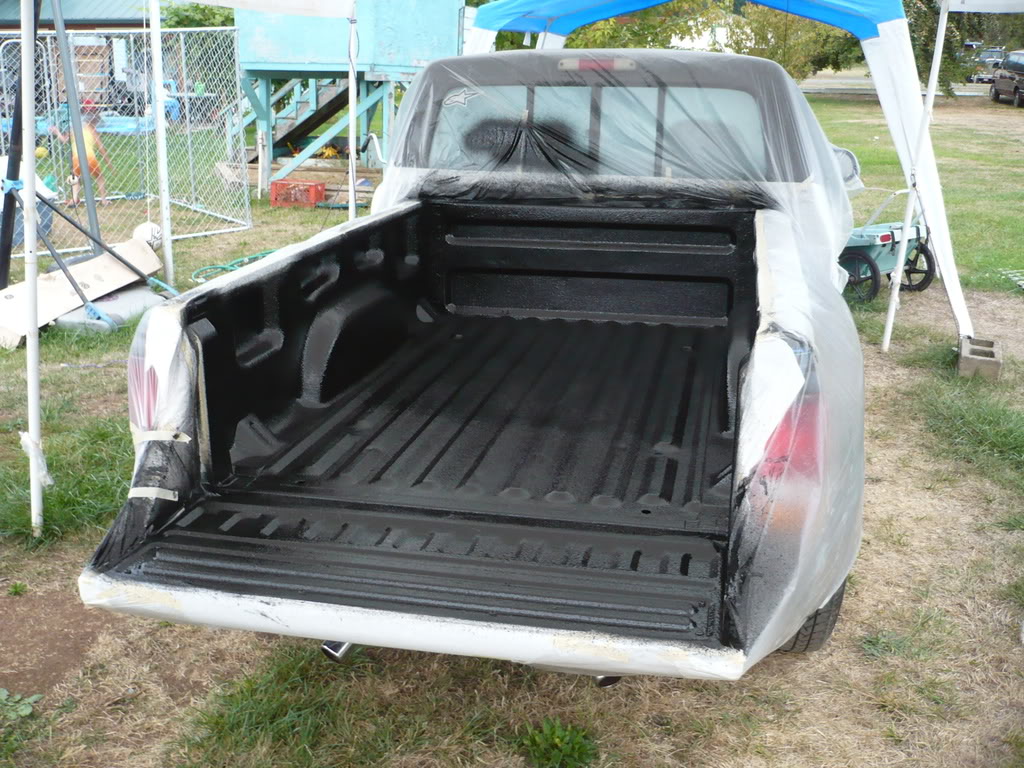
I got tires on last week and bedliner sprayed today. It goes into the body shop to get the frame straightened on thursday morning.

9/21/08:
Time for some "complete" pictures. The rear of the frame is still tweaked, but I had to do a test-fit on the toy so I would know if I needed to put on a hitch while the frame was being worked on.


It runs and drives, but has a huge dent in the oil pan. It's got 15" boyds wheels, but the tires on them need replaced. 225/50's on a 15" don't fill the fenders enough at all, so I'm going with more sidewall when I get new ones. It is already lowered a little (2" I think?) with eibach lowering springs up front and a belltech shackle flip kit in the rear. A previous owner backed it through a barbed wire fence (still a clean title), so it had the bed replaced and lots of body work done before I got it. I just have to finish up what's left and get it painted. I got a gallon of black basecoat with the truck, and once I buy clear, it's spray time.
4/17/08:
I did a little sanding today and mocked up the rollpan so I could shape the rear corners of the bed.
This was somebody's baby once upon a time. There's an alarm with sensors everywhere on this thing, and wires and holes from what was probably a nice stereo system. Apparently it also has under 50,000 miles, and the original paint and interior indicates truth to that statement, or at least a very well cared for 150,000.
7/30/08:
I got all the burned paint sanded off the tailgate and got one side primed, but the primer is not drying nearly as fast as it should.
I also sprayed the frame down with Ospho to destroy the rust. The difference is amazing. Rust is GONE.
And then painted it with some heavy duty urethane (semi-gloss black centari 5000) that was leftover from a big truck shop
I also did the same to the front end while I was making the mess
Someday the front calipers are getting painted as well.
Dad is picking up some dx84 tonight to get the PPG dpu174 primer drying faster. One patch of body filler to work out (right in a body line at the rear of the bed, it sucks) and I can prime and block all the repaired areas. I also scored some chip guard thats going on the bumper, rockers, behind wheels, etc...
7/31/08:
Got primer on today. Next is hand blocking and hopefully a final sand for paint.
8/2/08:
I got doorjambs done today.
If my repaired areas work out nice, I'm shooting for paint by tuesday. Gonna have a sweet new (well, fresh painted) truck soon.
8/7/08:
My job put me behind schedule on the truck, but more money buys more toys :E. I'm mid-process on painting now. I did the bed, cab, and tailgate today. All the other pieces are going to have to be done after the truck gets rolled out.
Redneck Spraybooth - I've seen better paintjobs done this way than some that come out of "professional" shops
Epoxy Sealer
Basecoat
Clear will be done very soon
8/8/08:
Well, after 8 hours sweating like a pig in my paint suit, my clear turned out like crap. It's glossy (looks great from about 50 feet), but its not smooth and I even got a little crazing in the second coat (I was most unhappy when I saw that). I went to the paint shop, and apparently I had too much time between coats, it was too hot to spray, and I needed more reducer. So I picked up some very slow reducer because the weather is only supposed to get hotter, and I need all the time I can get before it starts to dry. Now I get to sand it back down and respray the clear.
8/10/08:
I finally got clear sprayed this morning.
There's a really fine line between excessive orange peel and runs on this particular stuff. Not forgiving at all. I had my old man spray it this time, just because he has way more experience than I do, and he got several runs trying to get it to lay out smooth. Next is sanding out the mistakes and going after it with the buffer (the best part about base-clear, easy to fix).
Now that the truck is out of the "spraybooth" I can get the smaller pieces in and sprayed, then it all starts going back together.
8/18/08:
Ok, I lied, the clear looks like crap. It looks good from across the street, but don't get close. I talked to dad about it, and he ended up bringing home a box of 1000 and 1500 grit paper, some rubbing compound, and swirl remover. Both of us HATE wetsanding and buffing, the only reason we have a buffer is my cousin's mistake (he thought he had a nice milwaukee grinder, until it turned way too slow :E so he gave it away). There are clears out there that can be sprayed and left alone and still look better than OEM. No more Omni clear is coming home, we've decided to buck up for better stuff if we do any more base-clear work.
I have a little work to do...
8/26/08:
More paint!!! I finally got all the smaller parts done. We used a Valspar clear on this stuff and it sprayed nice. Apparently people either love or hate Omni, and I'm in the hate crowd. It's going on the shelf and probably won't get used until all the other clear is gone.
Once I get the buffing done, the fun begins...
I didn't take this truck apart, so I don't know which bolts go where. All the bolts are in one tray, and none are labeled. A few are obvious, but the rest are going to be fun to figure out.
8/29/08:
The whole cab is wet-sanded, and I got a good start on buffing today. I even got to put some of it back together.
Now I need to go buy headlight bulbs because I could only find one when I put the housings in. Probably going to pick up some silverstars if the price isn't way out of sight. And someday I need to find some lights for that lower valance. I'm thinkin' aircraft landing lights for those long, lonely night drives. And as for that insane wheel gap, I'm getting some almost new 235/70R15's. Parents want shorter tires for the 'vette, so I can get them for way cheap. I measured, and the gap should be about half of what it is now.
8/30/08:
It's starting to look like a truck again, but I still have a lot more buffing to do.
It looks like it's gonna need a little time on the frame rack now too. Too bad I didn't catch it before. I guess that explains why if a tire spun on me, it was always the right.
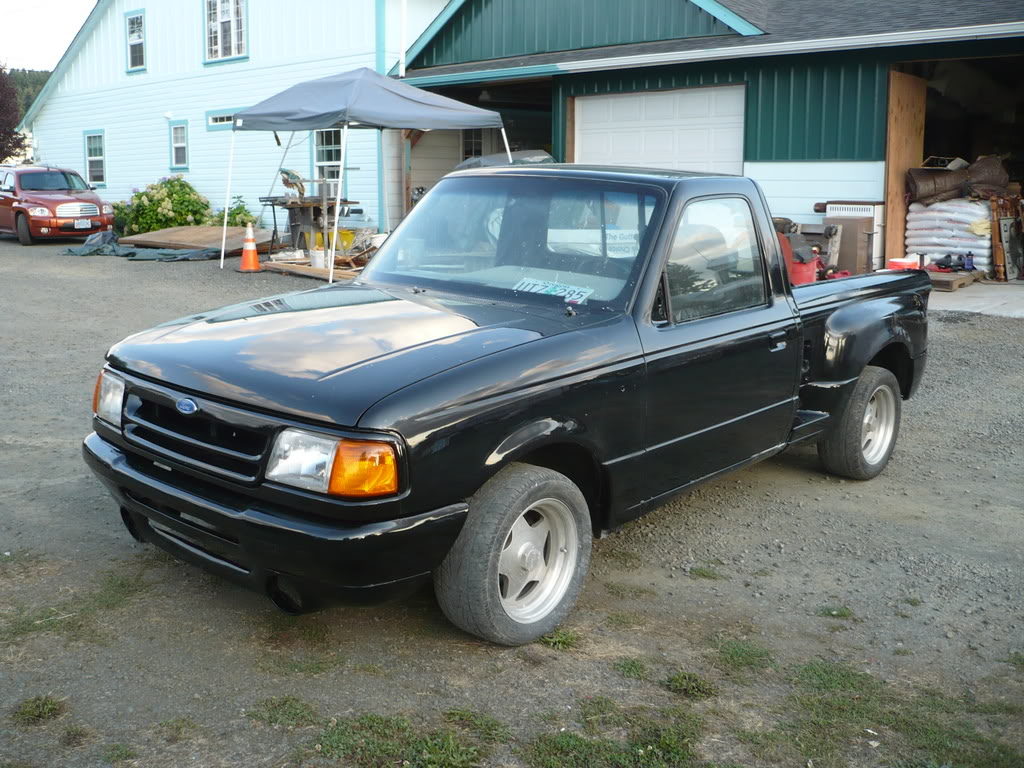
9/4/08:
It's all buffed, cleaned, emblemed (if thats a word lol), striped, and lettered.
Next is foglights, bedliner, polish those rims and get some tires, and then I move on to the interior.
9/20/08:
I got tires on last week and bedliner sprayed today. It goes into the body shop to get the frame straightened on thursday morning.
9/21/08:
Time for some "complete" pictures. The rear of the frame is still tweaked, but I had to do a test-fit on the toy so I would know if I needed to put on a hitch while the frame was being worked on.


#4
10-06-2008
#5
10-07-2008
Join Date: Apr 2007
Location: Olathe, KS
Posts: 220
Likes: 0
Received 0 Likes
on
0 Posts
#6
10-07-2008


#8
10-07-2008
Join Date: Oct 2008
Location: Cottage Grove, OR
Posts: 77
Likes: 0
Received 0 Likes
on
0 Posts
I wish my dad could stripe, I could have saved $320. A local guy who goes by Goldnrod did it. He's been doing it forever and has the straightest hand stripes I've ever seen.
As far as the wheels, they're 15" boyds, and I would have liked 245/60s on them but these tires were cheap. 245/60-16s I think would be a super combo on this truck.
I'm probably going to leave the interior mostly stock aside from the addition of a stereo (none in it right now). Maybe some buckets down the road if I keep this truck very long. I have a bad addiction of building and selling cars after only a short time driving them. I liked my last project and still sold it after only 8 months when I ran into this truck.
#9
10-07-2008


#14
10-07-2008

Join Date: Oct 2004
Location: ***
Posts: 2,099
Likes: 0
Received 0 Likes
on
0 Posts
#15
10-29-2008
Join Date: Sep 2008
Location: Winnipeg, Manitoba
Posts: 176
Likes: 0
Received 0 Likes
on
0 Posts

#19
10-29-2008
#20
10-30-2008
#21
10-30-2008
#24
11-01-2008
Join Date: Oct 2008
Location: Cottage Grove, OR
Posts: 77
Likes: 0
Received 0 Likes
on
0 Posts
Thanks for all the positive coments guys. I've been too busy driving it and thrashin on my homework (engineering major) to be on here checkin my threads.
The quad is on a short rack that sits over the wheelwells. The rear wheels just barely clear the bedrails to fit in there. I had to go pick up a 250r a couple weeks ago, and it wouldnt fit in at all. It sat on top of the rails.
The stripes were my design and color choice, but the hard part was done by a guy who goes by Goldnrod. He's been doing stripes and custom work for longer than I've been alive.
For the rust, I used Ospho on this particular project. I also use a lot of Rust Mort.

Thread
Thread Starter
Forum
Replies
Last Post
Wowak
General Ford Ranger Discussion
8
07-30-2004 06:26 AM


