Overhauling my 2002 4.0 SOHC
#1
 12-06-2013


Join Date: Sep 2013
Location: Virginia/DC area
Posts: 42
Likes: 0
Received 0 Likes
on
0 Posts
Overhauling my 2002 4.0 SOHC
Hey guys I've been working on this project for about 2 months now. Been posting regular updates over on FRF but decided to share it here too.
Scroll down for pix or read a little back story: got my first Ranger, a 2001 Edge 4.0 SOHC, back in September. It was running alright but not great. I popped the valve covers to do a simple gasket job (valve cover gaskets were leaking) only to find I had a busted timing chain guard on the backside, meaning I would need to pull the engine to fix it.
Decided to get a junkyard special (the 2002) to swap in to make the repair faster. Did that but the engine ran like ****, even worse than the 01 that I had just pulled out. Most likely due to leaky valves (see below). So I decided to bite the bullet and overhaul the motor. Now on to the good stuff
I'll spare you guys all the tear down details.
Here's the block lookin' all ugly and sad

After scraping the old gasket material off with a blade, I hit the block head gasket surfaces with a block sander, 400 then 600 grit. Did the same on all the other gasket mating surfaces (on the heads, intakes, valve covers, front cover, timing cover, oil pan, ladder frame, etc etc...)

After some wire brush action. Those crevices are damn hard to get down into. Took about 10 hours in total to get all the rust and crappy gray paint off

Masking about half done, lookin neat. New freeze plugs in too

Masking done, notice how spiffy the block looks after wire brushing

Lookin purrtty after a few coats. Another project in the background (brother fell asleep at the wheel and smashed his bug off a boulder - dumbass)
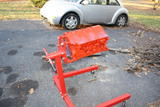
I think this is after the second coat of paint. Looking 1,000 times better

O_O oooh yea baby. That's my block

I love peeling off the masking tape and seeing clean lines and stuff. Makes me feel all fuzzy in my pants

Honed the cylinders with one of those ball-type hones. Left a pretty good surface finish if you ask me but scratched up the head gasket surface a little on entering the cylinder and also sprayed a thick abrasive dust all over the freshly cleaned block. ****. Had to clean it all over again. Oh well

Put some new valve stem seals in. I also did a valve job on these heads a few weeks back, I'll post those pix up later
Got the crankshaft in, main bearings, caps, and rear main oil seal in. Silicon gasket sealer used on the corners of the rear main bearing cap (not visible). Notice how nice the ladder frame gasket surface looks?

I hope the rear main oil seal is in good enough. Nobody likes leaky engines

So while I was waiting for the correct piston rings to come in (damn eBay seller sent the wrong ones) my block developed a bit of surface rust. Should have known a cast iron block with fresh surfaces would have rusted in a cold damp garage. To be fair, I did oil it and cover it up. No biggy though

So like the idiot I am I was looking at the block wrong. I put piston #1 in cylinder #6 and facing the wrong way, #2 in #5 etc. So I put all the pistons in wrong. Those arrows are supposed to be pointing the other direction. I guess its better to see it now rather than down the road

After a few hours more I got all the pistons back in the right way

Lookin damn good. All oiled up and ready for action. Next thing up is to put the timing gear in

Plastic bagged this time around to prevent any more surface rusting

So let me re-iterate: I am an idiot. I was moving the harmonic balancer (damn heavy btw) with oily fingers and it slipped out of my grip and landed right on the oil pump, breaking the pickup tube in half. FCK! Going to grab the old one out of the '01 engine tomorrow

Scroll down for pix or read a little back story: got my first Ranger, a 2001 Edge 4.0 SOHC, back in September. It was running alright but not great. I popped the valve covers to do a simple gasket job (valve cover gaskets were leaking) only to find I had a busted timing chain guard on the backside, meaning I would need to pull the engine to fix it.
Decided to get a junkyard special (the 2002) to swap in to make the repair faster. Did that but the engine ran like ****, even worse than the 01 that I had just pulled out. Most likely due to leaky valves (see below). So I decided to bite the bullet and overhaul the motor. Now on to the good stuff
I'll spare you guys all the tear down details.
Here's the block lookin' all ugly and sad

After scraping the old gasket material off with a blade, I hit the block head gasket surfaces with a block sander, 400 then 600 grit. Did the same on all the other gasket mating surfaces (on the heads, intakes, valve covers, front cover, timing cover, oil pan, ladder frame, etc etc...)

After some wire brush action. Those crevices are damn hard to get down into. Took about 10 hours in total to get all the rust and crappy gray paint off

Masking about half done, lookin neat. New freeze plugs in too

Masking done, notice how spiffy the block looks after wire brushing

Lookin purrtty after a few coats. Another project in the background (brother fell asleep at the wheel and smashed his bug off a boulder - dumbass)

I think this is after the second coat of paint. Looking 1,000 times better

O_O oooh yea baby. That's my block

I love peeling off the masking tape and seeing clean lines and stuff. Makes me feel all fuzzy in my pants

Honed the cylinders with one of those ball-type hones. Left a pretty good surface finish if you ask me but scratched up the head gasket surface a little on entering the cylinder and also sprayed a thick abrasive dust all over the freshly cleaned block. ****. Had to clean it all over again. Oh well

Put some new valve stem seals in. I also did a valve job on these heads a few weeks back, I'll post those pix up later

Got the crankshaft in, main bearings, caps, and rear main oil seal in. Silicon gasket sealer used on the corners of the rear main bearing cap (not visible). Notice how nice the ladder frame gasket surface looks?

I hope the rear main oil seal is in good enough. Nobody likes leaky engines

So while I was waiting for the correct piston rings to come in (damn eBay seller sent the wrong ones) my block developed a bit of surface rust. Should have known a cast iron block with fresh surfaces would have rusted in a cold damp garage. To be fair, I did oil it and cover it up. No biggy though

So like the idiot I am I was looking at the block wrong. I put piston #1 in cylinder #6 and facing the wrong way, #2 in #5 etc. So I put all the pistons in wrong. Those arrows are supposed to be pointing the other direction. I guess its better to see it now rather than down the road

After a few hours more I got all the pistons back in the right way

Lookin damn good. All oiled up and ready for action. Next thing up is to put the timing gear in

Plastic bagged this time around to prevent any more surface rusting

So let me re-iterate: I am an idiot. I was moving the harmonic balancer (damn heavy btw) with oily fingers and it slipped out of my grip and landed right on the oil pump, breaking the pickup tube in half. FCK! Going to grab the old one out of the '01 engine tomorrow

Last edited by wingman358; 12-06-2013 at 06:29 PM. Reason: updated with pictures and shit
#2
12-08-2013
Join Date: Sep 2013
Location: Virginia/DC area
Posts: 42
Likes: 0
Received 0 Likes
on
0 Posts
Did some work on the heads: got the valves final cleaned and installed with assembly lube. Put the valve springs in and installed keepers and keys. heads just need final wipe down of gasket surfaces and maybe spark plug thread chasing. The threads look pretty good already though.
I also got the old 01 engine up on the stand and dug out its oil pump pickup tube (cause I broke the one on the 02 with a fumbled harmonic balancer - D'OH). I promptly torqued down the newish pickup tube too far and put a small crack in the plastic on the outside of one of the screw / donut inserts. I patched it up with several layers of super glue and will reinstall with a small washer to help distribute the compressive stress from the bolt. Should work just fine.
I gave in and ordered the OTC #303-634 special tool to hold the jack shaft. I hate having to rig up some solution that may or may not work. Though sometimes the special tools leave something to be desired. Oh well.
Getting close to the moment of truth. Can't ******* wait, been nearly 3 months in the making now.
Supposed to get snow / ice / freezing rain tonight, should be interesting. Poor truck's sitting out in the elements right now. Can't wait to pull her into the garage and drop this ticker in there already!!
#3
12-09-2013

#4
12-09-2013
Join Date: Sep 2013
Location: Virginia/DC area
Posts: 42
Likes: 0
Received 0 Likes
on
0 Posts
With these SOHC engines the only issues I'm aware of are the timing chain troubles. I'm not aware of any other common problems with these. As far as I can tell it's a pretty solid engine all around.
How much do I have in this particular engine? Too much. I got it from a salvage yard for $800 and have put probably another grand into it on top of that (300 for the rering kit on eBay) several hundred on new tools, special Ford tools, fluids, and other miscellaneous parts
In time I have probably 200 hours into it over 2+ months. It's also my first rebuild so I'm sure it could be done quicker
#6
12-09-2013


#7
12-09-2013
Join Date: Sep 2013
Location: Virginia/DC area
Posts: 42
Likes: 0
Received 0 Likes
on
0 Posts
Assembly lubed the jackshaft before installing it

The old rear cassette and new cassette parts

Rear cassette installed

Front cassette comparing old and new

Both cassettes installed

Big differences between the new jackshaft chain tensioner and the old...

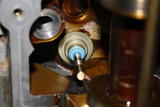
The end of the new jackshaft tensioner showing the grenade pin/leaf spring holder

Comparing old and new jackshaft guides. I think I receieved an extra jackshaft chain guide piece (two identical pieces)

All timing gear installed

Now I'm just waiting on my jackshaft holder tool to come in the mail so I can finish this up. Also, anybody know why the new timing cassette kits only come with one crush washer for the chain tensioners? There's two tensioners but only one washer... wtf

The old rear cassette and new cassette parts

Rear cassette installed

Front cassette comparing old and new

Both cassettes installed

Big differences between the new jackshaft chain tensioner and the old...

The end of the new jackshaft tensioner showing the grenade pin/leaf spring holder

Comparing old and new jackshaft guides. I think I receieved an extra jackshaft chain guide piece (two identical pieces)

All timing gear installed

Now I'm just waiting on my jackshaft holder tool to come in the mail so I can finish this up. Also, anybody know why the new timing cassette kits only come with one crush washer for the chain tensioners? There's two tensioners but only one washer... wtf
#8
12-10-2013
I recently changed my timing chain tensioners. I noticed the original front tensioner had what looked like a seal washer and the rear had nothing.
The new timing chain tensioners had no washer with them. I reused the front seal washer and used a little non hardening sealant on the rear one. No leaks so far.
I also thought it was strange to have only one washer.
The new timing chain tensioners had no washer with them. I reused the front seal washer and used a little non hardening sealant on the rear one. No leaks so far.
I also thought it was strange to have only one washer.
#9
12-11-2013

Good work!! I've lurked your other thread on the other site before. This was just beyond me and the setting of the timing as well....degreeing the cams. I lucked out coming across a 1,000mi 2006 engine back when I swapped mine out for only a grand.
I'm great on pushrod engines....I just didn't have the funds for the specialized tooling for the OHC engines.
I'll be watching...
I'm great on pushrod engines....I just didn't have the funds for the specialized tooling for the OHC engines.
I'll be watching...
#10
12-11-2013
Join Date: Sep 2013
Location: Virginia/DC area
Posts: 42
Likes: 0
Received 0 Likes
on
0 Posts
Good work!! I've lurked your other thread on the other site before. This was just beyond me and the setting of the timing as well....degreeing the cams. I lucked out coming across a 1,000mi 2006 engine back when I swapped mine out for only a grand.
I'm great on pushrod engines....I just didn't have the funds for the specialized tooling for the OHC engines.
I'll be watching...
I'm great on pushrod engines....I just didn't have the funds for the specialized tooling for the OHC engines.
I'll be watching...
Anyways, I just did the timing tonight. It wasn't bad with the special tools, took maybe 20 minutes total to do both heads. But yea the tool kit was expensive, $200 ish on eBay.
#11
12-21-2013
Join Date: Sep 2013
Location: Virginia/DC area
Posts: 42
Likes: 0
Received 0 Likes
on
0 Posts
So I got the engine all finished up and put back in the truck, only to find it was doing the exact same thing as before I started the rebuild. CEL P0174 "fuel bank 2 too lean", rough vibration at idle, shuddering when putting into gear, and loud erratic clicking when accelerating over 2000 rpm, and glowing red cats. Having just rebuilt the engine I was near certain that the problem wasn't mechanical. So I started checking fuel, air, and spark.
Checked for vacuum leaks, disconnected hoses, etc, removed and tested O2 sensors, checked spark plugs, and then I randomly decided to try unhooking coil wires one at a time with the engine running to see if I could find any dead cylinders.
I got excellent spark from the coil and each cylinders 1,2,3 when disconnected caused the engine to sputter / stall so I knew those cylinders were all functioning. It got interesting when I tested #4,5,6. Cylinder 4 and 6 seemed dead because nothing happened when I disconnected the spark wires to them. Number 5 seemed good, so I ruled out the bank 2 fuel rail. I really didn't want to start disassembling down to check the injectors so I called it a night.
Later when my old man came home from work I told him my findings and he asked, "Did ya check yer firing order?" and I almost told him, yes, I've checked 11 times. But I remembered questioning the coil numbering layout, so I decided to check again.
Turns out the spark wires for cylinders 4 and 6 were switched!! That explains the two dead cylinders!!! Never should have trusted the POs.
Now the engine runs great- no CELs, the harsh vibration is gone, the long term fuel trims are back to 0%, the cats aren't glowing, no shuddering when going into R or D, better MPG, etc etc. It's like a new engine!
I've driven it about 100 miles since fixing the spark wire mix-up and it's riding like a dream. Sooo happy. Now I just gotta tackle the rest of the items on my to-do list.
#13
02-01-2014
Join Date: Dec 2012
Location: pinckney, mi
Posts: 85
Likes: 0
Received 0 Likes
on
0 Posts
nice write up!!! orange though??? check out my thread https://www.ranger-forums.com/projec...-could-141019/
did a 4.0 swap on my truck little over a year ago. very intimidating compared to a small block
did a 4.0 swap on my truck little over a year ago. very intimidating compared to a small block
#14
02-02-2014
Join Date: Sep 2013
Location: Virginia/DC area
Posts: 42
Likes: 0
Received 0 Likes
on
0 Posts
Maybe its just my eyes or the camera but it looks real red to me, though several people have called it orange or "chevy orange" ... 
Eventually I'll be doing a frame-off on this truck, and probably a total body resto or maybe just a newer cab and bed from the southwest with no rust. At that time I'll probably paint it a different color, not sure what yet. Maybe black or slate gray with red accents. Always liked dark grays
Eventually I'll be doing a frame-off on this truck, and probably a total body resto or maybe just a newer cab and bed from the southwest with no rust. At that time I'll probably paint it a different color, not sure what yet. Maybe black or slate gray with red accents. Always liked dark grays

Thread
Thread Starter
Forum
Replies
Last Post
straightedge
Wheels & Tires Semi-Tech
20
09-30-2005 06:31 PM


