Harvest Gold 1999 Ranger
#76
 02-24-2016


Well, if I hadn't been at harbor freight yesterday AND today. I was debating whether or not to buy an inverter yesterday, and didn't because I couldn't justify it. Well HELLO comes a blackout. Lost power last night and would have LOVED to have had an inverter so I could have inflated an air mattress. No such luck.
At least I was able to provide some light that night. 12 volt fluorescent tube light hung on the inside of a lamp hooked up to a free battery found in a parking lot. Not enough current to start a car but it certainly works well enough for a lamp that draws 17 milliamps (nothing).
Anyway, today I bought a 400 watt continuous/800 watt peak inverter and it works very well. Gave it a try on a few things. So now I'm going to see how much it would cost to install it in my truck vs the cost of the inverter and go from there.
This baby can draw 73 amps on the DC side, which means I'm going to need something heavy duty to switch this current on and off with the key so the inverter doesn't drain the battery. I'm not sure if I want to use a continuous duty solenoid, like for an E fan installation, or if I want to use a regular relay. I'm not sure if a regular relay (rated for 100 amps) will actually handle it though.
The relays I'm seeing that are supposedly rated for 100 amps look like a regular relay and I have my doubts whether or not one of these can actually do the job. I don't want to cheap out but I don't want to spend a fortune either. I may not install it at all, but it's still good to have in my opinion.
#77
02-26-2016


Got this cluster installed yesterday. I took out the odometer/speedometer module from my factory cluster then bolted it in this new cluster. Used a Garmin GPS to get the speedo accurate. The others were pretty straight forward. Best to do the fuel gauge when you have a full tank, cycling the key on and off as needed. Battery voltage, oil pressure and engine temp are all easily adjusted after a good drive, I'd estimate 20 minutes.
Of course, only the speedo re-calibration would be necessary if you didn't peel the faces off to change their color like I did.
#78
02-26-2016
That... That's beautiful... I'll trade white clusters from both 2003 and 2004 for that!
And remember when we had the same number of miles? Did you stop driving? I passed you by 4k!
Also, now I guess I'm going to sand my gauges... That looks really good!
And remember when we had the same number of miles? Did you stop driving? I passed you by 4k!
Also, now I guess I'm going to sand my gauges... That looks really good!
#79
02-26-2016
#80
02-28-2016
As I mentioned several posts ago, I would go through each of my mods and go further in depth about how I personally tackled it. Been trying to figure out where to start, so a friend of mine with a certain blue Edge suggested I start with reverse lights of the auxilary variety.
Gotta start somewhere. While this is far from an uncommon mod with little info out there, I believe it's still worth covering for those who are new to the game and aren't quite at home with wiring things up.
First thing I did was take a mental diagram of where everything would go. After looking the vehicle over to ensure my ideas would work out somewhat smoothly, I removed the driver's side tail lamp and set it aside. Using a volt meter, I confirmed the black and pink wire as the hot wire for the reverse lights.
Using automatic wire strippers, I exposed a portion of the copper and soldered a wire to this exposed piece, leading it down along the harness to be picked up later. Afterwards I used 3M (not that cheap stuff) to cover up the connection as well as a ziptie to keep it from moving around too much and putting unneccesary stress on the solder joint.
Some mount the relay under the bumper. I don't like exposing relays or other items like this to the road grime if I can avoid it, not to mention I had some good 2 core wire laying around which came from a vacuum cleaner. The 2 core wire, being protected in an outer layer of rubber (I believe) made it so I didn't need any loom.
From here I ran the dual core wire along the frame and up into the engine bay, using black cable ties to secure it to the frame. Looking back I should have ran the cable along the inside of the frame but, oh well.
Using a water proof fuse tap, I took a hot lead from the positive battery terminal, fused to 15 amps, and used the second wire within the dual core to run power back to the rear of the truck, through the relay.
The trigger wire went to 86, ground to 85, battery in to 30 and battery out to 87, 87A left unused. I mounted the relay on an existing bolt near the battery. For grounding, I grounded the relay in the same place for my underhood lamps, on the hood hinge. Works well.
For my reverse lights, I went very fancy (sarcasm) with a set of 20 dollar, walmart aux lights. These are 55 watts and do very well to illuminate the area behind me. Later i plan to upgrade, but these will work fine for someone on a budget.

It's worth noting that these lights come with a wiring kit that you can use, but I personally think it's a little whimpy for my needs. I tossed it in my spare parts to use in a later project.
The relay I got from superbrightleds.com as well as a matching harness to which I can solder to. However, I could have easily used spade connections for this. I prefer this method, though.
For mounting the lights, I used some existing holes and grounded them both to the frame with eyelets, again using zipties to keep all the wires up and out of the way.
I initally tried to drill my own holes, but I found my old drill bits simply couldn't cut through it. If I had new drillbits I probably could have gotten through it, but I went this route instead.
Pics tomorrow.
Gotta start somewhere. While this is far from an uncommon mod with little info out there, I believe it's still worth covering for those who are new to the game and aren't quite at home with wiring things up.
First thing I did was take a mental diagram of where everything would go. After looking the vehicle over to ensure my ideas would work out somewhat smoothly, I removed the driver's side tail lamp and set it aside. Using a volt meter, I confirmed the black and pink wire as the hot wire for the reverse lights.
Using automatic wire strippers, I exposed a portion of the copper and soldered a wire to this exposed piece, leading it down along the harness to be picked up later. Afterwards I used 3M (not that cheap stuff) to cover up the connection as well as a ziptie to keep it from moving around too much and putting unneccesary stress on the solder joint.
Some mount the relay under the bumper. I don't like exposing relays or other items like this to the road grime if I can avoid it, not to mention I had some good 2 core wire laying around which came from a vacuum cleaner. The 2 core wire, being protected in an outer layer of rubber (I believe) made it so I didn't need any loom.
From here I ran the dual core wire along the frame and up into the engine bay, using black cable ties to secure it to the frame. Looking back I should have ran the cable along the inside of the frame but, oh well.
Using a water proof fuse tap, I took a hot lead from the positive battery terminal, fused to 15 amps, and used the second wire within the dual core to run power back to the rear of the truck, through the relay.
The trigger wire went to 86, ground to 85, battery in to 30 and battery out to 87, 87A left unused. I mounted the relay on an existing bolt near the battery. For grounding, I grounded the relay in the same place for my underhood lamps, on the hood hinge. Works well.
For my reverse lights, I went very fancy (sarcasm) with a set of 20 dollar, walmart aux lights. These are 55 watts and do very well to illuminate the area behind me. Later i plan to upgrade, but these will work fine for someone on a budget.
It's worth noting that these lights come with a wiring kit that you can use, but I personally think it's a little whimpy for my needs. I tossed it in my spare parts to use in a later project.
The relay I got from superbrightleds.com as well as a matching harness to which I can solder to. However, I could have easily used spade connections for this. I prefer this method, though.
For mounting the lights, I used some existing holes and grounded them both to the frame with eyelets, again using zipties to keep all the wires up and out of the way.
I initally tried to drill my own holes, but I found my old drill bits simply couldn't cut through it. If I had new drillbits I probably could have gotten through it, but I went this route instead.
Pics tomorrow.
#81
03-02-2016
Sorry about the late pics.


Anyway, onto my second order of buisness.
I've been battling a wet floor for a while now. I've managed to rule out both the heater core and the third brake light as being sources of water leaks.
So next I pulled my seat out, took out the inverter and it's mounting plate, as well as any other necessary parts to fold the carpet back. I found two rubber grommets in the floor. One, smaller grommet which lead directly to the underside of the truck, and another which lead to a box where a body bolt was hidden.
Water had to be coming from somewhere, so I decided to RTV the smaller gasket with hopes that would at least help. There was quite a bit of dirt and such around it, so I believe this may have been where it was coming in, which would explain why it did when it would rain, but not if I flooded the cowl or the door frame with a garden hose.
I also took an ice pick and cleared out the holes on the 'drain pans' for the cowl on both sides. The driver's side, ironically enough, was the only one which was clogged.
I also blew compressed air through the ac drain, but nothing came of that. As of now, the carpet is sitting up with a small fan blowing air to dry it out.
Also, my battery terminal came in today! Given I have a four gauge wire running just for the inverter, I thought it would be a good idea to upgrade the battery terminal so both the OEM cable as well as the inverter's cable could have a nice solid connection.
You'll notice that there isn't enough holes for the two oem cables as well as my four gauge cable to each have their own slots. Well that wasn't much of an issue. I cracked out the propane torch (because solder) and while the solder was molten I squashed both the cables together and effectively compressed the two enough to fit in the larger slot.
The four gauge cable I have not yet connected because of a positive cable flopping around in the interior as it is not connected to the inverter.
For a fuse, I bought a Bussman 'fusible link' rated at 80 amps. Using a 10mm nut and bolt I connected the fuse in line with the 4 awg using eyelets. Given I don't have a crimper that's big enough for these four gauge eyelets, I ended up using a bench vise to squash it just enough to keep it in place, then using a hammer with a large flat punch to squash it down nice and tight. After I was satisfied with that, I used the propane torch again to heat it up and flow a healthy amount of solder to ensure a good connection. Of course to do this I had to remove the plastic sheath, but afterwards gave all the connections a good wrap of electrical tape, 3M brand; not that cheap stuff.
Going back to the fuse, I had to use a step drill to open up the holes to accept the larger 10mm bolts. I would have used smaller bolts but I had to use something large to accomodate the lock washers and eyelets I was using. Of course, a liberal amount of black tape was again used to keep these bolts and such from shorting anything out. I'm sure there is a better solution for this, but I'm happy with this.
As for my existing accessories that were previously installed with an eyelet on the battery terminal, I ended up extending these wires and soldering them together so both wires could take up a single slot with still room to spare. I could probably fit another wire of the same size in this slot comfortably. Assuming this is correct, I can add up to four more lines for low current (30 amps or less) applications if I ever find a reason to.
Note that the set-screw for the positive terminal require allen keys.
Before the positive terminal was installed, I removed the much newer brass terminal and moved it over to the negative post as I wasn't happy with the crimp and solder style terminal I had installed prior. Much better now.
One thing that bugs me is my battery terminals don't match, in the respect of their bolts not matching. The positive terminal is 9/16ths as the negative is half inch. I also don't care for the thumbscrew/nut combo on the positive terminal either, so I'll likely replace the bolt on the positive terminal later on with something else.
Using my multimeter, there is no resistance on the positive terminal to the post of the battery. An awesome connection I'd say. As for the negative terminal there is 0.4 ohms of resistance. Perhaps with a little more cleaning on the post I can get that down to zero.
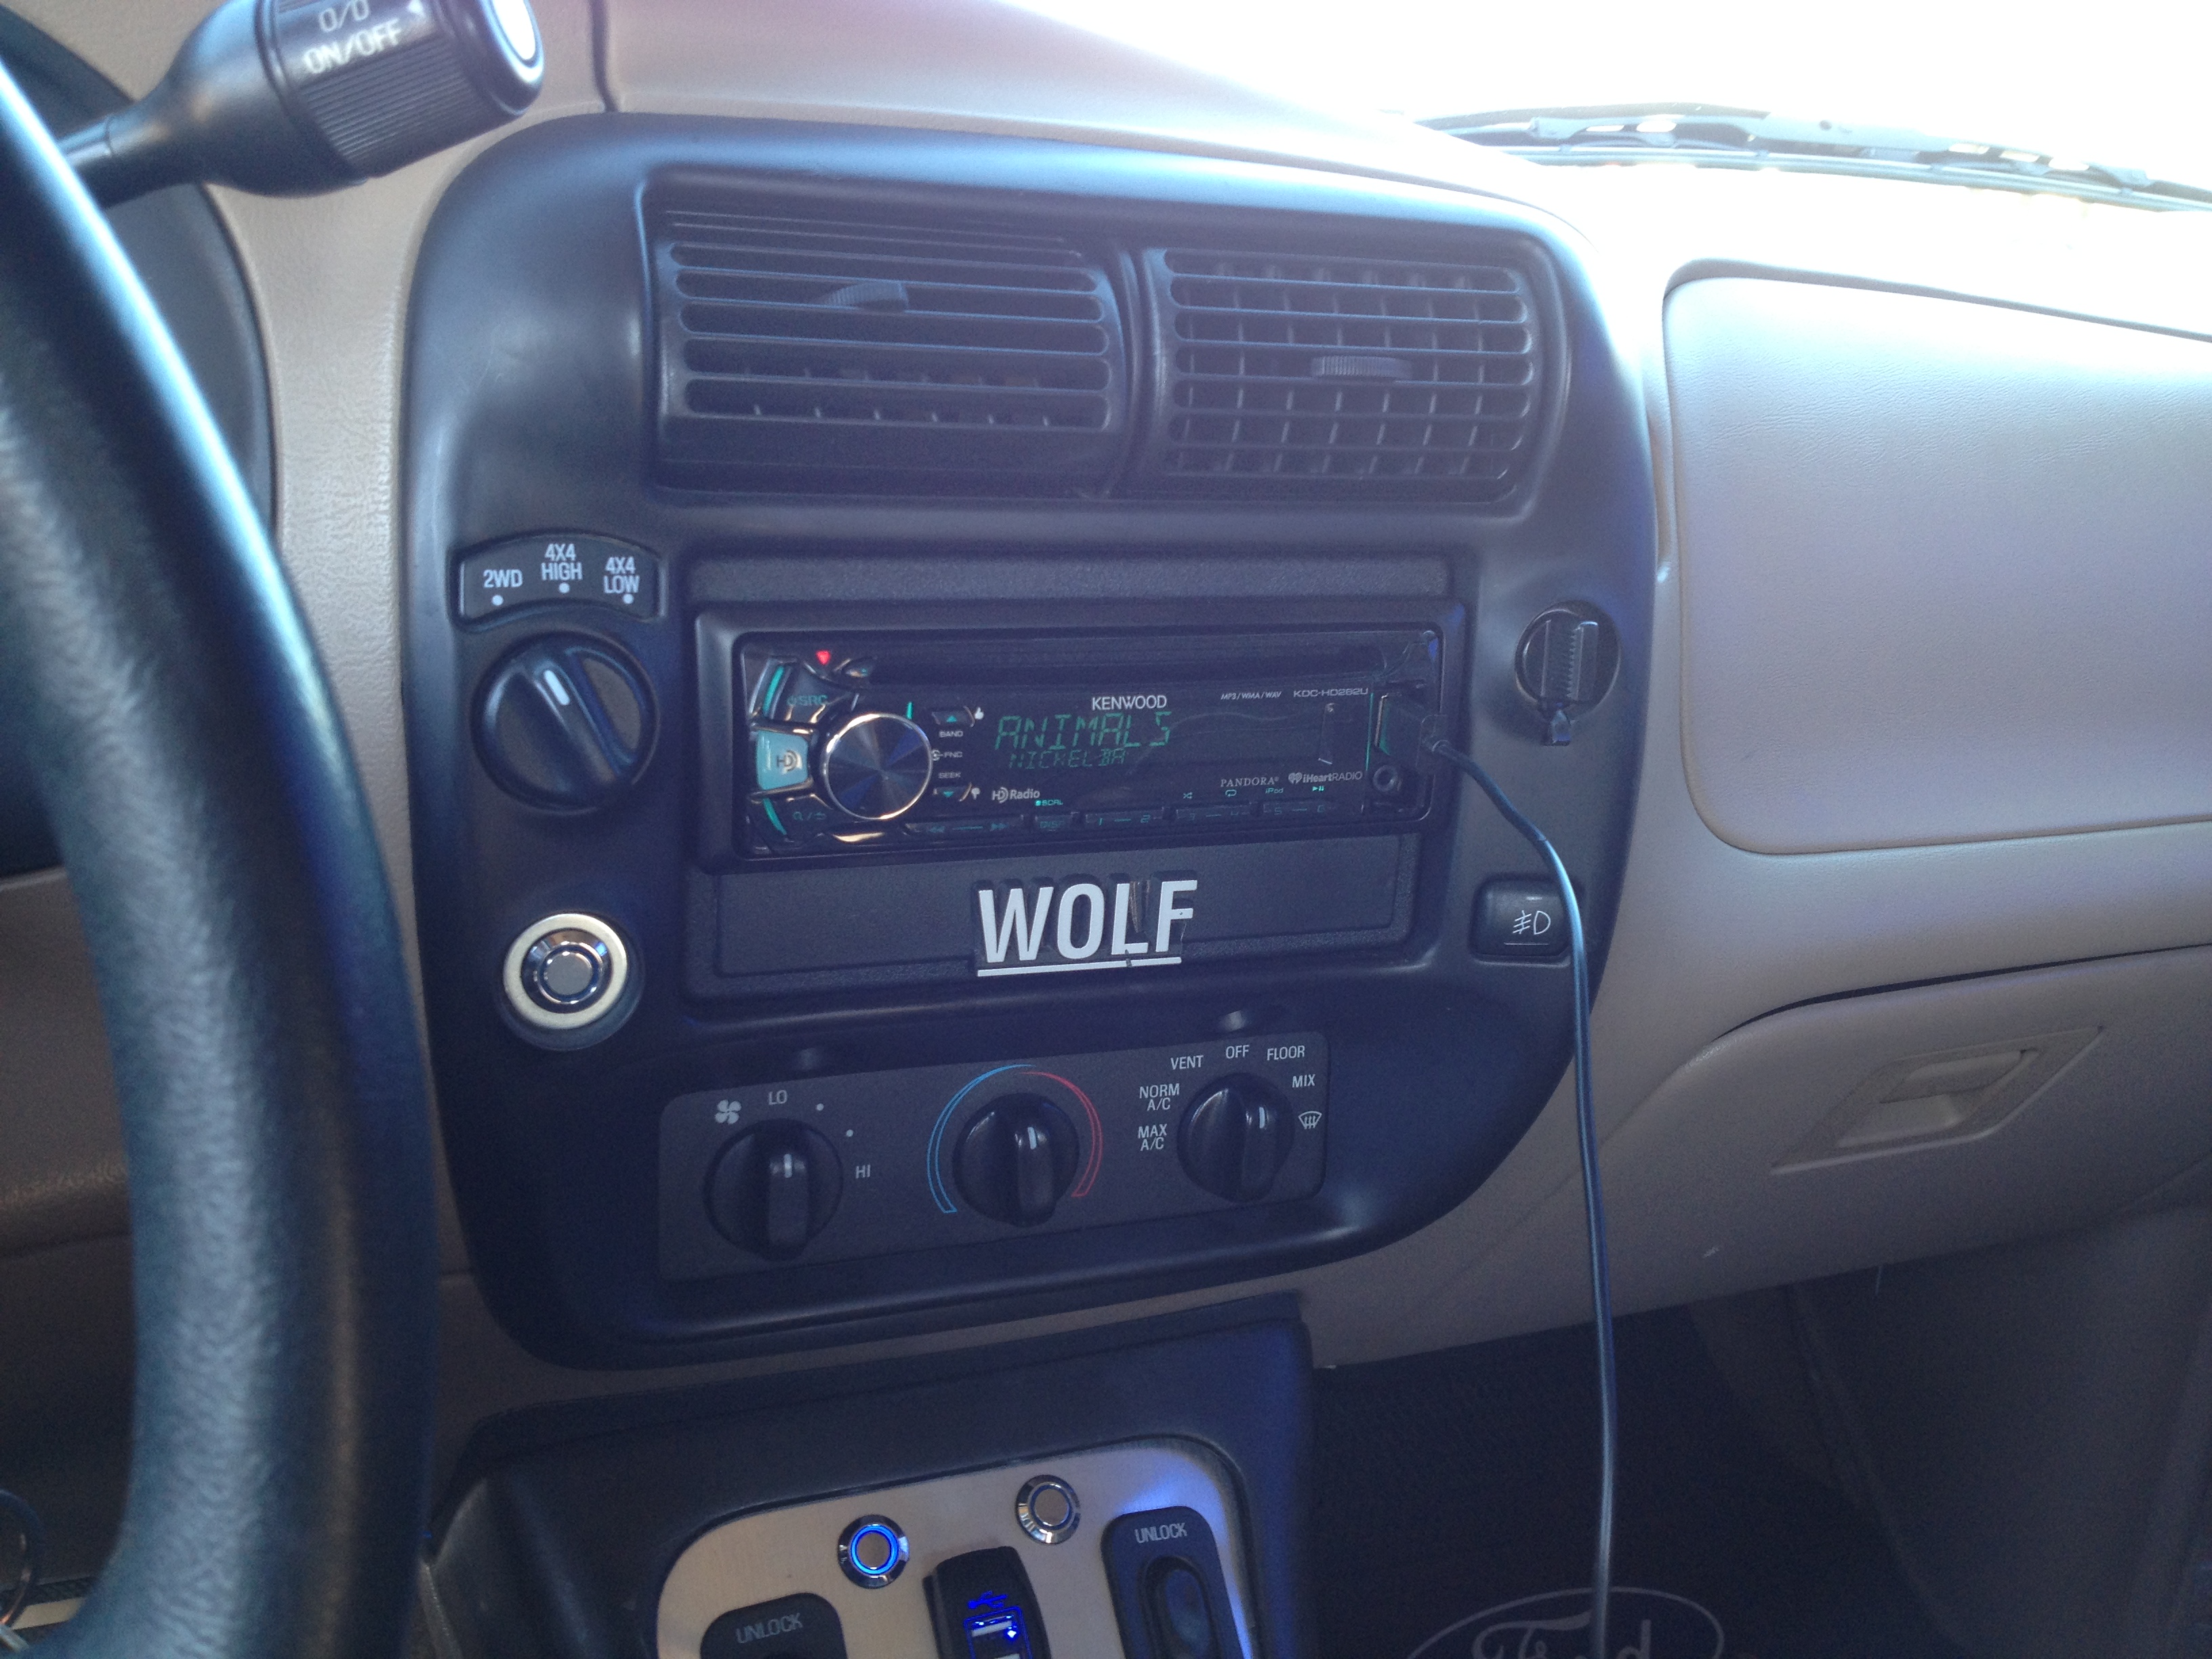
I'm also tossing in a photo of my head unit as I had forgotten to post a photo of it earlier.


Anyway, onto my second order of buisness.
I've been battling a wet floor for a while now. I've managed to rule out both the heater core and the third brake light as being sources of water leaks.
So next I pulled my seat out, took out the inverter and it's mounting plate, as well as any other necessary parts to fold the carpet back. I found two rubber grommets in the floor. One, smaller grommet which lead directly to the underside of the truck, and another which lead to a box where a body bolt was hidden.
Water had to be coming from somewhere, so I decided to RTV the smaller gasket with hopes that would at least help. There was quite a bit of dirt and such around it, so I believe this may have been where it was coming in, which would explain why it did when it would rain, but not if I flooded the cowl or the door frame with a garden hose.
I also took an ice pick and cleared out the holes on the 'drain pans' for the cowl on both sides. The driver's side, ironically enough, was the only one which was clogged.
I also blew compressed air through the ac drain, but nothing came of that. As of now, the carpet is sitting up with a small fan blowing air to dry it out.
Also, my battery terminal came in today! Given I have a four gauge wire running just for the inverter, I thought it would be a good idea to upgrade the battery terminal so both the OEM cable as well as the inverter's cable could have a nice solid connection.
You'll notice that there isn't enough holes for the two oem cables as well as my four gauge cable to each have their own slots. Well that wasn't much of an issue. I cracked out the propane torch (because solder) and while the solder was molten I squashed both the cables together and effectively compressed the two enough to fit in the larger slot.
The four gauge cable I have not yet connected because of a positive cable flopping around in the interior as it is not connected to the inverter.
For a fuse, I bought a Bussman 'fusible link' rated at 80 amps. Using a 10mm nut and bolt I connected the fuse in line with the 4 awg using eyelets. Given I don't have a crimper that's big enough for these four gauge eyelets, I ended up using a bench vise to squash it just enough to keep it in place, then using a hammer with a large flat punch to squash it down nice and tight. After I was satisfied with that, I used the propane torch again to heat it up and flow a healthy amount of solder to ensure a good connection. Of course to do this I had to remove the plastic sheath, but afterwards gave all the connections a good wrap of electrical tape, 3M brand; not that cheap stuff.
Going back to the fuse, I had to use a step drill to open up the holes to accept the larger 10mm bolts. I would have used smaller bolts but I had to use something large to accomodate the lock washers and eyelets I was using. Of course, a liberal amount of black tape was again used to keep these bolts and such from shorting anything out. I'm sure there is a better solution for this, but I'm happy with this.
As for my existing accessories that were previously installed with an eyelet on the battery terminal, I ended up extending these wires and soldering them together so both wires could take up a single slot with still room to spare. I could probably fit another wire of the same size in this slot comfortably. Assuming this is correct, I can add up to four more lines for low current (30 amps or less) applications if I ever find a reason to.
Note that the set-screw for the positive terminal require allen keys.
Before the positive terminal was installed, I removed the much newer brass terminal and moved it over to the negative post as I wasn't happy with the crimp and solder style terminal I had installed prior. Much better now.
One thing that bugs me is my battery terminals don't match, in the respect of their bolts not matching. The positive terminal is 9/16ths as the negative is half inch. I also don't care for the thumbscrew/nut combo on the positive terminal either, so I'll likely replace the bolt on the positive terminal later on with something else.
Using my multimeter, there is no resistance on the positive terminal to the post of the battery. An awesome connection I'd say. As for the negative terminal there is 0.4 ohms of resistance. Perhaps with a little more cleaning on the post I can get that down to zero.
I'm also tossing in a photo of my head unit as I had forgotten to post a photo of it earlier.
#82
03-03-2016
Finally, I get a break. As I mentioned before, I silicone RTV'd the smaller grommet with a healthy amount and allowed it to cure over night with the carpet up. During this time, the carpet too was drying as it was slightly damp.
Came out this morning and found the carpet nice and dry. Unfortunately the padding was coming apart underneath the passenger side carpet, so I decided to tear off as much as I could, wearing a mask to protect my lungs. Was rather grody anyway. After it was removed, I opted to use a small green rug, which actually was an improvement over the factory padding. That being said, the driver's side was still perfectly fine so I opted to leave well enough alone.
So with that in and everything smoothed out, I reattached the black scuff plate with it's four screws as well as the tan panel which is held down by said scuff plate. At this point the seat is not installed as of yet, but it's four screws all in their respective threads to keep water from coming in that way.
With everything closed up, I took the truck out for a drive in the rain. Highway, backroads, etc. About 20 minutes worth of driving with the heat/defrosters on, everything. Came back, parked, and peeled the carpet back to find it is bone dry, and that makes me happy. Rather toasty under there, too. Appears that I have this nipped in the bud and my floor can be mold free another day.
#83
03-03-2016
There's been something that I've been wanting to do since day one that I've gotten this truck. Replace the carpet.
The carpet is in decent shape, but it's got a stain here and there, so on and so forth. I want to get some indoor/outdoor carpet, that isn't too harsh on a bare foot but also isn't going to be tough to clean, lay that in the interior and cut the necessary holes, and lay that down with some padding. I've always felt the floor was a little hard for my taste.
I think tomorrow I'm going to head down to Menards or Home Depot and see what kind of carpet is available, see if there's anything I would like in my truck. I'm also considering black carpet instead of tan. Depends what's available. Hopefully I can get some samples.
#84
03-04-2016
I went to both home depot and Menards today. Home Depot didn't have anything that would work for my purposes, no indoor/outdoor carpet, but menards does.
Pure black carpet that's gentle on skin but is easy to clean. The best part is how flexible it is. I may just post a video showing just how flexible it is in comparison to traditional waffleback carpet. If you've ever handled waffleback carpet, you know just how not flexible it is.
Here's a link to it. http://www.menards.com/main/flooring...308-c-6542.htm
Now I need to take some measurements and find out how big of a piece I need, because I need this carpet to be one solid piece. I will not deal with a seam, no way, no how. I'll only be padding the footwells, btw. Reason being, that is the only place feet will ever be on the floor. Padding anything else, except maybe the center console's underside for sake of gap, would be a waste of time and money.
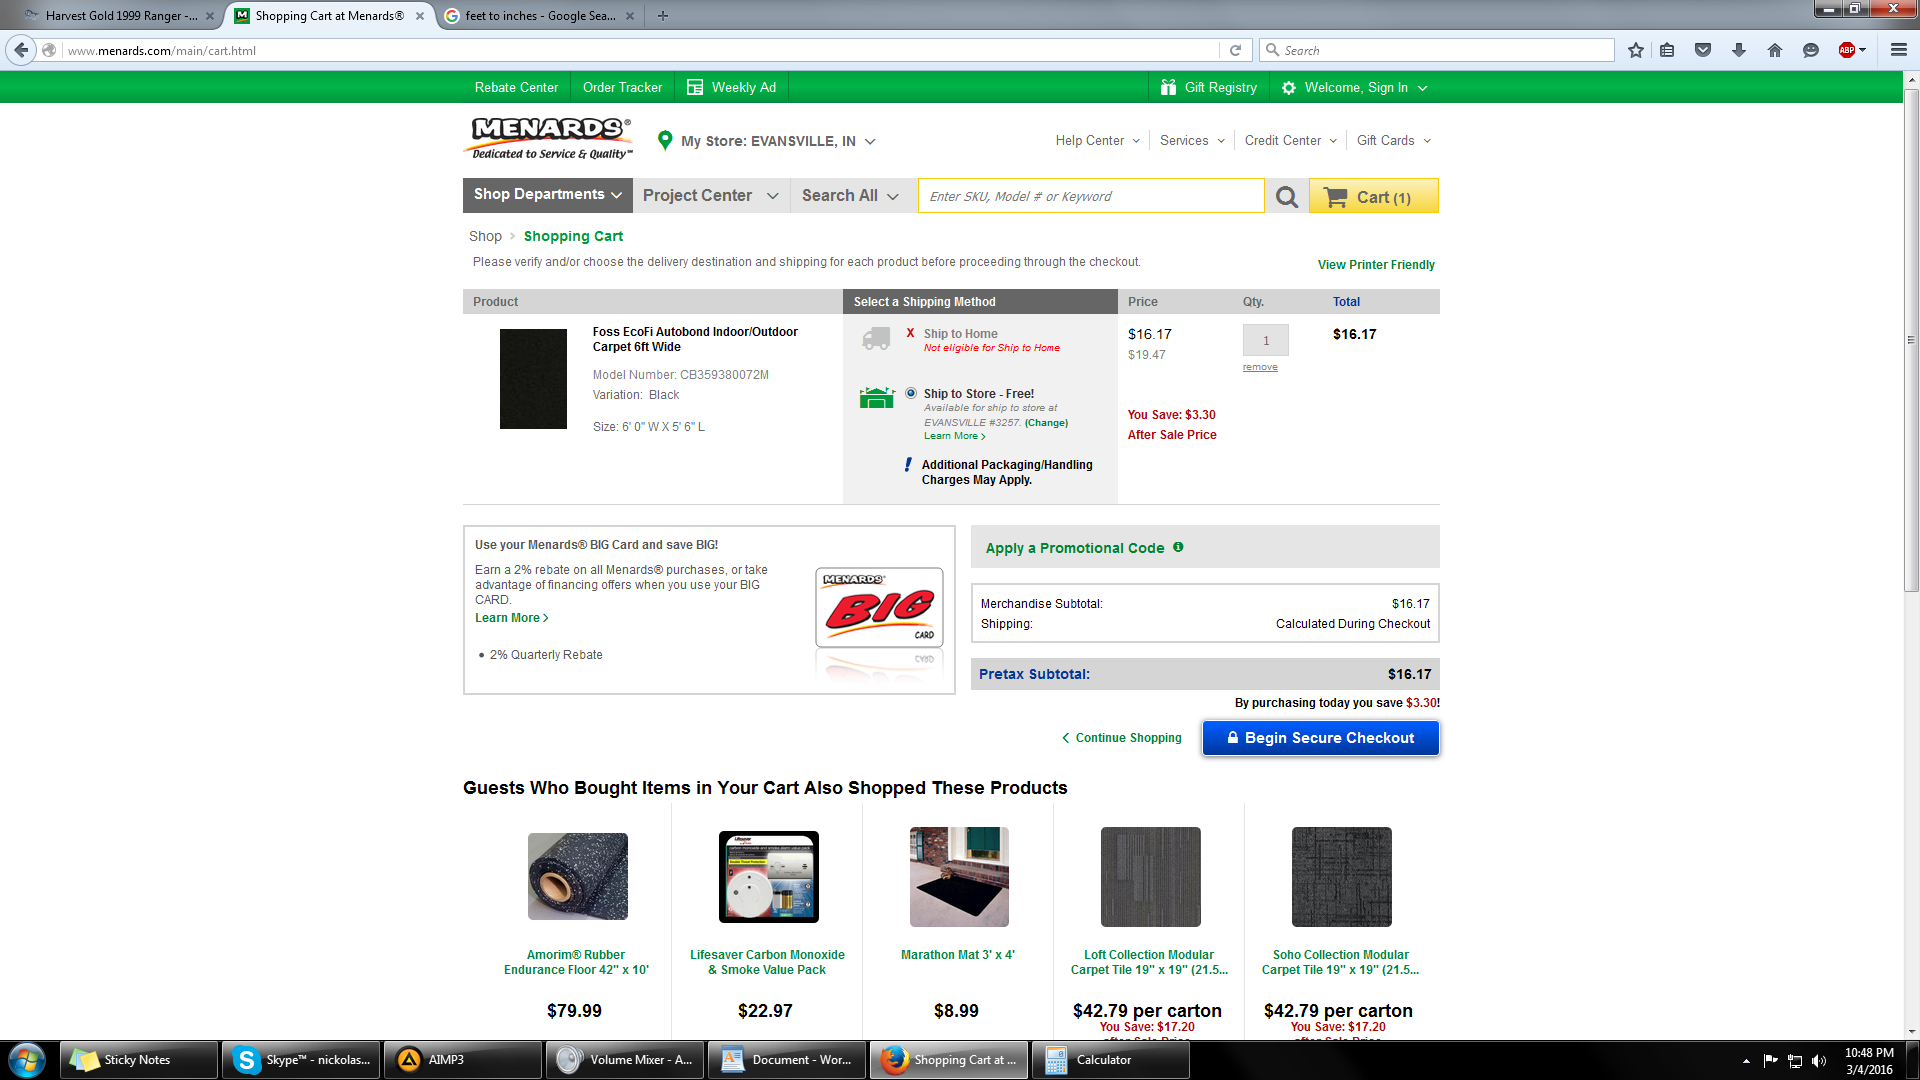
EDIT: Oh my God this incredible! I love it when things are this cheap. I went out to the truck and measured and, well, let the screenshot do the talking. 20 bucks for the carpet! INCREDIBLE!!!!!! There must be some mistake. There's no way it's this cheap.
Pure black carpet that's gentle on skin but is easy to clean. The best part is how flexible it is. I may just post a video showing just how flexible it is in comparison to traditional waffleback carpet. If you've ever handled waffleback carpet, you know just how not flexible it is.
Here's a link to it. http://www.menards.com/main/flooring...308-c-6542.htm
Now I need to take some measurements and find out how big of a piece I need, because I need this carpet to be one solid piece. I will not deal with a seam, no way, no how. I'll only be padding the footwells, btw. Reason being, that is the only place feet will ever be on the floor. Padding anything else, except maybe the center console's underside for sake of gap, would be a waste of time and money.
EDIT: Oh my God this incredible! I love it when things are this cheap. I went out to the truck and measured and, well, let the screenshot do the talking. 20 bucks for the carpet! INCREDIBLE!!!!!! There must be some mistake. There's no way it's this cheap.
Last edited by TheArcticWolf1911; 03-04-2016 at 09:54 PM.
#85
03-07-2016
Update on the carpet. No, it wasn't wrong. Still surprised, because it seems nothing I ever do is so budget-friendly. Turns out the pics I took today were all crap, so I have to take more. Carpet is in the truck, took two days to do it using 3/8ths padding.
Took advantage of the nice weather today and gave the Ranger a bath and a new coat of wax for spring. Also took each wheel off one at a time to give them a buff with some mother's polish via drill-cone. Brass brush with some armorall wheel and tire cleaner on the tires along with some turtlewax tirewet spray to make 'em look new.


While putting one of the wheels back on, I forgot I set the lugnuts on the bench. Went to get them, turned around, and immediately cracked up. Thought you guys would laugh, too.

Took advantage of the nice weather today and gave the Ranger a bath and a new coat of wax for spring. Also took each wheel off one at a time to give them a buff with some mother's polish via drill-cone. Brass brush with some armorall wheel and tire cleaner on the tires along with some turtlewax tirewet spray to make 'em look new.
While putting one of the wheels back on, I forgot I set the lugnuts on the bench. Went to get them, turned around, and immediately cracked up. Thought you guys would laugh, too.
#86
03-07-2016
By the way, I forgot to mention. To anybody who shops at harbor freight, BEWARE of anything with threads on it. Got a hold of a harborfreight blowgun and removed the fitting which would go to an air hose. The threads decided to slice my thumb open. Lots and lots of bleeding. I actually pulled a shaving of metal, a fair size one, out of my thumb. Just a tip to those of you unaware as I was.
#87
03-10-2016
Well, today I took my LED 9007s out of my headlamps and stuffed the halogen bulbs back in. So, why the change, you may ask?
Just to get this out of the way, no, I was not pulled over nor did people start to flash me, nothing of that nature.
The LED bulbs I used are brighter than the stock bulbs, but they need to be refined. As I mentioned in a previous post, they do not follow a traditional beam like the stock bulbs do. These beams are more like a flashlight than anything. For upclose illumination, like in wearhouses and such, they're fine.
But come on, how many people use pickup trucks in wearhouses and nowhere else? Not me. These LEDs simply don't reach as far as they should and thus do not preform very well at night in comparison to the stock bulbs.
I drove around at night, few streetlights, using a mix of high and lowbeams when appropriate and found I could see farther with the halogen bulbs. There's one problem I still had with the halogen bulbs, though. They're old which means they're dim.
To combat that, I've ordered a pair of Nighthawk Platinum 9007 bulbs from General Electric on amazon for 12 bucks.
I still want to install spot lights, but I'm confident that these Nighthawk Platinum bulbs will suit fine for my applications, at least for the time being.
Unfortunately I'm past the return date for this kit, so I'll be listing in on ebay along with my old manual flag mirrors.
I'm considering swapping out my 'fog' lamps, as well in favor of something better.
Unfortunately, my fog lamps leave much to be desired in the way of illumination. They make excellent driving lamps, being seen and such during those certain weather conditions or times of day where cars blend in. They look good, too. Unfortunately that is where the pros stop. Fog lights are designed to be hung low and spread wide light over a short distance, the object being to illuminate the area underneath the fog so you can see. While the effectiveness of these is questionable in a fog situation, you're also supposed to be able to rely on them without your headlights at all. These do not do that, not even in a neighborhood do they provide sufficient area illumination. Like I said, good driving lights. If I had bought them for this reason I would be happier, but that being said, I bought these for fog purposes. Granted, I don't remember the last time we had fog, but my point remains.
Now, the question is. Is this my fault for not choosing the proper product or did I do the proper research and the product itself fails to measure up to it's specifications? To be completely honest, I believe it's both. The lamp itself claims to be a fog lamp replacement as well as a work light. A work light, maybe it does serve this purpose well. I don't know and never will. A fog light, it is not in any sense of the word. On my part, I should have looked closer at the specifications. I think for this light in particular, it's beam angle is just right but the fact of the matter is, it's illumination is wrong; too dim. It needs to pump out more light. It does illuminate reflective street signs, so the light is getting there, but not enough for our eyes to see objects which are not reflective, which is 99% of the road and it's surroundings. Will I swap fog lights? Maybe, maybe not. We'll have to wait and see.
#88
03-13-2016
#89
03-18-2016
After much laziness, carpet pics!


Now with that off my mind, onto a much more serious project of mine which I plan to carry out. Although, bear in mind, I have yet to move (or even pack) and a pole barn must be built before any of this can be even brought to life.
With the mention of moving and a pole barn, you can gather that there will be much more space for something like this, making an engine swap doable. In my current residence, and our two car garage, it just can't happen unless I do it somewhere else.
Anyway, I plan on finally kicking my 3.0 Vulcan to the curb in favor of a 4.0 SOHC. Yeah, I'm going to skip out on a 5.0 for a few reasons. Expensive aftermarket parts which aren't optional, meaning I'm screwed if I can't find a part, and 5.0 explorers are few and far between around my area whereas 4.0 explorers are EVERYWHERE. It simply makes more sense in my case with my very low budget.
But why an explorer and not a Ranger? After all, the Ranger did come with an SOHC. True, but Rangers are expensive around here in most cases. And when the drivetrain isn't flat out shot, it's all simply too clean and straight for me to be able to rip the drivetrain out of it in good faith. Explorers can be found around here for less than two grand, and in some cases less than even one grand, which is very budget friendly. Not to mention, they're usually pretty rough which makes it undesirable as far as looks goes. That being said, there's some nice ones too for that price.
Another thing to look at is the fact of parting the rest of it out. If I'm lucky, the explorer may have some desirable parts on it. More desirable parts means more money back on my investment. Among those parts, I'm hoping it'll have an aluminum driveshaft I can steal out of it for Gold Dust.
Alright, time to talk application. What all am I going to do with it once I have it? Just drop it in and be on my way? I'd like to do better than that. Of course while I have the 4.0 engine out, the plugs, wires, thermostat, etc will all be replaced.
As far as looks go, both the engine and engine bay will be given a good scrubbing with degreaser and a pressure washer. I'd also like to primer and paint the engine bay (fixing any rust of course) as well as primer and paint the engine itself. I'd paint the engine blue, specifically. The bay would likely be black or harvest gold. Not a rattle can job either. Spray gun! All out or go home.
To top the engine off, I'd like to incorporate a few performance parts to squeeze more go out of it. Supercharger, coil pack, a good set of plugs and wires (motorcraft), etc. Just what performance parts will be bolted on, that remains to be seen. More research required for that. Suffice it to say, more go will be squeezed like a lemon out of this engine, while still keeping it within it's limits of course.
Of course if we're squeezing more go out of a bigger engine, we need to stop too. I'm thinking a good set of performance pads with some drilled/slotted rotors and perhaps a set of steel braided brake lines would be thrown at it, all new brakefluid as well just because. Again exactly what brake parts would be installed also remains to be decided. Researching.
After all that, we want some nice sound too. I'll be installing a true dual exhaust system, likely with either glasspacks or flowmaster mufflers. Catalytic converters will also be used. 2.5 inch diameter pipe all the way throughout, exiting either out the back or in front of each rear wheel. That too remains to be decided.
A lot of this is still up in the air, but what you've read here will likely be what will take place. Again bear in mind it will be a while before I even start on this. The space is required, and I need some extra tools. Welder, better compressor, to name a couple. The aftermarket parts, vehicle, and exhaust parts will also be needed as well as the basic tuneup parts and fluids. You should see dollar signs and hear cashregisters dinging by now.
Somewhere in there, I would also like to work in a new coat of paint and all the dents to be fixed. She will remain harvest gold, for those wondering. Although I have to admit, tuxedo black with the glass dust would look ultra sexy.
#90
03-18-2016
On a more realistic point, got froggy and took out my bedliner. Removed the bedside covers with ease, although the bolts needed some persuasion to come loose. Nothing unusual there.
The tiedown bolts were another story. These puppies were rotten, and I do mean rotten; in the form of rust. I managed to remove three completely. Three more twisted off, one had to be drilled, and another had to be turned out with vicegrips. Fun.
I'll have to buy new screws, then drill and tap new holes for new bolts. I plan on having one Eye Bolt for each corner to not only hold the existing tiedowns down but to moreso provide another way to hook up my ratchet straps. They like to slip off of the factory tiedowns. However, after making a post on Dewey's thread and spawning an idea while suggesting how to fix one of his, I think I may use some steel and make my own tie downs. Maybe. Either way, improvements to be made.
Anyway, here's what I ended up with after some wirewheeling on a drill. Not bad, but not exactly what I wanted to see.


I'll wirewheel the area again to remove any surface rust that may have developed between the time of now and when I get the paint, then clean the area with acetone on a rag. Afterwards I'll spray down three different rustolem products. One of which converts the iron oxide into a paintable surface, then primer which also has rust prevention additives, then a coating of undercoating, also with rust inhibitors. For the area with the hole, the rust converter will be sprayed first and allowed to dry for two hours then patched with fiberglass. Ideally, I'd want to cut out and weld in new metal but, no welder. I'm comfortable with fiberglass in this case, though.
The bed side and tailgate caps too will get some love with some sandpaper and a couple coats of krylon black to make 'em look nice while I have them off. After that, the differential, front member/control arms, axels, etc, will get the same treatment of wirewheeling, rust converter, primer, then undercoating.
The tiedown bolts were another story. These puppies were rotten, and I do mean rotten; in the form of rust. I managed to remove three completely. Three more twisted off, one had to be drilled, and another had to be turned out with vicegrips. Fun.
I'll have to buy new screws, then drill and tap new holes for new bolts. I plan on having one Eye Bolt for each corner to not only hold the existing tiedowns down but to moreso provide another way to hook up my ratchet straps. They like to slip off of the factory tiedowns. However, after making a post on Dewey's thread and spawning an idea while suggesting how to fix one of his, I think I may use some steel and make my own tie downs. Maybe. Either way, improvements to be made.
Anyway, here's what I ended up with after some wirewheeling on a drill. Not bad, but not exactly what I wanted to see.
I'll wirewheel the area again to remove any surface rust that may have developed between the time of now and when I get the paint, then clean the area with acetone on a rag. Afterwards I'll spray down three different rustolem products. One of which converts the iron oxide into a paintable surface, then primer which also has rust prevention additives, then a coating of undercoating, also with rust inhibitors. For the area with the hole, the rust converter will be sprayed first and allowed to dry for two hours then patched with fiberglass. Ideally, I'd want to cut out and weld in new metal but, no welder. I'm comfortable with fiberglass in this case, though.
The bed side and tailgate caps too will get some love with some sandpaper and a couple coats of krylon black to make 'em look nice while I have them off. After that, the differential, front member/control arms, axels, etc, will get the same treatment of wirewheeling, rust converter, primer, then undercoating.
Last edited by TheArcticWolf1911; 03-18-2016 at 10:44 PM.
#91
03-19-2016
With the carpet being recent, I'll go into more detail about how I went about it. Unfortunately I neglected to take photos during the install process.
Before I start, I'm just going to lay this out now (no pun intended). This is my first time laying carpet. That being said I'm sure I made plenty of mistakes, and it is not a perfect install, but for less than 20 dollars it turned out very nice in my eyes, although it would have been nicer done by a professional, but more expensive and that's money I don't have. If you can't tell by now, my budget is severely limited, although I plan to change that.
Anyway, let's begin. I purchased a 6x6 foot square of carpet at my local Menards. It's indoor outdoor carpet and at the time of purchase was 49 cents per square foot, ten cents off per square foot on sale. Auto Bond Black was the specific carpet I used.
Here's a screencap of all the info you should need to find the carpet I used if you want to use it.

No matter what carpet you use, there is one MAJOR factor to it, and I cannot stress this part enough. It must be a very flexible carpet. If it isn't flexible, immediately forget about it. Unless you have access to special equipment or are a master carpet layer, then move on. This carpet was as flexible as paper, almost.
Next up is padding. I used 3/8ths carpet padding like what you'd use in a house and this worked well. If you need to buy some, a 6x6 square is ideally what you want.
I first gutted my interior, removing anything holding the carpet in. Stupid me and my full length console didn't wire it up using a plug which meant it had to stay in the truck
Lessons were learned that day. Anywho, the hardest part of gutting it for me was one of the middle seat, seatbolts. It was frozen like a side of beef. If you run into this same problem, DO NOT USE HEAT! If you do, you'll likely set the carpet on fire no matter what you do. I didn't do this, but I know sometimes people don't think things through, myself included; like that console I mentioned earlier.
To get it un-frozen I used a sledge hammer and a piece of steel to bash on it (ideally I would jave wanted to use brass), a wire brush and silicone wd40 on the underside to clean up the rust, a 3/8ths impact gun with a pathetic compressor, and a 3/8ths breaker bar with pipe. Eventually it did break loose, much to my enjoyment.
At that point the carpet came out and was laid in the driveway, out of the way. I needed an extra set of hands to hold my console up off the floor while I pulled the carpet underneath it. If you can remove the center console then do that.
One tip I used was to use the old carpet as a guide. I had to make a relief cut in the middle so it would spread evenly to both sides. I made several relief cuts when absolutely necessary and cut away excess material also when needed. Remember, you can always cut more off.
This part is really trial and error and it's all about smoothing the carpet out. Getting the seats in will be the hardest part, most likely. A small drill bit in vice grips (or ice pick) and a pair of scissors or razor blade can be used to cut the holes out for the seat bolts in both the padding and the carpet.
You can use your weight to help mash everything down so the seat bolts fit. I found I needed to tighten the front seat bolts to get the rear seat bolts to align properly. You may run into the same thing.
I used an ice pick soley to get the scuff plate screws through the carpet. This worked rather well, although it is kind of a pain when removing it for whatever reason. You could probably get away with not having carpet in the way of the screws in the first place.
One thing to mention, if you do not want to use the center seat belt for any reason, put the bolts back in their holes with the rubber grommets used. You can use RTV if you want. If you do want to use them, but want a clean install, you can cut slits in the carpet for the belt to run out of, too. I have no reason for mine so I left them out entirely. The same logic here can be applied to any cables that come through the carpet. Think seats. Speaking of seats, only the center seat belt needs to be removed. The jump seat belts (if you have them) and the main seat belts can stay put.
For the rear portion of the cab, extended specifically, you don't have to remove your jump seats, 4 or 2 door regardless. Just fold them up. What you DO have to remove, however, is the plastic trim along the bottom of the seat. This is held in by two christmas trees and is quickly and easily removed with a good tug.
Don't worry too much about the carpet around here, so long as the necessary relief cuts/smoothing is done. The cover we removed will hide a lot of it. The carpet along the back can simply be trimmed down and slipped underneath the plastic going along the back of the cab.
For the foot wells, do be sure (on the driver's side) that there are no lumps or anything that will interfere with your pedals. Floor mats, if you use them, will help protect you from this.
Once you're done, vacuum it off. Note that the carpet will relax over time so fitment may change. I haven't seen any issues arise from this, though. Enjoy your new carpet on the cheap.
Before I start, I'm just going to lay this out now (no pun intended). This is my first time laying carpet. That being said I'm sure I made plenty of mistakes, and it is not a perfect install, but for less than 20 dollars it turned out very nice in my eyes, although it would have been nicer done by a professional, but more expensive and that's money I don't have. If you can't tell by now, my budget is severely limited, although I plan to change that.
Anyway, let's begin. I purchased a 6x6 foot square of carpet at my local Menards. It's indoor outdoor carpet and at the time of purchase was 49 cents per square foot, ten cents off per square foot on sale. Auto Bond Black was the specific carpet I used.
Here's a screencap of all the info you should need to find the carpet I used if you want to use it.
No matter what carpet you use, there is one MAJOR factor to it, and I cannot stress this part enough. It must be a very flexible carpet. If it isn't flexible, immediately forget about it. Unless you have access to special equipment or are a master carpet layer, then move on. This carpet was as flexible as paper, almost.
Next up is padding. I used 3/8ths carpet padding like what you'd use in a house and this worked well. If you need to buy some, a 6x6 square is ideally what you want.
I first gutted my interior, removing anything holding the carpet in. Stupid me and my full length console didn't wire it up using a plug which meant it had to stay in the truck
Lessons were learned that day. Anywho, the hardest part of gutting it for me was one of the middle seat, seatbolts. It was frozen like a side of beef. If you run into this same problem, DO NOT USE HEAT! If you do, you'll likely set the carpet on fire no matter what you do. I didn't do this, but I know sometimes people don't think things through, myself included; like that console I mentioned earlier.
To get it un-frozen I used a sledge hammer and a piece of steel to bash on it (ideally I would jave wanted to use brass), a wire brush and silicone wd40 on the underside to clean up the rust, a 3/8ths impact gun with a pathetic compressor, and a 3/8ths breaker bar with pipe. Eventually it did break loose, much to my enjoyment.
At that point the carpet came out and was laid in the driveway, out of the way. I needed an extra set of hands to hold my console up off the floor while I pulled the carpet underneath it. If you can remove the center console then do that.
One tip I used was to use the old carpet as a guide. I had to make a relief cut in the middle so it would spread evenly to both sides. I made several relief cuts when absolutely necessary and cut away excess material also when needed. Remember, you can always cut more off.
This part is really trial and error and it's all about smoothing the carpet out. Getting the seats in will be the hardest part, most likely. A small drill bit in vice grips (or ice pick) and a pair of scissors or razor blade can be used to cut the holes out for the seat bolts in both the padding and the carpet.
You can use your weight to help mash everything down so the seat bolts fit. I found I needed to tighten the front seat bolts to get the rear seat bolts to align properly. You may run into the same thing.
I used an ice pick soley to get the scuff plate screws through the carpet. This worked rather well, although it is kind of a pain when removing it for whatever reason. You could probably get away with not having carpet in the way of the screws in the first place.
One thing to mention, if you do not want to use the center seat belt for any reason, put the bolts back in their holes with the rubber grommets used. You can use RTV if you want. If you do want to use them, but want a clean install, you can cut slits in the carpet for the belt to run out of, too. I have no reason for mine so I left them out entirely. The same logic here can be applied to any cables that come through the carpet. Think seats. Speaking of seats, only the center seat belt needs to be removed. The jump seat belts (if you have them) and the main seat belts can stay put.
For the rear portion of the cab, extended specifically, you don't have to remove your jump seats, 4 or 2 door regardless. Just fold them up. What you DO have to remove, however, is the plastic trim along the bottom of the seat. This is held in by two christmas trees and is quickly and easily removed with a good tug.
Don't worry too much about the carpet around here, so long as the necessary relief cuts/smoothing is done. The cover we removed will hide a lot of it. The carpet along the back can simply be trimmed down and slipped underneath the plastic going along the back of the cab.
For the foot wells, do be sure (on the driver's side) that there are no lumps or anything that will interfere with your pedals. Floor mats, if you use them, will help protect you from this.
Once you're done, vacuum it off. Note that the carpet will relax over time so fitment may change. I haven't seen any issues arise from this, though. Enjoy your new carpet on the cheap.
#92
03-23-2016
Small update with regards to maintenance.
Finally got my bedliner back in, so it looks good again. For those of you who also have found rust in their bed, but not much, let me go over the products I chose as well as the procedure I took.
The main goal is to stop the rust in it's tracks as well as preventing new rust from forming. While a wire brush and some cheap paint will probably fix it, let's spend a little more to keep us from spending a lot more later. With the paint and primer we bought now, we can use them on later projects too.
First thing to do is to get rid of as much rust as possible. A hand held wire brush will do, but power tools are better. I used a drill with a wire wheel attachment, although an angle grinder with a wire wheel would probably work much better. Realize now that we'll never get it 100% rust free with this alone. The goal here is to remove as much as we possibly can. You can use some solvents if you wish.
Once you have all the rust cleaned up as best you can, clean the area with rags and either acetone or lacquer thinner. Keep any solevents or tools, or paint for that matter, off of the paint you want to protect, like your fenders and cab. As for the paint in the bed, we don't care how this paint looks as we'll be covering it later for extra protection.
Note that from this point forward, the vehicle does not get exposed to rain, or salt, etc. We want to keep this metal as clean as possible. If you have a hole like I did in the bed, but no access to a welder, fear not. I purchased a fiberglass kit in the piping section of my local menards for ten dollars. Simply follow the instructions on the box and lay it over the area. Allow it to cure for 24 hours at minimum, 48 if you want to be extra sure that it's nice and set. I won't cover much about the fiberglass, as each kit will likely be different and what I did with my kit may not work well with yours. One thing to definitely do though, is to WEAR GLOVES. Your kit should come with a set you can throw away afterwards. This stuff is nasty.
Once your fiberglass has cured, or your welds cooled if you went that route, clean off any dust or debris that may have gotten on the bed. Now, we need three products, all made by Rustolem. Rust Reformer, Primer, and Undercoating. The Rust Reformer's job is to kill any rust we couldn't get to and leave a nice paintable surface. The primer is to protect the rust reformer, the bed, and prevent future rust, as will the undercoating. You can use any color you want, but in the end it won't matter at all what color it is, because we're covering it back up with the bedliner. This being said though, the undercoating is paintable so you can paint it the factory color if you wish to do so. The final color for me was black.
Rust Reformer: http://www.menards.com/main/home-dec...12126974086048
Primer: http://www.menards.com/main/home-dec...73825189292141
Undercoating: http://www.menards.com/main/home-dec...02561206135010
Quick sidenote: I sprayed rust reformer on the affected area BEFORE I laid the fiberglass down to kill any rust that was there. Whether or not you do is up to you, but I would recommend doing so.
Continuing with rust reformer, spray the rust reformer only where you saw rust, even if it's only a little bit. If you spray the entire bed you're wasting it, unless the entire bed was rusty of course. Once the reformer as dried completely, (I gave it 6 hours), spray down the entire bed with primer. I used only one coat, but you can do more if you want. I then let the primer sit overnight, but if you wanted to, you could spray it after the can says it's dried.
The next morning, the undercoating was put on. Now if you buy black undercoating, it may appear like it's being sprayed brown in color and not black. Don't panic, mine did this too. It will dry black, unless someone really did swap caps. Oddly enough, I needed two cans of the undercoating, which are larger than the primer, even though I only did one coat for each. Go figure, right?
Now once the undercoating is dried completely, you can put your bed liner back in, which is a reversal of the removal process.
A quick tip to those struggling with the bed liner. You must pull the center up for the sides to go down. Muscling it like I did will get you nowhere in a hurry. Use a breaker bar to gain some leverage if you need to. Some thick gloves are a good idea too, as the edges can be a bit sharp with pressure.
I would have taken more pictures, but I didn't feel there was very much to show. All I really did was follow the instructions on the cans, but regardless, I felt I should at least say what I did to combat this should anyone else with the same thing come along and read this project sheet. You're welcome, future person.
Next mod I'm going to cover is how I wired my cargo lights to turn on with the door circuit. Now there won't be any pictures of the actual product, but there will be a lot of words to soak in, and maybe a poorly drawn schematic to hopefully get the point across. After that I may go over my dual note horns, or maybe I'll swap them and the horns first. We'll have to see what comes our way.
#93
03-26-2016

#94
03-29-2016
No mods happening this post. Tomorrow I plan on dropping my transmission pan and changing out the fluid and filter. I had originally bought a few quarts of Supertech Mercon V for my power steering pump from walmart. Good price, good ATF in my opinion. Went back to walmart today for more ATF, and guess what. Walmart in their infinite wisdom no longer sells Mercon V of ANY description, at least mine. Multivehicle atf, dexron(?), Type F, etc; every single kind except Mercon V. Not even in the five quart jugs.
My local Menards still has a spot for Mercon V, but had none at all. Which left me to going to autozone. I ended up paying 4.99 a quart for STP brand ATF. Wasn't too happy about the price, but ATF even at that price is still cheaper than a new transmission. My fluid isn't particurally bad, but I don't know the last time it was changed and I want to stomp on it before something happens. Knowing my luck, my transmission would start to slip or something on the way to Menards to get their ATF when it was restocked. Go figure.
If anyone is curious, I'm using a Duralast filter/gasket kit from Rockauto.
#95
04-06-2016
Well, I did just as I said and changed out the fluid. Boy what a mess it makes, too! I've learned that Dawn dishsoap and a bush broom to scrub takes oil out of concrete very easily, though. Smells nice, too. Shifts smoother, runs a little better with a bit more torque (just a bit) and the gearshift lever actually moves a bit more freely which surprised me. I ended up using all five quarts to get it full.
Aside from that, Gold Dust is getting a bit of a facelift which I'm very excited about. I'm going to stick on an 01 to 03 front bumper, in chrome of course. I've never been thrilled with how my bumper fits with the J hooks, nor with my fog lights as I detailed in a previous post, so I won't waste your time here by explaining it all over again, but tl;dr, they don't exactly live up to their claim.
I can buy a brand new chrome front bumper off ebay (just the top part) for 125 shipped to my door, which is awesome. My father is giving me his old valance and fog lights w/ bulbs, so I've already got 75% of it here. Since the insides of the fogs themselves are a little nasty, I'm taking them apart, scuffing the failing chrome and painting them satin black with primer. I'll be using all new nuts and bolts for as much as I can. I'm hoping the Jhooks will fit better (I can make them fit better with a heatgun, too) and I'm stoked to have a front chrome bumper that doesn't have failing chrome. Gonna look awesome!
#96
04-11-2016
Last night I removed my 1999 bumper and test fitted a 2003 Edge bumper with my Jhooks bolted on the frame. The fitment couldn't be more perfect. Unfortunately I don't have any brackets, so I wasn't able to take any photos of it.
I did just place an order for a brand new set of brackets for 30 bucks plus a set of H10 / 9005 plugs to solder onto my existing harness, desoldered from my old fog lights. Not sure what to do with my old fog lights.
After I get my bumper, I'd like to turn my foglights yellow. I really liked how my amber lights looked, and I'd like to do that again. Not sure how I'll be doing that. Either way, I'm doing it on the cheap. 30 dollars or less.
#97
04-15-2016
While browsing around on here, I found a photo of a guy who took a regular ranger tailgate and grafted in an early 90s ford tailgate, with "FORD" embossed into the tailgate itself. Someday if I ever get a welder, I definitely want to try that.
Also, bumper brackets came in today, but without any bolts to connect it to the frame. Luckily for me, I have 4+ grade 8 bolts (1/2 inch), zinc plated, with stainless steel lock washers I can use, with matching nuts; all brand new never used.
Also, the ceramic 9005/h10 plugs came in, so I can solder those up after I get the rest of the parts I need.
#98
04-16-2016
Update on the bumper. If I get enough money from pulling rock and laying mulch, I should have a bumper ordered next week. (4/18 - 4/22). So, there's that.
While poking around on ebay motors, I found a rather nifty looking set of projector fog lights for only a couple dollars more than a pair of factory (new) fog light housings. Since my fog lights are painted on the inside, I fully intend on replacing them later on when I have some extra funds laying around. So, since I'll be running HIDs in my foglights, I feel it would make since to upgrade to projectors since I intend on replacing the ones i have anyway. I don't think I'll be wiring up the halo ring, though as I have a ton of forward facing lights as it is. Headlights, park lights and fog lights, I feel the halo rings on both sides (especially since I have my fogs on all the time anyway) would be a little excessive. In that same breath, if I find the 3000ks glare excessively with the reflectors (like, massively) then I'll hold off until I do get projectors. I've got a pair of good H10s so I'm not without light if that is the case.
Link, if anyone wants to check them out.
Halo Projector OE Fitment Clear Bumber Fog Light Lamp for 01 03 Ford Ranger Un | eBay
After seeing those, I got to thinking and began to wonder what kinds of projector headlights exist for the fourth generation. There seem to be three basic varieties in the premade selection, all the same general design but one being black, another black+smoked, and another chrome for around 80 bucks. Not bad.
However, one thing stood out to me that I'm honestly very curious about. I noticed that these aren't just a projector that a 9007 slots into and done; rather it separates it out into two H1 bulbs. A low beam projector and a high beam reflector.
If there is one thing I always felt was lacking on the Ranger was the highbeams. However, on my mother's Rendezvous, I love those highbeams. They're like spotlights. (Too bad it's a GM )
)
I could be wrong, but I believe the theory for this is all in the separation of the two modes In the stock Ranger headlight, the reflectors must be angled in such a way that the two modes still function as they should but don't interfere with the other. Doing anything in this manner will result in a loss of performance. However, in the case of a dual beam head light where there are two single beam bulbs as opposed to a single dual beam bulb, the reflector itself can be maximized to best suit the performance desired in a given scenario.
I suspect the same thing would happen in this case. Which, I'm curious to see. However, I absolutely love my GE nighthawk platinum 9007s, so I won't be changing any time soon unless one of my headlights gets busted for one reason or another. I'll probably change lenses when the bulbs themselves burn out.
A few incentives I find to change though.....
With the traditional setup I have, bulbs are going to be about 30 bucks for a pair, at the cheapest (usually), or 60+ in store, which I find absolutely insane.
The bulbs themselves do their job, but lack in both looks and performance, in my opinion, plus they're pretty inefficient. Although, I could swap over to an HID kit if I wanted to, but at that rate....
With these other headlights, I can use two HID kits, which are not only brighter but the light they produce can be used more effectively. I can also buy bulbs for 8 or less a pair without fail. Another bonus is, I could have (for example) an 8000K kit for the lowbeams, and a 5000K kit for the highbeams. So there's that as well. Like the fogs I definitely will be buying, I would likely just leave the halo disconnected.
It's unlikely I'll be buying all that any time soon. The total for the two kits plus the headlights themselves would be $138. Very fair price in my opinion, but that's 138 I don't have atm. Unless someone wants to send me that stuff...
Nah, jk.
Also looked at my aux reverse lights, and was curious to see if the bulb was replaceable. Indeed it is. They're H3 bulbs to be exact, one per side. Depending on how well the 3000K's work up front, I may see myself ordering another set for the aux lights.
I have one concern though. I would be forced to mount them underneath the bumper, where they're exposed to road grime and other abuse. I'll have to come up with some method to project the ballasts, if I can't find a set of weatherproof ballasts, which is probably not going to happen. We'll have to play that one by ear.
While poking around on ebay motors, I found a rather nifty looking set of projector fog lights for only a couple dollars more than a pair of factory (new) fog light housings. Since my fog lights are painted on the inside, I fully intend on replacing them later on when I have some extra funds laying around. So, since I'll be running HIDs in my foglights, I feel it would make since to upgrade to projectors since I intend on replacing the ones i have anyway. I don't think I'll be wiring up the halo ring, though as I have a ton of forward facing lights as it is. Headlights, park lights and fog lights, I feel the halo rings on both sides (especially since I have my fogs on all the time anyway) would be a little excessive. In that same breath, if I find the 3000ks glare excessively with the reflectors (like, massively) then I'll hold off until I do get projectors. I've got a pair of good H10s so I'm not without light if that is the case.
Link, if anyone wants to check them out.
Halo Projector OE Fitment Clear Bumber Fog Light Lamp for 01 03 Ford Ranger Un | eBay
After seeing those, I got to thinking and began to wonder what kinds of projector headlights exist for the fourth generation. There seem to be three basic varieties in the premade selection, all the same general design but one being black, another black+smoked, and another chrome for around 80 bucks. Not bad.
However, one thing stood out to me that I'm honestly very curious about. I noticed that these aren't just a projector that a 9007 slots into and done; rather it separates it out into two H1 bulbs. A low beam projector and a high beam reflector.
If there is one thing I always felt was lacking on the Ranger was the highbeams. However, on my mother's Rendezvous, I love those highbeams. They're like spotlights. (Too bad it's a GM
)I could be wrong, but I believe the theory for this is all in the separation of the two modes In the stock Ranger headlight, the reflectors must be angled in such a way that the two modes still function as they should but don't interfere with the other. Doing anything in this manner will result in a loss of performance. However, in the case of a dual beam head light where there are two single beam bulbs as opposed to a single dual beam bulb, the reflector itself can be maximized to best suit the performance desired in a given scenario.
I suspect the same thing would happen in this case. Which, I'm curious to see. However, I absolutely love my GE nighthawk platinum 9007s, so I won't be changing any time soon unless one of my headlights gets busted for one reason or another. I'll probably change lenses when the bulbs themselves burn out.
A few incentives I find to change though.....
With the traditional setup I have, bulbs are going to be about 30 bucks for a pair, at the cheapest (usually), or 60+ in store, which I find absolutely insane.
The bulbs themselves do their job, but lack in both looks and performance, in my opinion, plus they're pretty inefficient. Although, I could swap over to an HID kit if I wanted to, but at that rate....
With these other headlights, I can use two HID kits, which are not only brighter but the light they produce can be used more effectively. I can also buy bulbs for 8 or less a pair without fail. Another bonus is, I could have (for example) an 8000K kit for the lowbeams, and a 5000K kit for the highbeams. So there's that as well. Like the fogs I definitely will be buying, I would likely just leave the halo disconnected.
It's unlikely I'll be buying all that any time soon. The total for the two kits plus the headlights themselves would be $138. Very fair price in my opinion, but that's 138 I don't have atm. Unless someone wants to send me that stuff...
Nah, jk.
Also looked at my aux reverse lights, and was curious to see if the bulb was replaceable. Indeed it is. They're H3 bulbs to be exact, one per side. Depending on how well the 3000K's work up front, I may see myself ordering another set for the aux lights.
I have one concern though. I would be forced to mount them underneath the bumper, where they're exposed to road grime and other abuse. I'll have to come up with some method to project the ballasts, if I can't find a set of weatherproof ballasts, which is probably not going to happen. We'll have to play that one by ear.
#99
04-16-2016

#100
04-17-2016


