Project: Paint Prep
#1
 09-04-2010


Project: Paint Prep
Well, the time has some for a little rear end work to be done. I have been waiting for this time for several months now. Been collecting supplies and parts and now have what I need.
Fiberglass fillers....Check.
New tail lights....Check.
Epoxy, Fiberglass resin/cloth....Check.
New Roll pan....Check.
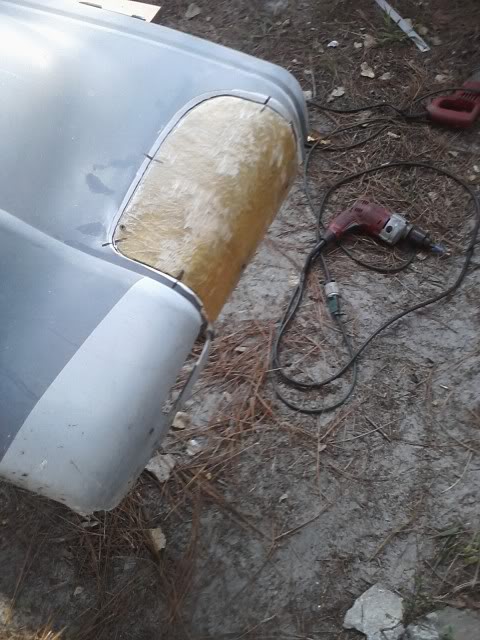
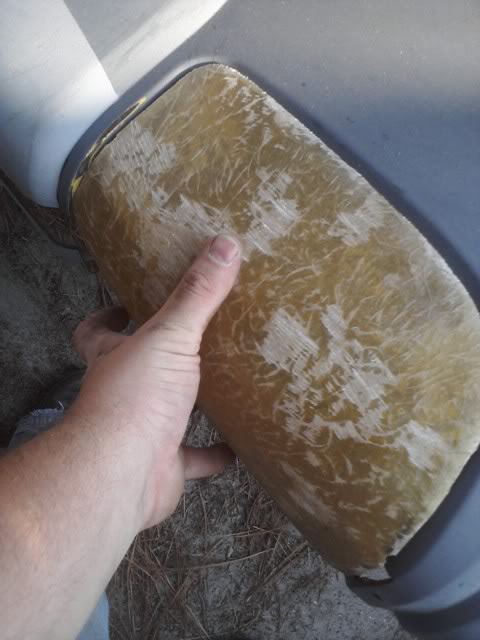
I'm not going to expose what tails I have, but if anyone wants to guess, they are more than welcome. Dj224Ranger made the tail light fillers for me. A little trimming and they fit pretty well.


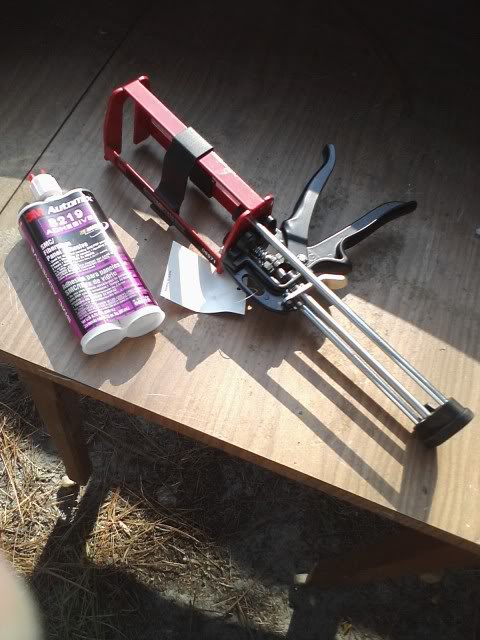
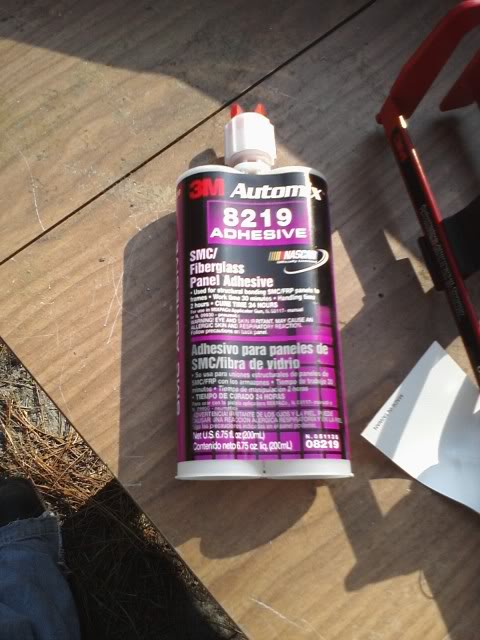
Then picked up a 3M applicator gun, and some 8219 SMC/Fiberglass adhesive. Found a guy on ebay that sells at a package, and at a good price. Got both for less than the cost of a gun.
Everything fit, trimmed, and ready to go.
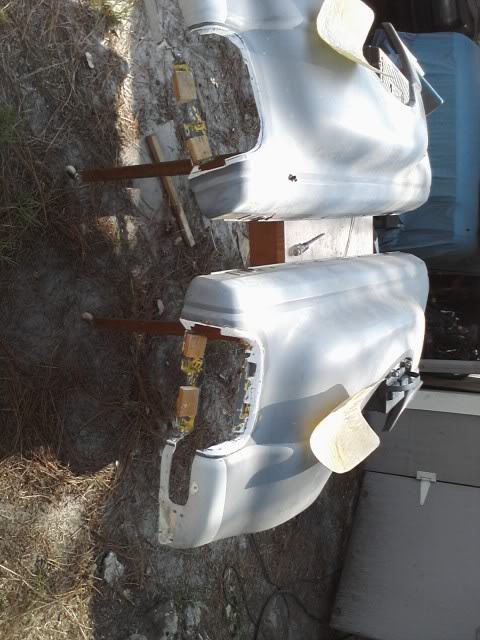
Glued in:
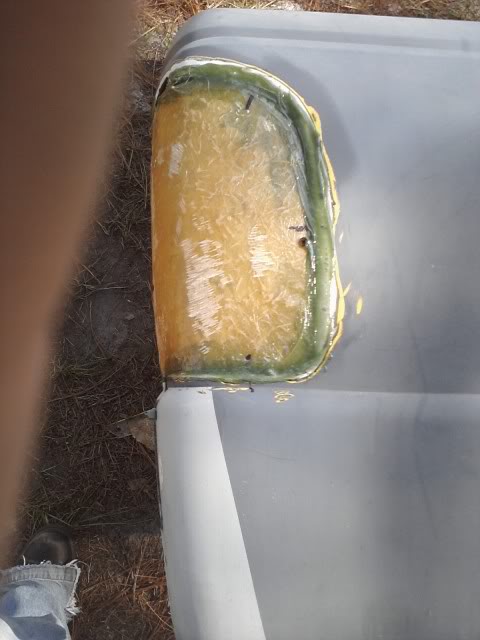

After about 3 hours, I went ahead and trimmed down the inside in preparation for adding the mat. Hoping to lay some tomorrow. Also have a few cracks here and there that are ready to be reinforced from the rear.


I plan to add a layer of mat to the areas where I had cut out for the Caddy's before, then fill it in from the front. should work out great. Have Monday off as well, so hoping to get the majority of the fiberglass work roughed in, ready for sanding. I need to pick up an air file, but that won't be for another week or so. I'm planning to get all the body work done on my truck this fall so I can try to get it painted either this winter or in the spring.
And as time allows, I will try to include all the interior work I have done. It will be a lot of copy/paste from RPS as I have a build thread going there.
Fiberglass fillers....Check.
New tail lights....Check.
Epoxy, Fiberglass resin/cloth....Check.
New Roll pan....Check.
I'm not going to expose what tails I have, but if anyone wants to guess, they are more than welcome. Dj224Ranger made the tail light fillers for me. A little trimming and they fit pretty well.
Then picked up a 3M applicator gun, and some 8219 SMC/Fiberglass adhesive. Found a guy on ebay that sells at a package, and at a good price. Got both for less than the cost of a gun.
Everything fit, trimmed, and ready to go.
Glued in:
After about 3 hours, I went ahead and trimmed down the inside in preparation for adding the mat. Hoping to lay some tomorrow. Also have a few cracks here and there that are ready to be reinforced from the rear.
I plan to add a layer of mat to the areas where I had cut out for the Caddy's before, then fill it in from the front. should work out great. Have Monday off as well, so hoping to get the majority of the fiberglass work roughed in, ready for sanding. I need to pick up an air file, but that won't be for another week or so. I'm planning to get all the body work done on my truck this fall so I can try to get it painted either this winter or in the spring.
And as time allows, I will try to include all the interior work I have done. It will be a lot of copy/paste from RPS as I have a build thread going there.
#2
09-05-2010
Here is some of the interior stuff. A lot of this is well over a year old. Any questions, feel free to ask.
Finally got around to redoing my interior. Got the speaker box modified from 2 12's to 1 10, and now my amp is mounted to where the other sub used to be. I had to do that due to my new console not fitting the amp under it anymore.
Old:
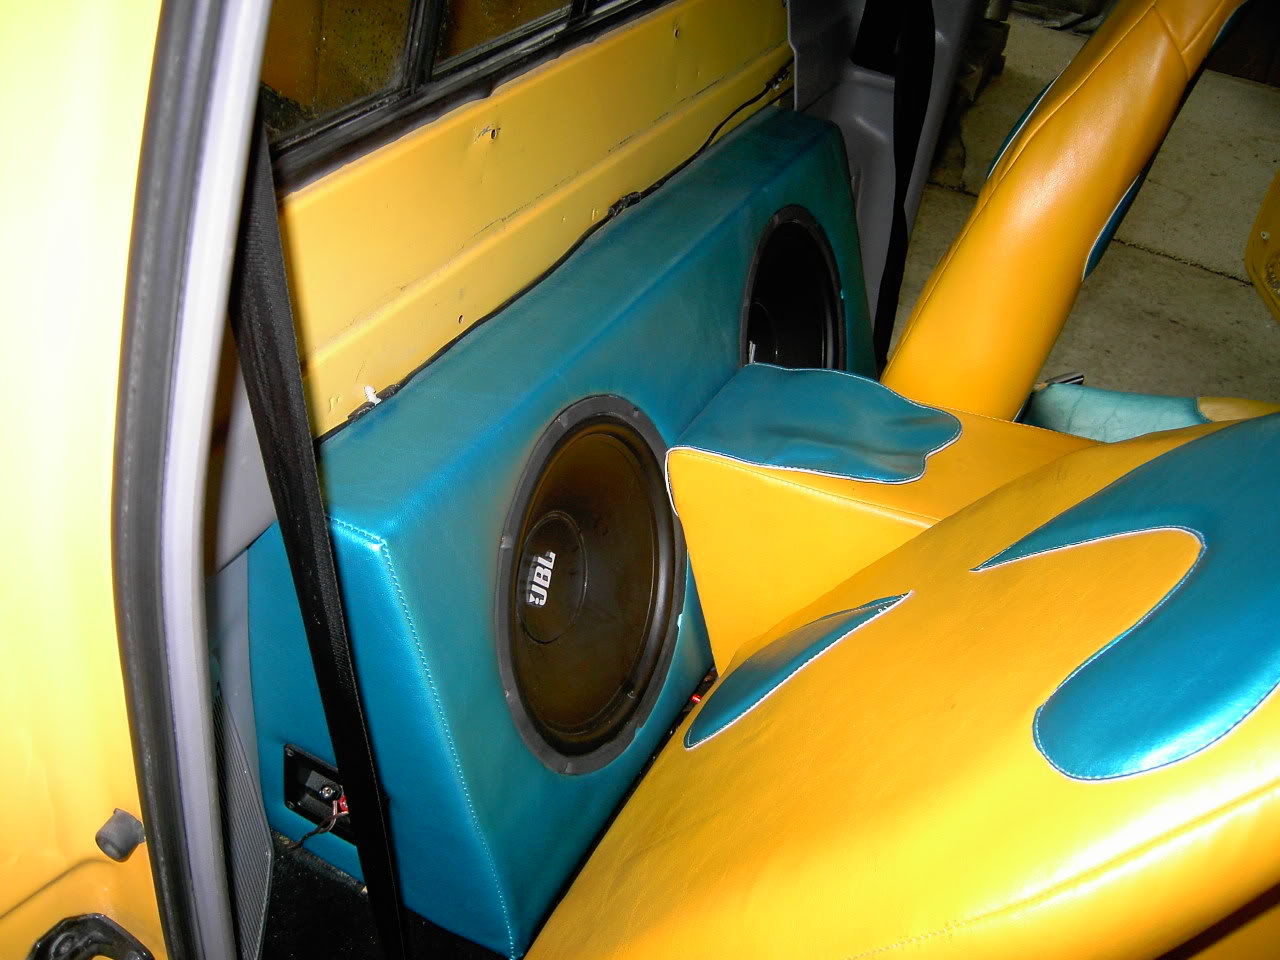
New:
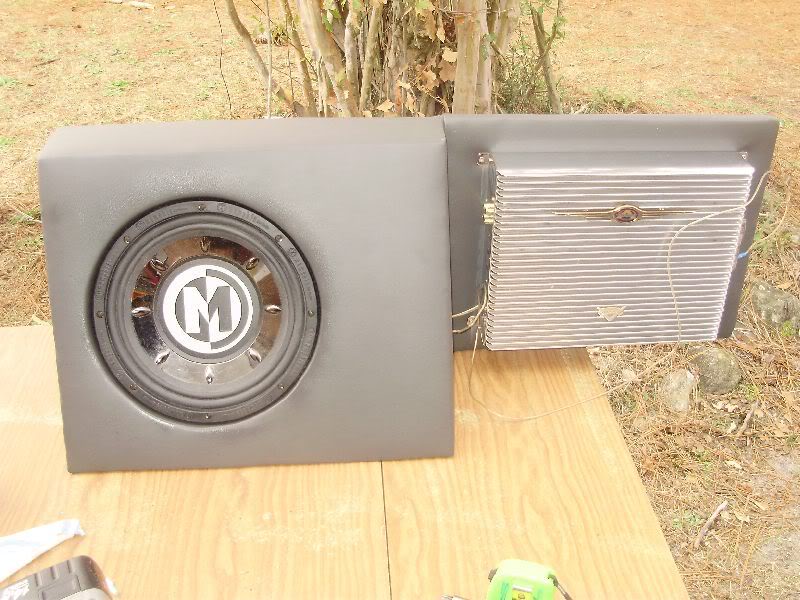

I think I'm going to build a cover over the amp at a later time. Mainly to hide the wires. I also upgraded my power wire from an 8ga to a 4ga.
Finally got around to redoing my interior. Got the speaker box modified from 2 12's to 1 10, and now my amp is mounted to where the other sub used to be. I had to do that due to my new console not fitting the amp under it anymore.
Old:
New:
I think I'm going to build a cover over the amp at a later time. Mainly to hide the wires. I also upgraded my power wire from an 8ga to a 4ga.
#3
09-05-2010
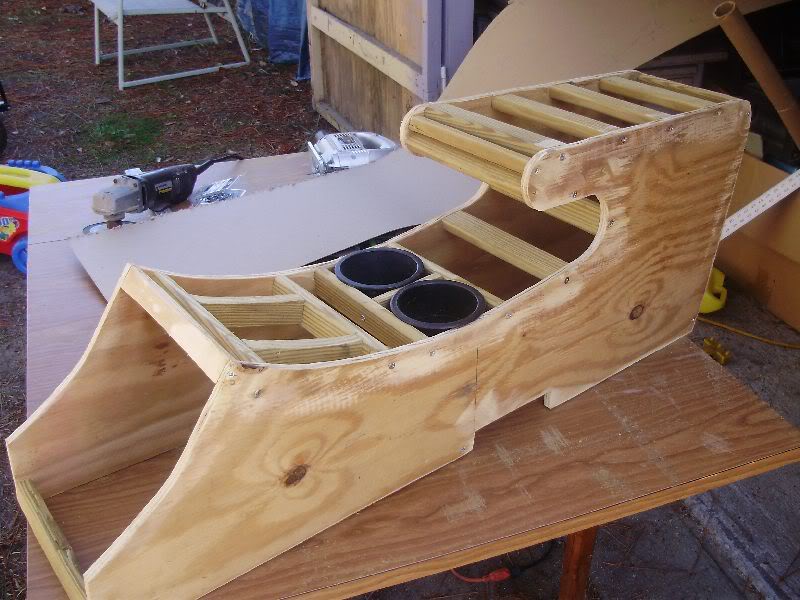
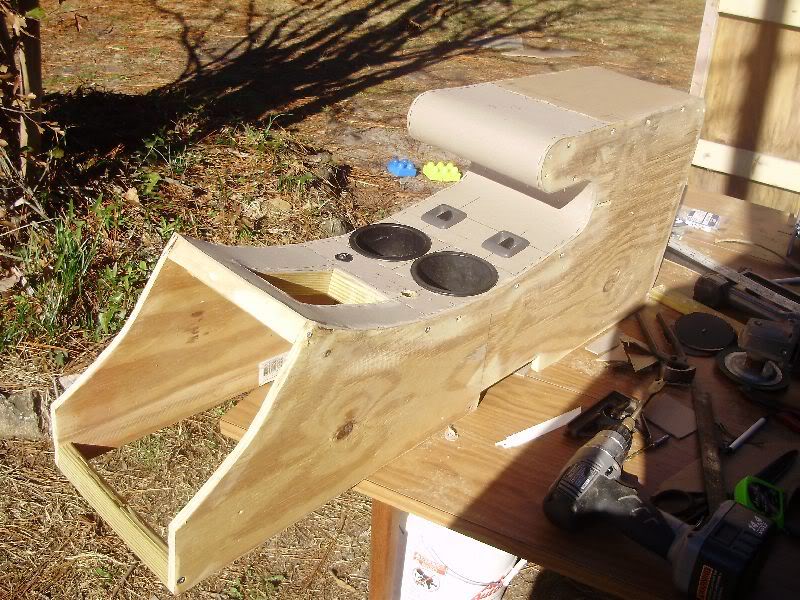
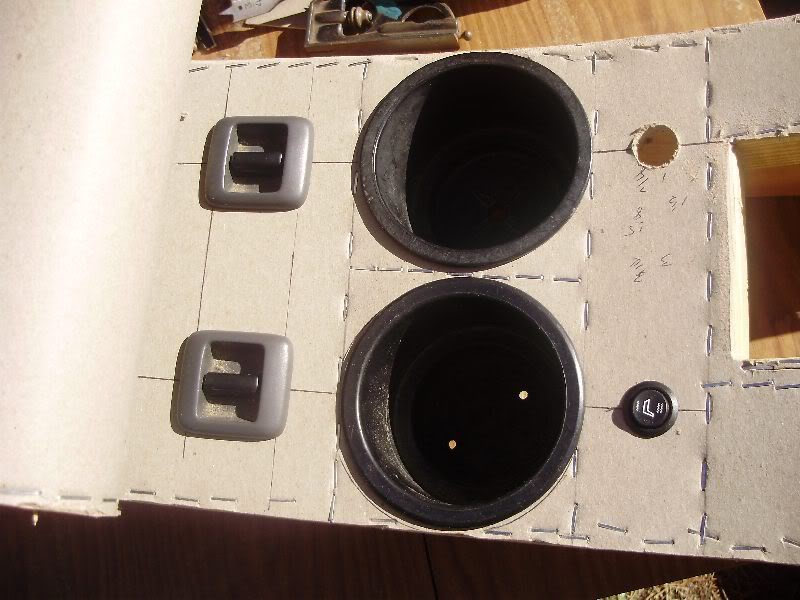
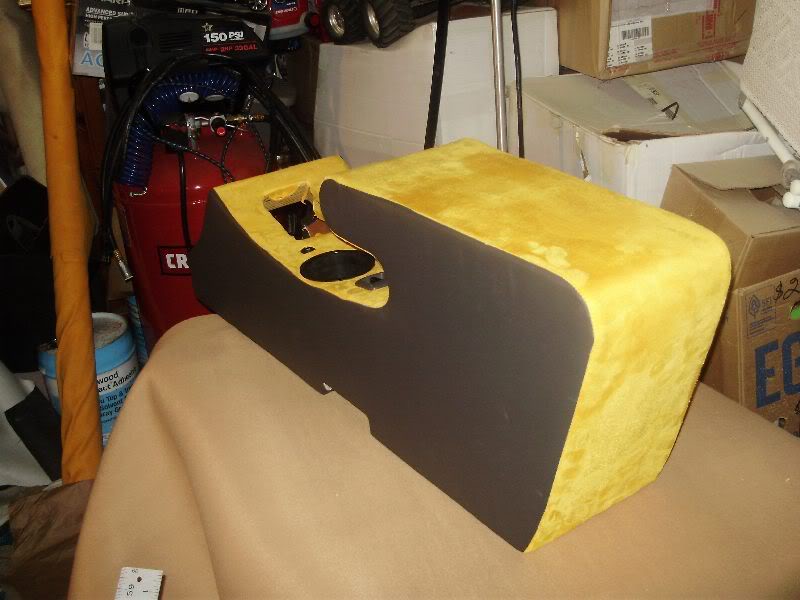
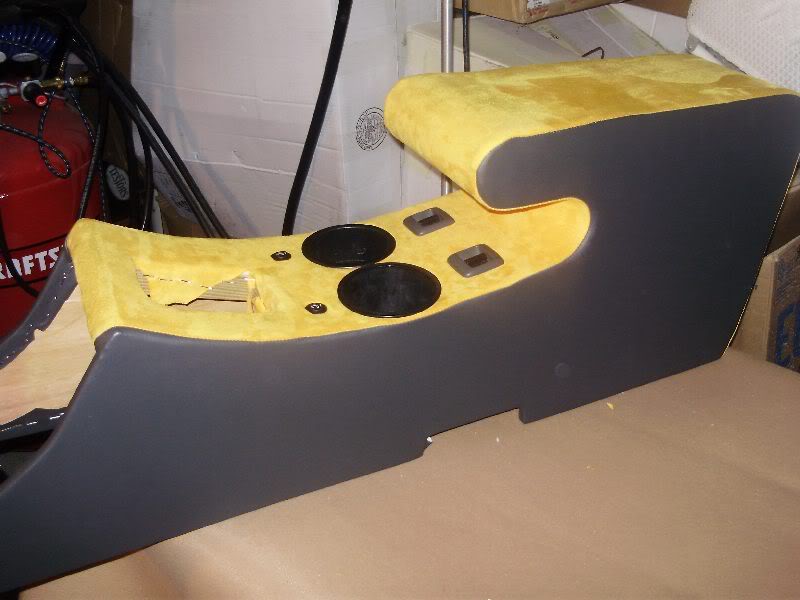
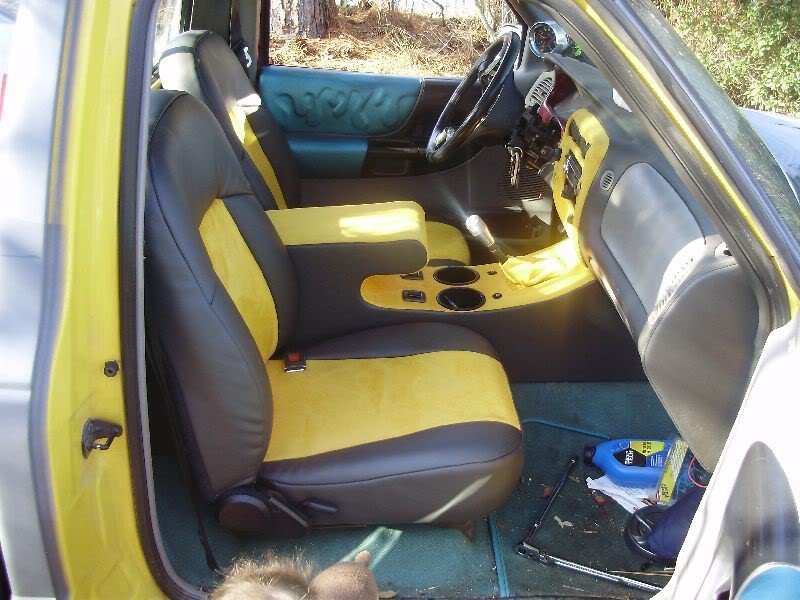
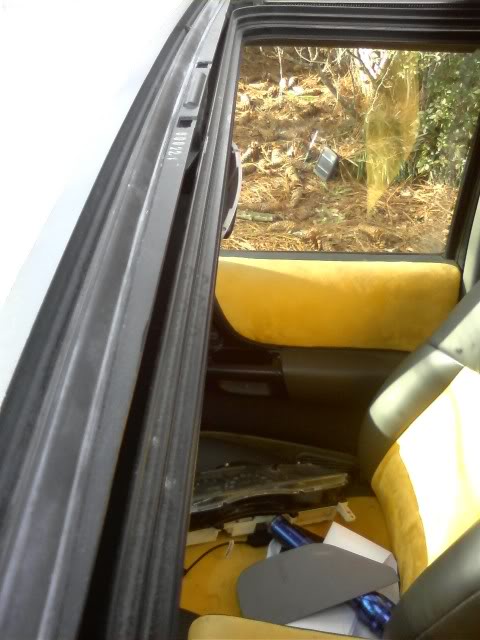
Built a new console as well. It houses two large cup holders, my power window switches, and the switches for my seat heaters. It is covered in yellow suede and charcoal vinyl. It is installed in the truck now, but ran out of light. Will try to get pics of it tomorrow in the truck.
Old:
New:
Old:
New:
#4
09-05-2010
Still haven't gotten pictures of the console yet. I nee to pull it back out to finish running wires for the seats. That will probably happen Sunday.
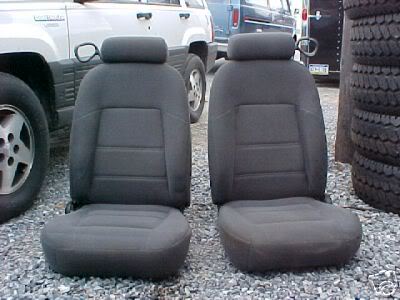
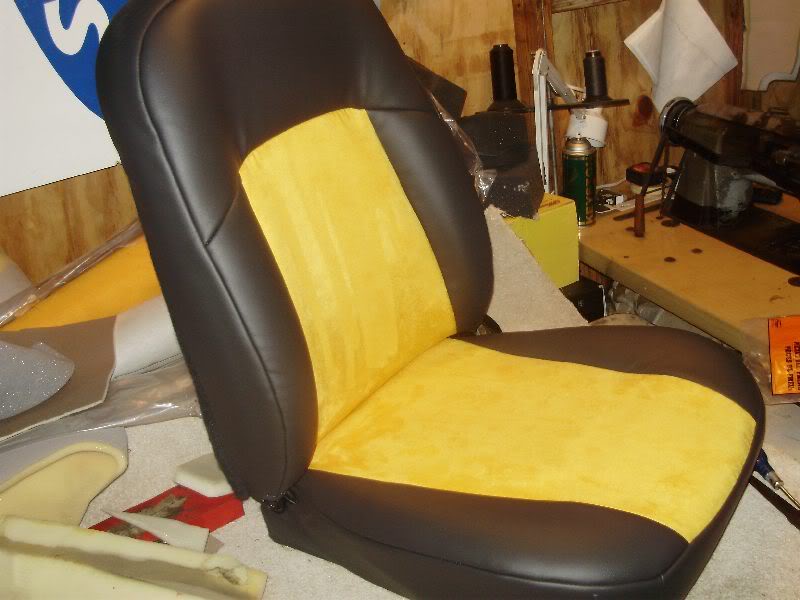
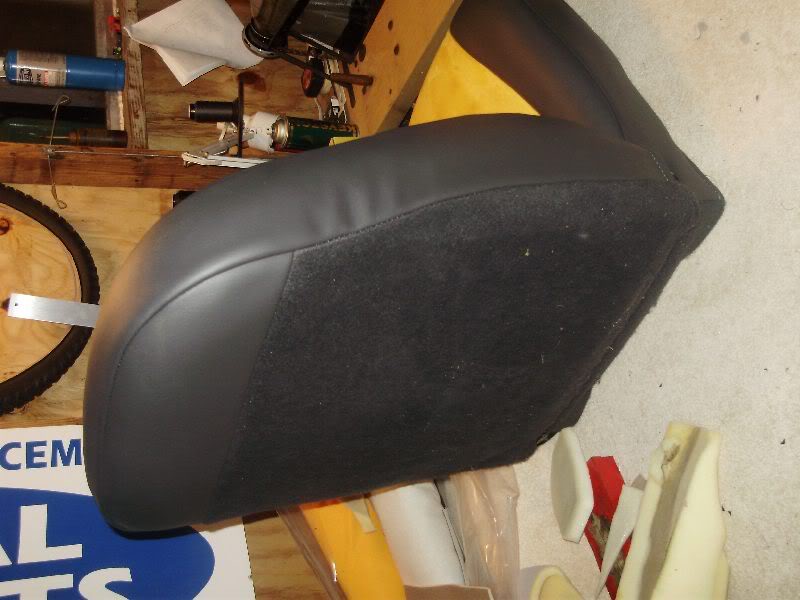
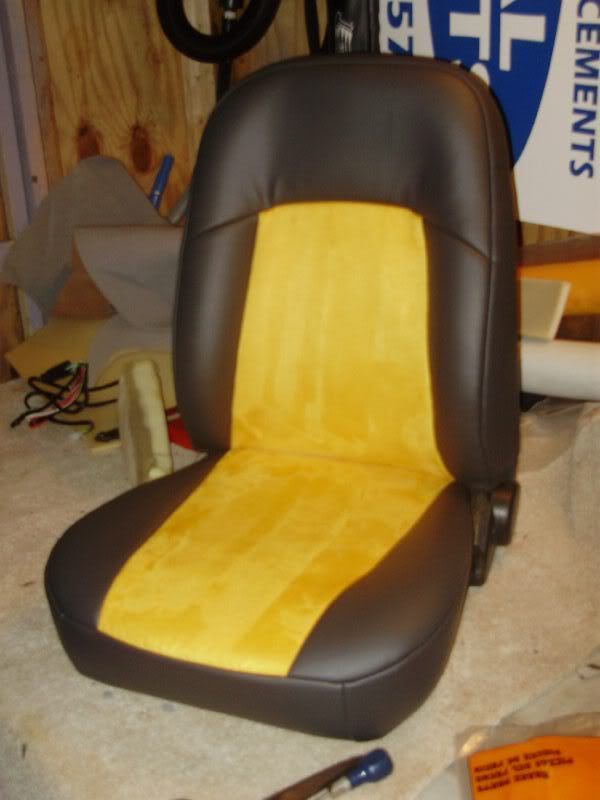
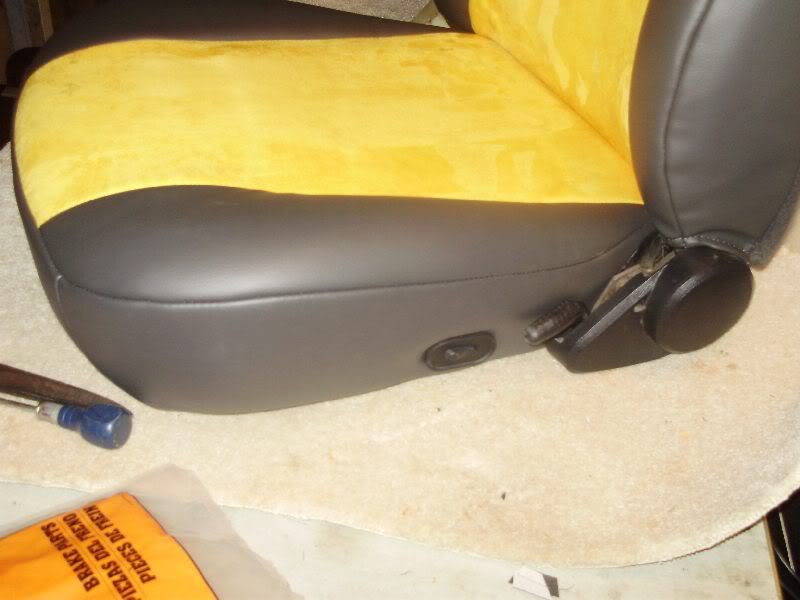
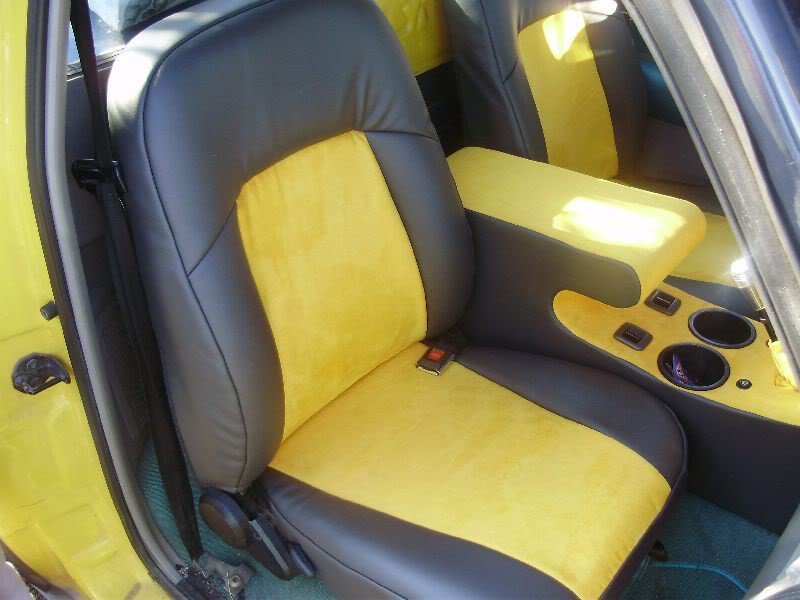
Got time to work on my seats today. I got the driver's done, and part of the passenger. Seats are from a 95 Mustang GT, with power lumbar from a set of Cobra seats, seat heaters, and no head rests.
Old seat covers:
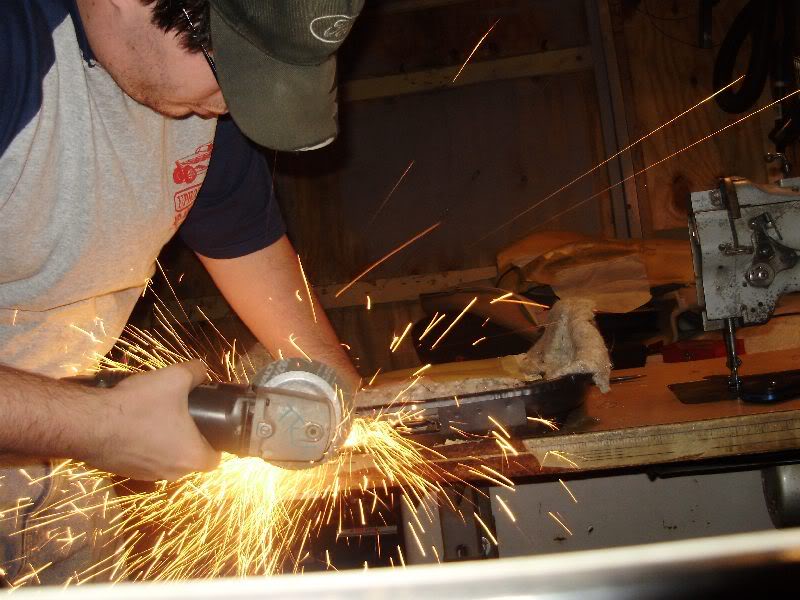
Cutting the seat belt loop bracket off:
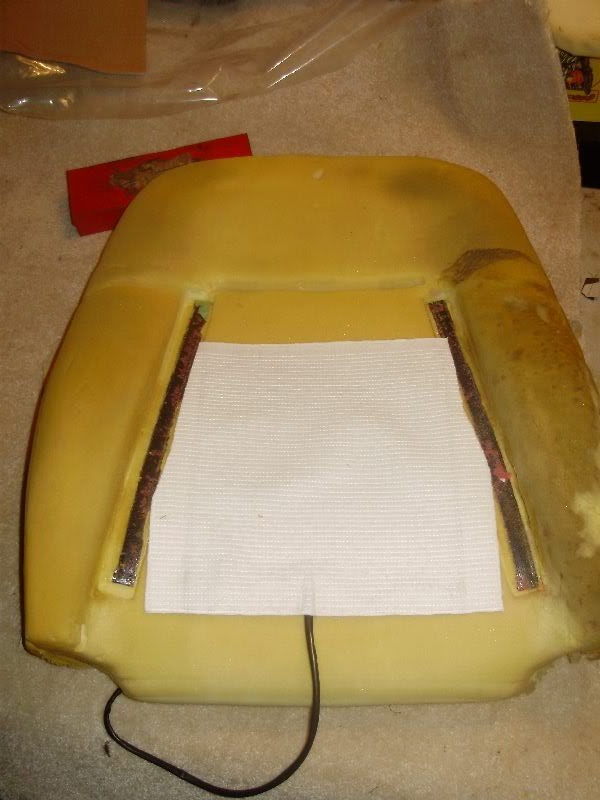
Backrest Seat Heater:
Finished Seat:
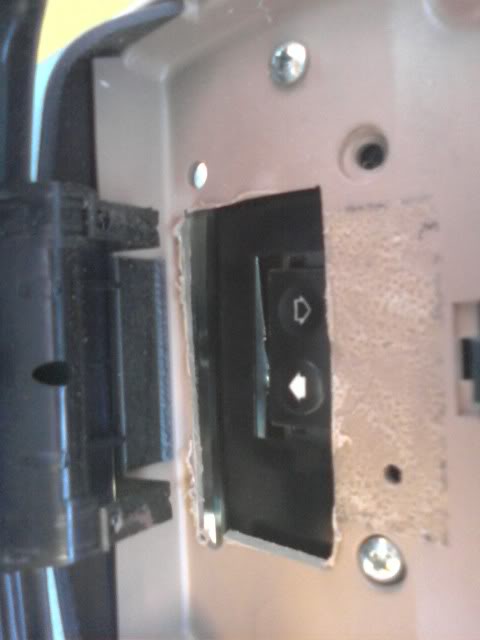
Lumbar Switch:
I'm heading to South Carolina tomorrow to get a couple dash pieces and a headliner. I'm hoping in a month or so, I can get a new sunroof so I can get my headliner in. Next on the list is getting the door panels wrapped.
Got time to work on my seats today. I got the driver's done, and part of the passenger. Seats are from a 95 Mustang GT, with power lumbar from a set of Cobra seats, seat heaters, and no head rests.
Old seat covers:
Cutting the seat belt loop bracket off:
Backrest Seat Heater:
Finished Seat:
Lumbar Switch:
I'm heading to South Carolina tomorrow to get a couple dash pieces and a headliner. I'm hoping in a month or so, I can get a new sunroof so I can get my headliner in. Next on the list is getting the door panels wrapped.
#6
09-05-2010
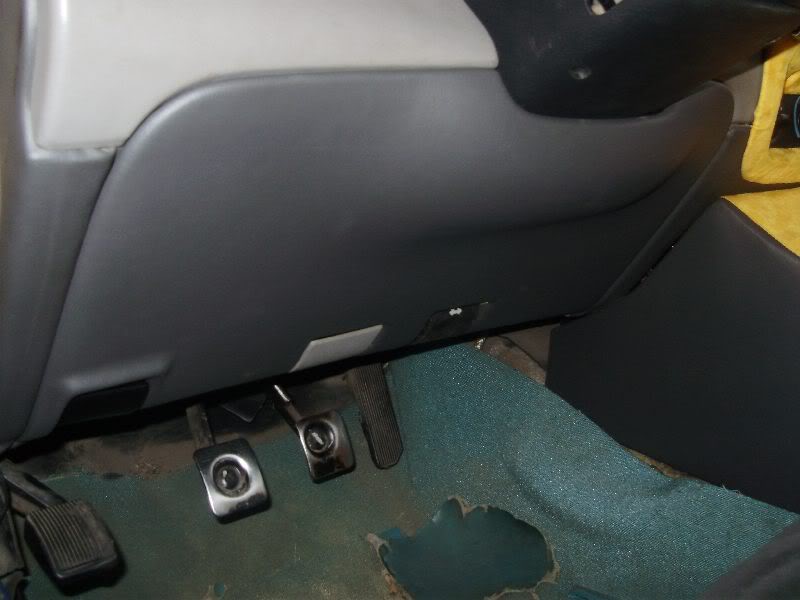
Got some more little things done today. Got my horn wired up through the mustang steering column. The clock spring was bad, so luckfully I had another stang column laying around. Next electrical job is trying to get the cruise to work. Still have to wire the lumbar/seat heaters. Might just wait now until I pull the carpet to replace it. I got the panel under the steering column wrapped and installed. Also got the glove box covered. I started on the door panels. I have one arm rest done, and about half way done on a door panel. I do have a question though. should i do black carpet, or find a charcoal carpet? I was thinking black earlier, but I think now it should be charcoal. also, the fuse door, the gauge bezel will be dyed to match the vinyl. I'm planning on painting the door handle bezels, and around the gauges yellow. what color should I do the little vents on top of the dash? I was thinking yellow, but I think it will be too much. what do ya'll think? match the vinyl for the vents or yellow?
#7
09-05-2010
I got one of the door panels finished today. well, other than carpet at the bottom. i'm really happy how it turned out. i'm on my way out the door to get some chicken, but will post some pics when i get back.
the stang seats are from a 95 gt, and are bolt in for 97 and older. they would require heavy modifying of the seat tracks for 98+. your best bet would be to find a set of seat tracks for a 97 and older and see if you can get them to work.
onto the work. here is the under dash panel. still need to get the small plastic pieces dyed. i'll get them all lined up and give them to the lady that does our dye work.
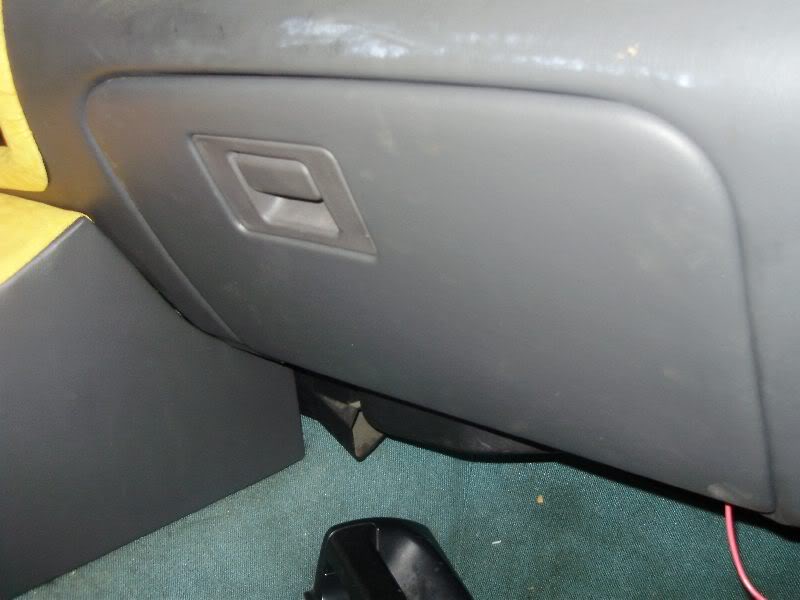
the glove box, and how the console fits under the dash. don't worry about the white stuff on the dash, i had a box crammed in there and it rubbed off. I just need to clean it.

the stang seats are from a 95 gt, and are bolt in for 97 and older. they would require heavy modifying of the seat tracks for 98+. your best bet would be to find a set of seat tracks for a 97 and older and see if you can get them to work.
onto the work. here is the under dash panel. still need to get the small plastic pieces dyed. i'll get them all lined up and give them to the lady that does our dye work.
the glove box, and how the console fits under the dash. don't worry about the white stuff on the dash, i had a box crammed in there and it rubbed off. I just need to clean it.
#8
09-05-2010
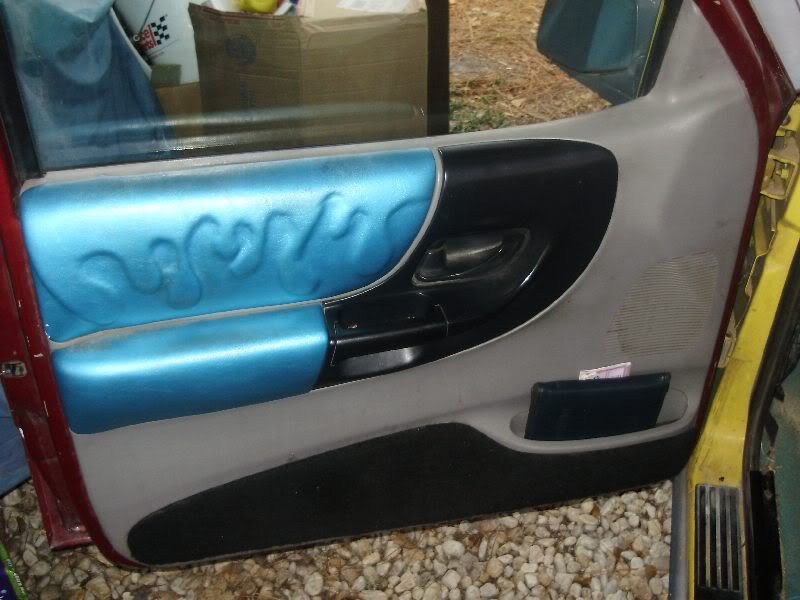
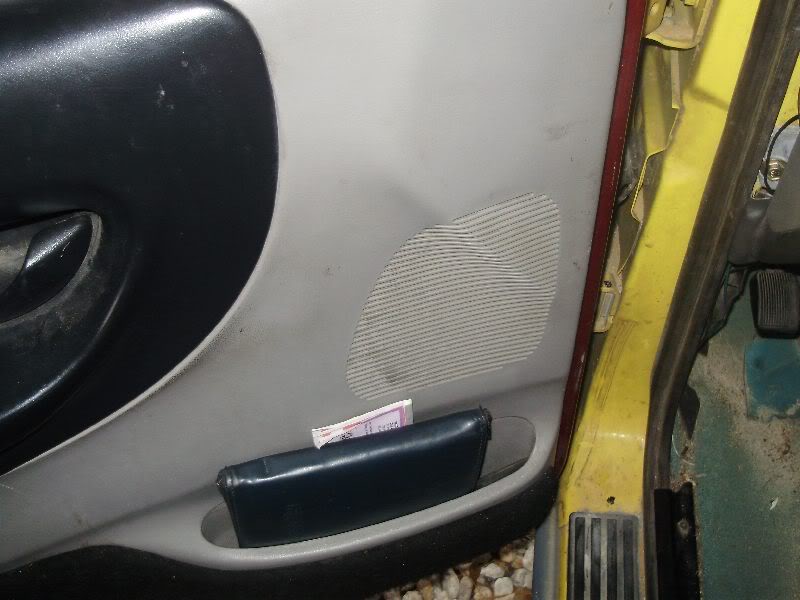
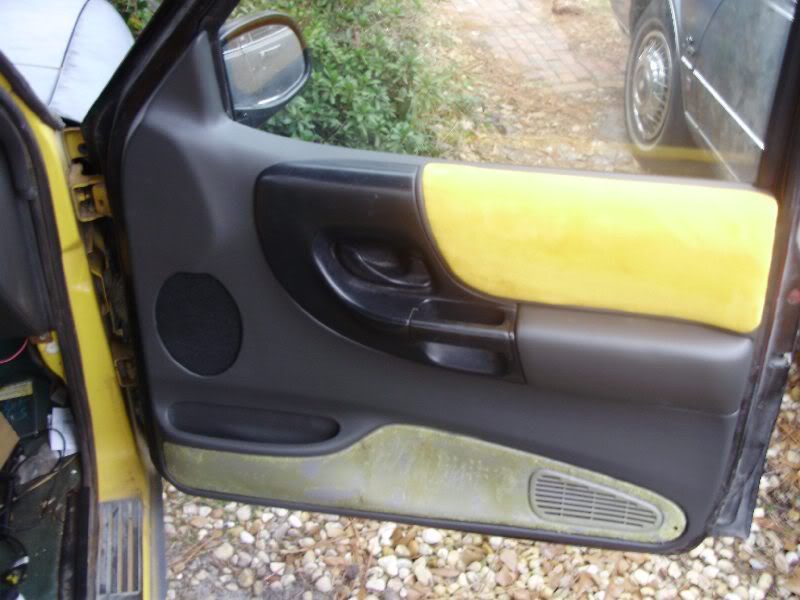
And now the door panels.
old:
Speaker hole cut out and filled grooves:

Lock hole filled: I don't lock my doors so I don't need it. (shaved door handles)
Pocket covered:
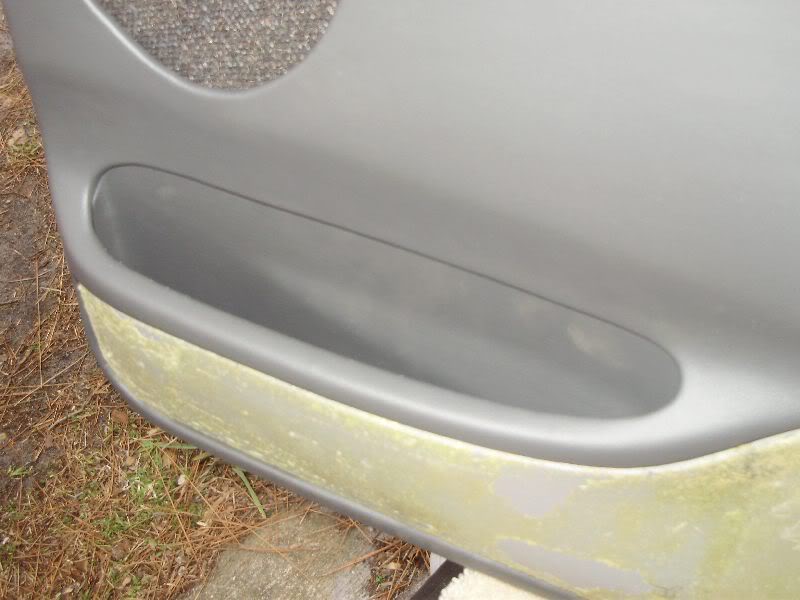
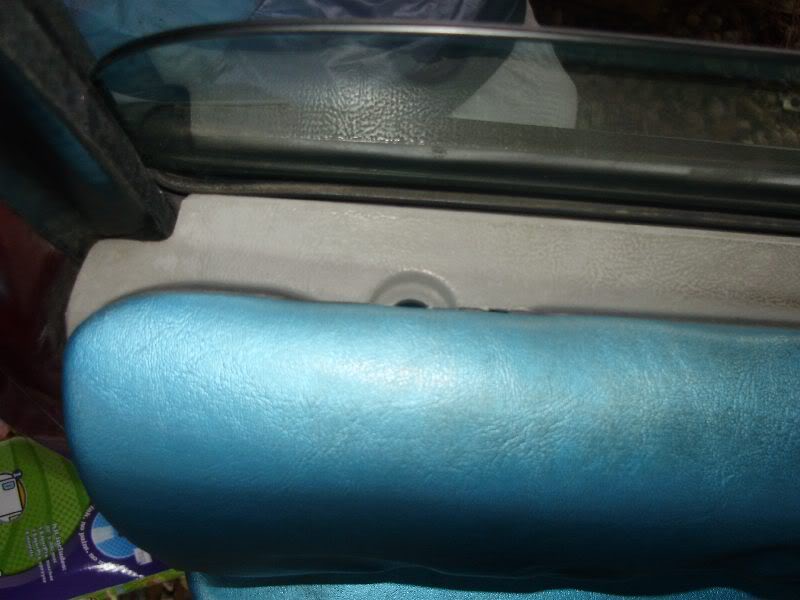
Door panel covered, and arm rest:
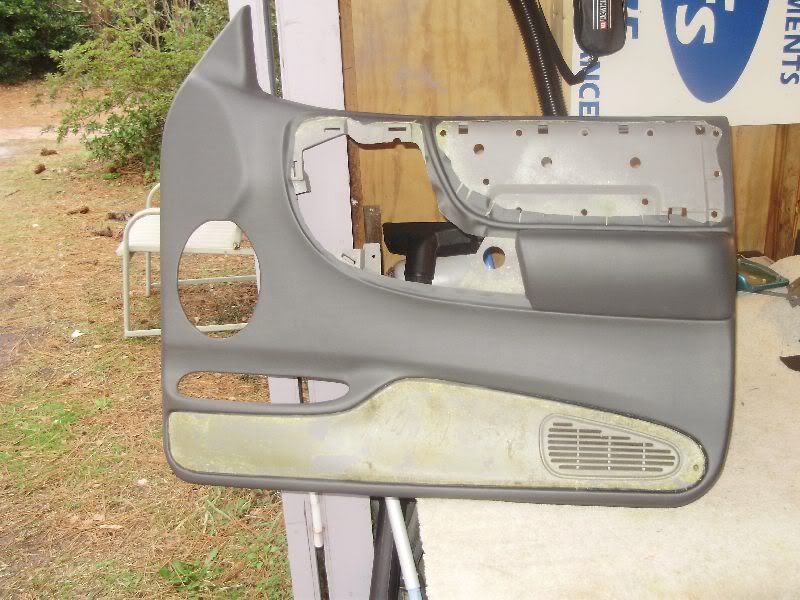
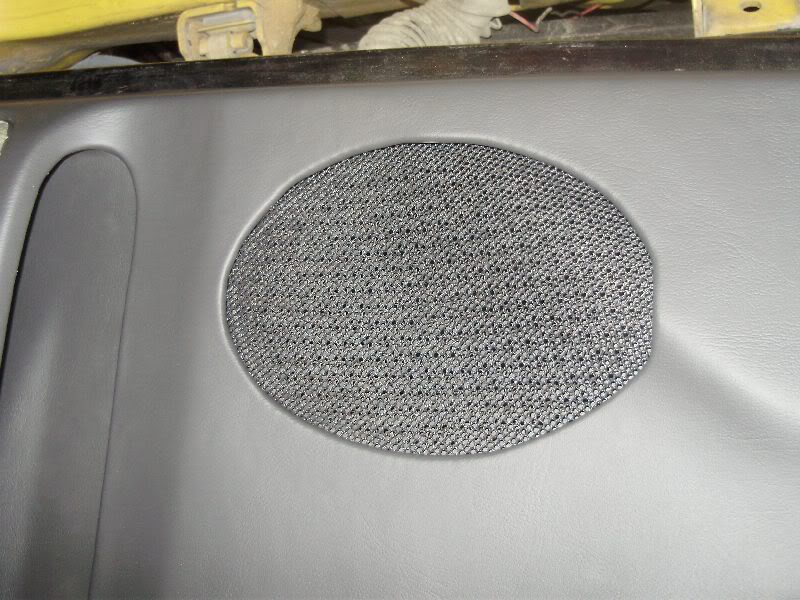
Speaker grill:
Test fitting to make sure door handle bezel fits:
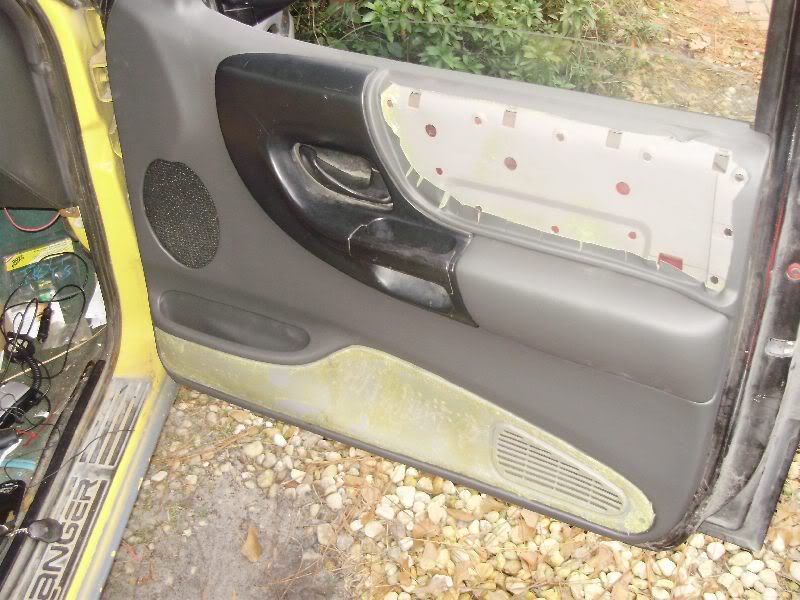
And finished (minus carpet on the bottom):
old:
Speaker hole cut out and filled grooves:
Lock hole filled: I don't lock my doors so I don't need it. (shaved door handles)
Pocket covered:
Door panel covered, and arm rest:
Speaker grill:
Test fitting to make sure door handle bezel fits:
And finished (minus carpet on the bottom):
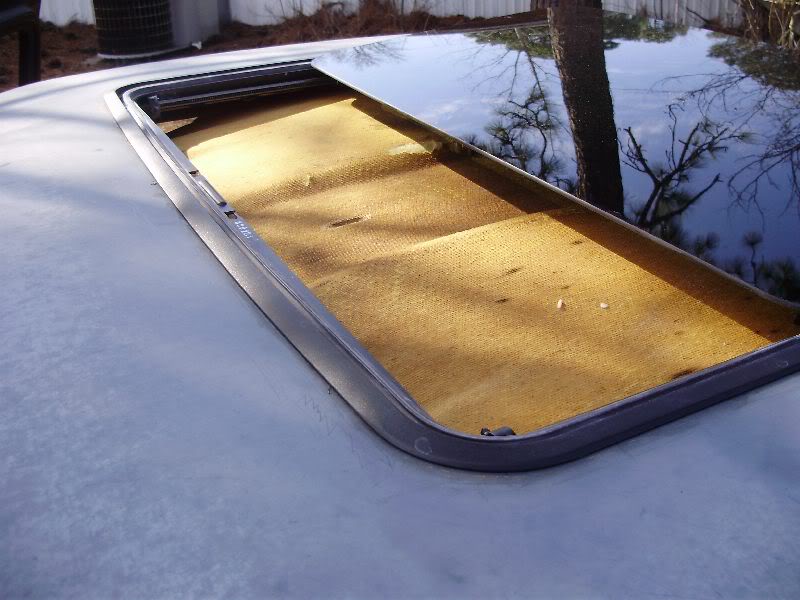
#9
09-05-2010
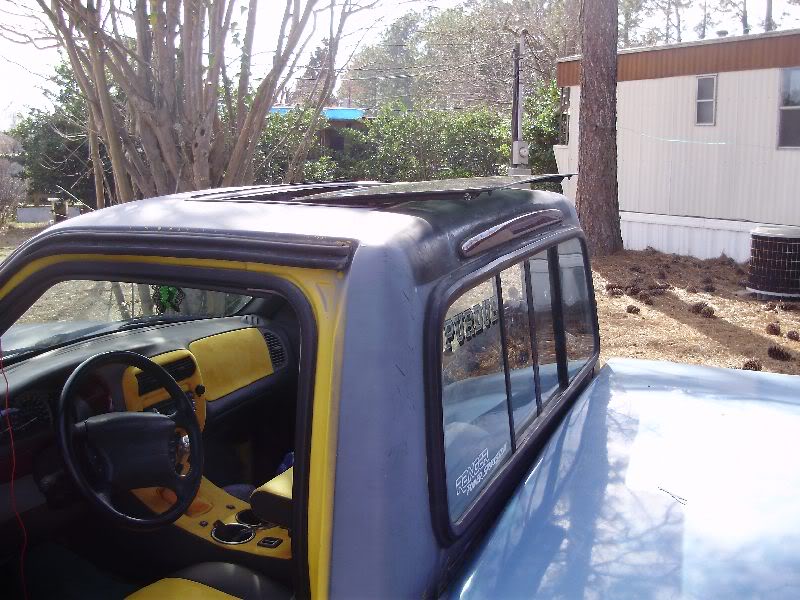
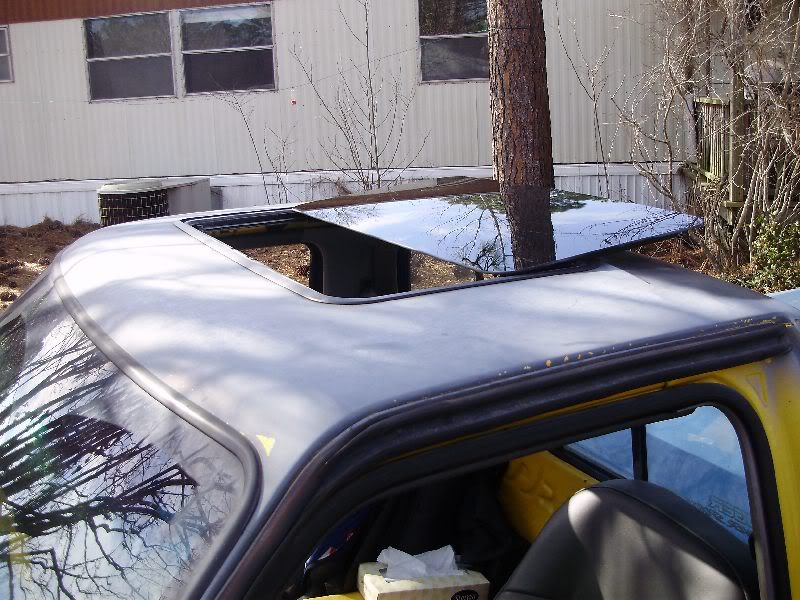
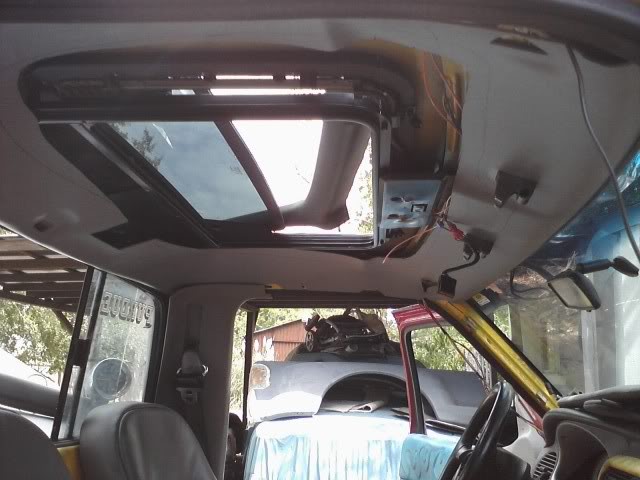
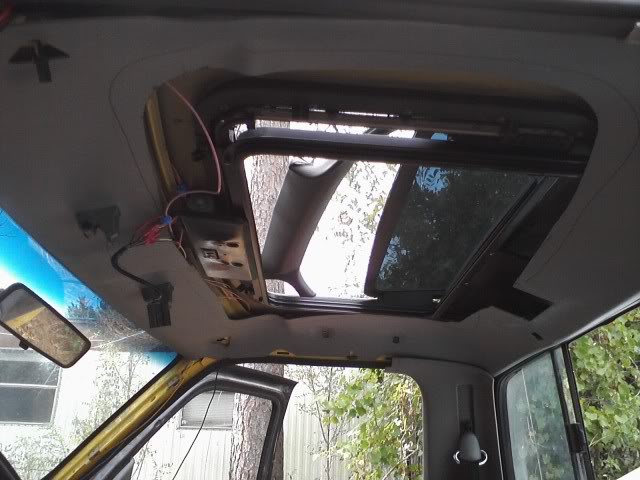
Finally, after nearly three years, I have a working sunroof! I still need to do the headliner, but I'm getting there. I now need to lower my seats about an inch. With the trim ring for the sunroof in, the first big bump out of my driveway I hit my head on the ring. Ouch! I think I'm going to pull the foam out of the bottom, and cut a 1/2" off the bottom. It's either that or cut the mounts off the seat frame, and raise it up. Not sure how that would work though.
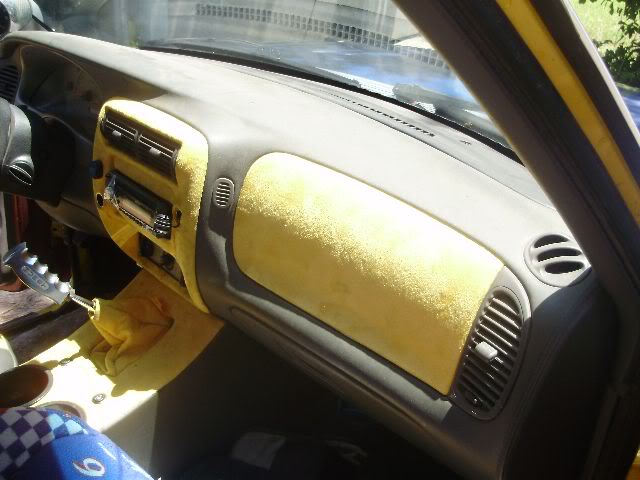
I have also come to the conclusion that I'm going to ditch the suede on the center console. It's not holding up very well. I'm also going to ditch it off the radio bezel, and just paint it, along with the door handle bezels, and the gauge bezel yellow. The console will be all charcoal vinyl.
I have also come to the conclusion that I'm going to ditch the suede on the center console. It's not holding up very well. I'm also going to ditch it off the radio bezel, and just paint it, along with the door handle bezels, and the gauge bezel yellow. The console will be all charcoal vinyl.
#10
09-05-2010
this is way overdue for an update. so to get caught up, this is what has been done.
went from this:

to this:

Then i picked up a set of white face explorer sport gauges and the matching hvac panel. (sorry, no pics. we all know what they look like)
And I got a new set of seats from KingofSpades. 65-67 Cougar/Mustang seats. I will hopefully get these covered soon.
Design I'm thinking about:

charcoal suede with the same charcoal vinyl that's in it now. will have seat heaters, and maybe lumbar.
now that we are up to date, here comes all the stuff from the past week.
went from this:
to this:
Then i picked up a set of white face explorer sport gauges and the matching hvac panel. (sorry, no pics. we all know what they look like)
And I got a new set of seats from KingofSpades. 65-67 Cougar/Mustang seats. I will hopefully get these covered soon.
Design I'm thinking about:
charcoal suede with the same charcoal vinyl that's in it now. will have seat heaters, and maybe lumbar.
now that we are up to date, here comes all the stuff from the past week.
#11
09-05-2010
Alright, now the fun stuff.
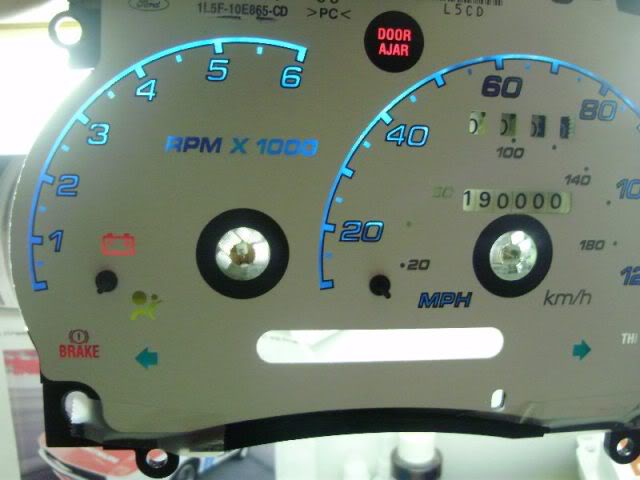
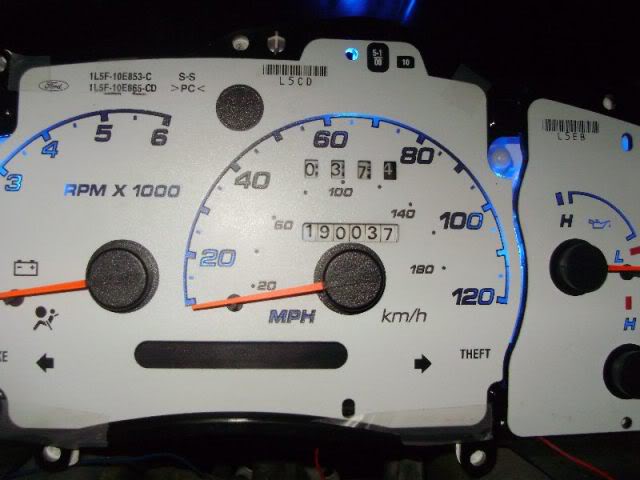
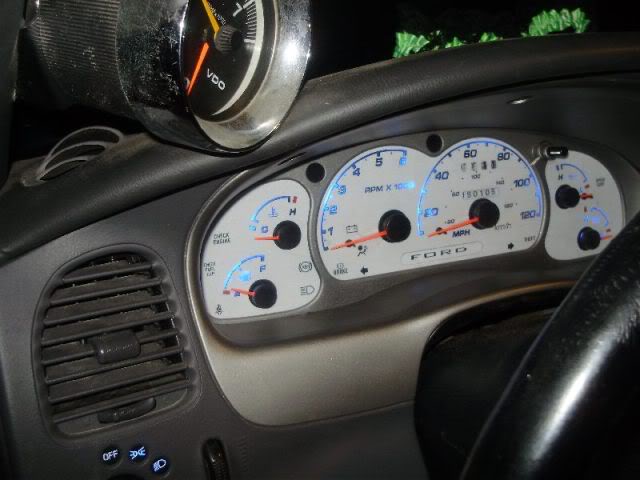
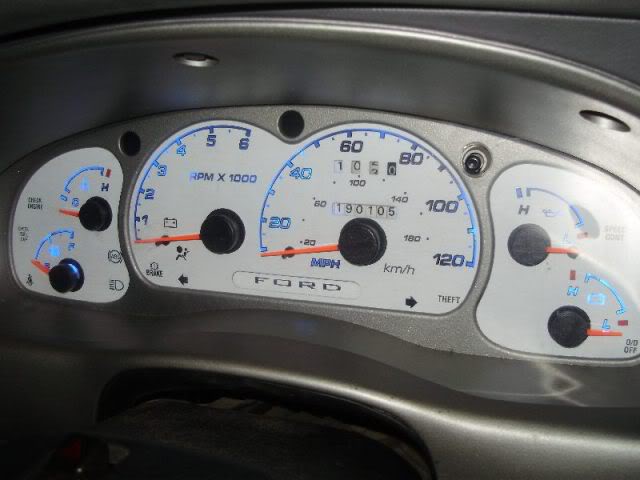
I took that explorer gauge cluster and tore it all apart. all the way.
Sanded all the green off the back of the overlays and painted them blue. Also rolled the odometer to a closer approx of what's on the truck. it's not been correct for over 5 years.
Also attempted to do the same to the hvac panel, but screwed it up:
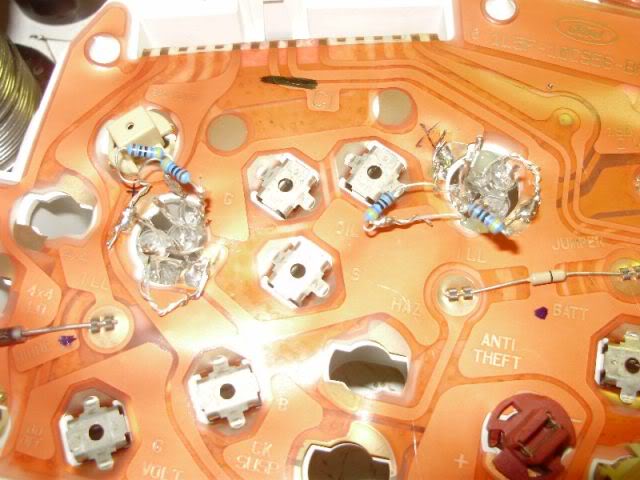
After painting the overlays, I added a few blue LEDS to the cluster: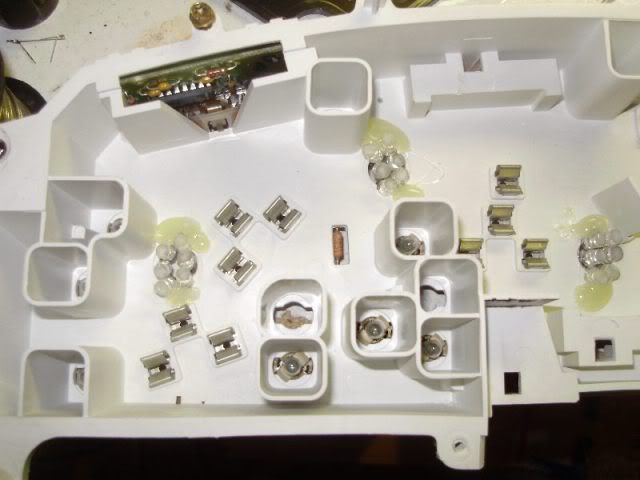

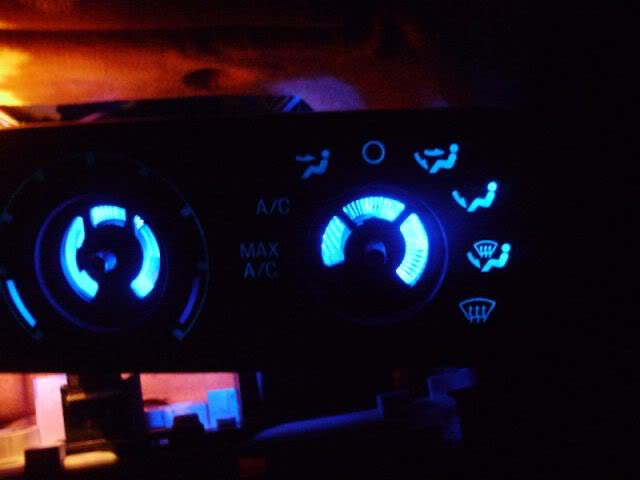
Bought a new hvac panel and gave it the same treatment. I'm not happy with it right now. I need to get the green off but haven't found a safe way. also need to see if i can add a few more leds to it.
did the headlight switch. didn't know it lights up whenever the truck is on. thought only when the headlights are on:

and did the sunroof switch. used to be green, now blue:

I took that explorer gauge cluster and tore it all apart. all the way.
Sanded all the green off the back of the overlays and painted them blue. Also rolled the odometer to a closer approx of what's on the truck. it's not been correct for over 5 years.
Also attempted to do the same to the hvac panel, but screwed it up:
After painting the overlays, I added a few blue LEDS to the cluster:
Bought a new hvac panel and gave it the same treatment. I'm not happy with it right now. I need to get the green off but haven't found a safe way. also need to see if i can add a few more leds to it.
did the headlight switch. didn't know it lights up whenever the truck is on. thought only when the headlights are on:
and did the sunroof switch. used to be green, now blue:
#12
09-05-2010
And i got a few other parts in for it.
another new speedo bezel.
the headlight switch pigtail is trashed. have two wires that are burnt badly. got a new pigtail from carquest. heavy gauge wires all the way across it. part # ECC 57-4783. I highly recommend anyone that runs higher wattage headlight bulbs to upgrade this wiring. i have higher wattage bulbs, plus the projectors and my headlight switch gets extremely hot. also bought the upgraded headlight harness from LMC truck. it's plug and play, but pulls the power off the battery instead of through the headlight switch.

explorer overhead console and auto mirror is going in as well. hopefully some more updates this weekend.
another new speedo bezel.
the headlight switch pigtail is trashed. have two wires that are burnt badly. got a new pigtail from carquest. heavy gauge wires all the way across it. part # ECC 57-4783. I highly recommend anyone that runs higher wattage headlight bulbs to upgrade this wiring. i have higher wattage bulbs, plus the projectors and my headlight switch gets extremely hot. also bought the upgraded headlight harness from LMC truck. it's plug and play, but pulls the power off the battery instead of through the headlight switch.
explorer overhead console and auto mirror is going in as well. hopefully some more updates this weekend.
#13
09-05-2010
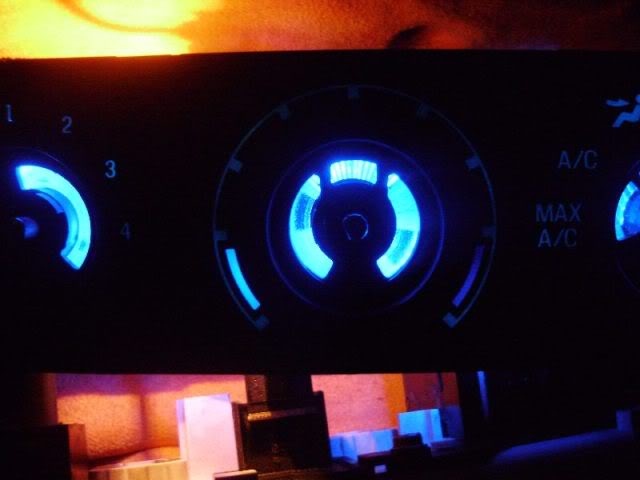
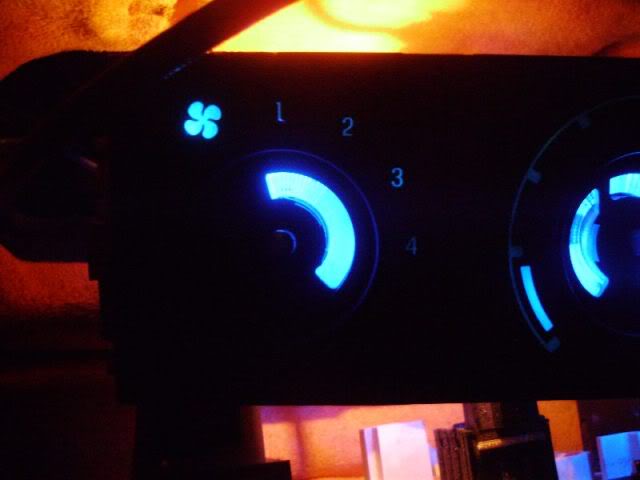
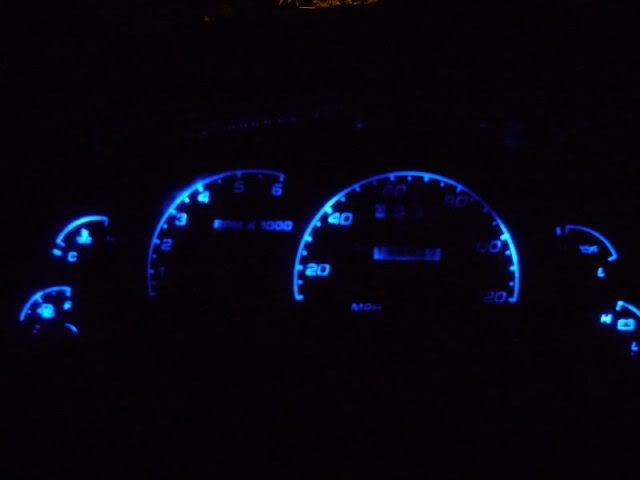
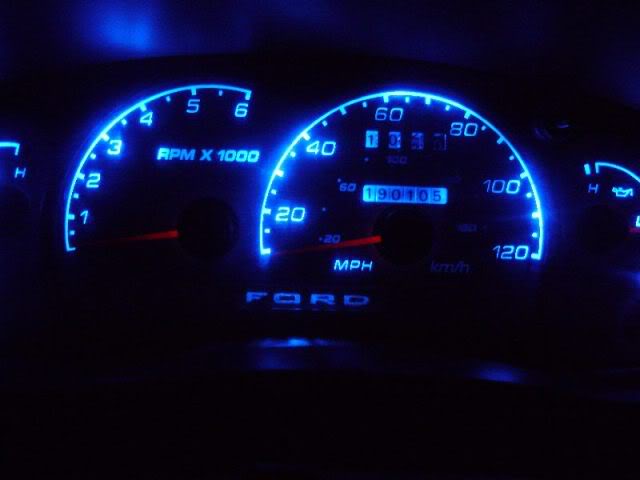
finished the leds up in the cluster today. tried them out this morning, wasn't happy. had three dark spots. 5-6k on the tach, 40 mph, and 80 mph
a couple more day time shots:
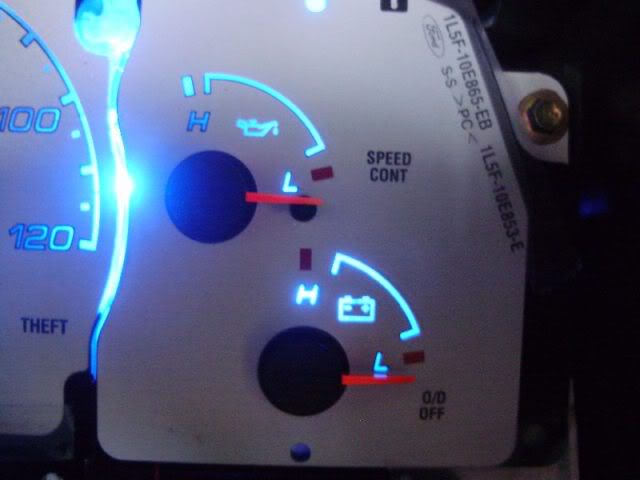

and after adding 10 more leds:
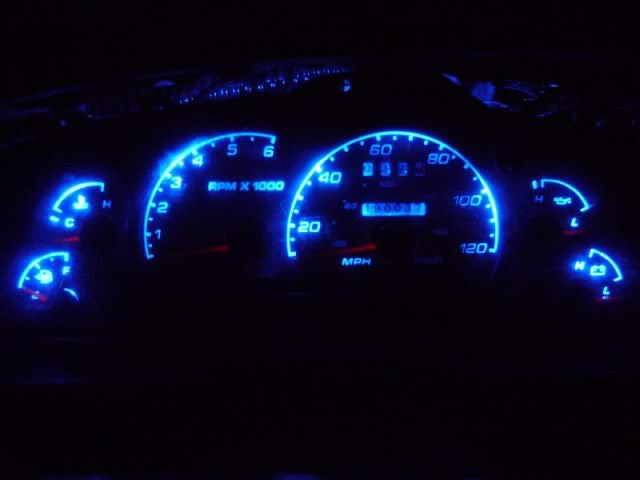

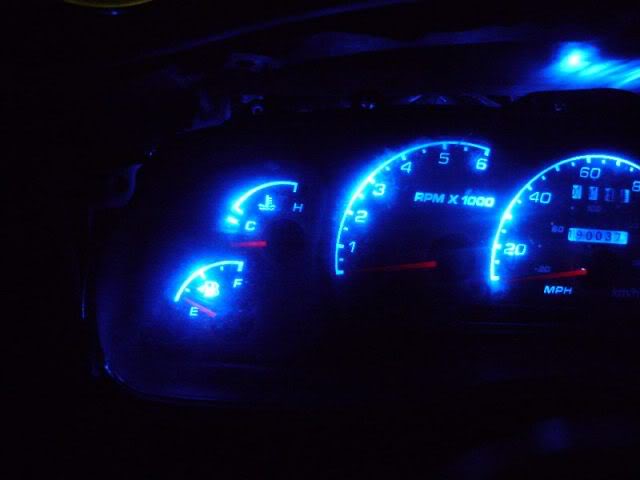
i'm really happy with them now. the spots are still slightly dark, but i think it looks good.
here is the final dimmed down. the dark spots really show when it's dimmed.
a couple more day time shots:
and after adding 10 more leds:
i'm really happy with them now. the spots are still slightly dark, but i think it looks good.
here is the final dimmed down. the dark spots really show when it's dimmed.
#14
09-05-2010
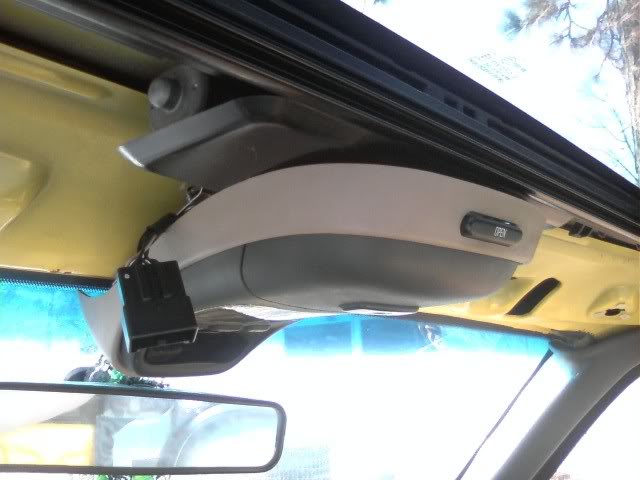
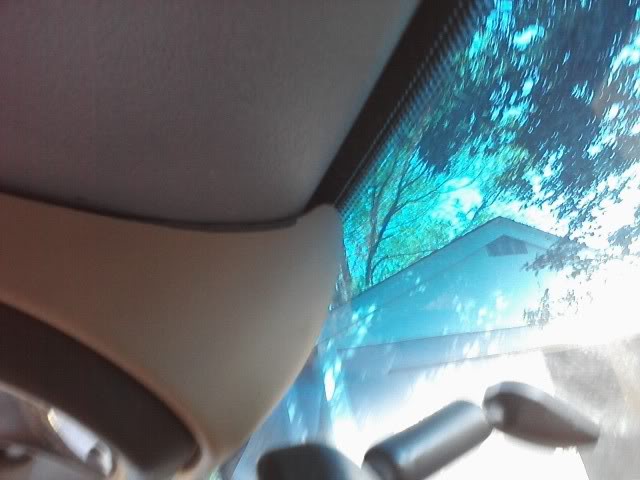
Got the overhead console in. So far, i like it.
Had to modify the bracket quite a bit. basically cut it in half:
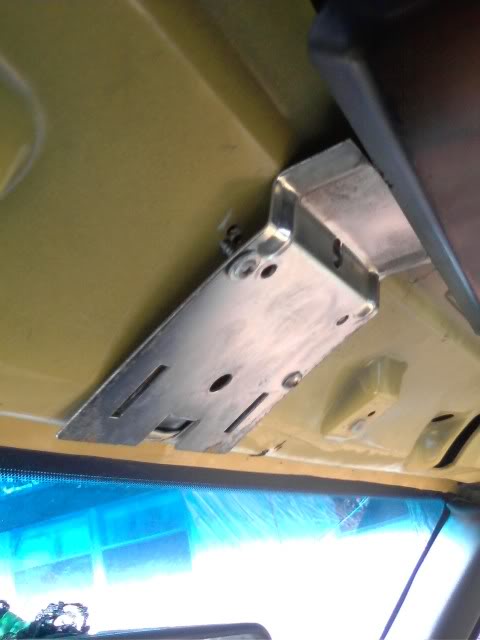
back holes for the screws:
first fitting:
need to extend the console up to match the sunroof. no big deal.
lines up pretty well!
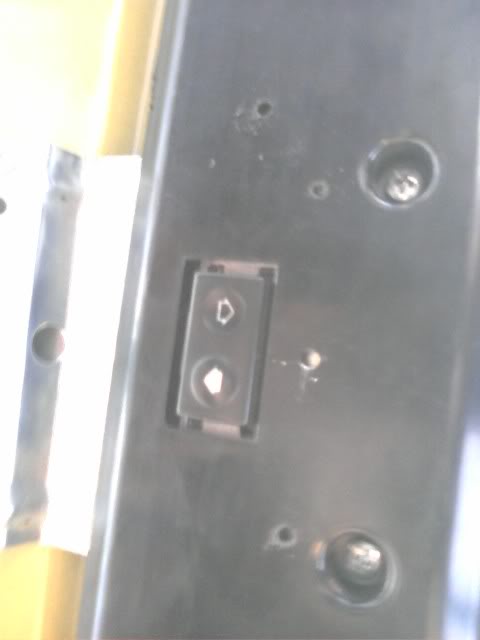
cut out the inside of the garage door compartment to get to the switch. I'll clean it up later when it gets covered:
it's all wired except for the temp sensor. plug it all in and the lcd doesn't light up. what did i wire wrong? everything looks fine. plug in the last one i've sold. it's works fine. out of all the ones i bought and sold, i ended up with the one that doesn't work! *$(@ oh well. need to find a new screen now. hoping this next weekend to get the auto dim/light mirror in.
Had to modify the bracket quite a bit. basically cut it in half:
back holes for the screws:
first fitting:
need to extend the console up to match the sunroof. no big deal.
lines up pretty well!
cut out the inside of the garage door compartment to get to the switch. I'll clean it up later when it gets covered:
it's all wired except for the temp sensor. plug it all in and the lcd doesn't light up. what did i wire wrong? everything looks fine. plug in the last one i've sold. it's works fine. out of all the ones i bought and sold, i ended up with the one that doesn't work! *$(@ oh well. need to find a new screen now. hoping this next weekend to get the auto dim/light mirror in.
#15
09-05-2010
Got the temp sensor wired up and the other lcd screen in. Damn thing looks green, but it has the blue filter! I'll probably add another blue filter behind it at a later time. Temp showed 43 this morning working on it.
Went to put the auto dim mirror in and the tab on the windshield isn't the right size. Hopefully the local advance will have one.
Went to put the auto dim mirror in and the tab on the windshield isn't the right size. Hopefully the local advance will have one.
#16
09-05-2010
got the dash buttoned back up tonight. well, almost. still need to finish the hvac panel. dem084 is helping with that.
anyways, here are the pics:
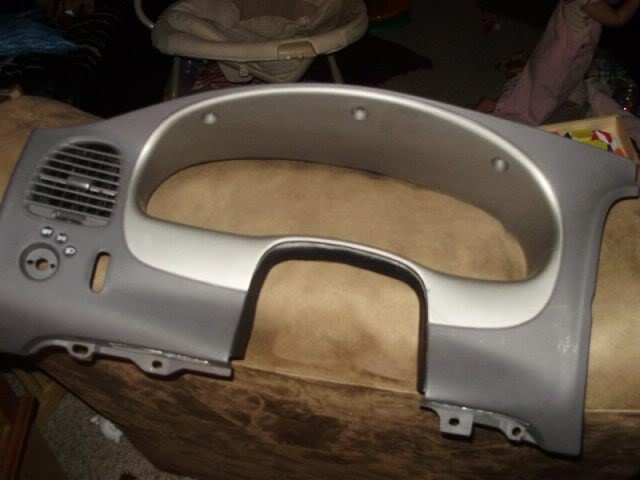
explorer sport gauge bezel:
headlight switch:

and the newest mod, backlit "FORD" logo in place of the gear selector:
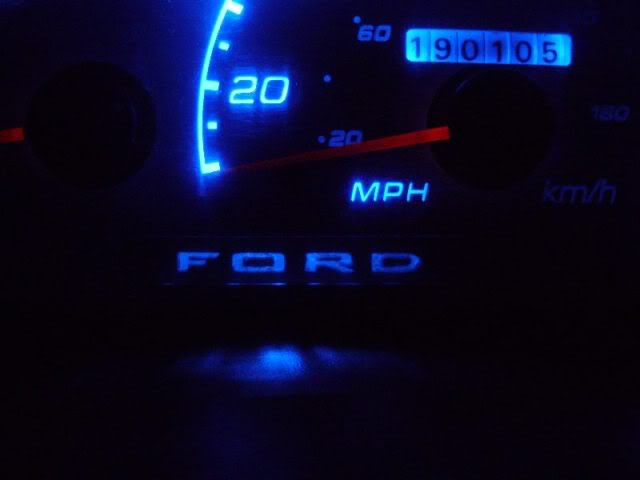
The logo took a lot of trial and error to get it to shine right. at first, the leds were too bright, causing the entire area to illuminate blue instead of just the "FORD". a little cutting, and a little painting took care of it.
anyways, here are the pics:
explorer sport gauge bezel:
headlight switch:
and the newest mod, backlit "FORD" logo in place of the gear selector:
The logo took a lot of trial and error to get it to shine right. at first, the leds were too bright, causing the entire area to illuminate blue instead of just the "FORD". a little cutting, and a little painting took care of it.
#17
09-05-2010
No real progress yet, but have changed some parts, and ordered some more. Over the last month, I have picked up the rest of the dash plastic, in dark charcoal. This includes both defrost vents, the little vent between the radio and the airbag, the fuse panel cover, and the passenger side vent. No more light grey plastic. I have picked up charcoal seat belts from an explorer. Haven't tried putting them in yet, but I think they should work. I've also got a silver radio bezel coming, with two cig lighters, and a fog light switch. plan to tie the projectors into the fog light switch. got the seat heaters wired up. very happy with them. nice and toasty.
And the big purchase, i just ordered my ABS headliner board. When it gets here, i'll post some pics of it.
And the big purchase, i just ordered my ABS headliner board. When it gets here, i'll post some pics of it.
#18
09-05-2010
Got the headliner board last week. It looks pretty nice. Haven't gotten a chance to fit it yet, but hopefully sometime soon. I want to test it in my truck without a sunroof first, but I don't want to tear into that truck right now.
this would look good painted, or even smoothed out and then painted. would be much easier than trying to fiberglass your stock board. only problem with it is there is an extra hole in the middle of the board. not sure what it's for, but it's not a problem for me.
this would look good painted, or even smoothed out and then painted. would be much easier than trying to fiberglass your stock board. only problem with it is there is an extra hole in the middle of the board. not sure what it's for, but it's not a problem for me.
#19
09-05-2010
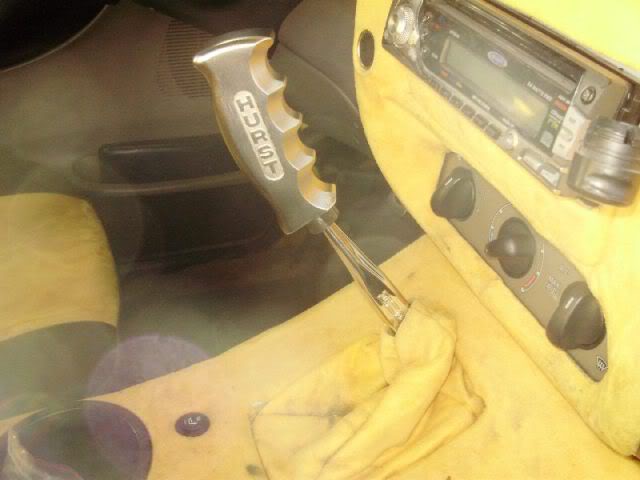
Hmmmm.......What is this?
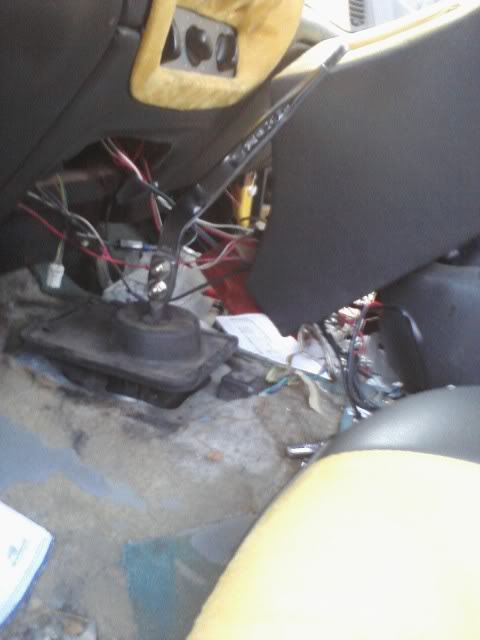
Oh yeah, HURST! I love it! Simple to install. Thanks to daranger94 for selling it! I actually had more time in reinstalling the console than i did installing the shifter. took me about 15 minutes to put it in, and another 30 minutes to put the console back in. the shape of the shifter make it difficult to slide a console brace between the shifter and the dash. i finally got it in, then found the shifter arm hits a different brace in 1, 3, and 5th gears. so i knocked it out for now, and will fix it when i recover the console. I think i'm also going to make an adapter to move the shifter back about 1.5". It's just a little too close to the dash for me.
I also just bought a pistol grip **** and a "hurst equipped" emblem. I got both of those for $33. The **** alone is $75 from jegs or summit. got to love ebay.
here are a few more pics of it with the console back in.
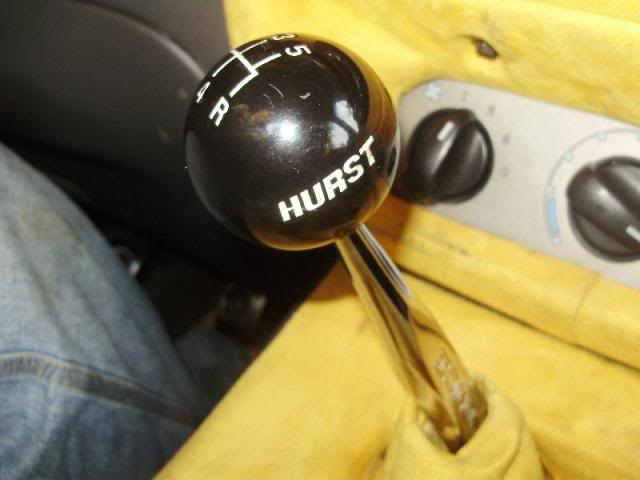
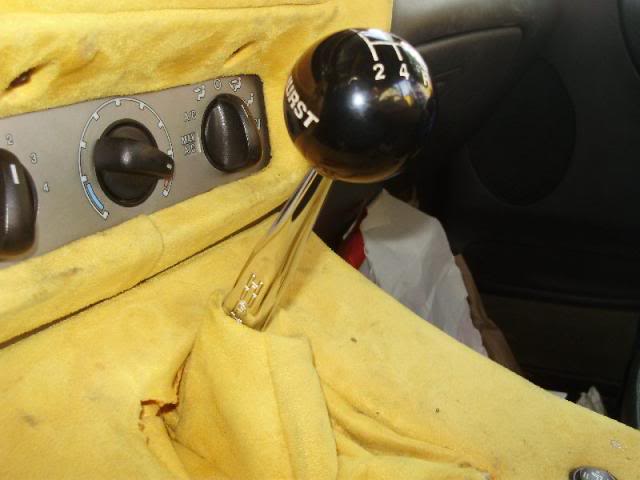
when i recover the console, i will probably make the boot not come up so high so you see more of the arm.
Oh yeah, HURST! I love it! Simple to install. Thanks to daranger94 for selling it! I actually had more time in reinstalling the console than i did installing the shifter. took me about 15 minutes to put it in, and another 30 minutes to put the console back in. the shape of the shifter make it difficult to slide a console brace between the shifter and the dash. i finally got it in, then found the shifter arm hits a different brace in 1, 3, and 5th gears. so i knocked it out for now, and will fix it when i recover the console. I think i'm also going to make an adapter to move the shifter back about 1.5". It's just a little too close to the dash for me.
I also just bought a pistol grip **** and a "hurst equipped" emblem. I got both of those for $33. The **** alone is $75 from jegs or summit. got to love ebay.
here are a few more pics of it with the console back in.
when i recover the console, i will probably make the boot not come up so high so you see more of the arm.
#20
09-05-2010
#21
09-05-2010
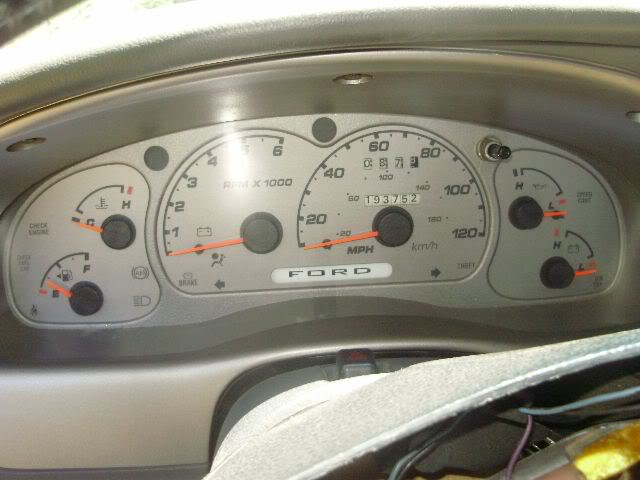
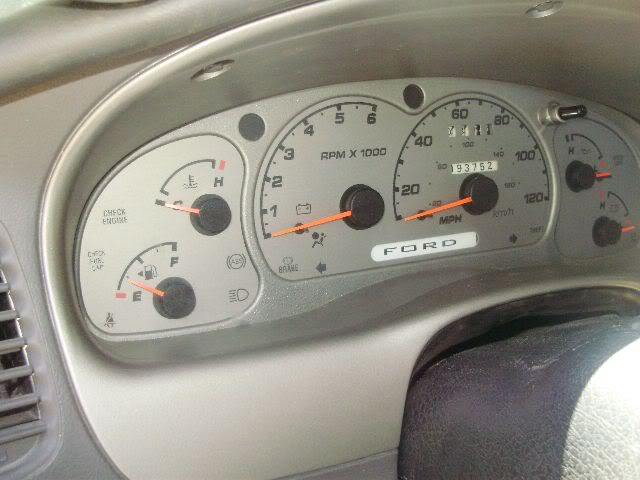
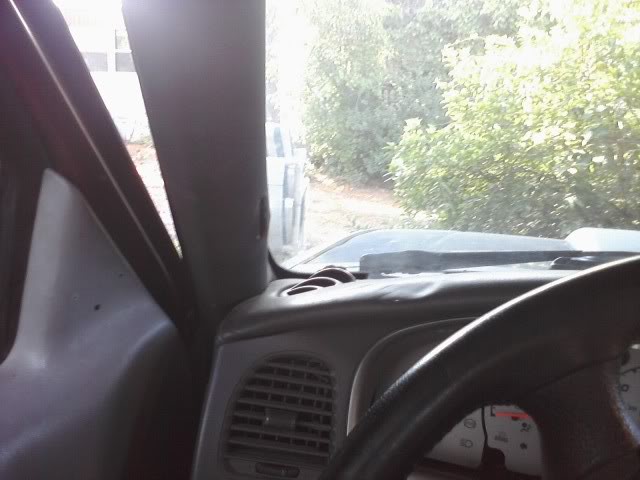
Haven't done much more lately. But I did get an 03 Ranger silver cluster and put it in with the LEDs. I need to get a new piece of vinyl cut for the gear selector delete. Also, took a few pics of the dash as I don't think I have ever posted any pics of it. There are a couple spots that I need to address, maybe this winter I can pull it back out.
#24
09-06-2010
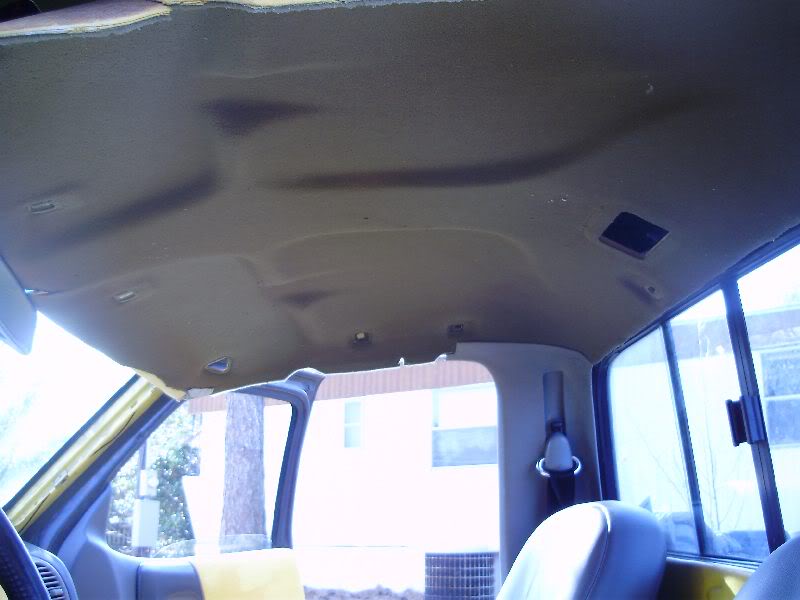
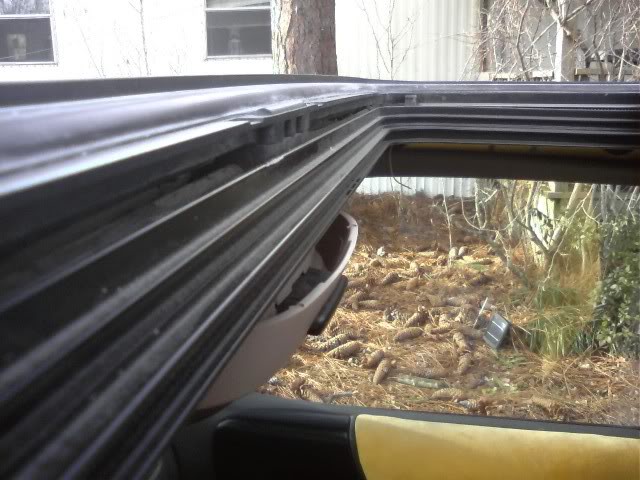
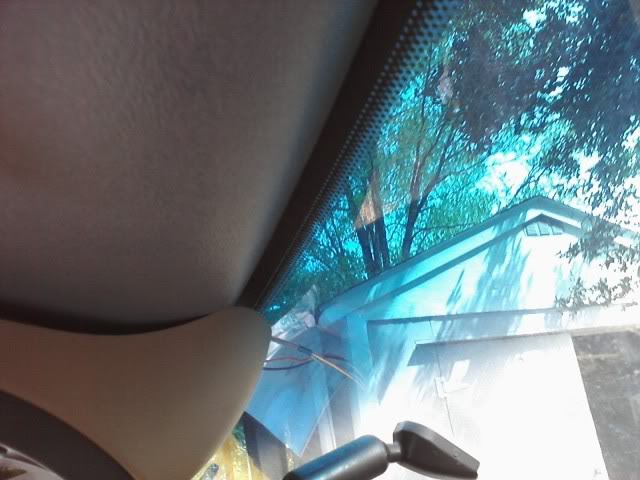
did some work on the headliner today. started out by putting the dome light switches back in the door latches. first time having a working dome light in close to 5 years. also found out that my "fuel door" light works and the dinger. guess i'll have to fix those later.
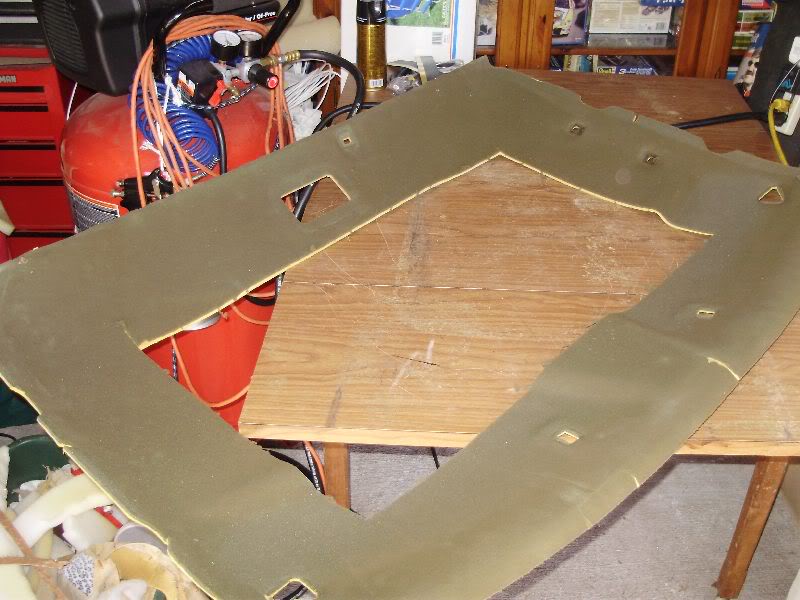
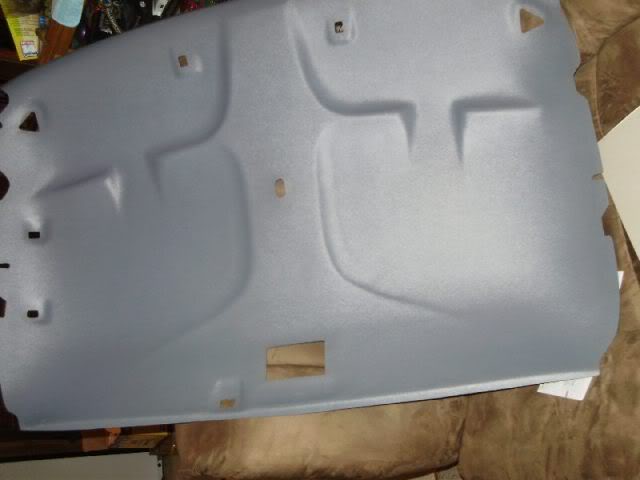
anyways, here are the pics of the headliner board.
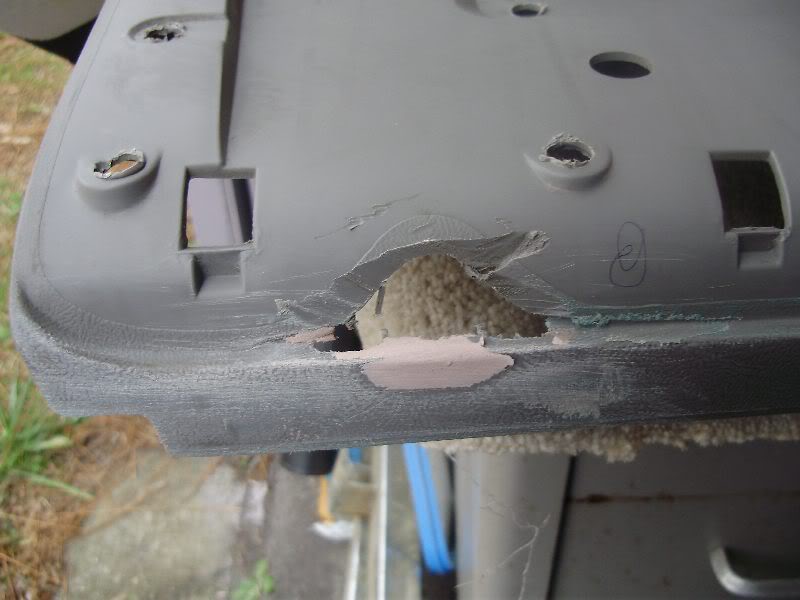
rough layout where to cut:

first cut and fit. yes, i cut up a $250 piece of plastic.
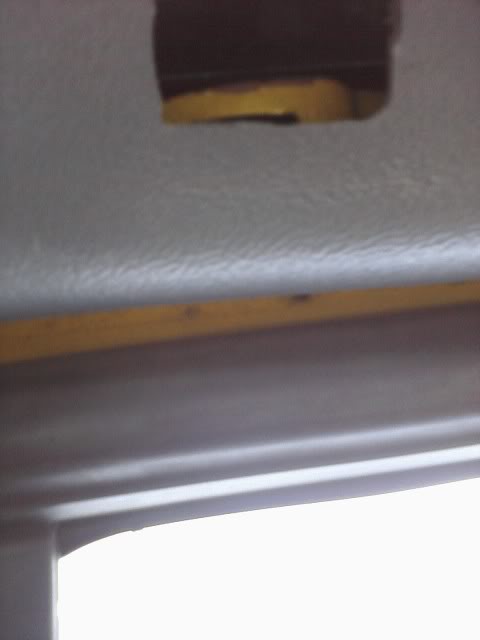
had to trim out for the ohc, and two small spots on the back of the sunroof frame.
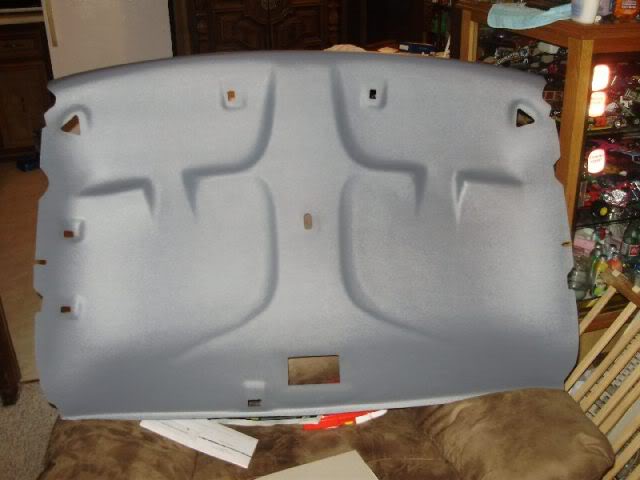
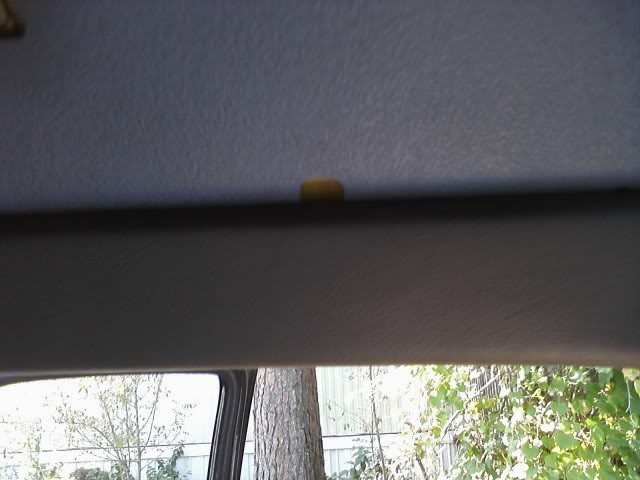
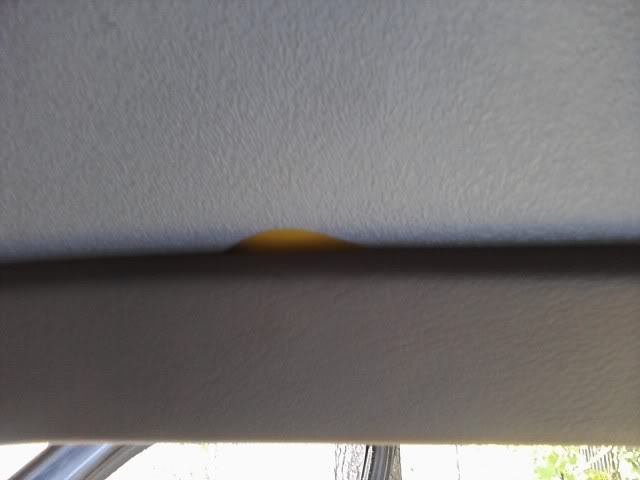
put the ohc back up and ran into this problem.
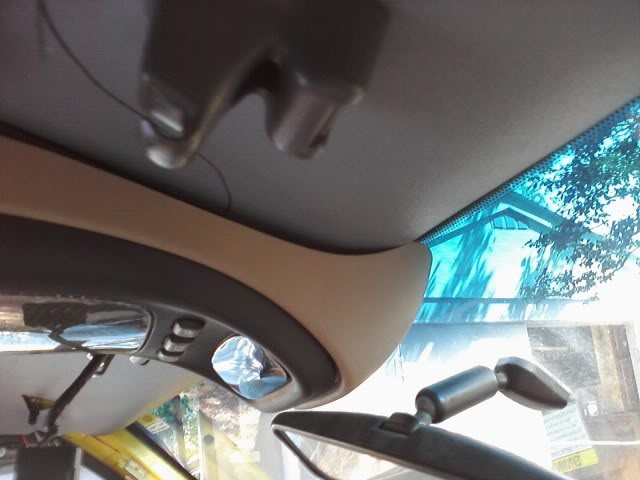
so a few minutes with the grinder, it now sits like this.
that's as far as i got. still need to drill a couple holes for the mustang dome light. i sat it up in place and it's gonna look nice. i can't wait to start laying some material on the visors, ohc, and dome light, but don't want to do the headliner until i can get some welding done on the roof. maybe i can get that stuff done in the next few weeks so i can button the headliner up.
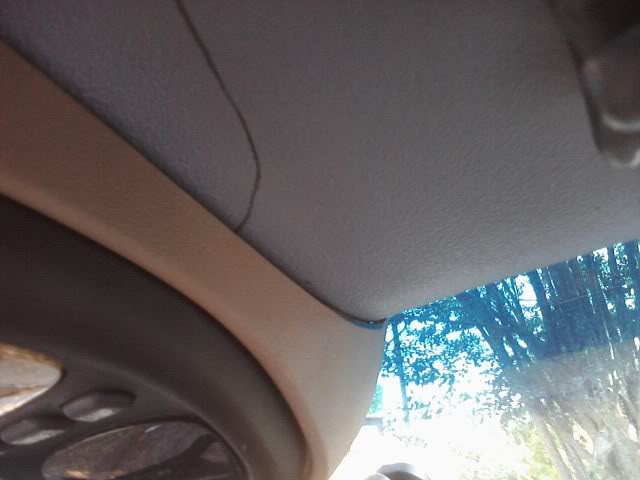
i am happy with the fit of the board, but it's not perfect. a couple holes are cut too big. if you were wanting to paint it, it would be a problem. once the material is on, should be no problem. i just have to remember not to trim my material down to the board as i normally do.
over both doors:
and the big problem is across the back. could be from cutting it all up, or the ohc may have pulled the board forward. i'll have to add a piece some board to it to make it go all the way to the window. no biggie. still need to shave the "oh crap" handle and the rear coat hook. don't need those.
and just for you dem, no more tach! pillars will get recovered when i do the suede work. hoping the spot in the dash pops back up in a few days.
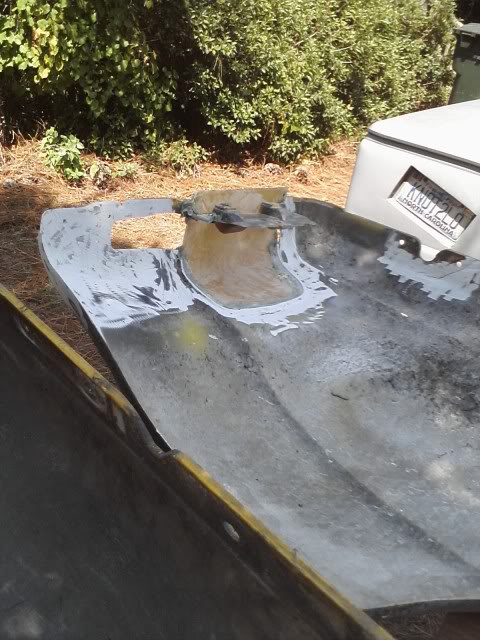
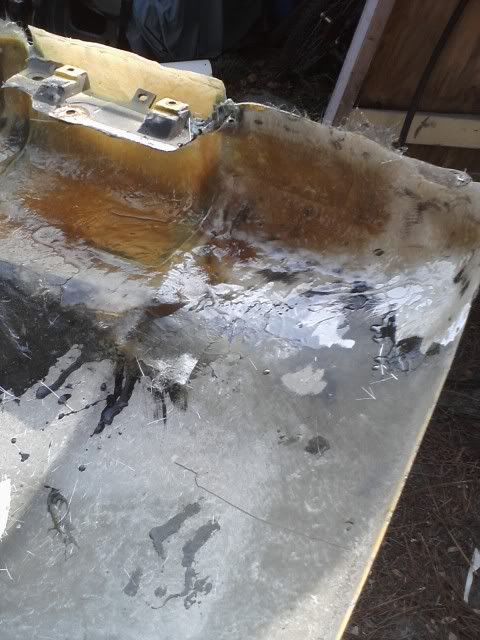
and a little more fiberglass work.
didn't get as far as i wanted. ran out of resin about half way through. have to wait til next week to buy some more. will probably get a gallon this time.
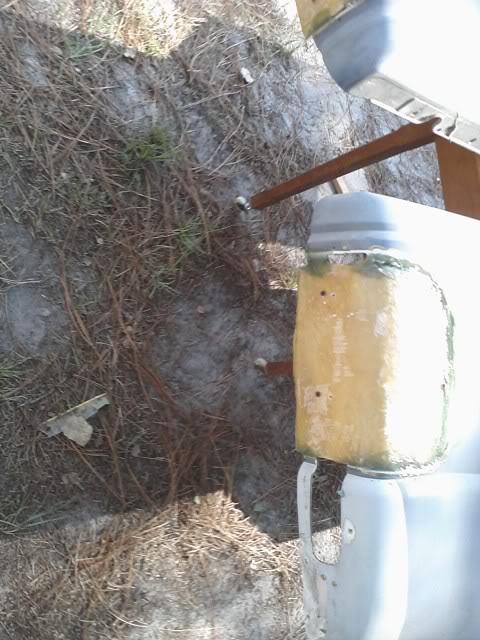
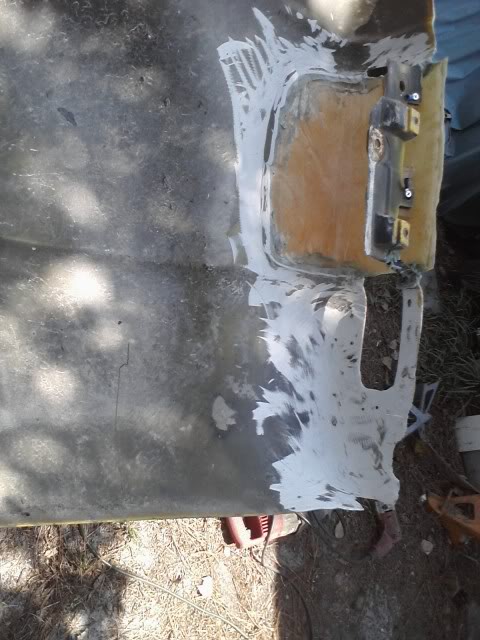
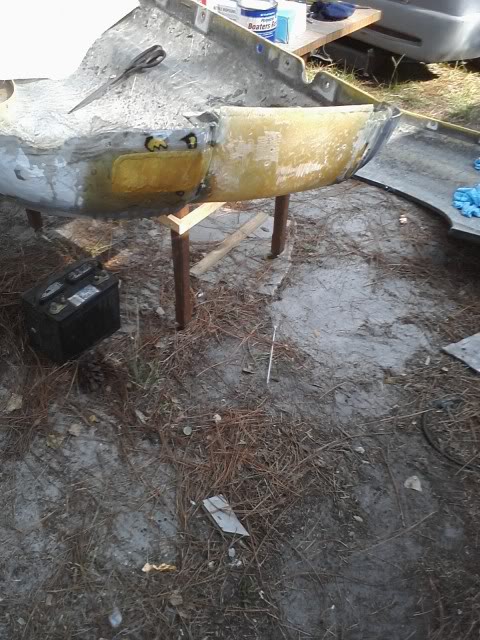
reinforcement on the rear: still need to add some more to the edge of the tail light filler, but it's pretty close.
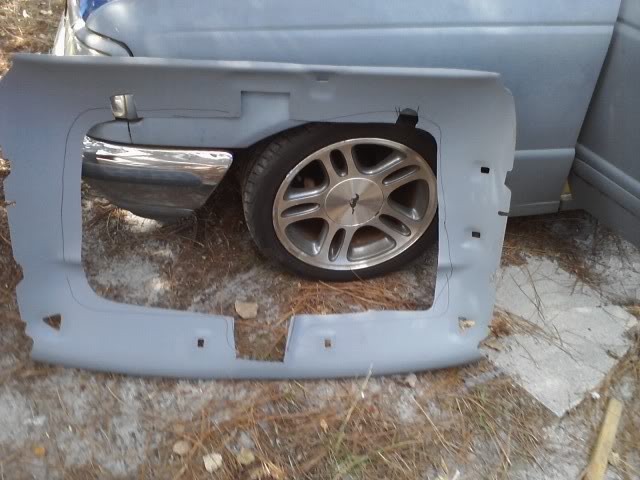
shot from the outside where the caddy's used to be:
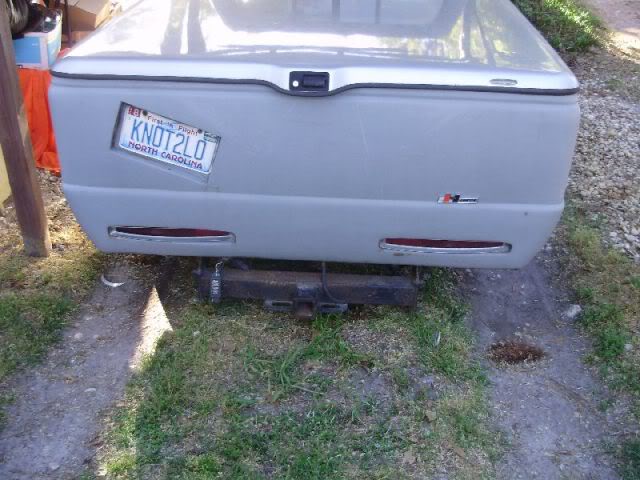
and i guess i'll go ahead and post this. here are my tails.

anyways, here are the pics of the headliner board.
rough layout where to cut:
first cut and fit. yes, i cut up a $250 piece of plastic.
had to trim out for the ohc, and two small spots on the back of the sunroof frame.
put the ohc back up and ran into this problem.
so a few minutes with the grinder, it now sits like this.
that's as far as i got. still need to drill a couple holes for the mustang dome light. i sat it up in place and it's gonna look nice. i can't wait to start laying some material on the visors, ohc, and dome light, but don't want to do the headliner until i can get some welding done on the roof. maybe i can get that stuff done in the next few weeks so i can button the headliner up.
i am happy with the fit of the board, but it's not perfect. a couple holes are cut too big. if you were wanting to paint it, it would be a problem. once the material is on, should be no problem. i just have to remember not to trim my material down to the board as i normally do.
over both doors:
and the big problem is across the back. could be from cutting it all up, or the ohc may have pulled the board forward. i'll have to add a piece some board to it to make it go all the way to the window. no biggie. still need to shave the "oh crap" handle and the rear coat hook. don't need those.
and just for you dem, no more tach! pillars will get recovered when i do the suede work. hoping the spot in the dash pops back up in a few days.
and a little more fiberglass work.
didn't get as far as i wanted. ran out of resin about half way through. have to wait til next week to buy some more. will probably get a gallon this time.
reinforcement on the rear: still need to add some more to the edge of the tail light filler, but it's pretty close.
shot from the outside where the caddy's used to be:
and i guess i'll go ahead and post this. here are my tails.


