Zorro38's 94 Ranger W/8in. Skyjacker
#1
 03-31-2015


Join Date: Nov 2014
Location: Tampa, FL
Posts: 20
Likes: 0
Received 0 Likes
on
0 Posts
Zorro38's 94 Ranger W/8in. Skyjacker
Well I figured I should start one of these if for nothing else it will at least help me remember how much money I'm going to dump into this thing.
Specs: 94 Ranger extended cab, 4.0, M5od, 4x4
So far the only thing not stock on it is the lift, tires, and bigger rear end. (8.8 instead of the 7.5)
I have also swapped the auto transfer case for the BW 1354.
The front is the 8inch Skyjacker kit. I was able to get the alignment correct with 3 degree bushings and
it actually steers quite well thanks to an 8 inch drop pittman arm from a superduty.
For the rear I used the stock top spring with an Explorer pack with the eyes cut off and a Procomp add-a-leaf.
Stock:


Spring comparison:

Lift installed:


Last edited by zorro38; 03-31-2015 at 12:57 PM.

#3
03-31-2015
Join Date: Nov 2014
Location: Tampa, FL
Posts: 20
Likes: 0
Received 0 Likes
on
0 Posts

#6
04-01-2015
Join Date: Nov 2014
Location: Tampa, FL
Posts: 20
Likes: 0
Received 0 Likes
on
0 Posts
For now it's getting 33inch baja claws that came with the lift on dick cepek dc2s. I'll probably be going to at least a 35. Bumpers might be in the distant future but this is going to be a pretty low budget build and I don't rock climb or even mud it that hard so bumpers aren't a huge need in my eyes. Thanks for the positive comments and I'll add some pics after the tires go on this weekend.
#7
04-01-2015


Join Date: Apr 2007
Location: Placentia, CA
Posts: 927
Likes: 0
Received 0 Likes
on
0 Posts
#9
04-01-2015


#12
09-01-2015
#16
04-07-2016
Join Date: Nov 2014
Location: Tampa, FL
Posts: 20
Likes: 0
Received 0 Likes
on
0 Posts


#17
04-07-2016

Join Date: May 2015
Location: Long Island, NY
Posts: 150
Likes: 0
Received 0 Likes
on
0 Posts
#18
04-08-2016
Join Date: Nov 2014
Location: Tampa, FL
Posts: 20
Likes: 0
Received 0 Likes
on
0 Posts
#19
04-08-2016

#20
04-11-2016
Join Date: Mar 2016
Location: Kelowna
Posts: 75
Likes: 0
Received 0 Likes
on
0 Posts
#21
04-12-2016
Join Date: Nov 2014
Location: Tampa, FL
Posts: 20
Likes: 0
Received 0 Likes
on
0 Posts
The SAS
After months of doing what seemed like nothing but buying parts it's finally in there.
Step 1: Sandblast and Paint everything.


I know the treads are still messed up, they were stripped and painted before installing.


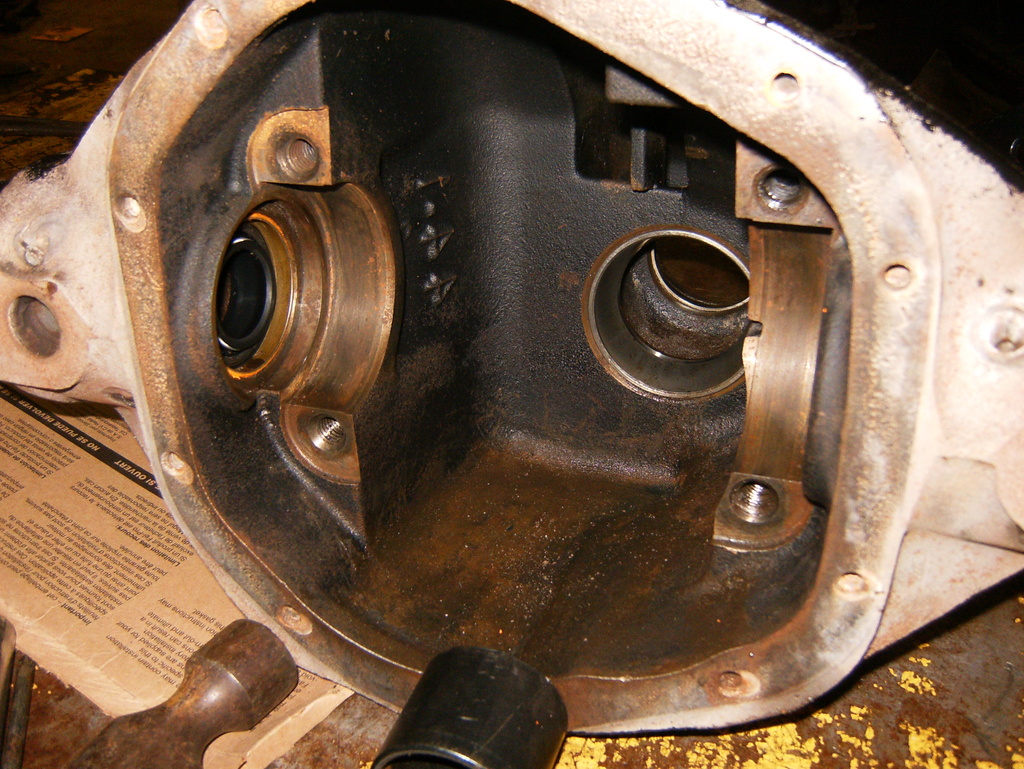
Yes those are locking Grade 8 bolts on the diff cover. Not necessary but it looks pretty cool.
Step 1: Sandblast and Paint everything.


I know the treads are still messed up, they were stripped and painted before installing.


Yes those are locking Grade 8 bolts on the diff cover. Not necessary but it looks pretty cool.
#22
04-12-2016
Join Date: Nov 2014
Location: Tampa, FL
Posts: 20
Likes: 0
Received 0 Likes
on
0 Posts
Step 2: Clean and install all the new goodies. It's got all new seals and bearings throughout.


If you can get your hand on one of these kits it will make your life a thousand times easier working with an old rusty axle from the early 70s. Cleaned every threaded hole on the whole front end.


If you can get your hand on one of these kits it will make your life a thousand times easier working with an old rusty axle from the early 70s. Cleaned every threaded hole on the whole front end.


#23
04-12-2016
Join Date: Nov 2014
Location: Tampa, FL
Posts: 20
Likes: 0
Received 0 Likes
on
0 Posts
Step 3: Drilling. Lots of drilling.
The heims that I ordered from RuffStuff Specialties Used non tapered 5/8" bolts so we drilled straight through with a 11/16" and sleeved the knuckles. For those of you who have tried drilling a factory pittman arm you know that it's a real SOB, we went through 2 drill bits, tried heating with the torches and then drilling but to no avail and ended up using some diamond bits on a rotary tool like ones you use to port engine heads then sleeved it.
Test Fit.

For tie rod and drag link I'm running 1.5" X .25" DOM with Heims from RuffStuff Specialties.
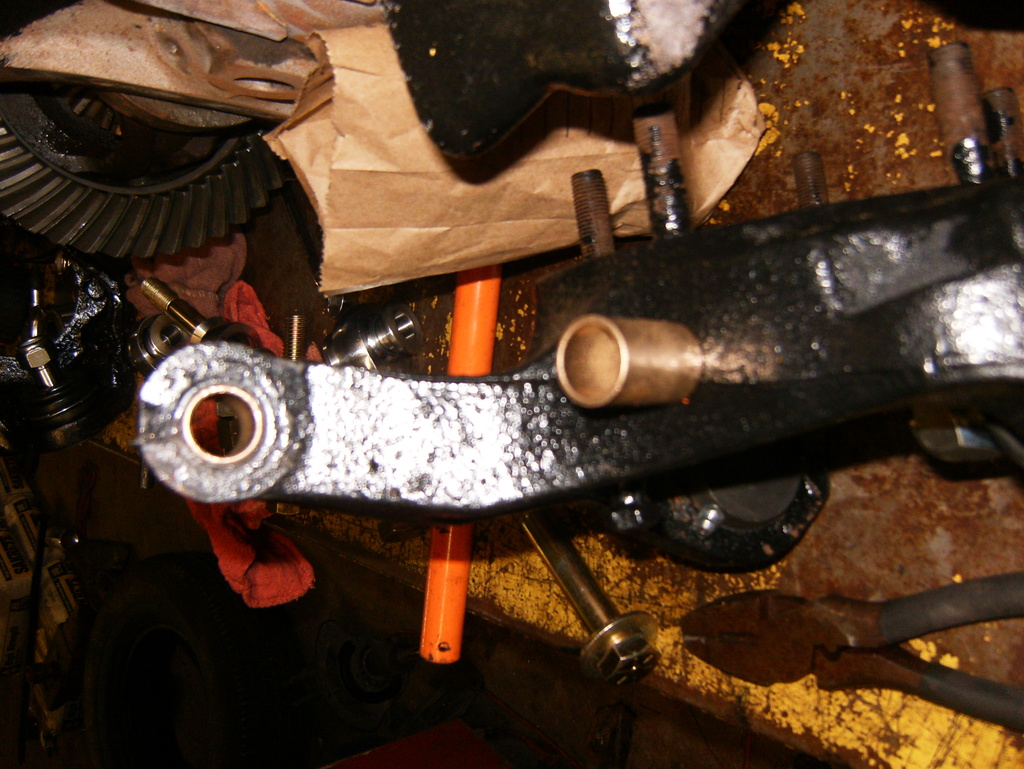
Drilling for the James Duff SAS trac bar bracket. It was a bit pricey but for basically bolt on ease and the cleanliness of the install I'd buy it again.


The heims that I ordered from RuffStuff Specialties Used non tapered 5/8" bolts so we drilled straight through with a 11/16" and sleeved the knuckles. For those of you who have tried drilling a factory pittman arm you know that it's a real SOB, we went through 2 drill bits, tried heating with the torches and then drilling but to no avail and ended up using some diamond bits on a rotary tool like ones you use to port engine heads then sleeved it.

Test Fit.

For tie rod and drag link I'm running 1.5" X .25" DOM with Heims from RuffStuff Specialties.
Drilling for the James Duff SAS trac bar bracket. It was a bit pricey but for basically bolt on ease and the cleanliness of the install I'd buy it again.


#24
04-12-2016
Join Date: Nov 2014
Location: Tampa, FL
Posts: 20
Likes: 0
Received 0 Likes
on
0 Posts
More Goodies
James Duff polyurethane bushing set and lower coil buckets.

(note more grade 8 hardware)
Heim joints burned in. The threads had been coated in hi temp anti seize, hence the copper color.

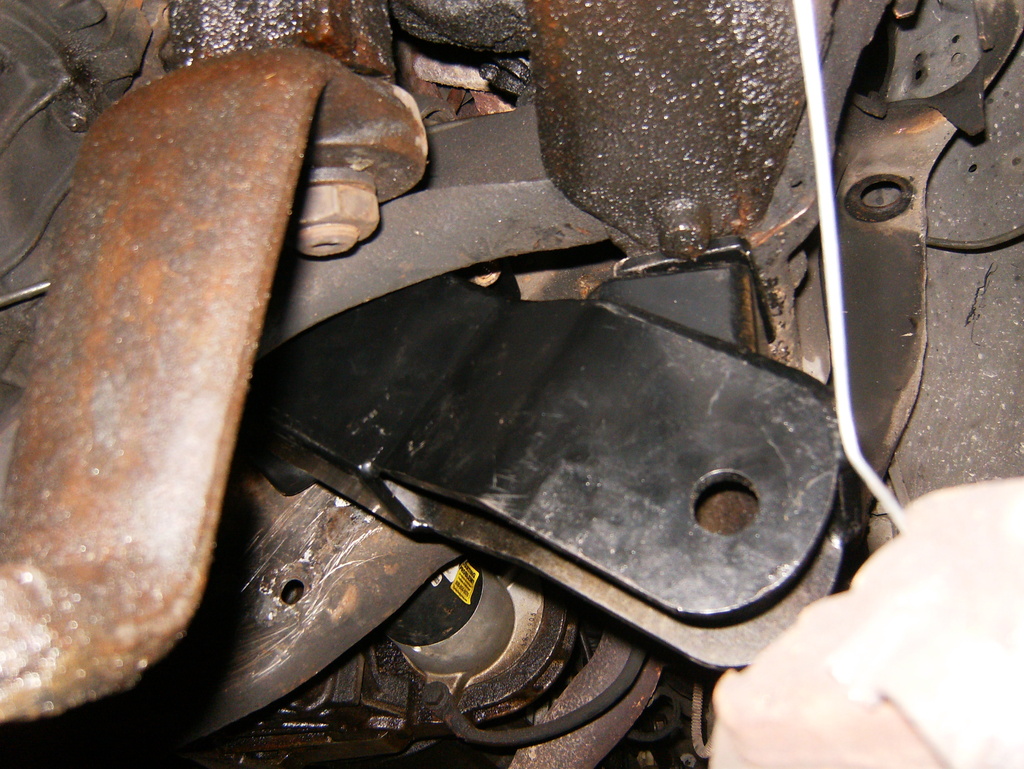
Better shot of the Trac bar mount. It bolts to your factory coil buckets and goes to the engine cross member where it bolts to the back of the engine mount and has a few more holes for more additional mounting bolts.

James Duff polyurethane bushing set and lower coil buckets.

(note more grade 8 hardware)
Heim joints burned in. The threads had been coated in hi temp anti seize, hence the copper color.

Better shot of the Trac bar mount. It bolts to your factory coil buckets and goes to the engine cross member where it bolts to the back of the engine mount and has a few more holes for more additional mounting bolts.

#25
04-12-2016
Join Date: Nov 2014
Location: Tampa, FL
Posts: 20
Likes: 0
Received 0 Likes
on
0 Posts
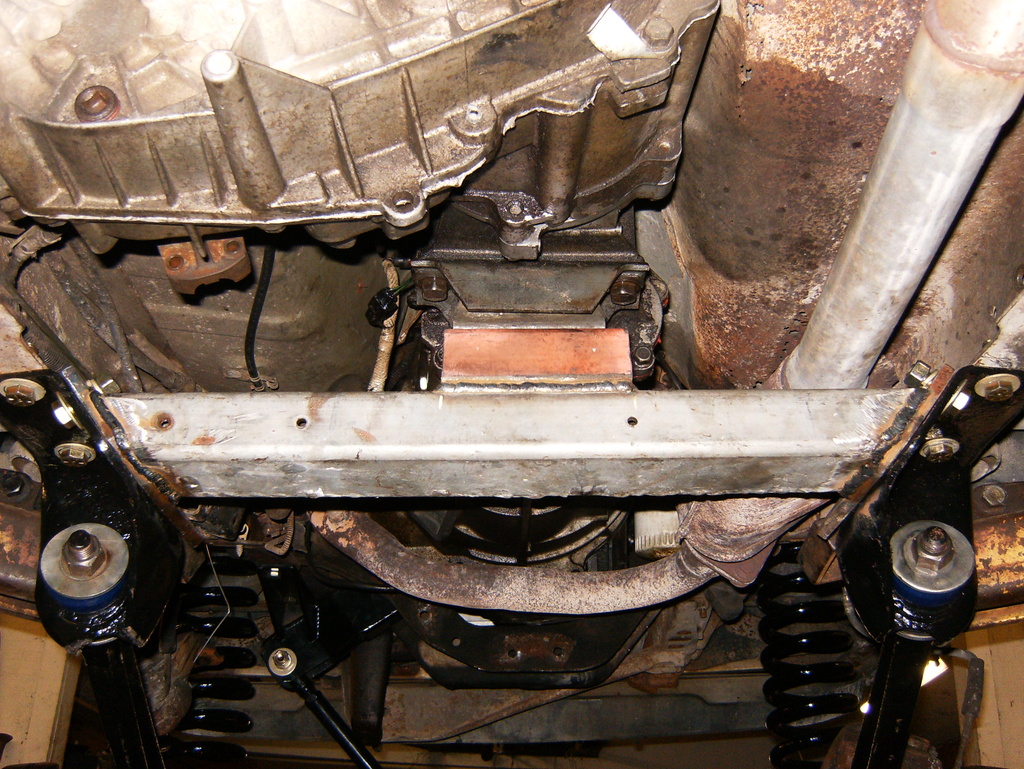
The fun part of doing this swap is that the new longer radius arms bolt right where the ranger transmission mount bolts on. To get by this we removed the ranger crossmember and fabricated a new one that bolts to the factory holes on the new radius arm brackets. The rear hole on the radius arm brackets mounts to the rear holes for the factory ranger transmission mount making lining everything up a breeze.
What the new crossmember started life as:

3/8" steel plate. Overkill? Maybe but who cares.


My buddy is an amateur welder but I don't think it's going anywhere any time soon.

In the truck.
If it looks crooked it's because it's on the lift a bit caddywompus because the arms of the lift go right where the radius arm brackets need to be.
What the new crossmember started life as:

3/8" steel plate. Overkill? Maybe but who cares.


My buddy is an amateur welder but I don't think it's going anywhere any time soon.

In the truck.

If it looks crooked it's because it's on the lift a bit caddywompus because the arms of the lift go right where the radius arm brackets need to be.


