
Bough a Hurst shifter.


I HIGHLY suggest taking a 4.5" grinder w/ a cutoff wheel to the Hurst base piece that bolts to the top of the trans. This will ELIMINATE any future leaky issues. I had my trans out and while it was out, I drilled a hole and tapped it for a REAL vent tube, but capped it off for a later date and did the Hurst base slice because it's been something I've thought about for quite some time. 7k on JUST the base vent relief and tons of high speed, long hour drives and NO leaks anywhere. I HIGHLY suggest it. All the other Hurst leak "fixes" are junk. I've tried 'em all and this groove is WIN!


Here you'll see the vent tube I added and will likely never do anything with....you can also see the vent hole I cut out of the base plate. I've never had good luck at all with paper gaskets.....I use grey silocone as my gaskets. Be sure if you do use silocone, be sure to clear out the groove in that base plate you just cut.

Here you'll see the vent tube I added and will likely never do anything with....you can also see the vent hole I cut out of the base plate. I've never had good luck at all with paper gaskets.....I use grey silocone as my gaskets. Be sure if you do use silocone, be sure to clear out the groove in that base plate you just cut.
As far as I know, I'm the first one to do it like this. At least the first one to post about it. I did it back in October and posted up a storm on my progress in Gumby's thread on RPS. Sorta stole his thread with a better, no need to drop trans fix.


So far so good for me on the groove.
I use some of the Fat Mat across the floor opening and laid on a couple pcs of �” Foam Padding around the area also up the stick some to reduce the noise level.
I didn’t know how good of a job I did until recently I had to remove the stuff and took a ride to find the noise level is almost a PITA.
Get as much sound proofing of what ever type you want in area of the floor opening and if possible around the stick as much as you can (not too tight) without interfering with the boot.
If you are using an OEM Floor Bezel/Cup Holder, fill it up with as much sound proofing as possible and place some Fat Mat (or other type) of sound deadening mat across the opening.
Last edited by Scrambler82; Apr 26, 2010 at 08:52 AM. Reason: spl chk
Great tip there Scrambler!
Oh...and Ben, if you're a little short armed like myself, you may find the ball to be somewhat of a reach. No worries....making an extention bracket is very easy with a grinder, some 1/4"x1.5" steel, center punch, and a drill...

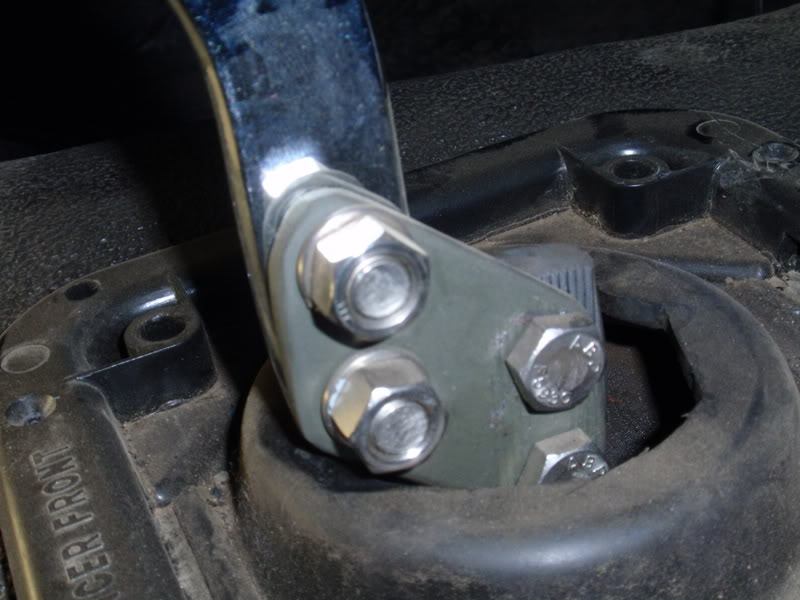

***NOTE: All installed pics posted above are on bodylifted trucks. But several other people find this mod to be very effective and very very cheap compared to buying a new arm from Hurst. I've even sold a couple extentions to folks with stock trucks.***
Oh...and Ben, if you're a little short armed like myself, you may find the ball to be somewhat of a reach. No worries....making an extention bracket is very easy with a grinder, some 1/4"x1.5" steel, center punch, and a drill...
***NOTE: All installed pics posted above are on bodylifted trucks. But several other people find this mod to be very effective and very very cheap compared to buying a new arm from Hurst. I've even sold a couple extentions to folks with stock trucks.***
Last edited by Fx4wannabe01; Apr 26, 2010 at 07:31 PM.
Mine too was too far forward even with the Optional Stick.
here are a couple of pics:
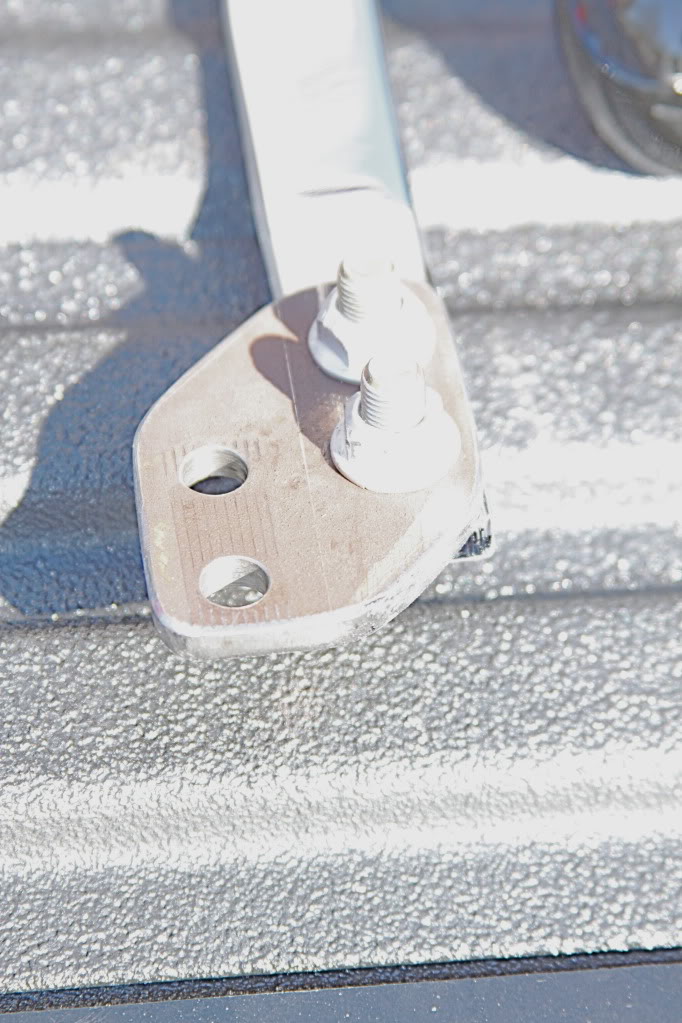
This is the adapter I made from � Plate, not too fancy but it did what it was suppose to, 1” back and 1” up. Was thinking maybe another inch up would be good.., 1” by 2” tall.
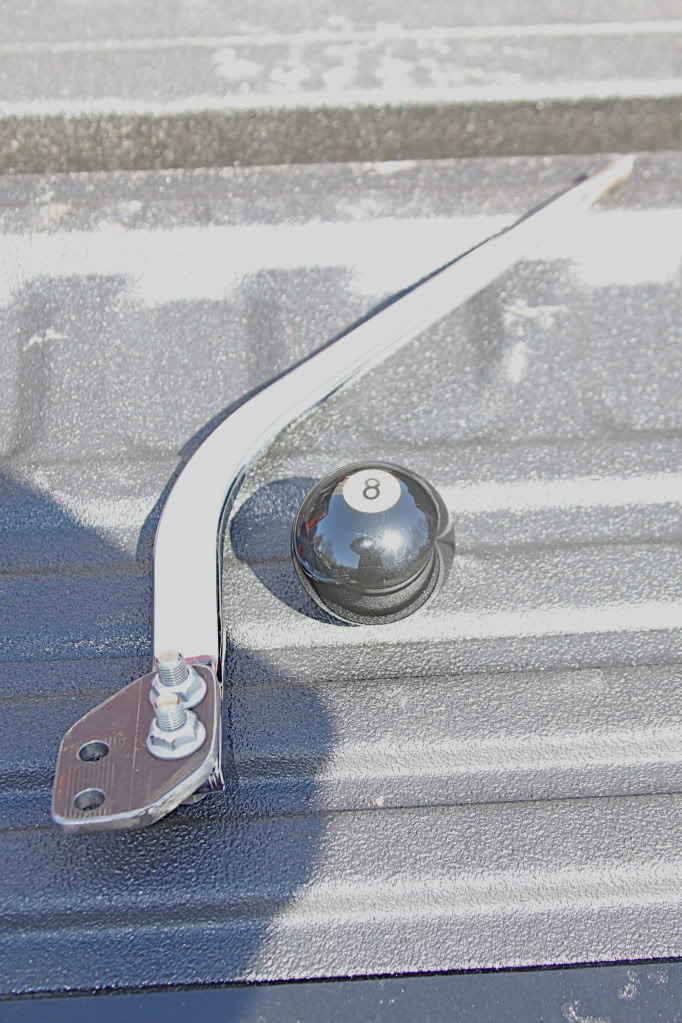
This is the extended length stick w/a little lean toward the driver, w/ adapter added to the bolt end and my 8-Ball ****.
If you decide to make an adapter, make it look like Shane’s first adapter and my adapter but just taller, the angle cut give the adapter more strength.
here are a couple of pics:
This is the adapter I made from � Plate, not too fancy but it did what it was suppose to, 1” back and 1” up. Was thinking maybe another inch up would be good.., 1” by 2” tall.
This is the extended length stick w/a little lean toward the driver, w/ adapter added to the bolt end and my 8-Ball ****.
If you decide to make an adapter, make it look like Shane’s first adapter and my adapter but just taller, the angle cut give the adapter more strength.
Last edited by Scrambler82; Apr 26, 2010 at 08:15 PM.
Yeah...I just sorta tossed mine together at work one sloooow night. lol. So they ain't nothin' pretty. lol. The holes are 7/8" on-center, 3/8" holes and obviously 3/8 hardware. I replaced those hex button heads from the Hurst and used hex heads...TONS easier to work with if needed.
Olive Drab one is 1" up, 1 1/8" back. I found I was unable to make a 1" back spacer because the shifter stub and the arm come in contact with eachother. I could be mistaken...it's been a few years. lol. I ran this one when I was stock and 1" BL'd.
Primer Gray one is 2.5" up, 1 1/8" back. I'm currently running this one with the 3" BL.
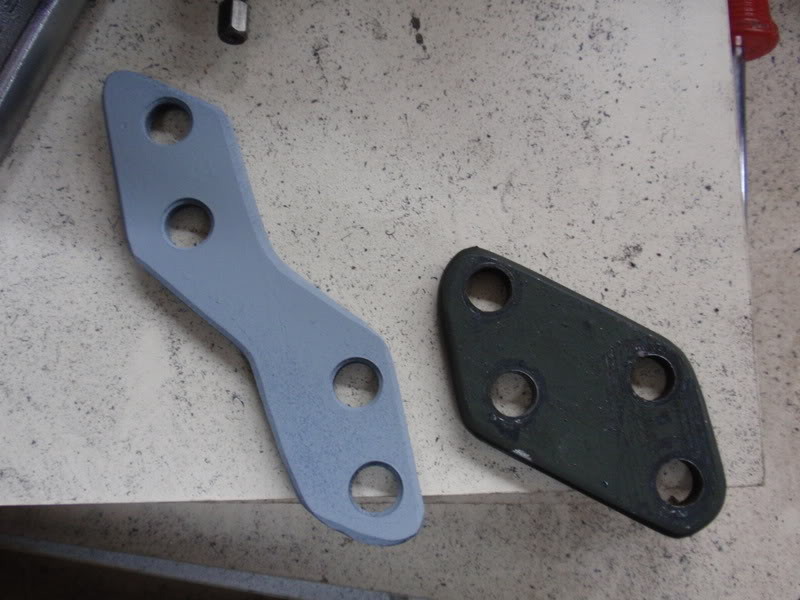
I just wanted the shifter to have a little 50/60s feel of the T-bucket rods so it may go up another inch.
I used the Button Heads for two reasons, they were free and they fit and two, the bolts should really be hardened bolts and the Button Heads from Hurst are just that, hardened bolts. The added bolts at the Shifter are Grade 8 with Grade 8 Locking Nuts; just me…
I used the Button Heads for two reasons, they were free and they fit and two, the bolts should really be hardened bolts and the Button Heads from Hurst are just that, hardened bolts. The added bolts at the Shifter are Grade 8 with Grade 8 Locking Nuts; just me…

Thread
Thread Starter
Forum
Replies
Last Post


