roof rack build
#1
 09-06-2010


Join Date: Oct 2009
Location: topanga, California
Posts: 179
Likes: 0
Received 0 Likes
on
0 Posts
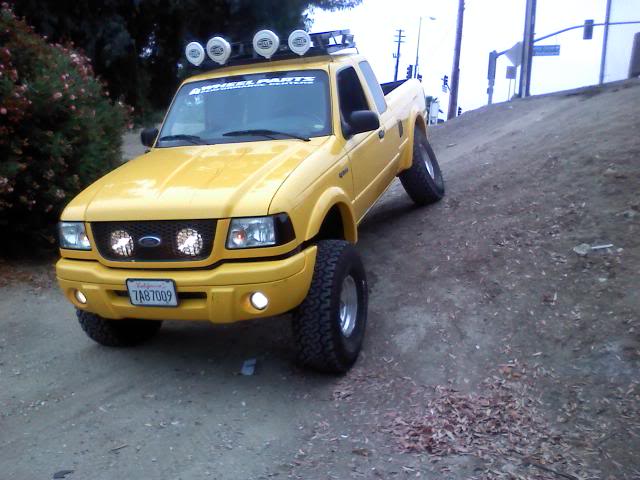
so a while ago i was lookin into gettin a roof rack only one i really liked was the 4x4 defender... 400 bucks!! also didnt quite fit. so i thought what the hell ill make my own... 50 bucks later here it is...
<a href="http://s753.photobucket.com/albums/xx177/dabumblebee/?action=view¤t=scraps.jpg" target="_blank"><img src="http://i753.photobucket.com/albums/xx177/dabumblebee/scraps.jpg" border="0" alt="Photobucket"></a>
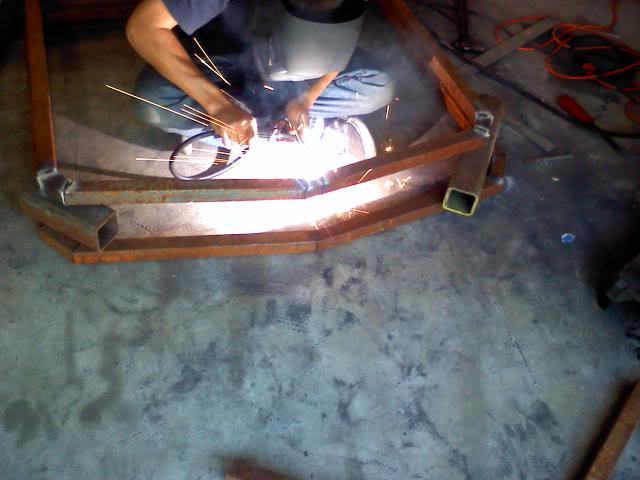
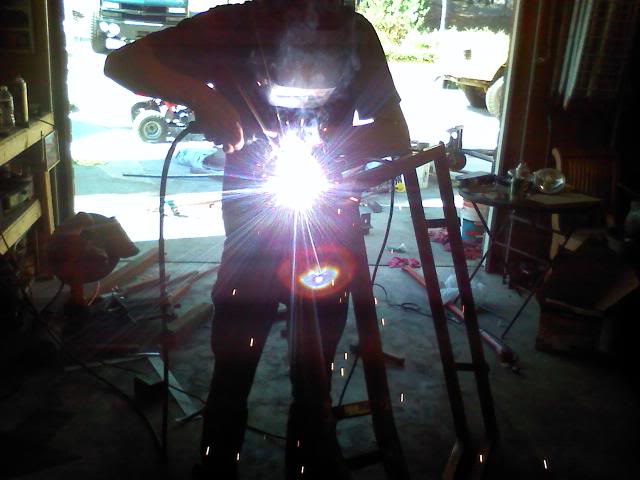
the start
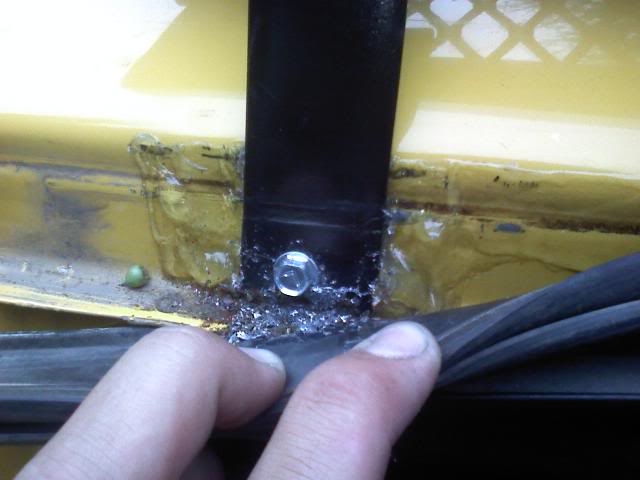
<a href="http://s753.photobucket.com/albums/xx177/dabumblebee/?action=view¤t=welding1.jpg" target="_blank"><img src="http://i753.photobucket.com/albums/xx177/dabumblebee/welding1.jpg" border="0" alt="Photobucket"></a>
<a href="http://s753.photobucket.com/albums/xx177/dabumblebee/?action=view¤t=welding2.jpg" target="_blank"><img src="http://i753.photobucket.com/albums/xx177/dabumblebee/welding2.jpg" border="0" alt="Photobucket"></a>
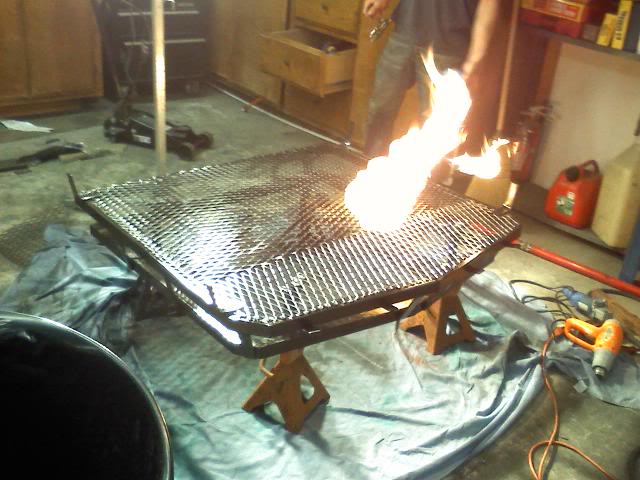
<a href="http://s753.photobucket.com/albums/xx177/dabumblebee/?action=view¤t=paintdrying2.jpg" target="_blank"><img src="http://i753.photobucket.com/albums/xx177/dabumblebee/paintdrying2.jpg" border="0" alt="Photobucket"></a>
very effective paint drying system
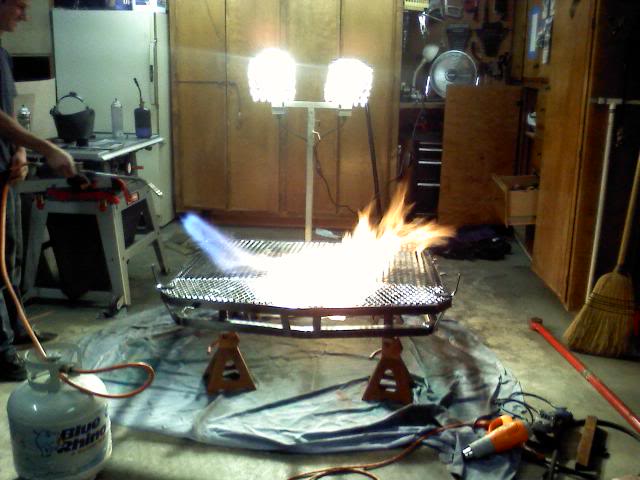
<a href="http://s753.photobucket.com/albums/xx177/dabumblebee/?action=view¤t=piantdryingsystem.jpg" target="_blank"><img src="http://i753.photobucket.com/albums/xx177/dabumblebee/piantdryingsystem.jpg" border="0" alt="Photobucket"></a>
wasnt workin fast enough hahah
<a href="http://s753.photobucket.com/albums/xx177/dabumblebee/?action=view¤t=roofrack2.jpg" target="_blank"><img src="http://i753.photobucket.com/albums/xx177/dabumblebee/roofrack2.jpg" border="0" alt="Photobucket"></a>
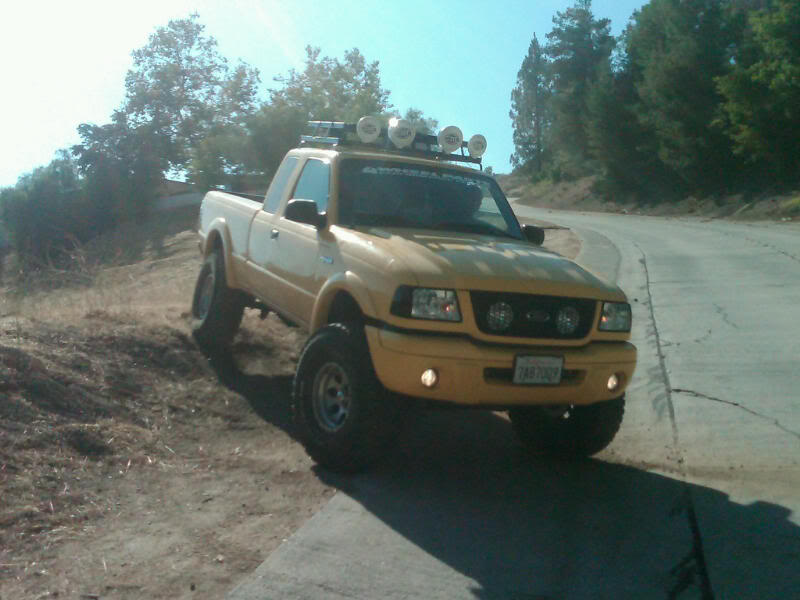
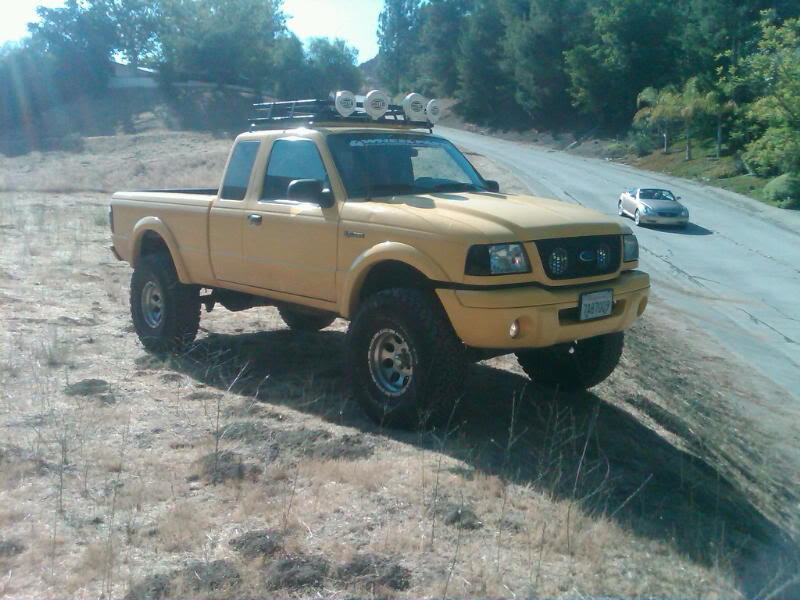
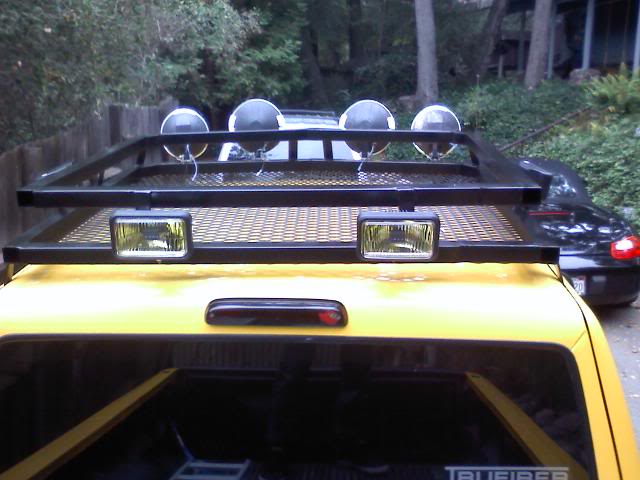
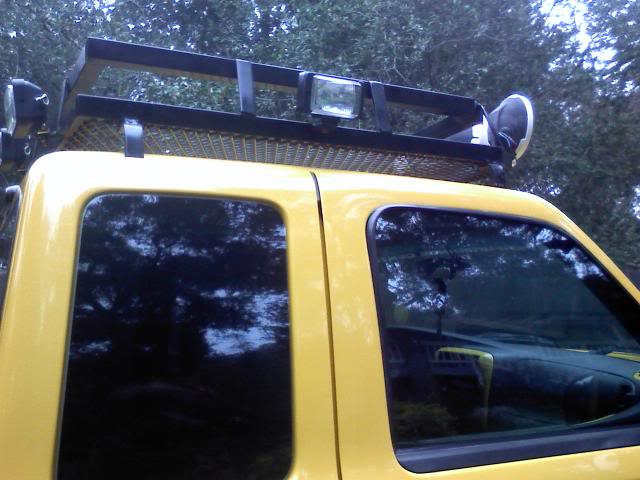
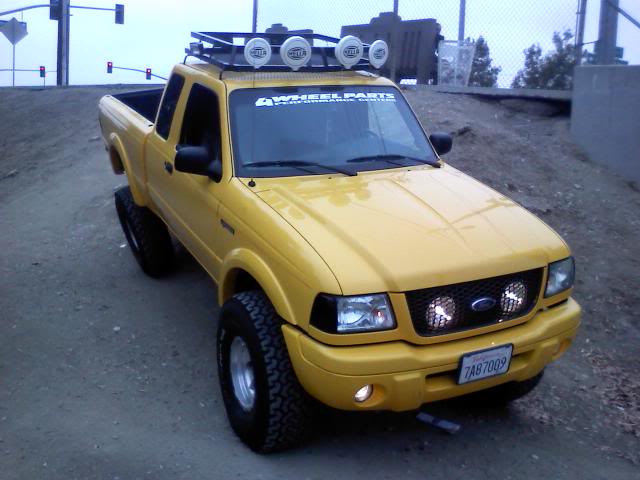
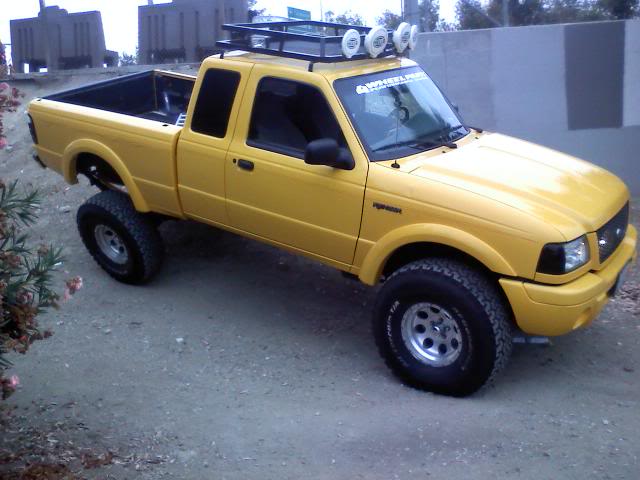
the finished product :)
<a href="http://s753.photobucket.com/albums/xx177/dabumblebee/?action=view¤t=roofrack.jpg" target="_blank"><img src="http://i753.photobucket.com/albums/xx177/dabumblebee/roofrack.jpg" border="0" alt="Photobucket"></a>
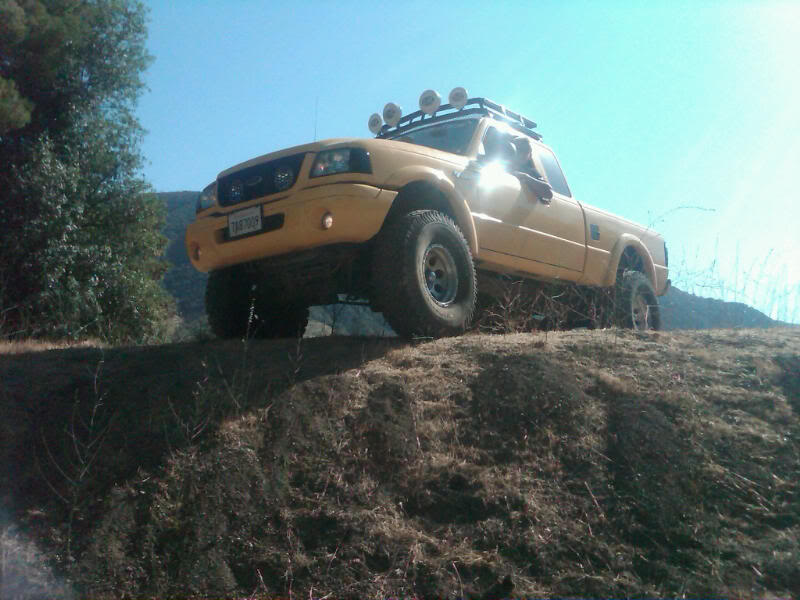
<a href="http://s753.photobucket.com/albums/xx177/dabumblebee/?action=view¤t=kingofthehill3.jpg" target="_blank"><img src="http://i753.photobucket.com/albums/xx177/dabumblebee/kingofthehill3.jpg" border="0" alt="Photobucket"></a>
<a href="http://s753.photobucket.com/albums/xx177/dabumblebee/?action=view¤t=roofrack3.jpg" target="_blank"><img src="http://i753.photobucket.com/albums/xx177/dabumblebee/roofrack3.jpg" border="0" alt="Photobucket"></a>
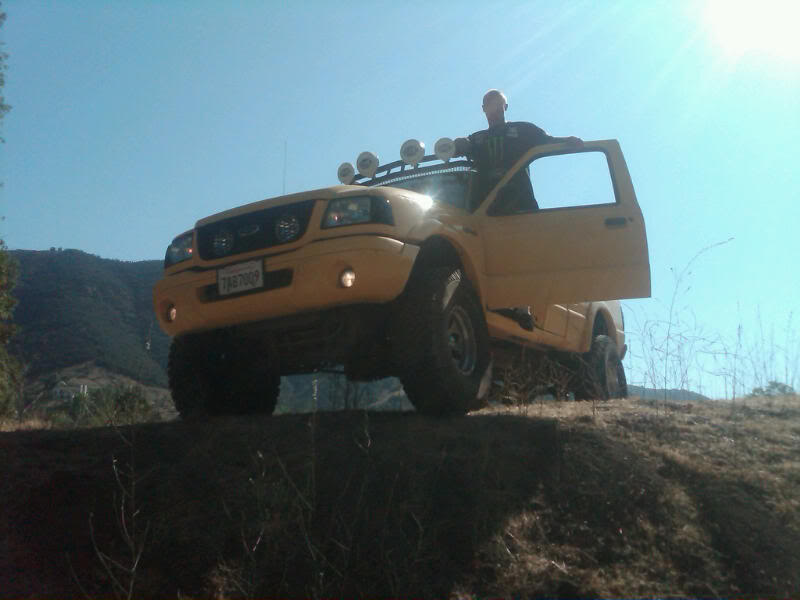
...oh also got sum 35"bfg allterrains :) lovin life
<a href="http://s753.photobucket.com/albums/xx177/dabumblebee/?action=view¤t=scraps.jpg" target="_blank"><img src="http://i753.photobucket.com/albums/xx177/dabumblebee/scraps.jpg" border="0" alt="Photobucket"></a>
the start
<a href="http://s753.photobucket.com/albums/xx177/dabumblebee/?action=view¤t=welding1.jpg" target="_blank"><img src="http://i753.photobucket.com/albums/xx177/dabumblebee/welding1.jpg" border="0" alt="Photobucket"></a>
<a href="http://s753.photobucket.com/albums/xx177/dabumblebee/?action=view¤t=welding2.jpg" target="_blank"><img src="http://i753.photobucket.com/albums/xx177/dabumblebee/welding2.jpg" border="0" alt="Photobucket"></a>
<a href="http://s753.photobucket.com/albums/xx177/dabumblebee/?action=view¤t=paintdrying2.jpg" target="_blank"><img src="http://i753.photobucket.com/albums/xx177/dabumblebee/paintdrying2.jpg" border="0" alt="Photobucket"></a>
very effective paint drying system
<a href="http://s753.photobucket.com/albums/xx177/dabumblebee/?action=view¤t=piantdryingsystem.jpg" target="_blank"><img src="http://i753.photobucket.com/albums/xx177/dabumblebee/piantdryingsystem.jpg" border="0" alt="Photobucket"></a>
wasnt workin fast enough hahah
<a href="http://s753.photobucket.com/albums/xx177/dabumblebee/?action=view¤t=roofrack2.jpg" target="_blank"><img src="http://i753.photobucket.com/albums/xx177/dabumblebee/roofrack2.jpg" border="0" alt="Photobucket"></a>
the finished product :)
<a href="http://s753.photobucket.com/albums/xx177/dabumblebee/?action=view¤t=roofrack.jpg" target="_blank"><img src="http://i753.photobucket.com/albums/xx177/dabumblebee/roofrack.jpg" border="0" alt="Photobucket"></a>
<a href="http://s753.photobucket.com/albums/xx177/dabumblebee/?action=view¤t=kingofthehill3.jpg" target="_blank"><img src="http://i753.photobucket.com/albums/xx177/dabumblebee/kingofthehill3.jpg" border="0" alt="Photobucket"></a>
<a href="http://s753.photobucket.com/albums/xx177/dabumblebee/?action=view¤t=roofrack3.jpg" target="_blank"><img src="http://i753.photobucket.com/albums/xx177/dabumblebee/roofrack3.jpg" border="0" alt="Photobucket"></a>
...oh also got sum 35"bfg allterrains :) lovin life

#3
09-06-2010
Join Date: Oct 2009
Location: topanga, California
Posts: 179
Likes: 0
Received 0 Likes
on
0 Posts
try this again...so a while ago i was lookin into gettin a roof rack only one i really liked was the 4x4 defender... 400 bucks!! also didnt quite fit. so i thought what the hell ill make my own... 50 bucks later here it is..
the start
very effective paint drying system
wesnt workin fast enough hahah
the finished product
... oh and got sum 35" bgf all terrians :) luvin life
the start
very effective paint drying system
wesnt workin fast enough hahah
the finished product
... oh and got sum 35" bgf all terrians :) luvin life
#4
09-06-2010
Join Date: Oct 2009
Location: topanga, California
Posts: 179
Likes: 0
Received 0 Likes
on
0 Posts
#5
09-06-2010
Join Date: Jun 2008
Location: Jacksonville, FL
Posts: 415
Likes: 0
Received 0 Likes
on
0 Posts
#6
09-06-2010
Join Date: Oct 2009
Location: topanga, California
Posts: 179
Likes: 0
Received 0 Likes
on
0 Posts
#7
09-06-2010
#8
09-06-2010
Join Date: Aug 2007
Location: Powell River,BC, Canada
Posts: 56
Likes: 0
Received 0 Likes
on
0 Posts
#11
09-07-2010
Join Date: Sep 2008
Location: Blackshear,GA.
Posts: 279
Likes: 0
Received 0 Likes
on
0 Posts
#14
09-07-2010
Join Date: May 2010
Location: suwanee, GA
Posts: 72
Likes: 0
Received 0 Likes
on
0 Posts
#15
09-07-2010
Join Date: May 2009
Location: Maple Grove, Minnesota
Posts: 172
Likes: 0
Received 0 Likes
on
0 Posts
#16
09-07-2010
Join Date: Oct 2009
Location: topanga, California
Posts: 179
Likes: 0
Received 0 Likes
on
0 Posts
#17
09-07-2010
Join Date: Oct 2009
Location: topanga, California
Posts: 179
Likes: 0
Received 0 Likes
on
0 Posts
i dont know for some reason it doesnt bother me haha
#18
09-07-2010
Join Date: Jun 2010
Location: Alexander City, Alabama
Posts: 250
Likes: 0
Received 0 Likes
on
0 Posts
#19
09-07-2010
Join Date: Oct 2009
Location: topanga, California
Posts: 179
Likes: 0
Received 0 Likes
on
0 Posts
#20
09-08-2010
Join Date: Nov 2008
Location: san jose, Costa Rica
Posts: 1,319
Likes: 0
Received 0 Likes
on
0 Posts
#22
09-08-2010
#23
09-10-2010
Join Date: Jun 2010
Location: Tampa, FL
Posts: 150
Likes: 0
Received 0 Likes
on
0 Posts


