
RBV wheeler from MO


Looks good!
It's not that heavy actually. It is 1/8" plate carbon. The plastic tag frame just makes it look thicker from the top view. I had everything laying around the shop to make it, so it was a freebie, and worked out perfect for what I wanted.
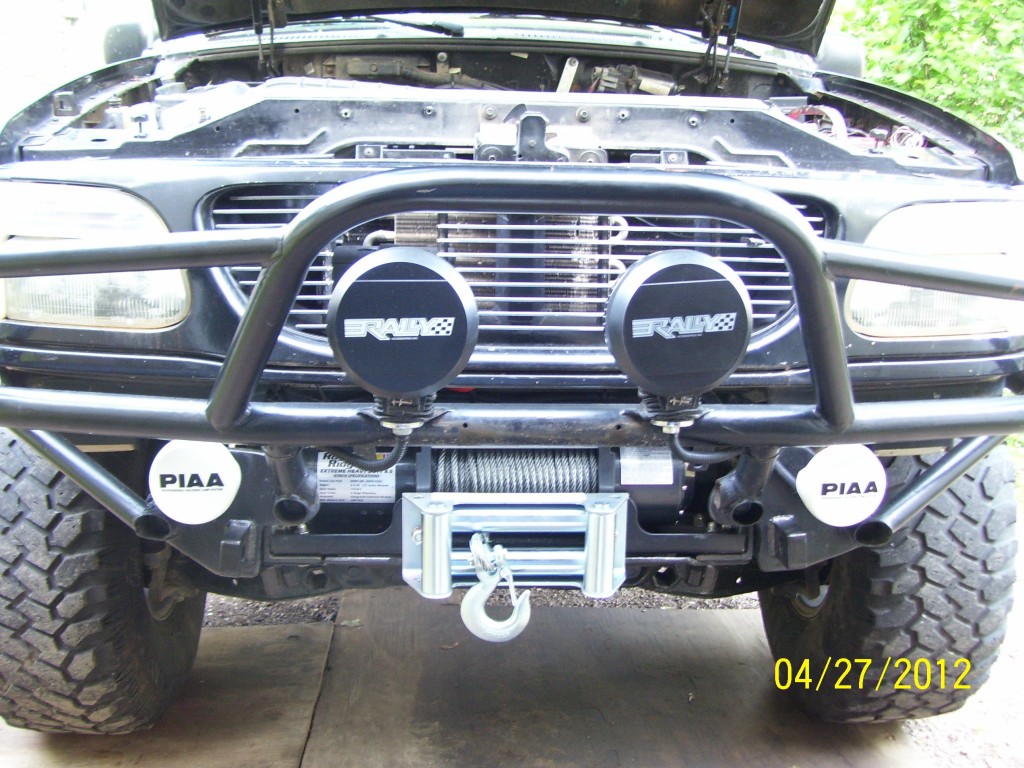
Since the tube bumper didn't have any where to permanently attach it to, (and a swing out tire carrier will be added someday), the hitch mount was the temporary answer.
Hoping to add some diamond plate to the top of the bumper soon. Need to get a section in a brake press first, before it can be welded up.

Little update to be updated in the future.
This rig will be in an upcoming issue of 4 wheeler magazine along with others that are joining us in a couple weeks for the Annual SMORR meet in MO. :)
If you would like the same honer, join us at the park, and be ready to hit the trails on the 4th during the day.
This rig will be in an upcoming issue of 4 wheeler magazine along with others that are joining us in a couple weeks for the Annual SMORR meet in MO. :)
If you would like the same honer, join us at the park, and be ready to hit the trails on the 4th during the day.


LOL, actually there is the plastic tool tray above it that would have to be removed to get the controller on the box. That can be a PITA! Say I was on a steep ascent with unsafe footing trying to get the controller hooked up. Yeah, pretty sure I would be cussing like a trucker. This way it is nice and easy to reach it.
Almost have all the parts together for the SAS!
D44, completely rebuilt with a new Trac-loc is almost ready for install.
Custom long arms with 7* wedges. Custom 1/4" mounts & trans cross member.
Using 1 ton GM TRE's, on a Y-link steering.
Duff towers for Bilstien 5165 reservoir shocks, & EB coils.
Full width 8.8 trussed, & locked. Ruff stuff SOA kit, with wedges for pinion angle.
Ruff stuff 1/4" Diff covers.
F-150 steering box bolted inside to plated frame.
This will take some time, but hoping to have it ready for Moab in May. :D

lol this is so funny, i just finished reading every damn page of your build of this truck on explorer forum! i was really hoping i would find your explorer finished with a solid axle when i got to the end because i really want to see how you are going to do it. the attention to detail and quality that has gone into this rig is excellent. this is going to one swap to keep an eye on
lol this is so funny, i just finished reading every damn page of your build of this truck on explorer forum! i was really hoping i would find your explorer finished with a solid axle when i got to the end because i really want to see how you are going to do it. the attention to detail and quality that has gone into this rig is excellent. this is going to one swap to keep an eye on


Well as life has taken a turn, this rig is up for sale to help pay the bills.
$4500.00 to forum members.
$1650.00 for the Full width LSD '77 D44 axle completely rebuilt hub to hub with 4:10's. Plus all the brand new SAS Parts.
Look for the sale threads I'm posting soon!
$4500.00 to forum members.
$1650.00 for the Full width LSD '77 D44 axle completely rebuilt hub to hub with 4:10's. Plus all the brand new SAS Parts.
Look for the sale threads I'm posting soon!
A little update. (been a while)
D44 and all SAS parts were sold last winter. :(
But...... I never sold the rig. It hasn't gone anywhere or seen any action for a long time, but it has been taken care of well. :)
In the meantime, I managed to re-do the roof basket, add some mounting brackets & tools, and LED lights to it.
Front end was dismantled, cleaned, painted, and looking brand new again.
Fixed little things like one rear windows electrical gremlin, and one door speaker wire.
Removed the fancy Italian leather shift boot for a stock rubber boot in the console. Leather one kept wanting to come off on one side after a while.
All fluids were drained and filled with new Mobil 1 products, and Ford Merc V.
CB got tuned at a shop, and works great now.
Engine was cleaned and detailed. Axle hubs were cleaned & painted black.
Replaced a UCA, & a Inner TRE.
Got under and removed as much old trail mud from it as I could, but I swear It's impossible to get it all off!! LOL!
So it wasn't just sitting around being neglected by no means, it just had low miles (60) put on it all this time. :) I will add some pics in a bit.
Been getting this rig ready for a long trip to the San Juan Mtn range.
Had to get a quieter set of tires for the HWY, but still aggressive enough for rugged terrain. I chose the Goodyear MTR's with Kevlar in the 35" variety. I wheeled in Moab with these and they did great, and comfortable for a 22 hour one way road trip, and that sold it for me. I did add 8 oz of Dynabeads per tire, after a road force balancing. They ride smooth as glass!


Added some more mounts to the roof rack for the small camp shovel and an Axe.


Installed some crazy bright Cree Led pods in the rear and the sides.


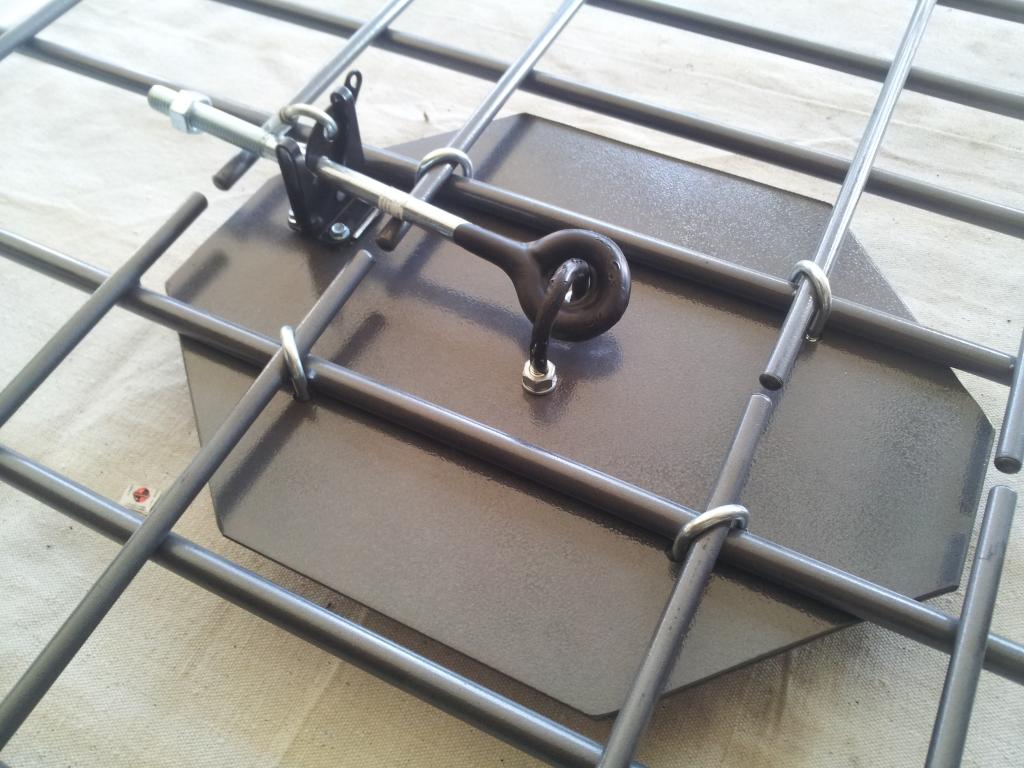
Made my own version of a roof top spare tire mount to get rid of straps and bungee cords. I can now safely carry two full size spares. Looks like I have to add some paint to it already! LOL! Oh well.

Decided to make a removable mount for the tire compressor and hose. I will be adding a Vair OBA system soon, so this is not going to stay forever.

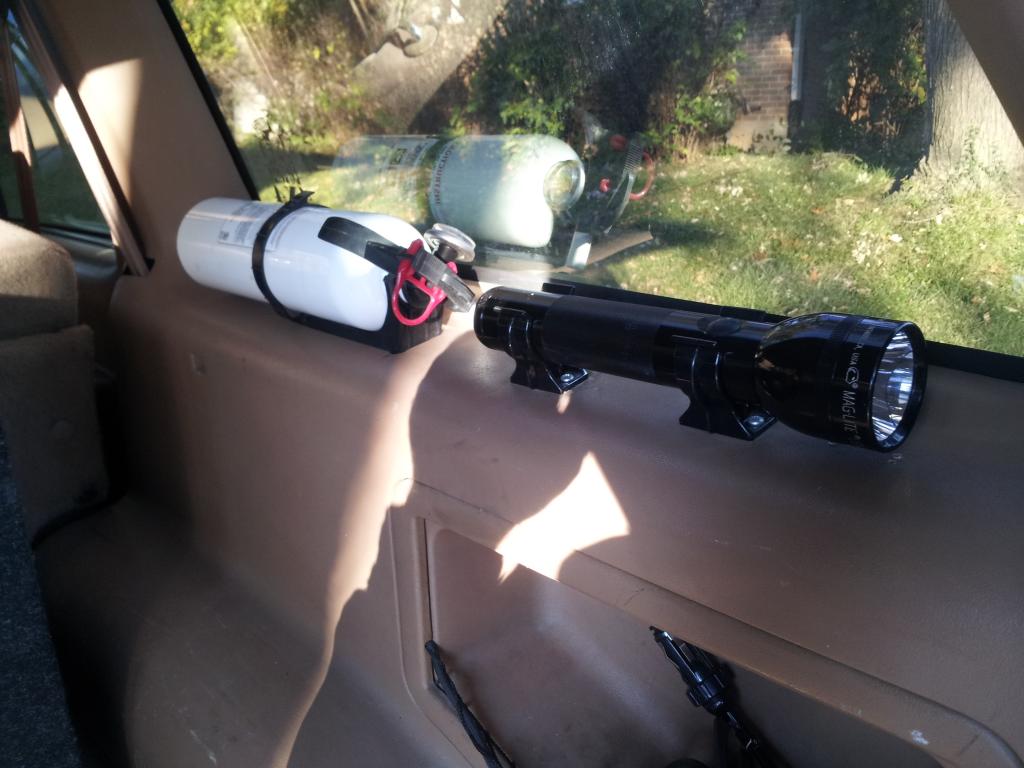
Relocate the fire extinguisher and flashlight.
Secured the front bumper cable posts in the cargo area.

Redid the battery terminals and ratchet strapped the battery down tight.

Rebuilt a fuel injector connector that I broke when cleaning the engine.

After doing all that, I Got hungry and stopped for lunch. :D

Next mods will be the OBA, Snorkel, Rear Resi shocks, LED light bar, Led rock light pods, and hopefully my custom made LCA skid plates will be made in time for the trip to CO.
As usual, stay tuned for more updates with pics!
Had to get a quieter set of tires for the HWY, but still aggressive enough for rugged terrain. I chose the Goodyear MTR's with Kevlar in the 35" variety. I wheeled in Moab with these and they did great, and comfortable for a 22 hour one way road trip, and that sold it for me. I did add 8 oz of Dynabeads per tire, after a road force balancing. They ride smooth as glass!
Added some more mounts to the roof rack for the small camp shovel and an Axe.
Installed some crazy bright Cree Led pods in the rear and the sides.
Made my own version of a roof top spare tire mount to get rid of straps and bungee cords. I can now safely carry two full size spares. Looks like I have to add some paint to it already! LOL! Oh well.
Decided to make a removable mount for the tire compressor and hose. I will be adding a Vair OBA system soon, so this is not going to stay forever.
Relocate the fire extinguisher and flashlight.
Secured the front bumper cable posts in the cargo area.
Redid the battery terminals and ratchet strapped the battery down tight.
Rebuilt a fuel injector connector that I broke when cleaning the engine.
After doing all that, I Got hungry and stopped for lunch. :D
Next mods will be the OBA, Snorkel, Rear Resi shocks, LED light bar, Led rock light pods, and hopefully my custom made LCA skid plates will be made in time for the trip to CO.
As usual, stay tuned for more updates with pics!
Last edited by Gmanpaint; Apr 25, 2015 at 04:19 PM.


Found me a nice upgrade to do sometime in the future on my 1st gen 4.0L. Heavy Duty Motor Mounts custom made by a top notch fabricating friend. Just as good as top ranked fab shops, but way way cheaper.


If anybody is interested, he has a few sets left. Find them in the link below.
For Sale HD Motor Mounts - Ford Explorer and Ranger Forums "Serious Explorations"�
If anybody is interested, he has a few sets left. Find them in the link below.
For Sale HD Motor Mounts - Ford Explorer and Ranger Forums "Serious Explorations"�
So it has been a while since I posted up here. Figured I should update the thread with the latest mods. Yes I know this is not the proper place for all this, but the thread is already ongoing. 
The group I wheel with decided on going to Moab this year. In prep for that run, I gave the rig a good shake down inspection, and found the rear pinion flange to have a good amount of play. This led to a number of upgrades and new mods. I will post up individual mods in their own posts.
We start off finding the rear crush sleeve had cracked and let loose. Inspecting the gears, revealed some minor blemishes. So..... The axle housing came out, gutted & stripped clean to bare metal. The tubes got welded to the housing, new carrier, gears, locker, and the Yukon 88 eliminator kit was installed. Then a POR15 treatment was applied, for a nice clean rebuilt axle assembly. The track width increased by 2" due to the eliminators, and longer Chromoly axles. The old RockCrusher cover went back on for the break in period. After 500 miles, fluids were changed, and a thick 3/8" RuffStuff cover was installed using a Lube Locker reusable steel gasket.
Last edited by Gmanpaint; Sep 7, 2016 at 04:38 PM.
Leaf packs
With the axle out, it gave me a chance to freshen up the leaf springs. Installed new frame bushings, and rebuilt the packs.
Another BDS leaf was added, and new factory bushings were pressed in by a spring shop. All the leafs got stripped clean and new paint. Made a little spring keeper to stop them from splaying on the trails.
The lift was back to where I like it.
Another BDS leaf was added, and new factory bushings were pressed in by a spring shop. All the leafs got stripped clean and new paint. Made a little spring keeper to stop them from splaying on the trails.
The lift was back to where I like it.
Last edited by Gmanpaint; Sep 7, 2016 at 04:40 PM.


