Any help would be appreciated (head gasket)
#1
 12-16-2006


Join Date: Dec 2006
Location: St Clair Shores
Posts: 32
Likes: 0
Received 0 Likes
on
0 Posts
Any help would be appreciated (head gasket)
I bought a 98 2.5l 4 cylinder Ranger a month ago... and it looks like the previous owner forgot to tell me that he was running 95% water and very little antifreeze. Let that be a lesson to you, that i just learned the hard way. I'm hoping it's just the headgasket. My "oil" froze solid.
On to my repairs....
I'm going to try to do the headgasket this weekend. Is there anything you can tell me up front? I've got a Chilton's, tools, a few beers and a decent brain.
On to my repairs....
I'm going to try to do the headgasket this weekend. Is there anything you can tell me up front? I've got a Chilton's, tools, a few beers and a decent brain.
#3
12-18-2006
Wow what a coincidence. I just spent a few days replacing the head gasket and all the other gaskets on my 2000 (same generation, same engine).
It was quite a job, but here are a few things I learned along the way that will be important to you BEFORE you begin:
Get the whole head gasket set, not just the head gasket alone. This will include the valve cover gasket, intake manifold gaskets (two), EGR and IAC gaskets, valve spring seals, camshaft seals, and the exhaust gasket.
Go ahead and invest the extra $35 for the head bolts. It's not necessary, but HIGHLY recommended. Over time the head bolts stretch and decrease in strength.
MAKE ABSOLUTELY CERTAIN you have these tools before you even buy the parts you'll need:
full set of Metric DEEP WELL sockets (or at least 7mm to 13mm)
full set of Metric sockets (or at least 7mm to 22mm)
12" and 3" socket extensions
swivel universal socket adapters (for hard to reach bolts)
Micrometer Torque Wrench (ft/lbs.)
Protective gloves
gasket scraper
Varsol or other engine-safe cleaner
drain pan and containers to store used motor oil and antifreeze in
a case (or more if preferred, but a case at minimum) of your favorite beer (I went through 3 6-packs, so just buy a case)
patience and good lighting
plenty of floor space and newspaper to protect the floor for the huge parts pile you will soon accumilate:
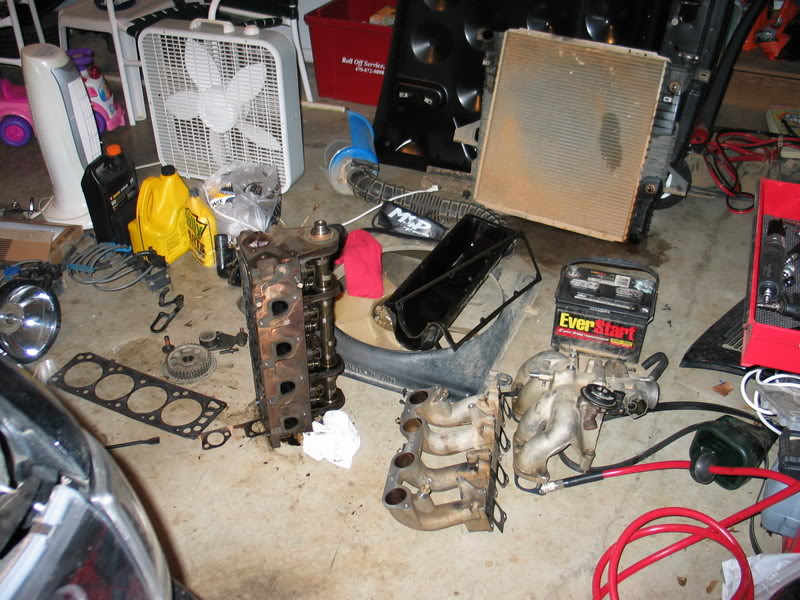
Keep in mind, since you have a 4-cylinder engine, basically everything is bolted to the HEAD, not the block. This means before you can even get TO the head, you'll have to remove the following:
Drain coolant and remove the fan/clutch assembly and shroud
Intake ductwork and filter housing
EGR supply line
upper intake manifold and throttle body
fuel rail and injectors
spark plugs, wires, and coil packs
lower intake manifold
A/C compressor
Power Steering pump and bracket assembly
Thermostat and housing
outer timing belt cover
valve cover
timing belt tensioner (read my current problem with that one HERE)
camshaft gear
and probably a few other items I'm forgetting...
One other important thing to do is LABEL ALL the vaccum connections to the upper intake manifold, and label the ignition wires (exhaust/intake side, along with piston number). This will make it much easier to put everything back together correctly.
Finally, before you begin, make sure the engine is cool and remove the hood. This will make this work MUCH easier, and allow more light into the hard to reach areas.
If you need any more info feel free to e-mail me at Needforspeed3685@***.net
It was quite a job, but here are a few things I learned along the way that will be important to you BEFORE you begin:
Get the whole head gasket set, not just the head gasket alone. This will include the valve cover gasket, intake manifold gaskets (two), EGR and IAC gaskets, valve spring seals, camshaft seals, and the exhaust gasket.
Go ahead and invest the extra $35 for the head bolts. It's not necessary, but HIGHLY recommended. Over time the head bolts stretch and decrease in strength.
MAKE ABSOLUTELY CERTAIN you have these tools before you even buy the parts you'll need:
full set of Metric DEEP WELL sockets (or at least 7mm to 13mm)
full set of Metric sockets (or at least 7mm to 22mm)
12" and 3" socket extensions
swivel universal socket adapters (for hard to reach bolts)
Micrometer Torque Wrench (ft/lbs.)
Protective gloves
gasket scraper
Varsol or other engine-safe cleaner
drain pan and containers to store used motor oil and antifreeze in
a case (or more if preferred, but a case at minimum) of your favorite beer (I went through 3 6-packs, so just buy a case)
patience and good lighting
plenty of floor space and newspaper to protect the floor for the huge parts pile you will soon accumilate:
Keep in mind, since you have a 4-cylinder engine, basically everything is bolted to the HEAD, not the block. This means before you can even get TO the head, you'll have to remove the following:
Drain coolant and remove the fan/clutch assembly and shroud
Intake ductwork and filter housing
EGR supply line
upper intake manifold and throttle body
fuel rail and injectors
spark plugs, wires, and coil packs
lower intake manifold
A/C compressor
Power Steering pump and bracket assembly
Thermostat and housing
outer timing belt cover
valve cover
timing belt tensioner (read my current problem with that one HERE)
camshaft gear
and probably a few other items I'm forgetting...
One other important thing to do is LABEL ALL the vaccum connections to the upper intake manifold, and label the ignition wires (exhaust/intake side, along with piston number). This will make it much easier to put everything back together correctly.
Finally, before you begin, make sure the engine is cool and remove the hood. This will make this work MUCH easier, and allow more light into the hard to reach areas.
If you need any more info feel free to e-mail me at Needforspeed3685@***.net
#4
12-28-2006
#5
12-28-2006

Join Date: Jan 2006
Location: Quebec, Canada
Posts: 52
Likes: 0
Received 0 Likes
on
0 Posts
Good prep list Tim. (I used water instead of beer) Also found the following useful:
-Penetrating oil - PB Blaster/Liquid Wrench
-Propane torch for rusted threads
-Anti-seize compound for re-assembly
-Borrowed electric impact wrench for flywheel nut
-Bardahl 2 as assembly lube because I ground the valves
-Haynes or equivalent manual
It was for a Nissan Sentra. Broken timing belt = bent valves.
A garage helps too.
Gordon

Thread
Thread Starter
Forum
Replies
Last Post
SuperGildo@RRP
4.0L OHV & SOHC V6 Tech
29
12-10-2019 03:16 PM
Cowboy713
General Technical & Electrical
12
02-29-2016 01:21 PM
TheLoneRanger
Audio & Video Tech
6
01-26-2006 02:07 AM


