Danger Ranger spring hangers, shackles and shock mounts... and frame clean up
#1
 04-19-2012


Danger Ranger spring hangers, shackles and shock mounts... and frame clean up
Well, I decided I should document all of the work that's going into the Danger Ranger.
Before you even think of tackling a job like this, especially on a truck from the rust belt, you'll need
1. High powered impact (1/2" drive IR 2135 TiMax or better... even this beast of a 1/2" needed the breaker bar to break stuff loose before it'd move anything)
2. Breaker bar and ~4 foot cheater pipe
3. Impact sockets
4. T-55 impact socket to remove bed bolts
5. A can of CRC Freeze-Off
6. Air hammer
7. Drill
8. Dremel or Rotozip or die grinder with a grinding stone
9. WD-40 for removing the old rear eye bushings, drill into them first, then spray the stuff in
10. Hammers of various sizes and weights... I used a 15 or so oz ball peen, a 3 lb mini sledge, and a 8 lb sledge
11. Angle iron
12. Ratchet strap
... I think that's about it... may have missed a few. I'll add them if I remember something.
Here's the list of what I'm doing/have done...
1. Replace all rear leaf hangers and shackles
2. Replace shocks and shock mounts
3. Prep the frame for rust converter by wire brushing it
4. Brush the rust converter on and let it cure fully (that takes 48 hours)
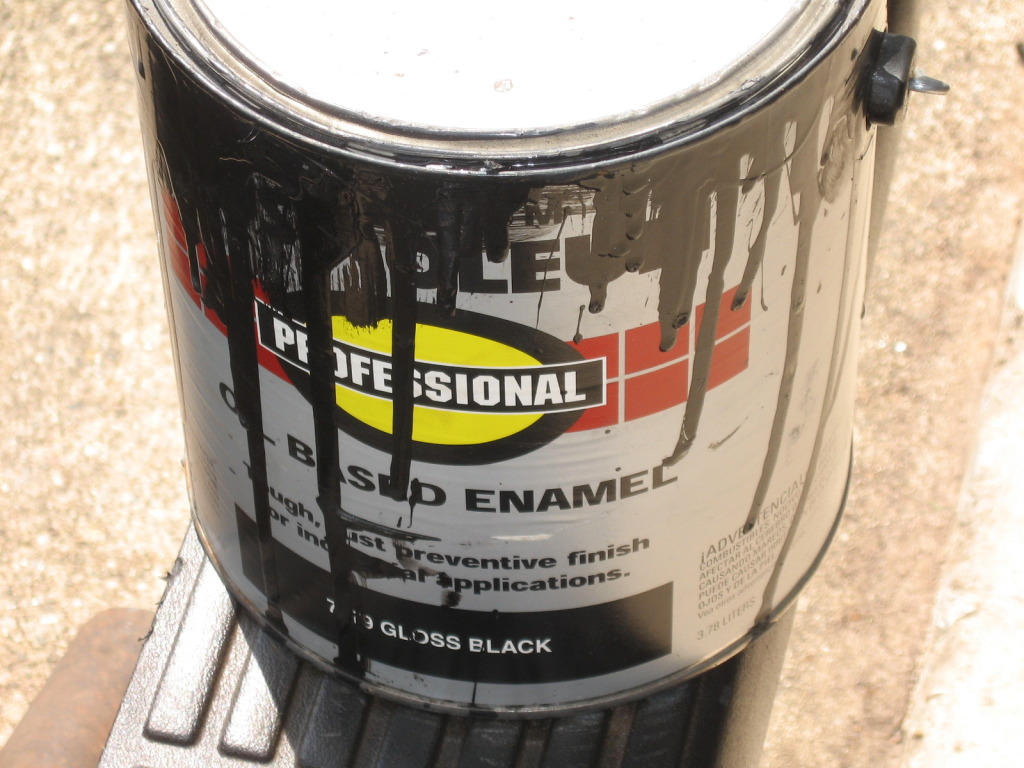
5. Brush on the Rustoleum gloss black oil based enamel
6. Replace fuel filler neck and fuel level sending unit
7. Replace gas tank straps
8. Wire brush and rust convert gas tank skid plate
9. Paint gas tank skid plate
10. Put lots of anti-seize on the bolts that go through the bushing sleeves to make future removal much easier
The way I'm doing this is putting the rear back together and the front spring hangers and all... this way I can roll the truck into the barn if rain/bad weather is coming so the paint or rust converter can cure properly.
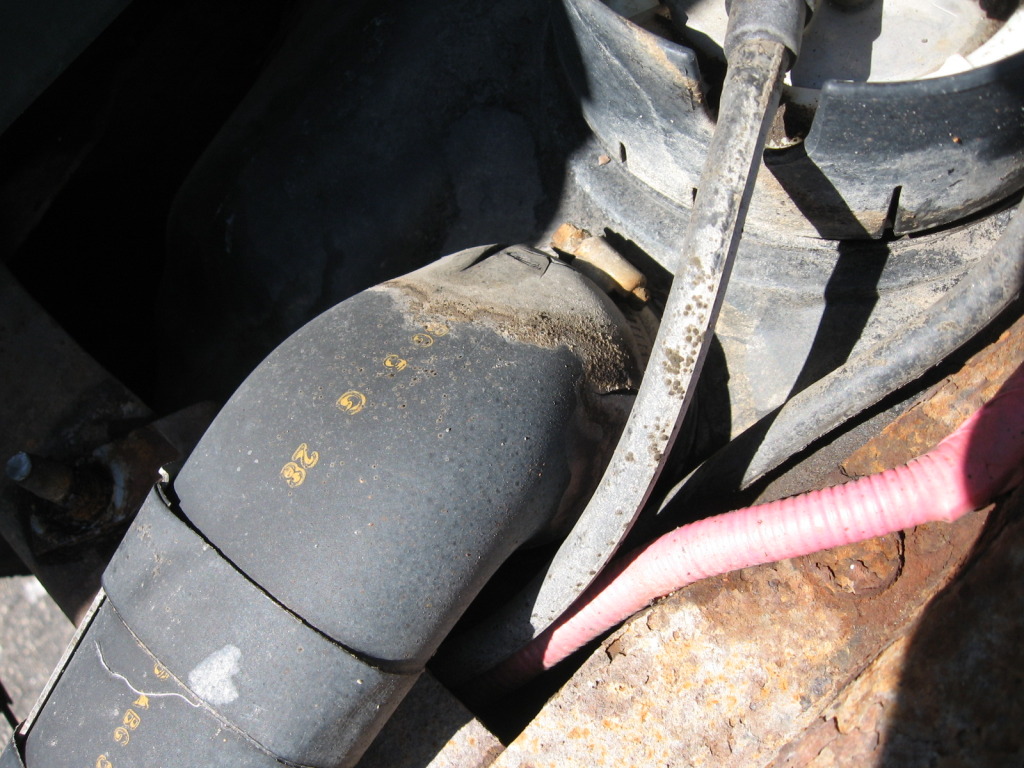
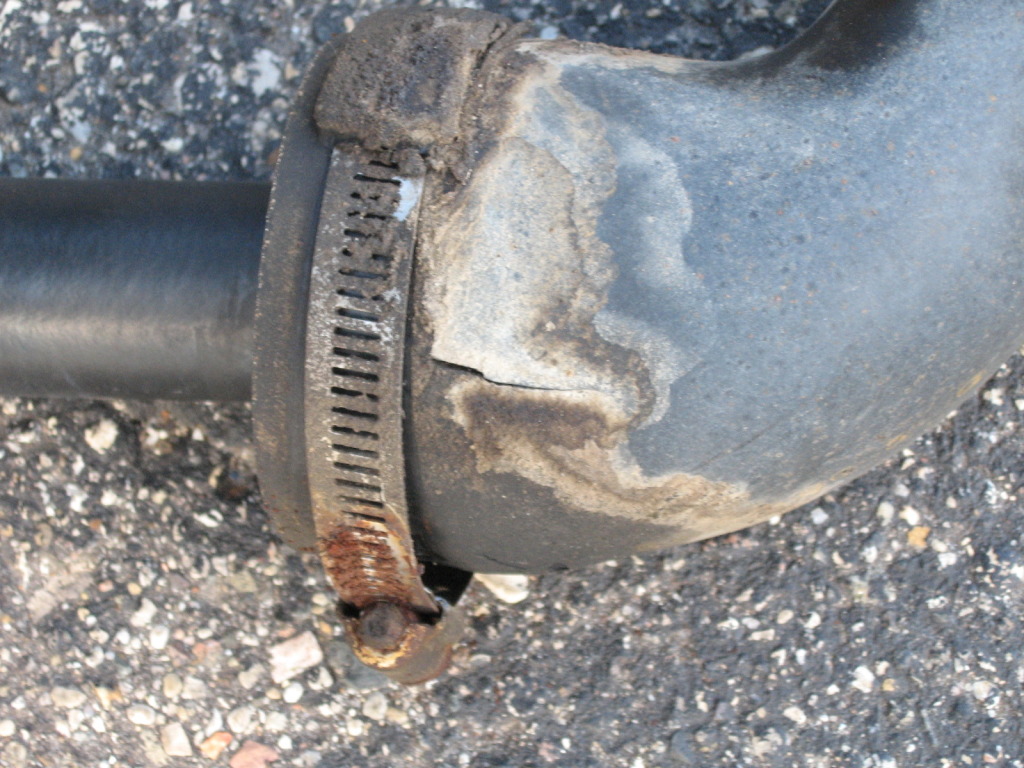
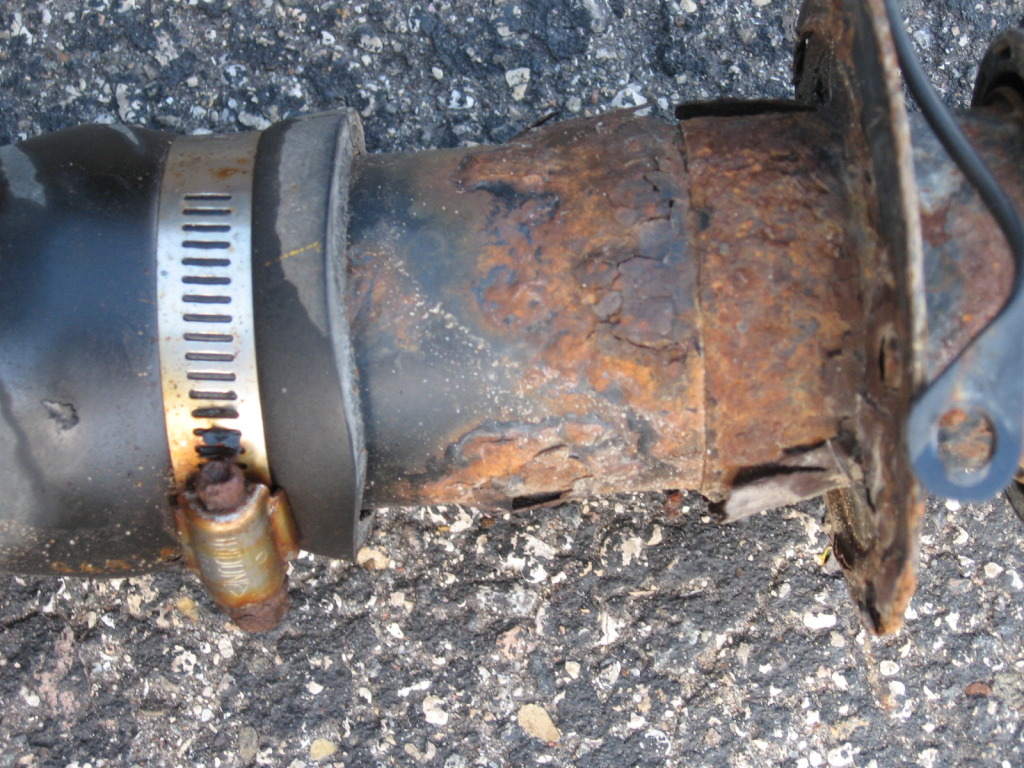
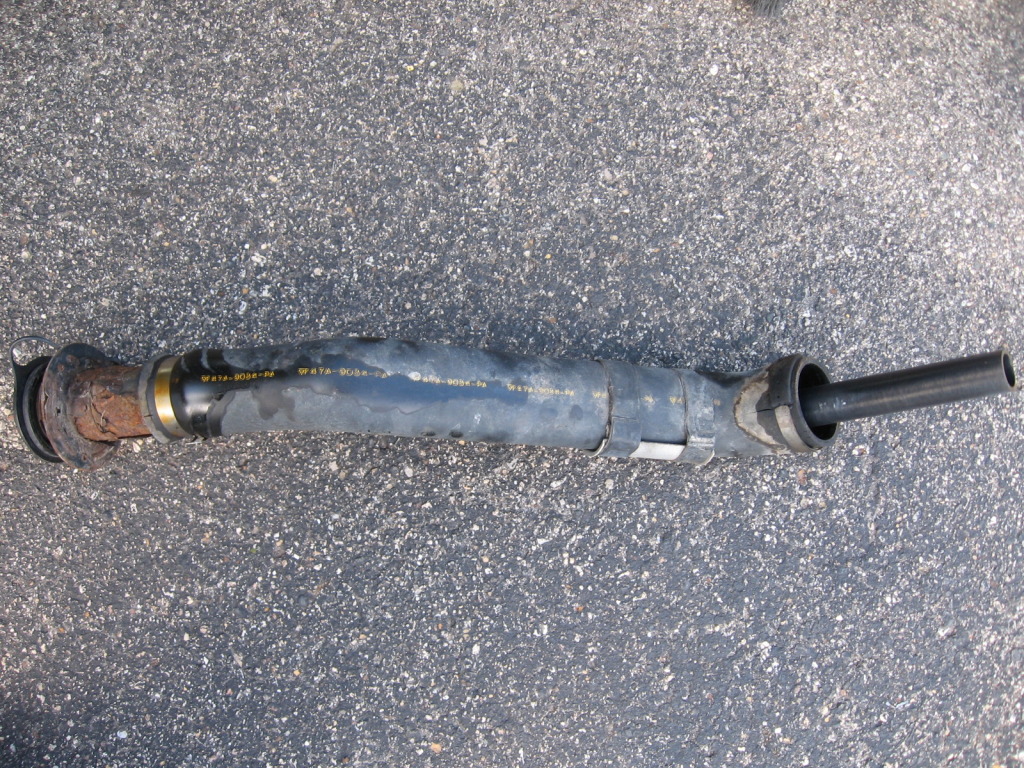
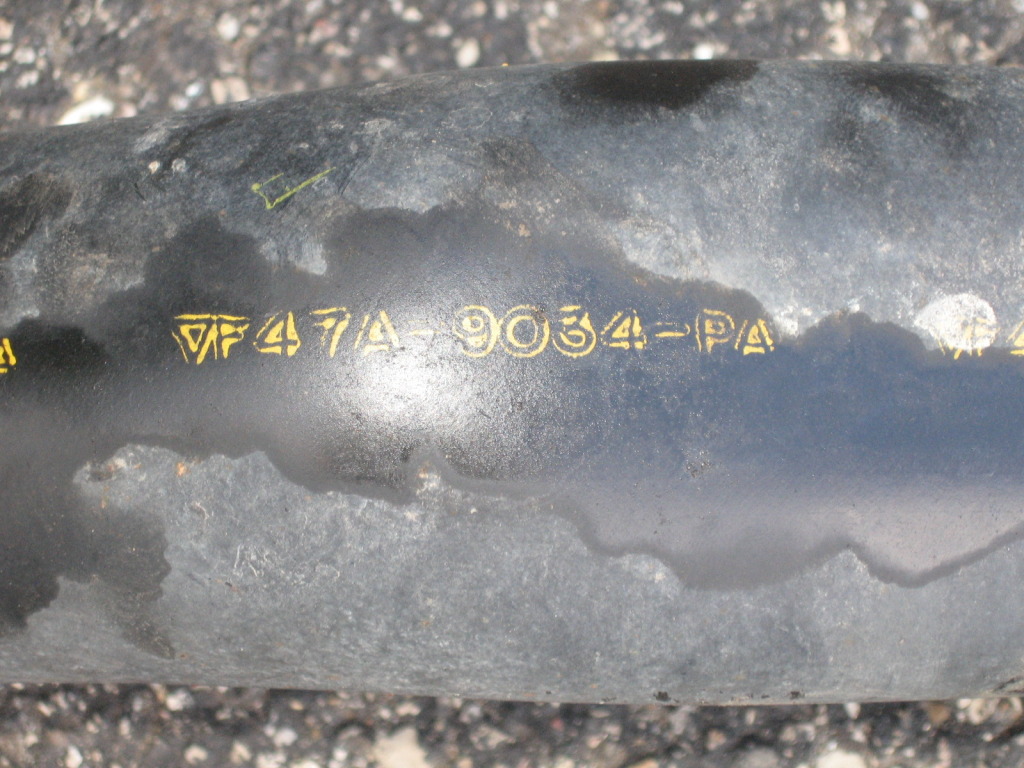
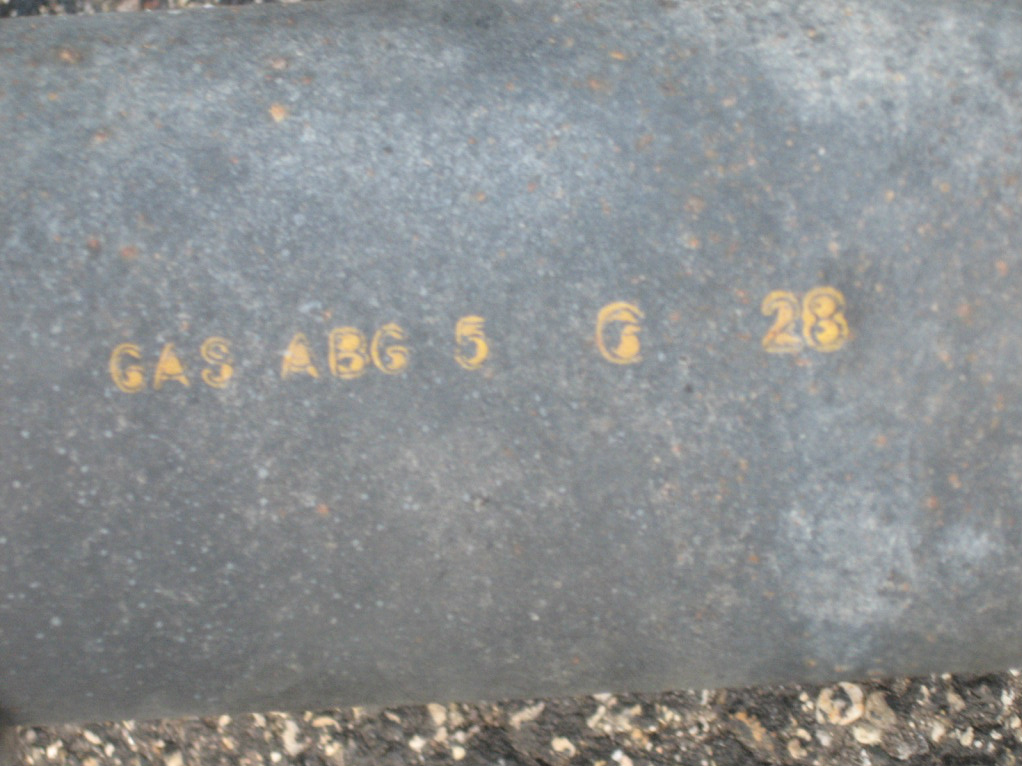
The gas tank is out, and was the first thing removed after I got the bed off. Here's some pics of the filler neck...
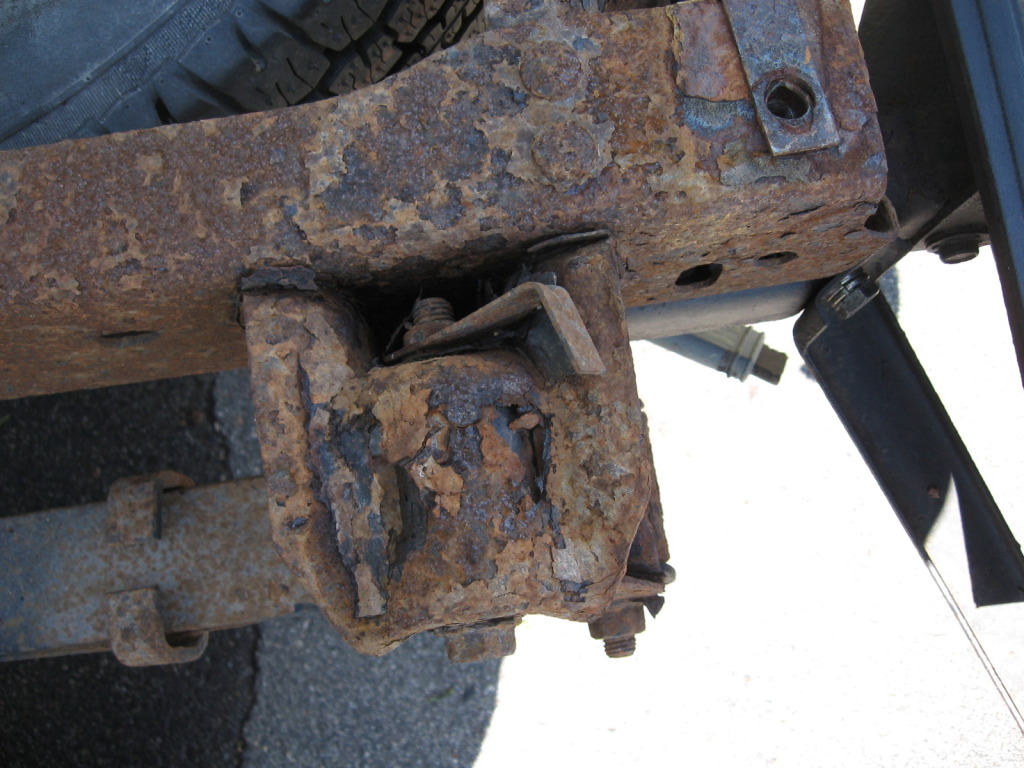
Then the shocks and shock mounts were removed. Here's the culprit of the *** end hop... parking brake cable rubbed through and let all of the gas or oil out of the shock. Hard, gritty movement on this one... it's junk. I'm going to remove the parking brake cables since they are rusted and don't work anyhow. I don't park on hills, if I have to, I'll get it close to the curb, put it in gear and turn the wheel so if it rolls, it'll roll a little and stop at the curb.

Then the rear leaf hangers and shackles were removed. Rear spring eye bushings were removed and the new ones put in. With the new ones, I found it real easy to get them in the eye after cleaning the rust and crap out of the eye with a grinding stone on the Dremel, and then oiling the eye well with motor oil.
I also left the new bushings in the freezer for a few hours so they would contract. Then I braced the leaf spring against the frame rail opposite of the one nearest it with a piece of angle iron wired to the spring, and a ratchet strap holding tension on all of it, and tapped the new bushings in with an 8 pound sledge. (I'll mock that up again after the paint dries and take a pic so you guys have an idea of what I'm talking about)
Old hangers/shackles...


The old fuel level sender measures fine across the whole scale, no dead spots. Guess what the problem was? It was the float... it developed a pinhole leak and filled up with gas. So I let the gas evaporate out of it so I can fill the hole with solder and then put it back on the float arm... viola, good used sender for later use...
Float with nearly impossible to see pinhole leak...

On the fuel tank, I removed that collar that protects the lines and plug, and then washed all of the dirt, sand, and crap off of the tank, making sure that the area around the locking ring was clean. A few taps on the ribs with a big screwdriver and a light ball peen hammer got it rotating. I alternated in a star pattern (like torquing lug nuts) to spread the force around so I wouldn't damage the locking ring. Put the new sender and old fuel pump together and dropped it back in, then snugged the locking ring down by hand.
Old gas tank strap... well, part of it...

Gas tank skid plate with rust converter on it...

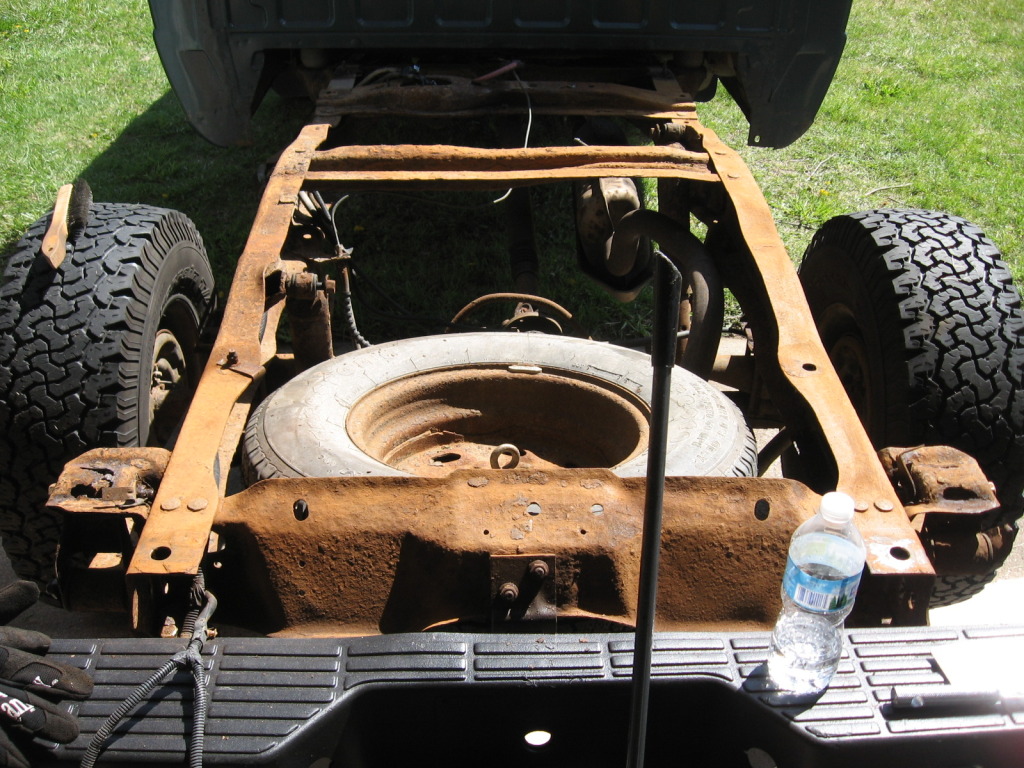
One of the many, many piles of rust and dirt that came off of the frame...

Here, the frame was wire brushed (by hand, with the one you see sitting on the tire) to remove all loose rust flakes and paint. This wasn't too hard.
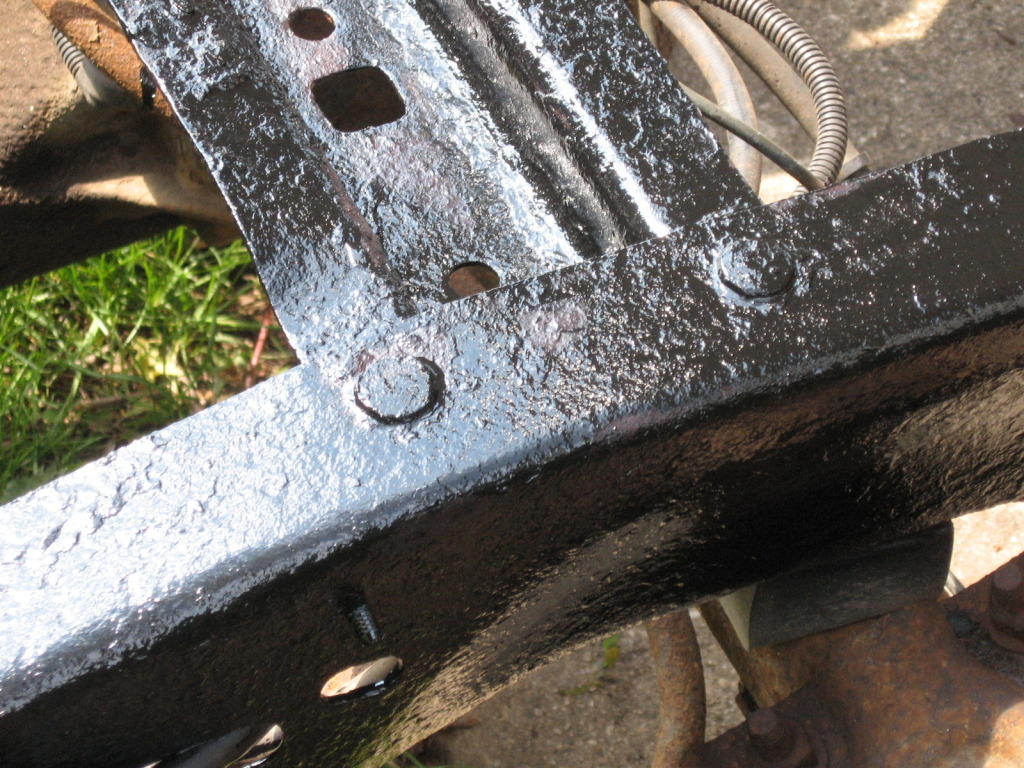
Here is the frame after I brushed rust converter on... the stuff goes on white, and turns to a light purple, then gets darker as it cures until it is fully cured, which is when it turns black.


Here's where I got the rust converter from... I am not affiliated with these folks in any way... simply a user of something they offer.
http://www.gemplers.com/search/rust+converter
Awesome stuff, and they sure aren't lying about it being an excellent primer. I will not hesitate to by more if I run out. However, be aware that the stuff only has a 9 month shelf life... so don't buy too much more than you need... a little bit of this stuff seems to go a long ways, even on the rough and rusty frame on my Ranger. I bought a gallon since I plan on using it all up on numerous projects.
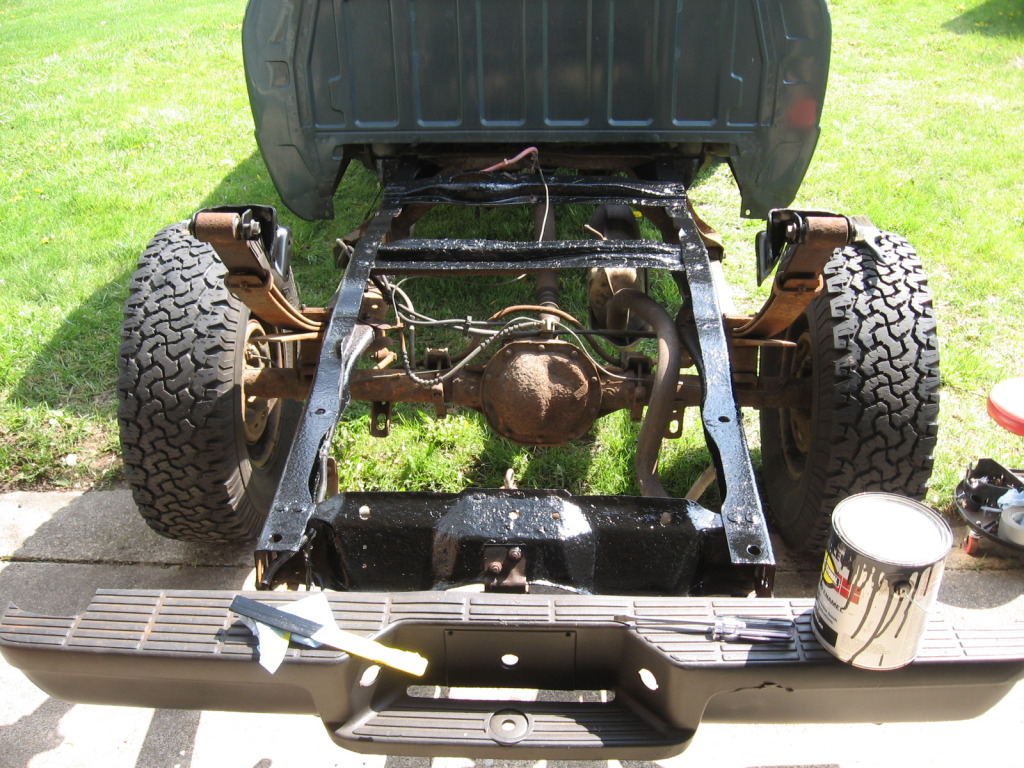
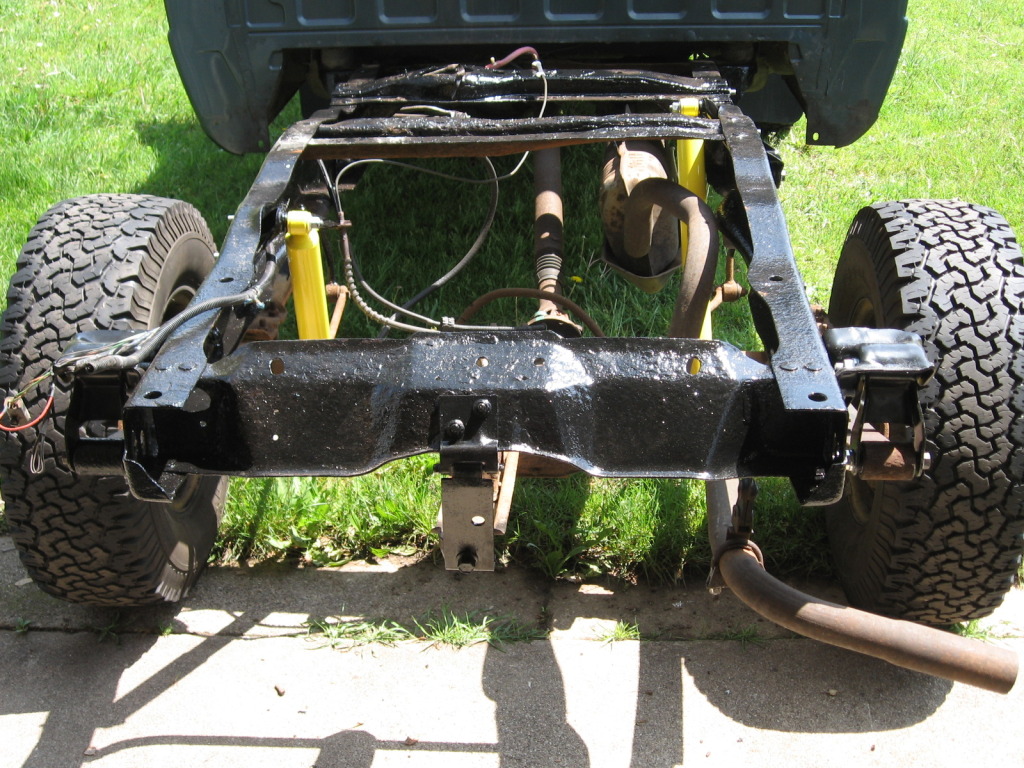
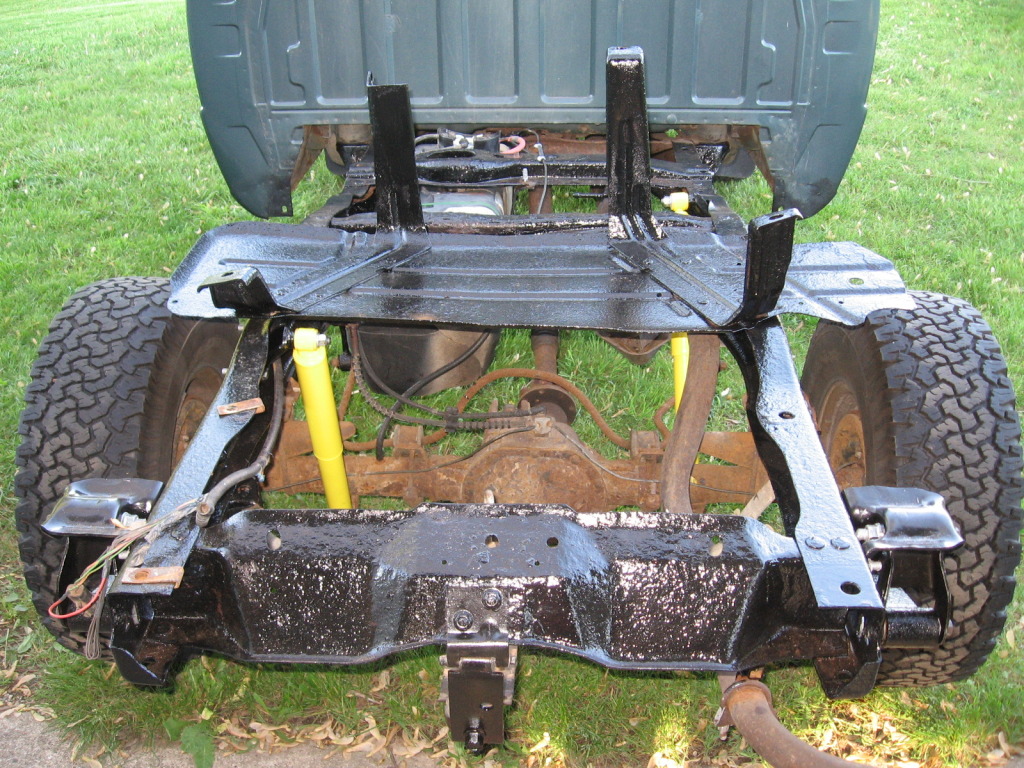
Here's the frame after I painted it... much, much better looking and with the combination of rust converter and Rustoleum paint, I don't think I'll have to do anything to it again for years to come. I still have some areas to hit yet, but I'll get around to those spots later as I work on it.
The paint...
I'm not done yet, but this thing is getting whipped back into good shape... I won't have that annoying rear end hopping to the side problem, and it should ride better with new shocks and shackles that move like they should. And the fuel level gauge should work again.
Before you even think of tackling a job like this, especially on a truck from the rust belt, you'll need
1. High powered impact (1/2" drive IR 2135 TiMax or better... even this beast of a 1/2" needed the breaker bar to break stuff loose before it'd move anything)
2. Breaker bar and ~4 foot cheater pipe
3. Impact sockets
4. T-55 impact socket to remove bed bolts
5. A can of CRC Freeze-Off
6. Air hammer
7. Drill
8. Dremel or Rotozip or die grinder with a grinding stone
9. WD-40 for removing the old rear eye bushings, drill into them first, then spray the stuff in
10. Hammers of various sizes and weights... I used a 15 or so oz ball peen, a 3 lb mini sledge, and a 8 lb sledge
11. Angle iron
12. Ratchet strap
... I think that's about it... may have missed a few. I'll add them if I remember something.
Here's the list of what I'm doing/have done...
1. Replace all rear leaf hangers and shackles
2. Replace shocks and shock mounts
3. Prep the frame for rust converter by wire brushing it
4. Brush the rust converter on and let it cure fully (that takes 48 hours)
5. Brush on the Rustoleum gloss black oil based enamel
6. Replace fuel filler neck and fuel level sending unit
7. Replace gas tank straps
8. Wire brush and rust convert gas tank skid plate
9. Paint gas tank skid plate
10. Put lots of anti-seize on the bolts that go through the bushing sleeves to make future removal much easier
The way I'm doing this is putting the rear back together and the front spring hangers and all... this way I can roll the truck into the barn if rain/bad weather is coming so the paint or rust converter can cure properly.
The gas tank is out, and was the first thing removed after I got the bed off. Here's some pics of the filler neck...
Then the shocks and shock mounts were removed. Here's the culprit of the *** end hop... parking brake cable rubbed through and let all of the gas or oil out of the shock. Hard, gritty movement on this one... it's junk. I'm going to remove the parking brake cables since they are rusted and don't work anyhow. I don't park on hills, if I have to, I'll get it close to the curb, put it in gear and turn the wheel so if it rolls, it'll roll a little and stop at the curb.
Then the rear leaf hangers and shackles were removed. Rear spring eye bushings were removed and the new ones put in. With the new ones, I found it real easy to get them in the eye after cleaning the rust and crap out of the eye with a grinding stone on the Dremel, and then oiling the eye well with motor oil.
I also left the new bushings in the freezer for a few hours so they would contract. Then I braced the leaf spring against the frame rail opposite of the one nearest it with a piece of angle iron wired to the spring, and a ratchet strap holding tension on all of it, and tapped the new bushings in with an 8 pound sledge. (I'll mock that up again after the paint dries and take a pic so you guys have an idea of what I'm talking about)
Old hangers/shackles...
The old fuel level sender measures fine across the whole scale, no dead spots. Guess what the problem was? It was the float... it developed a pinhole leak and filled up with gas. So I let the gas evaporate out of it so I can fill the hole with solder and then put it back on the float arm... viola, good used sender for later use...
Float with nearly impossible to see pinhole leak...
On the fuel tank, I removed that collar that protects the lines and plug, and then washed all of the dirt, sand, and crap off of the tank, making sure that the area around the locking ring was clean. A few taps on the ribs with a big screwdriver and a light ball peen hammer got it rotating. I alternated in a star pattern (like torquing lug nuts) to spread the force around so I wouldn't damage the locking ring. Put the new sender and old fuel pump together and dropped it back in, then snugged the locking ring down by hand.
Old gas tank strap... well, part of it...
Gas tank skid plate with rust converter on it...
One of the many, many piles of rust and dirt that came off of the frame...
Here, the frame was wire brushed (by hand, with the one you see sitting on the tire) to remove all loose rust flakes and paint. This wasn't too hard.
Here is the frame after I brushed rust converter on... the stuff goes on white, and turns to a light purple, then gets darker as it cures until it is fully cured, which is when it turns black.
Here's where I got the rust converter from... I am not affiliated with these folks in any way... simply a user of something they offer.
http://www.gemplers.com/search/rust+converter
Awesome stuff, and they sure aren't lying about it being an excellent primer. I will not hesitate to by more if I run out. However, be aware that the stuff only has a 9 month shelf life... so don't buy too much more than you need... a little bit of this stuff seems to go a long ways, even on the rough and rusty frame on my Ranger. I bought a gallon since I plan on using it all up on numerous projects.
Here's the frame after I painted it... much, much better looking and with the combination of rust converter and Rustoleum paint, I don't think I'll have to do anything to it again for years to come. I still have some areas to hit yet, but I'll get around to those spots later as I work on it.
The paint...
I'm not done yet, but this thing is getting whipped back into good shape... I won't have that annoying rear end hopping to the side problem, and it should ride better with new shocks and shackles that move like they should. And the fuel level gauge should work again.
#3
04-19-2012
The gas tank straps will be a little tricky to remove and install. I painted my new ones with a self etching primer and then flat black paint... hopefully they'll last a whole lot longer than the originals did. The back half of the gas tank was being held up by the skid plate, not the rear strap like it should be...
Last edited by 1996DangerRanger; 04-19-2012 at 12:36 PM.


#7
04-25-2012
Thanks for the comments. Fullscale, I am 100% sure you're right on the fact that it should ride a lot better with the suspension working properly. Bad shocks and shackles hurt movement. Poor movement = crappy and really rough ride
Update with no pics yet...
Got the rear shackles and hangers in place...
I'm working on the driver's side front hanger... took the old one off and hit the frame in that area with rust converter. So far so good. Plan on hitting the frame with the paint the day after tomorrow, (rust converter takes 48 hours to cure fully, paint takes 24, but probably am going to put it on after a few hours of drying time) and then I'll put the new front hanger on and move to the passenger side to repeat.
I used two ratchet straps to hold the driver's side of the axle in place (they're pulling against each other, one is pulling to the back, the other to the front) so that it wouldn't shift forwards or backwards too much after the front hanger is removed.
While the passenger side is being done, I will wire brush, rust convert, and then paint the frame and cross members inside and out in the area that the gas tank resides. That way when I'm done with the pass. side mount, I can roll the truck out, change the fuel filter, and then put the gas tank in. Which reminds me... I need to paint the gas tank skid plate.
#8
04-30-2012
Update: Will post some pics after lunch...
Had a minor set back... needed new bolts for the front spring eyes. So, I went to Fastenal (already tried Napa and Autozone, they don't stock bolts that big) and got them ordered up, along with new bed bolts. Also got washers for the bolts, thick ones for the spring eye bolts, and large 37mm diameter fender washers for the bed bolts. (the new bed bolts are your normal hex cap, and the new spring eye bolts are not flanged either) They'l be here tomorrow if all goes well with the distribution stuff.
About 36 bucks for all of these bolts and washers. Not bad... given stealerships want 16+ bucks a piece for each bed bolt... God knows how much they want for a spring bolt... with the way a typical dealer parts dept. works, I'd think you'd have to buy the leaf spring in order to get the bolts.
Unfortunately, I do have to get three new bed bolt clips... going to have to say bye-bye to 30+ bucks at the stealership to get those sometime soon.
If you don't need new bed bolts but are going to replace the spring hangers, etc. I recommend that you not only buy the hangers and shackles that you need, but also the leaf spring bolt... two of them. They're about 5 bucks a piece and less downtime later on if you happen to force the front bolts out of the spring eye.
I had to use the air hammer to get that bolt out, due to rust build up inside of the sleeve. I drilled the sleeve out with a 9/16" bit to clean the rust and crap out. That took about 30 minutes and got the Magnum Holeshooter real hot. Could barely touch the housing on the Milwaukee with a ungloved hand, it was working that hard to drill through the rust/crap, even with oil to help cool the bit and reduce friction.
Working on a rust belt vehicle is never easy. So far, I've only worked on one vehicle with no problems regarding bolts/etc. being hard to remove due to rust. Just one out of a lot. CRC Freeze-off sure helps a lot. I think the stuff works even better than PB Blaster.
#9
04-30-2012
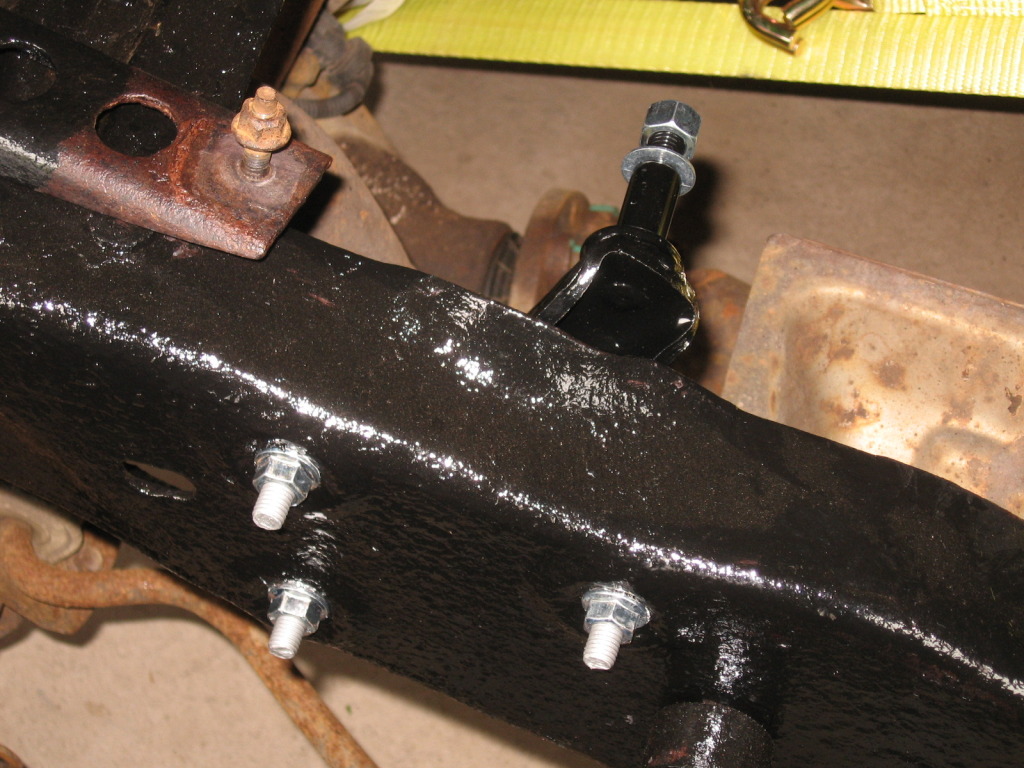
Here's the pics... one update of where I am on the whole project. And one of the new shock mounts that I bolted on a few minutes ago. Yes, I coated the bolts with anti-seize before installing. No need to make things harder for myself later on, if replacement is necessary.

I have most of the rear frame painted. Only a few small spots left, the biggest being the area under the passenger side front leaf spring hanger.
I have most of the rear frame painted. Only a few small spots left, the biggest being the area under the passenger side front leaf spring hanger.
#10
05-08-2012
Another update... got the shocks painted a while back, I painted them yellow. And also installed them once the paint dried. Got all of the brackets and stuff on, and most of the rear frame is painted. (about 95% of it) Put the new fuel filter on, and put the gas tank on with the new straps. Filled her up and started the engine... seems to idle a little better now that the fuel filter is new.
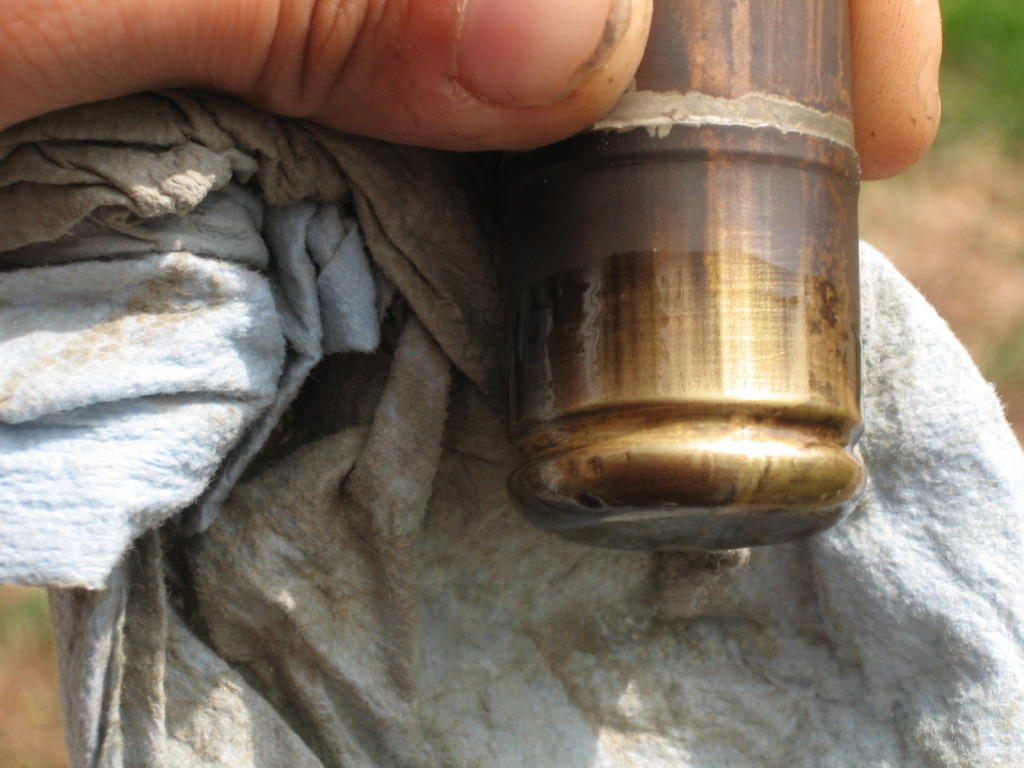
The old one appears to be the original, and it's so freaking rusty that I could wiggle the tit that comes off of the end... doing so flexed the end wall of the filter canister too. The new filter doesn't flex like that...
Here's a pic of the the progress, before I put the gas tank in. (that progress pic will come tomorrow)
Also a little more info... my brother decided he will cover the purchase of a bedliner as an early birthday and Christmas present. Duraback 18 will be on the way soon.
Gotta try to save the other two bed clips with the broken off bolts... I broke one trying to get the broken piece of bolt out. Hope I can at least save the other two. That would be 20 less bucks to drop at a stealership.
#11
05-08-2012

#13
05-08-2012
I know, I probably could've bought much better shocks, but I decided I'm going to set that money aside and get them when I do a Chevy leaf swap, since that requires longer shocks anyhow. Why waste a bunch on stock length fancy shocks when you'll need longer ones down the road?
I not only put rust converter on the frame, but the enamel Rustoleum. If the stars line up just right, I might end up bed lining the entire frame. That would mean no more rust problems. The frame would have to be in decent shape, but I figure by that time of frame off repair/resto, (10 or so years) it'll be scrap.
So I know my frame isn't as strong as it was when it left the factory. At least it doesn't have cracks in it near the shock mounts like another fellow here had to deal with on his.
Worst comes to worst, I'll either build a new rear frame section (if I do this, it'll be 2x4" rectangular tube, 1/8" wall) or swap a rear section (or entire frame, depending on how the fronts part is doing) in from a cleaner rust free Ranger.
Or part it out and scrap the remaining rusty junk.
#14
05-08-2012
#15
05-08-2012

#17
05-09-2012
It only stops it where it's undercoated. My 84 Maxima was ziebarted all under the car when it was new (I bought it used, third hand) However, it still rusted out on the rockers and rear bumper subframe area, since those were not ziebarted. The doors and rear liftgate are rotting out as well.
Poor car. Mine is probably the last somewhat roadworthy one in all of Michigan.
Poor car. Mine is probably the last somewhat roadworthy one in all of Michigan.
#18
05-09-2012
I brushed on one thick coat. It should hold for quite some time. At least I hope it does.
#19
05-09-2012
Here it is... all painted and waiting for the bed and the gas tank skid plate to be put on...
Here is the fuel line protector mod... see the holes that I drilled? That is to help crap fall out of the space between the locking ring and the fuel line protector. I was astonished at how much crap was packed into there when I was taking the tank out.

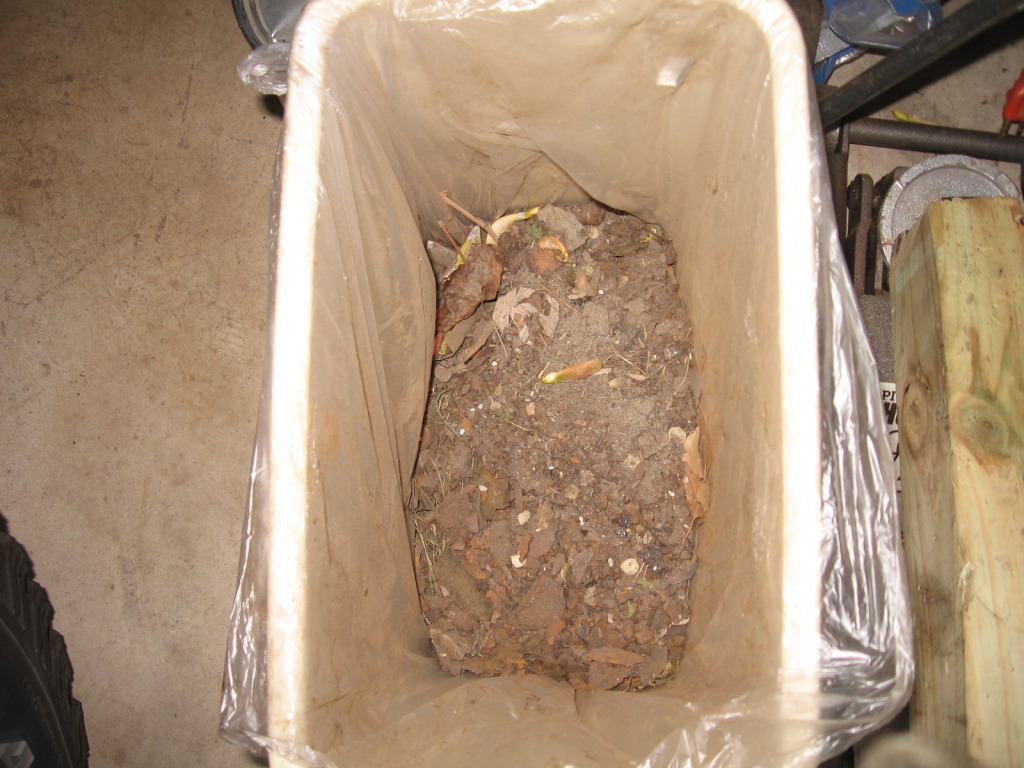
And here is the wastebasket with a crap ton of rust flakes and dust in it. Very few leaves or otherwise in it. 99.99% rust. I'll be bringing it in to the scrapyard. They should take it.
This whole deal has taken longer than I thought it would. Hopefully the fuel filler neck will be in tomorrow so that I can bolt the bed back on. I got a bad itch to drive the Danger Ranger. If the filler neck doesn't come in, I just might drive it anyways... duct tape the taillights to the frame and drive around for no reason.
Here is the fuel line protector mod... see the holes that I drilled? That is to help crap fall out of the space between the locking ring and the fuel line protector. I was astonished at how much crap was packed into there when I was taking the tank out.
And here is the wastebasket with a crap ton of rust flakes and dust in it. Very few leaves or otherwise in it. 99.99% rust. I'll be bringing it in to the scrapyard. They should take it.
This whole deal has taken longer than I thought it would. Hopefully the fuel filler neck will be in tomorrow so that I can bolt the bed back on. I got a bad itch to drive the Danger Ranger. If the filler neck doesn't come in, I just might drive it anyways... duct tape the taillights to the frame and drive around for no reason.
#20
05-09-2012
I was so very tempted to do this when I was doing my body lift. Only thing that kept me from doing it was finding somewhere to leave my bed haha. Try it out!
#21
05-10-2012
As for trying it out, I don't think I will. I'd probably be peeling out all over town without that extra 200 lbs on the back, lol. I don't think people would take to kindly to that, and I don't want to destroy the fresh BFG's.
#22
05-10-2012

#23
05-11-2012
#24
05-12-2012
#25
07-03-2012

Join Date: Jul 2012
Location: north nj
Posts: 2
Likes: 0
Received 0 Likes
on
0 Posts
Nice, I just finished mine frame repair i fab. it all together ill post pics of before and after
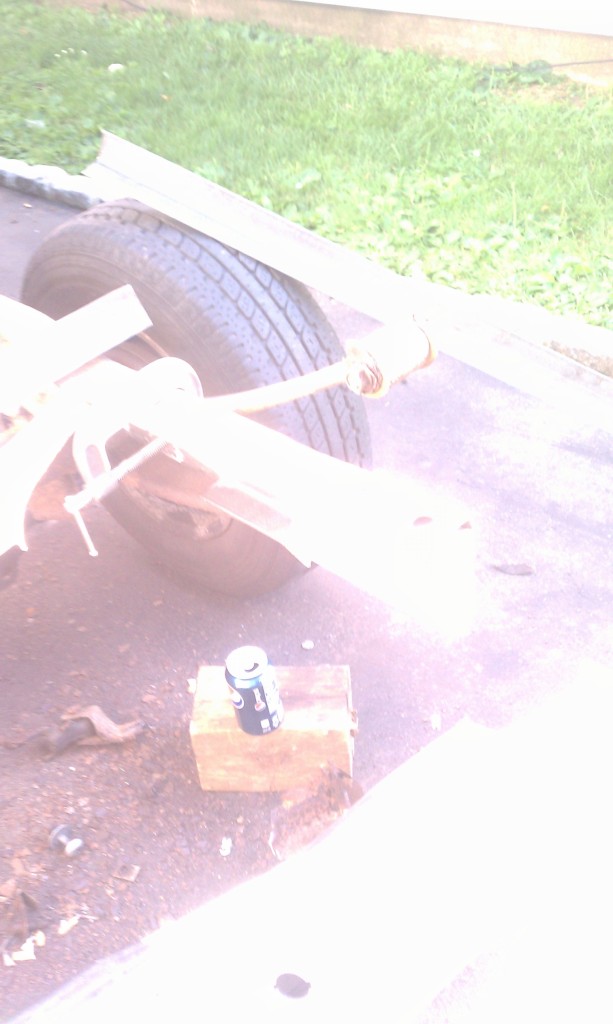
Can anyone see the rear sagging

4'' C channel
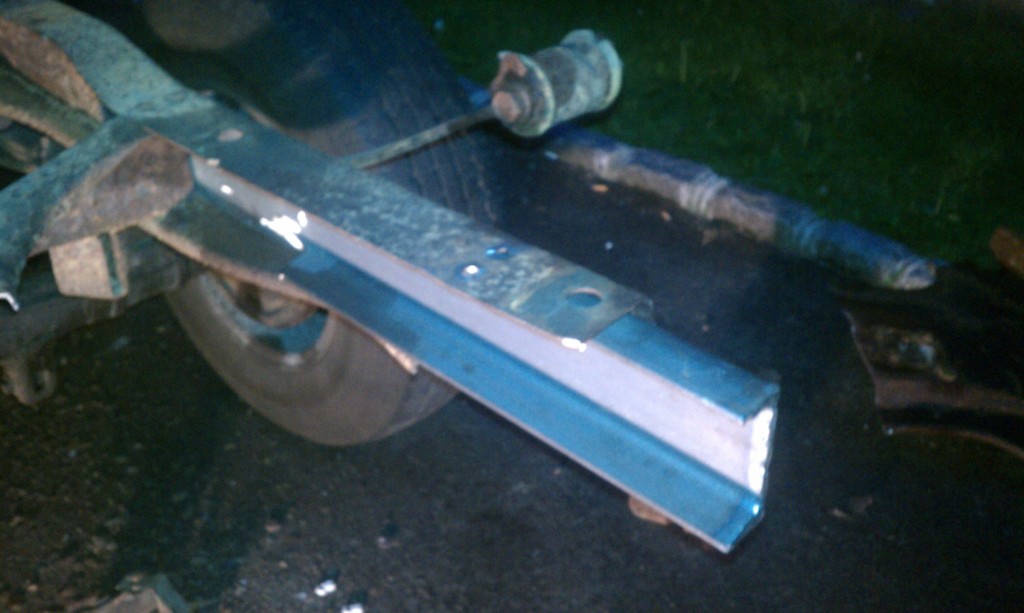
Rear frame and shackle install


sorry for the quality

C channel installed

The leaf spring was pushing up on the bed the shackles where gone..srry it was really bright out


C channel installed

Drilling holes

Can anyone see the rear sagging
4'' C channel
Rear frame and shackle install
sorry for the quality
C channel installed
The leaf spring was pushing up on the bed the shackles where gone..srry it was really bright out
C channel installed
Drilling holes
Last edited by wtfisakseries; 07-03-2012 at 01:59 AM.


