How To - Axle Seals (8.8" rear)
#1
 07-13-2007


How To - Axle Seals (8.8" rear)
I posted this on RPS but I know alot of you don't visit there (anymore) so I thought it might be helpful here . . .
Hi guys, I just thought I would put this together for a few thread lately asking about axle shaft seals. I had to replace mine today and for a young guy like me/learning it was a little nerve racking to not screw something expensive up/cause hasle.
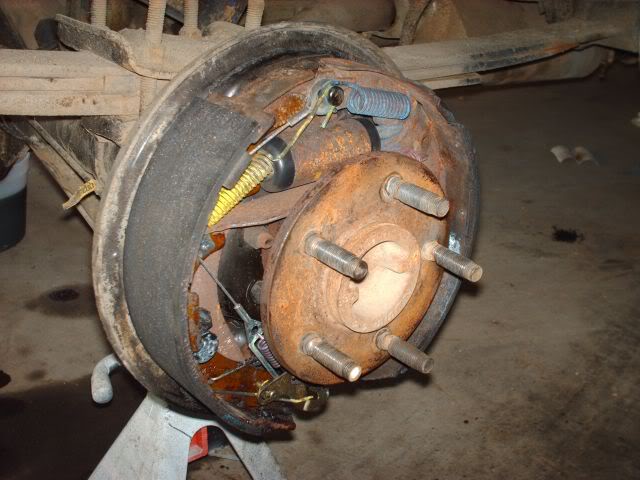
1) Loosen lug nuts while truck is on ground. Jack up rear axle and USE jack stands, when it falls and pins you under there you'll wish you did. Lossen and remove lug nuts in air and remove tire and brake drum.
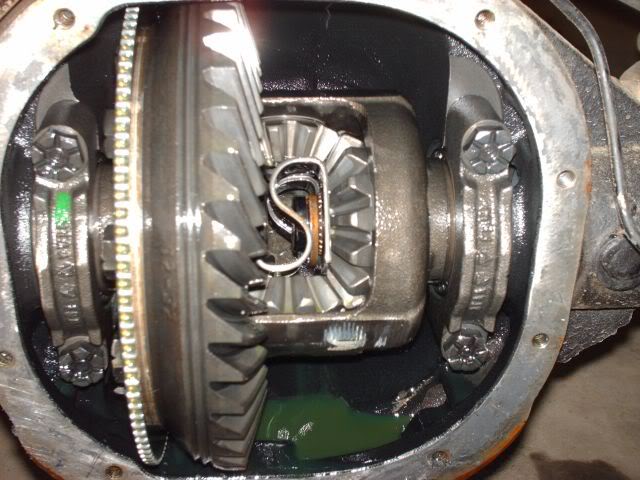
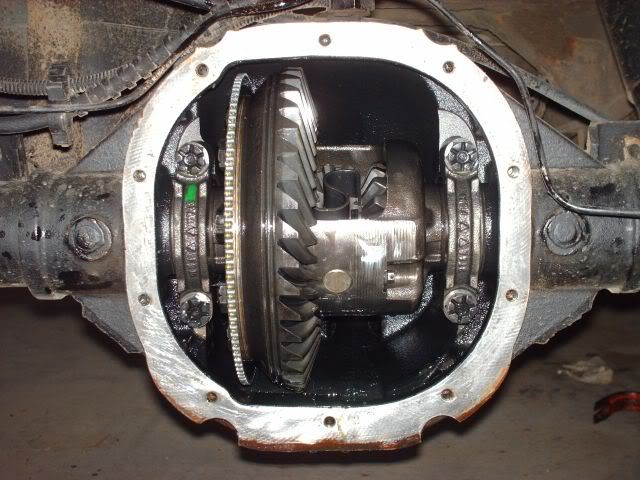
2) Remove diff cover and drain fluid (this can get nasty!). Set cover away to remove old gasket later. Next you'll want to make SURE the truck is in Park or gear so the pinion gears do not pivot when you remove the pinion shaft & lock bolt. To do so you remove the 5/16" bolt in the diff housing and slide the shaft out.

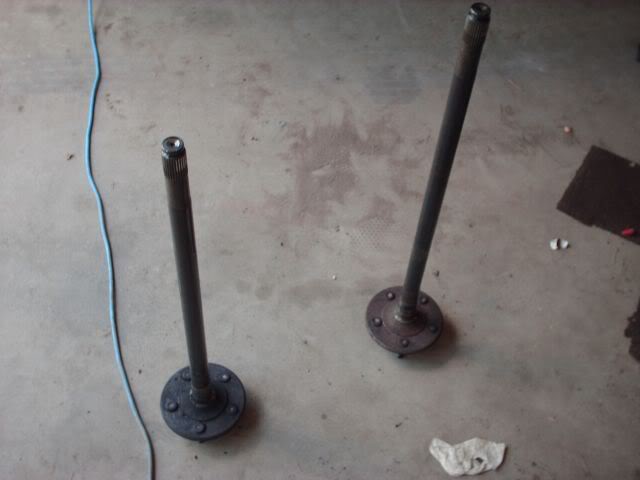
3) Next you push the axle shaft inwards (to the center of the truck), but DO NOT turn them or it'll rotate your pinion gears. You can see the C-clips you have to remove on the end of the axle shaft below (rusty looking piece behind spring).
4) To remove the C-clips you can use a small needle nose plier, a magnet or push them off the shaft and pick them from bottom of housing.
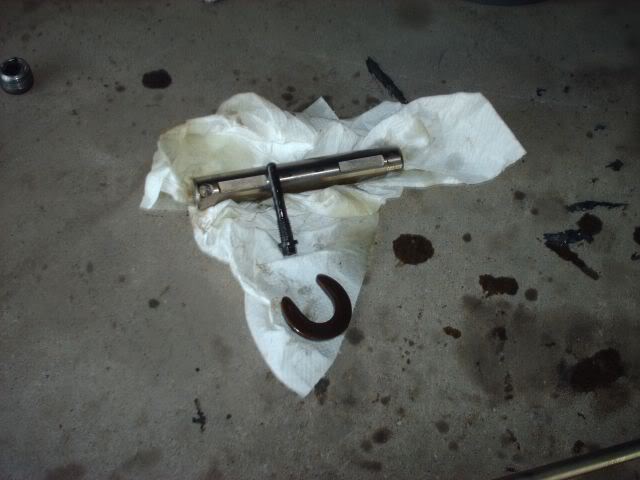
5) Slide your axle shafts out ONLY enough to clear your pinion shaft and DO NOT rotate the shafts. Now you can put put your pinion shaft and lock bolt back for now. You can now carefully slide your axle shafts out.
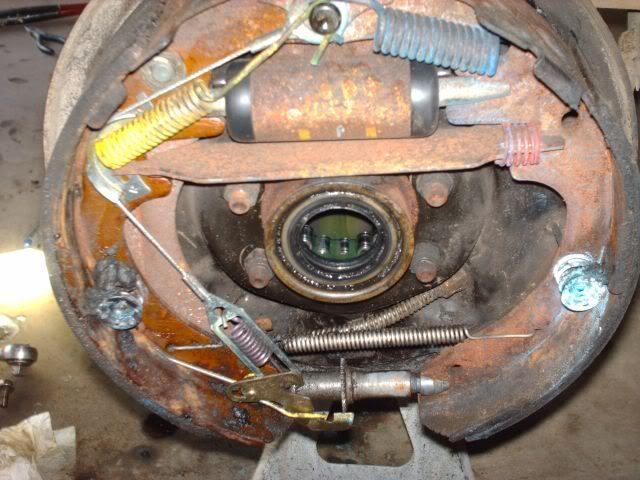
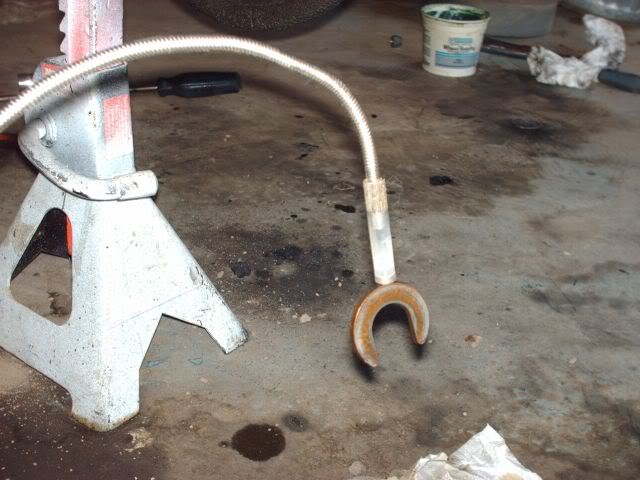
6) You can now remove your seals, you can use the end of your axle shaft and pry your seal outward or use a seal remover. BECAREFUL not to pull on your bearing, only the seal itself. Take your new seals and install them, you can GENTLY tap them in with a hammer, but evenly tap around the seal. You can also use a Bearing installer or a socket large enough to fit the case of the seal to GENTLY tap them in. Install untill flush with end of axle.
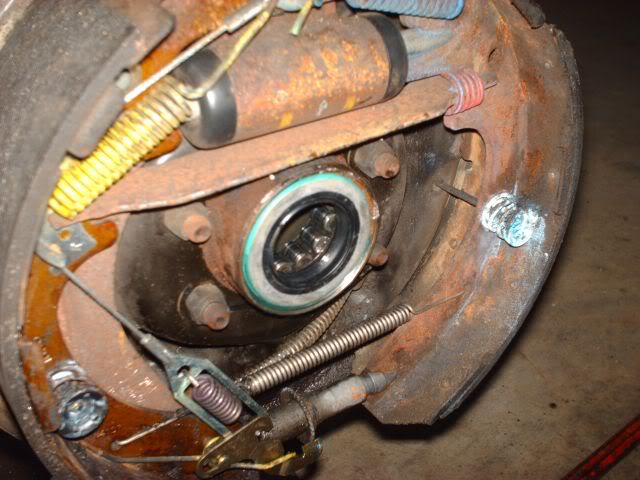
7) Next you'll want to LIGHTLY pack your bearings with some greace and smear a little over the rubber of the seal.
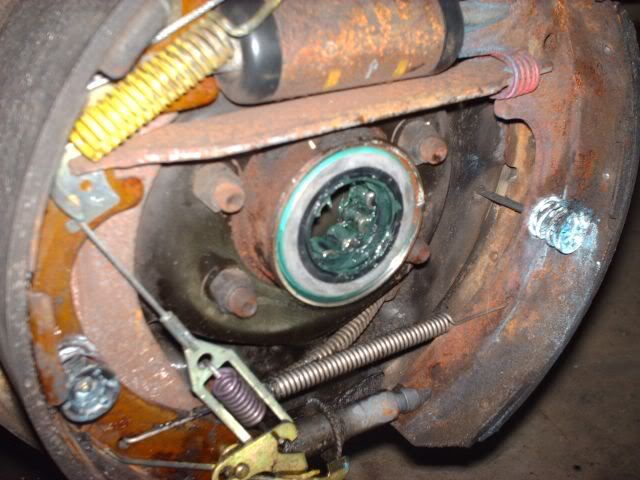
8) Now you can CAREFULLY slide your axle shaft back. With the pinion shaft already in you can safely rotate the axle shaft to fit through the splines. Once both shafts are in place you can once again cafefully remove the pinion shaft and lock bolt. Slide your axles shafts STRAIGHT inward and replace the C-clips on the shafts. Then pull your shafts back outward gently and careful not to rotate them so you can now replace the pinion shaft and lock bolt.

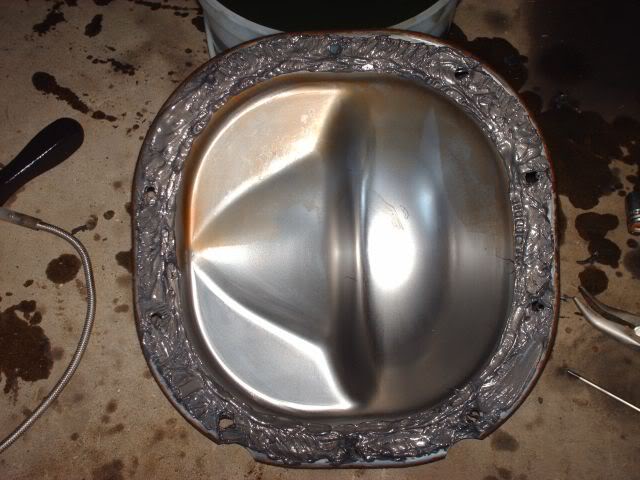
9) I decided not to put my chrome diff cover back on. Remove all old gasket material and sand mating surface of cover down if you wish. **Personal Preference Here** I use RTV Ultra Black gasket maker and apply a wide/fat layer of gasket maker to the cover. I hand tighten the bolts on the cover and let it sit hand tight for 30 mins to no longer than 1 hour then final tighten in a "criss-cross" patern.
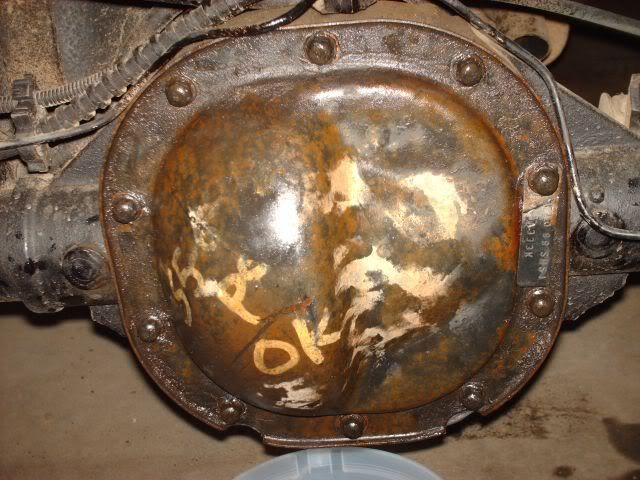
10) You can refill your differential now and add Limited Slip Additive iff you have a L/S and replace full plug. Put brake drums and wheels back on and tighten. Drop vehicle back down to the ground and finish tightening the lug nuts in a "criss-cross" patern to spec.
I hope I didn't miss anything. This is my first time doing this so it's missing a few minor details but I think I have most of it covered. Hope this helps you guys who like things a little bit simpler and all areas covered!
**I do not hold any responsibilty for damage, injury or any harm caused**
I hope this hasn't been covered to many times, I couldn't find anything on the Drivetrain FAQ so I hope this helps.
Hi guys, I just thought I would put this together for a few thread lately asking about axle shaft seals. I had to replace mine today and for a young guy like me/learning it was a little nerve racking to not screw something expensive up/cause hasle.
1) Loosen lug nuts while truck is on ground. Jack up rear axle and USE jack stands, when it falls and pins you under there you'll wish you did. Lossen and remove lug nuts in air and remove tire and brake drum.
2) Remove diff cover and drain fluid (this can get nasty!). Set cover away to remove old gasket later. Next you'll want to make SURE the truck is in Park or gear so the pinion gears do not pivot when you remove the pinion shaft & lock bolt. To do so you remove the 5/16" bolt in the diff housing and slide the shaft out.
3) Next you push the axle shaft inwards (to the center of the truck), but DO NOT turn them or it'll rotate your pinion gears. You can see the C-clips you have to remove on the end of the axle shaft below (rusty looking piece behind spring).
4) To remove the C-clips you can use a small needle nose plier, a magnet or push them off the shaft and pick them from bottom of housing.
5) Slide your axle shafts out ONLY enough to clear your pinion shaft and DO NOT rotate the shafts. Now you can put put your pinion shaft and lock bolt back for now. You can now carefully slide your axle shafts out.
6) You can now remove your seals, you can use the end of your axle shaft and pry your seal outward or use a seal remover. BECAREFUL not to pull on your bearing, only the seal itself. Take your new seals and install them, you can GENTLY tap them in with a hammer, but evenly tap around the seal. You can also use a Bearing installer or a socket large enough to fit the case of the seal to GENTLY tap them in. Install untill flush with end of axle.
7) Next you'll want to LIGHTLY pack your bearings with some greace and smear a little over the rubber of the seal.
8) Now you can CAREFULLY slide your axle shaft back. With the pinion shaft already in you can safely rotate the axle shaft to fit through the splines. Once both shafts are in place you can once again cafefully remove the pinion shaft and lock bolt. Slide your axles shafts STRAIGHT inward and replace the C-clips on the shafts. Then pull your shafts back outward gently and careful not to rotate them so you can now replace the pinion shaft and lock bolt.
9) I decided not to put my chrome diff cover back on. Remove all old gasket material and sand mating surface of cover down if you wish. **Personal Preference Here** I use RTV Ultra Black gasket maker and apply a wide/fat layer of gasket maker to the cover. I hand tighten the bolts on the cover and let it sit hand tight for 30 mins to no longer than 1 hour then final tighten in a "criss-cross" patern.
10) You can refill your differential now and add Limited Slip Additive iff you have a L/S and replace full plug. Put brake drums and wheels back on and tighten. Drop vehicle back down to the ground and finish tightening the lug nuts in a "criss-cross" patern to spec.
I hope I didn't miss anything. This is my first time doing this so it's missing a few minor details but I think I have most of it covered. Hope this helps you guys who like things a little bit simpler and all areas covered!
**I do not hold any responsibilty for damage, injury or any harm caused**
I hope this hasn't been covered to many times, I couldn't find anything on the Drivetrain FAQ so I hope this helps.
#2
07-13-2007


#4
05-22-2009


Thread
Thread Starter
Forum
Replies
Last Post


