When you click on links to various merchants on this site and make a purchase, this can result in this site earning a commission. Affiliate programs and affiliations include, but are not limited to, the eBay Partner Network.
This was taken from an original how-to (created by member Wowak) describing how to remove the silencer from your Air box.
installing a cold air intake can sometimes cause issues with your MAF sensor and may throw some lean codes, to avoid any headaches and to achieve the same effect with the stock ranger air box, follow this simple modification.
There will be zero discussion over the benefits and drawbacks of installing a "Cold Air Intake" or a "Free Flow filet"
As always, please mod at your own risk and the Ranger Forums claims no responsibility for anything you to do your truck.
Tools Required:
-WD40
-Your hands
Start by following the instructions in your owners manual to remove the air filter. Picture one picks up from there:
It will take a good bit of tugging to break this loose the first time. Make sure it doesn't catch on any hoses or wires in the area.
It will take some wiggling around to get the bottom tabs to engage their holes. Again be sure not to catch any hoses or wires underneath the box as you push it back in!
Hope this was helpful. Thanks to MRC for taking the digital pictures (and for hooking me up with a free K&N!)
Last edited by RazorsEDGE; 05-19-2015 at 04:15 PM.
just so everyone knows, 2006+ sohc, spraying wd40 into the holes does nothing for you, they are sealed.
this mod is a great addition to the K&N drop in filter. Give a nice sound, and a little throttle pickup. first mod i ever did, and the only time i reverse it is offroading.
also, when you place the box back in, move the radiator overflow hose out of the way, or you will pull it off the reservoir and have a half gallon of coolant everywhere.
No mod = engine breathing cool clean air from outside the engine bay behind the headlight
Mod = hot dirty air from under the hood inside the engine bay
That's a good idea ?
No mod = engine breathing cool clean air from outside the engine bay behind the headlight
Mod = hot dirty air from under the hood inside the engine bay
That's a good idea ?
I am also considering this mod, but that is kinda true.
No mod = engine breathing cool clean air from outside the engine bay behind the headlight
Mod = hot dirty air from under the hood inside the engine bay
That's a good idea ?
if you actully look at where the opening of the box is to the back of the head light, there is a very limited chance of hot air coming in
We're not debating that fact here either.
this is a how-to. not a discussion thread.
That's kind of silly. I understand why you want to keep it on track, but I'm new to this and I want to know if it's worthwhile, not just if it's possible. Probably is just for the added growl but if you're sucking warmer air from the block instead of from out front, are you really doing much?
That's kind of silly. I understand why you want to keep it on track, but I'm new to this and I want to know if it's worthwhile, not just if it's possible. Probably is just for the added growl but if you're sucking warmer air from the block instead of from out front, are you really doing much?
Your best bet is to do a quick search using the button on the toolbar... it's been covered on the site a few times.
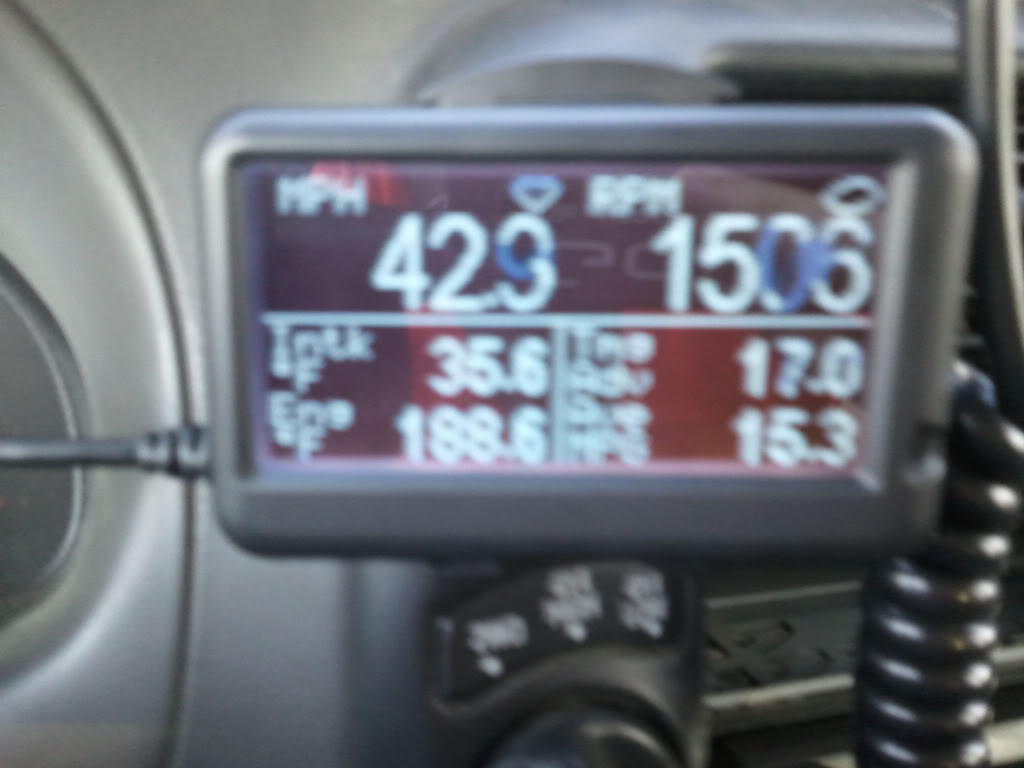
this is just to set thing right, for those who dont know, this mod will not be sucking in hot engine air like some say, in the picture my intake temp is 35.6 and the engine itself is 188.6, nothing wrong will happen by doing this
this is just to set thing right, for those who dont know, this mod will not be sucking in hot engine air like some say, in the picture my intake temp is 35.6 and the engine itself is 188.6, nothing wrong will happen by doing this
I have been long time reader of the form and found this thread while looking for how to remove the air box without damaging it. I just wanted to thank @StxDangerRanger and @Wowak and all the others on this thread for the great info. Using this write up and the comments which follow I created an airbox modification of my own and I thought it was worth sharing.
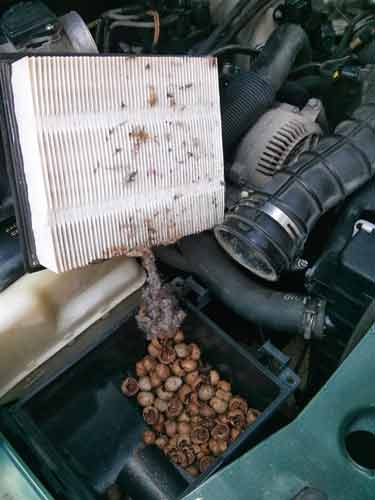
Currently my truck is only driven about 2-3 days per week and recently I�ve discovered that it has even less power than it did when I was driving it every day. This weekend I opened the air filter box and discovered that mice or squirrels have been storing and eating nuts in my airbox. I guess they figured if I wasn�t going to be using my truck that often, they might as well use it.
My goal was to prevent further entry by the critters by placing a non-restricting metal mesh over the opening. Here are the tools and parts you�ll need:
� Ford Ranger � New Air filter � Old Air filter � Flexible plastic or rubber - about 3� x 8� (you can cut apart an old plastic soda bottle or fuel injector cleaner bottle for this � a water bottle will be too think and might melt too easily under heat) � wire dykes and straight tin snips � Drill (90 degree angle drill if you have it) � 1/8 and 1/4 inch drill bits � (4) 1/4 inch diameter x 1/2 inch long aluminum rivets, (2) 1/8 inch x 5/16 aluminum rivets with rivet washers � Air riveter, air blow gun, compressor
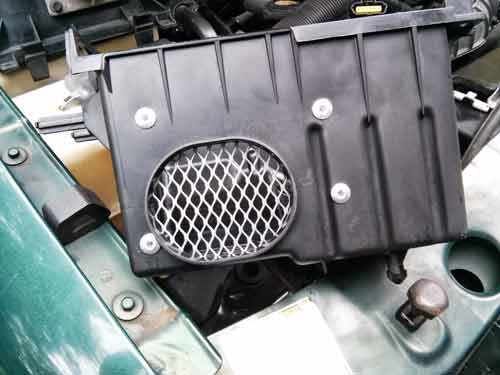
Remove air filter assembly, clean and leave to dry. Remove the snorkel from the air box. Use your wire dykes & tin snips to remove and trim metal screen from your old air filter as seen:
Check the screen fit against the inside of your air box and trim again if necessary. Place the screen inside your air box over the intake hole and use your right angle drill with 1/8� bit to drill pilot holes from the inside out in 4 corners of the screen. Pull the screen out, and change to the 1/4" bit and enlarge the holes in the air box and screen. Place the screen back in the air box, line up he holes and place the 1/4"rivets from the outside in and through the screen. Place washers over the rivets and secure with your air riveter.
Place the flexible plastic over the top of the air shield so that it sticks out about an inch. Drill with 1/8� bit on each side and rivet in place. This shield will help maintain a better balance of air from behind the headlamp and keep out the air from under the hood.
Use your air blow gun and get any shavings off the new parts. Place all components (except snorkel) back into truck, with new air filter.
I hope this helps someone else as much as the original post helped me.
Last edited by Stevenc; 07-01-2013 at 01:50 PM.
Reason: corrected photo link
Hi, I was wondering why I can't see the pics in the original post. I am new to this kind of stuff but would like to try this, but I seriously don't feel confident doing this without pics. Thanks for all the info.
Hi, I was wondering why I can't see the pics in the original post. I am new to this kind of stuff but would like to try this, but I seriously don't feel confident doing this without pics. Thanks for all the info.
I wanted to add here for the @stevenc post, i like the ducting idea, but you left in the portion of plastic shrouding in the headlight opening, that too needs removing (as well as the venturi tube)
I need to mock up something similar to the venturi tube to help take air from the factory location, without the narrower intake the factory part has.
PS. I thought finding a mouse nest in my airbox was bad (they made it from the firewall insulation) but those nuts are crazy!
I did this mod many years ago. Then realized it would just suck hot air into the engine. I put the ducting back. In all reality by doing this mod you aren't freeing up any horsepower or making the engine suck more air. The engine will suck the same amount of air in. Most people think that changing the intake to something else all of a sudden opens the path. It might make it less restrictive slightly but the engine is still pulling in the same amount of air as it was.
My 2002 ranger has an ac line wrapped around the air filter cover preventing it from coming off - it's wedged in. I have released the snap clips and the cover moves freely, well semi freely considering it's blocked by the ac line.
I note you disconnected the large hse from the filter cover in your (first photo)
Do you think I could do that to get more room to move the filter around and get it off?
Are there any considerations so as to prevent problems doing this?
I don't see why I would expect replies at this point in time. No one seems to either know an answer or even cares.
This forum doesn't seem to be "A premier Site for Ford Ranger Enthusiasts" as it s ays at th top of all page - at least as regards question which I regard a simply question.
 04-02-2012


 This shield will help maintain a better balance of air from behind the headlamp and keep out the air from under the hood.


