To those who have modded your gauge cluster
#1
 06-22-2010

To those who have modded your gauge cluster
I'm in the process of modding an Explorer cluster.
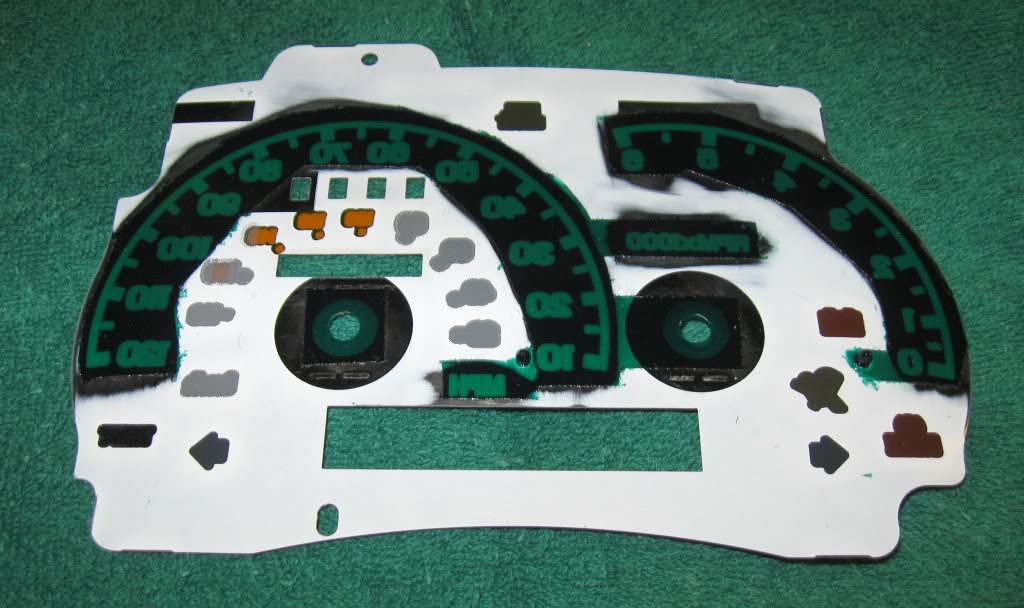
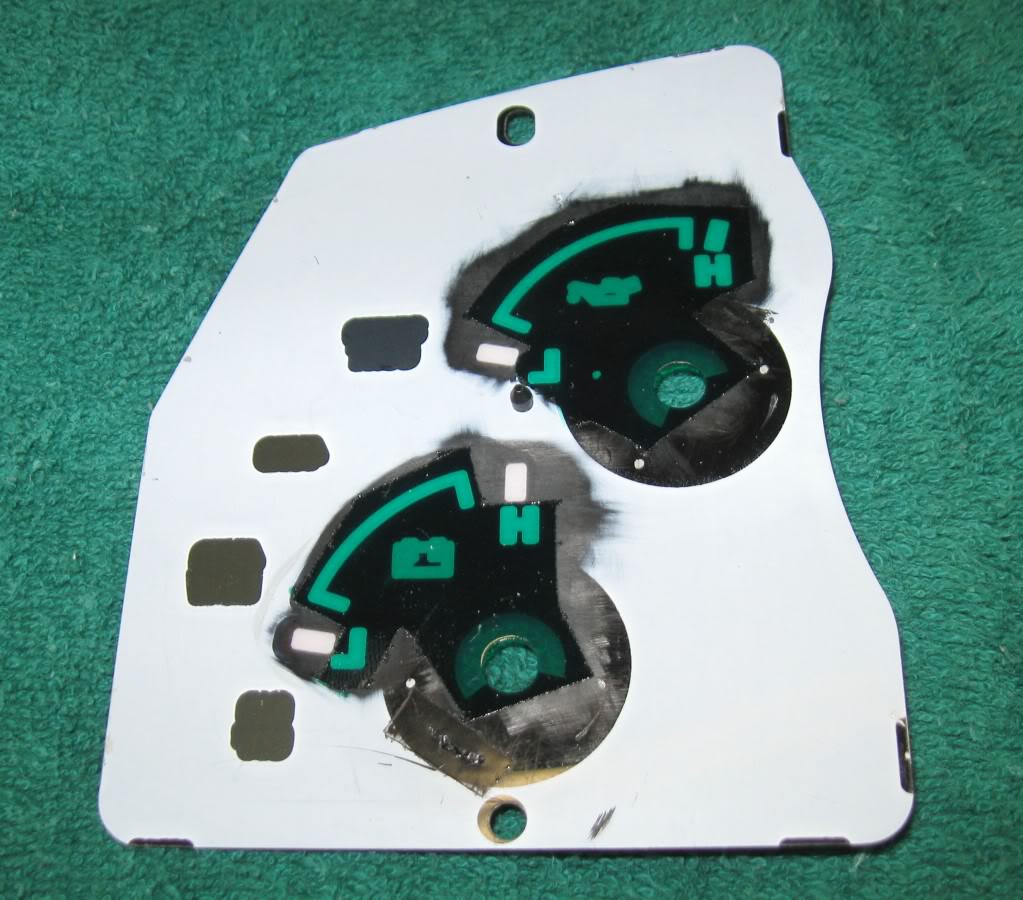
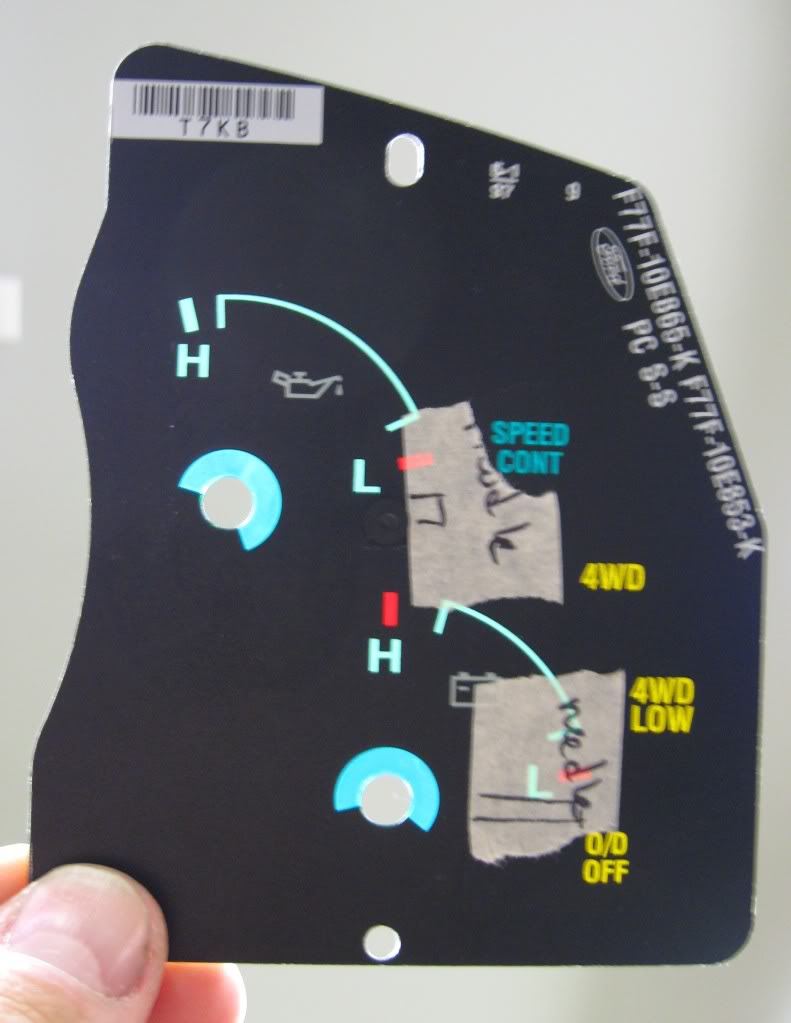
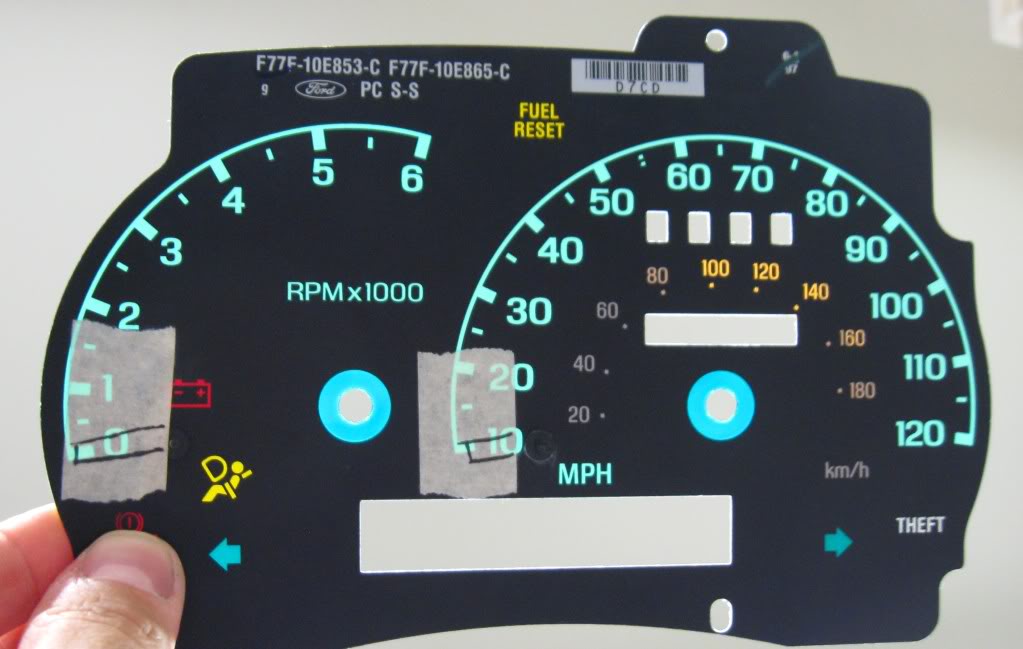
Today, I got the overlays off & wet sanded the blue areas so they're now clear. For now, I left all the other indicators as they were (turn signals, theft, etc) as I'll be attempting to install LED's in each of those tiny little twist-in bulb holders.
I'm thinking of 2 methods to get my gauges to be green...
#1 paint the back of the overlays with some translucent paint. I'm hoping to find some Duplicolor Metalcast in Green at my local auto parts store. No local hobby or craft stores nearby, so I'm limited as to what I can find.
#2 leave the overlays clear & mod some plug-in LED's (from 7x white 3mm LED's to 7x green 3mm LED's). I have the bulbs & LED's already.
#2a leave overlays clear & mount individual LED's to the cluster itself if #1 or #2 don't make the cut.
That's the easy decision. What I'm having trouble with is getting my cluster to light up so I can make sure I have the plug-in LED's in correctly. Plug-in LED's may be temporary... have to see how they look first.
I have all 3 of the wiring harnesses now, but for the life of me, I can't get the 2 left side bulbs to come on. I've tried new bulbs, LED's, every wiring configuration I can think of but the stupid lights won't come on. Switched the bulb holders, cleaned the contacts, even probed them with a digital multimeter in hopes of finding voltage. I must be having an extended brain fart because I should have figured this out in about 10 minutes.
I know someone here is laughing at me right now & that's ok.....as long as you tell me which freakin' wires power the left side bulbs!!

I have the 2 right side bulbs (behind oil pressure & voltage pod) working with LED's as well as the 3 behind the tach & speed-o pod.
They don't look bad even with clear overlays & white LED's, actually much brighter than the ones in my truck right now.
I just need to get the left side working before I take my truck all apart. I need the swap to be as quick & painless as possible as I can't be without the use of my truck for more than a couple hours.
Today, I got the overlays off & wet sanded the blue areas so they're now clear. For now, I left all the other indicators as they were (turn signals, theft, etc) as I'll be attempting to install LED's in each of those tiny little twist-in bulb holders.
I'm thinking of 2 methods to get my gauges to be green...
#1 paint the back of the overlays with some translucent paint. I'm hoping to find some Duplicolor Metalcast in Green at my local auto parts store. No local hobby or craft stores nearby, so I'm limited as to what I can find.
#2 leave the overlays clear & mod some plug-in LED's (from 7x white 3mm LED's to 7x green 3mm LED's). I have the bulbs & LED's already.
#2a leave overlays clear & mount individual LED's to the cluster itself if #1 or #2 don't make the cut.
That's the easy decision. What I'm having trouble with is getting my cluster to light up so I can make sure I have the plug-in LED's in correctly. Plug-in LED's may be temporary... have to see how they look first.
I have all 3 of the wiring harnesses now, but for the life of me, I can't get the 2 left side bulbs to come on. I've tried new bulbs, LED's, every wiring configuration I can think of but the stupid lights won't come on. Switched the bulb holders, cleaned the contacts, even probed them with a digital multimeter in hopes of finding voltage. I must be having an extended brain fart because I should have figured this out in about 10 minutes.
I know someone here is laughing at me right now & that's ok.....as long as you tell me which freakin' wires power the left side bulbs!!
I have the 2 right side bulbs (behind oil pressure & voltage pod) working with LED's as well as the 3 behind the tach & speed-o pod.
They don't look bad even with clear overlays & white LED's, actually much brighter than the ones in my truck right now.
I just need to get the left side working before I take my truck all apart. I need the swap to be as quick & painless as possible as I can't be without the use of my truck for more than a couple hours.
#2
06-23-2010

I have to ask… you are going from Blue to Green ?
Why, OEM is green !?
Also, what Cluster did you use that ended up clear after taking the paint off of the rear of the panels ?
Go to the JY and get a cluster in the style you want almost Plug & Play.
I have heard that the temp gauge can be a problem for Ranger earlier than ’98.
If you end up using LED Bulbs, get the SMD LEDs, the tall ones with 10 or 12 LED mounted on the side and tops; cost more but will spread out the light more.
If you do get to clear then a colored LED will give you color but you will get hot spots and the clear numbers will show it off worse than the older LED s. OEM Gauge Faces have a coating on them for one reason to spread out the lights and make sure there are no hot spots.
Not trying to be an @ss here but review what is going on, make sure you understand that OEM Gauges Faces are a white translucent color when the back finish is scraped off and OEM is green in color and to save a lot of work get a stock Cluster.
I may be off the track here and it has happened before so sorry if this isn’t where you are at.
Let the site know what year the cluster came out of.
One more thing about the electric, the OEM Cluster Lighting requires two hookup locations.
Trace the etching on the PCB and see and remember that LED are polarity sensitive and you need to get the positive and negative sides in the correct position.
good Luck, post pics...

#4
06-23-2010
#5
06-23-2010
Join Date: Jul 2009
Location: Wilmington, DE
Posts: 345
Likes: 0
Received 0 Likes
on
0 Posts
#6
06-23-2010
I have to ask� you are going from Blue to Green ?
Why, OEM is green !?
Also, what Cluster did you use that ended up clear after taking the paint off of the rear of the panels ?
Go to the JY and get a cluster in the style you want almost Plug & Play.
I have heard that the temp gauge can be a problem for Ranger earlier than �98.
If you end up using LED Bulbs, get the SMD LEDs, the tall ones with 10 or 12 LED mounted on the side and tops; cost more but will spread out the light more.
If you do get to clear then a colored LED will give you color but you will get hot spots and the clear numbers will show it off worse than the older LED s. OEM Gauge Faces have a coating on them for one reason to spread out the lights and make sure there are no hot spots.
Not trying to be an @ss here but review what is going on, make sure you understand that OEM Gauges Faces are a white translucent color when the back finish is scraped off and OEM is green in color and to save a lot of work get a stock Cluster.
I may be off the track here and it has happened before so sorry if this isn�t where you are at.
Let the site know what year the cluster came out of.
One more thing about the electric, the OEM Cluster Lighting requires two hookup locations.
Trace the etching on the PCB and see and remember that LED are polarity sensitive and you need to get the positive and negative sides in the correct position.
good Luck, post pics...
My '96 xlt truck actually has blue cluster, hvac, 4x4 & fog switch lighting, even the hvac ***** are blue. I thought I've read here where a bunch of other guys here have green as OEM & make the switch to blue. Just my luck that my truck has to be different from the start.
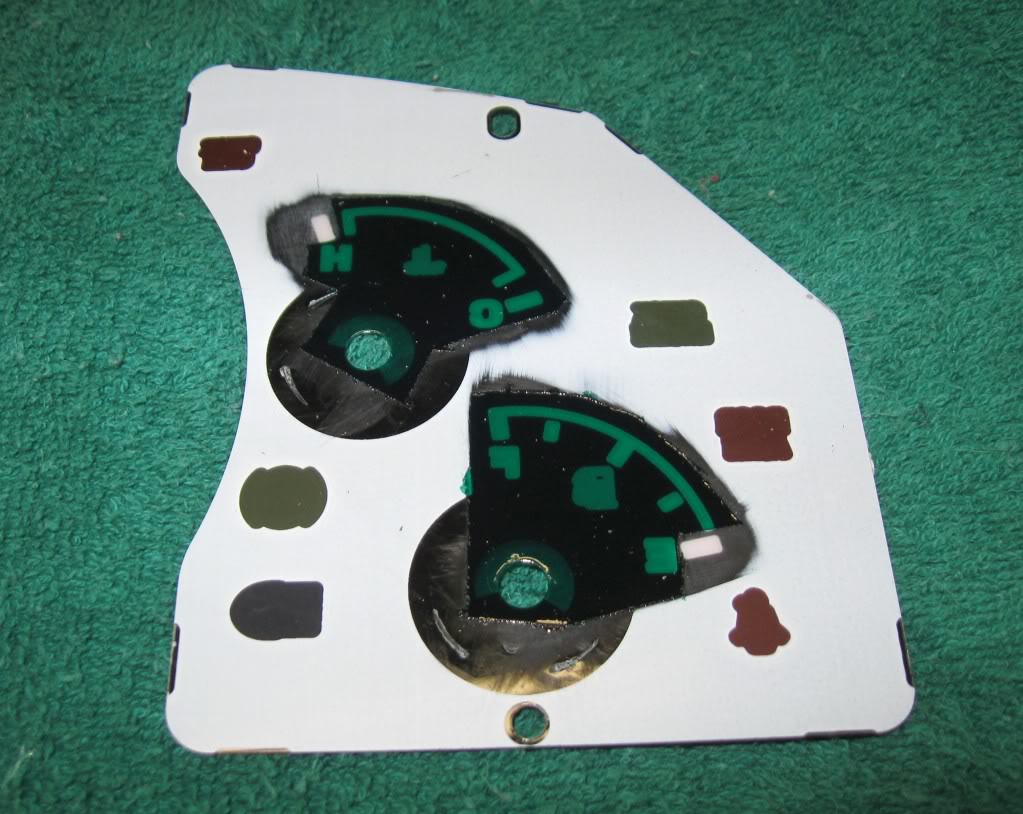
The Expo cluster I have had blue backing & after I wet sanded the back of the overlays, it came out sort-of clear-ish, more like semi-transparent white though. I guess just removing the blue backing paint lets more light through the overlays.
I wish I had a JY that had some vehicles... we only have one "JY" around here close by & they might get one car a month. I was thinking about posting a wanted ad for a green automatic cluster overlay set, that would make life so much simpler.
I have a can of duplicolor metalcast in green on order, so hopefully this will remedy the green background color. I'm going to try my cheapie white LED's first (while I'm still working with the Expo cluster in the garage) and I may replace the 7 white LED's with 7 green LED's to see how they look. I may even modify the 7 LED housings to hold 7x 5mm LED's with longer leads so I can bend them around inside the cluster housing.
For now, I'm just experimenting on my Expo cluster so I don't screw up anything that can't be easily fixed before I dig into my truck's dash. If these overlays look good on the Expo cluster, I'll be able to pop off the overlays from my truck & glue the Expo ones right back in place.
I'll keep posting my results & I'll try to get some pics as I go along...
#7
06-23-2010
I know it has to be some simple wiring that I missed somewhere.

#8
06-23-2010
I was trying each plug-in connector separately.
This Expo's cluster illumination power wires were red/black stripe.
Thanks
#9
06-23-2010
The expo runs a PWM dimmer module(electronic) and the ranger runs a resistor style(analog). Thats the difference in wire color.
#10
06-23-2010
This is just something off the top of my head !!!!
Why not just get the OEM Replacements from the JY ?
As far as GREEN goes, OEM is hard to beat, you could add some of the Tall SMD LED with a lot of LEDs on them and that would give you the GREEN and LED at the same time.
Luck and yes PICS.
Why not just get the OEM Replacements from the JY ?
As far as GREEN goes, OEM is hard to beat, you could add some of the Tall SMD LED with a lot of LEDs on them and that would give you the GREEN and LED at the same time.
Luck and yes PICS.
#12
06-23-2010
This is just something off the top of my head !!!!
Why not just get the OEM Replacements from the JY ?
As far as GREEN goes, OEM is hard to beat, you could add some of the Tall SMD LED with a lot of LEDs on them and that would give you the GREEN and LED at the same time.
Luck and yes PICS.
Why not just get the OEM Replacements from the JY ?
As far as GREEN goes, OEM is hard to beat, you could add some of the Tall SMD LED with a lot of LEDs on them and that would give you the GREEN and LED at the same time.
Luck and yes PICS.
#13
06-23-2010
This evening, I modded one of my 4 white LED T10 bulbs (cheap evilbay ones) so they now have 4x 3mm green 10,000mcd LED's. I don't know if I have the correct resistor, I just used a 300ohm 1/4watt to replace the tiny 300ohm resistor that was soldered to the original PCB.
Even with just the sanded overlays, the green really pops through. Once I have enough of these modded, I'll change all the bulbs to these modded green ones & see how they look.
The only thing that was a little weak on light were the needles, but that could be where I only had one green bulb, or where I didn't have the needles seated all the way down or because the overlay wasn't attached to the pod or because I had a dozen 4' fluorescent light fixtures overhead.
The little hole that feeds light to the needles has that clear plastic "light channel" over the gauges that looks like I might be able to disassemble it and drill a few 3mm holes to fit in a few LED's from the back side.
I need to take pics to better illustrate this.... sort of like Jp7's plastic LED rings, except instead of any additional materials, I'd just drill into the clear plastic from behind & add LED's. I gotta be different
#14
06-25-2010
Finally got my overlays painted...
I left all of the other indicators (turns, theft, airbag, etc) the OEM colors.
Just holding these up to the ceiling to let some light through...
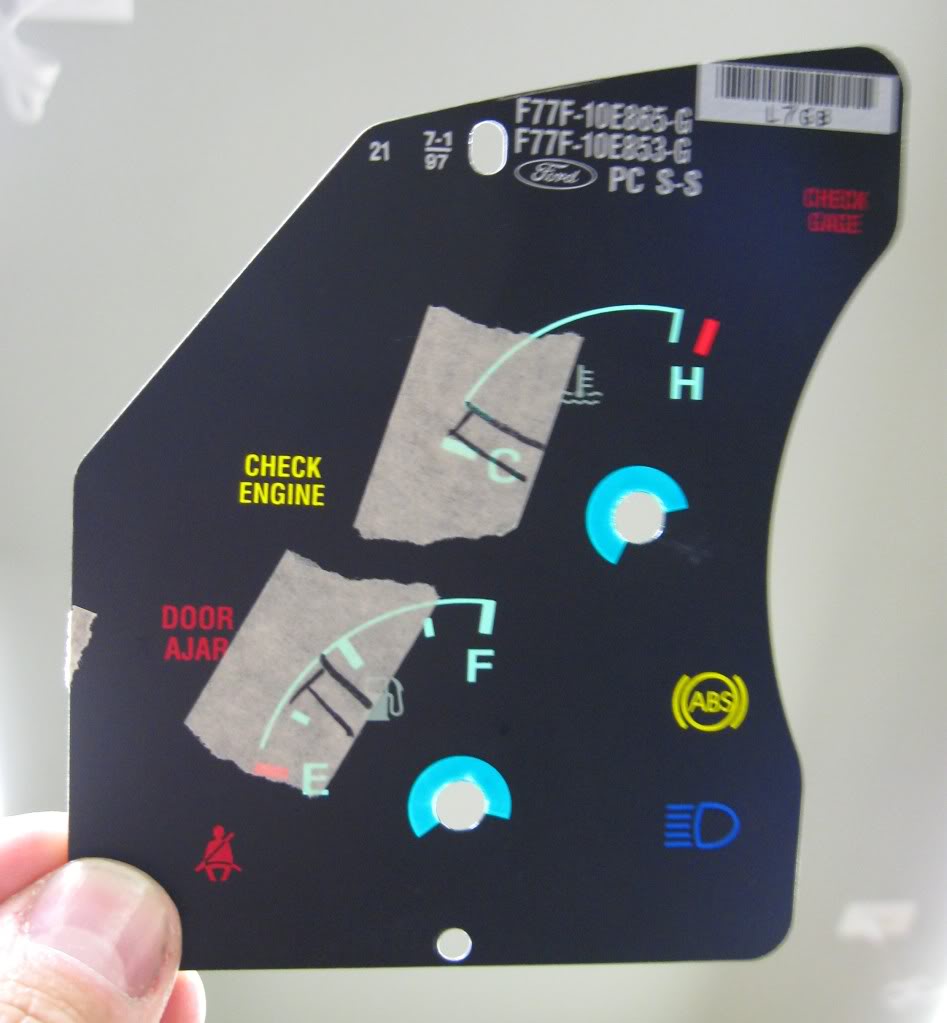
Those last 3 pics make the green look a lot lighter than it really is. Also the holes where the needles attach look blue here, but they're the same color green as the rest.
4 or 5 coats of Duplicolor Metalcast Green after quite a bit of masking.
My initial tests indicate that green LED's behind the areas I painted look the best... white looked ok, but the green LED's really make them pop.
Currently working on modding all the other indicator bulbs to color matched LED's. I made up a bunch of 5mm white LED's, but after some testing, I like blue LED's behind blue indicators, yellow behind yellow, etc. Seems like the color matching makes the colors more vibrant than just the white LED's.
I just realized that the turn signal indicators in my Ranger are green, while the ones in this Explorer cluster are blue. I tried a green LED behind these blue indicators & they show up green, a blue LED makes them vibrant blue. Now I can't decide if I want to stay blue or go green.
More as I progress...
I left all of the other indicators (turns, theft, airbag, etc) the OEM colors.
Just holding these up to the ceiling to let some light through...
Those last 3 pics make the green look a lot lighter than it really is. Also the holes where the needles attach look blue here, but they're the same color green as the rest.
4 or 5 coats of Duplicolor Metalcast Green after quite a bit of masking.
My initial tests indicate that green LED's behind the areas I painted look the best... white looked ok, but the green LED's really make them pop.
Currently working on modding all the other indicator bulbs to color matched LED's. I made up a bunch of 5mm white LED's, but after some testing, I like blue LED's behind blue indicators, yellow behind yellow, etc. Seems like the color matching makes the colors more vibrant than just the white LED's.
I just realized that the turn signal indicators in my Ranger are green, while the ones in this Explorer cluster are blue. I tried a green LED behind these blue indicators & they show up green, a blue LED makes them vibrant blue. Now I can't decide if I want to stay blue or go green.
More as I progress...
#15
06-26-2010
Currently working on modding all the other indicator bulbs to color matched LED's. I made up a bunch of 5mm white LED's, but after some testing, I like blue LED's behind blue indicators, yellow behind yellow, etc. Seems like the color matching makes the colors more vibrant than just the white LED�s.
More as I progress...
More as I progress...
#17
06-26-2010


#18
06-26-2010
#19
06-26-2010
Did you do the Speed-O calibration with a battery before disassembly… at least then you can get it in the ball park.
The other way will be to follow someone and have them do 60, have a passenger put the speed-O needle in place when you are equal speed.
BUT… stop and start the speed cal again just to be safe, the weight of the needle itself will change the way the speed-O reacts.
luck,
The other way will be to follow someone and have them do 60, have a passenger put the speed-O needle in place when you are equal speed.
BUT… stop and start the speed cal again just to be safe, the weight of the needle itself will change the way the speed-O reacts.
luck,
#20
06-26-2010
I might be OK when I switch the gauges out.
I'm thinking I'll remove the actual gauges from the pods & swap them out.
This way, I can remove the needle stoppers & mark the location on the old gauges before I remove the needles so I'll have a starting point when I install the new pods & overlays with the old gauges.
I'm thinking I'll remove the actual gauges from the pods & swap them out.
This way, I can remove the needle stoppers & mark the location on the old gauges before I remove the needles so I'll have a starting point when I install the new pods & overlays with the old gauges.
#21
06-26-2010
#22
06-26-2010
Unfortunately, now I'm going to have to disassemble most of them to change colors of the LED's & resistors.
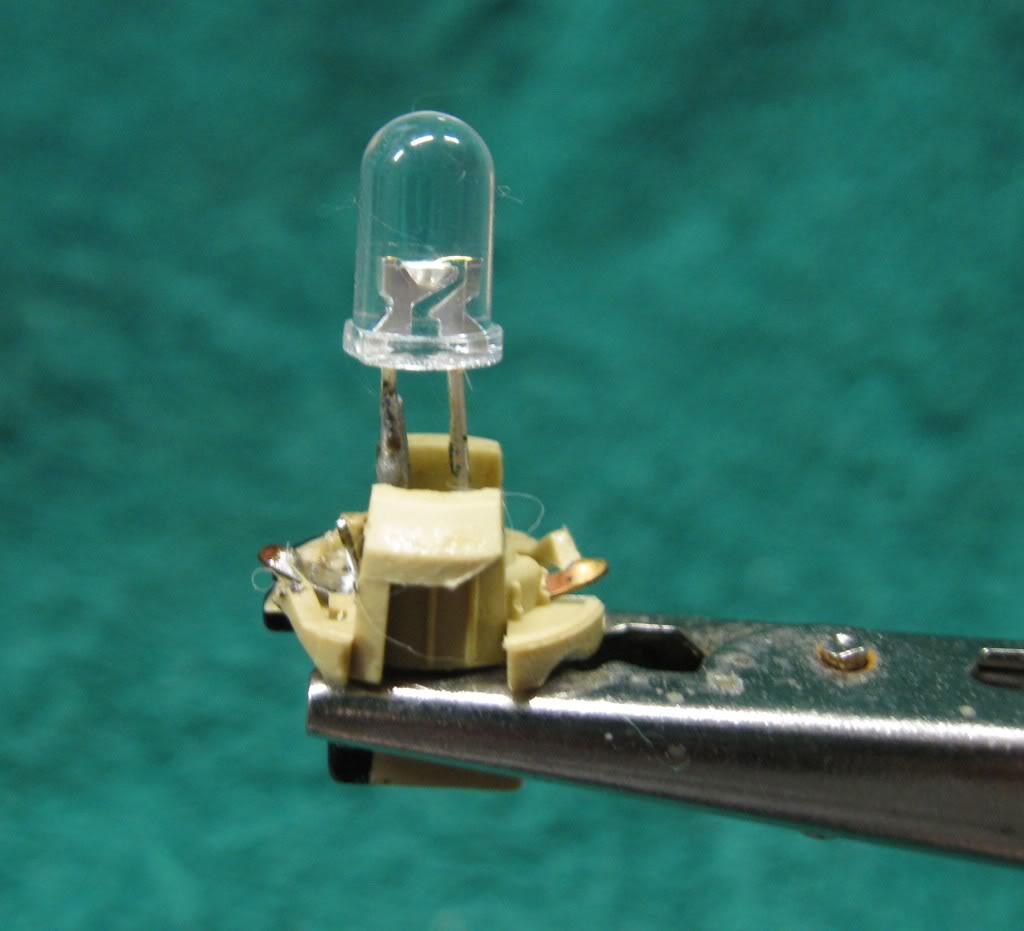
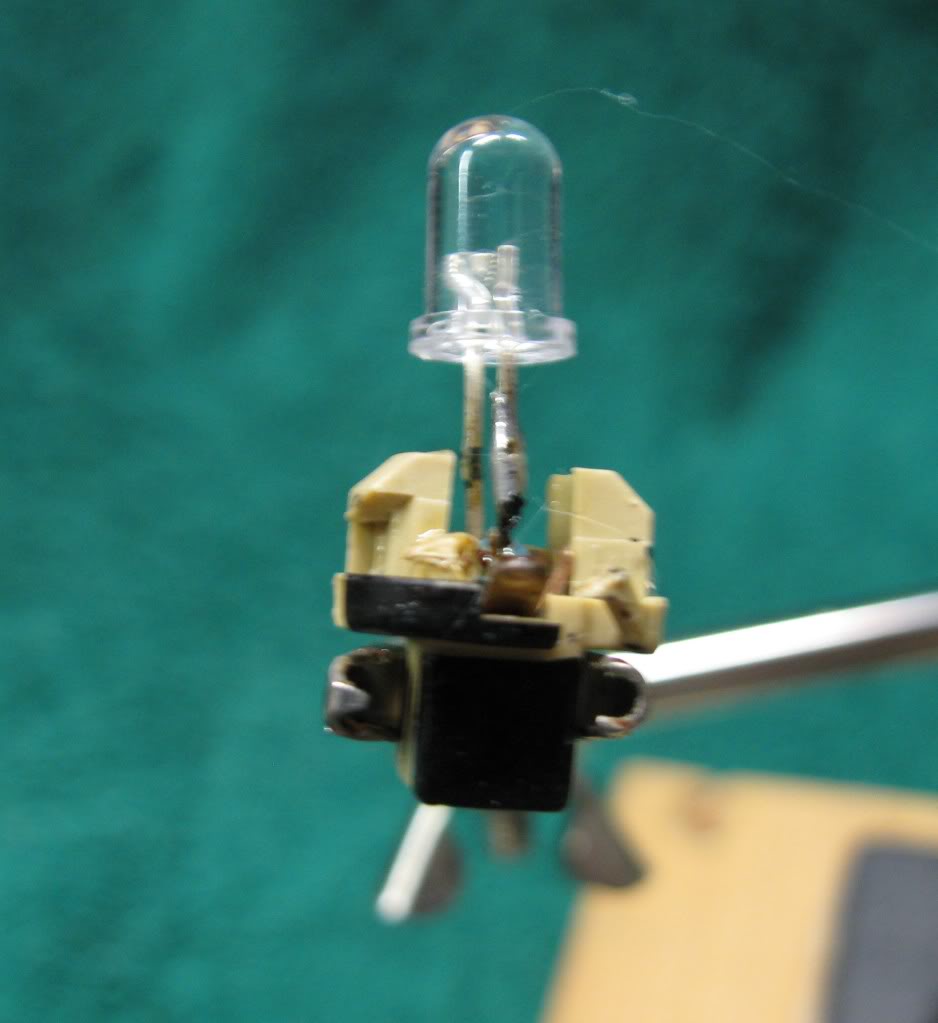
The 5mm LED's are the same size diameter as the OEM bulbs & they have plenty of clearance around the openings. I did, however leave a little extra length on the LED leads... this moves the LED's a tiny bit closer to the overlays & gave me just enough room to get my soldering iron in there to heat up the contacts.
The extra length also gives me some wiggle room in case one of the LED's isn't perfectly level once soldered in.
I marked one side of every bulb holder black to indicate the negative side & that's the side where I soldered the resistors to. The positive side of the LED gets soldered directly to the other contact.
There was just enough room inside the bulb holder to squeeze in the 1/4 watt resistor.
I soldered the resistor to the LED first, then bent the lead up & trimmed it off so it wouldn't contact the LED. Then I brushed on some solder flux to the contact terminals & slid in the assembly. I heated the positive side & soldered it on first, holding it as close to upright as I could...then soldered on the negative side.
After each LED was done, I tested them with my cheap 12v power supply to make sure it worked & was wired correctly.


Getting them back apart is going to be a PAIN, I always over build stuff like this & the LED's are very securely soldered in place.
* * If anyone would like to donate a few of these tiny bulb holders (only if you don't need them) to this project, please feel free to contact me
 * *
* *
#23
06-26-2010
I'm getting a little worried about swapping the overlays out now that I read Fx4wannabe01's guide on calibrating the needles.
Wish I had looked into it before I took off the Expo needles now.
I guess I could install the needles back on the Expo cluster & calibrate them using the AA battery method.
I noticed that some of the gauges have some surface rust on the metal housings, is that normal?
When I took the voltmeter gauge off to drill holes for 3mm LED's, I noticed the rust on the housing for the first time.
I hope I didn't do all this work on the overlays & get too scared to pull the cluster from my truck now.
#24
06-26-2010
All this work and your trying to use monochromatic LEDs through a colored filter element. I can appreciate the hard work, but essentially what your doing here is wearing sunglasses at night. Putting a filter that cuts out all but that greenish blueish color with pseudowhite LEDs only lets the greenish-blueish portion of the output past. Since psuedowhite LEDs have very little greenish-blueish wavelength output, your going to kill the crispness potential of what could have been done here.
To switch gears, calibration without any base reference measurements is not hard. I did mine before I knew the "shane method", with my AEM logging software (you could use a basic obd2 handheld scanner with live data capabilities).
To switch gears, calibration without any base reference measurements is not hard. I did mine before I knew the "shane method", with my AEM logging software (you could use a basic obd2 handheld scanner with live data capabilities).
#25
06-26-2010
Actually, I'm re-doing most of the indicator LED's from white to color match them to their respective colored filters.
I'm also modding some 7x 3mm white LED plug-in bulbs with 3mm green LED's for the T10 sized bulbs. It would be easier to just buy green plug-in bulbs, but I already have the green LED's & the 7x 3mm bulbs, not to mention a lot of free time.
After playing around with the white 5mm LED holders I made up, I found they're quite a bit brighter than the old bulbs, but as you mentioned they're a little bland.
I tried a blue LED under a blue filter & it did seem to pop out better.
I'll probably end up de-soldering most of the white 5mm LED's/resistors and swapping them out with color matched LED's. It only took an hour or so to make them all up & it was a good test to see what worked best.


