Headlight Projector Retro
#1
 10-16-2007


Join Date: Aug 2006
Location: Demorest,Ga
Posts: 1,724
Likes: 0
Received 0 Likes
on
0 Posts
Headlight Projector Retro
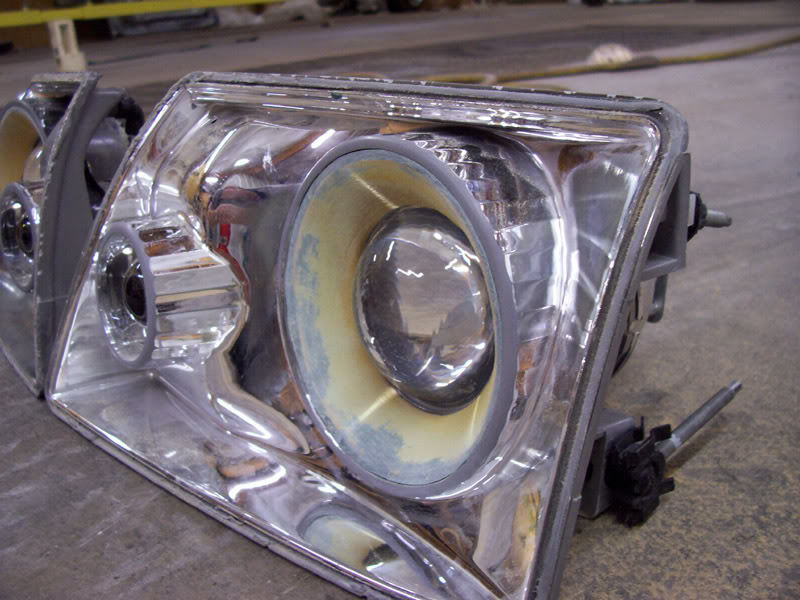
I got my projectors yesterday, and started working on them tonight. Made pretty good progress tonight.
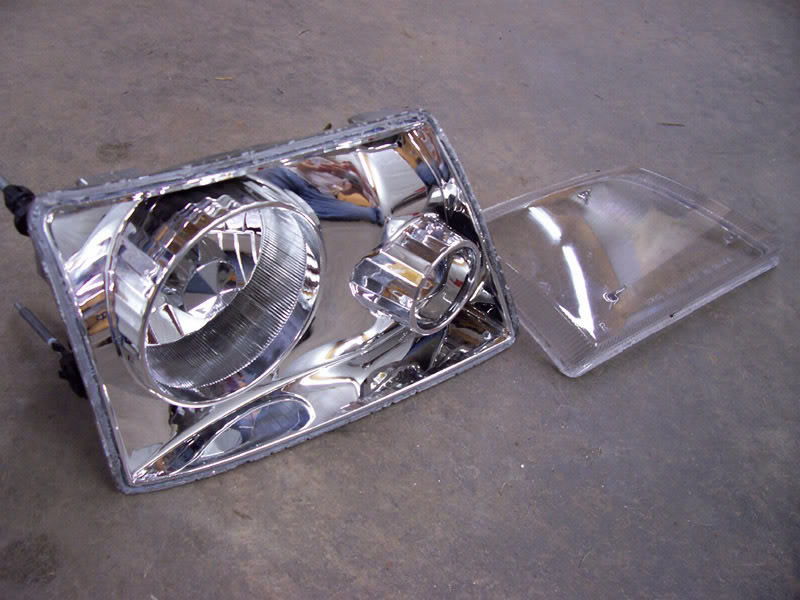
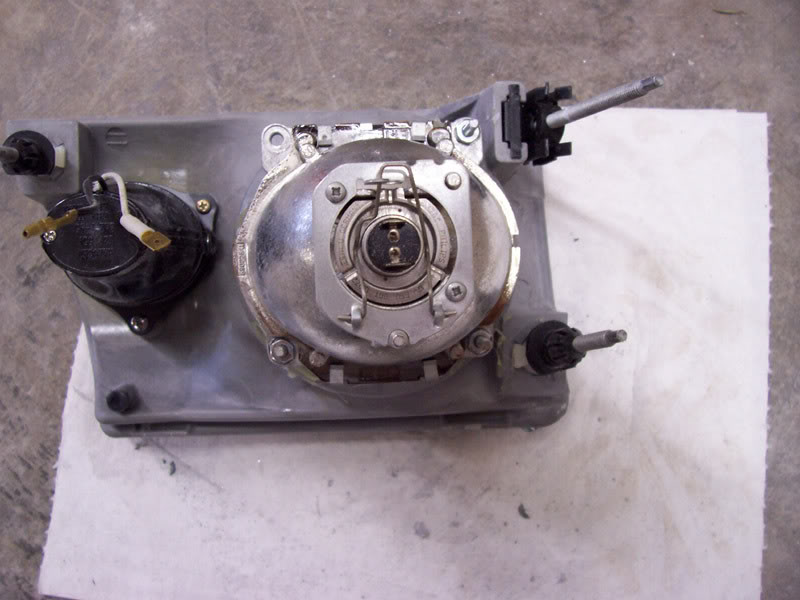
Cover off
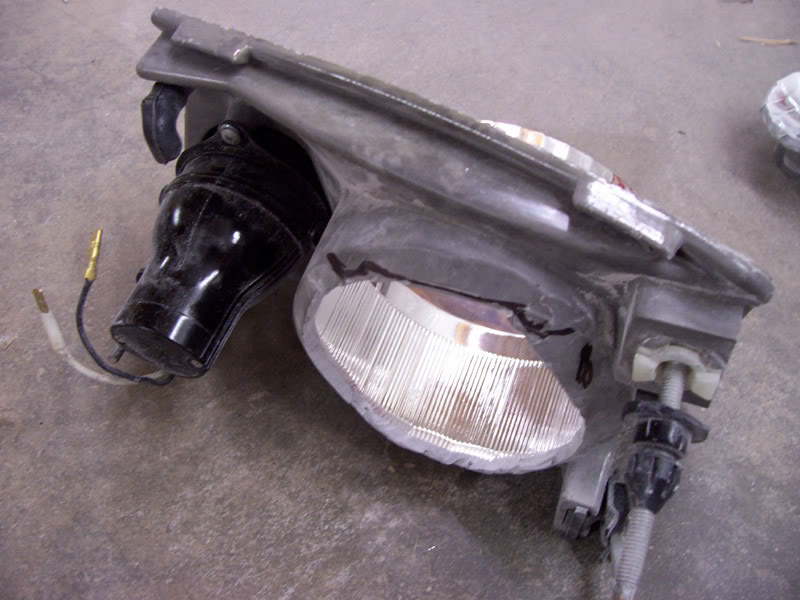
Cut the back out with an air angle grinder (similar to a dremel)
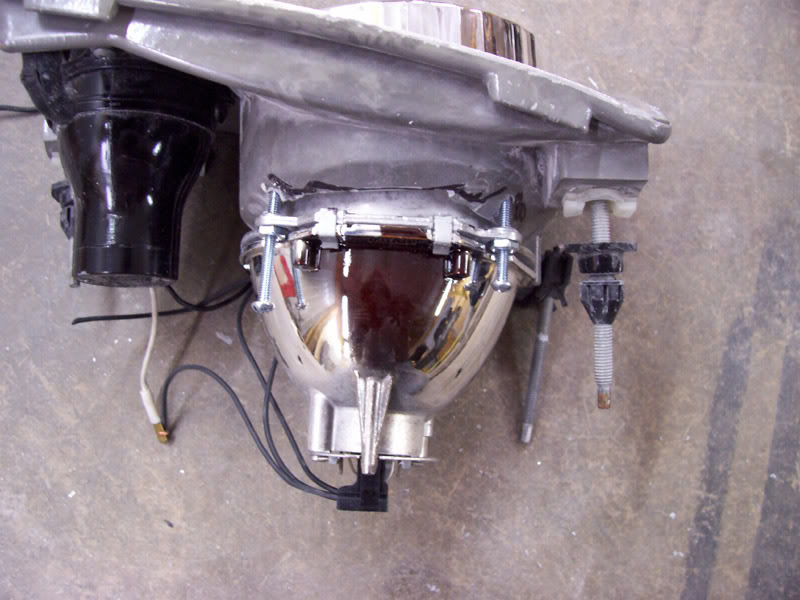
Test fit

Adjusted the projector so the cut off would be level when I got the headlights back on the truck, and then drilled holes, and screwed some screws in for alignment adjustments.
And this is how it looks right now.
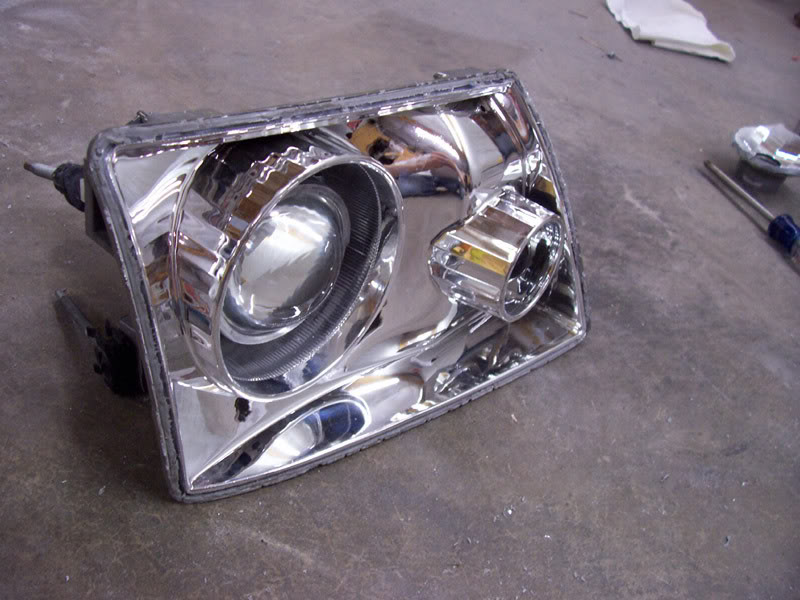
I still need to do some fine adjusting to the projector aiming, and then make a shroud to fit around the projector to cover the gap. And of course, I still have to do the other headlight. Im thinking about painting the insides of the headlights flat black, and getting black corners so it will all match. What do ya'll think?
Cover off
Cut the back out with an air angle grinder (similar to a dremel)
Test fit
Adjusted the projector so the cut off would be level when I got the headlights back on the truck, and then drilled holes, and screwed some screws in for alignment adjustments.
And this is how it looks right now.
I still need to do some fine adjusting to the projector aiming, and then make a shroud to fit around the projector to cover the gap. And of course, I still have to do the other headlight. Im thinking about painting the insides of the headlights flat black, and getting black corners so it will all match. What do ya'll think?

#3
10-16-2007
Join Date: Aug 2006
Location: Demorest,Ga
Posts: 1,724
Likes: 0
Received 0 Likes
on
0 Posts
#5
10-17-2007
#6
10-17-2007
Join Date: Aug 2006
Location: Demorest,Ga
Posts: 1,724
Likes: 0
Received 0 Likes
on
0 Posts
Originally Posted by winks
Neat work, what are you doing to keep moisture out?
Originally Posted by lifted97ranger
nice job....if i were you, i would paint the headlights the same color as the truck. that woudl be sweet.....and do the same with a set of diamond clear corners, leaving just a section around the bulb chrome for light refelection...
#7
10-17-2007
#8
10-18-2007
Join Date: Aug 2006
Location: Demorest,Ga
Posts: 1,724
Likes: 0
Received 0 Likes
on
0 Posts
Ok, here is what i've done in the past couple evenings.
I grinded the heads off the screws so the projector can be removed and put back in during the retro process, and keep its alignment, and also, so the holes in dont get worn out by screwing the screws in and out so many times.
Both projectors installed and aimed.

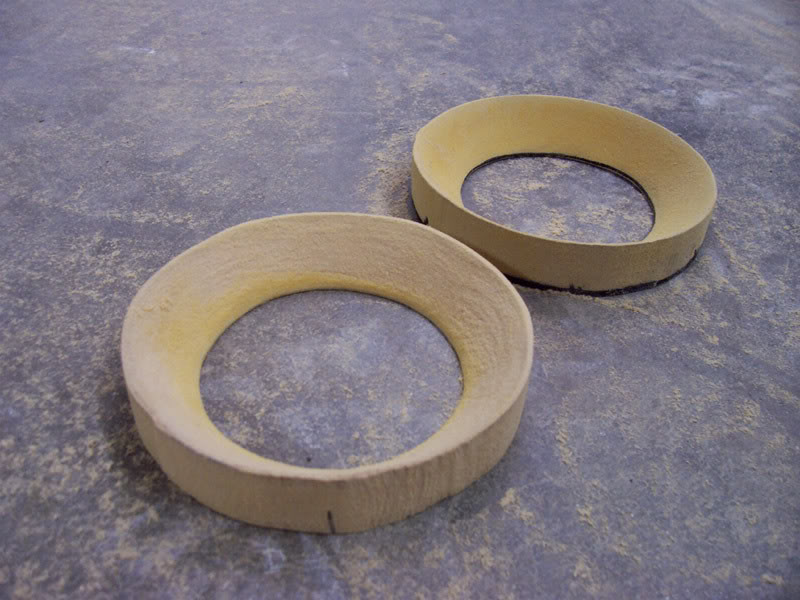
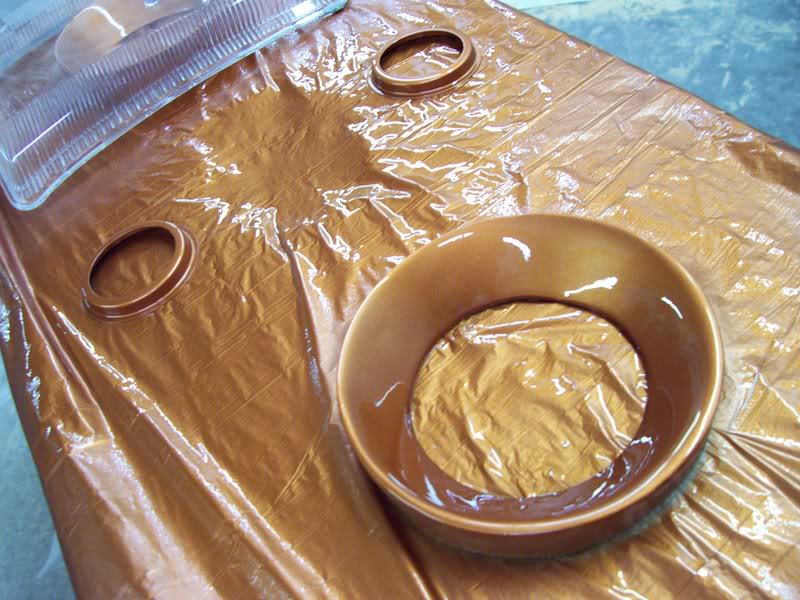
Here are the shrouds to cover the gap around the projectors. Made out of MDF...I cut them out with a jig saw and sanded them with a sanding disk on a air angle grinder to get the inner shape like I wanted.
Installed...notice the gaps around them.
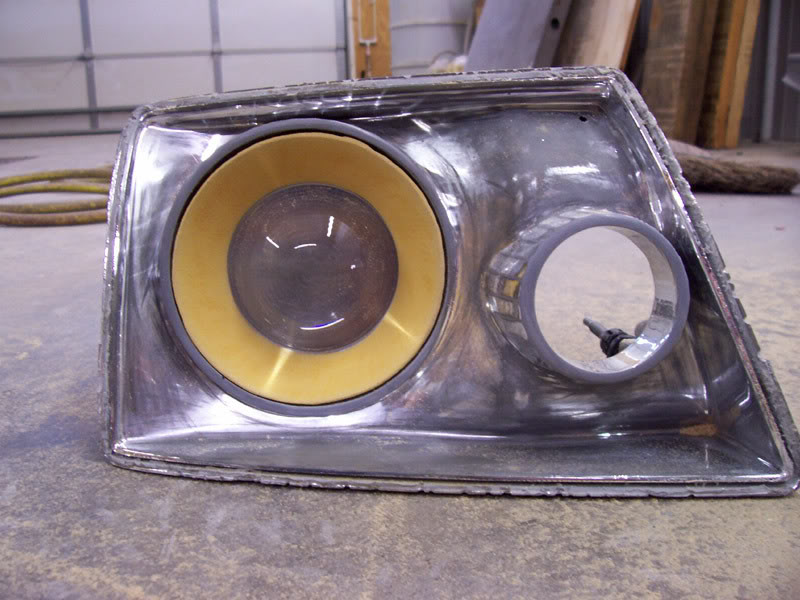
I fixed that by sticking the shrouds in and pressing fiberglass filler into the holes, and then sanding the filler.
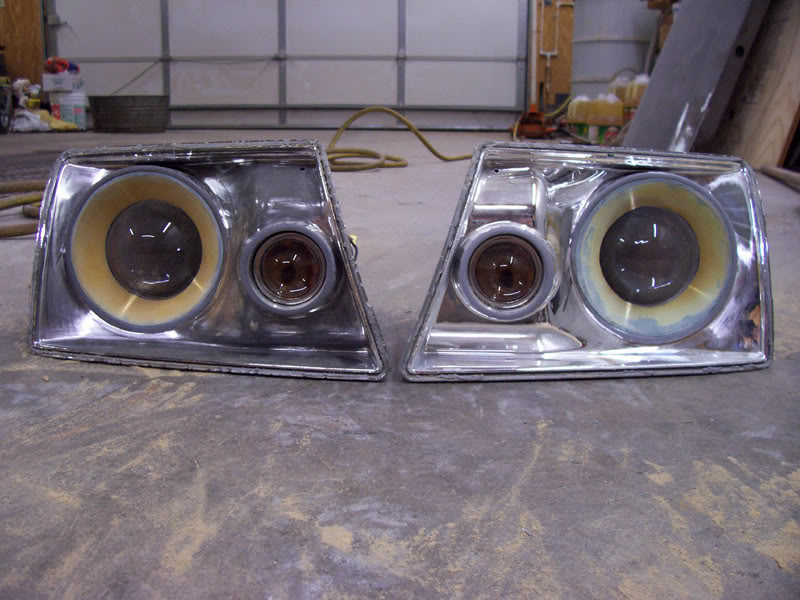
I grinded the heads off the screws so the projector can be removed and put back in during the retro process, and keep its alignment, and also, so the holes in dont get worn out by screwing the screws in and out so many times.
Both projectors installed and aimed.
Here are the shrouds to cover the gap around the projectors. Made out of MDF...I cut them out with a jig saw and sanded them with a sanding disk on a air angle grinder to get the inner shape like I wanted.
Installed...notice the gaps around them.
I fixed that by sticking the shrouds in and pressing fiberglass filler into the holes, and then sanding the filler.
#9
10-18-2007

Join Date: Dec 2005
Location: Raleigh, NC
Posts: 248
Likes: 0
Received 0 Likes
on
0 Posts
#11
10-19-2007
#15
10-19-2007
Join Date: Aug 2006
Location: Demorest,Ga
Posts: 1,724
Likes: 0
Received 0 Likes
on
0 Posts
#17
10-19-2007
Join Date: Aug 2006
Location: Demorest,Ga
Posts: 1,724
Likes: 0
Received 0 Likes
on
0 Posts


#19
10-19-2007
Join Date: Dec 2005
Location: Raleigh, NC
Posts: 248
Likes: 0
Received 0 Likes
on
0 Posts
#20
10-19-2007
Join Date: Aug 2006
Location: Demorest,Ga
Posts: 1,724
Likes: 0
Received 0 Likes
on
0 Posts

#22
10-19-2007
Join Date: Aug 2006
Location: btwn the Buff and the Roc
Posts: 1,302
Likes: 0
Received 0 Likes
on
0 Posts
#24
10-20-2007
Join Date: Jul 2005
Location: Fairbanks, AK
Posts: 3,256
Likes: 0
Received 0 Likes
on
0 Posts
#25
10-20-2007
Join Date: Apr 2005
Location: NC
Posts: 1,955
Likes: 0
Received 0 Likes
on
0 Posts


