Josh's SAS thread
#26
 06-21-2011


Join Date: Jun 2011
Location: Kentucky
Posts: 376
Likes: 0
Received 0 Likes
on
0 Posts
Oh don't worry boys, she gets rode hard and hung up wet. I'll make sure to keep you all in the loop

#29
06-21-2011
Join Date: Nov 2008
Location: san jose, Costa Rica
Posts: 1,319
Likes: 0
Received 0 Likes
on
0 Posts
#30
06-22-2011
Join Date: Jun 2011
Location: Kentucky
Posts: 376
Likes: 0
Received 0 Likes
on
0 Posts
Here is a build thread that actually goes in depth on the whole SAS deal. I will keep updating this thread from now on though.
http://therangerstation.com/forums/s...ad.php?t=73934
Thanks so much to everyone for the comments.
http://therangerstation.com/forums/s...ad.php?t=73934
Thanks so much to everyone for the comments.
#31
06-23-2011
Join Date: Jun 2011
Location: Kentucky
Posts: 376
Likes: 0
Received 0 Likes
on
0 Posts
well gents, I got some bad news last night. :(
The guy who was going to lead the group on the Rubicon has gotten ill. Like badly ill. So needless to say, the trip has been cancelled.
I guess everything happens for a reason though. I might go with the Jeep guys up to the Dusy-Ershim trail, but we will see. Going to get the doubler done first, then see where we are at then
#32
06-28-2011
Join Date: Jun 2011
Location: Kentucky
Posts: 376
Likes: 0
Received 0 Likes
on
0 Posts
#33
06-29-2011
Join Date: Jun 2011
Location: Kentucky
Posts: 376
Likes: 0
Received 0 Likes
on
0 Posts
Still no doubler yet. I called Duffy like 5 times yesterday to see if he shipped it yet, and couldn't get a hold of him. Going to try all day today too.
I did get some new gas and got the new-to-me welder up and running. This thing works pretty well! I still have some work to do on welding, but that takes time. I think they are not too bad, but could be better.
Here is the Airtank from the bed. Since i am moving the fuel tank, this will be moved to the frame.

Since it will be mounted on the side, the release valve and saftey valve would be horizontal.

So i cut the brackets off, ground down to the bare metal, well, until my flap wheel grinder **** out on me, and rotated the tank 90* and welded the brackets back on.


To me, it looks like i need to prep the area a little better. As far as welder settings, I think i have them set pretty good. What do you guys think?
Here is a close up of the welds....
Bead 1 (Horrible)

Bead 2 (Better)

Bead 3 (I think this is my best)

Bead 4

I did get some new gas and got the new-to-me welder up and running. This thing works pretty well! I still have some work to do on welding, but that takes time. I think they are not too bad, but could be better.
Here is the Airtank from the bed. Since i am moving the fuel tank, this will be moved to the frame.
Since it will be mounted on the side, the release valve and saftey valve would be horizontal.
So i cut the brackets off, ground down to the bare metal, well, until my flap wheel grinder **** out on me, and rotated the tank 90* and welded the brackets back on.
To me, it looks like i need to prep the area a little better. As far as welder settings, I think i have them set pretty good. What do you guys think?
Here is a close up of the welds....
Bead 1 (Horrible)
Bead 2 (Better)
Bead 3 (I think this is my best)
Bead 4
#34
06-29-2011
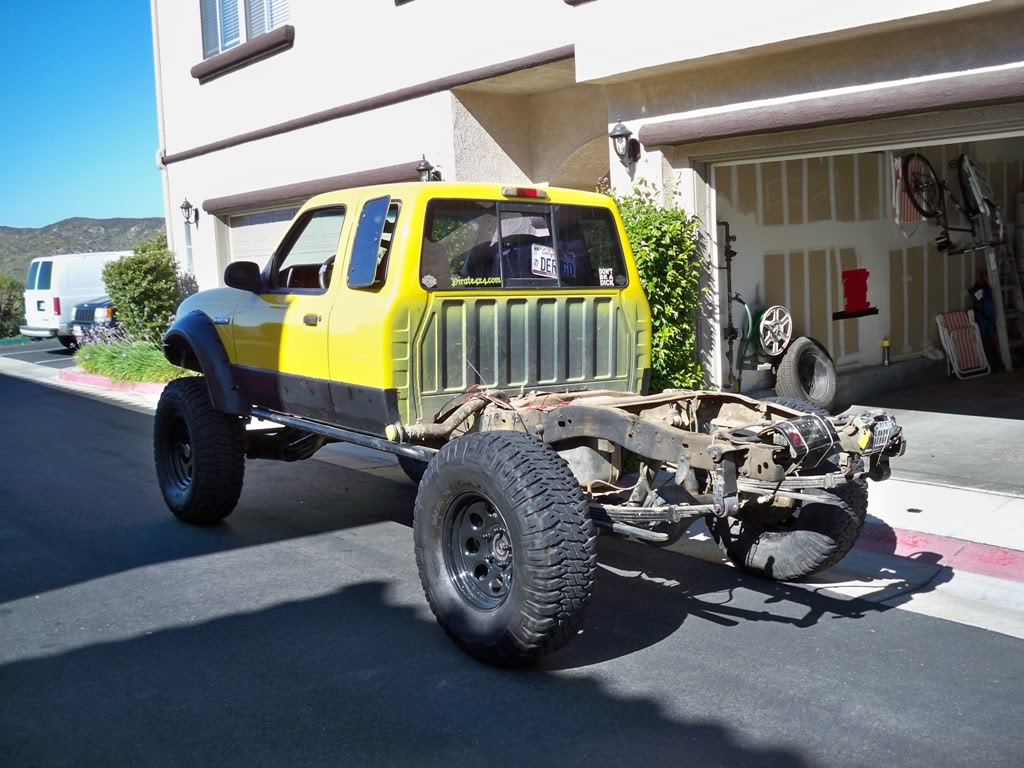
Nice job on both of the trucks… just too high !
One question and I know this will bring out the “OWNED” stickers but can a SAS be done without all of the lift ?
I’m not getting any younger and I know lift looks good but I was thinking 4 to 5” MAX…; just what I have with the SL Lift and Coil-Over setup ?
Was thinking keep it lower… no not ricer just not too high.
#35
06-29-2011
Join Date: Jun 2011
Location: Kentucky
Posts: 376
Likes: 0
Received 0 Likes
on
0 Posts
Both trucks?
I am sure you can, but i don't how to do it for under 5" Most people use 5.5" EB springs.
When i first pulled it out of the shop, the goal was all about flexing out the suspension (which the truck can't do to the stiff *** springs), so i went with coil overs. With as wide as mine is, it is still very stable.
If you try to keep it under 5" lift, you are going to be cutting out alot of the sheetmetal, engine crossmember, clearencing the frame, stuff like that.
What i have learned is that ANYTHING can be done if you have a cutoff wheel and a welder. Just depends on if you want to put that much time into.
If you're not rock crawling it, I'd just stick with the SL. It will ride better, be lower, and if you go with lockers, will be able to go damn near anywhere offroad too.
#36
07-01-2011
Join Date: Jun 2011
Location: Kentucky
Posts: 376
Likes: 0
Received 0 Likes
on
0 Posts
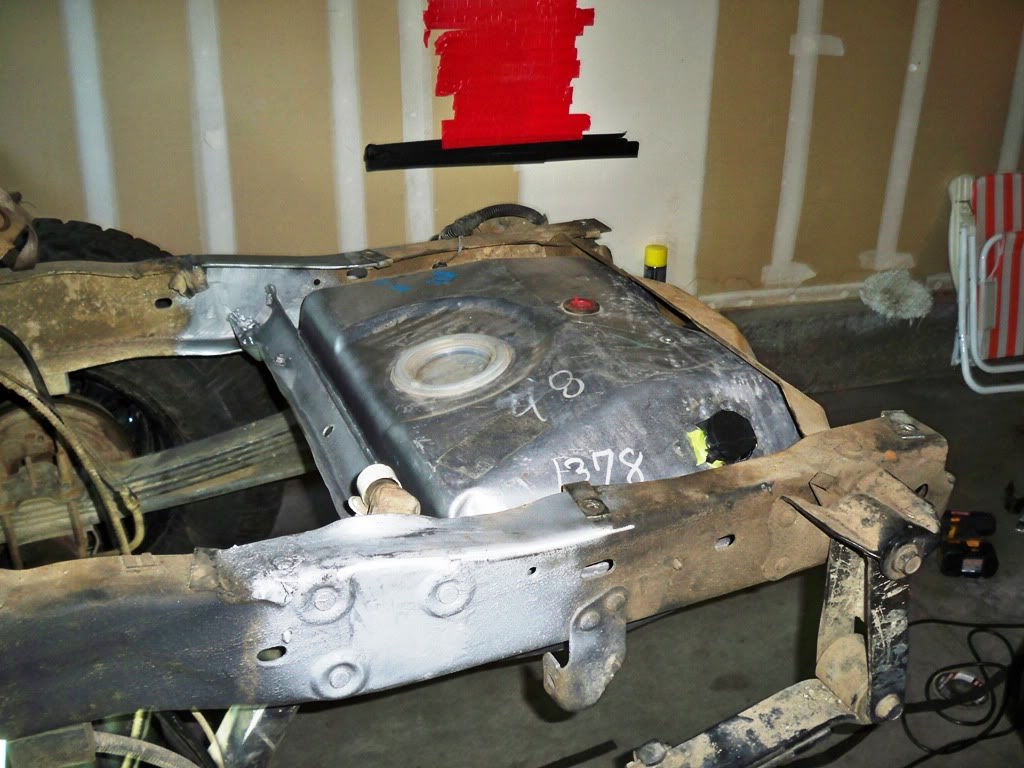
well, worked on the truck yesterday. Got the bed off, then drove it home from the base to get the gas tank mounted.
I took a crossmember from a buddy's F350 that still had the tank straps attached, and cut it down to the size i wanted. Then i set the crossmember in and tacked it in place while i checked to see if i liked the tank position. Looked good to me, so i burned it in place. formed the straps to my tank, then drilled two holes, welded on 2 studs, and bolted the straps down, securing the new tank. I am taking it back to the base today to run the fuel lines and put it back together.
Still no doubler.... I have called Duffy about a bajillion times, and talked to him once. Yesterday. Haven't heard anything since.... This is starting to annoy me...
Last edited by Josh40601; 07-01-2011 at 11:15 AM.
#37
07-01-2011
Join Date: Nov 2008
Location: san jose, Costa Rica
Posts: 1,319
Likes: 0
Received 0 Likes
on
0 Posts
#39
07-02-2011
Join Date: Jun 2011
Location: Kentucky
Posts: 376
Likes: 0
Received 0 Likes
on
0 Posts
Update:
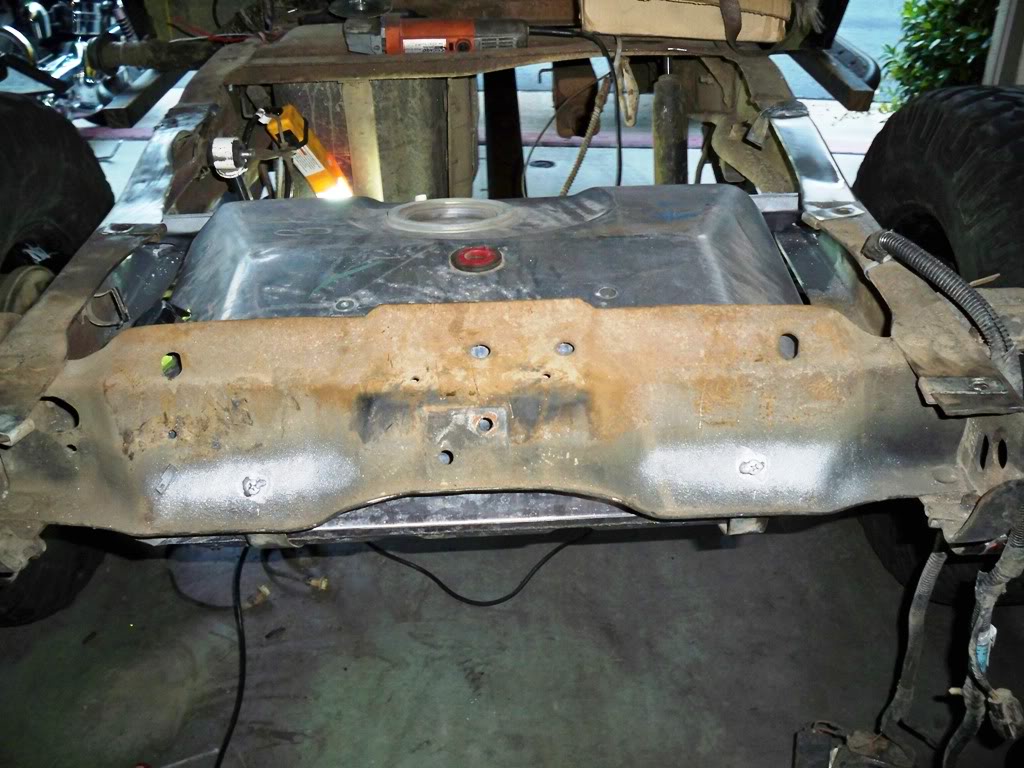
Yesterday, I got the skid plate and old tank out, pulled the pump, then realized something.... It doesn't fit. Its about 3 3/8 inches too tall. Next i decided to go ahead and extend the lines with the stuff i got at the junkyard. They were too short. The evap line was too small for the nylon barbs. The ol lady put padding on the tank straps, afterwards, the tank was a BEAR to get on, but we finally did. We then went to Napa, where they didn't have nylon fuel line, or barbs that would fit the evap line. So they ordered the line from LA, and we put a vacuum barb and 1/4" fuel hose for the evap.
Today, i cut the pump down, put some fuel injection clamps and submursable 5/16" fuel line and put it back together and did a test fit. Fit great. We then got all the parts, and cut the nylon fuel line down to size, and inserted it between the factory line sections i cut. Cut the wires to the pump and sending unit and extended them. Once we got it lined up, time for a test. Fired right up. Let it run for a bit, looking for leaks, everything was good. Checked the fuel gauge, and it was stuck on "F". Something is wrong... Even though, I still put the bed back on and drove the truck back to the house. I still need to cut the bed and install the Jeep filler neck thingy, but i will do that tomorrow.
We found out Pick your Part and Ecology were having their half off sale, so we headed out. After going through 4 yards, there were 3 gen3 rangers. I did find a couple parts though. I got a 130 amp alternator, a relay box for the E-Fans, a working driver seat, and my jeep fillerneck thingy. All for 55 bucks.
#41
07-03-2011
Both Trucks ?
One a ’94 and the other a ’94/‘what ever !
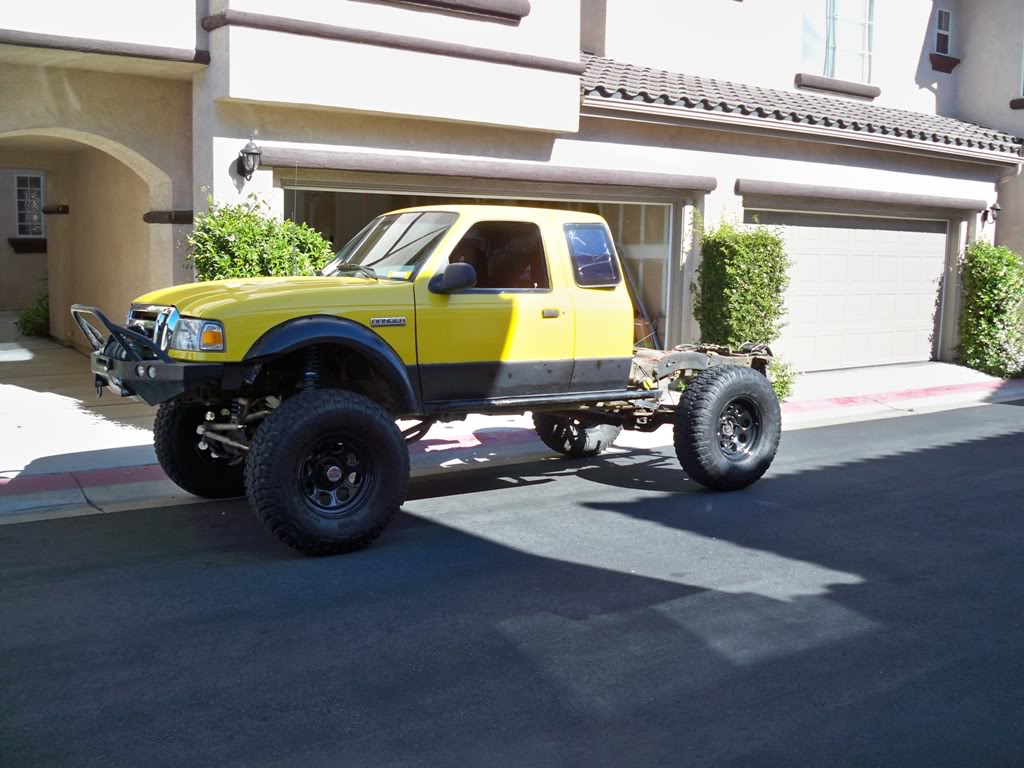
You painted it YELLOW and it looks like a completely different truck, nice work… LoL.
I know people say the nose of the newer trucks will fit the older ones but seeing it done makes it come together.
Ya, you are right on that but I wanted the more rugged setup, still thinking on it; thks !
One a ’94 and the other a ’94/‘what ever !
You painted it YELLOW and it looks like a completely different truck, nice work… LoL.
I know people say the nose of the newer trucks will fit the older ones but seeing it done makes it come together.
Ya, you are right on that but I wanted the more rugged setup, still thinking on it; thks !
#42
07-03-2011
Join Date: Jun 2011
Location: Kentucky
Posts: 376
Likes: 0
Received 0 Likes
on
0 Posts
Both Trucks ?
One a �94 and the other a �94/�what ever !
You painted it YELLOW and it looks like a completely different truck, nice work� LoL.
I know people say the nose of the newer trucks will fit the older ones but seeing it done makes it come together.
Ya, you are right on that but I wanted the more rugged setup, still thinking on it; thks !
#43
07-03-2011
Join Date: Jun 2011
Location: Kentucky
Posts: 376
Likes: 0
Received 0 Likes
on
0 Posts
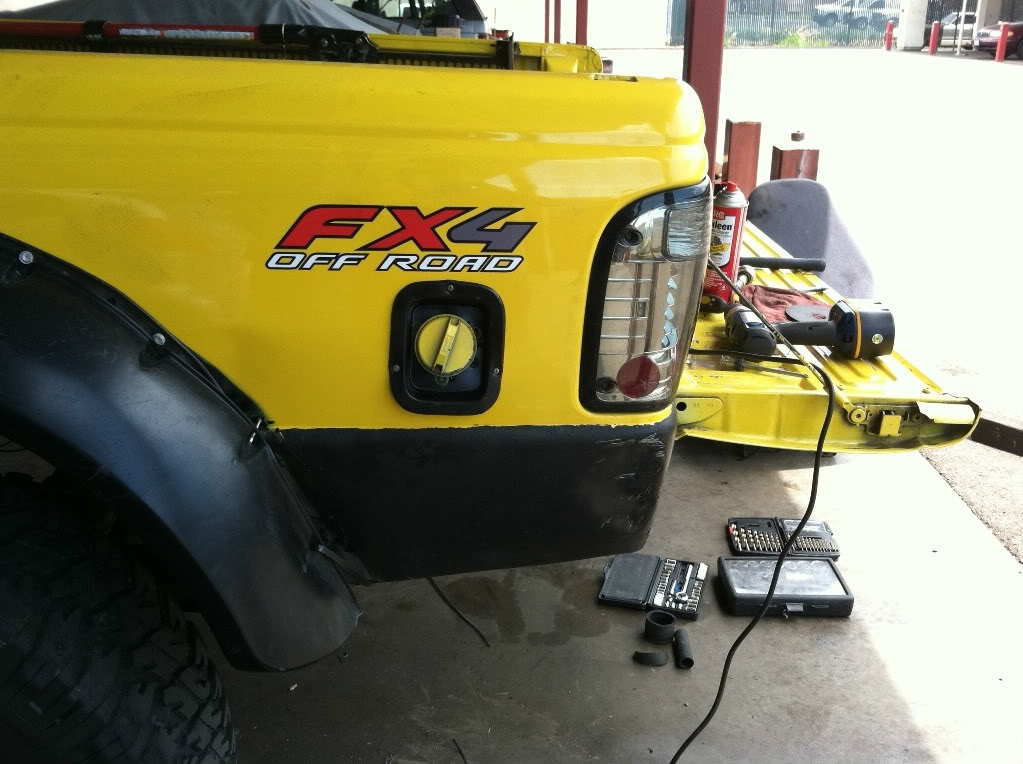
'Nother update!
Finished what i started today. First, I laid out some blue tape where i wanted the hole.

Then i cut a hole in the good side of the bed
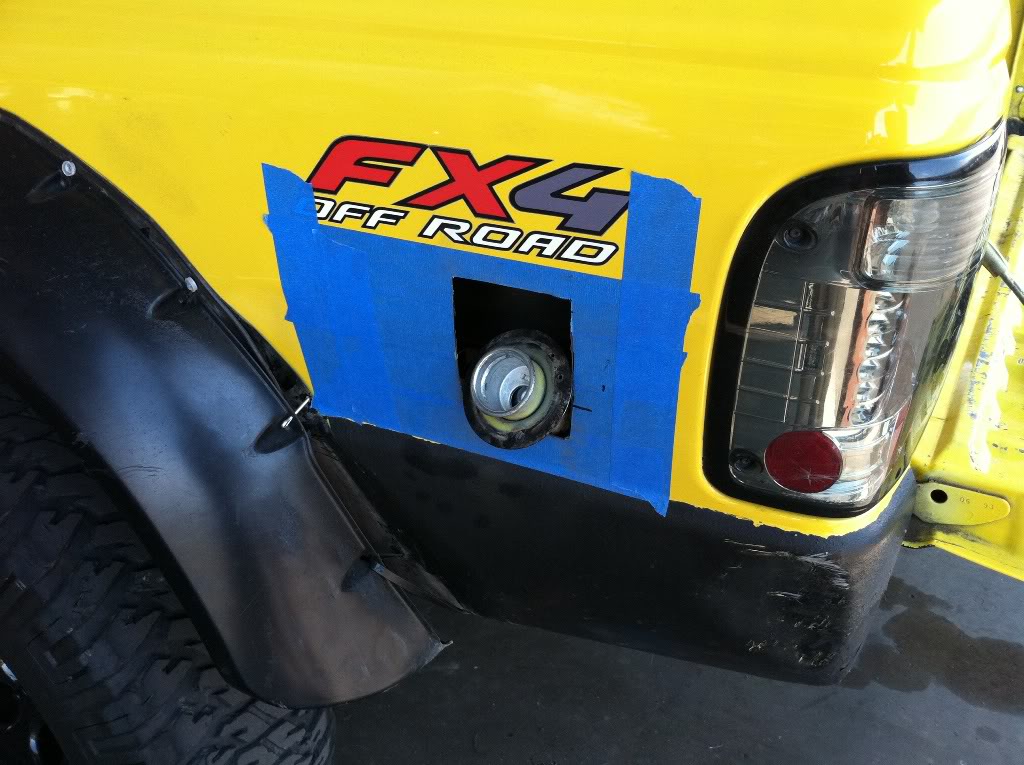
The bed and the filler neck were not getting along, so i cut a chunk out of the bed that i will fill in later. (sometime this week)

Then i drilled my holes, and mounted the new-to-me Jeep Thingy
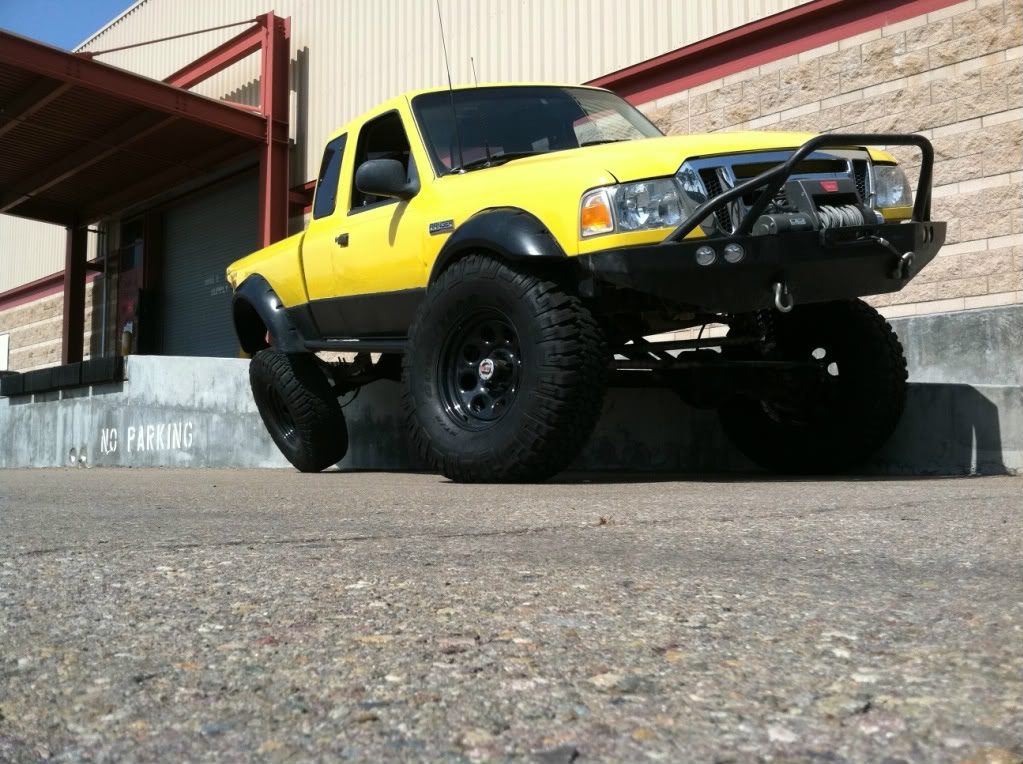
Once i got all the filler neck crap done, I installed my new-to-me driver seat. Next on the list was to install my new coils. I took the old 450 coils off, and put on a set of 200 coils on top, and moved the 300 coils to the bottom. I'm not too happy with the change, as it doesn't seem to flex out any better than before. Maybe it is due to running 2 14" springs? Still not sure, but i am glad it lowered the front end down. A LOT.
Took some loading dock poser shots to see if she flexed any better. Not really any different.
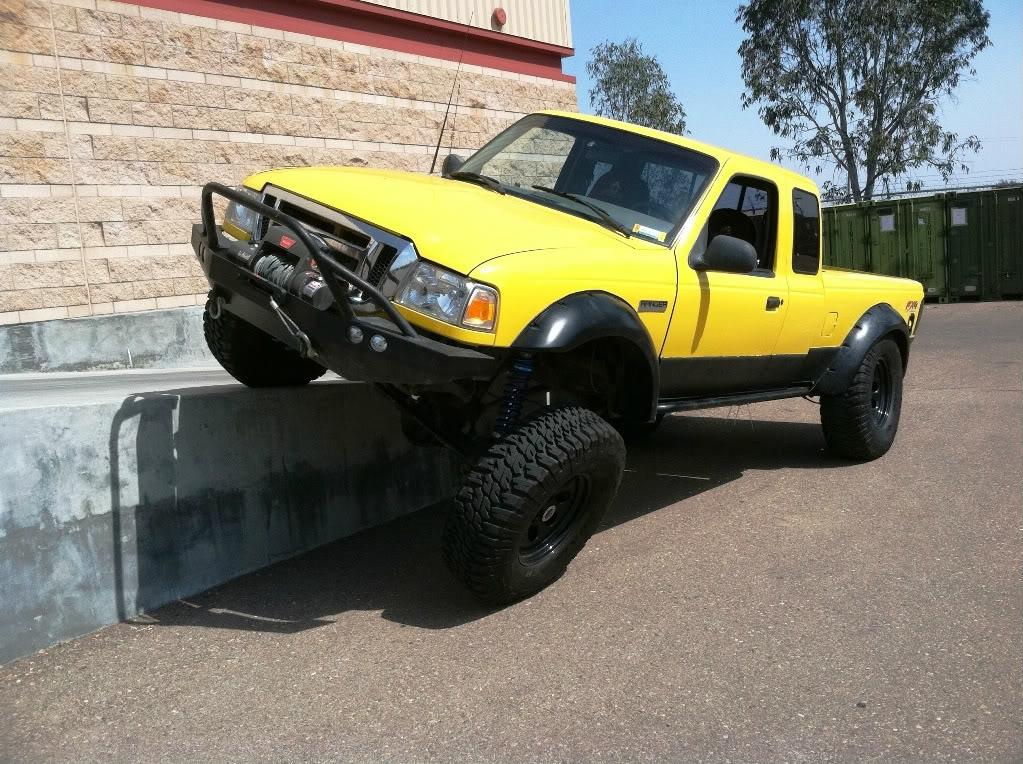
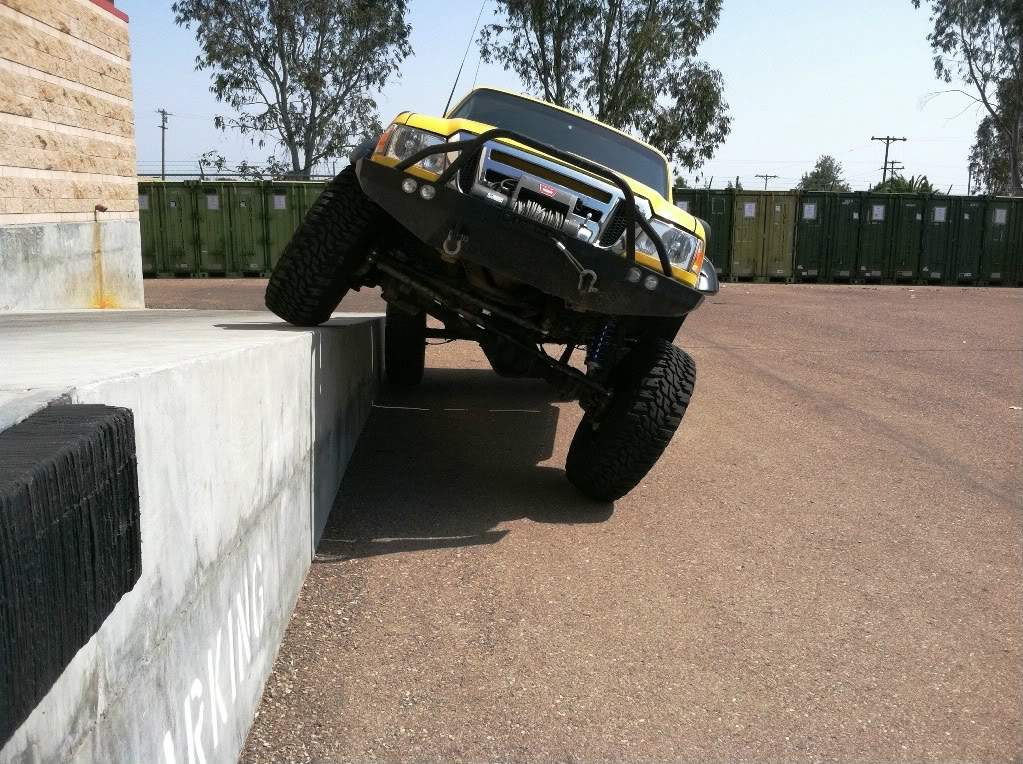
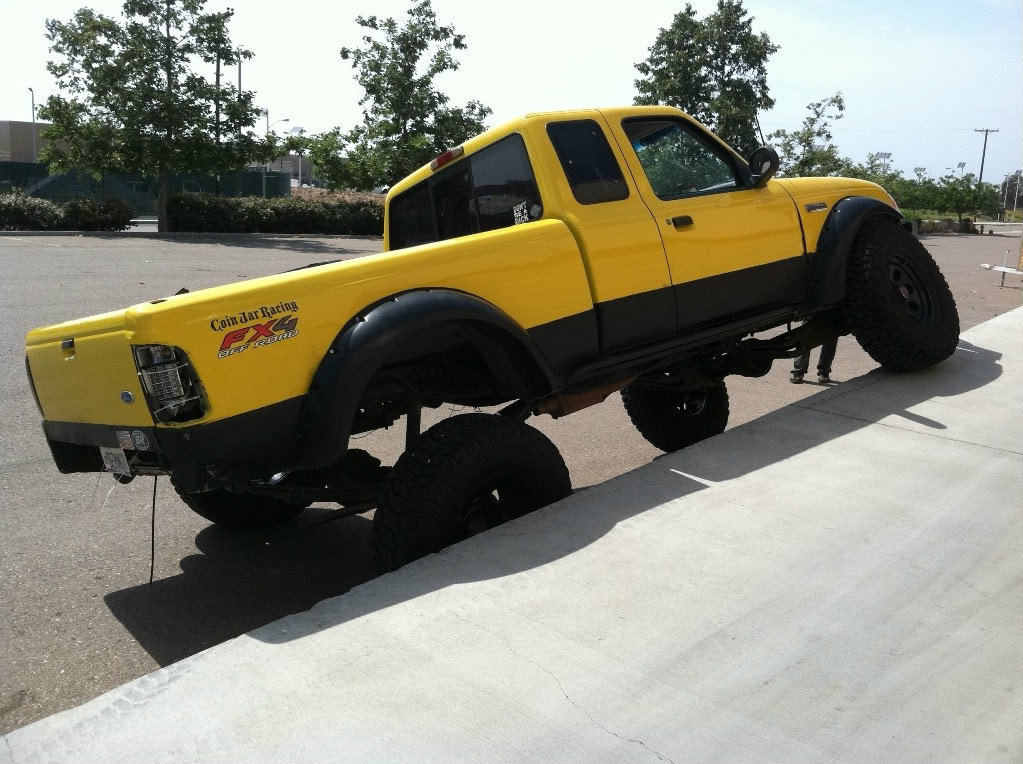
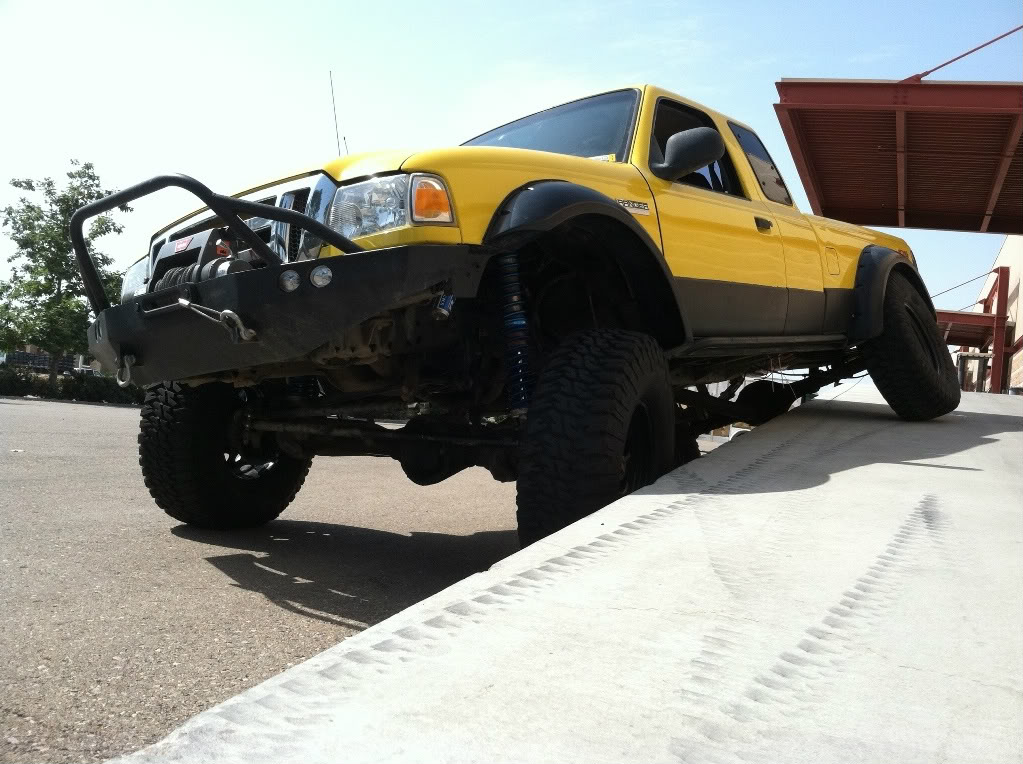
And my favorite shot...
Finished what i started today. First, I laid out some blue tape where i wanted the hole.
Then i cut a hole in the good side of the bed
The bed and the filler neck were not getting along, so i cut a chunk out of the bed that i will fill in later. (sometime this week)
Then i drilled my holes, and mounted the new-to-me Jeep Thingy
Once i got all the filler neck crap done, I installed my new-to-me driver seat. Next on the list was to install my new coils. I took the old 450 coils off, and put on a set of 200 coils on top, and moved the 300 coils to the bottom. I'm not too happy with the change, as it doesn't seem to flex out any better than before. Maybe it is due to running 2 14" springs? Still not sure, but i am glad it lowered the front end down. A LOT.
Took some loading dock poser shots to see if she flexed any better. Not really any different.
And my favorite shot...

#46
07-03-2011
Join Date: Jun 2011
Location: Kentucky
Posts: 376
Likes: 0
Received 0 Likes
on
0 Posts
#47
07-03-2011
haha i think you mixed me up with sniper. I can probably get it shipped to ya for 10-12 bucks depending on the method. maybe cheaper if you dont care to not have the box or strange metal rod that was in the box for some reason. comes with a gasket and rivets though too. i'll look into shipping.
#49
07-05-2011
Join Date: Jun 2011
Location: Kentucky
Posts: 376
Likes: 0
Received 0 Likes
on
0 Posts


