
A Pillar speaker pod build.

Joined: Jun 2010
Posts: 296
Likes: 0
From: Daytona Beach, Florida
A Pillar speaker pod build.
So, my speakers finally came in, though I dont typically really go for this type of look, these are for sure going to stand out, but I'm confident I can make it look ok,and absolutely refuse to ever..ever.. use those "super tweeters" in my vehicles so this is what came to mind, in advance, I'm going to do all of the prep/mock up over the next few days up to the point of being ready to reinforce with fiberglass, but wait until the weekend of the 1st to start actually glassing as a friend wants to get some hands on and it's a perfect small project to get familiar with the materials.
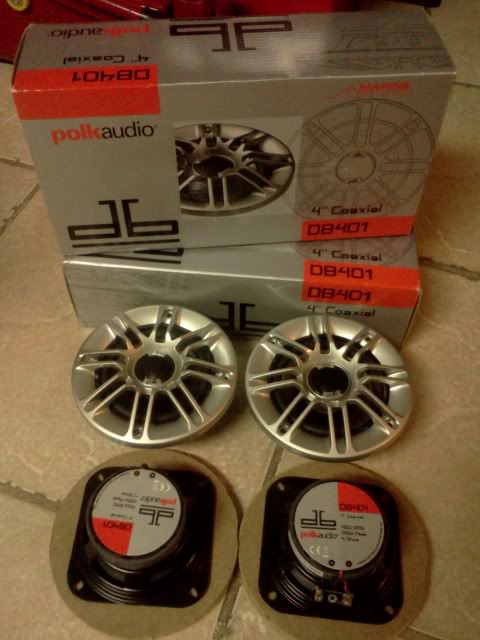
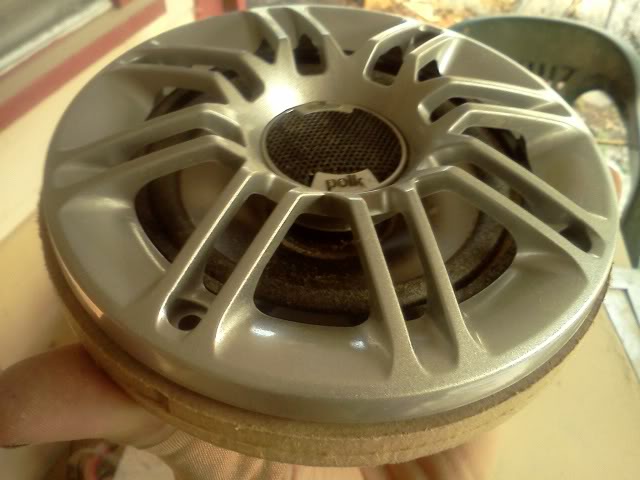
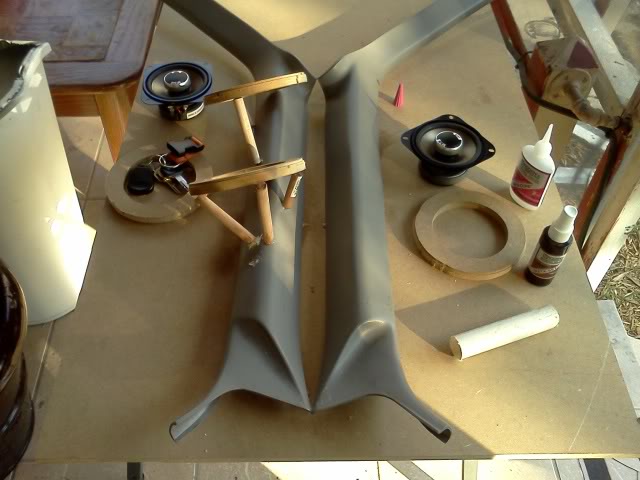
Anyway, the speakers I chose are [4] Polk DB401 4" coaxials, I already have replaced my interior speakers with Polk DB571's 5x7'" coaxials, I love them, they sound great, but even amplified the level of volume I'm looking for just isnt quite there, for the time being I'm using an Arc Audio FD4150 4 Channel until I get ready to order Polks PA1100.5 that I have my eye on to power all of the interior speakers as well as the 2 JL 10W1's I have ready and waiting.
Anyway..
Just for those who like to see a project from start to finish, for all intensive purposes I'll be posting somewhat of a step by step to make everything as clear as possible for everyone who views.
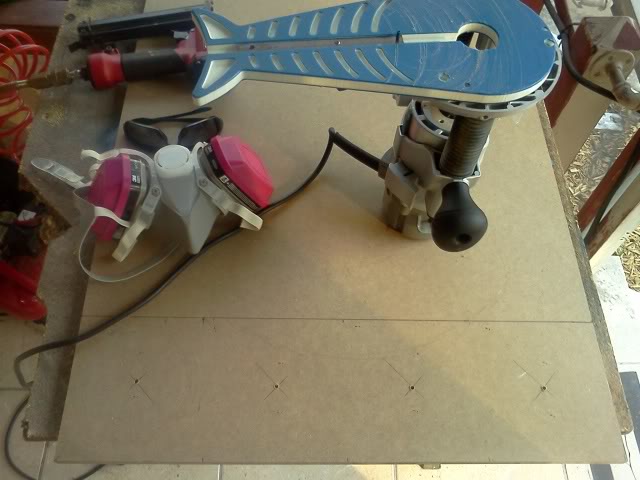
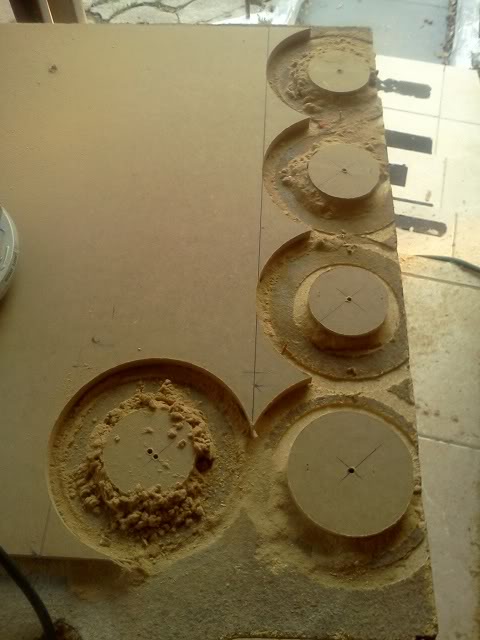
Tools I used are, a run of the mill Craftsmen plunge router with a circle jig, drill, trim router, drill/router bits obviously, brad nailer and small compressor.
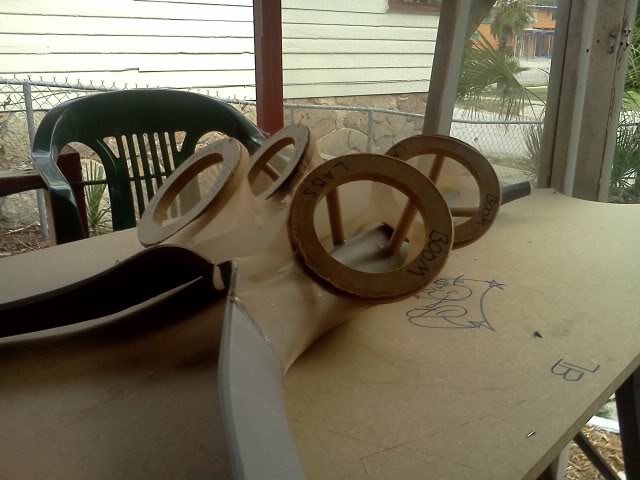
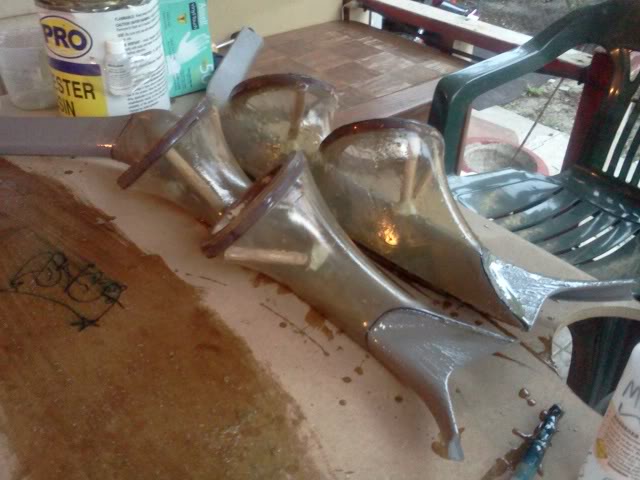
First things first, I measured the inner and outer measurements of my speakers with 2 T squares so I can set my router accordingly, marked my centers to drill for my router pivot point.
I always check my fitment after the first cut just to make sure its correct before i waste time and materials, which ..does happen lol.
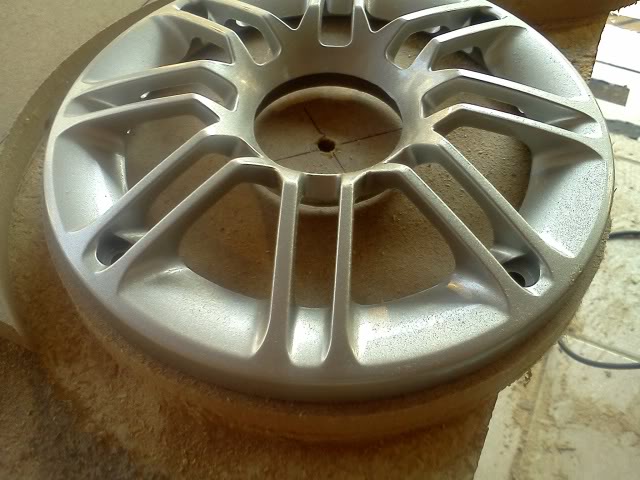
..rushing, I accidentally set my jig wrong hence the 5th cut
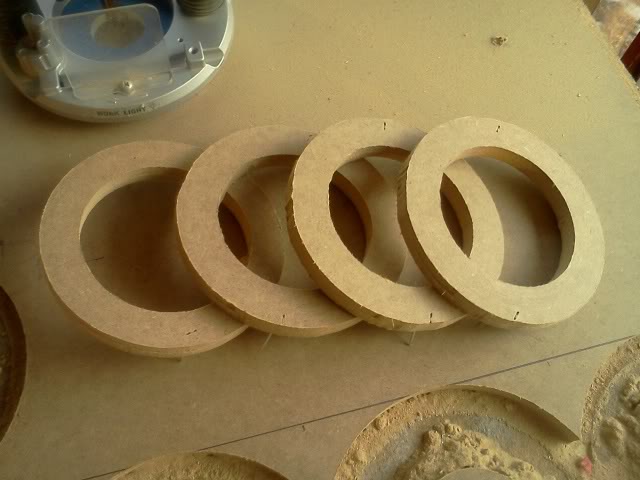
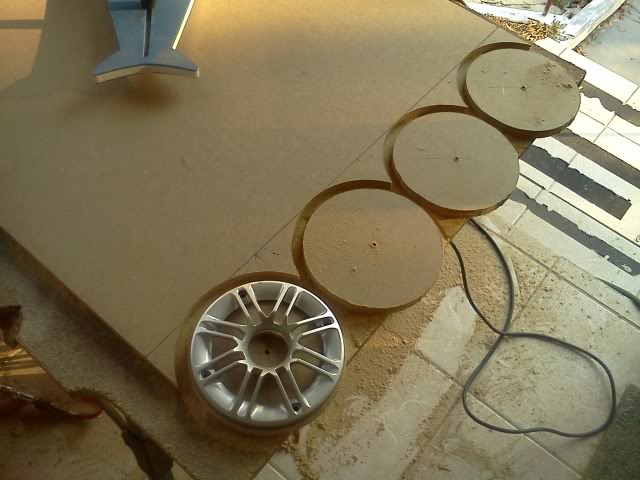
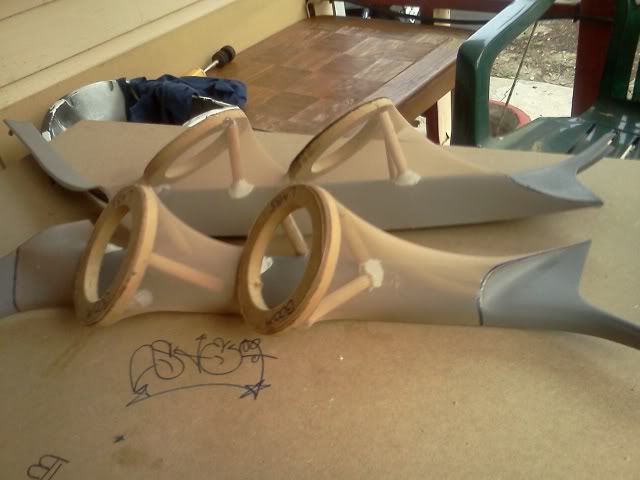
The reason for the nailer is just to tack down my rings to keep them from drifting and making a weird cut, before I cut my rings out, I usually add about 2mm on the outer edge to compensate for the notch I add to create a staple channel to flush up my material, but I tack the rings down again and run the trim router around the edges with a bit that can be set to just cut a small notch around the edge to have a space to tuck my material into when stapling down to create my pod shapes, makes everything look much better and saves a lot of time as opposed to just wrapping over the top of the entire ring cutout.
This is my trim router, I think it was like 15 bucks or so at Harbor Freight, cutting out the end allows a full size router bit and is basically just a dremil on steroids.
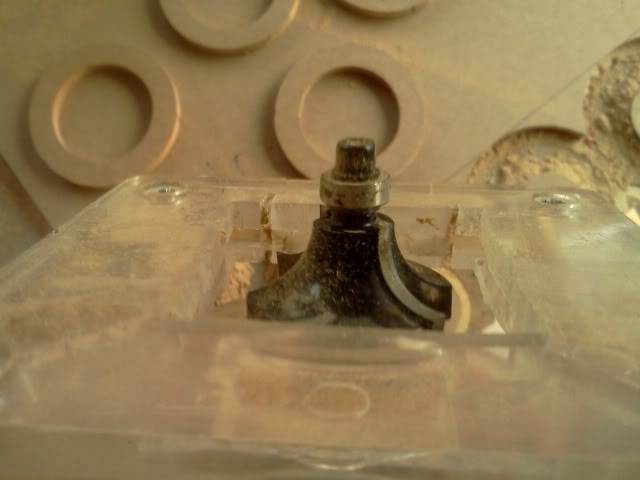
I've always called this a "rabbiting" bit, not sure if thats the correct term or not.. but its what i use to trim my edge.
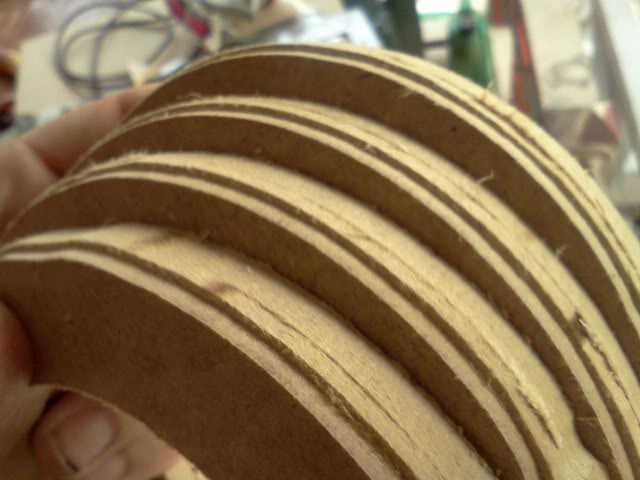
As you can see, the extra time measuring and accounting for the material thickness saves a lot of time later on.
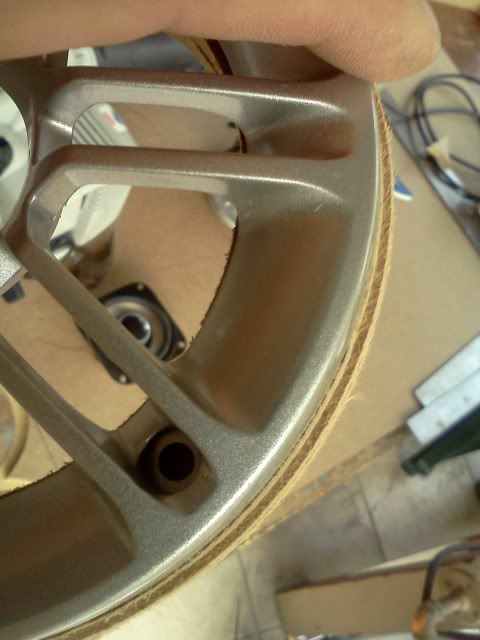
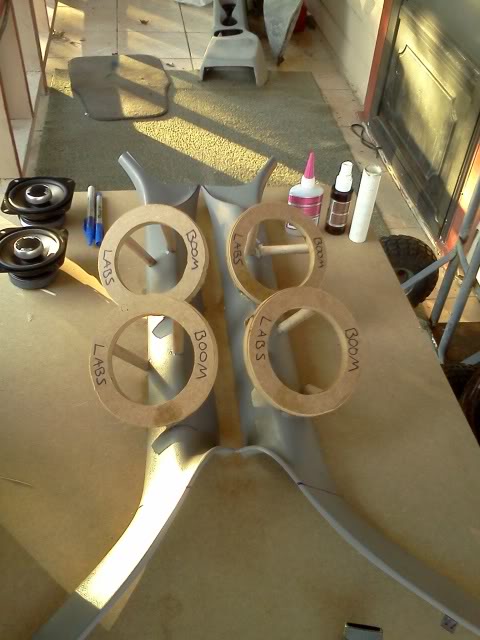
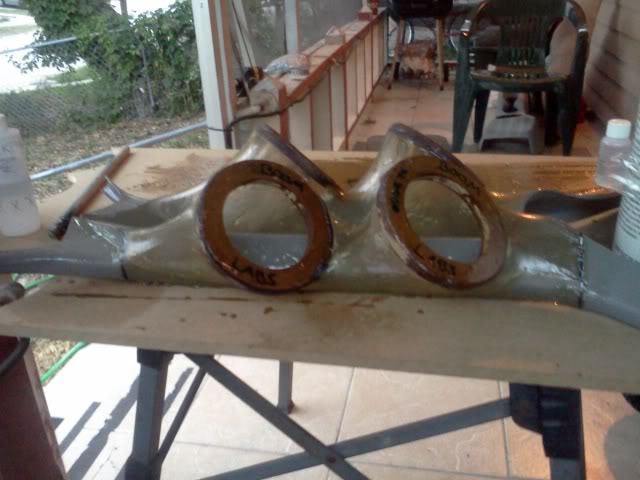
Just getting a better idea as to how they will mock up, the idea is to mount one as pictured and one above it, and mirror on the other side.

Anyway, the speakers I chose are [4] Polk DB401 4" coaxials, I already have replaced my interior speakers with Polk DB571's 5x7'" coaxials, I love them, they sound great, but even amplified the level of volume I'm looking for just isnt quite there, for the time being I'm using an Arc Audio FD4150 4 Channel until I get ready to order Polks PA1100.5 that I have my eye on to power all of the interior speakers as well as the 2 JL 10W1's I have ready and waiting.
Anyway..
Just for those who like to see a project from start to finish, for all intensive purposes I'll be posting somewhat of a step by step to make everything as clear as possible for everyone who views.
Tools I used are, a run of the mill Craftsmen plunge router with a circle jig, drill, trim router, drill/router bits obviously, brad nailer and small compressor.
First things first, I measured the inner and outer measurements of my speakers with 2 T squares so I can set my router accordingly, marked my centers to drill for my router pivot point.
I always check my fitment after the first cut just to make sure its correct before i waste time and materials, which ..does happen lol.
..rushing, I accidentally set my jig wrong hence the 5th cut
The reason for the nailer is just to tack down my rings to keep them from drifting and making a weird cut, before I cut my rings out, I usually add about 2mm on the outer edge to compensate for the notch I add to create a staple channel to flush up my material, but I tack the rings down again and run the trim router around the edges with a bit that can be set to just cut a small notch around the edge to have a space to tuck my material into when stapling down to create my pod shapes, makes everything look much better and saves a lot of time as opposed to just wrapping over the top of the entire ring cutout.
This is my trim router, I think it was like 15 bucks or so at Harbor Freight, cutting out the end allows a full size router bit and is basically just a dremil on steroids.
I've always called this a "rabbiting" bit, not sure if thats the correct term or not.. but its what i use to trim my edge.
As you can see, the extra time measuring and accounting for the material thickness saves a lot of time later on.
Just getting a better idea as to how they will mock up, the idea is to mount one as pictured and one above it, and mirror on the other side.
Last edited by edge2k; Jun 20, 2011 at 10:20 PM.


Joined: Jun 2010
Posts: 296
Likes: 0
From: Daytona Beach, Florida
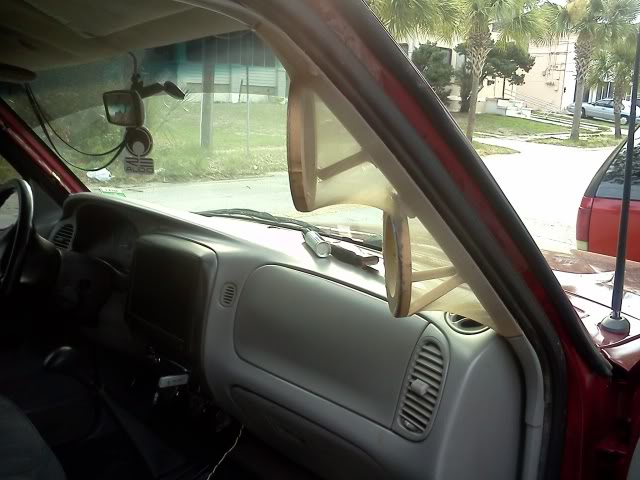
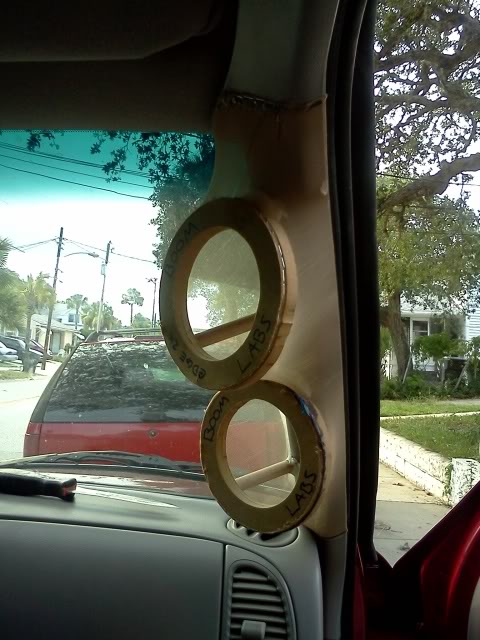
Today I was able to fit, mount and secure my rings to the pillars, I was having a little trouble with the limitations of the tshirt material I was using to stretch over them, I may need to find something a little more stretchable or go the urethane foam route since the rings sit so close together, but that will get sorted out when it gets to that point.
I use CA glue [Cyanoacrylate] since it hardens seriously fast and bonds to almost anything to hold my rings in place while i adjusted them and got them as even as possible by eye before i secured them permanently, i used a 3/4" wooden dowel cut up into pieces to prop up the rings while getting them where i wanted them.
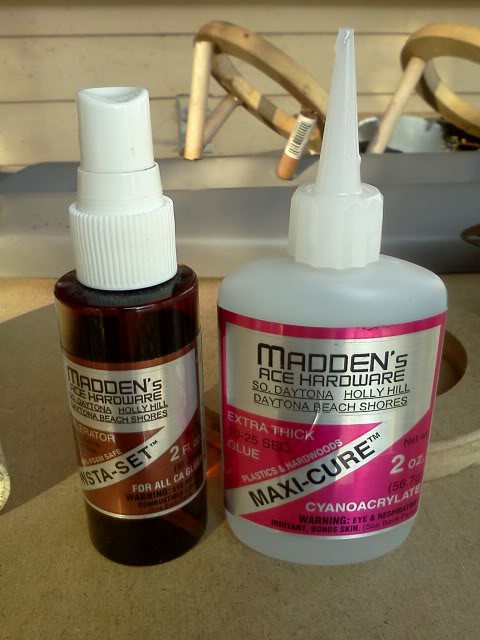


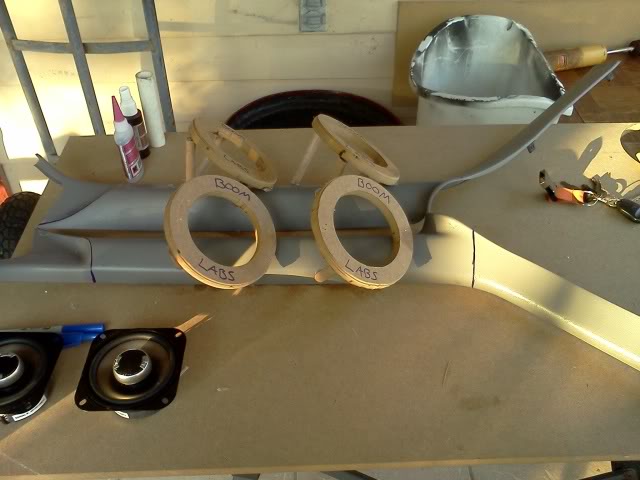
I use CA glue [Cyanoacrylate] since it hardens seriously fast and bonds to almost anything to hold my rings in place while i adjusted them and got them as even as possible by eye before i secured them permanently, i used a 3/4" wooden dowel cut up into pieces to prop up the rings while getting them where i wanted them.
Last edited by edge2k; Jun 23, 2011 at 06:36 PM.
Joined: Jun 2010
Posts: 296
Likes: 0
From: Daytona Beach, Florida
Made a little progress today, had to scrap using a cotton tshirt to make my shape, the limited stretch it had left to much bunched up fabric in the tight areas, fortunally I was able to find some pantyhose and it worked out perfect, wasnt able to staple it down like i typically would since it tears so easily, but running a bead of glue around the edges as i worked down the panel works just as good.
The polyester resin I prefer is from a marine supply store here locally, its cheaper then the bondo resin at home depot/auto zone etc and has a much better wet out, i typically mix about 10-12cc's of hardener to 12oz of resin, and use acetone to clean my brush after so I dont have to buy 1000 brushed to get me through a project.
Anyway.
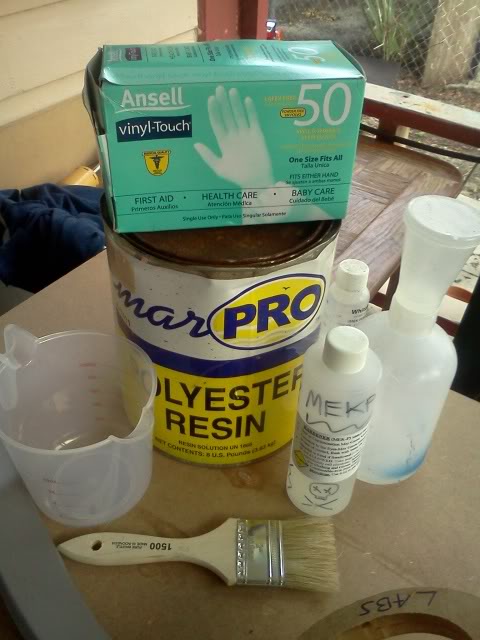


Joined: Jun 2010
Posts: 296
Likes: 0
From: Daytona Beach, Florida
This is the first time I've actually used pantyhose for this personally the only downside is its veeeery brittle with just a coat of resin over it being so thin and all, which i already cracked in one spot lol but isnt anything thats going to ruin anything, but the pantyhose is essentially the same as using grille cloth, spandex, lycra or other thin super stretchy materials, the nice part is that you can get it at the dollar store though, despite looking like total tranny, would be worth the price tag in my opinion.
Joined: Jun 2010
Posts: 296
Likes: 0
From: Daytona Beach, Florida
Sorry for the lack of updates, I recently lost my job so time isnt exactly hard to come by, but ive had to watch my finances and keep things down on the splurge department, anyway.. i decided to scrounge up the last of my materials today, make a litle more progress, ive gotten some big jobs lined up for people so i can keep adding a little here and there anyway.
Ive gotten the last layer of fiberglass on one pod this morning, waiting right now for the resin to cure before putting the last layer on the other pod, in between I got to looking, I found some flexible led strips left over from another project, got to thinking, it would add a little extra if I illuminated my speaker grilles, so I trimmed them down to 6 leds, wrapped them around the tweeter and tacked a few CA glue spots to secure it, fits awesome! Tested them out with a 12v power supply and I dig it, and I think im gonna do it to all 4.
Feedback always appreciated, good or bad, it just helps keep the creativity flowing.
What made you decide to mount all this in the a pillars and not in the door panel? And you do realize the speaker cone is probably going to bump into those stupid led strips as they play, right? The speaker rings look good
Joined: Jun 2010
Posts: 296
Likes: 0
From: Daytona Beach, Florida
I decided to mount these in my a pillars simply because I wanted to mount these speakers in my a pillars.. the fact that I havent seen anyone else do it slightly contributed to the reason as well but overall it was for exactly the same reason why I molded a netbook into my dash, it's sort of a 4 step process usually taking place in this order.
1 - The opportunity presents itself
2 - I felt like it
3 - Generally have not seen it before
4 - Doing it
Occasionally there is a step between 2-3 usually consisting of a snack or gaming break, but in this instance, I've stuck to the formal 4 steps required for this project.
To ease your concern, you do realize I obviously checked for clearance taking into consideration the cone travel at full excursion before mounting my stupid led strips, right? ;]
Member

Joined: Mar 2011
Posts: 844
Likes: 0
From: Pennsylvania
I love the idea, its good outside the box thinking. Only thing id bring up is wont they be distracting while driving? I know I got triple gauges in my one truck on the pillar and it draws your eyes badly. Other than that though id do this in a heartbeat had I the skill
Joined: Jun 2010
Posts: 296
Likes: 0
From: Daytona Beach, Florida
Thank you sir, yeah it will probably distracting as all could be but I'm just going to play that one by ear, I think the lighting would be the biggest distraction at night but, I may just put them on a switch somewhere hidden or something to that degree if it comes down to it, but at least for me i rarely drive this truck as it is, especially at night, im usually in my chevy or on my bike but I am thinking of just adding a lot more leds into the cab, just for fun, like under the dash, seats, dome light and pretty much where ever I can mount some, I dont really plan to keep this truck much longer to be honest, I really am just in the mood for a cadillac or a towncar at the moment, but we'll see where that leads.
Joined: Jun 2010
Posts: 296
Likes: 0
From: Daytona Beach, Florida
So, got the itch aaaaaaand found this flasher from an old police light, tested it out with the grille lights and I'm definately going to put this in the truck on a 2 way switch to have them either constantly on or flashing depending on my mood, check the video to see how they flash, yes.. i know one of the strips flaked out on me and half isnt lit up, i need to back and fix that and plan to do so, probably tomorrow after a heavy night of xbox usage.

Joined: Jun 2010
Posts: 296
Likes: 0
From: Daytona Beach, Florida
Forgot to post these yesterday,


Unfortunately I need to go back, get some more resin, and actually put a layer of fiberglass down along the back flexible part of the pillars, its to pliable and the resin /filler just isnt enough and it separates and down the road, Im sure it will crack so, would rather take a little longer to do it right then rush to get them in by the weekend incomplete.
Unfortunately I need to go back, get some more resin, and actually put a layer of fiberglass down along the back flexible part of the pillars, its to pliable and the resin /filler just isnt enough and it separates and down the road, Im sure it will crack so, would rather take a little longer to do it right then rush to get them in by the weekend incomplete.
Joined: Jun 2010
Posts: 296
Likes: 0
From: Daytona Beach, Florida
I just have more spare time without the 9-5 lol so, depending on my strictly commission income on installs at "American Audio - Located in sunny South Daytona Beach, Florida, a trusted name in mobile electronics ;]" hint hint.. will determine what I can do piece by piece, I'm actually thinking of ditching the molded 10's in the seat cavities idea I originally had and getting some explorer buckets and building a little styled center console, downfiring and ported if space permits, with some REAL cup holders naturally, and using the spare space in the back to maybe mount my equipment or something, or just make some flush panels to hide mass loads of electronics lol, either way, it has been nice to have some time to be creative, it's been a while.

Thread
Thread Starter
Forum
Replies
Last Post
Maggied6.0Ranger
OLD - Interior, Exterior, Electrical, & Misc.
6
Jan 11, 2014 06:13 PM
For Sale: Painted Pillar Pod WITH Gauges! - WA
Oh2Ranger
OLD - Interior, Exterior, Electrical, & Misc.
15
Jul 18, 2010 02:24 PM


