How-To: Adding Tilt Steering Column w/ New Clockspring (from Explorer)
#1
 11-30-2010


How-To: Adding Tilt Steering Column w/ New Clockspring (from Explorer)
So I picked up a tilt steering column with cruise control clock spring from a 1998 Explorer Sport. Just to let you guys know the Explorer tilt column is a DIRECT BOLT ON, at least for my 2000(I don't know if this has been addressed). The clock spring from the 1998 explorer connects fine except on both ends of the wires you may or may not have to change out the harness connectors for the air bag, the two wire connectors( I had to). Just push out the red plug out of the harnesses and pry the itty bitty tabs that hold the terminals in place and install them into the other connectors and replace the plugs. The connectors look the same but one has "fins" that wont let you slide an old connector in. My ranger connector is brown and the explorers are black.
BTW turns out the only difference between a tilt and non tilt steering column is like 2 springs, a lever and the latches for the tilt setting. The metal of the columns is exactly the same, which makes since because it cuts down on cost for Ford to make them this way. I still say its probably easier to just switch out the columns than to change these parts out.
How TO:
1. First disconnect your ground cable to your batter, very important you don't want the air bag going off in your face.
Also MAKE SURE YOUR WHEELS ARE STRAIGHT AND YOUR WHEEL IS LOCKED IN THE CENTER, makes this much easier.
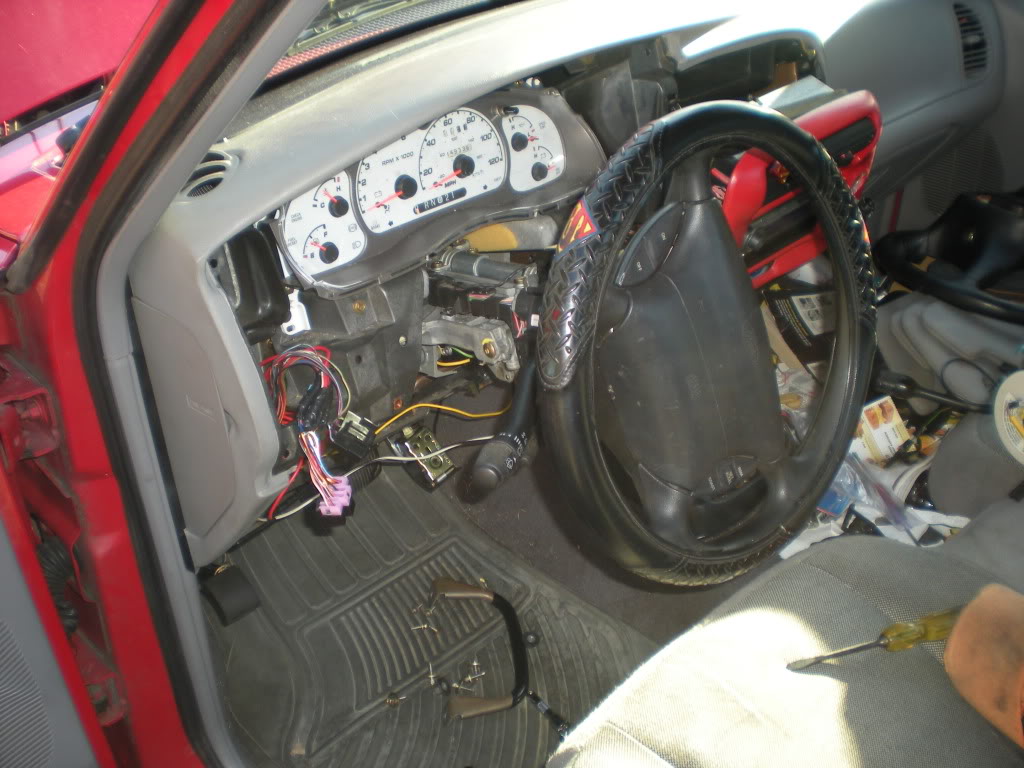
2. Remove the bottom dash cover and the metal dash cover under the steering column.
For the plastic piece: (4) 7mm bolts (2 on hood release, 2 more on bottom edge)
For the metal: (5) 8mm bolts.
3. Slide out your radio bezel. You don't need to take this out all the way, just about 2 inches out. (2) 7 mm bolts
4. Take out the "main" dash by removing (3) 7 mm bolts above the cluster and (2) 7mm at the bottom edge and also your headlight ****.
Also disconnect the harnesses to the dimmer switch and headlight switch.
Remove steering column shroud pieces by unscrewing (3) phillips screws from bottom of shroud.
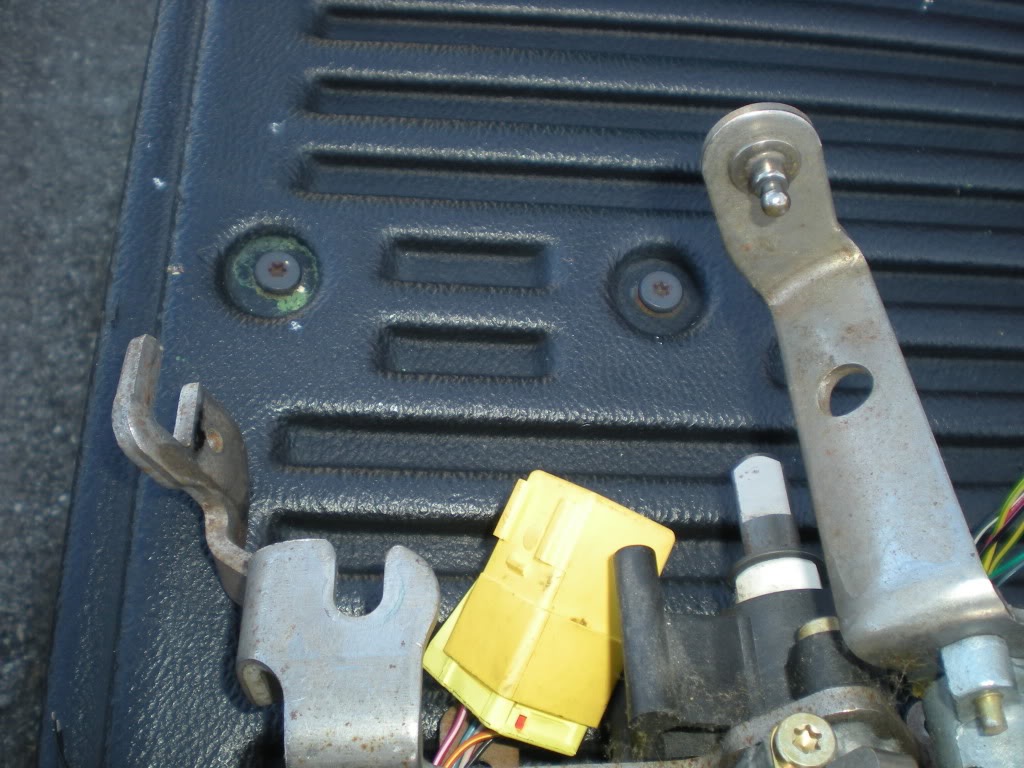
5. For Automatics unhook the shift indicator wire/cable and unscrew the bolt holding the tiny white plastic bracket underneath the column.

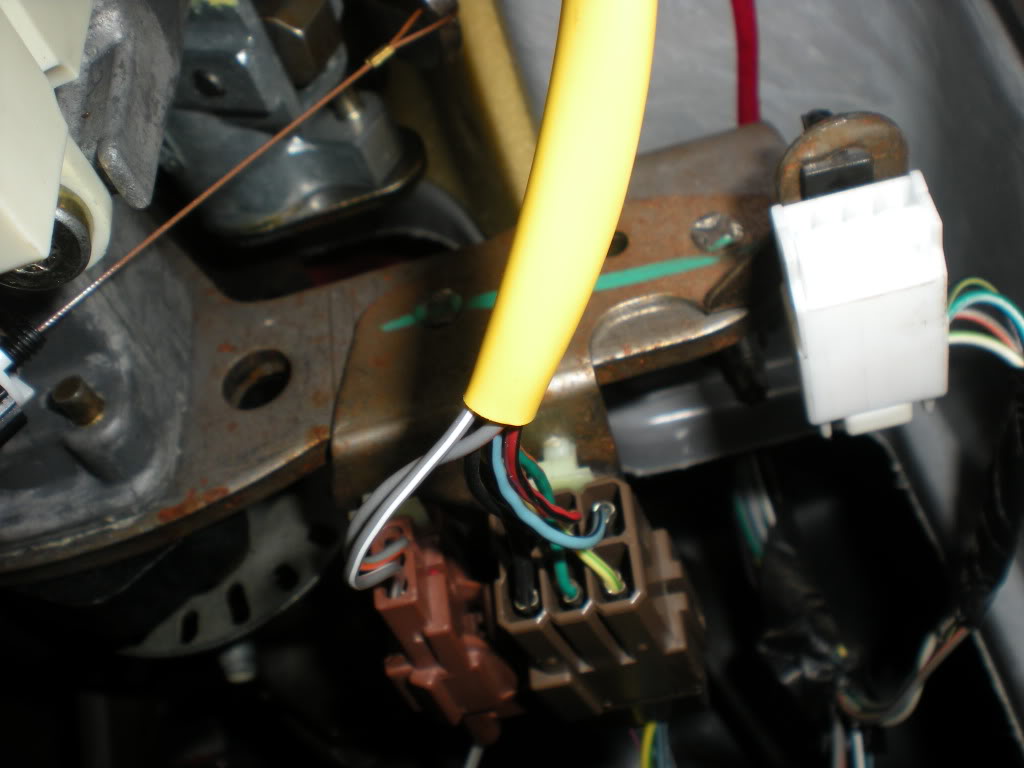
6. Disconnect all the wiring connectors at the bottom of the steering column.
These include: ignition switch (under steering column in the middle, has plastic cover over it, bolt through the middle, 7mm I think)
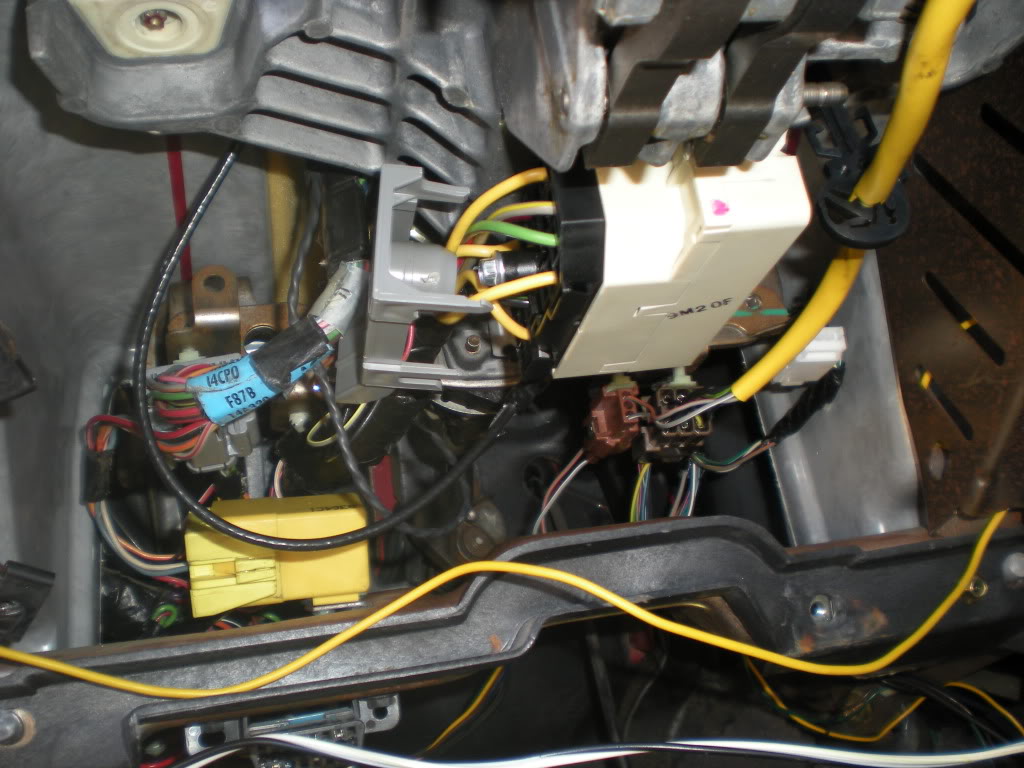
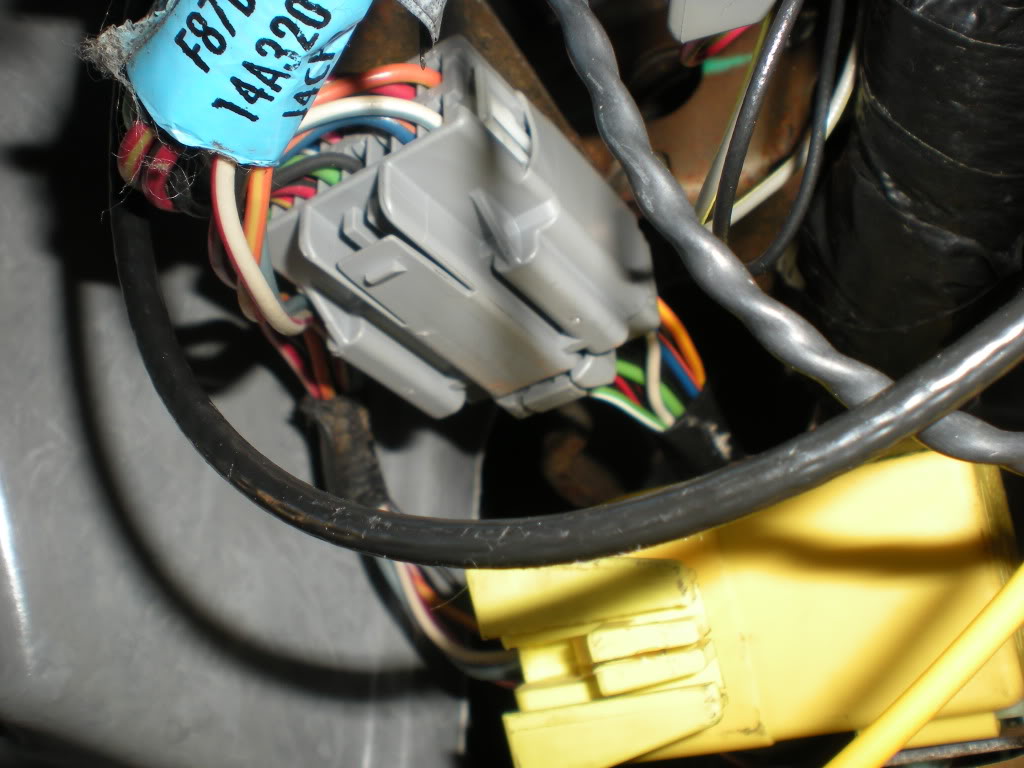
multifunction switch (gray connector on the far left)
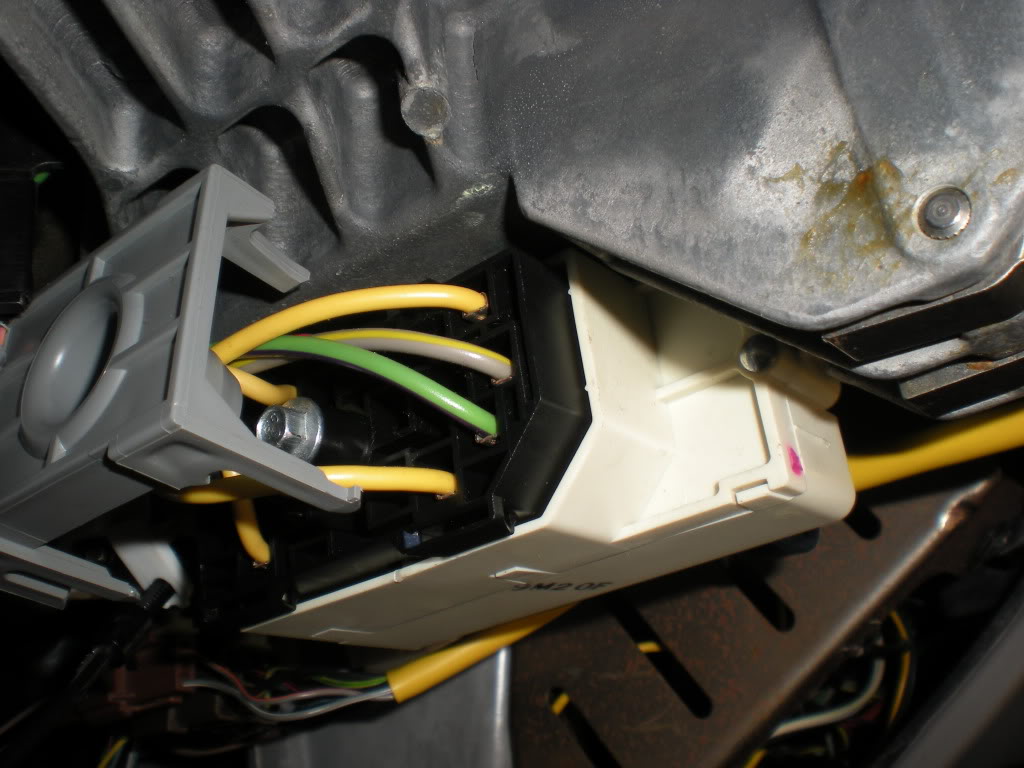
flasher relay (bright yellow box, you can just slide the hole box to the left and remove it, may make it easier in the long run)
for Automatics: O/D button wiring (small two wire connector, on the side of the ignition switch bundle)
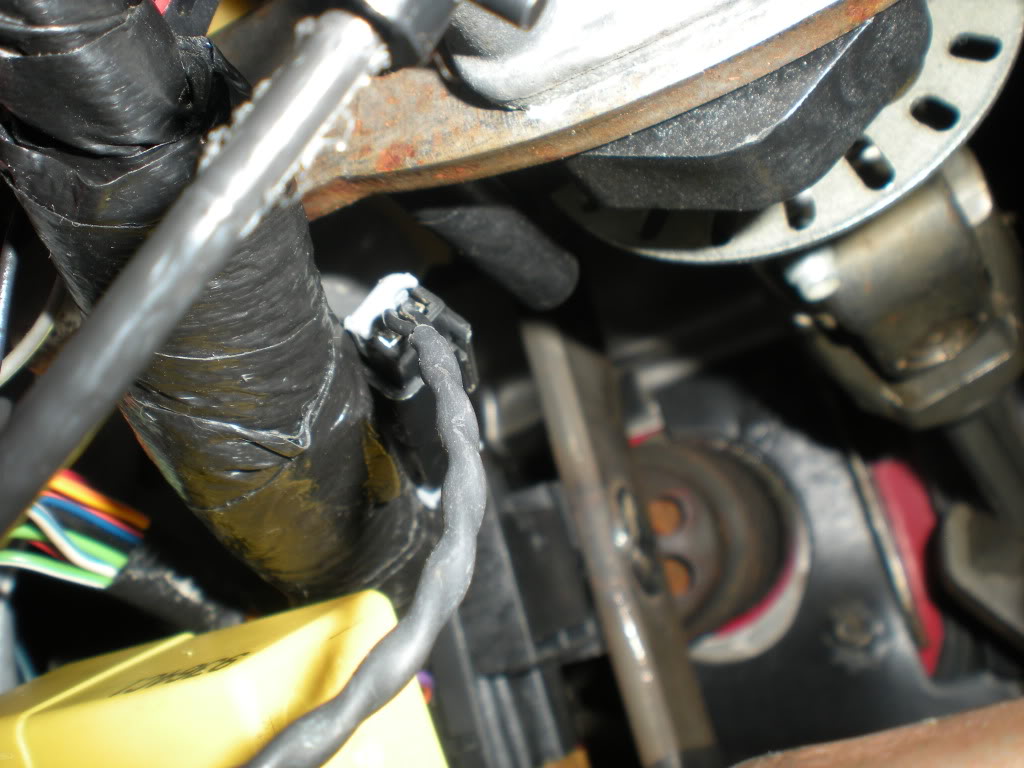
Clock spring wiring: on the right side at the bottom a 6 wire brown connector and a two wire connector (brown or black)
PATS: white connector on far right ( mine doesn't have PATS so it has a plug in the connector.
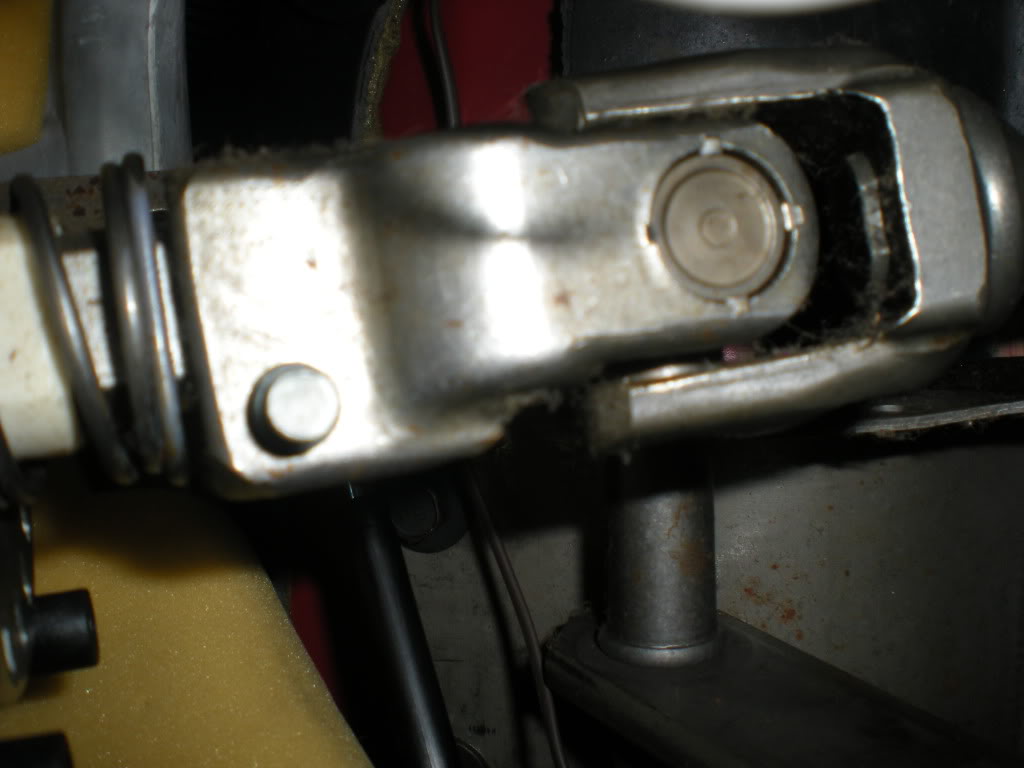
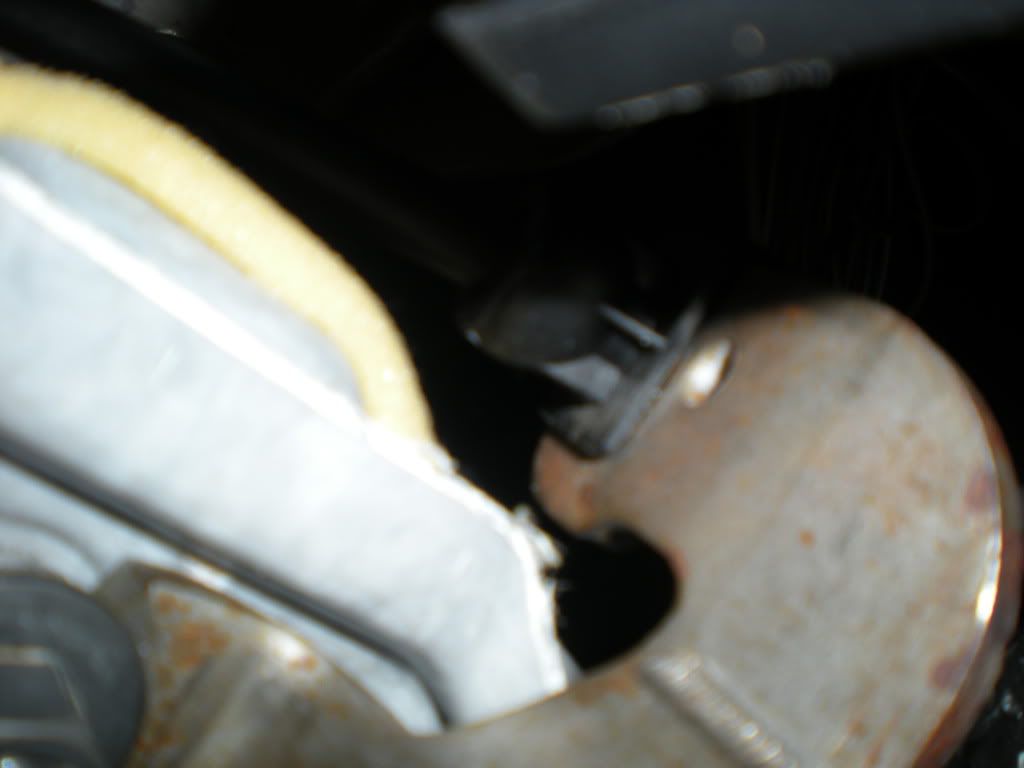
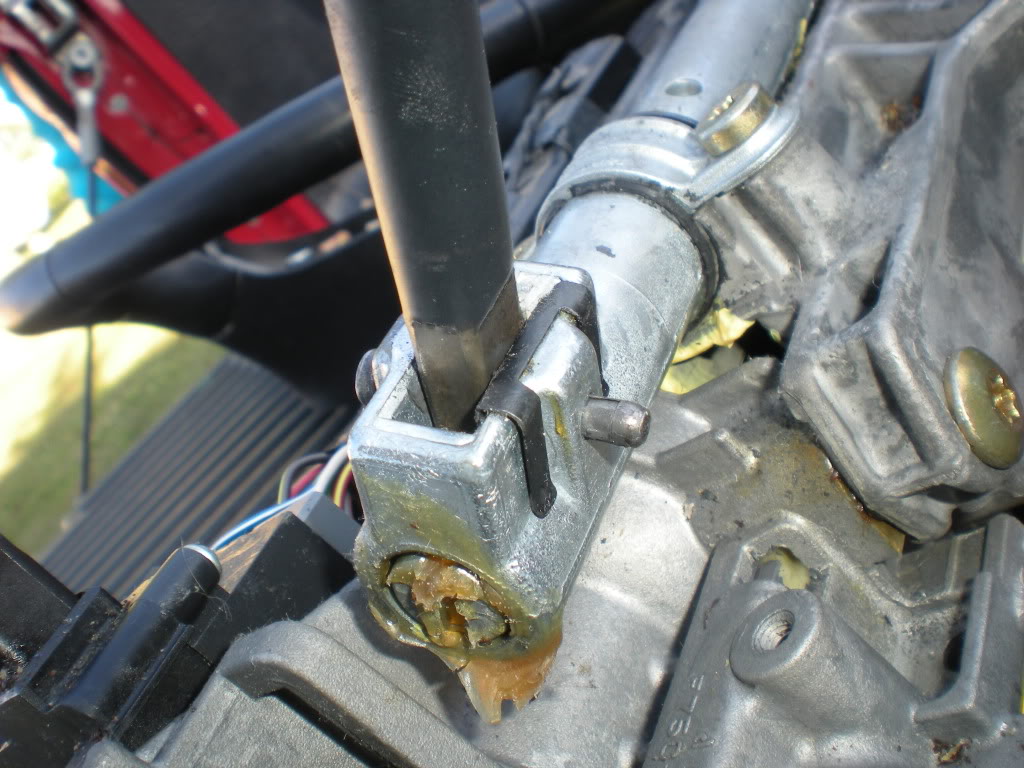
7. Unbolt the universal joint from the end of the column at the bottom. (forgot bolt size)
8. Unbolt the (4) 9/16 (not really 9/16 but I only have standard deep sockets, 9/16 will work). That hold the main part of the column in place.
2 bolt in the front, 2 in the rear.

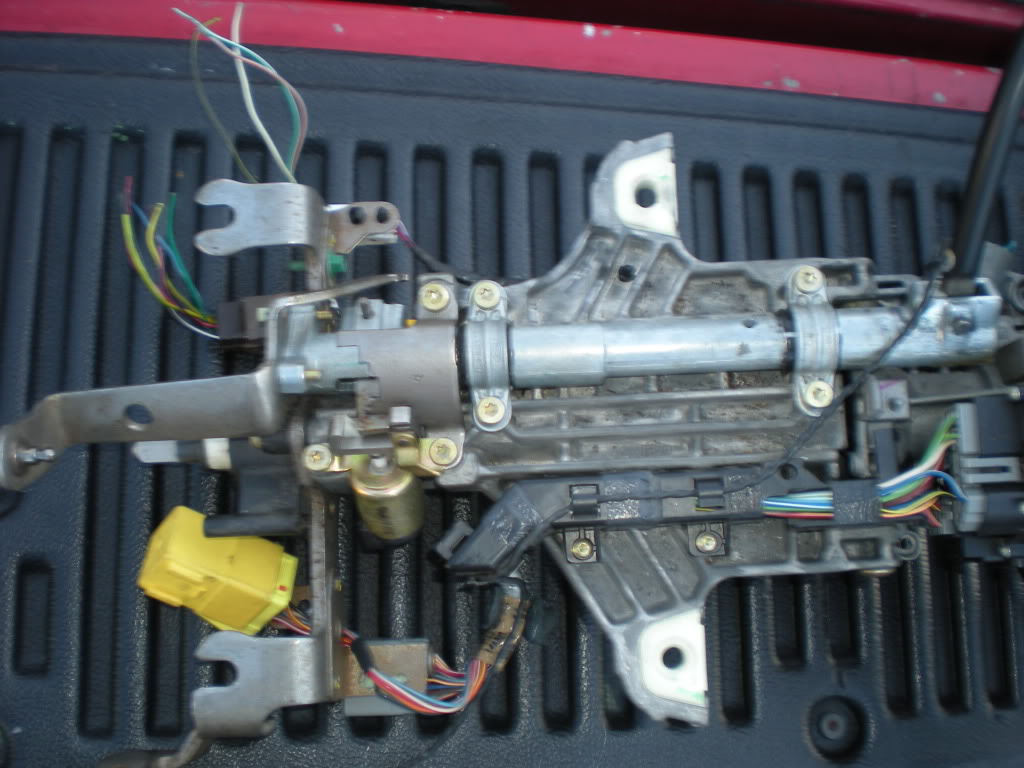
9. For Manual transmissions you are ready to remove the column. For automatics you need to remove the shift linkage. Let the column drop down a little bit and look down the top of the column to the end. You will see a cable attach to the metal of the column. Pry off the eyelet as I call it from the steering column. Now you need to release the plastic bracket ( you may not be able to see this and have to crawl under the dash. Push a small screw driver in the hole under the bracked to release it and slide it out toward the back.
10. Column should be able to be removed! Be careful not to break anything when removing.
***********Replacing parts from old column to new******
To replace ignition cylinder place key in and turn to ACC. Then push pin in, on the underside of cylinder. Pull cylinder out. Reverse for installation.
I advise replacing all of your old wiring to your new column. I didn't and ended up using a bad multifunction switch and wiring. Almost had to remove everything to replace.
If you have to remove your O/D button I would just remove the whole handle. Just hammer out the pin at the bottom of the handle.
To remove your steering wheel:
Pop off the plastic trim pieces off the side of your wheel and remove the (2) 8mm bolts that hold your air bag in place.
Remove the air bag and the connector.
Next remove the torx bolt holding your wheel in place.
Place a nut on top of the spline of the column so you don't damage the threads. (VERY IMPORTANT).
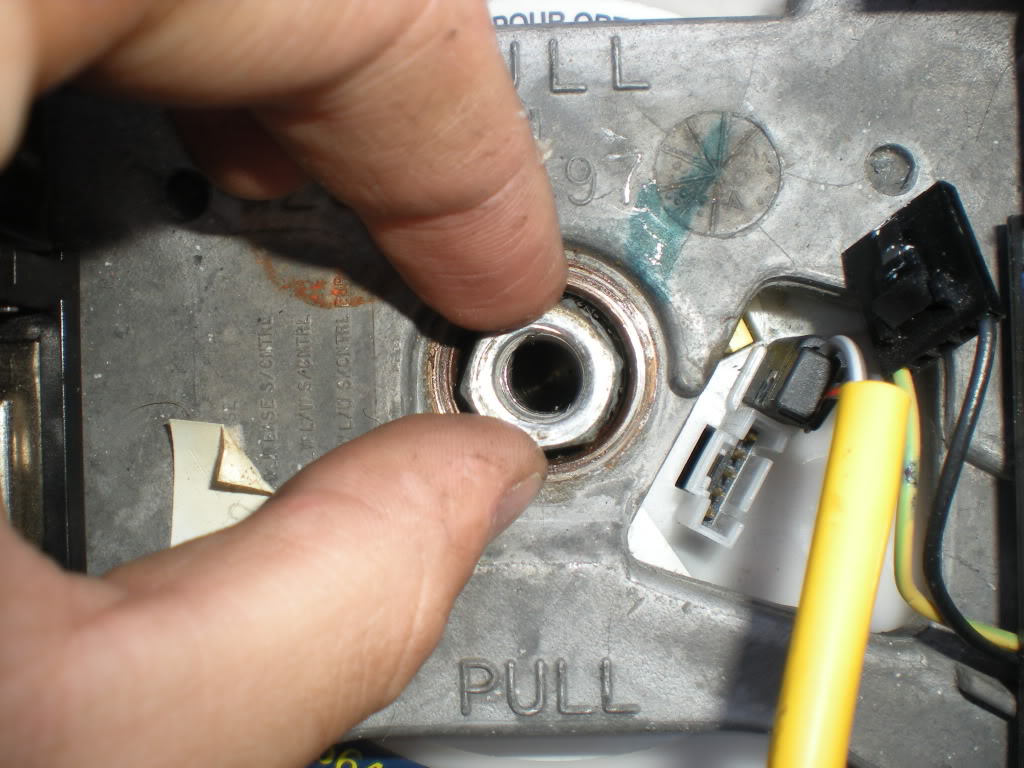
Grab a 2 jaw puller from a local autoparts place ( I got mine from O'reillys free to rent).
Attached the puller as shown:
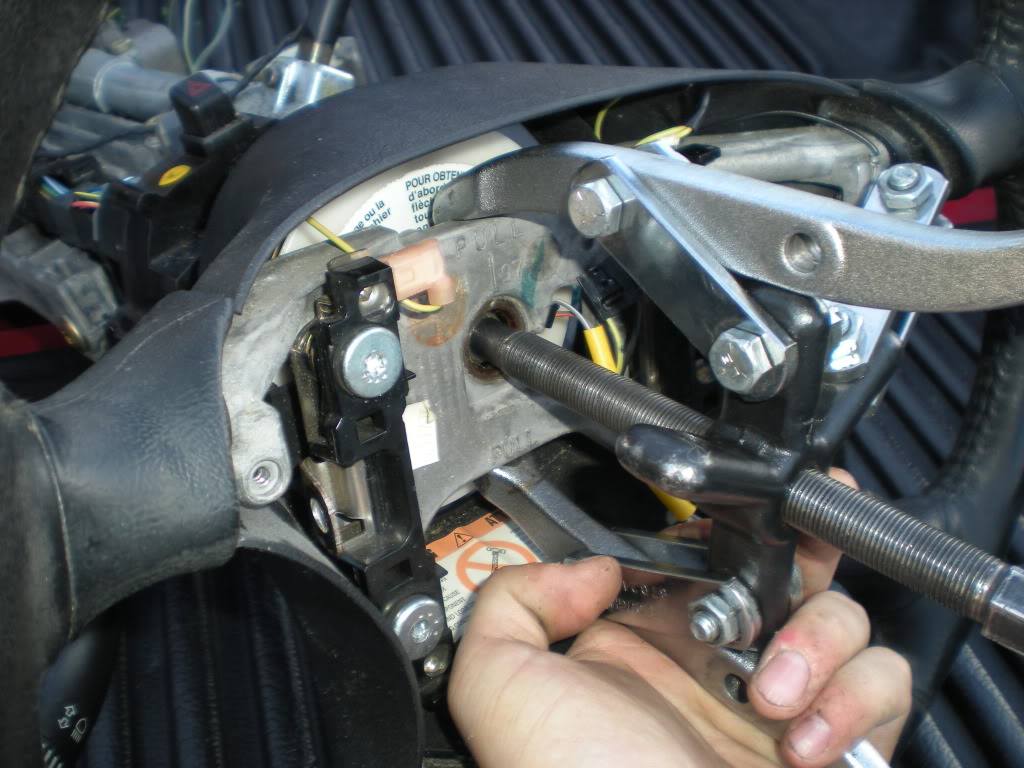
Crank the bolt down to pull the steering wheel off.
************************************************** **************
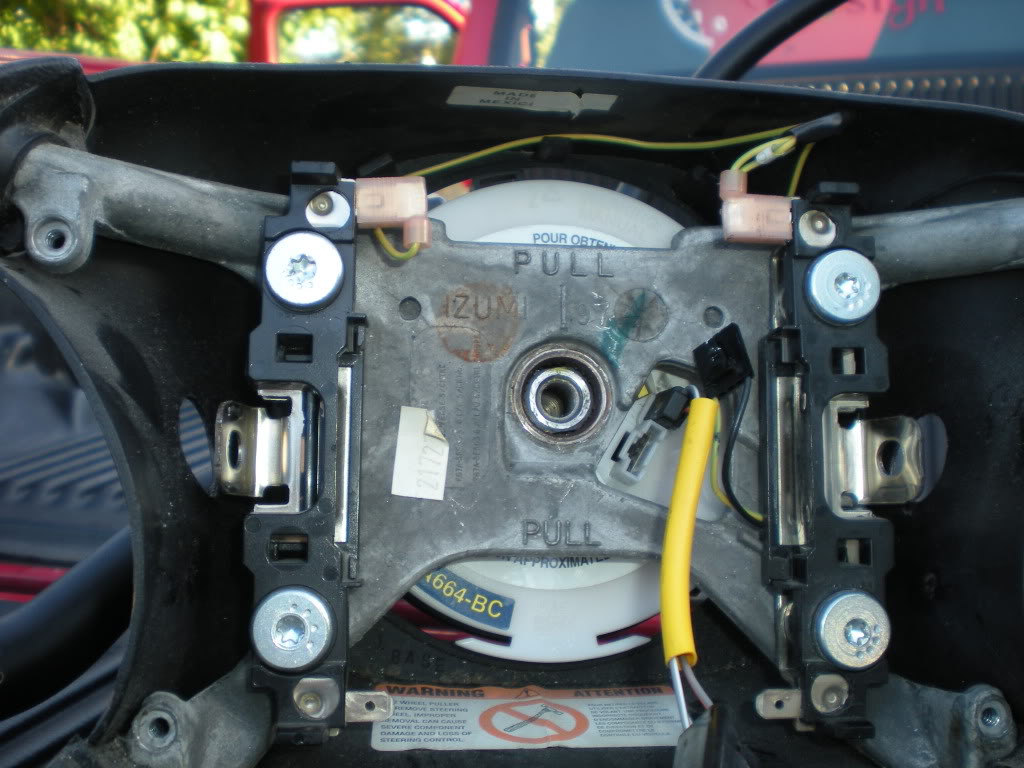
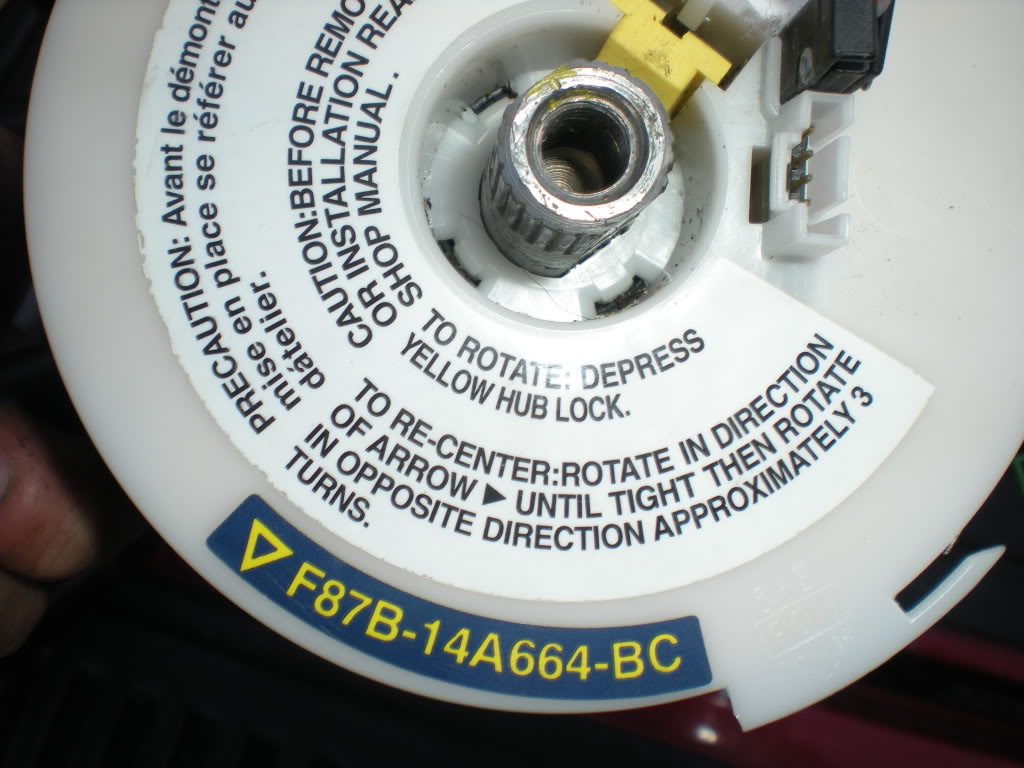
To put the new column in reverse the steps. I would leave the clock spring off till the column is all bolted in.
To put the clock spring in make sure the clock spring is centered before it is installed. Instructions are on spring:
Run your wiring down the column and into the connector.
Put steering wheel back on (after putting on CC switches)
Put trim pieces back on.
Connect battery and check all the switchs, linkage, etc.
BTW turns out the only difference between a tilt and non tilt steering column is like 2 springs, a lever and the latches for the tilt setting. The metal of the columns is exactly the same, which makes since because it cuts down on cost for Ford to make them this way. I still say its probably easier to just switch out the columns than to change these parts out.
How TO:
1. First disconnect your ground cable to your batter, very important you don't want the air bag going off in your face.
Also MAKE SURE YOUR WHEELS ARE STRAIGHT AND YOUR WHEEL IS LOCKED IN THE CENTER, makes this much easier.
2. Remove the bottom dash cover and the metal dash cover under the steering column.
For the plastic piece: (4) 7mm bolts (2 on hood release, 2 more on bottom edge)
For the metal: (5) 8mm bolts.
3. Slide out your radio bezel. You don't need to take this out all the way, just about 2 inches out. (2) 7 mm bolts
4. Take out the "main" dash by removing (3) 7 mm bolts above the cluster and (2) 7mm at the bottom edge and also your headlight ****.
Also disconnect the harnesses to the dimmer switch and headlight switch.
Remove steering column shroud pieces by unscrewing (3) phillips screws from bottom of shroud.
5. For Automatics unhook the shift indicator wire/cable and unscrew the bolt holding the tiny white plastic bracket underneath the column.
6. Disconnect all the wiring connectors at the bottom of the steering column.
These include: ignition switch (under steering column in the middle, has plastic cover over it, bolt through the middle, 7mm I think)
multifunction switch (gray connector on the far left)
flasher relay (bright yellow box, you can just slide the hole box to the left and remove it, may make it easier in the long run)
for Automatics: O/D button wiring (small two wire connector, on the side of the ignition switch bundle)
Clock spring wiring: on the right side at the bottom a 6 wire brown connector and a two wire connector (brown or black)
PATS: white connector on far right ( mine doesn't have PATS so it has a plug in the connector.
7. Unbolt the universal joint from the end of the column at the bottom. (forgot bolt size)
8. Unbolt the (4) 9/16 (not really 9/16 but I only have standard deep sockets, 9/16 will work). That hold the main part of the column in place.
2 bolt in the front, 2 in the rear.
9. For Manual transmissions you are ready to remove the column. For automatics you need to remove the shift linkage. Let the column drop down a little bit and look down the top of the column to the end. You will see a cable attach to the metal of the column. Pry off the eyelet as I call it from the steering column. Now you need to release the plastic bracket ( you may not be able to see this and have to crawl under the dash. Push a small screw driver in the hole under the bracked to release it and slide it out toward the back.
10. Column should be able to be removed! Be careful not to break anything when removing.
***********Replacing parts from old column to new******
To replace ignition cylinder place key in and turn to ACC. Then push pin in, on the underside of cylinder. Pull cylinder out. Reverse for installation.
I advise replacing all of your old wiring to your new column. I didn't and ended up using a bad multifunction switch and wiring. Almost had to remove everything to replace.
If you have to remove your O/D button I would just remove the whole handle. Just hammer out the pin at the bottom of the handle.
To remove your steering wheel:
Pop off the plastic trim pieces off the side of your wheel and remove the (2) 8mm bolts that hold your air bag in place.
Remove the air bag and the connector.
Next remove the torx bolt holding your wheel in place.
Place a nut on top of the spline of the column so you don't damage the threads. (VERY IMPORTANT).
Grab a 2 jaw puller from a local autoparts place ( I got mine from O'reillys free to rent).
Attached the puller as shown:
Crank the bolt down to pull the steering wheel off.
************************************************** **************
To put the new column in reverse the steps. I would leave the clock spring off till the column is all bolted in.
To put the clock spring in make sure the clock spring is centered before it is installed. Instructions are on spring:
Run your wiring down the column and into the connector.
Put steering wheel back on (after putting on CC switches)
Put trim pieces back on.
Connect battery and check all the switchs, linkage, etc.

Thread
Thread Starter
Forum
Replies
Last Post
psvines
General Technical & Electrical
1
10-11-2023 05:14 PM
t9743
General Technical & Electrical
3
02-26-2008 05:26 PM


